
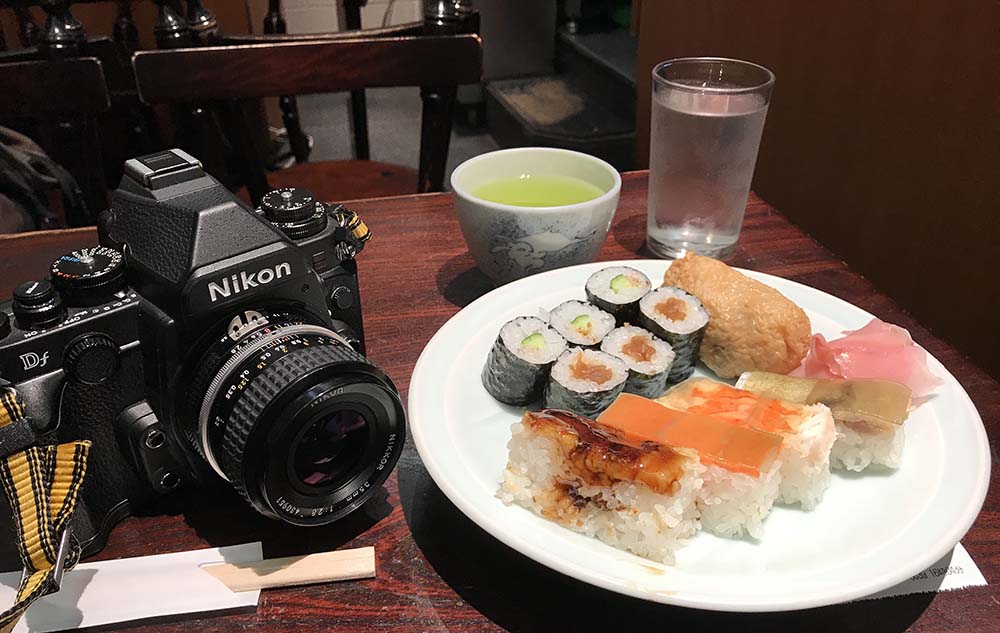
Hello, everybody! I like eating sushi, it’s nutritious, fun and yummy. People used to eat these as street food but they have become quite expensive these days mainly due to sourcing and handling of the ingredients. This is why an inexpensive solution was found in the form of the “sushi-go-arounds”. They are cheap but not necessarily economical because the ingredients are not as good as the ones used by more expensive shops. Once you get a taste for the better stuff you’ll never go back. This is what I call “false economy” and this is the topic of our current article. You thought you’re getting a good deal but at the end of the day you find yourself wanting to buy the real-deal.
Introduction:
The Nikkor 35mm f/2.8 Ai was sold from 1979 to 1981, a very short time for a mass-produced Nikkor because the newer Nikkor 35mm f/2.8 Ai-S was about to be released soon. It replaced the Nikkor 35mm f/2.8 Ai which was already starting to get old by that time. Many people confuse this with that lens and so Nikon named this one Nikkor 35mm f/2.8 Ai (N) officially to denote that it is a later iteration. If there’s an existing lens with the same name, why was there a need to replace it with something similar? The answer to that is this has the newer optical formula which was used for the newer Nikkor 35mm f/2.8 Ai-S that soon replaced it and Nikon wanted to market it quickly since the 35/2.8 line of lenses was quite popular.

This is a great lens for street photography, it’s light, compact and sharp. This handles very well with all Nikons. It’s perfect with the Nikon F3HP, its dense and well-built, it will survive professional use.
It has a 5-elements-in-5-groups design which is simpler compared to the old formula used on the original Nikkor 35mm f/2.8 Ai. The engineers managed to reduce one more element. If you ask me, the 35/2.8’s development story is all about reducing the number of elements with each iteration. The formula gets simpler over time until we’re left with the bare minimum. This doesn’t come without sacrifices, I actually consider the older formula to be the best since it has a lot less distortion, something that a lot of people cared about. I think that this is a nice optic but it’s not the best in my opinion.
It’s being sold cheap these days because people desire the faster models. It’s a good thing because you could get one of the for cheap. Many people think that the Nikon 35mm f/2.5 Series-E is a steal but you could get one of these if you look hard and they’re cheaper than the plastic lens in some cases. With it you get an all-metal body and better optics. That’s false-economy for you.
Here are all the major versions of the 35/2.8 family:
- Nikkor-S 3.5cm f/2.8 Auto (Tick-Mark)
- Nikkor-S 35mm f/2.8 Auto
- Nikkor-S 35mm f/2.8 Auto (2nd version)
- New-Nikkor 35mm f/2.8
- Nikkor 35mm f/2.8 Ai
- Nikkor 35mm f/2.8 Ai-S
All the names of the lenses that I mentioned can be confusing so here are a few photos showing it beside some of the more popular ones so you’ll have an idea about what I am talking about.

The older Nikkor-S 35mm f/2.8 Auto is a nice lens but its optical design is old despite being updated mid-production. Compared to it, this lens feels better when held in your hands but it also has a shorter focus-throw which is not something that I’d like specially when focusing with the scale. A lens with a longer focus-throw is desirable if you’re shooting videos. If that’s what your need is then this lens is of little use to you.

The original Nikkor 35mm f/2.8 Ai has a longer focus-throw which I prefer. I like the wider depth-of-field scale since it makes reading it easier. Optically, I think the older one is better since it has near-absent distortion. It’s perfect for architectural photography and reproduction. This one doesn’t have a lot but it’s certainly not as good as the old one which is a shame.
Knowing how your lens performs will help you maximize its use. You’ll get to know its strengths and weaknesses, this knowledge will help you decide if a lens is the right tool for the job. I took these from f/2.8, f/4 and f/5.6 since we’ll see the most changes happen within these apertures. I’d imagine that these are also the most common apertures that people would like to shoot it with, too.


(Click to enlarge)
Distortion is kind of low, much lower than average lenses but it won’t match what the older Nikkor 35mm f/2.8 Ai could do since it has almost none of it. Vignetting is heavy wide-open but it’s not a problem since the falloff isn’t as high. Stopping it down to f/4 will help alleviate it, you’ll only see traces of it by f/5.6 and it’s gone at f/8.

Vignetting can be seen wide-open. If this bothers you just stop the iris down to f/5.6 and that should eliminate it.


(Click to enlarge)
It has above-average resistance to flare but that doesn’t mean that you will not see it with this lens. You’ll get blobs when the sun is in the frame. You’ll have to be careful or it could ruin your perfect sunset photo.


(Click to enlarge)
This is the worst I could get it to produce flare and ghosts. It could affect the contrast by subduing it, giving you a washed-out effect where it happens. It cover the whole frame which is reassuring to know. You’ll get some blobs if you’re not careful but it’s not the worst that I have seen so far. In fact, it’s a lot better than what I’ve from other lenses.


(Click to enlarge)
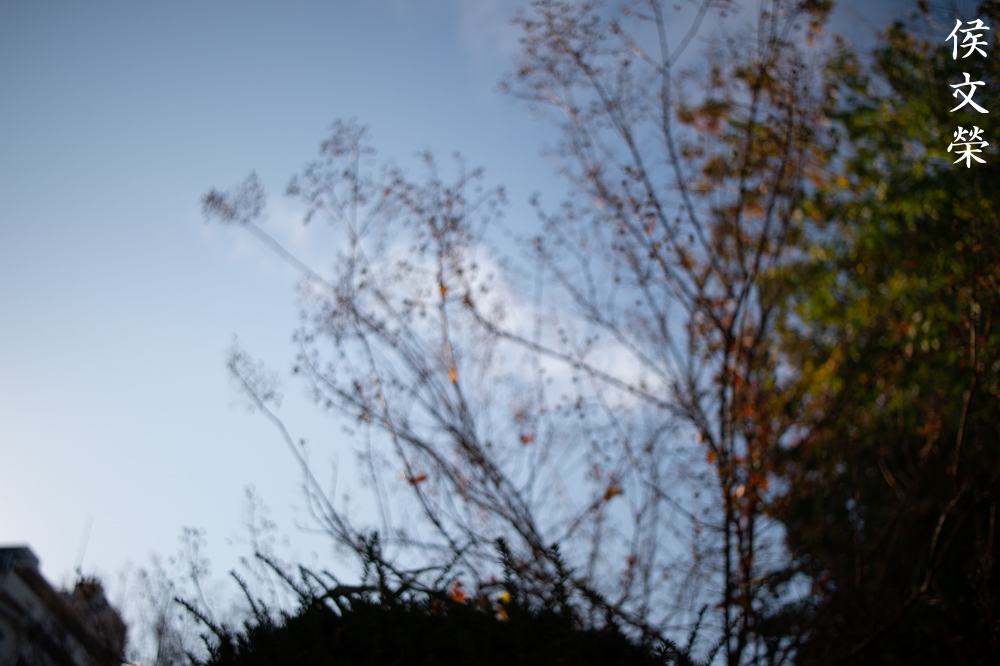
The character of the bokeh isn’t bad at all for a wide-angle lens but it’s not a great lens for this, it’s quite mediocre.


(Click to enlarge)
Chromatic aberration is well-controlled even in worst cases. It is visible but you won’t notice it much, it’s quite resistant to it.


(Click to enlarge)
Sharpness and contrast at the center looks good wide-open, its decent and it has enough resolution. The corners don’t look as good but not unusable. The center looks better at f/4 and the corners improve drastically. You’ll also see that the corners look brighter, too. Stopping it down to f/5.6 yields a sharper center where it operates at its peak. The corners improve even more and it’s now quite nice. Stopping it further won’t make the center any sharper but it makes the corners marginally sharper.


(Click to enlarge)
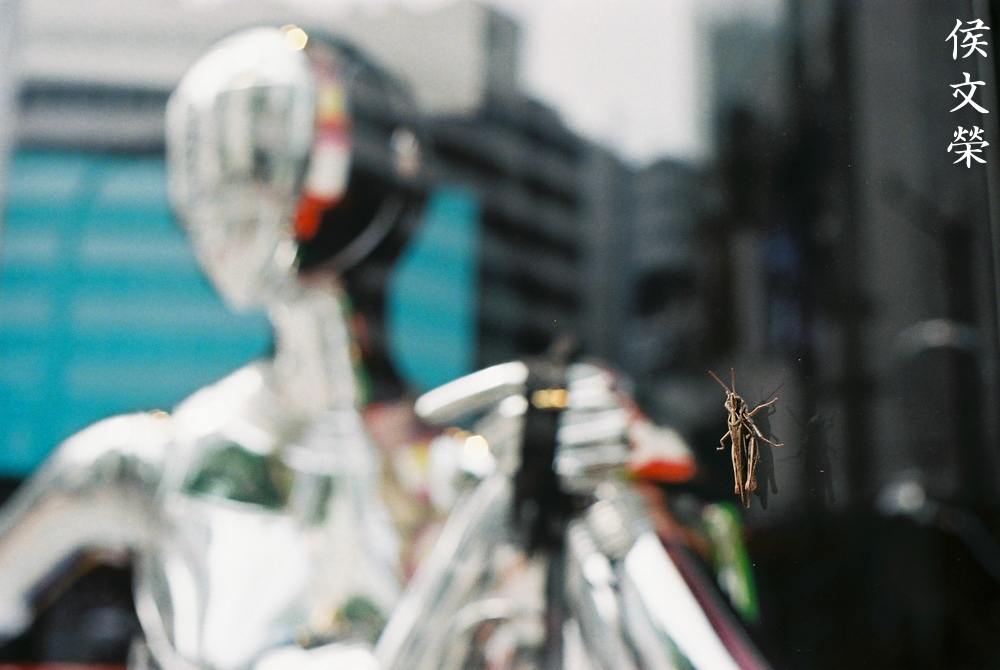
This is how good it is at its minimum focusing distance. It’s really sharp, the center sharpness is the best part of shooting with this lens.

Its minimum focusing distance is about 0.3m which is great. This was taken about 0.6m away from the toys, behind a 5mm sheet of glass. The glass did a good job at lowering the contrast a bit but it’s still sharp. I took this at f/8.
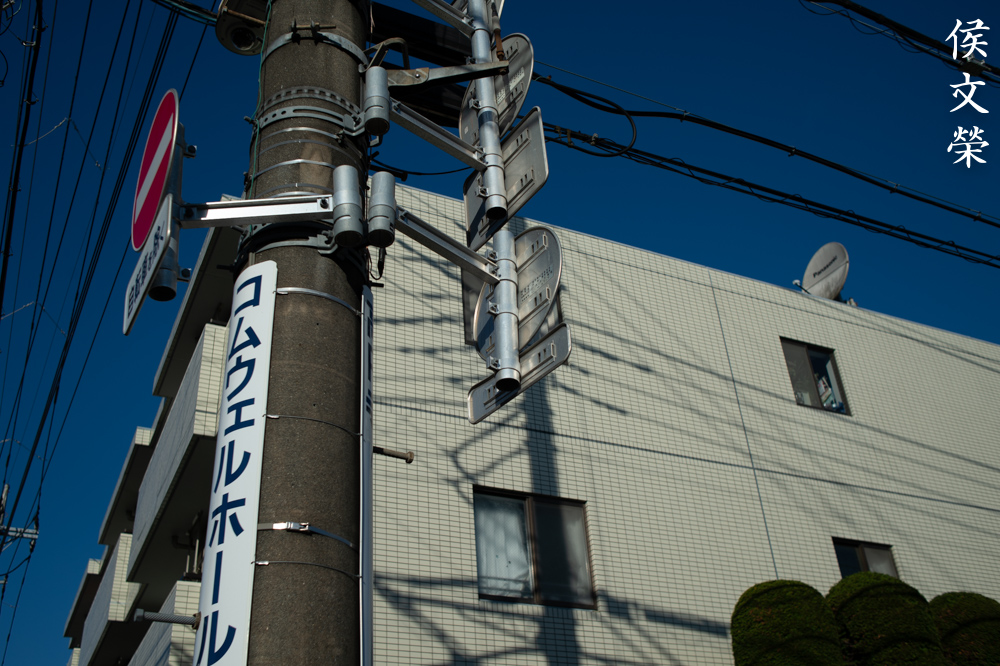
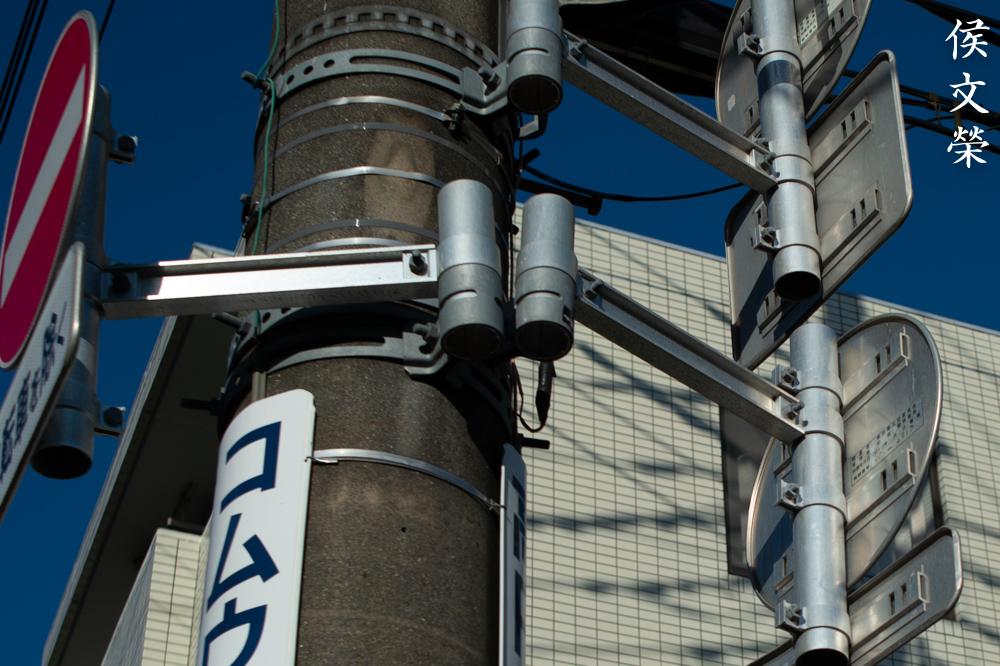
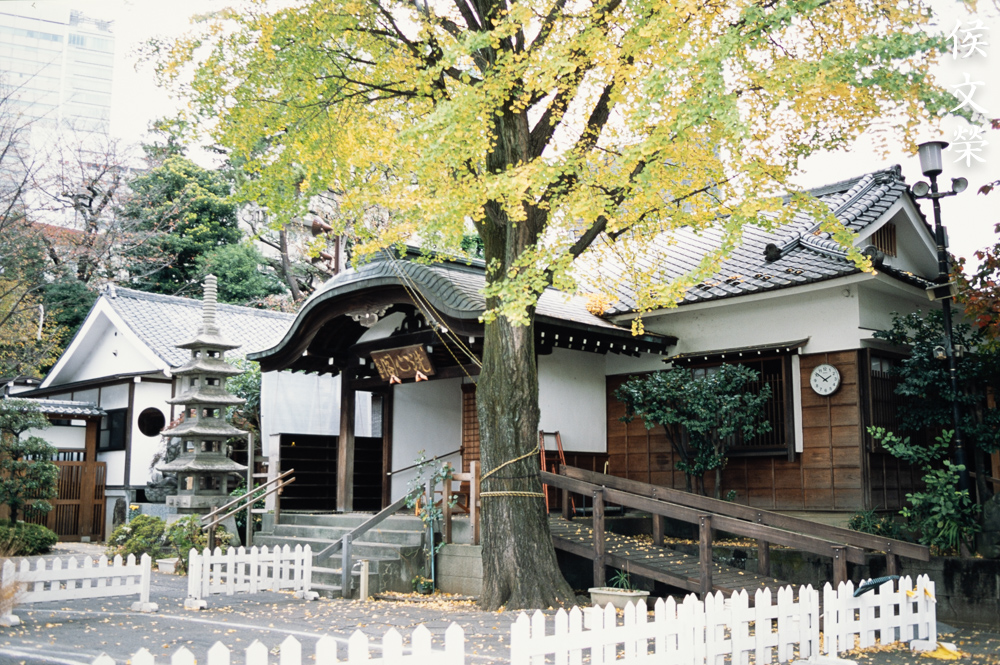
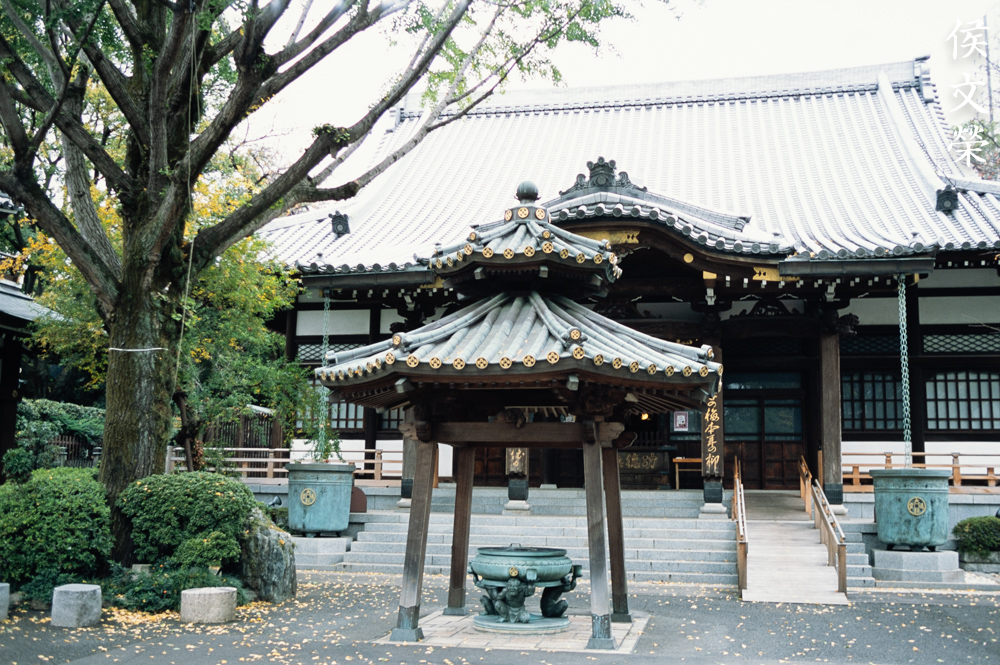
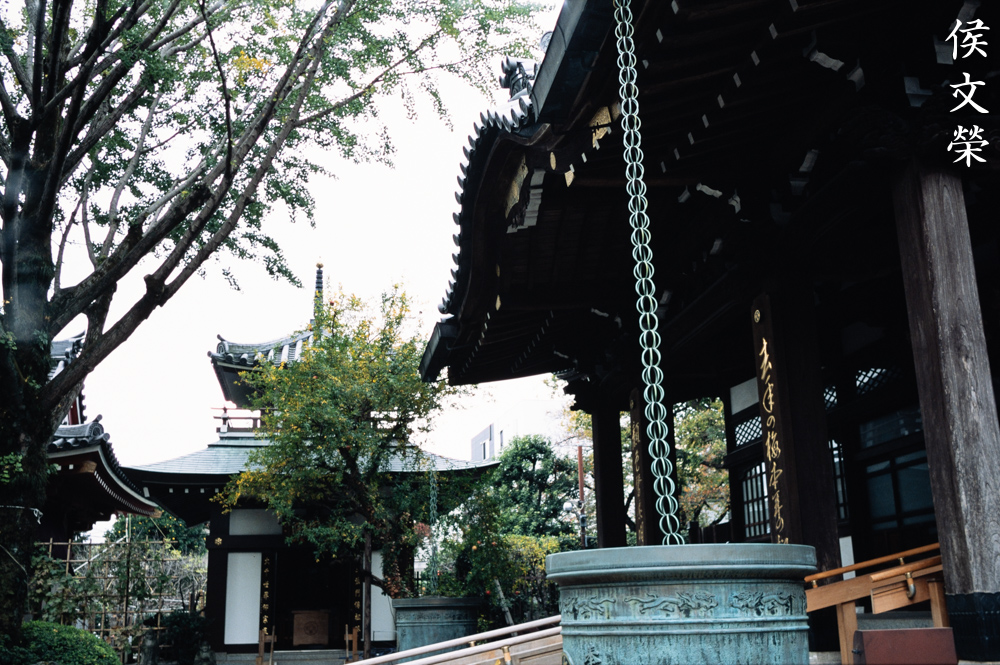
Its low levels of distortion makes it a great lens for shooting architecture.


(Click to enlarge)
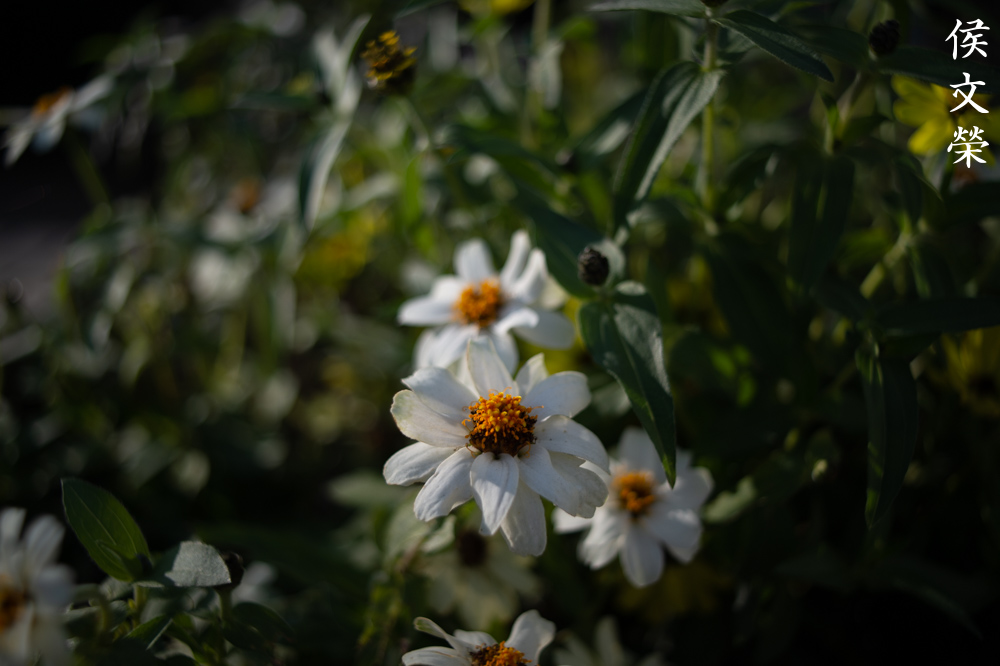
This classic focal length is great for environmental portraits. It’s useful for a lot of applications due to its versatile specs.


(Click to enlarge)
It’s a great lens for shooting architecture. Its lower-then-average geometric distortion is useful for reproduction as well but the older Nikkor 35mm f/2.8 Ai is better for that since that one has nearly-none of it. You’ll still find a bit of it if you look hard but it’s otherwise not obvious in most cases.


(Click to enlarge)
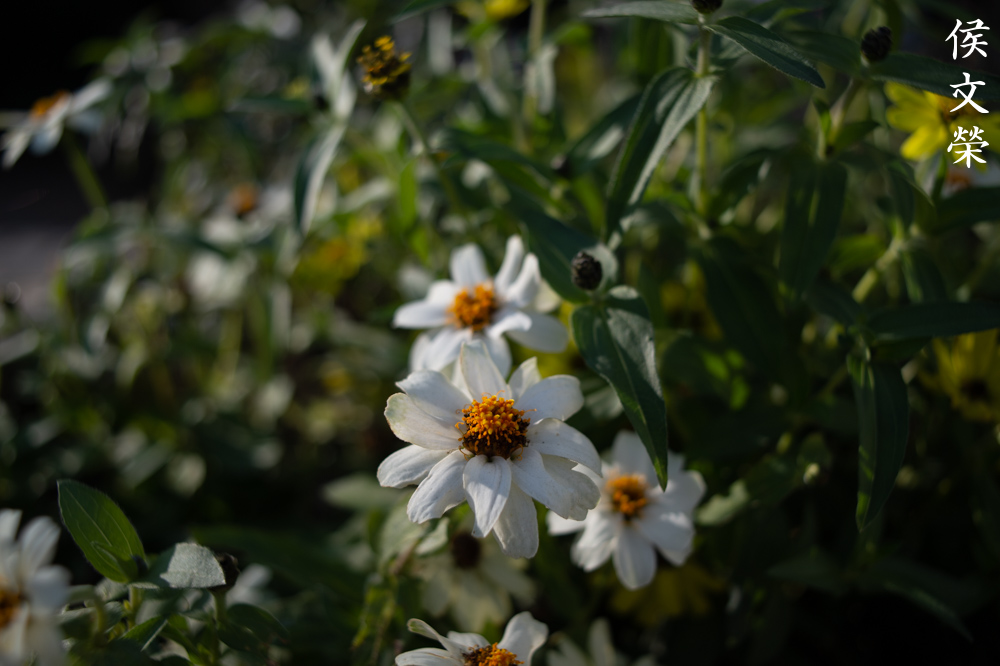
It’s a great lens for reportage, you won’t get an exaggerated perspective and your subjects looks natural and not larger-then-life. This is the widest focal length that I would use for this kind of task and maybe 28mm is the limit if I just had to get even wider.


(Click to enlarge)
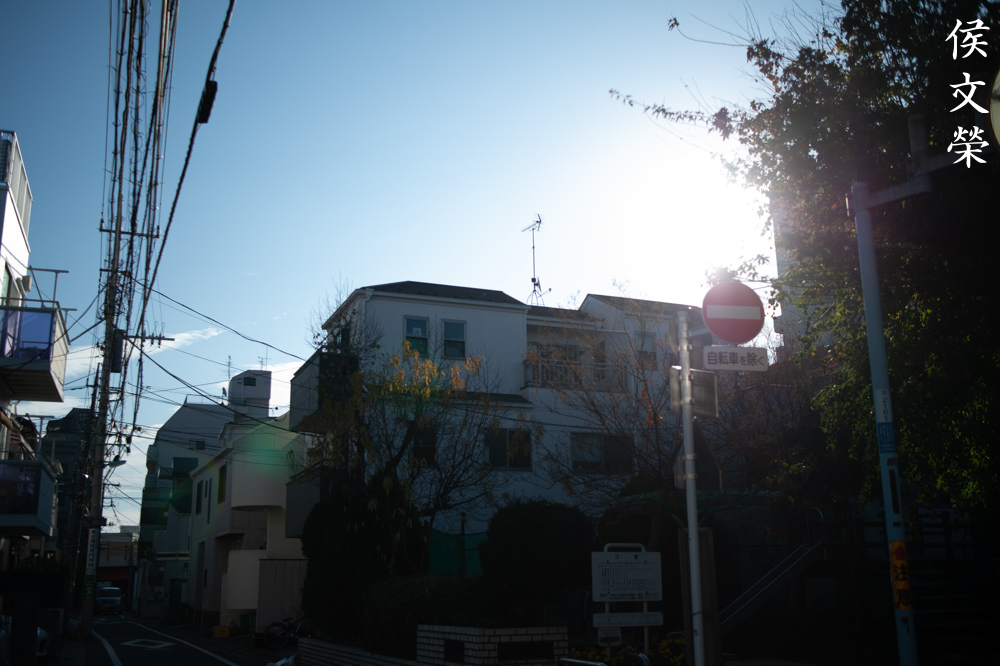
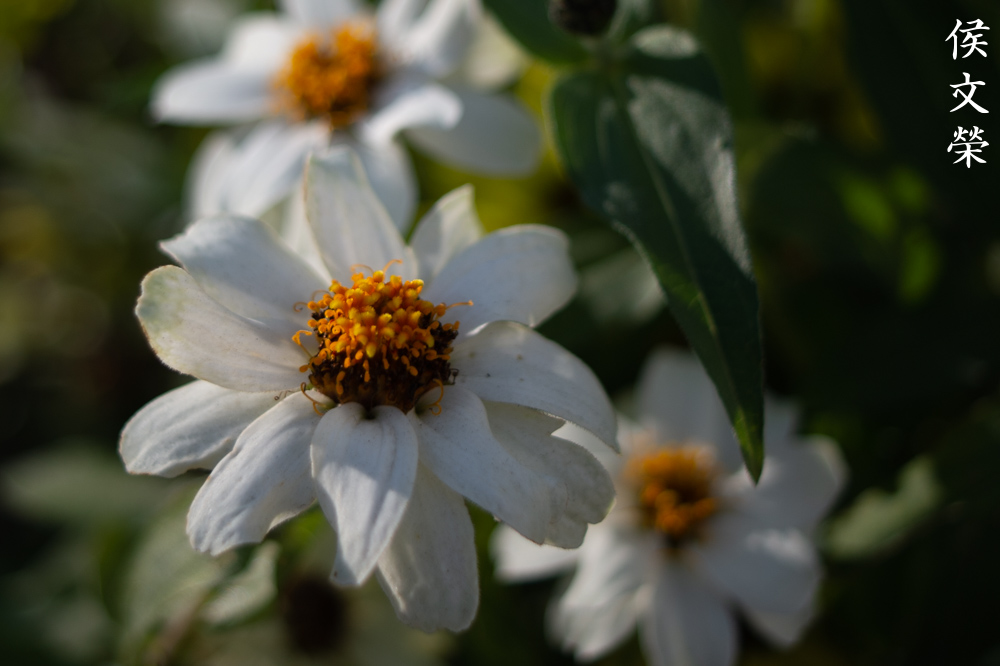
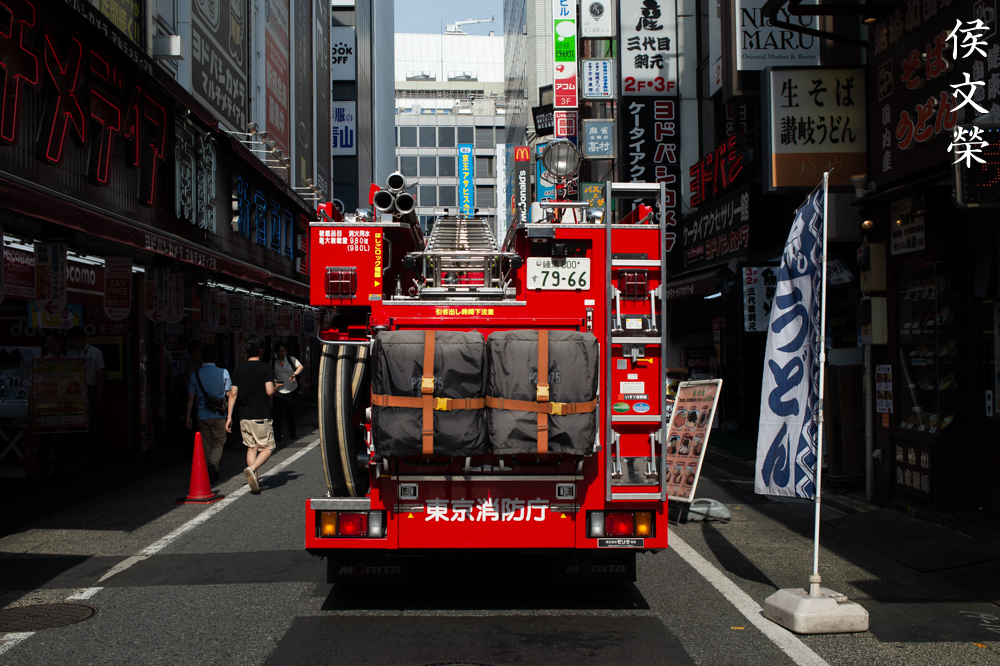
Its compact barrel makes it look inobtrusive so it’s great for shooting street photography. You’ll want a faster lens for lowlight shooting but this is not a bad lens at all even for shooting inside a nightclub.
Let’s now check some film photos. Film has a unique look that is difficult to simulate with a digital camera thanks to grain. It reacts differently to light, this means that it could mask a lens’ flaws or amplify them. Since this lens was designed to be used with film it’s best that we just it using its intended medium. This will give us a better assessment on its abilities.


(Click to enlarge)
It’s a nice lens with film, too. Despite being an older lens it renders pictures with results that look more akin to what modern lenses give even on film. I like its subtle and natural rendering thanks to the smooth focus-transition. I took these with Fujifilm Industrial 400.
How about some samples that were shot with Fujifilm Provia 100? It’s a fine-grained film so it’s more demanding. I took these with my Nikon FM and the photos were mostly taken at smaller apertures from f/5.6 to f/8.
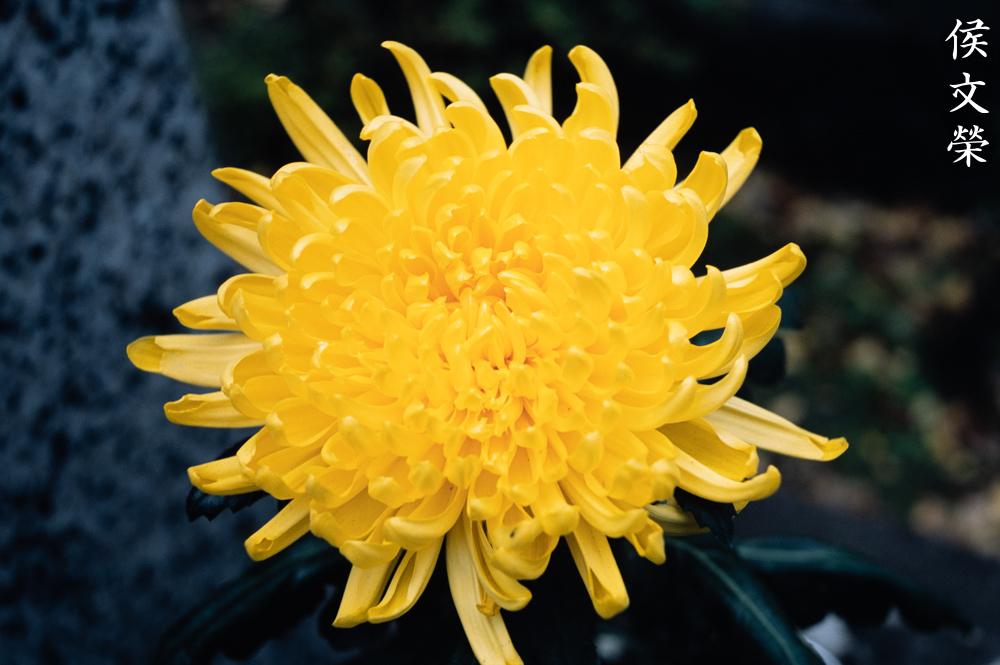
It7s able to reproduce every detail beautifully. The tonality is great, this is a great example of how good it is when shot at closer distances.

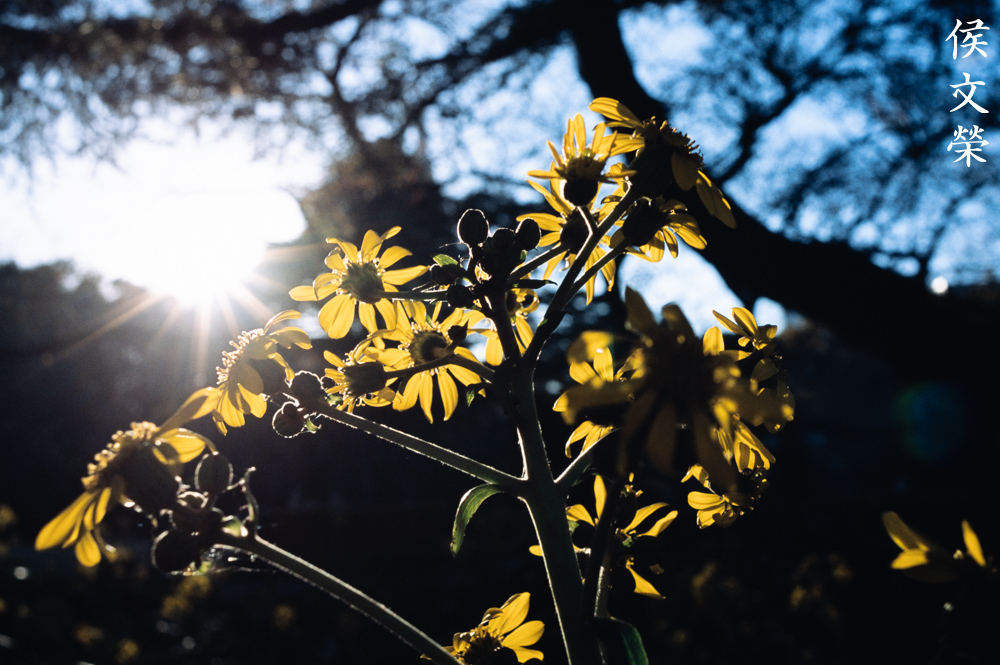
Flaring is apparent here but I’d like you to pay attention to its bokeh quality since we have a mix of long-and-round details. You’ll get a bit of smearing, it isn’t the best example to show how well it handles background blurs.
Flaring is suppressed when you stop the iris down to smaller apertures. You will get a nice balance of sharp and washed-out details in your frame which you could use to your advantage. The effect is delicate.

It’s great for travel photography, too. Just pair this with an 85mm lens, that’s enough to take the majority of your photos on a trip.


(Click to enlarge)
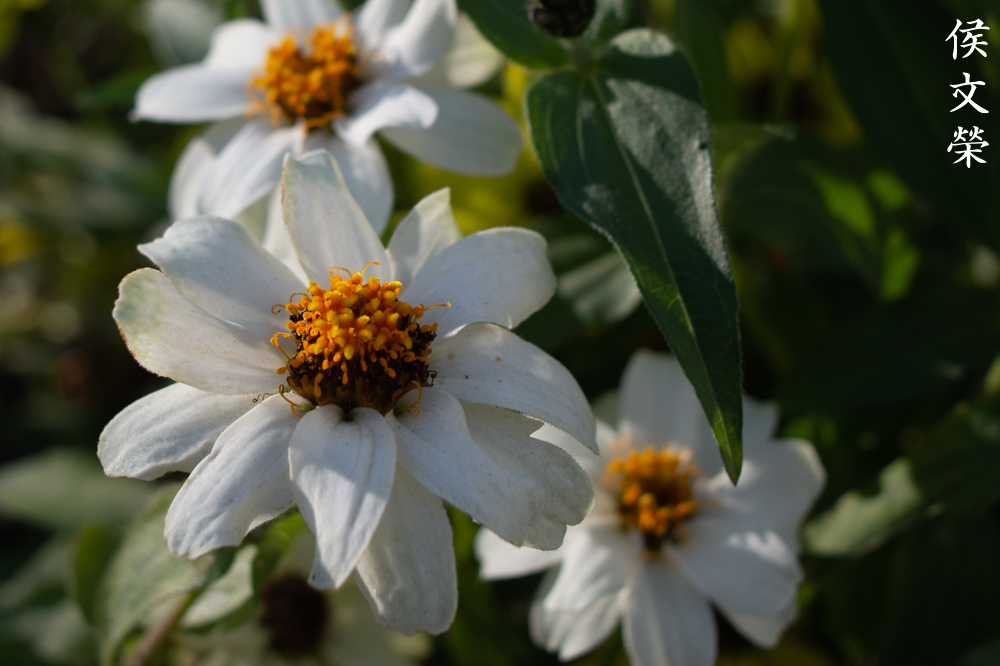
Here are more photos for you to check. It’s an amazing lens despite its age. I like how great it performs when you don’t have the sun within your frame. Even if it is, just stop the iris down and you’ll get great results.
This is a great lens due to its practical specs but it will all depend on how it’s used within your kit. Its short focus-throw is useful for focusing quickly but it could also be annoying since you can focus-past your subjects. This isn’t a good thing specially if you’re require to focus precisely. It’s bright but you’re going to want a faster lens when shooting at lowlight situations to help you focus better. A good alternative to this is the Nikkor 35mm f/2 Ai, it has a fast maximum aperture which is handy but it costs a bit more. Avoid buying the Nikon 35mm f/2.5 Series E you could buy one of these for less in most cases. I don’t see any benefit in owning one of those, this is superior lens compared to the plastic Nikon 35mm f/2.5 Series E. The older New-Nikkor 35mm f/2.8 is an excellent lens so long as you get one with an Ai-ring. That lens has really-low amounts of geometric distortion that it’s nearly-absent. All of these will satisfy your need for a 35mm lens that’s within budget. If you still want this you could search online and find that these are sold for $60.00 on average. I got mine for $20.00 because it was sold as junk. When looking for these, see if the iris is dry and snappy when actuated. The barrels should be smooth, it should focus with a nice, damped feeling, too. Check the glass, there should be no fungus and everything should be clear and clean. Buying the shade is a good idea but it won’t help much in real-world use apart from shielding it from fingerprints. This is a nice tool for students and photographers who do not have a lot of cash to spare. Happy hunting.
Before We Begin:
If this is your first attempt at repairing a lens then I suggest that you check my previous posts regarding screws & drivers, grease and other things. Also read what I wrote about the tools that you’ll need to fix your Nikkors.
I suggest that you read these primers before you begin (for beginners):
Reading these primers should lessen the chance of ruining your lens if you are a novice. Before opening up any lens, always look for other people who have done so in YouTube or the internet. Information is scarce, vague and scattered (that is why I started this) but you can still find some information if you search carefully.
I highly recommend that you read my working with helicoids post because this is very important and getting it wrong can ruin your day. If I can force you to read this, I would. It is that important!
For more advanced topics, you can read my fungus removal post as a start. This post has a lot of useful information and it will be beneficial for you to read this.
Disassembly (Lens Barrel):
The construction of its barrel is conventional so there are no surprises here but there are a few things that you should be aware of which I’ll mention in this section. Like most lenses we’ll want to remove the objective first, that’s going to prevent any accidents from happening to the glass. You should use the right drivers for this, using the right tools is essential to a successful job along with the right skills and experience. Take plenty of notes as you go so you will know how to put things back again later.
Please note that I couldn’t remove the parts in the right order since this was seized. The order of the photos won’t make sense but the sequence that I am presenting the photos to you is the correct way to dismantle it.

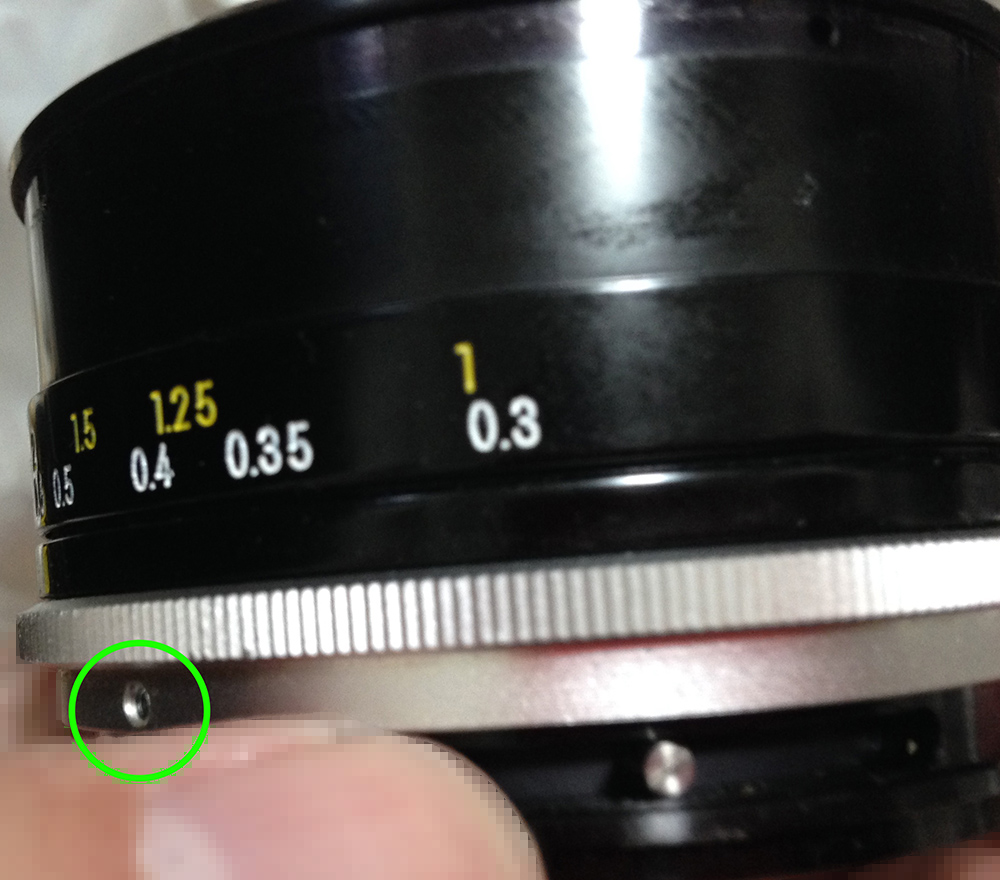
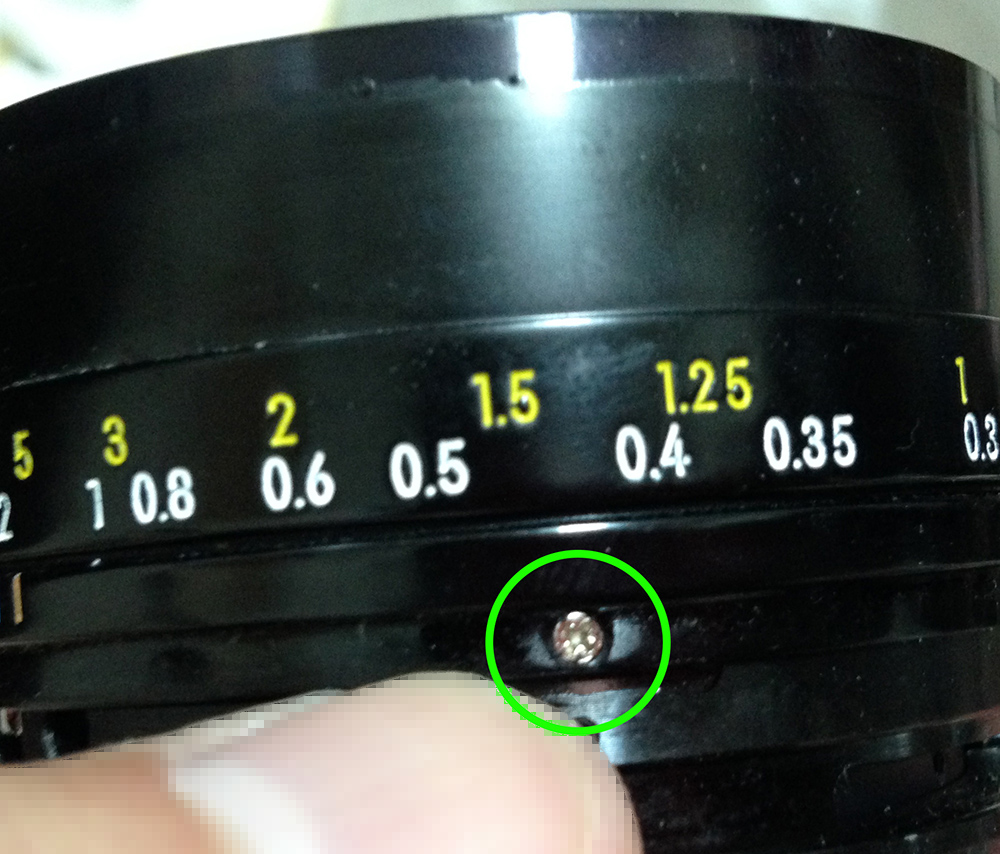
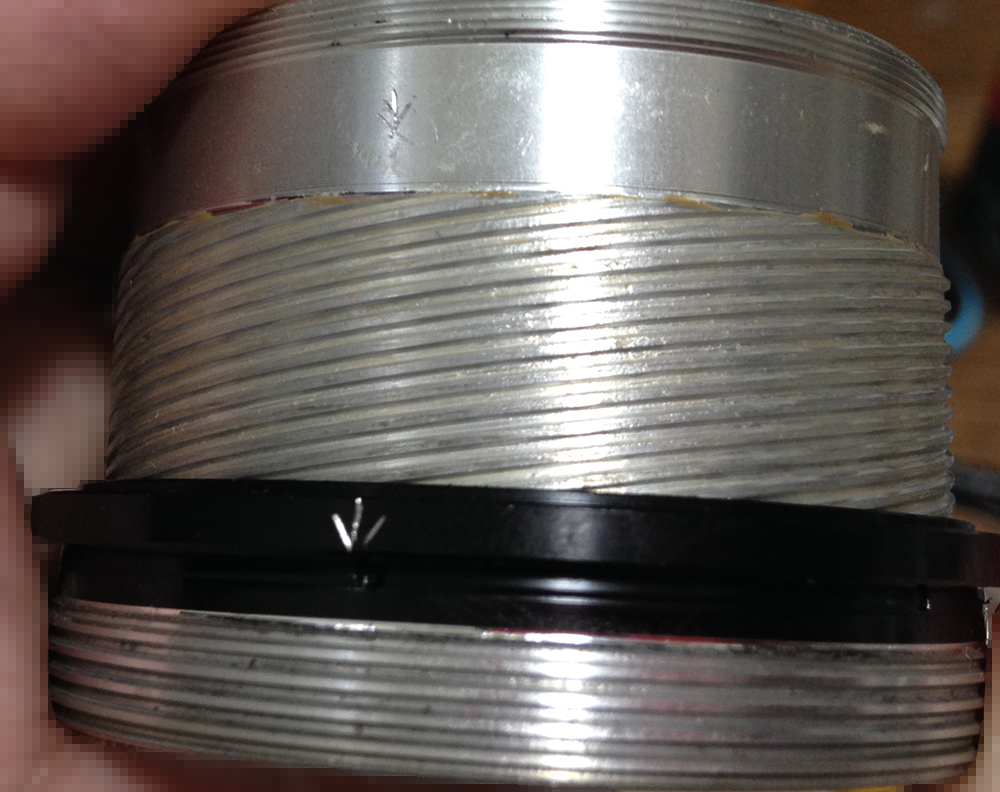
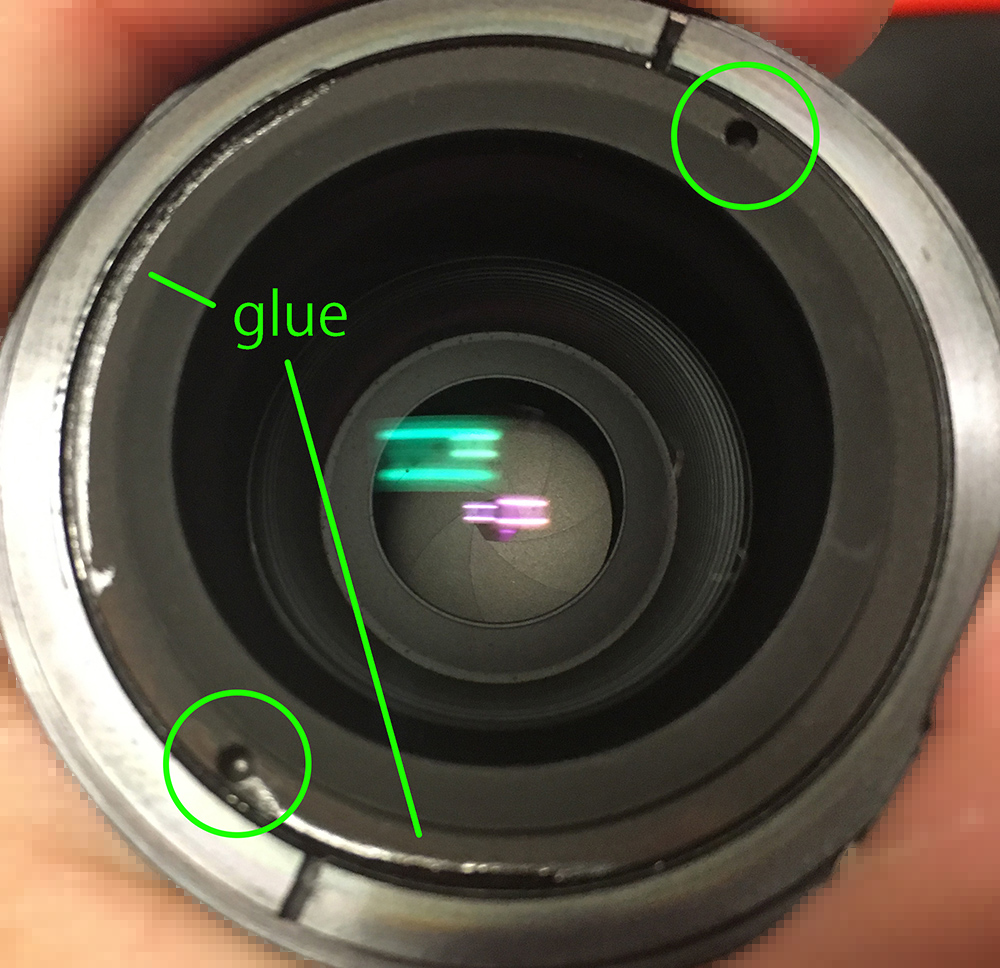
Locate and extract this set screw to unscrew the front barrel. It can be hard to remove so dissolve the paint first before you extract it.

Unscrew the front barrel. Note the depression on the threads, you should be able to sink the set screw in this later during reassembly.

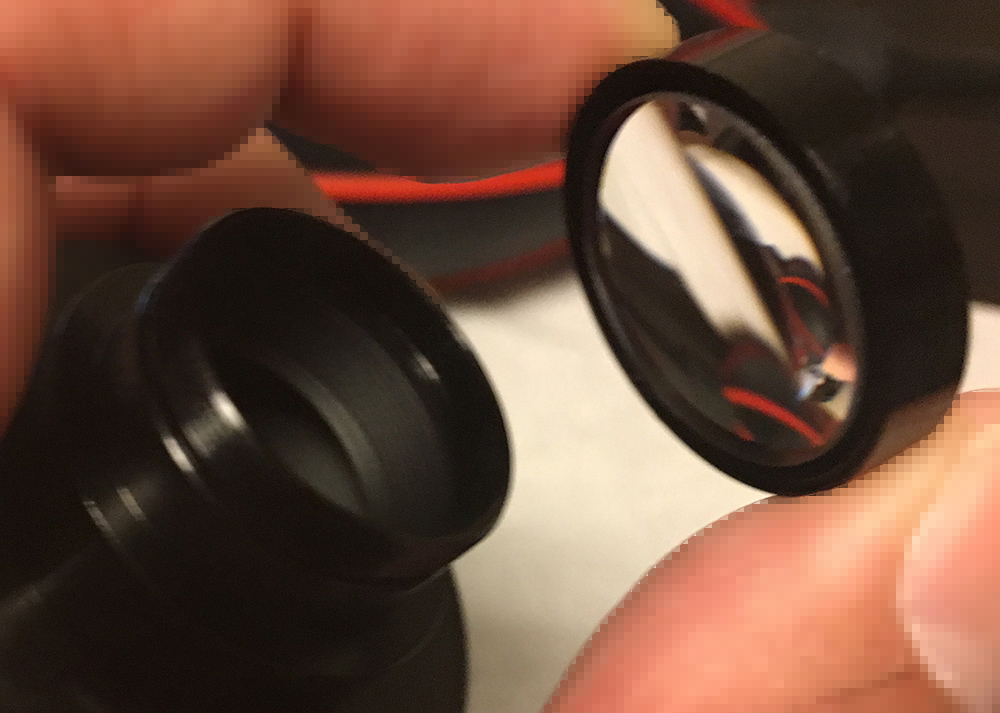
Extract the objective and keep it in a safe place.
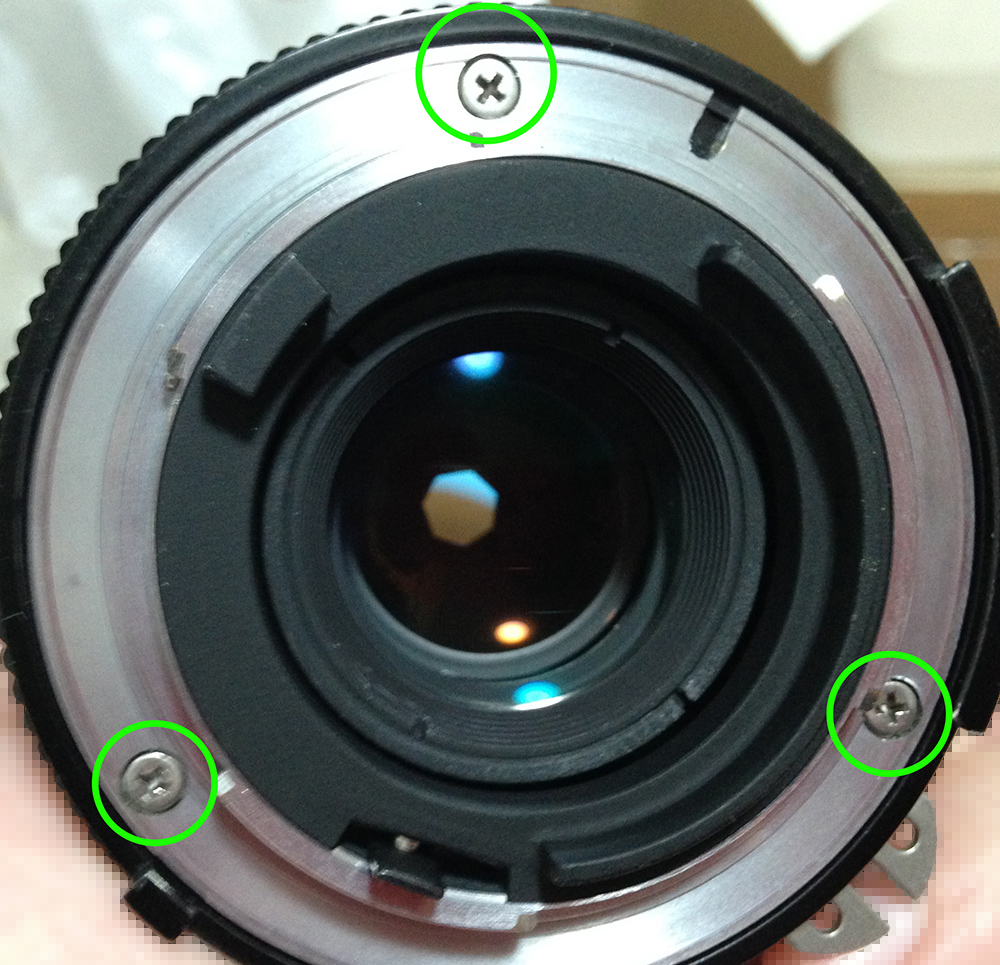
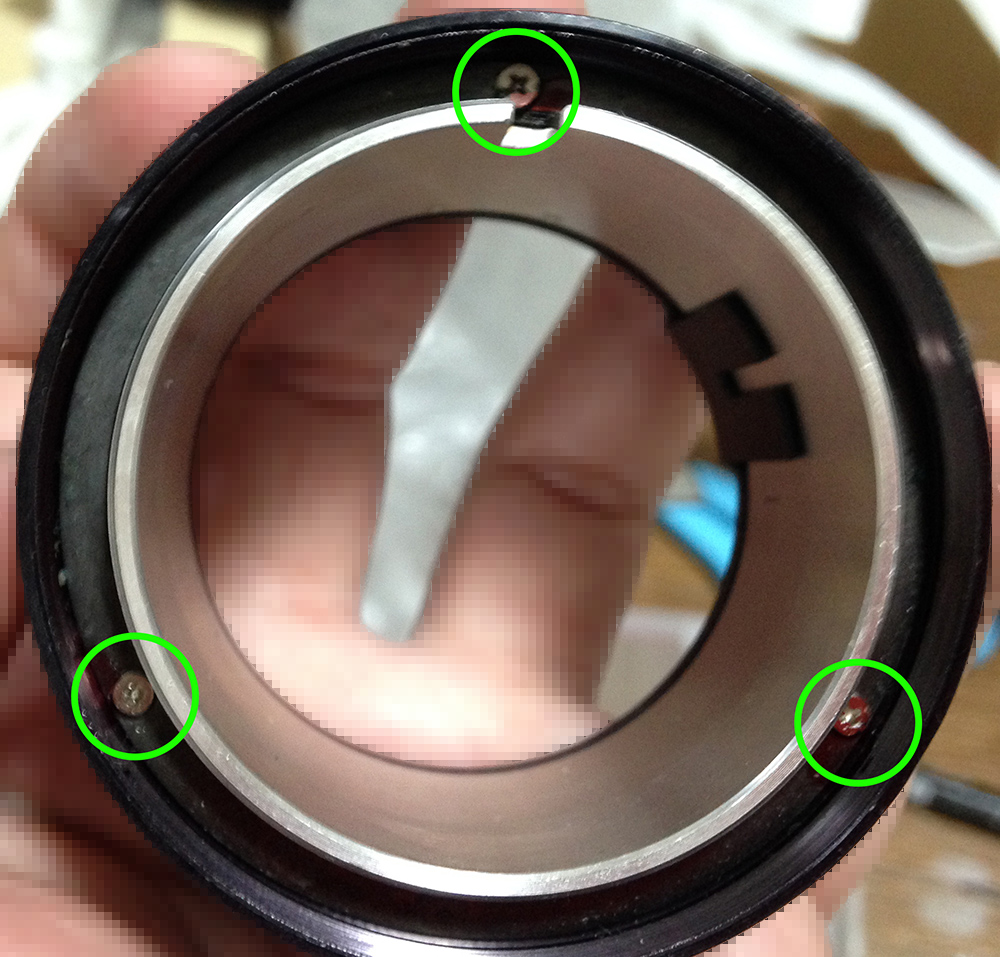
Extract these so you can remove the bayonet mount. Many people get stuck here because they have stripped them. To prevent this happening, read my article on how to remove bayonet screws. Use the correct type of driver, the screws are JIS so you should only use a JIS driver for them.
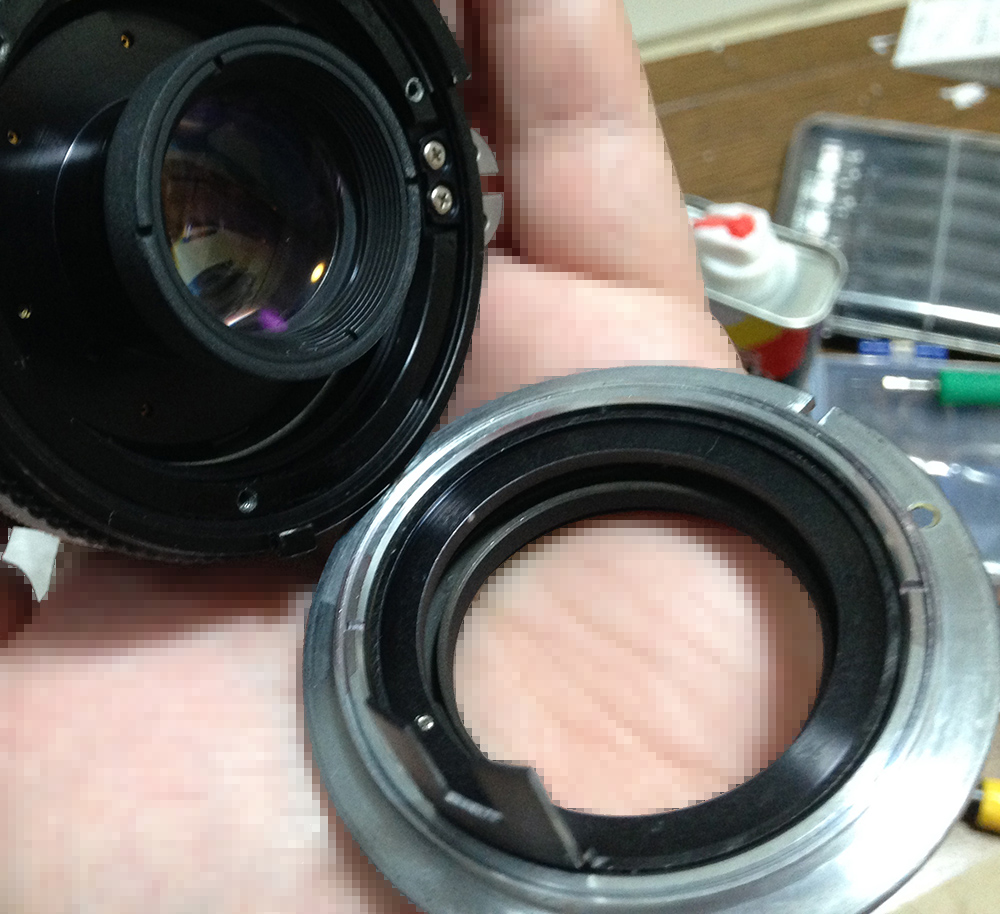
Remove the bayonet mount.

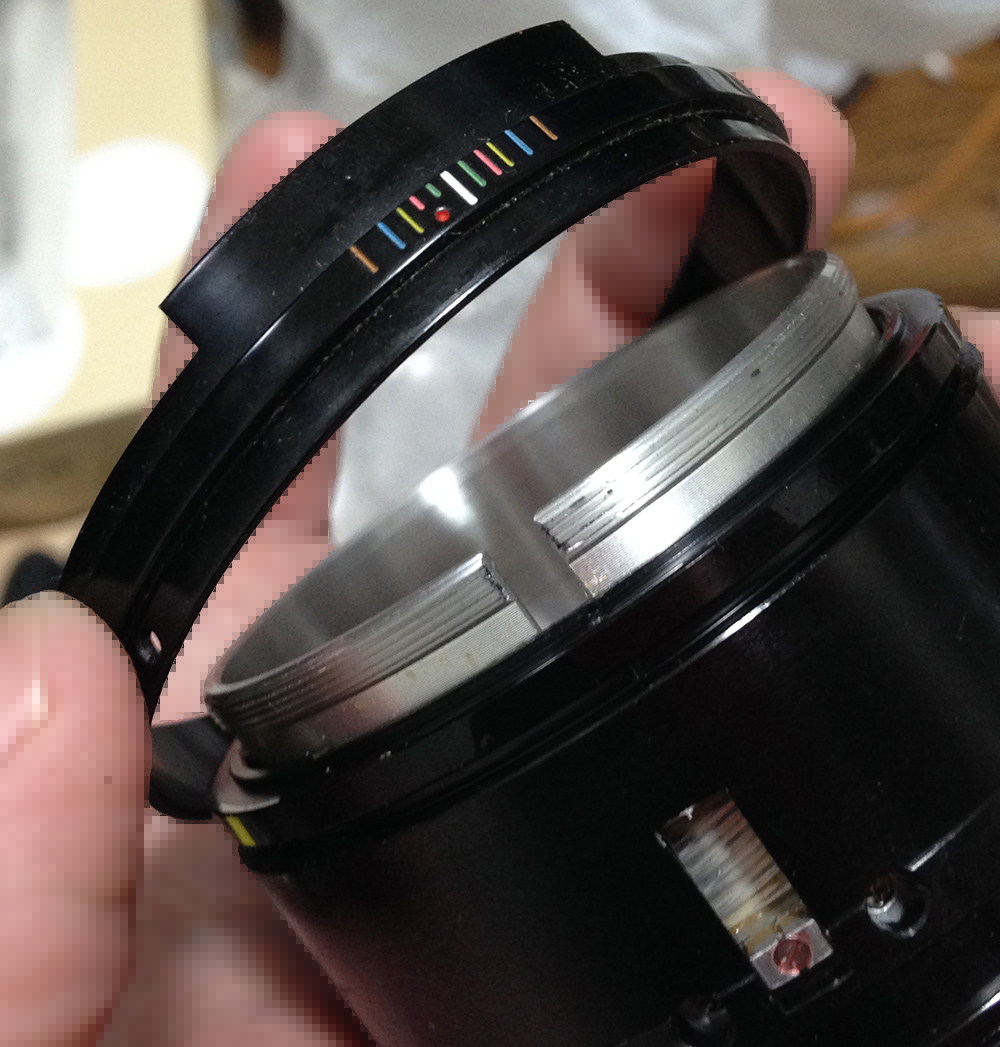
Remove the aperture ring.
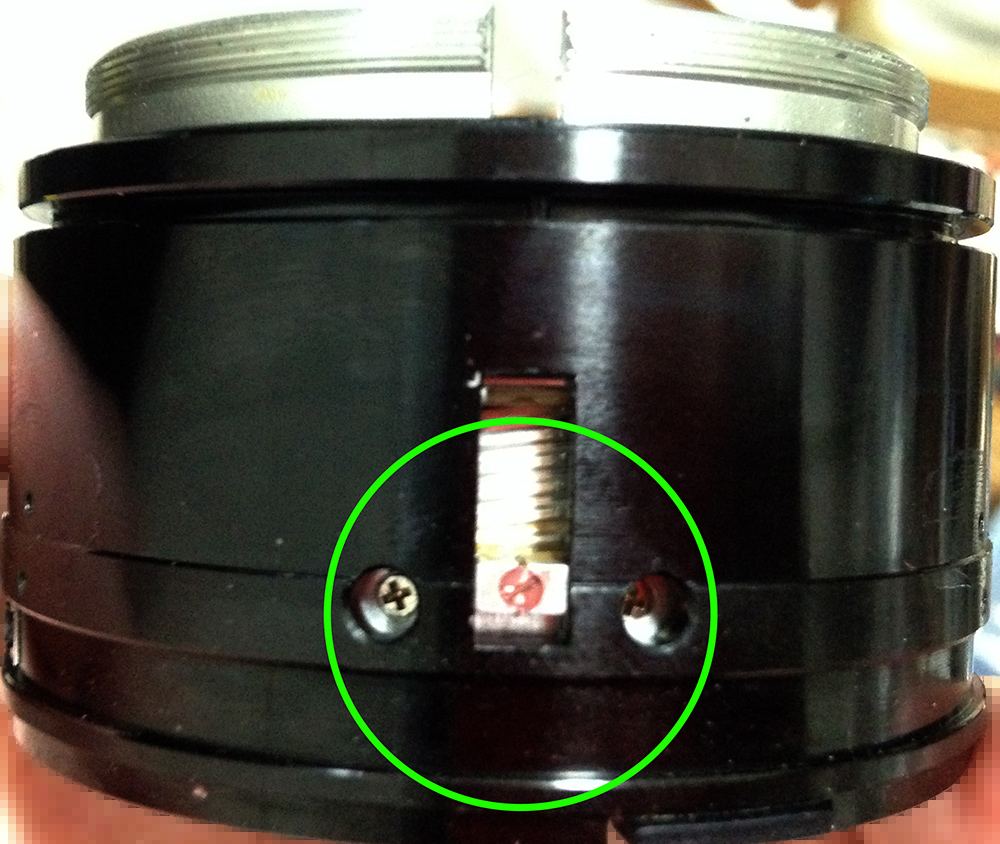
Locate and extract these to remove the grip.

The grip is sometimes glued to the barrel and acetone will help in softening the cement. Carefully remove it with your nails.
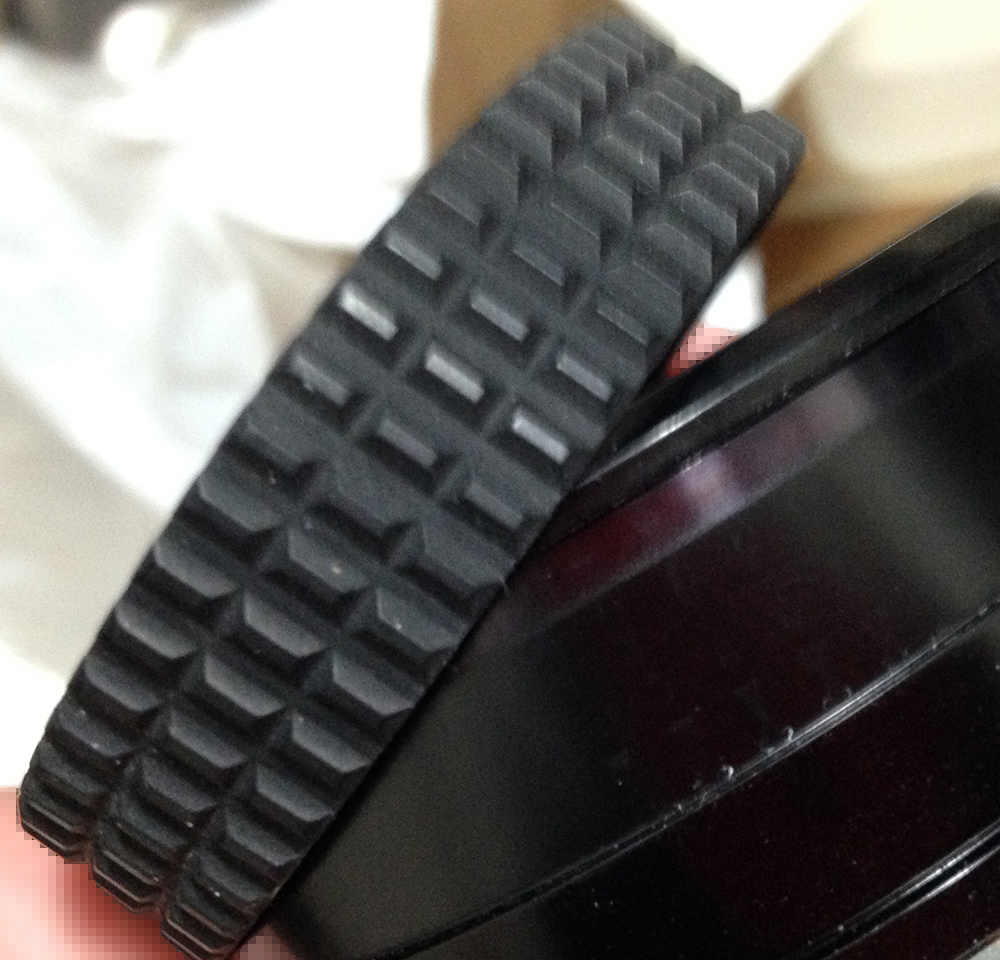
Carefully remove the rubber grip by running a thin toothpick underneath it and gently go through its whole circumference. Doing this will separate this part from the focusing ring as it is likely being held by rubber cement. This can be brittle at times so be careful not to tear it.

Locate this hole and drop some alcohol into it to dissolve the seal. This can take several applications as the adhesive used here is strong.
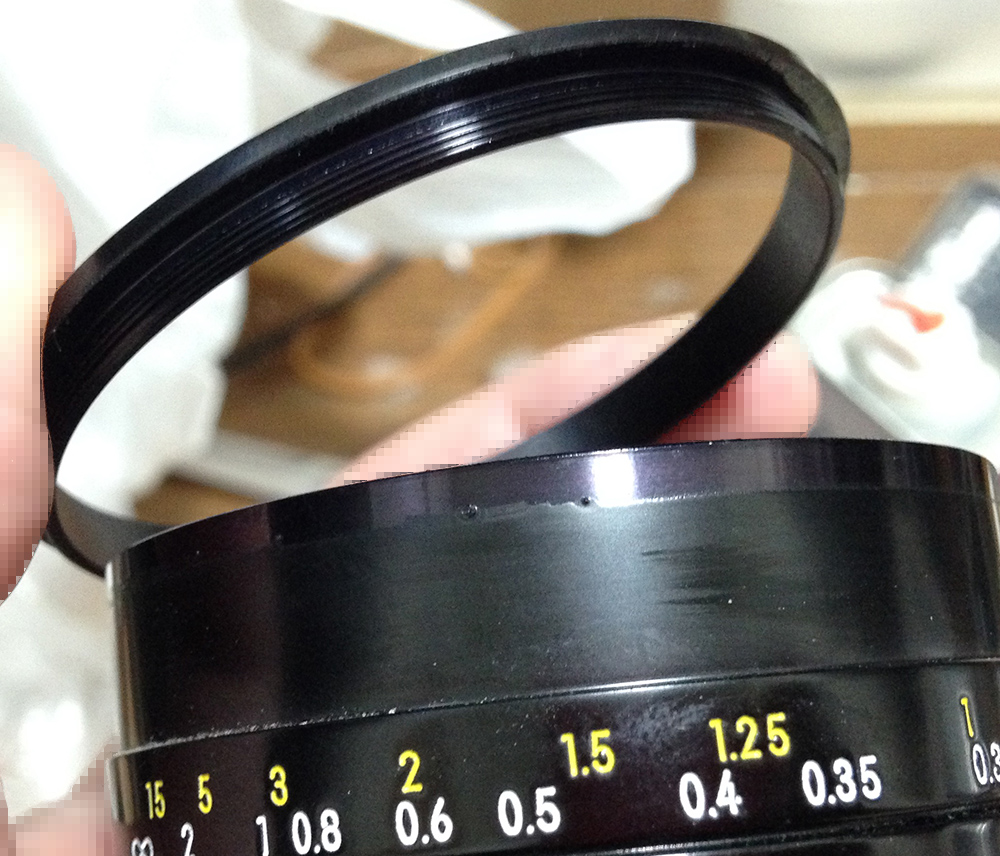
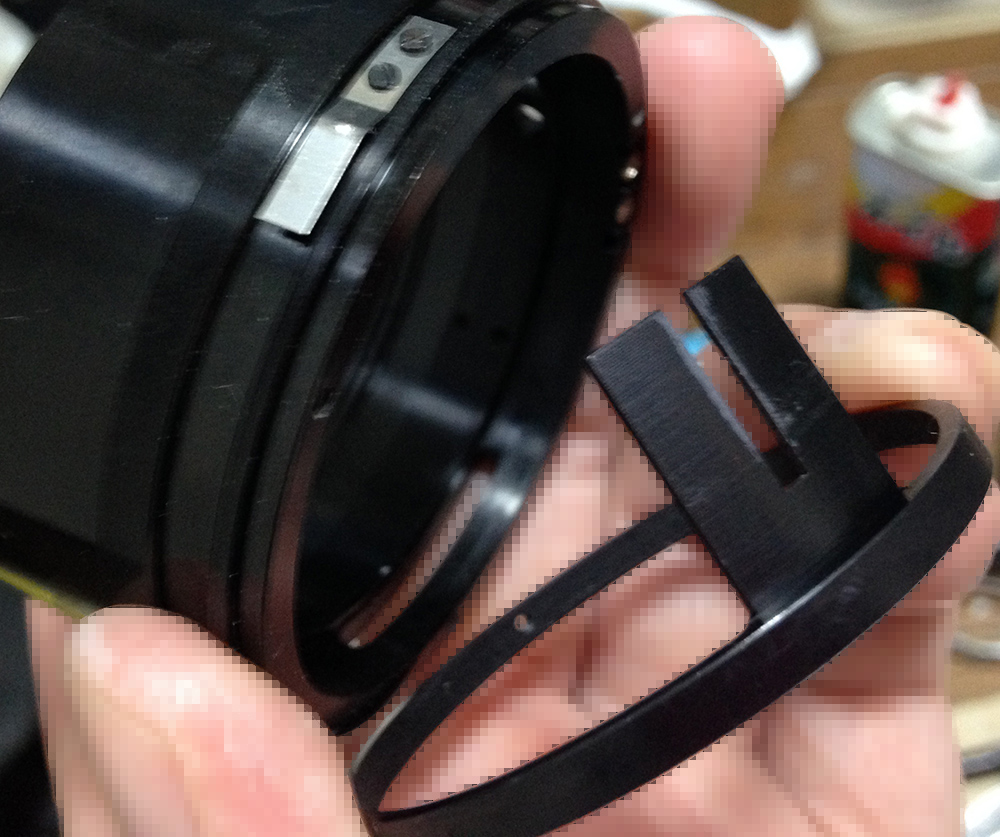
Carefully unscrew the bezel of the focusing ring.
Removing the bezel will allow you to access these screws. Extract them and you can remove the focusing ring. Note the alignment of the focusing ring, I take plenty of photos so I’ll know how to put it back. This is important since this is where you could adjust this lens’ focus.

Remove the focusing ring.
Extract these to remove the sleeve.
Extracting this is trivial but it’s sometimes glued to the barrel.
Locate and extract these to remove the helicoid key. The key keeps all of the helicoids synced, turning the central one will extend-or-retract the barrel. I always make sure to make a mark at the central helicoid so I’ll know how it should be aligned when the barrel is turned to infinity as you can see here in this photo.
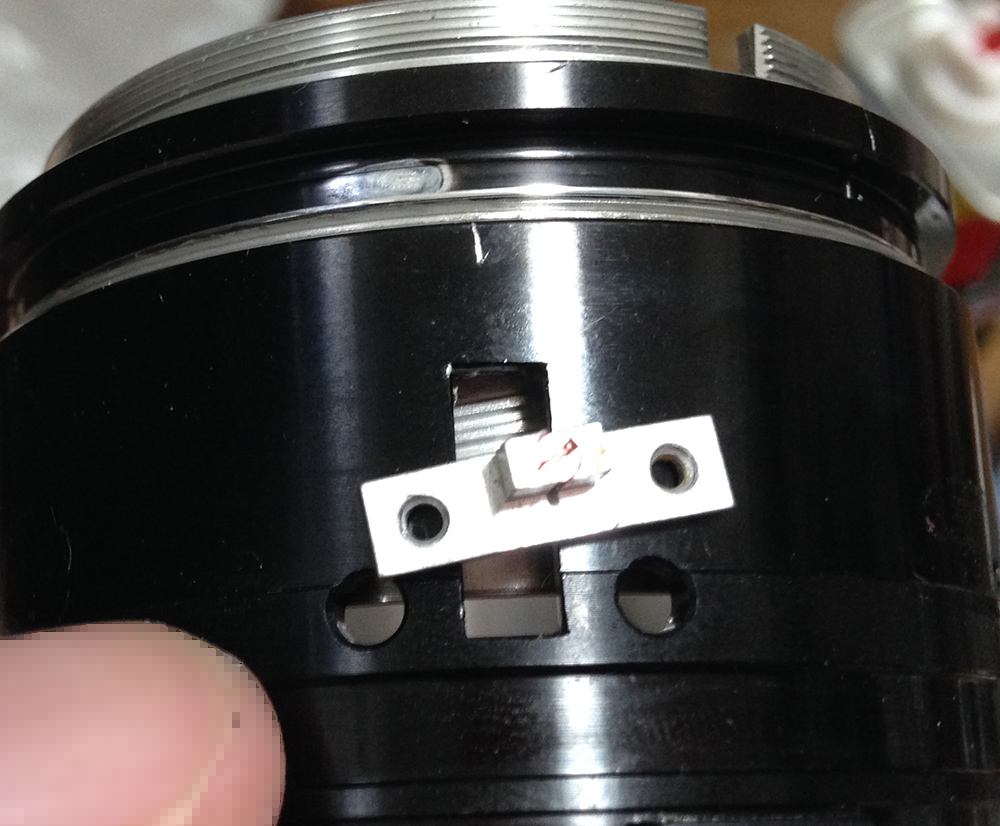
Remove the helicoid key and make sure to note its direction.

Separate the central helicoid from the outer one. Don’t forget to note where they parted since this is also the same spot where they should mesh. People forget to do this and waste a lot of time later figuring how to put these back. To prevent this from happening to you, read my article on how to work with helicoids.
Extract a long-headed screw from the aperture fork’s ring to remove it. The screw serves as a pin so it couples to the aperture ring, it’s delicate so don’t snap it.
Separate the inner helicoid from the central one and don’t forget to note the spot where they parted.
Carefully clean the parts and never leave any residue. Scrub the helicoids, I would even polish the threads with a stiff-bristled brush. Hardened dirt can only be removed with a sharp toothpick.
A thick-type of grease works best with this since the focus-throw is short, it will give the best results. Never apply too much grease or it will migrate to the iris mechanism and cause an even bigger problem. Only apply a really thin film to the slots of the aperture ring.
Disassembly (Objective):
The objective is of conventional design so it shouldn’t be confusing to repair. Since this lens wasn’t that dirty I only did a partial overhaul of the objective. You can read my other repair articles instead to look for hints.
When working with the glass be sure to note their direction so you’ll know how to put them back properly later. I use a pencil do draw a small line or a series of dots at the walls of the groups to help me determine their direction and order. Putting back a group facing the wrong way will crack it.
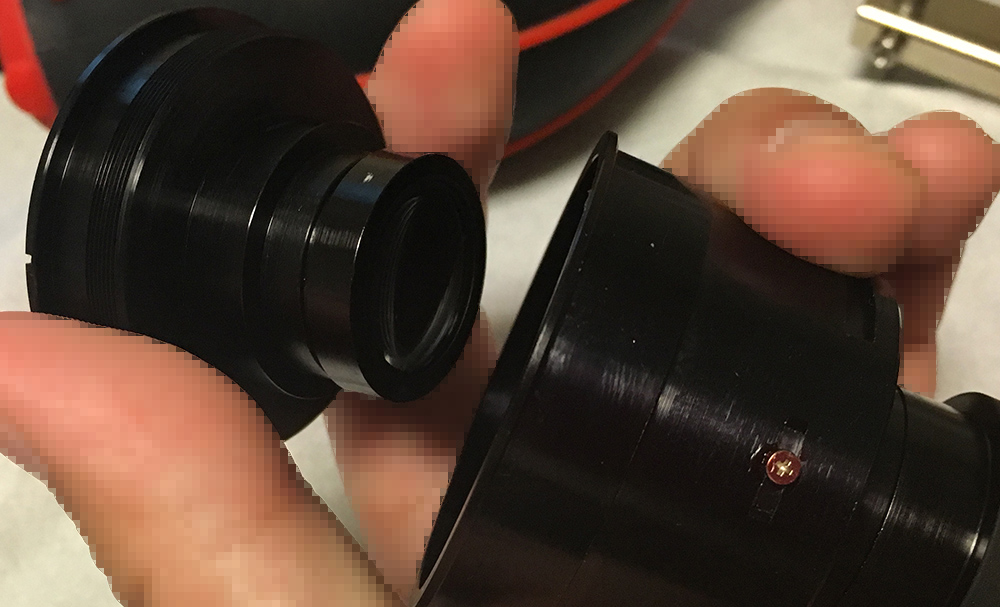
The front optics assembly can be unscrewed with a lens opener.
The front element can be unscrewed with a lens spanner. It’s sealed so this isn’t easy to open, you’ll need to apply a drop of alcohol to soften the seal. If that doesn’t work, try using acetone but be very careful with it. Remove the front element with a lens sucker.
It’s easy to unscrew its rear, you simply twist it with your hands. You could access most of the optics from here without further disassembly.
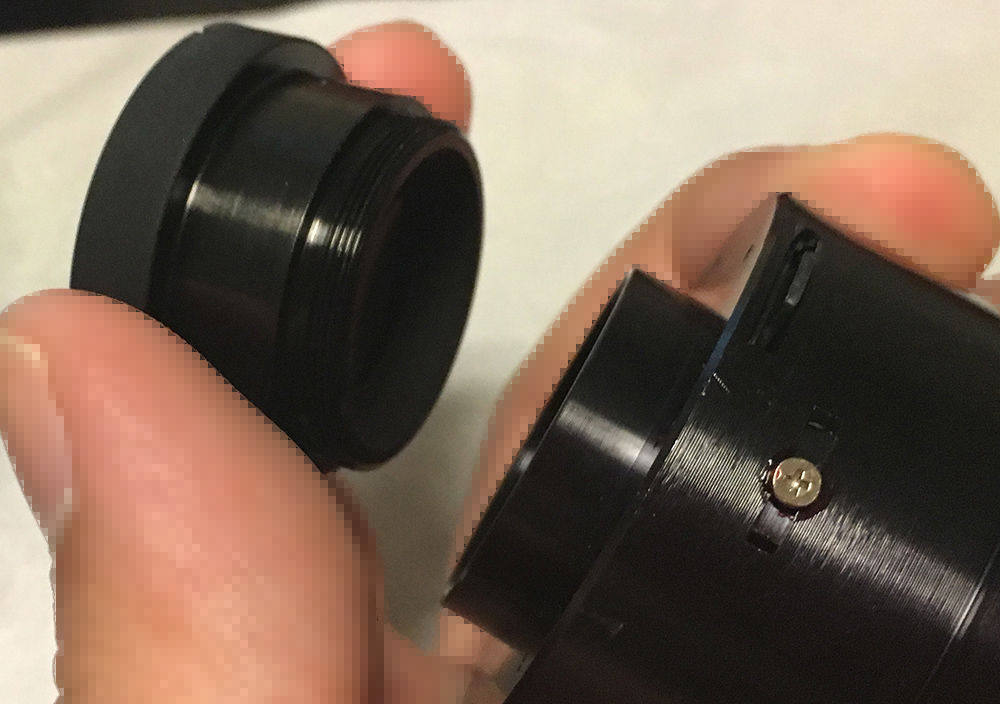
The rear optics assembly can be unscrewed with your hand.
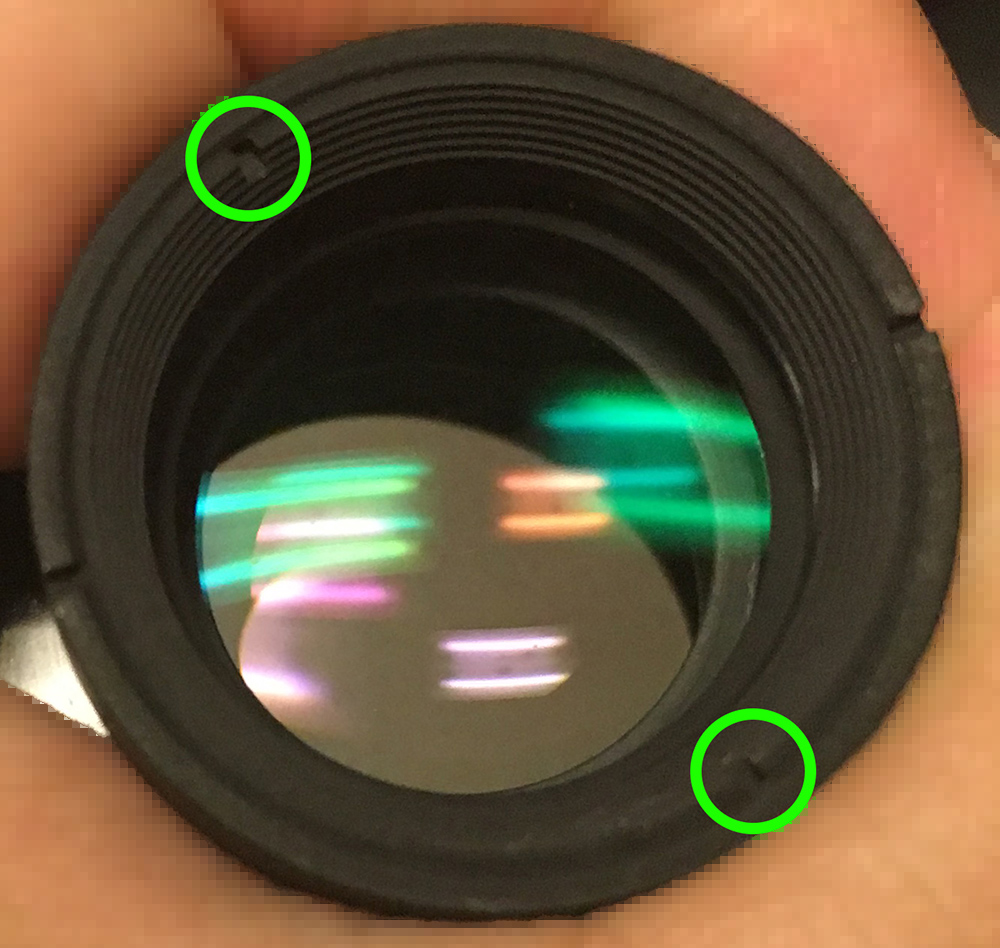
Unscrew the retainer to dismantle the rear optics assembly. This is sealed, a drop of alcohol won’t help since it was sealed with paint. Carefully scour the paint at the seams with a sharp needle and apply a drop of alcohol. You can remove the other lens groups once this is gone.
Clean the glass carefully. If your lens has fungus, read my article on how to clean lens fungus. Don’t use the solution at full-strength, thin it with distilled water. Don’t soak the elements in the solution for too long or it will dissolve the coatings. The cemented group is fragile so handle it with a lot of care.
Conclusion:
This one took me roughly 2 hours to service with most of that time spent on cleaning the parts thoroughly. It now works perfectly, you wouldn’t think it was bought as junk for very little money. This is a nice project if you want to relax but it’s not something for a complete beginner to work with, specially as their first project. If your lens needs to be serviced, send it to a repairer. I have heard that there are many fake repairers out there so ask your friends before you commit to anything.
Reassembly everything but leave the bezel of the front ring out so you could adjust the focus. If you don’t know how this is done in a DIY setting read my article on how to adjust your lens’ focus. This will help give you an idea as to how this is done with readily-available tools. Once you are satisfied with the adjustments, carefully put everything back and check your work.
This is a great lens and I’m glad that I spent all that effort overhauling it. Its elegant design makes it a perfect companion with any camera.
Thanks for following my work, if you liked this article please share this with your friends so it will get more views. This site earns around $0.30 a day, it’s totally reliant on views. You can also support this site, it helps me offset the cost of maintenance and hosting. You are also helping me purchase, process and scan film. This site promotes the use of film so we’re all in this together. See you again in the next article, Ric.
Help Support this Blog:
Maintaining this blog requires money to operate. If you think that this site has helped you or you want to show your support by helping with the site’s upkeep, you can make a small donation to my paypal.com (richardHaw888@gmail.com). Money is not my prime motivation for this blog and I believe that I have enough to run this but you can help me make this site (and the companion facebook page) grow.
Buy me a roll of film or a burger?
Thank you very much for your continued support!
$2.00
Helping support this site will ensure that this will be kept going as long as I have the time and energy for this. I would appreciate it if you just leave out your name or details like your country’s name or other information so that the donations will totally be anonymous. This is a labor of love and I intend to keep it that way for as long as I can. Ric.

May 20, 2018 @ 18:26:38
Hello Richard Haw,
this is a stunnig website you‘ve built here.
I‘ve got a problem with my Nikon Nikkor 35mm f2.8 Ai-S. When I turn the focus ring to the hard stop at infinity, the actual focus doesn‘t turn all the way up to infinity. So in practice, objecta more than about 100m (or less?) away won‘t appear in focus. I‘d have to turn the focus ring even further, but the hard stop is already reached. I haven‘t found anything on the internet on how to fix this. As everything else works smoothly and I haven‘t ever opened a lens, I‘d consider it too risky to just disassemble it and try to find a fix.
Is there any way you could help me on this? Is there an easy fix, a part I could adjust?
Help much appreciated
Best Regards
Jun 21, 2018 @ 16:17:47
Hello.
The problem is with the focusing scale. it’s a very easy fix and I wrote a whole article on how to calibrate it. Search for it using infinity calibration as keyword. Ric.
Aug 09, 2018 @ 01:38:54
Boy, your website sure is interesting!
Regards,
Jon Campo
Jun 02, 2019 @ 22:30:35
Hi, I really admired your elaborate work on classic nikon lenses, that I cant find anywhere else but here. May be it is out of topic from this page discussion, but I hope that you can suggest me, do you have any article that explain how to dissamble center glued lens on nikon 35-70 mm f2.8? I have no ide how to tae this glued lens apart as I attempted to clean the fungus that situated in between of that glued lens element, help and suggestion are much appreciated.