
Introduction:
The PN-11 extension tube is a companion accessory to the amazing, popular and very long-lived Micro-Nikkor 105mm f/2.8 Ai-S lens. This lens was introduced in the early ’80s but it’s still in production up to this day. Having said that, the PN-11 is obviously in-production as well. You have to buy the PN-11 separately which doesn’t make sense since it is so vital to the Micro-Nikkor 105mm f/2.8 Ai-S’s performance and it is needed for the lens to achieve a 1:1 (almost) reproductive ratio. Why Nikon sold these separately, I don’t know.


Here are pictures of the PN-11.
The difference between this one and the other extension tubes like the M rings is this one has a rotating tripod collar. It is very well-built and can definitely take a lot of abuse. The collar is finished in rubberised crinkle-finish and It can be easily damaged to be careful.
The PN-11 can still be nought new around the world and is being sold for around $90 here in Japan. I find that price ridiculous so I looked for one from the junk section. I got this one after a couple of days’ of searching and sure enough, it is as advertised – a junk. The inside was mouldy and the aperture coupling tab is not returning to it’s position when pressed. I was not even sure if this should have a spring action so I didn’t really take this seriously. I got this for a bargain price anyway so I am not going to complain much.
Before We Begin:
If this is the first attempt at opening a lens then I suggest that you read my previous posts regarding screws & drivers, grease and other things. Also read regarding the tools that you will need in order to fix your Nikkors.
I highly suggest that you read these primers before you begin (for beginners):
- Essential tools
- Best practices 1
- Best practices 2
- Best practices 3
- Ai conversion
- Working with Helicoids
Reading these primers should lessen the chance of ruining your lens if you are a beginner. Also before opening up any lens, always look for other people who have done so in Youtube and the internet. Information is scarce, vague and scattered (that is why I started this) but you can still find some information if you search carefully.
I highly recommend that you also read my working with helicoids post because this is very important and getting it wrong can ruin your day. If I can force you to read this, I would. It is that important!
For more advanced topics, you can read my fungus removal post as a start. This post has a lot of useful information here and there and it will be beneficial for you to read this.
Disassembly:
IMPORTANT! Before I begin, I would like to warn you that I opened this thing up from the wrong side. This is best opened from the front instead of the back like what I did, I did not have anything to read so I am clueless as to how I should go about opening this thing. With that said, please DO NOT follow my steps but only use these as a guide so that to help you go about dismantling this thing. Remember, begin working on this thing from the front!
After reading my caveat, I will assure you that this thing is not complicated at all, you only have to be careful with the spring on the front.
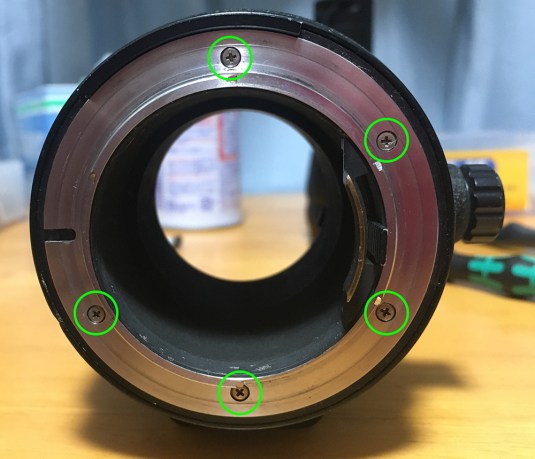 The rear bayonet can be removed by getting rid of these screws. Mine came off easily but if yours are glued then you would need to place a drop of solvent first.
 There’s nothing connected to the rear bayonet mount so you do not have to worry about it pulling anything while you pull it from the barrel.
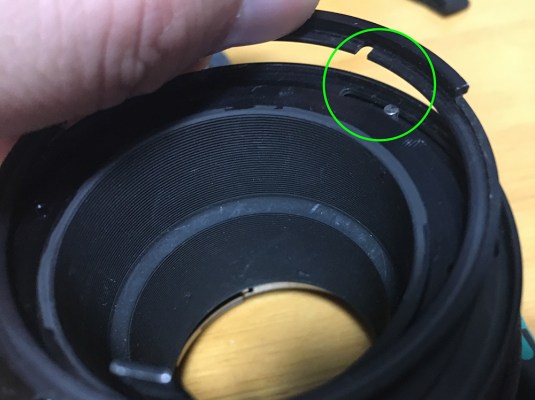 The notch on this ring should be mated to this pin. Be careful when you put this back later because you might damage these if you force the bayonet in while these aren’t properly set in place.
 The outer barrel comes off with the rotating collar. Dirt and grime gets collected under the seams and edges so clean it properly with alcohol and some Q-tips.
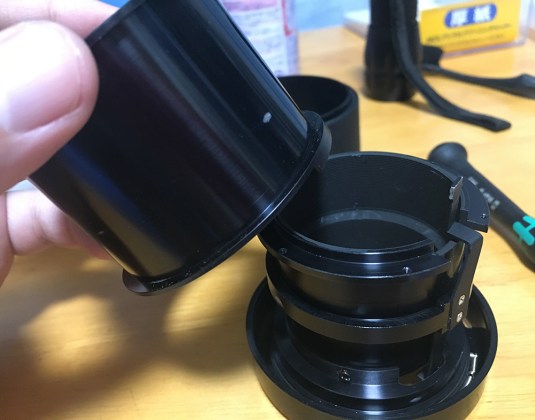 The inner barrel is the one responsible for coupling what’s connected on both ends of the PN-11. Be careful when you remove this because the spring is connected to this part. If you started from the front then you should be able to remove the spring before you even get to this part. Remember, I opened this from the wrong end!
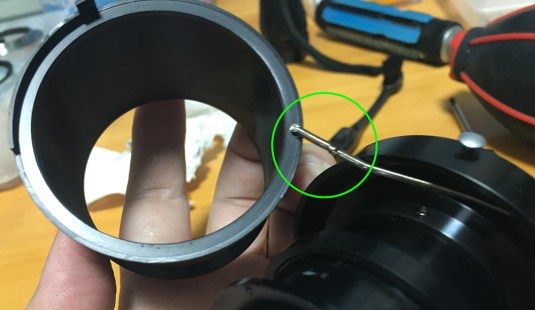 OK, I ruined the spring. I would not have known about it anyway since this barrel was not moving when I got this and I never thought that there’s a spring in there. Now, It may be that somebody else opened this thing before and ruined the spring and not me, but at this point, who knows? It’s too late to care about it anyway. Besides, this was being peddled as junk.
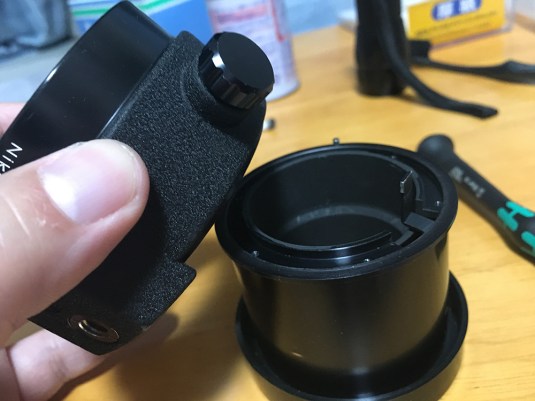
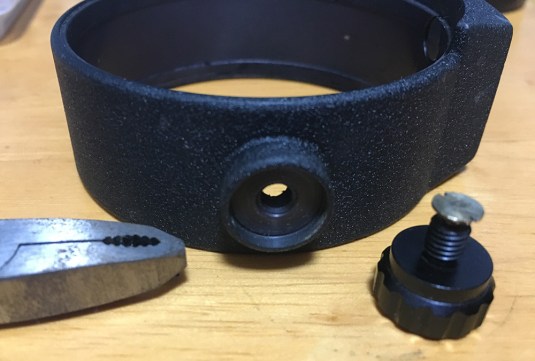
 It’s now time to clean the rotating collar! This part is usually the thing that collects dirt so we must clean this properly so that this ring rotates smoothly. Make sure that the knob is not tightened and pull the collar from the barrel.
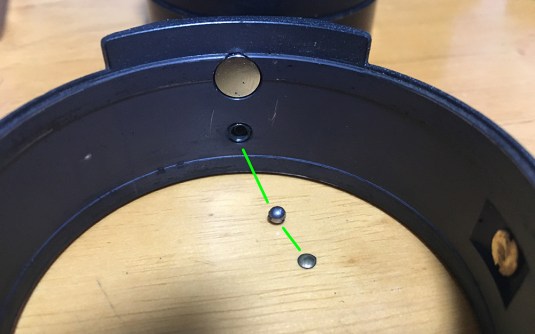 On one side (bottom) of the collar you will find these small parts, a bearing ball and a cap. This mechanism is responsible for the clicks when you turn the tube. Be careful not to lose any part when you pull the collar from the barrel.
The cap is at the top, followed by the bearing ball and finally to the spring inside the hole in the collar. This is delicate to be patient when you reassemble this part, it actually took me a couple of tries to get this right when I put the inner barrel back.
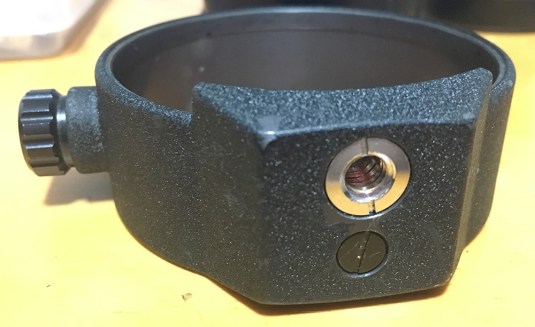 There is another way of putting the spring mechanism back and that is through this screw underneath. I do not want to bother with it so I skipped this.
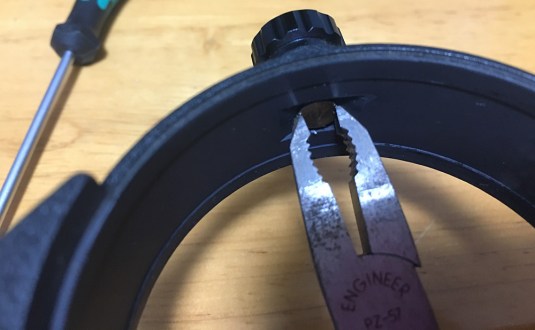 The knob itself doesn’t require cleaning in most instances but mine was dirty underneath so I decided to clean this thing anyway. I grabbed the screw securing it with a nejisaurus plier and twisted the knob until it came off.
 I am not sure if you can see it from this picture but the hole for the knob is dirty and that’s the reason why the knob felt “gummy”.
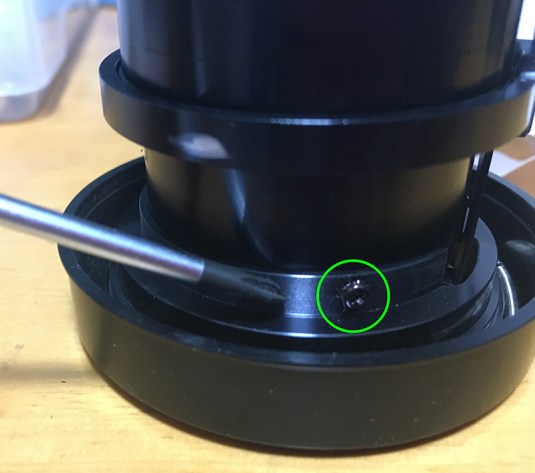 The innermost barrel where the stop-down lever is situated is secured by 3 screws and this is one of them.
 Removing the said screws will free this assembly from the front assembly. The stop-down lever goes into the slot over there in case you do not know where it should go. Just look at that spring, I definitely ruined it.
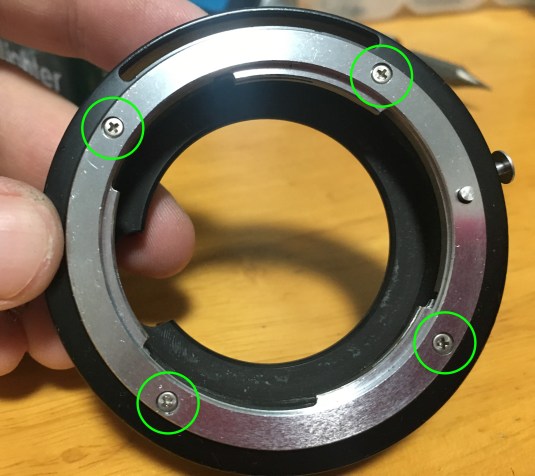 The front bayonet mount can be removed by getting rid of these screws. This should be the first step if you want to open the PN-11 correctly.
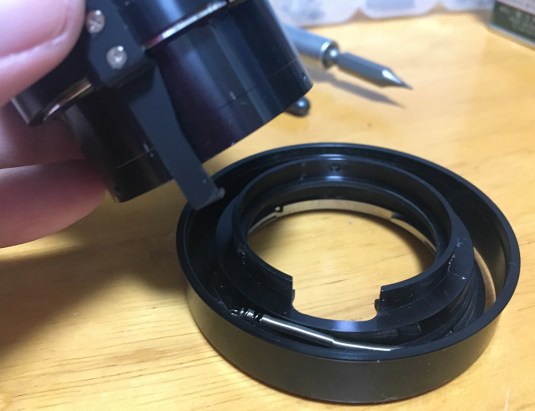
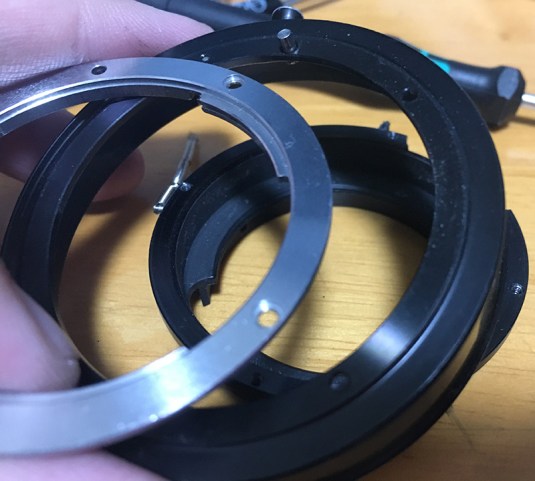 The front assembly comes in 3 parts, the bayonet mount, the front ring and the inner ring.
Conclusion:
OK, I hope that you are not confused at this point. I could’ve written this in reverse order but that would confuse you even more since you are seeing parts of the PN-11 that should not even be there. You can choose to follow my guide from the last step up to the first step if you prefer it that way.
This isn’t really a difficult thing to take apart if you start from the front since this is really simple and consists of less than 10 major parts. The only thing that you should be careful of is the spring and how things should line-up under the front assembly.
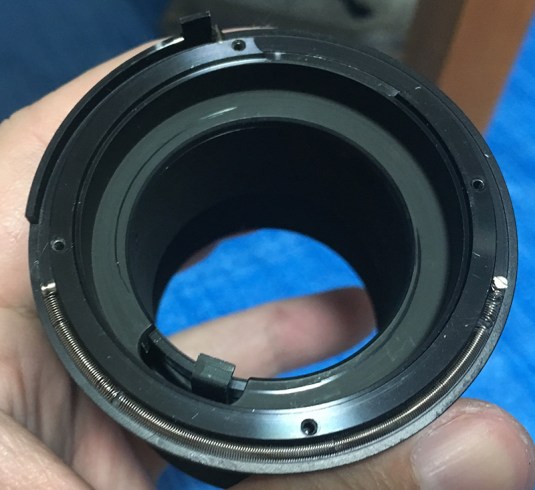 This is how the spring should be laid out with the rotating barrel and the inner part of the front assembly. If you opened this from the front then this will be the first thing that you should see.
This is one of the more unusual articles that I have written. I am sure that somebody will find this useful. Somewhere in this world, somebody else probably bought a stuck PN-11 so he would definitely want to take it apart and for that person alone I would spend my night writing this.
Next week, we will be looking into another Nikkor. So please check out the next article, Ric.
Help Support this Blog:
Maintaining this blog requires money to operate. If you think that this site has helped you or you want to show your support by helping with the upkeep of this site, you can simple make a small donation to my paypal.com account (richardHaw888@gmail.com). Money is not my prime motivation for this blog and I believe that I have enough to run this but you can help me make this site (and the companion facebook page) grow.
Helping support this site will ensure that this will be kept going as long as I have the time and energy for this. I would appreciate it if you just leave out your name or details like your country and other information so that the donations will totally be anonymous it is at all possible. This is a labor of love and I intend to keep it that way for as long as I can. Ric.

Sep 16, 2017 @ 16:07:44
Do you have any experience or know if this will work with a Nikkor 55mm micro 3.5?
I already have the pk-13 & would like to get a little closer. Appreciate any help with this or suggestions.
Sep 18, 2017 @ 04:00:04
Hello, Nick!
Yes, I use it with that lens as well when copying slides. It works very well. Ric.
Nov 02, 2019 @ 18:47:34
Richard, any advice for a PN-11 that has a stuck (or extremely hard to move) AI follower? I’ve taken it apart and applied a small bit of grease to the parts. The follower moves cleanly with everything mostly put back together, but as soon as I tighten the screws on the body-side F mount, the follower gets stuck. In fact, I have two copies of the PN-11 with this problem. I’m thinking of getting out the Dremel and shaving off some material. That feels extreme though.
Thanks for your excellent work on all of these lenses!
Dec 21, 2019 @ 03:22:44
that doesnt sound right. it seems like something is getting impinged.