
Hello, everybody! Do you know someone who looks normal from the outside but is actually rather special inside? That person may be talented or very intelligent to the extent that is not normally achievable by the majority. You can call the person a genius, gifted or any superlatives and they would all fit. I sometimes think that the root of all this is hard-work but maybe there’s more to this. Maybe they just process things differently so they could grasp something in a different manner and easily digest it mentally. Today, I will show you something that looks normal but is actually unconventional inside. You can’t call it a genius because it’s not a person but I am sure the person who made this is a genius.
Introduction:
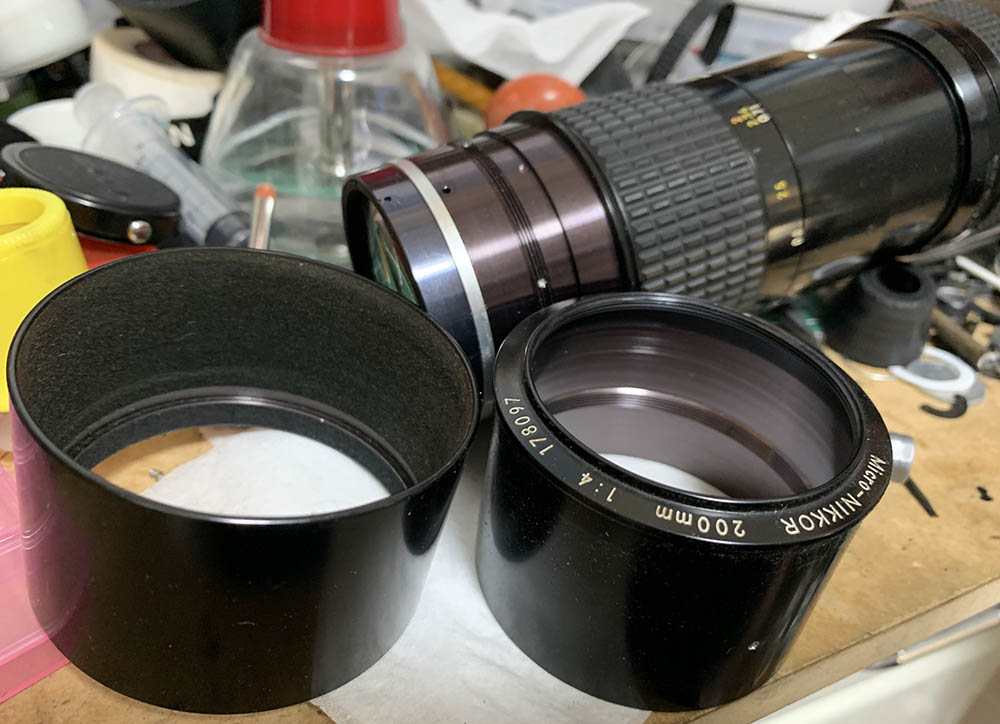
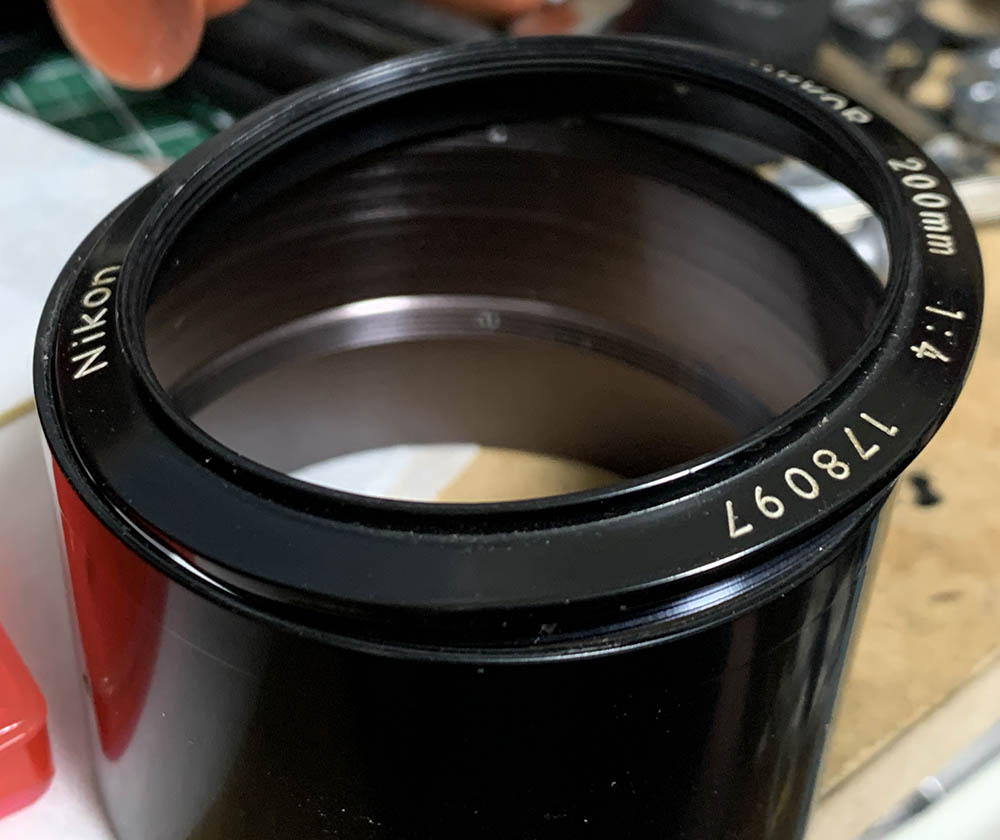
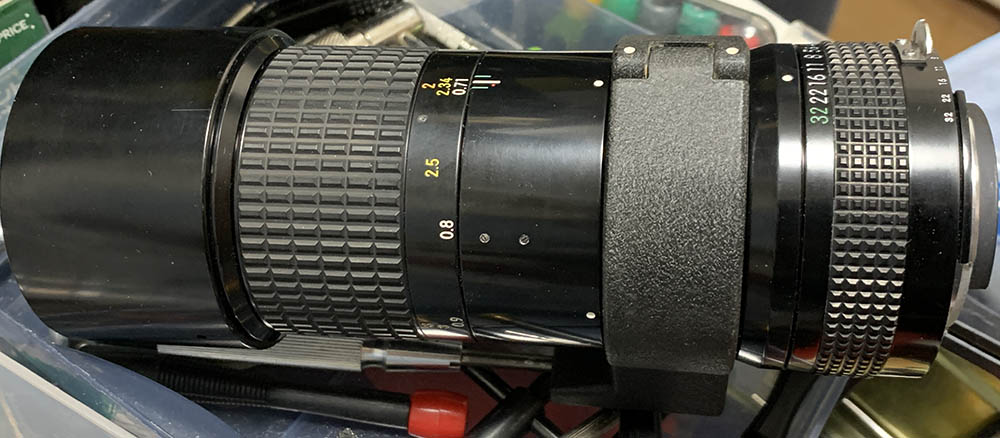
The Micro-Nikkor 200mm f/4 Ai debuted in 1978 and was sold until 1982 when this was replaced by the similar-looking Micro-Nikkor 200mm f/4 Ai-S. It was hailed as one of Nikon’s most-advanced lenses and it opened-up new avenues for expressing creativity or research. Most macro-lenses at that time were limited to shorter focal-lengths but this one has a focal-length 200mm which was something that no other Micro-Nikkor have so this is its claim-to-fame.

It’s a very rugged lens, with a removable tripod-collar. It also has a built-in shade which I find quite useful. It’s smallest aperture is f/32 as typical with many Micro-Nikkors, this is a big-deal when shooting at higher magnifications but this is not ideal if sharpness is a concern because diffraction will certainly make your photos look terrible. I normally never use my Micro-Nikkors beyond f/16 since it’s common for them to lose sharpness just before that value.
It has a 9-elements-in-6-groups design and is said to be Nikon’s first true IF design which means that the length of the barrel won’t change as you focus in-or-our. The optical design appears to be complicated for its time but I guess that’s what it takes to prevent the barrel from changing its dimensions when you focus. Since this is a 200mm lens with an f/4 maximum speed the result is a barrel that’s rather long and moderately-fat. The IF feature is actually very important for a lens of this type specially when you use extension-tubes because your working-distance will get shorter. This feature was a game-changer back then because macro-lenses traditionally extend to about 2x their length to get to 1:1 or just to 1:2 magnification in the case of the majority, some lenses like the Micro-Nikkor 5.5cm f/3.5 will even extend to about 3x its length. This will not only impact your working distance but also the balance of your setup which could potentially alter your framing, something that is difficult to manage as the focal-length gets longer and the working-distance gets a bit shorter.
While it’s not known to be a sharp Micro-Nikkor it does offer amazing potential when you use this with a teleconverter. That will allow you to shoot unique photos that’s otherwise impossible to take using a shorter lens. The drawback is it’s going to lose more speed since f/4 isn’t considered a fast aperture by any standards so you’ll get a darker view.

Handling is rather standard, the focusing-ring is situated at the front where your other hand comfortably situated in a natural manner. If it’s closer to you then you might upset the balance when turning it. The aperture-ring is broad, this makes it hard-to-miss when you’re wearing gloves.

Removing the tripod-collar allows you to have a sleek setup but this is not going to make handling better when you’re hand-holding this because the base of the collar functions like a rest for your palm, giving you more stability. This will not allow you to shoot at 1:1 magnification on its own and you will need the Nikon PN-11 or other extension-tubes to help you get there. The viewfinder will get quite dark when using extension-tubes with this and that’s something that you should be aware of. The rather slow maximum-aperture of f/4 makes it tough to focus as you get closer so you’re going to want a fine-ground matte focusing-screen to shoot this with. A split-prism is something that you should not even consider since the center will black-out specially when you don’t have enough light.
Learning how a lens performs is important so you will maximizing its use. You will learn how to utilize its strengths and avoid its weaknesses. This knowledge helps in determining which lens to bring on an assignment. I shot these pictures from f/4, f/5.6 and f/8 as these are the most common apertures that people would want to use this, we’ll also get to see the most changes happen within these values. I shot these with my Nikon Df, some of the pictures were cropped close to 1:1 so we could see the details a lot better.
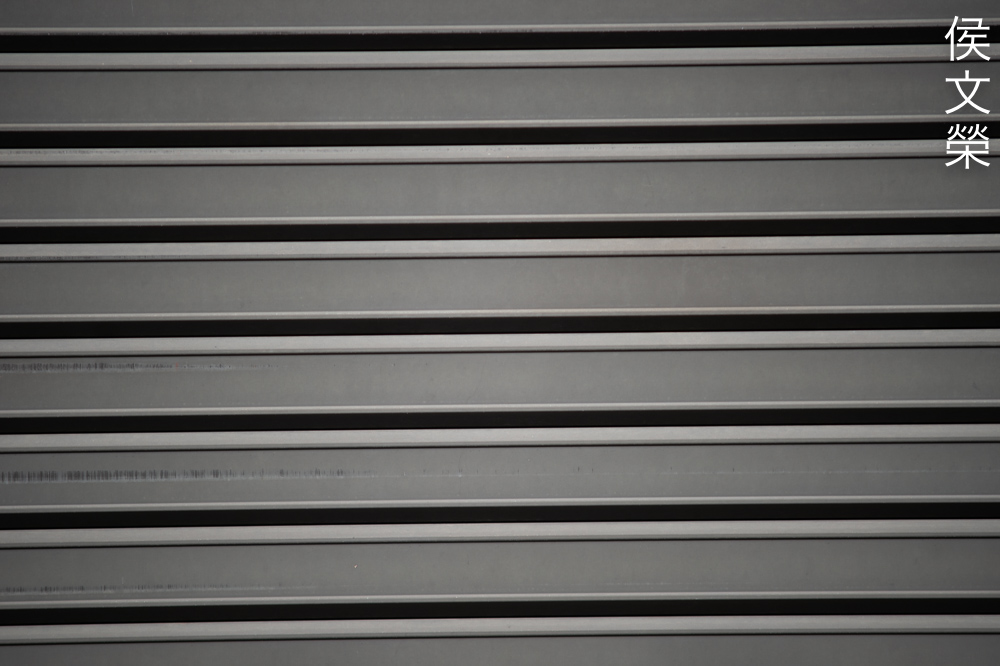
It has quite a bit of distortion for a Micro-Nikkor and it’s of the pincushion-type since this is a long lens. This makes it a useless lens for reproduction but it’s not going to be much of a problem for shooting bugs or documenting things that require more working-distance between you and your subject. The shorter Micro-Nikkors are the best solutions for the times when you need to keep your lines straight.


(Click to enlarge)
Vignetting is observable wide-open and it improves significantly by f/5.6 but you’ll still see it at f/8 which is a shame. It should exhibit much-less of it by this aperture and I suspect that it won’t look significantly better even at f/11. Since it isn’t something that you’ll consider for reproduction I don’t think this will be an issue at all, this is a specialized lens for shooting other things.


(Click to enlarge)
It flares terribly and you’ll see traces of blobs formed by internal-reflections. The latter is less-pronounced and it should not pose much of a problem in real-world use. You must also consider that my lens had terrible fungus-damage so that may have contributed to this since the coatings are damaged.


(Click to enlarge)
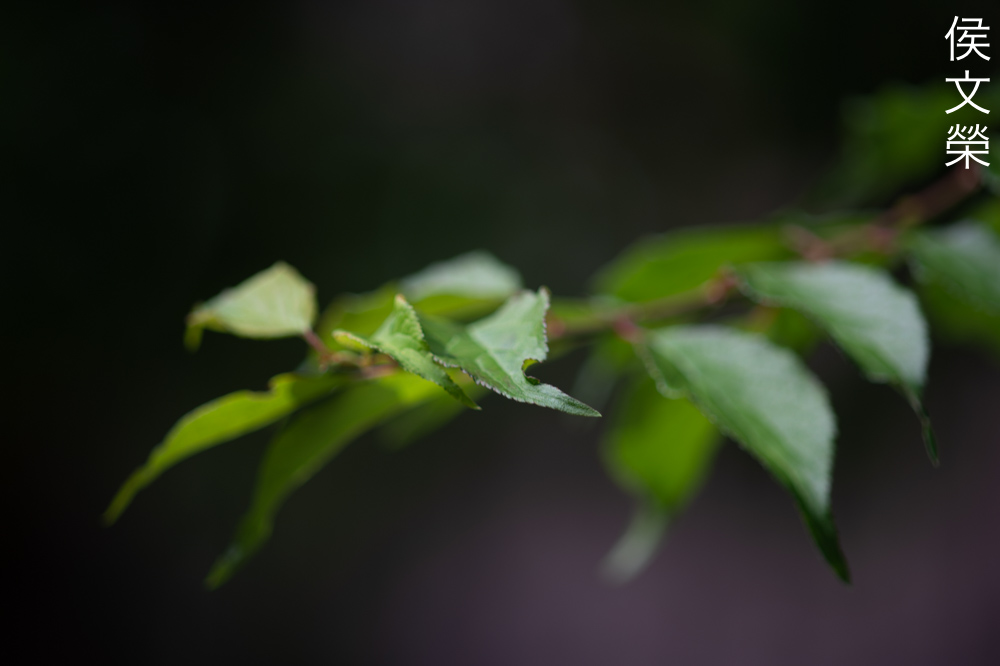
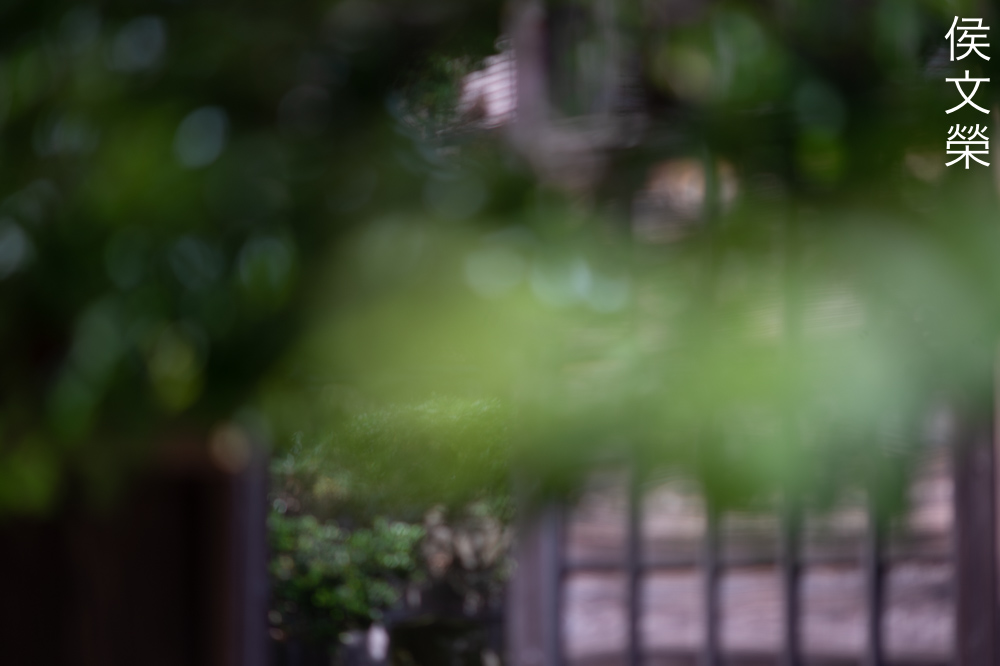
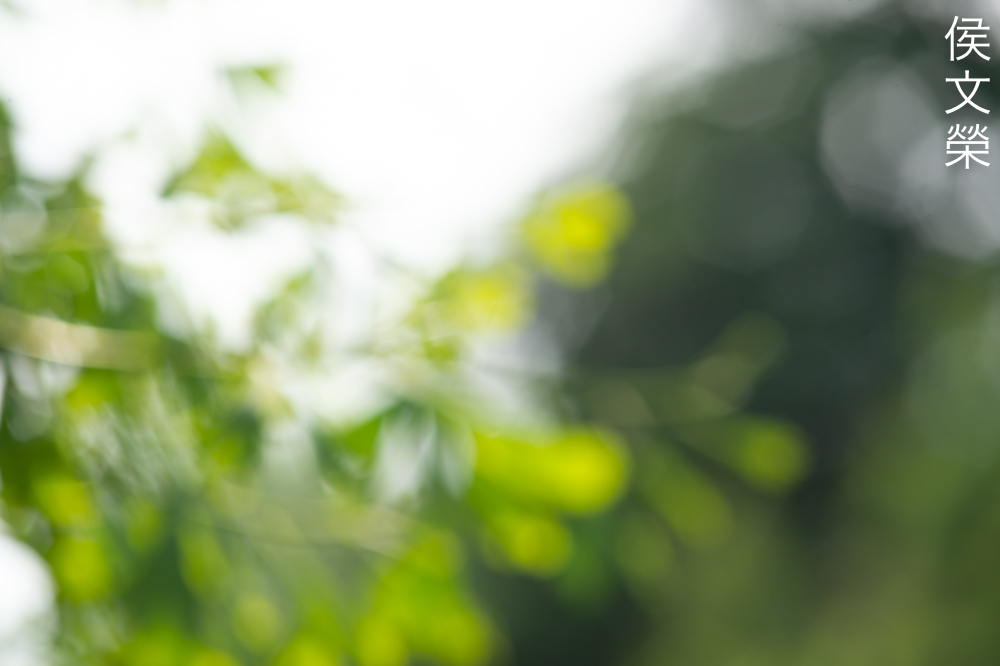
As expected, the character of the bokeh is excellent. It’s difficult to make this render ugly-looking artifacts even if your background has things that will trigger them. This is typically true with many Micro-Nikkors, it seems that rendering the background smoothly is mandatory for macro-photography.


(Click to enlarge)
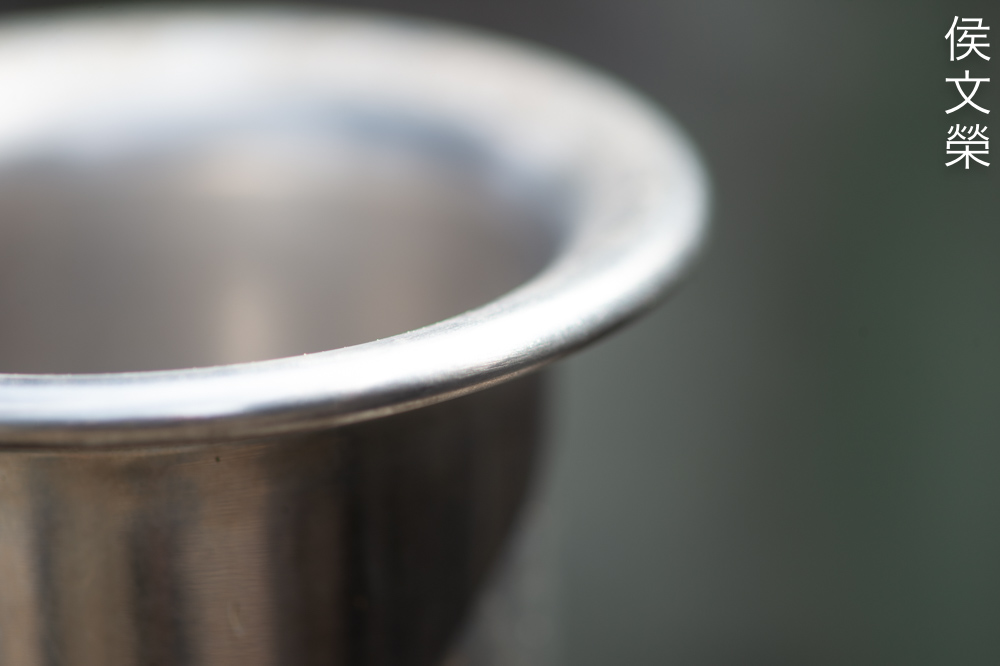
Chromatic aberration could be seen wide-open specially when shooting shiny surfaces, it’s not bad and you won’t see much of it in areas where things are focused. However, it’s obvious in the areas where the focus is transitioning to what is blurry. This is natural but it’s more than what I’d expect this to have. You will only see traces of it by f/5.6 at the areas where things are focused but it’s still rather strong at the areas around it despite showing some improvement. You will not see any of it by f/8 except for the areas around the focus-plane where you’ll still traces of it. This is easy to avoid by carefully framing your subjects but it will be a problem when shooting jewelry at closer distance.
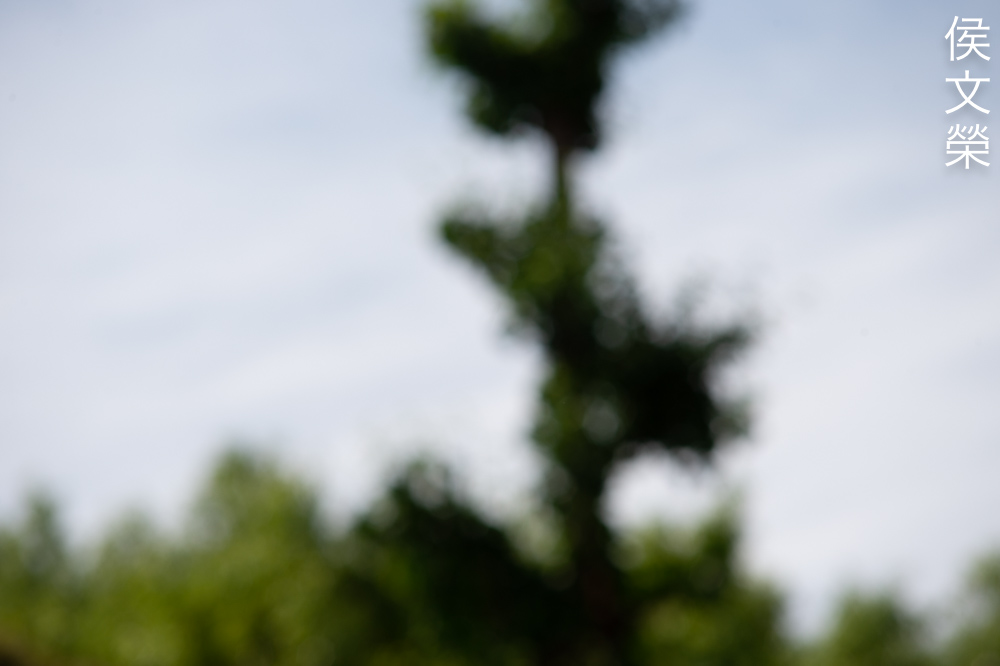
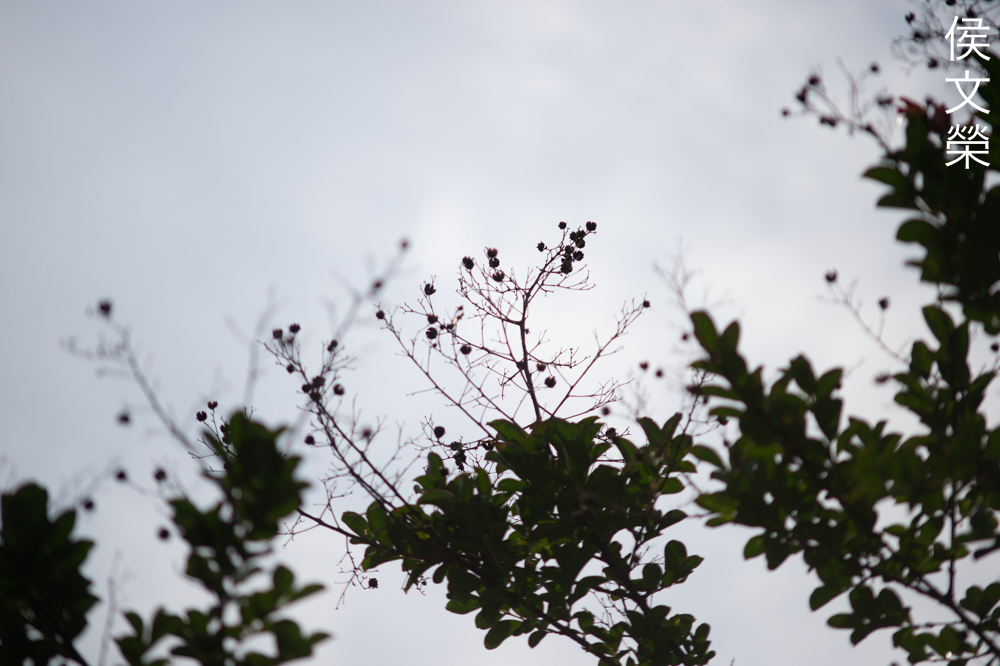
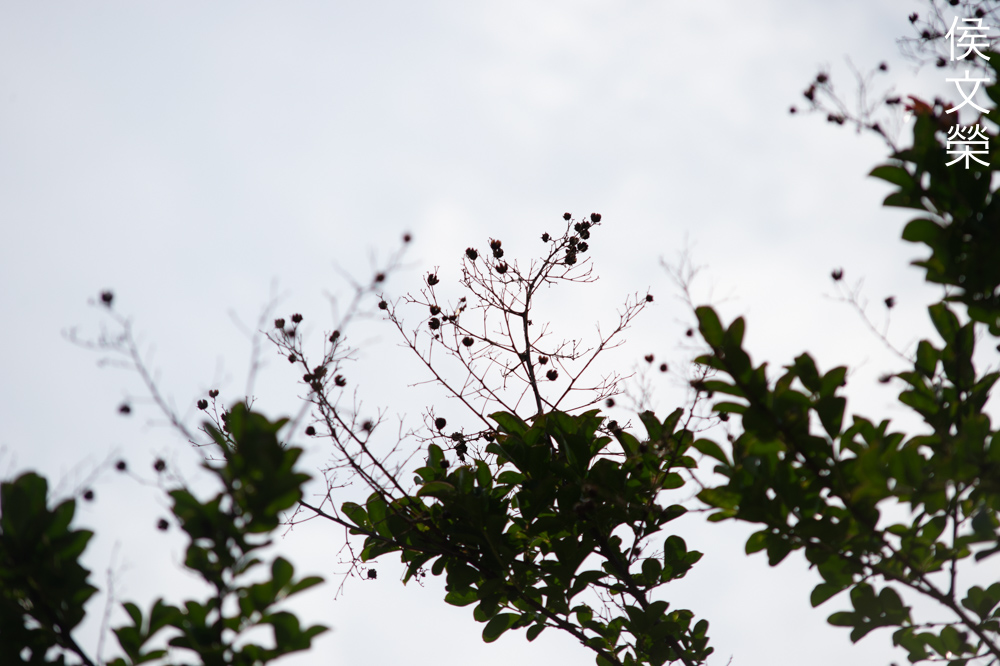
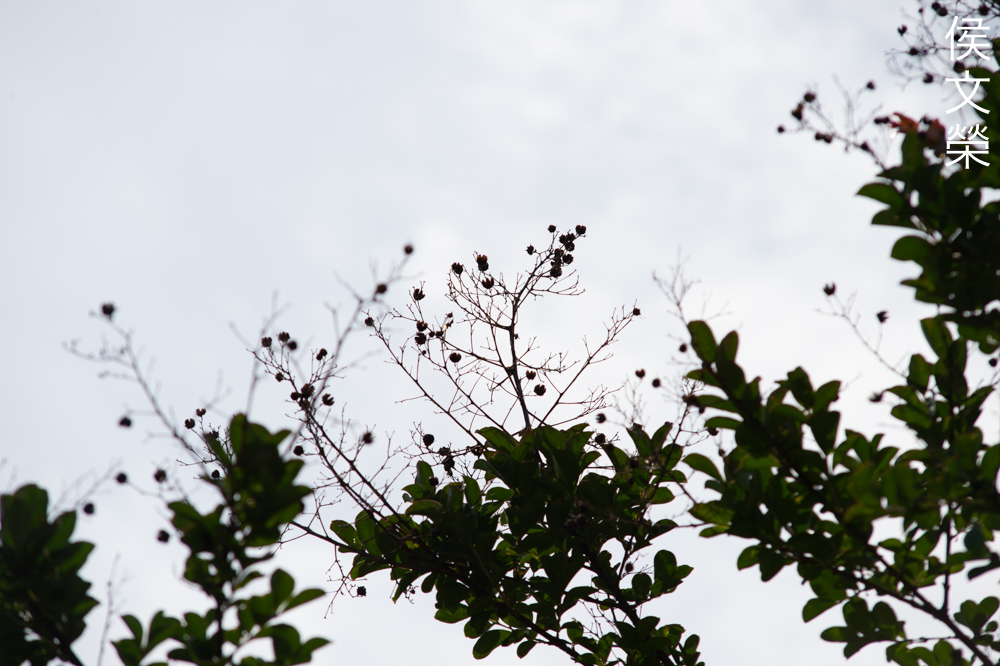
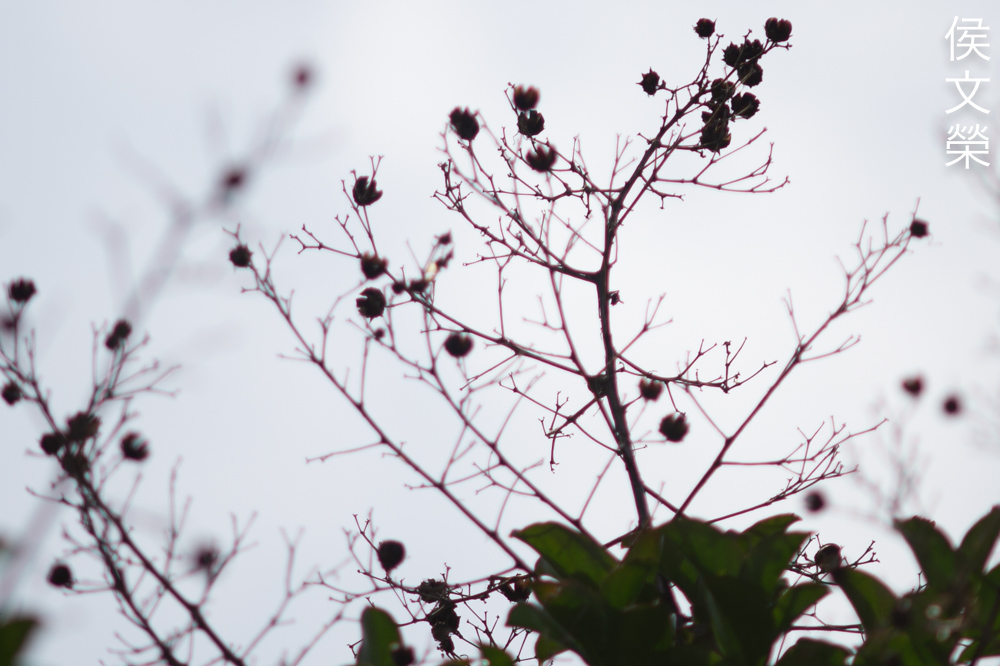
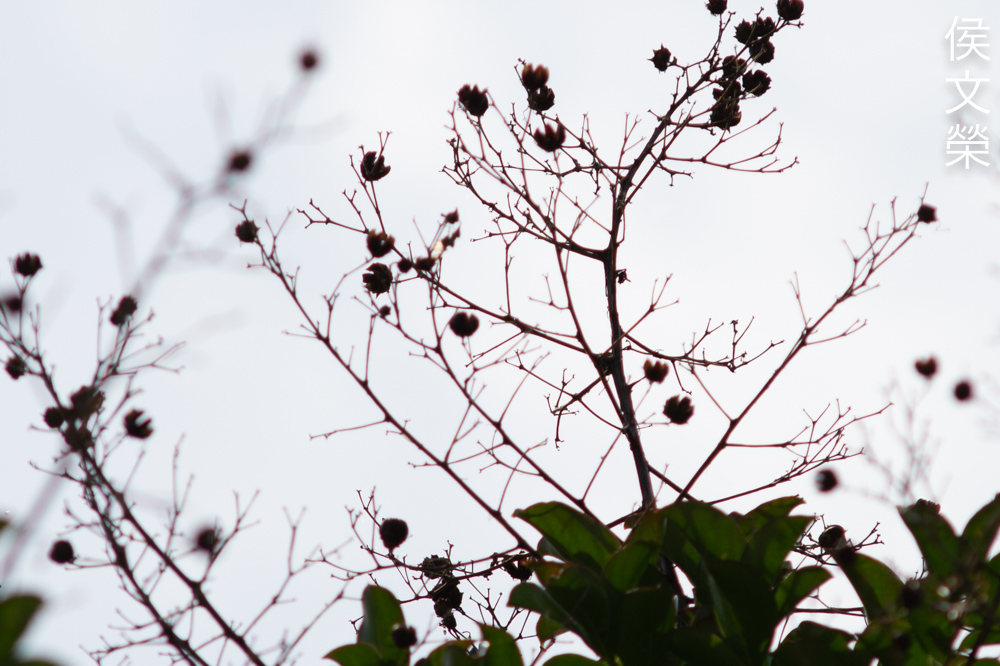
It’s a different story when you’re shooting something against a bright backdrop such as the sky. It looks terrible when shooting wide-open and it only looks acceptable by f/8. You should be aware of this and avoid any scenarios where it’s going to be a problem. Stopping the iris down beyond f/8 should help you get a cleaner photo.
To be fair to this lens, these photos were shot in situations where it’s easy to trigger chromatic aberration. You should not worry too much about this in real-world scenarios but it’s handy to know where the limit is.


(Click to enlarge)
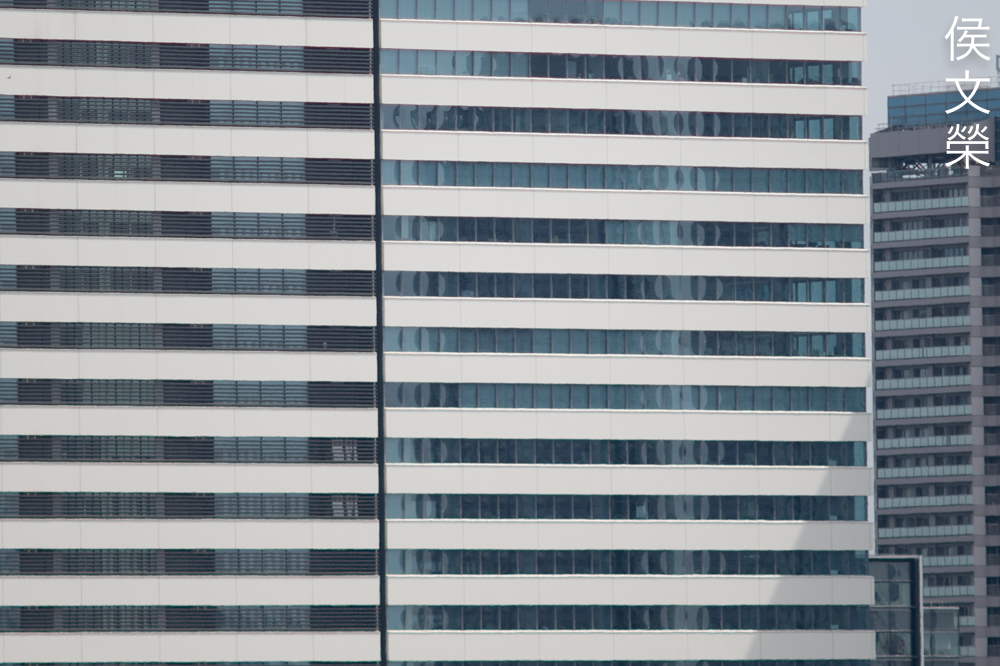
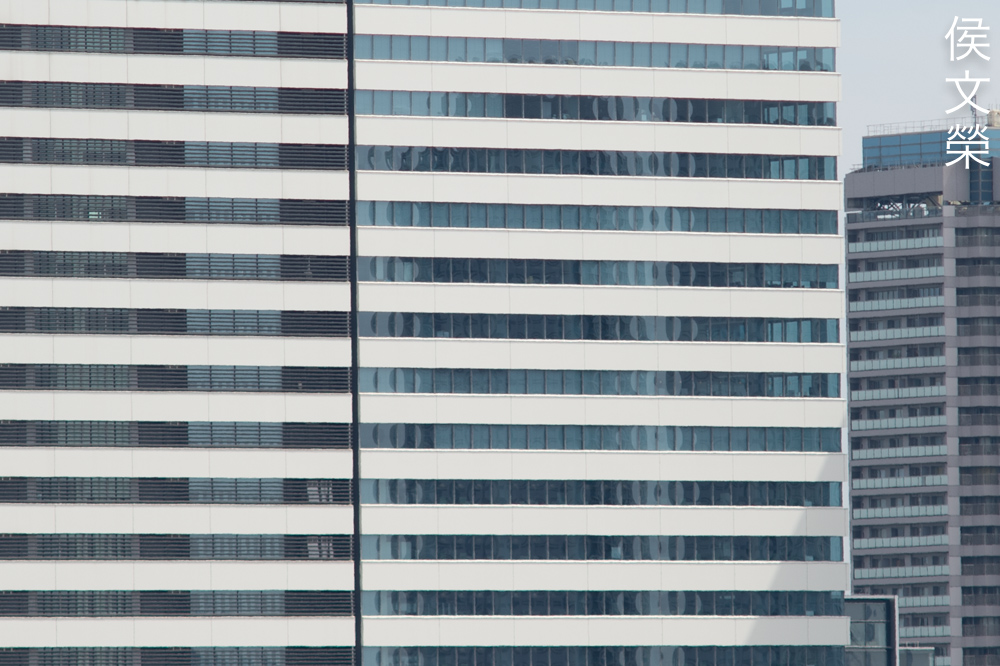
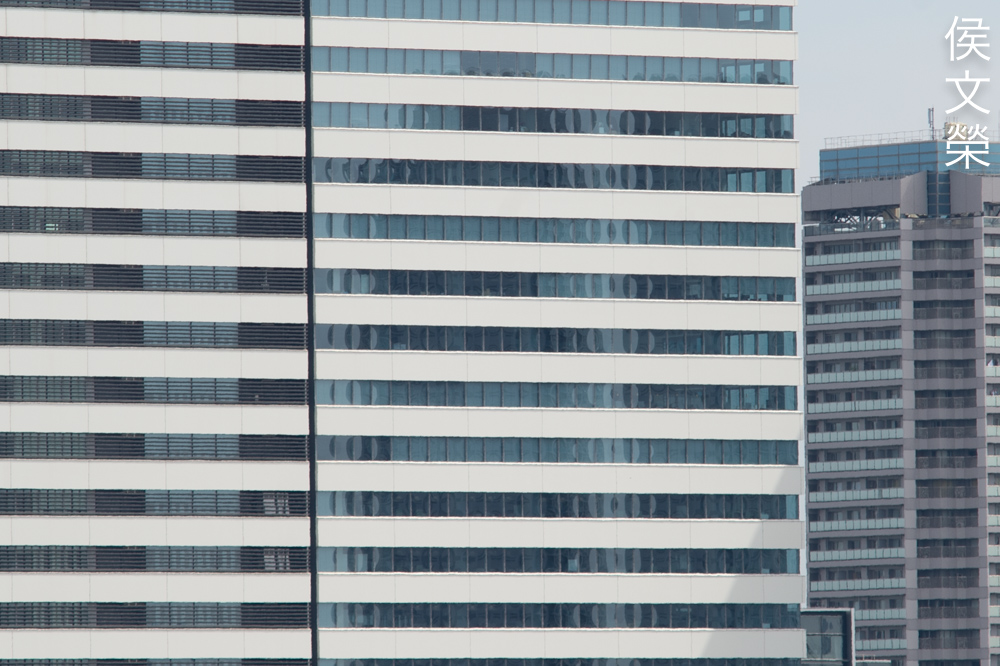
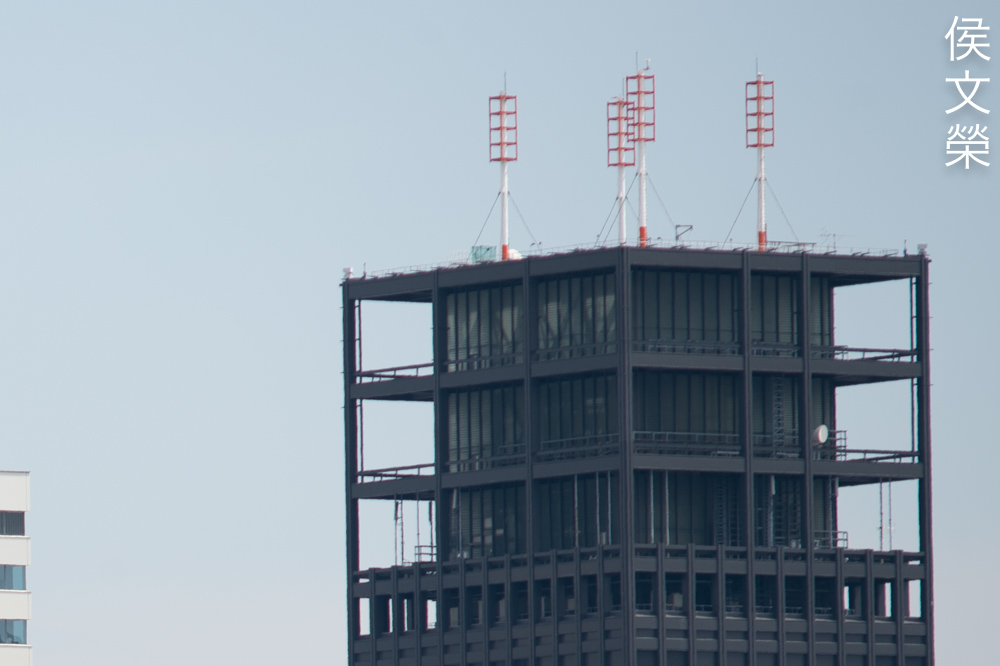
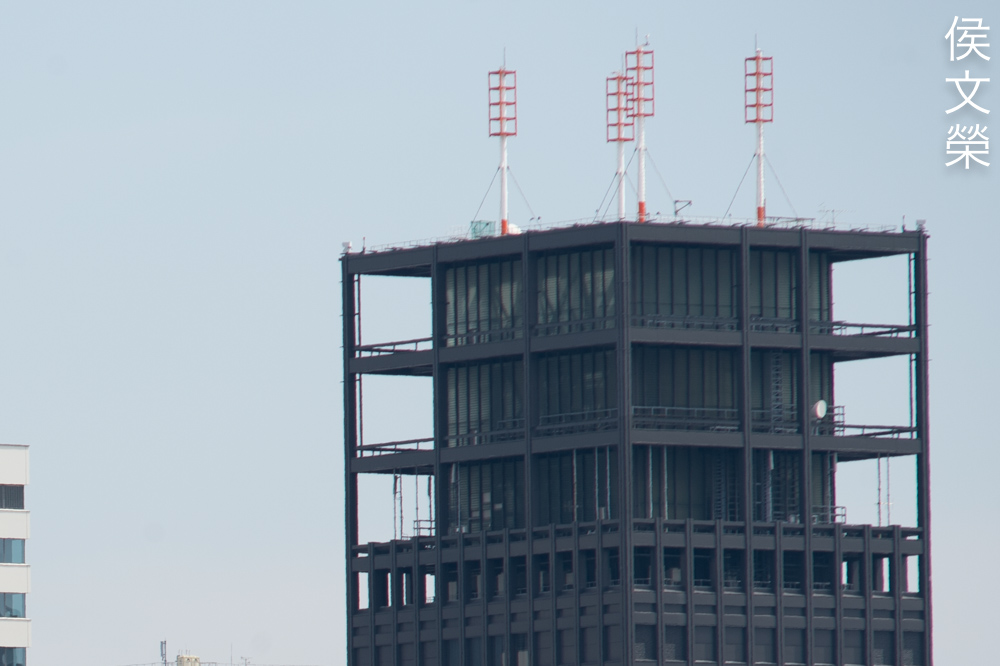
It’s not bad wide-open but the general lack-of-resolution makes things look rather soft at the center. The corners look worse but rather acceptable which is something very important for a Micro-Nikkor. Stopping the iris down to f/5.6 will improve the resolution at the center considerably, enabling it to render details beautifully. The corners look better, too. It appears to exhibit near-peak performance at the center by f/8 and the corners improve some more. This is probably the best resolution to shoot this lens with, stopping it down further will help make the corners look sharper but I don’t think the center will improve much. The wider depth-of-field might give you the illusion that things are getting sharper as well so take that into account.
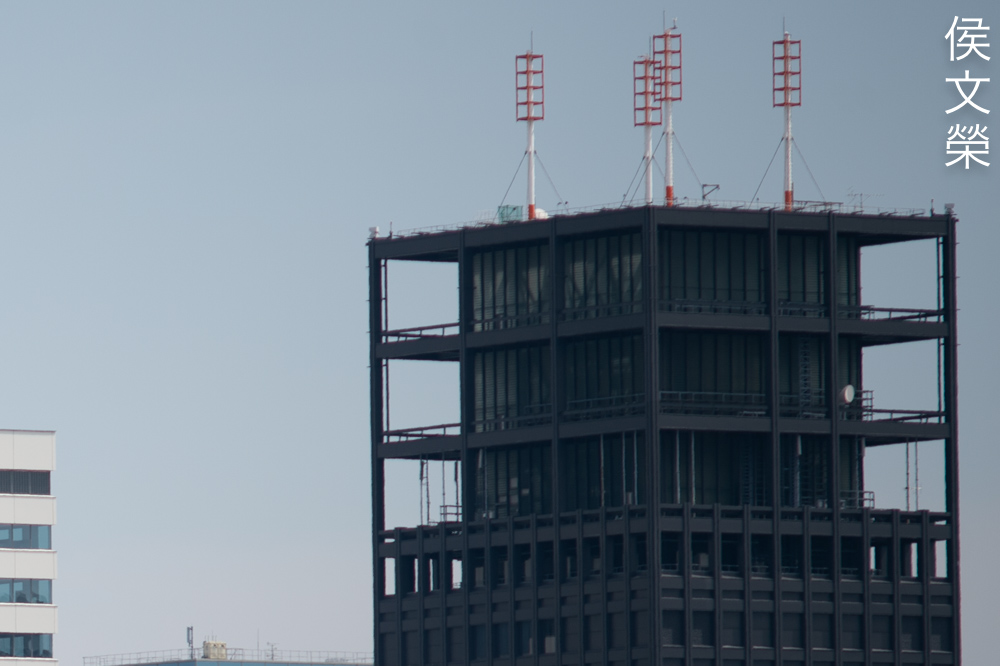
I did notice that my lens performs better from 1m up to about 30m then the performance drops slightly as you get to infinity. Mine’s not as sharp at closer distances specially when shooting wide-open, the shallow depth-of-field could be the culprit here but I doubt it. If you don’t believe me just look at my photos where the focus is around 10m to 40m to see just how sharp it is even at f/4 and compare that to my photos that were shot at much-closer distances.


(Click to enlarge)
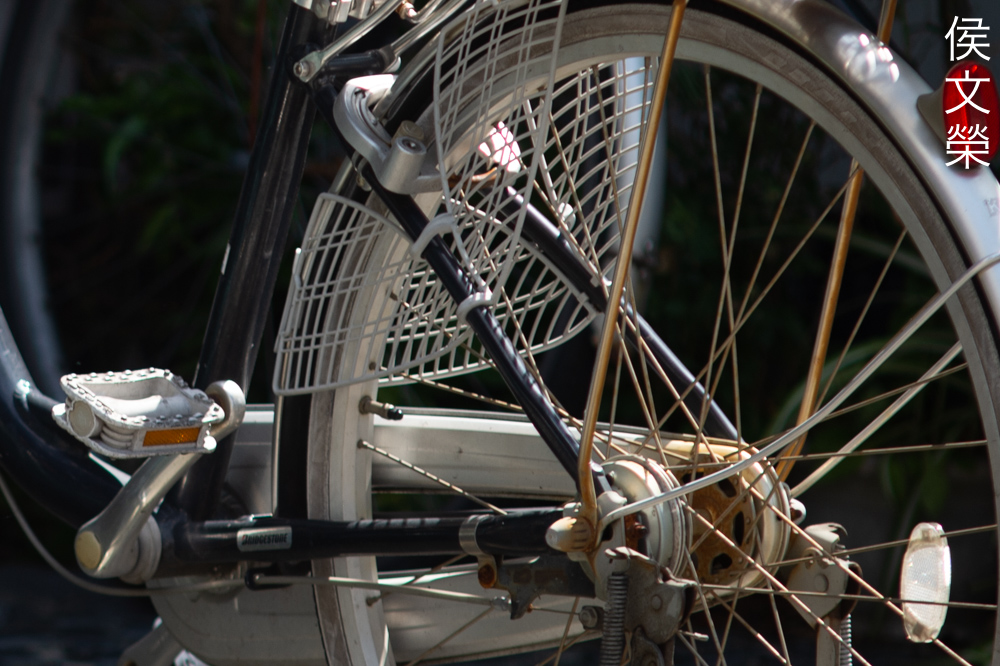
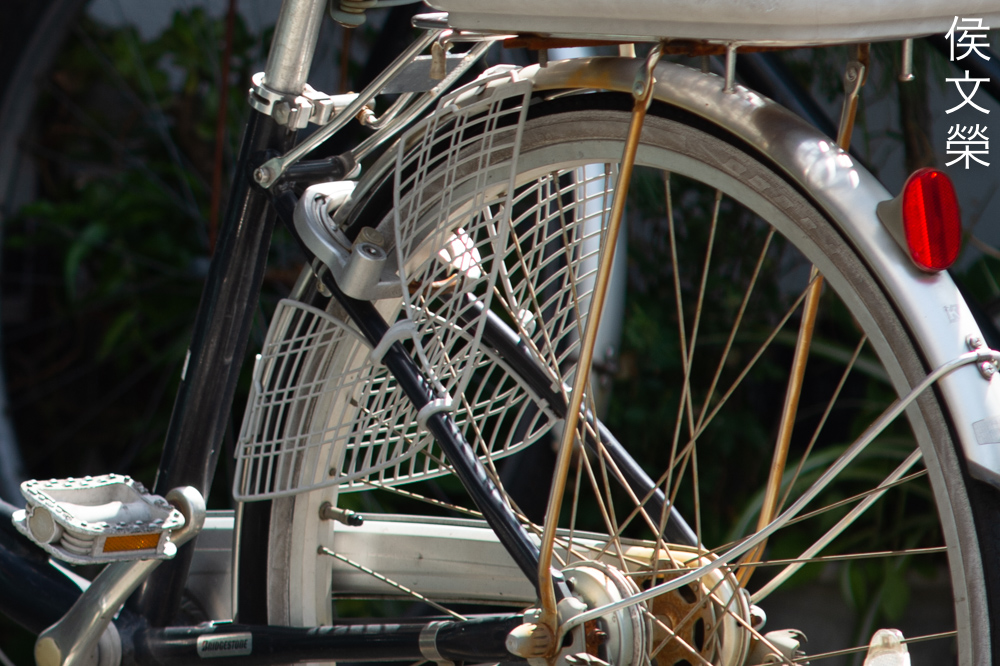
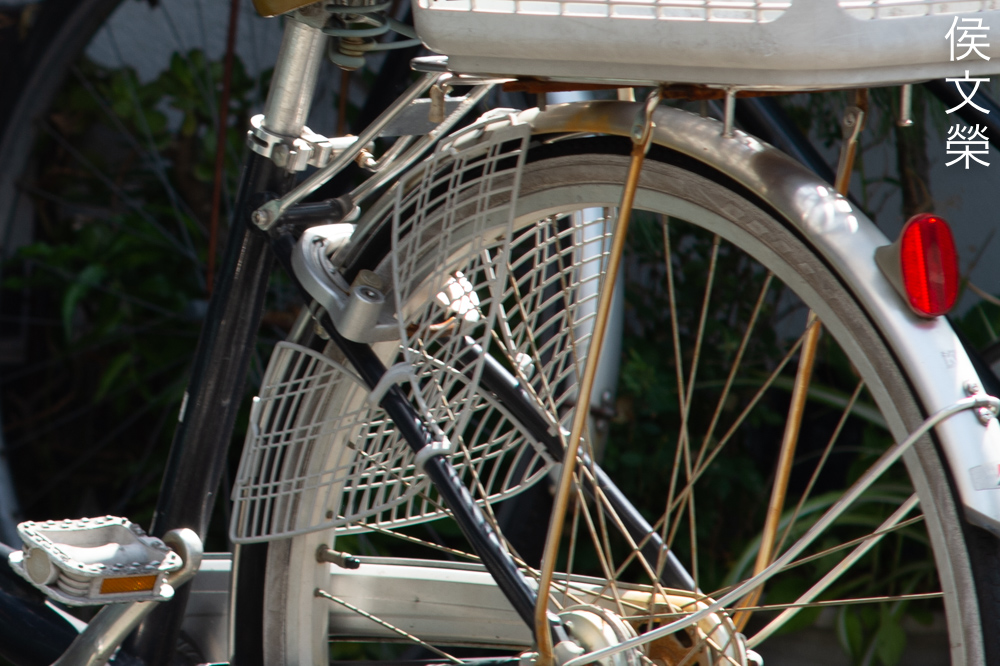
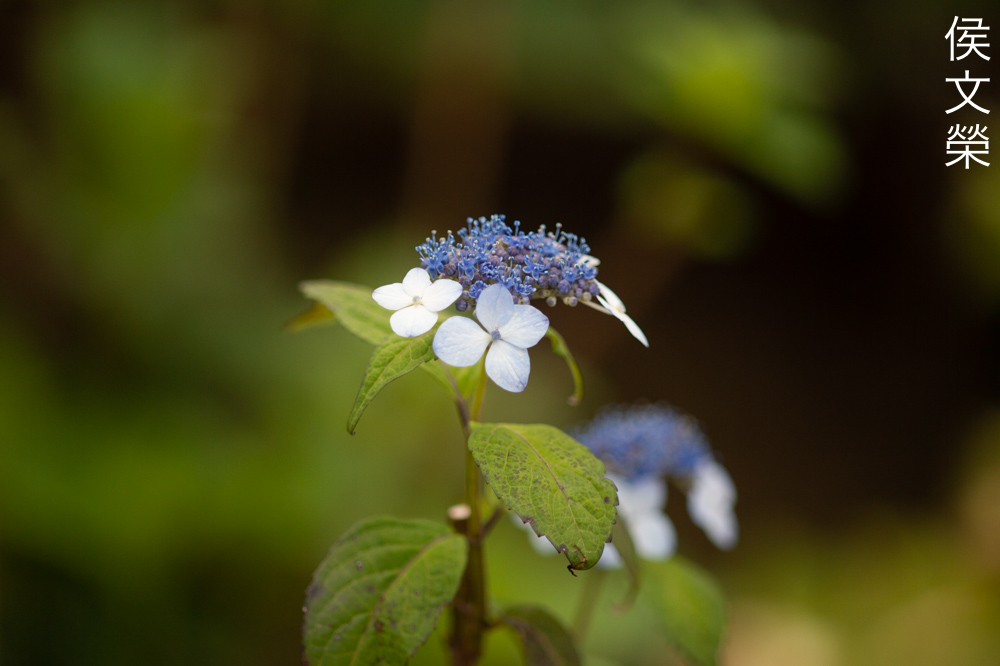
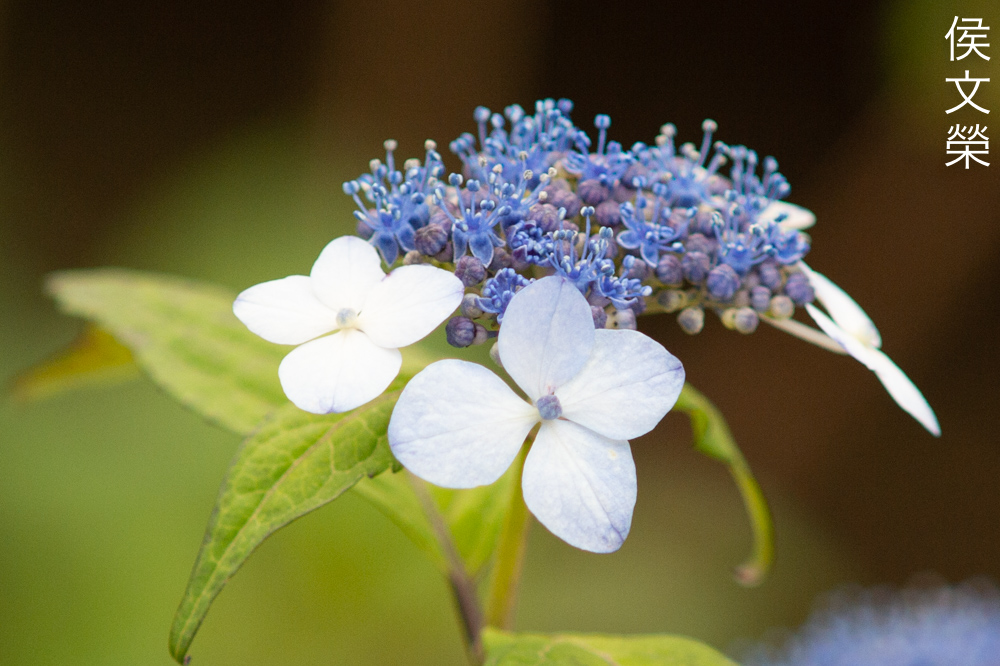
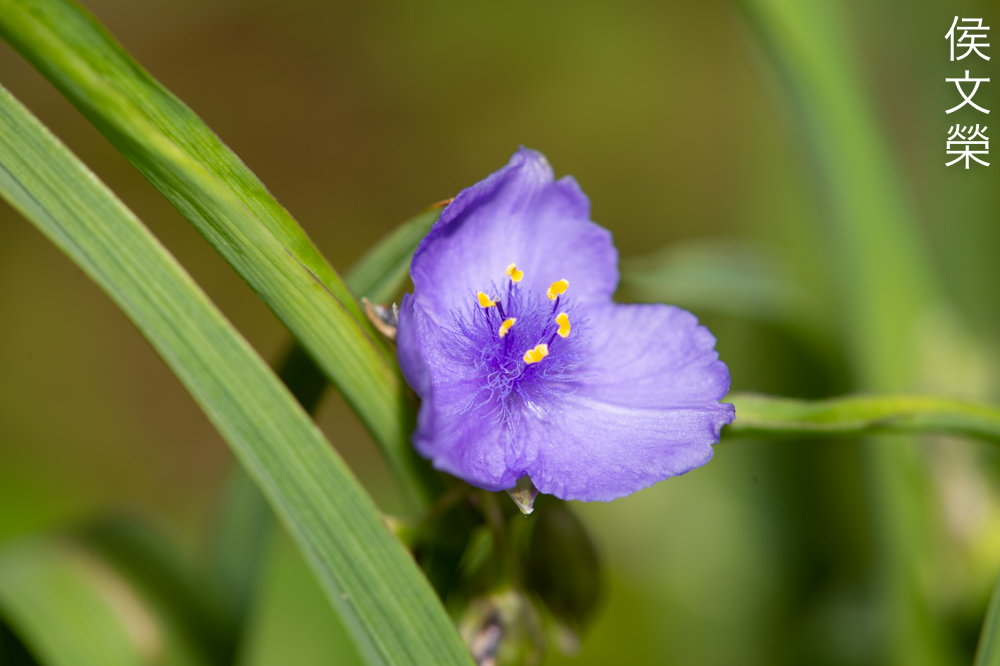
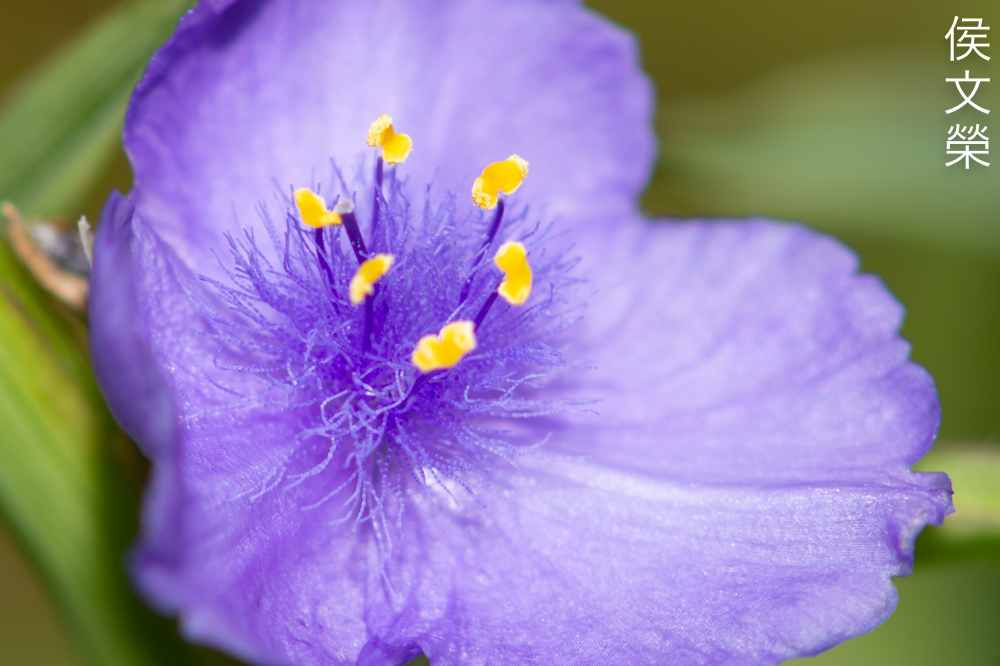
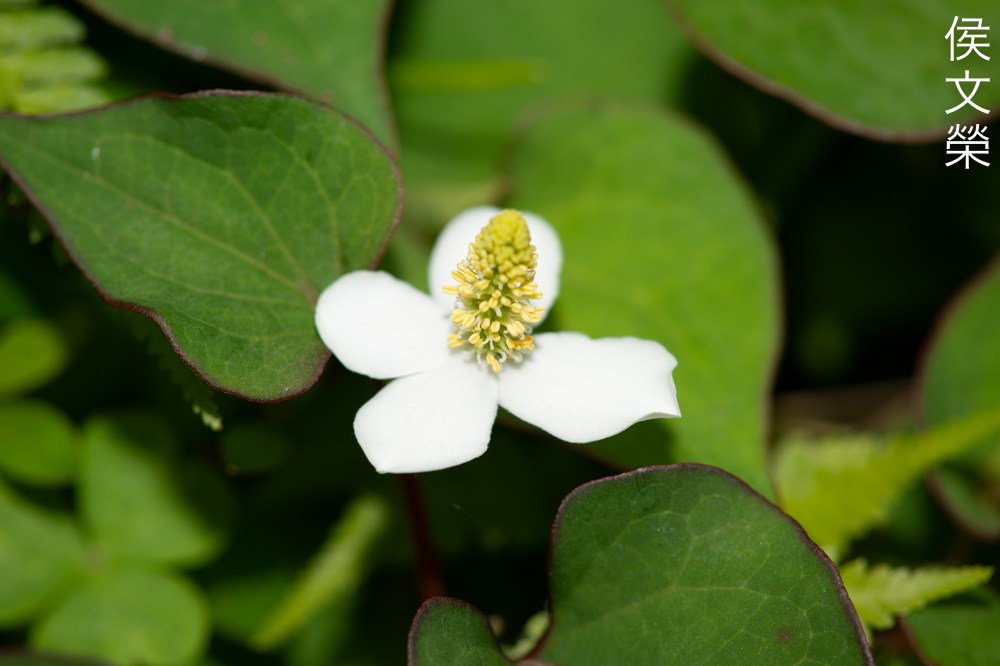
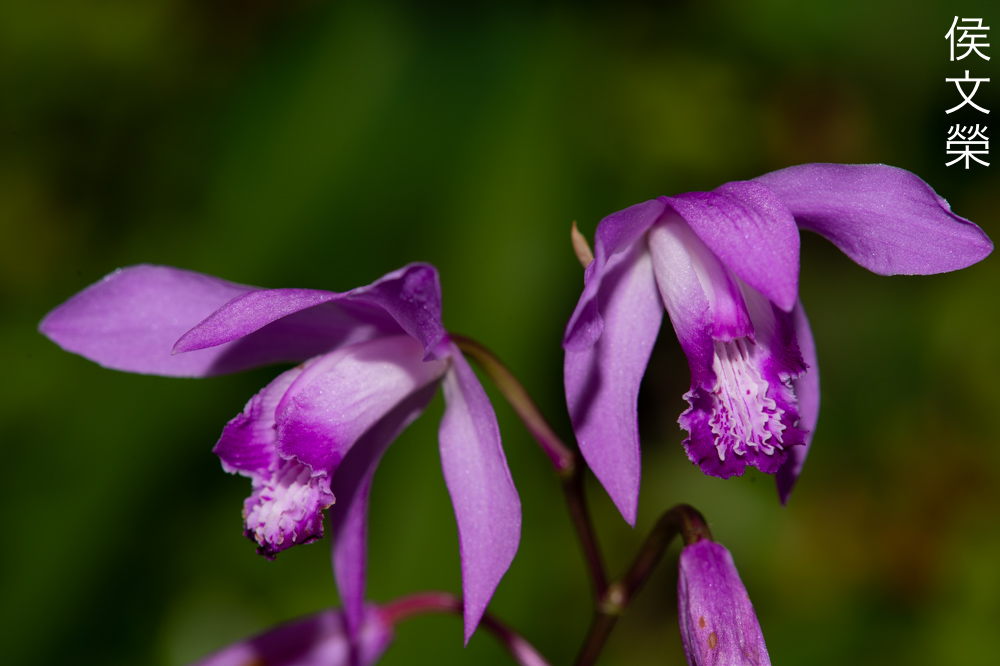
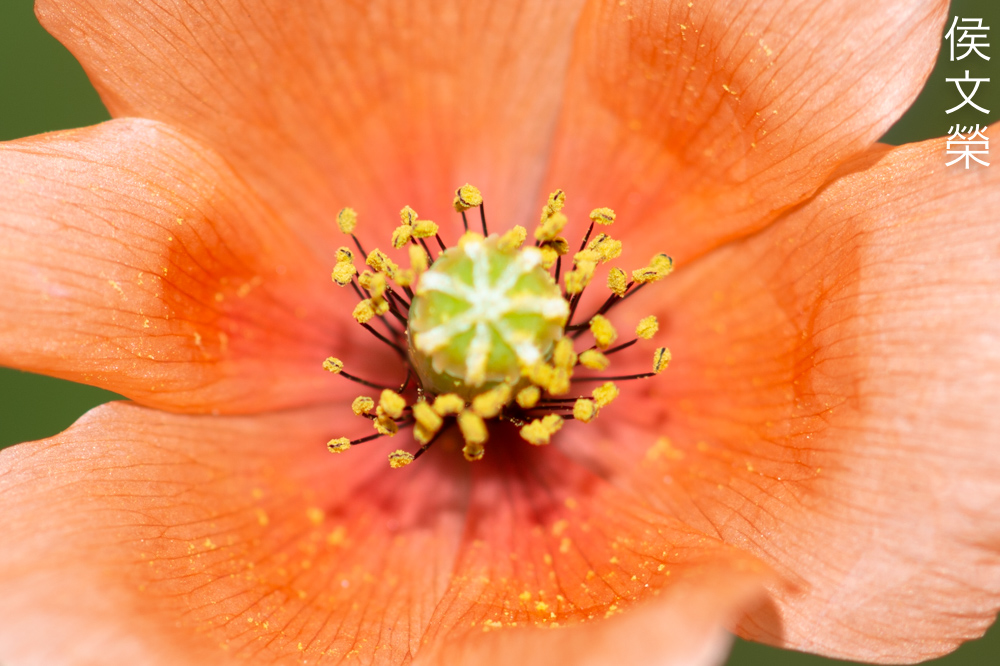
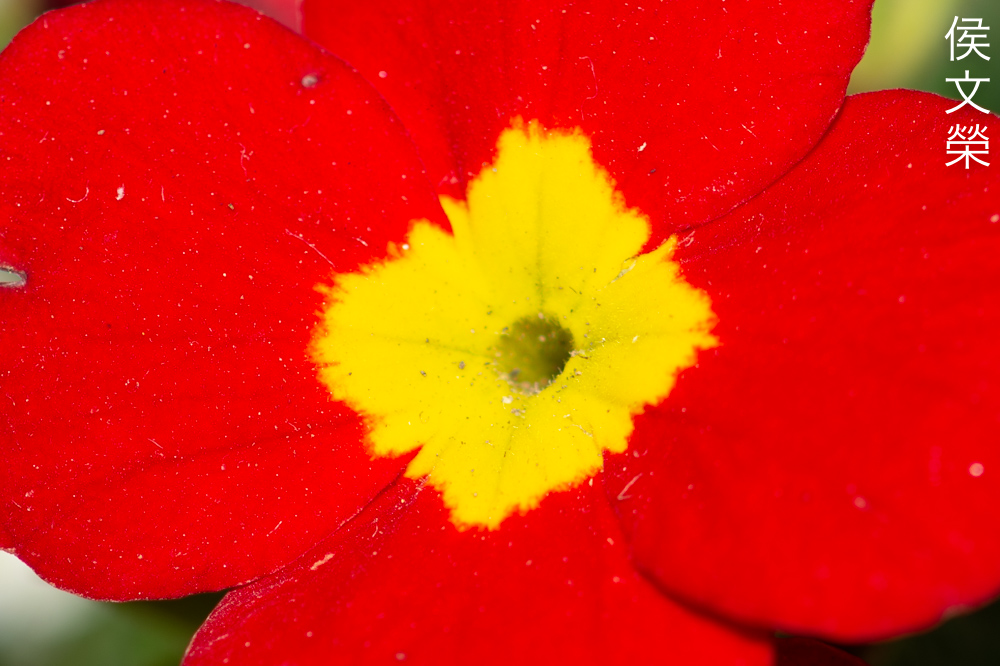
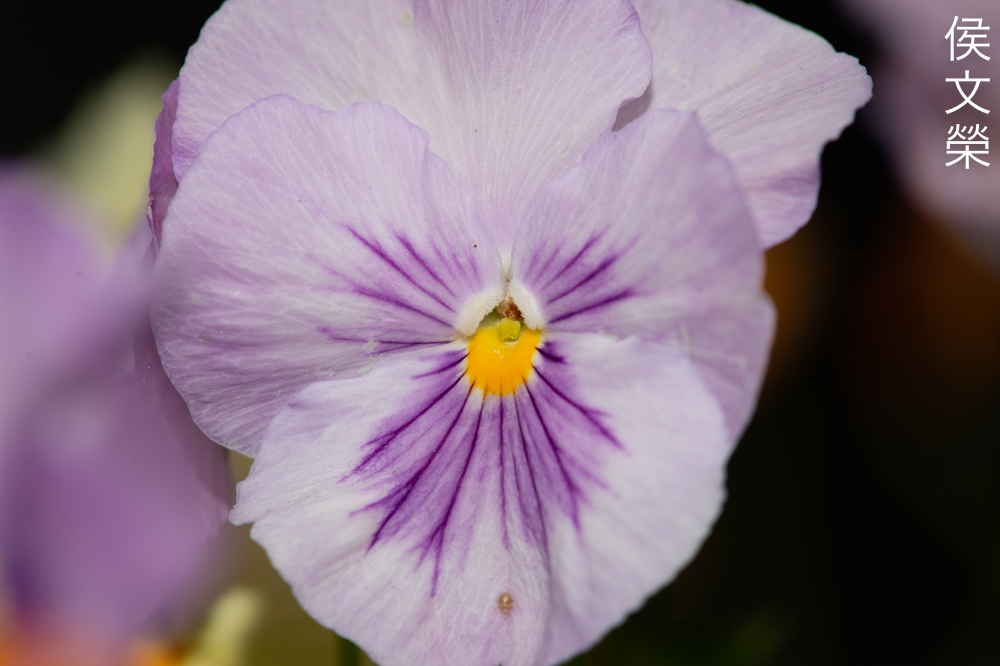
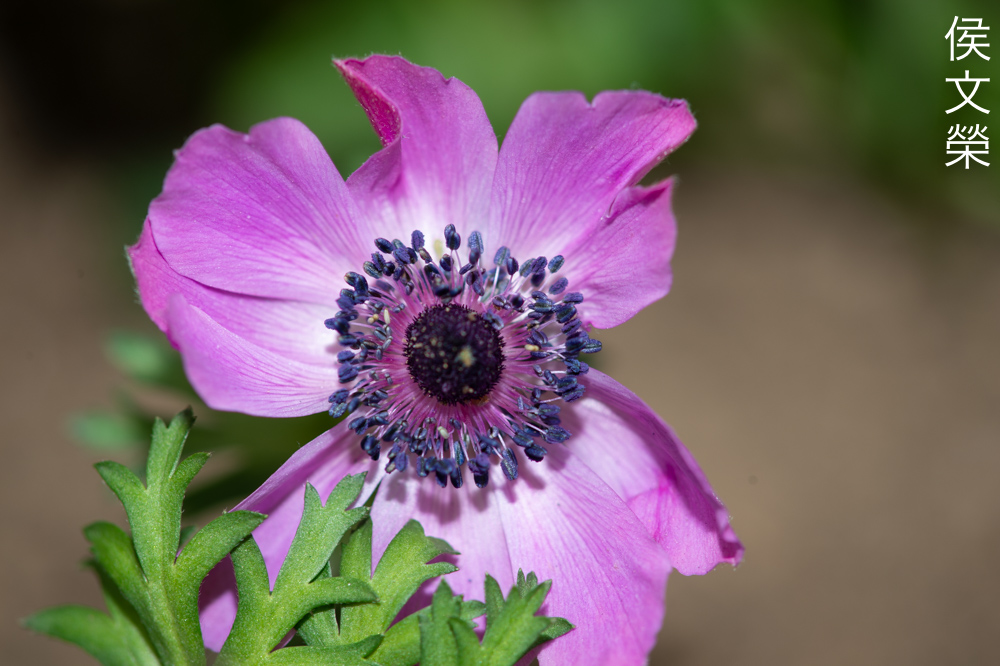
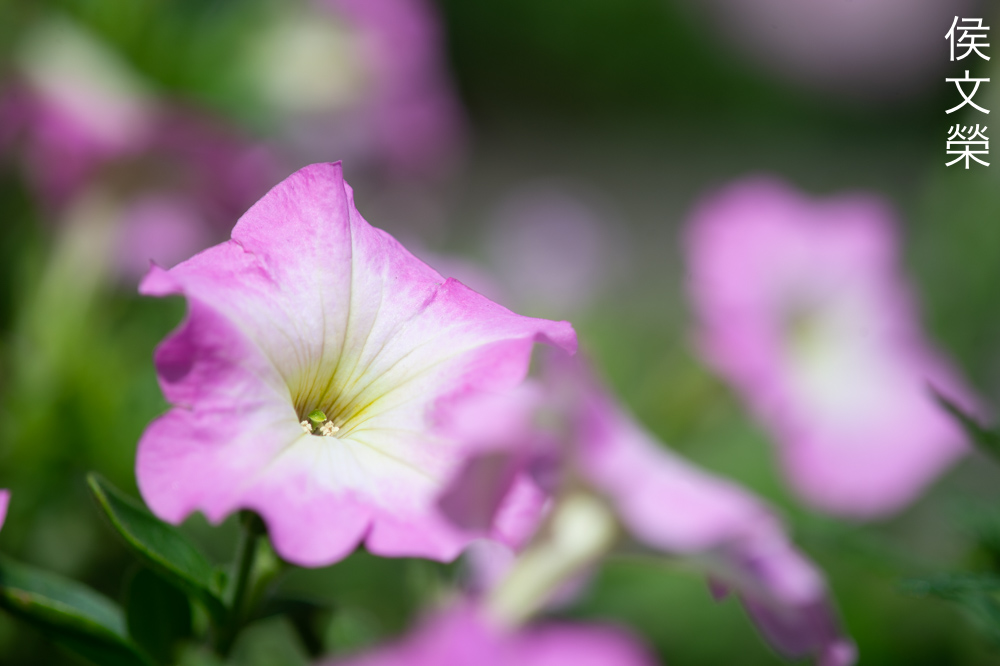
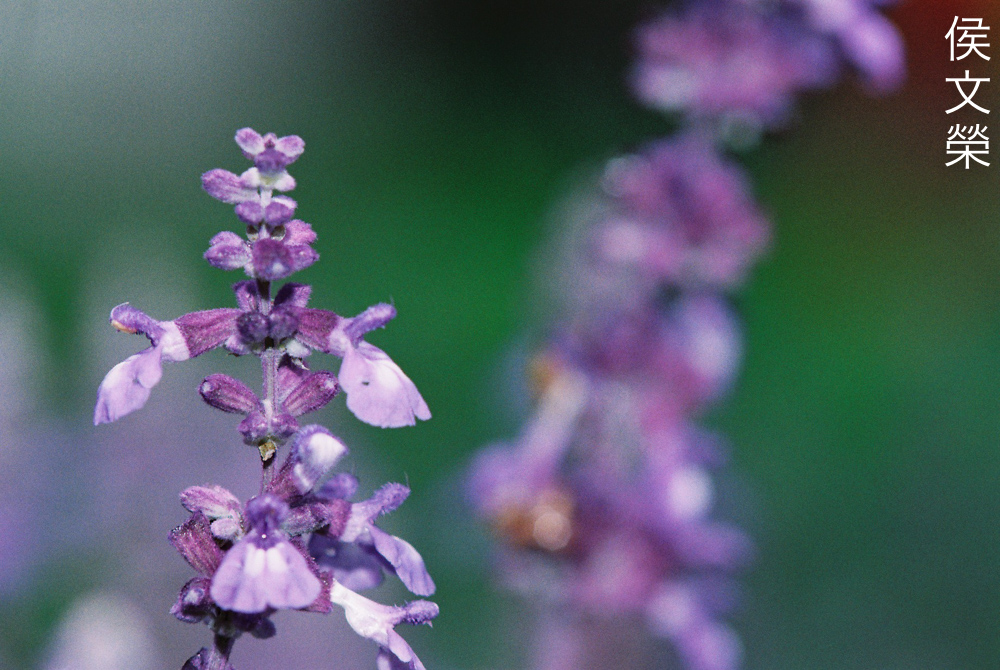
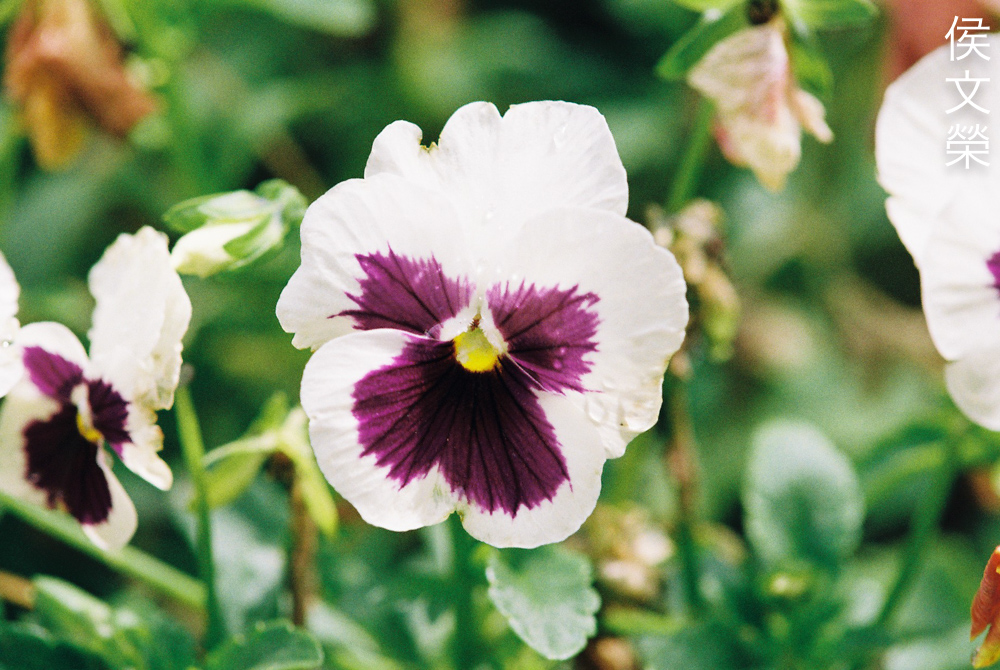
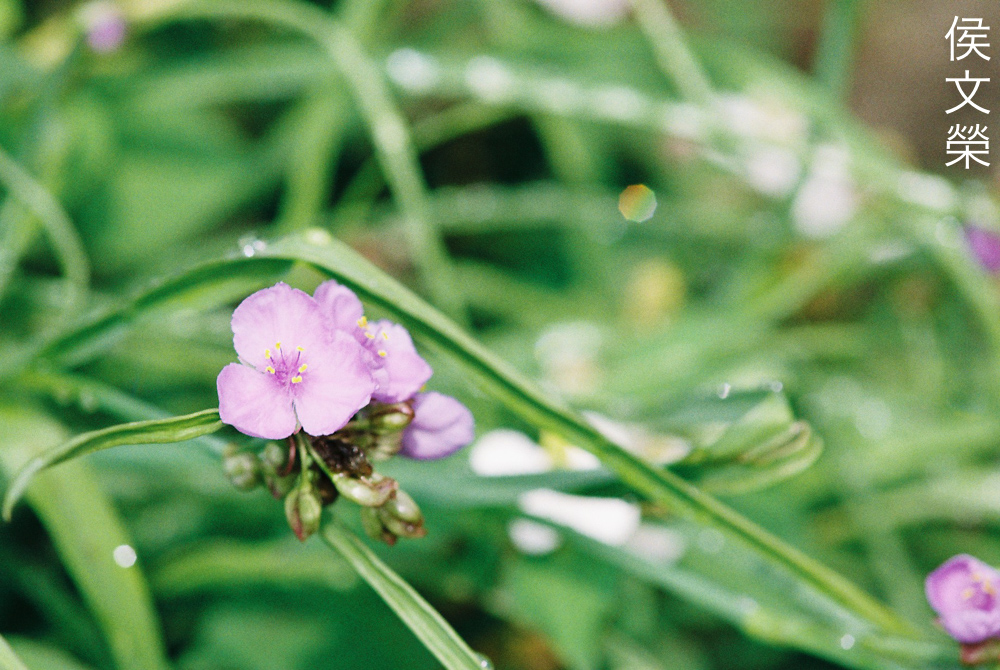
Here’s a couple of flower photos that were taken at f/8 but some of them were shot at smaller apertures such as f/16. I also showed some tight-crops which will help you see the details better. The depth-of-field is very shallow even when you’re shooting at smaller apertures which makes it difficult to focus accurately, it’s a bit difficult to acquire focus with a 105mm lens so this one makes it twice as hard. Despite that, this is probably the only Micro-Nikkor of its time that is able to help you capture photos of shy animals since you’ll have a longer working-distance.

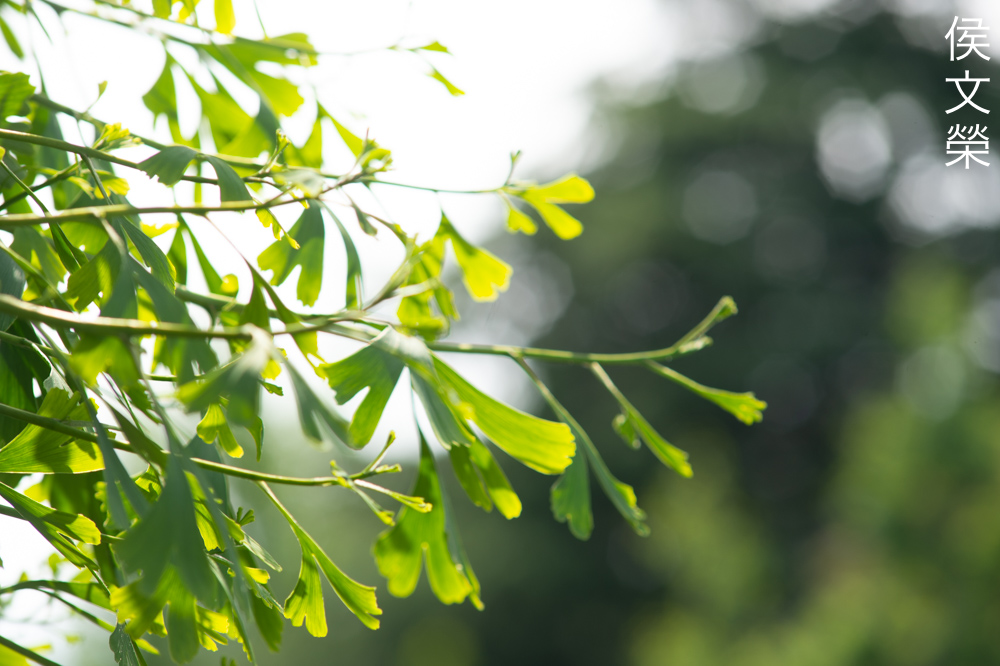
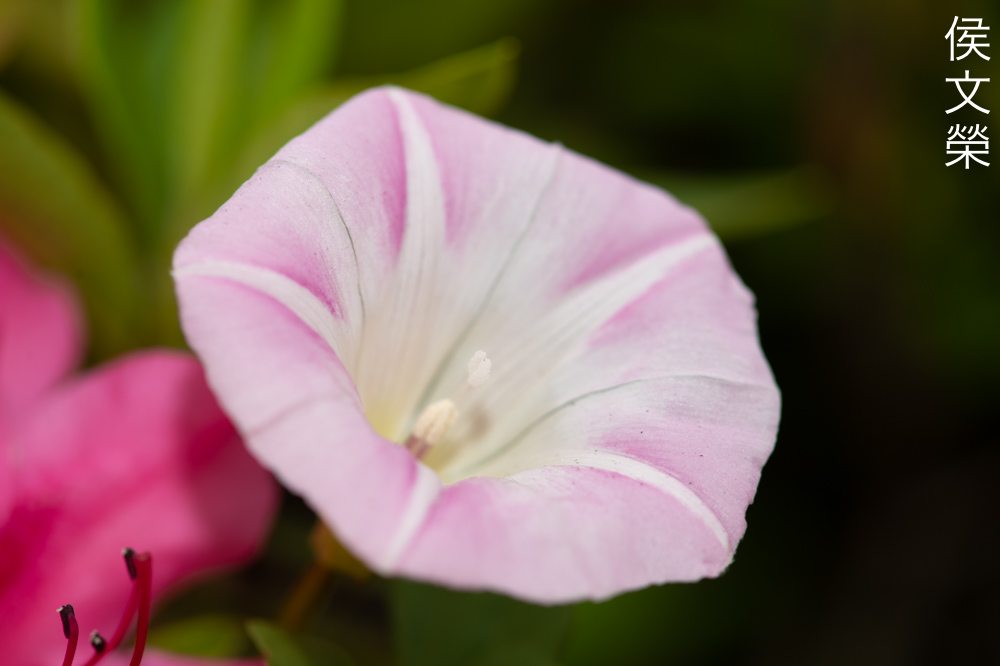
It renders backgrounds smoothly since the longer focal-length helps in blurring the background much better.

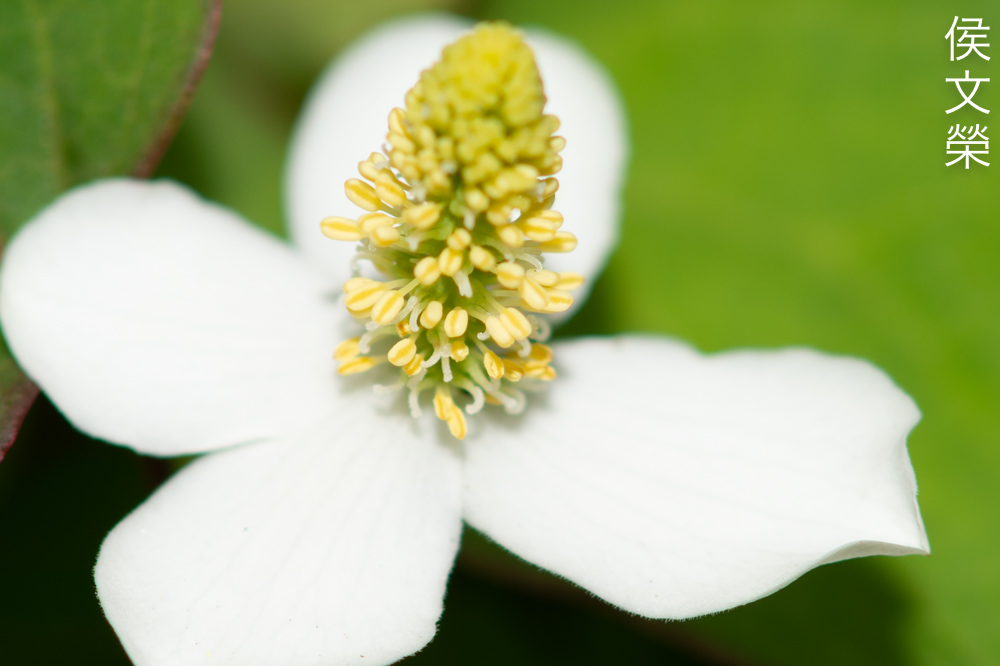
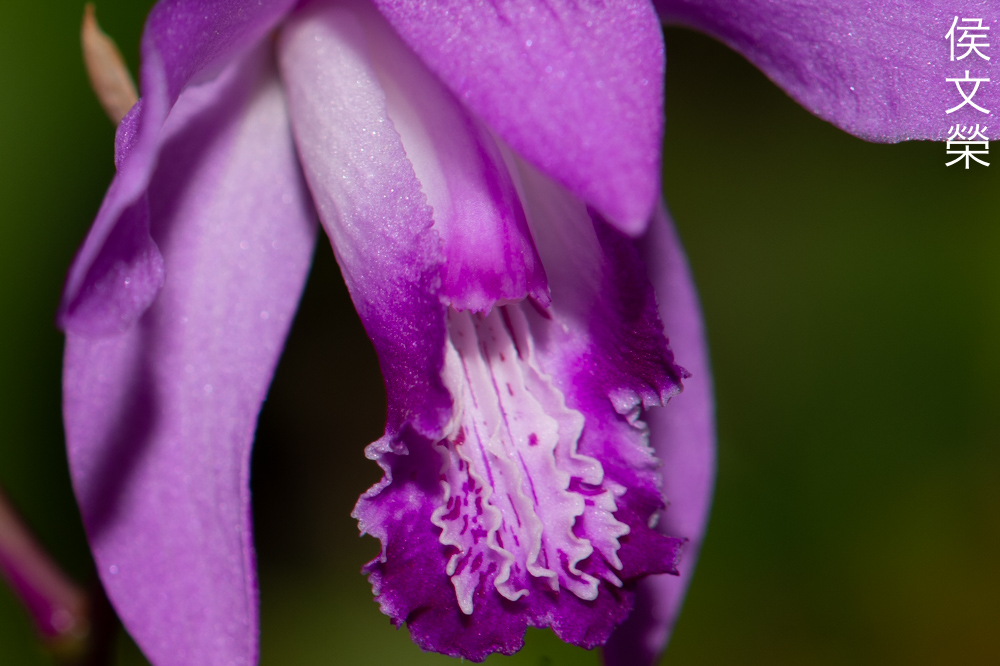
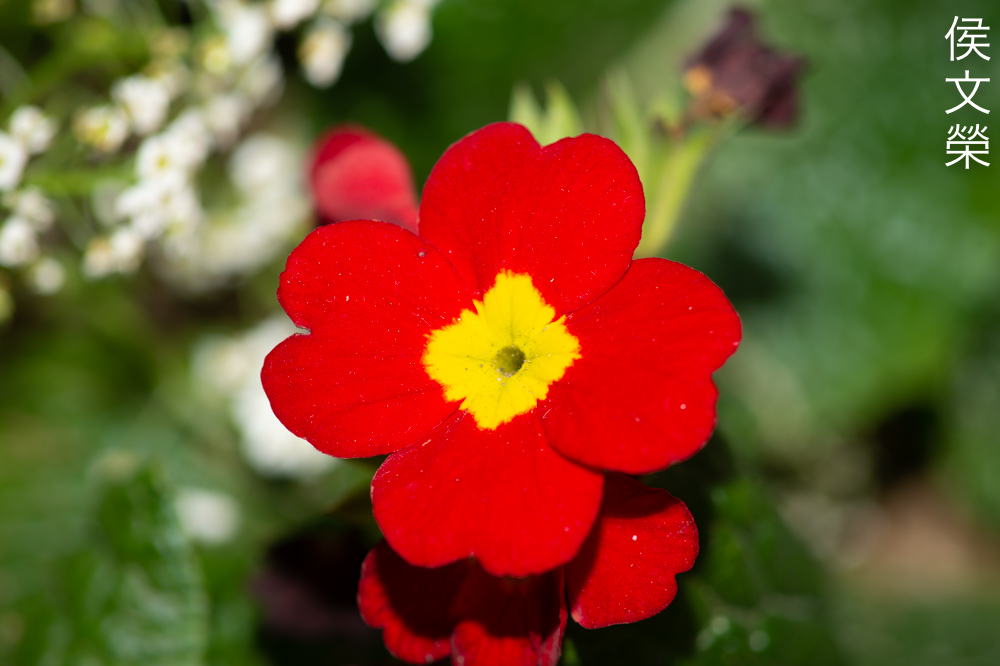
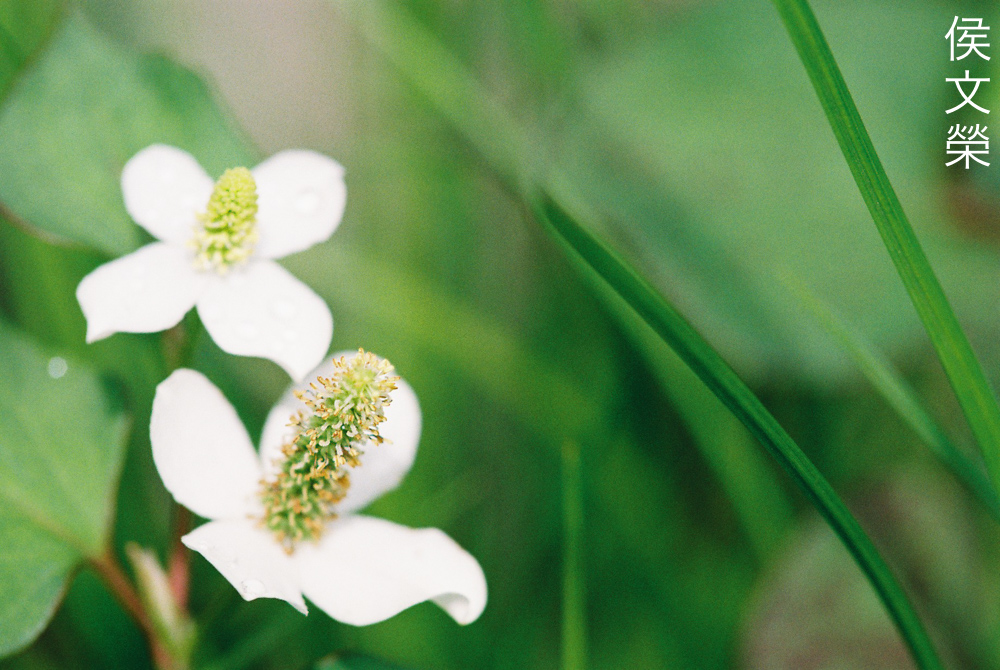
I love how beautiful the lens rendered the white flower at the background because the petals look smooth. What I do not like so much is the small amounts of chromatic aberration seen just at the back of what’s in-focus. It’s not a lot but I could see some of it. I don’t think this is much of a problem at this level.

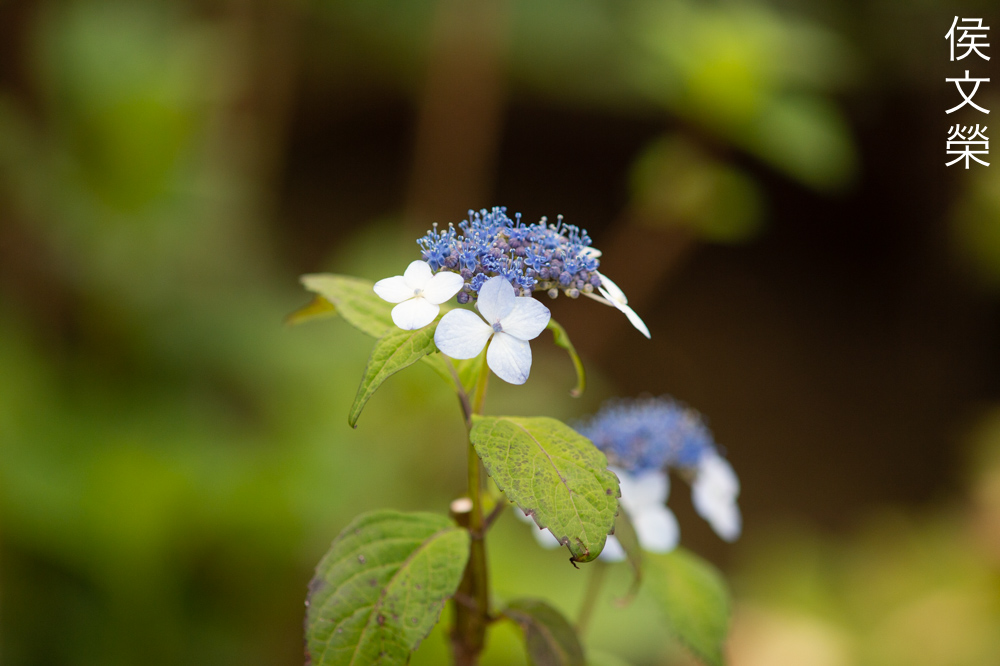
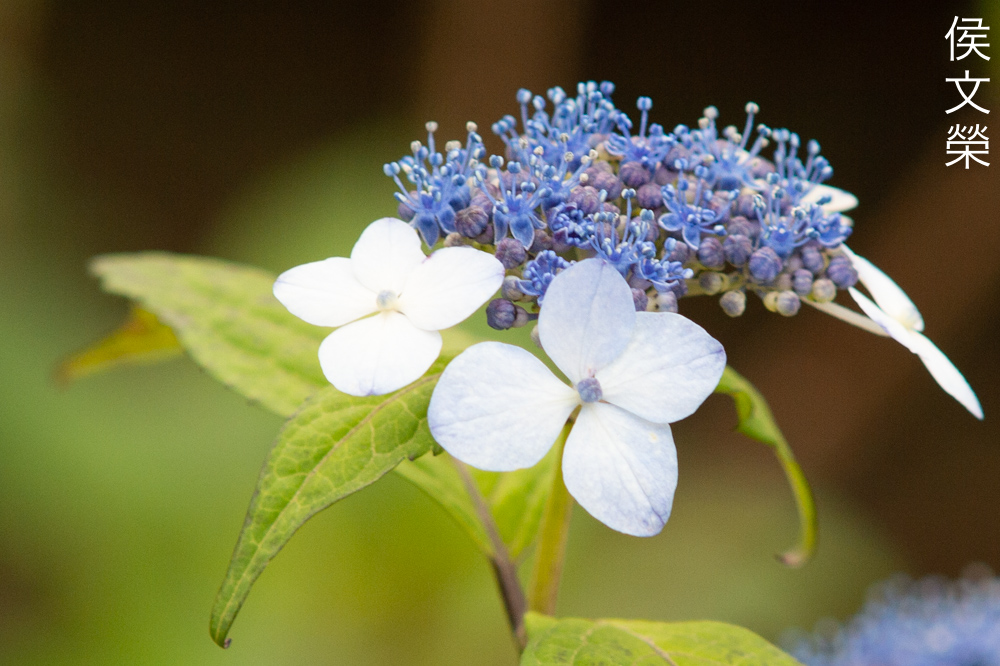
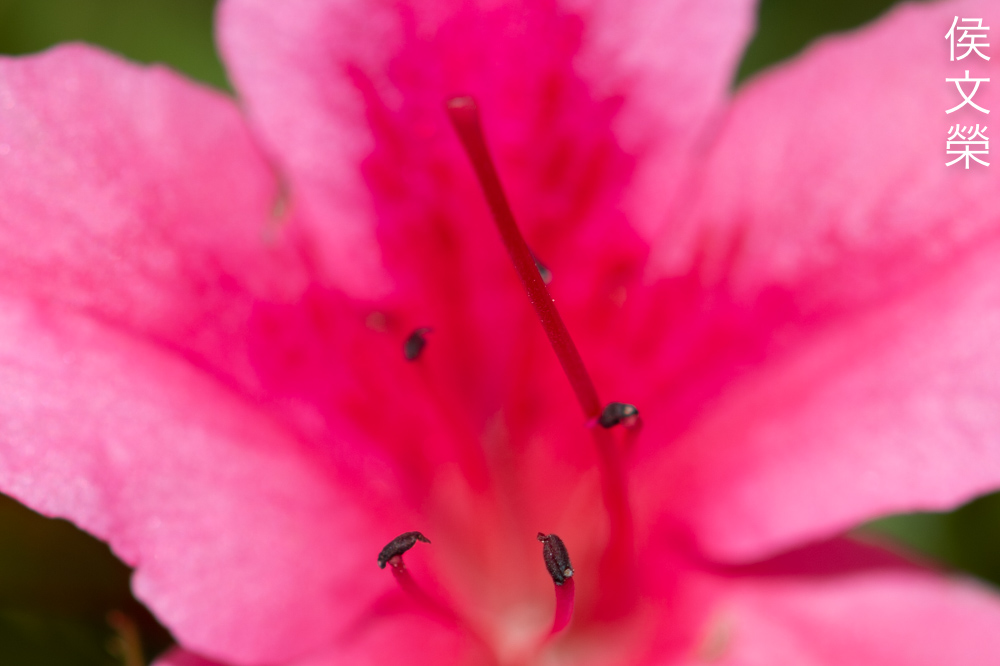
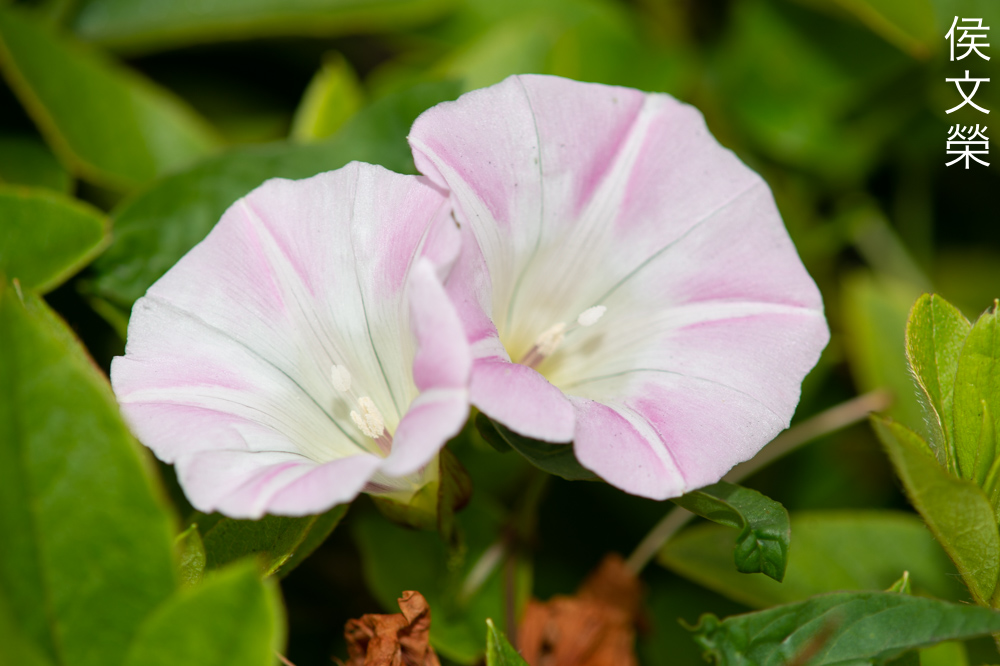
The foreground-blur is just as exquisite, some lenses perform really well when blurring what’s in the background but it renders the foreground in a slightly-different manner, this one does both quite well.

You’ll have to shoot at a smaller aperture in order to get more things in-focus, this is a given and you will just have to deal with it.
You’ll also need to maintain a reasonably high shutter-speed and using a flash will help you do just that. A shaky-hand is going to be a problem and using this with a monopod helps considerably.
In order to help get more things in-focus be sure to position your subjects at roughly the same plane, this will help you “trap” them in the plane-of-focus, the same applies to shooting multiple models for portraiture, specially when you are using a long lens.
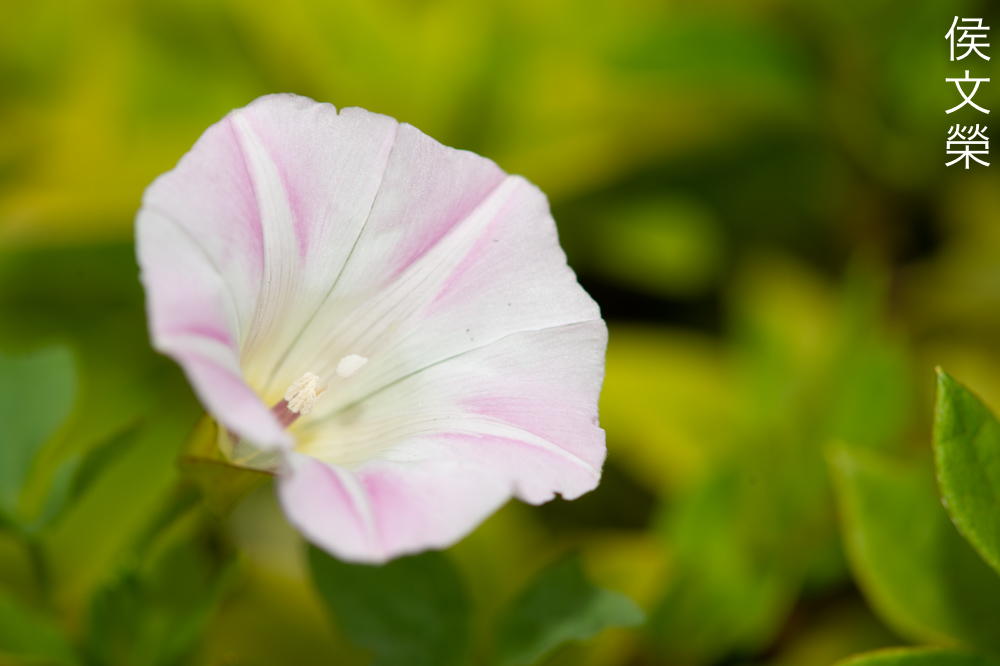
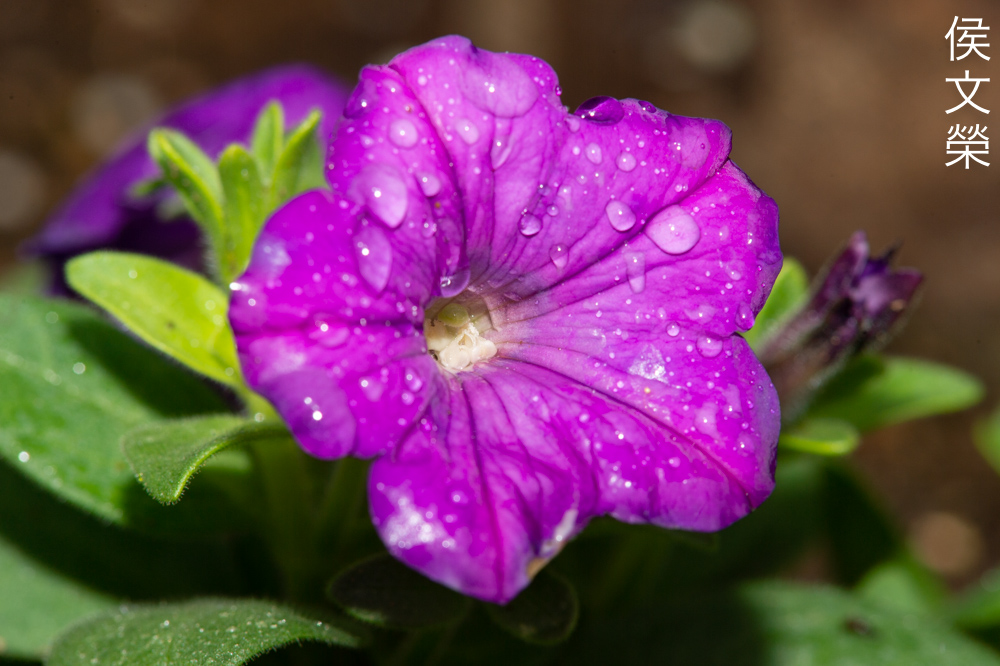
The focus-transition is so smooth and natural you won’t get a “wall-of-focus” effect which plagues a lot of later lenses. This is one reason why I love shooting with vintage Nikkors.

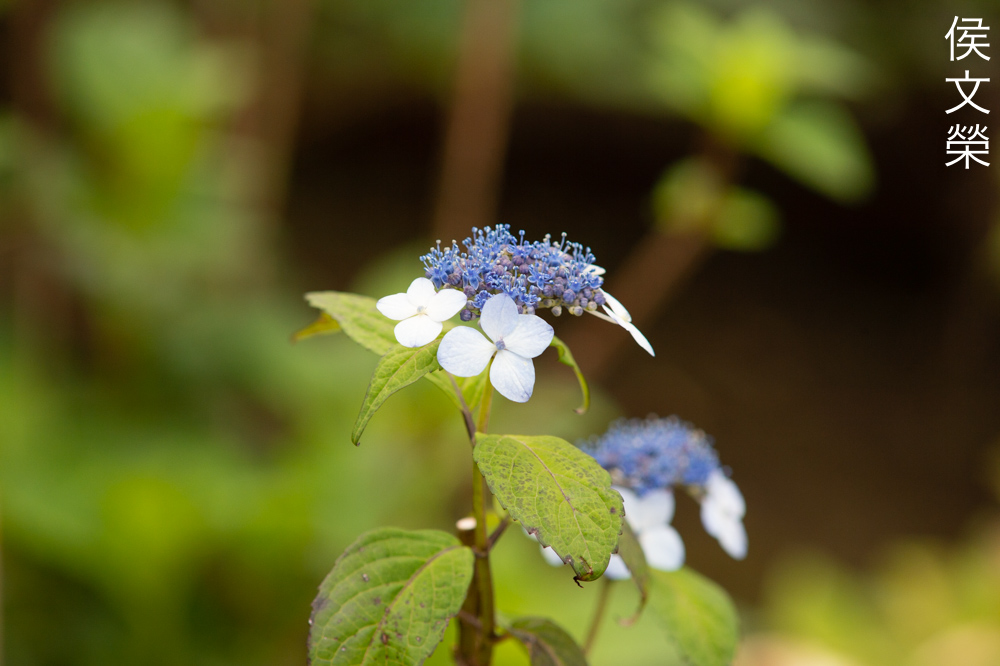
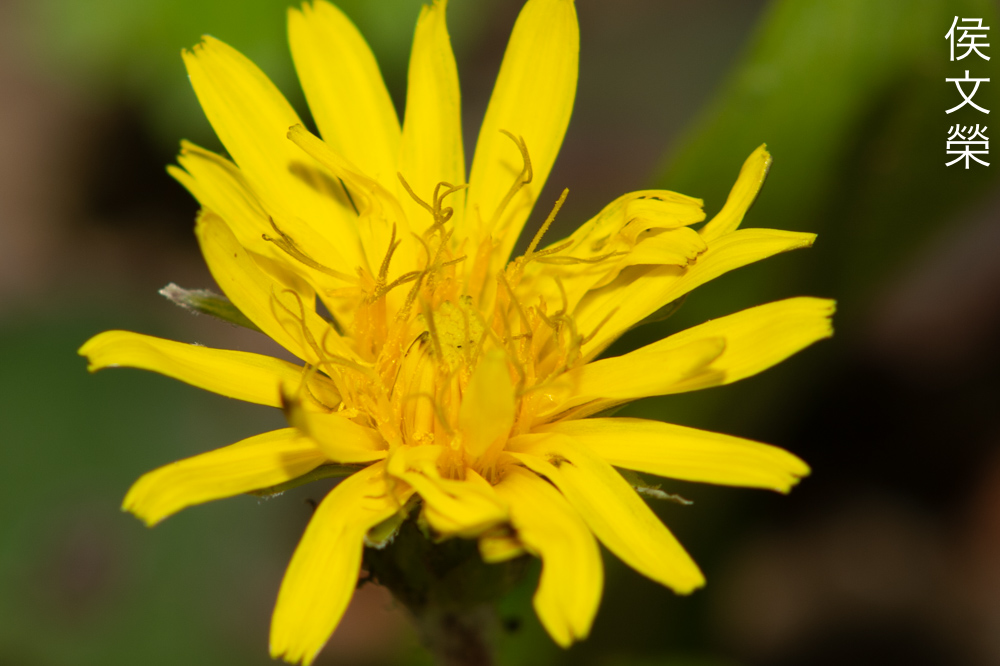
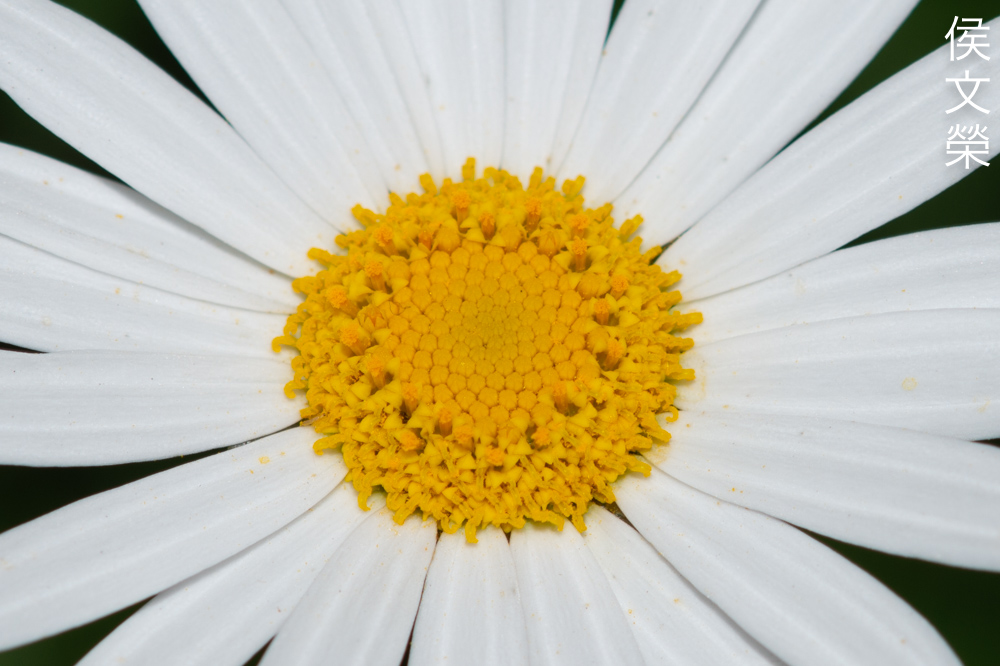
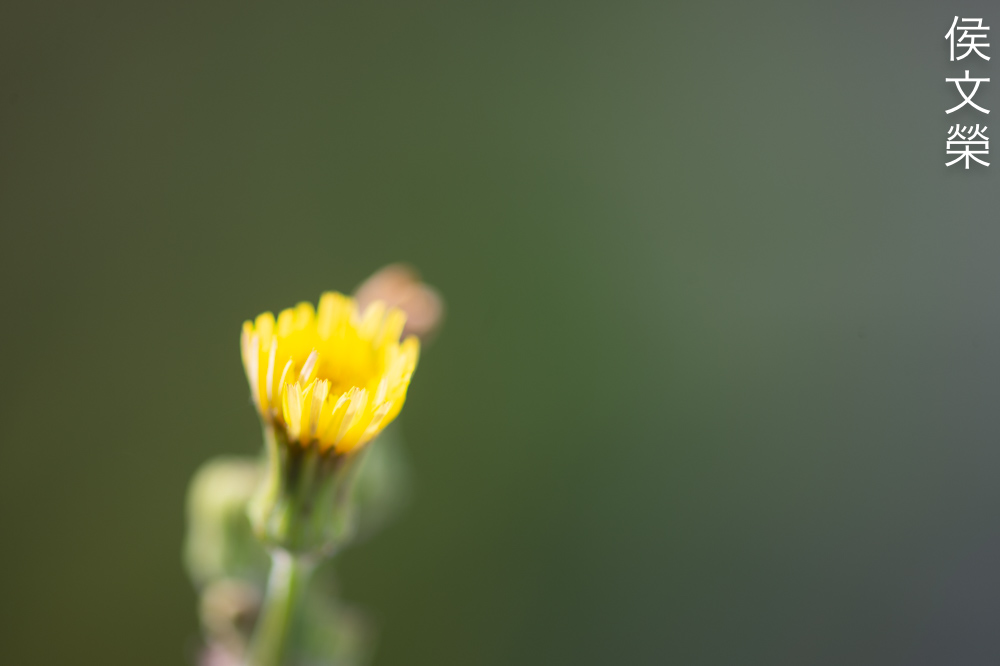
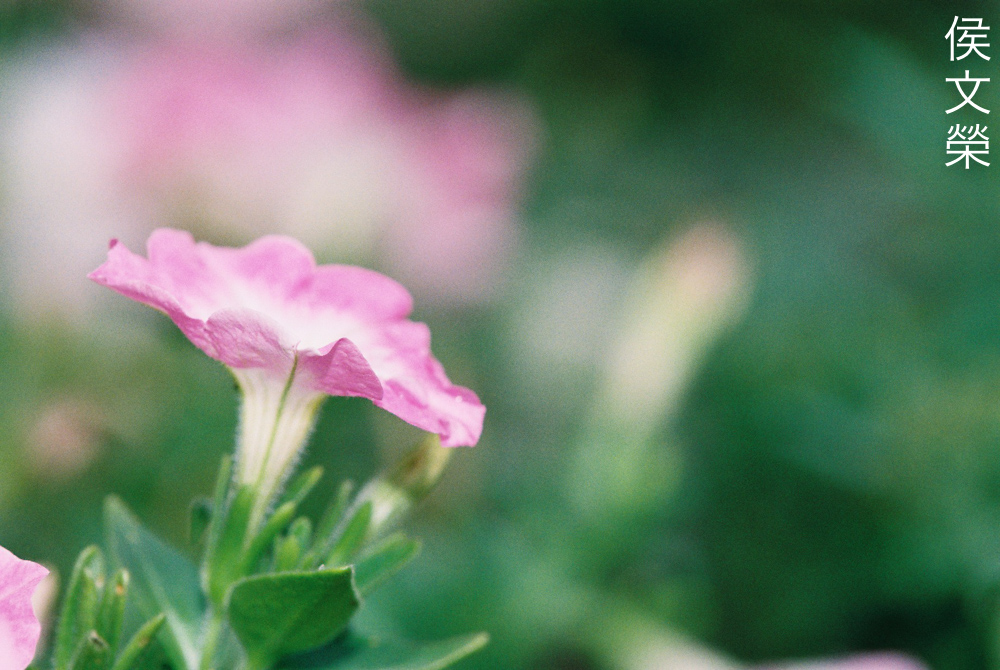
This is probably the ugliest I could get it to render the background, stopping the iris down a bit will help smooth things up, giving you a cleaner look.
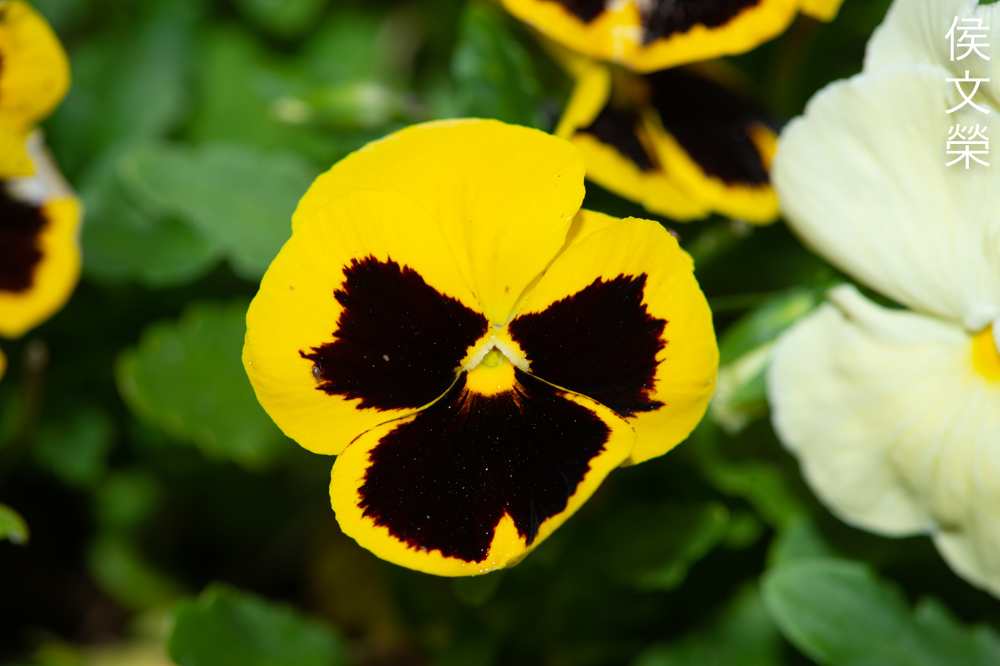
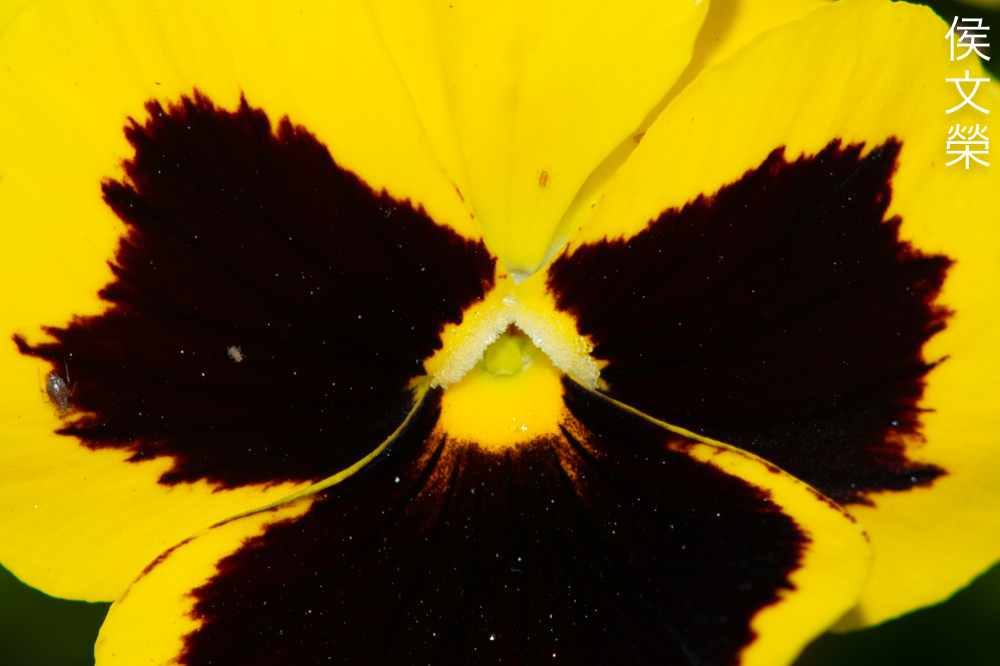
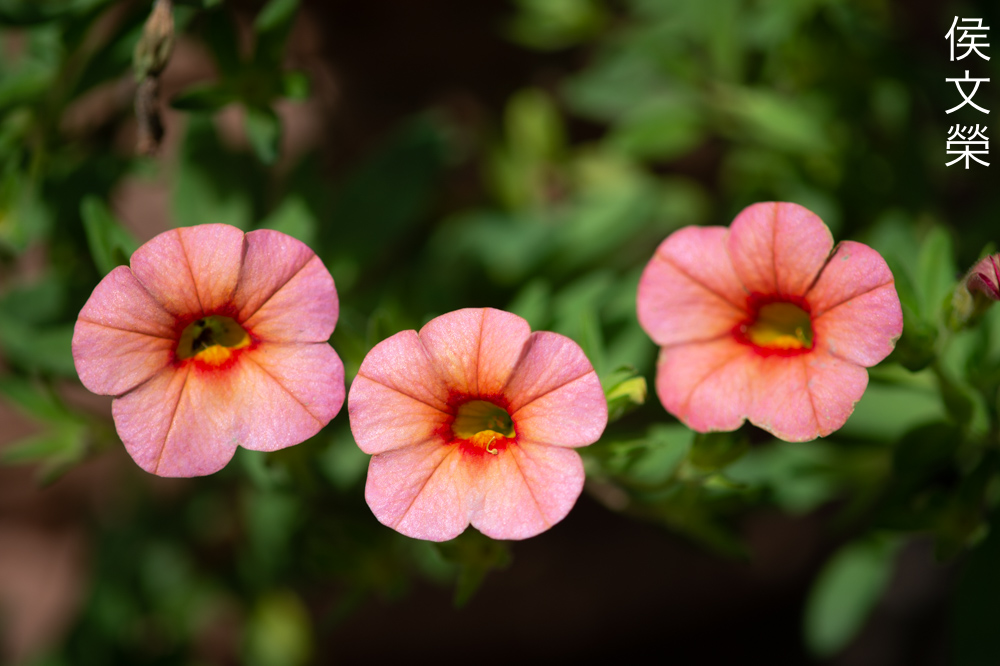
I always find yellows and oranges to be rather difficult to render and this lens struggles with that, too. To be fair I don’t think this is much of a problem with the lens at all and it has more to do with the sensor capturing the photo.

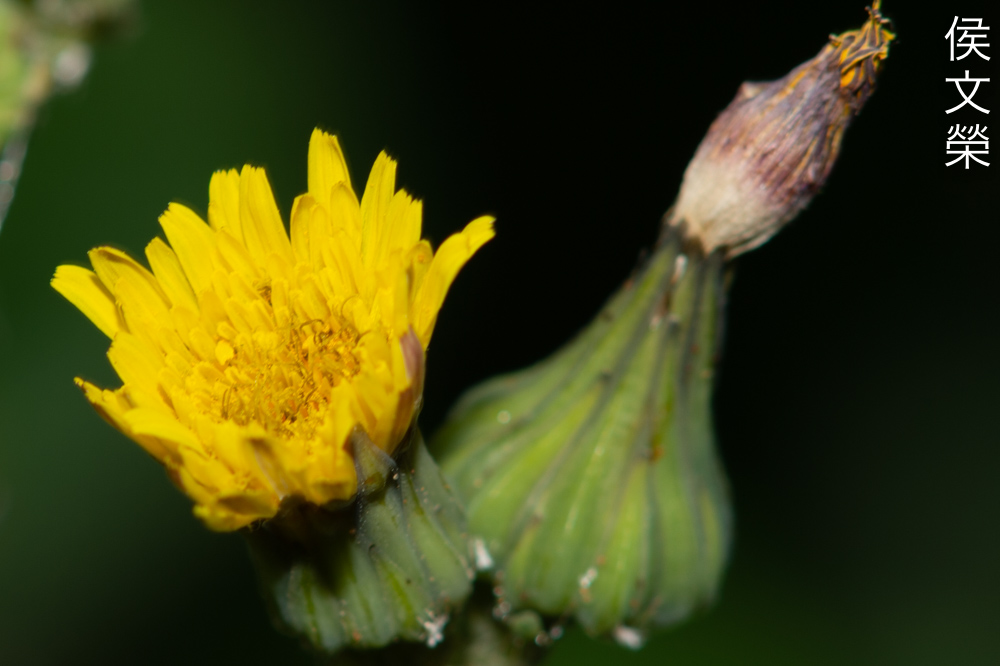
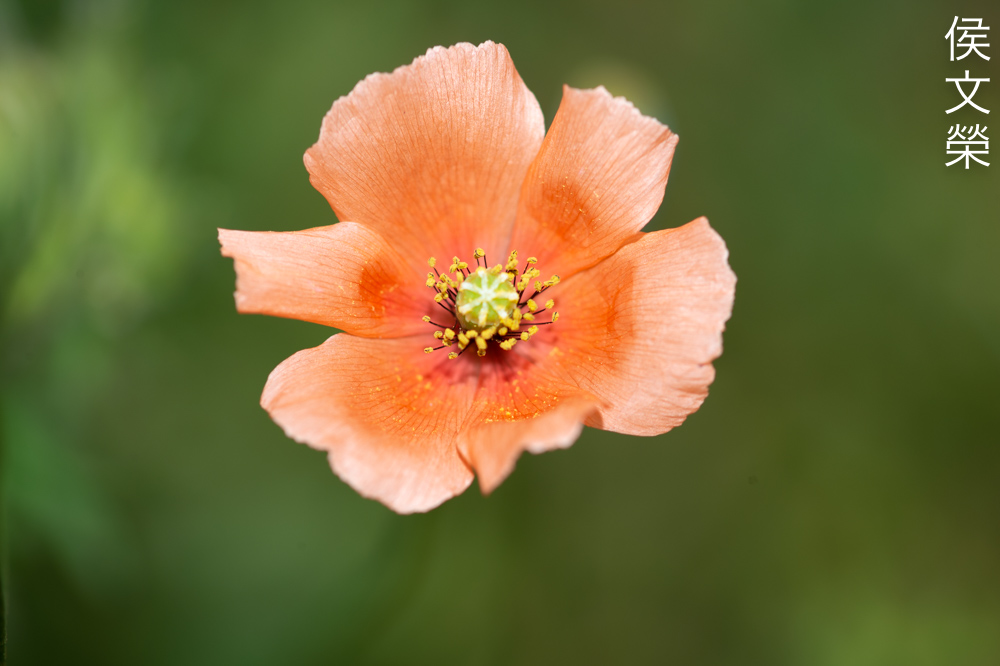
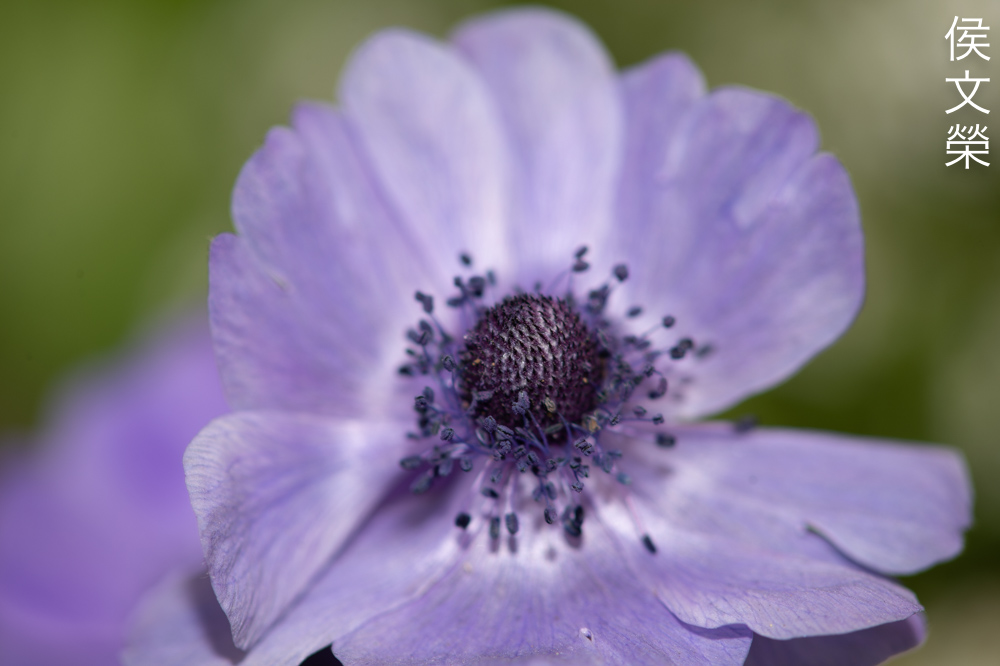
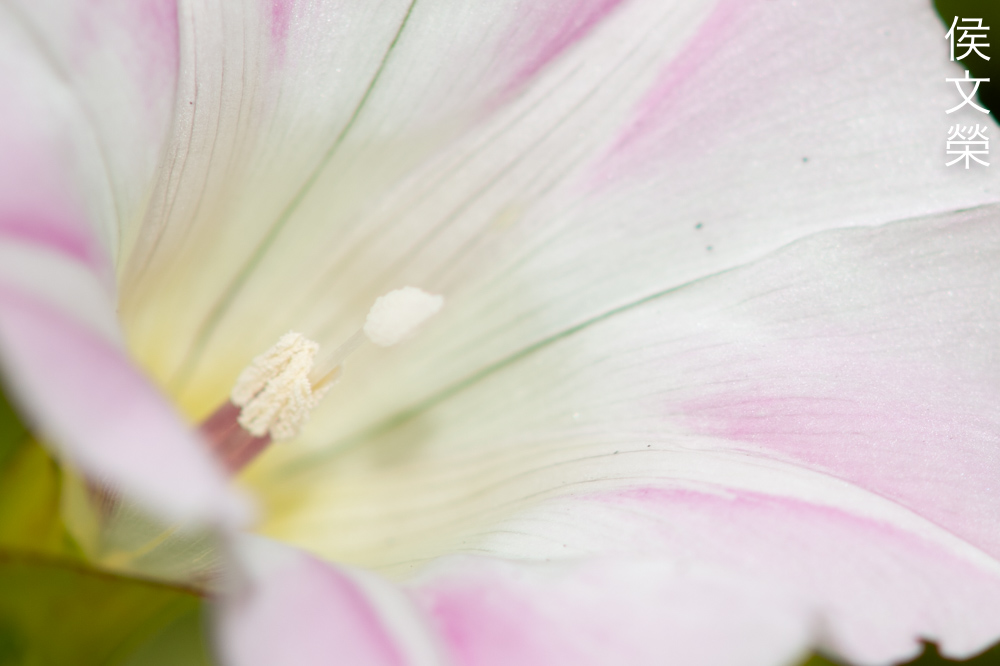
It’s not the sharpest Micro-Nikkor at wider apertures so I suggest stopping it down to at least f/8 if you want the sides to look better. The center isn’t the sharpest wide-open either and I find that f/5.6 should be the minimum when you’re fussy about sharpness at the center.
This lens is able to render a balanced photo so you can appreciate both sharp and smooth characteristics in one photo. This is remarkable because some cheaper lenses will only give you one or the other, often doing a very bad job, too.
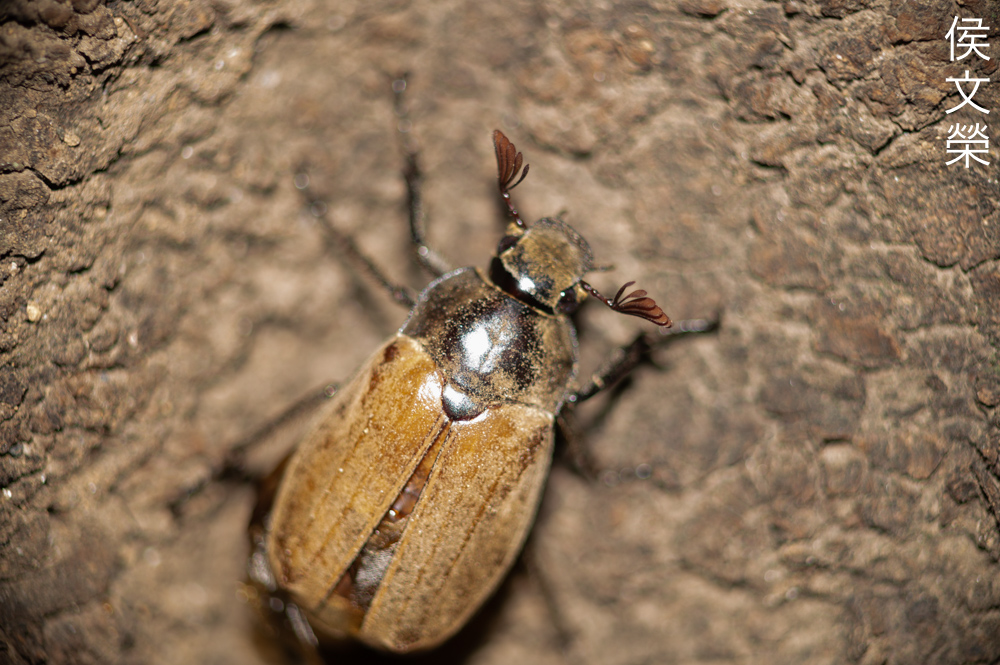
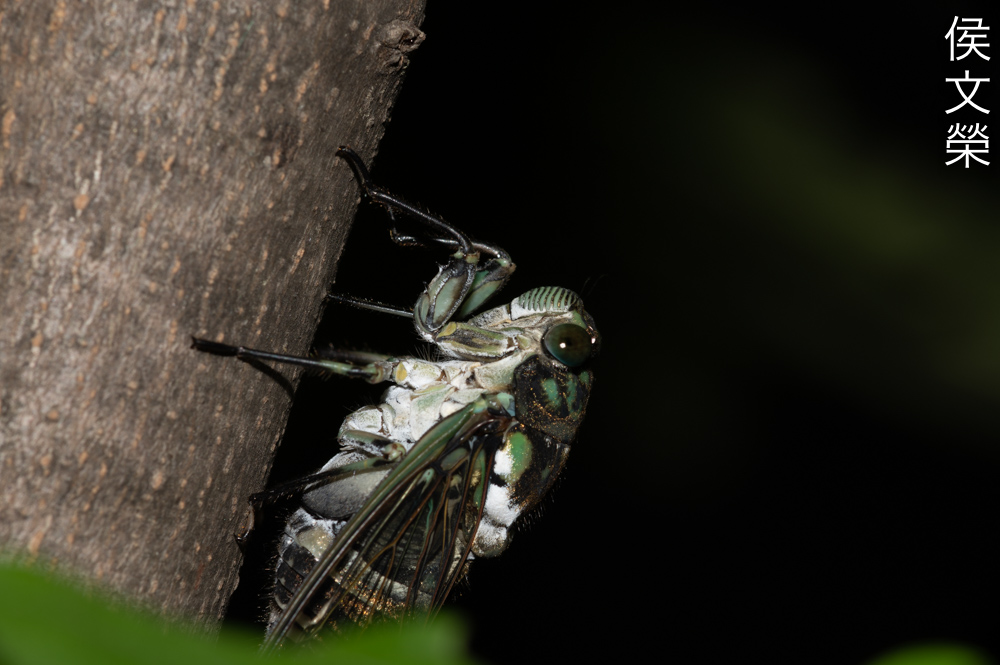
Many people may be wondering how does this perform for taking photos of bugs. I went out for a quick stroll around the nearby park and captured a few photos just to share with you my experience and opinions with it. I used to shoot a lot of bug photos a couple of years back but I will never claim to be an expert of the subject but I could confidently say that I know what I’m talking about. I took these with a Nikon Z6 with a Kenko extension-tube installed which helps give me a magnification that’s closer to 1:1, for illumination I used my trusty Nikon SB-900. These pictures were mostly shot at f/16 or f/11 in order to get more depth-of-field.

This is an unremarkable photo but I’m just sharing this in order to give you a narrative. It’s difficult to focus with this if you’re shooting at higher magnifications since it’s so easy to lose your focus. The magnifier of a mirrorless camera will help you focus on stationary objects but tracking small, moving critters will be quite the task. I’ve realized that a DSLR is still king for this kind of photography, this is why I think the Nikon D7200 is such a valuable camera for people taking photos of insects.

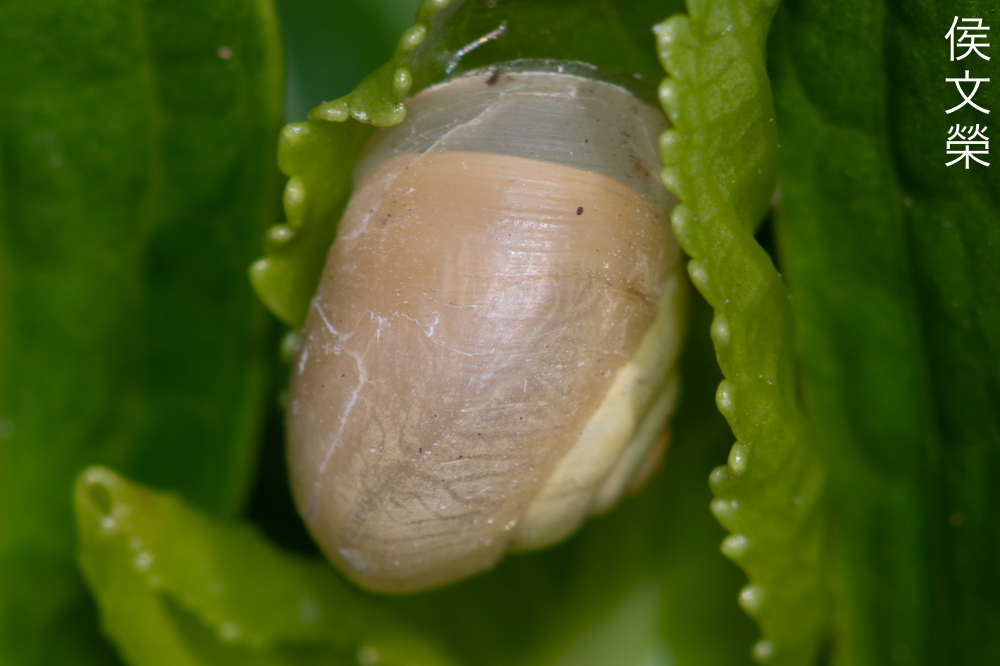
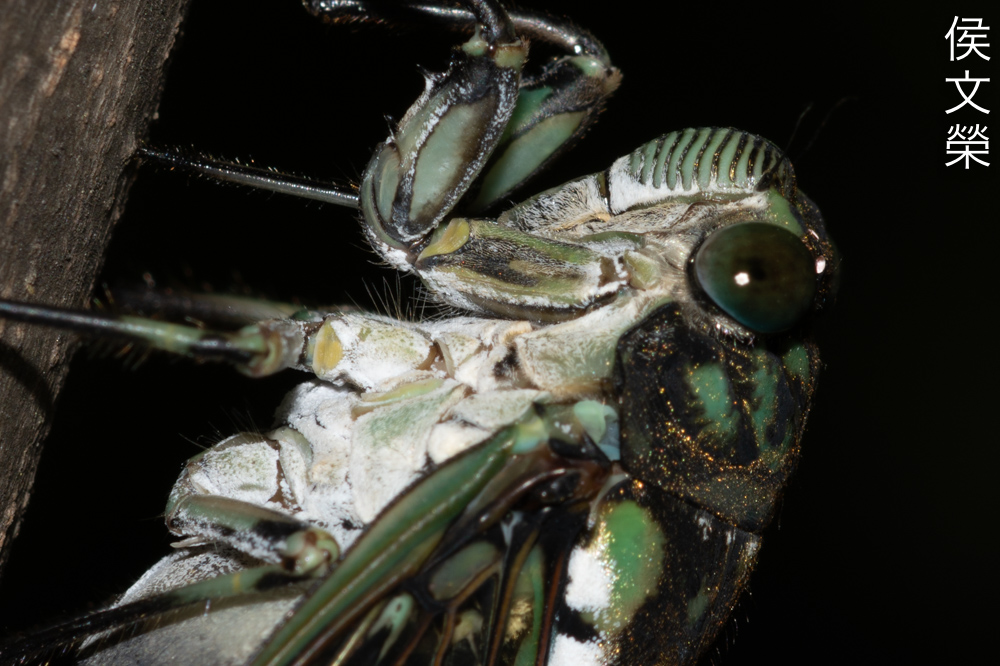
The last instar. If the subject is stationary it’s obviously going to be a lot easier to acquire your focus but it’s still not as easy as using a 105mm lens. Not only are you dealing with shallower depth-of-field you’ll also have to think about the shakiness of your hands or any slight movements like a gentle breeze which could throw everything off.

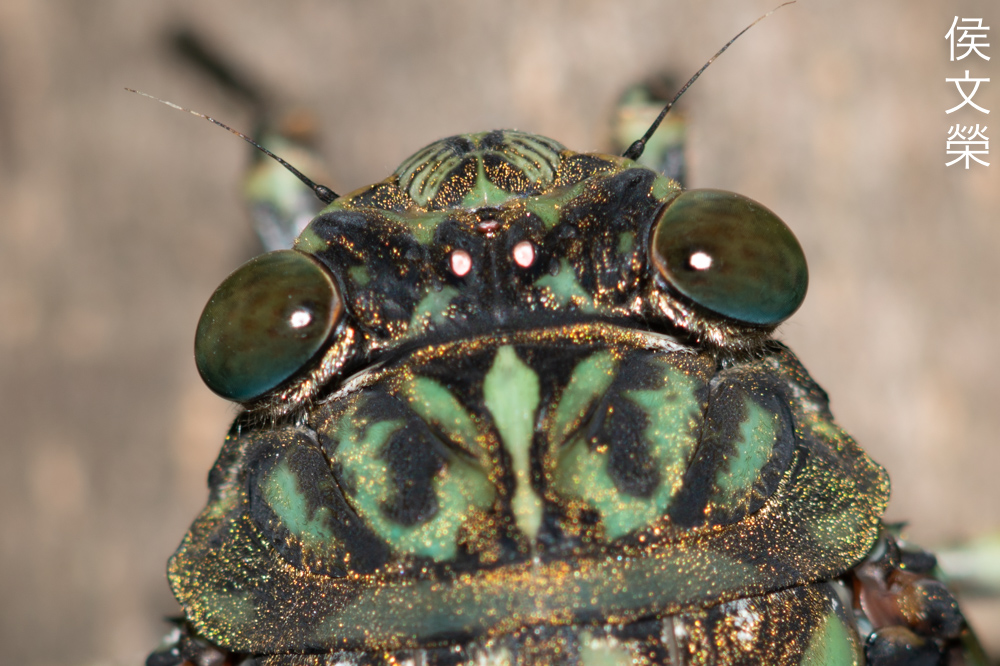
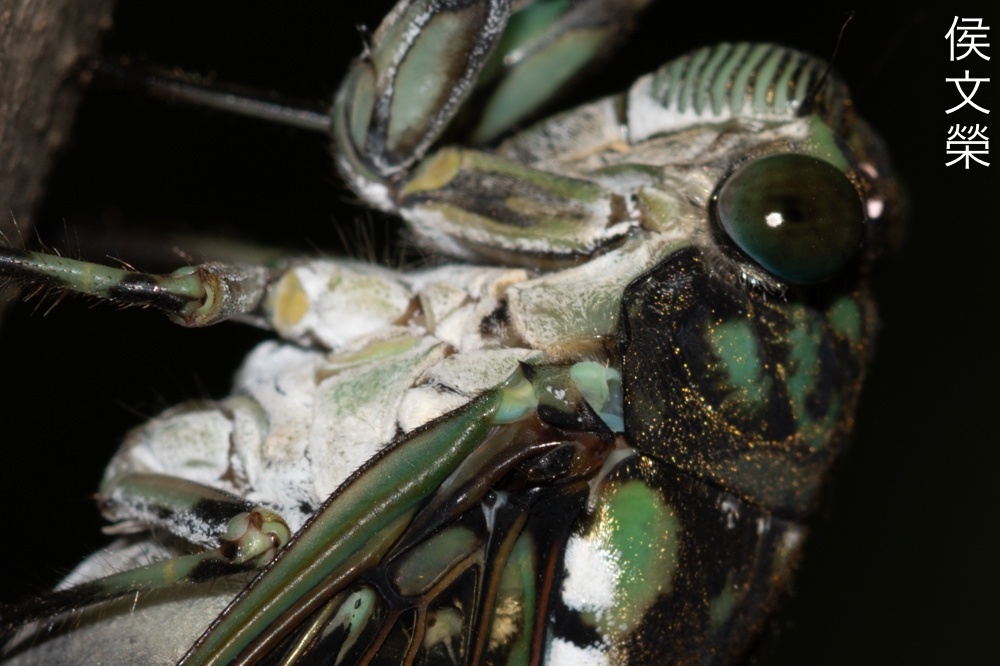
This photo shows how chromatic aberration can be an issue despite not occurring in the focus-plane. It can be rather distracting and could lead to misinformation if this photo is for research. I’d normally tolerate this for shooting bugs as it’s something that I’ve come to accept but certainly not at this level. Also note the high-level of vignetting, I may have shot this at a wider aperture such as f/5.6 or so.
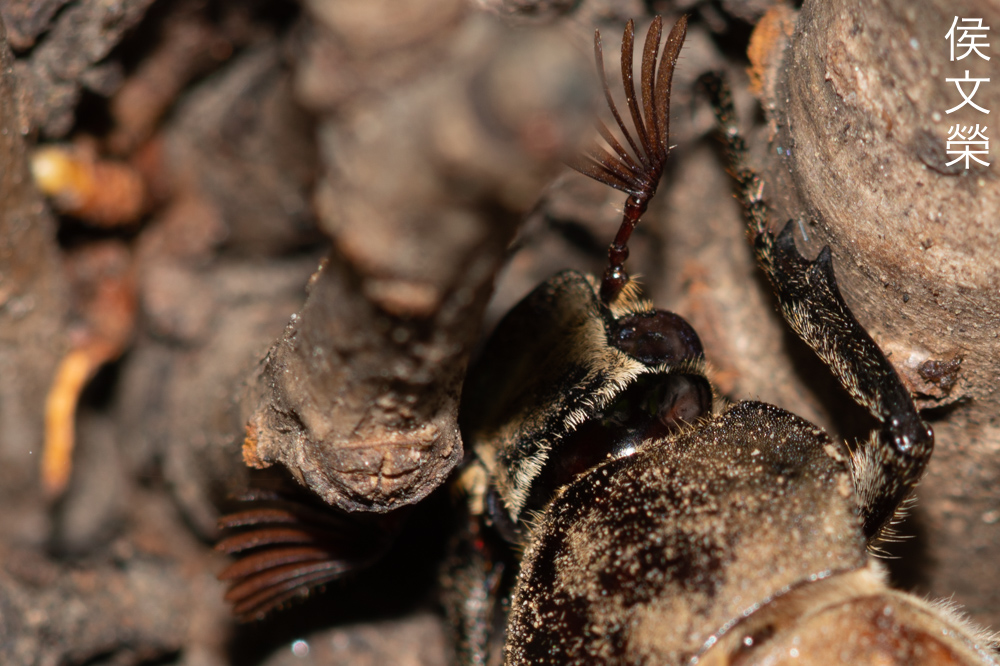
One of the primary reasons to shoot with such a long lens is the effects of foreshortening won’t be as obvious. You will present your subjects in such a way that they look more “authentic”, a wider macro-lens will exaggerate how they look and may them appear larger-than-life. This will all depend on your vision and needs. If this is for scientific purposes it’s best to have less foreshortening in order to measure your subjects more accurately.


(Click to enlarge)
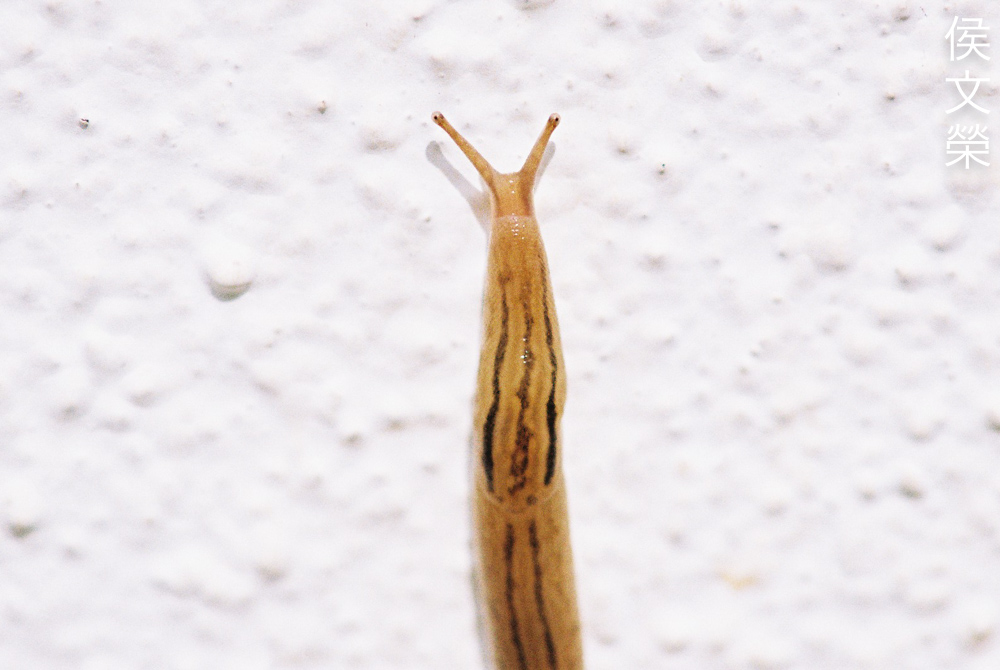
One of my metrics for determining if a macro-lens has enough resolution or which aperture is best for rendering small details is by shooting the compound-eyes of a fly. If I could render each lens well then that aperture is it’s best when it comes to resolving power. The photo of the fly was shot at f/16 if I am not mistaken and I’m able to see the highlights at the individual lenses that were illuminated. This is nice but it’s not as sharp as I wanted, it may be due to the effects of diffraction which softens the details, I’m interested to see how it performs if I took this at f/11 or lower. I suspect it’s best not to stop the iris down to f/16 if you want to render small things like this but it’s really a tradeoff between this and having a deeper depth-of-field. The photo of the snail is for illustrating how well it’s able to resolve the wrinkles of the shell, you could even see how the dirt is rendered as granules instead of a smudgy-looking mess.


(Click to enlarge)
Here are more photos of bugs. I won’t recommend using this for shooting at higher magnifications due to how hard it is to work with at closer distances. However, if this will allow you to take photos from a safe distance then there are no other options that could beat this at its current price.
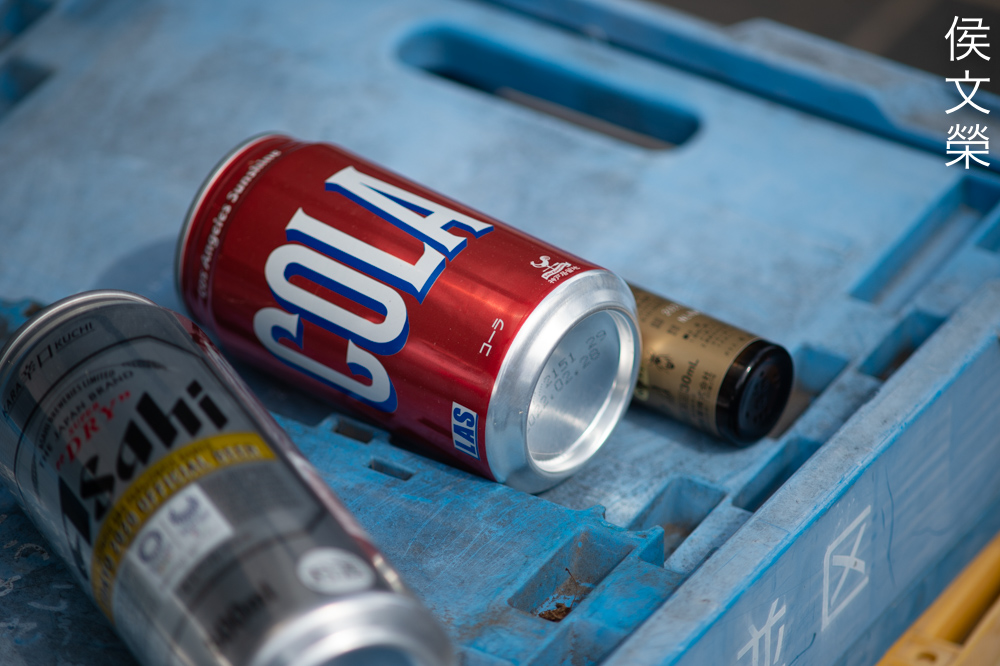
Let’s now check some film photos. Film has a unique look that is hard to simulate with a digital camera thanks to grain. It reacts differently to light, this means that it could mask a lens’ flaws or amplify them. Since this was designed to be used with film, it’s best that we judge this using its intended medium.
This is not an easy lens to use for moving subjects specially at higher-magnifications but this slug is moving so slow it allowed me to take single shot that’s reasonably-focused. I don’t recommend taking bug photos with film because it’s not going to be economical.
Since film photography is not cheap despite what the adherents of it says it’s best to shoot with a smaller aperture just to make sure that you get things in-focus. This makes it mandatory to use a flash so you’re able to use higher speeds.

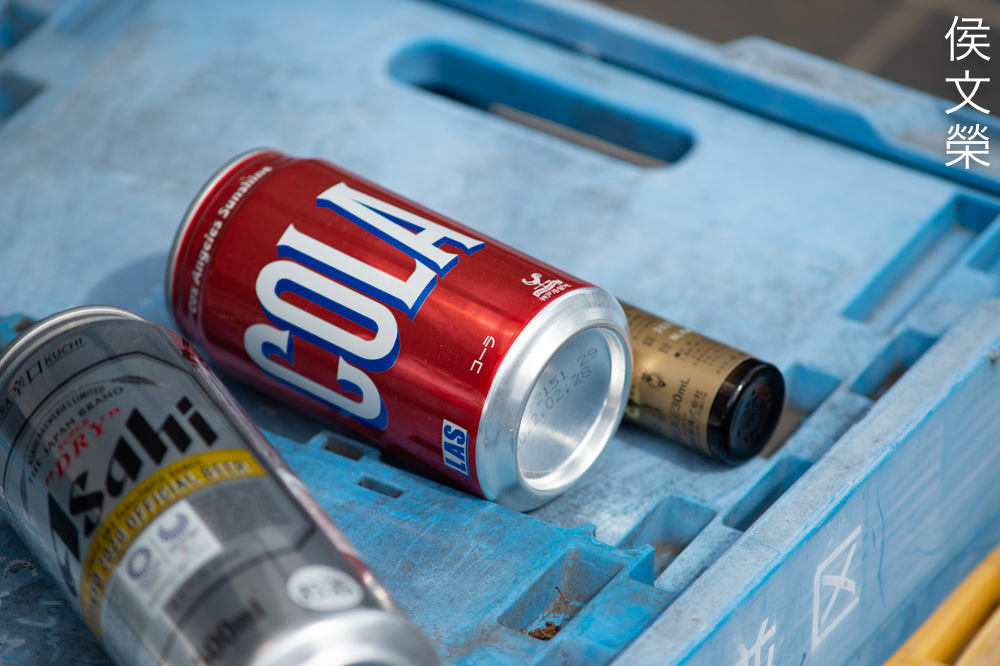
I’m happy that the yellows don’t look brutal here, it looks clamped in some areas but the tonality didn’t suffer as much.
Film grain is so beautiful, it adds another interesting layer to your photos, making them look more organic.

While film can potentially exhibit very-high resolution specially if you’re shooting with a fine-grained film it’s no-match to a digital camera with decent resolution. This is another reason why macro-photography is best enjoyed using a new digital camera with a high-MP sensor. Can you find the spider in this photo?


(Click to enlarge)
Here’s the rest of the roll. Macro-photography is low-yielding compared to other forms of photography so it’s not the best medium for it. Despite that it’s not impossible for you to enjoy shooting with it and nobody could stop you if it’s something that makes sense for you. I only shot these to give you an idea as to how this lens performs with film.
This is a nice lens but it’s a little bit hard to use compared to the 105mm variety but I’m sure that there are people who will find a use for this thing. Needless to say, this is a specialized lens for those who shoot photos of reptiles, bug and other subjects who are easily-startled. People who document industrial processes will want this as well in order to get a safe working-distance away from what’s happening. If you want a cheap, tough manual 200mm Micro-Nikkor then this is the only alternative apart from the Micro-Nikkor 200mm f/4 Ai-S which is optically-identical to this. This isn’t going to be the sharpest lens in its class, that one goes to the AI AF Micro-Nikkor 200mm f/4D IF-ED which is an astounding lens by any standard but that one’s not cheap at all. The former could autofocus which will be very useful when tracking any subjects. Trust me, you’ll want that feature. That is also capable of reaching 1:1 magnification on its own, too. If you are looking for one of these then you’re going to be surprised as these aren’t expensive, it’s easy to find one for $100.00 or even cheaper if you’re lucky. I got mine for much cheaper thanks to all the fungus damage. If you’re looking for one be sure that the optics are clear and clean. This lens and the Micro-Nikkor 200mm f/4 Ai-S have this tendency to develop balsam-separation in the inner cemented-group which could easily be seen. Avoid those if you see them, fungus could be cleaned but balsam-separation requires more effort to correct which is beyond most professionals. Also check if the iris is dry and snappy when actuated. Turn all the rings and they should operate smoothly. The focusing-ring may be a bit uneven but that’s natural for this lens as it doesn’t have a proper helicoid which you’ll soon see in the next section. There are many of these in terrible state, just be patient and you should be able to find one that fits your budget.
Before We Begin:
If this is your first attempt at repairing a lens then I suggest that you see my previous posts regarding screws & drivers, grease and other things. Also read what I wrote about the tools that you’ll need to fix your Nikkors.
I suggest that you read these primers before you begin (for beginners):
Reading these should lessen the chance of ruining your lens if you are a novice. Before opening up anything, always look for other people who have done so in YouTube or the internet. Information is scarce, vague and scattered (that is why I started this) but you can still find some information if you search carefully.
I highly recommend that you read my working with helicoids post because this is very important and getting it wrong can ruin your day. If I can force you to read this, I would. It is that important!
For more advanced topics, you can read my fungus removal post as a start. It has a lot of useful information, it will be beneficial for you to read this.
Disassembly (Lens Barrel):
This is an unusual Nikkor in terms of construction so it may confuse those who are not familiar with it. Its unorthodox internal construction is essential for it to achieve the IF gimmick. Having said that, this is not a lens for a beginner, it’s better for someone with more experience to tackle this because you will need special tools and experience to repair it properly. One more thing that you should be aware of is Nikon used plenty of glue and even epoxy when sealing any important parts of the lens during this era. The only way to make it safe to remove a sealed part is to use acetone and alcohol to soften the seals, skillful use of a micro-torch will help you safely extract any screws that were epoxied. You’ll also want to use a nice pair of rubber gloves and some special tools for unscrewing tight rings and you should be very careful when you use these so you won’t warp anything accidentally.
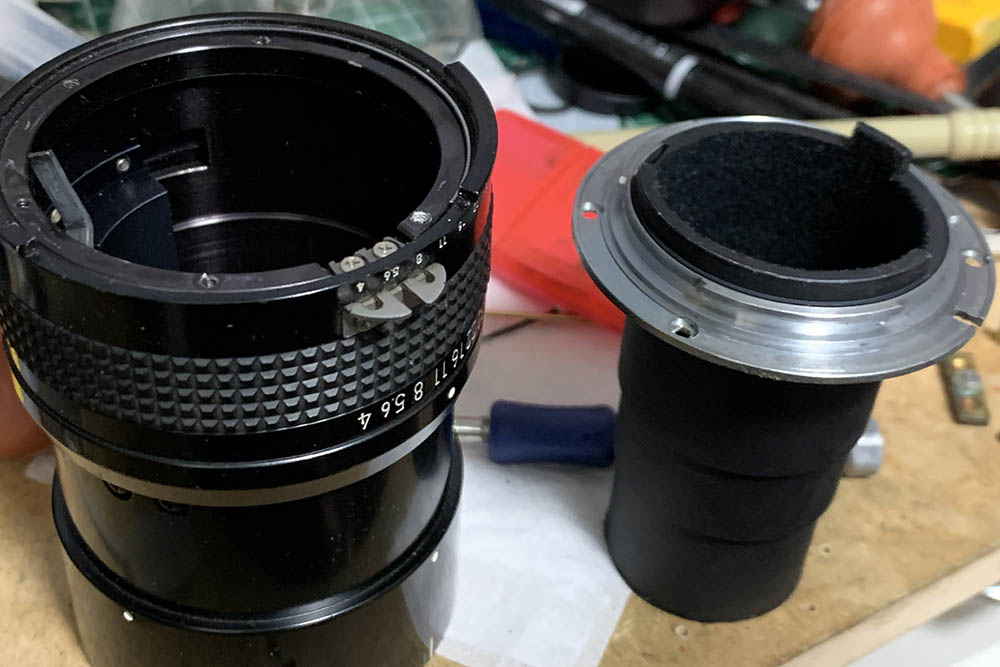
This one doesn’t have any helicoids, it uses a cam instead. This is something that we usually see with zooms so it may confuse those who have not worked on zooms prior to fixing this. Take lots of notes or photos before you dismantle anything, that will help you when it’s time to reassemble this. If you’ve got it wrong then you’ll have to was your time backtracking your steps until you get to the problematic parts.
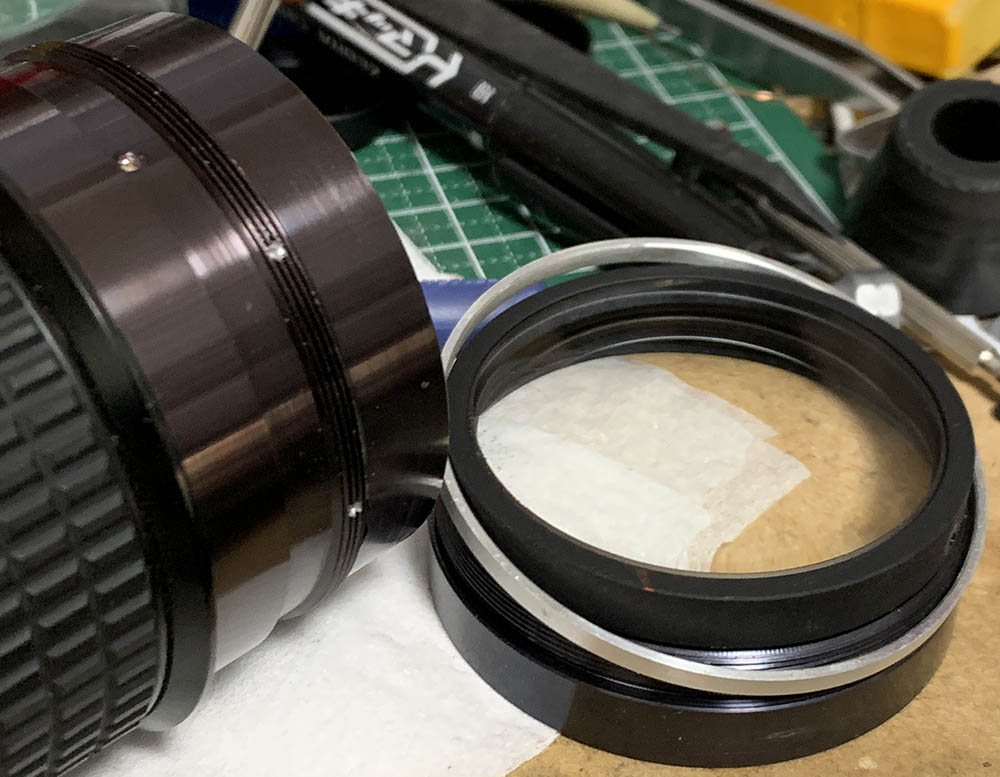
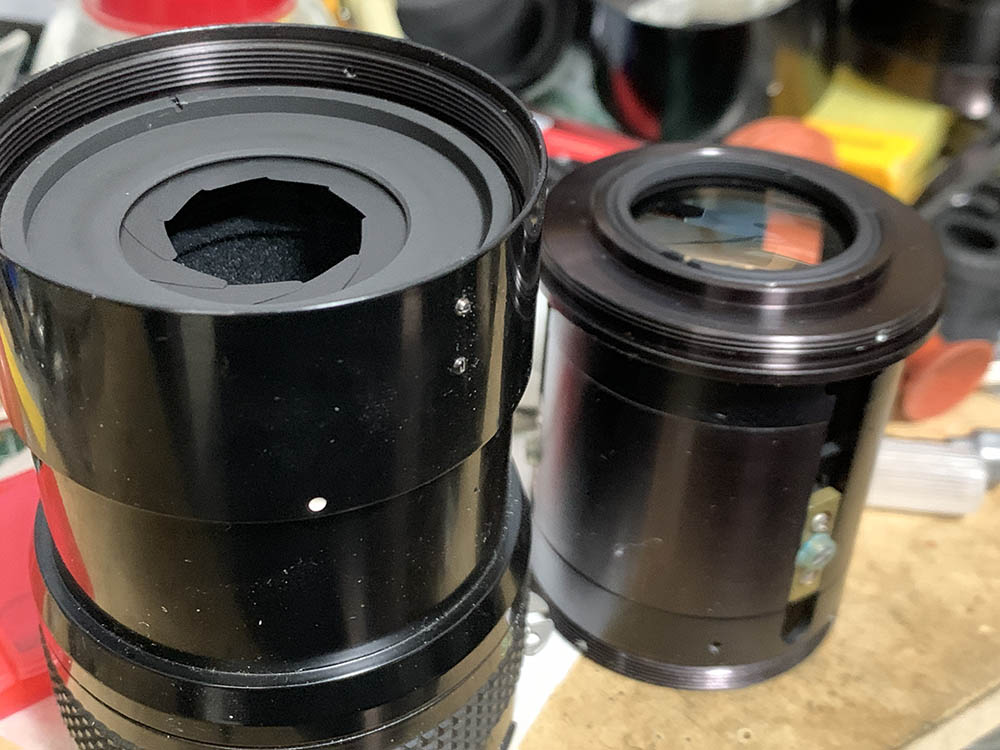
Since this is an unconventional Nikkor we won’t be able to separate the barrel and the objective as separate units like what we usually do for the usual Nikkor. This is the reason why I’ll condense the section for parts of the objective and iris mechanism here in this section.
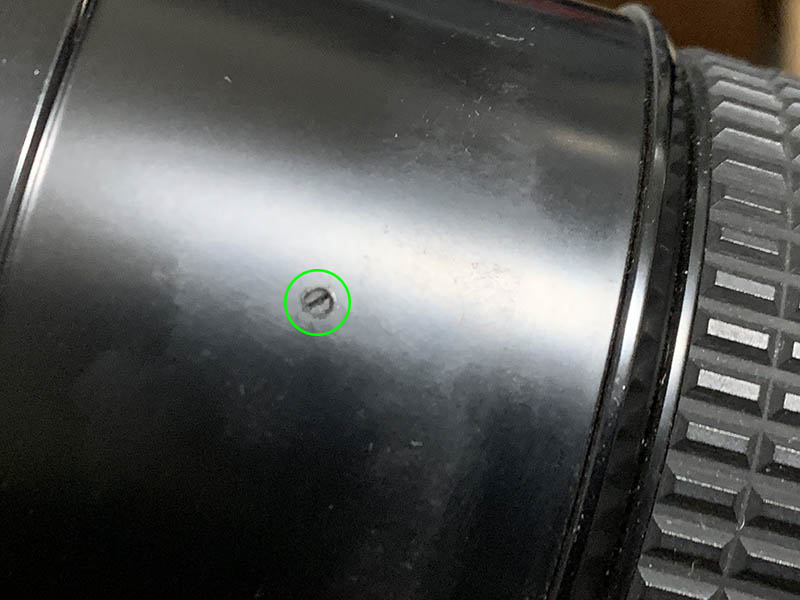
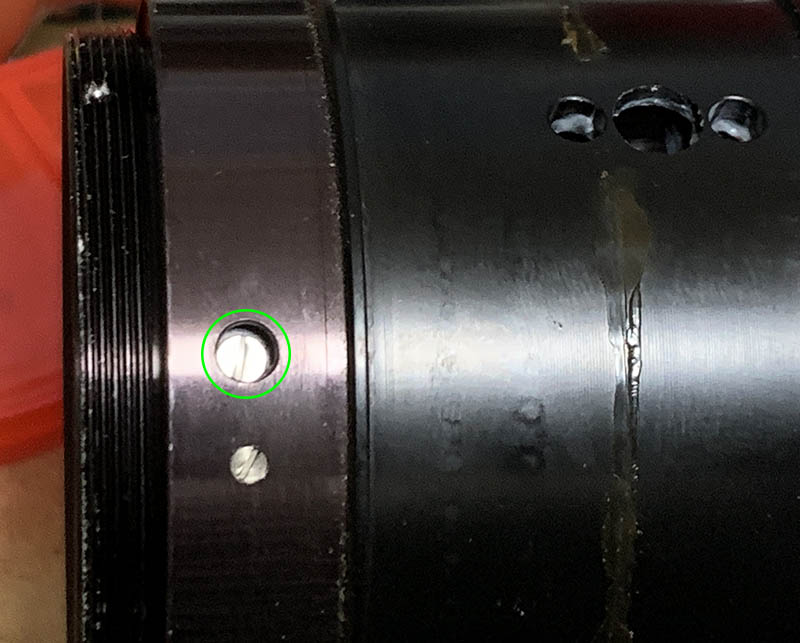
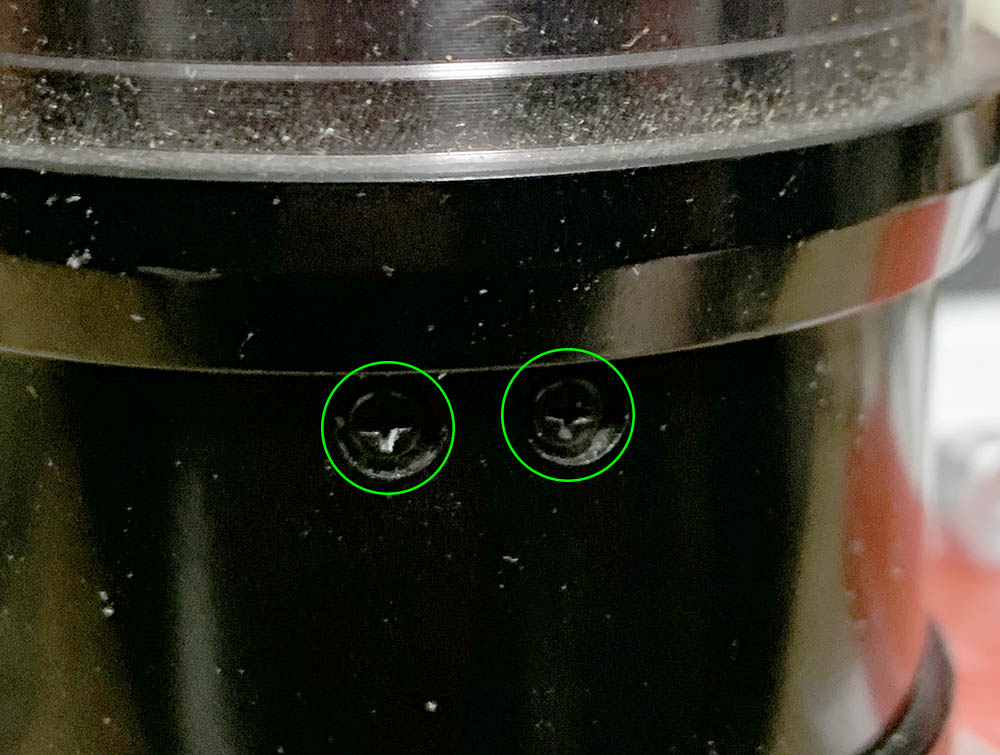
Locate and extract this, your lens may have more than a single screw so be sure to remove them all. Mine was sealed, I had to apply some solvent in order to dissolve the paint before I could remove it safely.
Unscrew the front cover off and remove the hood. Scrub the lining of the hood to clean it or use some tape to stick all of the dirt to it and peel it off carefully.
You could dismantle it further if you wish so it’s possible to clean it even better.
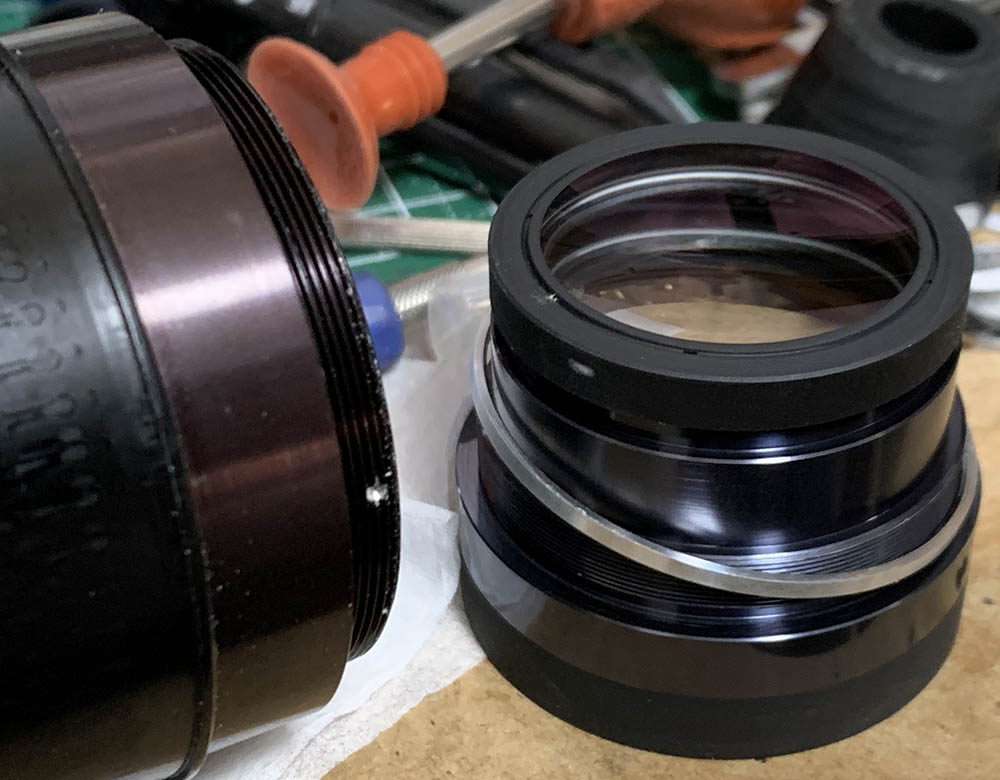
Unscrew the front optics assembly and be sure not to scratch the optics. There’s a thick spacer here, it’s used to adjust the focus of the lens so don’t misplace or warp it.

Extract these and unscrew the front barrel, I think I saw 3 of them in this lens but I am not sure.
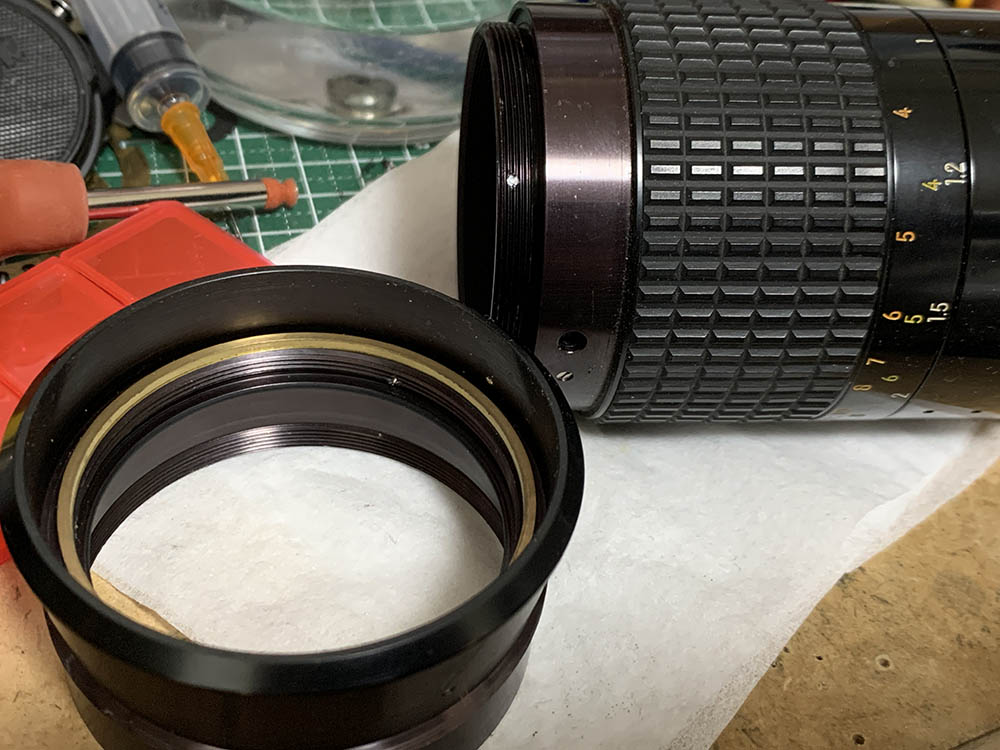
There’s a brass shim here, be careful not to warp it.
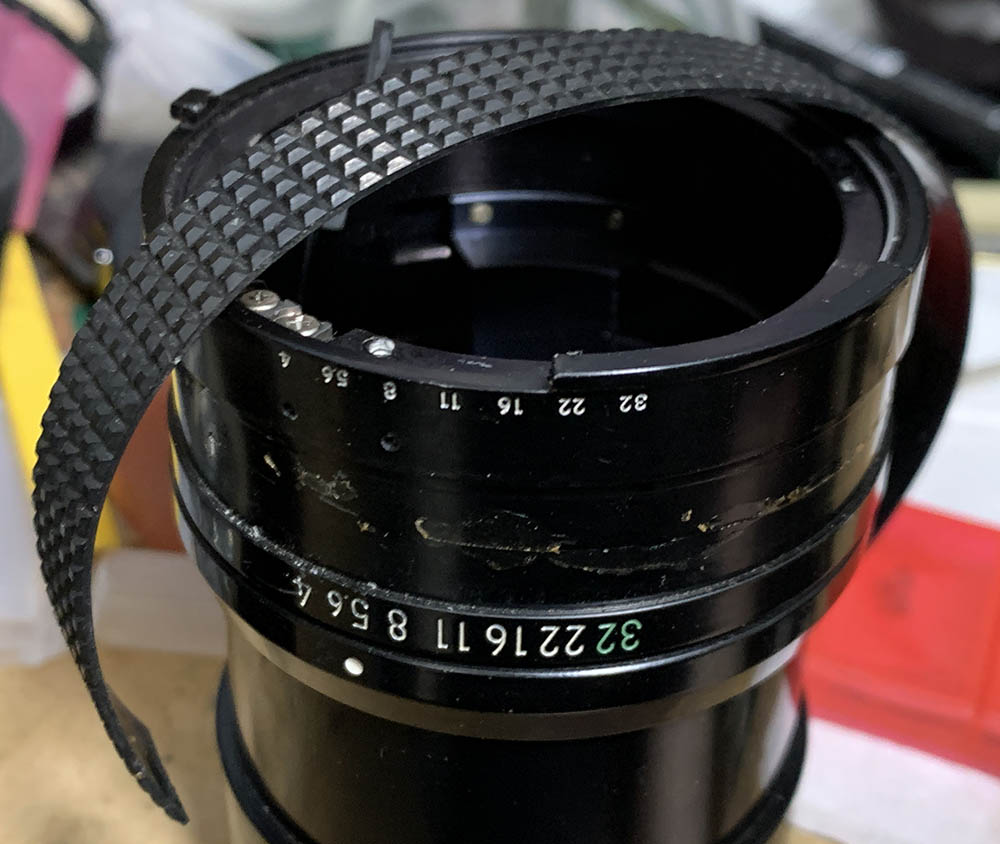
Carefully remove the rubber grip off by running a thin toothpick underneath it to lift this from the glue. Be sure not to tear it because they may become brittle due to age.
Unscrew this optical assembly off and be sure not to damage the shim.
Carefully locate and extract this.
Remove the focusing ring assembly.
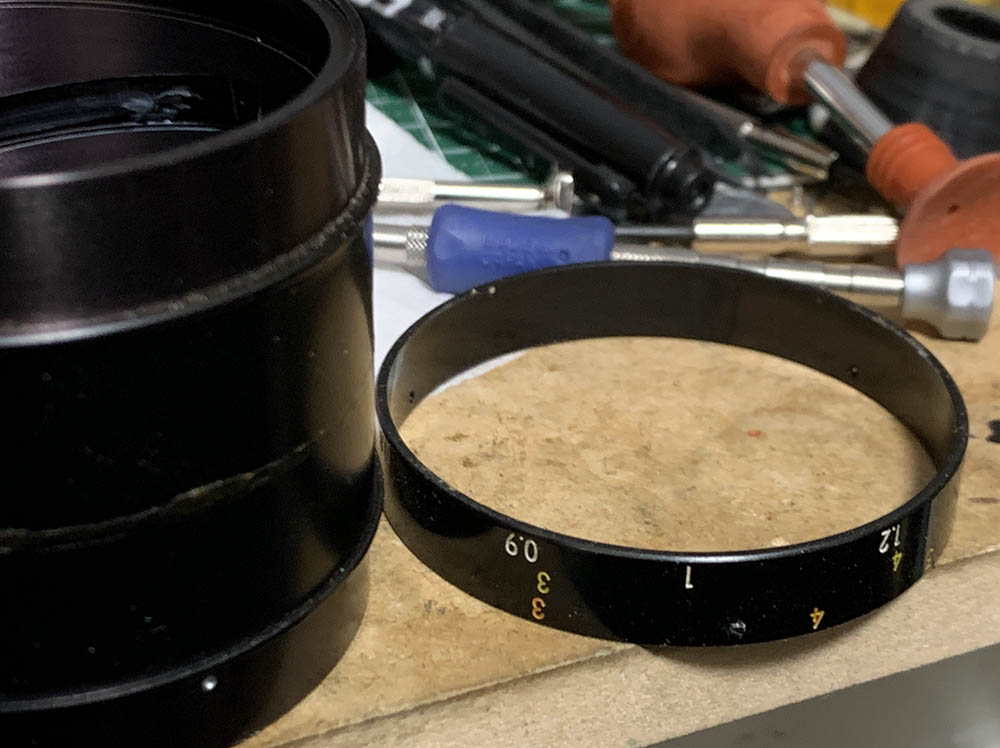
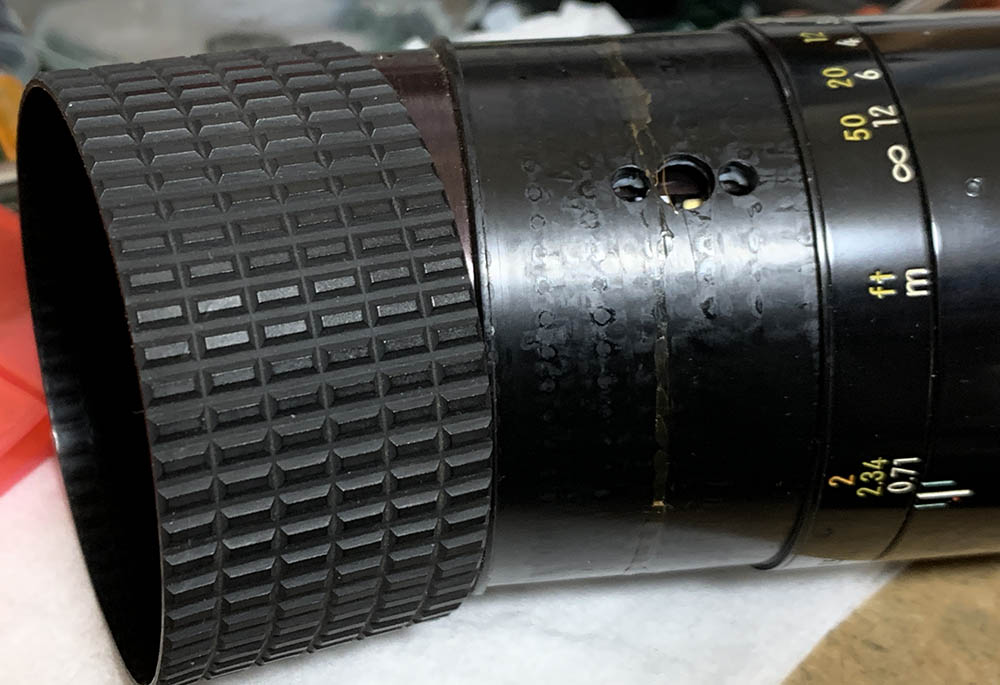
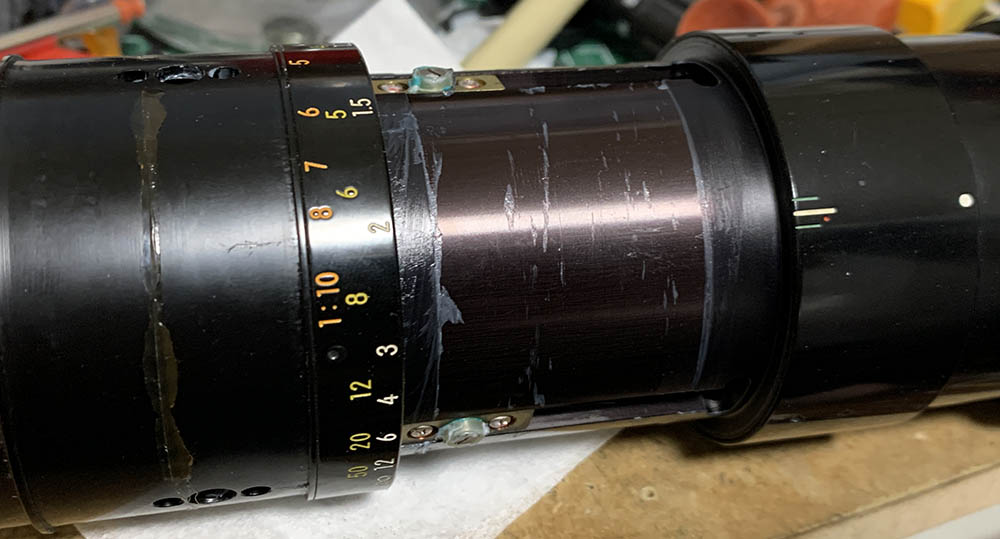
Loosen the screws of the distance scale and pull it off.
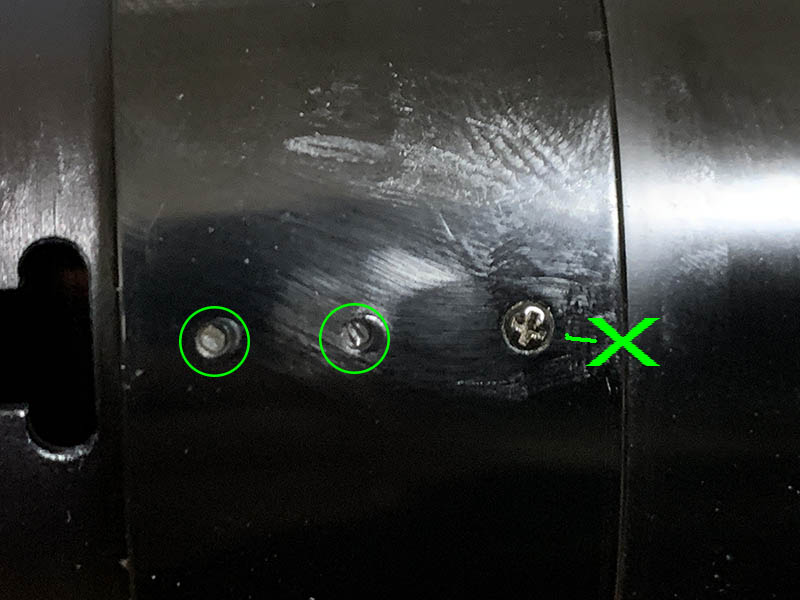
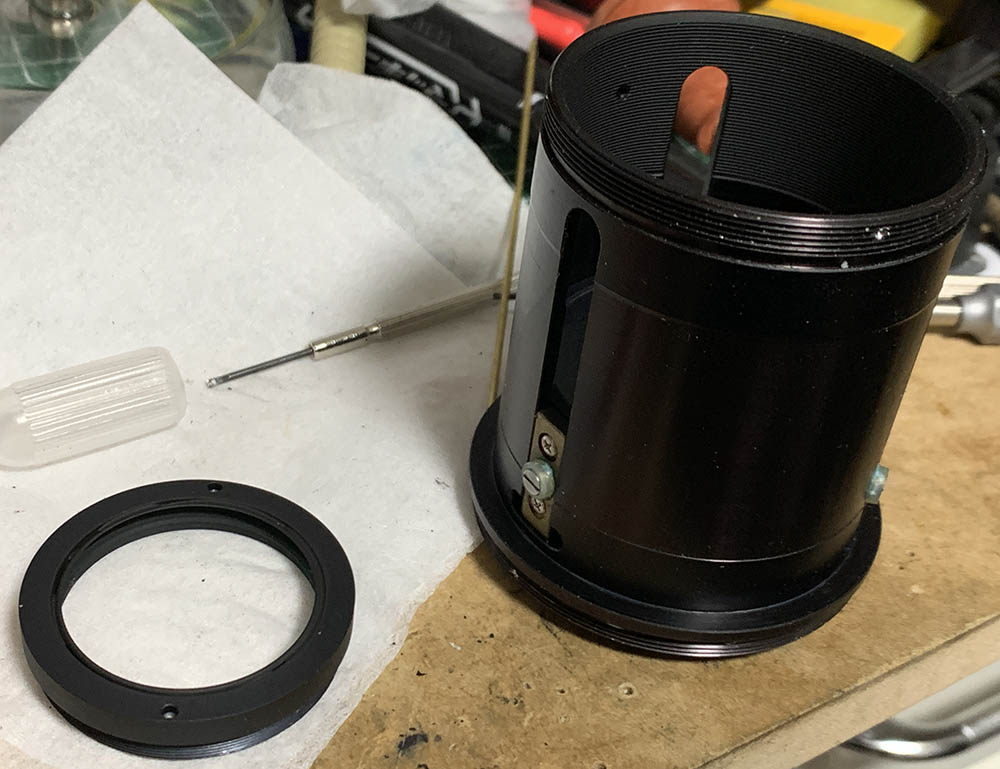
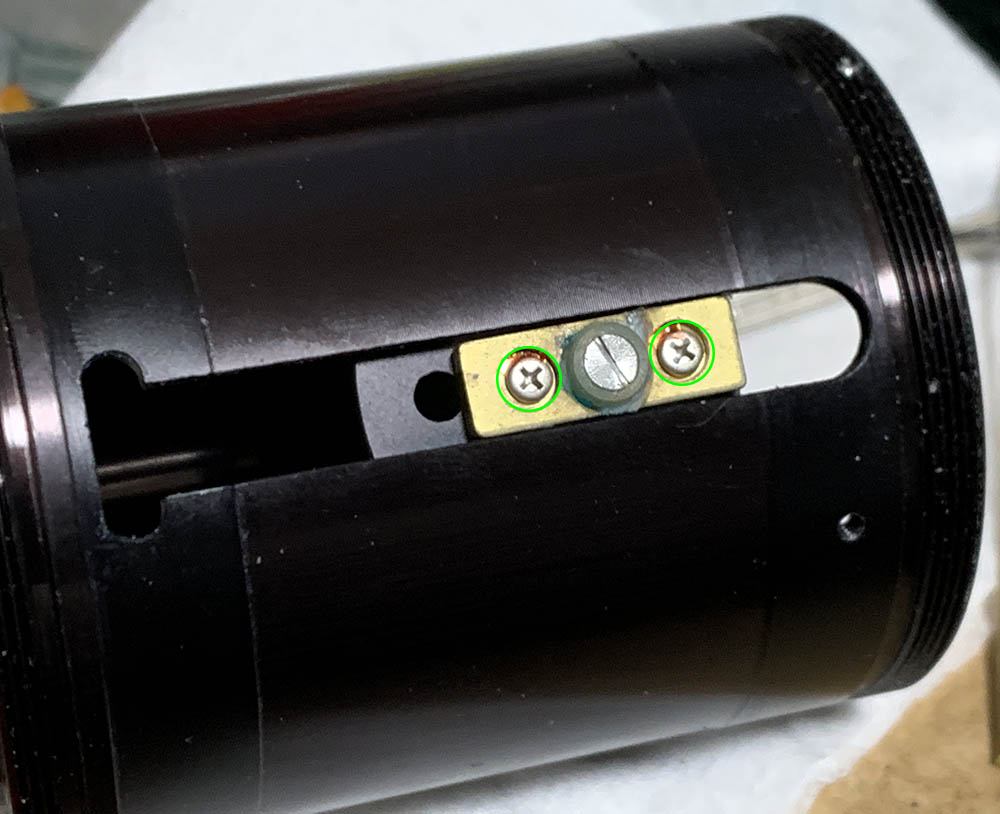
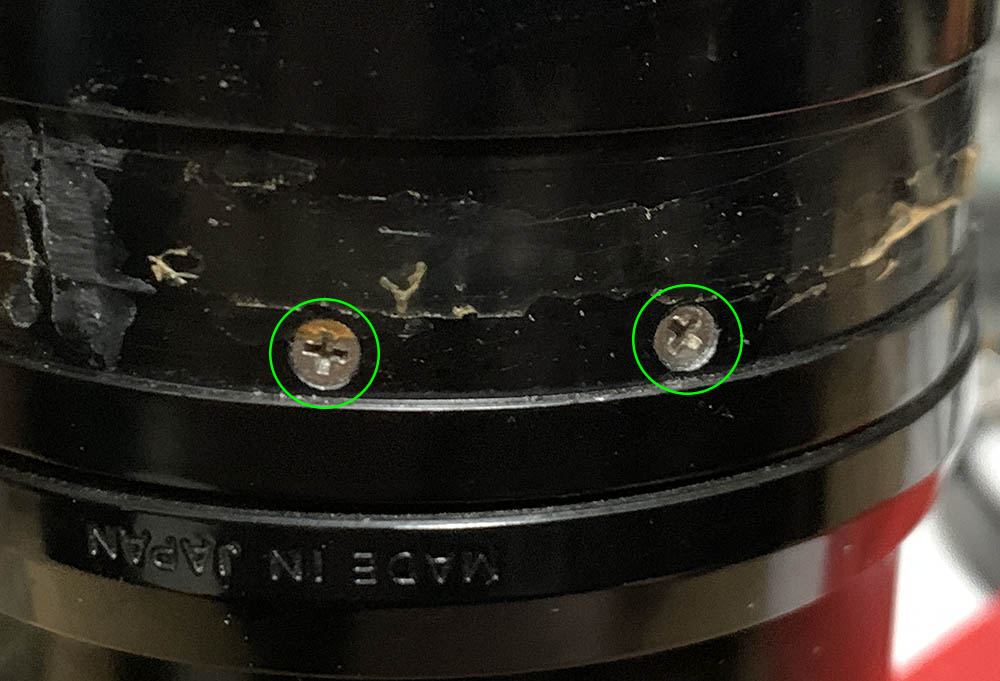
Before you proceed to the next step be sure to take a couple of notes and photos so you’ll know the original position of the iris mechanism, without this information you won’t be able to put it back properly. Once you’re satisfied with the notes you took extract these screws but leave the one marked “X” alone for now. One set of screws secure the iris and the other set secures the central barrel.
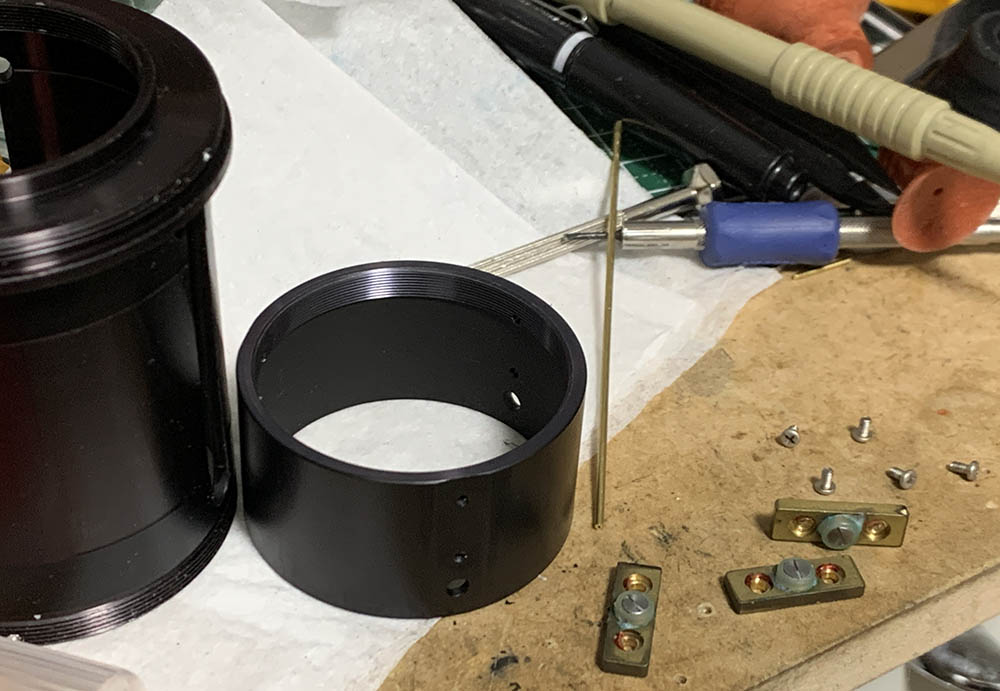
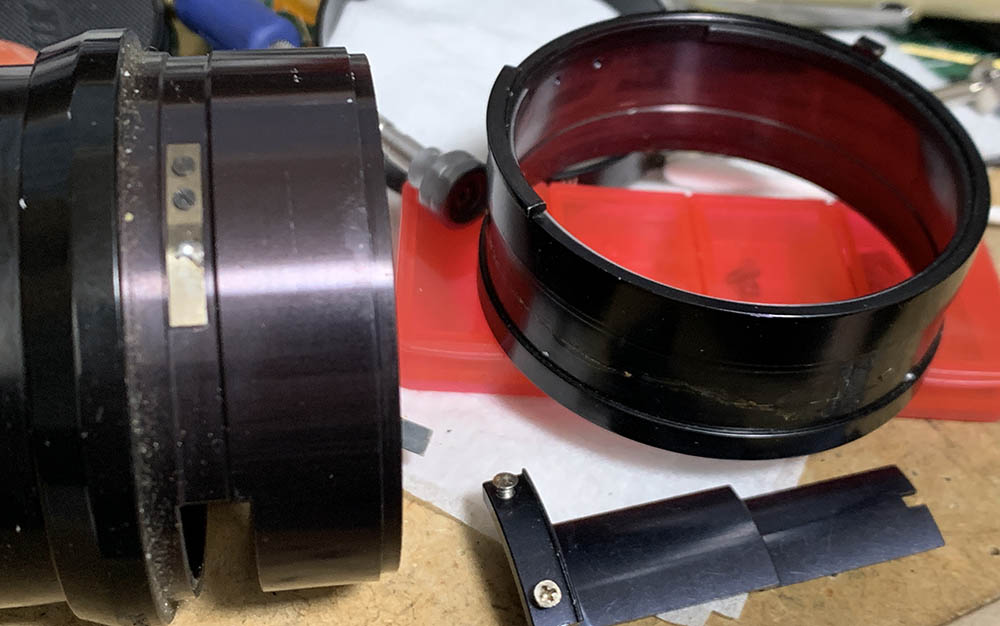
Unscrew the central barrel off, now you have a better view of the iris mechanism.
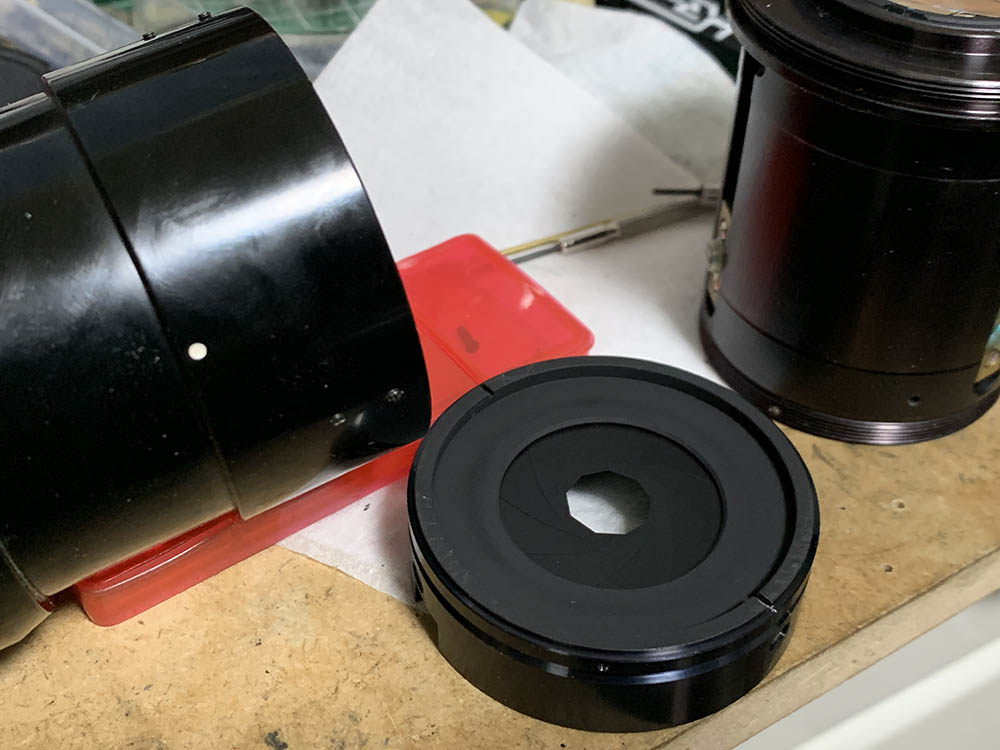
Carefully pull the iris mechanism off.
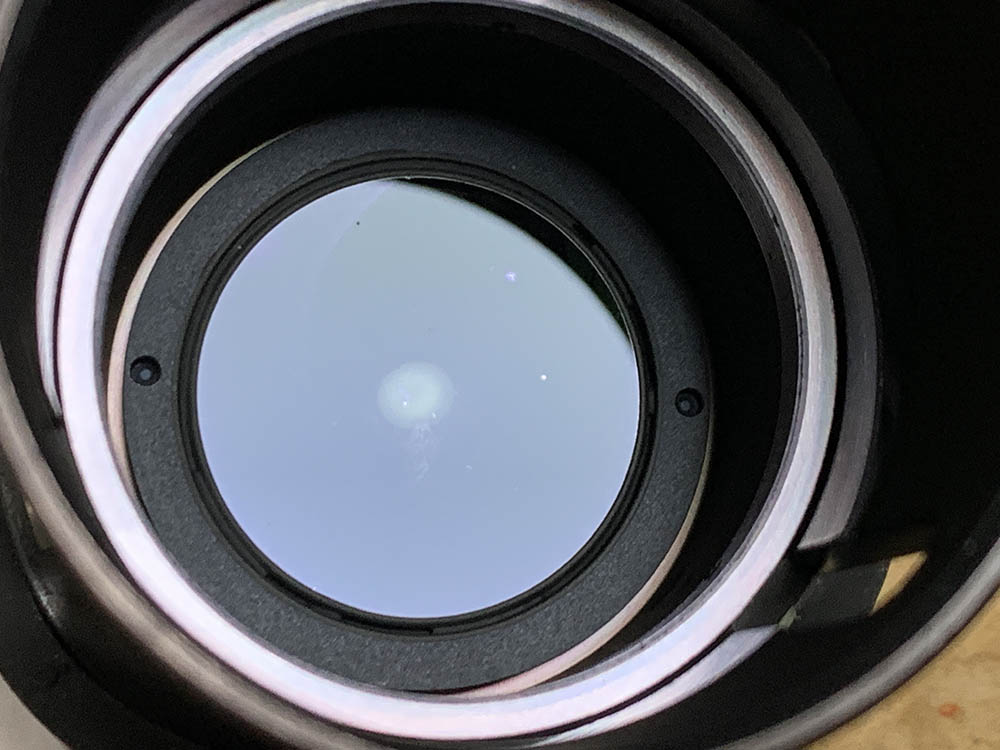
Use a lens spanner with long bits to unscrew this assembly off.
Carefully remove it with a lens sucker.
Extract these screws to remove the rollers but before you do so be sure to note which side should be facing front.
Remove the cam and clean all of the rollers very well since they’re usually filthy.
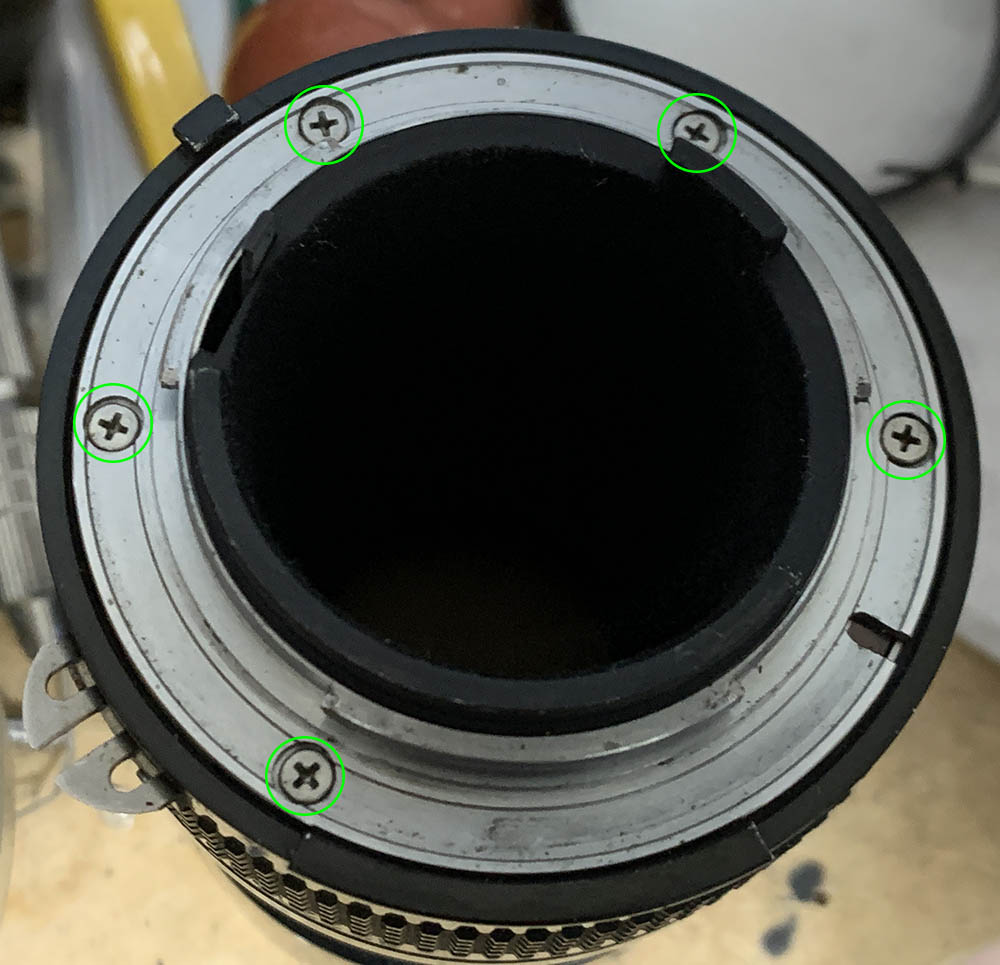
Carefully extract these screws and be sure to use a JIS driver so you won’t damage these. Many people use the wrong tools so they damage these, read my article on how to remove bayonet screws to prevent this from happening to you.
Carefully remove the bayonet mount. You can dismantle this further if you wish in order to clean it thoroughly.
Carefully peel the rubber part of the aperture ring. Mine is cut, I am not sure if it’s supposed to be like this. Whichever the case is just be careful so you won’t damage this.
Carefully extract these, I had to heat them carefully in order to remove them safely since they were sealed with epoxy.
The screws secure the aperture fork to the aperture ring, it enables you to adjust the iris mechanism from the outside.
These screws secure the stop-down lever assembly if I am correct. Only remove these if you wish to clean the lens in a thorough manner or repair the stop-down lever mechanism. You’ll have to heat these well in order to safely extract the screws as they’re secured with epoxy.
Clean everything well and be sure not to leave any residue. I scrubbed everything with a strong toilet detergent, they’re also cleaned with alcohol after a thorough rinsing to remove any oily residue. There’s no way for you to adjust its focus so be sure not to lose any of the shims, you should be able to put them back properly or your lens won’t be able to get to infinity or will focus beyond that.
Since this one doesn’t have a helicoid I used a grease that has more resistance to help give me a damped-feel when it’s turned. Do not apply too much or it will migrate or evaporate to the iris mechanism or the glass. Just apply enough for it to operate smoothly. Do not be obsessed with making this operate as smoothly as lenses with helicoids because this won’t be able to do that. As long as the focusing-ring turns reasonably-smooth then you’ve done the job properly.
Disassembly (Optics):
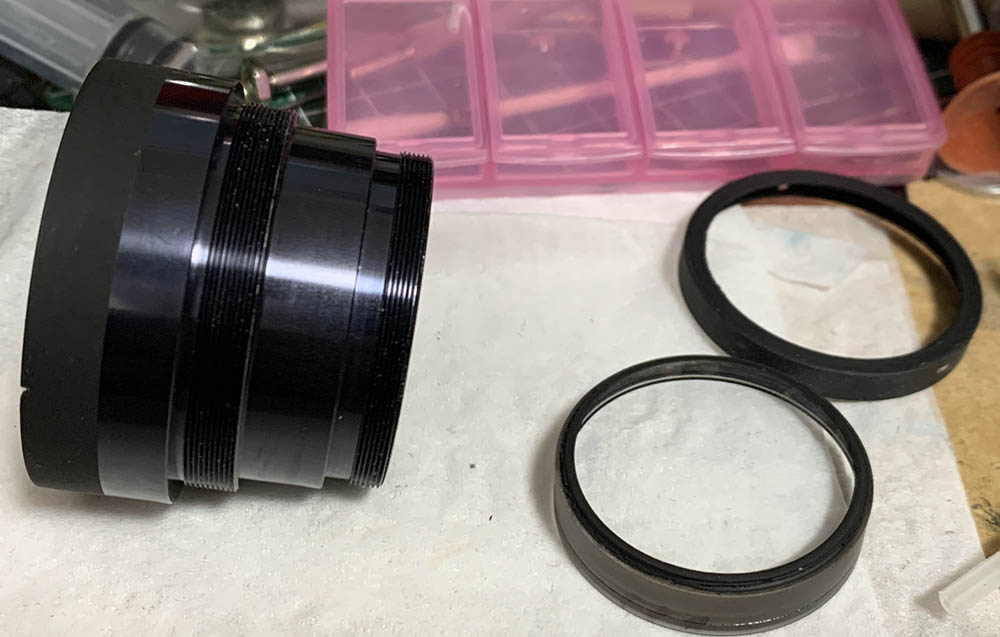
The optics is not difficult to service but you should be really careful because the collars and rings are usually sealed and some of the glass parts are rather huge. You will need a steady pair of hands in order not to slip. Do not forget to note which side any of the groups should be facing because some of them have ambiguous curvature. Putting a group back facing the wrong way will potentially crack it and you will also have to dismantle the lens in order to flip it. Finding out which element is flipped also takes a lot of time.
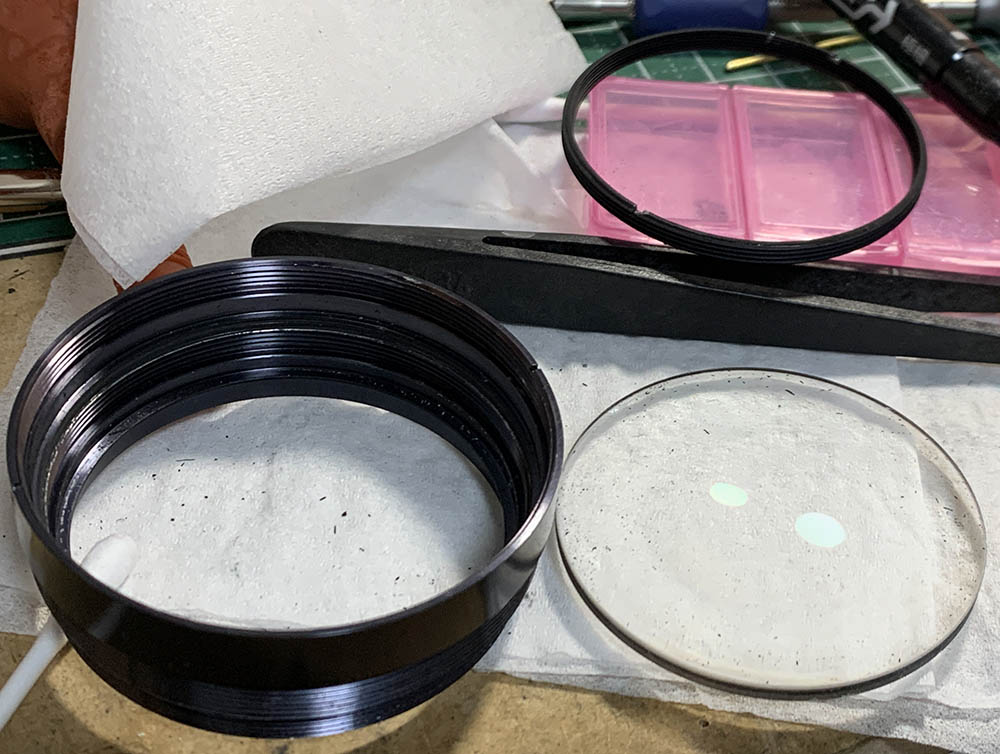
Unscrew the front collar to remove the front element.
Remove the other groups carefully and don’t forget to note which side the spacer should face. One of the elements is cracked, I don’t know where this came from but I’m sure glad that it’s not anywhere near the center.
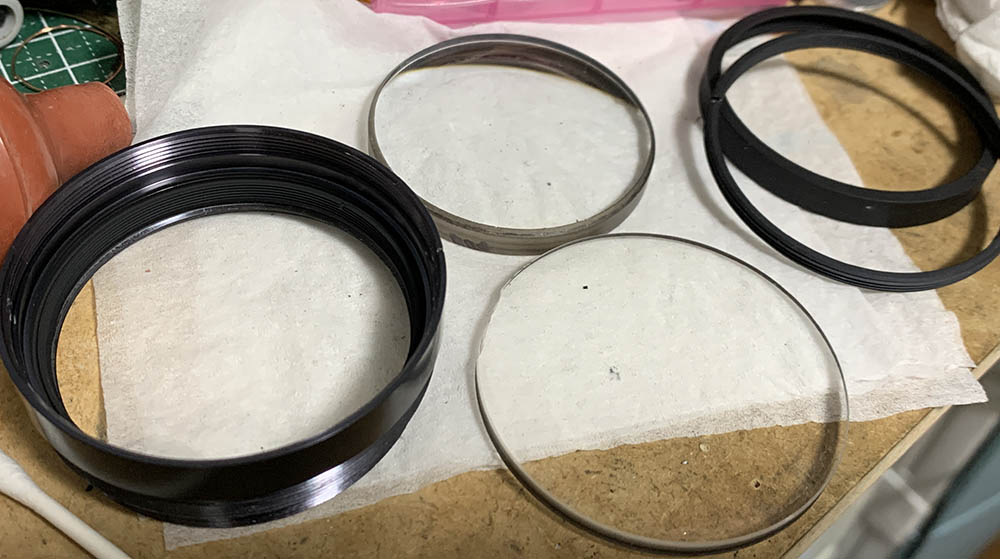
You can extract the 4th group once its ring is gone.
The 5th group could be easily extracted after you’ve unscrewed its ring.
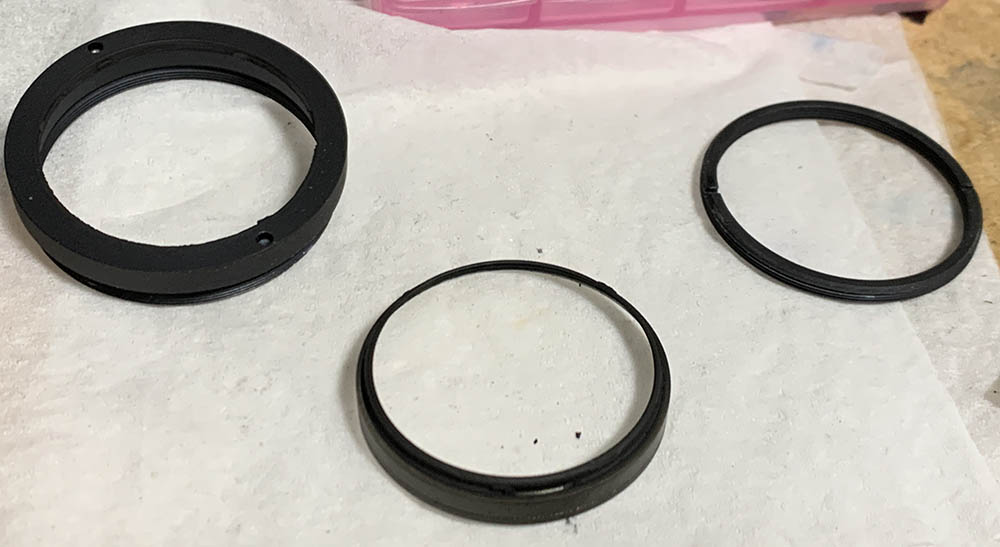
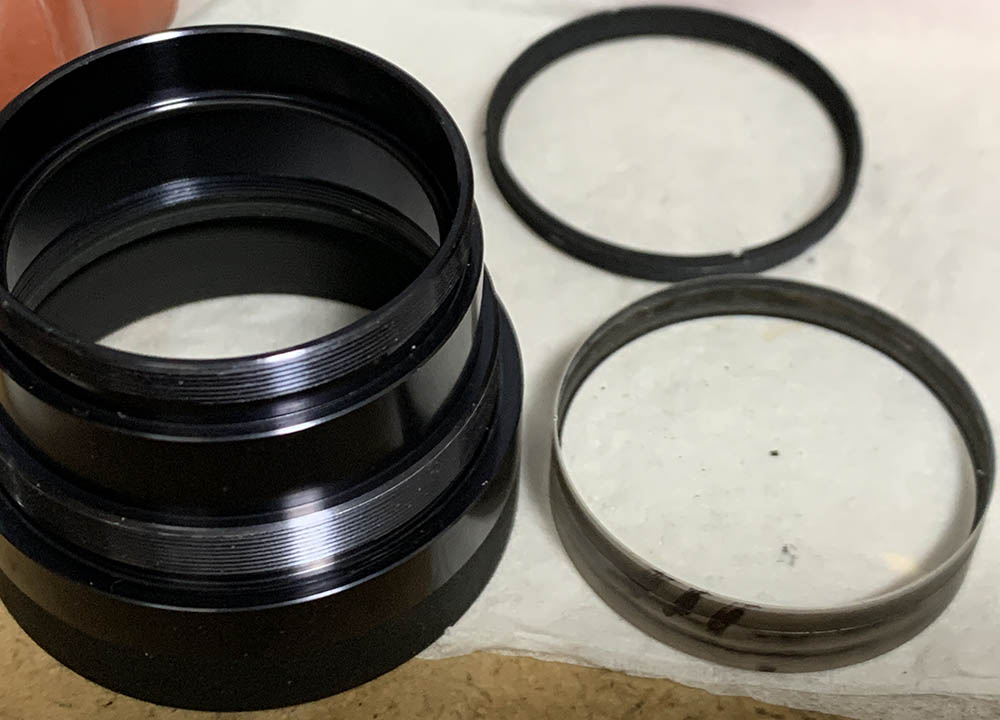
The 6th group is secured by its retainer and you should be able to extract it when the ring is gone.
Carefully clean the optics and never flood the cemented groups with solvents. If your lens has fungus, read my article about how to clean lens fungus. Thin the solution so it won’t damage the coatings.
Conclusion:
I’ve enjoyed servicing this lens, it’s so unusual that it excites me just thinking about how the engineers figured-out how to make this work. This is certainly one of the more memorable lenses that I’ve repaired and I hope that you’ve found it entertaining as well educational. Now that you’ve seen how much effort it takes, if your lens needs to be serviced send it to a professional and be sure that he’s legit.

Be sure that the parts that couples to the iris mechanism are positioned properly.
The lens is now free from fungus and it’s now ready for shooting. Since there’s no way for you to adjust its focus you’ll have to be sure that you’ve gotten everything right. It should focus perfectly after reassembling it, if that’s not the case then you’ll have to figure out where you went wrong.
Thanks for following my work, if you liked this article please share this with your friends so it will get more views. This site earns around $0.40 a day, we are totally reliant on views. You can also support this site, it helps me offset the cost of maintenance and hosting. You’re also helping me purchase, process and scan film. This site promotes the use of film so we are all in this together. See you again in the next article, Ric.
Help Support this Blog:
Maintaining this requires resources and a lot of time. If you think that it has helped you or you want to show your support by helping with the site’s upkeep, you can make a small donation to my paypal.com at richardHaw888@gmail.com. Money isn’t my prime motivation for this blog and I believe that I have enough to run this but you can help me make this site (and the companion facebook page) grow.
Buy me a roll of film or a burger?
Thank you very much for your continued support!
$2.00
Helping support this site will ensure that this will be kept going as long as I have the time and energy for this. I would appreciate it if you just leave out your name or details like your country’s name or other information so that the donations will totally be anonymous. This is a labor of love and I intend to keep it that way for as long as I can. Ric.

Jul 29, 2021 @ 00:00:17
Richard,
We are so very lucky to have you and your work as a resource!
I have a puzzler for you. I have a 200 f4 ais lens with fungus behind the front element. I have tried every which way to remove the front ring with a lens spanner. Of course the two small screws are removed., and I have tried nail polish remover as a solvent and a lot of heat from a heat gun. I have pretty strong wrists but it won’t budge. I have spent way more time working on this than the value justifies, but I would REALLY like to pull this one apart and get it clean. Any ideas?