
Hello, everybody! Sorry for the irregular blog updates as I am very busy this month. We are scheduled to have a lens teardown this time but I am too busy to write a full teardown so I am going to continue a previous series that I started many months ago. This is supposed to be just a supplement of the first part so I will keep this short.
Introduction:
The Zoom-Nikkor 43-86mm f/3.5 lens that I discussed previously is an important lens in the photography world because it was the first affordable (normal range) zoom lens for the 35mm format. As I mentioned in the previous part, the lens had some quirks that needed to be ironed out and some of it was corrected in this version with the addition of a modern lens coating – the Zoom-Nikkor C 43-86mm f/3.5 lens.
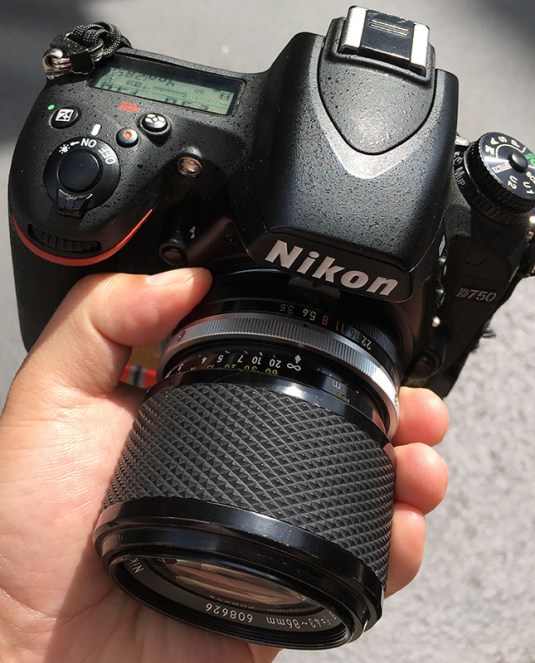 The lens balances wonderfully on the Nikon D750. I had to convert this lens to Ai before I attach this to the Nikon D750 or else the lens will damage the camera’s Ai coupling tab.
There are some minor mechanical changes in this version of the lens that help make this lens more robust as you will see later on the actual teardown. They are not a lot but they are significant enough and is a sign that Nikon engineers are always looking into ways to make production lenses better in mid production – a commitment to quality!
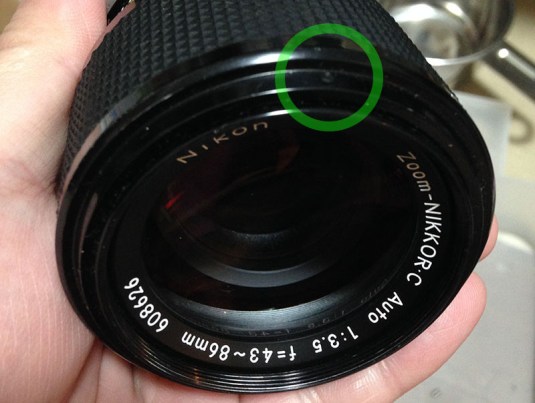
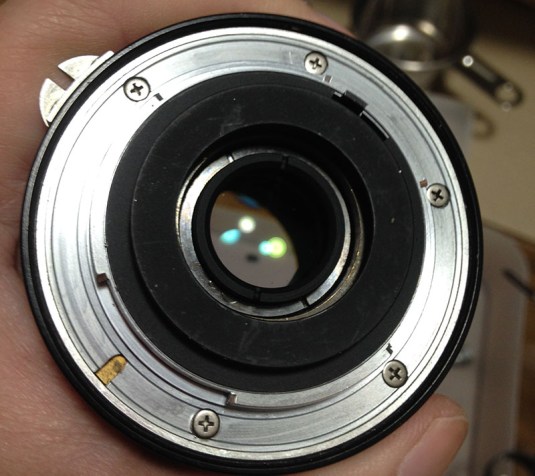
 Take a look at the nice purple coating. This version of the Zoom-Nikkor 43-86mm f/3.5 has improved coatings that differentiate it from the previous one. The new coating is better if you like to shoot against bright light sources and helps with the flare resistances giving you better contrast across the frame.


(Click to enlarge)
Here is a simple illustration of how the new coating work. NIC (Nikon Integrated Coating) did a great job on minimising optical artefacts like flares and ghosting. The image on the Left was made with the older lens while the image on the Right was taken with the lens we are featuring in this article. Notice any difference? If you didn’t then you are a lost cause.
Flares and ghosts sometimes add to the image depending on artistic use so wether this is a good thing or not will depend on the person viewing the image. If you ask JJ Abrams, he will likely pick the image on the Left since lens flares are part of his story telling. Lens flares or ghosts are OK, just don’t use too much of it!
This lens was made with a lot of glass elements and the more elements you add, the more ghosts you see because ghosts are basically reflections of the glass elements in the lens. I can even count how many elements there are in a lens sometimes by counting how many blobs I see. Try it and see for yourself, just be sure to use an older lens.
I will not repeat all the things that has been said about the performance of this lens that I wrote on part 1 so we will now proceed with the teardown!
Before We Begin:
If this is the first attempt at opening a lens then I suggest that you read my previous posts regarding screws & drivers, grease and other things. Also read regarding the tools that you will need in order to fix your Nikkors.
I highly suggest that you read these primers before you begin (for beginners):
- Essential tools
- Best practices 1
- Best practices 2
- Best practices 3
- Ai conversion
- Working with Helicoids
Reading these primers should lessen the chance of ruining your lens if you are a beginner. Also before opening up any lens, always look for other people who have done so in Youtube and the internet. Information is scarce, vague and scattered (that is why I started this) but you can still find some information if you search carefully.
I highly recommend that you also read my working with helicoids post because this is very important and getting it wrong can ruin your day. If I can force you to read this, I would. It is that important!
For more advanced topics, you can read my fungus removal post as a start. This post has a lot of useful information here and there and it will be beneficial for you to read this.
Disassembly (Removing the Optics):
Just like any lens, we should separate the optics from the lens barrel before we continue so that it won’t get contaminated with grease or dirt. Accidentally scratching one is also a big risk and nobody wants something likes that to happen.
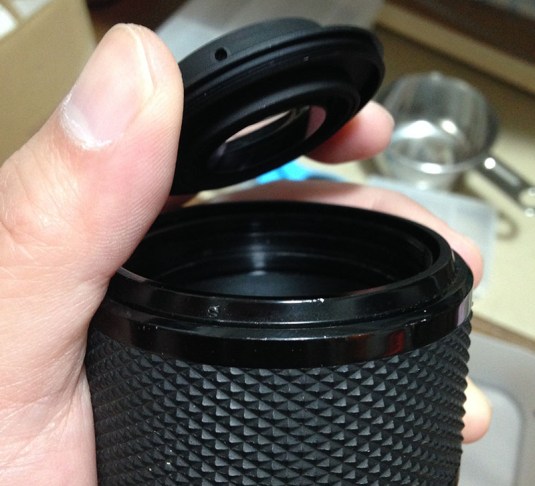
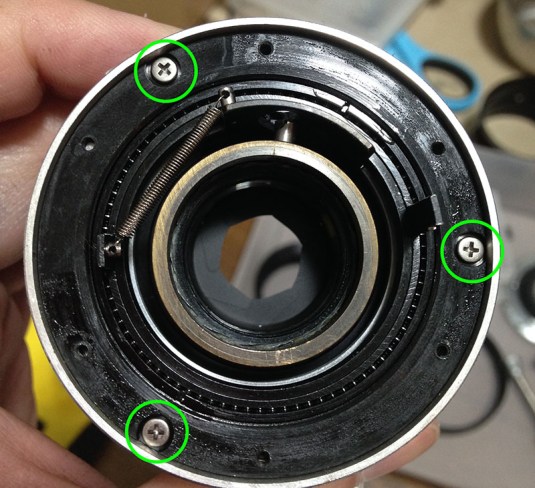
 Remove these set screws to loosen the front elements group/assembly. There are 3 screws in total and can be covered with black paint or grime so scrape these off first to reveal the slots before you start unscrewing them or risk damaging the screws.
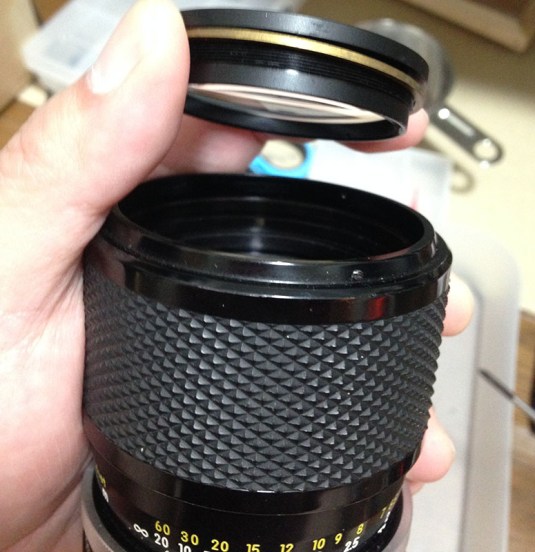 The front elements group can be unscrewed by hand but these may be glued on some other lenses so drop some acetone to soften up the glue and use a soft rubber pad to add friction to your grip.
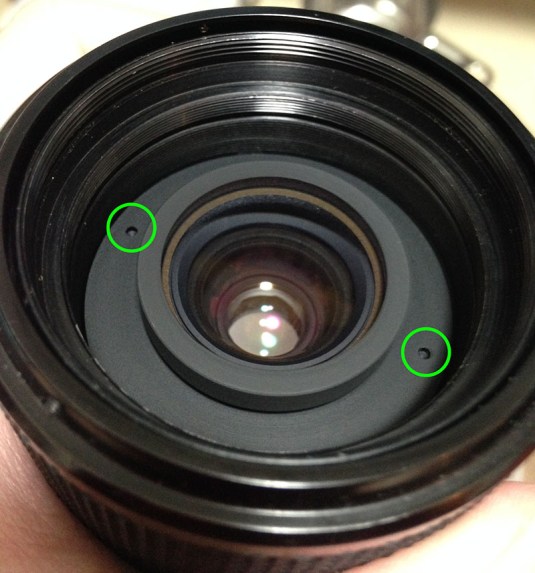 The 2nd elements group can be easily removed by using a lens spanner. These dimples are tell-tale signs that you should use a lens spanner (with a long bit).
 Never ever use a screwdriver and brute force your way on this part! The screwdriver in the picture is used as a sort of measuring tool just to see how deep this part racks in and out as I zoom this lens so I have an idea how deep this should be later when I reassemble the lens and avoid any headaches. It is not precise but I just wanted to see what’s going on. You can use a ruler if you want to exact.
 You can use your fingers to remove the 2nd element group if you can or use a lens sucker if your fingers are too chubby to fit in.
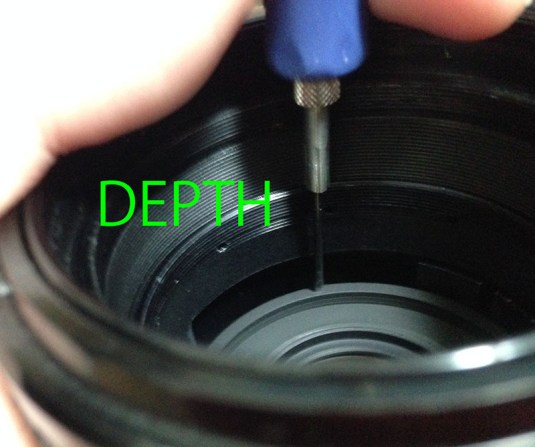 As with the previous steps, I also measure the depth of the 3rd elements assembly with my screwdriver just to get a rough idea of how far this thing moves in and out as you zoom.
 Now, these holes may be too deep to access with a regular lens spanner to I advise that you get out your longest bits of fabricate ones yourself.
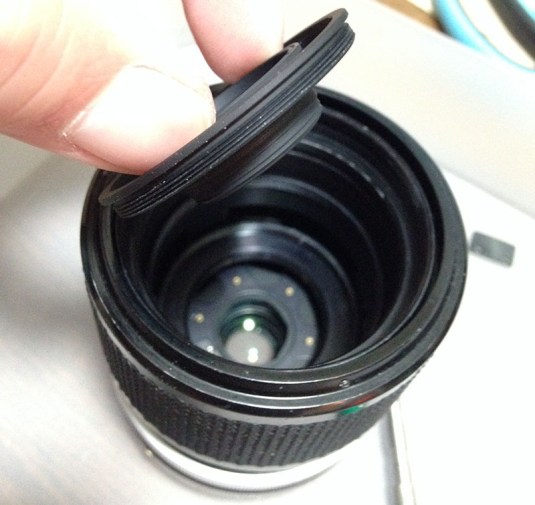 Since my fingers are small enough, I simply catch the 3rd elements group after unscrewing it from the basket that it was secured to.
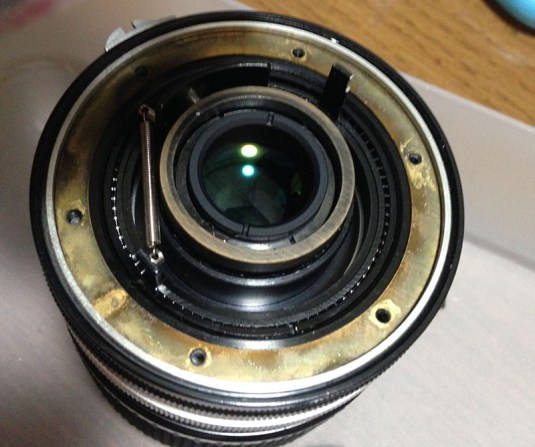
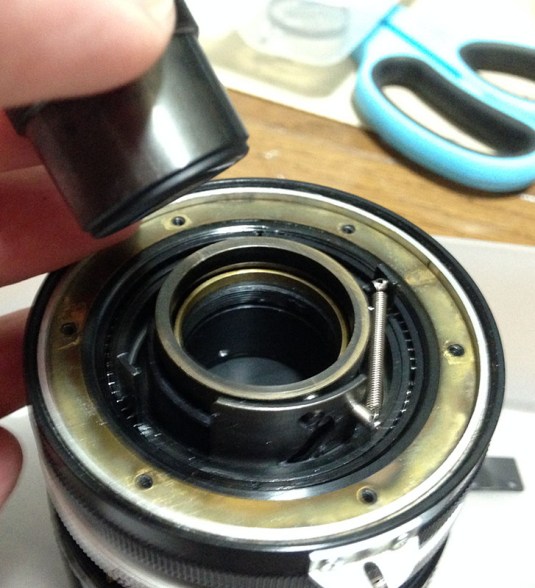
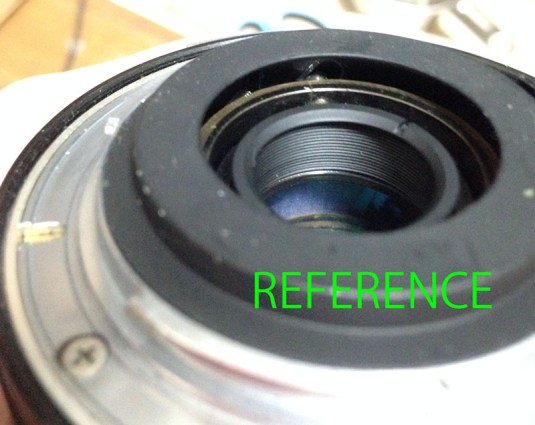 Now, for the rear elements assembly! Before removing it I took some pictures as reference to see approximately how deep this part should be in reference to the baffle.
 The rear elements group is seated too deep into the lens and the baffle is in the way so we need to unscrew these 5 screws to remove the rear bayonet.
 With the rear bayonet gone, you can now appreciate what’s underneath it. The brass shims or washers are there to calibrate the infinity focus of this lens and be sure never to damage or lose any of these.
 Before removing anything, be sure that you took enough pictures as reference of this part. This is very important because it sets how far the rear elements group would move as you zoom in and out. If you got this wrong during reassembly you will end up with a lens that will never focus properly or what I sarcastically call an “art lens”.
 Use a lens spanner and fit the bits to these slots to unscrew the rear elements assembly.
 The whole thing can be taken off as a unit. Notice that brass washer inside the hole where the rear optical assembly was. Be sure not to lose that little thing.
Disassembly (Lens Barrel):
This lens is so similar to the Zoom-Nikkor 43-86mm f/3.5 and I am not going to repeat what I wrote for the majority of this part so please refer to the Zoom-Nikkor 43-86mm f/3.5 guide because it is also relevant to this lens. I only added this section so that you can see what is different between the 2 versions of this lens.
The differences are very minor like how the screw for the focusing ring is not exposed and neatly hidden under the rubber grip, the addition of leaf springs for some resistance in the pumping action of the zoom, the sizes and amount of screws were also increased to make the lens more robust and some other minor details that are too insignificant to mention.
 Carefully remove the rubber grip by running a thin wire or toothpick underneath it. Run it under the whole circumference of the rubber grip to loosen up the old glue and carefully tug on the rubber grip to remove it.
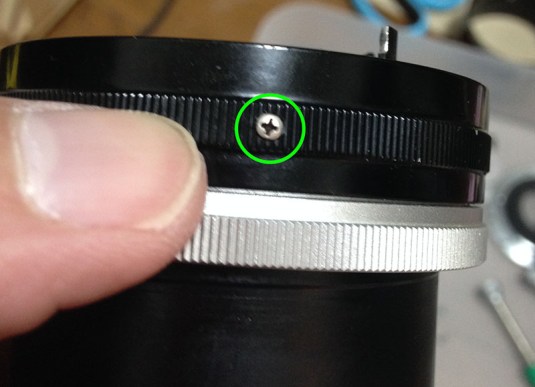
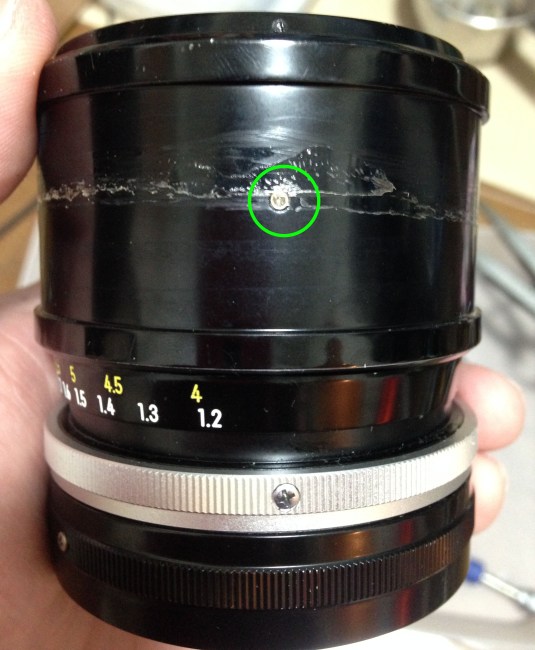 Remove this screw to remove the focusing ring.
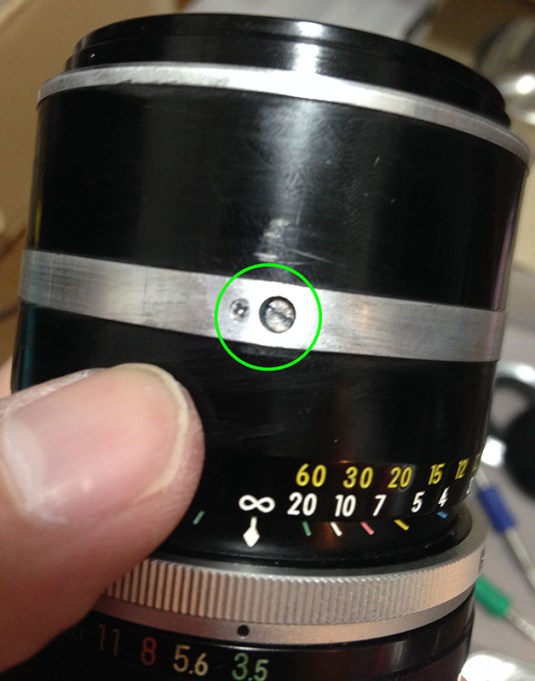
 Slide the focusing ring away and you will find this small nut. This square nut is secured to the screw that we removed in the previous step and this serves as a guide for the focusing ring as it travels up and down the slot. Now that you see how delicate the mechanism is, I hope that you will turn the focusing ring with a little bit more care next time.
 Next, we need to remove the focusing barrel. Rotate it until you see this screw. Carefully remove the big one.
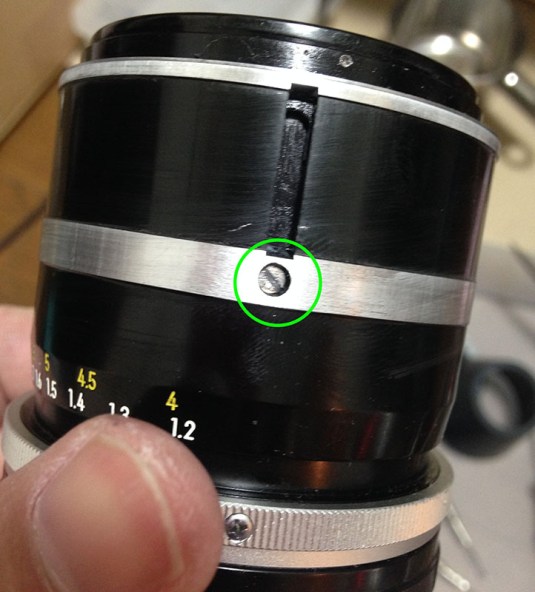 Here’s another on on the other side.
 Simply remove the barrel from the rest of the lens but before doing so, be sure that this is focused all the way to infinity since it is our reference point. The 2 big screws that we got rid off in the past few steps go into the slot underneath this barrel and it keeps the scale aligned with the barrel as you focus and focus in and out.
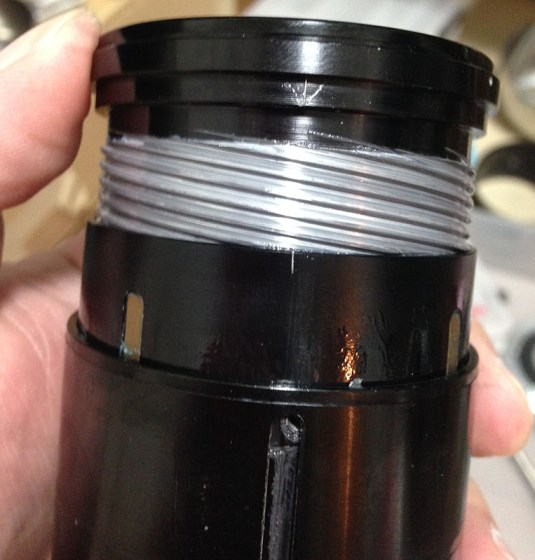 Next is the delicate part. Unscrew the helicoid and mark where they separate. I scratched a mark on the body to coincide with the centreline and I scratched an arrow on the helicoid so I will know where these things should mate when I reassemble them.
 Next, remove the screws on the chrome grip pull the outer lens barrel away. See those two springs? These leaf springs are used to apply tension on that greasy barrel so that this part will not feel loose as you zoom in and out. If you feel that you want more or less tension to fix zoom creep or whatever then you should flatten or bend these springs until you get the desired effect.
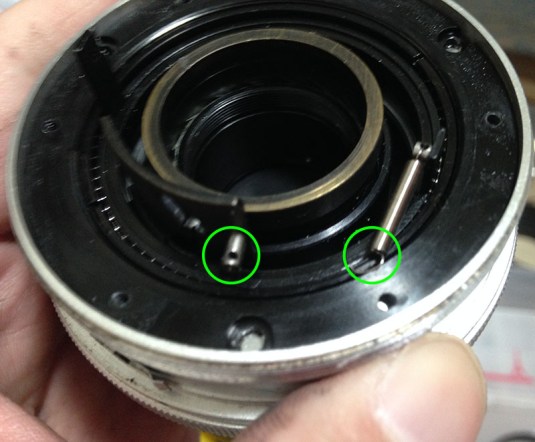
 Now, on to the rear of the lens. Remove this screw on the aperture ring. This screw serves as a pin and it couples to a prong inside the lens to connect it to the iris.
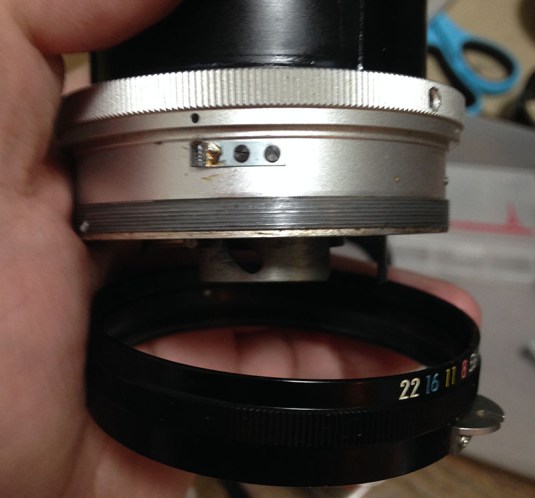 Unscrew the aperture ring and be careful not to ruin the fine threading underneath it.
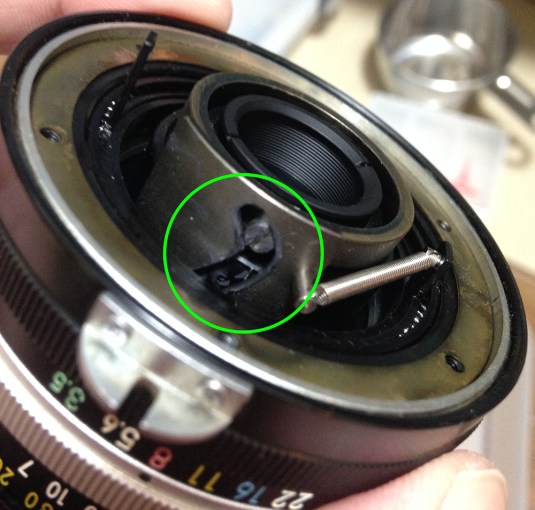
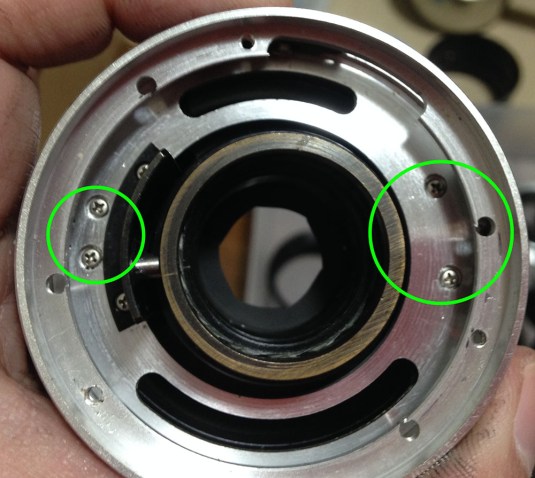
 Remove these 3 screws to separate the stop down lever mechanism but before removing it be sure to read the next step first. This mechanism houses a bearing so be very careful not to foul it up with debris or solvents or you will need to open this thing up and overhaul it!
 Before removing it, disconnect this end of the spring so you won’t overextend and ruin it.
 This prong is used to adjust the opening of the iris by offsetting it left or right. Do not take this thing apart unless you want to make adjustments to the size of the iris.
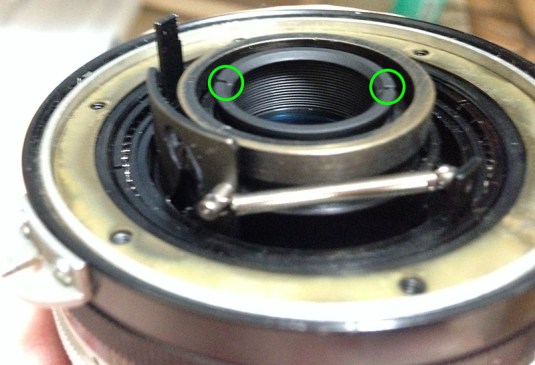
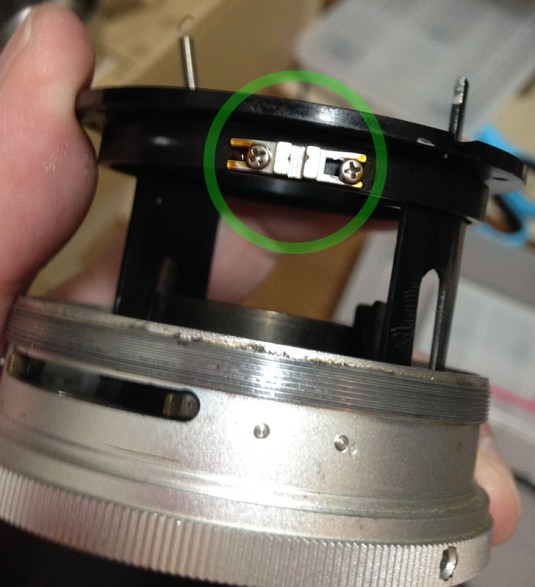
 Remove these 2 sets of screws and make sure that you do not forget which screws should be on which side. To prevent any mistakes, I simply screw these back to their respective holes once the I have removed the the adjoining part at the opposite end. The other end is a basket that houses the iris mechanism.
 And here is the basket with the iris assembly removed.
Conclusion:
If you have worked on the original Zoom-Nikkor 43-86mm f/3.5 then you will find this lens very familiar because majority of the parts and sequences are similar. My lens had an oily iris so I had to open it up and clean each blade properly by wiping it with lighter fluid.
 Oily blades. These will have to be cleaned! This lens has a tendency to get oily iris blades so keep an eye on this when shopping around for one. As you can see from this teardown, the iris assembly is situated very close to grease sources and these will migrate to the blades as the old grease deteriorates.
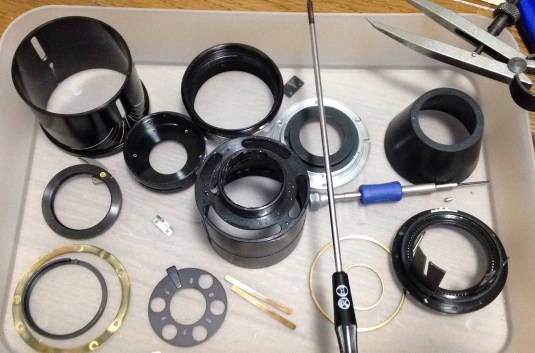 So many parts jammed into such a small lens. I would say that this is twice as complicated as your usual Nikkor prime of the same vintage.
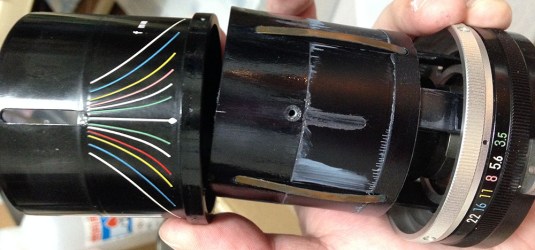
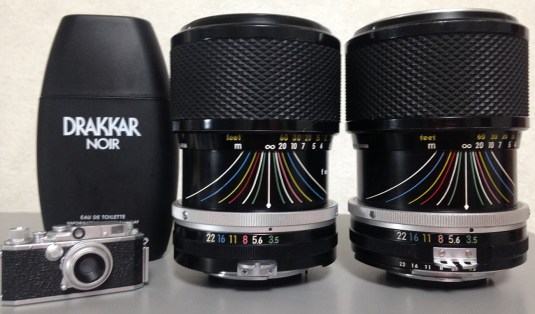 Here it is beside it’s brother, the original Zoom-Nikkor 43-86mm f/3.5 (right). To make the picture period-correct, I added a bottle of Drakkar Noir. Both lenses look similar but there are small improvements inside. Also notice the difference in the screw heads,too as Nikon began using cross-headed screws instead of the older slot-headed ones.
I hope that you enjoyed the second part of this series. This part is kind of sparse because it is simply an extension of the first part.
The third part is much more interesting since I will show you the insides of the third and final version of this lens – the Zoom-Nikkor 43-86mm f/3.5 Ai lens. This final version of the lens line is considered by many as the ultimate version of this line because the lens was totally redesigned from the ground-up from the optics to the barrel. It corrected many of the original lens’ shortcomings but on the other hand it implemented a lot of cost-cutting measures making this lens easier to service as you shall see on the third part of this series.
Thank you very much for understanding my busy schedule and we shall resume with our regular schedule next month. Ric.
Help Support This Site:
Maintaining this blog requires money to operate. If you think that this site has helped you or you want to show your support by helping with the upkeep of this site, you can simple make a small donation to my paypal.com account (richardHaw888@gmail.com). Money is not my prime motivation for this blog and I believe that I have enough to run this but you can help me make this site (and the companion facebook page) grow.
Helping support this site will ensure that this will be kept going as long as I have the time and energy for this. I would appreciate it if you just leave out your name or details like your country and other information so that the donations will totally be anonymous it is at all possible. This is a labor of love and I intend to keep it that way for as long as I can. Ric.

Dec 05, 2025 @ 13:14:53
I have used the 43-86mm f3.5 Nikkor for many years on my beloved Nikkormat FTN. The version I have is the middle of this article – C. Its very useful for street photography where I find the zoom facility extremely useful for framing my pix. Its invariably used at f5.6 to f8 in the UK. One particular aspect I like very much: the 43mm setting is at the back of the lens and one zooms outward to reach the higher numbers. Some lenses I have looked at work the opposite way round. I use a simple rubber lens hood which works fine on a 50mm lens, I don’t have to fold it back a43mm unless a filter is affixed. Despite its age, my lens shows no signs of fungus, haze, excessive dust etc.
Its weight adds to the weight of the Nikkormat, thus if anyone interfered with me while shooting, I would have no hesitation in flouting them in the face with it. A plastic digital camera would be no use whatsoever.