
Hello, everybody! I am feeling very well now, thank you very much for the well-wishes and messages that I received! The weather is beginning to get warm as Spring is just around the corner. Spring brings plenty of seasonal things like migrating birds, hay fever, the numerous seasonal produce that I enjoy and most especially – bugs! Bugs are shy creatures and taking pictures of them can be a challenge at times. For that, you’ll need a lens that will give you enough subject-to-lens distance. For me, that is only the job of a 105mm lens macro lens (or longer).
Introduction:
Today, I’m going to introduce you to the Micro-Nikkor 105mm f/2.8 Ai-S. This is a very versatile lens for portraiture, macro and just about everything. It’s an advanced lens that was way-ahead of its time when it debuted, it is still available now new for use with the scientific community wherein precise manual focusing in high magnification is important. How many lenses can boast of such longevity? Not a lot.
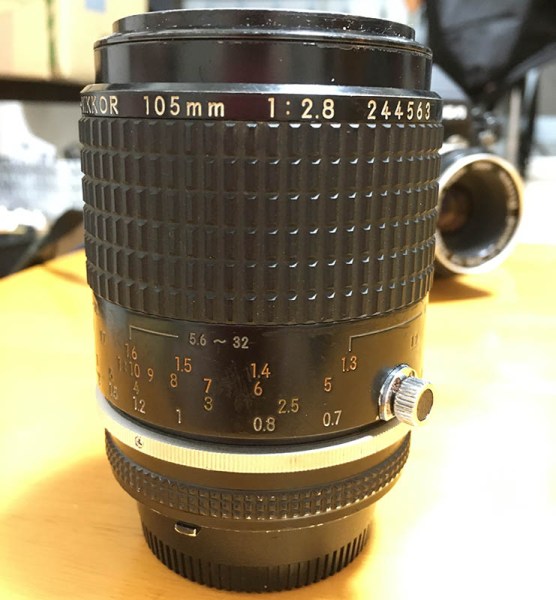
The Micro-Nikkor 105mm f/2.8 Ai-S lens is still being produced now in 2017. That is around 34 years of continuous production since its debut in Spring of 1983. Can you imagine that? It’s older than some of my readers.
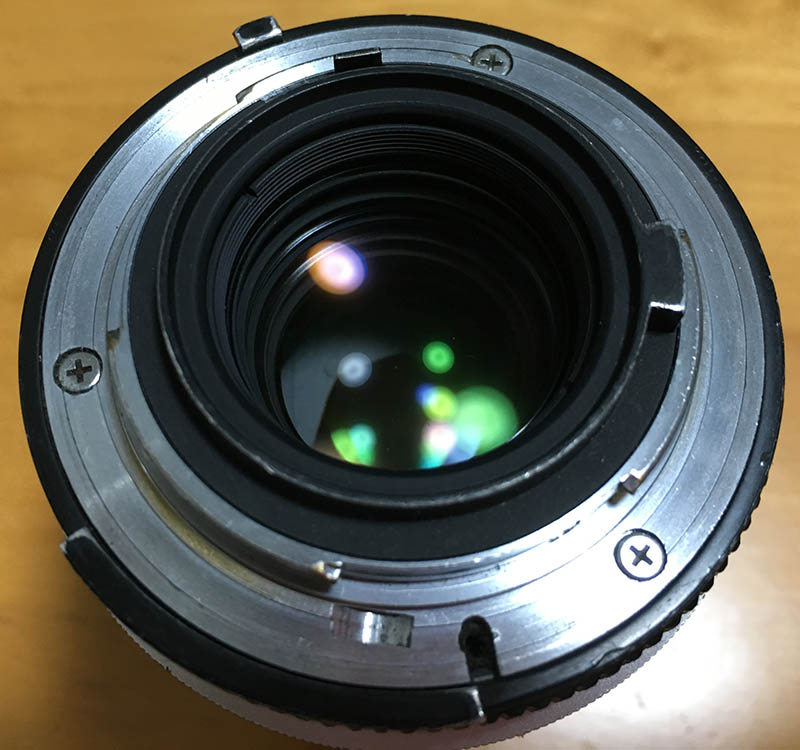
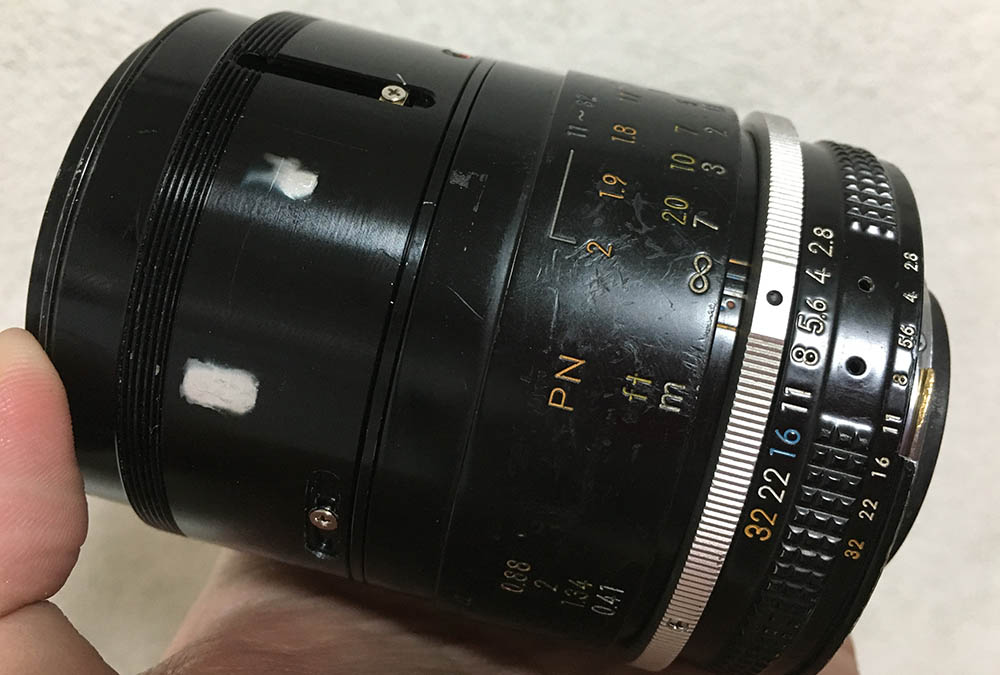
This particular lens was bought from the junk shop and you can check from the pictures how bad this thing was. The lacquer coat is worn and the only way to restore this back to its former shiny state is to strip this to metal and repaint this. I do not have the time for that so I will just leave it as-is. I was very pleased with the results of the lens so I restored this so the operation is smooth.
The 105mm line of Micro-Nikkors have a very long tradition beginning with the bellows lens from 1968 to the AF-S VR Micro-Nikkor 105mm f/2.8G IF-ED of today. This line has always been popular with bug shooters since 105mm gives you just the right distance from your subject so you won’t scare it off or get in the way of your own lighting. It gives you just the right amount of compression so your subjects aren’t distorted by foreshortening. If you need something that’s wider for things like food or product photography wherein the perspective is important so your subject won’t look flat you’ll definitely want the Micro-Nikkor 55mm f/2.8 Ai-S and the Micro-Nikkor -P 55mm f/3.5 Auto. If you want a lens that has history then the Micro-Nikkor 5.5cm f/3.5 preset lens might excite you.
The design’s made up of 10-elements-in-9-groups which is more complicated than usual as far macro lenses of its kind goes. It has CRC so it could deliver sharp corners regardless if you are focusing near-or-far. The difference will be most apparent in the corners at closer-ranges. It does this by altering the spacing of the elements as you focus in-or-out, the scale in the focusing ring shows you the optimal aperture setting for best sharpness and depth of field at any given distance when used with the PN-11 that this lens is supposed to be used with in order to achieve 1:1 magnification. Like most Micro-Nikkors before the autofocus era this is only capable of reaching 0.5:1 on its own, it needs an extension ring to get to 1:1 or bigger. This compromise has a lot to do with its handling and the engineering limits of its time, we now take the ability to get to 1:1 magnification for granted.

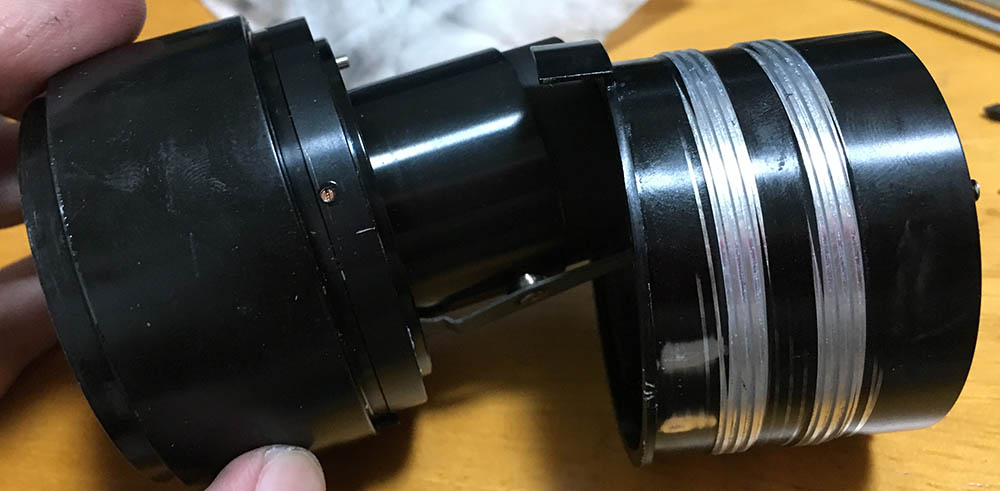
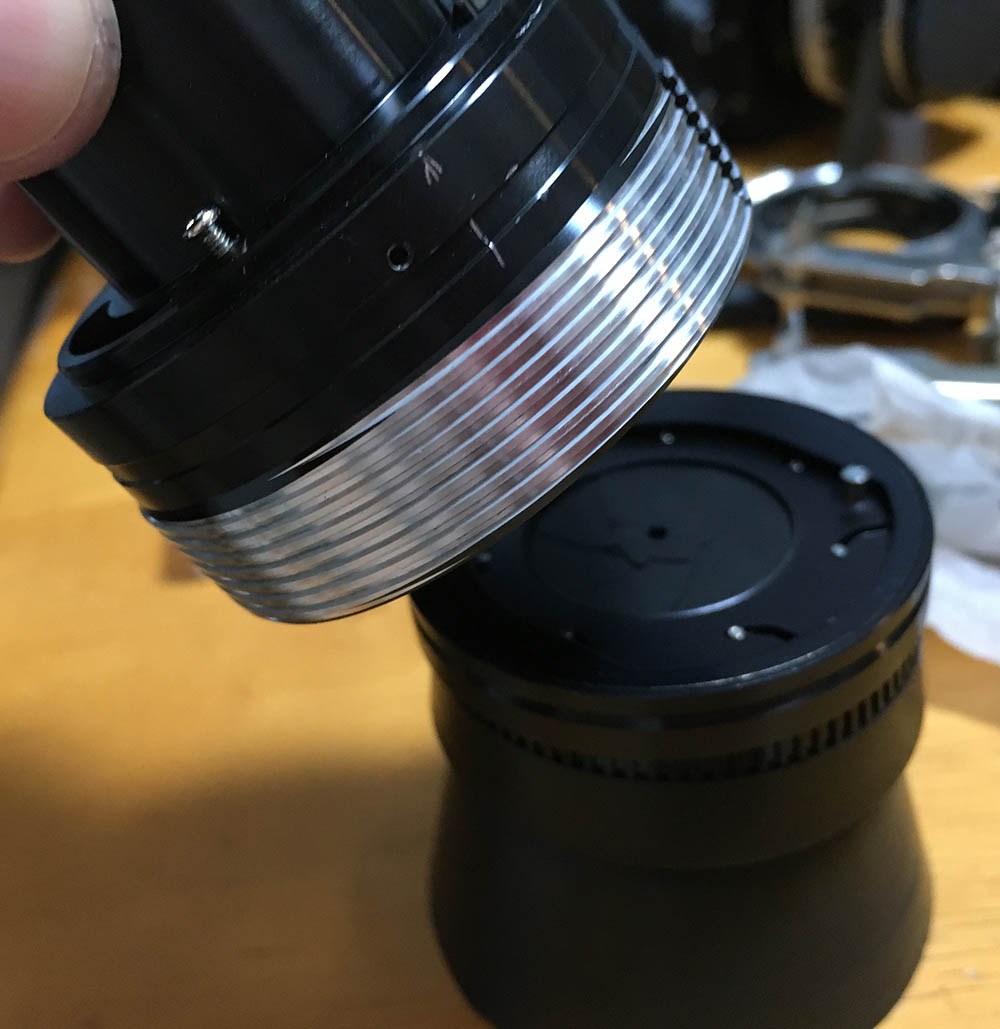
Here it is with its predecessor, the Micro-Nikkor 105mm f/4 Ai. The older one is basically a high-performance bellows lens that was fitted into a focusing unit. It is very popular and well-regarded amongst macro shooters because of its high-magnification and amazing image quality. The problem is the f/4 maximum speed really is not useful if you’re on higher magnification as it can get really dark as you get closer. Add the PK-11 or other extension tubes and the view gets even darker, making accurate focusing a pain.
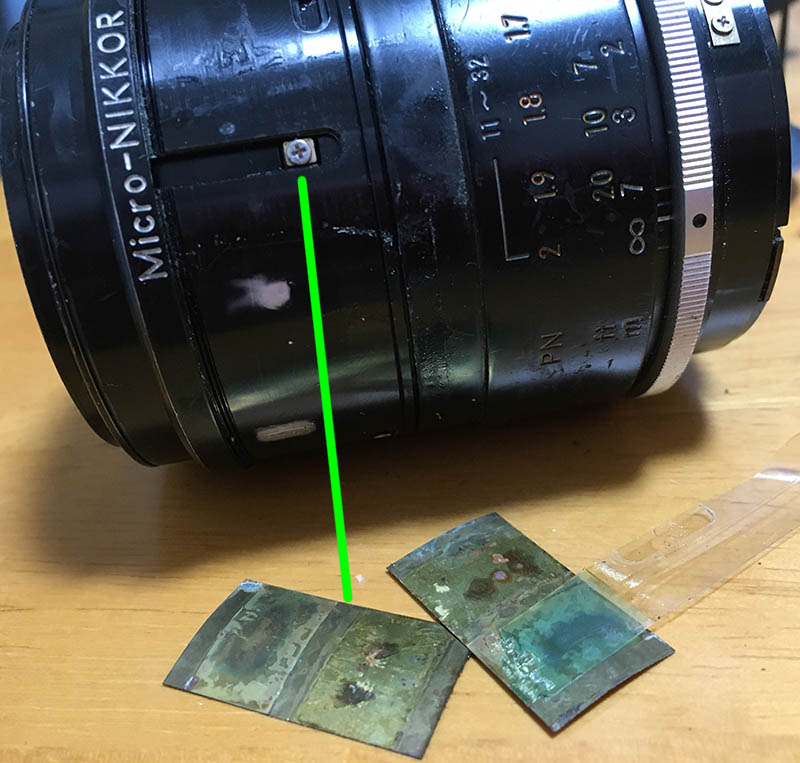
The Micro-Nikkor 105mm f/2.8 Ai-S’s direct predecessor is the Micro-Nikkor 105mm f/4 Ai-S, it’s an improved version and it also has a chrome knob for damping focus. Some people use this as a focus lock of some sort but I think that it is too weak for that especially if you have things attached to the lens like your lighting setup, etc. This may be sufficient but if your setup is heavy enough then it’s gonna affect it over time when you have the lens pointing up or down. When the padding underneath this is worn it gets even worse. I will show you the mechanism for that in the disassembly section.


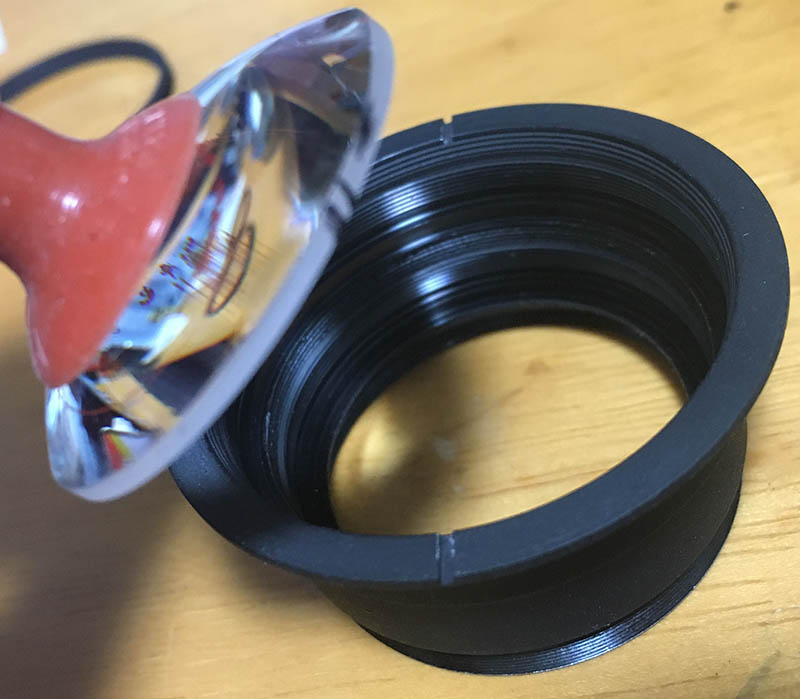
Here it is with the various lighting options that I use for shooting macro. If I want to have a more directional look, I’ll use my inflatable soft box but my favorite so far is the ring light setup. The Sunpak 16R Pro ring light kit is a powerful and compact setup that is perfect for macro and portraiture. The tube is a contiguous toroid so there’s no dark spots in the illumination not like some other designs so the catch lights in the eyes remain circular but some people will prefer separate tubes so they can control lighting ratios. I can achieve it by wrapping waxed paper or colored plastic bags on parts of the lamp.
Knowing how your lens performs will help you maximize it better. You will know its strengths and weaknesses, this knowledge will help you determine which lens to bring to an assignment. I shot these photos from f/2.8, f/4, f/5.6 and f/8. These show the most changes in its character and performance. It’s important to note that most people shoot with these using smaller aperture values and the effects of diffraction or when it starts to appear is important but I didn’t add the smaller apertures here since it will make this too long. I took these sample photos with a Nikon D3.


(Click to enlarge)
Vignetting is quite heavy wide-open. It gets better by f/4 and you’ll only see traces of it at f/5.6. Distortion is minimal, I couldn’t even see it. Macro-lenses usually have near-zero distortion so we can assume that this one has none.


(Click to enlarge)
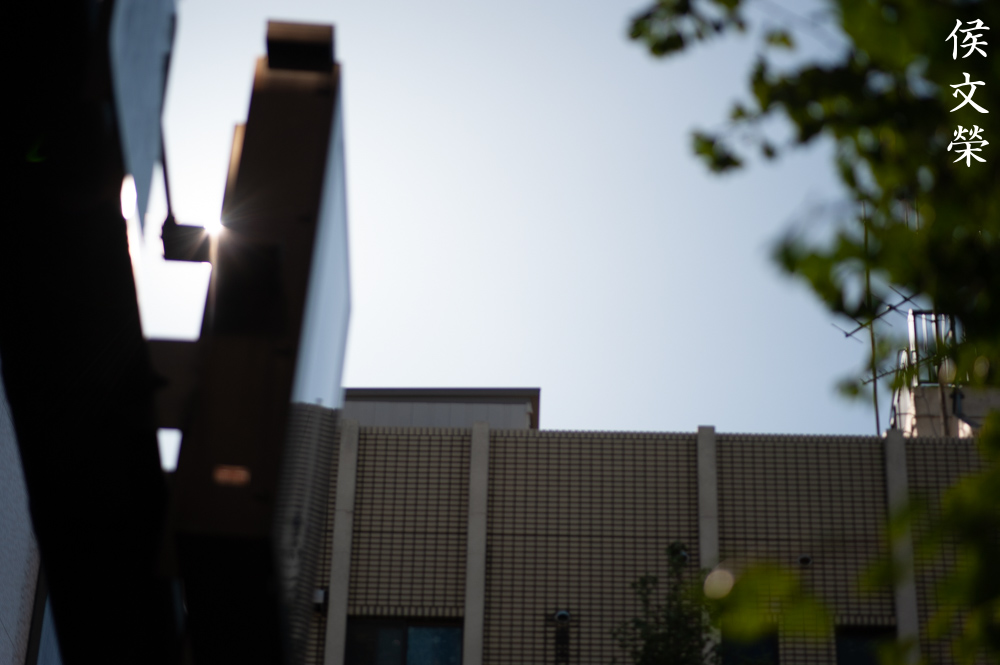
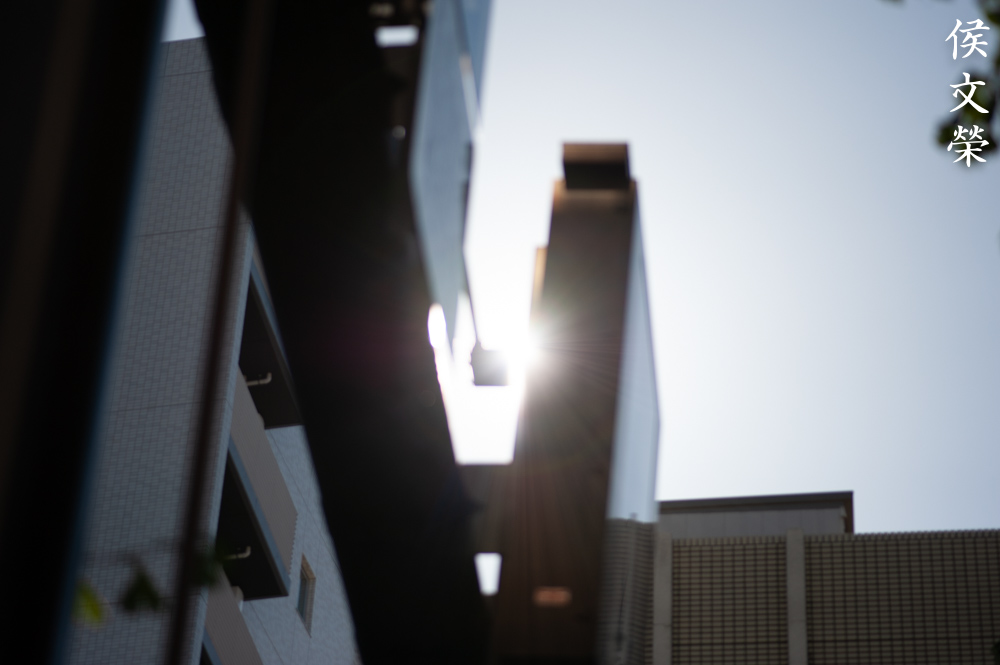
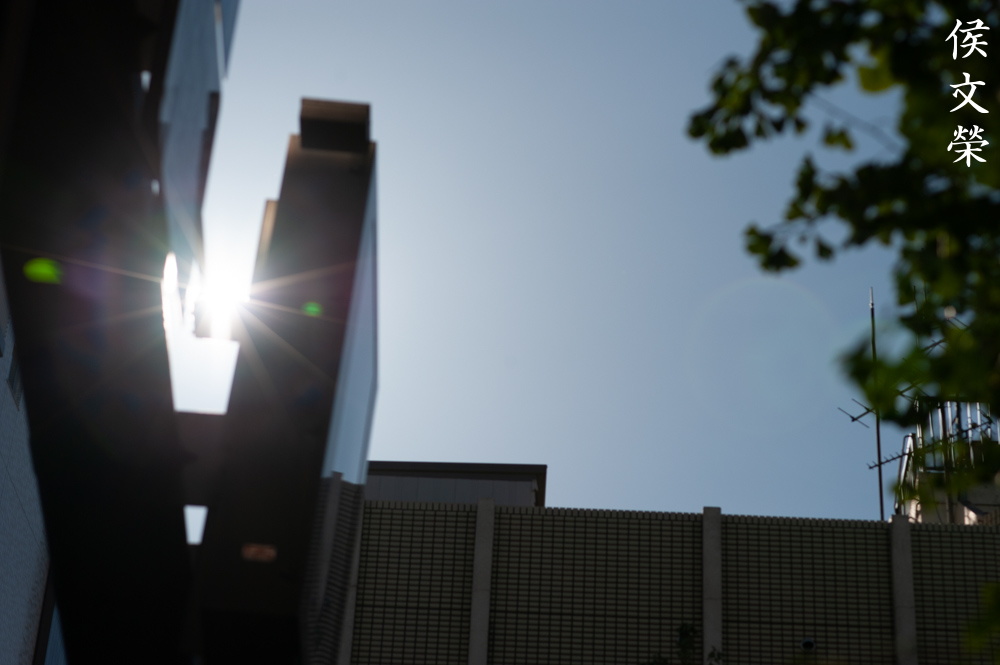
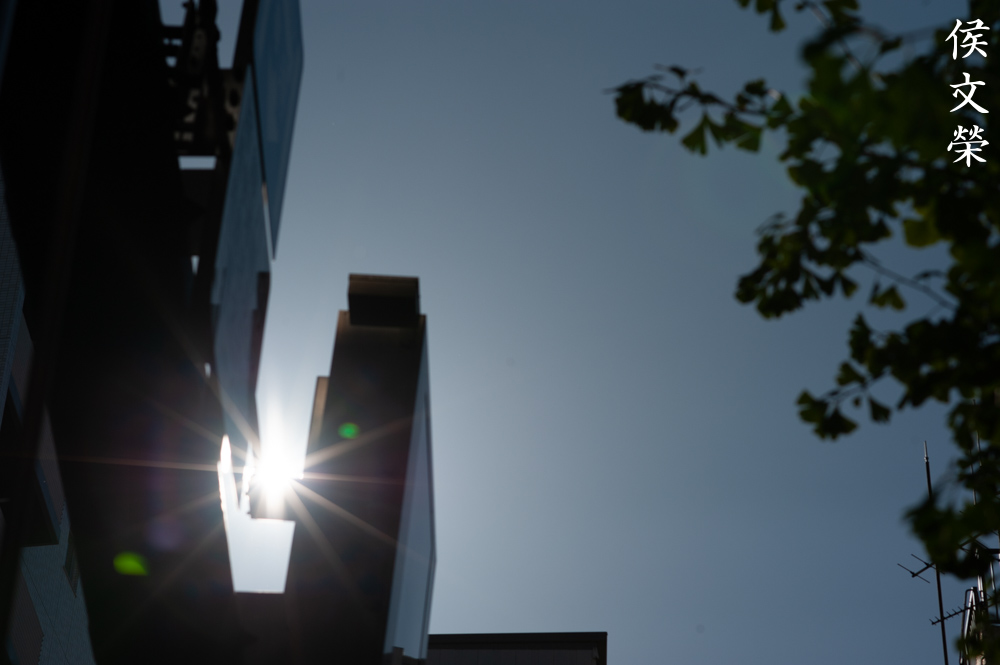
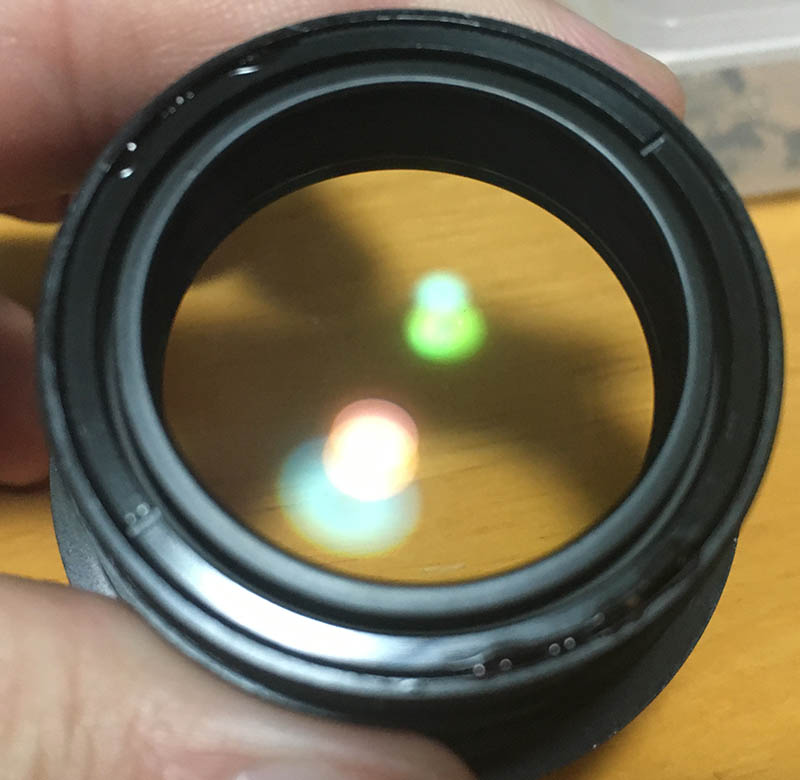
It flares quite a bit and you could see ghosts appear when you have the sun within your frame. This won’t be an issue for its intended use. Its sun-stars look nice and natural.

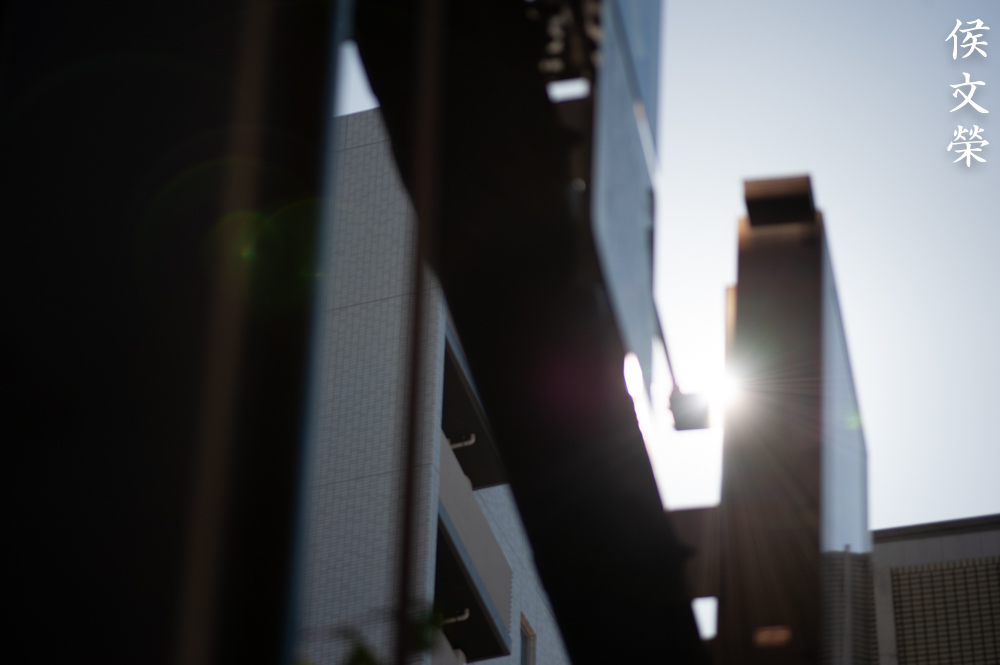
This was shot with the sun outside of the frame. Flaring can be observed, it resulted in less contrast. Some people like this look which they call “classic”.


(Click to enlarge)
Macro-lenses generally have pleasing-looking bokeh characteristics. It is not bad in my opinion but not exceptional as well. So long as it doesn’t render a scene with rough-looking artifacts then it’s good-enough for me.

Of course, it looks quite smooth in high-magnification.


(Click to enlarge)
Chromatic aberration is rather high as you focus-further, it has some of the worst results I have ever seen. In extreme cases, you could even see it even after you have stopped the iris down to f/8. On moderate scenarios, it’s gone by f/8. This is something that you should think about when shooting jewelry or other shiny objects.


(Click to enlarge)
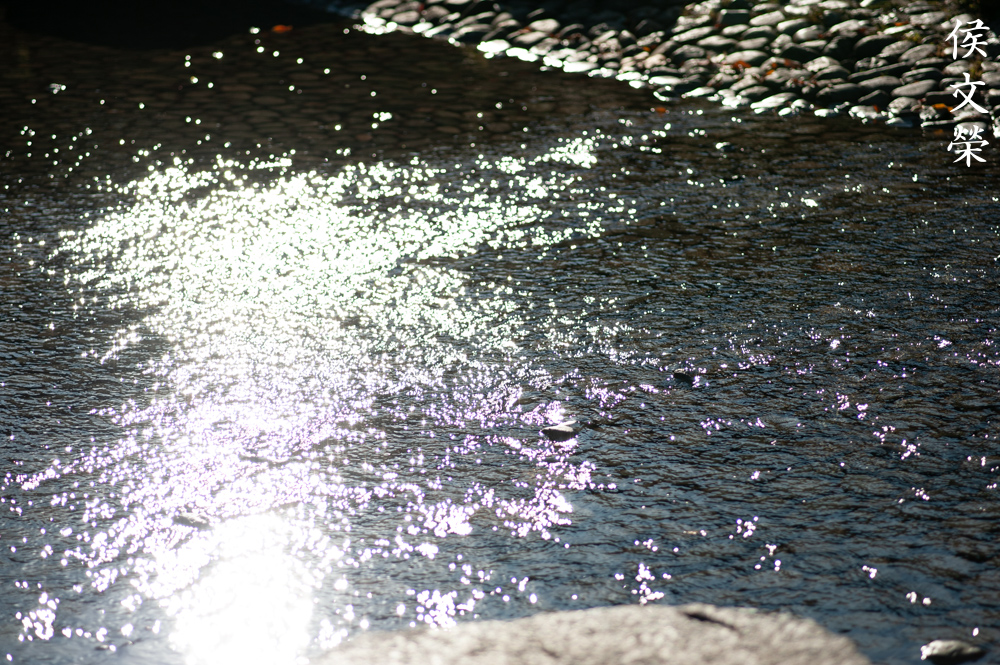
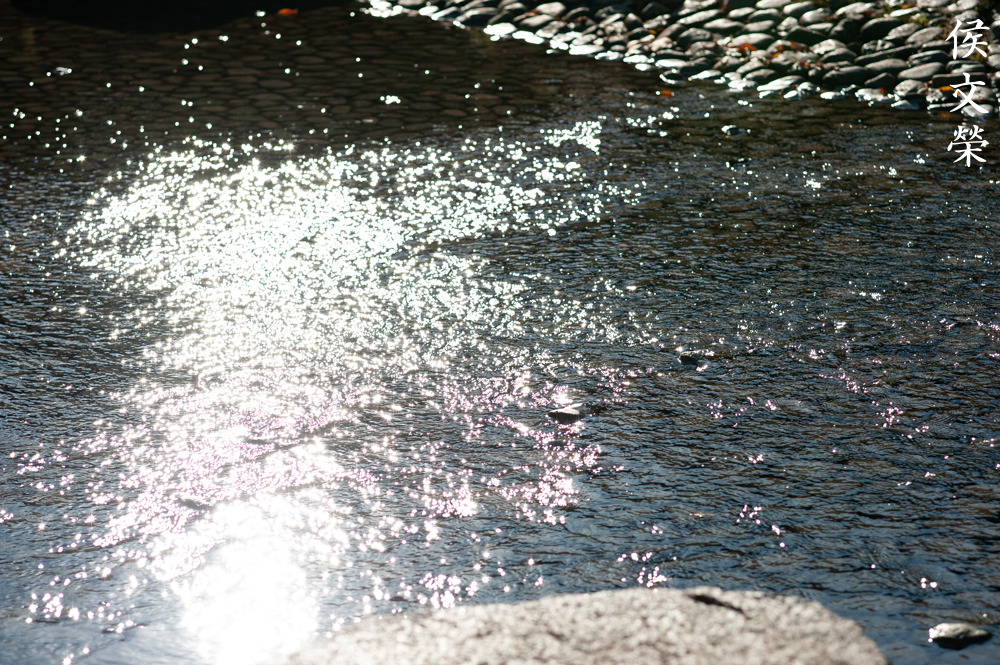
Sharpness is exceptional wide-open but the resolution isn’t there yet. Stop it down to f/4 and the center improves considerably due to higher resolution. It approaches peak-performance at the center by f/5.6 but f/8 looks better in my opinion. I usually don’t shoot it beyond f/11 because I could observe the effects of diffraction at this aperture. Its sweet-spot is f/8 for shooting small things at higher-magnification. Its performance drops as you focus-further, it may just be my sample so please don’t take my observations as final. The last set shows a tightly-cropped version of how it performs at infinity.
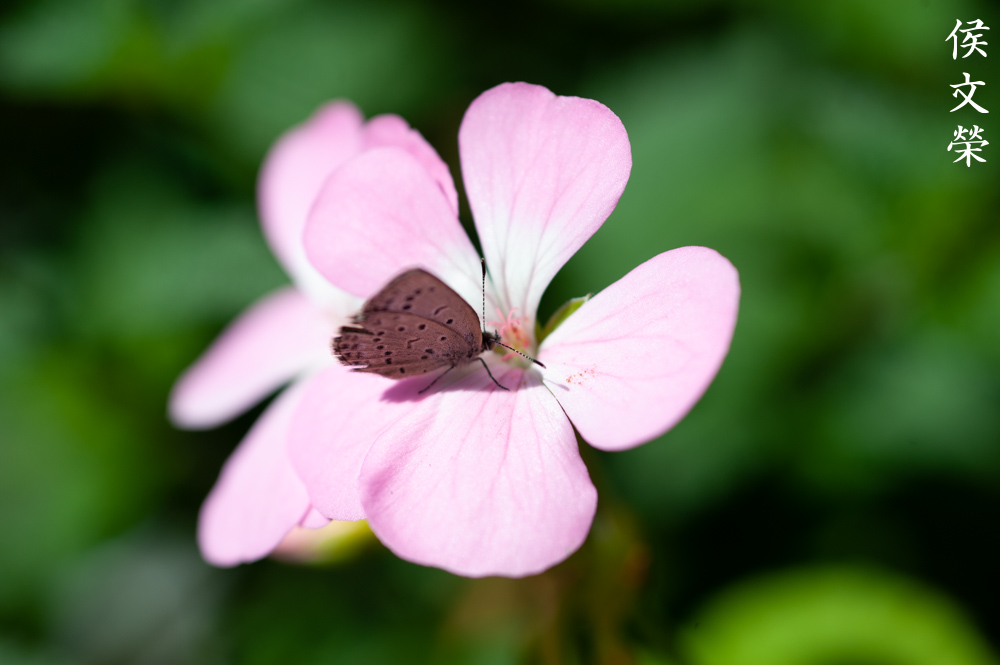
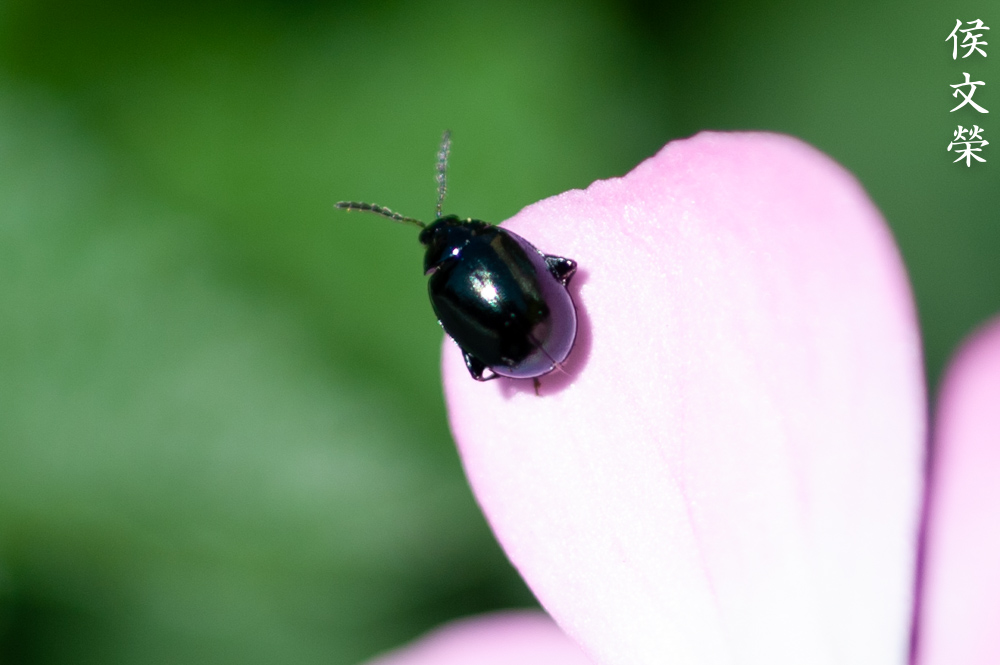
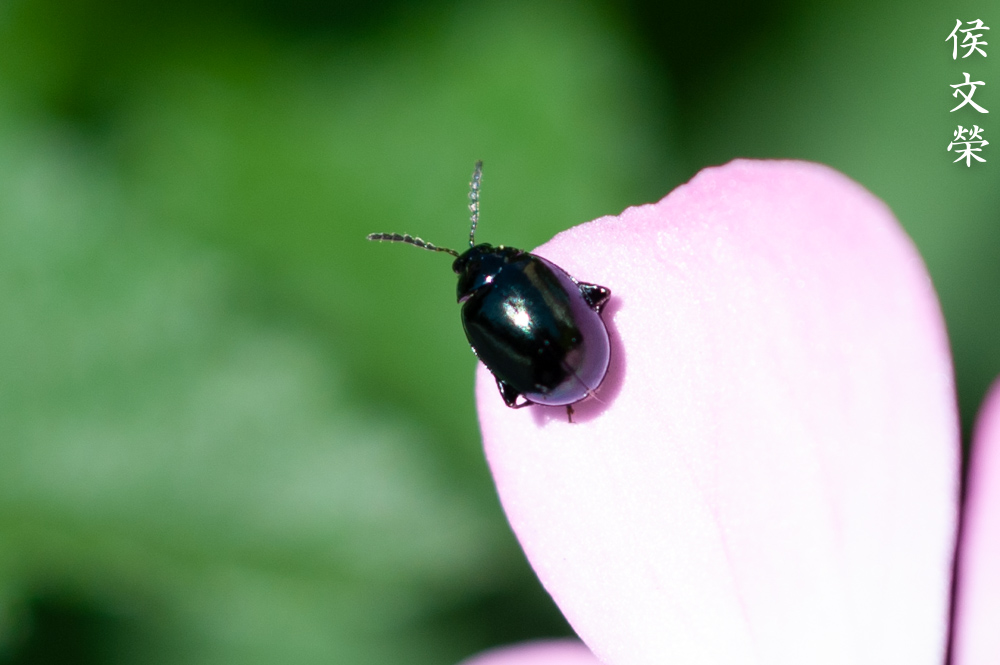
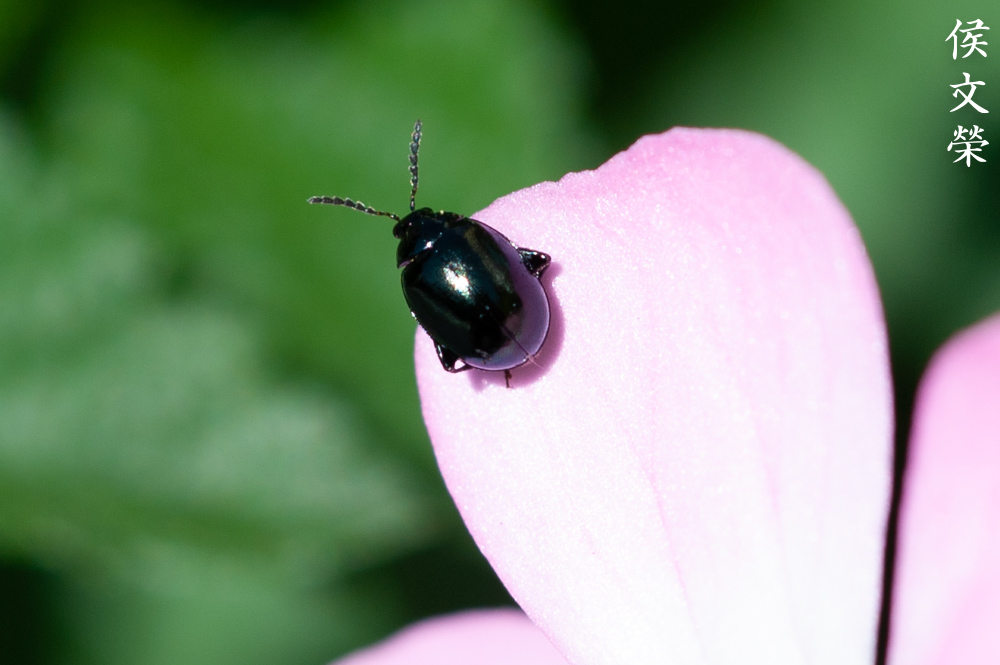
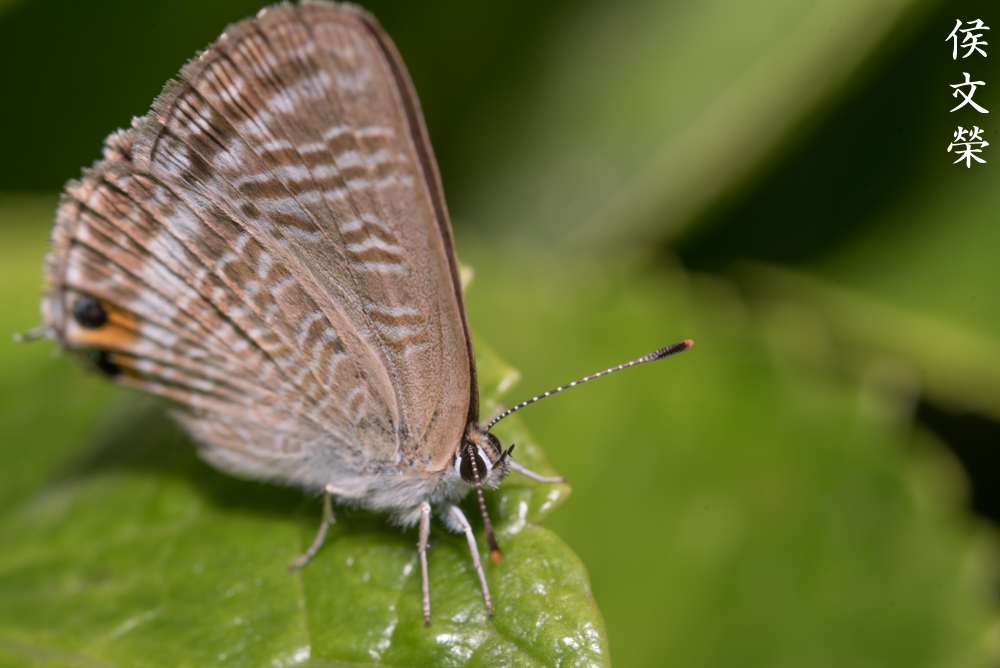
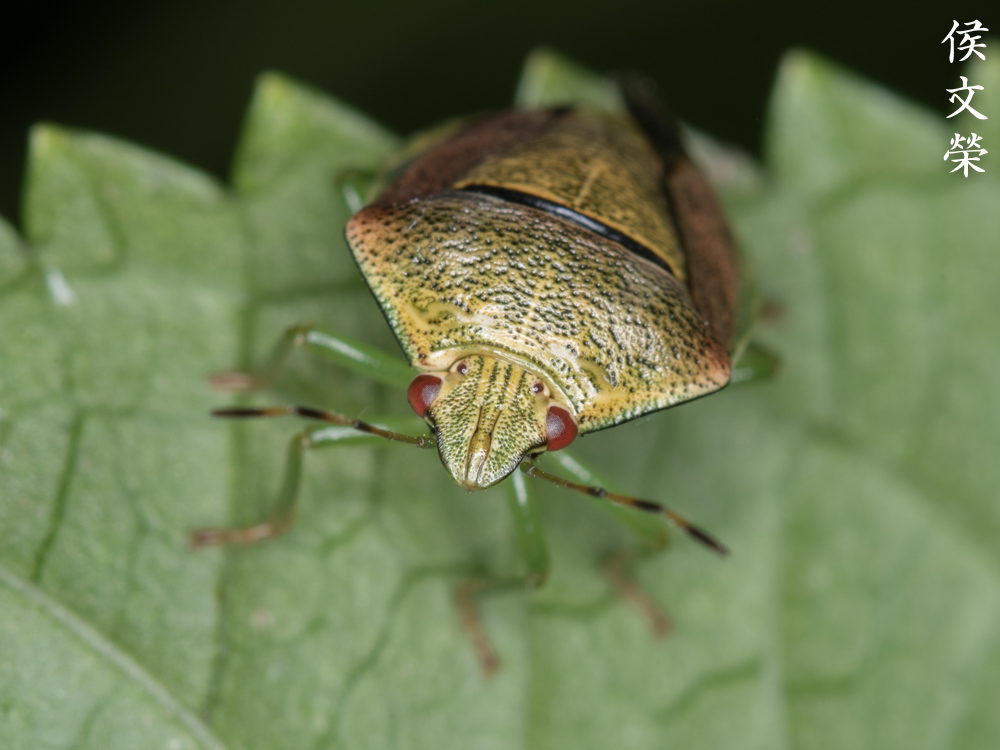
If you’re shooting bugs, this lens is the right choice for you. The thin depth-of-field will work against you at this magnification so learning how to move your framing is important. I would’ve shot this butterfly from the side if it’s possible in order to get its wings in-focus more.
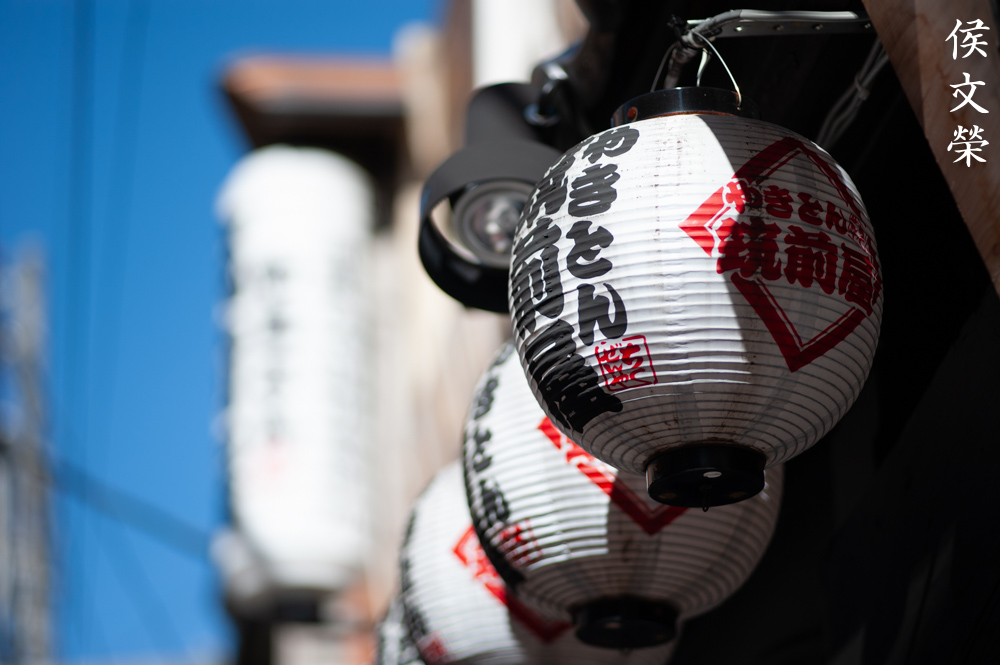
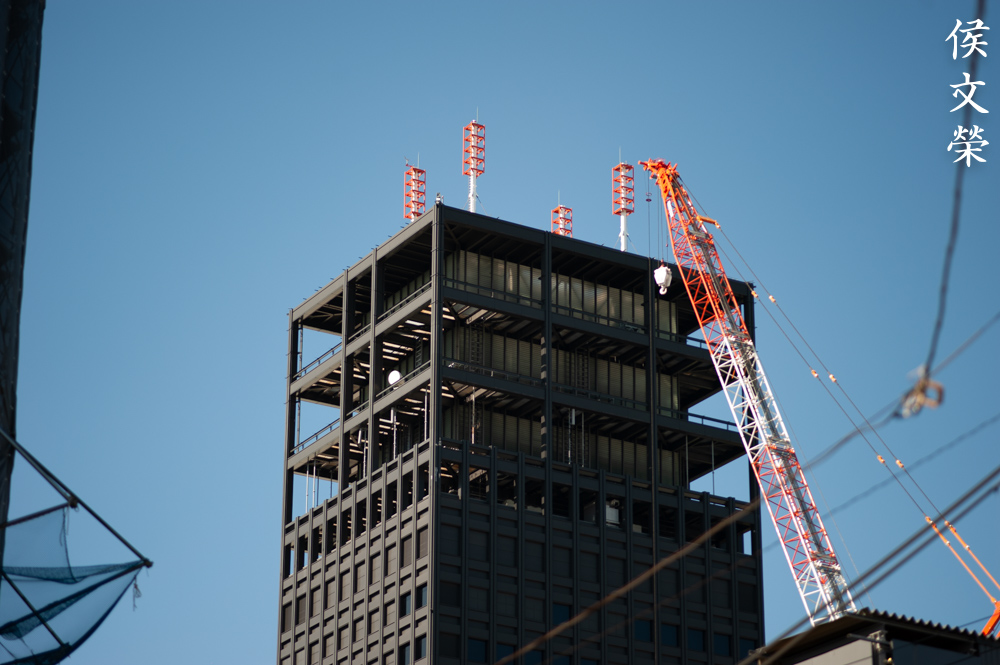
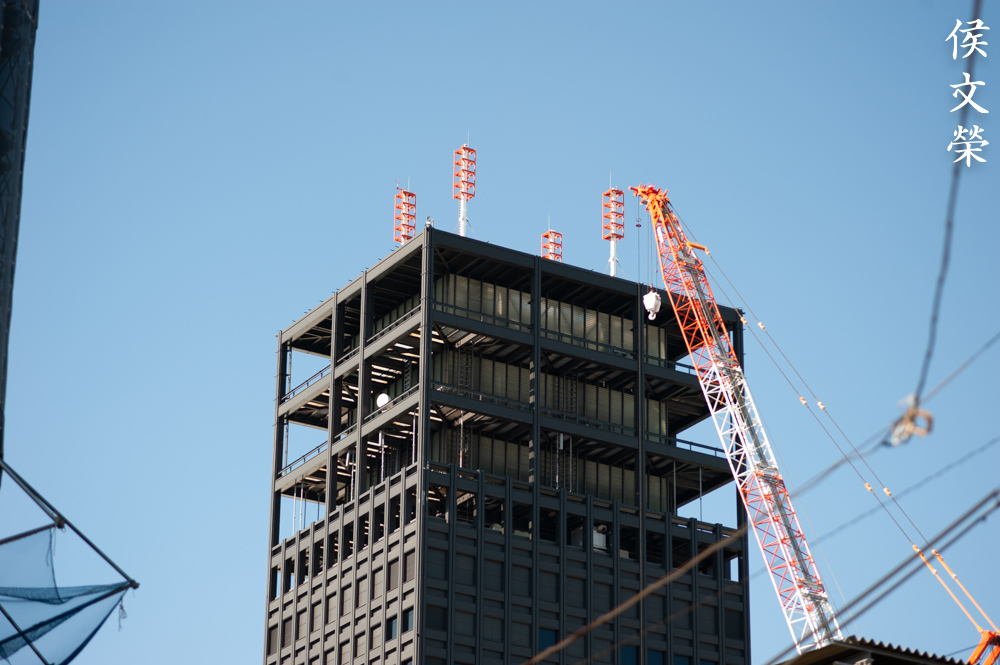
The cables don’t look bad at all, a lens with poor bokeh quality will turn the lines into a smudgy-looking mess.

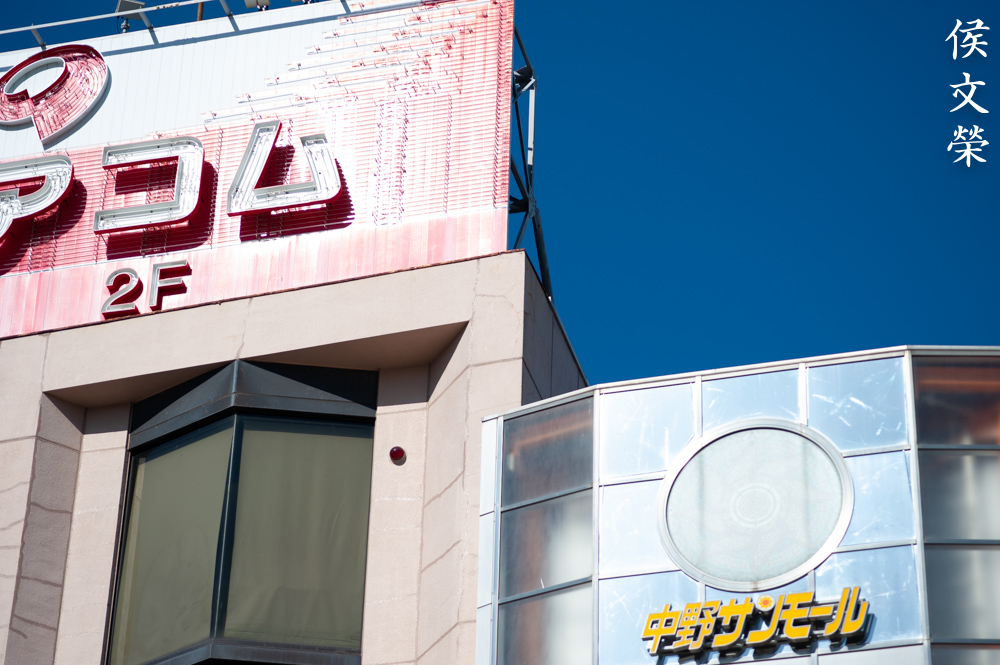
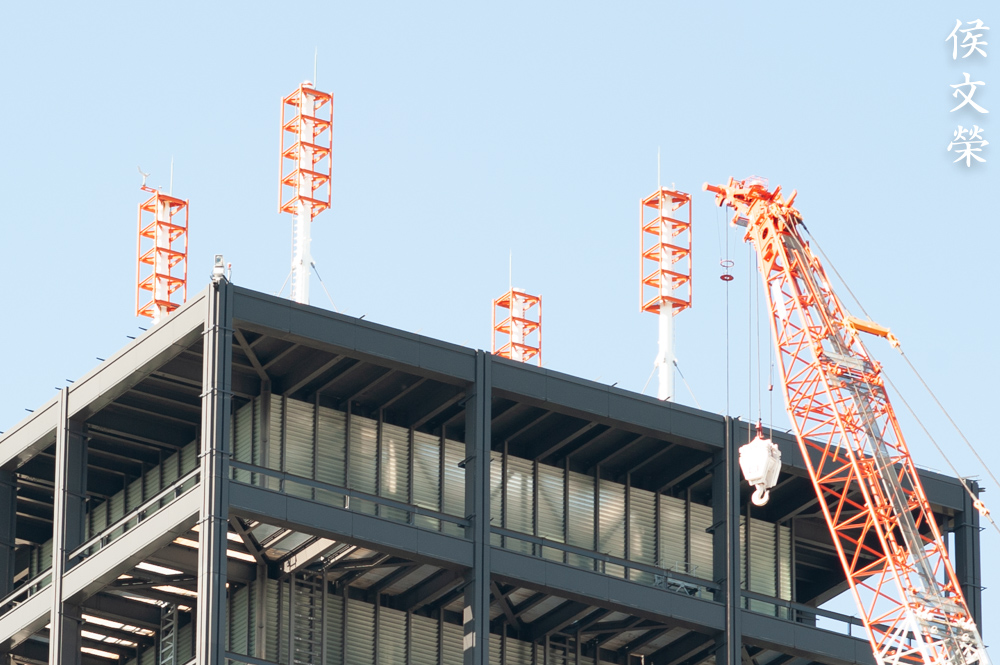
Contrast is rather neutral, it’s not overdone so it could reproduce colors and tones that looks closer to the real thing.

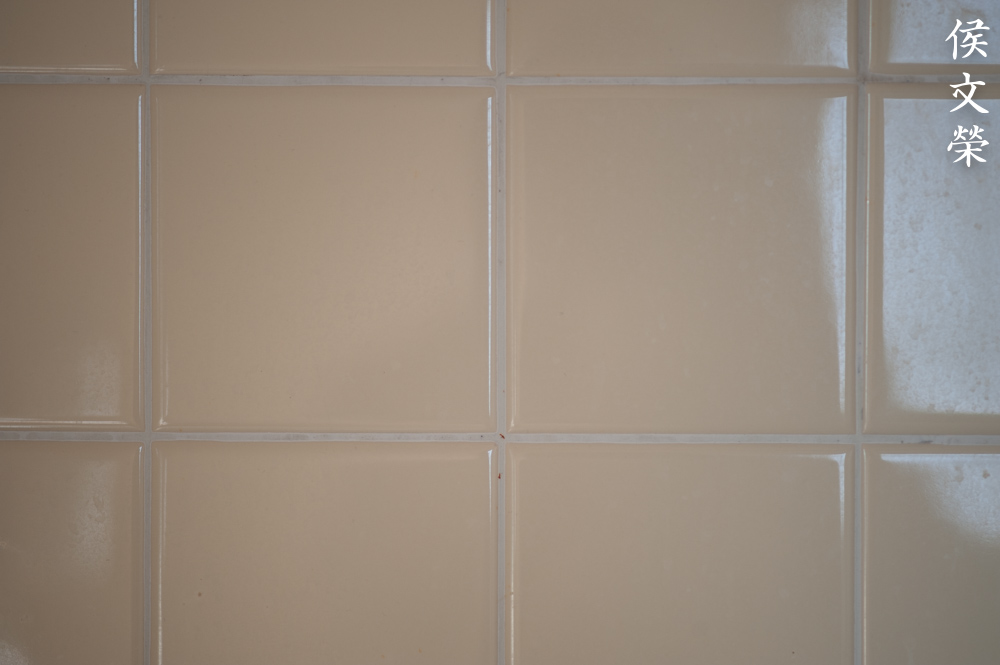
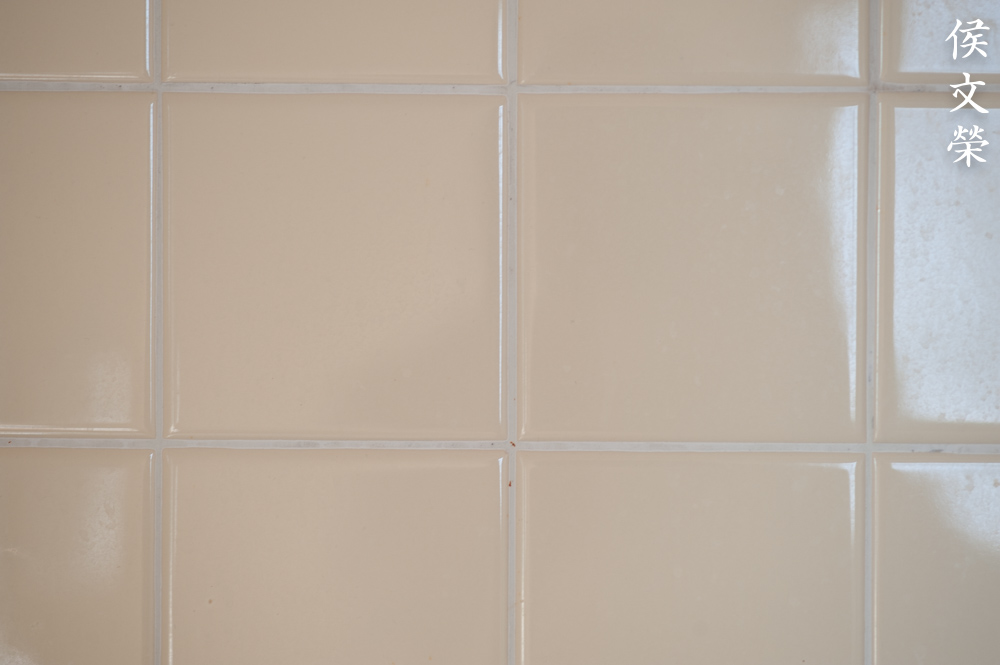
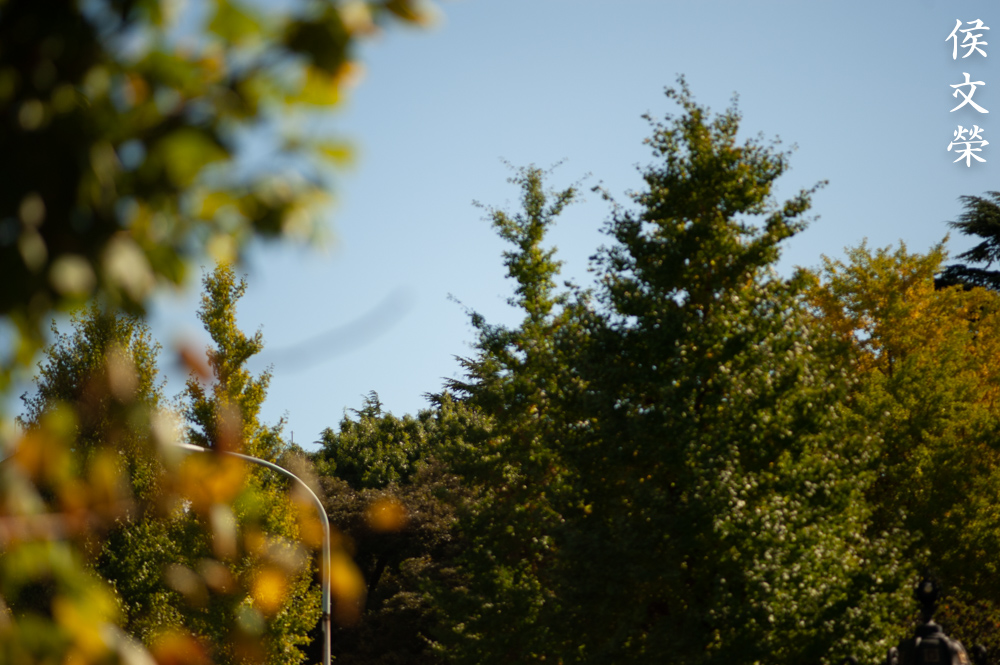
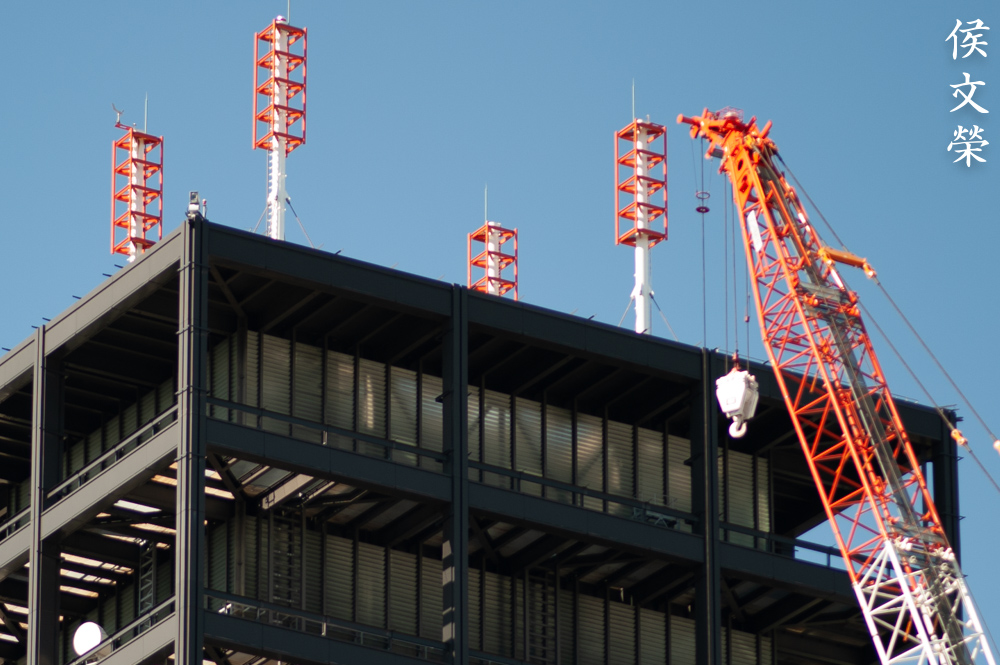
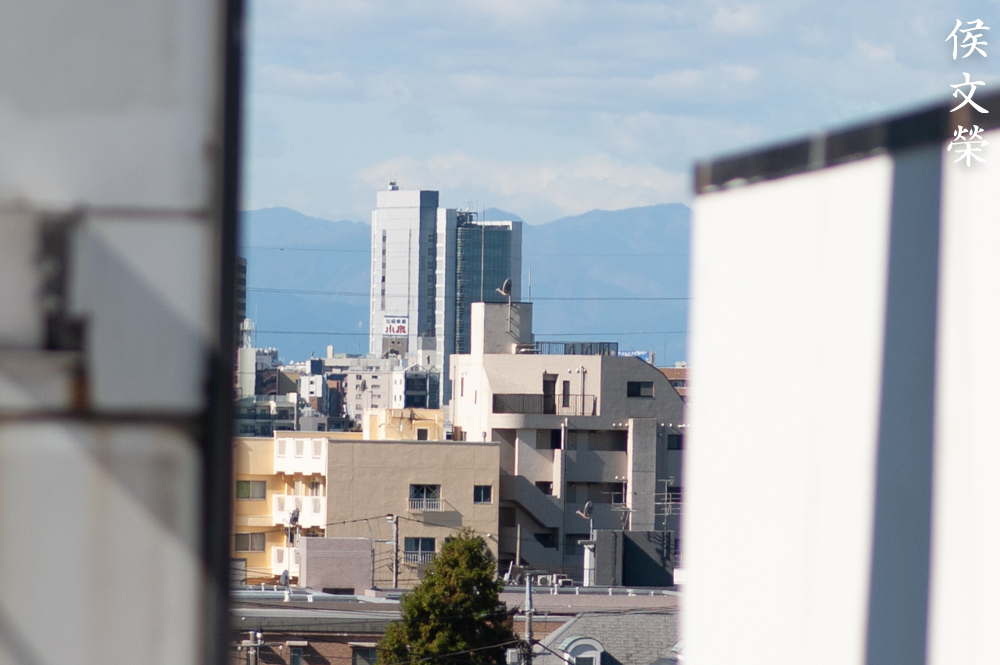
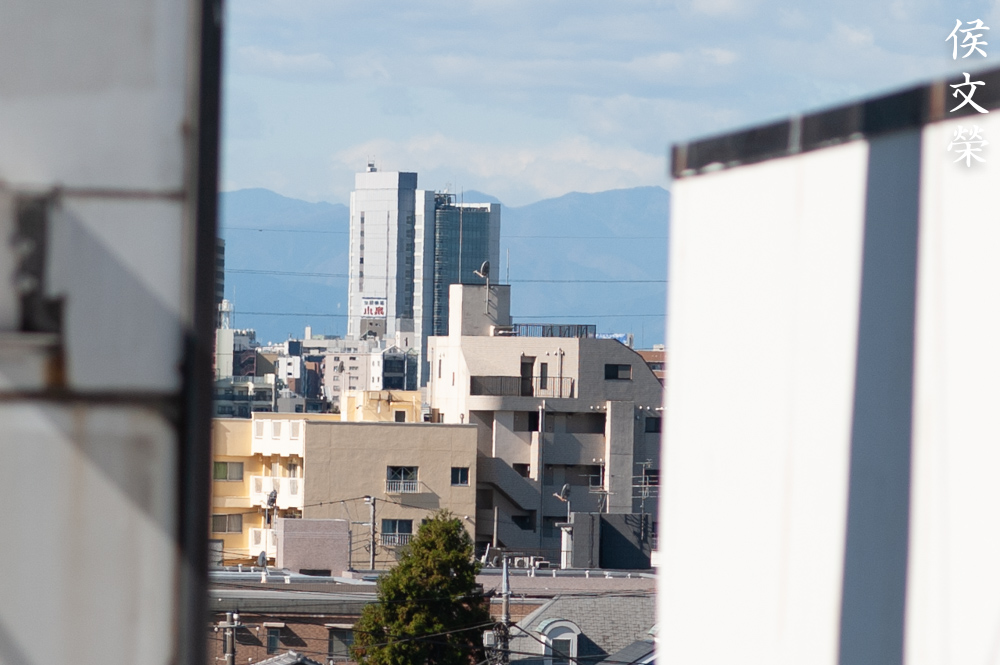
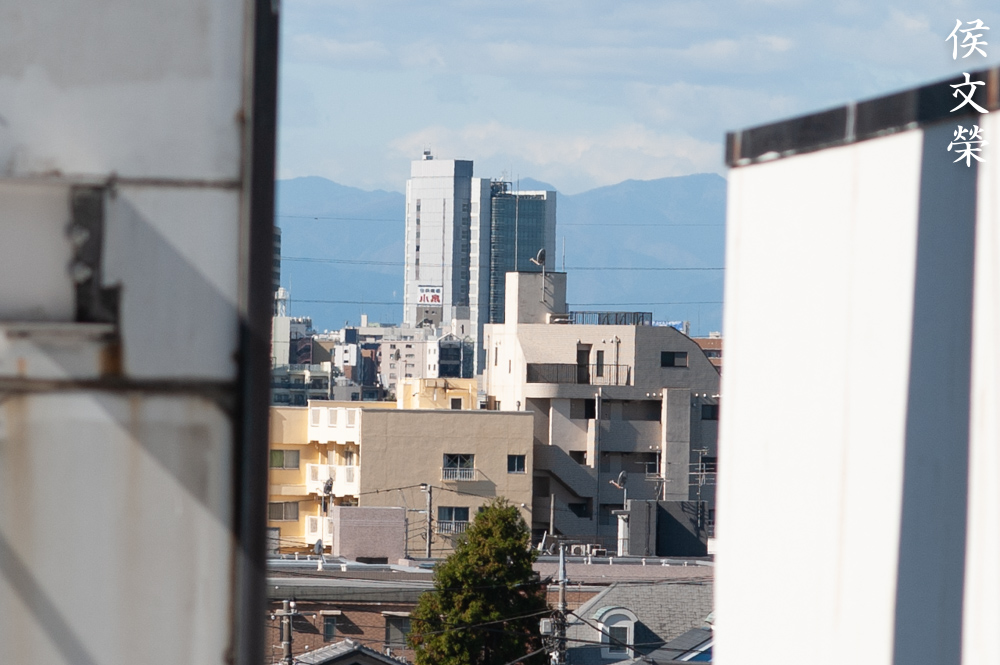
The pillar looks straight thanks to its low distortion profile.

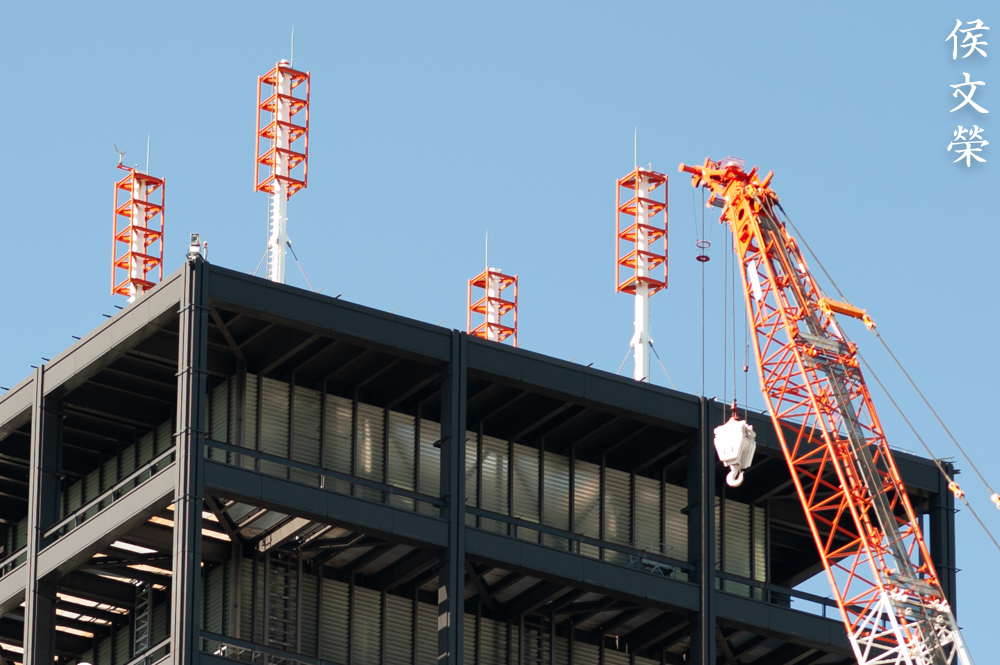
Contrast is quite good except for areas that are over-exposed. This lens isn’t the best choice for these kinds of photos but it could be a nice option if you need to carry fewer lenses in your bag.
The following photos were shot with a Nikon D750. Let’s see if it’s still good when paired with a camera that has a high-MP count.


(Click to enlarge)
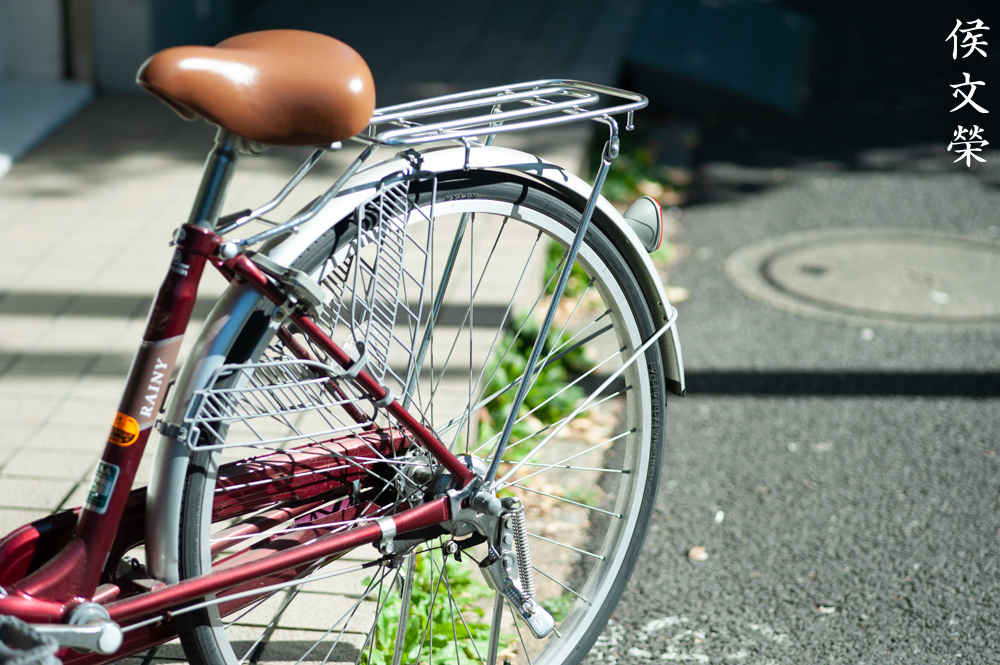
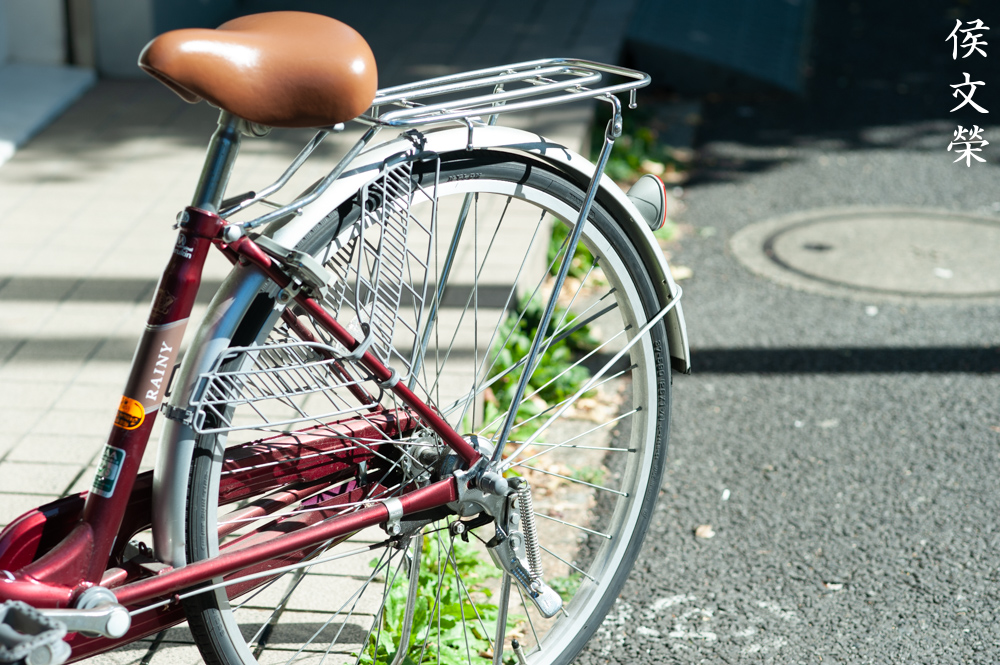
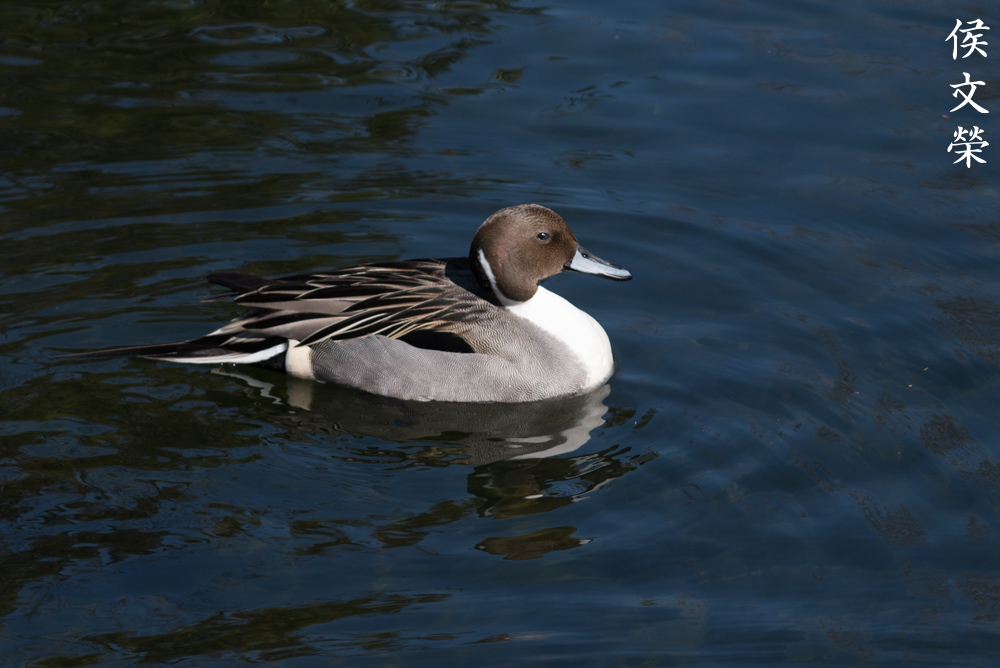
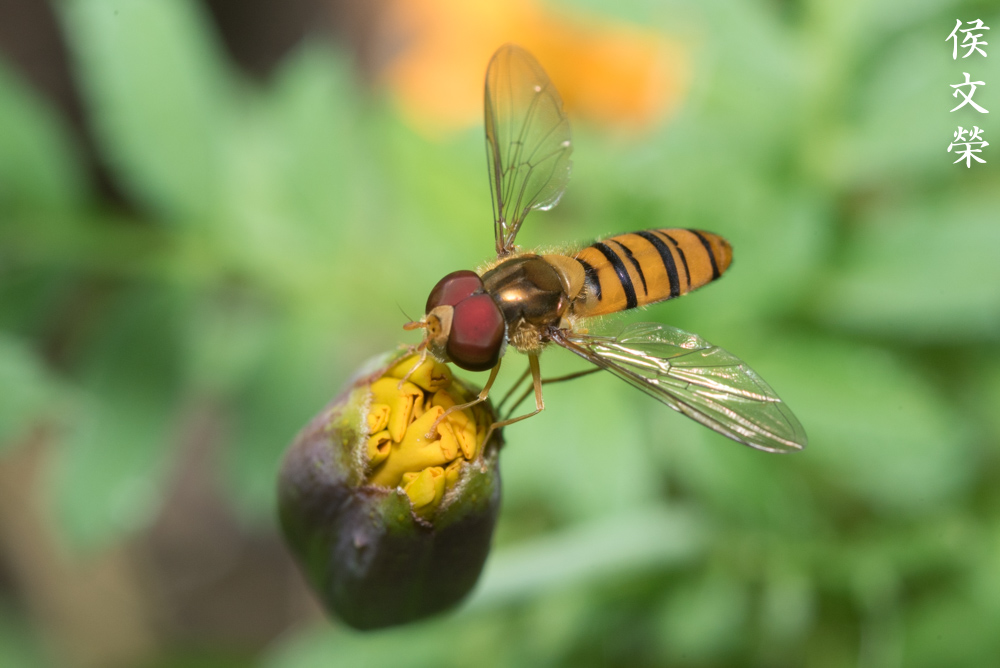
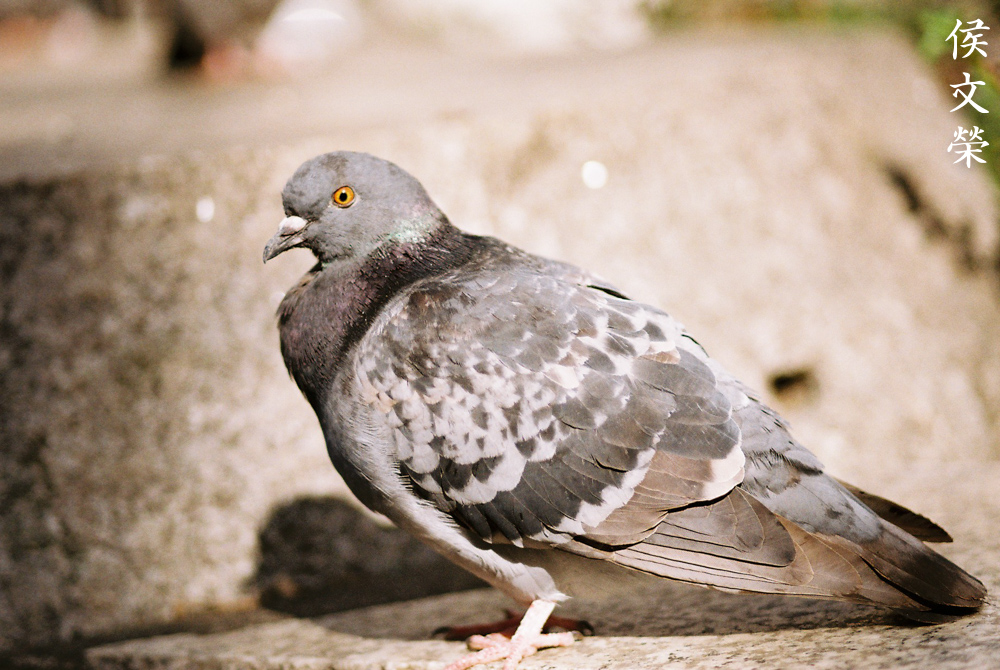
Here are some samples. The bug pictures were shot last year before Fall so don’t get any ideas that we have this much bugs this early in the year. The rest were shot this morning. Wide-open, the f/2.8 maximum speed clearly shows that this is good for blurring the background out. Even at f/16, you’ll see that those bug pictures still have a bit of separation between the subject and the background. This is one of the reasons why the 105mm lens is great for bug photography. The turtle, football and duck pictures were cropped. I would like you to pay attention to the turtle photo, notice the magenta color shift? This can be a problem when you have a high-contrast object that’s not in-focus. This is not a problem because chromatic aberration only shows up in special cases. I shot the bug pictures with my Sunpak 16R Pro, notice the nice light-wrap effect.
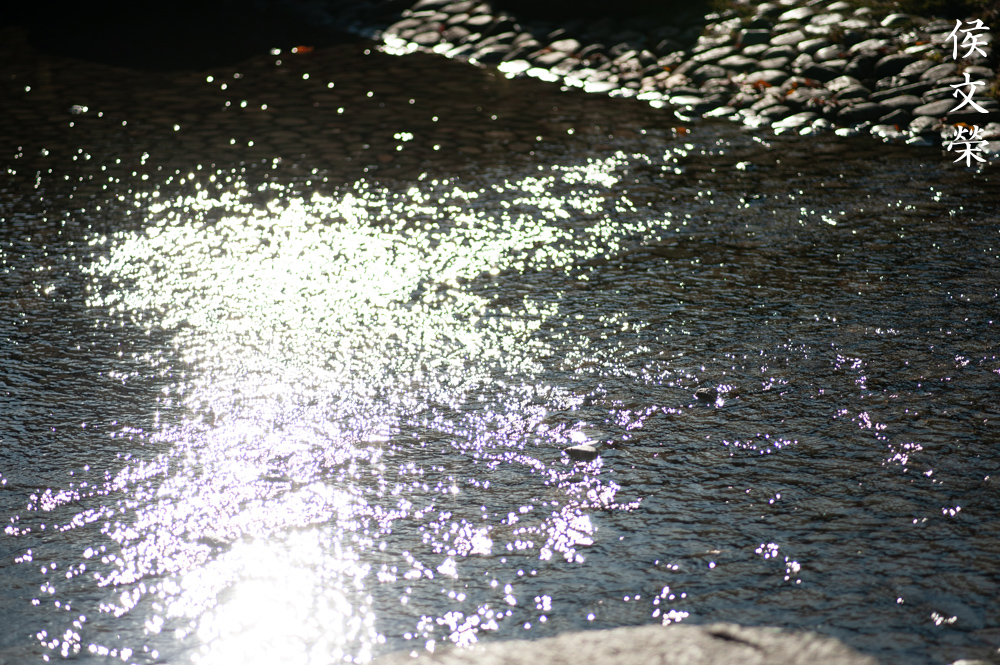
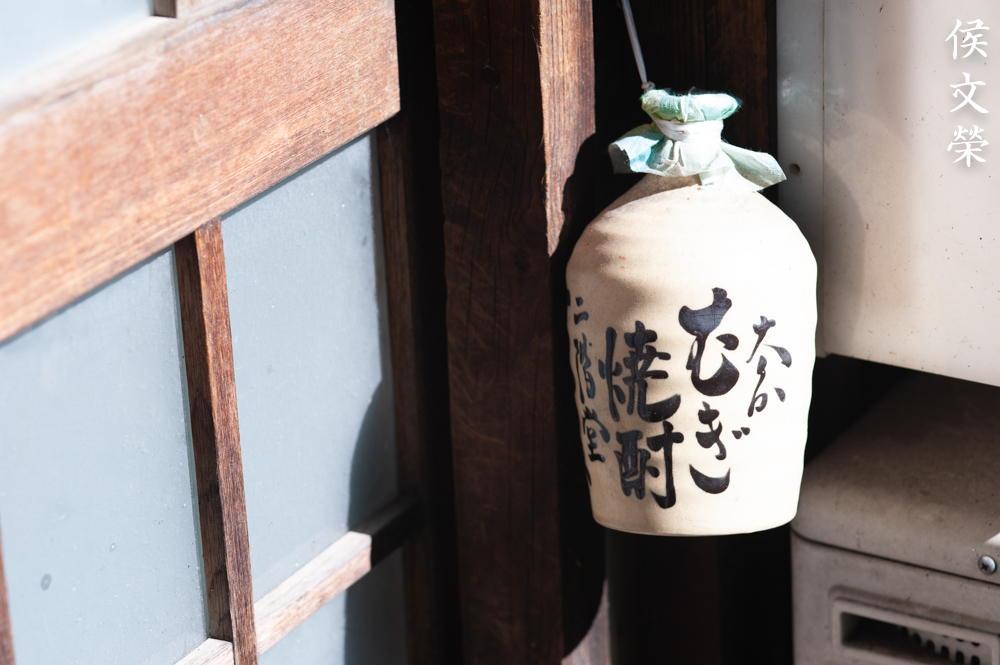
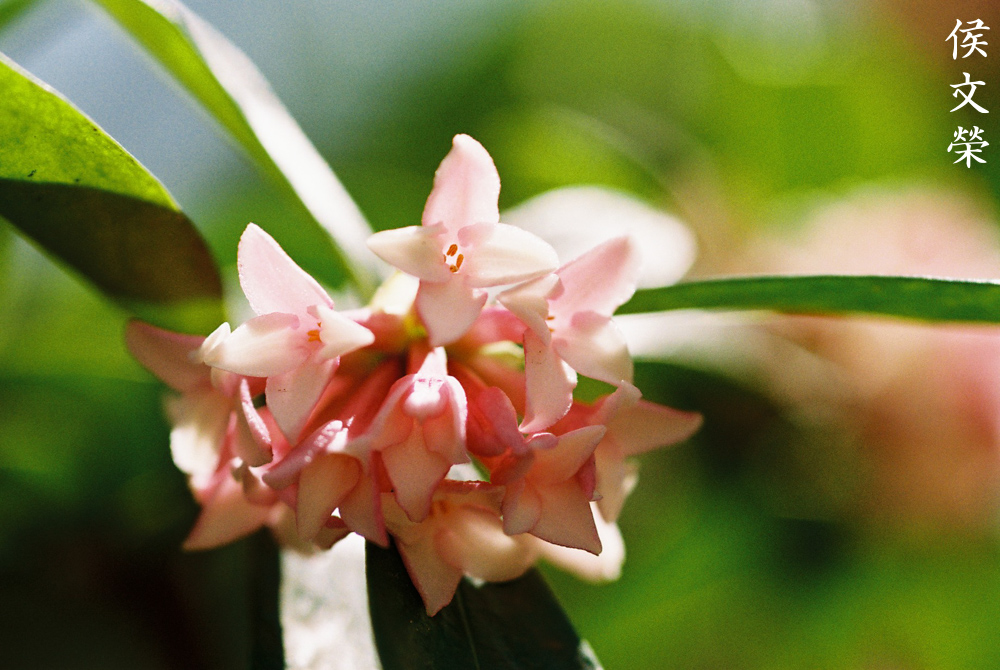
Let’s now see some photos that were shot with film. Film has a unique look that’s difficult to simulate with a digital camera. This is because grain works differently, it could hide or amplify a lens’ flaws, too. This was designed for film so it’s only fair that we judge it with its intended medium.
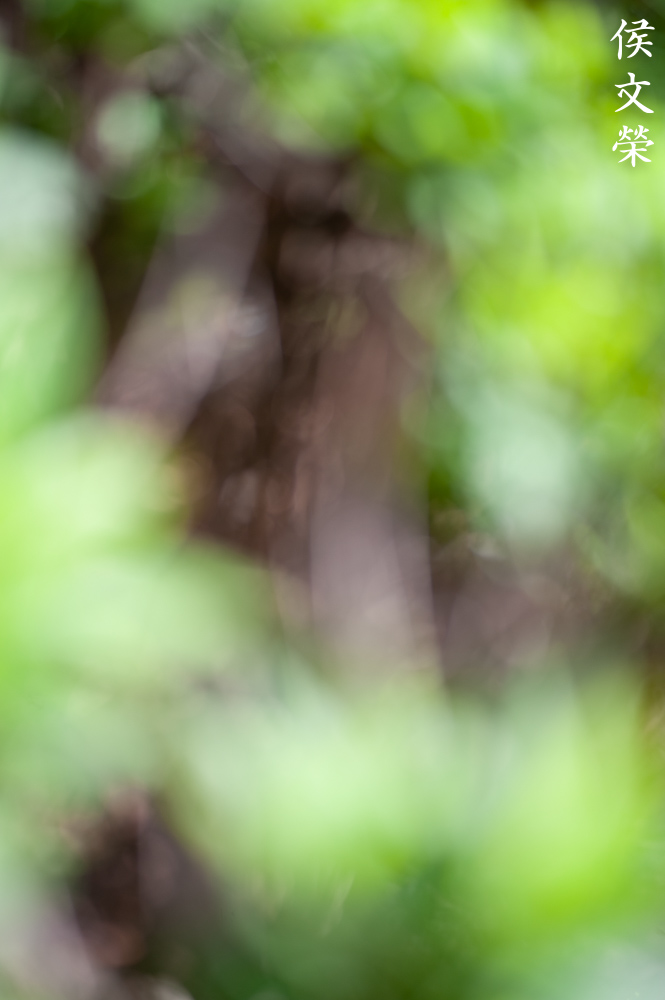
The character of the bokeh looks rough here, that has more to do with what is in the background than anything else.
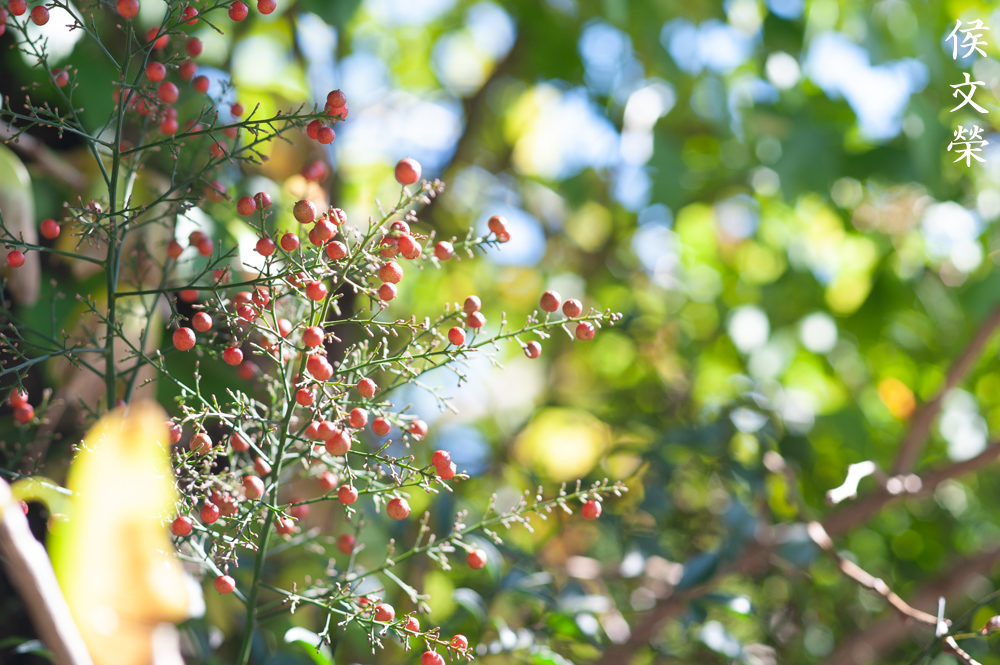
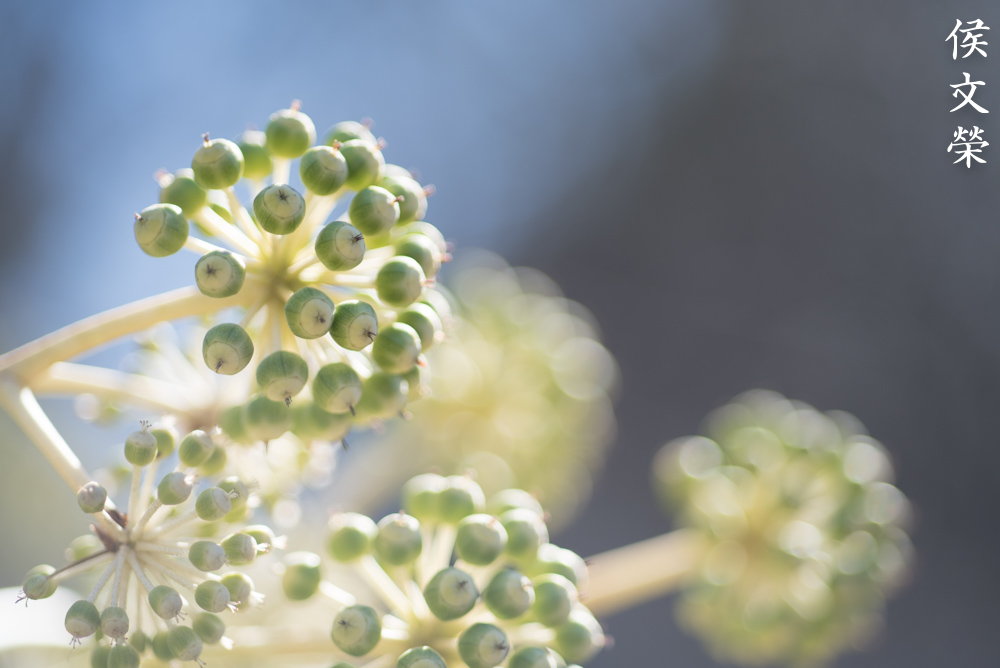
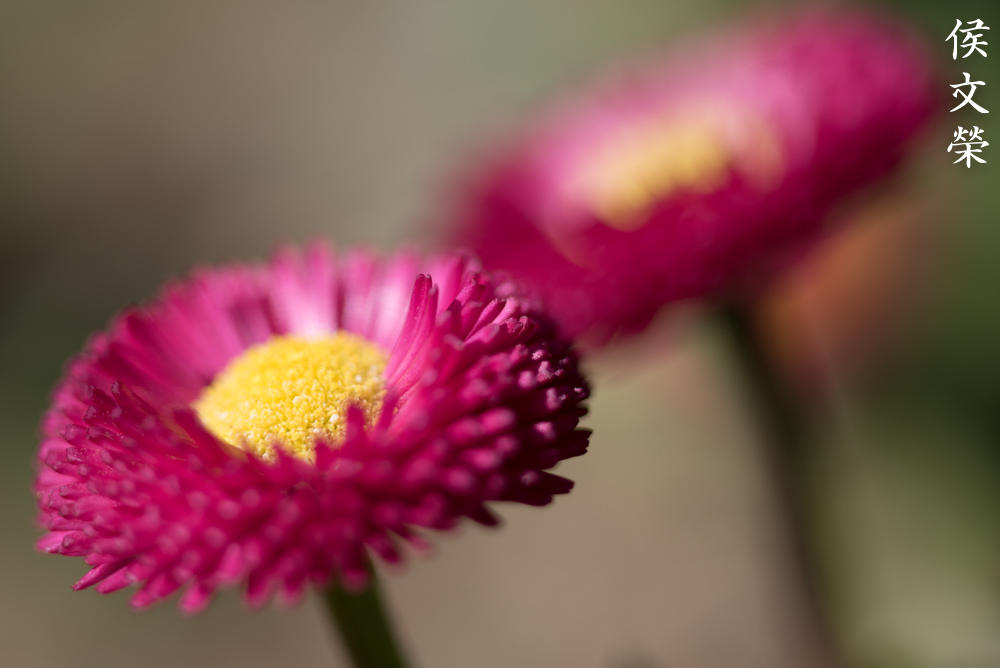
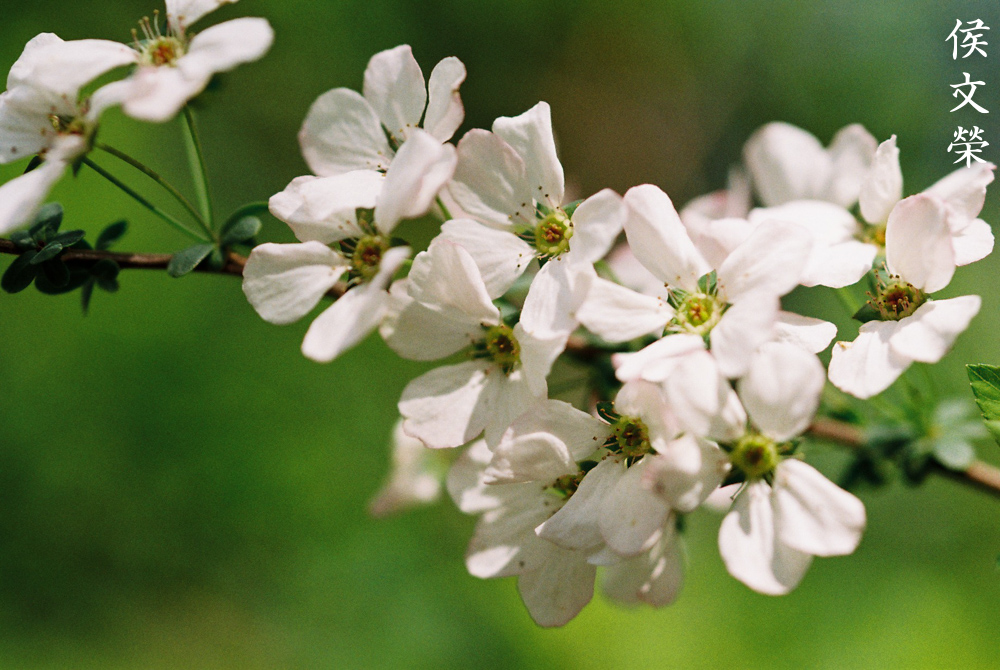
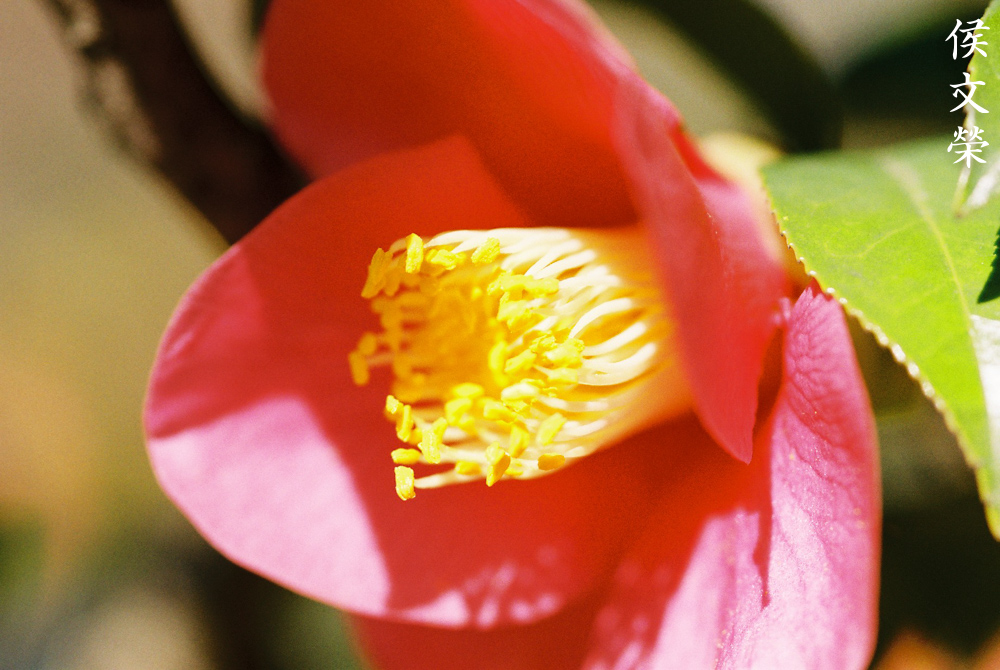
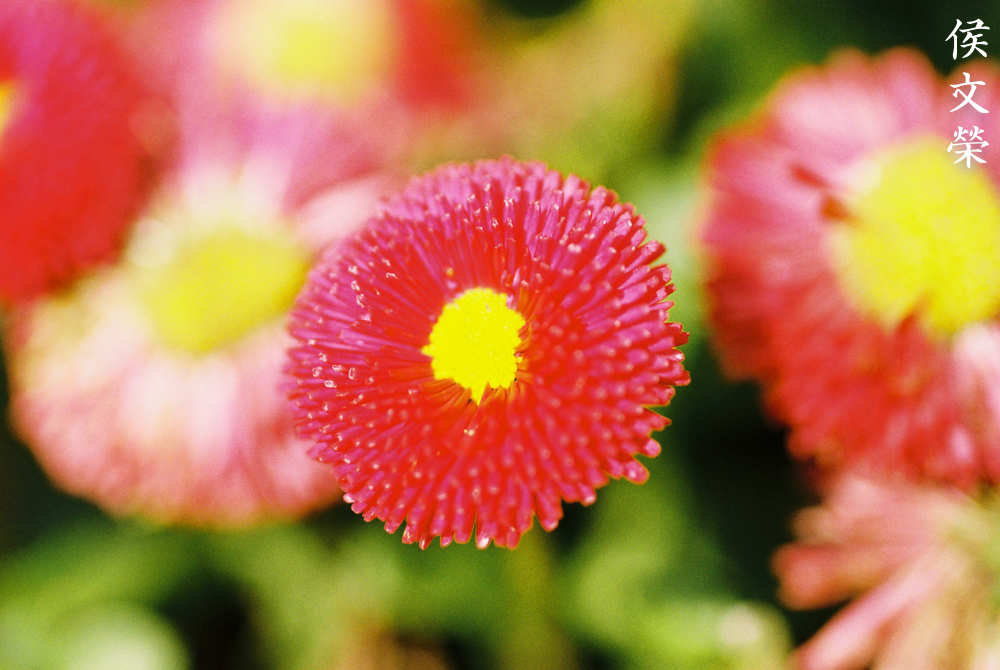
It’s able to resolve the tiny details of these flowers despite using it with film that isn’t fine-grained.
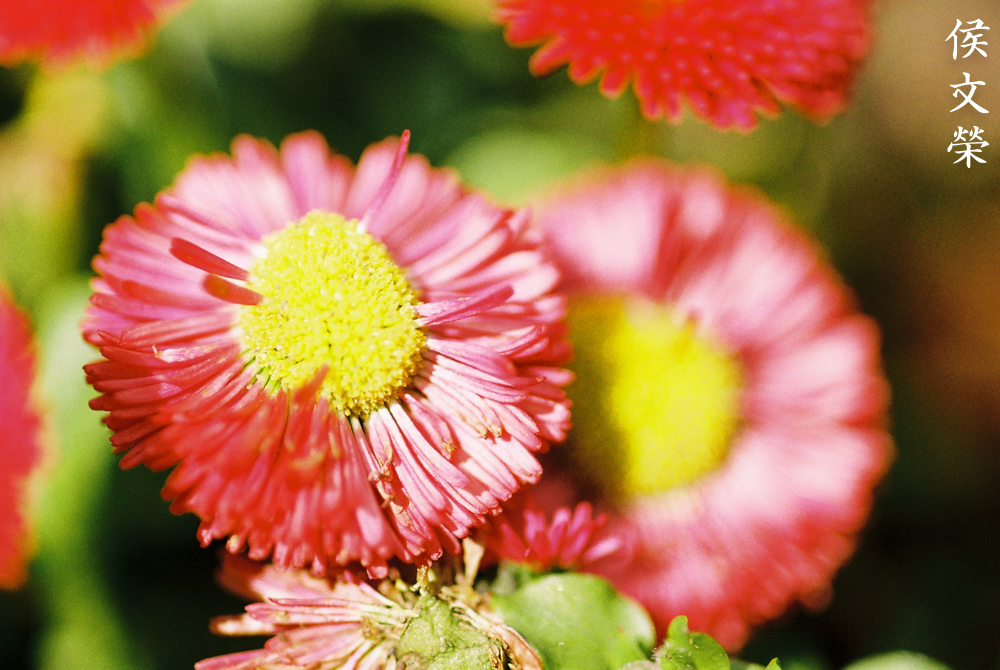
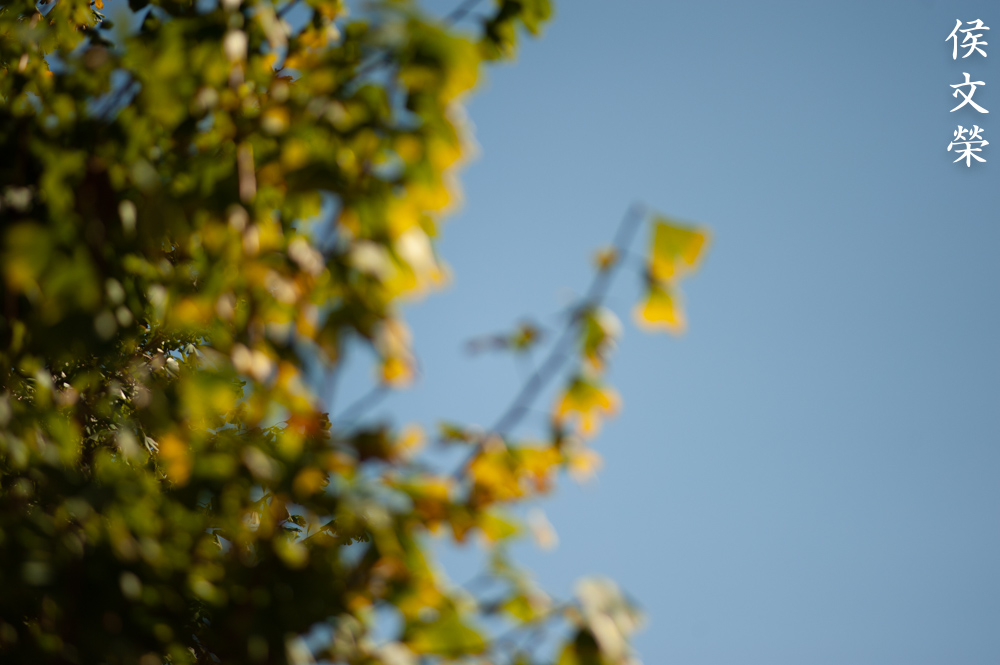
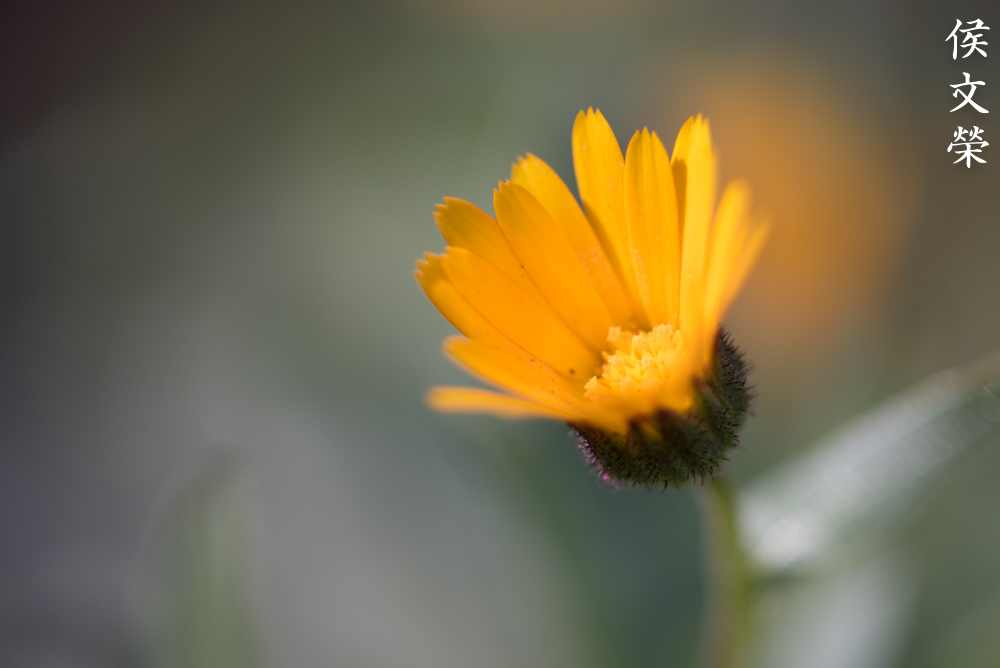
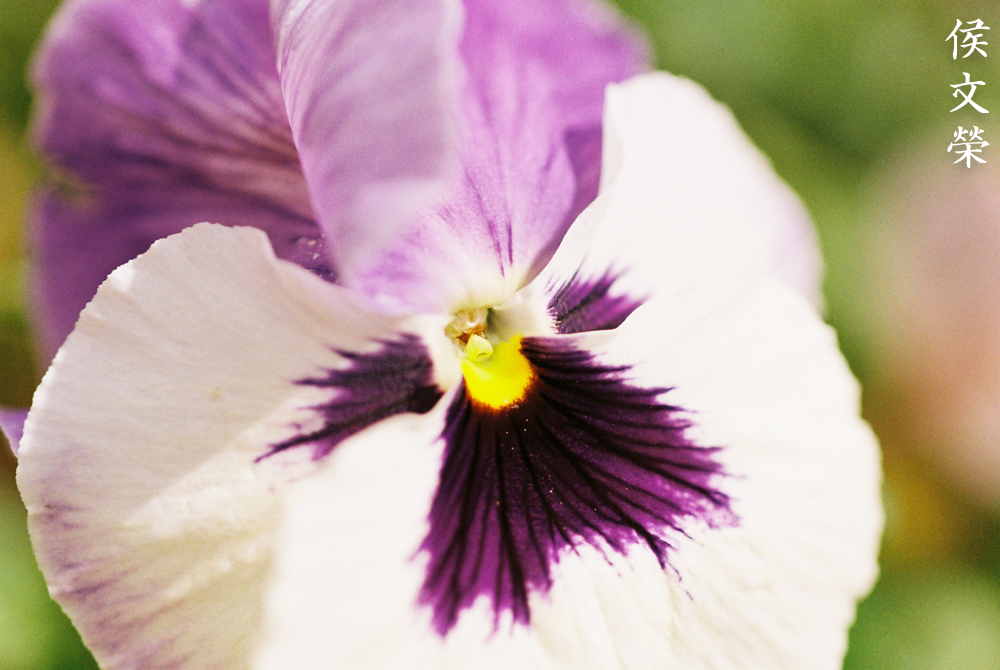
This is over-exposed, if this was metered properly we could see the details of the yellow parts better.
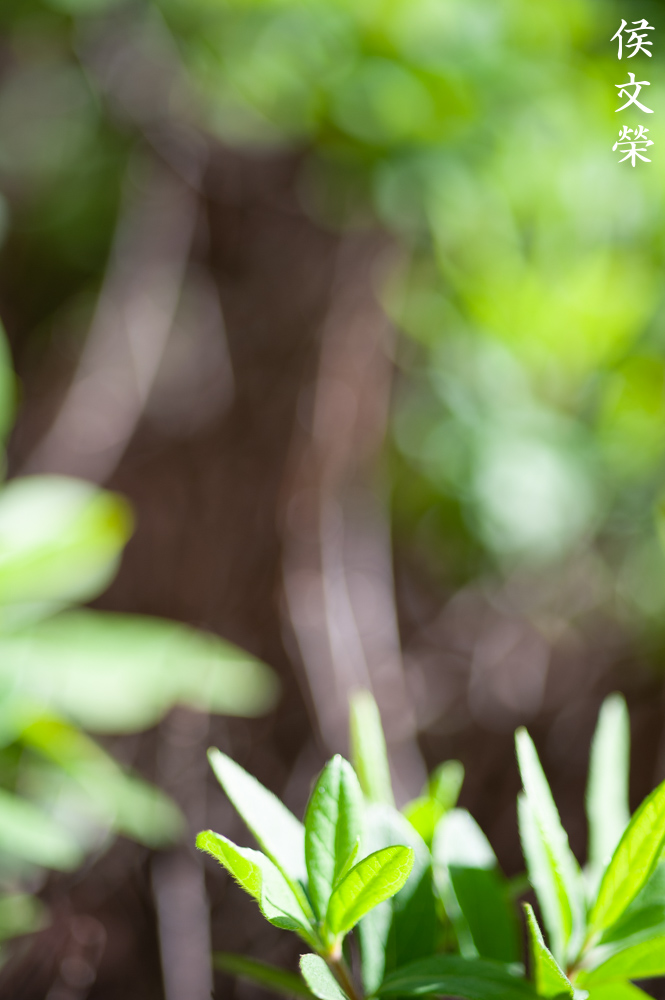
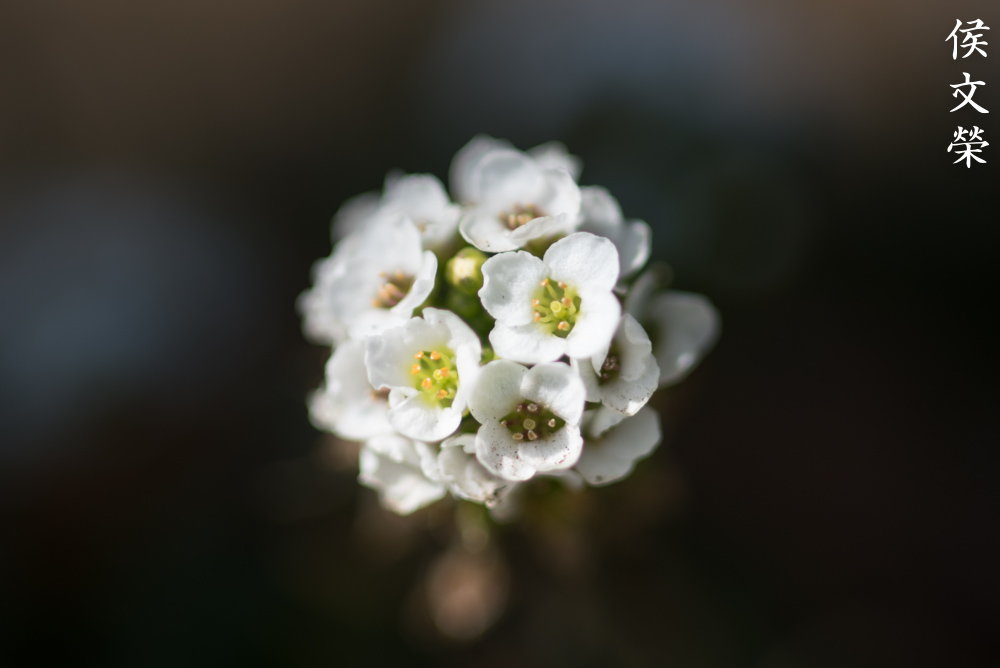
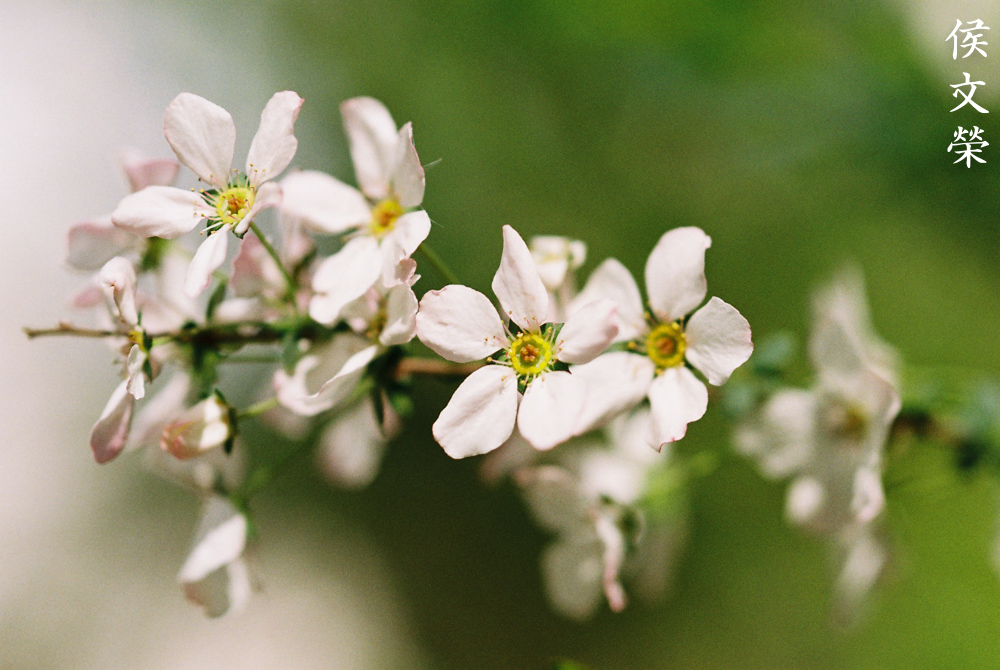
It’s able to capture this flower beautifully, the rendering looks nice and the focus-transition looks quite natural.


(Click to enlarge)
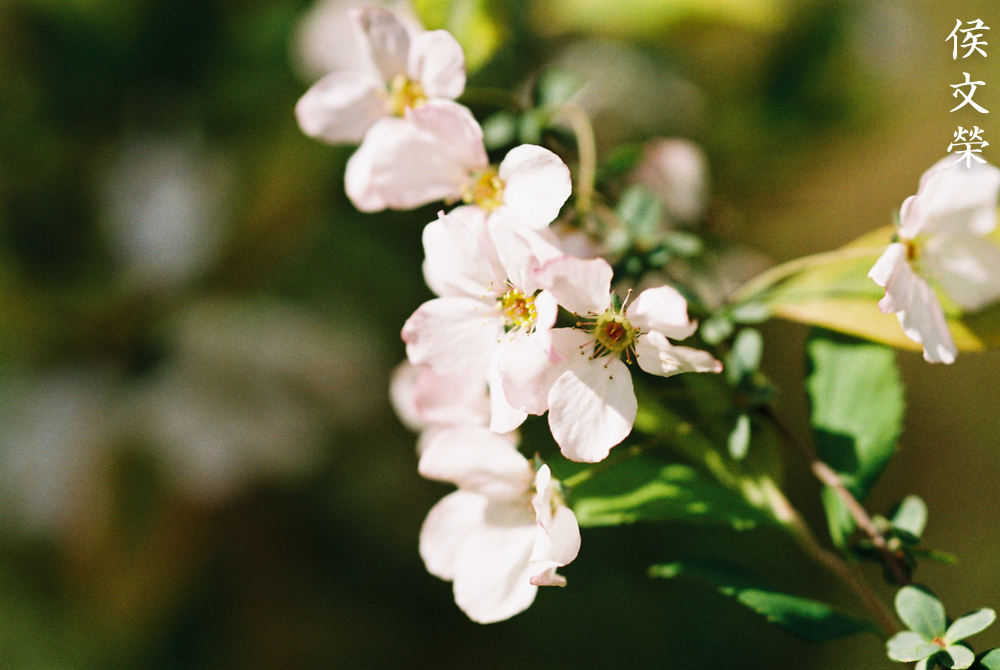
Here are more photos from the same roll. This is a wonderful lens but it’s a better-match for use with a digital camera in my honest opinion. This is due to the coarser-look of film. If you want to maximize this, shoot fine-grained film with it and you’ll see better results.
I highly recommend this lens to everybody who loves to shoot bugs and just about anything macro photography. While the Micro-Nikkor 105mm f/4 Ai is a sharper lens in my opinion, this one isn’t that far-behind. The main reason to buy this one over the earlier lens is the faster maximum aperture. You’ll enjoy it when shooting up-close because your view will be brighter. You will see your subjects better and you can focus more precisely. The handy lock is also nice so you won’t change your focus accidentally. If you really like this you can still buy these new but you can find these easily in the used market, they’re common and you can get one for less than $300 in perfect state. This is a great lens that’s versatile and it will last you a lifetime.
Before We Begin:
If this is your first attempt at repairing a lens then I suggest that you check my previous posts regarding screws & drivers, grease and other things. Also read what I wrote about the tools that you’ll need to fix your Nikkors.
I suggest that you read these primers before you begin (for beginners):
Reading these primers should lessen the chance of ruining your lens if you are a novice. Before opening up any lens, always look for other people who have done so in Youtube or the internet. Information is scarce, vague and scattered (that is why I started this) but you can still find some information if you search carefully.
I highly recommend that you read my working with helicoids post because this is very important and getting it wrong can ruin your day. If I can force you to read this, I would. It is that important!
For more advanced topics, you can read my fungus removal post as a start. This post has a lot of useful information and it will be beneficial for you to read this.
Disassembly (External):
Since this wasn’t made in the traditional main barrel/objective configuration and the more complicated construction due to the implementation of CRC, I will be going from one end of the lens to the other very often in this article. To make it less confusing, I will be going through it in stages so don’t worry. This is certainly not a lens for beginners as this is way too much for them to handle due to the numerous interlocking parts inside. Don’t try to overhaul this if you are a novice. If all you want is to clean a lens element or two then this might be OK as most of the lens elements are easily-accessible but you’ll need special tools for this. Lubrication and overhaul? Leave it to the experts this time.
We’ll begin with the external part since this is the easiest to access and the natural step for anybody working with this. I got a bit confused and I didn’t follow the steps progression perfectly but I’ll do my best to present it to you in a logical manner so that you will not waste your time.
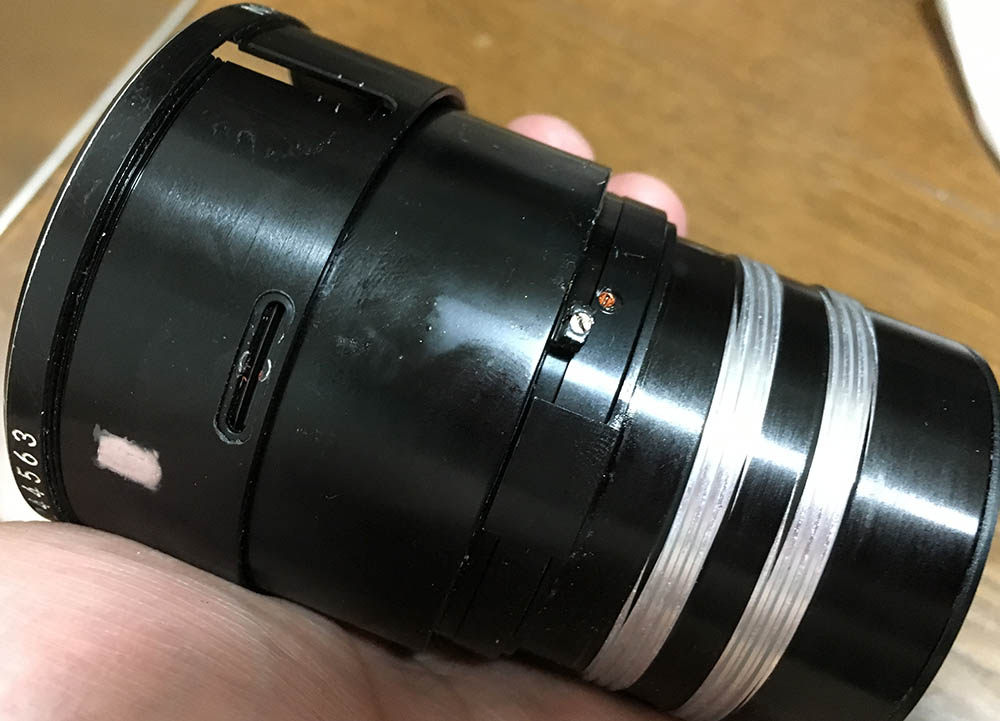
Remove these screws on the bayonet. If they won’t move then you’ll have to put a drop of acetone or MEK on each screw and let that dissolve whatever was used on them before you attempt doing it again. It can take 30min to a couple of hours so please be patient with this step. If you want to be quick about it you will want a butane torch. I also want to stress that you should use a JIS screwdriver for this and get the one with the longest shaft since a long-shafted driver will give you more torque. Finally, use the weight from your shoulders to prevent slippage. This is an acquired skill. If you are new to lens repair read my article on how to remove bayonet screws to prevent doing any damage to your lens.
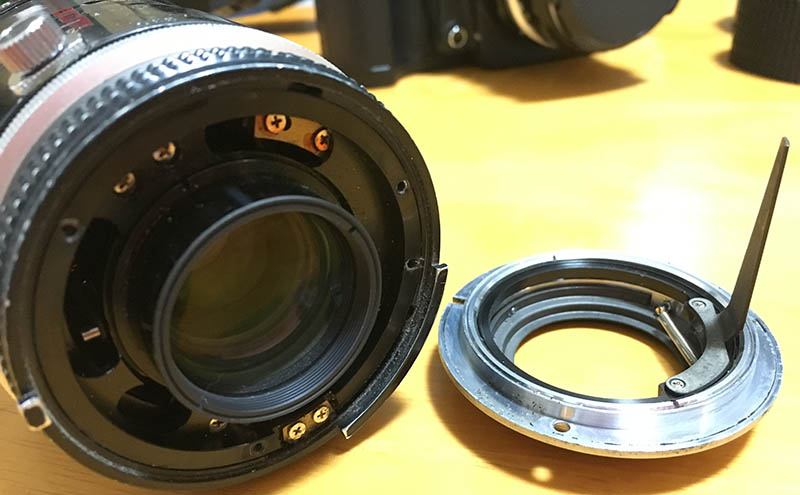
The bayonet comes off just like that and there’s nothing connected to it that will snag.
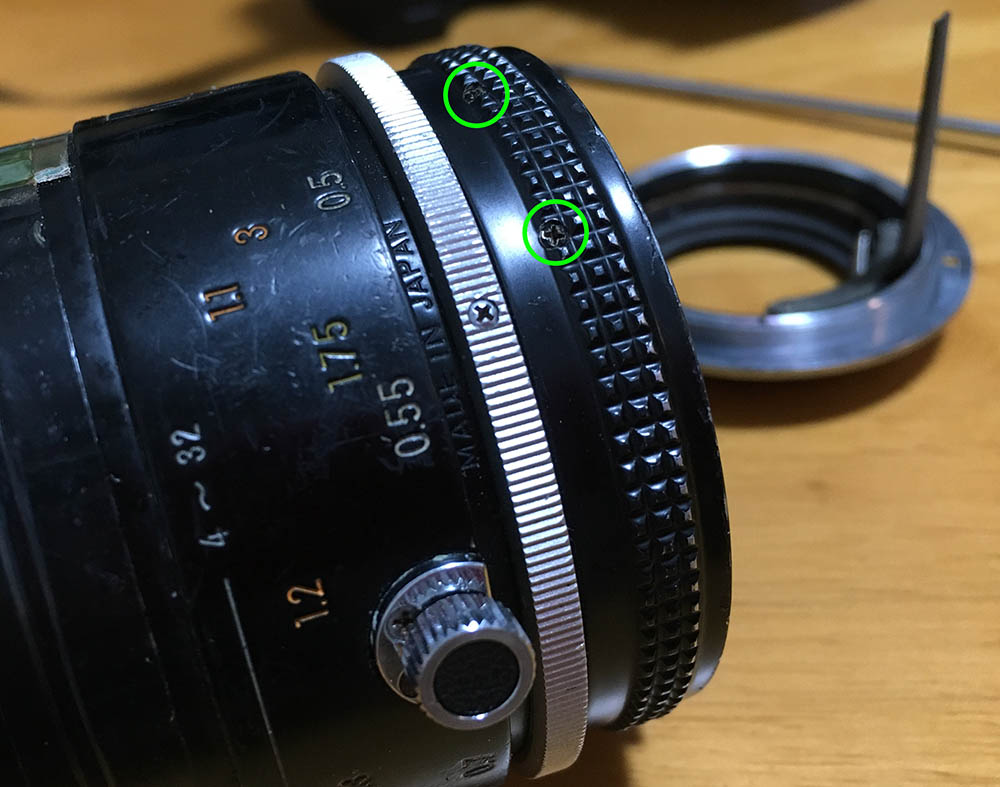
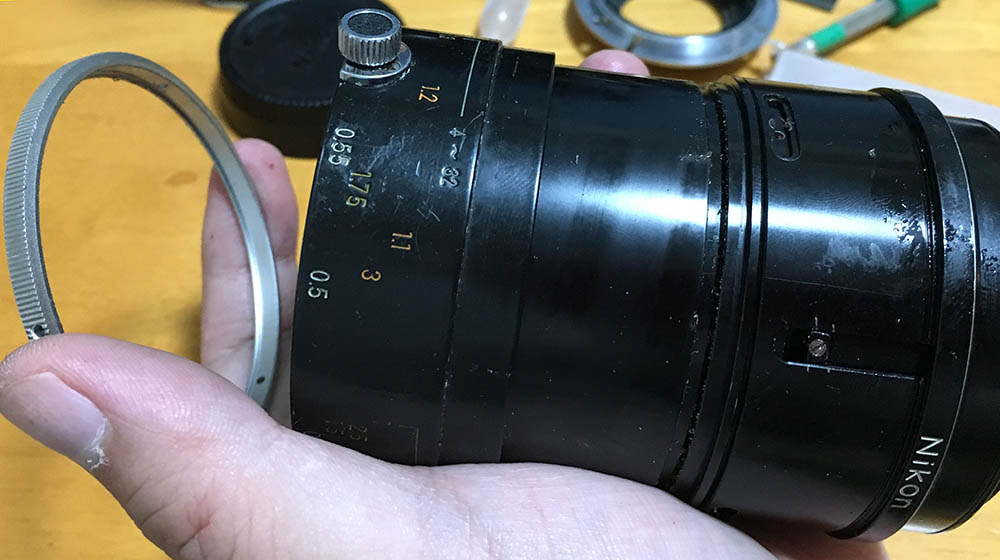
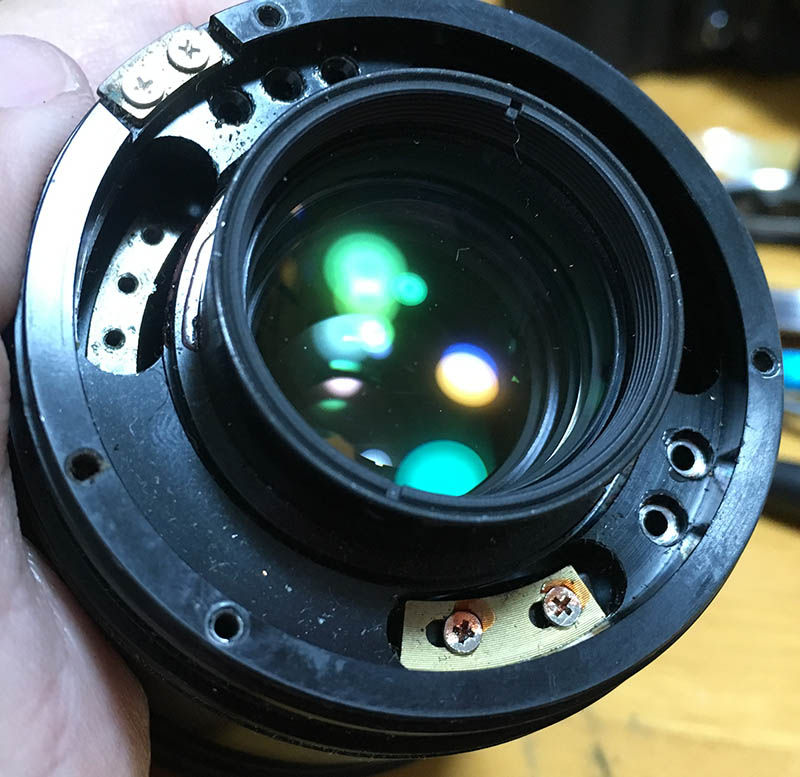
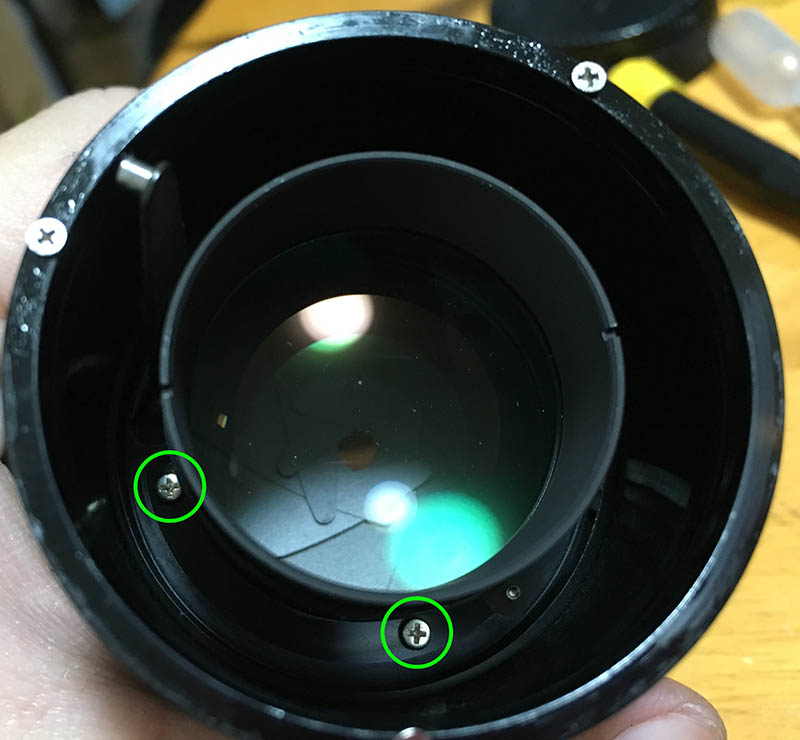
Before you get excited and start removing the aperture ring, make sure you remove these first, the aperture ring is connected to a mechanism inside.
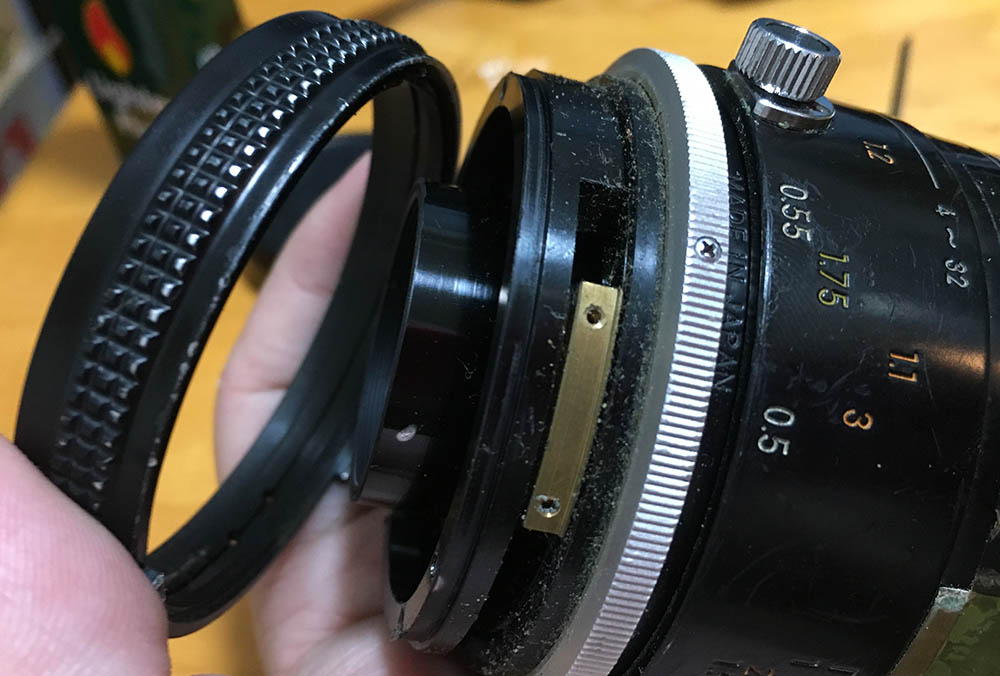
Once the screws are gone you can now safely remove the aperture ring.

Here’s a good view of how it should look like from the factory. I shot this as a reference so I won’t get lost later during reassembly.
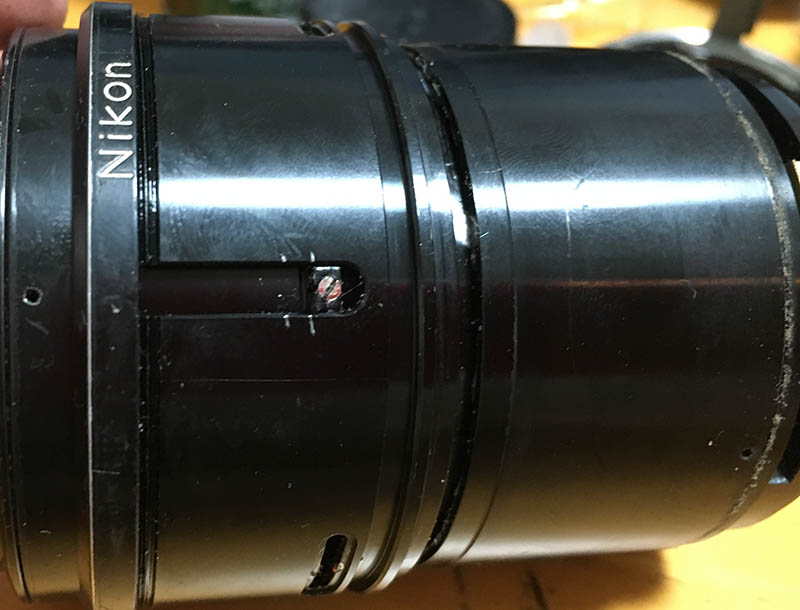
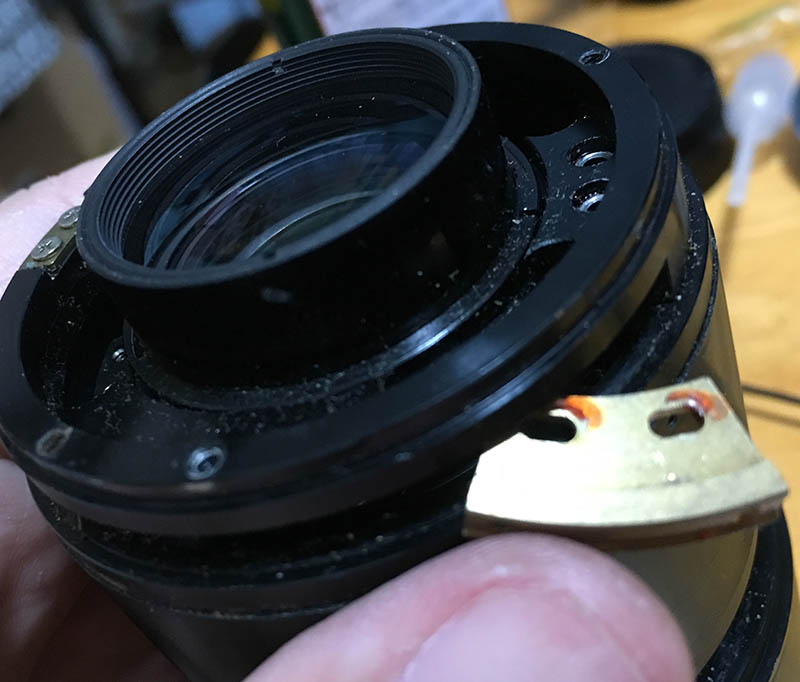
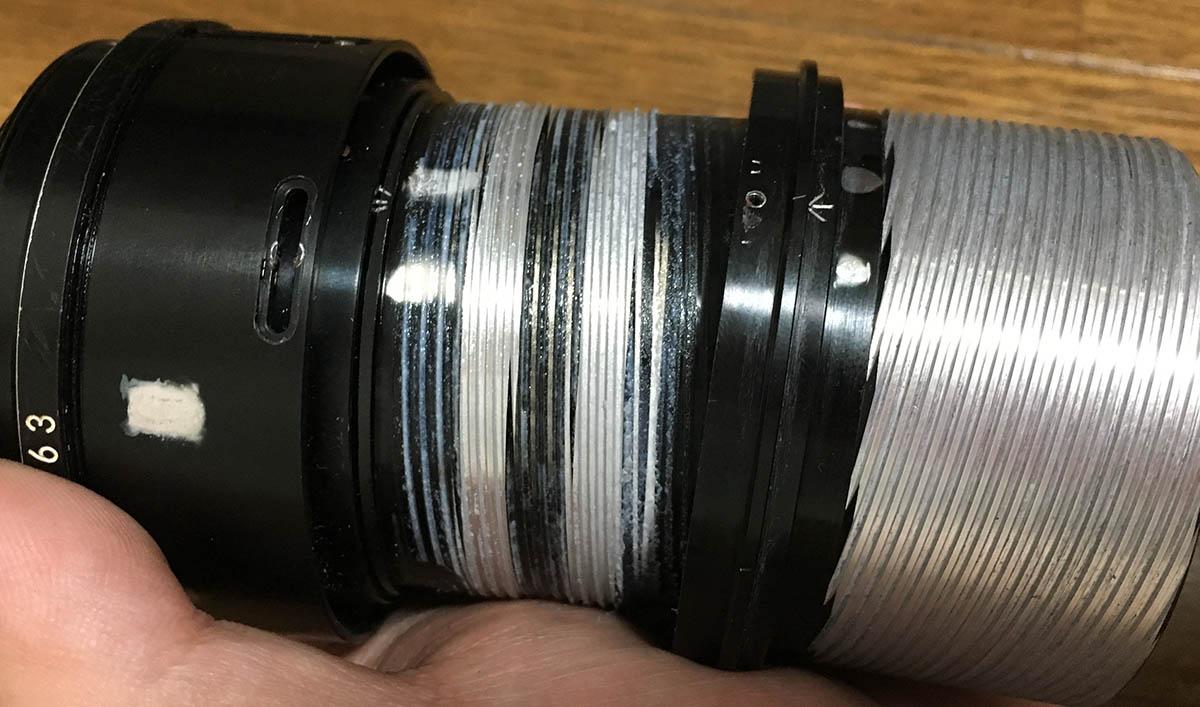
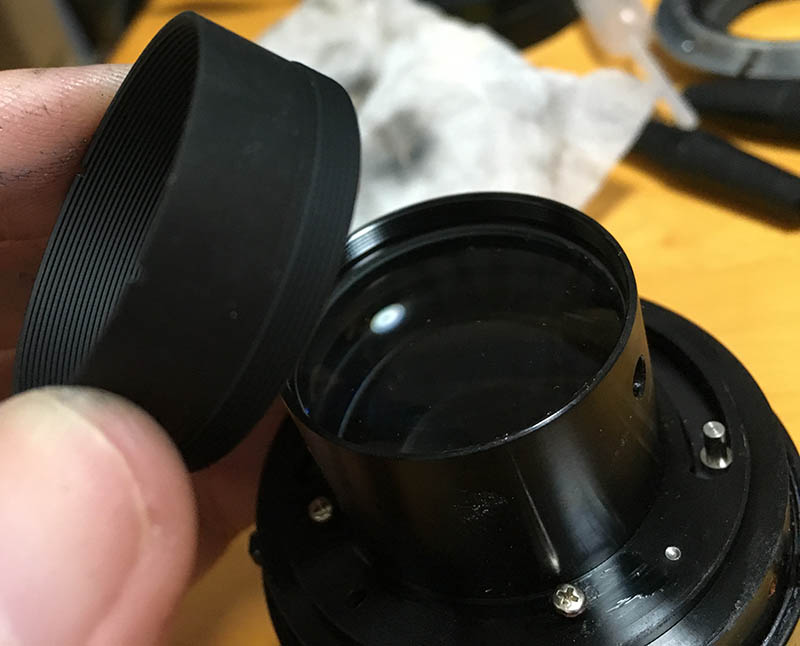
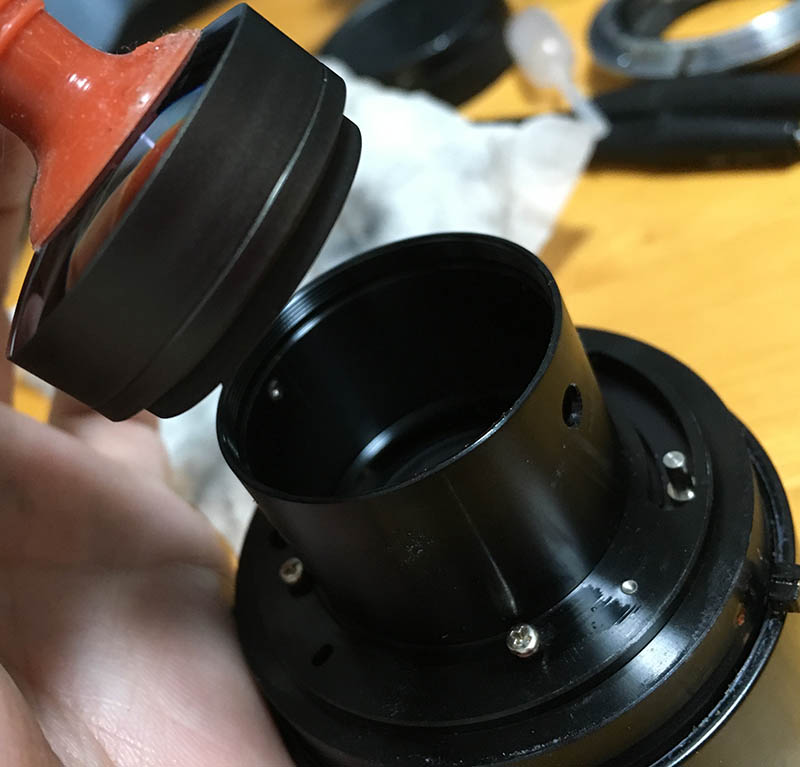
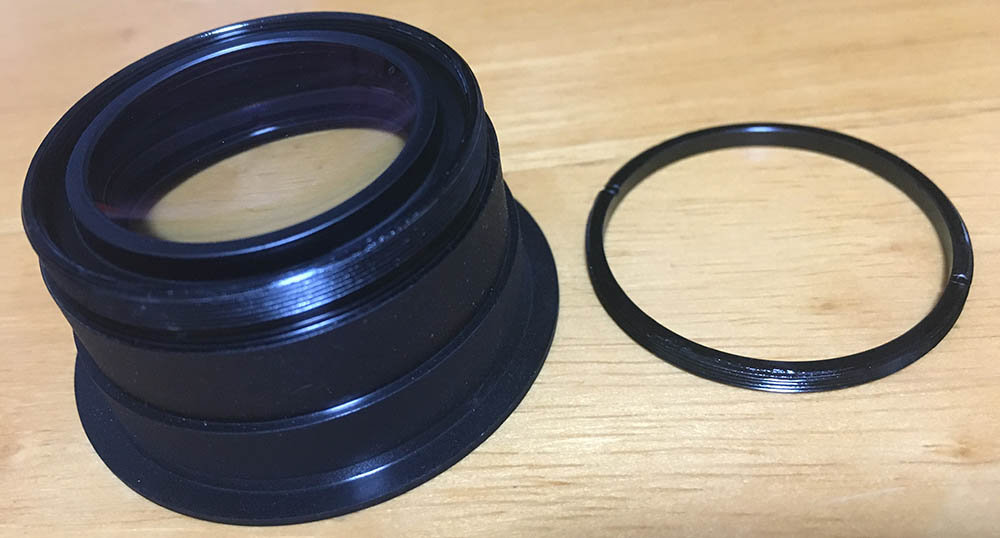
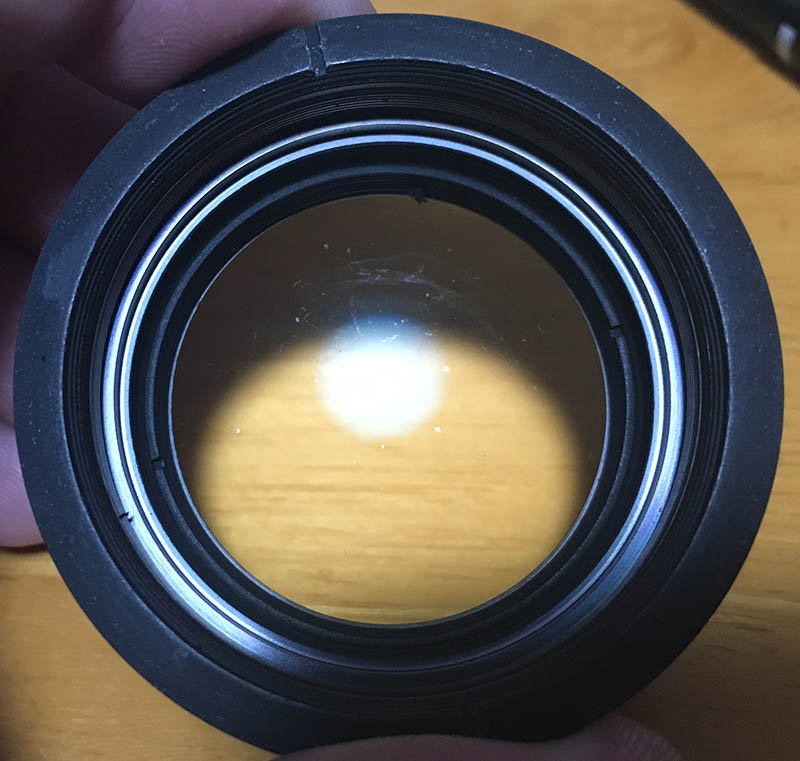
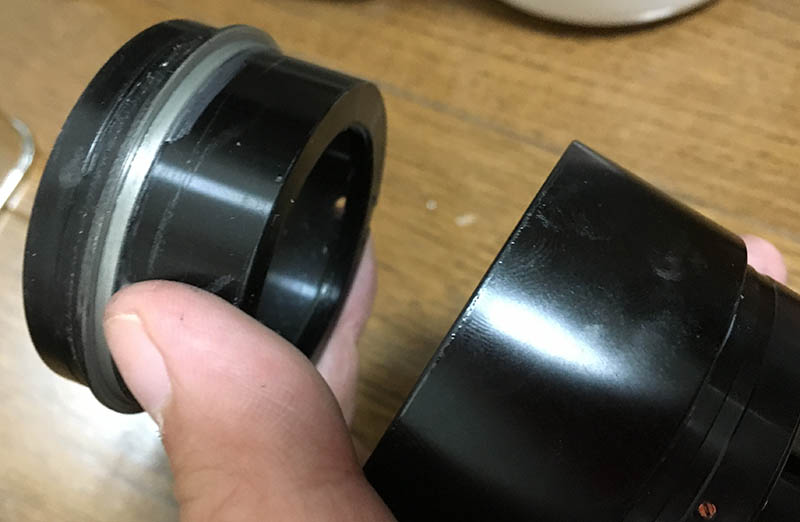
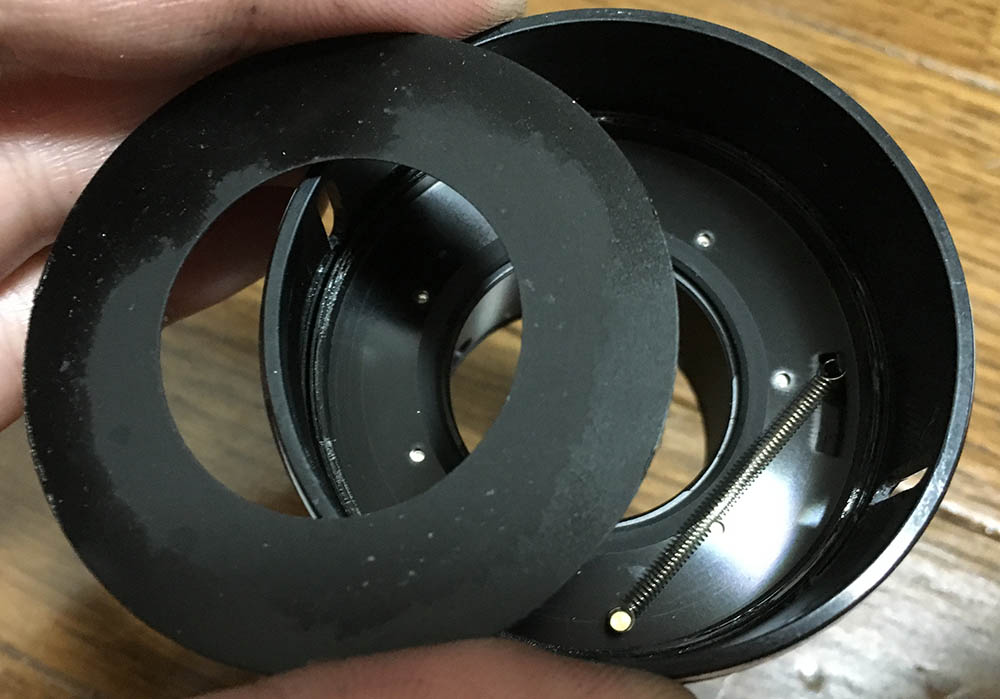
Let’s now go to the front. Carefully remove the rubber sleeve and make sure you don’t rip it. Like grandma’s bones, this can become brittle with age, too. These are usually glued so run a toothpick underneath the rubber sleeve to unstick it first then carefully lift it until it comes off.
Go back to this step when you are almost done reassembling your lens and it’s time to do the focus calibration part.
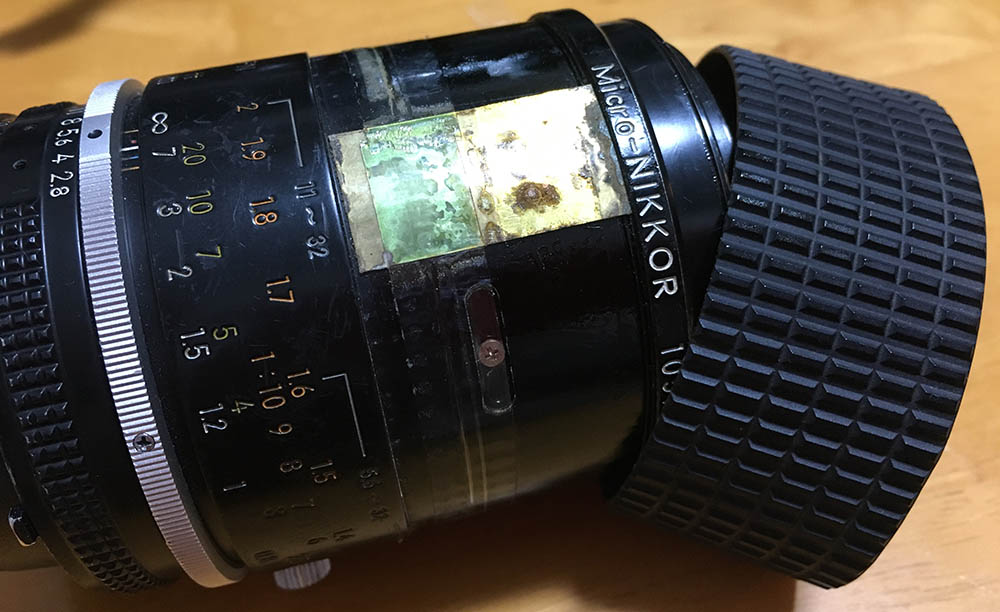
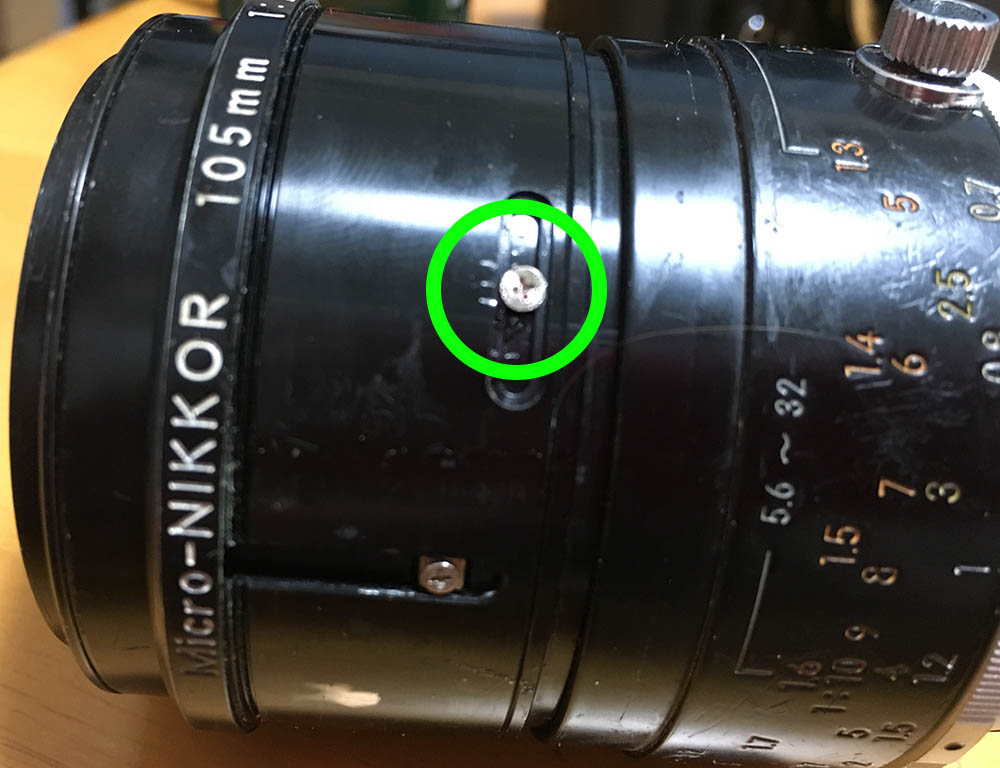
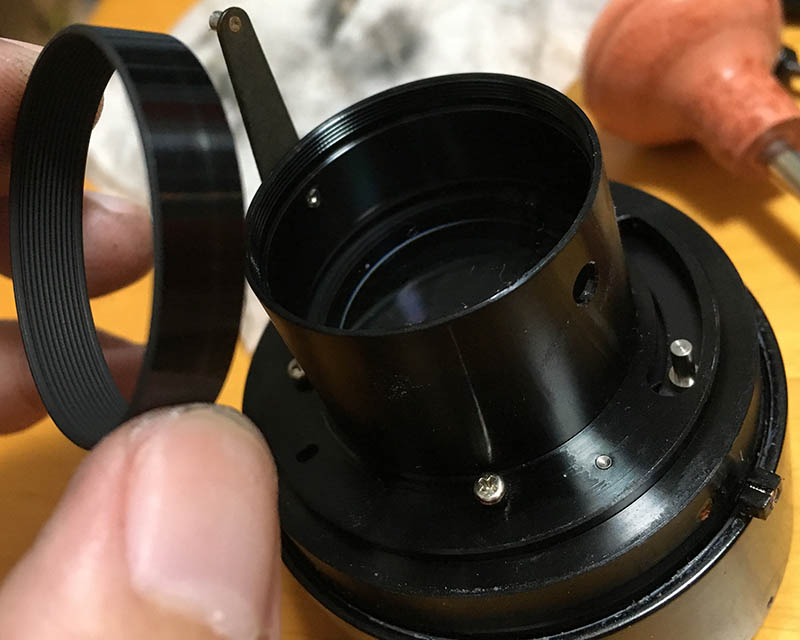
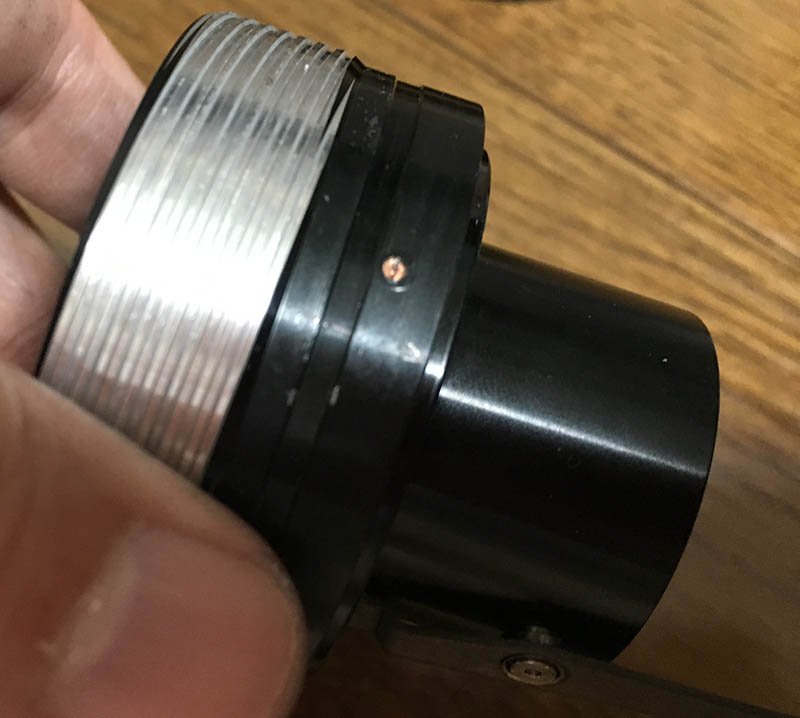
You can remove this set screw so you won’t have to deal with this later on. It secures the front ring so it won’t get unscrewed accidentally. We’ll deal with this part again later so for now, place a couple of drops of acetone to soften the glue used on its threads. Drop it along the seams and let capillary action take the acetone into the rest of the thread.
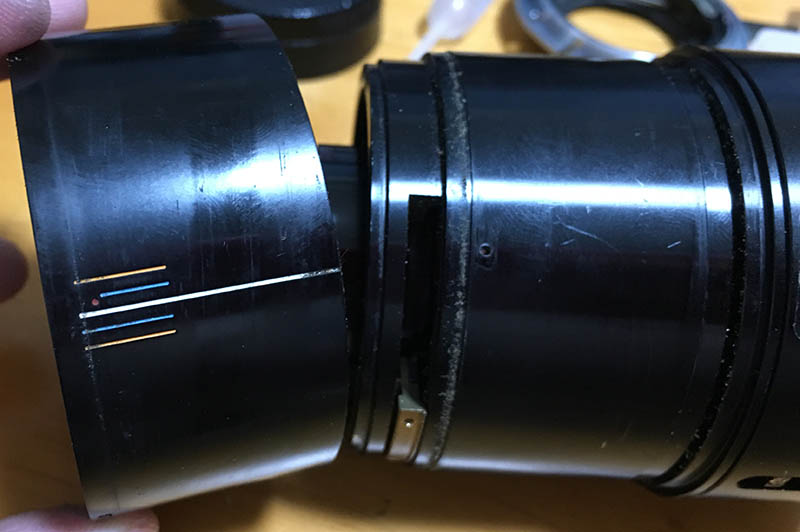
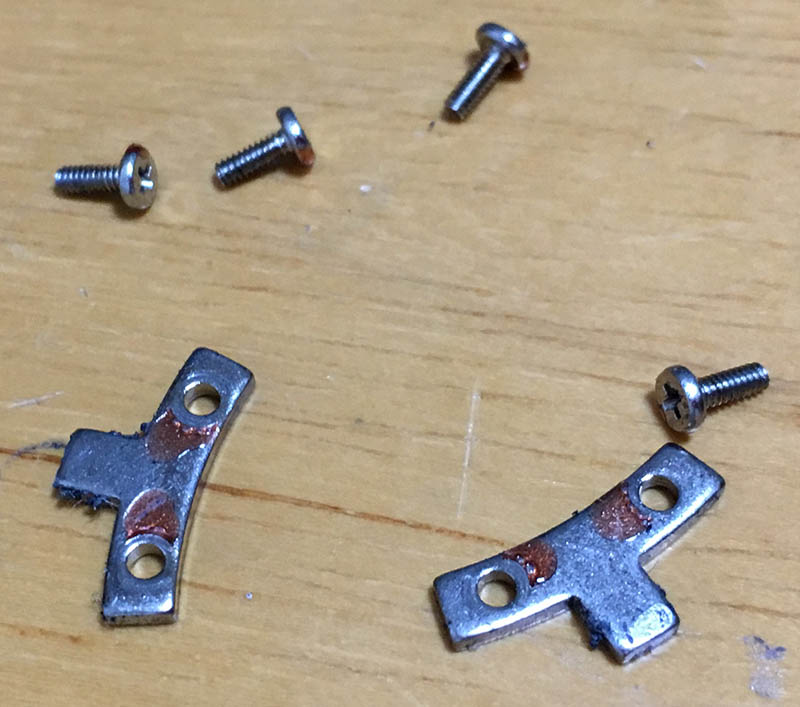
You can now begin removing these brass shields. The scotch tape is used to hold both the brass sheets and focus scale in place. The brass sheets protect the nuts underneath it.
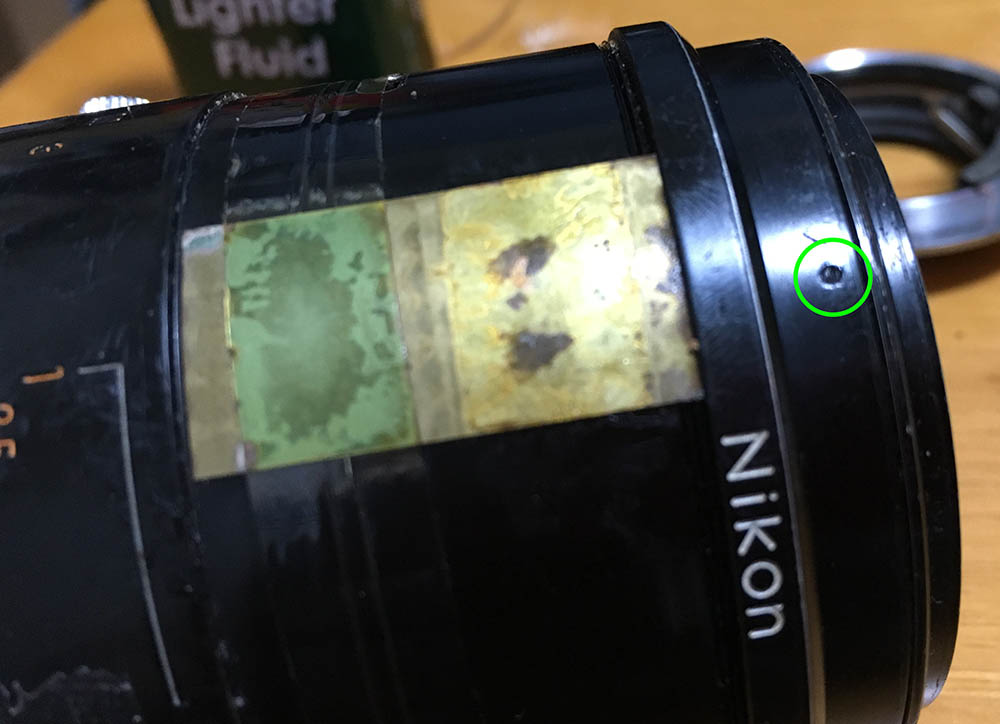
Carefully mark the position of one of these. These are for keeping the front barrel in-sync with the CRC unit inside. You can remove these screws later.
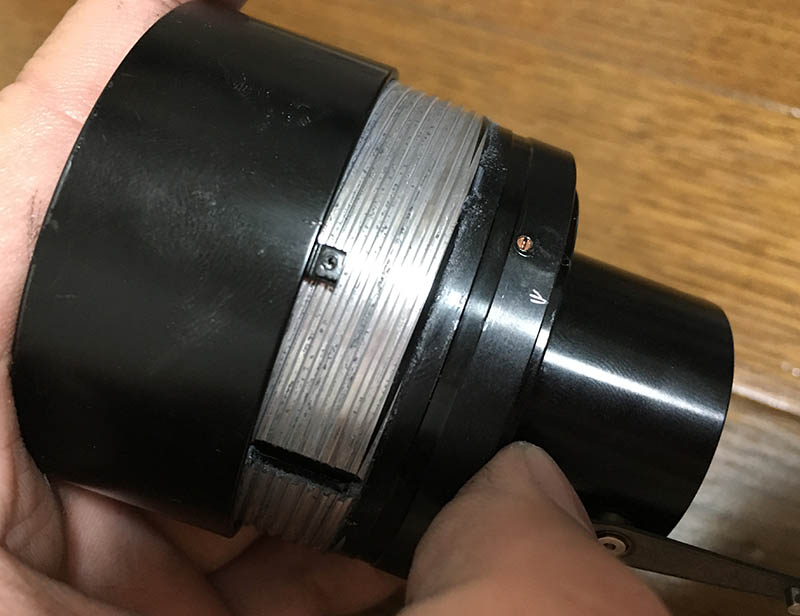
Remove the screws securing the chrome grip so you can take it off. Once it’s gone, the focus scale and other things can safely be removed.
This sleeve can now be removed. Look at all that dirt that got accumulated underneath this.
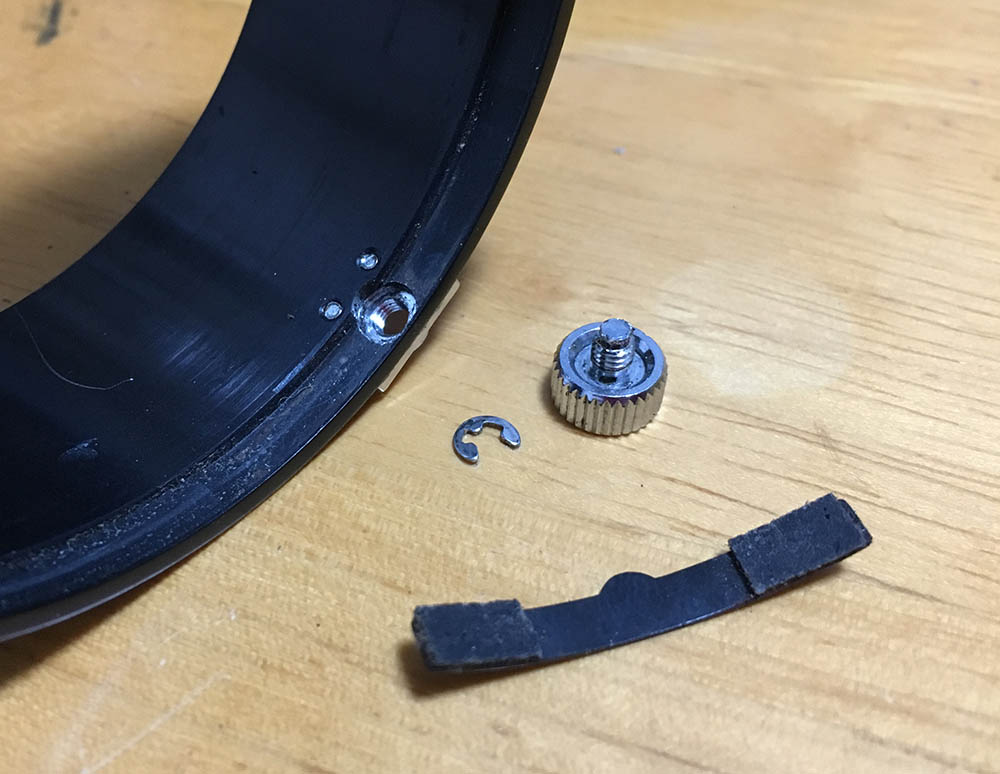
This is the focus damp mechanism after dismantling it. This is being held by a C-clamp. This is part of the focus scale, you can skip this if you want to but for a thorough cleaning, this has to be dismantled. you can replace the worn felt pads on the spring if yours doesn’t grip the barrel properly anymore but make sure that the adhesive you use is strong enough.
This is a good time to take notes, both visual and physical. This is the proper alignment of the front CRC floating elements on my lens, it may be different on yours.
That’s it for the external bits. This is probably the most crucial step because you will have to take careful notes in order to be able to put this thing back together again. Photos and marks will suffice but you will have to adjust it later just to make sure everything is aligned perfectly.
Disassembly (Internal):
Things are going to get more challenging from this point so pay attention to everything you do, take notes and pictures before you dismantle anything. Also be very strict with yourself when it comes to maintaining the focus of your lens, making sure that it’s always set to infinity especially when taking notes. This will be your point-of-reference and if you got it wrong (like I did) then you are in for a hell-of-a-time.
It is now time to separate the helicoids. Remove the 3 screws to the left and the 2 screw to the right. Before you separate the helicoids, that brass thing is getting in the way so let us look at the next step first.
Time to disassemble the lens further. Remove the screws that’s securing the brass part. It was connected to the aperture ring before we got rid of it. Be sure to make some marks so you will know that these are aligned properly when you reassemble the lens.
Carefully get that thing out of the way.

Now that nothing is in the way you can now separate the outer helicoid. As far as helicoids go you must never forget to mark where they separated, this is also the position that they’re going to mate. Check the picture above, you can see that I made a mark to indicate where they separated. If you are new to lens repair, read my article on how to work with helicoids to prevent any trouble.
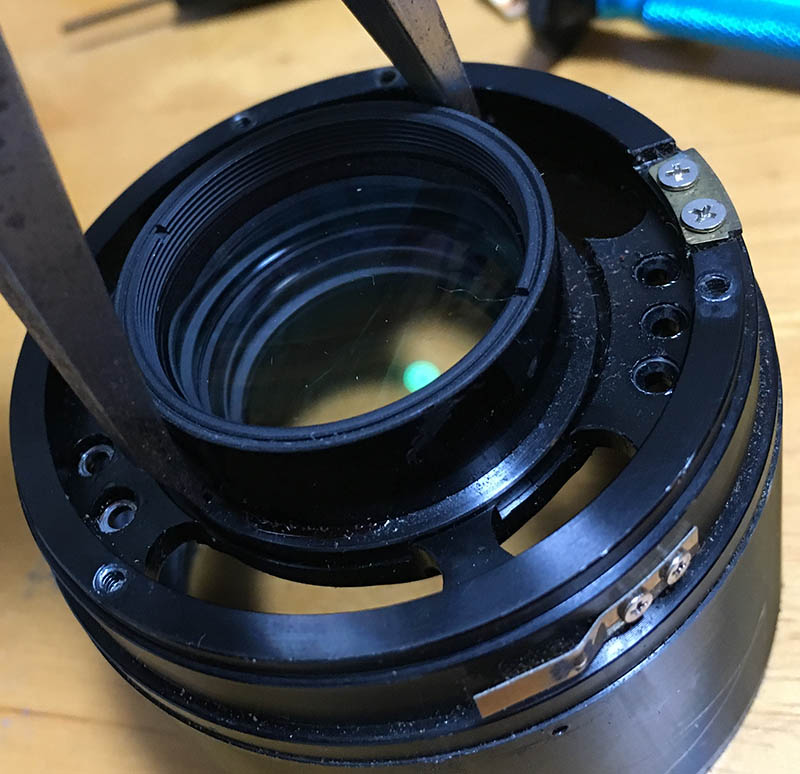
Now, time to get that delicate rear elements group out of the way. Use a lens spanner for this and stick it in the slot found on the casing. You can do this earlier if you want to but it just occurred to me now so don’t worry.
Pick the rear elements group with your fingers and keep it somewhere safe.
This is the other half of the lens. At this point, you can pull those long keys from the barrel. These were connected to the base of the outer helicoid and it keeps it in sync when you focus in and out.
I marked where the midline should be, better safe than sorry.
The central helicoid can be separated from the rest of the barrel.
You can remove the focusing ring but be careful with it because it will snag with that small tab from the CRC mechanism. A little bit of dexterity will be needed here.
From here on we are just going to dismantle some parts here and there in no particular order until we reach the delicate CRC assembly itself.
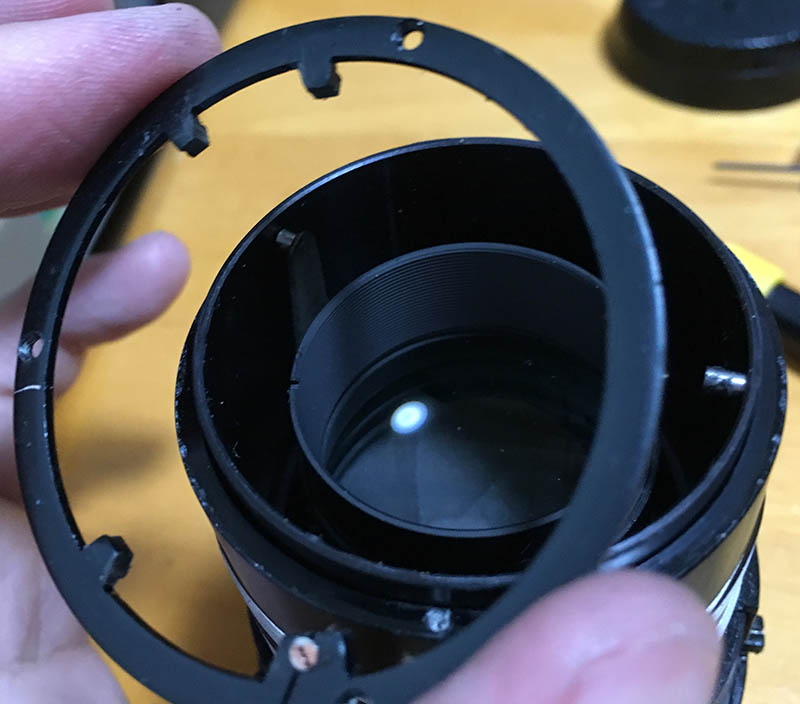
In order to access deeper into the inner barrel’s parts you must first remove this ring. This is being held held by 3 screws so you’ll have to remove those first.
Remove this cup. This cup rotates and is in charge of actuating the iris.
Time to remove the inner helicoid from the objective’s casing. Extract these, look for the other ones on the other side that is hidden from view.
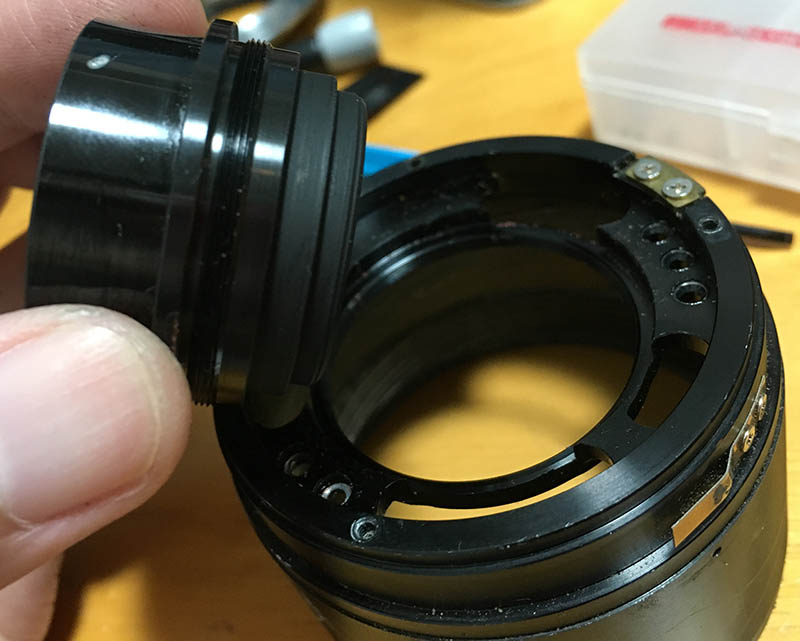
The objective can now be separated from the inner helicoid. Do not forget to mark their position in relation to each other.
As you can see from this photo, this lens has a tendency to develop the oily iris syndrome. Any lens which has the iris mechanism close to a helicoid is at risk so please apply grease sparingly since a little can go a long way but not too thin since it will dry up rapidly.
Disassembly (Objective):
Disassembling the objective is not difficult if you know what you are doing. The only thing that I remembered was how it was a pain to remove some of the retention rings due to these being glued or sealed by paint. This issue is most especially true of the front elements assembly.
Unscrew the rear baffles with your bare hands. Be careful because the rear element might drop to the floor since this is the one securing it. Remove the rear element with a lens sucker, keep this safe. Do not forget to mark which side should face where using a pencil or a Sharpie. This will help a lot when it is time to reassemble this. I usually mark the wall of the lens with a thin line facing the front of the lens.
Carefully remove this spacer, do not forget to mark which way should face forward. These spacers aren’t usually symmetrical and you’ll risk damaging your lens if you put it back facing the wrong direction.
Use a lens sucker and pull this thing out. For very obvious pieces like this, I wouldn’t bother marking which side should be facing where.
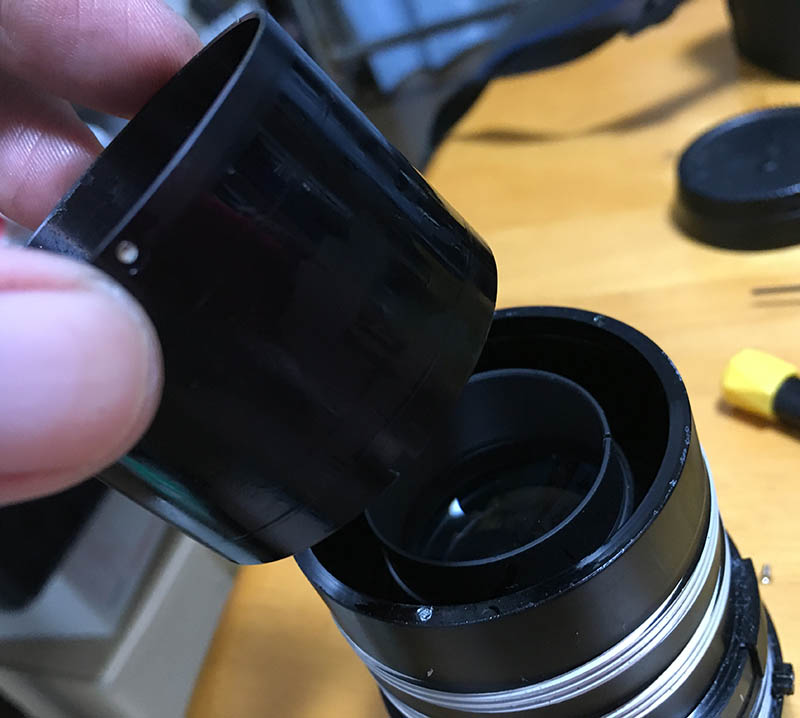
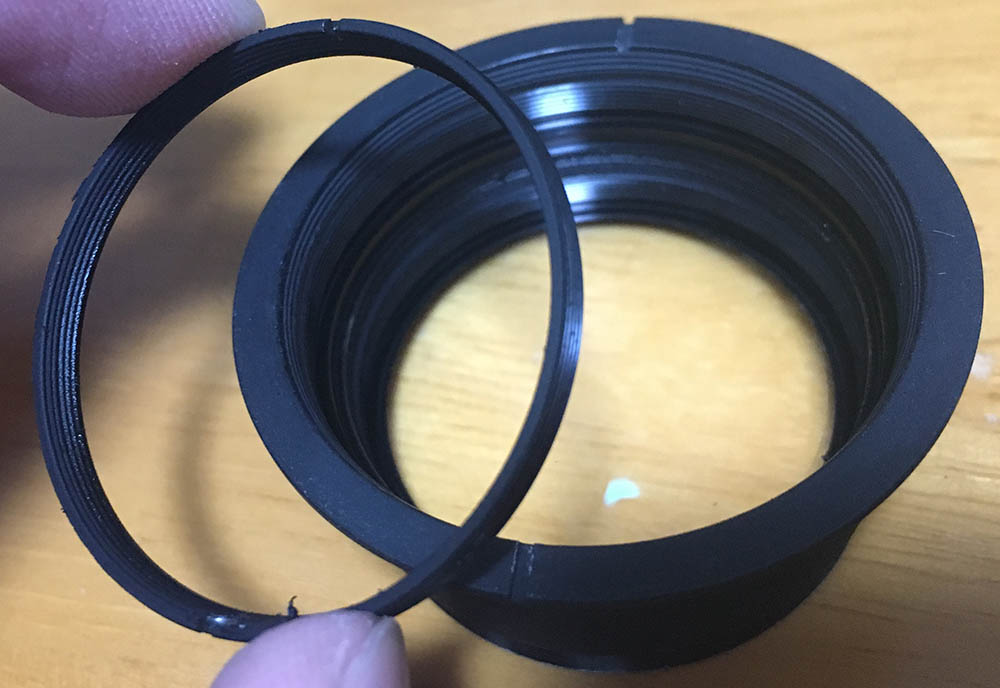
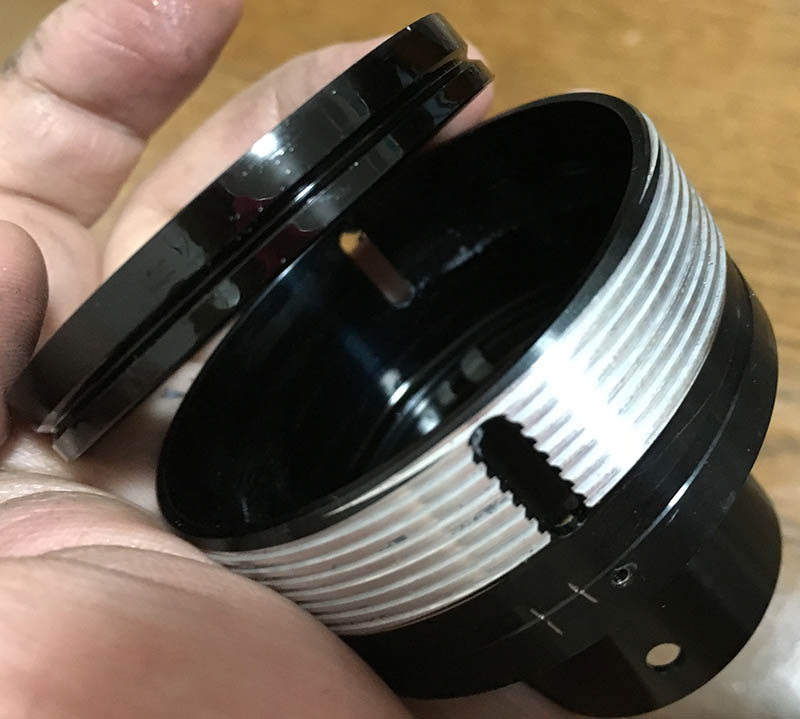
Back to the front. Do you remember the front ring that we applied acetone to after removing the set screw? Now it’s easier to remove since we gave the solvent some time to work on the glue. Nikon loves to seal the front rings of their lenses.
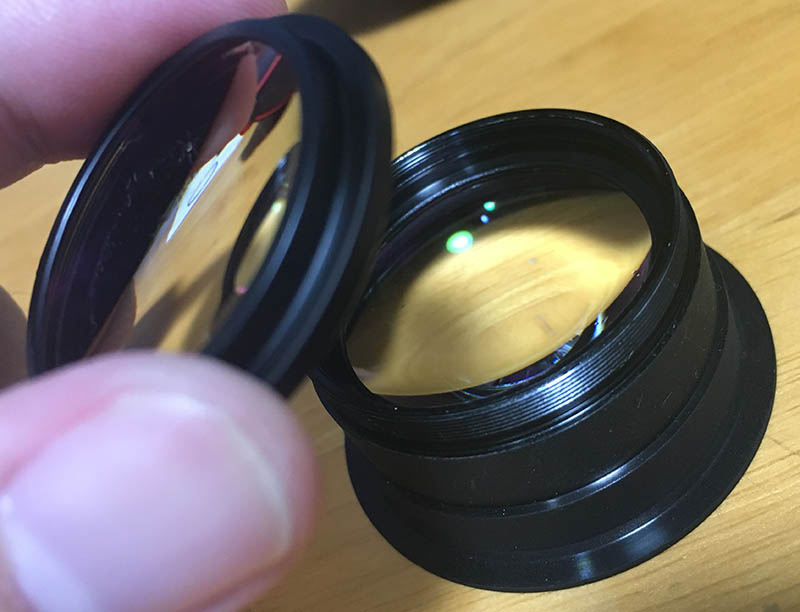
With the ring gone you can now unscrew the front elements assembly away from the objective so you can keep that in a safe place. You can do this step earlier if you wish but I had to wait for the solvent to work on the glue first so I worked on the other parts first.
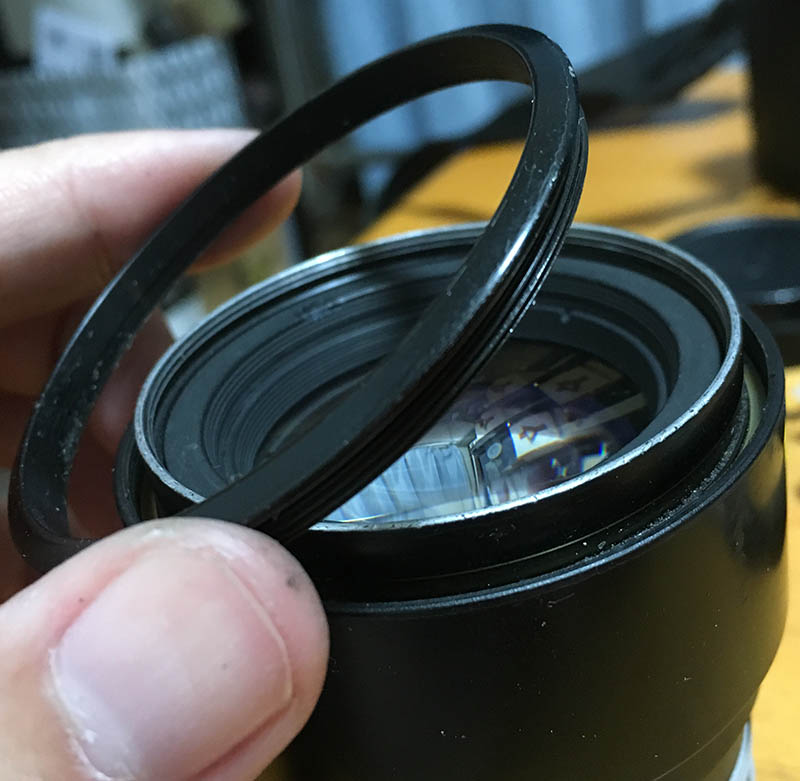
In order to open up the front elements group, you will need to unscrew this retention ring first. As you can see, it’s glued with lacquer. Alcohol will do a quick job on this.
After a few drops of alcohol the ring came off effortlessly. Just remember to use the correct spanner for this and be careful not to scratch the glass.
You can now proceed by extracting the glass with a lens sucker.

Back to the front. This ring has to be removed but it was secured with paint. Before you begin working on it with a compass, use a needle to scrape into the seam where this ring and the casing meets. This is to remove the paint sealing the seam so you can drop alcohol into the seam itself. This part can be hard to remove so be patient.
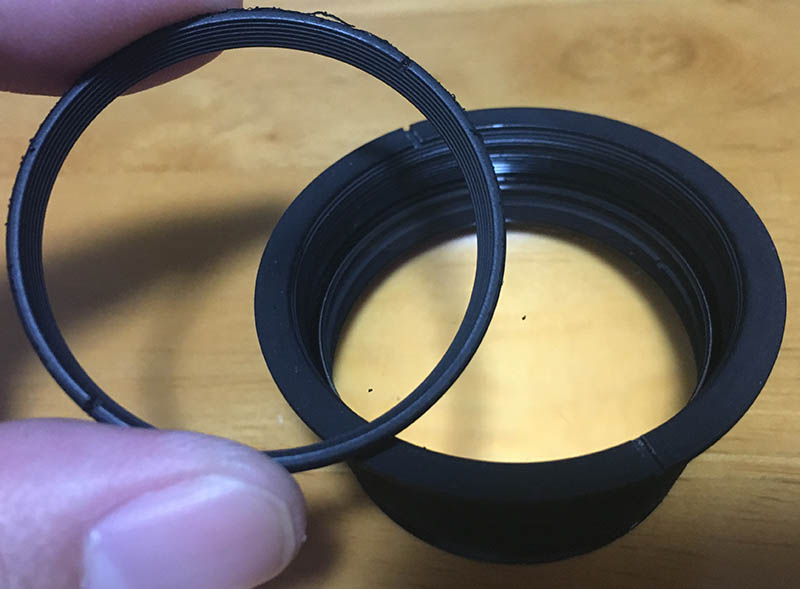
After a couple of minutes, I tried attempting it again and the ring came off easily due to the solvent seeping into the thread, working on the adhesive and paint. See that thing sticking out from the edges of the ring? That’s the dried paint that’s sealing this cell.
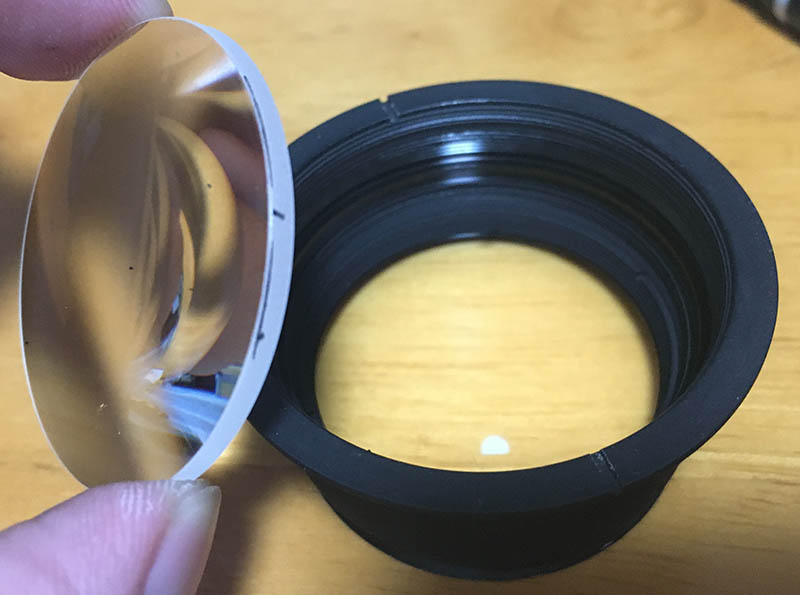
Use a lens sucker to extract the front element. Remember to do this with the front element facing up or you’ll drop everything to the floor.
More rings? Use a compass and be careful not to scratch the glass.
As evident from the picture, this ring was also sealed using black paint like the one before.
You can use a lens sucker to pull that 2nd element out of the way. I usually store these in a small plastic box with plenty of lens tissue as cushion.
Clean everything thoroughly before you put them back. The residual paint can be dissolved with acetone or alcohol.
Disassembly (CRC):
This part is critical. You will have to make plenty of notes and take plenty of pictures before you dismantle anything. You will have to be very careful of the tolerances and count how many how many turns you need to remove something. It is also helpful to study how a mechanism works before you dismantle it so you’ll know if you got it right when you reassemble it later.
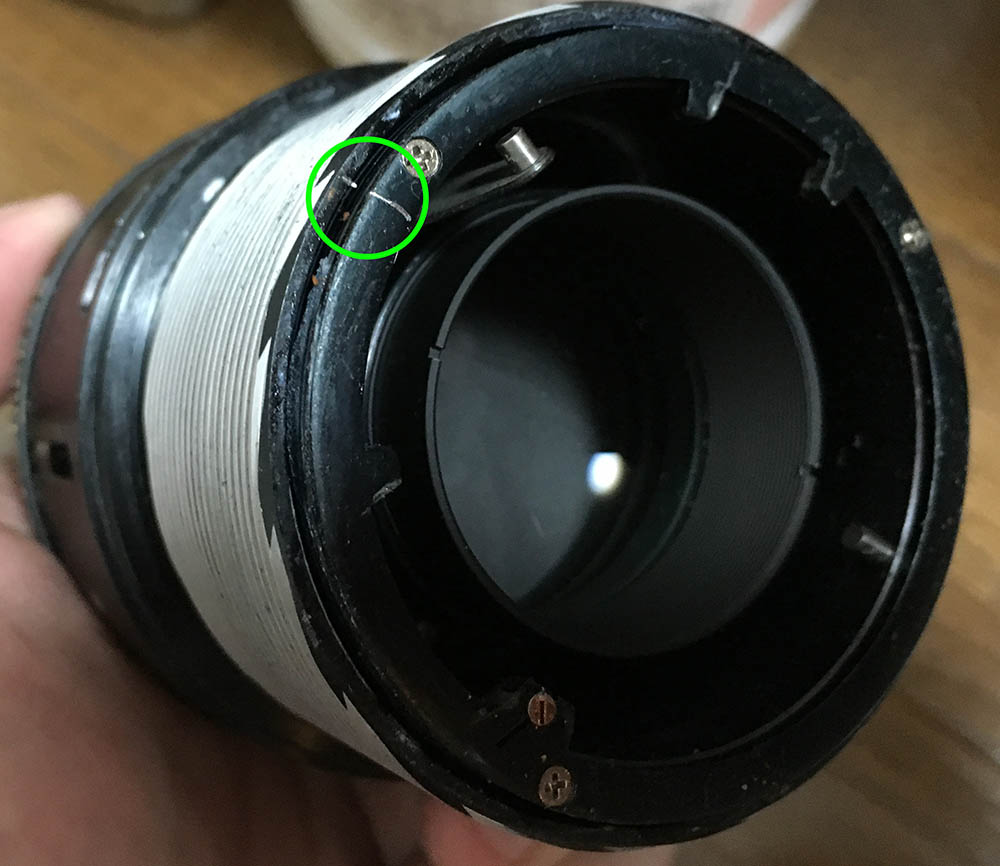
Before going any further make sure to take plenty of pictures of the iris and the 2 helicoid keys for the CRC. Note their positions,etc. That brass ring you see in the middle of the pic is a spacer for the front elements group. Remove it and keep it in a safe place.

Take more notes and pictures while you still can. This time, of the outside. This is an important part so get the tolerances and measurements right.
Once you are satisfied with your note-taking, you can remove the 2 helicoid keys found in the front barrel.
You can now remove the front barrel.
You can safely separate the front CRC helicoids. Be sure to mark where they separate.
This is the most demanding part of this lens as the measurements have to be precise. The alignments made at the factory have to be replicated to the best of your abilities, if you get anything wrong then you won’t get this lens to be as sharp as it was.
Disassembly (Iris Mechanism):
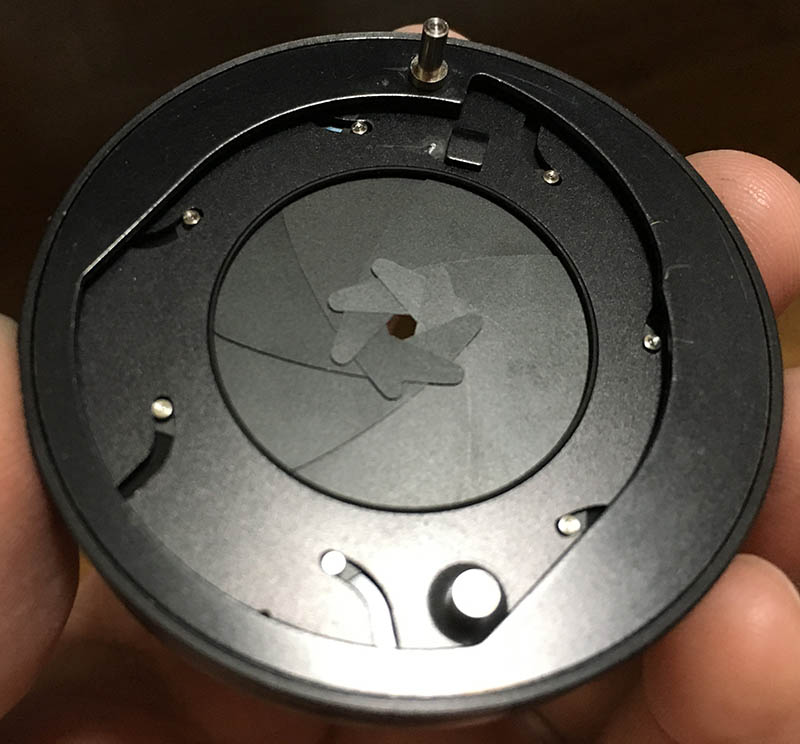
The iris mechanism is pretty straight-forward, the only thing noteworthy is the protective plate used to cover the inner parts of this assembly. It is glued so you’ll need to use alcohol to get that off. You will have to be careful while picking this thing and be sure that the iris is fully-open when doing this so you won’t accidentally snag anything. The blades are really delicate, too.
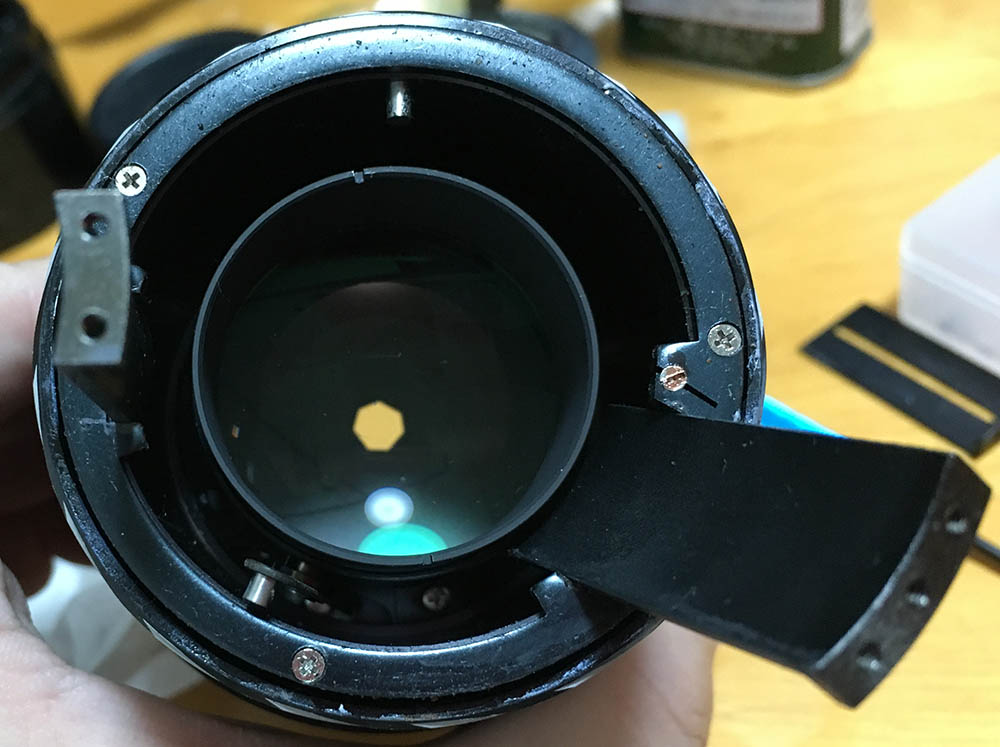
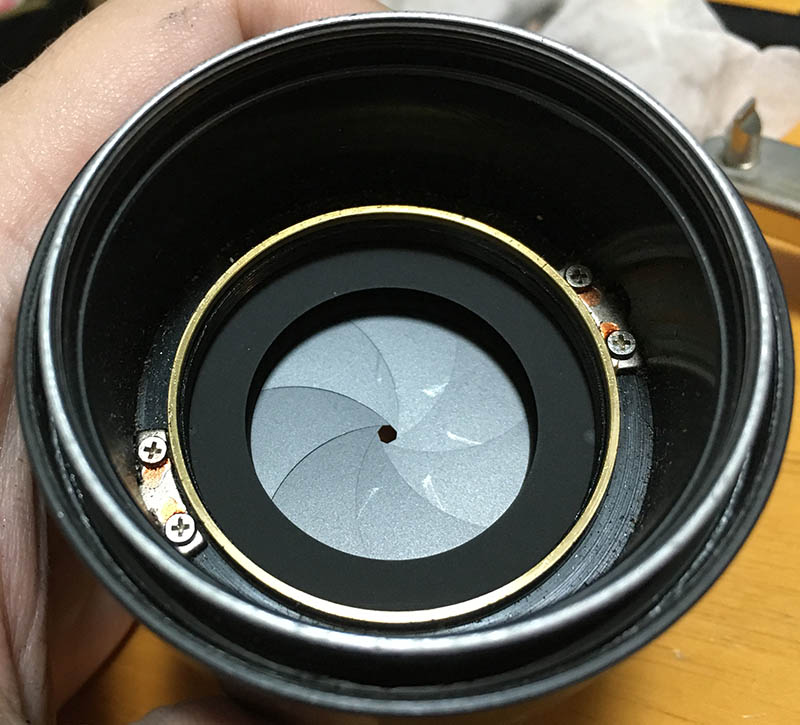
Now, remove this protective plate from the iris mechanism. It was glued on mine so I had to soak the edges with alcohol first before attempting to lift it off. Be careful not to damage the blades when you remove this plate. Do it while the iris is wide-open.
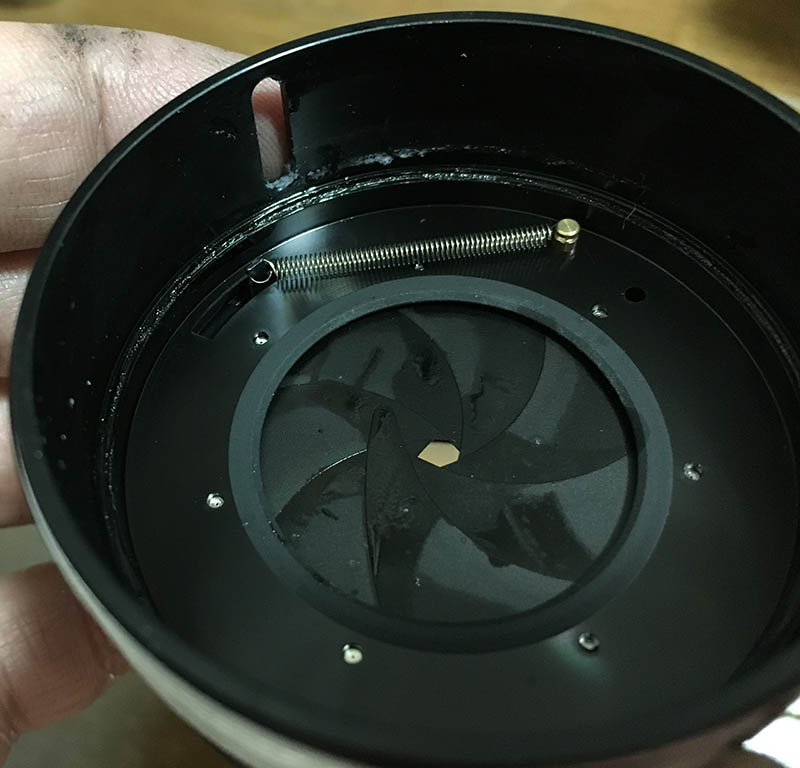
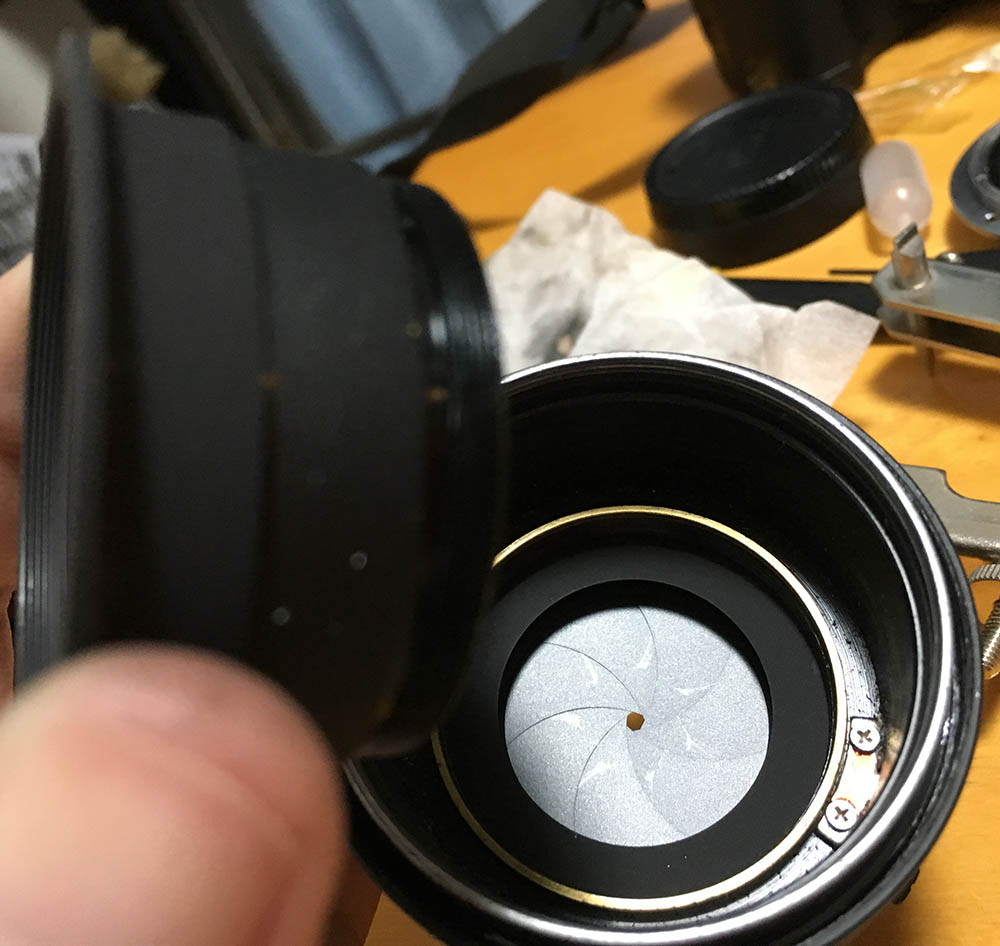
Notice the shape of the iris, it’s irregular. While odd-numbered irises have a tendency to do this, this one is on the bad side. This is caused by improper seating of the blades, a warped blade or both. I fixed it by reassembling the iris and hoping that the blades will even up now that they are randomized a bit. This trick usually works, in bad cases the iris will still be a bit irregular but not as bad as before. Before you go any further, use a pair of tweezers to remove the spring.
To open up the iris you will have to remove these set screws. I believe there are 3 of these and the others are on the other side. These screws secure the iris mechanism.
The iris mechanism can now be removed as a single unit.
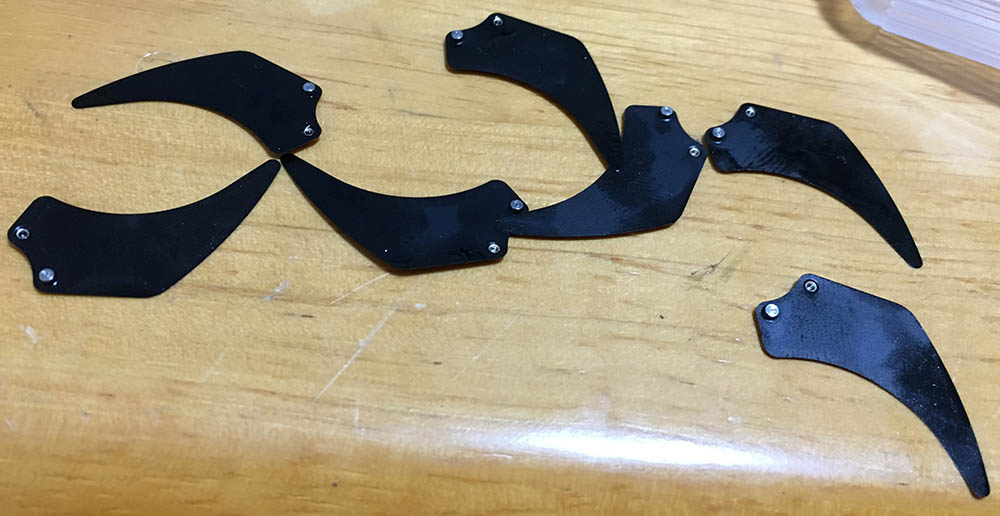
The blades will be cleaned thoroughly with lighter fluid and lens tissue.
This part isn’t difficult at all but it’s a common repair for this lens. I know a friend who owns one and his lens has an oily iris even after cleaning it. This is a recurring problem that can only be solved by a proper overhaul and the grease will have to be changed, too. Never apply too much grease specially on the CRC unit so the oil won’t reach the iris.
Conclusion:
This is a pretty good exercise, I sure learned a lot from this. I got confused because I made bad notes while I was dismantling the front where the CRC unit is located. When it comes to lubricating the helicoids make sure not to lubricate them too much or you might end up with an oily iris if the excess oil migrates to it. The helicoid for the CRC unit won’t need a lot of grease so it is OK to just leave a thin film on it. Also be sure not to use a heavy type of grease or else you will end up with a lens that is hard to focus. I always use a lighter type of grease for lenses with CRC like the Micro-Nikkor 55mm f/2.8 Ai-S. Lenses that have CRC have more helicoids than usual lenses and all the resistance coming from all those damped helicoids will add-up so you have to take that into account.
The Iris mechanism can be tricky to put back but there’s a trick that I do, I’ll show it to you later.
The iris is now circular again. Well, it’s still a little bit irregular because of the odd-numbered blades but at least it looks a lot better now.
To easily restore the iris mechanism back into position, you’ll need to place it on top of a cup or something smaller than its diameter. Carefully reinstall the housing so the iris mechanism won’t be disturbed or everything will fall apart. Secure it with its screws again and it’s as good as new. Finally, return the spring to its proper place after all this is done.
Reassemble your lens up to this point, check to see if it’s focusing correctly all the way to infinity. Focus on something 4-6km away or more and using the focus confirmation dot on your modern Nikon camera to make sure that it is focusing correctly. Check the image that you took on your camera’s LCD to make sure that it is sharp. Now, the dot may light up but the focus is not spot-on so take a series of pictures to see which one gives you the sharpest result at infinity and then adjust the focus scale to reflect that. This can be a bit tricky and tedious but you have to get this to focus perfectly at infinity or else the other distances will all be incorrect according to the scale. Read my article on how to adjust a lens’ focus to know more about the process.
That’s it for this article. I want to show you something different this time so I thought that a more complicated lens would be good so I hope you enjoyed this. Now, I’m not sure whether people actually read these things from start to end but I hope that you do since I put a lot of care and effort into writing and editing the sequence of the steps.
Thanks for supporting or following my blog. If you enjoyed this, please help me maintain this by supporting the blog. Your help goes a long way because you help me pay for this site’s maintenance and you also help me offset the cost of buying film and developing it. Your support helps make this blog the best resource for classic Nikon repair on the net. See you again, Ric.
Help Support this Blog:
Maintaining this blog requires money to operate. If you think that this site has helped you or you want to show your support by helping with the site’s upkeep, you can make a small donation to my paypal.com (richardHaw888@gmail.com). Money is not my prime motivation for this blog and I believe that I have enough to run this but you can help me make this site (and the companion facebook page) grow.
Buy me a roll of film or a burger?
Thank you very much for your continued support!
2.00 $
Helping support this site will ensure that this will be kept going as long as I have the time and energy for this. I would appreciate it if you just leave out your name or details like your country’s name or other information so that the donations will totally be anonymous. This is a labor of love and I intend to keep it that way for as long as I can. Ric.

Feb 23, 2017 @ 03:04:10
Nice work and great detail.
Feb 23, 2017 @ 06:38:01
Glad you like it!
Feb 23, 2017 @ 03:05:13
Nice work and great detail.
Feb 23, 2017 @ 06:37:35
Thanks, John!!!
Sep 19, 2017 @ 21:01:46
Well that was a lot of work and a lot of helicoides to take apart. Do you have any experience with a 135 F2 AIS lens.? The copy I have is very stiff to focus or is this just possibly a design of the lens? Appreciate your reply thanks Richard and I sure enjoy your comments and your articles on Nikon gear.
Sep 22, 2017 @ 01:20:26
Hello, Gerry!
No, I don’t unfortunately. I am looking forward to working on one in the future and I am just waiting for a reasonably-priced one on the used market. Ric.
Sep 22, 2017 @ 15:20:17
Good luck with that, I found one on eBay for around 350 Dollars w shipping but usually they were always around 550 or 600 Canadian that I saw. I I check the other day and at 2.8 it’s definitely sharper than the 105 2.5.
Dec 24, 2019 @ 15:04:40
A helpful tip if I may. One of the bugbears of replacing the mount is getting the long aperture pin spring neatly back inside the mount. It tends to be crushed between the black back plate of the mount and the rear element and its a rare struggle to get it in place. I have just serviced four of these, three of the springs were crushed and in one case a bad tempered DIYer managed to trash the mount and the back of the lens in a way difficult to describe or believe. It takes a few extra minutes but the way to do it is:
a) separate the 2 halves of the rear optic group.
b)replace the inner half and the aperture ring.
c)remove the black back plate and replace the mount
d)screw in the other half of the back optic – the spring will sit to the side.
e) replace the back plate
Job done!
Happy servicing
Apr 28, 2020 @ 17:04:47
Our lenses will rarely have any heavy marks on the elements or fungus inside; if they do we try our best to point out all the cosmetic marks and imperfections.
Aug 06, 2022 @ 10:15:39
A tip, when resetting the CRC the front ring has to be in place to check otherwise the cams won’t aline with your reference marks. I couldn’t get it right, though I was sure it was reassembled correctly, I put the ring on and they just slipped straight into place.