
Hello, everybody! How are you guys today? I am sure that you have noticed some of my personal things creeping into this blog such as my work-related stuff. I work as an artist but I also do lots of technical stuff that’s a bit closer to engineering. There will be times that I’ll have to devise clever solutions to a problem, this is what’s keeping me sharp. I am comfortable working with both scenarios, that makes me a generalist of some sort. Speaking of being a multi-role professional and using clever gimmicks, I will showcase today an innovative lens that utilizes a really clever solution to a problem, making it flexible for more than one purpose. This lens is legendary in its own right, I shall explain to you why in this article.
Introduction:
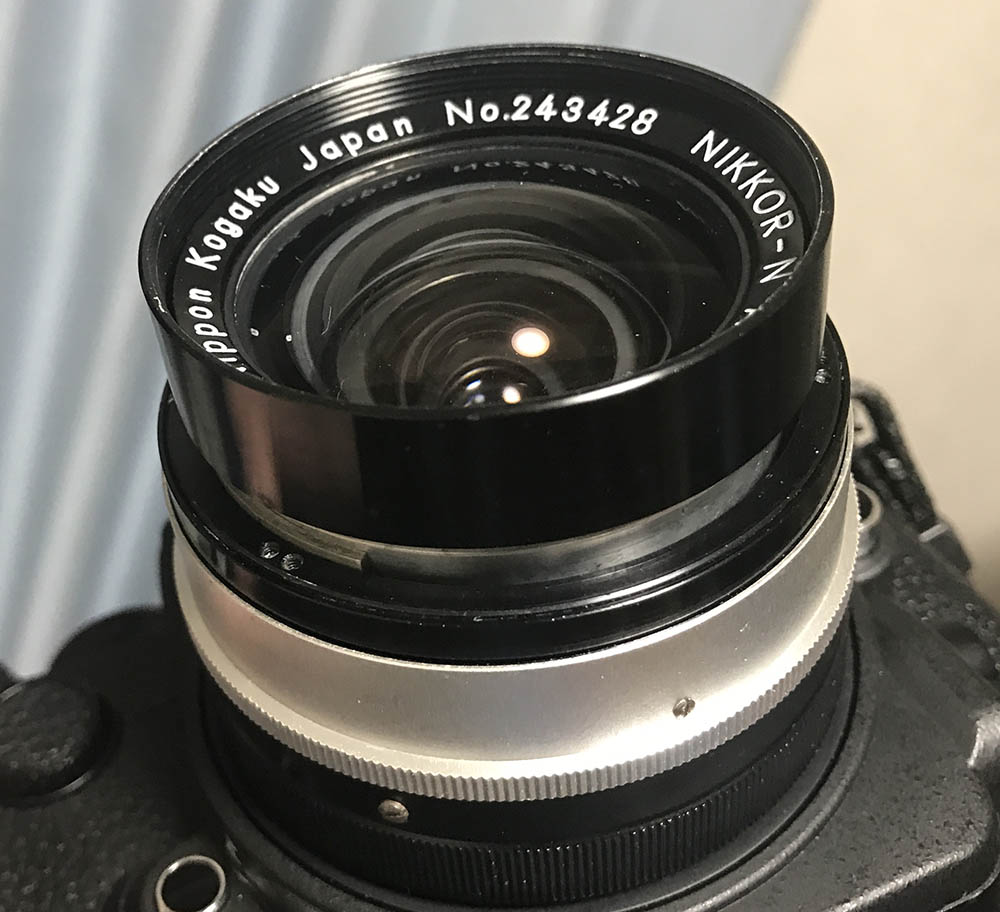
We’ll talk about a very influential lens this time so let me have the pleasure to introduce to you the Nikkor-N 24mm f/2.8 Auto. It’s the first lens to utilize the innovative CRC (Close-Range Correction) mechanism. The CRC system is used for altering the spacing of the elements as you focus in-or-out. This is a creative and efficient concept because up until that point, most, if not all of the other lenses use simple rack-focusing wherein the objective only moves in-and-out as a single unit. With CRC, rack focusing is coupled together with another movement wherein one or more optical assemblies move closer or further in relation to the film plane to give you better results when the lens is focused up-close and the corners look better, too. In this lens’ case, CRC is used for making it achieve an impressive 0.3m minimum focusing distance. It also ensures that the image remains sharp through-out the frame at 0.3m. This was hard to achieve back in the day for a lens this wide, it also helped make this compact while giving it a reasonably-fast maximum aperture of f/2.8. Retro-focusing techniques were used on wide-angle lenses of the day, it was yet to be perfected because the technique is known to produce terrible corners at very close ranges. This is the reason why the Nikkor-H 2.8cm f/3.5 Auto only has a so-so 0.6m minimum focusing distance. CRC enabled this to overcome that since a wide-angle lens that couldn’t focus close is limited in its use. You don’t exclusively use a wide-angle lens to get things in-frame in tight spaces, this is one thing many beginners get wrong.

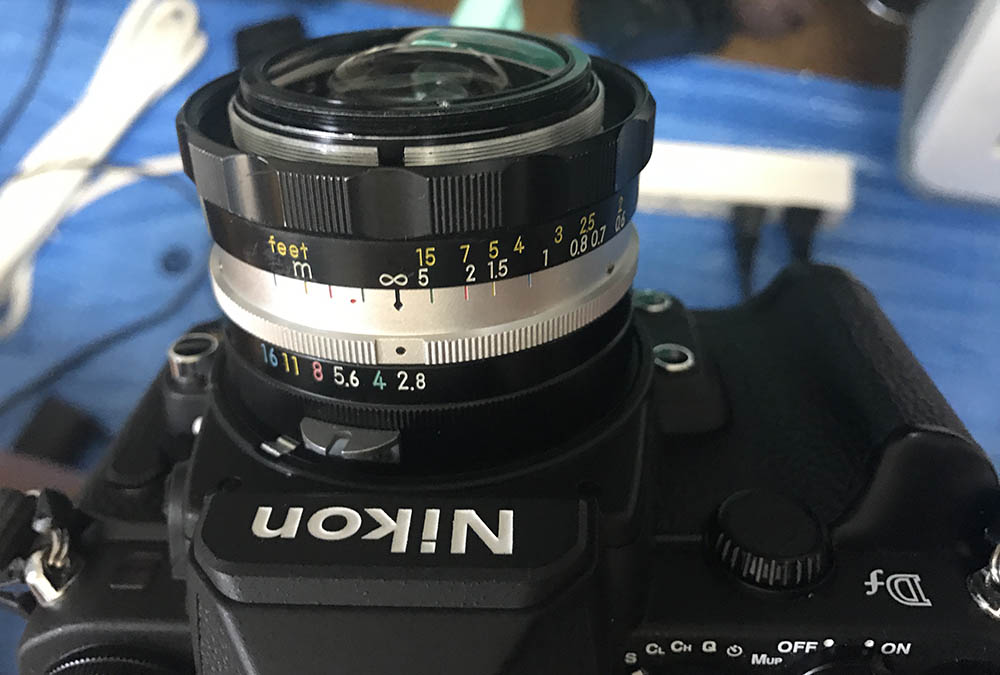
The Nikkor-N 24mm f/2.8 Auto is a lovely lens. This is dense and compact, it balances really well on most cameras. This lens is also great for people who shoot videos because 24mm is pretty good for videography. You can use this for storytelling, making your subjects appear more important since they’re going to appear larger in your composition as they get closer to the camera. Of course, you can also us this to get more things inside your frame.
The CRC gimmick is widely-used on many lenses that require it and is used on the Micro-Nikkor 55mm f/2.8 Ai-S and the Micro-Nikkor 105mm f/2.8 Ai-S to name just a few. Macro-lenses benefit from it since they have to perform perfectly at high-magnifications and still required to do a good job when it comes to objects that are further into the frame. Nikon implemented it with many premium Nikkors, without CRC we won’t have legendary lenses such as the ground-breaking Nikkor-N 35mm f/1.4 Auto.
This is named Nikkor-N 24mm f/2.8 Auto because “N” stands for “nona” (or 9). There’s 9 lens elements in all and Nikon used to name their lenses using Latin names for numbers to show how many elements were used. As lenses got more complicated, the element count got more, this became impractical so it was dropped. The design is a then-new 9-elements-in-7-groups one, it’s a complex lens for its time so I imagine that this was quite expensive when it came out in 1967. It was sold until 1975.

Here it is beside the smaller Nikkor-S 35mm f/2.8 Auto. It is just a bit bigger, if you consider that the Nikkor-N 24mm f/2.8 Auto has more things going on inside you’ll appreciate all the efforts made in designing this little gem. It’s a ground-breaking lens for its time, getting this wide with an SLR lens wasn’t something easy and some lenses require you to shoot with mirror-up so it’s not easy to compose or frame your scene accurately. This, and the amazing Nikkor-UD 20mm f/3.5 Auto helped change the game.
Knowing how your lens performs is key to maximizing it. You will know its strengths and weaknesses, this will help you decide when to use this or not. These were taken from f/2.8, f/4, f/5.6 and f/8, we will see the most changes happen with these apertures and I’d imagine that people will want to shoot with this at the mentioned values. The tests aren’t scientific, they’re merely based on my observations and should be treated more as my impression of how this lens performs. I took these with my Nikon Df but some were taken with my Nikon D3.

(Click to enlarge)
Distortion looks horrible, the profile is complex, this wouldn’t have been so bad if the profile is simpler. Vignetting is king of heavy, it reaches closer to the center than most wide lenses that I have tested. It improves as you stop the iris down to f/4 where the far-corners aren’t as dark but only improves to an acceptable level by f/5.6 but you will still see traces of it which is such a shame since this could’ve been a lot better if it’s better-controlled.


(Click to enlarge)
These photos should give you an idea of how bad the distortion is. This was released in 1967 to put things in-context so I wouldn’t knock it for this but I won’t be using this for architectural photography or for things that requires accurate reproduction of lines in your scene.

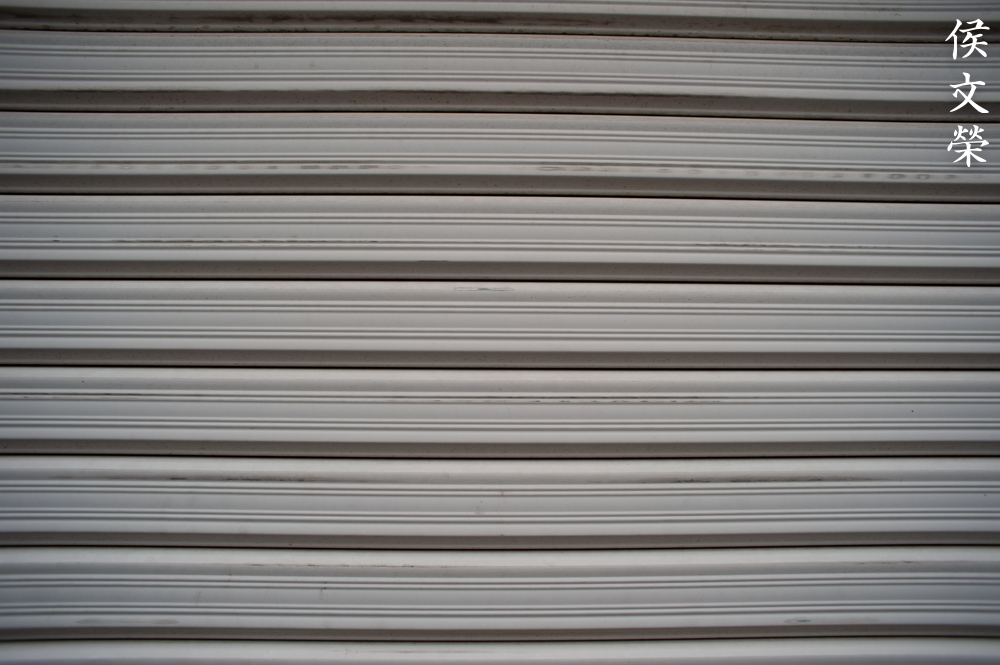
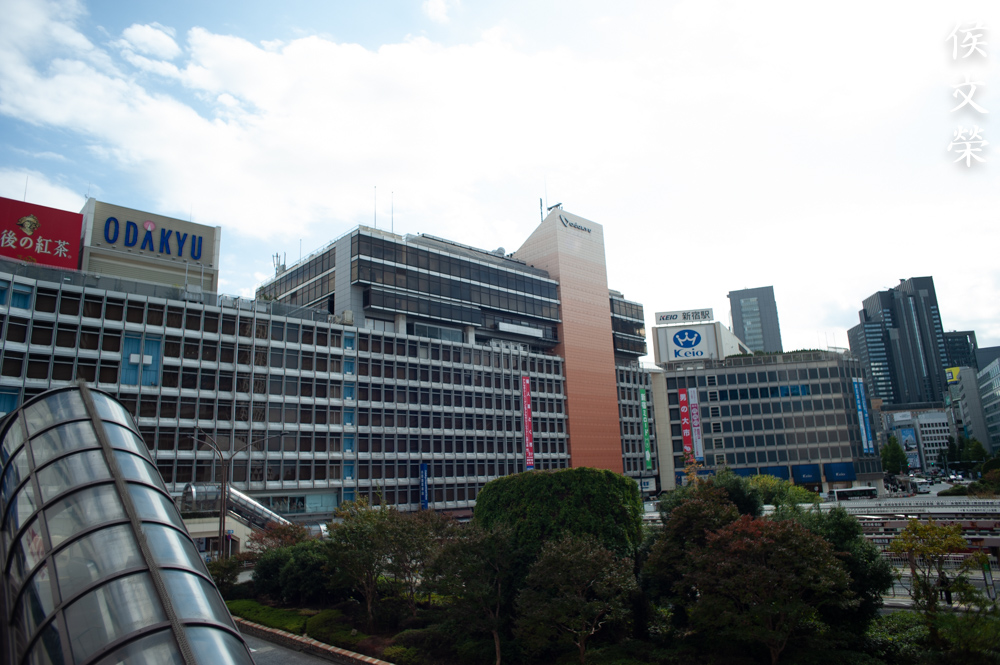
Here is another sample of the lens in real-world use. I shot this on purpose to show more lines. You’ll observe the orange line dips a bit and the awning is distorted but that is probably because I was shooting a scene with plenty of lines on purpose. If you look at the track at the bottom of the, you can see that this will give you a shallow bell-curve-type profile if you’re not careful framing the lines in your scene.
(Click to enlarge)
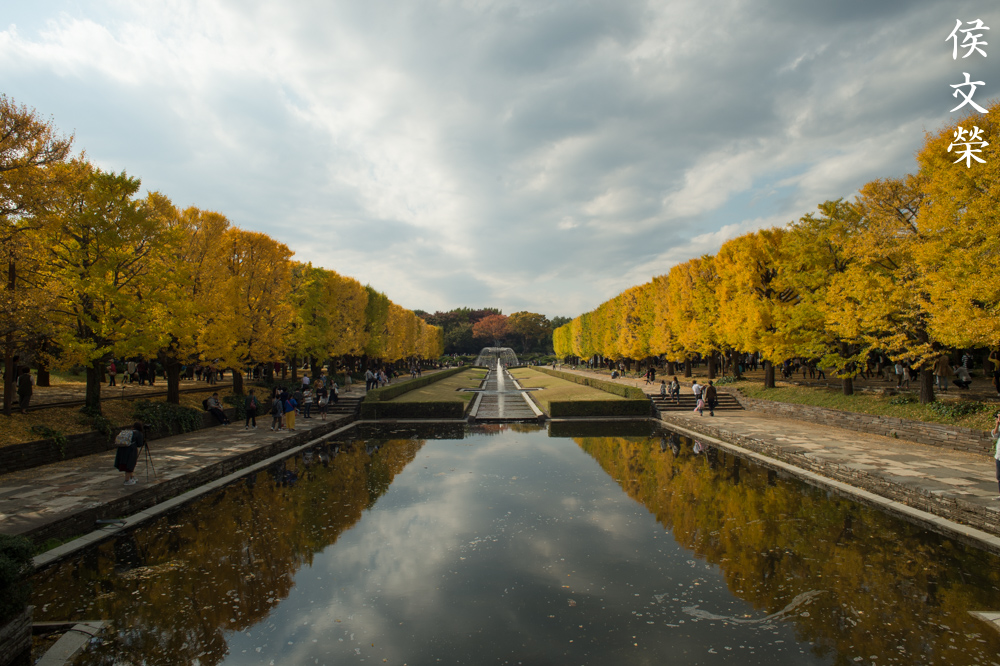
In real-world use, the distortion isn’t that noticeable unless you look for it. I observed that it has a cooler-than-normal cast and that is normal for a lens of this vintage, these were made for use with monochrome film. Many older lenses exhibit this slight, bluish tint, it only becomes an issue when shooting color film. It’s easily-fixed using white balance with digital cameras.

(Click to enlarge)
Flare and ghost resistance is pretty bad compared to later lenses with better coatings but this was what we had in 1967. See the pictures below to see it.


(Click to enlarge)
It flares and ghosts badly since the coatings are quite basic. You could avoid it by not shooting against-the-sun which can be difficult if you’re wanting to use this for landscape photos. Chromatic aberration appears to be bad too. I could see plenty of it in overblown areas of the photos but it improves quite a lot by f/5.6 unless it’s found on areas where the contrast is extreme such as things that border the sky. Stopping it down to f/8 won’t even help either.


(Click to enlarge)
These pictures should give you an idea of how it performs when it come to flare and ghost resistance. The photo to the left was shot at f/2.8, You can see that this will give you ugly artifacts when the sun is in the frame. The photo to the right was taken stopped-down, the ghosts turned into polygonal blobs but the ugly rainbow went away. This was shot with the sun just outside the frame so a hood may have been helpful here. Contrast remained relatively high which is good. You can also notice some astigmatism.


(Click to enlarge)
Its performance is stellar wide-open at closer distances. It’s sharp and it has enough resolution at the center but the corners don’t look good at all. Stop it down to f/4 raises the center resolution, it could now support its sharpness. The corners begin to look better but still lacking, specially for subjects that are further into the frame. The center is performing at its peak by f/5.6 and the corners look a lot better. If you require nice, sharp corners you should shoot this from f/5.6 or f/8 specially if your subject is positioned quite far. Its rendering is quite nice, the saturation is a bit muted and the contrast is not too-high so it takes photos with a nice “vintage-look”.

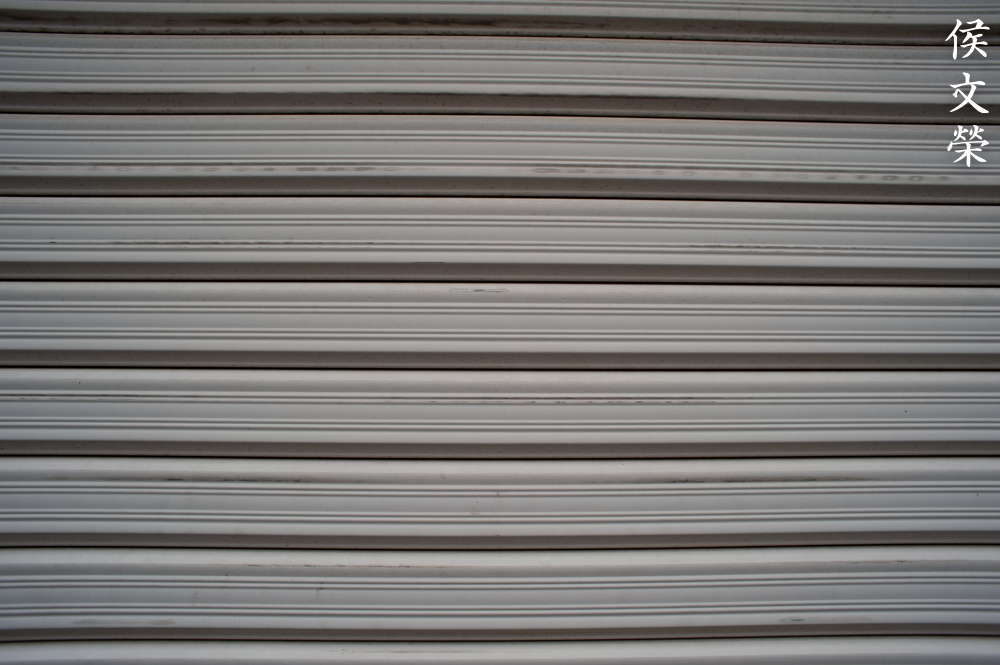
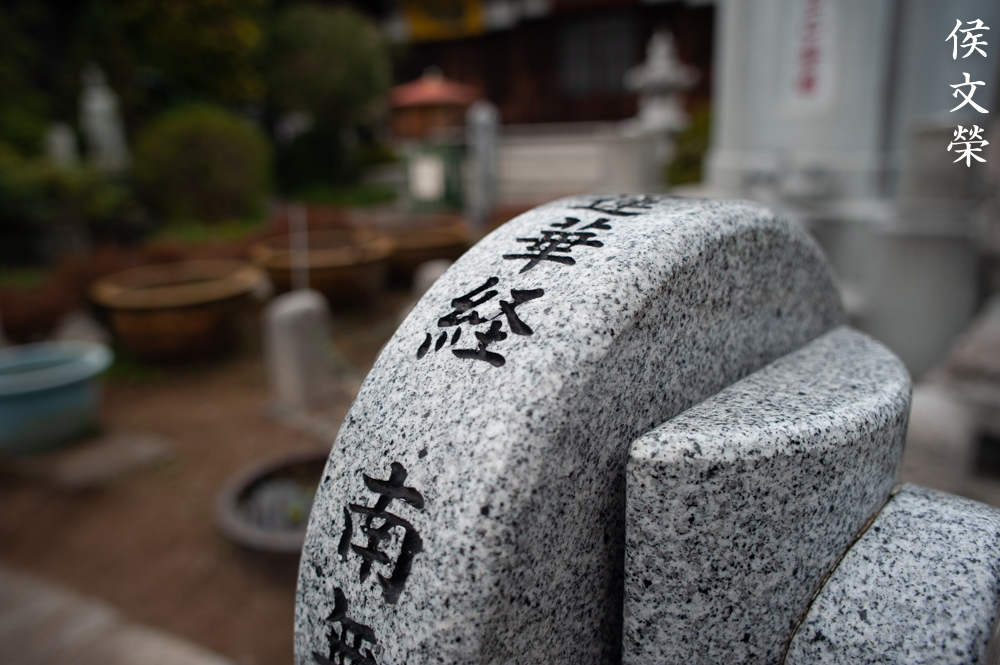
This is how bad the distortion is, it does not look right even on a dilapidated scene.

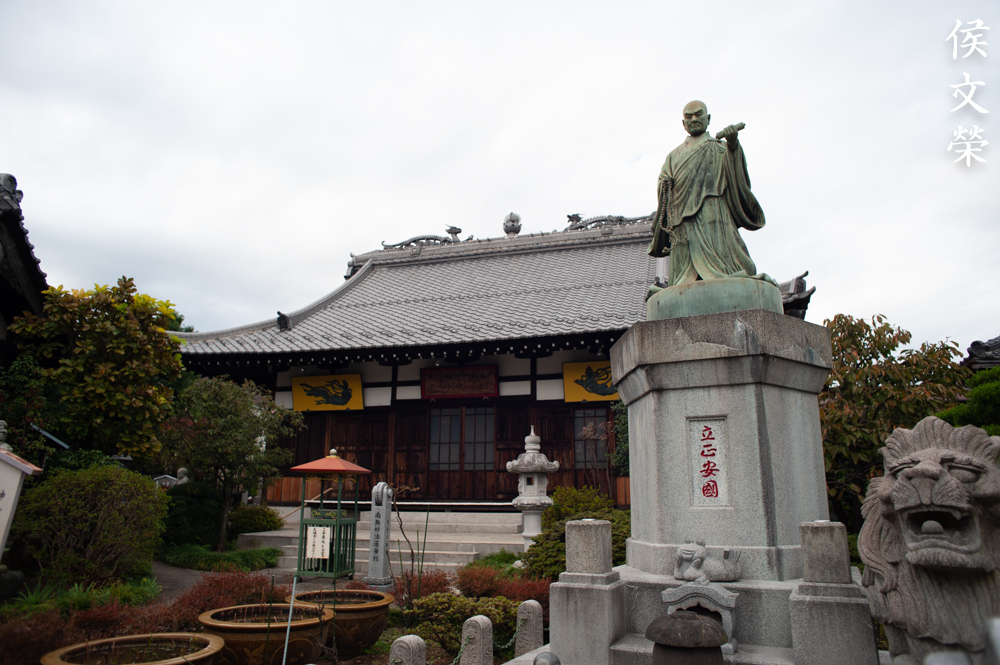
It looks exceptionally bad here since we have straight lines near the edges of the frame.

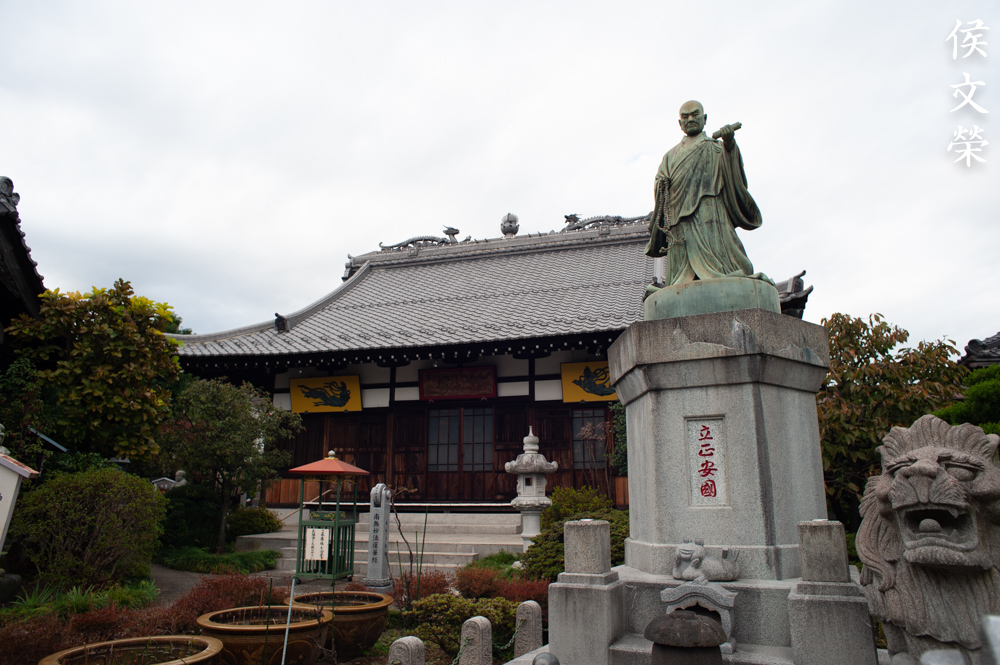
This is how I would frame a scene in order to prevent the lines from bowing and making my viewers dizzy.

It’s actually nice for taking photos of toys since it could focus quite close. Its sharpness at closer distances is due to the implementation of CRC.

Chromatic aberration looks terrible in overblown areas but you won’t see it in places where the exposure is just-right.

The photos it takes has a lovely, nostalgic feeling. All its imperfections work together to present a unique-looking character that is absent in most newer lenses.


(Click to enlarge)
This lens is probably too-wide for general photography but it can give you interesting opportunities to play with your angles and foreshortening. This can be very useful for storytelling, that is why many cinematographers like using wider lenses to give their frame and subject a sense of where they are and how important they are to the story.


(Click to enlarge)
One of the most important features is its ability to focus really close. If you look at the bulb you can see that the filaments look sharp. The picture to the right was focused at the hen but it is a bit blurry due to my shaky hands so I missed my focus. When shooting this at 0.3m, it is easy to make your subject stand-out due to its wide angle. A little strawberry on top of a cake suddenly looks larger-than-life and its significance has been showcased. There are no strawberries on my photos but you get what I mean. This trick could also be used on wedding rings or figurines on a wedding cake. If someone told you that a 28mm and a 24mm lens is too-similar, tell them that’s not true. With a wide lens, each millimeter counts so even a 1mm difference will give you a different coverage, the effect is amplified as the lens gets wider.


(Click to enlarge)
It’s nice for general photography, it’s also handy for travel photography, too. Just use this with a 50mm and 135mm lens and your kit is now complete.
This was originally designed for use with film so it’s only fair that we judge this with its intended medium. It’s difficult to simulate the look of film with a digital camera because of grain. It reacts to light differently and it’s not as reflective compared to a digital sensor so it can hide certain artifacts. I shot these with a Nikon F3 and a Nikon F4.

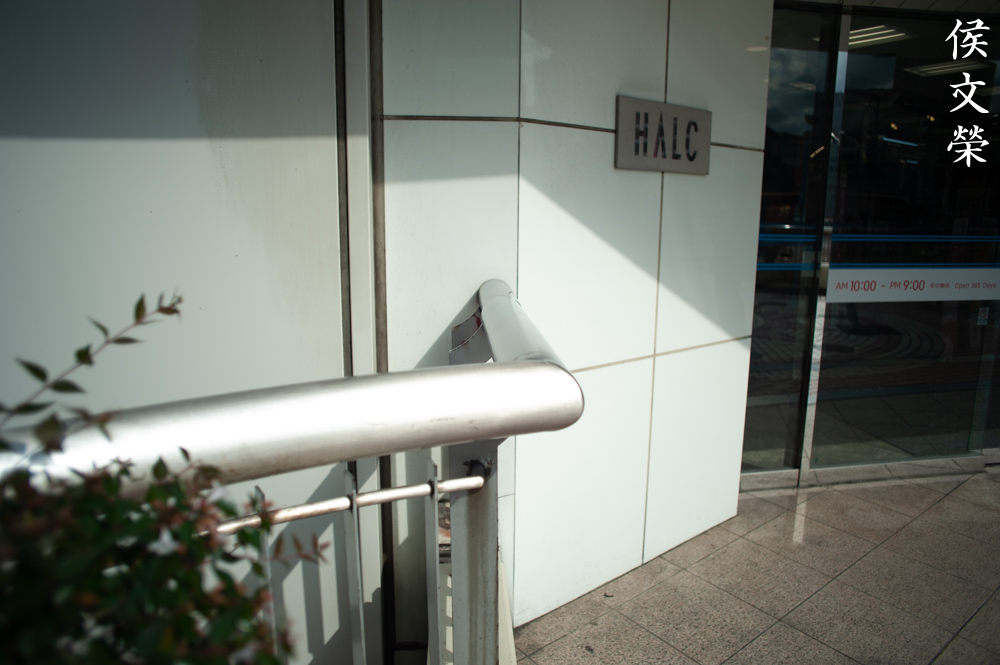
I think this was shot wide-open and the focus is on the green sign. You won’t get plenty of background blur with a lens this wide but it is enough to blur some parts of it.

This was taken at about f/5.6 using a fast shutter speed of about 1/250s with the setup mounted on a tripod. The Nikon F4’s mirror-slap is strong and you should use the mirror-up mode to prevent blurry shots like this.
You’ll want to use a faster film with it for indoor photography since f/2.8 will not be enough. The good news is you’re able to use slower shutter speeds so shooting at 1/15s is an option.

Leaning against a wall will help stabilize your setup, it took this at 1/15s and it’s still useable.
Shooting at 1/8s is probably the limit when you’re hand-holding your setup. This isn’t bad at all but you’ll want to use a faster shutter-speed as much as possible to prevent blurry photos.

Let us now see some long-exposure pictures. These were taken using slower speeds from 2-4 seconds with it stopped-down to smaller apertures like f/8. Coma isn’t a problem at these apertures so you won’t see that here.

Sharpness is nice so far even to the far-edges of the frame as expected. This film isn’t fine-grained but it looks nice when viewed with a large monitor. A fine-grained film is better for these kinds of photos where you will want to resolve every bit of detail.

The sun-stars look good despite being 6-sided instead of the more-appealing 7-sided ones that’s common in most later Nikkors.


(Click to enlarge)
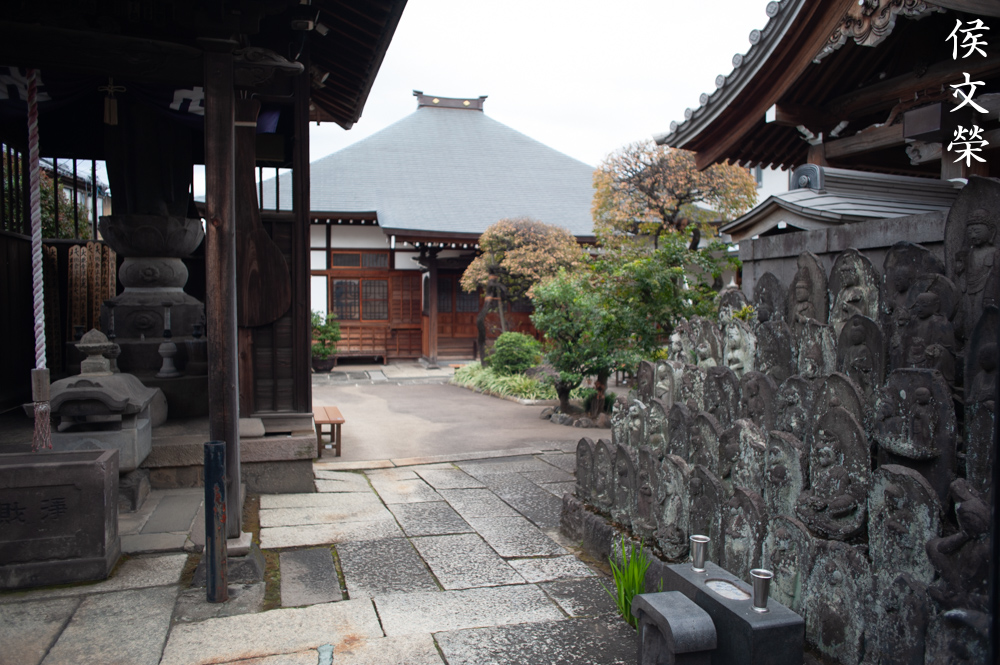
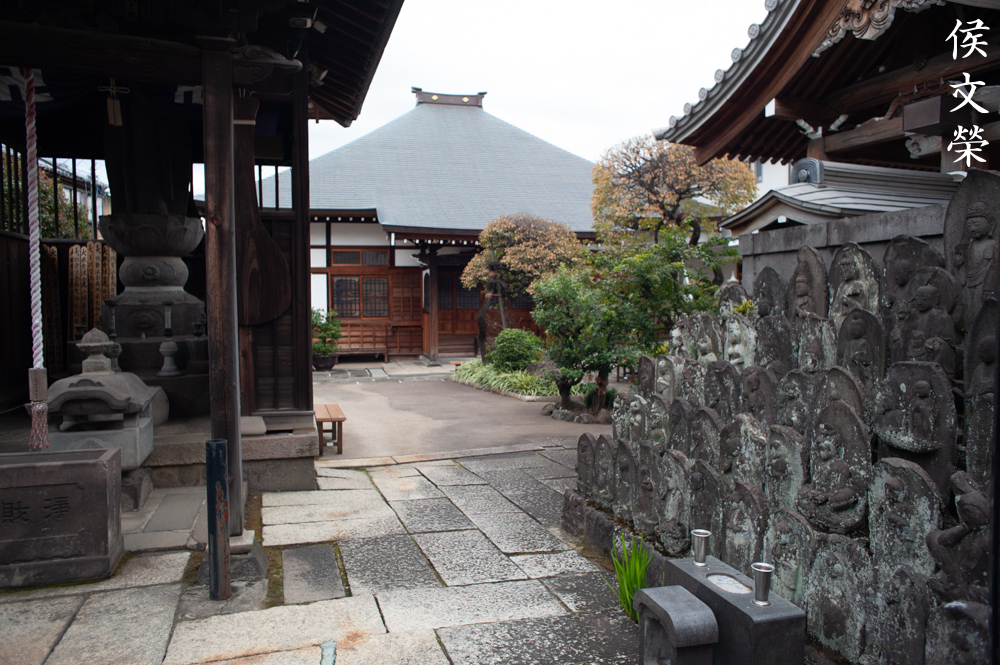
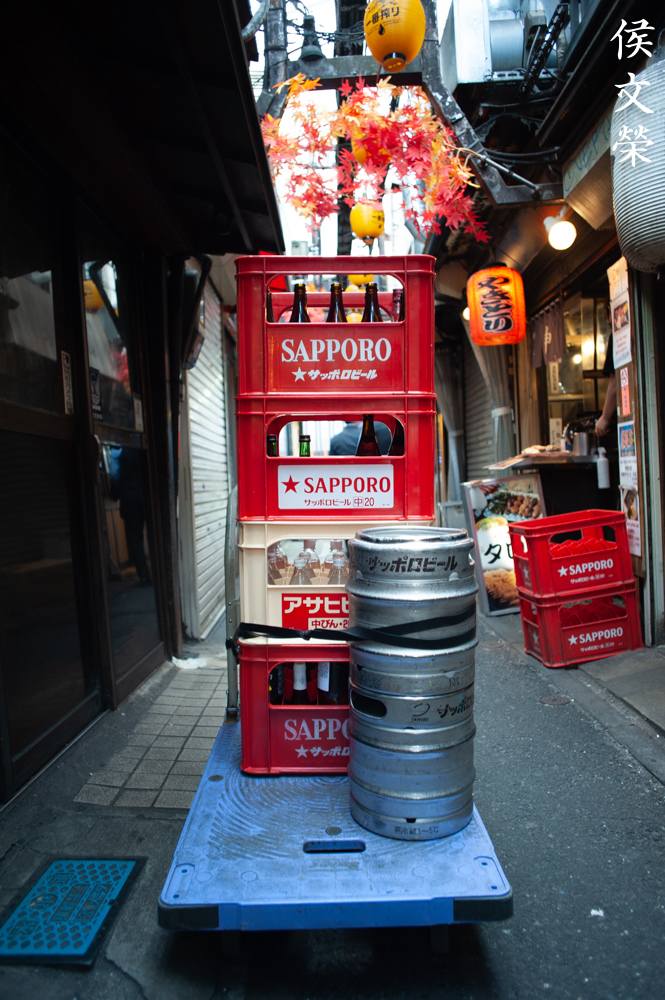
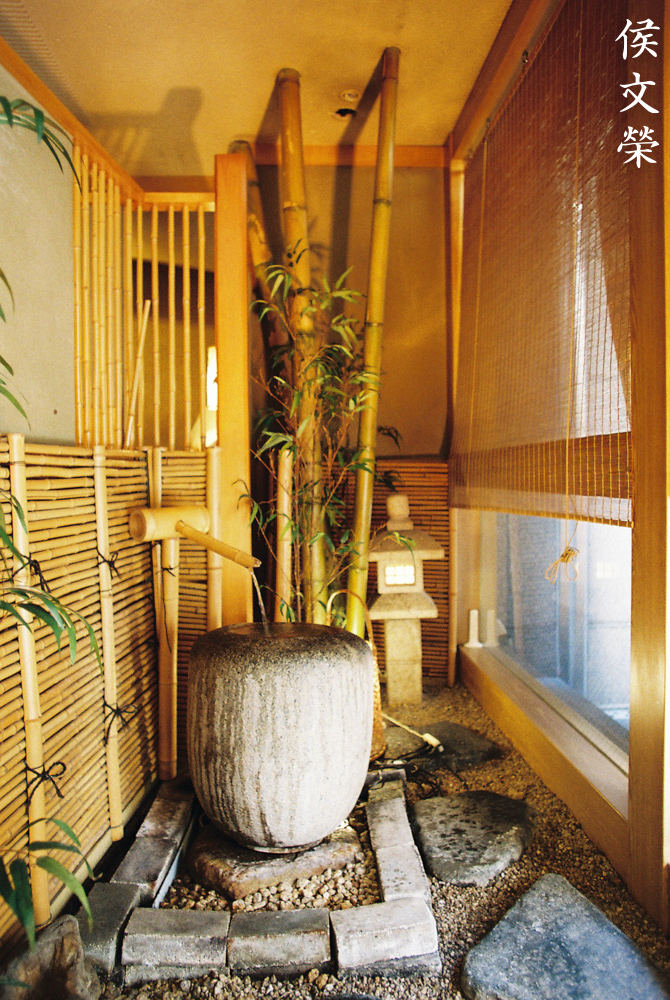
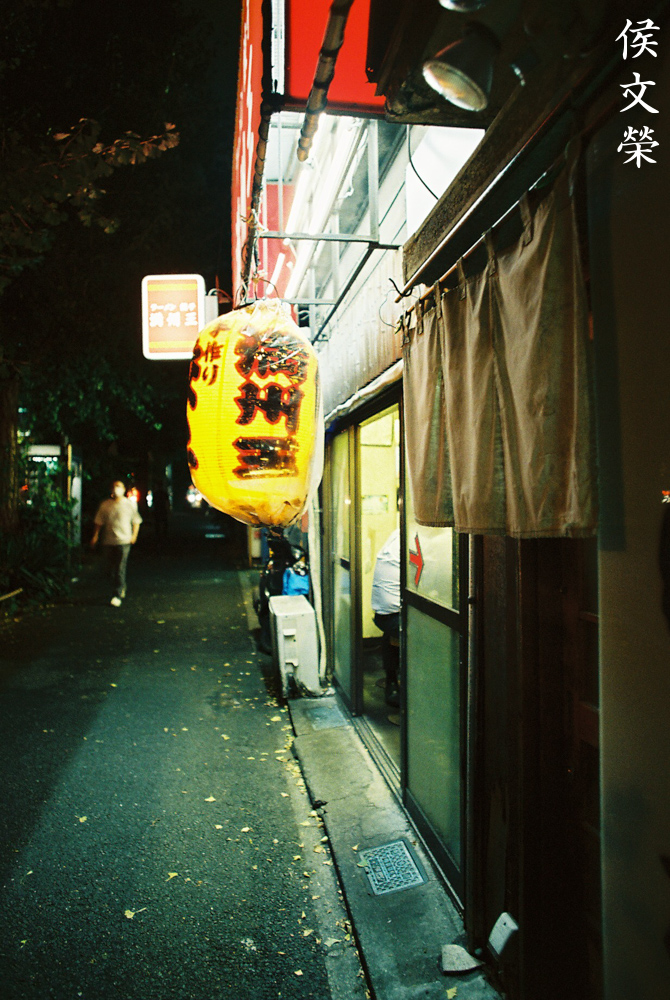
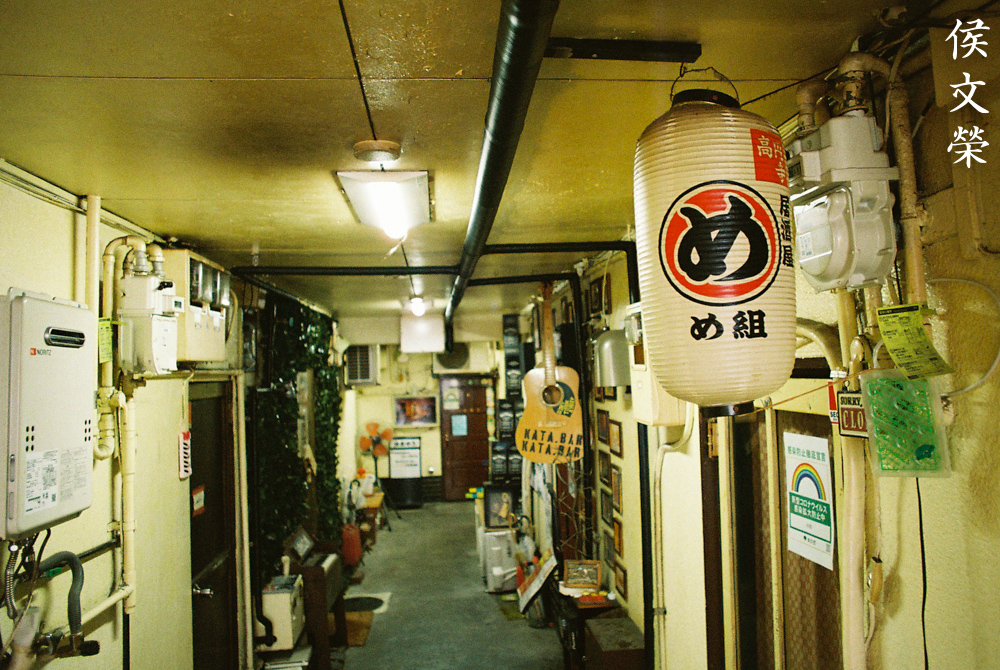
Here are more photos that I took with film. These should help give you an idea on the potential uses of this lens. You can take photos of restaurants if that’s your thing but a lens with less distortion is probably what you’ll want to use if you’re a modern-day professional. If you’re just shooting for fun, it will give you plenty of nice photos that you can share with your friends. It’s even better if you shoot them with film since this lens works nicely with it.
I’ll say that this is still pretty good despite its age. The later versions of this lens are much better due to better coatings. The final evolution of this lens is the AF-Nikkor 24mm f/28D which has autofocusing capabilities while still maintaining the CRC mechanism. It’s quite good as well and it is a testament to how good this lens family is from its first version down to the last model. DX shooters will love this since it works like a classic 35mm lens because of the 1.5x crop factor. I like this focal length, it will be part of my kit for travel and landscape photography. If you’re looking for a nice sample, be sure that you get one that has the Ai-ring so you can use that with newer Nikons. The non-Ai ones can damage your Nikons that only supports Ai lenses. They’re a bit more expensive but it’s important that you get them. Photographers who prefer shooting with older gear should get one, for those who just wanted a nice manual-focus equivalent, the Nikkor 24mm f/2.8 Ai-S should be an even better option, it has the improved 9-elements-in-9-groups design and better coatings, too. That will cost you quite a bit but it’s a better lens overall. Your budget will dictate your choice at the end, happy hunting.
Before We Begin:
If this is your first attempt at repairing a lens then I suggest that you check my previous posts regarding screws & drivers, grease and other things. Also read what I wrote about the tools that you’ll need to fix your Nikkors.
I suggest that you read these primers before you begin (for beginners):
Reading these primers should lessen the chance of ruining your lens if you are a novice. Before opening up any lens, always look for other people who have done so in Youtube or the internet. Information is scarce, vague and scattered (that is why I started this) but you can still find some information if you search carefully.
I highly recommend that you read my working with helicoids post because this is very important and getting it wrong can ruin your day. If I can force you to read this, I would. It is that important!
For more advanced topics, you can read my fungus removal post as a start. This post has a lot of useful information and it will be beneficial for you to read this.
Disassembly (Lens Barrel):
You’ll want to separate the optics from the barrel first in order to store that safely while you work on the rest of the barrel. You’ll have to be careful due to the CRC unit. This is a precise mechanism, be careful while working with it. I won’t encourage people who have no experience in lens repair to tackle this as their first lens. You won’t need special tools for this but you will need drivers that fit the slots perfectly or you risk stripping the screws. Take lots of notes specially on areas that have to do with the CRC mechanism.

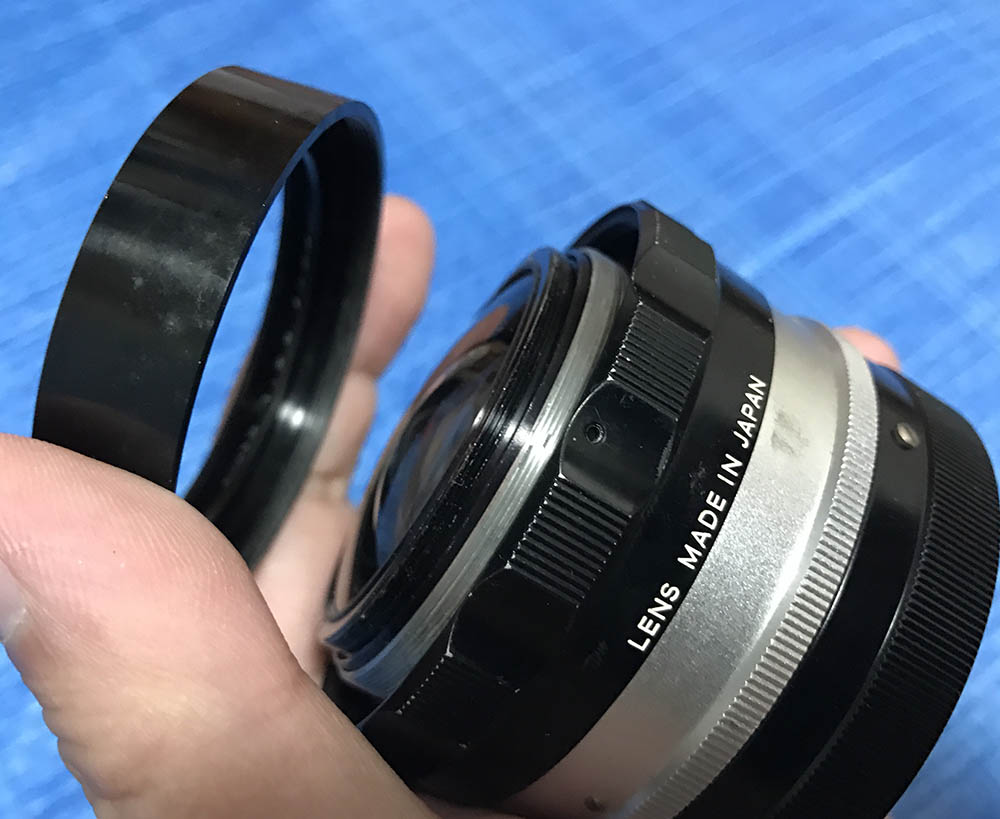
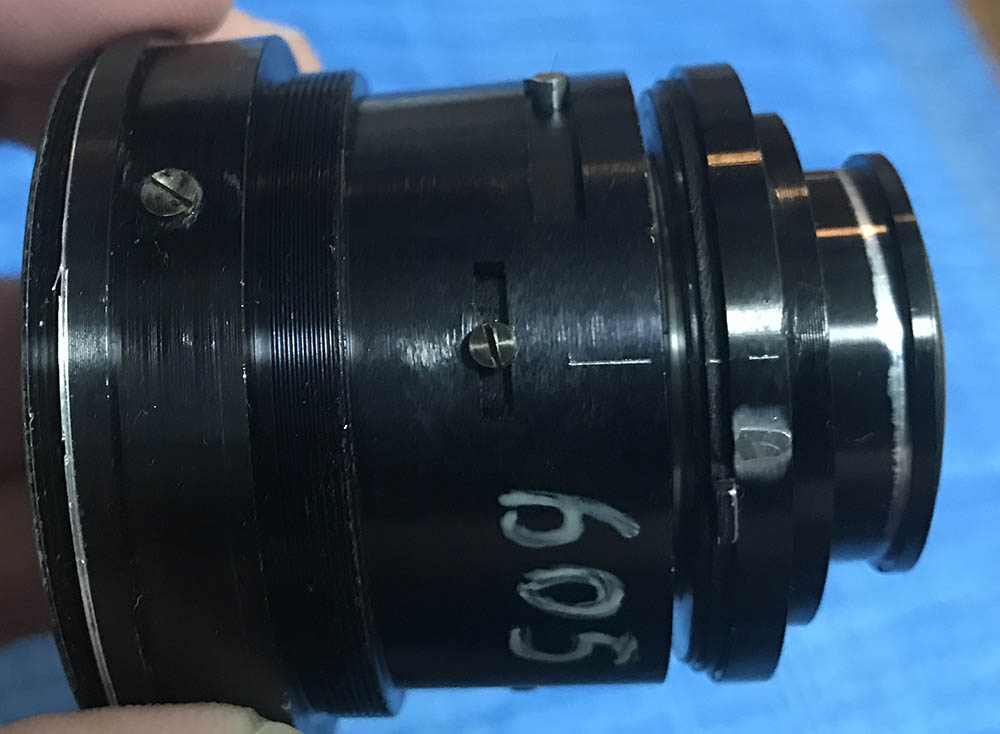
Extract this screw, it secures the bezel of the focusing ring.

The bezel of the focusing ring can now be unscrewed.

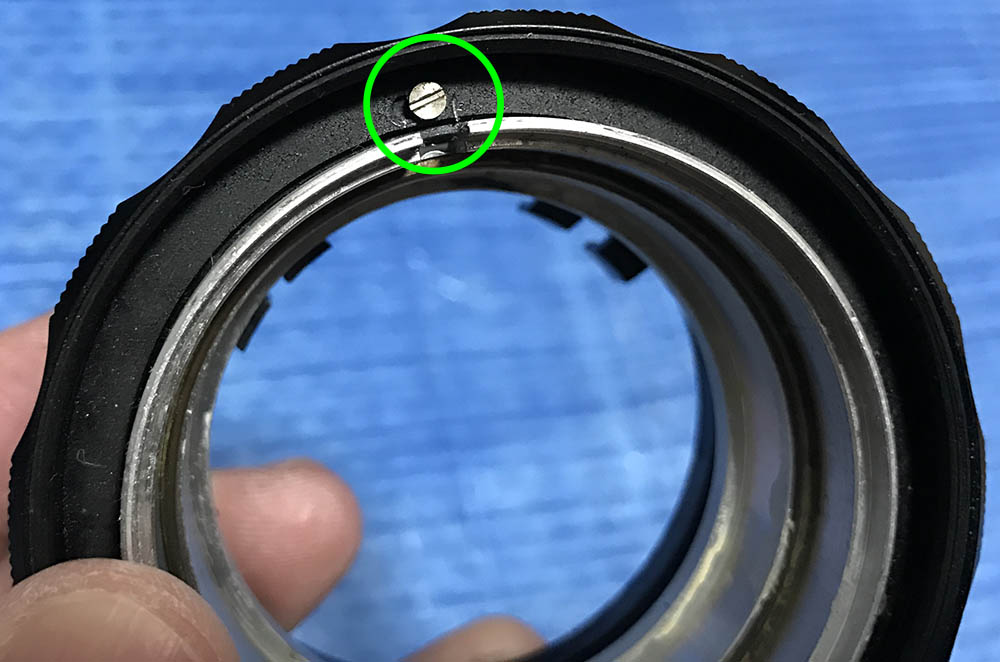
You can now access this set screw, it secures the front barrel. Be careful not to damage the head of the screw while doing it.
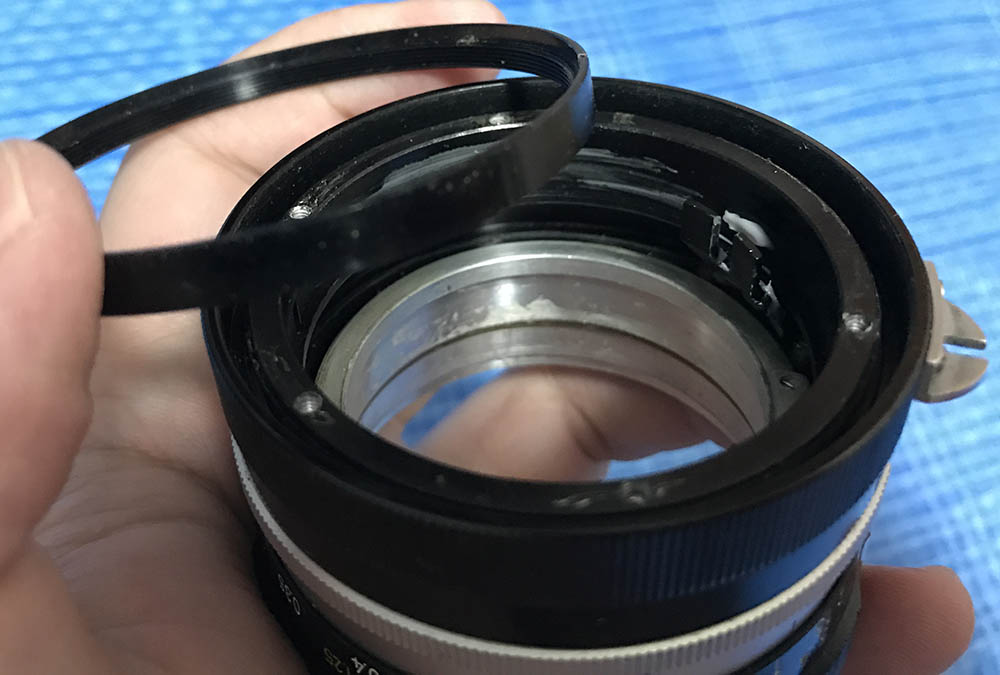
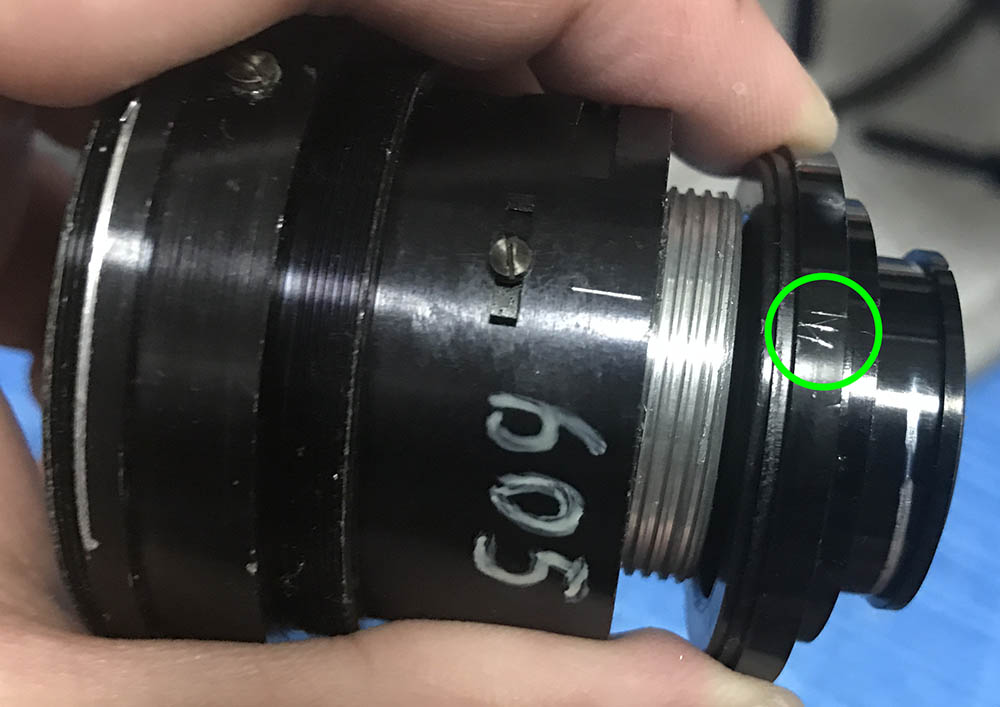
With the screw gone, you’re now able to unscrew the front barrel. From this point, focus the barrel to infinity and prevent moving the focusing ring. It is crucial that you work on it at this state so you’ll have a point-of-reference.

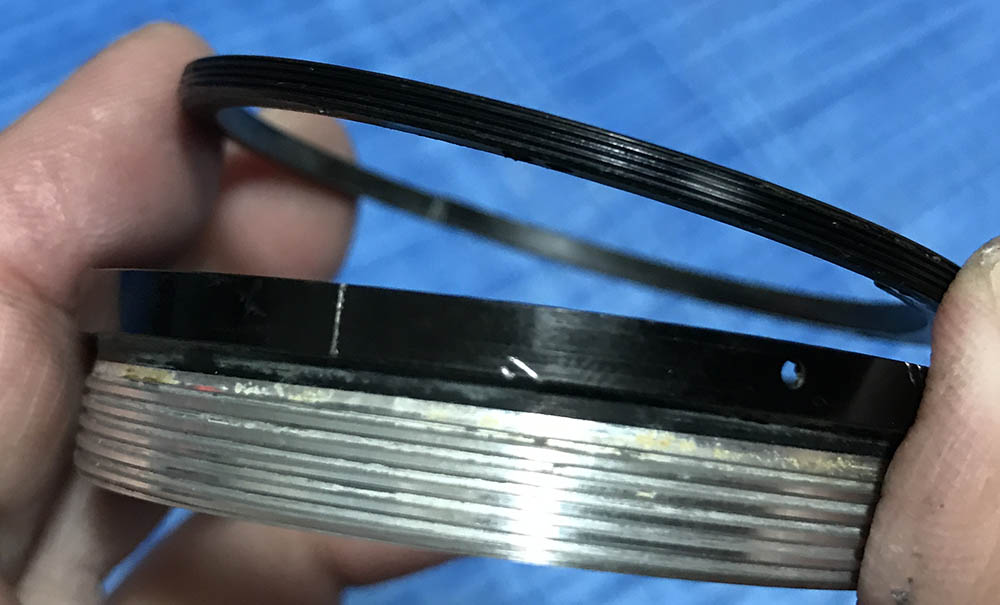
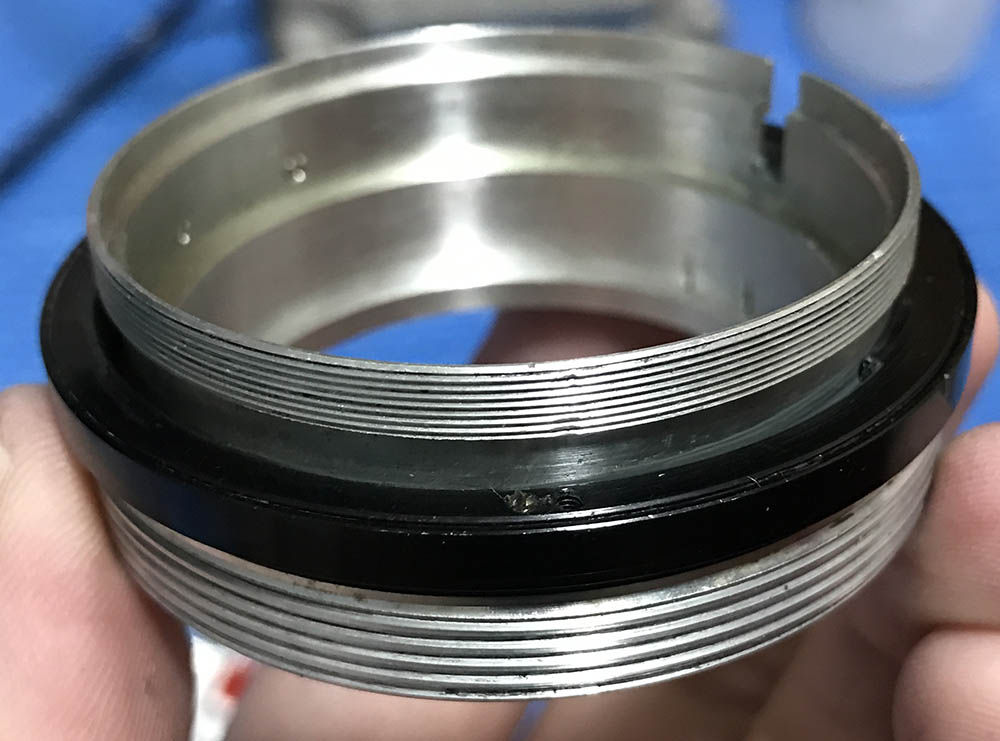
Pull the objective out carefully and don’t disturb its alignment. This is a CRC lens and things are oriented in a precise manner. If you look at my lens you can see that somebody else has scribed a line along the center housing. It’s a mark made for reference so that I’ll know how it should be aligned. Do this while the barrel is turned to infinity. Store the objective in a safe place.
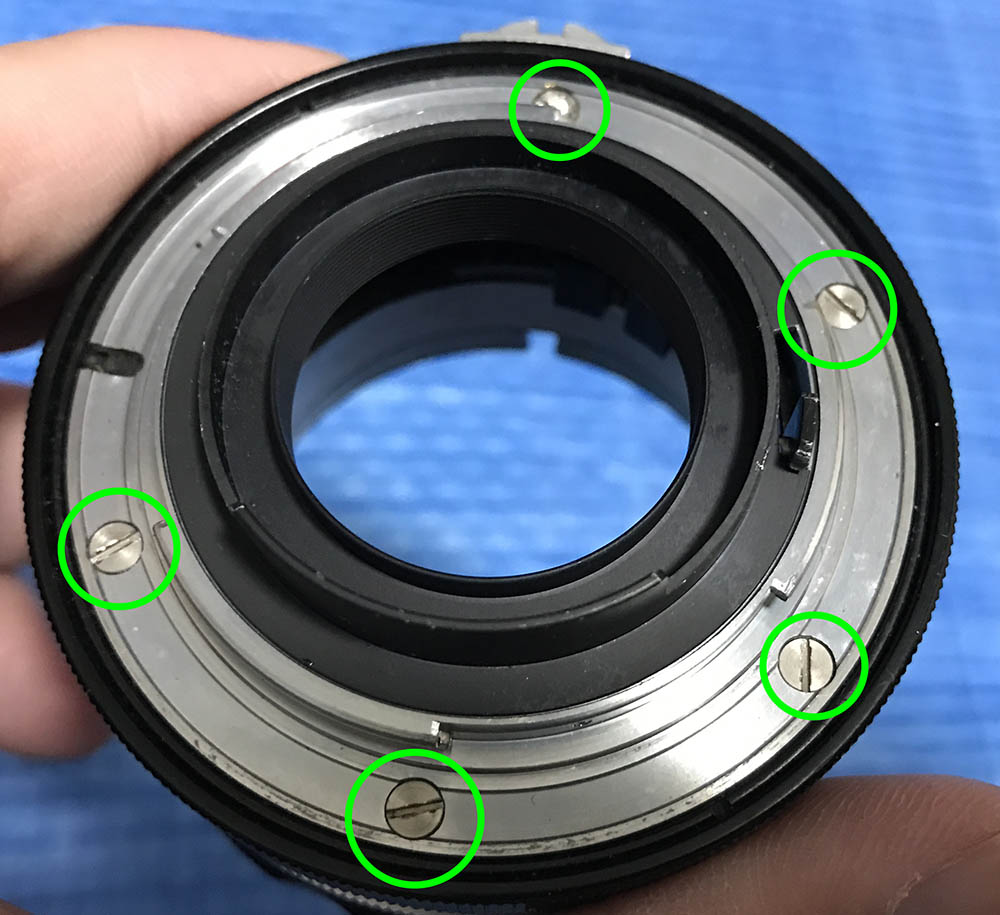
Extract these to remove the bayonet mount. Many people strip these screws because they either use the wrong drivers or lack the skills and experience. I wrote an article on how to remove bayonet screws, follow my guide so you won’t end up ruining your lens.

One of the screws is stripped, this can only be safely removed using a screw extractor. Read my article on using a screw extractor to know how to use it. This is the only way that I know that actually works, do not follow any silly advice that you read on the internet.

The bayonet mount can now be safely removed.

To remove the aperture ring you’ll have to extract this first. This serves as a pin to couple the aperture ring to its fork inside that’s coupled to the iris.

The aperture ring is being secured by this retainer. Use a lens spanner with flat bits to remove it. Yours may be sealed, if it’s stuck, simple apply alcohol to it to dissolve whatever is securing it.
It may be difficult to unscrew it due to some gunk.

The aperture ring can now be safely unscrewed. Do not forge to count how many turns it took for you to unscrew it so you could put it back at the same height later.

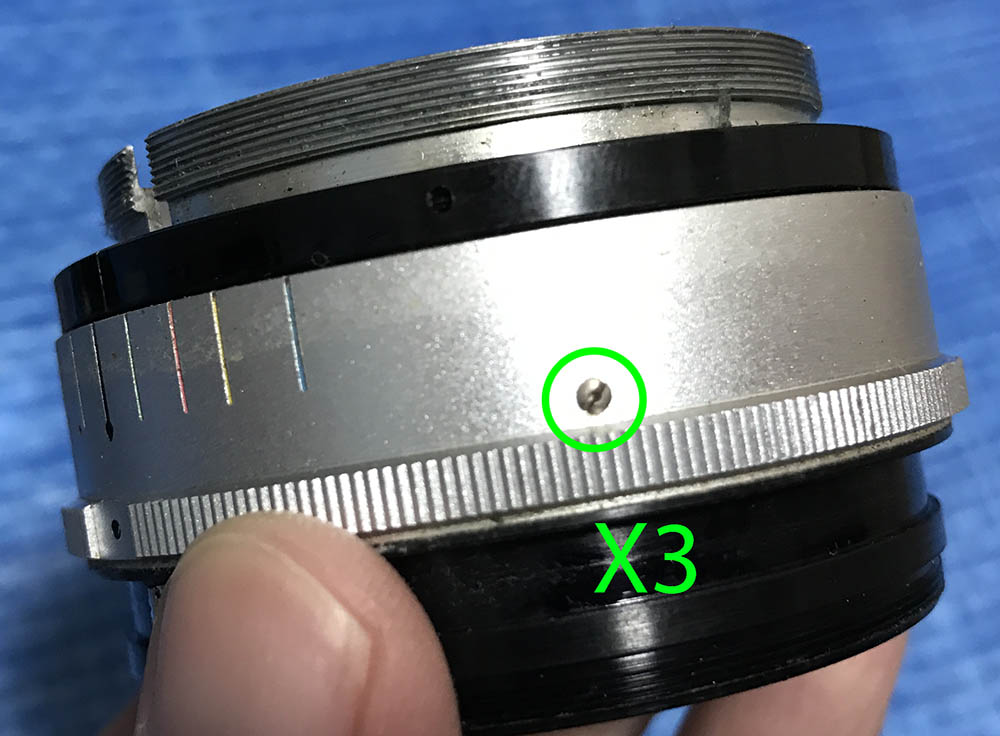
Extract these screws so you can remove the focusing ring. These secure the focusing ring, you loosen them so you could adjust this lens’ focus. They are usually secured with lacquer, glue or some thread-locking agent. Use a little bit of acetone or heat to soften whatever was used to bind them.
You may want to make a mark to help you remember how it was originally oriented so that it’s going to be easier for you later.

Study how the mechanisms work and take plenty of notes.
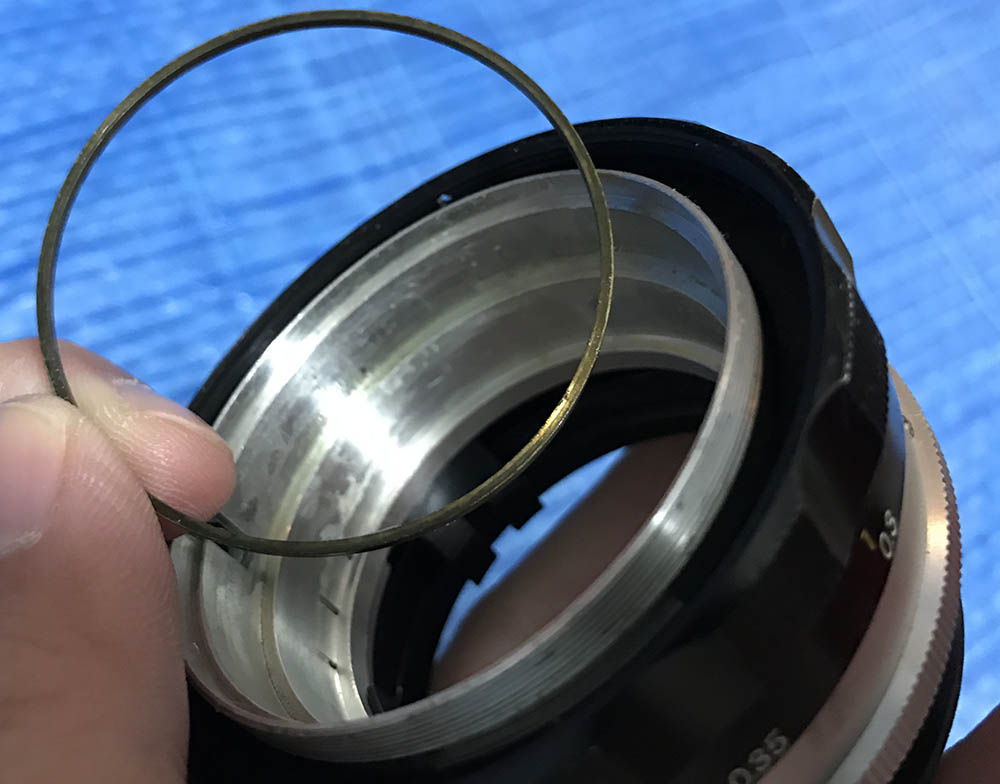
Do not lose this brass shim.
Carefully extract these to remove the sleeve. Be careful with your tools, you do not want to damage the surrounding material.

Gunk tends to accumulate under it so I always make it a point to clean these parts thoroughly before reassembly.
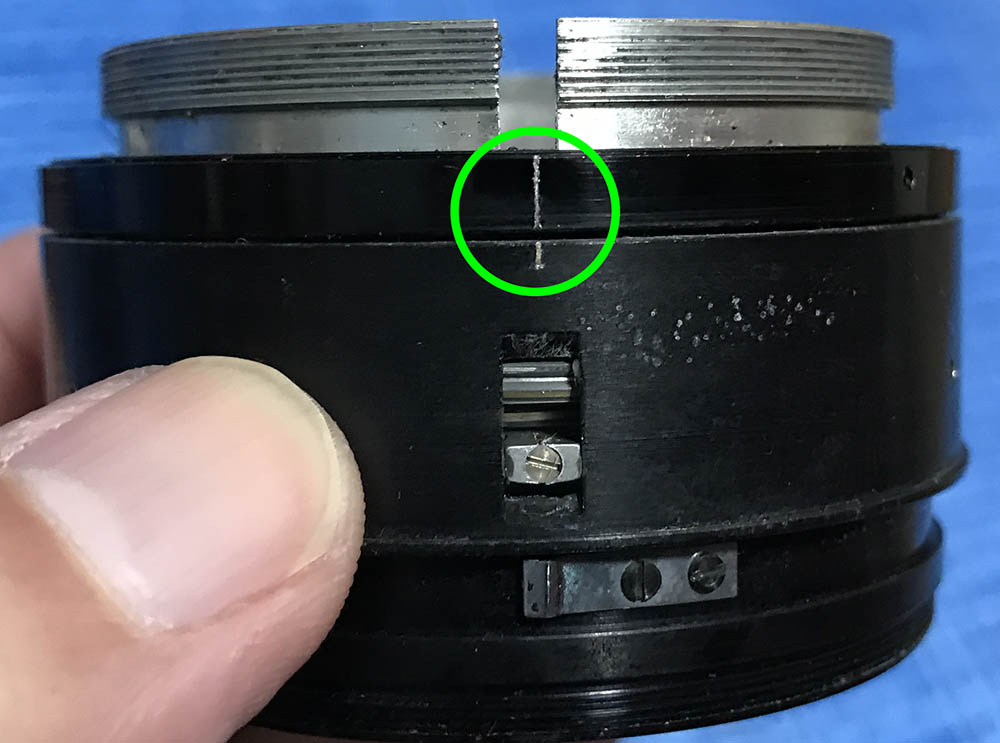
With the barrel focused at infinity, scribe a line along the center to remind you that this is is how the helicoids should align. The repairer who worked on this previously did exactly that. This is a common practice in lens repair.
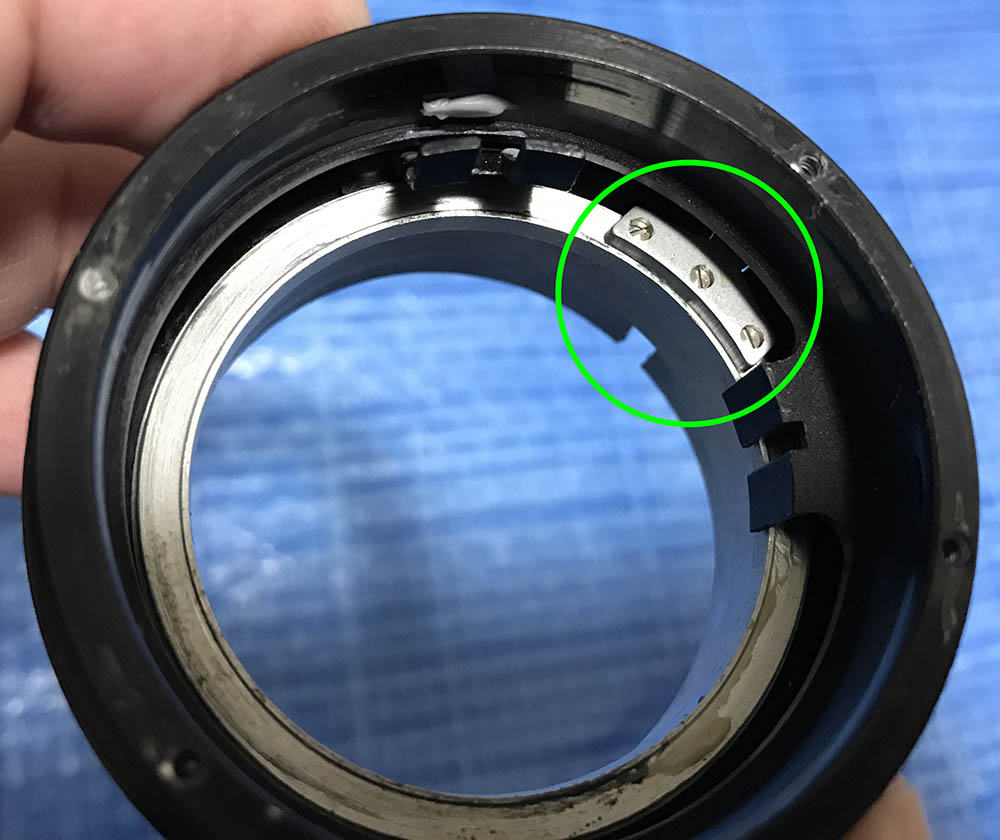
The helicoid key is a bit different compared to most Nikkors of the same era. It’s situated at the base of the inner helicoid. This keeps the helicoids synced as you rotate the central one via the focusing ring. Without it you lens won’t be able to extend or collapse the barrel.
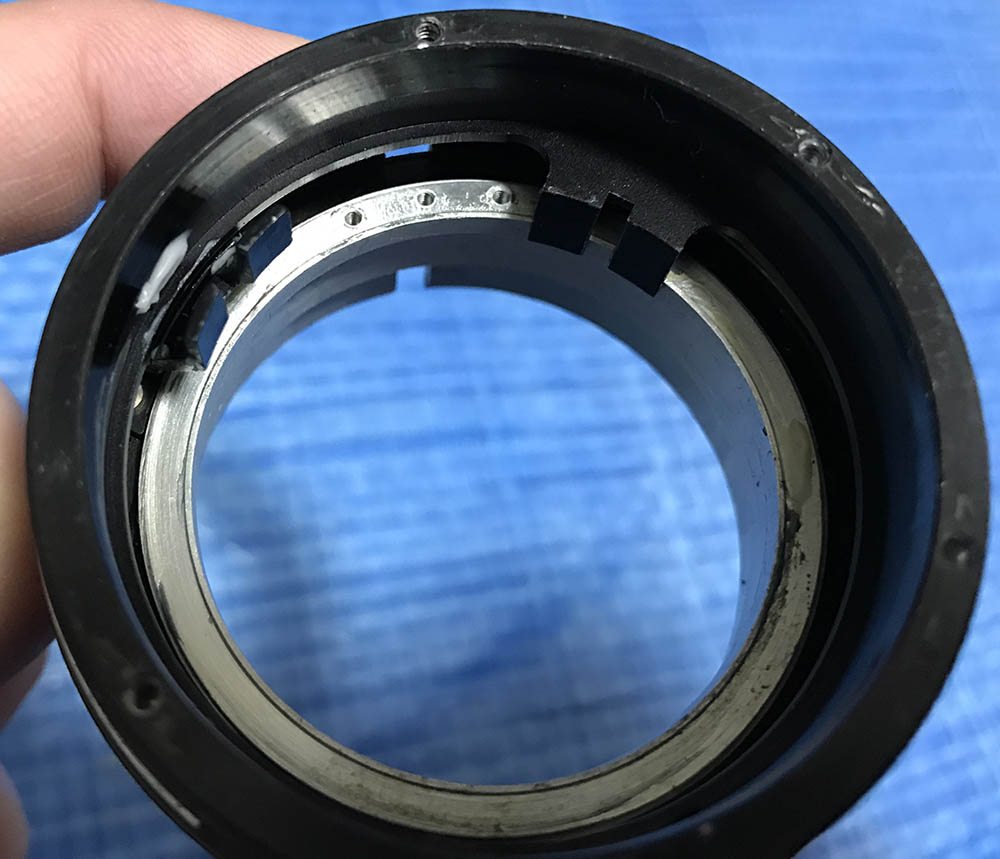
Carefully remove the helicoid key by removing its screws. These can easily be stripped because the screws were made with a softer type of metal so be careful. I would even use heat to soften the glue if they’re stuck.

Now that the helicoid key is gone, the helicoids can now turn freely. I would collapse the helicoids and make a mark to remind me of their position. This will help me determine if I got the helicoid back together properly or not.
They can now be separated. Always make a mark to remind you where they separated because this is also where they should mate. If you forgot to do it you’ll be frustrated just guessing where these should mate. Read my article on how to work with helicoids to prevent this from happening to you.

Carefully pick off this brass ring so you can remove the aperture fork along with its ring.
This couples the aperture ring to the iris assembly. Don’t lubricate this part, it’s directly touching the iris mechanism. Excess oil will migrate to your iris eventually and contaminate it.
This is the fork for the CRC, remove and clean it thoroughly. Only apply a bit of grease on it, all you need is a very thin application.
These screws can be loosened to remove the adjuster ring for your helicoid stop. This ring constrains the helicoids to its range. These are usually sealed, saturate them with MEK to soften the glue before removing them. Solvents should be applied to the threads, too. This will make it safer to unscrew the ring, I usually pickle this overnight in an alcohol bath. Note that I scratched 2 marks to serve as guides for me later so I’ll know its alignment.
The adjuster ring should come-off easily. If yours is still stuck, pickle it more until it’s loose.
This is how far the inner helicoid should be. Always take photos to help you reassemble the helicoids.
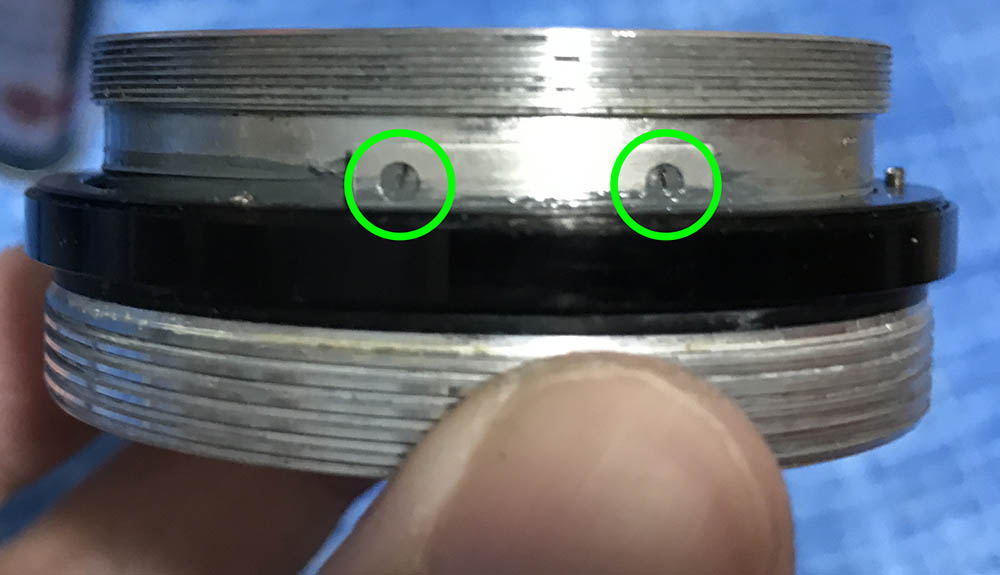
To remove the inner helicoid from the central one you’ll need to extract the helicoid stop by unscrewing these. Rotate the inner helicoid until you could them and carefully extract them.
Once the helicoid stop is gone, you can now separate the inner helicoid. As usual, always mark where they parted. A small mark is all you’ll ever need.
Clean the helicoids thoroughly and never leave any residue. Use a brush to scrub them, a strong detergent helps remove much of the old gunk, too. All of the parts were cleaned and soaked in an alcohol bath for hours so that I can be sure that any tough residue is gone. Polish the threads with a brush and clean them very well. Grease with a little bit more resistance is helpful since this lens has a shorter focus-throw but don’t apply a lot or you’ll end-up with a mess. Only apply a thin film.
Disassembly (Objective):
The glass on my lens is clean enough so I don’t need to open it up and clean everything. It did have some haze on the central optical block but that was easily taken cared off before it made any permanent damage to the coating. That likely came from evaporated grease in the CRC helicoids. If you need to open everything up for a thorough cleaning, I’m sorry but I cannot help you in this guide. Except for the CRC, the objective is the similar to most Nikkors, Just read my other articles to help you find your way.
Remember to take photos before you remove anything. Take measurements of the CRC’s tolerances before you proceed, never forget to mark where and how they separated when working with its helicoids.
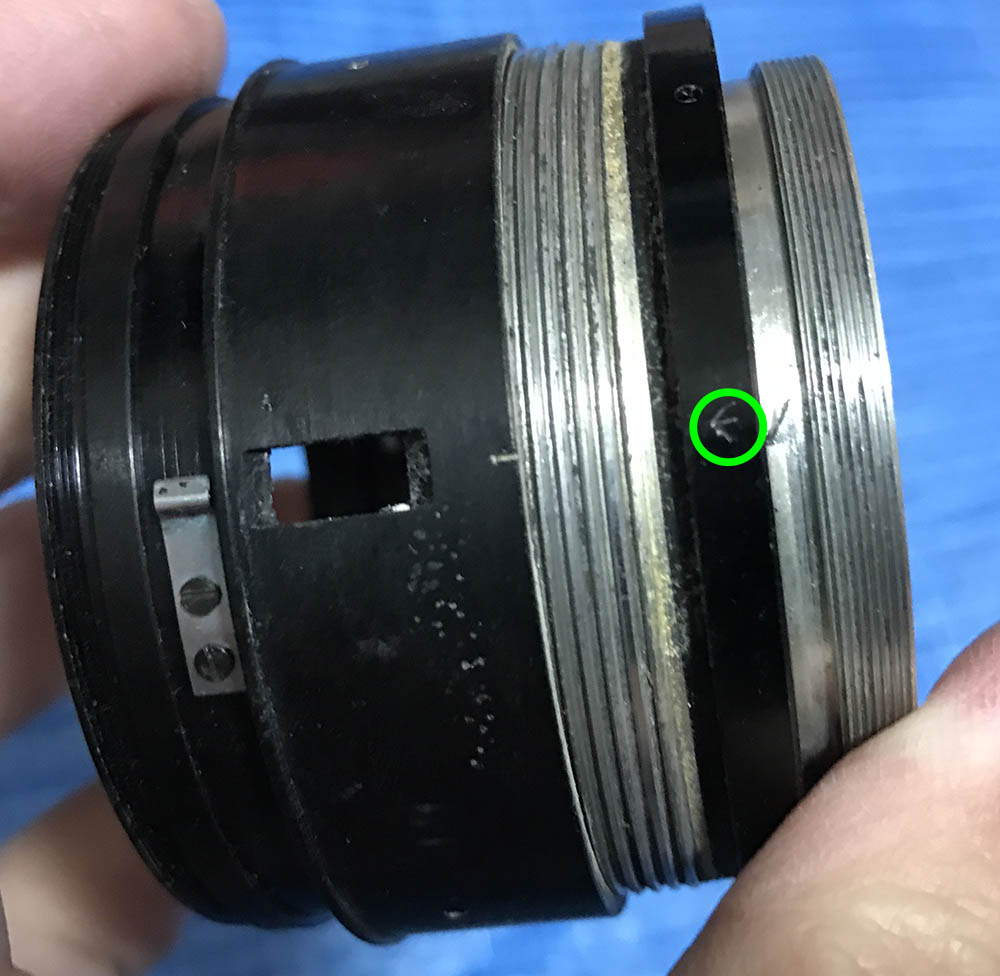
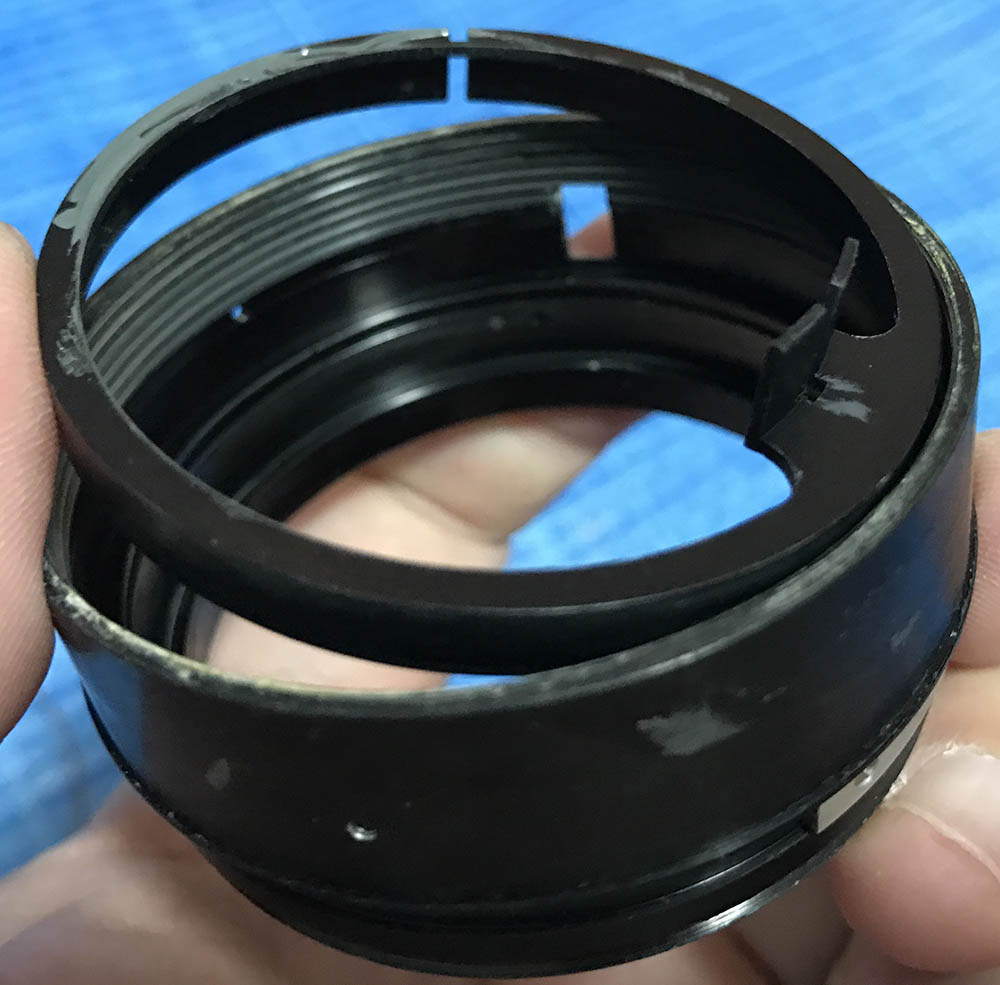
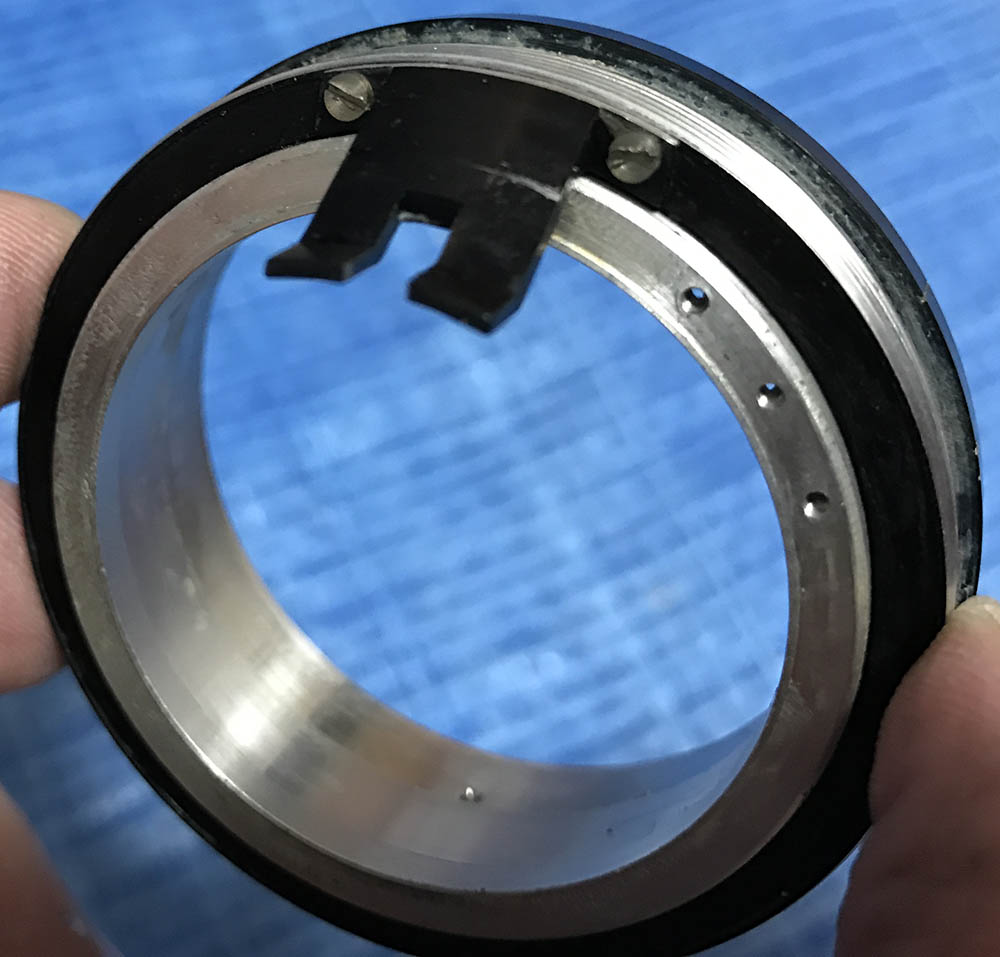
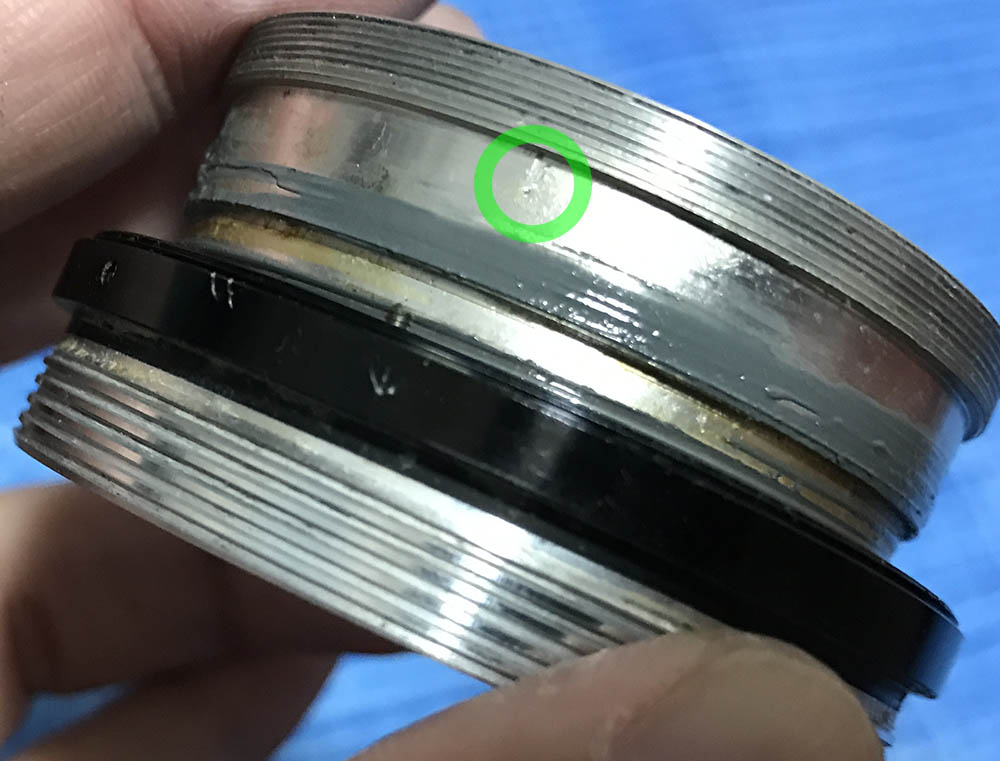
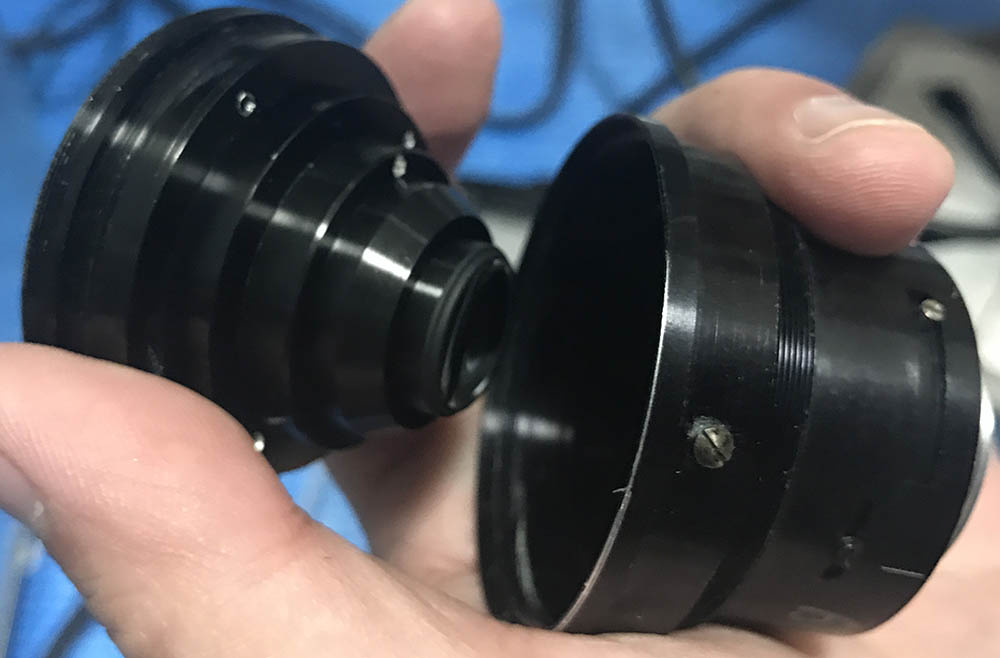
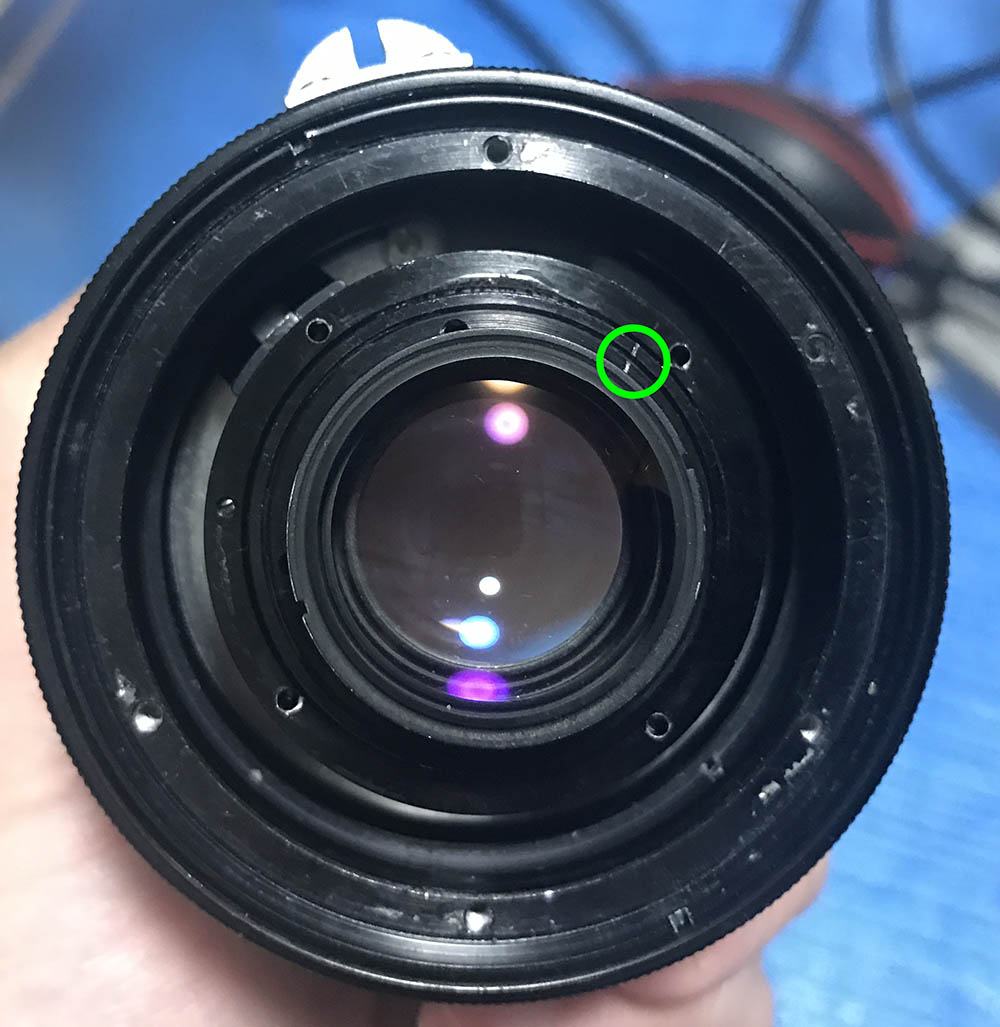
Here is the objective. Be very careful while working with this because of the the CRC unit. It is important that you take notes and measurements before you remove anything. Notice the small tab near the rear-end of the objective just below the scar made during machining. That tab’s connected to the fork on the inner helicoid. Putting this lens back together can be a pain since you will have to line this up perfectly with the fork.
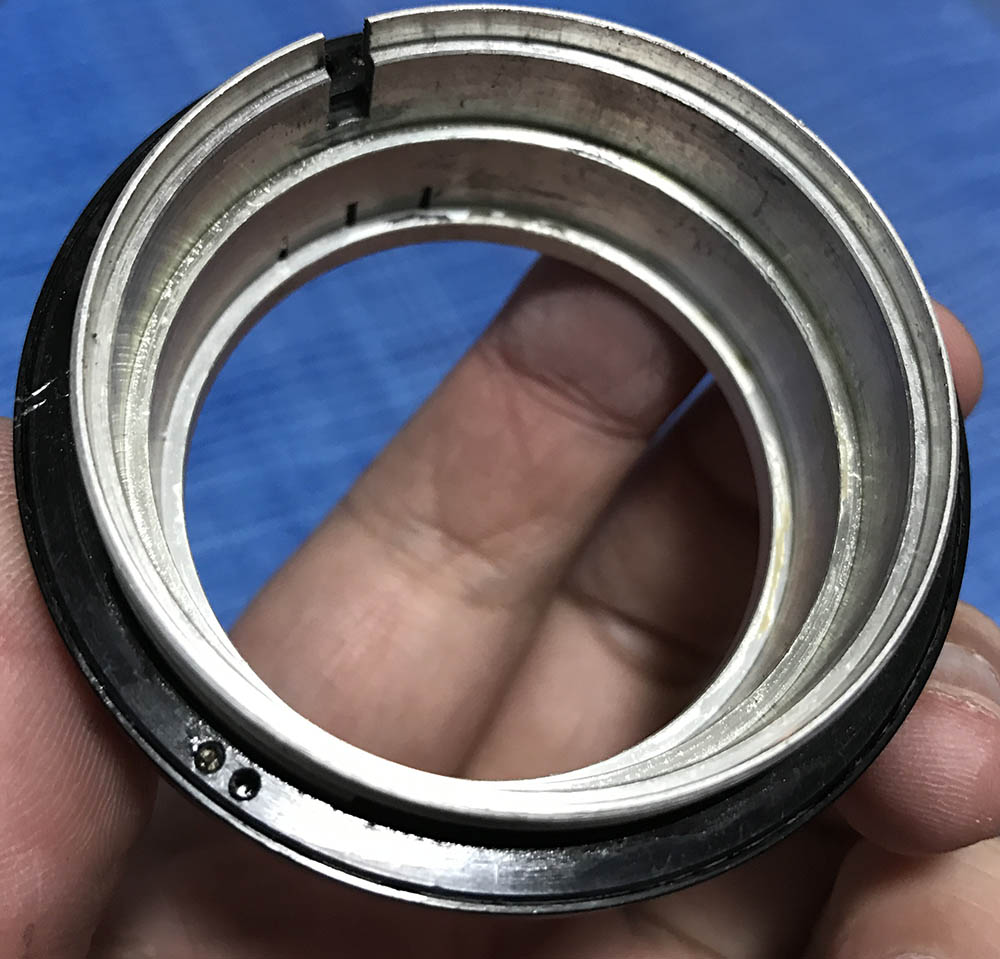
The CRC on this lens is a rear-focusing type. It has a helicoid that allows the rear to move as you focus in-or-out, altering the geometry of the design. Just like any helicoid you’ll need to mark where they separated. Be careful not to scratch the glass while you work on it. Lightly lubricate it using thin grease or it may migrate to the glass.
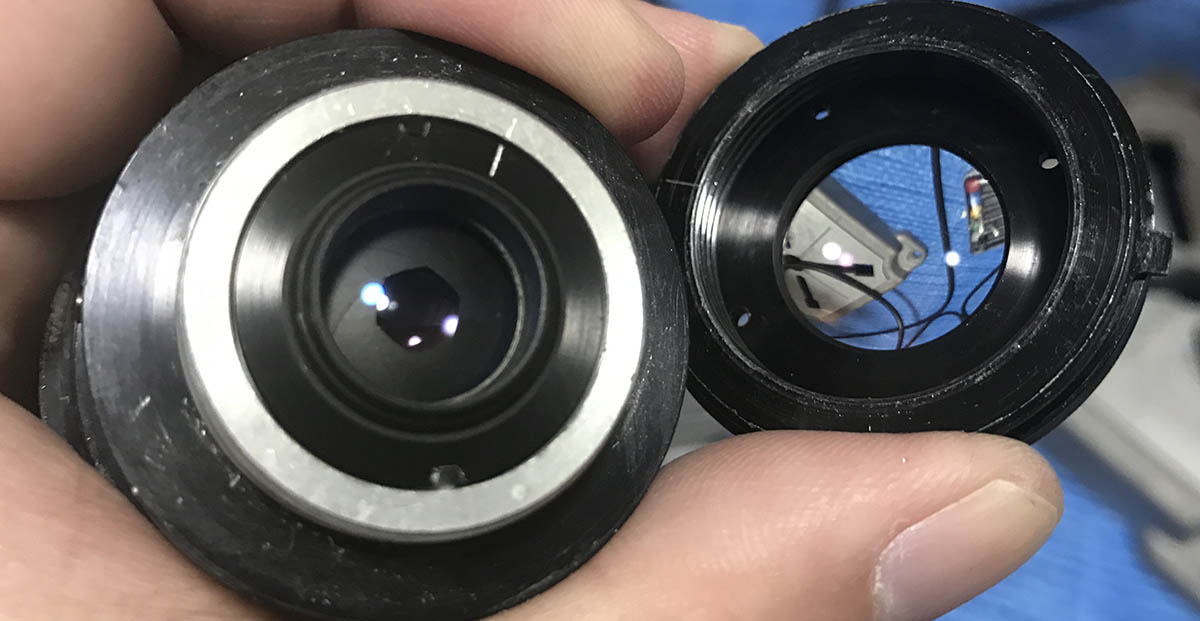
Clean The lens and helicoids properly. Its inner elements can be accessed by using a tool with prongs such as a spanner to unscrew the housing.
The front elements assembly can be removed by unscrewing it. The rear is quite delicate so handle this carefully
As long as you are careful with the CRC unit, everything should be fine. This is Nikon’s first CRC lens so I guess that the engineers were conservative with its implementation.
Conclusion:
It’s now time to put things back together. Just follow all the steps in-reverse. Remember never to put too much grease on the CRC unit’s helicoids, it will just create a mess and will cake-up eventually. In colder weather, your lens may even seize if you lubricate this part too much. I had a lot of fun with it and it took me a few hours to clean this thoroughly. It was a nice exercise, I didn’t expect to have this much fun.
The repairer who worked on this lens prior to me had the common sense to scribe a mark to remind him of the lens’ correct orientation, this helped me a lot and removed plenty of guesswork. I would normally rebuild a lens and then insert the objective into the barrel in the same manner you pulled it off while carefully making sure all the tabs in the iris line-up to their respective forks. This is a bit different, it has a 3rd tab for the CRC at 10:00 so I left out the bayonet mount until the objective is safely reinstalled. I made sure that things are all aligned before I reinstalled the bayonet mount.
It’s now time to calibrate its focus. Read my guide to make it easy for you to do it. This ring is where you could adjust its focusing range. Make sure that the lens is turned to infinity and you have done what the calibration article said. Carefully adjust this so that the helicoid stop is in contact with it. This will give you a hard stop at infinity, the lens won’t go any further when you turn it. Check your infinity focusing again and see if there is nothing wrong. If your infinity focus is off then calibrate it again. If you’re satisfied with the results, you can tighten the screws to secure the ring. Dab a small amount of nail polish on the seams and the screws. Be sure that the nail polish doesn’t overflow and wait for it to cure before you proceed or you will make a mess or worse, contaminate the freshly-applied grease.
You can now adjust the focusing ring, be sure that the infinity sign and the black line are aligned. Tighten all the screws once you’re satisfied and then test the focus again. It should be fine since we did that in the previous steps but you’ll want to do another round just to be sure. Lastly, reinstall the front barrel and the other parts to complete your project.
Thank you for following my work. If you liked it, please share this with your friends. You may also opt to support this site, that helps me offset the cost of hosting and maintenance. You’re also helping me purchase and process film for the reviews. This helps keep the industry alive. Thank you again and see you next time, Ric.
Help Support this Blog:
Maintaining this blog requires money to operate. If you think that this site has helped you or you want to show your support by helping with the site’s upkeep, you can make a small donation to my paypal.com (richardHaw888@gmail.com). Money is not my prime motivation for this blog and I believe that I have enough to run this but you can help me make this site (and the companion facebook page) grow.
Buy me a roll of film or a burger?
Thank you very much for your continued support!
2.00 $
Helping support this site will ensure that this will be kept going as long as I have the time and energy for this. I would appreciate it if you just leave out your name or details like your country’s name or other information so that the donations will totally be anonymous. This is a labor of love and I intend to keep it that way for as long as I can. Ric.

Feb 20, 2018 @ 15:58:54
Dear Richard, thank you for sharing this guide, I had some trouble with my Nikkor-N 35mm 1.4, from noticing the similar barrel design I decided to give it a try with your guide, and I realized the construction is almost exactly similar. I fixed my lens by following your guide, thank you.
Sep 05, 2018 @ 11:33:54
Hello Richard and thank your for this tutorial.
I have the exact same lens, and while I was using it the focus got really hard and now is completely stuck at about 5 m (I wanted to service this lens because the focus was grainy, you could feel that the grease was long gone… Too bad it stucks before).
What would you recommand to unstuck it? Is that even possible without ruining the helicoid?
Sep 16, 2018 @ 22:33:52
Hello. Glad you liked it. That certainly needs an overhaul. it’s not an easy lens to work on so I suggest that you send it to a repairman. There are 2 sets of helicoids there and what you are feeling may come from the inner CRC one. Ric.
Sep 17, 2018 @ 04:30:58
I also have the 24 mm f/2.8 Ai-S in perfectly working order so going to the repairman and pay probably $150+ for this lens is not planned at the moment :D. I managed to extract the optical block and you were correct: this is indeed the CRC helicoid that is stuck.
Sep 25, 2018 @ 00:51:20
Hello. $150 for a complete overhaul? I usually charge $100 or so for a complete overhaul of a lens in that class (with CRC). I can understand if he would ask that much since CRC lenses are a bit more complicated. Make sure you take photos before you send it so you will know if the lens was set properly when you get it back. Ric.
Sep 25, 2018 @ 19:48:53
Tonight I put the objective in the oven at 100 °C for 20 mn; I was able to unstuck the back helicoid without damage. The doublets don’t seem to have separated from the heat so that’s a good news. I’m lucky enough that all the marking for infinity on the back elements were already there. Now to overhaul this lens!
Sep 25, 2018 @ 05:59:39
Indeed $150 seems high; last year I went for regreasing 2 Nikon lenses that had a stiff focus, I payed 100 € (approx. $120). I supposed that for something that is stuck, the time and price would be higher.
Apr 20, 2019 @ 06:23:44
Hello Richard,
Just finished an overhaul on my 24mm N.C. and thought a minor variation from the earlier N might save tearing some hair out (as I did!).
When removing the front barrel to release the optic block, where the grub screw is on the N there is only a hole on the later one, which can easily be thought of as a solvent hole to release their glue. But no, they decided to put a tiny set screw on the INSIDE of the barrel, which is made visible after removing the bezel and name ring. No amount of effort (or cursing) will release the barrel on the later version without finding this sneaky little set screw.
Kind regards
Greg
Australia
Dec 23, 2023 @ 21:29:17
Hi Richard,
Just wanted to say how much I appreciate (and have enjoyed) your lens repair articles. I have used these articles to teach me how to service and repair a number of my vintage nikkor lenses (24mm, 50mm, 85mm, 105mm among others). The articles are very informative and detailed – which has allowed me the courage to try and successfully complete the repairs. So, thank you!!
Regards,
Amit
Boston, USA
Sep 17, 2024 @ 13:22:49
Hello Richard and community, thank you for the tutorial. I have a comment, actually a question rather than a comment: can the Nikkor-N f/2.8 24mm be attached to Nikon DSLR such as D800, D600 or D5600? I received the lens from a Nikon enthusiast and I understood that the lens was used on a film camera. Please advise. Thank you in advance
Dan
Olathe, Kansas