
Hello, everybody! I was talking with a colleague of mine about how the old, original iPhone changed how we look at mobile phones these days. It got all the right features and it pushed the limits of miniaturization, enabling it to add as many features as possible within a small housing. It was smart, cute, reliable and responsive for its time, it is one of the high-points of industrial engineering and design that’s being studied to this day by people who make and design tools and software such as me. I’m not an “iZombie” but nobody (I assume) will object to my statement from an engineering perspective. It’s a great design that spawned copycats as a testament to its success. Today, I’ll show you one such game-changing design from Nikon. This lens made a big difference back then and it brought the F-mount to newer heights. Just like the original iPhone, it was expensive when it debuted because it broke new grounds and it pushed the limit of optical engineering back then. Let’s now see what this lens is all about.
Introduction:
The Nikkor-UD 20mm f/3.5 Auto debuted in 1968, it’s the first lens of its class and it was a game-changer. Back when the Nikon F was introduced up until the unveiling of this lens you only have the choice of using your Nikon F in mirror-up configuration since most of the lenses’ optics have to be inside of the mirror-box. You frame with an external viewfinder and focus using the distance and depth-of-field scales. The Nikkor-UD 20mm f/3.5 Auto did away with all those inconveniences and that changed everything for Nikon users since. This is an interesting lens from a historical and technological point of view and is one of the high-points in optical engineering in the past century.

The front element is the largest of all the classic 20mm Nikkors and a 72mm filter size is a must. People who are invested in 52mm filters need to get the bigger 72mm equivalents or just get a step-up ring and adapt their existing 77mm filters. This is the reason why buying bigger filters makes more sense for landscape photographers and adapting larger ones will prevent any sort of mechanical vignetting.
The optical formula consists of 11-elements-in-9-groups, a complicated one as far as classic Nikkor primes are concerned. Nikon had a hard time with it since the required retro-focus technology hasn’t matured yet back then. It’s considered by many to be a masterpiece of optical engineering back then. I am actually impressed by this lens in the technical senses because it’s tough to make something like this with the technology that the engineers had and how they calculated this with just mechanical calculators.
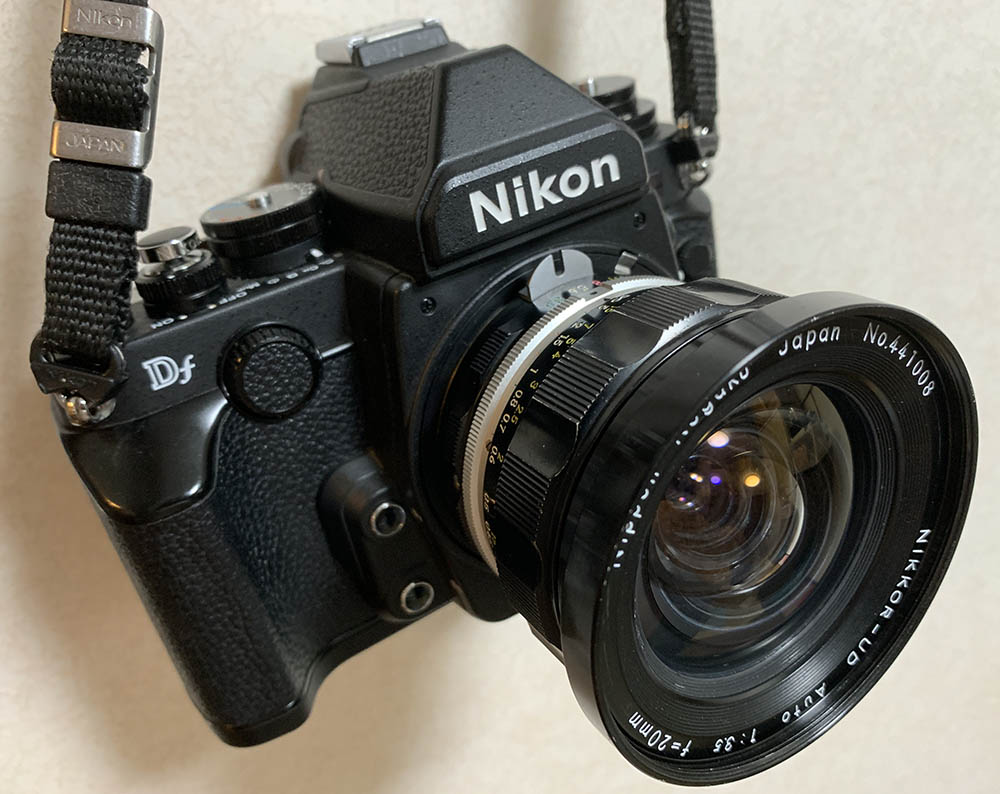
It’s a very handsome lens, its size and the big front element gives it a unique look. These are some of the reasons for its appeal and many people prefer it over newer lenses because of it.
The build is as expected from a classic Nikkor – all-metal, tough, substantial and well-built. It’s heavy since there are 11 elements and the front ones are huge but it handles very well with heavier Nikons. Using this with a smaller camera will tip the balance towards the front and you will want to use this with a winder to make the balance more even. Despite the weight, this does not feel unreasonable at all and you can carry one all-day and your neck or back won’t feel sore the day after.

The hood is pathetic, it won’t help much and you cannot use filters with it. It has no threads on the inner part so filters will have to be installed before it. This can be troublesome and cause mechanical vignetting but it is what it is.
Let’s now see some sample pictures from this thing. It’s important so know how a lens performs in order to maximize its use. You’ll know how to use its strengths and avoid its weaknesses. The following pictures were taken with the iris stopped-down from f/3.5, f/5.6 and f/8 from left-to-right.
It’s important to mention that this particular lens suffered from severe coating damage and my results should not be considered accurate but this is enough to give you a general idea of how this lens performs.


(Click to enlarge)
Vignetting is quite heavy wide-open but improves drastically by f/5.6 and it won’t be obvious by f/8. I would use this from f/5.6 if I were you specially for shooting scenes where the sky is bright and visible.
The distortion profile of this lens is quite strong, complex and bothersome. I will avoid putting straight lines near the edges of the frame, I’ll position the horizon at the exact center of the frame to prevent it from bending. This is a problem if you’re shooting by-the-sea if horizon is clear of obstruction.


(Click to enlarge)
This part of the “review” is sketchy since my lens has bad fungus damage so please don’t take seriously. This is how the flare looks in my particular lens, it flares really bad wide-open and it doesn’t look like stopping the lens down helps. The blobs get smaller as you stop the iris down, they’re not really big and you can ignore them. I will try and do something about this once I get a hold of my coating-repair formula and come back to this test.


(Click to enlarge)
These are cropped photos of the corner. Coma can be observed wide-open. I don’t think it’s that bad since this isn’t a fast lens but it’s there. It improved a lot when you stop the lens down to f/5.6 and is negligible by f/8. Stop the iris down to at least f/5.6 if this bothers you.
(Click to enlarge)
Chromatic aberration seems to be well-controlled but you can observe a bit of spherical aberration in the frame wide-open. It’s mostly gone by f/5.6 and you won’t see any from f/8 on.


(Click to enlarge)
Sharpness at the center seems pretty good wide-open but it gets better once you stop the lens down to f/5.6 since the improved resolution helps resolves the finer details on your scene. The lens is reaching its peak performance at f/8 where the center looks nice. The corners seem to be behind by a stop but it’s not bad at all considering the age of this lens. This lens seem to perform better when focused at closer objects near its closest focusing distance and it seems that the performance drops a bit as you focus it towards the middle of the distance scale. The performance bounces back again when you focus it in or around infinity.
Contrast seems to be quite low in certain situations but this is probably due to the poor state of the coating on this lens.

The coating on my lens is damaged so I get this ugly haze. The modest f/3.5 maximum aperture will force you to use a higher ISO speed but this should not be a problem with later digital cameras unlike how it used to be prior to the Nikon D3.

The rendering looks nice and it certainly has that vintage-look. I’m not sure but I suspect that this lens has a rather deep field curvature so it may be an important factor that contributes to the look.

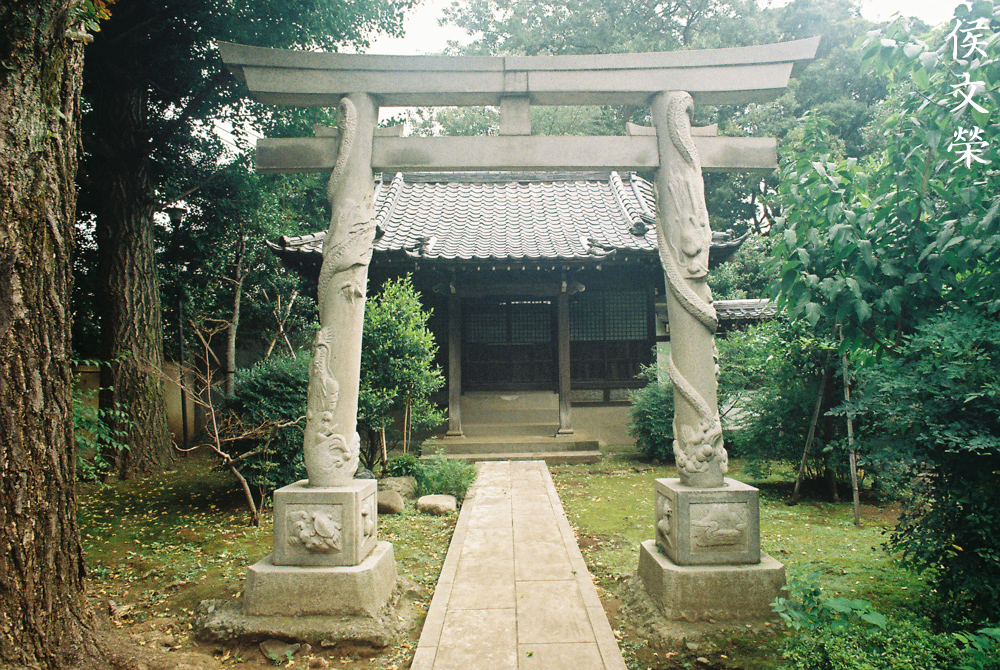
While 20mm isn’t what you would want to use for street photography, this is a handy focal length for shooting from-the-hips as you can just focus using the depth-of-field scale and frame your scene using your intuition. This isn’t ideal for this application but it’s fine depending on the situation specially if you’re using a cropped sensor camera.

It’s challenging to use a 20mm lens for this kind of photography, I would’ve used a 28mm lens instead for something like this. You will have to get really close to your subjects or crop the frame like I did here.


(Click to enlarge)
While this lens is handy for architectural photography due to its wide angle- of-view, the amount of geometric distortion can be a problem. You can use a software to fix this or just do it the right way and choose a lens that doesn’t have a high distortion profile to begin with.


(Click to enlarge)
Here are some more photos to help you see what this lens can do for you. It is a nice lens and I liked it a lot, this would have been perfect if not for what happened to the coating of my lens. I don’t shoot landscape photos lately so I don’t see myself using this one regularly but to be frank with you, I would use the Nikkor 20mm f/3.5 Ai-S instead for this if I wanted a manual lens for the job. It’s more compact and sharpness is more even across the frame.
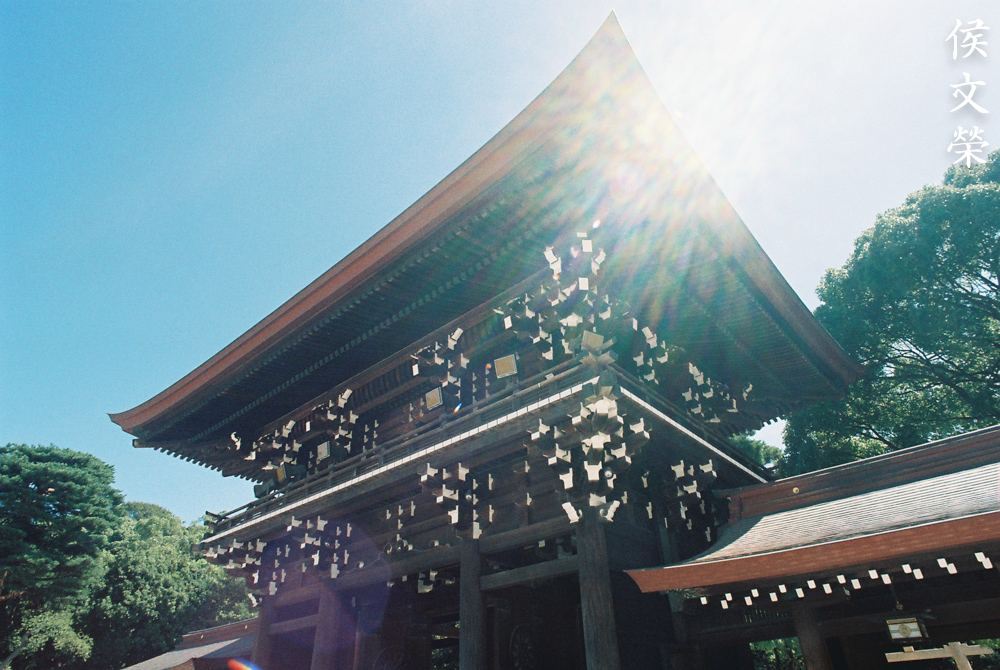
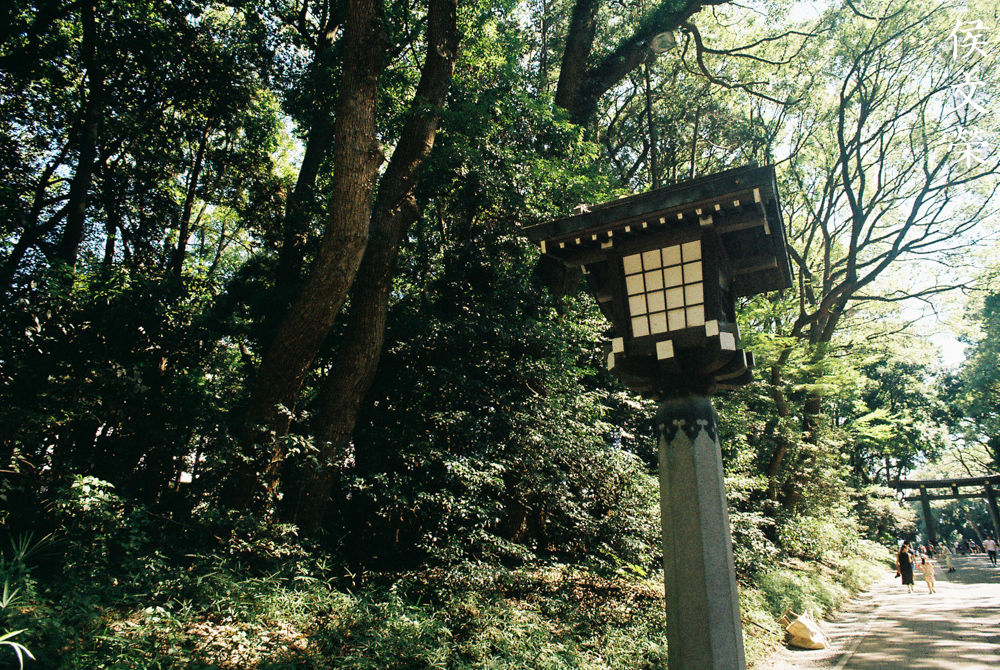
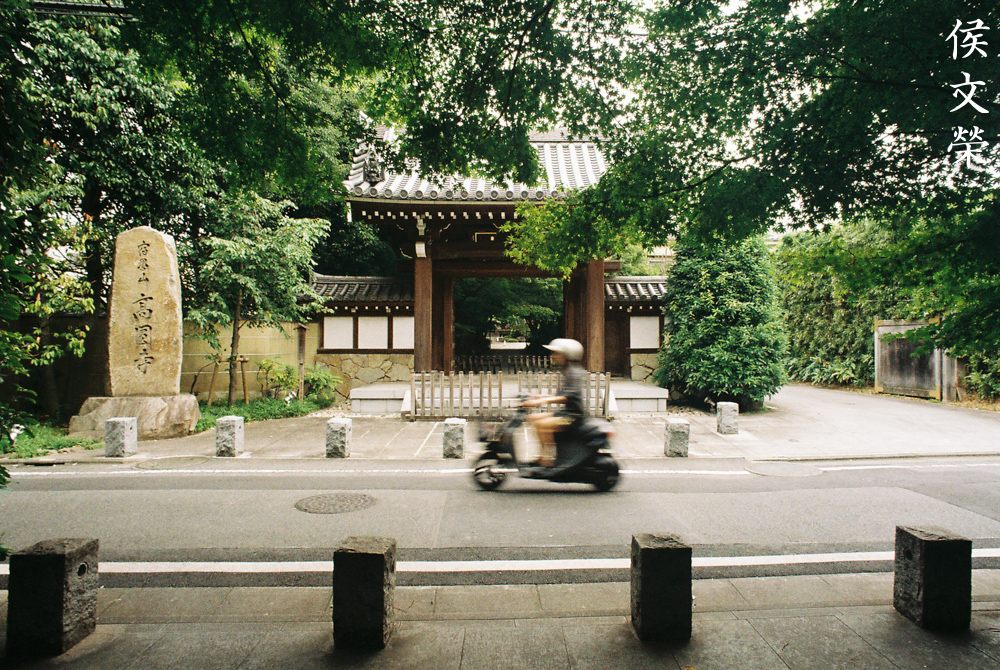
Let’s now see some pictures that were shot with film. Film has a unique and special look that’s difficult to simulate with digital because of film grain. It’s important that we study these pictures because this lens was calculated for use with film. This will give us a fair assessment of this lens because we are judging this lens using its intended medium. I took these with a Nikon F and Kodak Color Plus 200, most of these were taken with the iris stopped-down.
It seems to me that this lens performs better with film since its rendering is a perfect match with the classic look of film.

It’s very handy as a travel lens but some people may find 20mm to be wider than what they would require for most cases. A 28mm lens may be a better choice for your travel needs.
This picture looks like it was taken several decades ago. If you want to have that vintage-look going on then just shoot film and you’re done. You do not have to simulate that look because you’re getting the real deal.
Surprisingly, the damaged coating didn’t seem to affect the performance my lens at all. I didn’t get those ugly flares from my samples taken with a digital camera or they don’t look as bad here. This is probably due to the reflective quality of the sensor’s protective glass versus the dullness of emulsion so it won’t reflect as much light back towards the elements.

Here’s another example, at least I am getting the usual blobs instead of that ugly washed-out look that I described previously. I would take this any day over the horrible flare.
This is the worst example that I got. That ugly flare reminds me of the funky look that I get with some of Nikon’s cheaper lenses. Again, this is caused by the poor state of my lens’ coating.
Well, at least it looks much better when the sun is not in the frame.

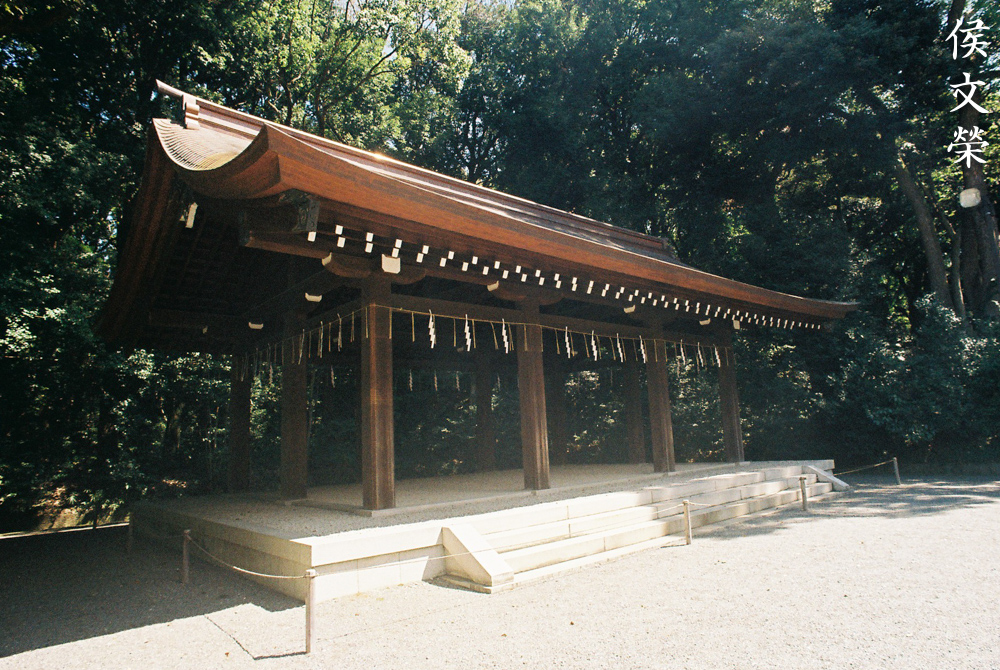
This is a really nice and sharp picture that was taken at f/8. Notice how the lines of the pillars and beams curve a bit due to distortion? I would not use this for architectural photography if I can help it. It’s not bad but it could’ve been much better.


(Click to enlarge)
Here are some more photos that were taken with film. The rendering of this lens looks exquisite, it’s the only 20mm Nikkor that does this. I recommend that you use this lens with film.
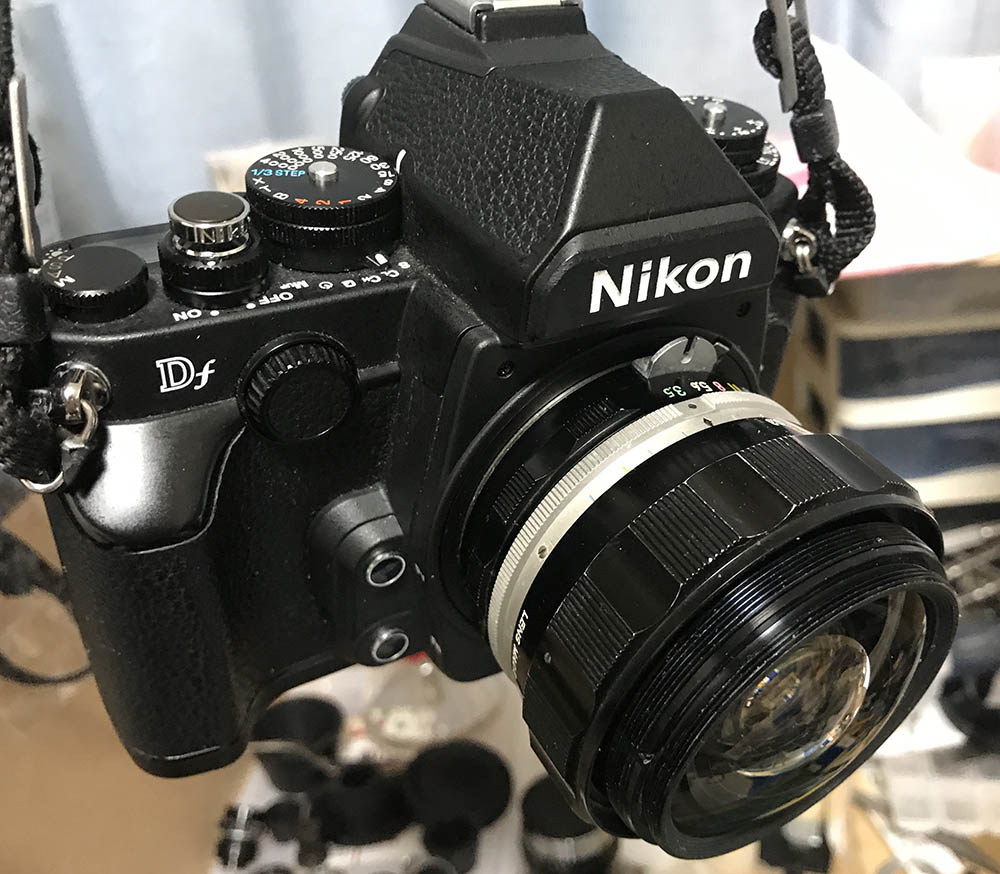
I highly recommend this lens for people who want a classic 20mm Nikkor, it has a unique, vintage-looking rendering that most lenses don’t have today. It is sharp even by today’s standards and is still relevant depending on what it is used for and how you use it. The prices for these remain high on the used market due to demand and the ones with an Ai-ring will cost even more. If you’re looking for one of these, make sure that you buy the ones that have a factory installed Ai-ring so you can use it with newer Nikons. A non-Ai lens can damage newer Nikons that have the Ai-coupling tab unless it is a Nikon F4 or a Nikon Df and similar bodies that allow the tab to be folded. If you’re looking for a smaller one, check out the Nikkor 20mm f/3.5 Ai-S, it’s smaller, lighter and has better coatings but the performance is a bit inferior at the center but the corners look better. It’s a more balanced lens with regards to performance but some people may find its looks boring. Whenever you are shopping for a Nikkor-UD 20mm f/3.5 Auto be sure to check the condition of the rear and central elements, these are sometimes hazy and the cause can come from condensed oil, dirt, balsam separation and fungus. I don’t know why but these are the most common factors that I usually see when looking for one of these. If you found an exceptional copy then just pay the extra for it and it’s going to be worth it in the long run. Investing in this lens is good, I don’t see the prices of these things going down anytime soon and from how things look like its price is just going to get higher and higher as more folks get to know more about this lens.
Before We Begin:
If this is your first attempt at repairing a lens then I suggest that you check my previous posts regarding screws & drivers, grease and other things. Also read what I wrote about the tools that you’ll need to fix your Nikkors.
I suggest that you read these primers before you begin (for beginners):
Reading these primers should lessen the chance of ruining your lens if you are a novice. Before opening up any lens, always look for other people who have done so in Youtube or the internet. Information is scarce, vague and scattered (that is why I started this) but you can still find some information if you search carefully.
I highly recommend that you read my working with helicoids post because this is very important and getting it wrong can ruin your day. If I can force you to read this, I would. It is that important!
For more advanced topics, you can read my fungus removal post as a start. This post has a lot of useful information and it will be beneficial for you to read this.
Disassembly (Main Barrel):
The barrel’s more complicated compared to your usual Nikkor prime. You’ll initially get confused but this article should help you get your way around it in no time at all. This is best left to the experienced repairer, a beginner will have a hard time with this as you will require several types of openers just to open some of the parts. Most of the parts here are sealed so you will want to use solvents to soften the seals first if something isn’t moving at all. You’ll spend the most time here depending on the condition of your lens.
Remove the bezel using a rubber tool. It can be tight at times so dropping a bit of alcohol to the seam will help loosen it a bit.

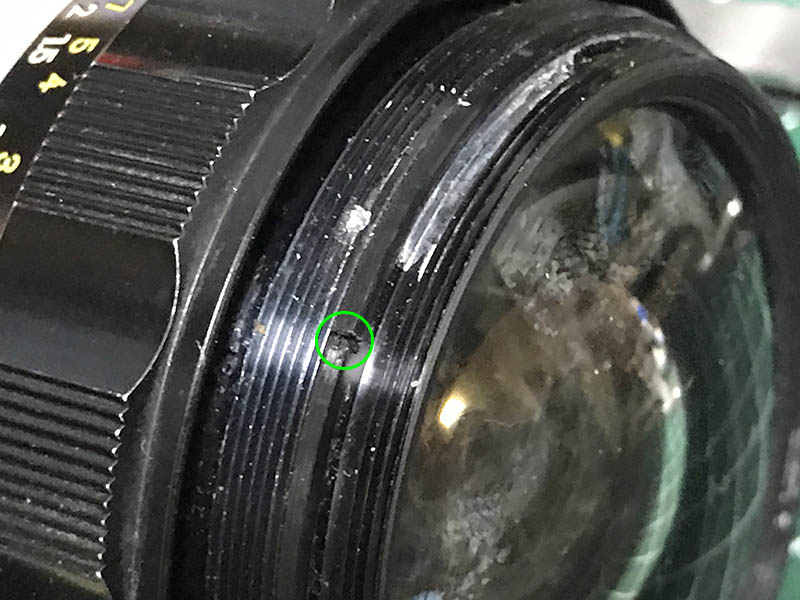
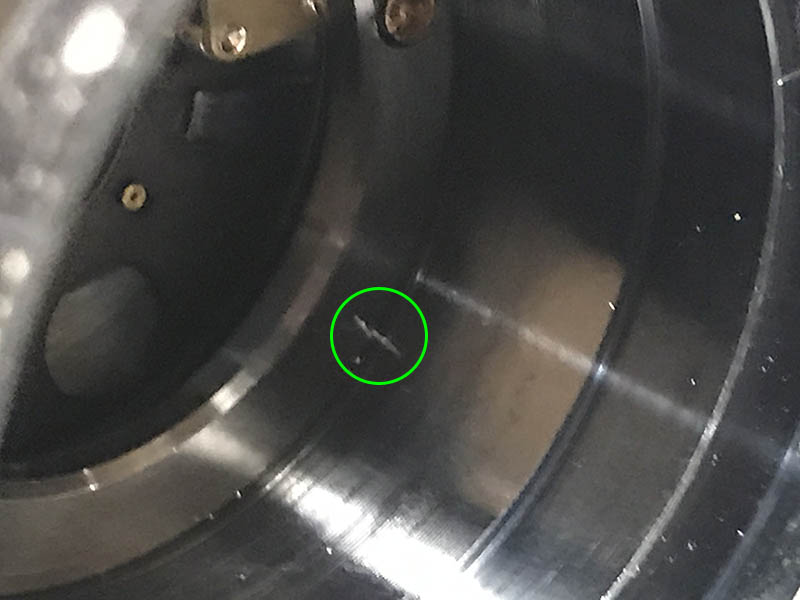
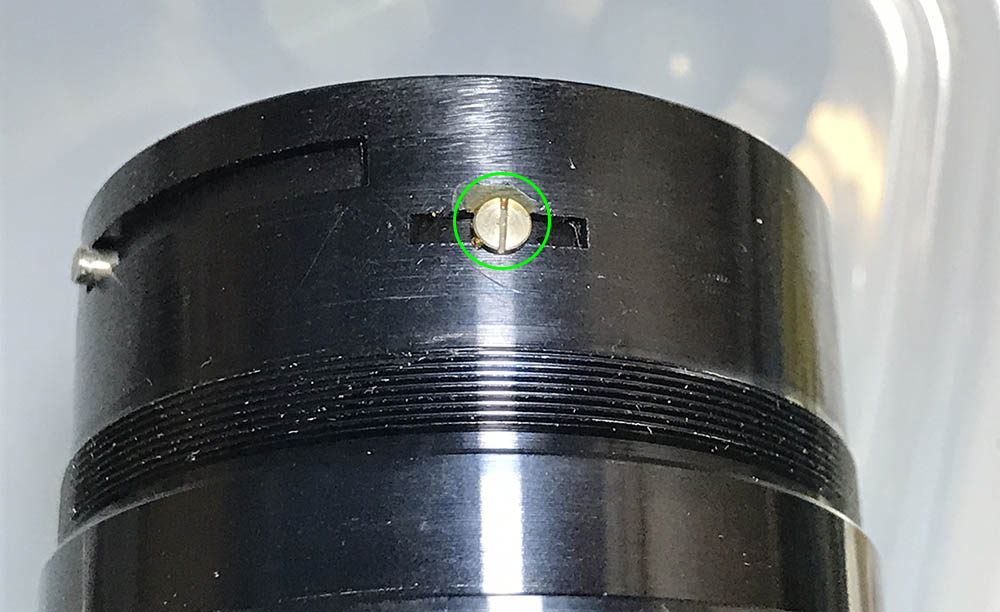
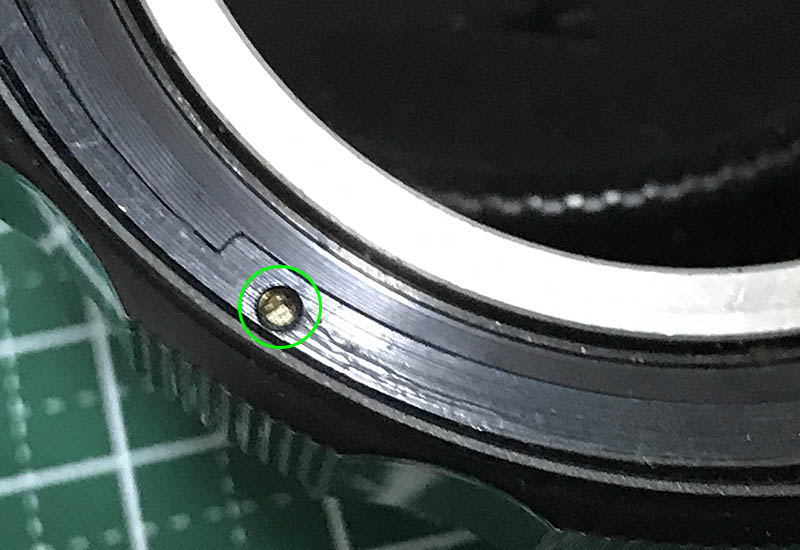
The front ring is secured by a set screw, locate and extract it and be careful not to ruin its head.
This is how things should look like without the front ring.
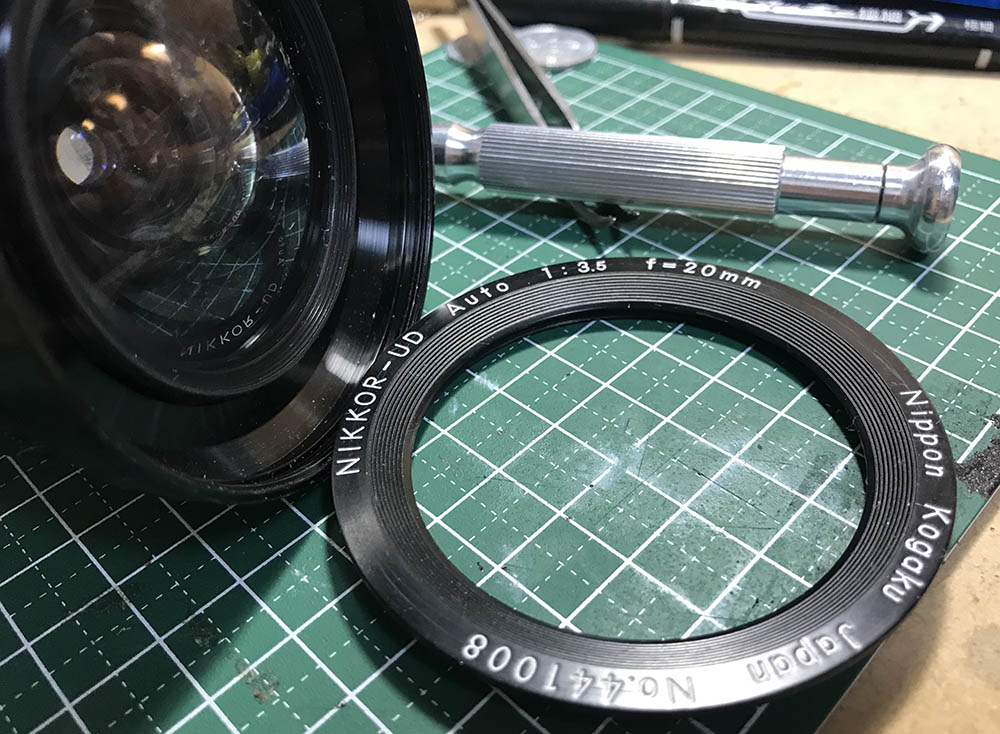
To remove the objective you must first remove the front elements assembly. Carefully extract it with a lens spanner and make sure not to damage it, the threads and the slots can easily be stripped so be careful.

Mine took some time to remove since it was sealed as evident by the marks on the threads. Be careful when storing the front elements assembly, it has an exposed rear that can easily get scratched.
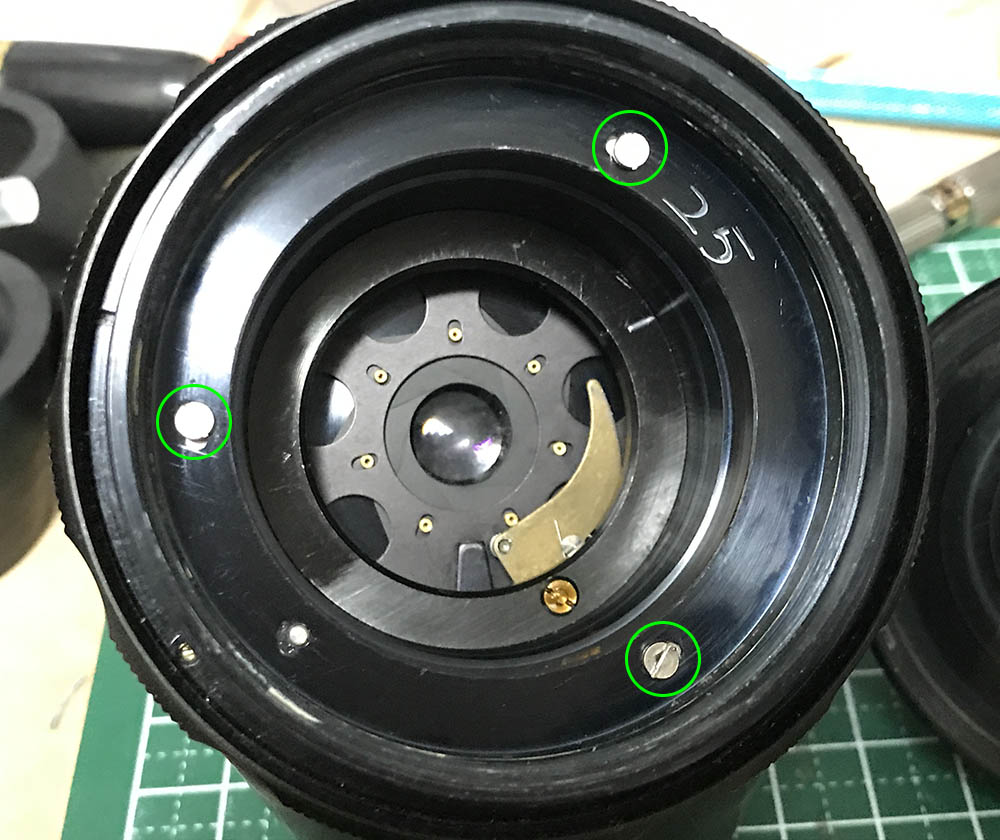
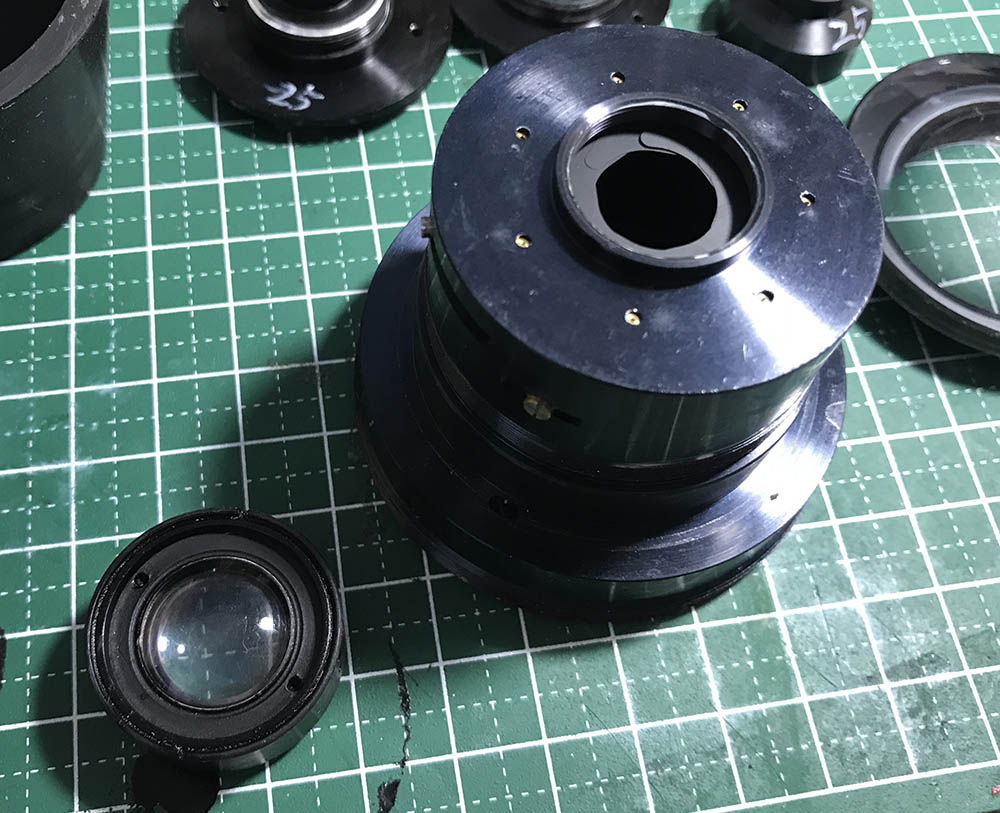
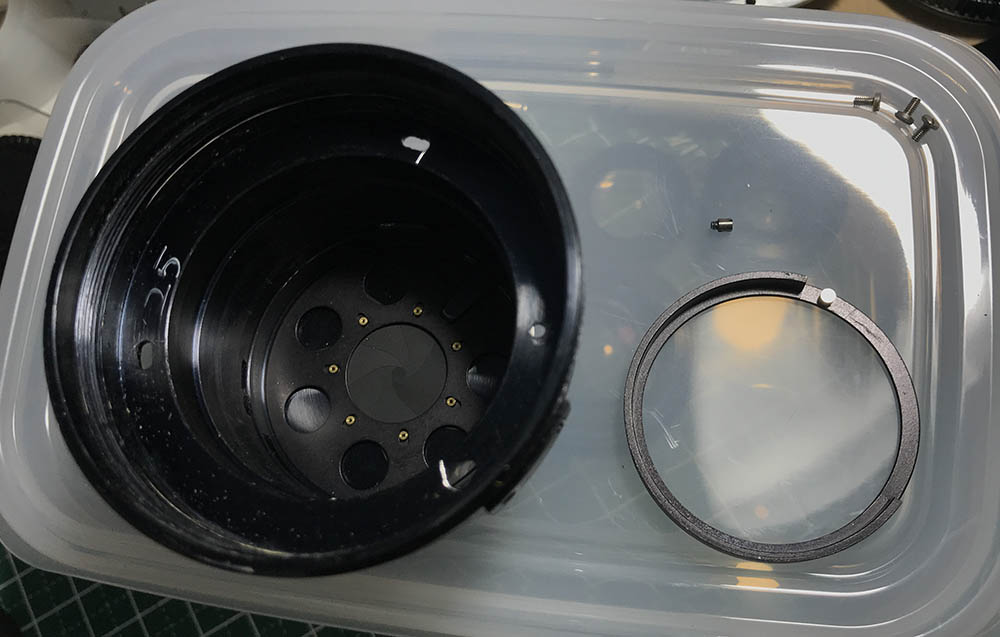
There are 3 screws that you have to extract to remove the objective’s casing. There’s a small pin at the 8:00 position that serves as a guide to position this thing. It can get it the way so the fit is tight.

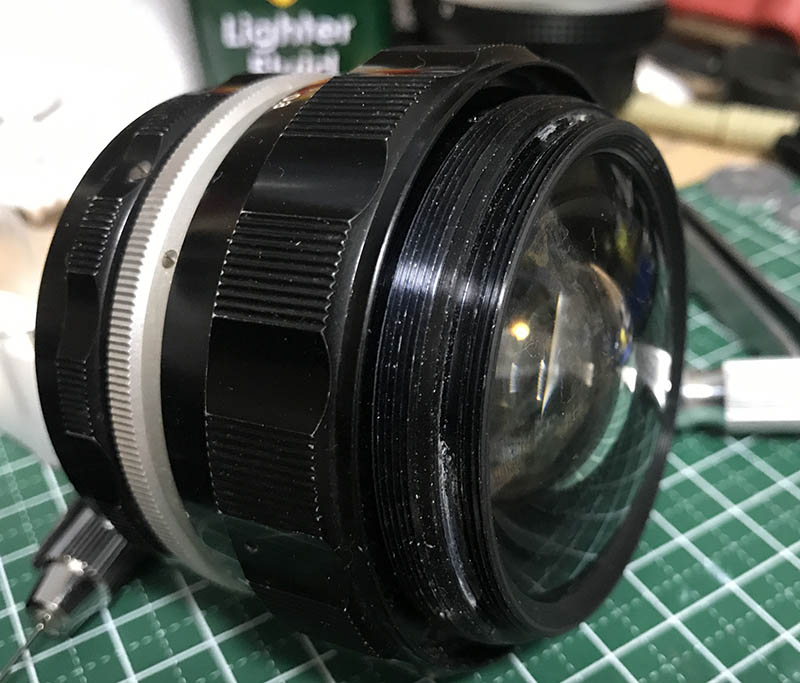
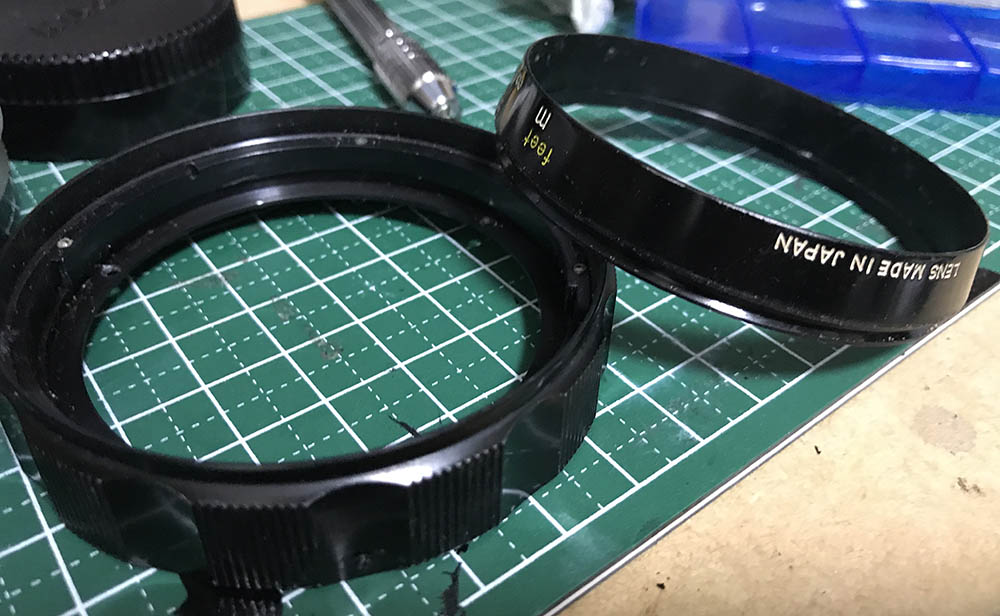
With a bit of patience you can pull the objective’s housing off. Screw back its front and store it in a safe place before you work with the main barrel.

Extract these screws to remove the bayonet. To prevent stripping these, go and read my article on how to remove bayonet screws. Many get stuck here because they don’t know the right technique to remove these screws so they end up stripping the heads, reading my article can help you prevent this.
Please disregard the fact that the objective is in the picture, I was waiting for the solvent to soften something so I began working on the rear instead.

The bayonet can easily be removed by pulling it away.

The aperture ring is being secured by this screw, it acts as a pin to couple it to the iris mechanism so turning it will control the size of the iris.

You can remove the aperture ring once the screw is gone.

The focusing ring is secured by these screws.

Extracting the screws will allow you to remove the focusing ring.
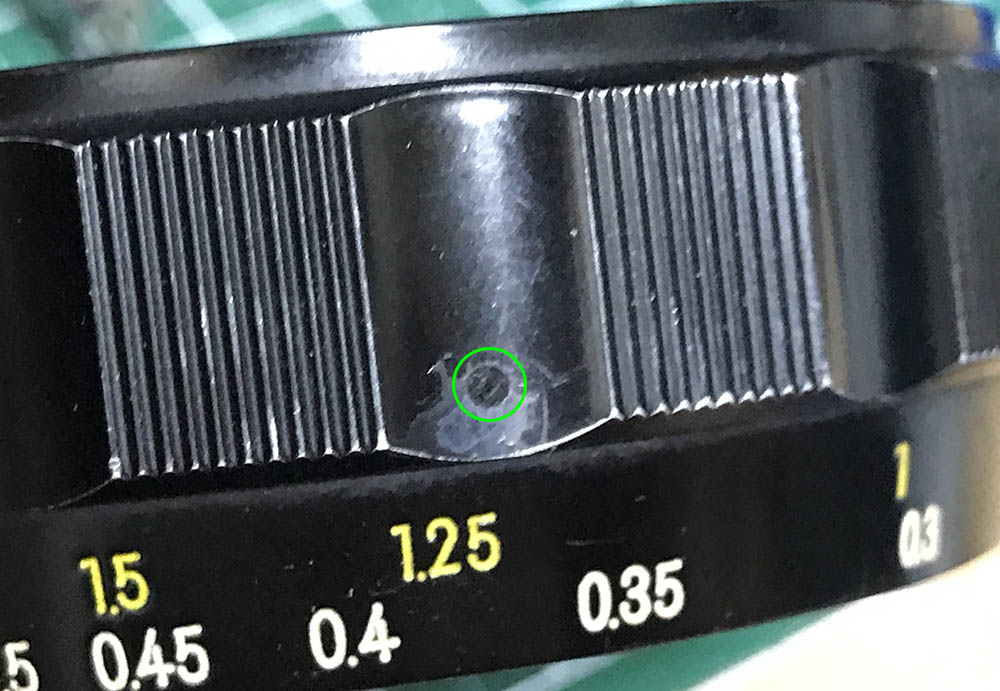
The focusing ring can be further dismantled by removing the distance scale. Locate and loosen these set screws so you can remove the scale.
The scale can now be removed. Clean everything really well to remove dirt, germs and old oil from it.
The focus adjuster ring can be removed after loosening its 3 set screws. This is usually annoying to remove as they were sealed at the factory. Soaking it in an alcohol bath for some time will help you dissolve the seal, making this an easy job. The threads are fine and easily-damaged so be careful.
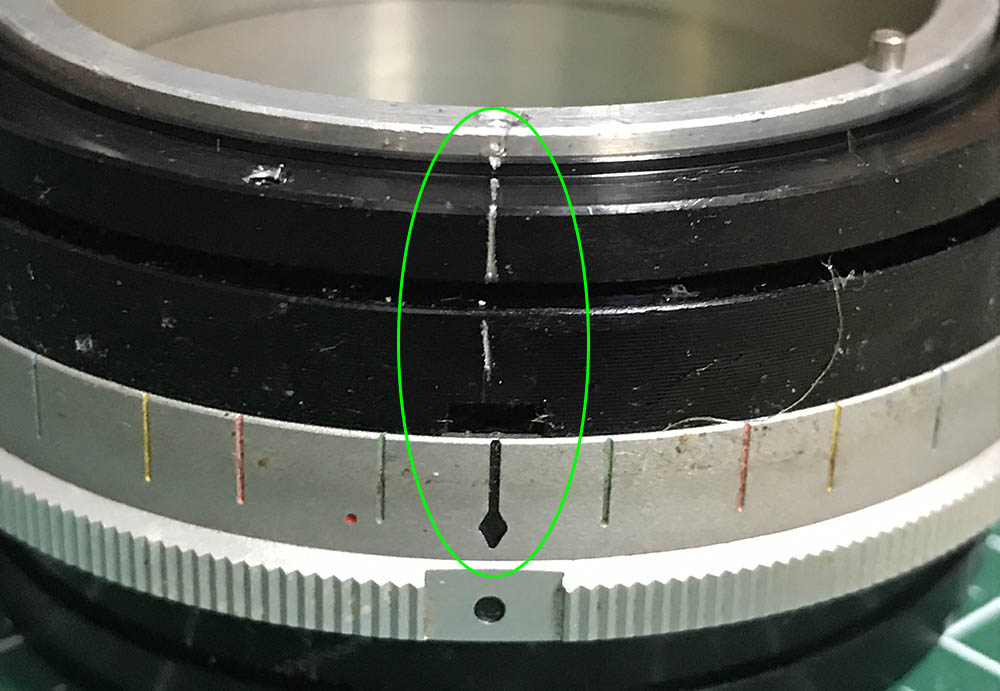
This is a good time to take your notes. The person who worked on this made these, this will help me know the proper alignment of the helicoids when it is turned to infinity.

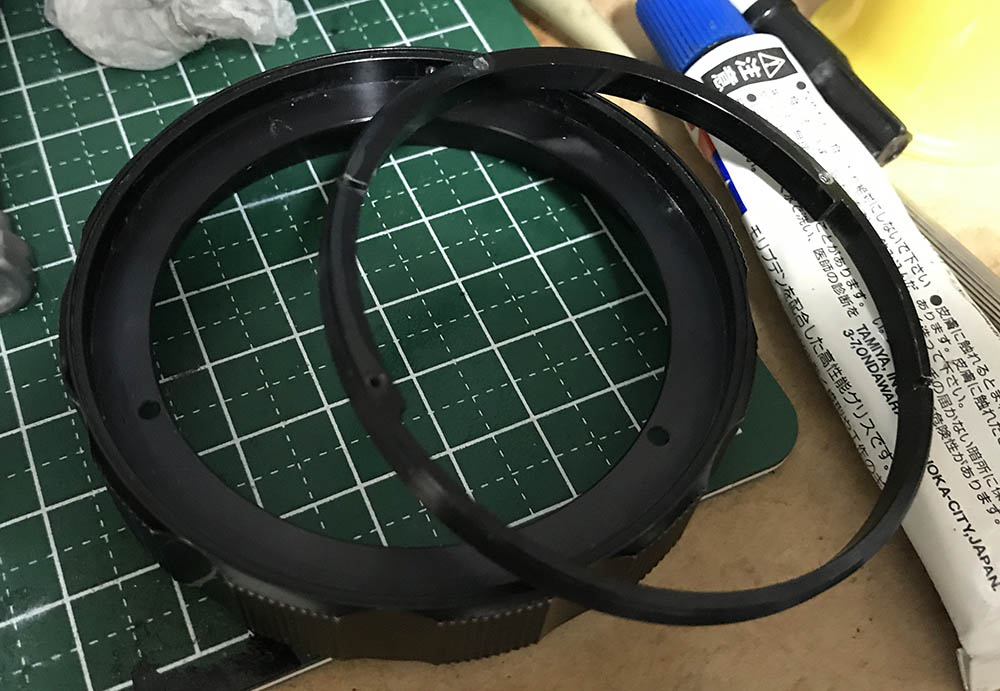
Extract the screws of the sheath and remove it. The sheath has the grip and the depth-of-field scale, it also covers some of the holes in the barrel.
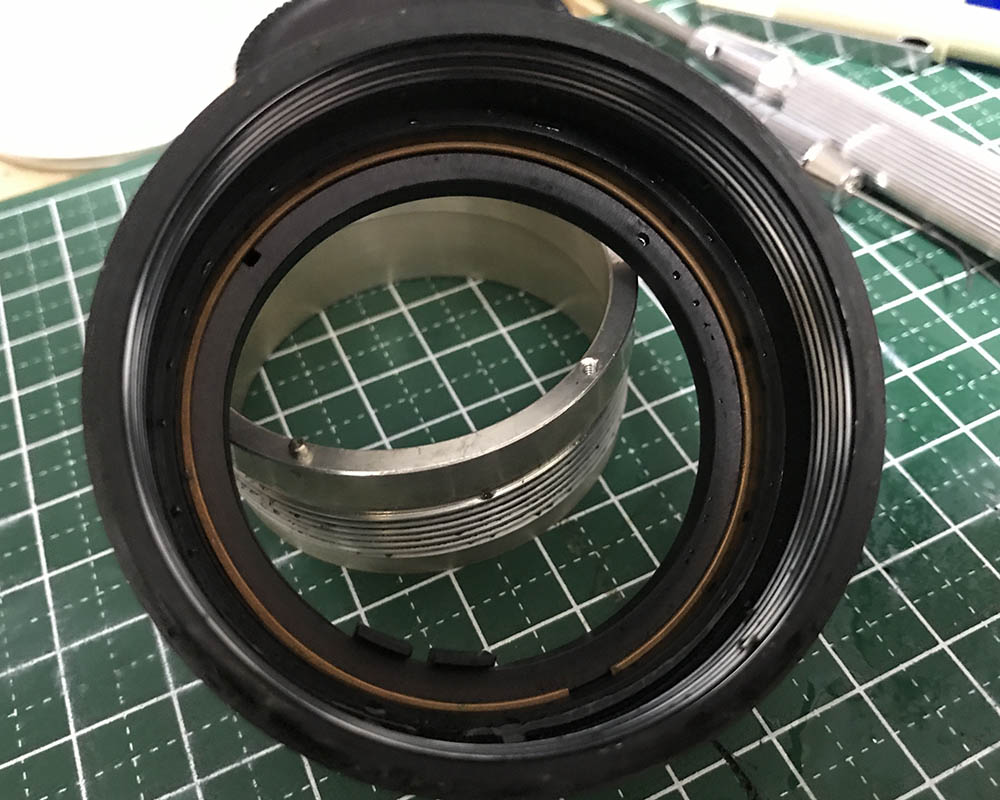
Turn the barrel to expose these screws, they secure the helicoid key.

Remove the helicoid key and don’t forget to put it back facing the right way later. Clean it very well and set it aside. It constrains the turn range of the helicoids so turning the central one will turn the inner one, enabling you to extend or retract the barrel.

The helicoids can now be turned beyond their range, collapse the outer one and then make a diagonal mark. You should be able to reproduce this layer or you have put the helicoids back the wrong way.
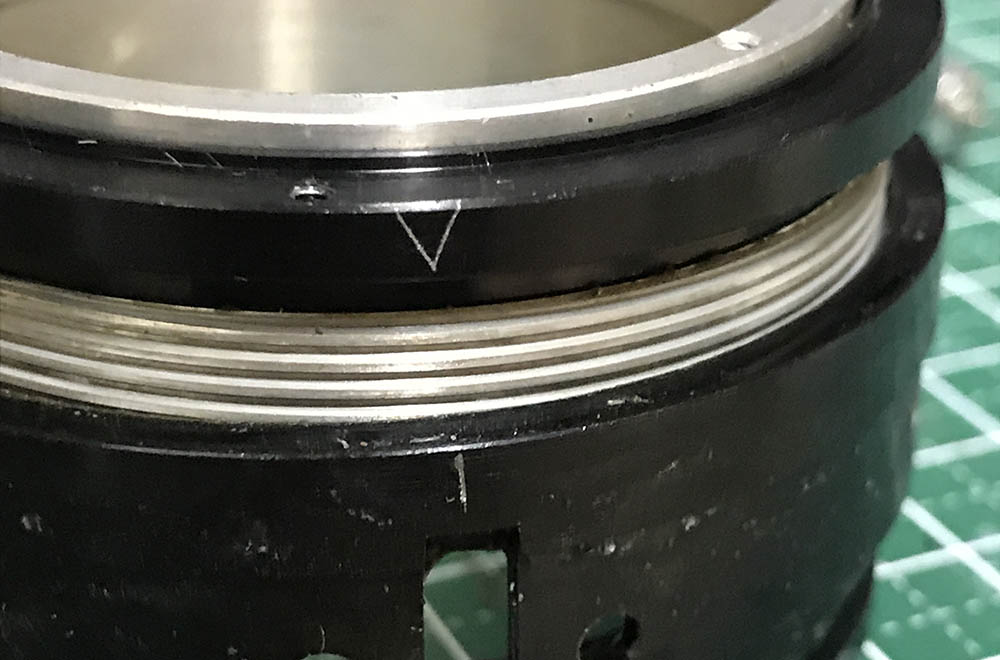
Separate the outer helicoid from the central one and do not forget to mark where they separated. Many people forget to do this so they get stuck. Read my article on how to work with helicoids to prevent this problem.

Do the same for the inner helicoid.
To remove the aperture fork and its ring, remove this copper ring. You can use a small pick but be careful not to scratch anything.

This is how the fork should be installed, don’t put this back the wrong way.

Remove the aperture fork assembly. It couples the aperture ring to the iris mechanism.
Clean the helicoids really well and don’t leave any residue. You will have to use solvents, strong dishwashing liquid or an ultrasonic cleaner just to get this cleaned properly. This will all depend on what type of grease was used. I even brush these to remove any hard deposits. I use a thick type of grease for this lens because It’s a wide-angle lens and the focus throw is a little bit on the short-side. Don’t apply too much grease so your iris won’t get oily.
Disassembly (Objective):
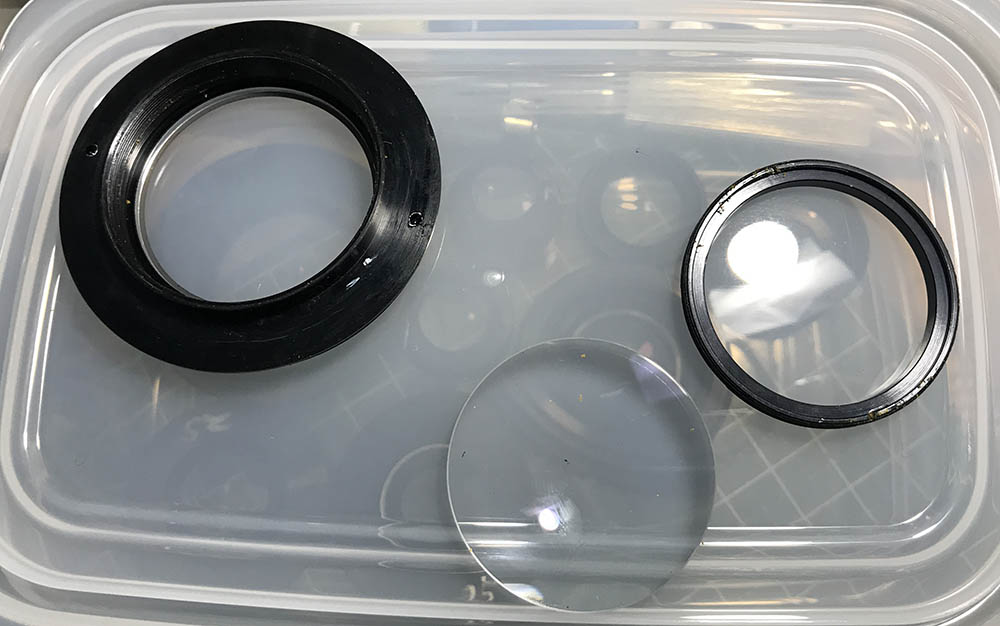
The objective is composed of several housings for all 9 groups. It is not easy to work with if you need to clean everything and it will test your patience. I spent a lot of time here because everything had to be cleaned very well just to kill the fungus and germs. Everything was filthy and each part had to be treated really. If your lens isn’t this dirty then just clean whatever is needed, do not open everything up. To prevent any mistakes, note which direction a group or element should be facing. Putting them back in the wrong way can turn your lens into an expensive paperweight because you may crack them due to pressure.
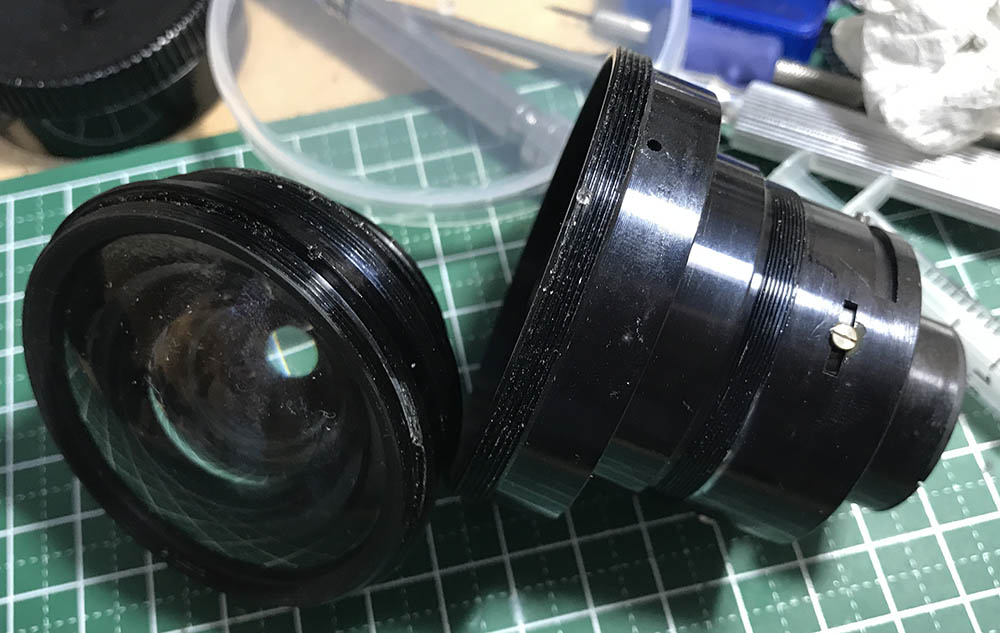
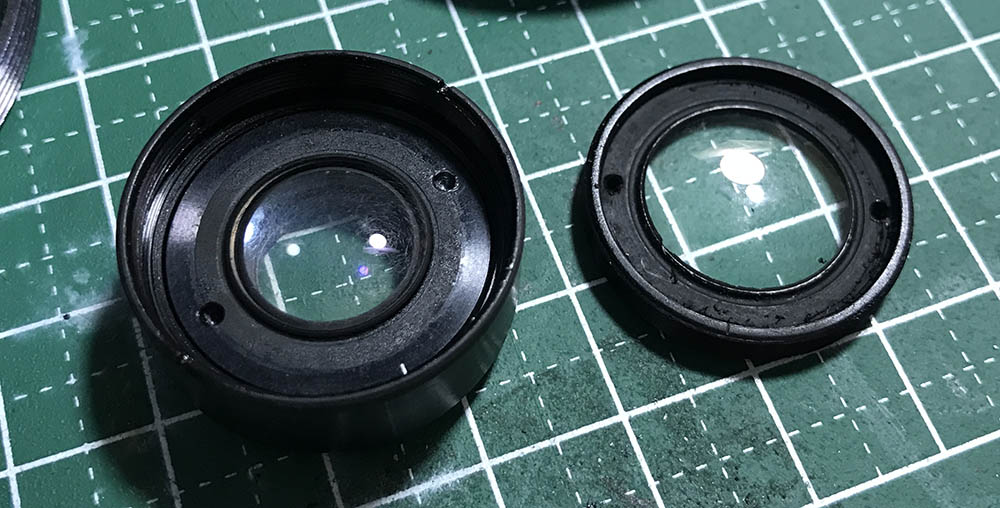
The front optical assembly comes-off like this as you already know.

The 6th group and its casing can be removed by unscrewing it off from the whole assembly. The 6th and 7th elements were cemented to form a single group. Be careful when using solvents near this thing as it can dissolve the cement.
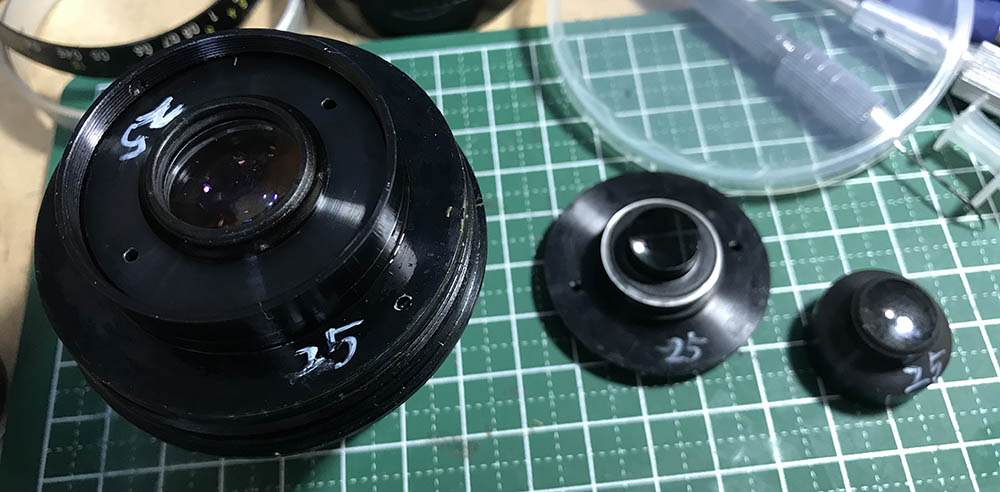
The 5th element and its casing can be removed in the same way.

Unscrew the casing of the 4th element to expose the 3rd element. Look at all that fungus, they’re looking very much alive!
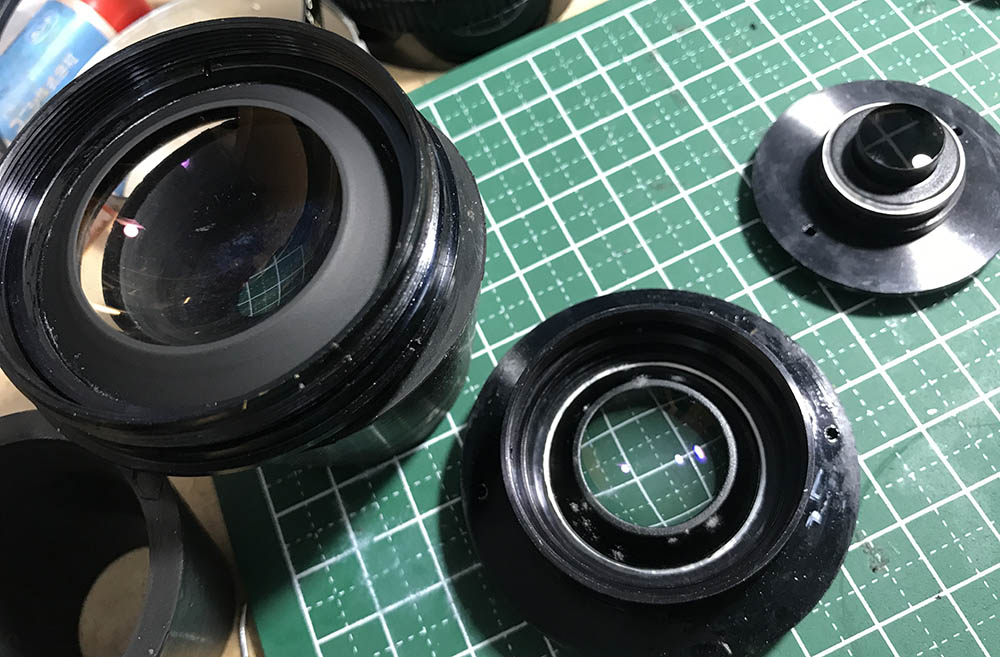
Extract the housing of the 2nd and 3rd elements and set it aside.

The 2nd element can be accessed once you get the 3rd element’s casing off.
Remove the retainer ring of the 2nd element to extract it.

The front element can be removed once the retainer is gone. Notice that the retainer was sealed with contact cement. Soften the seal with solvent and it should make things easier for you.
The rear optical assembly can be unscrewed from the objective’s housing.
Remove the rear element to access the 10th element and its casing.

Remove the 10th element and you can now access the 8th and 9th elements, they’re cemented into a single group and care should be used so you won’t dissolve the cement.
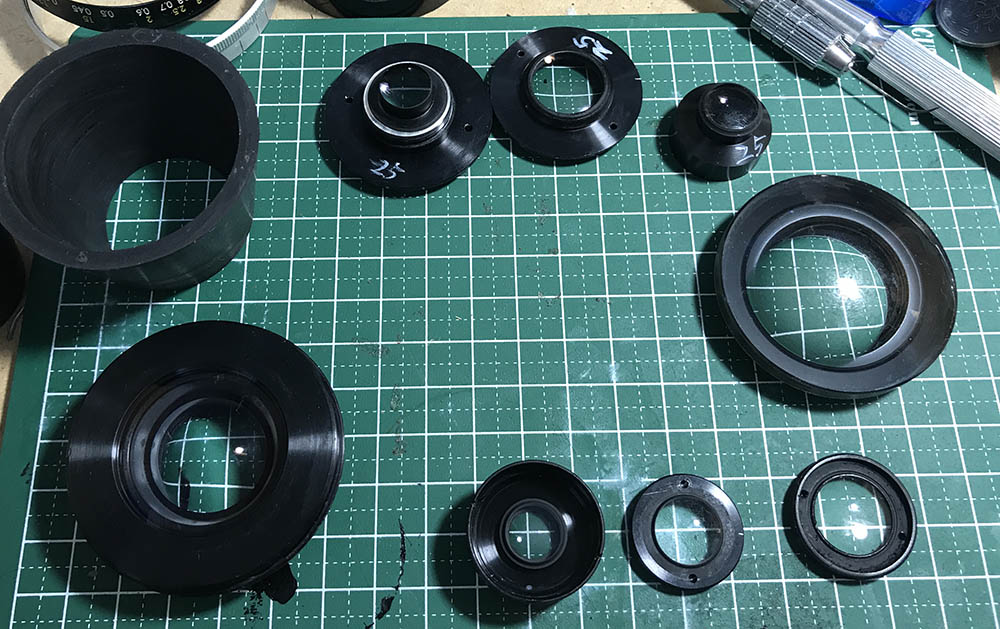
Here’s everything laid-out, ready to be cleaned.
I cleaned everything very well, to kill the fungus I used my technique that’s outlined in my how to kill lens fungus article. You can’t avoid fungus, spores can be found everywhere and the only way to prevent in outbreak is to use your lens often and deny the right conditions for it to germinate, flourish or spread.
Disassembly (Iris Mechanism):
It’s best to leave the iris mechanism alone but this one’s filthy so I had to go and dismantle everything just to make sure the germs and fungus are dead. The construction is typical of many Nikkors from this era and you can find your way around this thing easily if you’re an avid follower of the blog.
The iris mechanism can be adjusted so it’s good to make a small mark. This will help you later so you’ll know how to align this part properly.
Remove these screws to remove the regulator and its ring.

Remove the regulator and its ring, it can be tight so be careful when getting this thing out as you may damage the iris while doing so. This ring holds the whole iris mechanism together.
The regulator has a spring that rests on the inner wall of the objective. This can be annoying to put back, make sure that you have it in the right place so you won’t have to spend a lot of time fiddling with it once reinstalled.

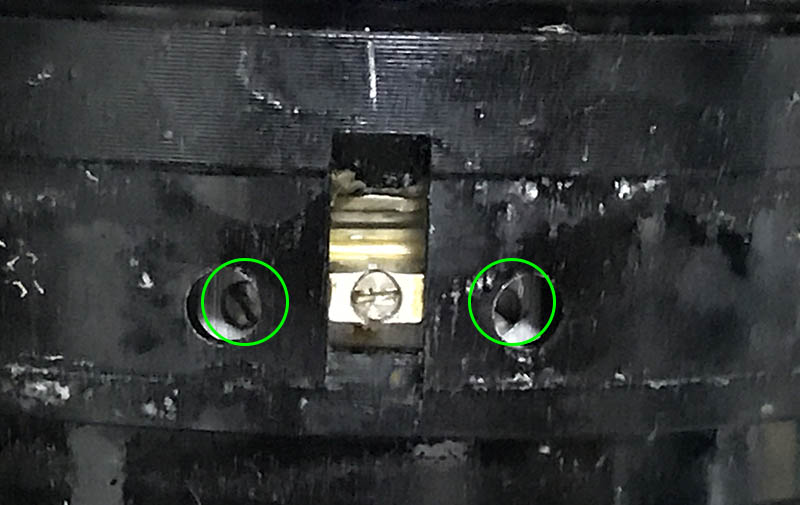
This screw has to be extracted, it couples the iris mechanism to the aperture fork. Remove this carefully since this is fragile.
That screw secures the regulator ring, the lever of the regulator that we saw in the previous steps is being controlled by this thing. Pick it out using your fingers or a sharp pair of tweezers.

The actuator plate can be easily removed by pressing on its tab using your finger from the outside to lift it up so you can easily pick it off.
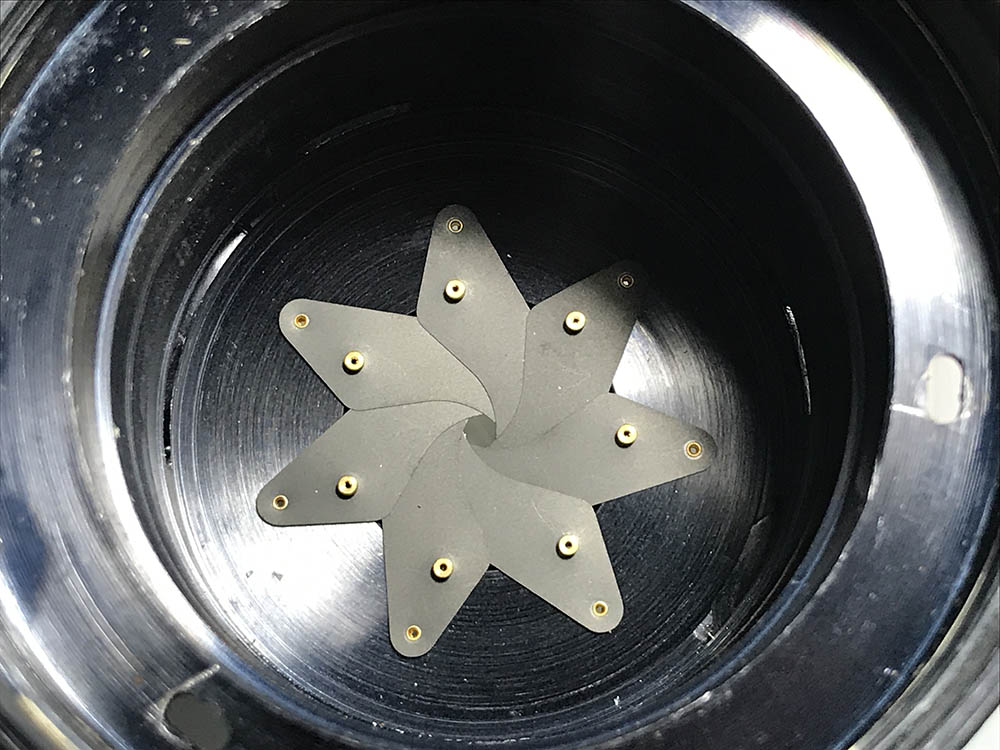
The iris blades can now be accessed.

Remove them carefully and only handle them by the pegs. I usually just pop them over an alcohol dish and the surface tension should cushion their fall.
The iris blades were cleaned with lens tissue and naphtha. Never use oil or grease anywhere near the iris so it won’t get oily. Everything here is fragile, handle everything with care so you won’t warp anything.
Conclusion:
This one took me several nights to repair since it was filthy. It’s complicated that’s wasn’t the problem, most of my time was spent cleaning and I used up my supply of lens tissue. The fungus has damaged the lens beyond repair, it won’t perform at its optimal performance due to that but at least it’s worth saving. It’s still a sharp lens despite the damage but I will have to be careful when shooting the lens in backlit situations since I can’t rely on the coating.

I painted any “bald” spots on the black paint using India ink.
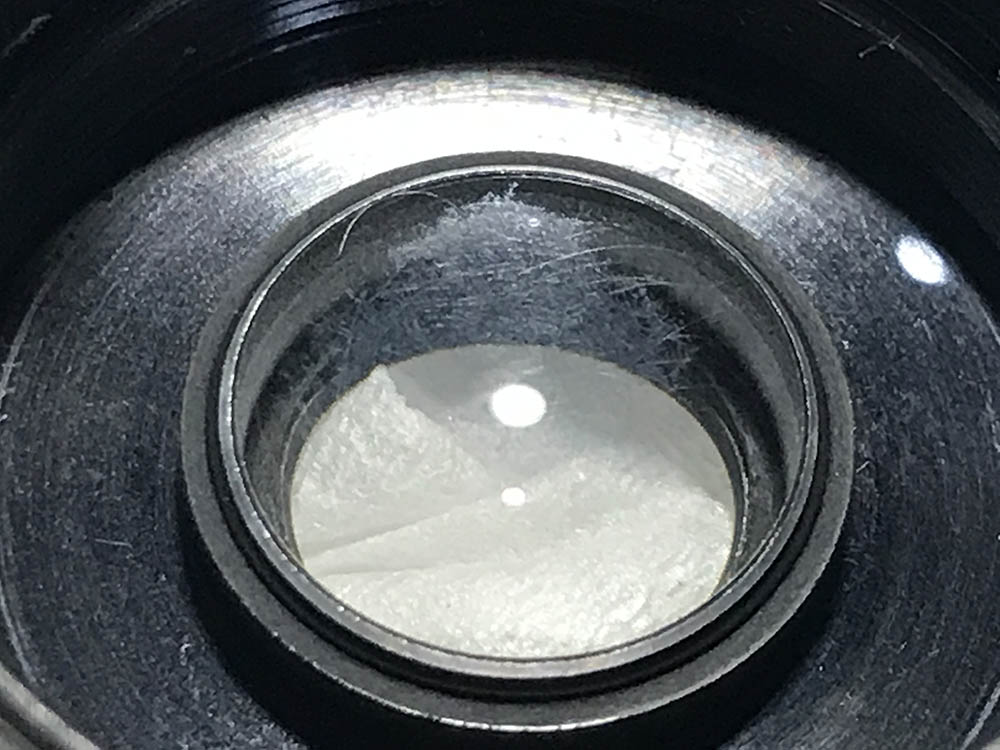
The coating was severely damaged on this element so I polished it. It won’t help because the coating will be mostly gone but at least I won’t get dark or uneven spots on my pictures due to the damaged coating. Damaged coating can also result in a hazy-look as light is diffused by the rough surface. This is replaced by flare as a side-effect of losing much of the coating. I’d rather have that than a milky-looking photo any day.

Reassemble your lens to this state so you can adjust the focus of your lens.
Loosen these set screws so you can turn the focus adjuster ring.

You can turn the adjuster ring by using a lens spanner.
It’s now time to calibrate the focus of this thing. If you don’t know how to do this, read my article on how to adjust the focus of your lens. When you’re OK with everything, adjust the distance scale and put everything back together. Enjoy your lens!
That’s it for this article, it’s one of my most-requested articles so I am happy that this is now part of the blog. This is usually an expensive lens and I can’t afford one in good condition so I had to make-do with this. If you found this article helpful or interesting, please share this with your friends at facebook or your photography group. You can also support this blog to help me offset the cost of maintaining this, the cost of film and development isn’t cheap so any help is welcome. Thank you for supporting and following this blog and don’t forget to come back for more interesting things. See you again, Ric.
Help Support this Blog:
Maintaining this blog requires money to operate. If you think that this site has helped you or you want to show your support by helping with the site’s upkeep, you can make a small donation to my paypal.com (richardHaw888@gmail.com). Money is not my prime motivation for this blog and I believe that I have enough to run this but you can help me make this site (and the companion facebook page) grow.
Buy me a roll of film or a burger?
Thank you very much for your continued support!
$2.00
Helping support this site will ensure that this will be kept going as long as I have the time and energy for this. I would appreciate it if you just leave out your name or details like your country’s name or other information so that the donations will totally be anonymous. This is a labor of love and I intend to keep it that way for as long as I can. Ric.

3 Comments (+add yours?)