
Hello, everybody! Nikon just announced the Nikon Z50, it is a small camera that’s equivalent to the Nikon D7500 just without the mirror. Nikon sure has earned back the money spent on developing that sensor several times over, Nikon loves to repurpose older flagship sensors and use them on lower-end cameras after a few months or years. Nikon has been doing this thing since the start of their rebirth after the war. Repurposing isn’t a bad idea and I’m an advocate of it when I am designing studio workflows at work. It saves a lot of money but it also ensures repeatability which is important. Speaking of repurposing, our topic for this article is a lens that was sold in 2 different lens mounts, you don’t have to re-invent the wheel but you sure can modify it to fit different needs, so to speak. Please enjoy this article.
Introduction:
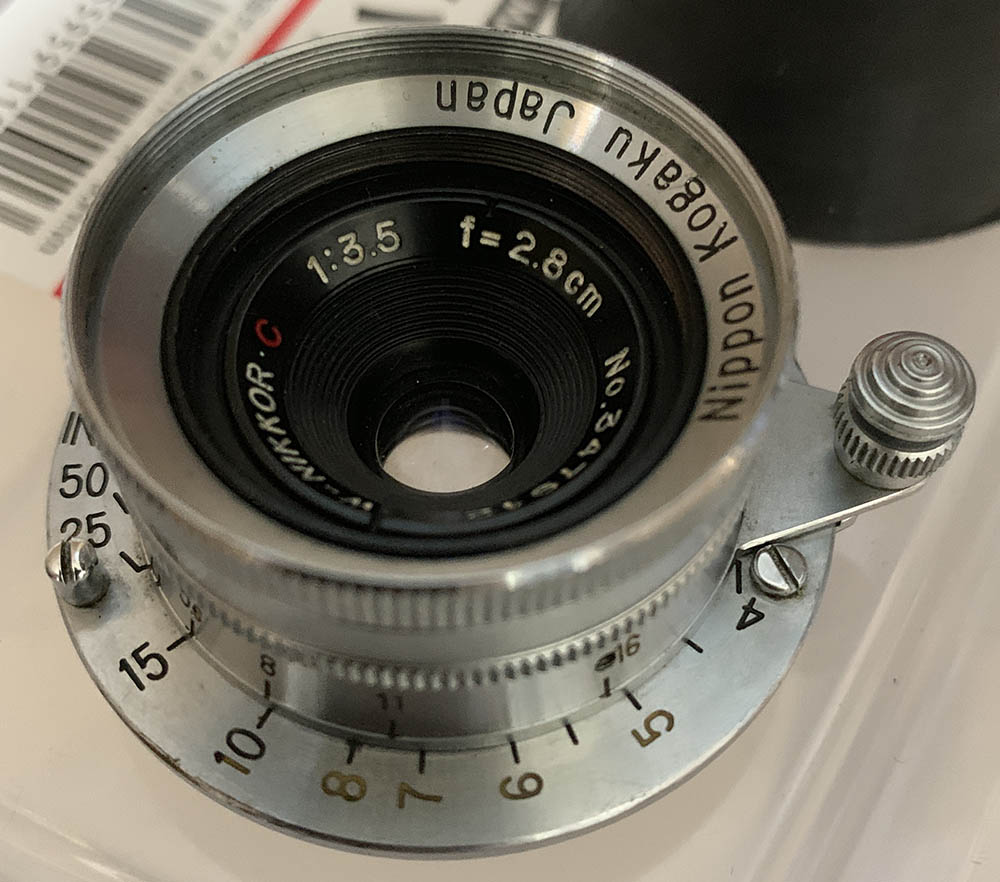
The W-Nikkor•C 2.8cm f/3.5 was a game-changer when it came out. It used to be the fastest lens of its type when it debuted in 1952. It was based on an old Nikkor that was used during the war for taking aerial spy photos, it has high resolution and a low distortion profile. It was miniaturized and it ended up being this lens. I have covered the W-Nikkor•C 2.8cm f/3.5 (S-mount) before so read that article if you want to know more about this lens. The lens that’s featured in this article the W-Nikkor•C 2.8cm f/3.5 (Leica Thread Mount). It’s similar to the W-Nikkor•C 2.8cm f/3.5 (S-mount) optically and that’s all. Many people debate to this day on which version came out first. Some say that it’s the Leica Thread Mount version came out earlier as Nikon wanted to get the Leica market which was bigger back then. There’s a lot of merit to it, I think that this lens was aimed at that market where there’s nothing equivalent to it for some time. It was the fastest wide-angle lens when all the competition (Germans) had were f/6.3 to f/8 ones. You can now buy a faster, cheaper lens at the loss of some prestige. This mattered to some people while some folks didn’t even care.
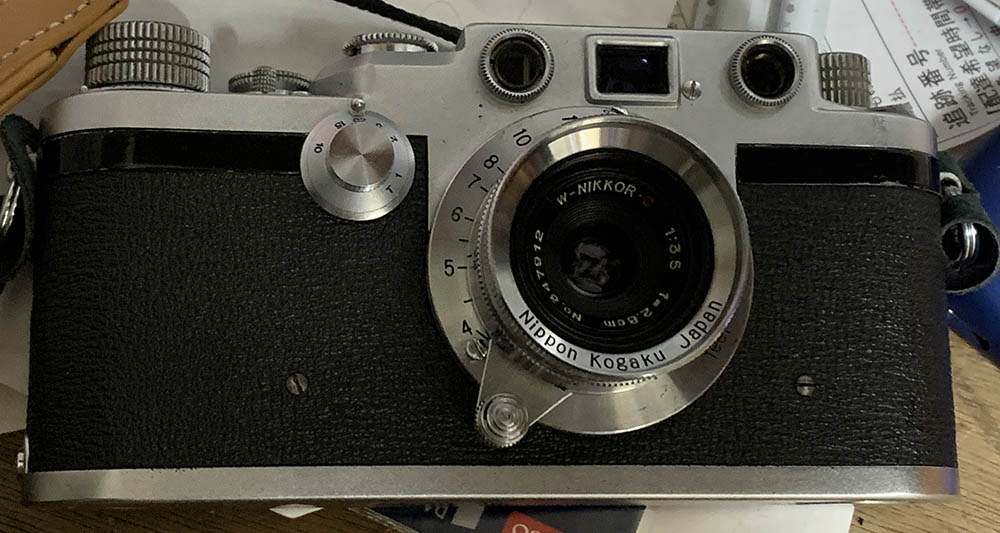
The lens arrived in this state. It was dirty, the paint’s worn and the inside of the objective was oily. I now it looks small in the picture but the lens is a big one as far as slower W-Nikkors are concerned. It’s dense and it reminds you of a hockey puck.
As previously mentioned, this is identical optically to the W-Nikkor•C 2.8cm f/3.5 (S-mount) but I personally like this version better because it feels more dense in my hands. This one costs about 2x more due to being “exotic” and a bit rarer to find depending on what’s available at the used market. This is a collector’s lens which makes it even more desirable than the other version. I was lucky to get one for not a lot of money because it was sold as junk.

Here it is with my Nicca 3S and its dedicated finder. This is a small setup so you can put this inside your coat pocket and forget about it. Your neck won’t hurt much after wearing one for a day despite the weight of the lens. There are a few accessories that you can use with this and one of them is a finder, it’s a dedicated Nikon-brand 28mm finder that you can attach and use with anything. Another one is the hood and if I’m not mistaken it’s the same one for the W-Nikkor•C 3.5cm f/2.5 or something similar. I don’t know how that’s going to work and I am not sure if it’s going to cause vignetting or not but it came with that hood on this one.
It’s important to study how a lens performs, this will give us an idea on how it renders. It will also help us understand its strengths so we can exploit the merits of this lens and avoid or work-around its flaws. The following photos were taken from f/3.5, f/5.6 and f/8 (left-to-right) so we can see how much it changes across its most commonly-used apertures. I took these with a Nikon Z6.


(Click to enlarge)
Contrast, resolution and sharpness are all muted wide-open but improves it considerably once you stop it down to f/5.6 but things only get to look great from f/8 to f/11. I will only shoot this from f/5.6 if I can but f/3.5 is not bad at all if you ask me, just not good enough. Vignetting is present wide-open and only goes away around f/11. You will still see traces of it at f/8 but it won’t be too obvious since the falloff is rather shallow.

Geometric distortion is surprisingly low. This is the best that I have seen so far amongst all of the rangefinder W-Nikkors. Using this for architecture or art is not a problem at all. I am not saying that it’s absent but the profile is a lot more even and thus you won’t notice it as much.
Flaring and ghosts is a different story. The coating used is old-tech and your pictures will end up looking like what I have when shooting against the sun. There’s nothing much you can do here, this is expected from lenses coming from this era.


(Click to enlarge)
The flares and ghosts remind me of other cheaper Nikkors from the ’60s like the Nikkor-T 10.5cm f/4. This is a result of older coating technology where it is ineffective but good enough for its time. The flare looks terrible at wider apertures and looks “truncated” at f/8. This will depend on the situation but shooting with the sun in your frame is just asking for trouble.

This is pretty good for a lens that came out nearly 70 years ago.

This is not a lens for taking photos at night but it does the job if you have a camera with good high-ISO performance such as my Nikon Z6.
This was taken with the iris stopped-down. It’s a bit over-exposed if you ask me but it’s a good example for showcasing just how shallow the distortion is despite being present. Contrast is also nice for a lens from this era.

This was taken at the minimum focusing distance wide-open. It is adequate in most cases but I would appreciate it if it’s sharper wide-open.

The lens has a bit of a cool-cast to it since it was calculated for monochrome film. It does have a nice side-effect of subtly correcting for artificial lighting when using it in this kind of situation.


(Click to enlarge)
Most of these were taken with the iris stopped-down from f/5.6 to f/8 or so. It is a nice lens despite its age and it can help you create photos with a vintage feel that so many people are into these days.
Let us now see some pictures that were taken with film. It is important that we see photos that were taken using film since this lens was intended to be used with it. Film has a unique look that’s difficult to simulate with a sensor because of film grain and how emulsion reacts with light. These photos will help give us a better understanding of how this lens works and will help us in giving this lens a fair assessment. These were shot with Kodak Color Plus 200 with my Nicca Type-5.
The rendering looks great with this film, I like it better than what I get with a digital camera.

It’s a great lens for traveling as it’s compact. Stop this down to f/11 and enjoy sharp pictures from your vacation.
The vintage-look is illustrated very well in this photo, taking you back a few decades into the past.

Spherical aberration can be observed in this photo. It’s not a bad thing at all and I embrace this “feature” as something that makes this lens unique. This was probably taken wide-open but I may be wrong.
The resolving power of this lens is so-so even with the iris stopped-down. It is an old lens that was designed in the 1950s so I’m giving this a bit of slack.

Vignetting isn’t really that bad when you stop the iris down to f/8 but you’re still going to see small traces of it.


(Click to enlarge)
I like this a lot, my results with digital looks mediocre but I’m impressed by the results that I got with film. If you plan on using this lens then I suggest that you shoot it with film.
I highly recommend this lens for Leica shooters who want a nice W-Nikkor for use with their Barnacks. These aren’t cheap but the equivalent German ones aren’t either but at least this one’s faster. People who like to adapt old lenses will be better-served by the W-Nikkor•C 2.8cm f/3.5 (S-mount) instead. It is cheaper and easier to source and it is usually found in better condition. Collectors will want this lens for its history, your W-Nikkor collection won’t be complete if this isn’t part of it. Whichever lens you get, make sure you get the lens serviced by a competent repairer so you will be sure that your lens will continue to give you great pictures for many more decades to come.
Before We Begin:
If this is your first attempt at repairing a lens then I suggest that you check my previous posts regarding screws & drivers, grease and other things. Also read what I wrote about the tools that you’ll need to fix your Nikkors.
I suggest that you read these primers before you begin (for beginners):
Reading these primers should lessen the chance of ruining your lens if you are a novice. Before opening up any lens, always look for other people who have done so in Youtube or the internet. Information is scarce, vague and scattered (that is why I started this) but you can still find some information if you search carefully.
I highly recommend that you read my working with helicoids post because this is very important and getting it wrong can ruin your day. If I can force you to read this, I would. It is that important!
For more advanced topics, you can read my fungus removal post as a start. This post has a lot of useful information and it will be beneficial for you to read this.
Disassembly (Main Barrel):
Disassembly of the main barrel isn’t really difficult but you will have to be a bit careful since some of the parts don’t come apart in an obvious manner. I spent a bit more time with this one compared to the other W-Nikkors due to this and I will advise that you take plenty of notes and measurements using a micrometer so you’ll have plenty of references for later. You’ll need some special tools for this so it’s best to have a specialist repair your lens. If your repairman isn’t exactly sure about this lens then show him my article and it should help guide him and prevent any expensive mistakes.
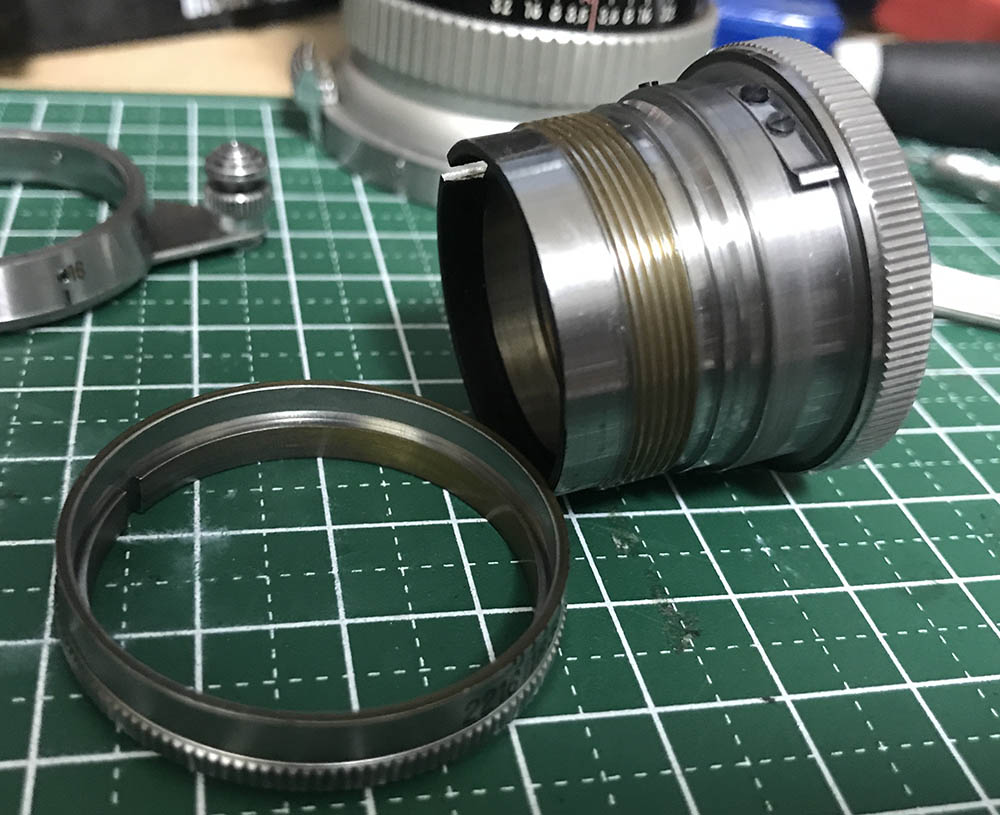
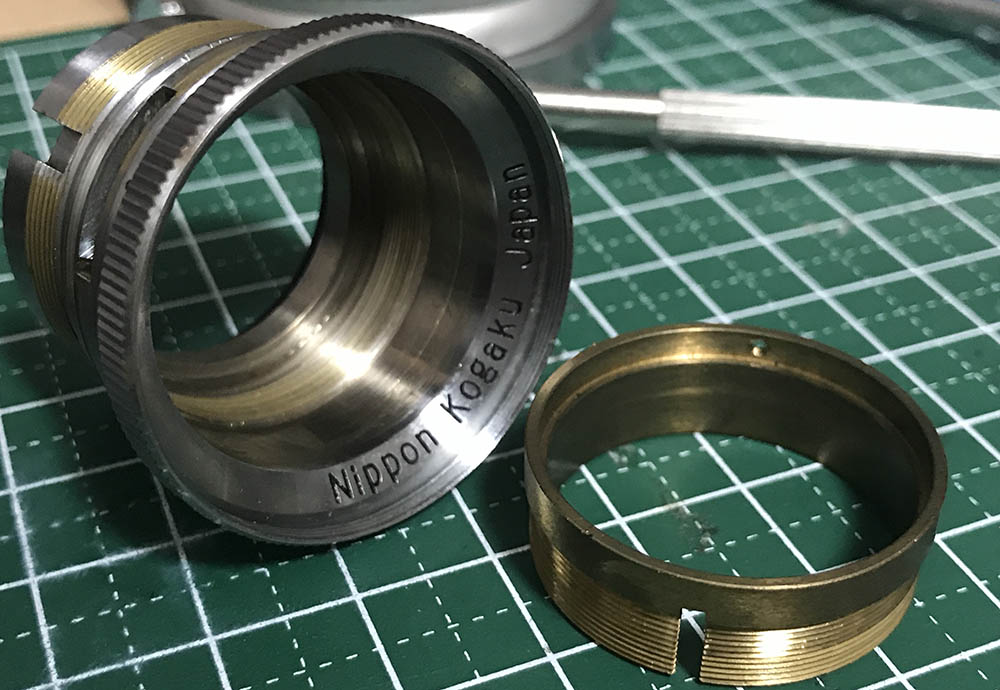
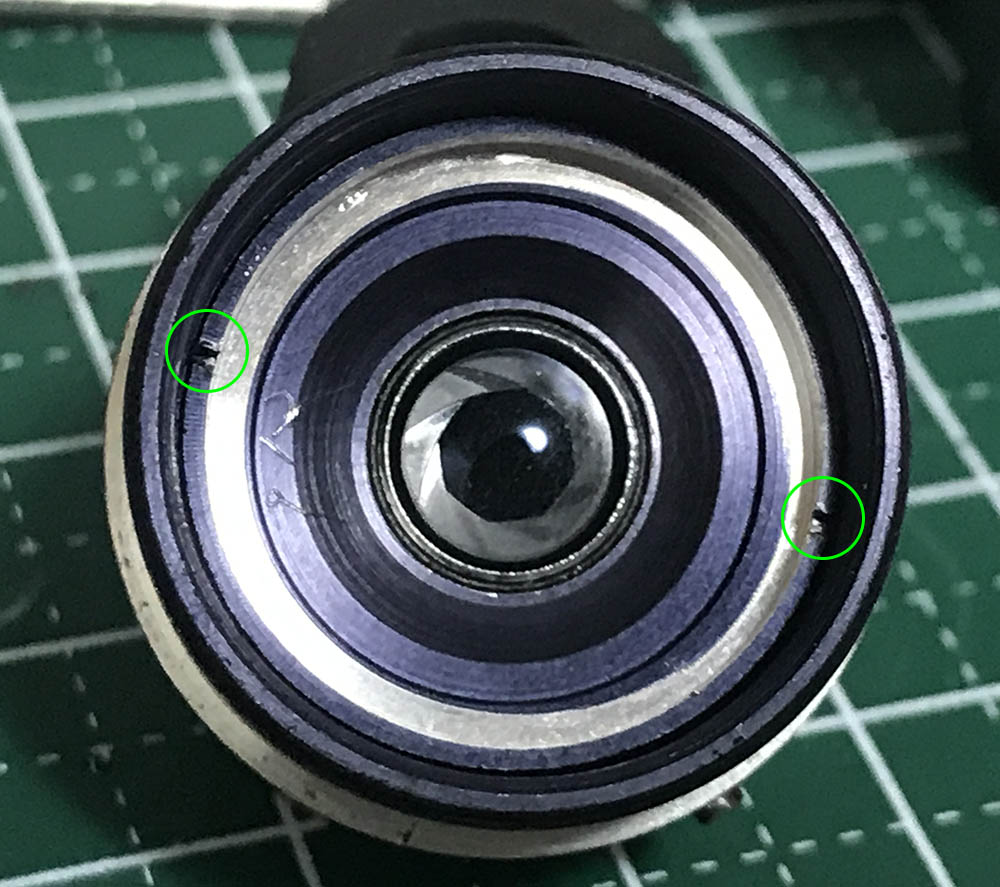
Just like most W-Nikkors, you start by removing a collar at the back of it and that will separate the lens into its 2 basic parts. This collar holds everything together so you will have to be careful when you remove this thing or you’ll end up picking one of pieces from the floor.

The housing of the objective can easily be removed once the collar is gone. It has a brass shim used to calibrate the focus of the lens, it is best that you do not lose this thing as fabricating another one isn’t going to be easy. Store the objective in a safe place to prevent any damage to it.
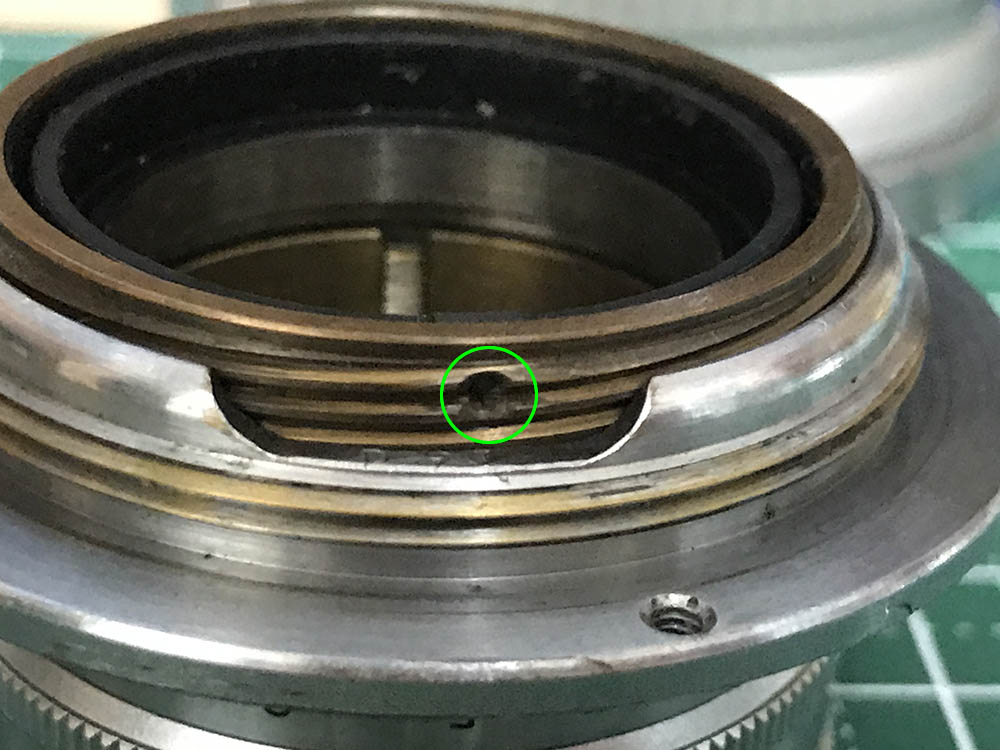
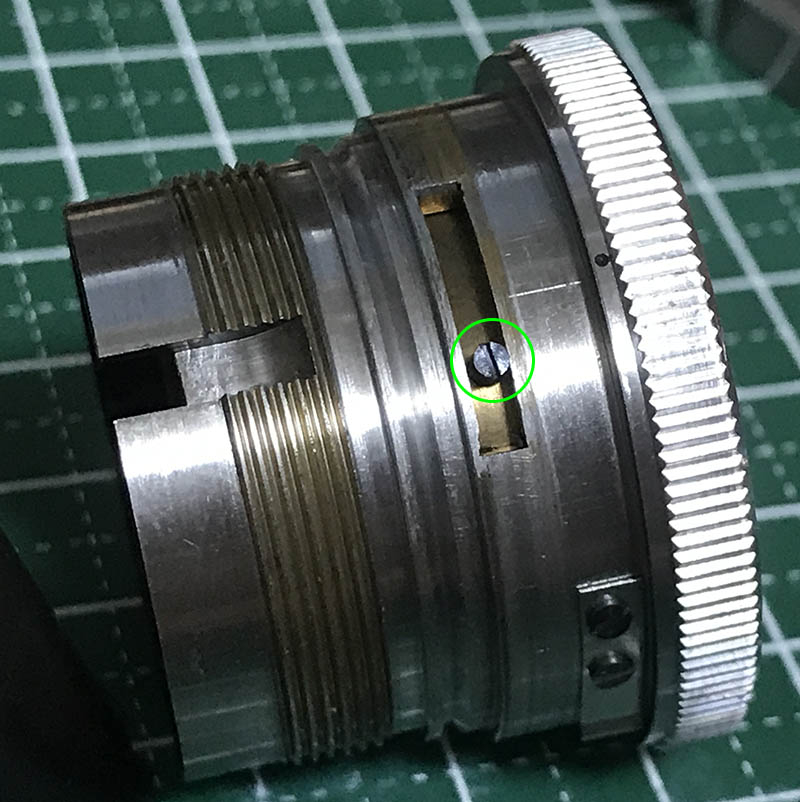
To separate the helicoids you must first remove its key but before doing that make sure that you turn the barrel to infinity and work on it at that state. It will make things a lot easier for you as you will have a point of reference. If you take your photos and references without doing this then it’s going to be hard for you to determine the proper alignment of things. The helicoid key can be removed by extracting a screw at the opposite end of this hole.

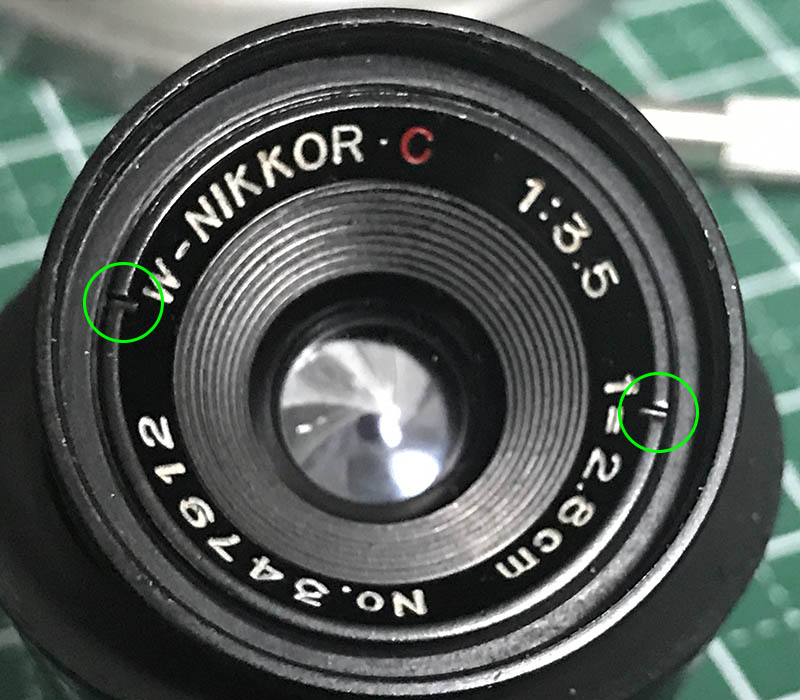
Here’s the helicoid key and its screw. Make sure to take plenty of notes and remember its position while the barrel is at infinity. It can be hard to reach it and you may even strip the head if you’re not careful.

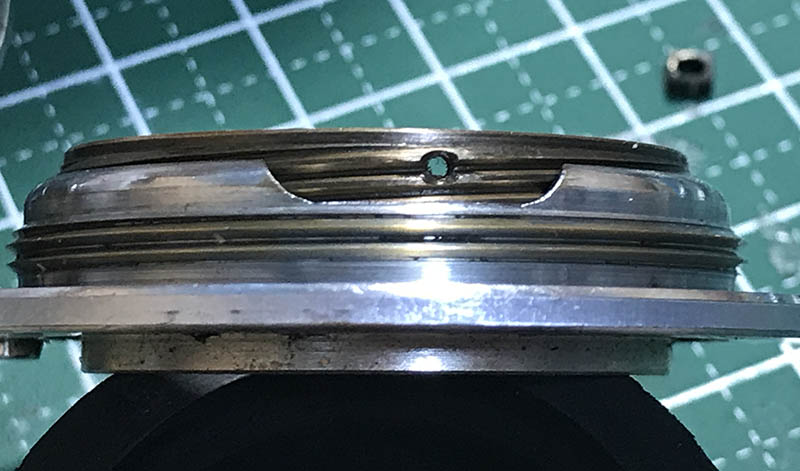
Carefully remove this screw, it prevents the barrel from turning beyond its range. You can easily lose this so keep an eye on it. Once this screw is gone it is easy to turn the focusing ring until the helicoids separate.

Mine separated at this point. Make sure that you take note as to where they parted because this is also the same place where they should mat. There are many people who don’t do this and they end up wasting lots of time trying to figure out how to put this back properly. To prevent this from happening to you, read my article on how to work with helicoids and follow my tips as much as you can.
This is a delicate part of the lens because you get this correctly or your lens won’t focus properly. It’s the helicoid that couples to the rangefinder arm in your camera, don’t forget to take measurements and notes so you will know its position when everything is at infinity.

Just like normal helicoids, don’t forget to note where it separated. It’s a pain to guess how this should mesh since you’ll have to check it with a camera if the difference is minimal.

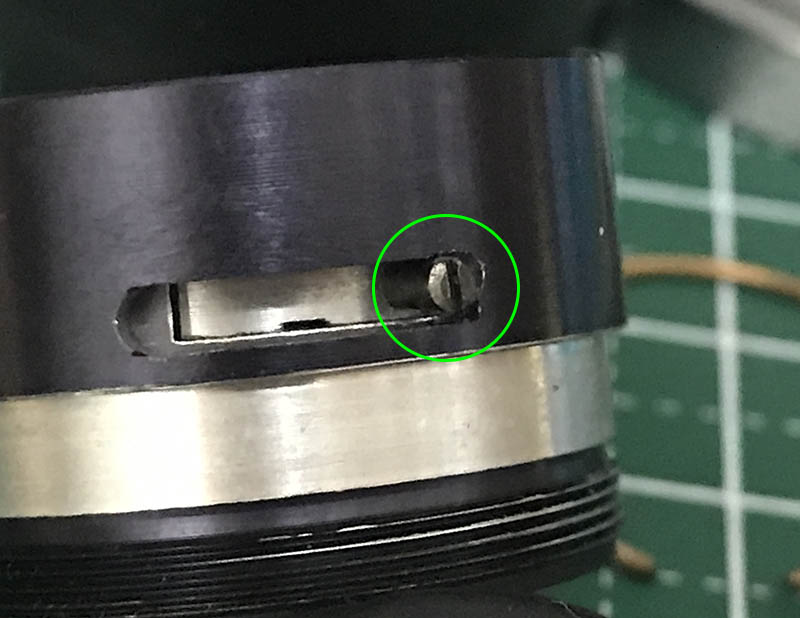
The helicoid that’s attached to the mount can be removed after extracting a tiny set screw. It can be difficult to put this screw back again so only remove it if you’re sure that you can put everything back again. The helicoid can be unscrews from the mount once this is gone but make sure that you took lots of pictures or notes so you’ll know how much you should turn so it sits right or your lens’ focus won’t be accurate.

The focusing ring can be removed by loosening the 3 grub screws around it. You don’t have to remove them and tightening them gain will prevent these from getting lost. This is how you adjust the lens’ focus, you will have to do it each time you remove the focusing ring which is bothersome but there is nothing much you can do about it.
The aperture ring can be removed by pulling it off from the rest of the front barrel. Never lubricate this with grease or just apply a very thin film of it if you have to or it may end up in the iris.
Removing this screw will allow you to remove the rotator cup inside. You’ll want to note how much this screw is centered on its slot so you’ll know how deep the cup should sit within the front barrel.
The cup can be removed by unscrewing it off just like this. Don’t lubricate it with grease or oil, graphite powder will be more than enough for this and it is a better option since it doesn’t have an oil component to it.
Clean the helicoids well and make sure that you did not leave any residue. I usually soak the larger components in an alcohol bath for this and scrub the parts where grease was applied with a kitchen sponge like Scotch. Don’t use the thick-type grease for this as it will make this difficult to turn. Only apply a small amount so the grease won’t end up in the iris or make the helicoids leak. Avoid applying anything to the parts that are closest to the iris, I use a special type of powdered graphite for this.
Disassembly (Objective):
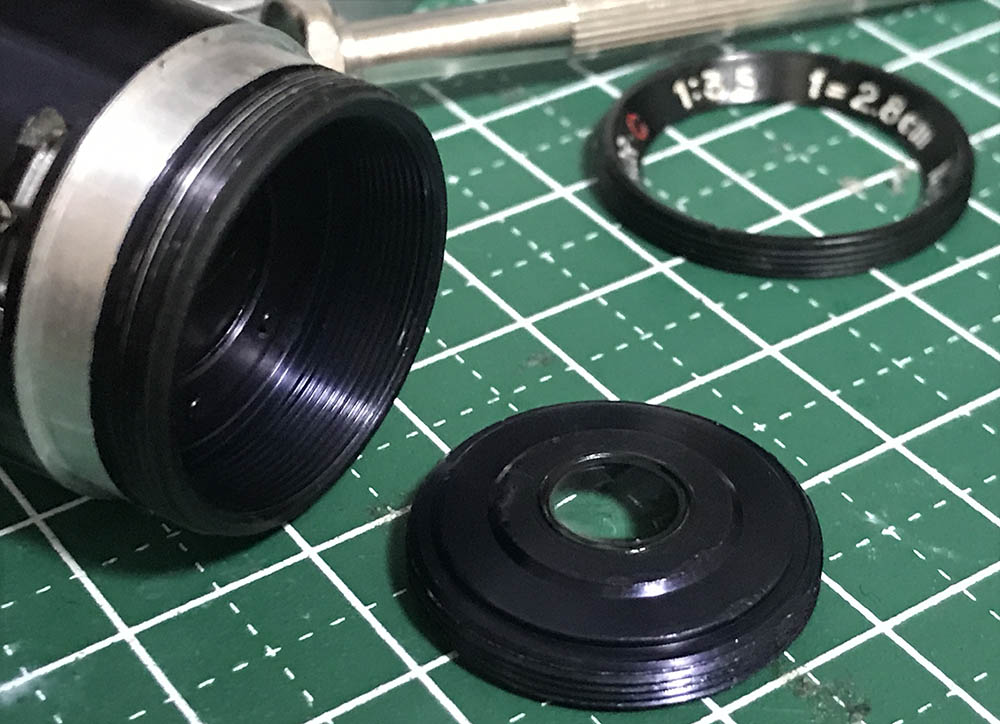
The objective is typical of W-Nikkors and should be pretty straight-forward. I will only warn you about using solvents near the glass since some of them were cemented and solvents will do a quick job on them. You will require a few special openers here such as a set of rubber friction cups, etc.
The bezel can be removed by using a lens spanner to loosen it and the bezel can be unscrewed safely with a rubber cup. Removing this will allow you to clean what’s underneath it as dirt and germs tend to hide there.
Use a Q-tip saturated with alcohol to clean this part thoroughly.

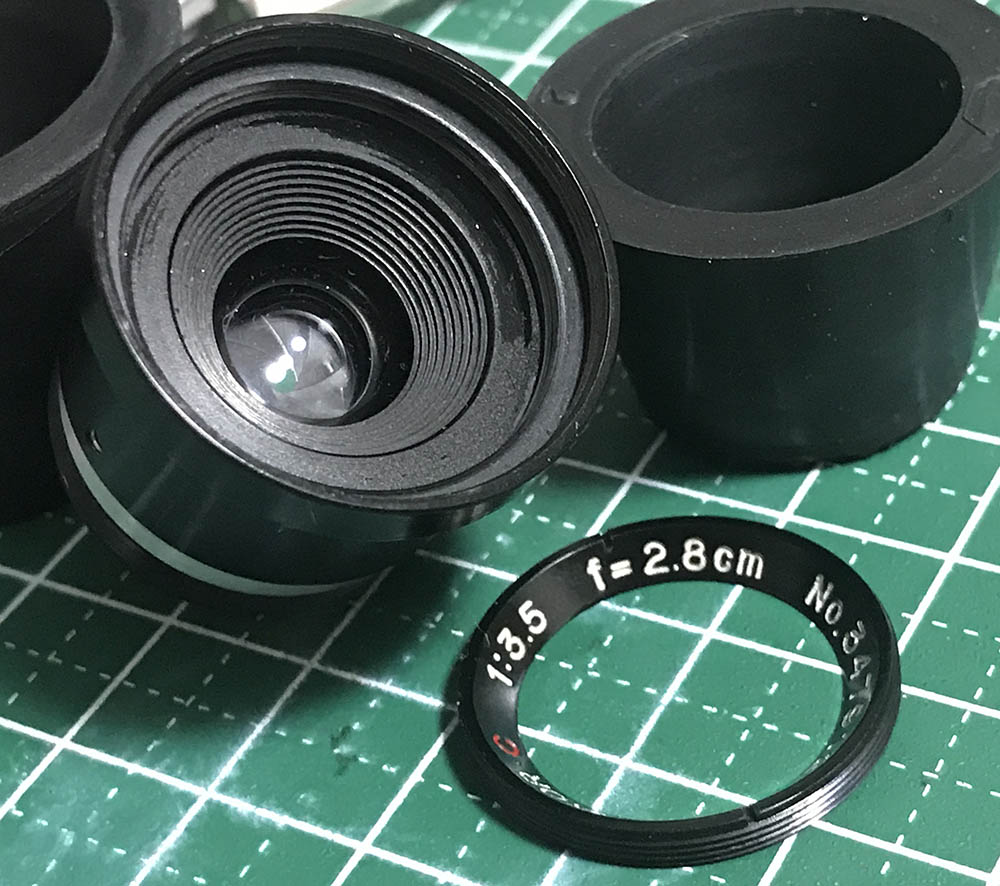
The front elements assembly can be easily removed by unscrewing using an improvised rubber or you can simply use your fingers if it wasn’t sealed.
Removing the housing of the 2nd group will allow you to access and clean the 1st group’s inner surface.

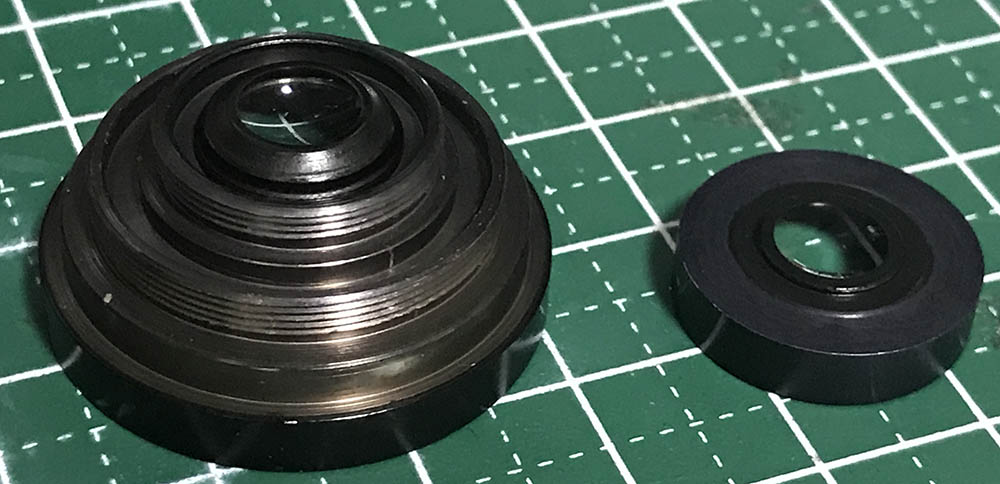
The rear group along with its housing can be unscrewed with the help of an opener. If yours was sealed, place a small drop of alcohol over the seams. It will soften the sealant within an hour but if that didn’t do it, simply repeat the process until it works.
The inner-most group can be removed with a lens spanner but be careful, it can be easily scratched if your not careful.
You can now clean every surface of the lens. Be careful because some of the elements were cemented and you don’t want the cement to fail so don’t use any strong solvents near any of these and never soak these in alcohol or any type of solvents.

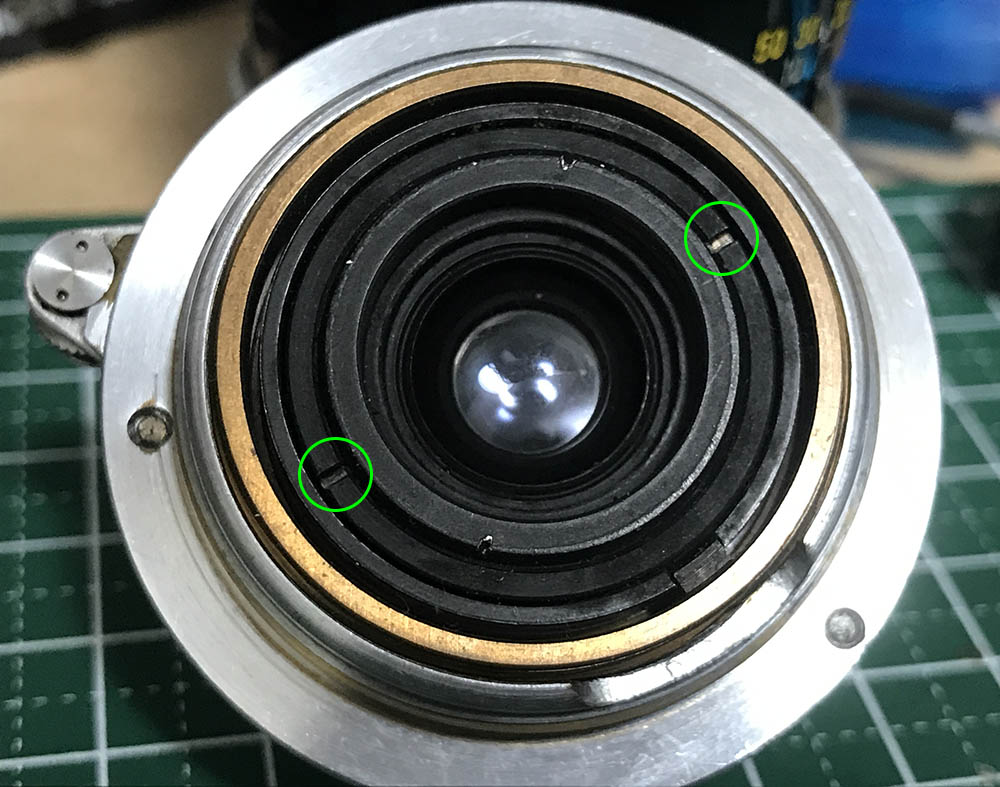
The iris mechanism can be opened by removing this brass ring.
You will have to remove this screw so you can pull the diaphragm off.

Examine the iris first before you dismantle it, be sure you know how to put it back again later so the hole of the screw lines-up perfectly with its slot or the iris won’t operate properly.
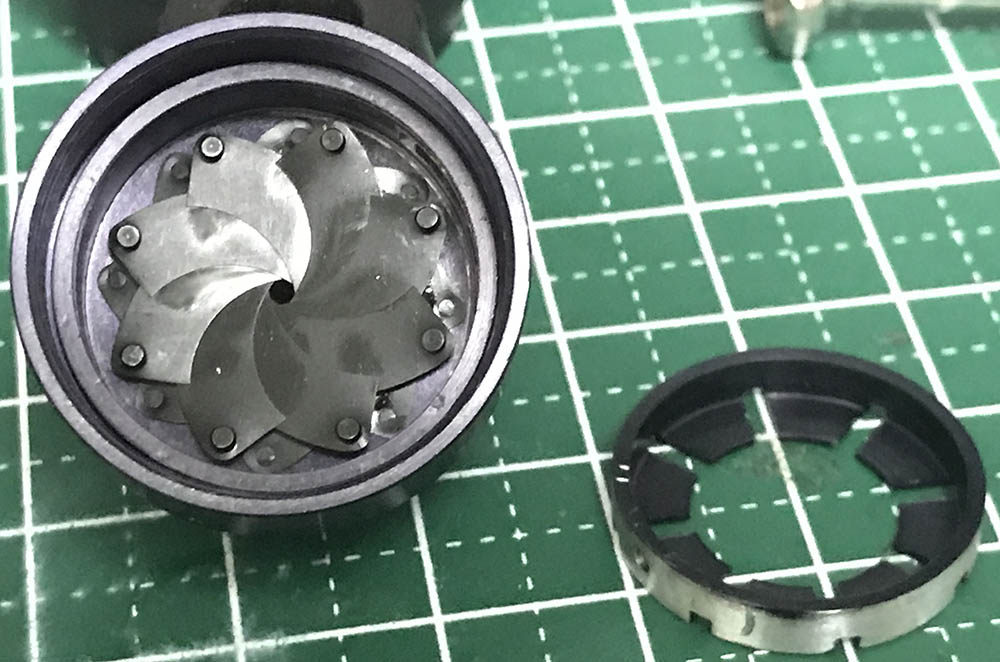
Pull the diaphragm off with a pair of tweezers. Study the iris very well and remember the direction where the corners of the blades are facing. The iris was so oily and the only way to clean this is with a total overhaul.

Use a sharp pair of tweezers to poke at the rear of the iris to lift the pins off from their holes. Do it carefully so you won’t damage the iris. The iris came off in one piece due to the oil coating it.
The iris blades were cleaned using lens tissue and naphtha. It can be a pain to put them back but I am used to it. If you’re new to this then you can read my article on how to work with preset lenses to help guide you through the process. The glass were carefully cleaned and I’m thankful that mine wasn’t infected by fungus. To clean fungus, I just follow my fungus removal article and modify the ratio of chemistry depending on the situation.
Conclusion:
It took me around 3 hours to service this thing. I had to restore the numbers and the parts had to be cleaned very well. The iris blades took some time to put back but it wasn’t troublesome at all since I’m so used to it at this point. This was easy to service for someone like me but I learned a few things, too. I enjoyed working with this lens and I didn’t experience any trouble so far. I spent around 15 minutes or so calibrating the focus using my Nicca Type-5, I can open the back and fine-tune the focus of this lens with it. Once I am OK with my results, I finished it off by tightening the set screws on the focusing ring and called it a night. If you are new to this, read my article on adjusting a lens’ focus so you’ll know how it’s done in a DIY setting.
Such a beautiful lens! It is a great partner for the Nicca Type-5, I had a great time with this setup as it’s light and compact. It now looks clean, the painted engravings were also restored.
Thanks for following my work. I didn’t post anything in the past few weeks since I’m busy with management duties at work on top of my main tasks. It takes considerable time, resources and effort to produce a single article so I have to set my priorities. Thanks to all of you who support this blog, you are helping me a lot by making sure that this blog is maintained. My health isn’t at its best condition as fall approaches but I try to gather enough strength to write this one just for you. Thank you very much and see you again, Ric.
Help Support this Blog:
Maintaining this blog requires money to operate. If you think that this site has helped you or you want to show your support by helping with the site’s upkeep, you can make a small donation to my paypal.com (richardHaw888@gmail.com). Money is not my prime motivation for this blog and I believe that I have enough to run this but you can help me make this site (and the companion facebook page) grow.
Leave me some tip?
Thank you very much for your continued support!
$2.00
Helping support this site will ensure that this will be kept going as long as I have the time and energy for this. I would appreciate it if you just leave out your name or details like your country’s name or other information so that the donations will totally be anonymous. This is a labor of love and I intend to keep it that way for as long as I can. Ric.

1 Comment (+add yours?)