
Hello, everybody! I was excited when the new Macbook 16″ was announced a couple of days back. The sad part is it’s still missing the function keys and the trackpad is still the new, larger one which requires more effort to swipe across compared to the older, smaller one. I still use the old, original Retina Macbook and I wish that the next one will be just as good as that release. It’s reliable and it still has an SD card reader and the good, older-type charging connector. There are many parallels to this in the real world, a new product that failed to supersede the older one because some people lost a few things in the name of an upgrade. This happens very often with cameras, too. I will show you an example of it when it comes to Nikkors.
Introduction:
The New-Nikkor 20mm f/4 debuted in 1974, replacing the popular Nikkor-UD 20mm f/3.5 Auto which is a fine lens but it’s big, takes bigger filters and a lot heavier than this. The impetus for designing this lens is to make a compact 20mm for the F-mount and Nikon succeeded in doing that with this lens. It’s amazingly compact and light compared to the older lens, a big advantage if you are traveling or hiking because every gram counts at the end of the day. It’s also a great performer optically and it has a cult-status amongst those of use who shoot high-magnification photography. When mounted in-reverse, it is able to achieve an unbelievable 12x magnification ratio which makes it a favorite for bug, coin and technical photographers. It was even mentioned in the user manual or brochures if I am not mistaken.
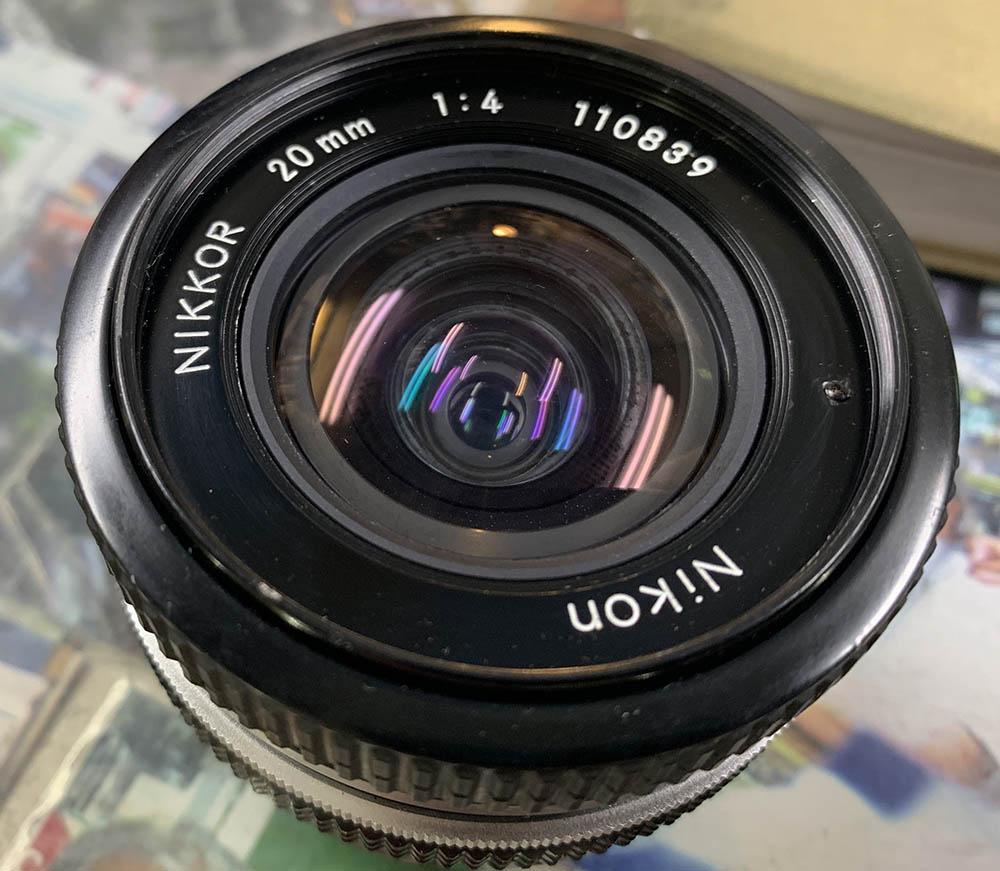
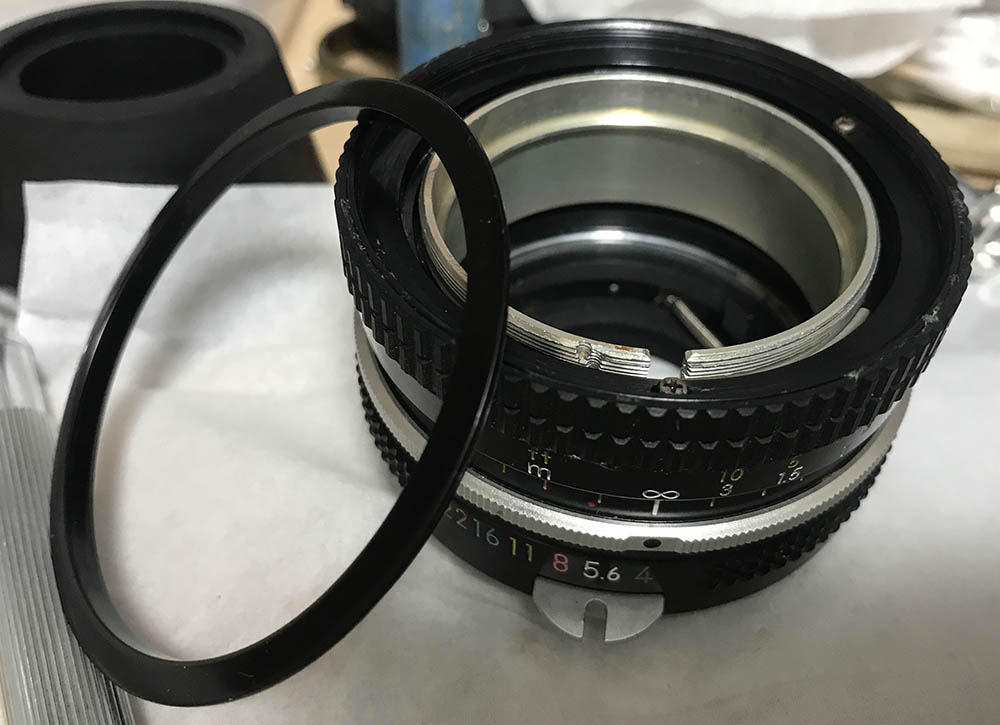
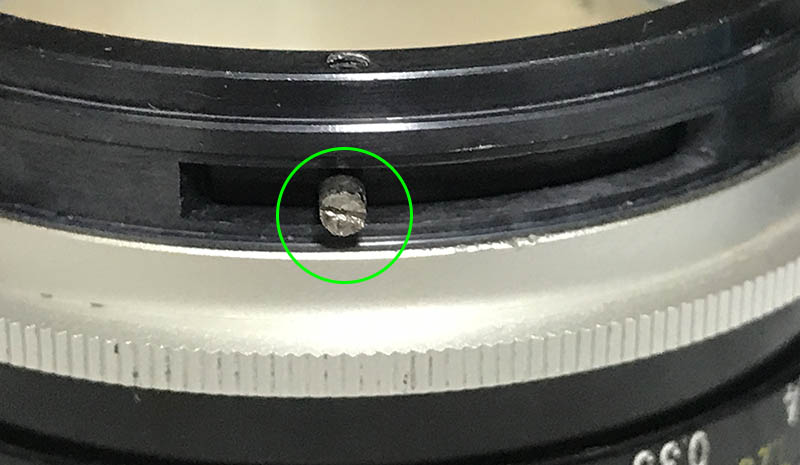
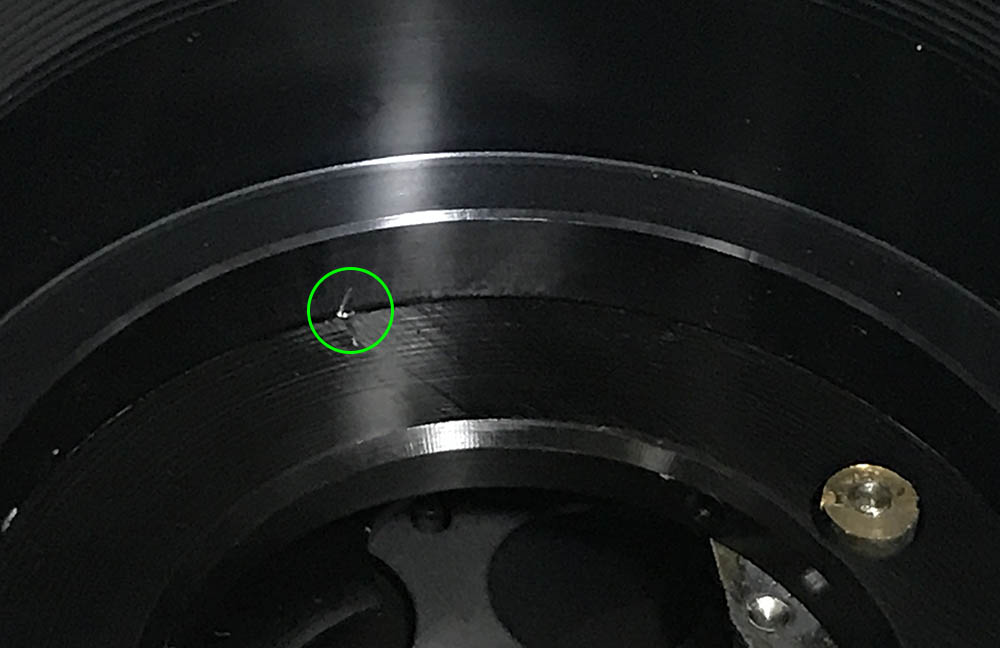
Despite its size, it’s well-made and will last you more than a lifetime. You’re going to need a step-up ring in order to avoid mechanical vignetting when you use filters with this. I haven’t tested this lens with any filters yet but it’s safe to assume the worst based on my experience. Notice that hole with the broken screw? That caused me a lot of headache when I was repairing this.
It has a 10-elements-in-8-groups design of the retro-focus type, it shows how Nikon mastered designing (wide) retro-focus type lenses in 1974. Prior to it, the Nikkor-UD 20mm f/3.5 Auto was the only option Nikon had when you’re looking for a through-the-lens solution when it comes to ultra-wide lenses. I said ultra-wide because this was considered to be one back then.
There’s an after-market hood available for this but it’s pathetic, it won’t be a lot of help when countering stray-light from the front but it’s useful for the pesky light that creeps-in from the side.
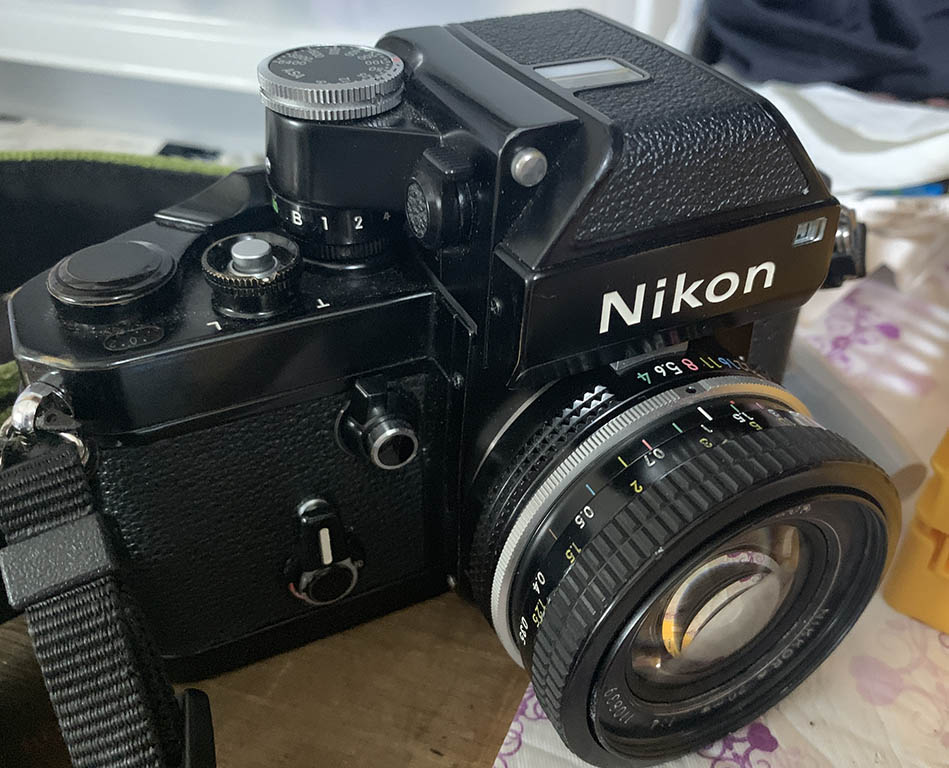
It’s perfect with the Nikon F2. It’s tiny, about twice the height of a rear cap. I like it a lot, the detailed depth-of-field scale is easy to understand. The focus throw is longer than most wide Nikkors so you can focus accurately with it and make subtle adjustments. The only 20mm Nikkor that I own that has a similar focus throw is the Nikkor-UD 20mm f/3.5 Auto.
This lens began the trend of compact 20mm Nikkors, the last version is the Nikkor 20mm f/3.5 Ai-S which is similar to the Nikkor 20mm f/3.5 Ai optically but with a different barrel construction. The Nikkor 20mm f/3.5 Ai replaced this lens in the catalogs but people loved this lens more because it’s sharper according to some people and the minor difference in speed isn’t a concern when it comes to 20mm lenses. I haven’t done any scientific tests but they’re both the same to my eyes and maybe one or the other is just a bit better but there’s not a big difference at all in general.
Knowing how your lens performs is key to maximizing it. You’ll learn how to exploit its strengths and avoid its flaws. My tests aren’t scientific and I am only documenting my impressions. The next sets of photos were taken from f/4, f/5.6 and f/8. I imagine that these are the most common apertures where people would like to use this lens with. Landscape photographers will want to stop the lens down further, though. These were taken with my Nikon Df.

(Click to enlarge)
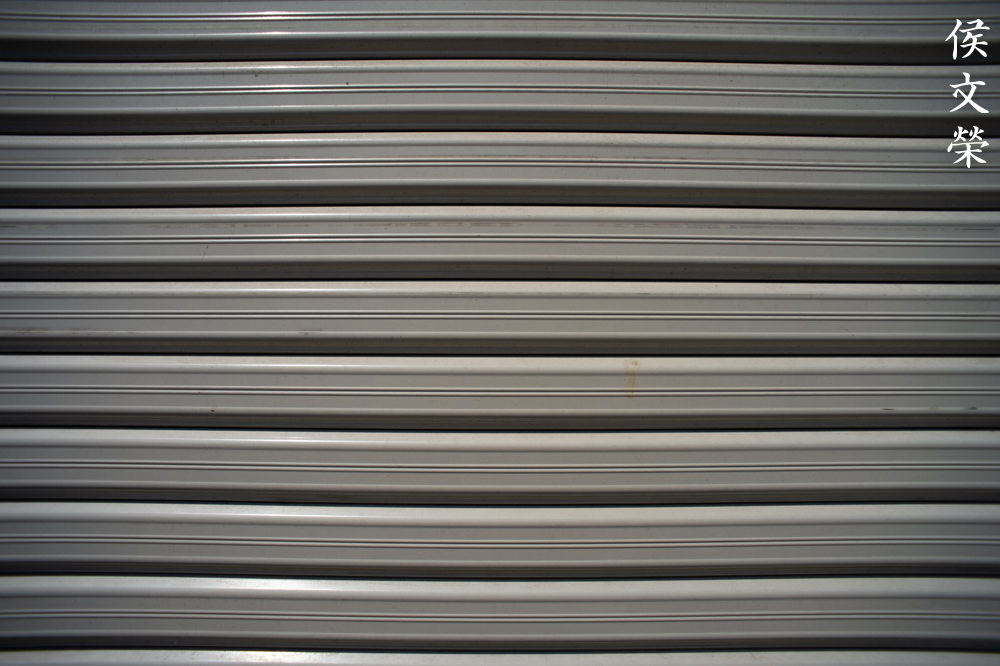
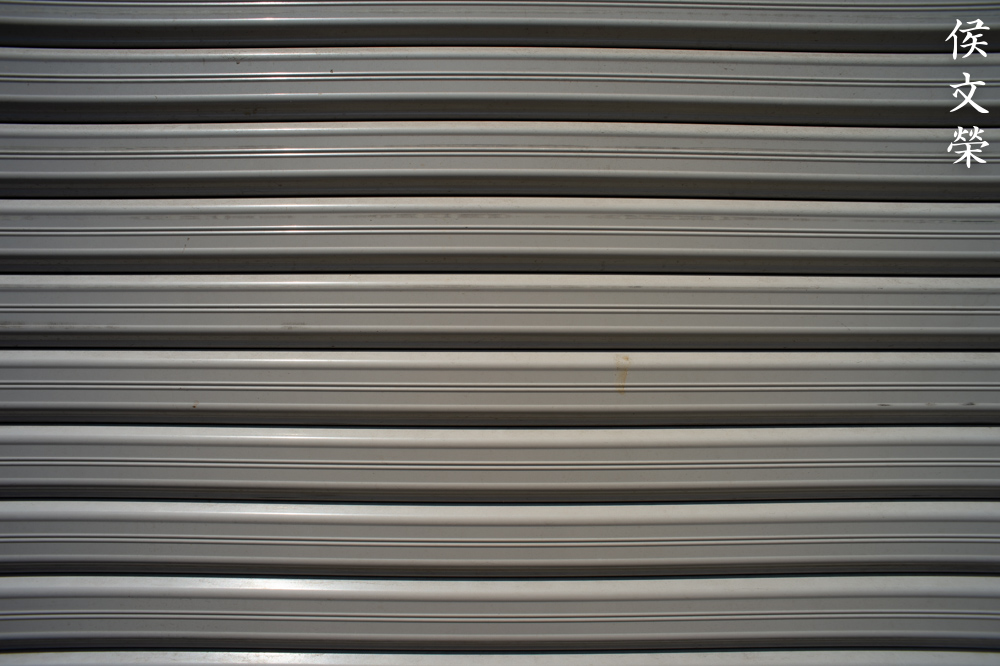
Vignetting can be observed wide-open, it’s heavy but the falloff is not bad at all because it’s more even than I expected. It improves by f/5.6 but you’ll be able to still see it by f/8 which is a shame. Distortion value is high but that is expected from a lens of this class and vintage.


(Click to enlarge)
Ghost and flare control looks impressive, the sunstars look nice, too. You are going to get tiny ghosts near your light source and that’s about it. It does not look distracting at all and I kind of like it to be honest. I didn’t get any nasty flares, it seems manageable.


(Click to enlarge)
Sharpness, contrast and resolution look nice even wide-open. Stopping this down helps push things up a bit and it looks great by f/8. The corners aren’t as good as the center but the difference is minor, about a stop’s difference. I am impressed at how nice the corners look in terms of sharpness.


(Click to enlarge)
You’ll get a bit of chromatic aberration wide-open but it goes away by f/5.6. I can’t find anything beyond that so it’s not something that you should worry about with this lens. Nobody shoots lens expecting a blurred background, it does have a nice transition from what’s focused to what’s not, though.

The center looks impressive. This lens renders very well, it has that vintage-look that many people are into these days. The colors look a bit muted, this is nice if you don’t like over-saturated photos.

You won’t notice the barrel distortion but it’s there if you look carefully. You will see how the lines curve despite being diagonal in the frame.

I like shooting pine needles for tests because some lenses will render these poorly, making them look “smudged” if they’re a bit out-of-focus. We do not see any of that here.
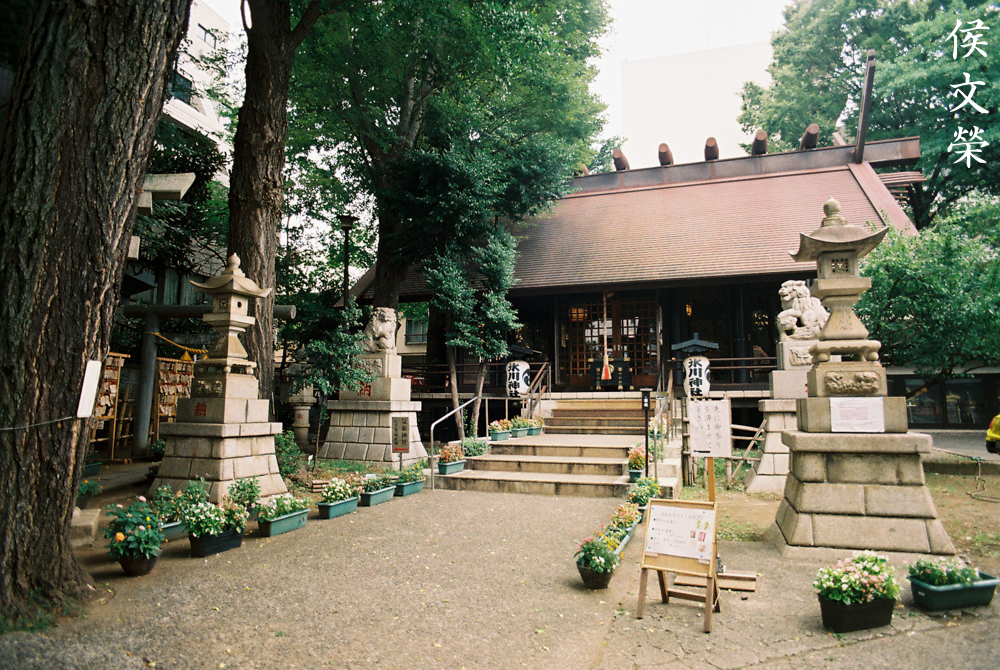
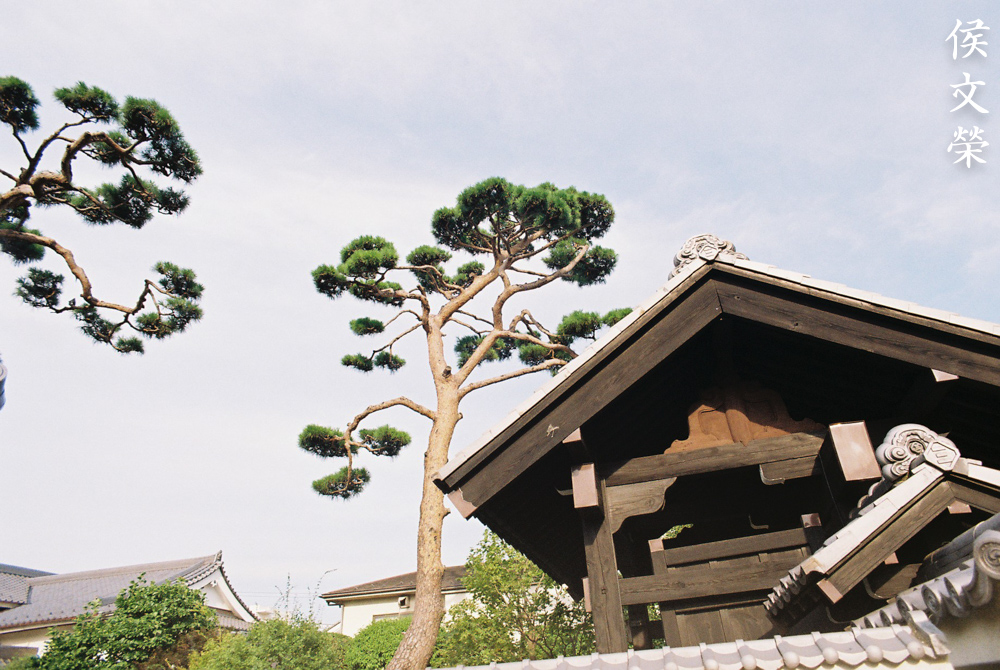
Let’s now see some photos that were taken with film. I love shooting film, it has a unique look that’s difficult to simulate digitally because of grain. This gives photos that were taken with film a subtle quality that makes it special. This lens was designed in the film days and it’s only right that we see photos that were taken with its intended medium and judge this lens with that.
I took these with my Nikon F2 loaded with Kodak Color Plus 200. Most of the photos were taken with the iris stopped-down but a good number of these were shot wide-open.

This lens focuses really close and that allows you to take photos like this. It’s sharp at its closest focusing distance even wide-open.
The focus transition is smooth and natural unlike what most modern lenses tend to do. This is the reason why I prefer shooting with older lenses these days apart from their cheaper price.
Despite the colors being a bit “muted”, this lens can still deliver photos with nice contrast and saturation depending on the situation (and film stock).

The 20mm focal length will give you exaggerated lines. You don’t see much of the distortion happening here because there’s a lot of things going on but you’ll notice it if you look at it carefully.
Notice how the beams curve in this shot. I would never use this for shooting photos of architecture and art unless you plan to fix that in post.

It’s troublesome to shoot with this lens in low-light situations. While this is not what I would call dark, it’s difficult to shoot if you’re using a slow-speed film. Thankfully, 20mm allows you to shoot with a slower shutter speed and that will help compensate for it.
This lens is probably too-wide for general travel photography but it’s great for that if you only have to carry one lens with you. For that purpose alone, I would suggest the Nikkor 28mm f/2.8 Ai instead as 28mm is more useful.


(Click to enlarge)
Here are more photos that were shot with film. They were taken under real-world scenarios and they should give you a good idea on how this lens will perform in real use. This lens has a subtle rendering style, it’s not harsh and I like it a lot.
I highly recommend this lens. It’s the best compact 20mm from Nikon and it is not that expensive either. It’s on-par with the later Nikkor 20mm f/3.5 Ai-S and maybe the later lens performs a bit better but this one costs much less. I advise that you find one with a factory Ai-ring so you can use it with your newer Nikons. A pre-Ai version is useless unless you want to use it with old manual Nikons, a newer Nikon that has a retractable Ai-tab or use this with a reverse-lens adapter for high-magnification photography. These are often sold for less than $200 depending on the lens’ condition or the inclusion of the factory Ai-ring. Anybody can buy one but these are starting to become a bit rare these days depending on the trend. Most of the demand comes from people who like shooting high-magnification photos and landscape shooters who want a small, light lens. Go get one, they’re great for travel, landscapes and a whole lot more!
Before We Begin:
If this is your first attempt at repairing a lens then I suggest that you check my previous posts regarding screws & drivers, grease and other things. Also read what I wrote about the tools that you’ll need to fix your Nikkors.
I suggest that you read these primers before you begin (for beginners):
Reading these primers should lessen the chance of ruining your lens if you are a novice. Before opening up any lens, always look for other people who have done so in Youtube or the internet. Information is scarce, vague and scattered (that is why I started this) but you can still find some information if you search carefully.
I highly recommend that you read my working with helicoids post because this is very important and getting it wrong can ruin your day. If I can force you to read this, I would. It is that important!
For more advanced topics, you can read my fungus removal post as a start. This post has a lot of useful information and it will be beneficial for you to read this.
Disassembly (Main Barrel):
The barrel and its construction is typical of many smaller New-Nikkors. This one is especially nasty to work with not because it’s complicated but it was repaired by somebody who didn’t have the proper tools and materials. The focusing ring won’t turn because the helicoids were seized and some of the screws were stripped, requiring me to drill one out. If you do not have tools or skills for lens repair, never attempt fixing your lens and just send yours to a repairman. This is a New-Nikkor and they’re notorious for having seals at every imaginable part. You will have to be careful in order to prevent any part from damage while you remove them. Heat, alcohol and solvents help a lot and it’s up to you to decide which one should fit the job.
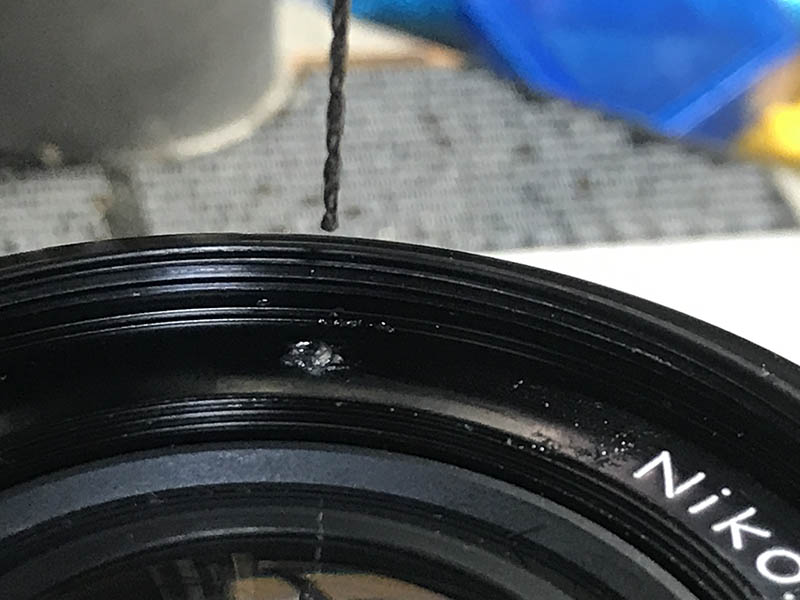
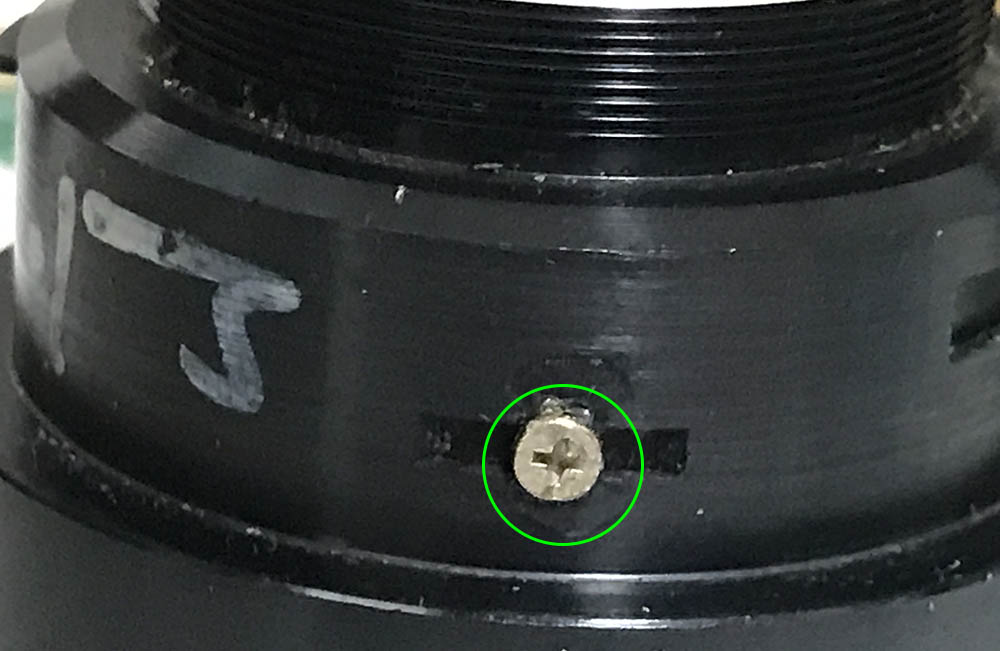
There’s a screw that you should extract in order to remove the front barrel. I had to drill this one out because somebody ruined the head of the screw.
The front barrel can then be unscrewed, if yours is tight, simply apply a bit of alcohol to the screw’s hole and let that dissolve the seal.

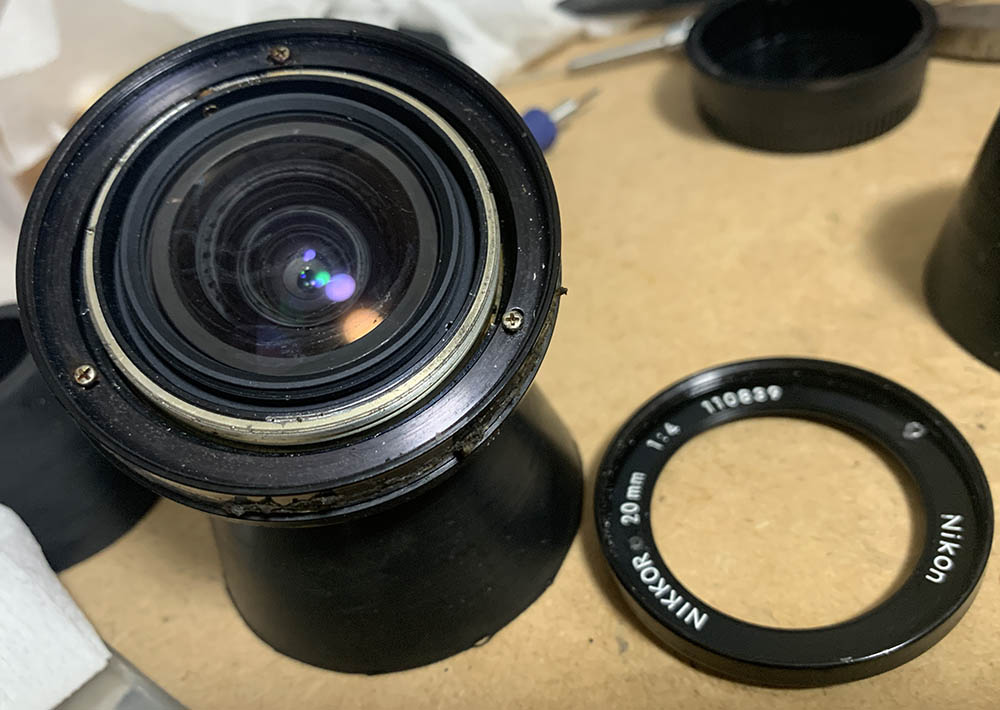
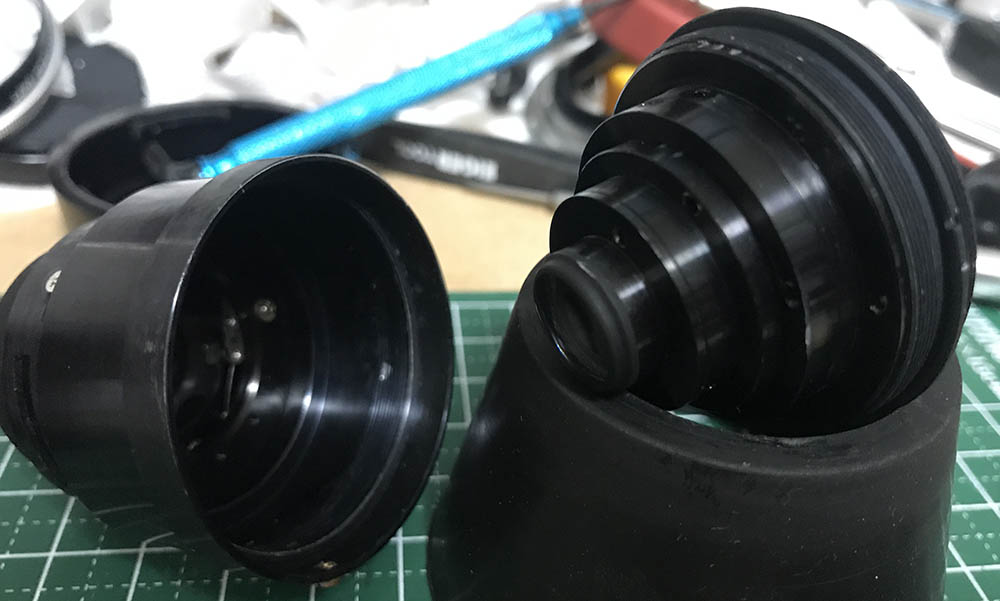
The front barrel secures the objective so you can pull it off once that is gone. Store the objective in a safe place while you work with the rest of the barrel.
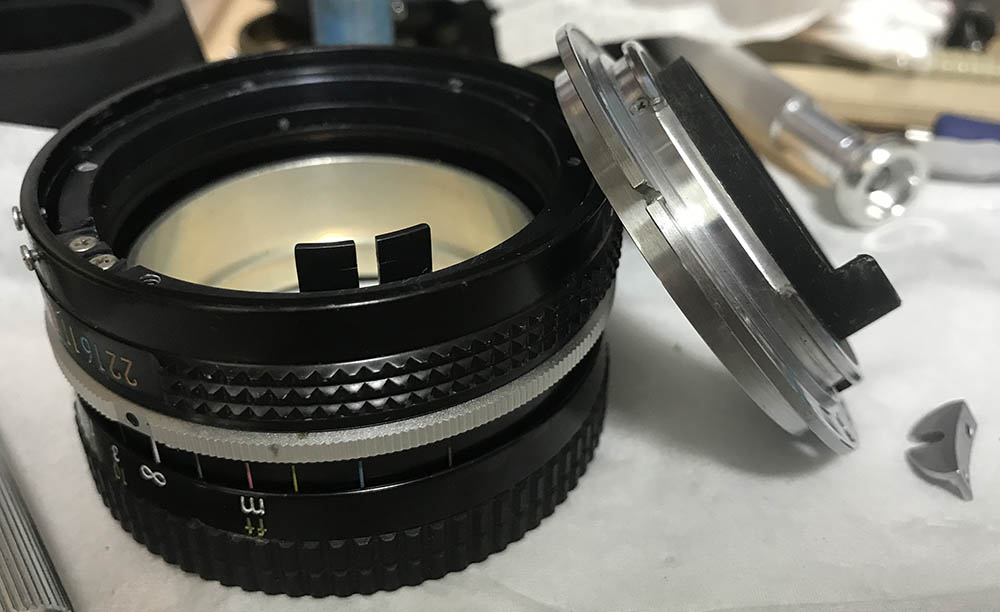
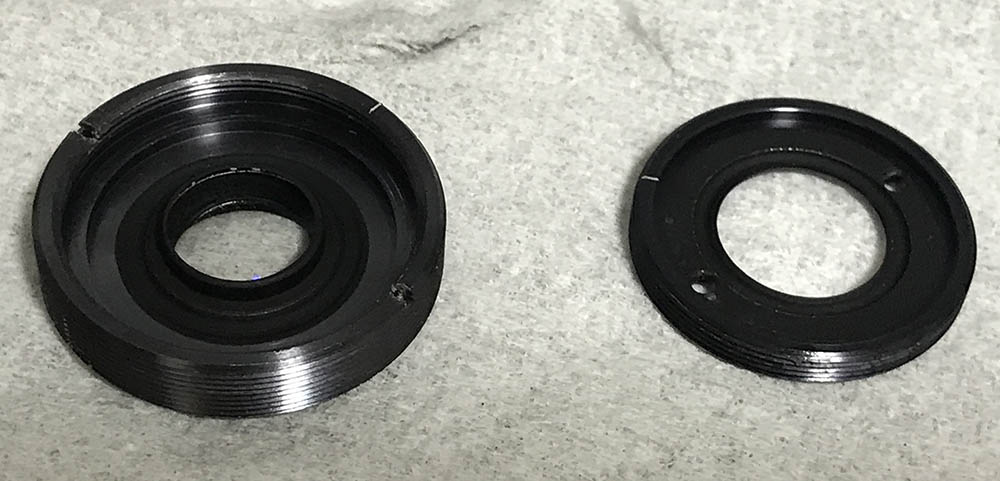
The focusing ring comes in 2 parts and the bezel can be unscrewed. This is often sealed but mine wasn’t. If yours was sealed, remove the rubber grip to prevent any damage to it and apply some acetone to the threads of the bezel to soften the glue. Wait for some time and unscrew the bezel.
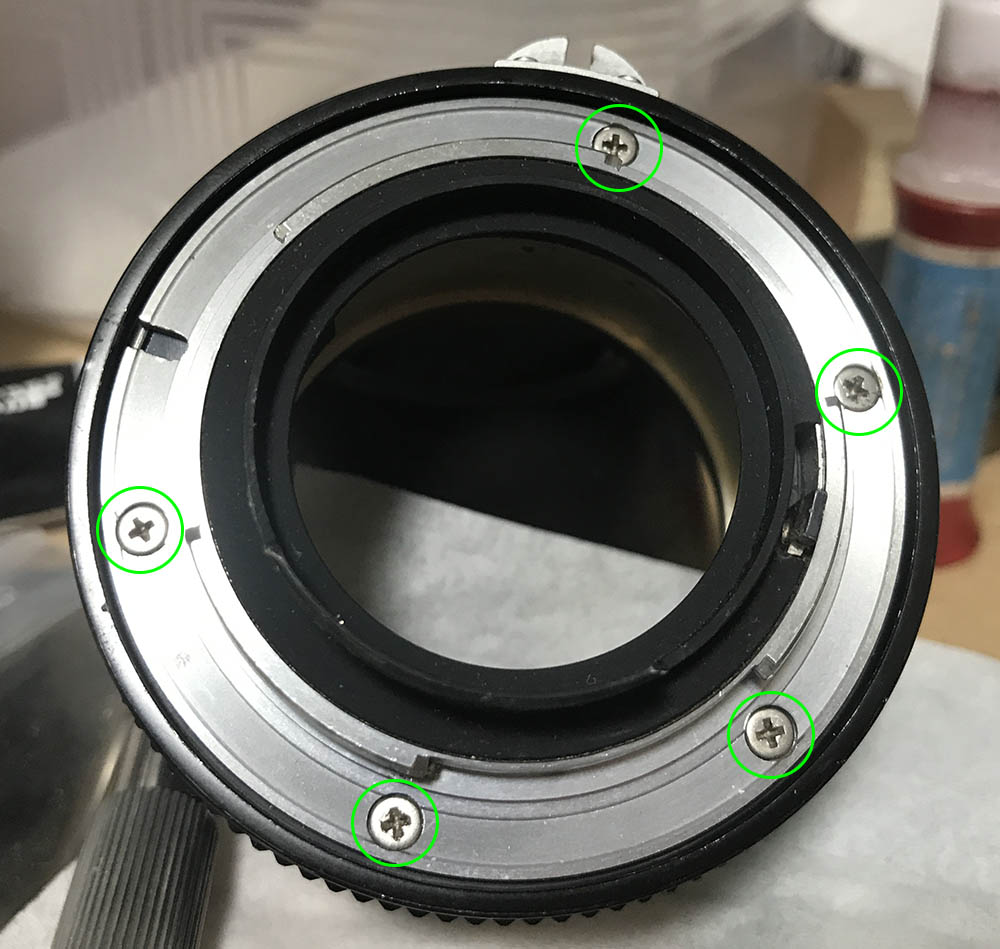
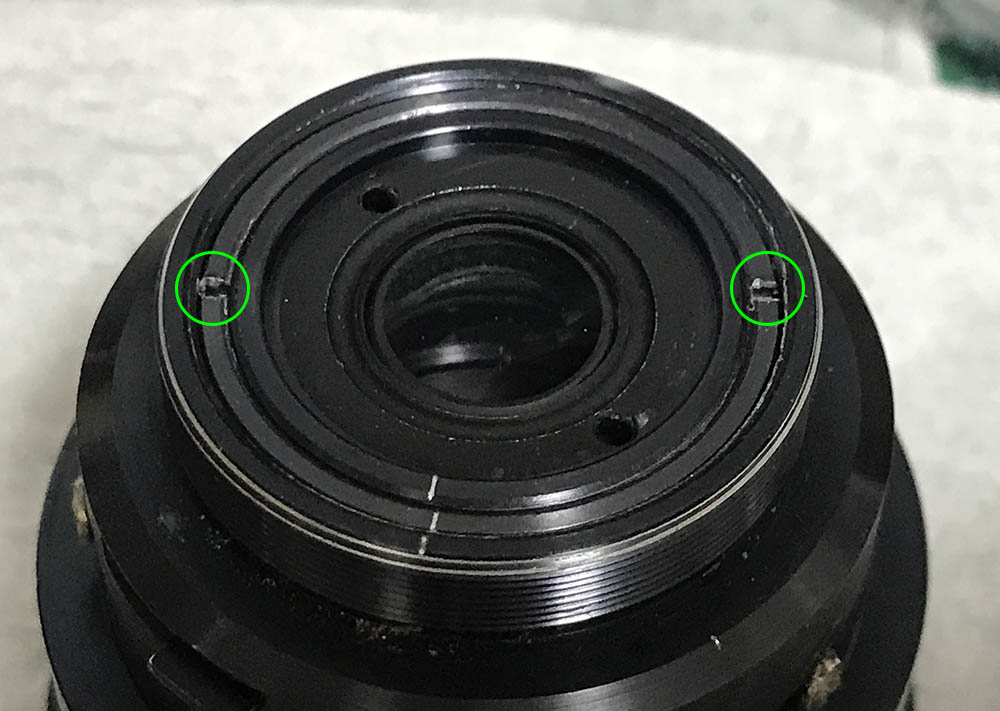
The bayonet can be removed after extracting these. These are often sealed, I would heat these first then remove them with a torque (JIS) driver. If you’re new to lens repair, read my article on how to remove bayonet screws. Many people use the wrong tools and techniques to remove these and they end up with a broken lens that costs more to repair than if they did it with the right tools and techniques.
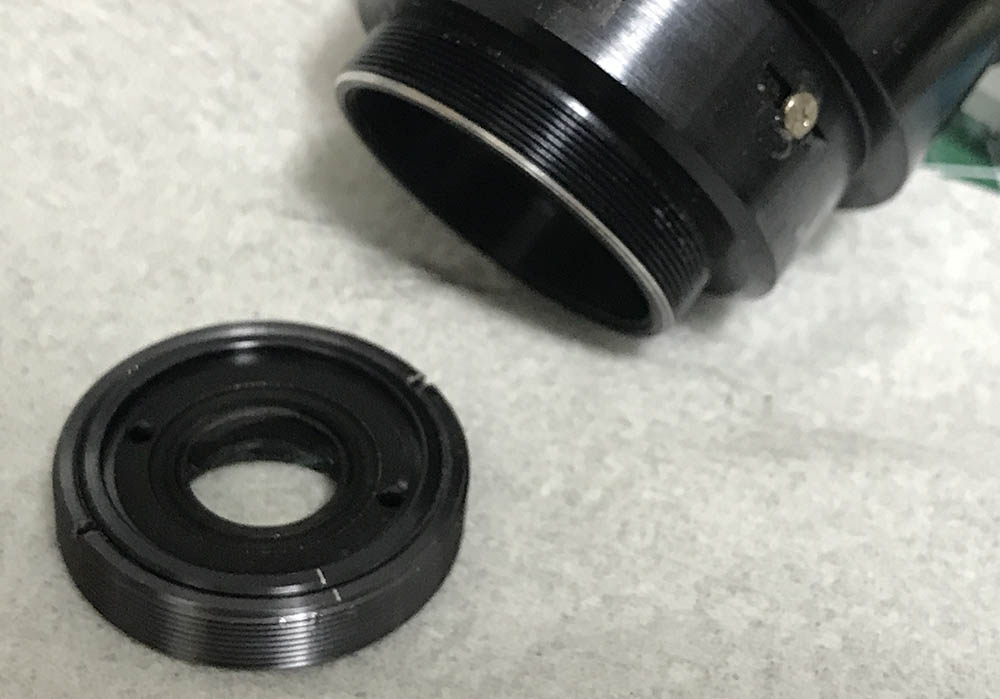
The bayonet mount can be easily removed once the screws are off.
The focusing ring is secured by these screws.
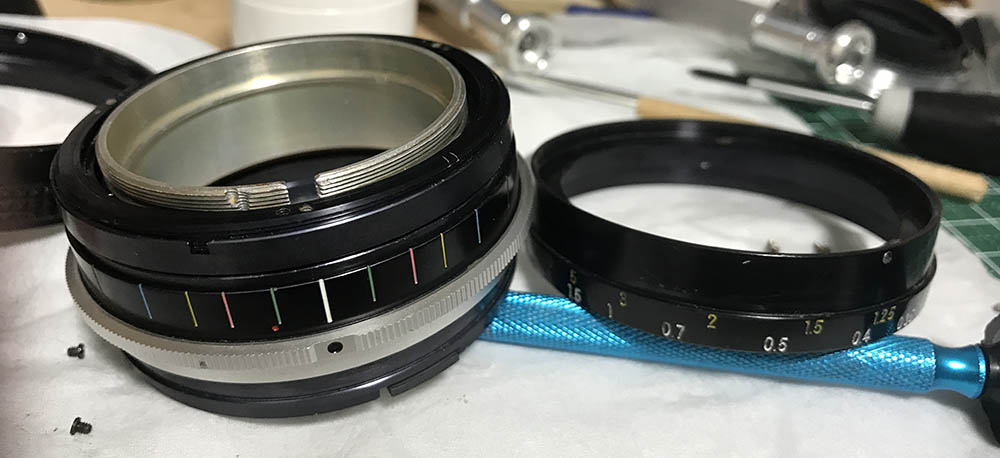
The focusing ring should be easily removed without any trouble.
You can remove this screw now if you want to. This serves like a pin to link the aperture ring the iris mechanism inside.
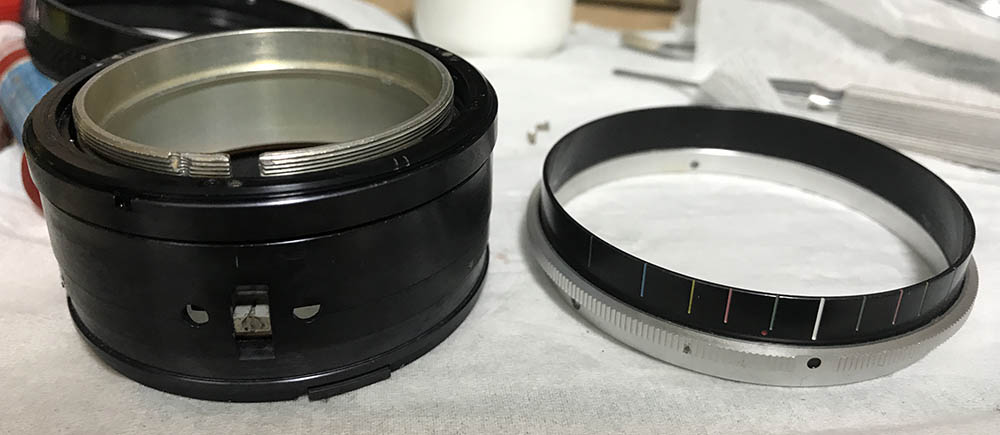
Extract the screws of the grip/sleeve so you can remove it. This can be stuck at times due to hardened grease or glue. If that happened, apply solvents to soften the glue or whatever and try again later.

The helicoid key has to be removed in order to separate the helicoids. You’ll have to extract its screws via their ports, turn the barrel a bit to easily get to them. The helicoid key syncs the turn-rate of the helicoids.

Separate the central helicoid from the outer one, don’t forget to mark where they separated because that’s also the same spot where they should mesh. If you don’t know what I am talking about, read my article about helicoids. The helicoids can be tricky and many people get stuck working on them so don’t ignore my advice and read my article.
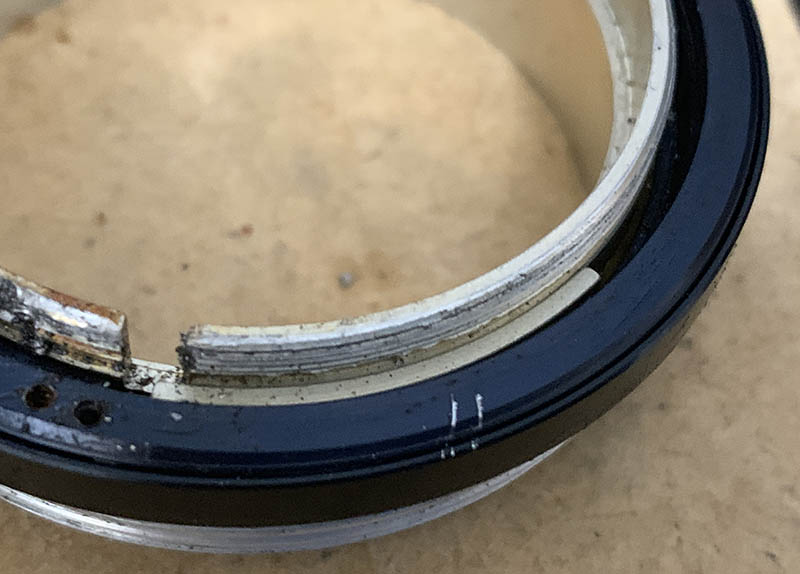
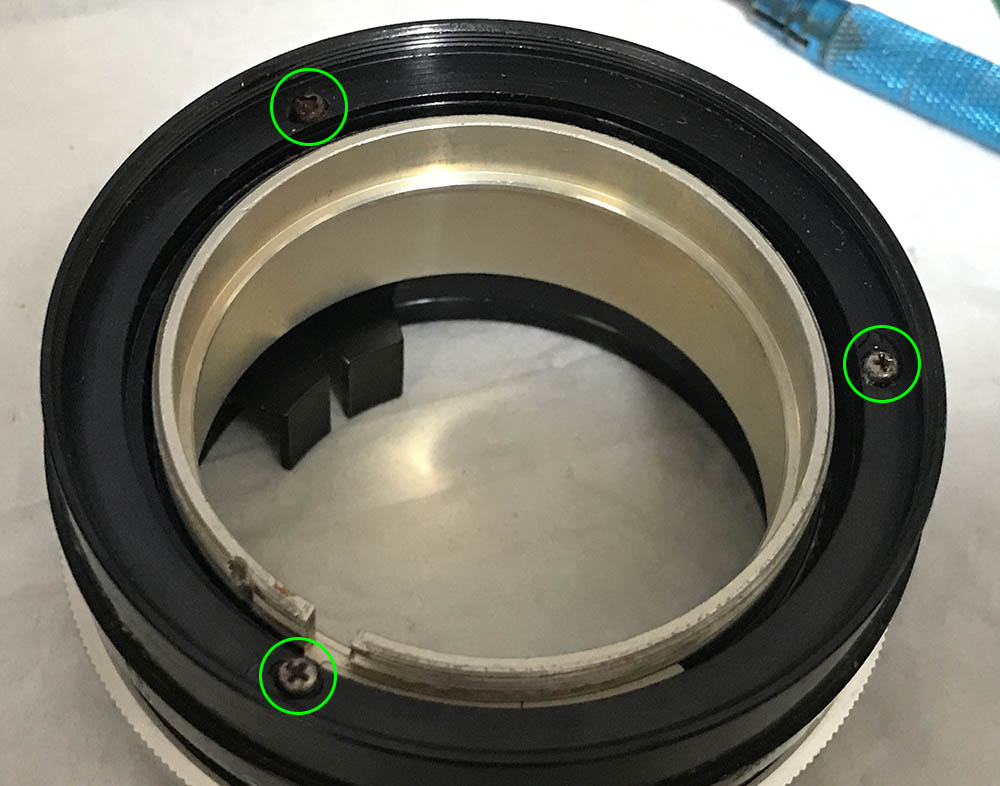
This ring with the scratch is where you adjust this lens’ focus. You do that by loosening some screws and then turning this ring while it’s loose. You adjust the helicoid then tighten these if you’re happy with your results.

These are the screws that secure the focusing adjuster ring. There are three of them and they’re usually sealed. Never attempt to remove these without dissolving their seals with alcohol or heat.
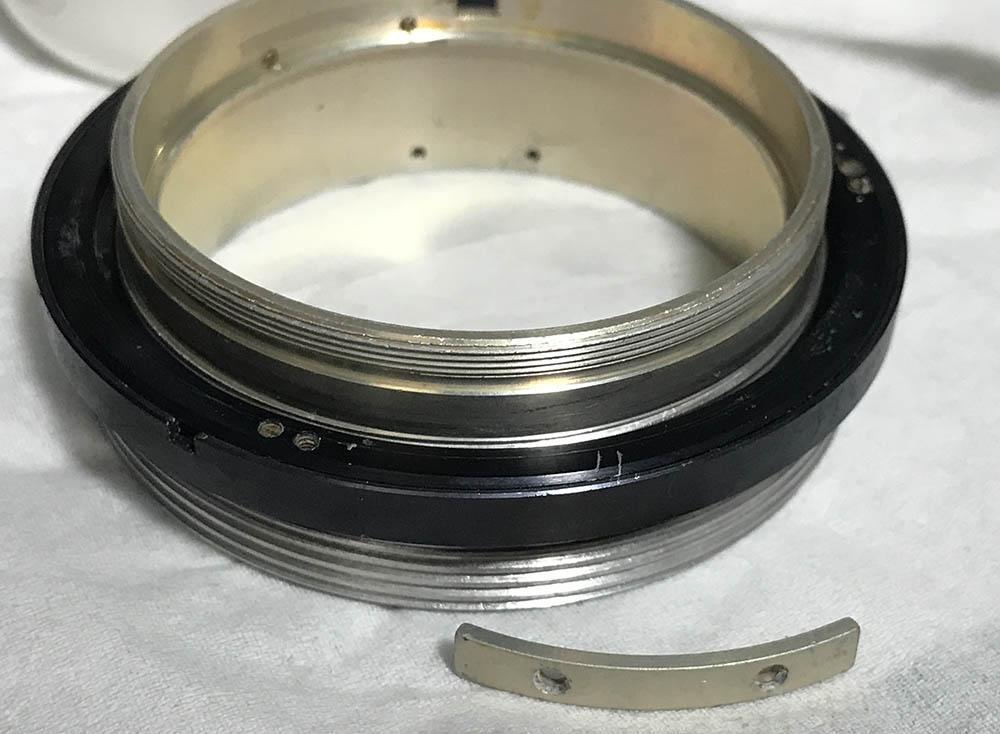
The focus adjustment ring can’t be removed at this point because this stop’s in the way. Remove it and you can turn the ring all-the-way.

The ring is delicate, the threads are easily damaged so be careful when you remove it. It’s easy to cross-thread this and there’s no easy way to repair the threads so consider your lens barrel useless if this is damaged.

You can now separate the inner helicoid.
The helicoids were cleaned thoroughly to make sure that no residue is left. I always make it a point to clean the helicoids as best as I can so the fresh one will not be contaminated by the old, bad grease. Since this is a wide lens, it’s beneficial that a heavier-type of grease is used. This will help a lot since this lens has a short focus throw.
Disassembly (Objective):
The objective is typical of many Nikkors from this era. The only thing that is annoying about this is the amount of elements it has and the small retainers securing some of them. You will have to be careful when removing anything so you won’t scratch something important. Most of the rings were sealed, it was really annoying having to wait for the solvent to soften the seals before I could do any attempt on any of the sealed parts. This was necessary since I don’t want to ruin anything but I had to be careful not to flood the parts that have cemented elements on them. To help you identify which side is facing where, use a permanent marker to make a small mark at the leading edge of the elements’ wall. This will help you later since putting an element back facing the wrong way can cause irreversible damage. Lastly, take plenty of photos and notes so you’ll know how to put things back again.
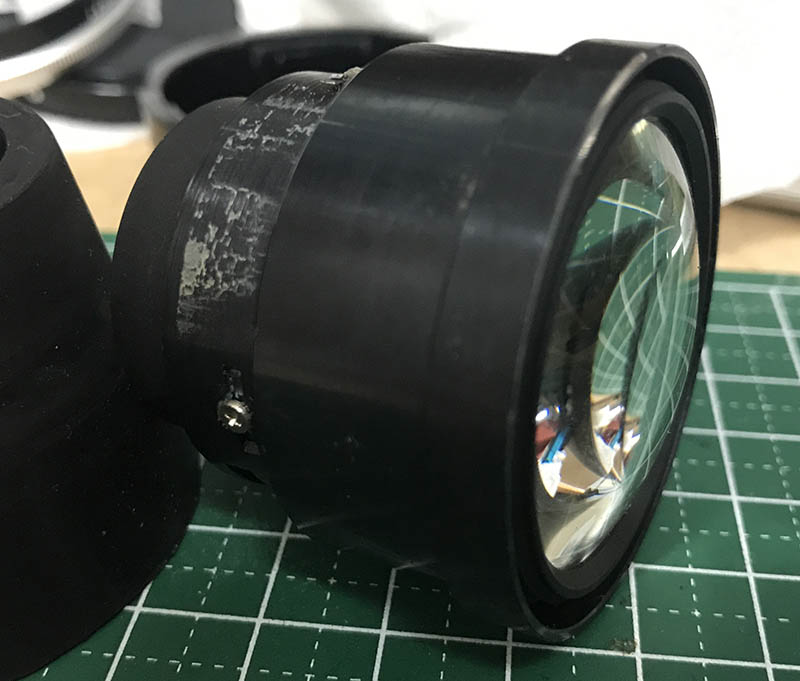
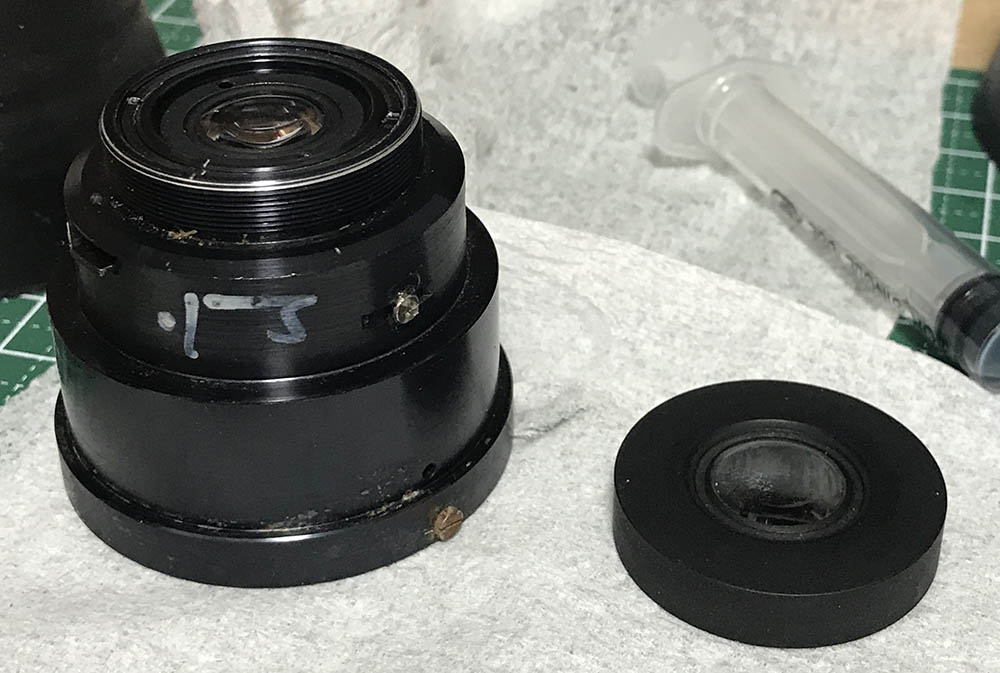
The objective itself is huge compared to the size of the barrel. It consists of more than half of the whole lens’ mass.
Remove the front assembly by unscrewing it. A lens spanner with deep tips helps but I just used a rubber cup with mine.

This is how the 2nd element can be accessed.
The first element is secured with this ring.
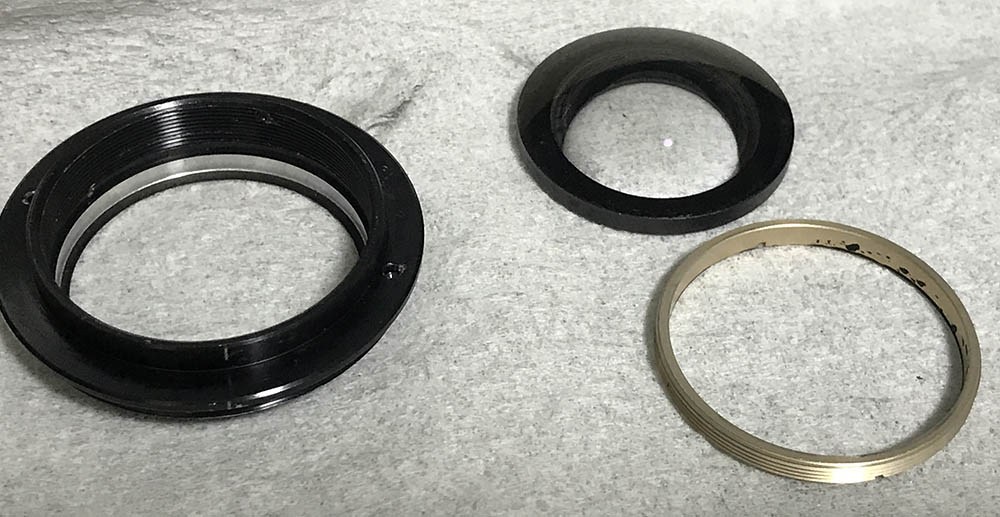
It should be easy to remove it once the ring is gone.
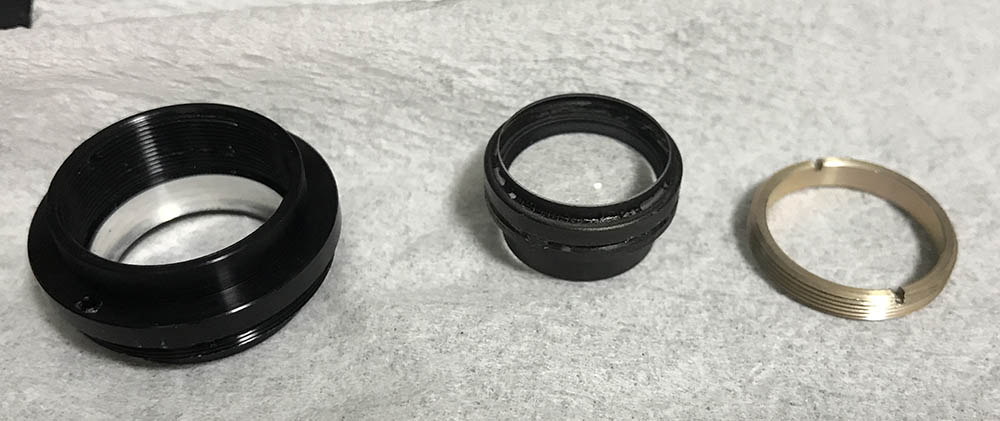
This doublet is secured with this retainer. Be careful when removing it, this is a cemented element so you don’t want to snap or crack it. Be careful with using solvents near this thing as the cement may dissolve from the fumes or direct contact from the solvent.
This is how you can access the rest.
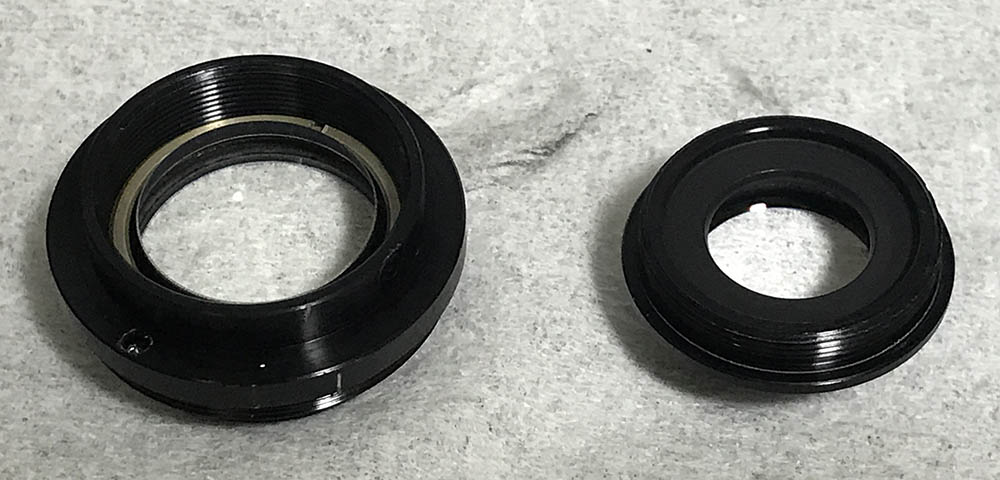
The rear element and its housing can be removed like this.
The other elements at the rear assembly can be accessed by using a spanner but be careful not to scratch anything. The lines were made by a repairman who cleaned this prior to me. This is a sensitive adjustment and its best just to align these as close as possible. Small adjustments can mean a big thing when it comes to wide lenses.
It comes off as a single assembly.
You can further open the thing and clean whatever is between them.
I cleaned all elements carefully, it took me a lot of time to do this but it was necessary because there was fungus in some of the elements. If you want to know about my fungus removal routine, go and read how to remove fungus. Follow my tips there and adjust the solution to your needs.
Disassembly (Iris Mechanism):
The iris mechanism is so simple that anyone who’s familiar with repairing Nikkors will know how to open it without a guide. You don’t need to follow this section if your lens is clean or the iris isn’t oily. Mine was filthy so I had to clean mine thoroughly to remove any traces of germs or fungi. If this lens was clean I would not have to do this and save me plenty of time. This is not a task for beginners, leave this to the experts.
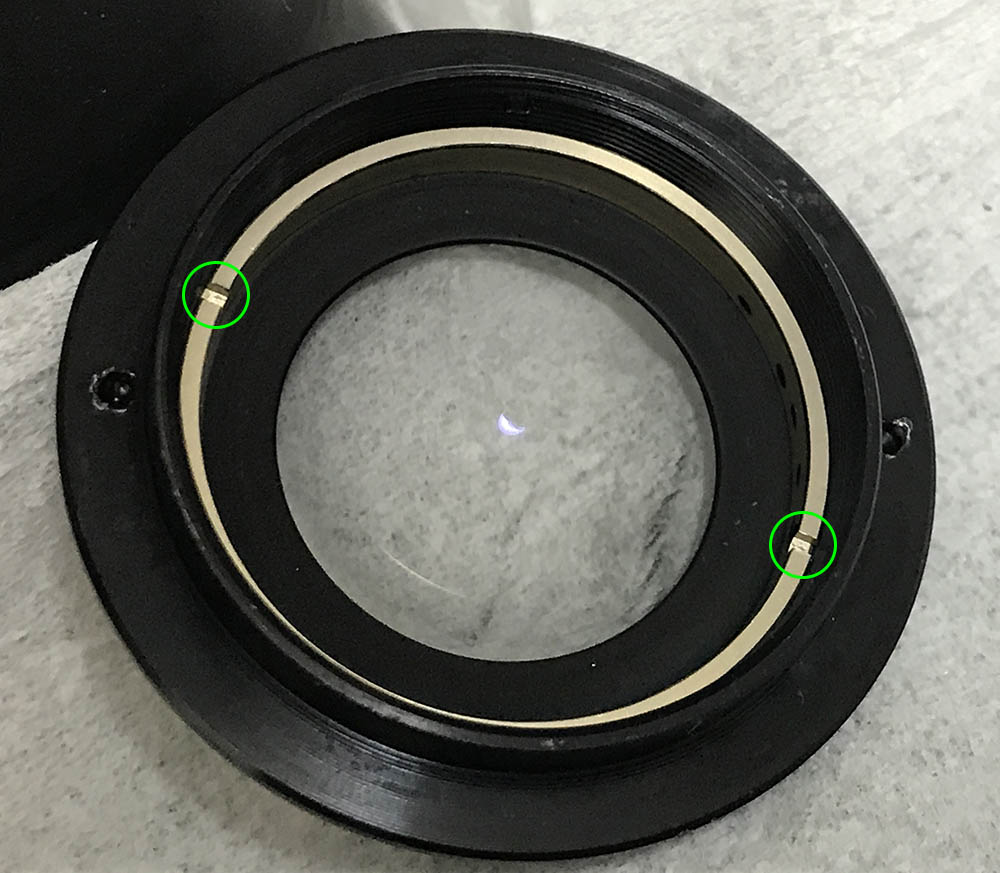
The ring that supports the iris is secured by these, that ring can be adjusted as evident by the seals on the screws. Don’t remove these just yet.
In order to remember how this part was aligned you will have to mark this with a small scratch. Don’t make it too big, a small one is sufficient.
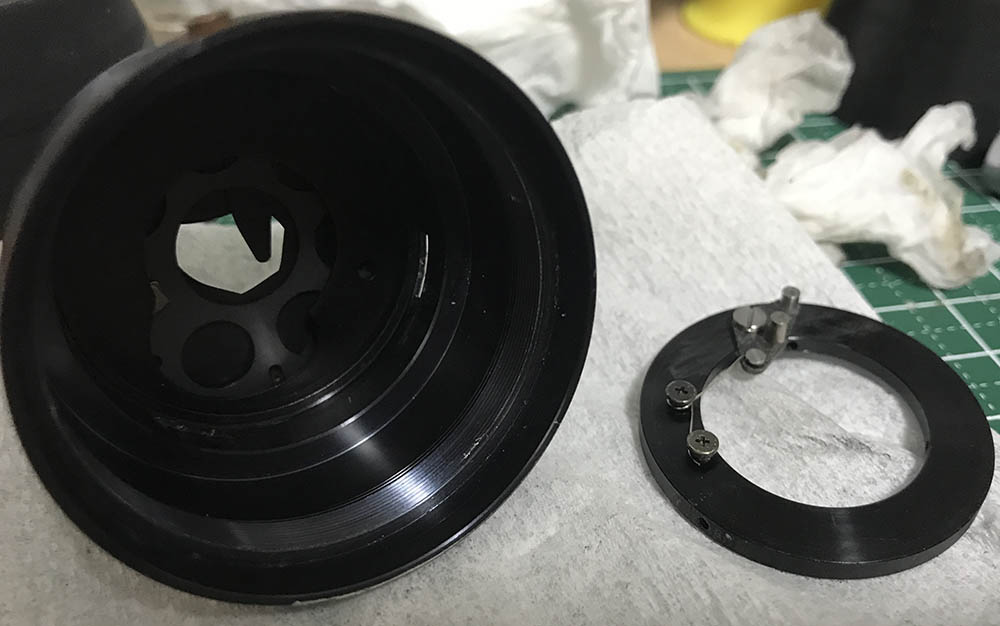
Once you’re satisfied with your notes (and marks), remove the screws at the outer surface of the objective’s housing and carefully pull the ring off using your fingers. Note how the spring is attached and don’t forget to put it back if it gets dislodged. The spring is connected to the regulator, flush it well and don’t leave any residue.

There’s a plate that constrains the movement of the iris. Note how this was positioned so you’ll know how to put this back later.

Carefully remove the plate.
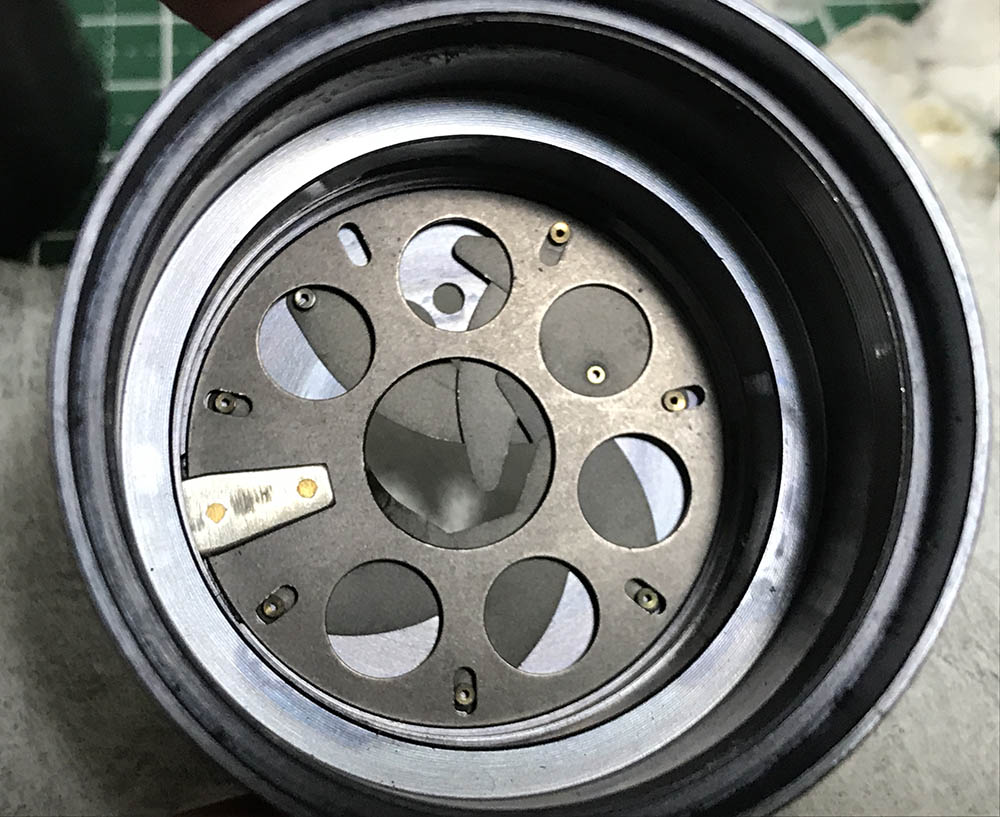
The iris can now be accessed. It’s being held by its rotator plate.
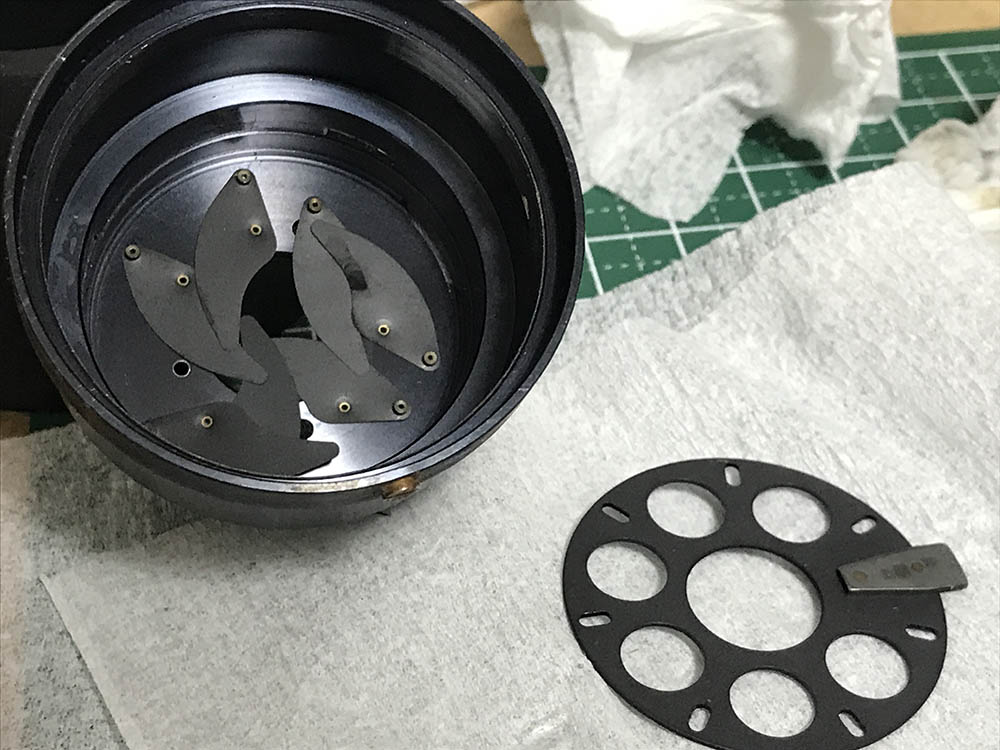
Push on the tab of the rotator plate (from the outside) to lift it up.

The individual blades can now be removed. Carefully remove these so they won’t get damaged, a damage blade will render the iris useless as it cannot actuate smoothly.
The blades were carefully cleaned by wiping them with naphtha and tissue. Make sure that you don’t warp the blades and you don’t damage their pegs, if any of them got dislodge you’ll have a hard time looking for replacements and making them yourself won’t be easy and it’s not guaranteed that you’re going to get it perfectly, you also run the risk of making more damage to the blade.
Conclusion:
Overall, this one took me more time than expected to repair. I spent plenty of time cleaning the various parts and making sure that there are no grime left from the old, hardened grease. I wasn’t able to turn the helicoids before but it’s now smooth-as-butter. This thing happens when somebody attempts to do a quick-fix by applying oil, WD40 or any type of chemicals to the hard or dry grease in an attempt to soften it. This only makes things worse, never ever do that when any of your lenses had to be lubricated. Make sure to do it the right way and the only way to do that is a proper overhaul.

The blades were cleaned very well and they were reinstalled carefully. They can be annoying to put back because of their shape but it’s not difficult. The dirt you see in one of the blades is an imprint from another blade, the grime created a mark because it was stored with the iris in that position for a long time. I cleaned it by wiping the hardened grime off using a stronger solvent.
The focus will have to be calibrated, read my article on how to adjust a lens’ focus to see how you can do it in a DIY setting. It can be hard to do that with this lens because it’s wide and it’s not fast so you cannot see the focus plane as clearly as you would with a faster, longer lens. The good thing is you are allowed a certain amount of slack because focus isn’t as critical with a wide lens of this speed as opposed to one that’s longer and faster.
Thanks for reading one of my articles. I haven’t posted anything new for a long time since I was busy at work, all I managed to do was update my old posts even those from a few years ago with new content and formatting. It is really tiring but I have to prioritize because it is my career we’re talking about. If you liked this article, please share this with your friends. If you are enjoying my work and learning a lot from it, please consider supporting my work. It helps me maintain this blog by offsetting the cost of hosting and for buying and developing film. This blog continues to exist because of that. It’s now time to say goodbye and see you again next time, Ric.
Help Support this Blog:
Maintaining this blog requires money to operate. If you think that this site has helped you or you want to show your support by helping with the site’s upkeep, you can make a small donation to my paypal.com (richardHaw888@gmail.com). Money is not my prime motivation for this blog and I believe that I have enough to run this but you can help me make this site (and the companion facebook page) grow.
Leave me some tip?
Thank you very much for your continued support!
$2.00
Helping support this site will ensure that this will be kept going as long as I have the time and energy for this. I would appreciate it if you just leave out your name or details like your country’s name or other information so that the donations will totally be anonymous. This is a labor of love and I intend to keep it that way for as long as I can. Ric.

Nov 27, 2019 @ 21:36:09
Hi, I need to ask you where is it possible to get the Nikon grub screws for the AIS lenses. I have one missing and need a replacement. Any help would be great. You can email me directly at clusterstudios@icloud.com
Nov 27, 2019 @ 21:39:37
could you tell me where one could buy those tiny grub screws that hold the barrel on the Nikon AIS lenses?? Thanks
Dec 21, 2019 @ 03:19:36
theres a factory here but they only sell by the hundreds
Jun 29, 2022 @ 15:35:12
Hi Richard – Many thanks for your article on the Nikkor UD 20mm f3.5. I have made a donation.
I have just purchased one in good optical condition, but there seems to be about a millimetre of movement of the front cowl which I believe should not move at all. This is annoying as the focusing action moves the front cowl when you focus. I just wondered if its something that can be fixed without taking the lens apart?
Kind regards
Andy