
Hello, everybody! Spring is just around the corner here so it’s cleaning time. Time to clean the house and time to “clean” problematic staff at the office. It is important to keep things clean in order to keep things moving smoothly. I will admit that I am lazy at cleaning but when it comes to cleaning cameras and lenses I will be the first one to raise my hand. I have cleaned lenses and cameras that are so filthy that you would probably get sick just by touching them. Today, I will show you one such lens and how I cleaned it. It’s now my favorite lens and I hope that this redemption story will inspire you.
Introduction:
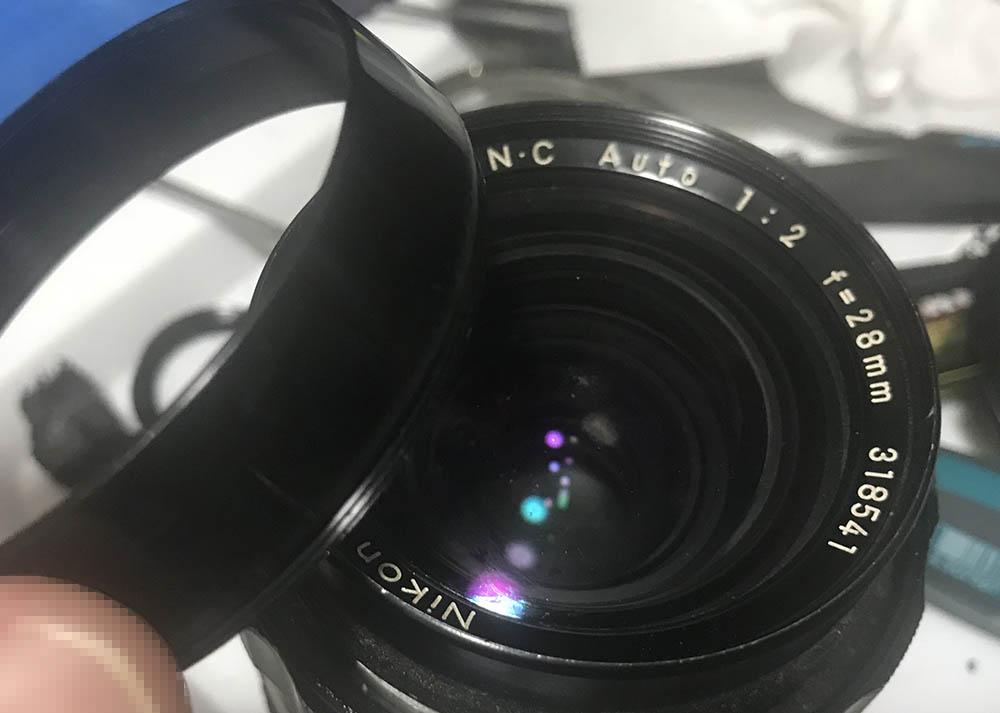
The Nikkor-N 28mm f/2 Auto was made from 1970 to 1975 and at one point it was the fastest lens of its class. It enabled astrophotographers to shoot the night sky using slower films and still enjoy the wide 28mm focal length. The lens also enabled news photographers to take important photos in the dark so long as they pushed their films in development. This was a game-changer and many manufacturers soon followed. It’s the first lens in the 28/2 family which was made until 2005 in the form of the Nikkor 28mm f/2 Ai-S. This is a very useful lens and many people won’t want to part with theirs. It’s easy to see why once you saw my sample photos.
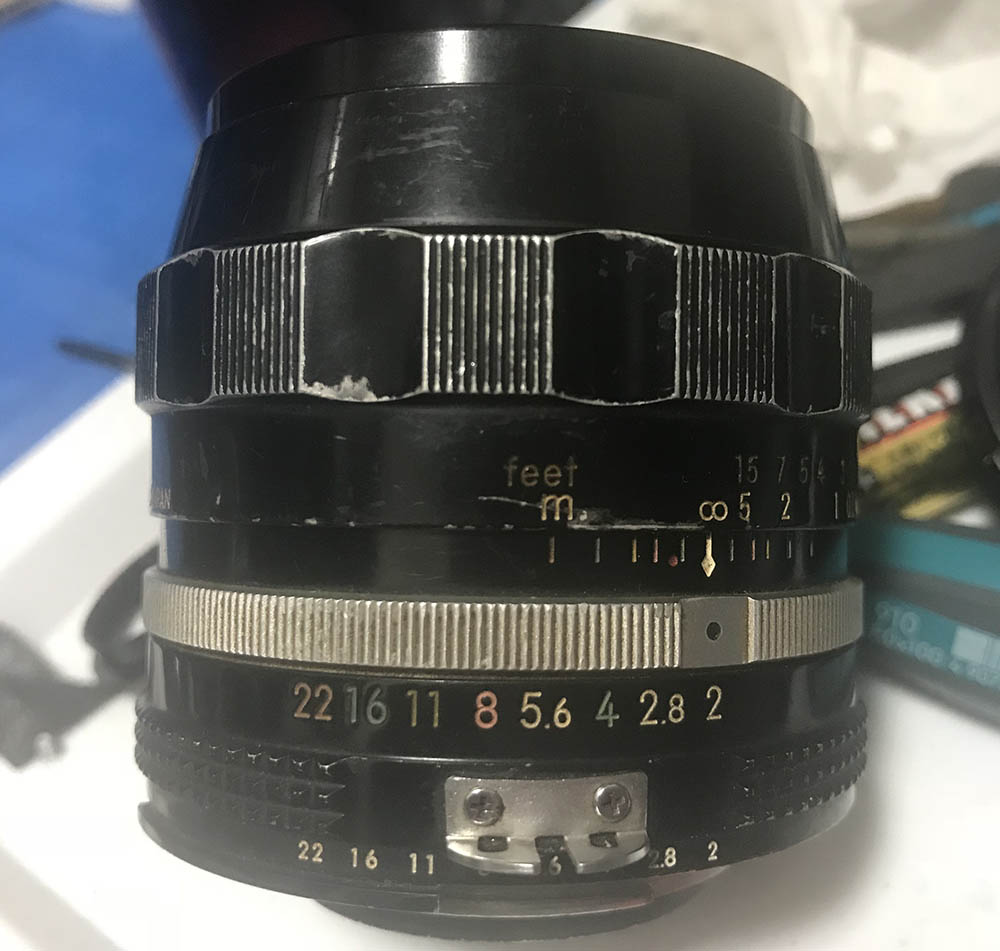
This lens is very well-made, it’s all-metal. This is what people think about if you mention the name “Nikkor“, a tool that just works and will survive a lot of beating. This lens will surely out-live me provided that it was taken cared of properly. If anything had to be serviced you can just repair it like any old carburetor engine.
This lens has a new optical formula of 9-elements-in-8-groups and it has the standard 52mm filter ring which is useful. To my knowledge, all succeeding lenses from this family inherited the original optical formula but they have much better coatings applied. This is a testament to the original design and it’s amazing how it endured for 35 years with little or no changes at all. This is a true optical masterpiece. One nice feature of this design is they all have Nikon’s CRC mechanism which changes the spacing of the optics depending on which distance you’re focusing at. This help ensures that you get sharp, high-resolution pictures at every range since the floating element/s correct and adjust the optical design to allow that. The easiest way to see it in action is to inspect the corners of a photo at minimum distances, a traditional lens with rack-focus design will perform poorly compared to a lens with the CRC mechanism. This makes it one of the top Nikkors of its time, it has the same status as the Nikkor-N 35mm f/1.4 Auto and the Nikkor-N 24mm f/2.8 Auto. It is a member of an elite group of short Nikkor primes, all of which have uses the CRC mechanism in their designs.
One appealing feature of this lens is how close it’s able to focus. The Nikkor 28mm f/2 Ai-S focuses even closer at 0.25m which makes that one even more useful. It allows you to take near-macro photos of small things such as toys and rings at a wedding. Wide lenses should be able to do this or else they’re limited in use and you could not exploit the exaggerated perspective that a 28mm lens will give you. If this is a feature that’s important to you then you should consider looking for the Nikkor 28mm f/2 Ai-S instead. I couldn’t see any differences in the optical formula despite the fact that the Ai-S focuses closer so let’s just assume that nothing has changed. Maybe the optics have been tweaked a bit during production but one thing I am sure of is the later versions such as the Nikkor 28mm f/2 Ai have better coatings applied. I own the Nikkor 28mm f/2 Ai-S, it’s an exquisite lens, the superior coatings surely fixed the nagging problem of this lens which you will soon see later in this introduction.
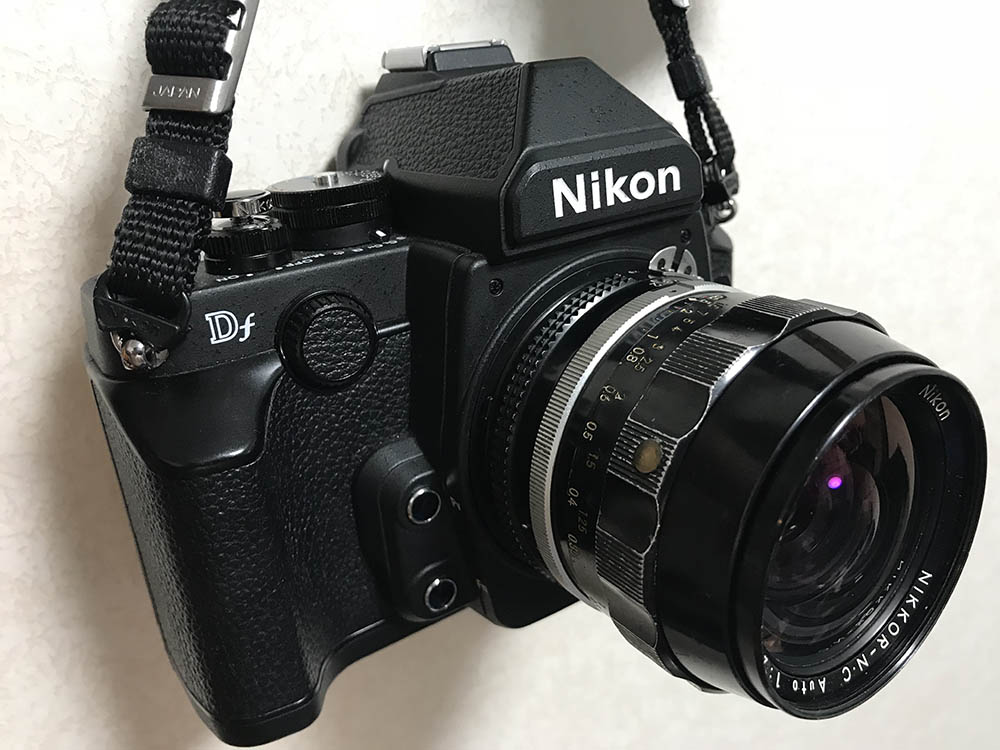
It’s a great pair with any modern Nikon so long as it has an Ai-ring installed. Using a non-Ai lens on most modern Nikons that have an aperture tab is not the smartest thing and you may end up damaging the camera which will be an expensive repair since the front part has to be taken out in order to do a proper replacement of the FRE wafer.
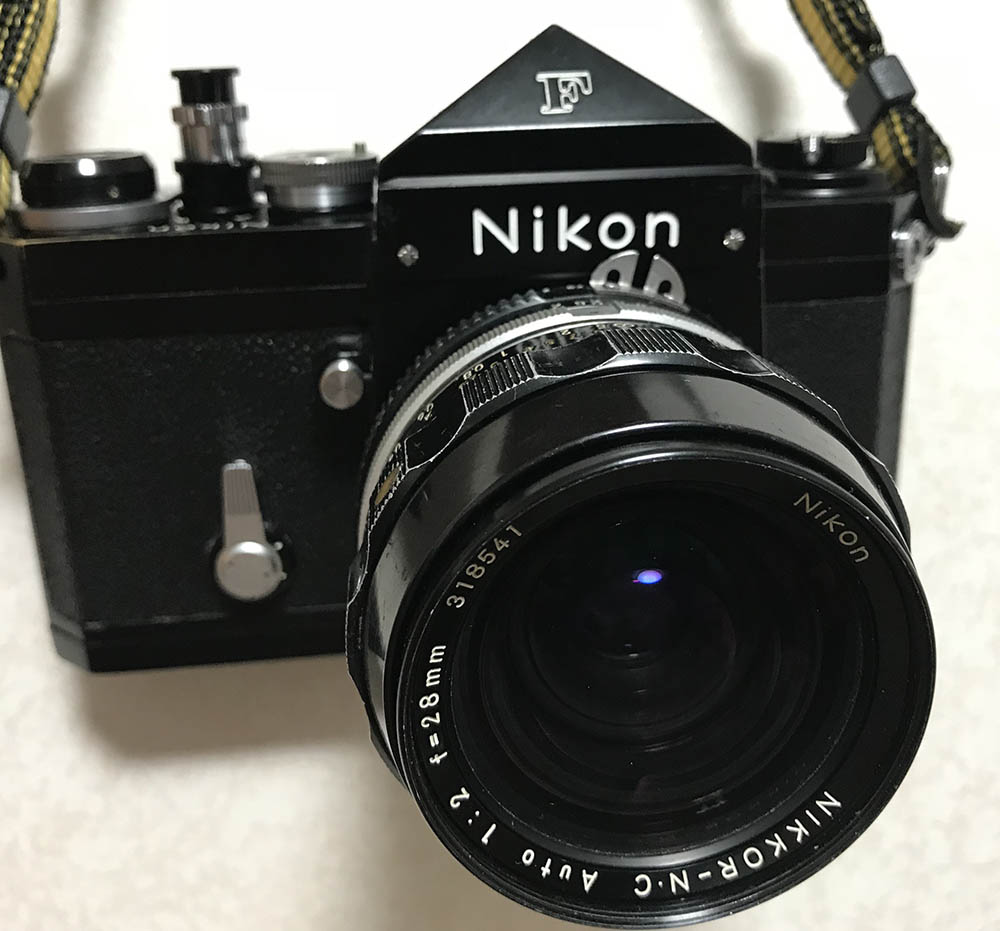
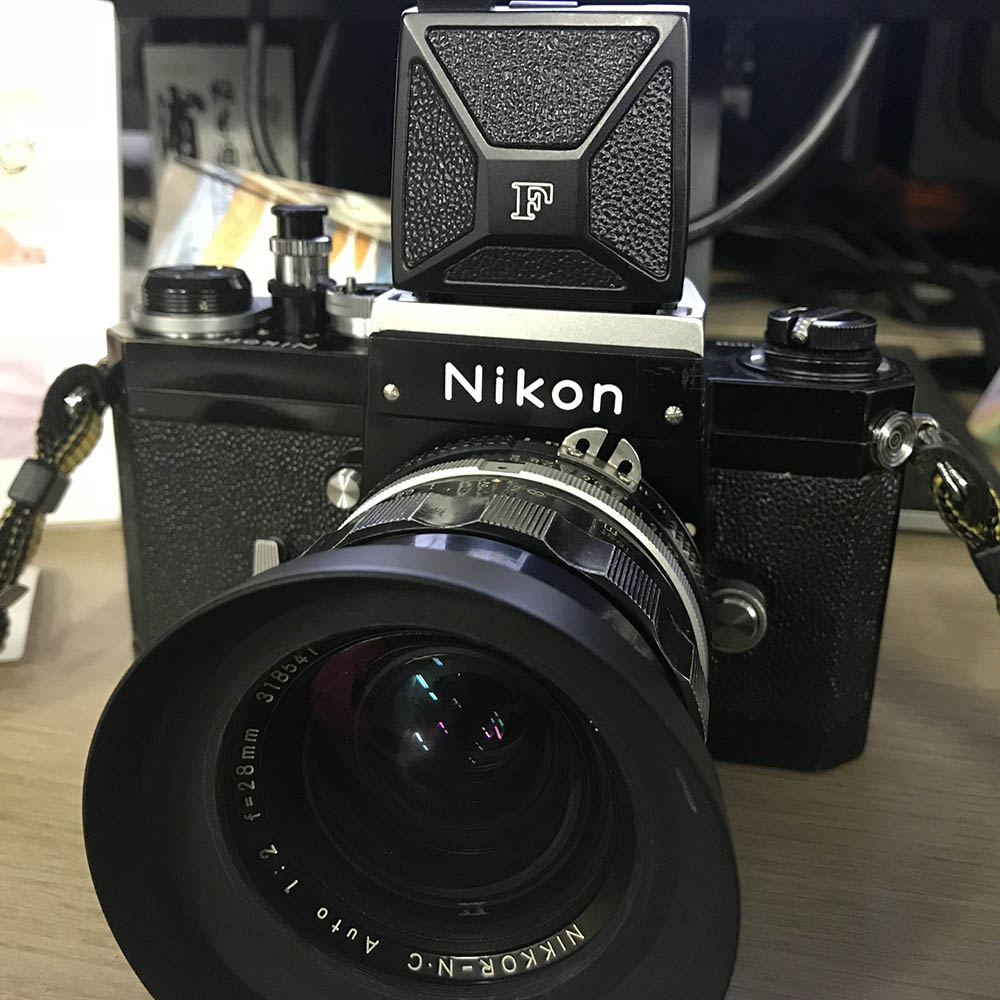
Using it with any other classic Nikons is not a problem since they don’t have the aperture tab that couples with the aperture ring. It looks sexy when you mount it to a black Nikon F.
The Nikon HN-1 is useful for preventing the front element from fingers and other things from touching it but it’s also great for preventing flares due to stray light coming at an angle outside of the frame. I suggest that you mount it to the lens permanently.
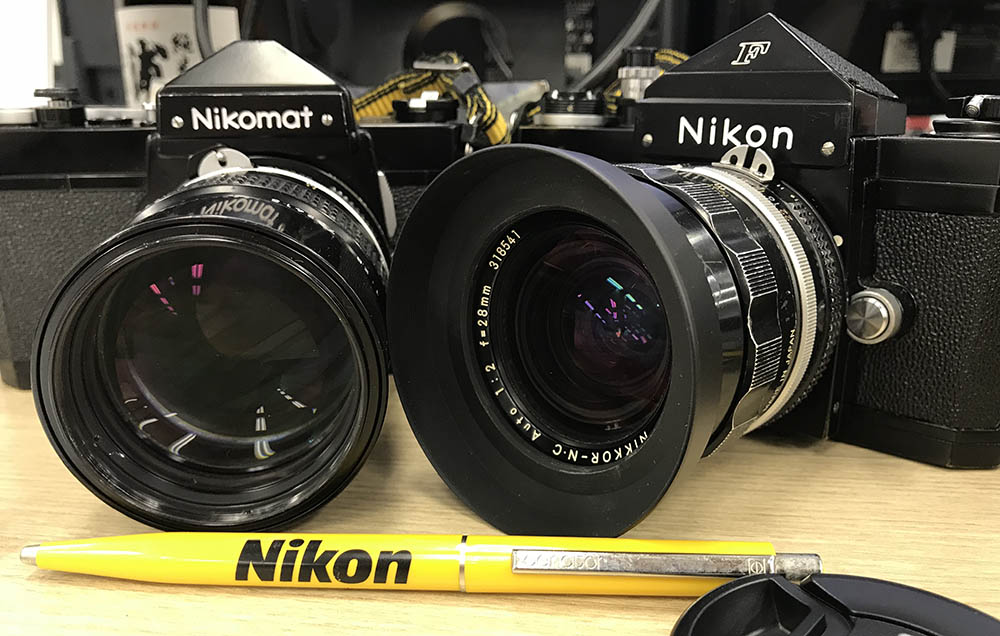
You’ll want to use this lens just because it looks so sexy. It feels as good as it looks, it feels like a real lens, they don’t make things like they used to. This is a real hardware if I may say so.
Using a waist-level finder with it is handy for getting low-angle shots, you’re capable of shooting-from-the-hips, the deep depth-of-field is handy and you will get most of your shots in-focus. This is not a problem with wide lenses, I never had a hard time doing this technique using this lens.
The following sets of photos are sample shots that I took to learn how it use this lens. Knowing how a lens performs is key to exploiting it, you will know how to maximize its use and workaround its weaknesses. You’ll know when to use it and when to leave it behind. These were shot from f/2, f/2.8, f/4 and f/5.6 from left-to-right, these apertures are the most common apertures that people would want to use this lens with I assume. These apertures are also the ones that show the most changes in a lens’ rendering characteristics so it’s best that we examine these. The smaller apertures do not vary much apart from the effects caused by diffraction leading to a loss in sharpness.


(Click to enlarge)
Vignetting is pronounced wide-open, it improves considerably by f/2.8, it is nearly-gone from f/4 on. I think you can’t get any better than that from here. Distortion is prominent but not over-whelming, it’s as expected from a lens of this class, I’ve seen worse. The quality of the bokeh is nice, it’s smooth and refined, at least at this distance. The discs look nice, they are clean and even but you’ll see a bit of outlining which doesn’t happen much. It suggests that this lens has above-average bokeh quality and you will soon see why I made that statement later. Mind you, I’m not saying that it’s perfect, it has a slight tendency to show undesirable qualities too but it’s a good performer overall in this department.


(Click to enlarge)
Spherical aberration is quite high wide-open, it’s my biggest complaint with this lens. The same goes with chromatic aberration but the former is more pronounced, it’s something that will certainly leave an impression with you. Flaring is quite high wide-open which can be blamed on coating damage or the state of the glass but I will tell you that it’s inherent to this lens design. I have a pristine Nikkor 28mm f/2 Ai-S which shares the same optical formula but with superior coatings and it suffers from the same problems but not as bas as this one. Stopping it down to f/2.8 helps somewhat but it you will still see the flaws that I just mentioned, chromatic aberration is less obvious but spherical aberration is still pronounced. These won’t totally go-away by f/4, I can still see traces of these problems even by f/5.6 which is surprising. It’s a shame that this problem persists up to this aperture albeit in trace amounts but I will show you that these aren’t really “problems” at all and you can use and enjoy this lens and maybe even embrace these “features” as they make your photos look more “unique”, you can even say that these were designed into the formula if you like.


(Click to enlarge)
This lens is decently-sharp by vintage lens standards wide-open. Spherical aberration will give you the impression that it isn’t but the details are there, it just lacks the resolution to present it. CRC is best demonstrated by taking a photo of a flat object at close distances and examining the edges so I shot a set that demonstrates that. The center looks so-so but the corners look bad. I won’t say that it’s useless but it’s acceptable except for the extreme corners. It’s pretty good at moderate distances wide-open and I can say that it is the best range for this lens. Objects at further distances look so-so at the center and quite good at the corners. Spherical and chromatic aberrations will be a big issue here but it’s not totally ugly wide-open, it’s just something that you will learn to live-with or embrace with this lens, I learned to love it. Stop the iris down to f/2.8 and things improve drastically as resolution starts to pick-up, it’s already pretty sharp wide-open at moderate distances but stopping it down improves sharpness at the rest of the focus range. The corners of the frame will lag-behind by a stop or so but they look much better specially at closer distances. The lens is performing near its peak by f/4 and it looks nice from here-on as it should be. Again, this lens seems to perform at its best at moderate distances. It’s quite good at the minimum focusing distance but its corners will only look good from f/2.8 on, this is quite impressive. CRC is the reason for this, most lenses without it won’t be able to perform quite as nice at closer distances.
Let’s now see some real-world photos, I judge a lens by its utility in the field and how it handles and what I can get with it from a practical sense is more important to me than shooting pointless photos of random things. This lens isn’t perfect. In fact, it has lots of flaws but I just learned to love it, this is an acquired taste if you can put it that way or you can just workaround it if it’s something that bothers you by not shooting things that will trigger the flaws and drive you nuts. To be fair, most of the problems that I mentioned were caused by the poor state of the coatings with my example. I shot these using a Nikon Df just in case you’re curious.
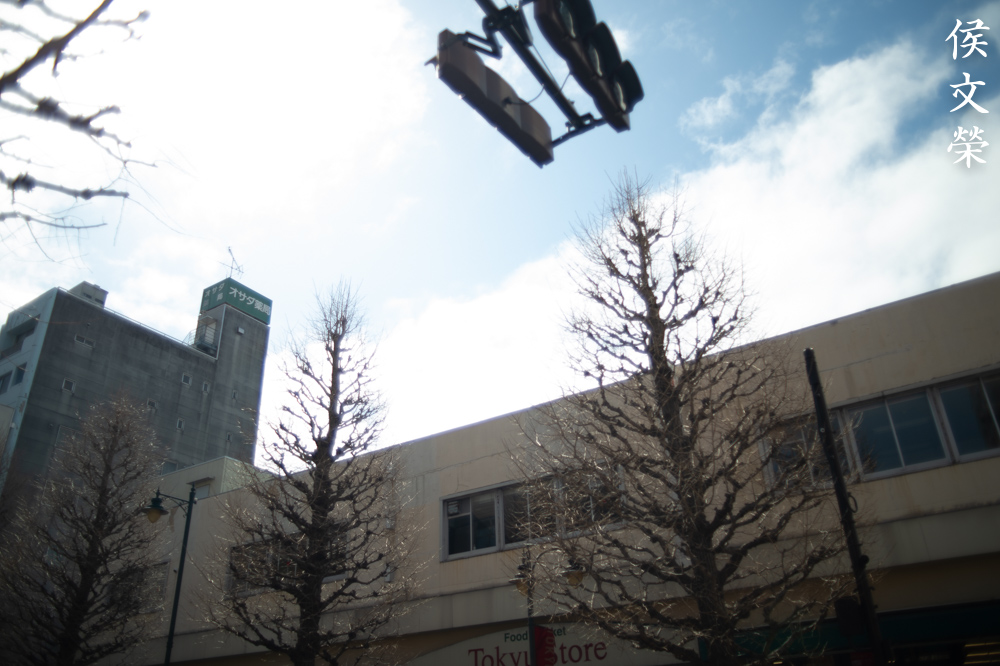
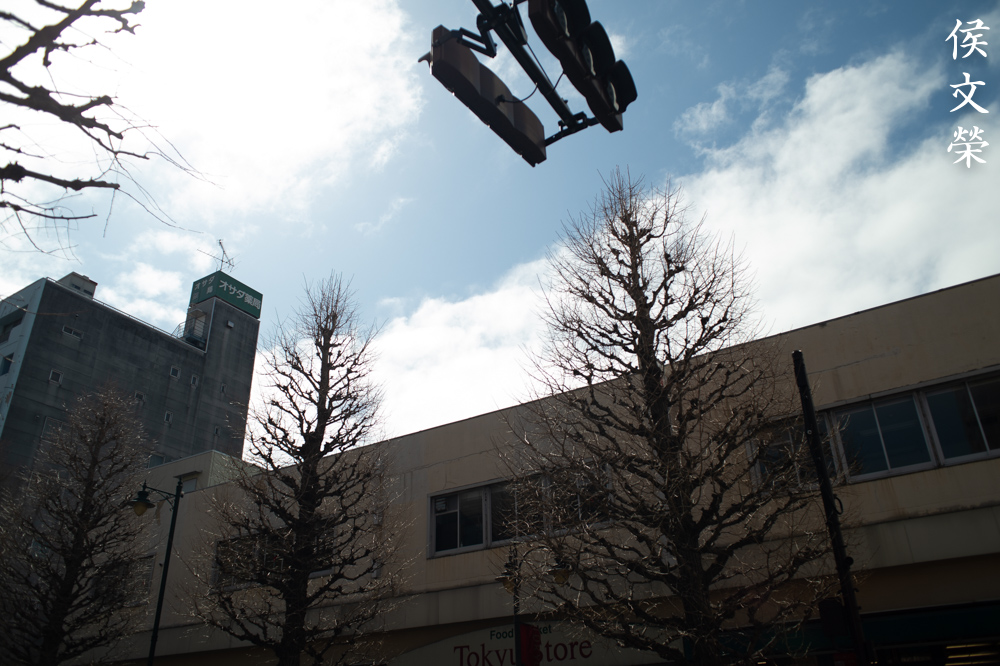
This lens is perfect for taking travel photos such as this but you will have to be careful about chromatic aberration when shooting wide-open. There is a lot of that in the upper part of the frame where the branches meet the sky. I can also see some spherical aberration, too.

The halation happening in the lamps can be more attributed to the coatings of my lens which has suffered serious fungus damage. While this lens has a reputation for flaring, this one is kind of an extreme case.

The unique combination of wide-angle and fast maximum aperture enables you to take pictures like this where you can get an exaggerated perspective along with a thin depth-of-field. It’s impossible to take this kind of picture if you’re using the Nikkor-H•C 28mm f/3.5 Auto. Do note that the bokeh quality looks pleasant in this kind of setting but there will be times when it can be a bit rough so you should learn and avoid situations where this can happen.

The 28mm focal length is useful for documenting events, it’s wide-enough to include multiple subjects into your frame without making them all look like cartoon characters. This photo looks interesting, the subject looks great, he’s sharp and the resolution is ample even wide-open to resolve all of the small details on his face but it transitions to ugly side towards the right where the characteristics of the photo takes on a more “dreamy-look” where all of the lens’ flaws begin to manifest. This is exquisite in my opinion because this is a good example of how this lens was designed as an artistic tool wherein its flaws were cleverly-integrated with its strength. If this was designed poorly then everything would’ve looked ugly, unrefined and just plain sad.

It’s not easy to focus with this lens if your subject is moving despite being a 28mm lens but it’s easier than focusing with the Nikkor 35mm f//1.4 Ai-S. It’s easy to see what’s in-focus, though. The thin focus plane helps you see what is in-focus in your viewfinder compared to a slower lens.

Just take a look at the lady’s face. This lens is capable of resolving all of her wrinkles and details wide-open which impressed me a lot. The character of the bokeh looks exquisite here but you can see some undesirable traits here as well. Inspect the building in the background the top-left corner, you will see some imperfections. I really don’t mind at all and I embrace it, I treat it as part of what makes this lens unique.

Lighting is very important. I chose to shoot at this location and stayed there for the rest of the event just because there’s a high-wattage lamp nearby. It’s important to consider this as a good photo with poor lighting does nothing. I love the subject-isolation capabilities of this lens despite its focal length. It’s able to isolate your subjects and make them pop-out from the background. Use this to your advantage whenever you have the chance to do so. The one thing that I disliked in this photo is the hand at the foreground but that is a good example showing how foreground blur looks like with this lens.

I like this photo a lot except that it shows plenty of barrel distortion. This is not the lens that I will choose for shooting architecture and art. It’s not that much of a problem when you’re viewing it in a monitor but once you blow this picture up and print huge the distortion looks more obvious and it can distract your viewers’ attention or even make them feel uneasy.

The fast f/2 maximum aperture makes this lens a useful tool for shooting at night. It’s better to be able to capture this than not at all so this lens is much more useful than the Nikkor 28mm f/2.8 Ai in nearly all respects. That lens is a very good one but it can’t give you an extra stop of light to work with. This is something that you should consider when choosing a lens. I like how this lens rendered the scene, it has that “vintage-look” and the photo looks very natural because it combines both sharp and blurred characteristics well. Its ability to do this is something that I like the most about this lens.

If you’re a documentary photographer in the 1970s, this lens is probably the best choice for this kind of assignment. This is the reason why this was very popular back then with Nikon shooters despite its price. Its utility justifies it and a real professional can earn that money back quick with his photos.

Here’s a photo showing just how exquisite this lens renders provided that it was given enough distance between your subject and your background. The character of the bokeh looks pleasing here but there will be times when the background will contain elements that can produce the ugly-looking details that’s more in-line with what cheaper lenses make. This is not the norm and you can be rest-assured that this lens will produce good-looking bokeh most of the time.


(Click to enlarge)
Here are more photos that I took from that day. Click on them to inspect the pictures in more detail, appreciate what this lens can do and learn from my photos so you’ll see what this lens can’t do for you. These photos are great if you’re looking for opinions on the internet about this lens and these will be useful in forming your decision.
The following photos were taken with Fujifilm Venus 800, I used my Nikon F with a waist-level finder mounted. This lens was made for film so it’s fair to judge it using its intended medium. Film has a unique look that’s difficult to replicate with digital because of film grain, some people hate it but I love it. Film grain can either hide or amplify a lens’ flaws and this is why we want to see some sample photos that were taken with it.

The fast f/2 maximum aperture of this lens is handy for night photography. I can also use a slower shutter speed because of its short focal length, it helps me take photos using shutter speeds as slow as 1/15s.

It’s not difficult to get things in-focus with this lens, all you need to do is set the focus to somewhere approximately close to where your subject is. If you need to accurately focus on something, the thin depth-of-field will help you a lot so you can easily see your focus plane.

I can drag the shutter longer with this lens. This shot was taken at a smaller aperture than what I am comfortable with for this kind of shot even using a high-ISO film.

You can see how the awning looks curved due to barrel distortion. You don’t want to use this for taking pictures of art or architecture. You will not notice this in real-world pictures so long as you keep straight lines away from the edges of your frame.


(Click to enlarge)
Here’s some more photos from the roll. This lens produces great photos of almost anything. It’s a joy to shoot with film, it feels right and it’s perfect if you are shooting it with a period-correct setup. I am thinking that I should shoot with this more these days after seeing these photos.
How about some pictures that were taken with Kodak Gold 200? I used my Nikon F5 to shoot these because its meter is really accurate. I was curious to see how this lens performs with moderate-speed film on bright days. This is a good chance to see pictures that were taken with the iris stopped-down. It is an amazing lens when shot from f/4 and on.

This lens focuses close but not as close as I would want it to. The quality of the bokeh is not so bad in my opinion but it can tend to look a bit busy if you have certain elements in your scene like foliage which is multi-faceted and with high-frequency. Overall, this isn’t bad at all, you shouldn’t expect much from a lens of this class anyway. This was taken with the iris stopped-down, by the way.

This was taken at around f/5.6 or so. The branches and the twigs show a bit of “double-line bokeh” but I am impressed with how it rendered the foliage and the twigs. Of course, sharpness is top-notch, it should be since this was shot with the aperture stopped-down.

I think this was taken at around f/8. The rendering is quite pleasing, it has a natural look to it and you don’t get a look that’s “over-corrected” like what a lot of modern lenses tend to give.


(Click to enlarge)
Have a look at some of the pictures here and judge the lens for yourself. It’s a great lens for taking with you on a stroll around town. It’s wide-enough so you can take photos of storefronts of your neighborhood. When you have to use it for low-light situations, the bright f/2 maximum aperture is useful for those times when you need it.
I recommend this lens to everyone, it’s one of the better classic Nikkors that you can buy. I advise that you look for the ones that have the factory Ai-ring installed so you can use it with newer Nikkors that support that. Mounting a non-Ai lens to a Nikon that has an aperture-coupling tab is dangerous and it can damage your camera. The ones with the Ai-ring installed will cost a bit more but it’s worth it. These lenses are prized by their owners and you can’t find a cheap one unless they’re junk (like what my lens used to be). They’re usually priced above the $100 mark and can go up to $300 depending on the condition and what’s included with the lens. For that price you can get what I would say a better option, the Nikkor 28mm f/2 Ai. The latter focuses closer and it comes with the Ai-ring. The downside is it doesn’t look as cool as this, it’s also a little bit heavier. Despite those differences, both lenses are similar and they share the same optical formula to my knowledge. Whichever your choice is, make sure that you check if the lens focuses smoothly and there is no oil on the blades. These lenses have CRC which can make focusing hard if the CRC mechanism’s grease went bad. Take these into account and have a wonderful time looking for one and shooting with it.
Before We Begin:
If this is your first attempt at repairing a lens then I suggest that you check my previous posts regarding screws & drivers, grease and other things. Also read what I wrote about the tools that you’ll need to fix your Nikkors.
I suggest that you read these primers before you begin (for beginners):
Reading these primers should lessen the chance of ruining your lens if you are a novice. Before opening up any lens, always look for other people who have done so in Youtube or the internet. Information is scarce, vague and scattered (that is why I started this) but you can still find some information if you search carefully.
I highly recommend that you read my working with helicoids post because this is very important and getting it wrong can ruin your day. If I can force you to read this, I would. It is that important!
For more advanced topics, you can read my fungus removal post as a start. This post has a lot of useful information and it will be beneficial for you to read this.
Disassembly (Lens Barrel):
This lens is not easy to repair and I will never recommend this to anybody who hasn’t grasped the basics of lens repair yet but this isn’t a difficult lens to service for a seasoned repairer. I personally had a good time repairing it, I learned a lot of things and my experience guided me through the process. This lens has many thing in common with other Nikkors with CRC and they all have sort of a similar-feeling construction. Repairing the lens barrel will probably be 70% of your task when overhauling this lens, most of the parts are here and it’s all a matter of removing and reassembling them back. You will have to be careful with many things here so take plenty of notes. You’ll also be needing the right tools for the job as well and I will assume that you already have them by this point if you’re a serious repairer. If you’re new, I will just tell you to pass this one, you may damage this lens beyond-repair.
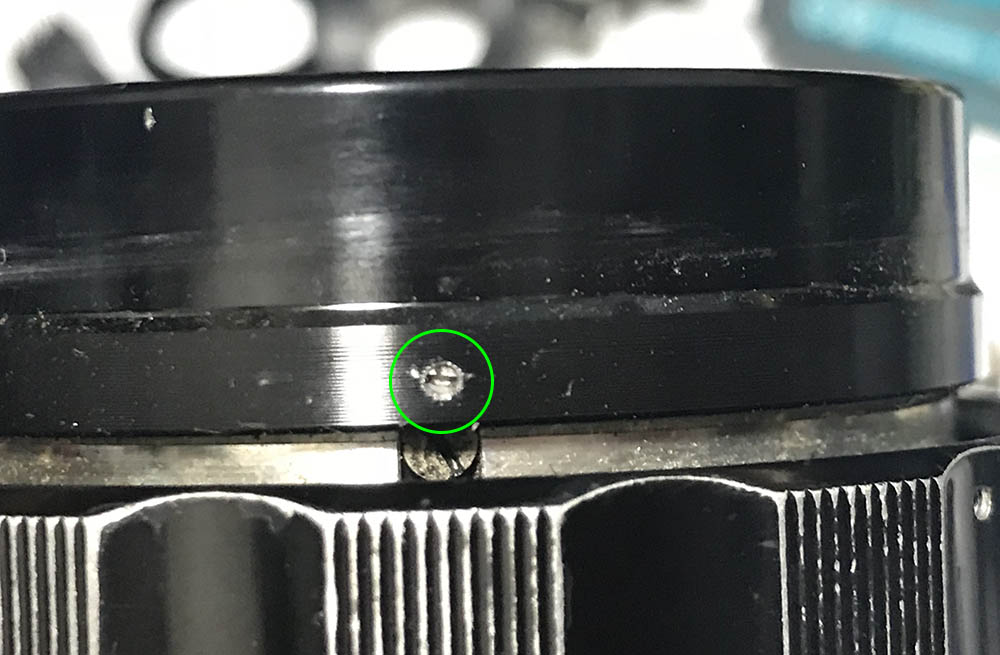
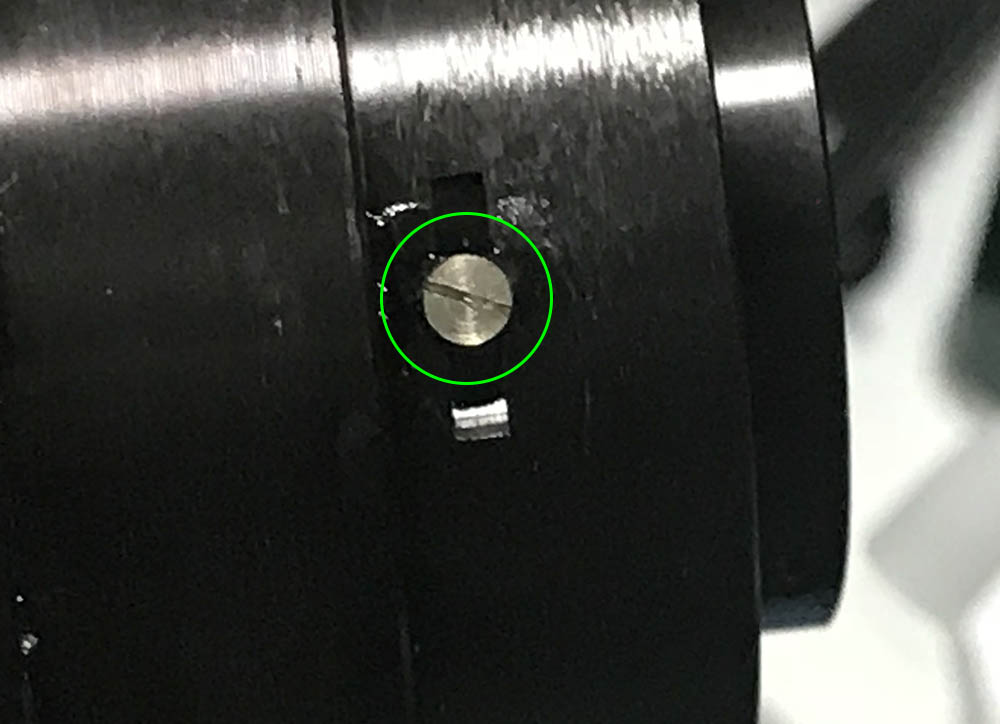
Begin by extracting this set screw, this will enable you to remove the cover of the focusing ring. You can just loosen it if you want because this is easy to misplace and it’s hard to fine a replacement for this.
You can unscrew the cover once the screw is gone. It can be tight at times so using a pair of rubber gloves will help a lot. A drop of solvent will soften the seal and make the job easier for you if it’s difficult to unscrew.
Removing the cover allows access to this little screw, extract it and you can unscrew the front barrel.

The front barrel can be unscrewed easily once the set screw is gone. If your front barrel is stuck then do that alcohol trick again, apply it to the hole and that should help soften-up anything that’s preventing you from removing it.

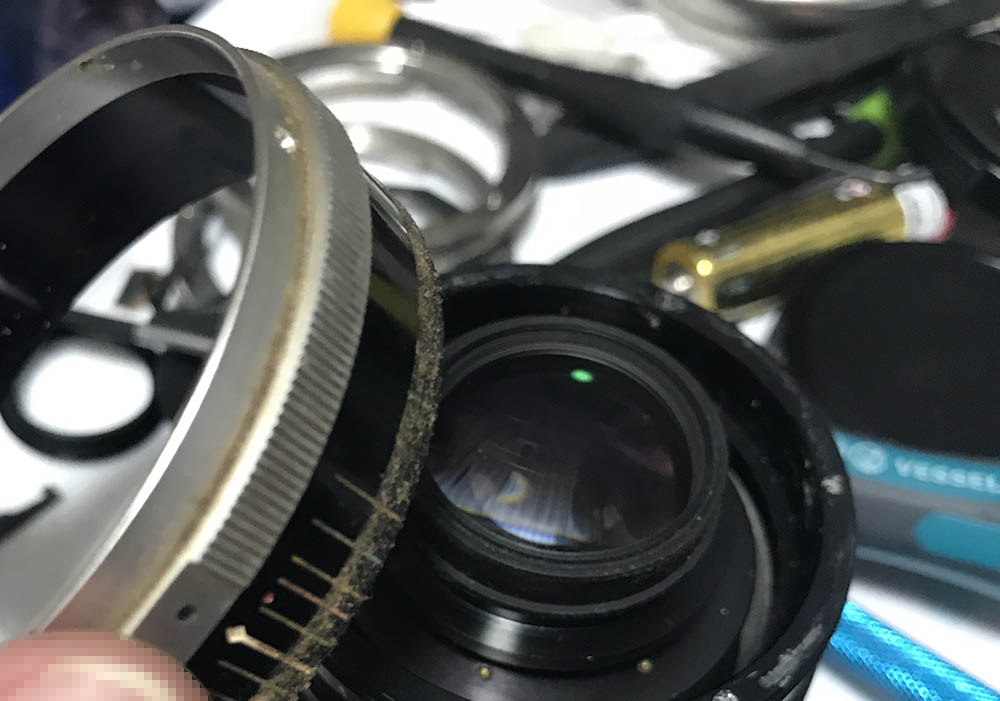
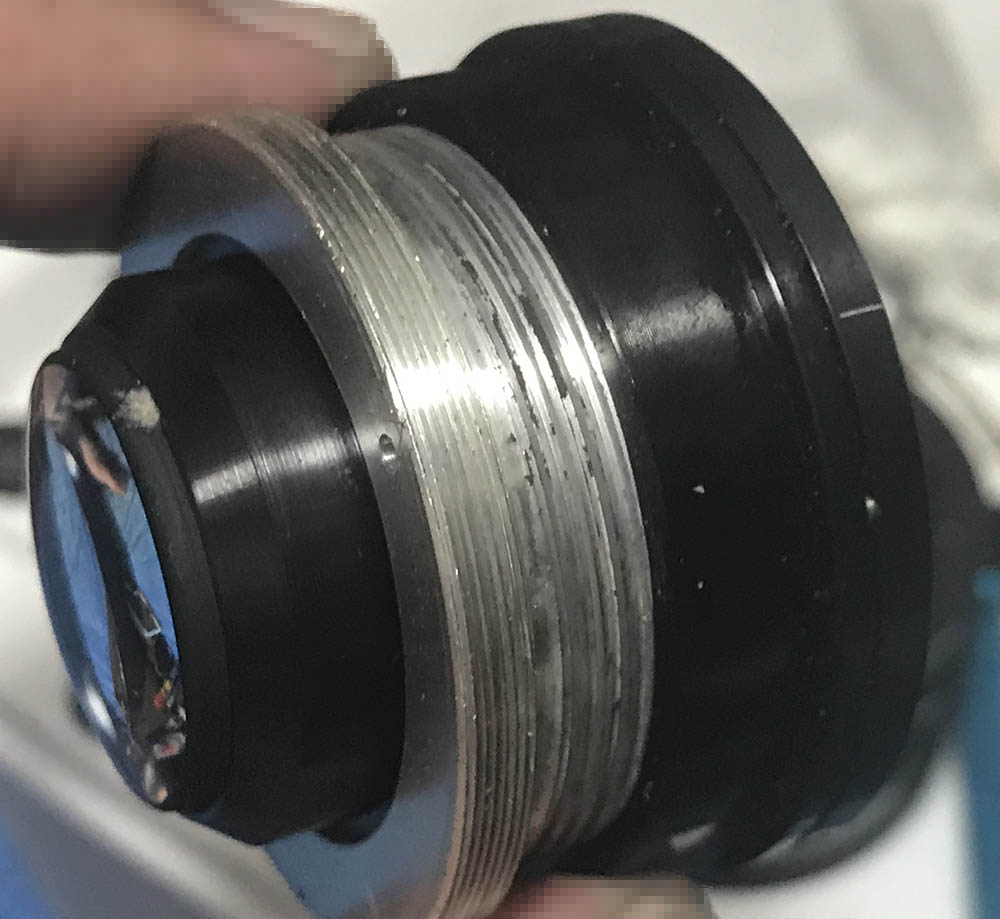
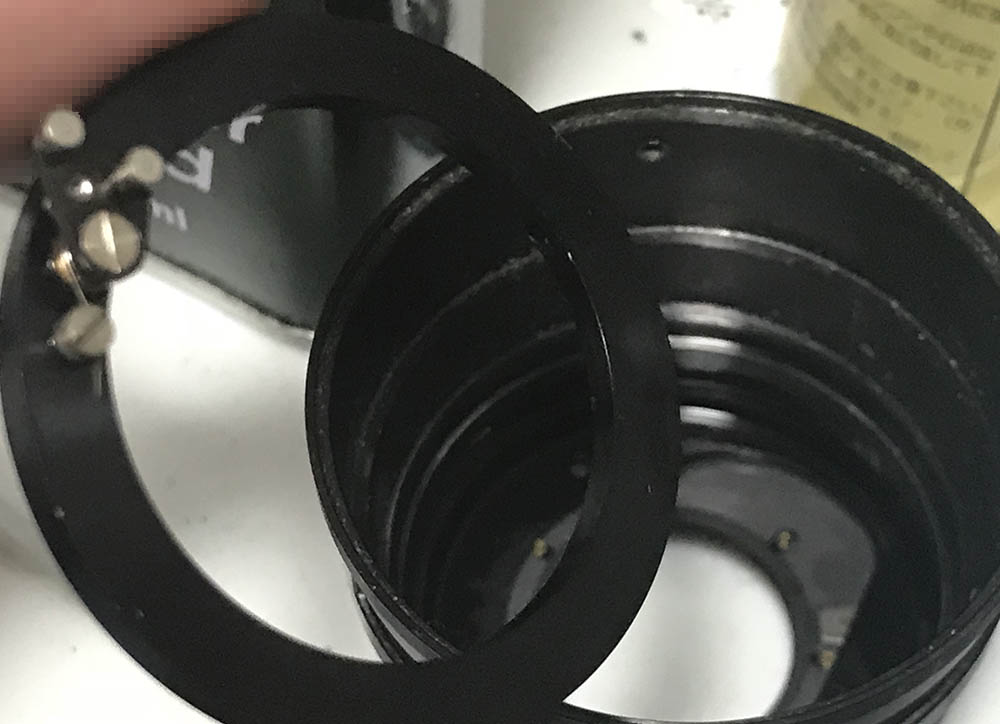
Since the construction of this lens is quite tight you are required to remove the front optics assembly in order to access some of the screws underneath it to remove the focusing ring. Set the front optics assembly aside for now, it should be stored in a safe place to prevent any damage to its rear.
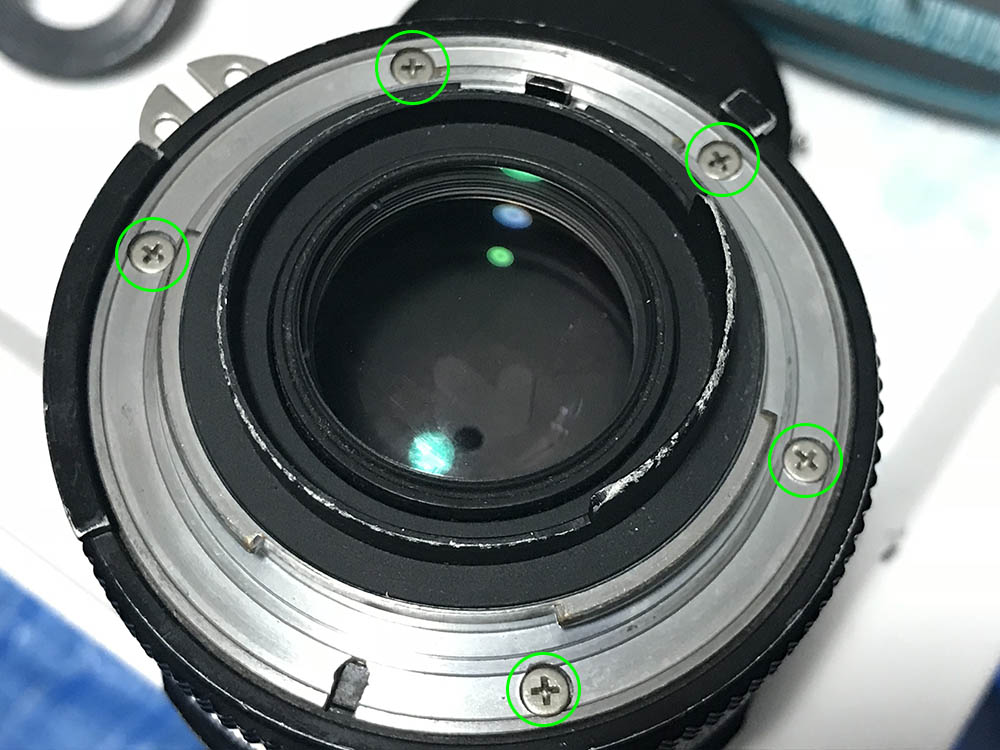
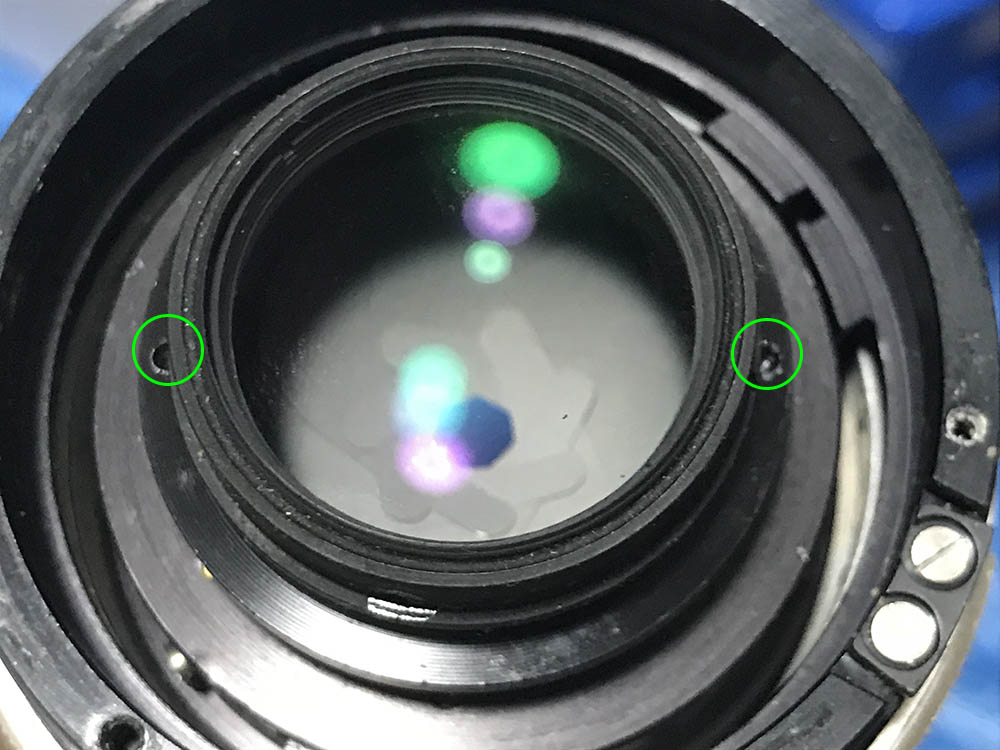
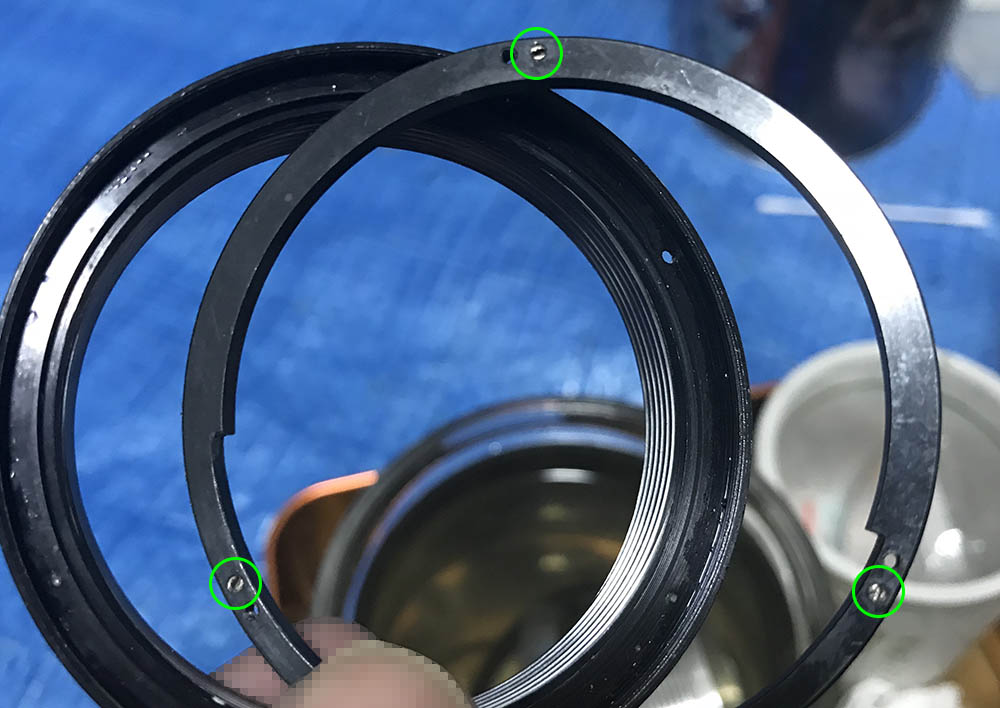
Remove the bayonet mount by extracting these screws. Use the correct type of drivers for these so you won’t end up stripping these. If you haven’t seen my article on how to remove bayonet screws, please read my article so your screws won’t get damaged. Many people don’t know how to remove these or use the wrong type of drivers and techniques, leading to a lot of suffering. It will be best if you follow my guidance so you won’t end up damaging these.
The bayonet can be easily removed once the screws are gone.

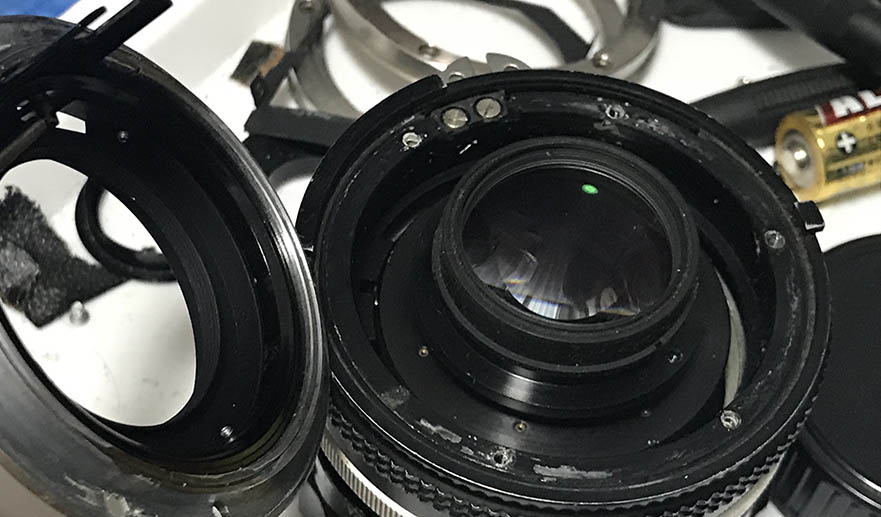
The aperture comes off next.
You can remove the rear optics assembly if you want but I would leave that for later since there are more things to take care of.
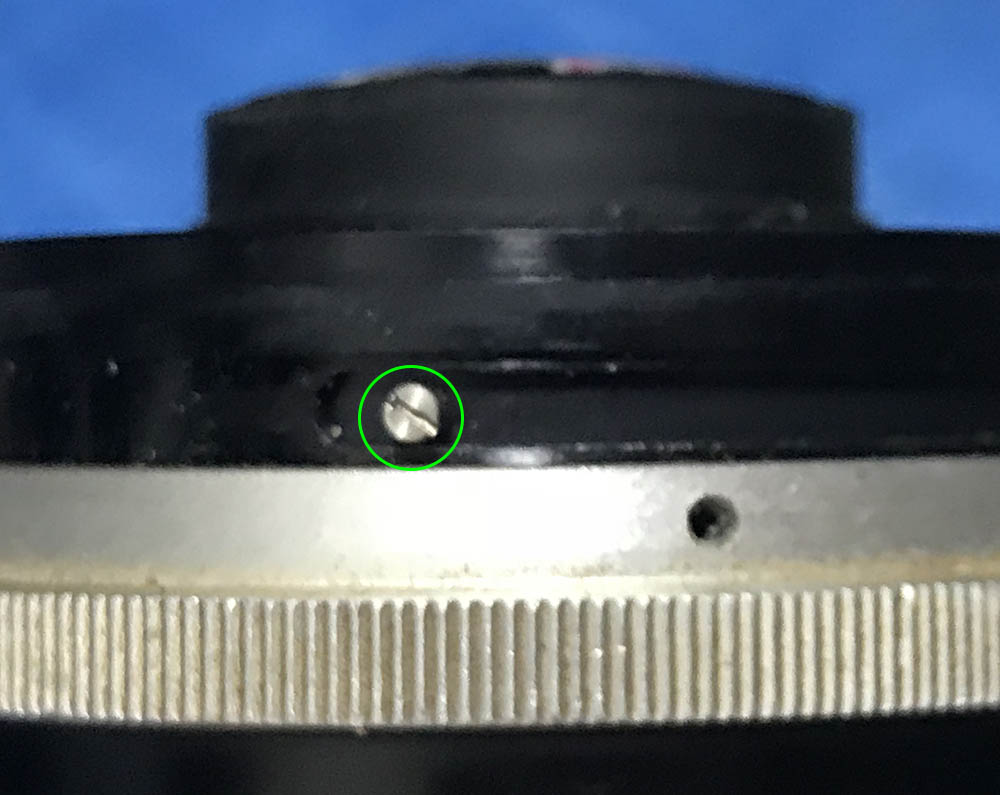
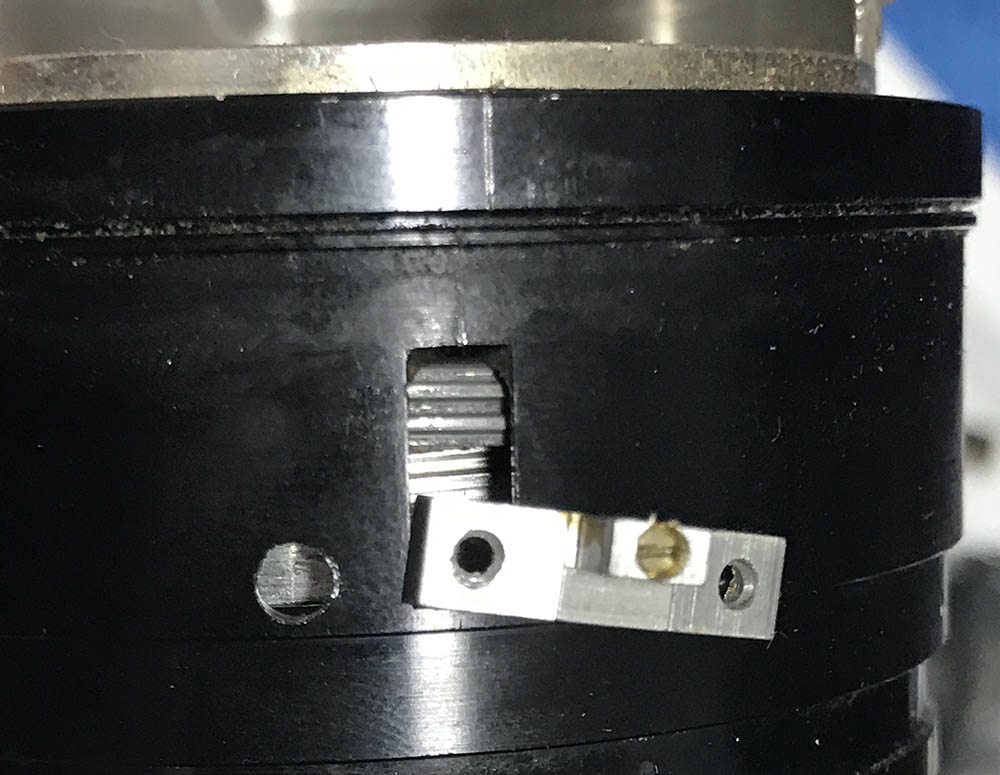
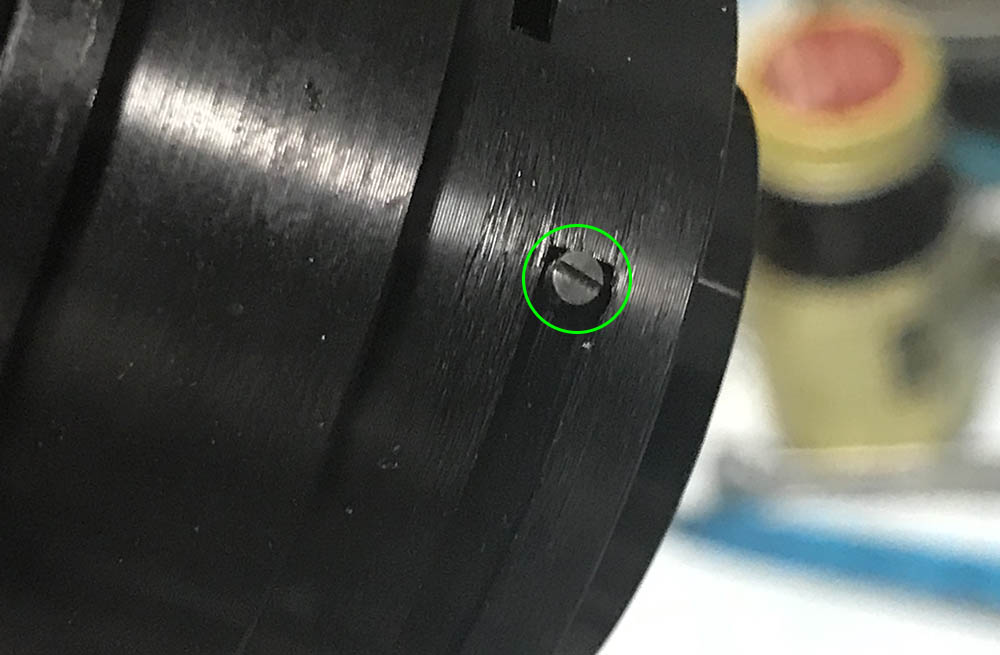
Extract this pillar screw so you can remove the sleeve and the grip. It links the iris mechanism to the aperture ring so turning the former will allow it to control the size of the iris.
Extract the screws of the grip so you can remove it. Use a driver that fits the head of the screws perfectly so you won’t scar the surrounding metal. It can be difficult to remove this at times and you should do that alcohol trick if it is stuck in order to soften the seal. Mine’s filthy, solidified grease can fuse it to the barrel and naphtha will be really useful here.

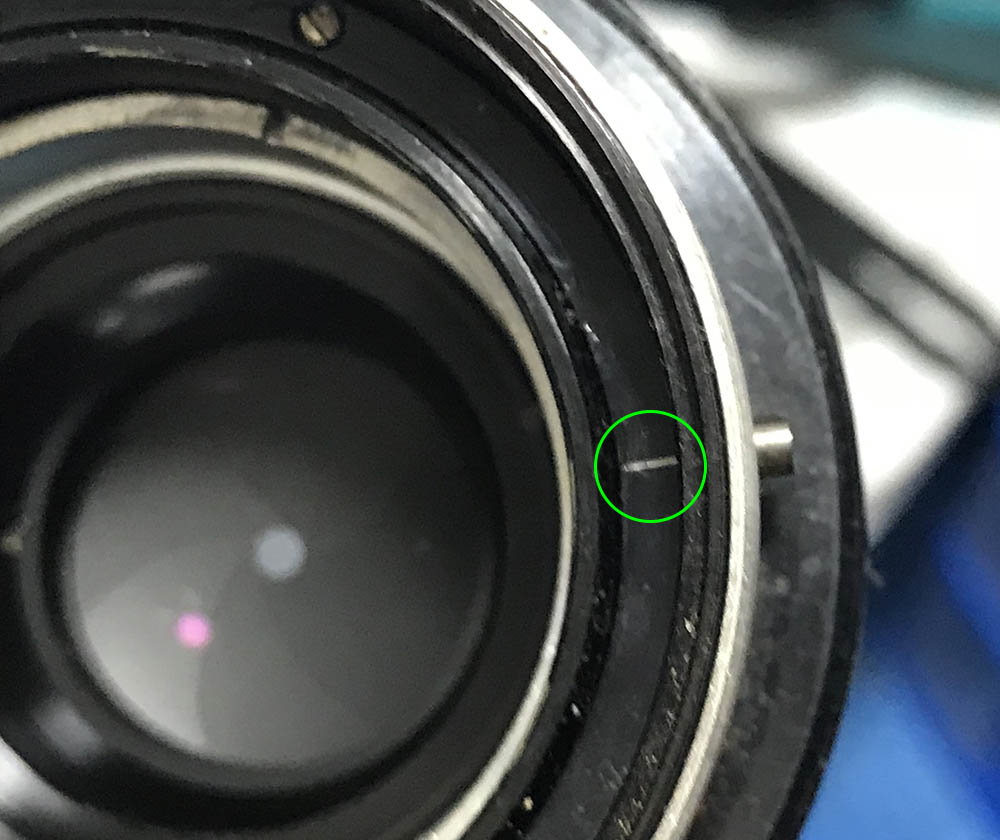
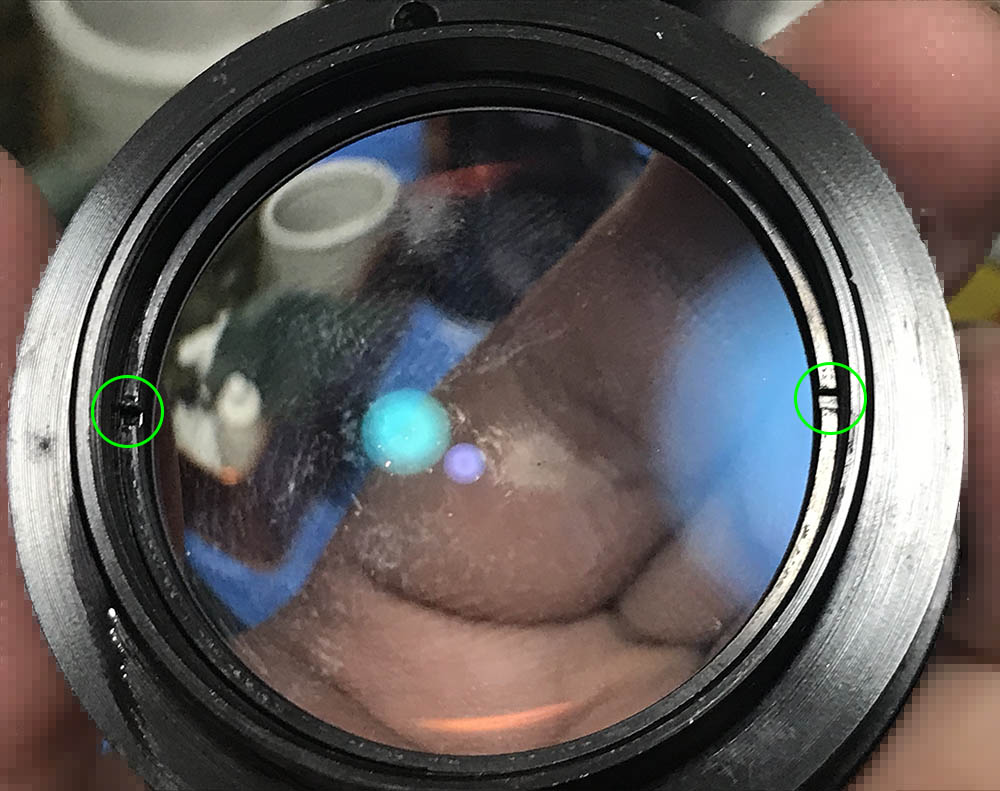
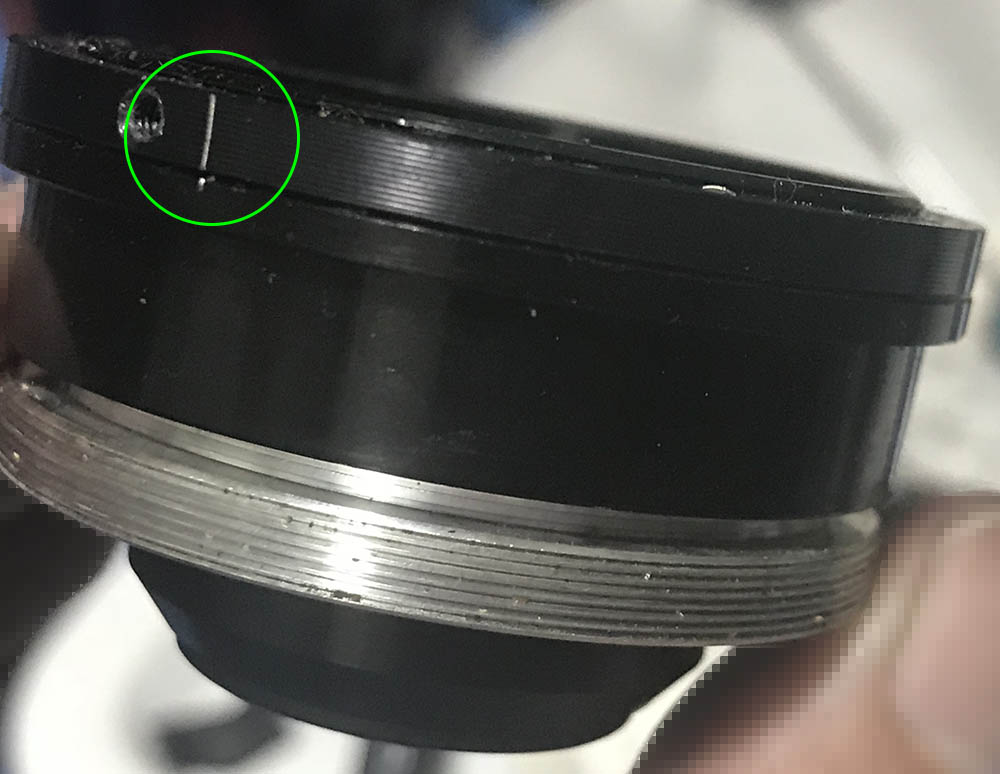
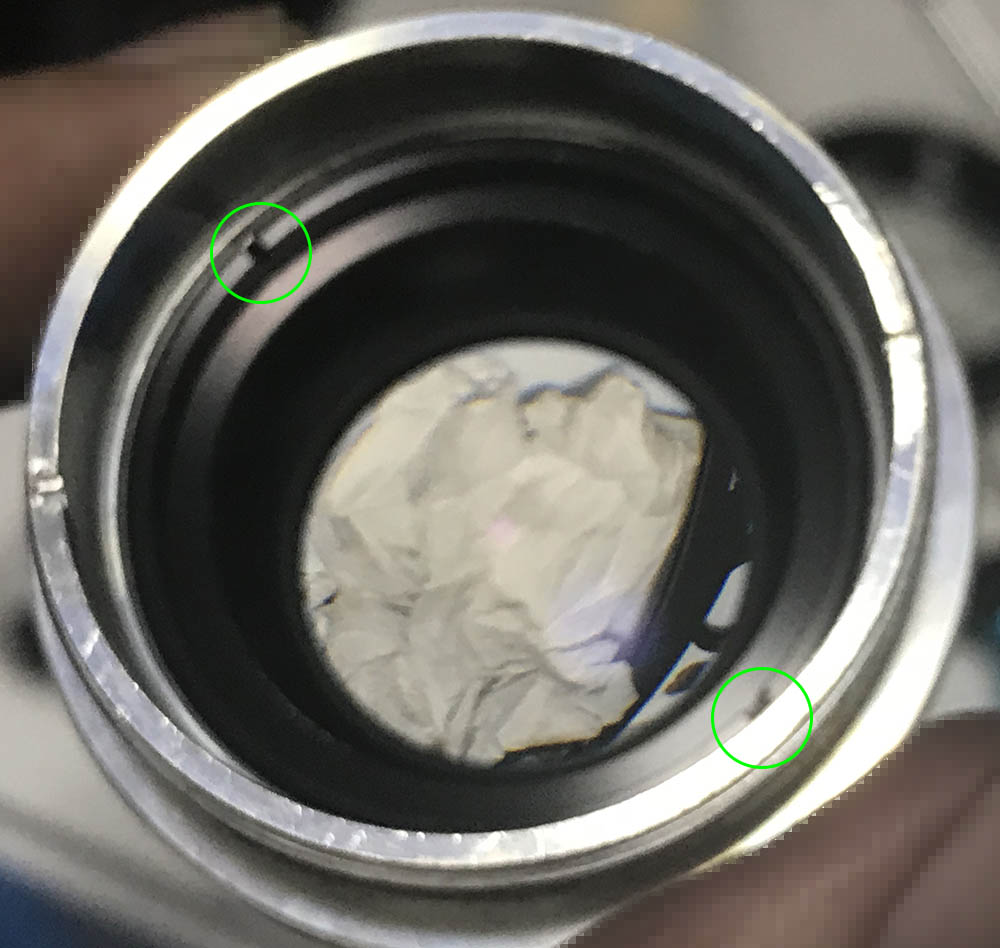
These screws secure the focusing ring to the helicoid, extract these and you can remove the focusing ring. Do note that there is a tiny screw that serves as a guide pin for the focusing ring, it does nothing except to help position the focusing ring. Do note that this is adjustable so you will have to mark its position before you remove it.
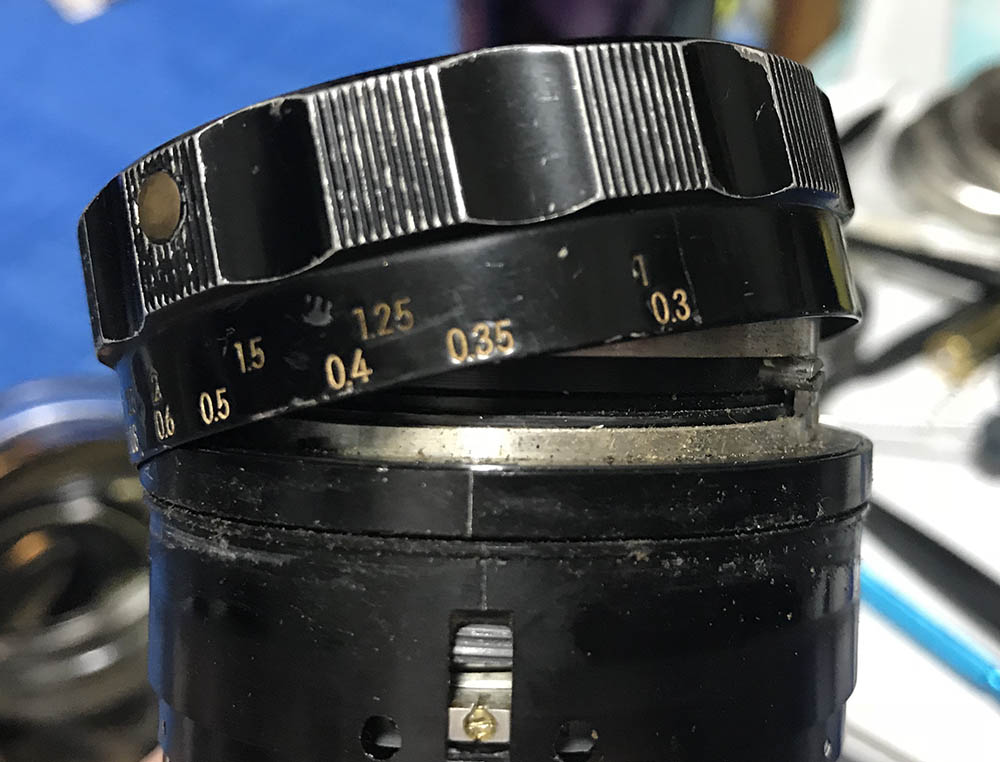
Removing the focusing ring should be easy but make sure that you damage the tiny guide screw in the process.
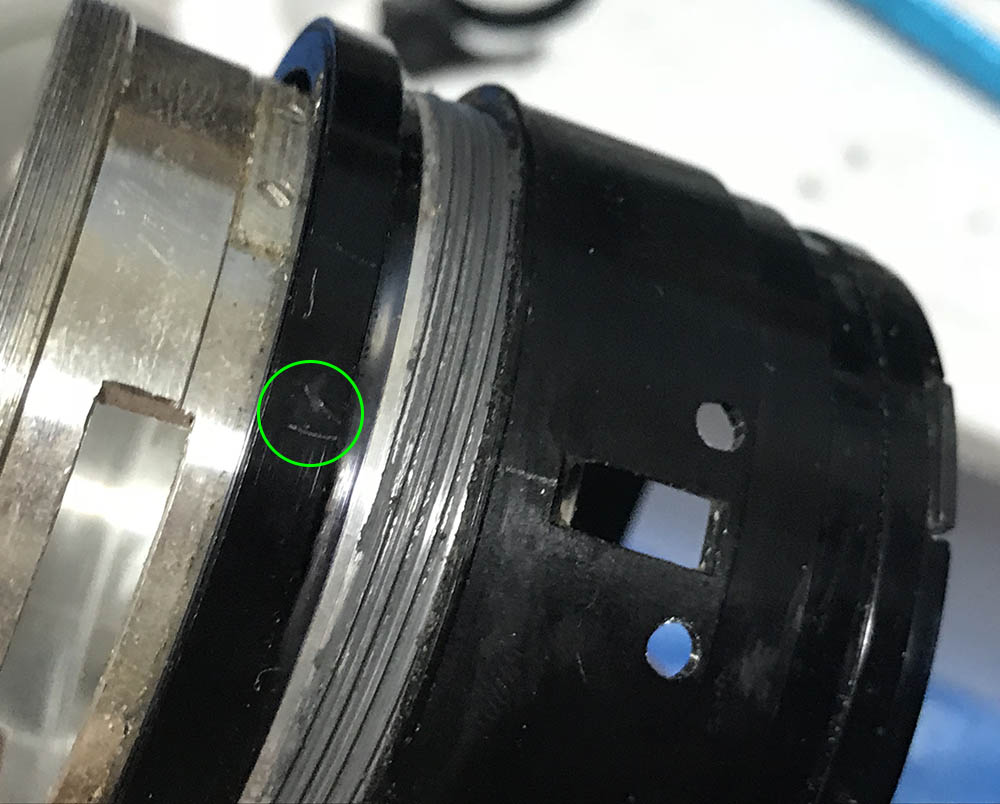
Before you pull the objective’s casing out of the lens barrel make sure that it is aligned properly. Somebody else made a mark here which corresponds to the position of the tiny screw at the other side which will be helpful later. It indicates the alignment of the CRC mechanism’s housing in relation to that screw. The screw couples it to the focusing ring so turning the focusing ring will turn the CRC mechanism, too. That screw has to be extracted, be careful not to damage anything in the process.
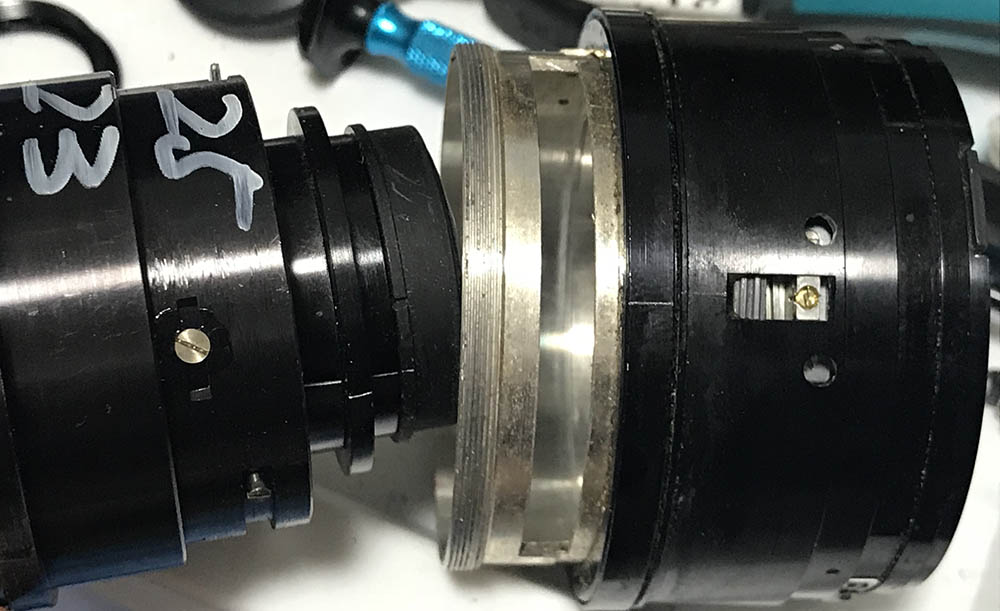
Pull the housing out but be careful not to disturb the CRC mechanism. This is important as you want to note its position later.
Remove the rear optics assembly and store it in a safe place.
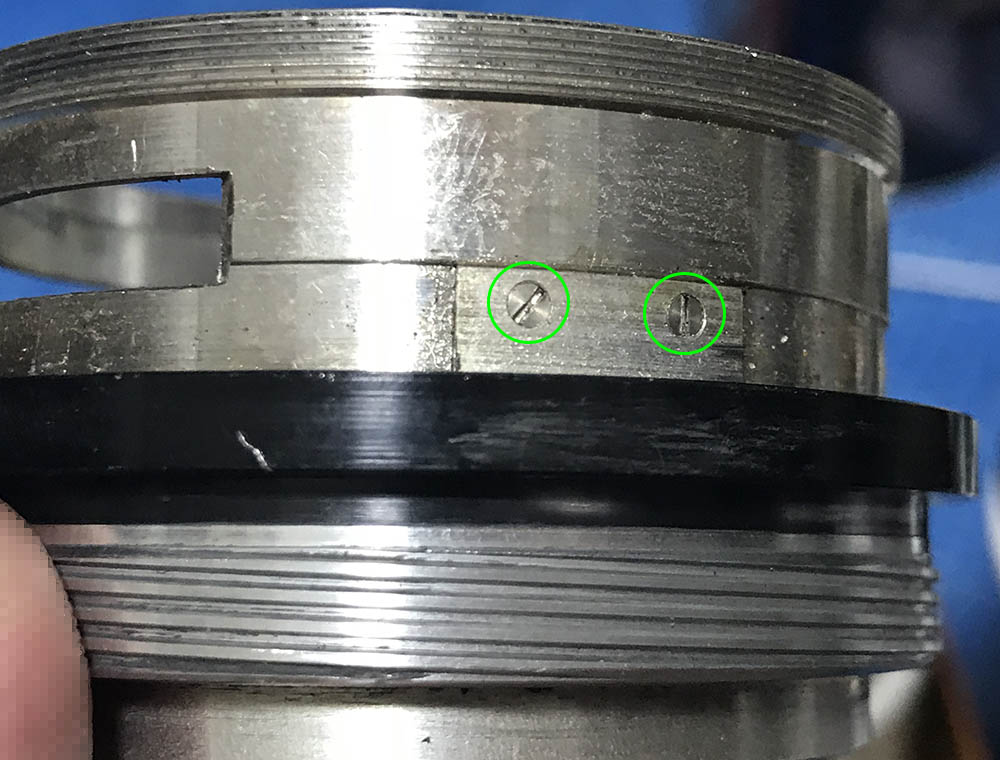
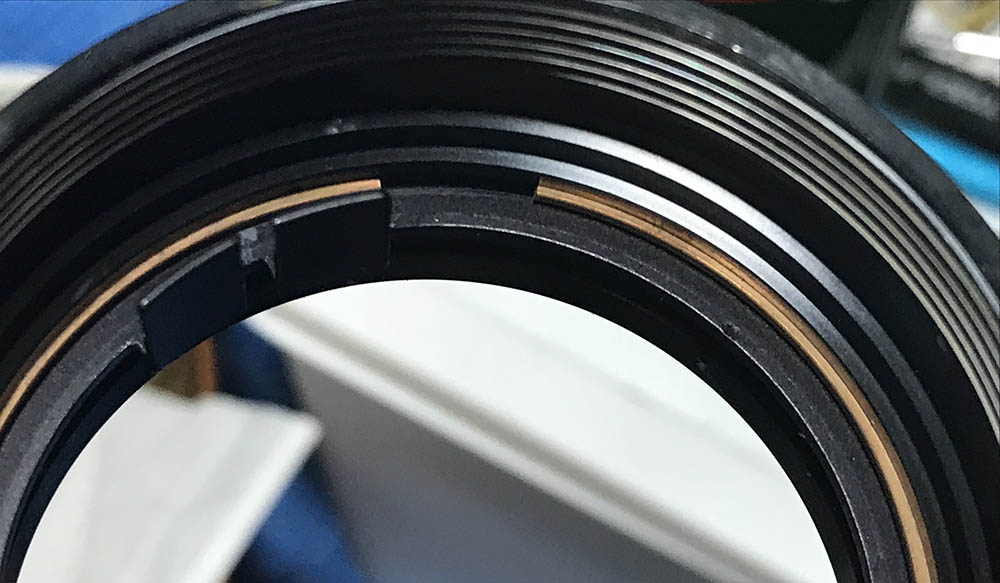
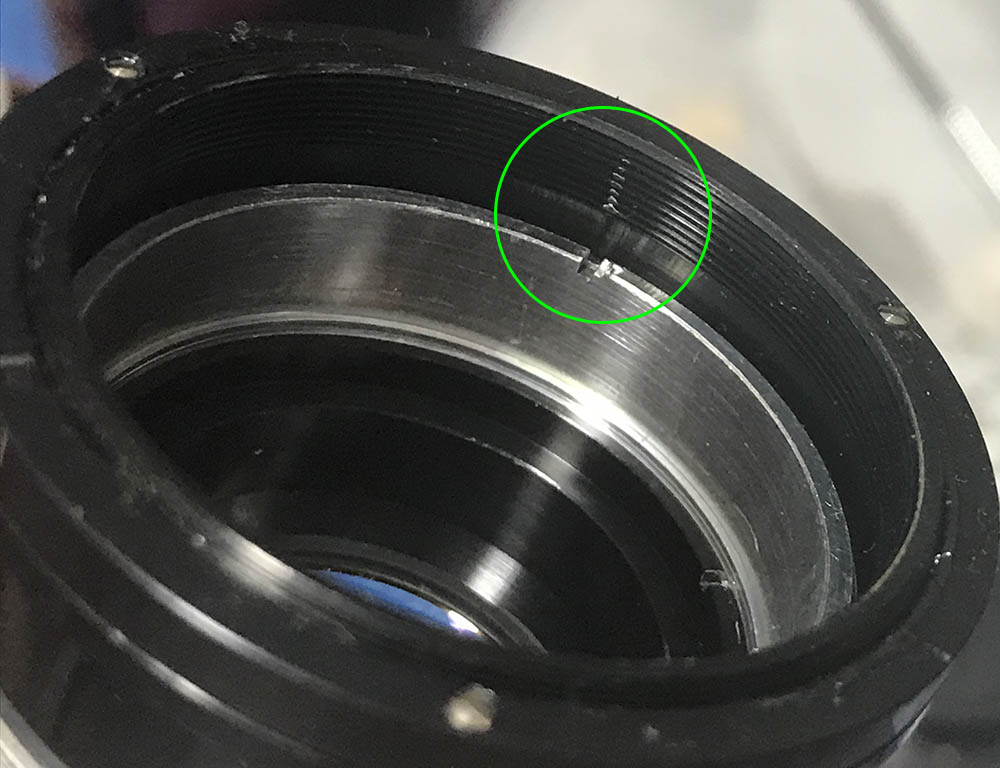
The helicoid key can be removed once its screws has been extracted. There are 2 access holes here that will allow you to do that. You may have to turn the helicoid a bit to reveal the screws.
The helicoid key constrains the helicoids so they all turn at the same rate. It allows the barrel to extend or contract as you turn the central helicoid.
Separate the central helicoid from the outer one and don’t forget to make a mark where they separated since this is also the same position where they will mesh. Many people forget to do this and they get stuck guessing where these should mesh. Read my guide on how to work with helicoids so you will not get stuck in this process.
Extract these screws so you can remove the helicoid stop. This prevents the helicoids from turning beyond the focusing range.
Once the helicoid stop is gone you can then separate the inner helicoid. The same rules apply to this so don’t forget to mark where they separated.
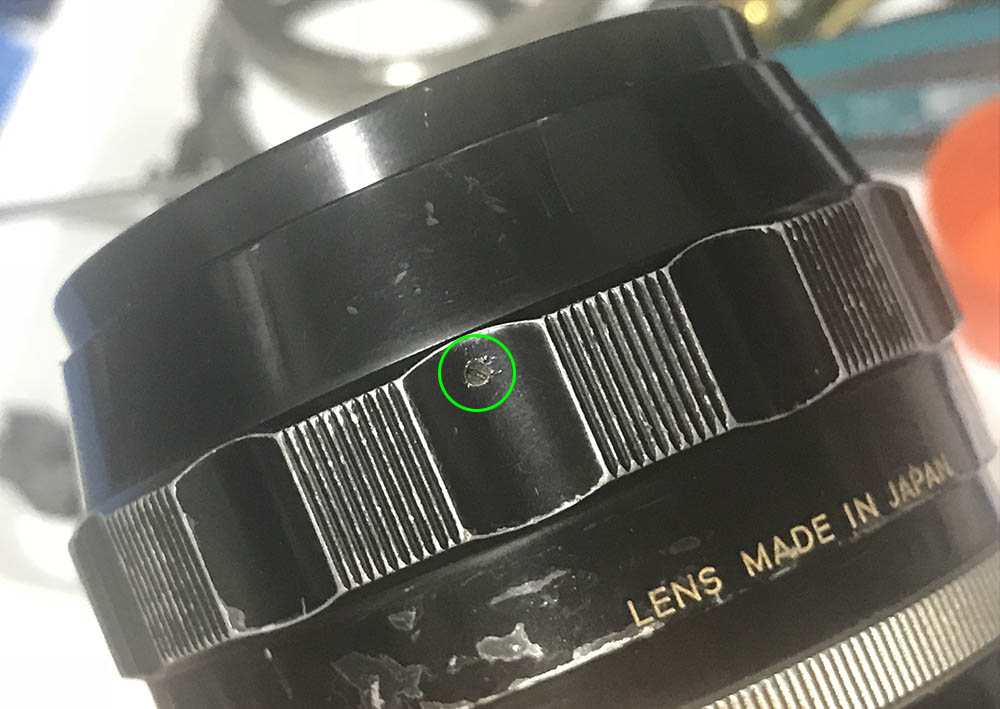
This is a delicate part of the helicoid’s assembly. These small screws should only be loosened but you should soak this part in alcohol first to soften the seals before you turn these or you’ll damage their heads. Once these screws are loose you can then turn the adjuster ring until you remove it. The ring is almost-always sealed at the factory and soaking this part in alcohol helps a lot. I usually soak these overnight before I attempt to remove this ring. This is easily damaged as the threads are fine and this part is delicate. This is the part that you should adjust when you’re calibrating your lens’ focus.
To remove the aperture fork and its ring, remove the brass ring carefully. A sharp tool or a pair of tweezers will be helpful.

Remove the ring and clean it really well.
Clean everything very well, never leave any oily residue, scrub everything. I even pickle some of the parts in an alcohol bath to remove residue. This will ensure that the fresh grease that you are about to apply won’t mix with the old one and get contaminated. While I would prefer using light grease on all of my Nikkors with CRC I used a heavier one on this since it’s a wide lens. It is an experiment to see if this would work. A lens with CRC has an extra set of helicoids in the form of the CRC mechanism so turning the focusing ring will actually turn both. To make sure that the helicoids won’t seize again it’s important to only apply a thin film of grease on the CRC mechanism. Please read the next section for more information.
Disassembly (Objective):
This is not your usual Nikkor because it has CRC, this makes it more difficult to service since there’s an additional mechanism to think about and it’s also delicate so you must be careful handling it. The optics are simple to repair, I didn’t see anything unusual with it and any guidelines that I use apply here. Take plenty of photos, note which side of the lens should be facing where. It took more time to service this compared to the objective of a normal Nikkor but that’s to be expected.
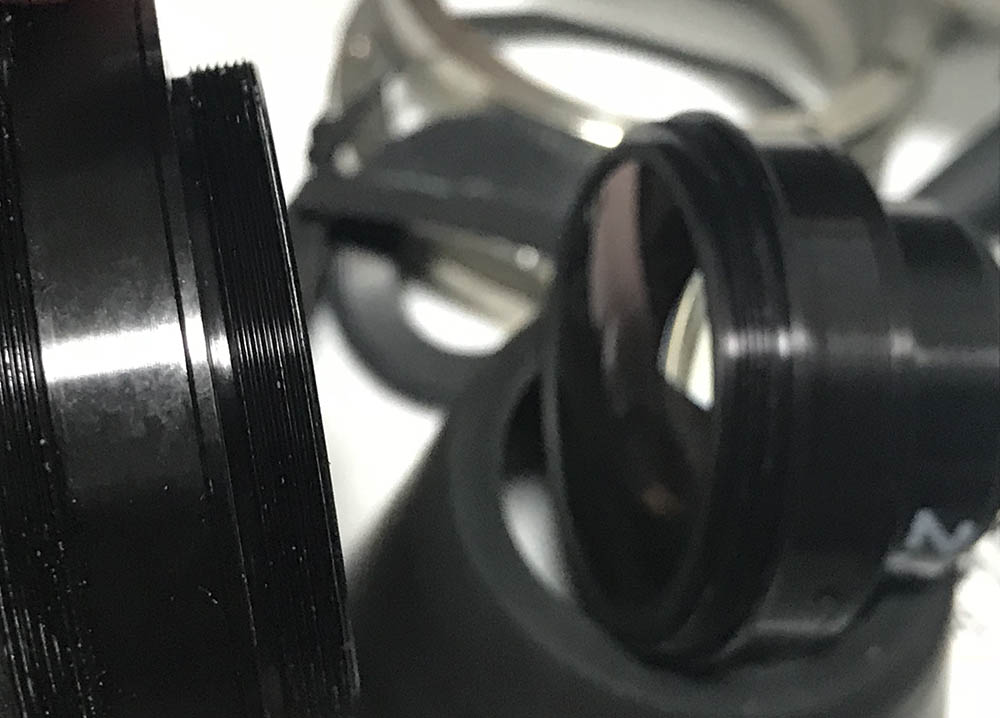
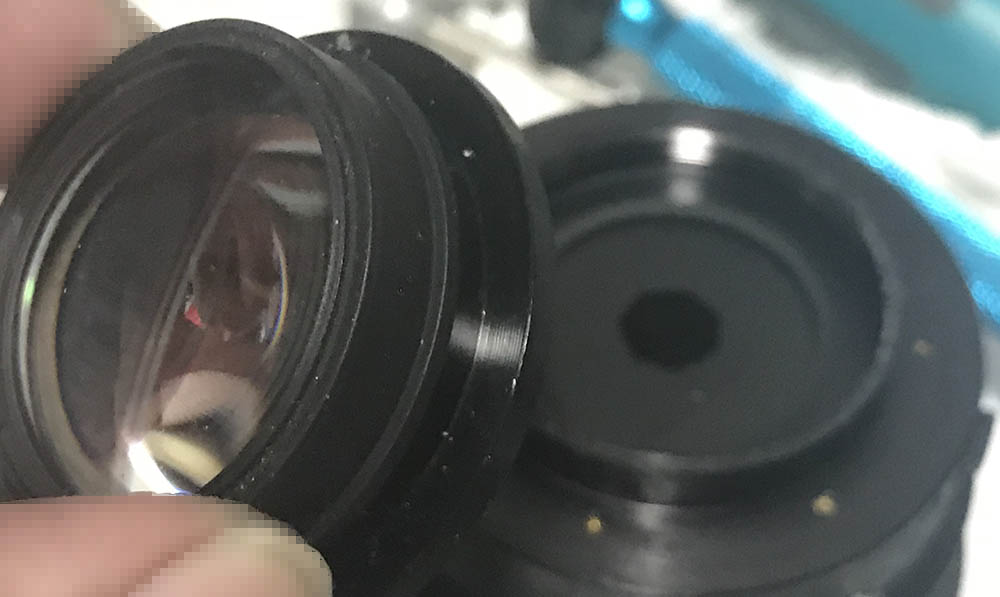
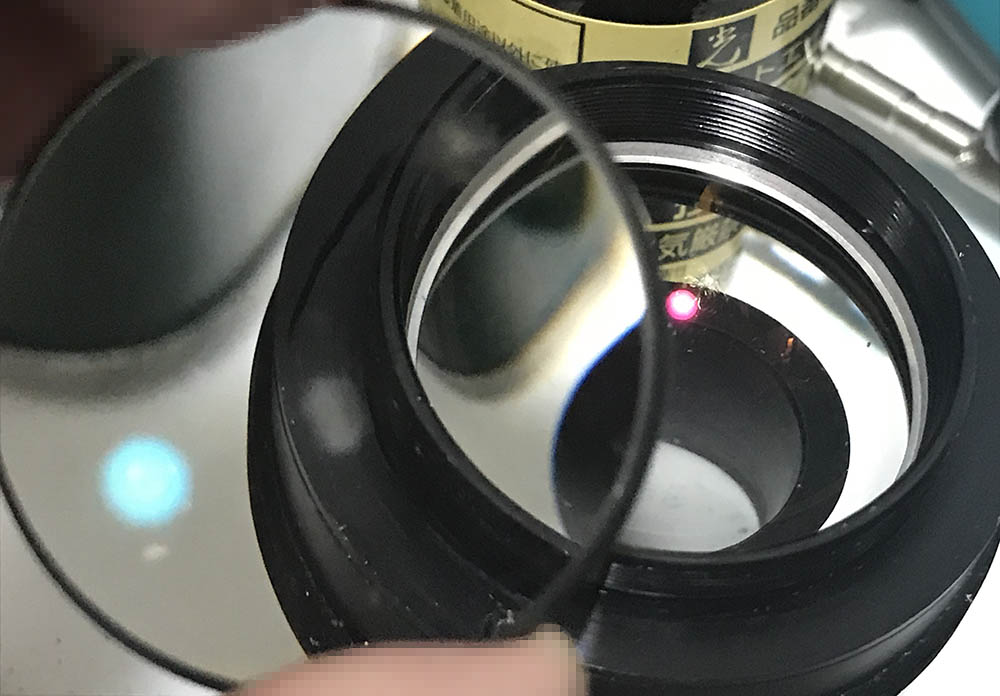
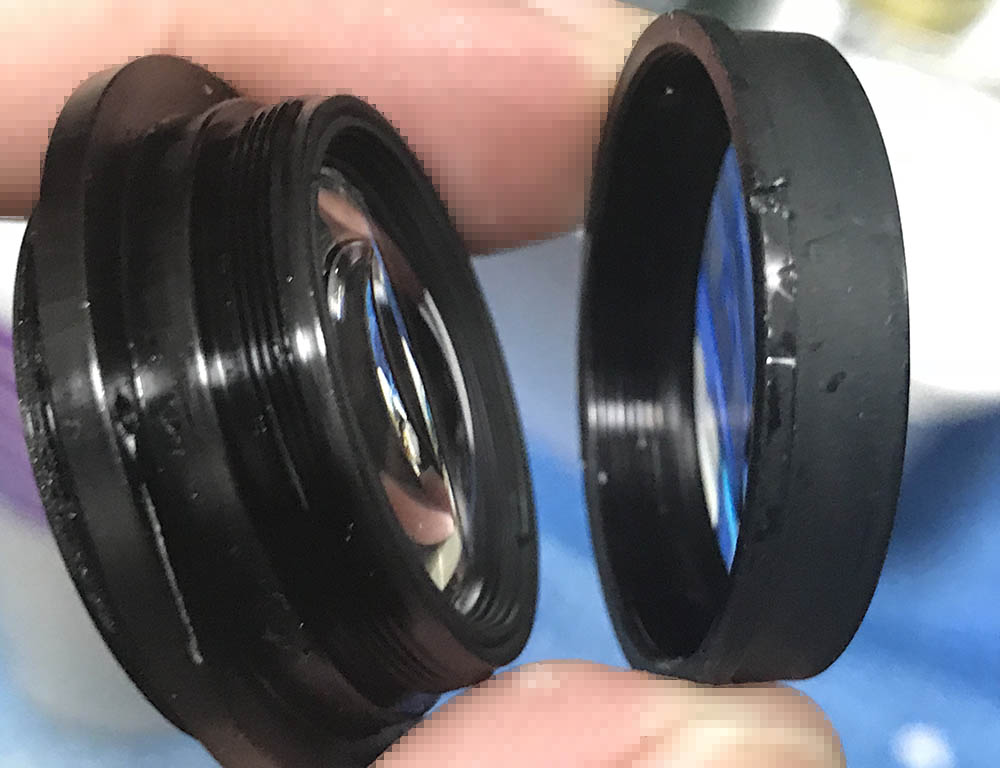
Separate the rear of the front optics assembly by unscrewing it.
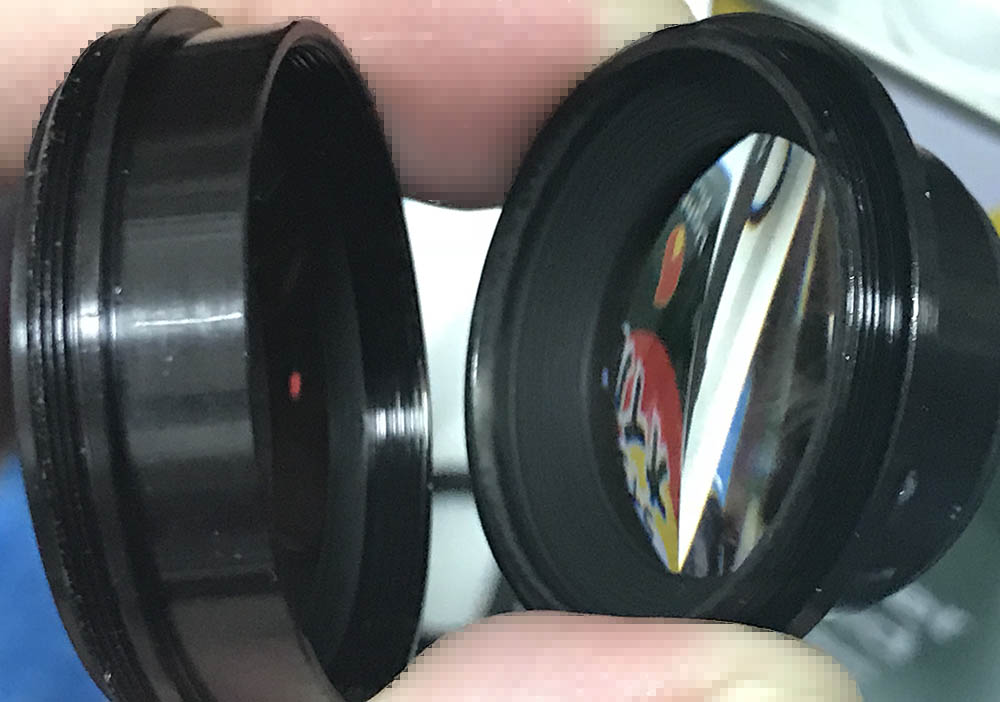
You can further dismantle it so you can get to the 3rd and 4th groups. Don’t flood this part with alcohol as the 4th group is cemented, this consists of the 4th and 5th elements, they were cemented to form a single unit and alcohol may damage the bond.
Carefully remove this ring with a lens spanner. If this is stuck a little drop of alcohol will do the trick.
Carefully remove it with a lens spanner.

Don’t loosen these screws at this moment. These secure the adjuster ring, if you removed these without documenting anything you’ll have a hard time putting things back. You can remove the central elements and the casing of the CRC mechanism by using a lens spanner on the bare aluminum part. Be careful doing so because if your hand slips the glass will be scratched.
This mark should help you align the adjuster ring later. You can remove the adjuster ring once you’re satisfied with your notes. There really is no merit in doing so unless you want to do a thorough job.
Collapse the CRC mechanism and make a small mark. You should be able to reproduce this later during reassembly.
The CRC mechanism is basically a tiny helicoid so you should mark the spot where they parted. The 6th element is vulnerable so be careful not to scar it and never attempt removing it from its housing as it’s sealed.
You can remove the 6th element’s housing with a lens spanner. Use a lot of care so you won’t scratch anything.
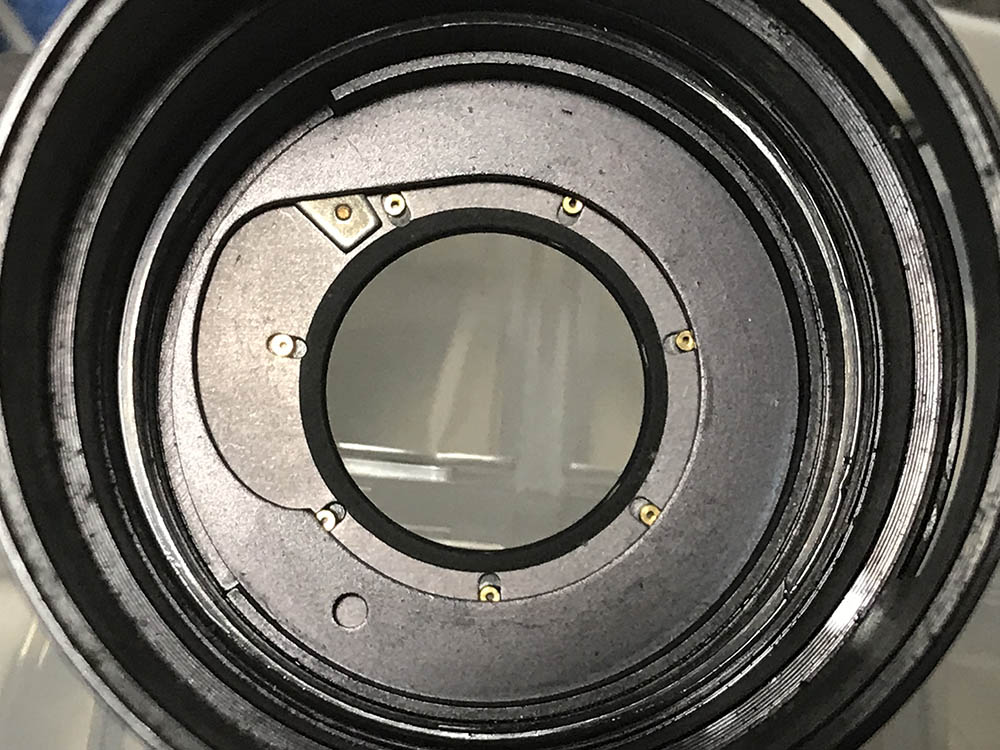
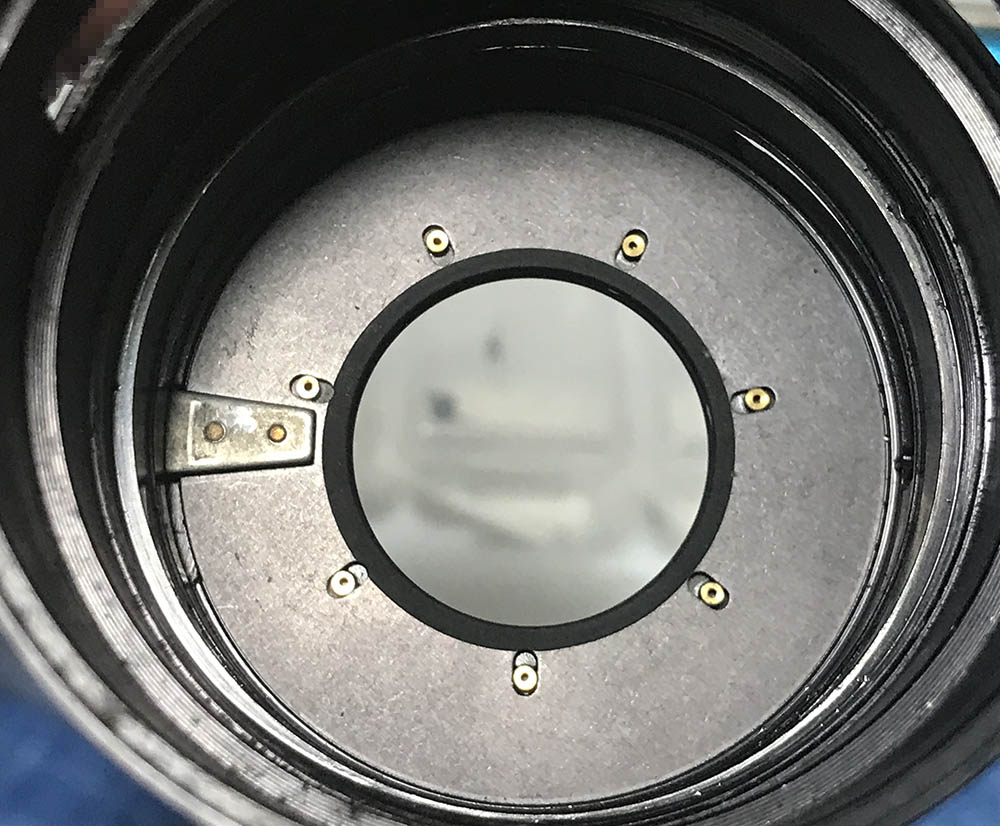
The rear optics assembly consists of the 7th, 8th and 9th elements. You can access them all by removing the housing of the 9th element and removing their respective retainers.
Everything looks standard here except for the CRC mechanism. You do not want to dismantle everything like what I did unless your lens is so filthy it’s the only option left. Clean everything well and make sure that you don’t use a lot of grease on the CRC mechanism, a thin film goes a long way.
Disassembly (Iris Mechanism):
I will usually leave the iris mechanism alone unless it’s oily or the lens has a bad case of fungus so skip this if you don’t have to do this step. This does not look any more different than your usual Nikkor iris mechanism so if you’re an experienced repairer this one should be a simple task.
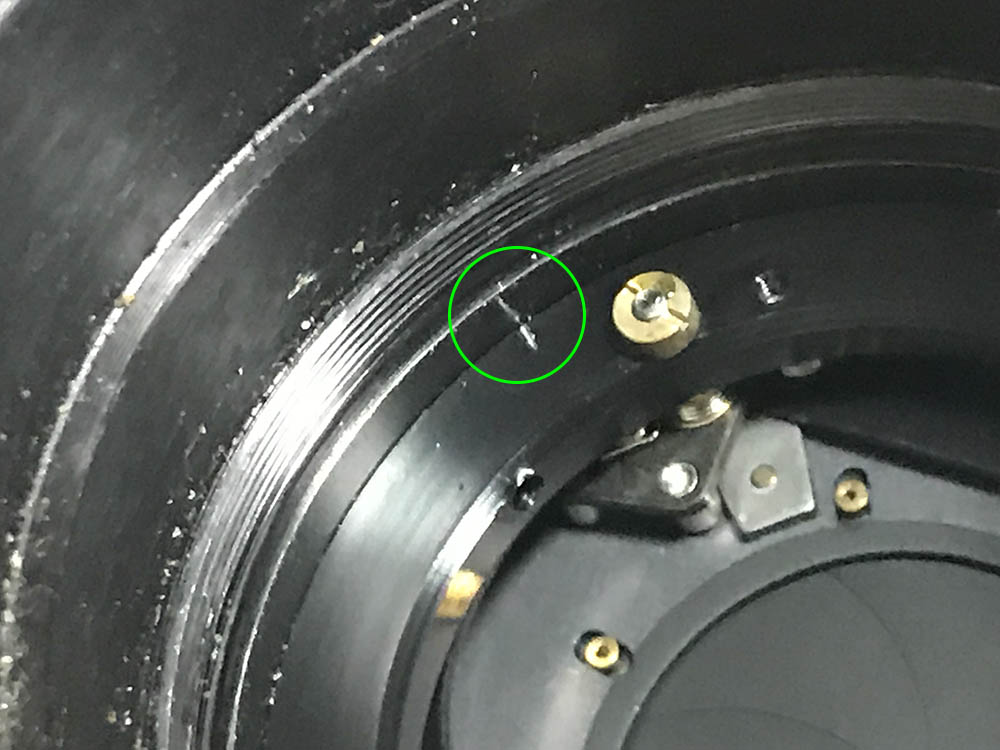
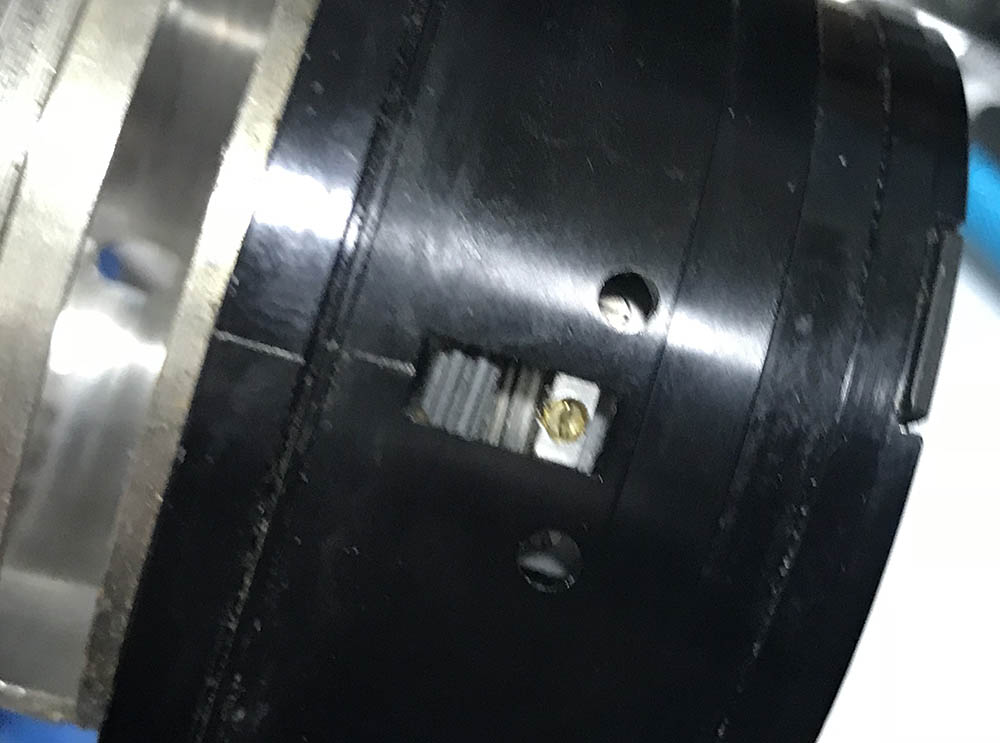
The iris mechanism is adjustable so make a small mark to help you align it. This will be very helpful later.
The iris mechanism is being held by these screws. Remove them and you’re able to remove the iris mechanism’s ring and its depressor mechanism.
Carefully remove the ring and make sure that you don’t damage the delicate mechanism and its spring.
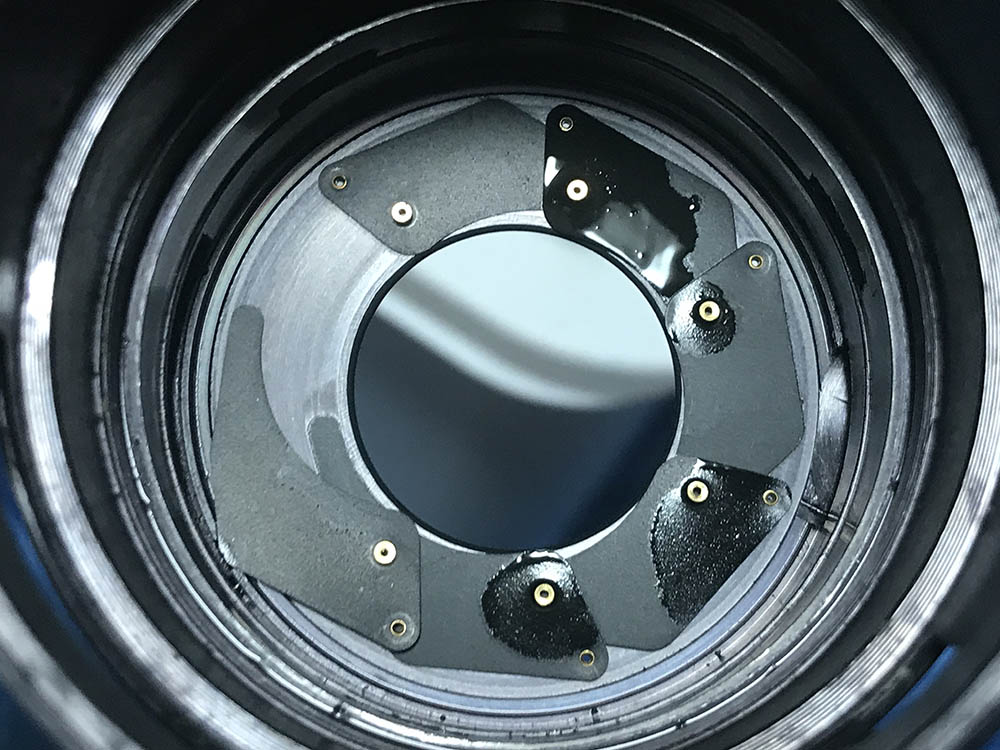
This regulator plate holds the iris mechanism together as well as control the size of the iris by limiting the actuation’s range. Make sure that you put this back together facing the right way later. Do not remove it yet until you have done the next step.
Extract this screw to remove the regulator plate. Be careful not to snap it off as it’s a delicate little thing. This is coupled to the aperture fork and turning the aperture ring will turn this thing, too. Once this screw is gone it’s safe to remove the regulator plate.
This leaves us with the rotator ring. This delicate ring actuates the iris and it is responsible for keeping the blades together. Remove it by pressing on the tab from the outside to lift it up and carefully pick it off with your fingers.
The iris blades can now accessed. Carefully remove them and make sure the pegs of the blades are safe since they can snap-off.
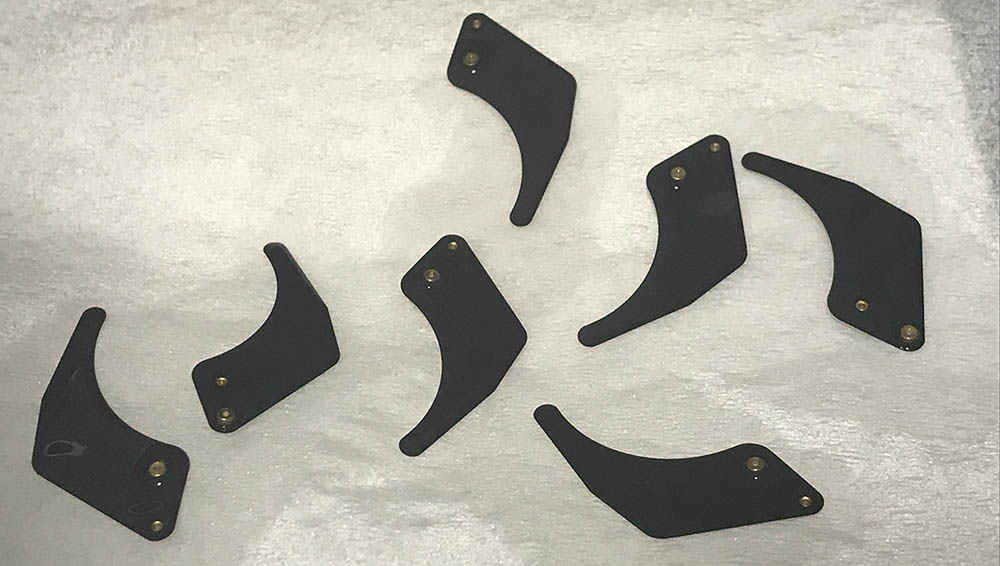
Clean the blades thoroughly. I cleaned them by wiping them with naphtha, I don’t like air-drying these since that will leave drying-marks.
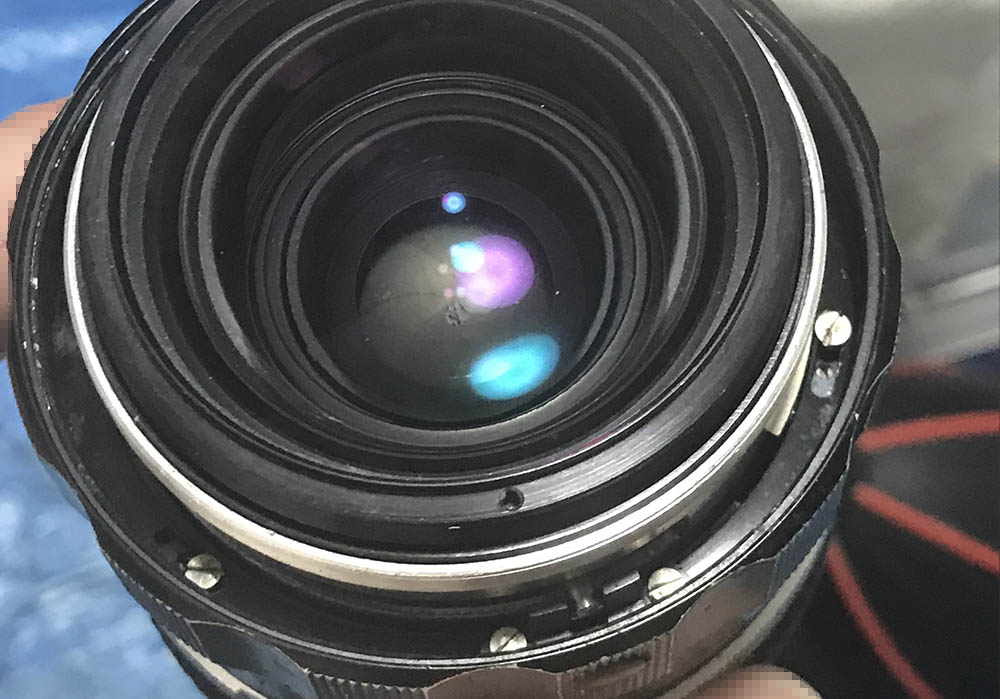
Carefully reassemble the iris mechanism. Make sure that the blades are flat and they’re facing the right direction. Actuate them manually and see if the iris closes smoothly and evenly. Never lubricate anything here or anything that’s situated close to this mechanism.
Conclusion:
I had a wonderful time repairing this lens. It took me plenty of time to fix it but it was all worth it. All-in-all, I probably spent around 3-4 hours working on it because everything had to be cleaned properly because of fungus. This lens was filthy when I got it but it’s now super-clean. I a lot of great pictures with this lens and I was glad that I took the time to overhaul this gem. They are usually sold above the $150 mark and the only way for me to own this is to look for a junk lens to restore.
Reassemble everything back until you get to this state. You can now adjust the focus of your lens by loosening and tightening some screws after minor adjustments. If your lens won’t focus properly with minor tweaks then that lens has been reassembled improperly. If you want to know to calibrate the focus of your lens read my article on adjusting a lens’ focus and follow what I outlined there.

There is nothing more satisfying than seeing a damaged lens brought-back to working order and taking excellent photos. You don’t need an expensive, auto-anything lens to take great photos, all you need is a lot of patience and the ability to visualize how light works. Shooting film helps a lot, too. You’re constrained by its rules and you learn to work under it.
Thank you very much for following my work. if you found this useful, share this with your friends in social media and help spread the word about what I am doing. If you love this blog and you want to help this continue, help me by supporting this blog. Your support helps me maintain this as it offsets the cost of maintaining this blog. You also help me buy, process and digitize film so I can show you photos that were taken with film. This makes the blog the only review page about Nikkors that showcases film photos regularly. That’s something that I am proud of and I’d love to continue doing this for as long as I can. Thank you and see you guys again, Ric.
PS: Many thanks to our friend, Roland Vink for his guidance and expertise.
Help Support this Blog:
Maintaining this blog requires money to operate. If you think that this site has helped you or you want to show your support by helping with the site’s upkeep, you can make a small donation to my paypal.com (richardHaw888@gmail.com). Money is not my prime motivation for this blog and I believe that I have enough to run this but you can help me make this site (and the companion facebook page) grow.
Buy me a roll of film or a burger?
Thank you very much for your continued support!
$2.00
Helping support this site will ensure that this will be kept going as long as I have the time and energy for this. I would appreciate it if you just leave out your name or details like your country’s name or other information so that the donations will totally be anonymous. This is a labor of love and I intend to keep it that way for as long as I can. Ric.

Dec 04, 2022 @ 20:22:47
Serial Numb. 293861 Nikkor-N Auto
This one has a yellow tint, I think I need WB down to 5000 K to keep it rendering like 5600 K. Radioactive ? Or solarized lens ?