
Hello, everybody! The Covid-19 outbreak is becoming a serious problem, it’s disrupting everything here and everybody’s lives are affected by it. It’s hard to find masks and even toilet paper in recent weeks. This is something that I have never seen since SARS. I hope that people will find a cure for this, it’s a huge problem and it will only continue to spread if not checked. We should never lose hope because doing so is accepting failure. This blog is all about hope as we restore old, broken equipment. Today, I’ll show you something that I found at the junk box. The previous guy who worked on this lost hope in this lens but I won’t give-up on this because I am all about fixing Nikkors.
Introduction:
The Zoom-Nikkor 28-50mm f/3.5 Ai-S is a unique lens. It’s unique because of its compact dimensions and it has a fixed-aperture when zooms at that time normally have variable-apertures unless you opt to buy the expensive ones that were made for professionals and they’re never as compact as this. This is such a lovely lens but it was only made for 2 years after it debuted in the mid-1980s, which is a shame because it’s such a practical little lens. This is a great partner for the Nikon F3 and some other smaller Nikons.

The appeal of using this lens is it’s compact and light. With a fixed-aperture, it was aimed at the advanced amateur and professional. Professional-grade Nikkors are usually fixed-aperture lenses with a decent speed of no-slower then f/3.5. This also has a practical zoom-range of 28-50mm, making it more useful for the working photographer. It’s a “pumper-zoom” wherein you’re treated with a comfortable piston-action focusing and zoom ring in one unit for easy and quick focusing and framing changes. I prefer this type of setup over the usual 2-ring option that has become normal these days.
This has a totally-new 9-elements-in-9-groups design, by that I meant that its optical formula is very-much different from most Zoom-Nikkors of its class where cemented elements are the norm. I don’t remember repairing a lens that has something similar to this optically, most of the 1980s Zoom-Nikkors follow a certain schematic that varies somewhat from lens-to-lens. This felt like I was repairing a lens that was made by a different manufacturer. This lens had Nikon Integrated Coating (NIC) applied to it. How effective is this? I will show you later in the sample photos section.
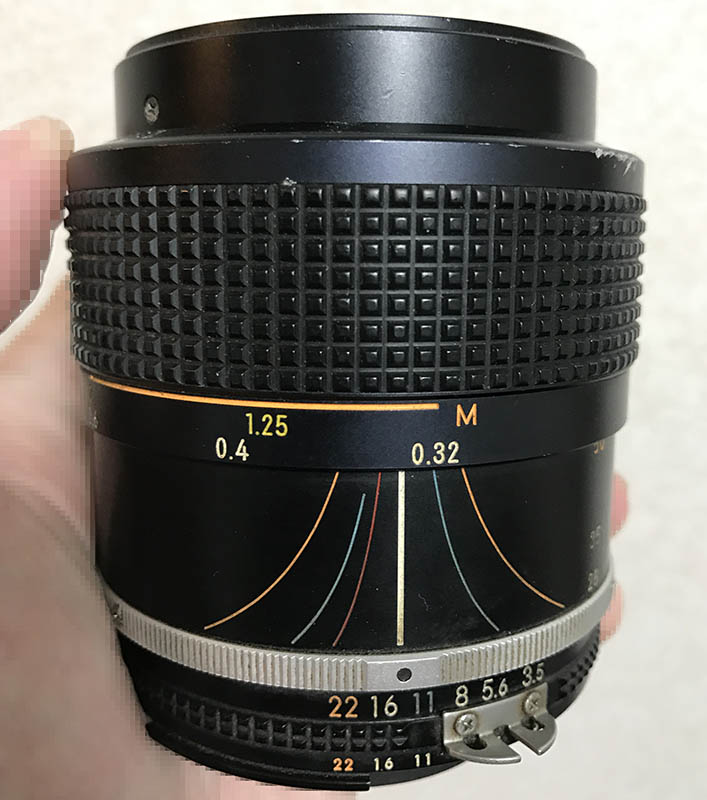
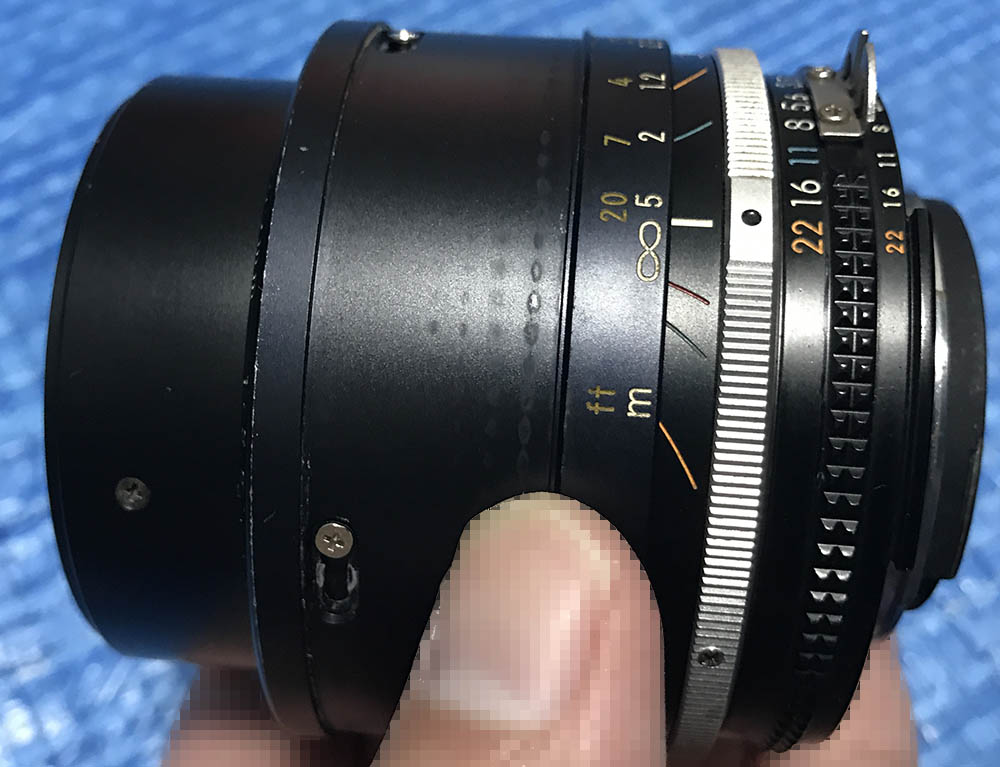
It’s a handsome little lens. The beautiful engravings make this lens look like a German guppy with all its colorful markings which are informative. I love the older Zoom-Nikkors because of this. The bold orange line with an “M” is there to denote that you’re focusing-past its minimum focusing range and it is now in “macro mode” which is just the lens over-extending itself. You can now focus much closer. Unlike the Zoom-Nikkor 28-85mm f/3.5-3.5 Ai-S, this one does its fake “macro mode” at the long-end instead of the wide-end, that is very useful since you actually get more reach with this lens that the latter one. This is handy for taking details and other small things such as wedding rings or even bugs if you have no other options.
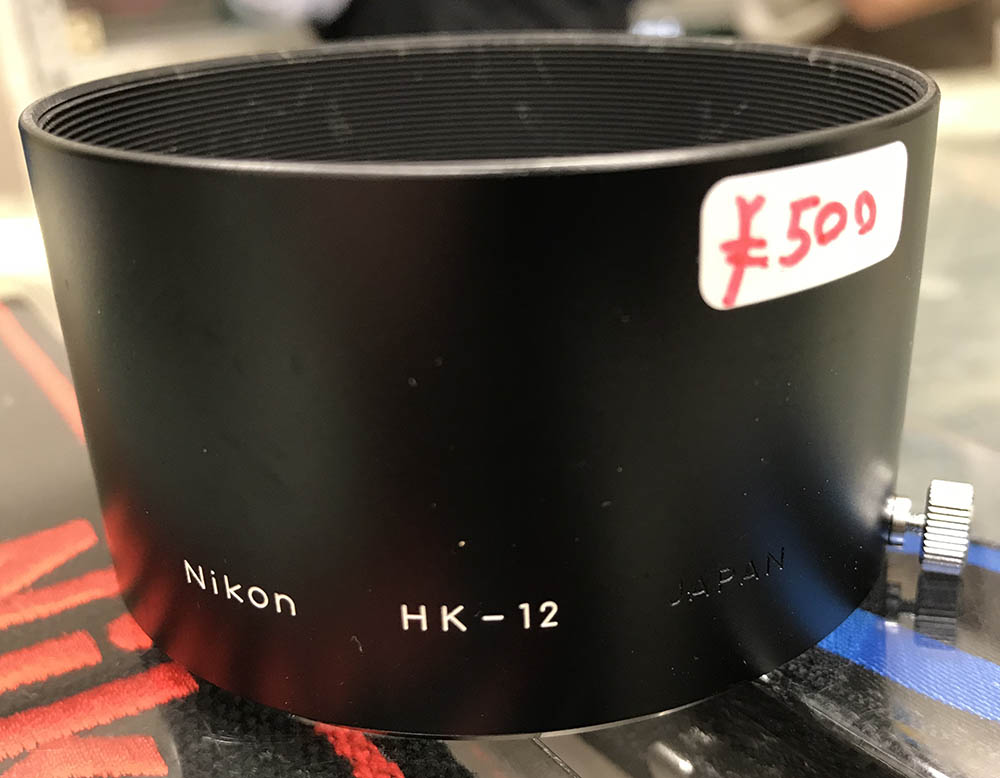
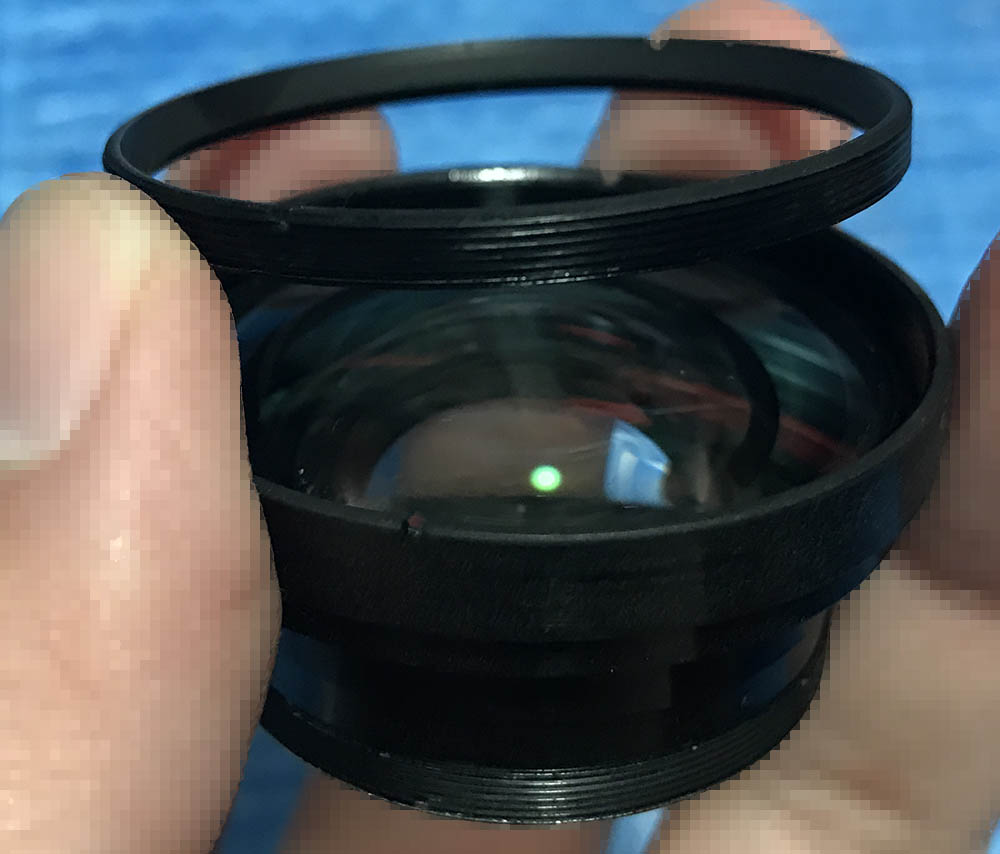
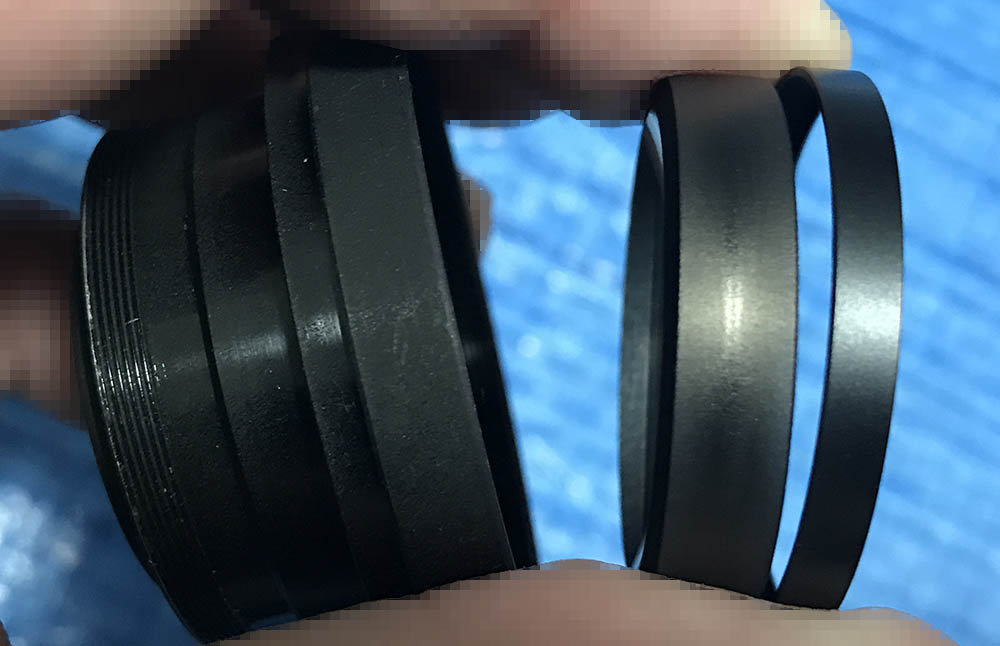
Here’s its dedicated hood. This is usually an expensive accessory due to the rarity of it. Not many people bought this lens back then, even fewer people bought the hood so this is now a rare item. I was lucky to find one cheap, it’s an important accessory and you should always use this lens with it.
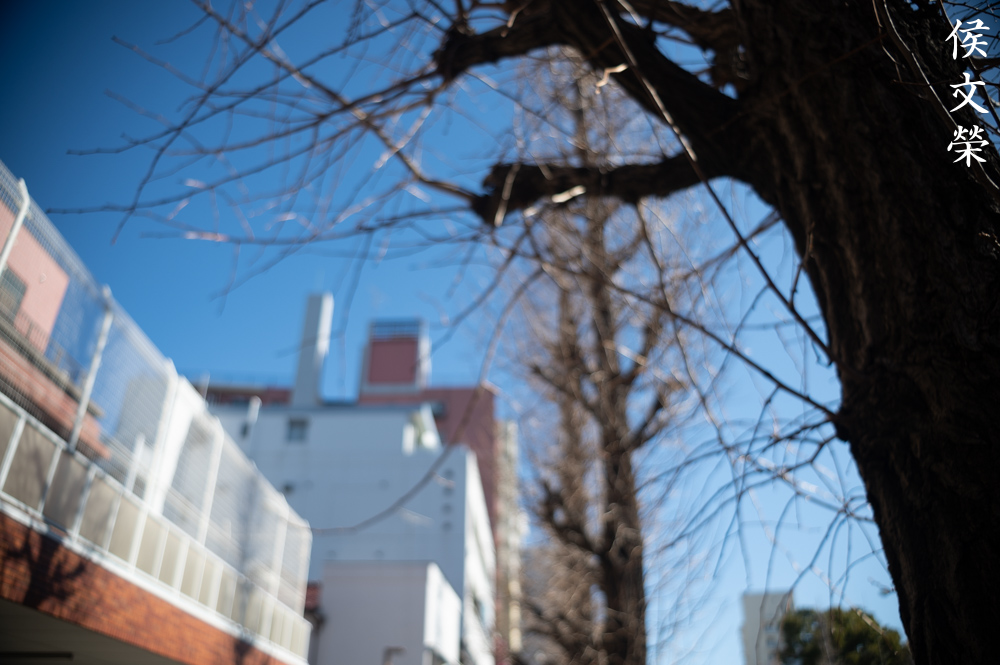
This lens had seen better days. I got this poor thing in this condition but this is a good chance to work on this lens so I can show you what this little thing is all about.


(Click to enlarge)
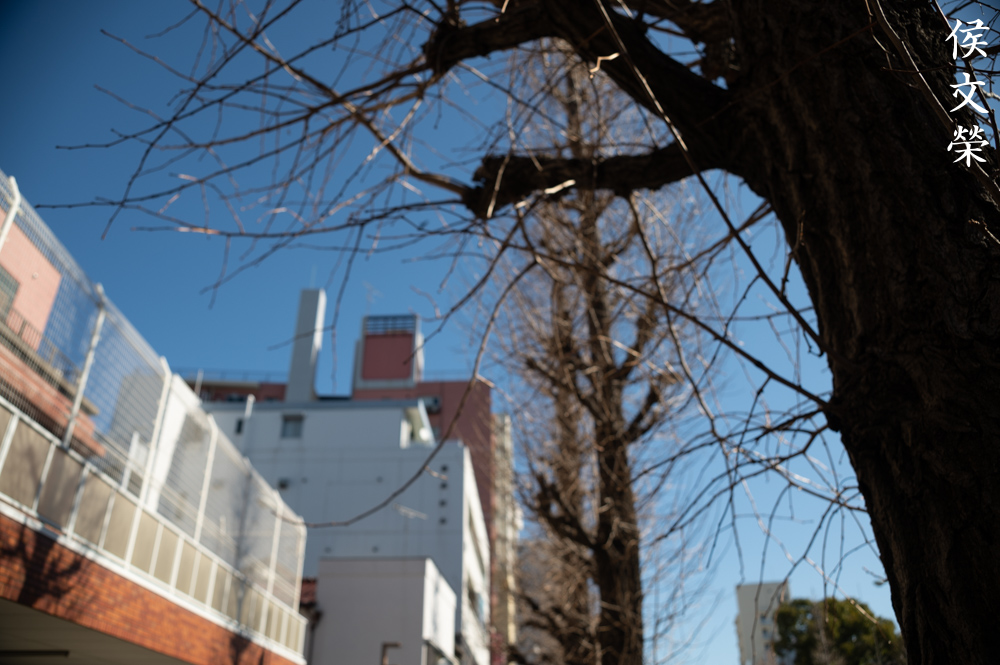
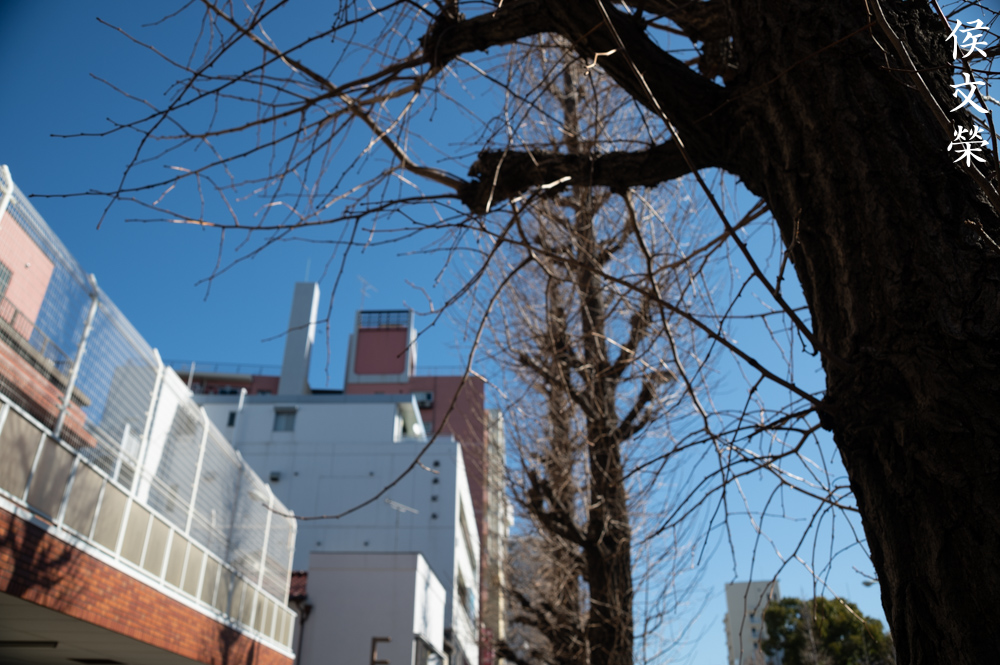
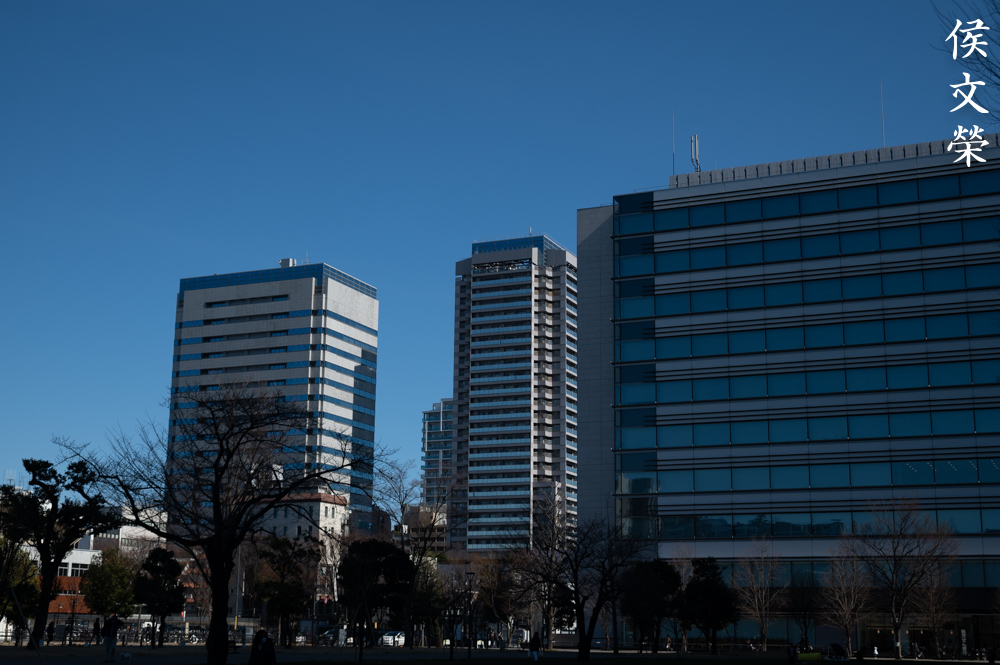
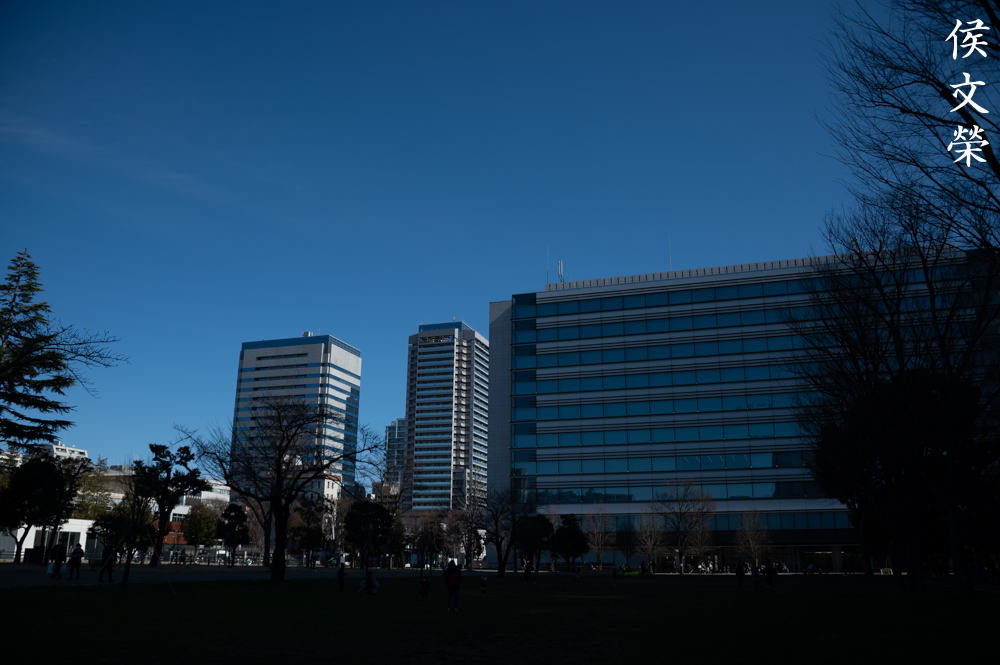
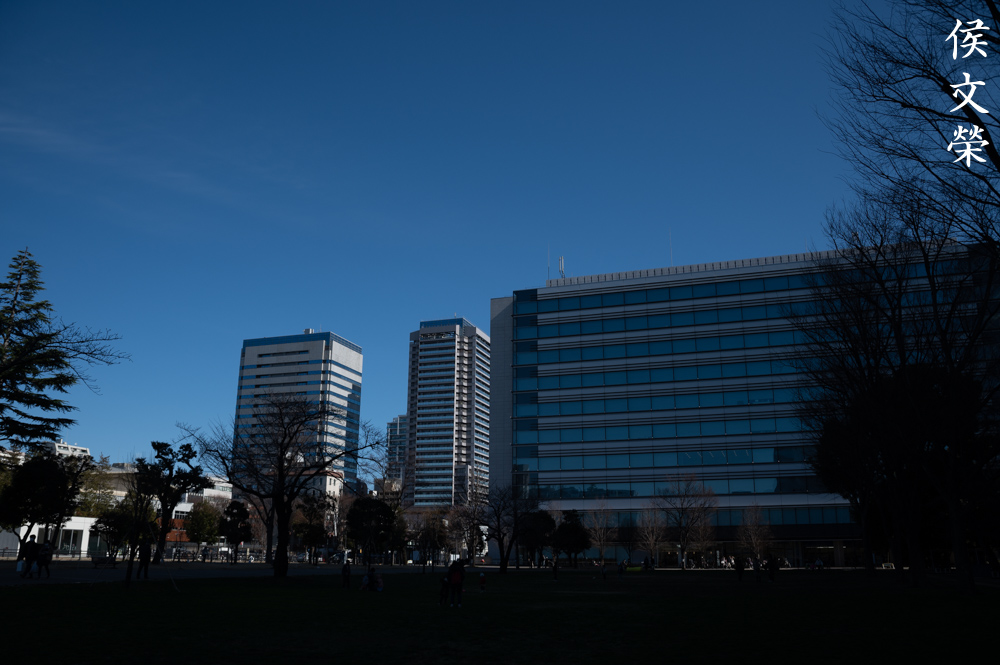
In case you are wondering how different 28mm looks like from 50mm, this set of photos should help you visualize it. Sure, 28-50mm doesn’t sound like much but it’s enough for most people. This is even more useful in the field, I can attest to this myself as somebody who shot plenty of photos in far-away villages. I don’t want to carry several lenses with me and having to swap my lenses depending on which situation I am in. This is a handy lens for people who shoot photo-journalism provided that the scene is bright enough. This limits this lens to mostly day-time work unless you shoot with a flash.
These lenses are usually found in mint-condition but beater examples also appear quite often as these are usually used by professionals. There’s very little in-between in my experience. Those who bought these are either rich hobbyists or professionals. These are somewhat rare compared to its peers but you can easily get one of these today if you’re prepared to pay. Since the lens was only made for 2 years, the pool of used lenses isn’t all that much. It took me some time to buy one of these because I cannot afford these, I had to wait until I found a junk that was sold for parts just so I can enjoy using it and share to you what this lens is all about.
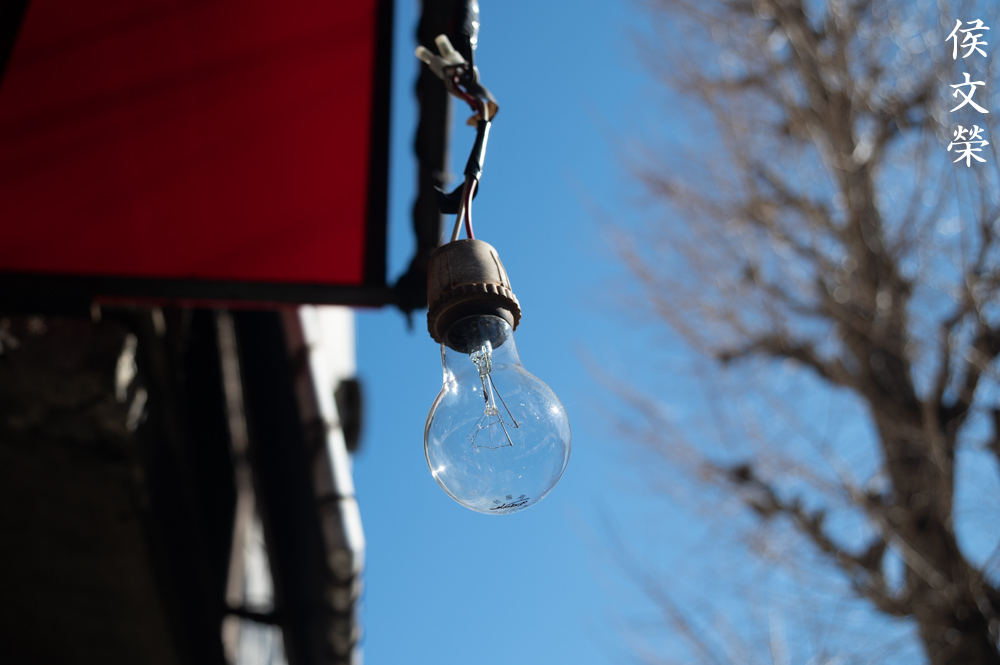
Knowing how a lens performs is key to using it effectively. You’ll know how to exploit its strengths and workaround its weaknesses. It helps you decide if this lens stays at home or goes into your bag. To help you see what’s up, I took these sets of photos for you. These were pictures taken from f/3.5, f/5.6 and f/8 from left-to-right. These apertures are the most common ones you’ll use and you’ll see the most changes as well in terms of lens character or its performance. I didn’t shoot photos that were taken at smaller apertures, it’s far too boring for me since they tend to look alike and any change in terms of performance will have to do with the effects of diffraction. I hope that my simple “tests” will help educate you more about using this lens.


(Click to enlarge)
Distortions is terrible at the wide-end while it’s tolerable at the long-end. It’s much better at around 40mm but I don’t have any photos showing that. The vignetting looks terrible wide-open at 28mm and it improves somewhat by f/5.6 but you’ll still see traces of it at f/8. It’s much better at the 50mm end, it looks as if there’s none of it from f/3.5, I am sure that it’s there but it is hard to see. It’s nice to see that the 50mm end is the better end of the focal range since it’s more useful to me.


(Click to enlarge)
The quality of the bokeh is not topnotch for this lens. It looks horrible at the wide-end to be honest and looks decent at most at the long-end of the zoom range. Just remember this bit when you’re taking photos with this lens. This can be remedied, just shoot with the long-end and then position the subject closer to you with the background further away, this will help with keeping background details blurred so they won’t form ugly-looking clumpy blobs. It looks cheap to be frank but this is a compromise that you should accept.


(Click to enlarge)
Sharpness looks pretty good wide-open but you’ll get chromatic aberration in areas of high-contrast. Spherical aberration and flare affects your frame and you end up with less contrast than what this lens is capable of. You can avoid this by under-exposing your photo when you have really-bright stuff in your frame such as white things or anything metallic. You won’t get this if you don’t have these variables in your frame as you can see in the other sets where I do not have over-blown whites in the pictures. Stop the iris down to f/5.6 and things look much better. You get less chromatic aberration and you won’t see as much spherical aberration from this point on. You’ll also notice a nice boost in resolving power which translates in better detail rendering. I think that the resolving power of this lens is already pretty good wide-open but it is much better as you stop the iris down further. Contrast is generally good since it’s already nice wide-open so long as you don’t have shiny metal or over-blown bright things in your frame. Stopping the iris down to f/8 will give you the best performance from this lens in terms of resolution. I think that this is the best aperture to shoot this lens with. Everything is sharp and it can rival more expensive lenses in this regard. This is an excellent lens so long as you know how to use it.


(Click to enlarge)
Here’s a set comparing the performance of this lens from either-end. Zooms usually perform better at one end over the other and for this one the 50mm end is the better one. It’s better at the long-end than at the 28mm end as you can see from the photos above. The performance difference is easy to see it doesn’t require a lot of pixel-peeping to verify that. I don’t know why it’s the way it is but the performance difference is easy to observe, it’s usually not a huge difference but it is what it is.

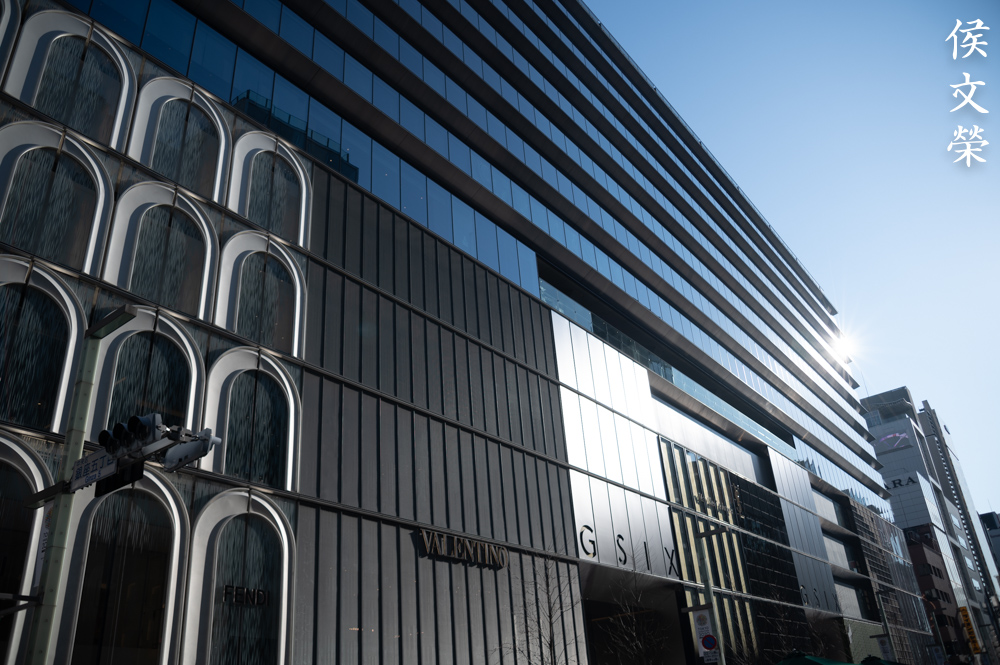
This was taken with the iris stopped-down. Notice the beautiful sunstars, it’s nice, pointy and overblown, that last trait isn’t supposed to be a plus but it’s nice to see the sunstars “bloom”, it adds something special to your photo. It’s sharp if you ask me but it seems that JPEG compression made this look a lot fuzzier than it did on my monitor.
That horrible distortion at 28mm won’t be obvious if you don’t have parallel lines at the edges of your frame. Simply position your subject so your lines won’t be parallel to the edges of your frame. Even with that, you can see the lines at the center curve unnaturally, making the building look “dented”. It’s something that you should keep in mind when shooting with the wide-end of this lens. It’s not really horrible in real-world use but it’s there.

You can find some distortion in this photo but it’s not obvious at all. You can get away with it most of the time in real-world use so don’t worry too much about it and just enjoy using this lens to take beautiful photos.

This is the main weakness of this lens, it flares too-easily and ghosts can be easily produced by simply having the sun within your frame. A hood won’t be any useful in this situation. The hood works well but it’s useless if you’re shooting directly at the sun.

The veiling flare can be used to your advantage as it helps you take photos with that “vintage-look”. Some people hate this while some people want this effect. You either love it or you hate it.

This looks like a sharp-enough photo that will be good-enough to print. This lens is sharp but it’s not the sharpest zoom you’ll ever use. Something that’s interesting about this photo is the spherical aberration present on the face and hand of the marionette wherein you get over-blown white parts. This is not something that I want but this is easy to fix by simply under-exposing it by 1/3 of a stop or more.

Here’s another photo. This is an over-exposed picture if you ask me. This is a tricky scene to meter because exposing this properly will make you lose a bit of detail on the marionette’s suit but you won’t get that disturbing glow on its face and gloves. You will have to judge your scene really well so you’ll know which part of the scene to prioritize. This is specially true with this, it is much easier with a different lens.

It can be difficult to focus with this specially when taking photos of kids. It does not have a fas maximum aperture so it’s more difficult to see what’s in your frame and it’s even more difficult to focus due to the darker view. This will also affect how you see things since the deeper depth-of-field makes it even harder to see the focus plane. This was a happy Sunday afternoon, the weather was a bit sunnier than usual so we went out for a stroll at Ginza.


(Click to enlarge)
Here’s the rest of the set. Click on the photos to see larger versions of these pictures. They’re not what I would call masterpieces but they are enough to help give you an idea of how this lens performs.
Let’s now see some photos that were taken with film. This lens was made in the film era so it’s only fair that we judge it with its intended medium. Film has a unique look that’s difficult to reproduce with digital because of grain, grain looks different to noise and it can help mask flaws or amplify them. I prefer the look of film grain and I embrace it. These photos were taken with Kodak Gold 200 and I used my Nikon F6 to shoot with it because its meter is fool-proof so I get very good exposures with it all the time which is great.

One thing I noticed is this lens flares a lot. This may be due to the lens being in such a terrible state when I got it, with plenty of fungus, haze and it just looks terrible to say the least. You can see the flare here and some ghosts at the left of the frame, too. My daughter doesn’t mind and she just stood there for daddy to take a quick snap of her.

This looks terrible but some people like this kind of look, buying expensive, plastic cameras just to replicate this. Some call this the “vintage-look”, I just call this the effects of terrible coating damage. Some of this can be avoided by using the hood but it can only go so far.

This “effect” does help make your pictures look more interesting, imparting a unique character to them. This seems to be a real weakness of this lens, I saw some photos taken by another person using a mint-condition example and his photos showed the same thing, ghosts and flares everywhere. That’s something if you ask me, so this isn’t just my lens being a restored junk.

I found myself using the “macro mode” gimmick a lot when I was shooting with this lens. It’s very handy and you can get addicted to using it. It’s sharp wide-open at the minimum focusing distance.

This gimmick enabled me to take photos that I would otherwise skip if I was using a lens that won’t allow me to do this. This is remarkable, I didn’t think that this feature would be so entertaining to use.

I took this photo expecting some chromatic aberration but I didn’t get much of it. Instead, I got this lens to show plenty of spherical aberration near the highlights since they were over-blown.

I love this photo a lot because it looks so painterly, as if it was drawn using a paintbrush with oil paint. You can see that it has a mix of smooth and harsh details, not the best if you ask me but it gives this photo some character. It’s not so bad here but wait until you see the next photos.

My biggest gripe with this lens is its inability to render pleasing bokeh. This is not the worst example that I have because I took this at 50mm where this lens blurs more things due to the longer focal length but wait until you see what it does at the wide-end.

It’s decently sharp wide-open but this lens has a tendency to produce rough-looking bokeh. This is probably the ugliest part of this lens, making this lens feel cheap which is a shame because this is otherwise a good lens.
This is probably the ugliest that I could get it to render, just look at the trees in the background, they look terrible. The foreground looks great, though.

It’s not so bad at the long-end since you get less things in-focus. If you must, use the long-end to shoot photos that need the background to be blurred. It is not a bad lens, you just need to know how to use it properly. Look at what it can do to the subject, it’s sharp and rendered beautifully, this is probably more than enough as a saving-grace for this little gem.

This lens is great as a travel lens, the wide-end is handy for shooting photos like this. The decently-fast f/3.5 maximum aperture is good-enough for most applications specially if you load it with an ISO400 film or faster.

Stopping the iris down a bit enables this lens to produce exquisitely-sharp photos. Shooting this at f/5.6 will give you crisp and clear photos, this is the best aperture to use this lens with in my experience. It’s much better at f/8 but it looks so boring at that aperture since everything looks so “generic” to me, the photos look like they were taken with a point-and-shoot.


(Click to enlarge)
Here’s the rest of the set. These pictures should give you a good idea of how this lens performs with film. It’s a nice lens to be honest but this is not what I would call a perfect lens but far from it. Despite its flaws, it’s an enjoyable lens to use with film because of its practical specs.
I will only recommend this lens to people who know what they’re doing. It’s a lovely lens to use so long as you know how to workaround its flaws. It was aimed for the professional market when it was announced so this lens isn’t that bad at all, it gave the professional photographer back then a lens that’s reliable, with practical specifications and most importantly a fixed-aperture so the photographer won’t have to do some mental math while changing its focal length. Having this in mind, it’s up to you if you still want to own this, I can only recommend this lens to aficionados because these aren’t cheap or common, you can get much better options for the same price. The hood isn’t cheap, too. For a lot less you can get the Zoom-Nikkor 28-85mm f/3.5-4.5 Ai-S instead which offers much better utility at the expense of losing the appeal of a fixed-aperture zoom. This is not much of a problem if you’re using that with a digital camera but that’s something that you should consider if you are shooting it with a manual film camera. If you still want to own one, it’s best that you look for one that’s not as beat-up as mine. Servicing this lens is not something for a beginner and you’re going to spend quite a bit of money having this serviced by a professional. Collectors don’t really mind since the lenses that they buy usually stay in the cabinet once the unboxing is done. It is truly a nice lens but it’s just not for everyone.
Before We Begin:
If this is your first attempt at repairing a lens then I suggest that you check my previous posts regarding screws & drivers, grease and other things. Also read what I wrote about the tools that you’ll need to fix your Nikkors.
I suggest that you read these primers before you begin (for beginners):
Reading these primers should lessen the chance of ruining your lens if you are a novice. Before opening up any lens, always look for other people who have done so in Youtube or the internet. Information is scarce, vague and scattered (that is why I started this) but you can still find some information if you search carefully.
I highly recommend that you read my working with helicoids post because this is very important and getting it wrong can ruin your day. If I can force you to read this, I would. It is that important!
For more advanced topics, you can read my fungus removal post as a start. This post has a lot of useful information and it will be beneficial for you to read this.
Disassembly (Lens Barrel):
You’ll spend most of your time in this section. This lens was well-designed, I had a great time overhauling this as things were laid-out really well. I don’t remember getting upset while repairing this. The best thing I remembered was how easy it was to remove the optics from the barrel. Most zoom lenses have to be dismantled to some degree in order to remove the optics but this one required minimal disassembly to do that. Despite my praises, this is not a lens that a beginner should tackle, it’s best to have this fixed by a repairer that’s reputable as this one requires experience.
This section deals with the dismantling of the lens barrel, like what I said in the previous paragraph, it’s easy to remove the optics from the barrel so the article won’t be written in a “back-and-forth” style like what you’re used to seeing in my zoom lenses articles. I’ll separate this article into 2 sections so I can concentrate on the barrel in one section and the optics and iris in their own separate sections. This makes this article much easier to read, it’s like a simple prime lens in this regard.
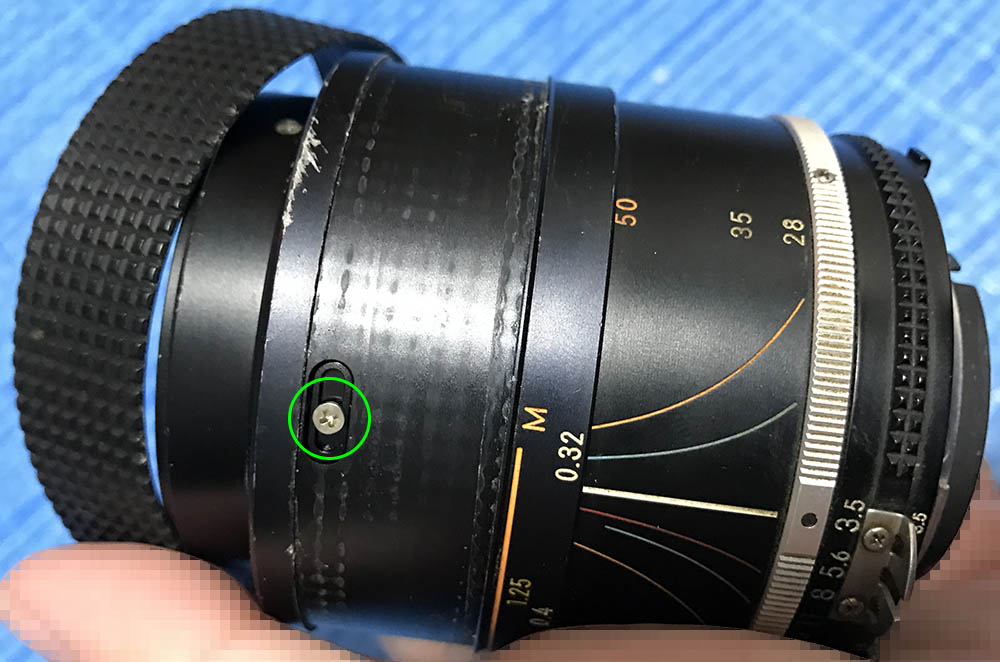
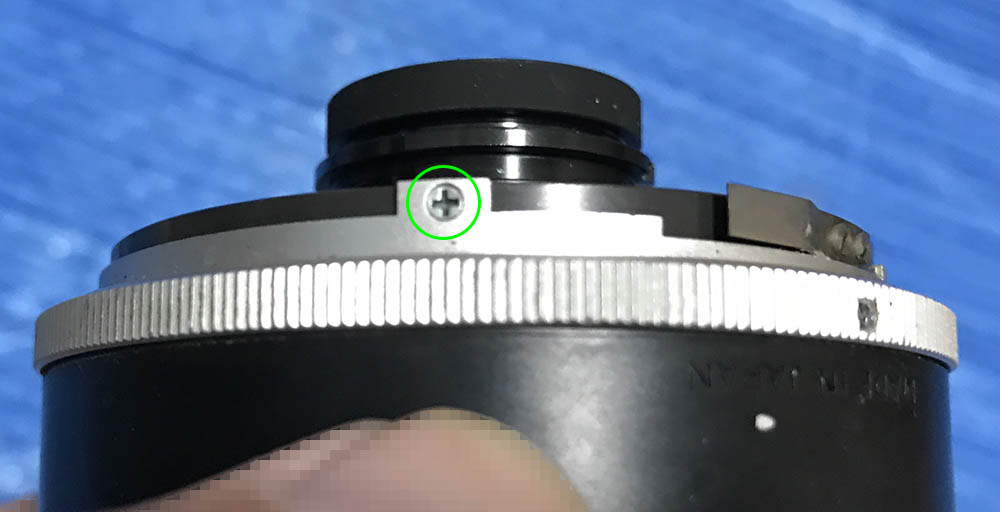
Begin by removing the rubber grip. It can be easily torn so you’ll have to be careful when removing it. Run a small toothpick underneath it to lift it from the glue underneath. Removing the rubber grip will reveal these 3 screws.

These screws enable you to adjust the focusing ring’s scale. Extract them by using a bit of alcohol to soften them up.

You can now remove the focusing ring.

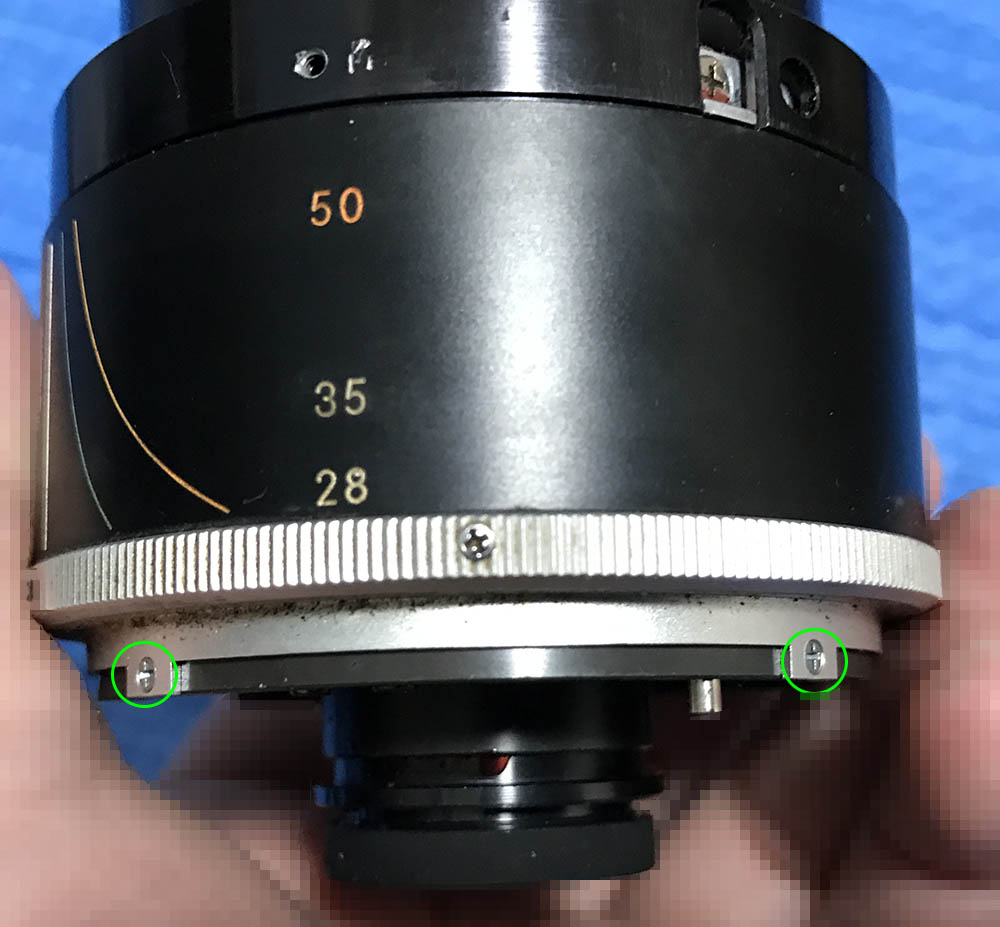
The front barrel is secured by these 2 screws.
Extracting these screws will enable you to remove the front barrel.

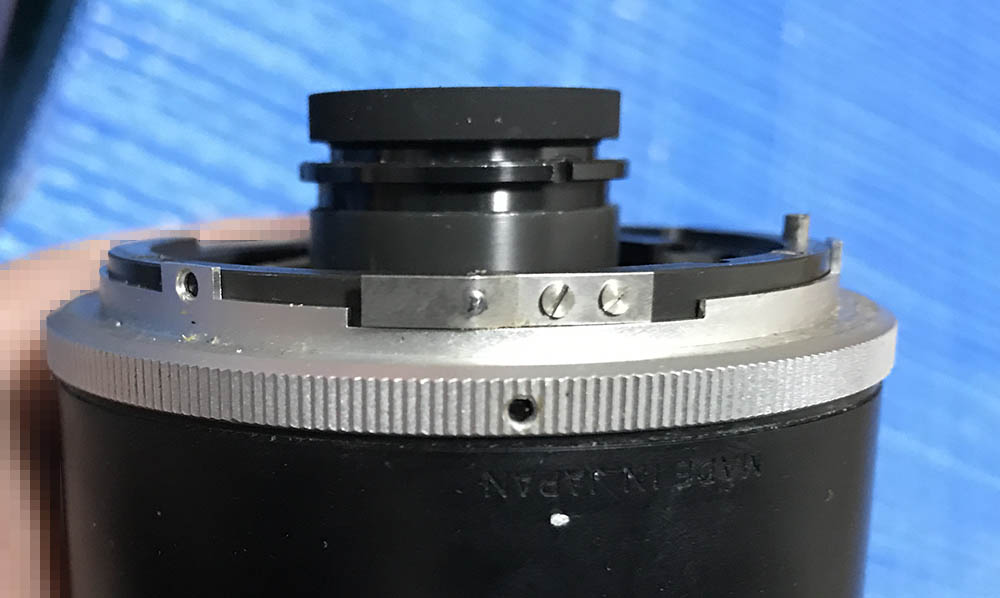
Here are more screws. Extract these so you can remove the front cell which contains the focusing unit of the optics along with parts of the helicoid.
Note the sport where this thing separates, if you don’t then you will spend a lot of time guessing where this should mesh. If you are new to lens repair I highly recommend that you read my article on working with helicoids. Lots of people forget to do this step and end up being stuck so don’t do the same mistake.
The outer cover can then be removed.
You can unscrew the front optical cell off from the helicoid. Note that there are a couple of shims here, they’re used to adjust the distance of the optical cell to enable you to focus properly. Never lose or damage any of these.
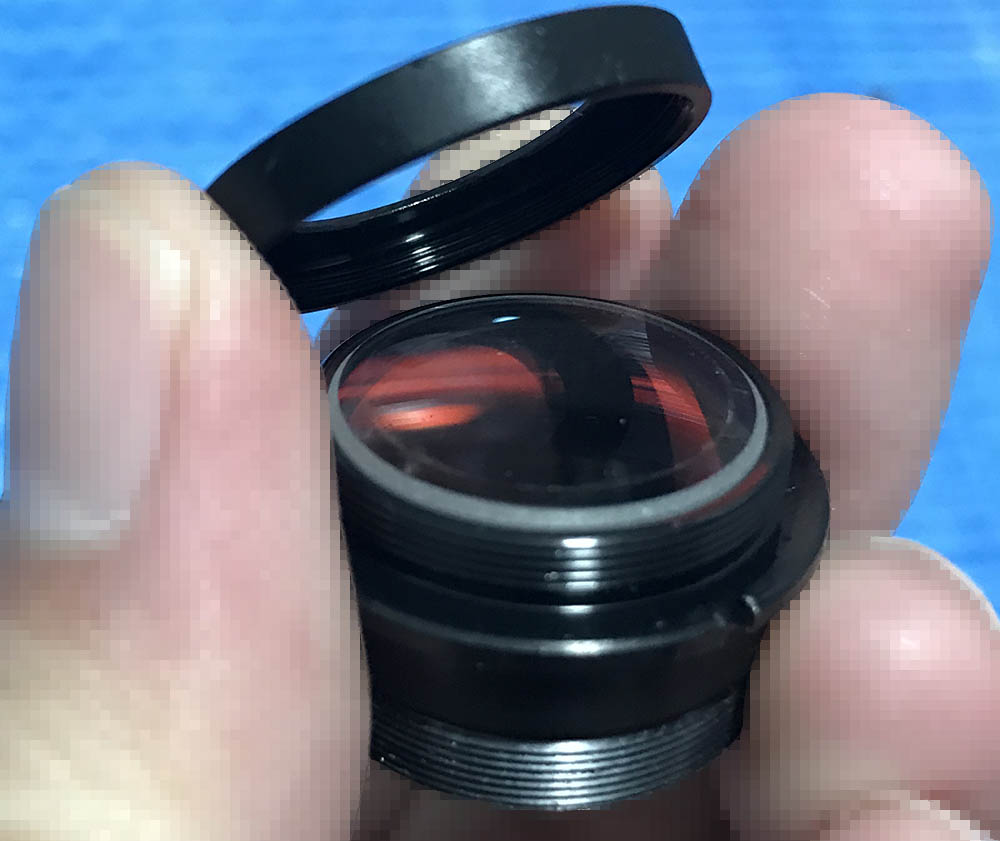
Well, here’s what I have at the moment. This looks nasty, the previous guy is a piece of work and he gave up on this lens while working on it.
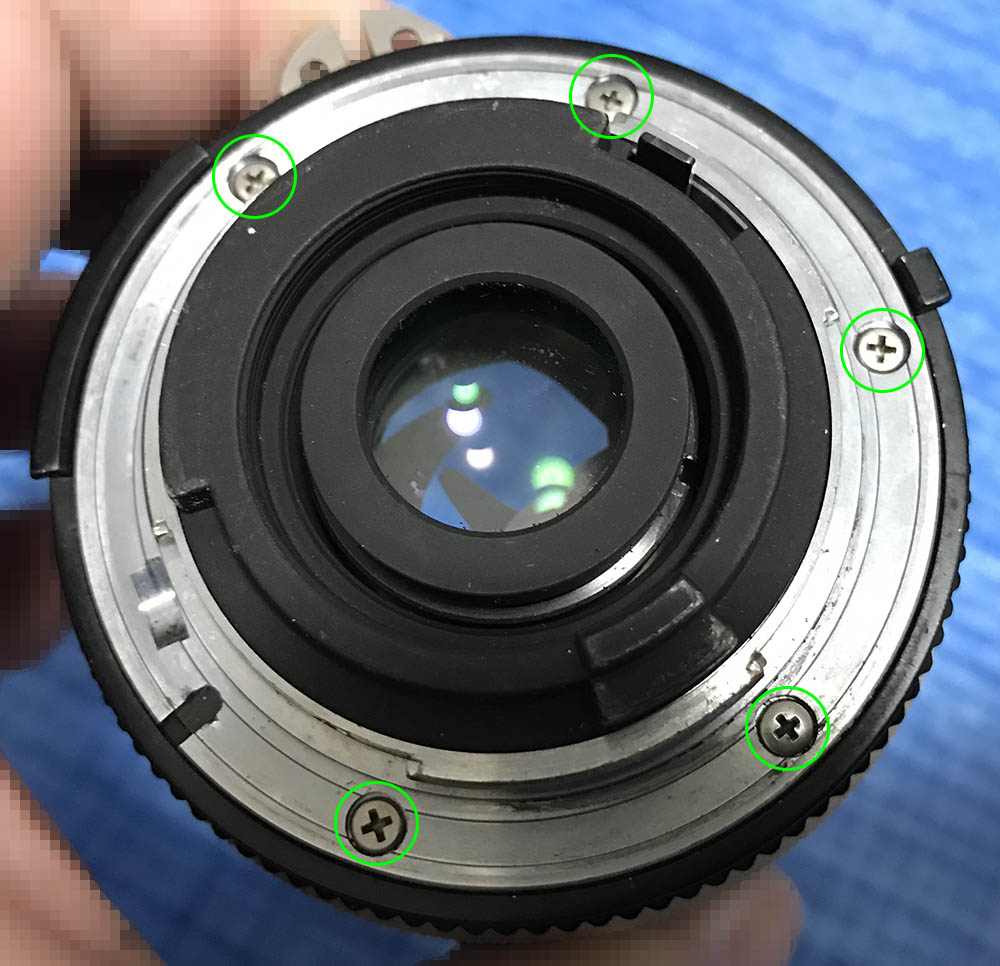
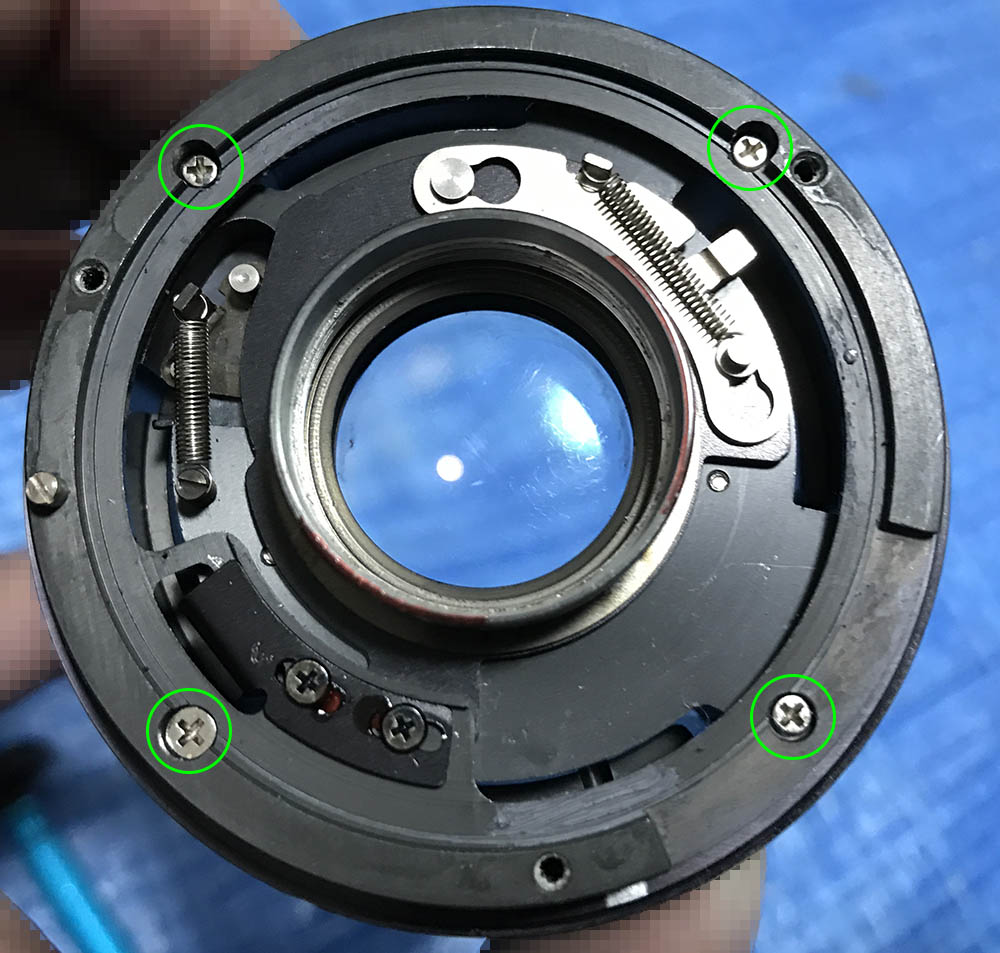
Removing the bayonet mount involves removing these screws. Read what I wrote about removing bayonet screws so you won’t strip these screws. Many people use the wrong type of driver or use the wrong technique and they’re now “screwed” because they stripped the heads of these screws. If someone told you that these are standard heads, slap them in the face and tell them it can only be removed properly by using a JIS screwdriver.
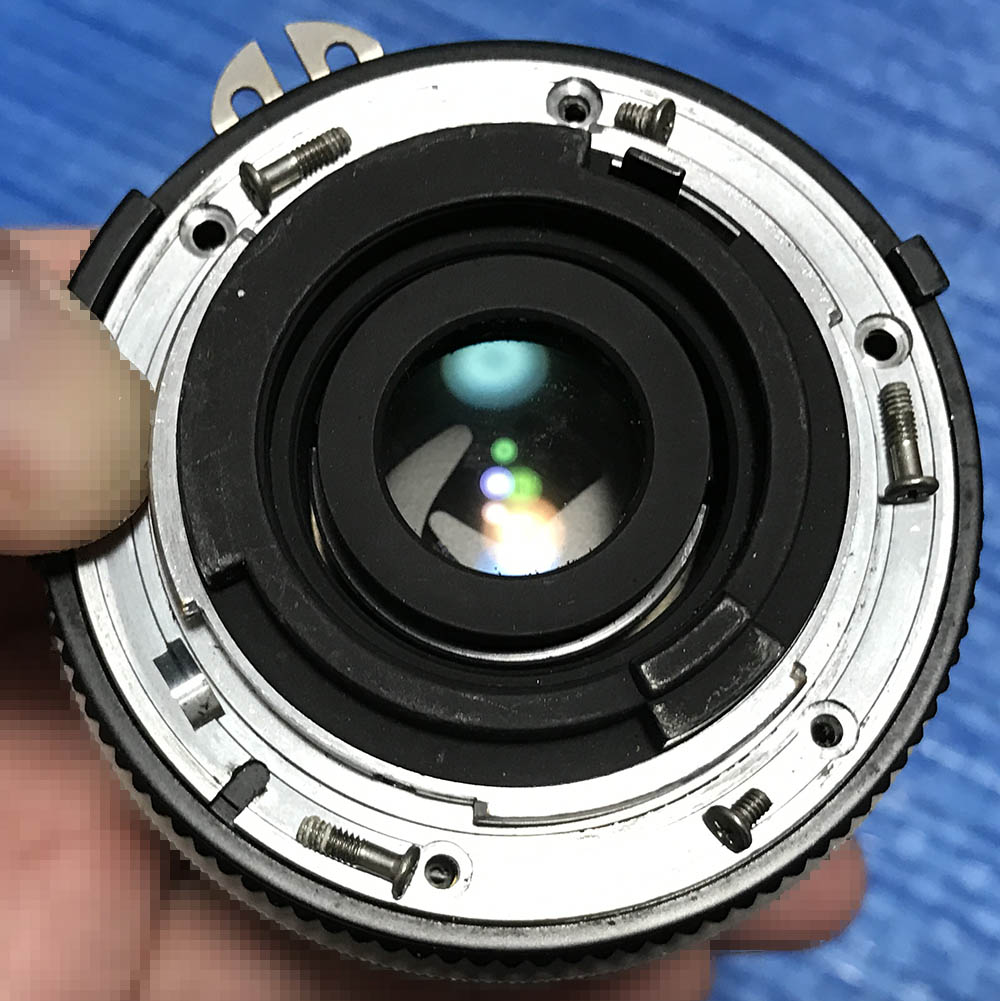
Note that the screws vary in length. Take note as to which screw should go into which hole, putting it in the wrong hole is a messy affair.
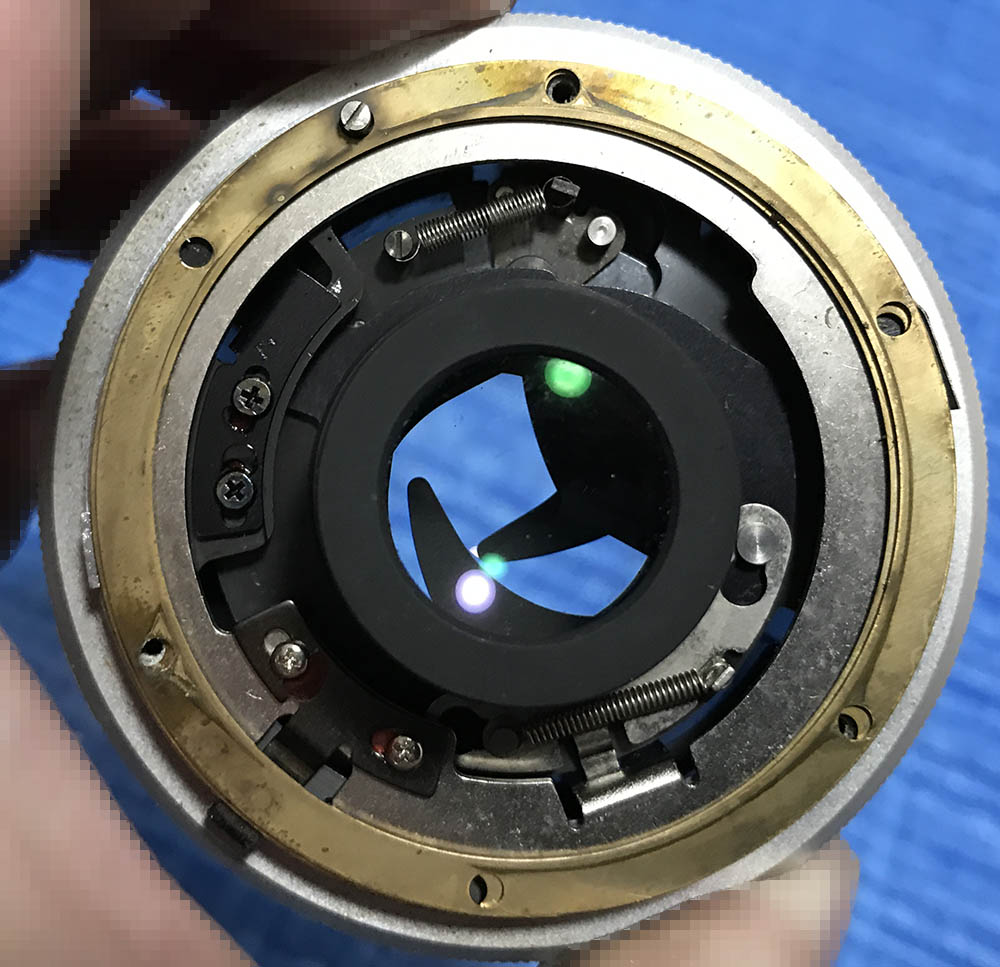
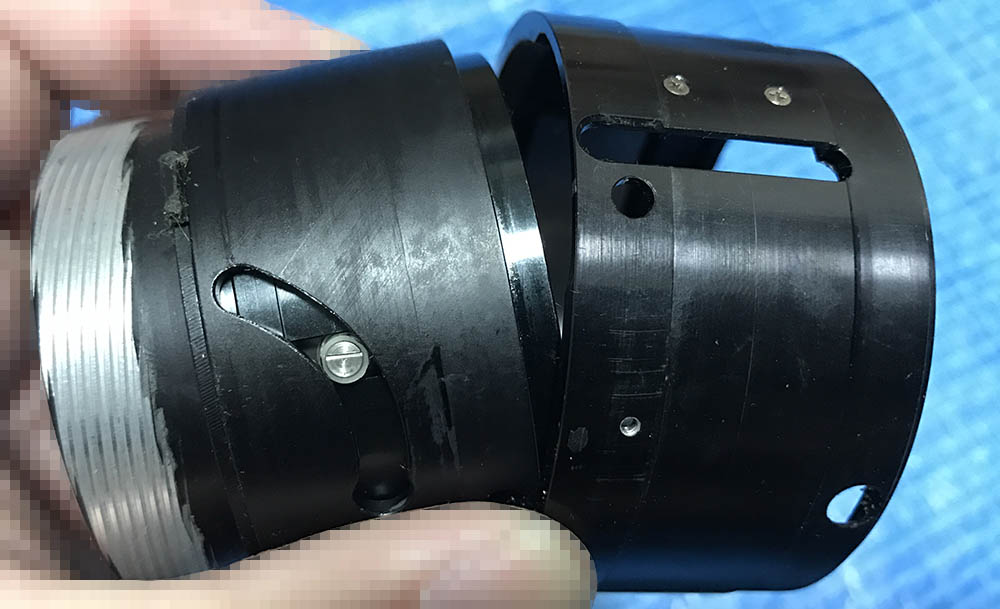
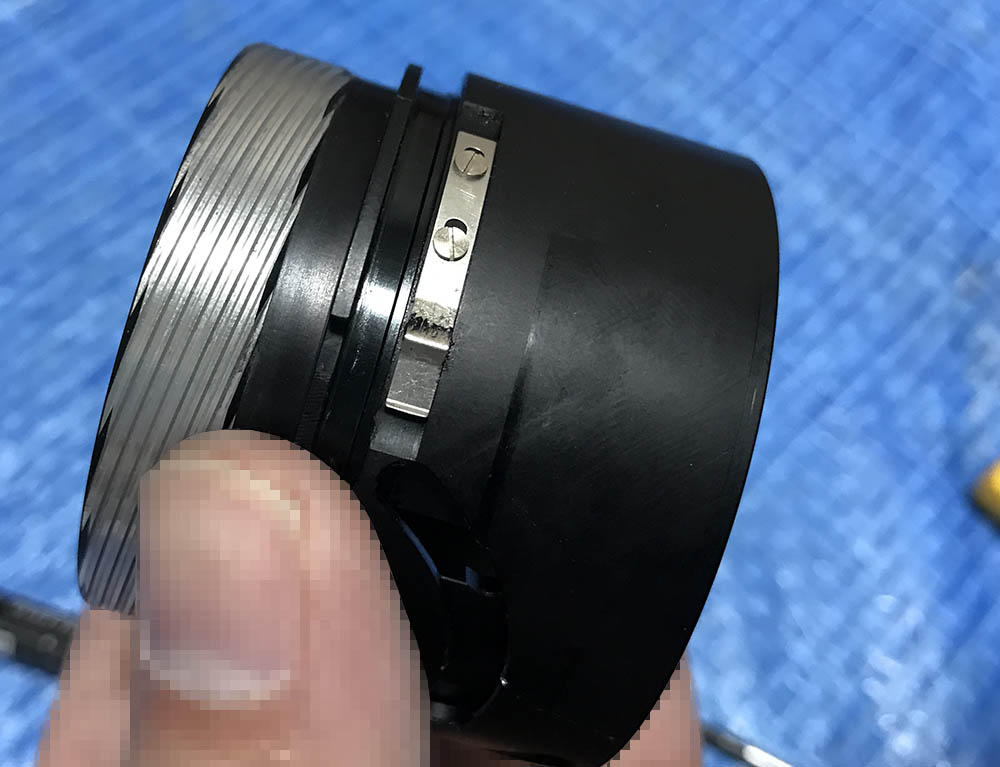
Carefully remove the bayonet mount, go about it slowly because theres is a long lever for actuating the iris attached to it. You don’t want to ben this, it’s for actuating the iris and it should move as freely as possible.
The aperture ring can then be removed.
Carefully remove this collar. It’s there to provide a stable mount so that the bayonet can sit squarely on top of it.
These shims are used for adjusting the lens’ focus just like the ones we saw earlier. It’s common to find these in Zoom-Nikkors.
Carefully remove the shims and clean them, these are usually oily since the aperture ring is nearby.

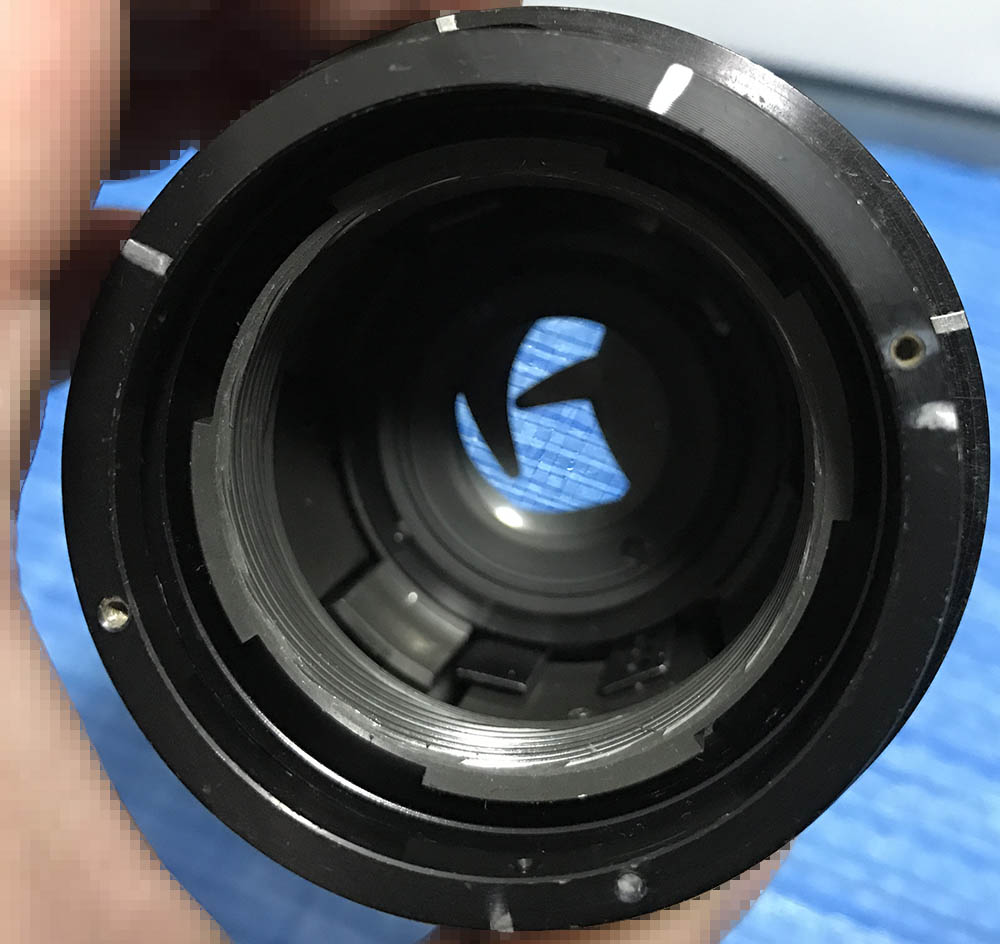
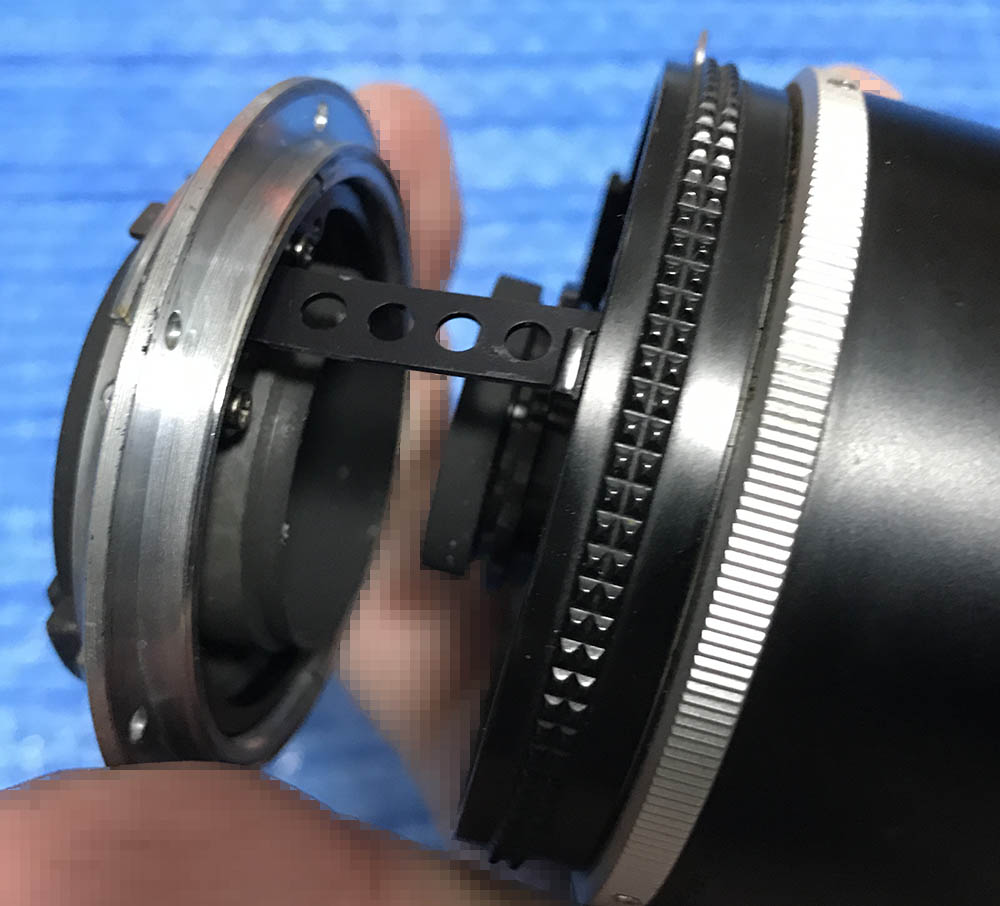
This is how the mechanisms look like. Inspect them carefully before you get anything off from this area.
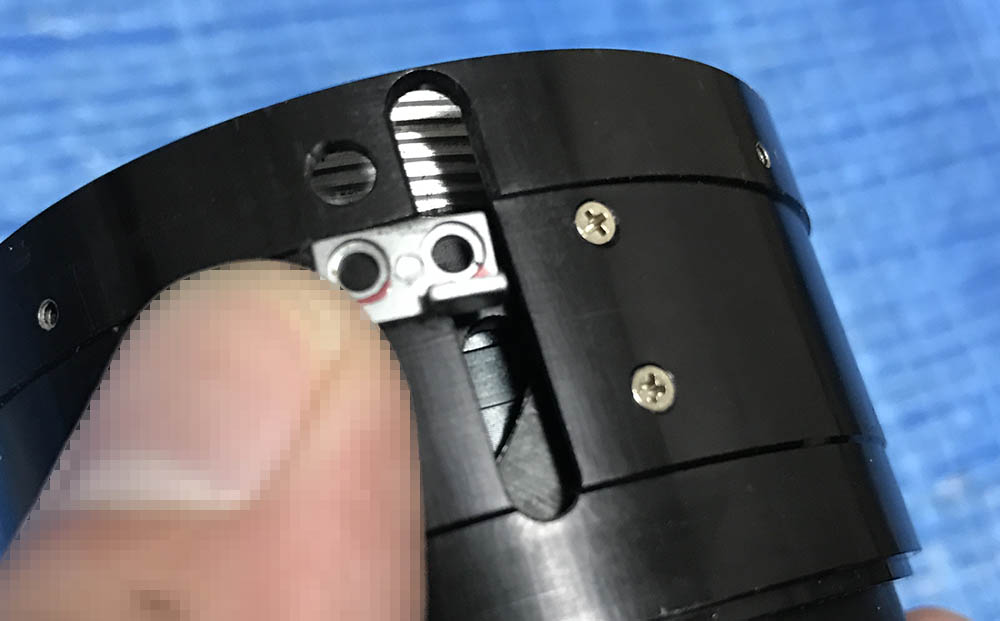
Carefully remove this ring since it has a delicate fork attached to it. This is a long fork that adjusts the iris mechanism. It has a slanted slot so the iris can adjust itself as it travels in-or-out of the barrel as you zoom, enabling this to maintain a constant aperture. Without this fork this lens will end up having a variable aperture. If you think that this trick looks familiar then you have already seen my article about the Micro-Nikkor-P 55mm f/3.5 Auto. That lens has the same gimmick going on so the aperture stays constant as you extend its barrel to focus closer.
Extract these screws to remove the grip.
Here’s another one. Don’t forget to extract the screws on the knurling, too. It is important to use a driver that fits perfectly to avoid scarring the beautiful fluted details.
Don’t forget to remove the spring, too.

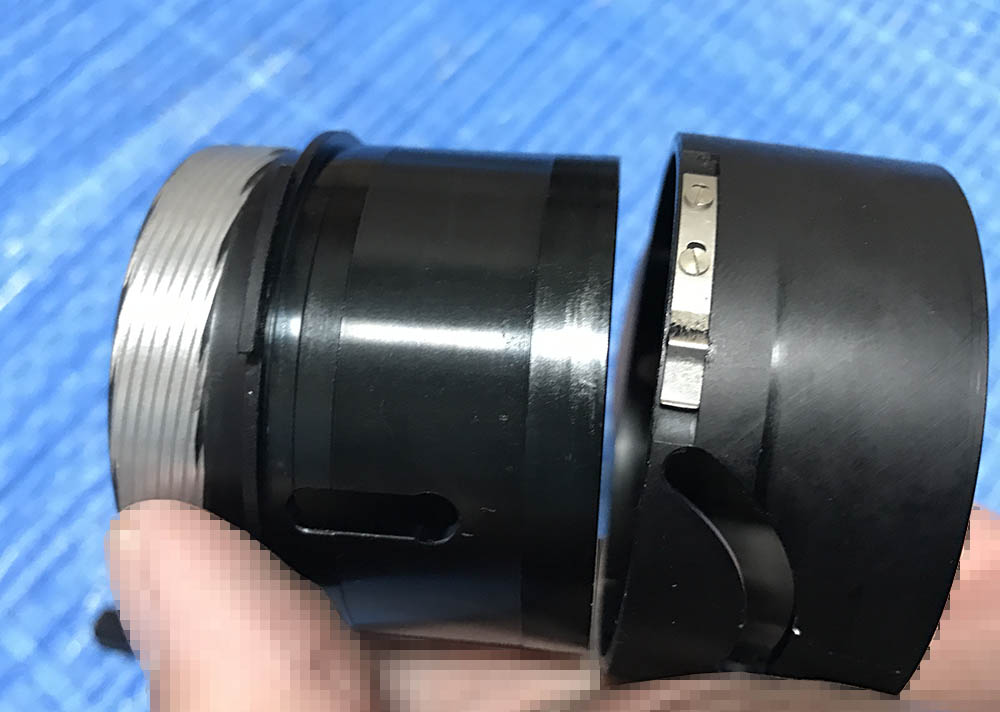
You can now remove the grip and the sleeve, clean these very well since oil and grime usually coat the inner surfaces of these things.

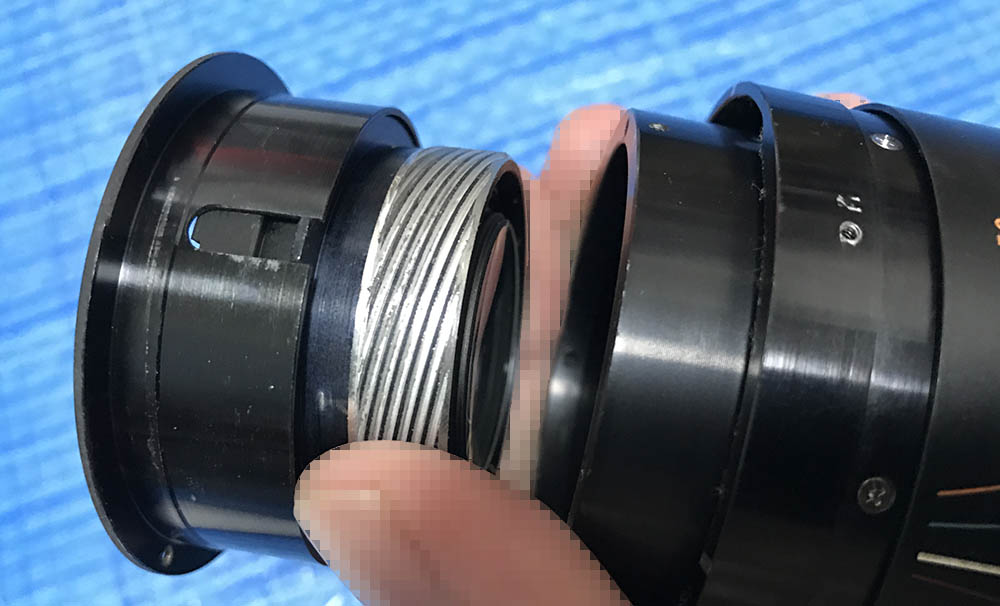
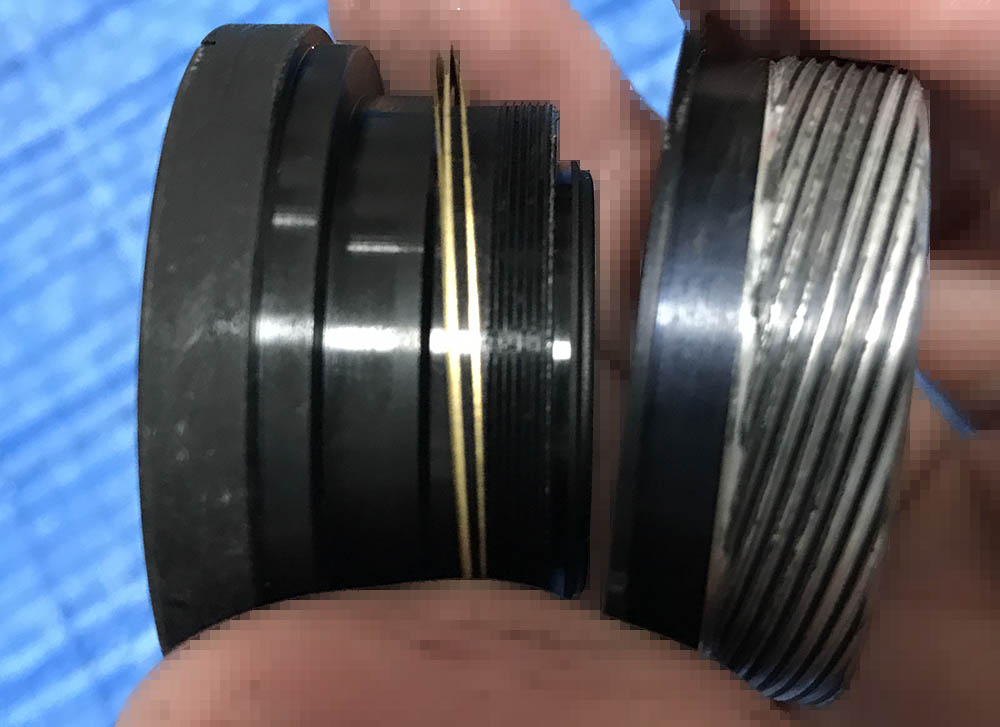
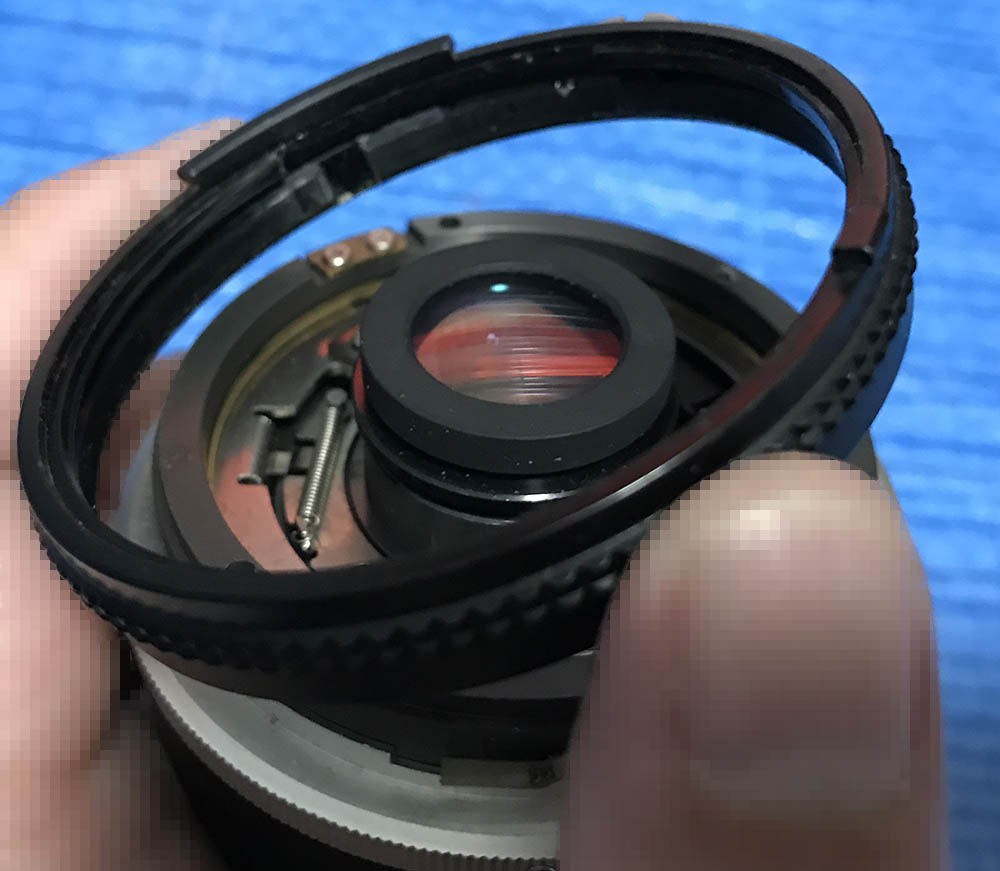
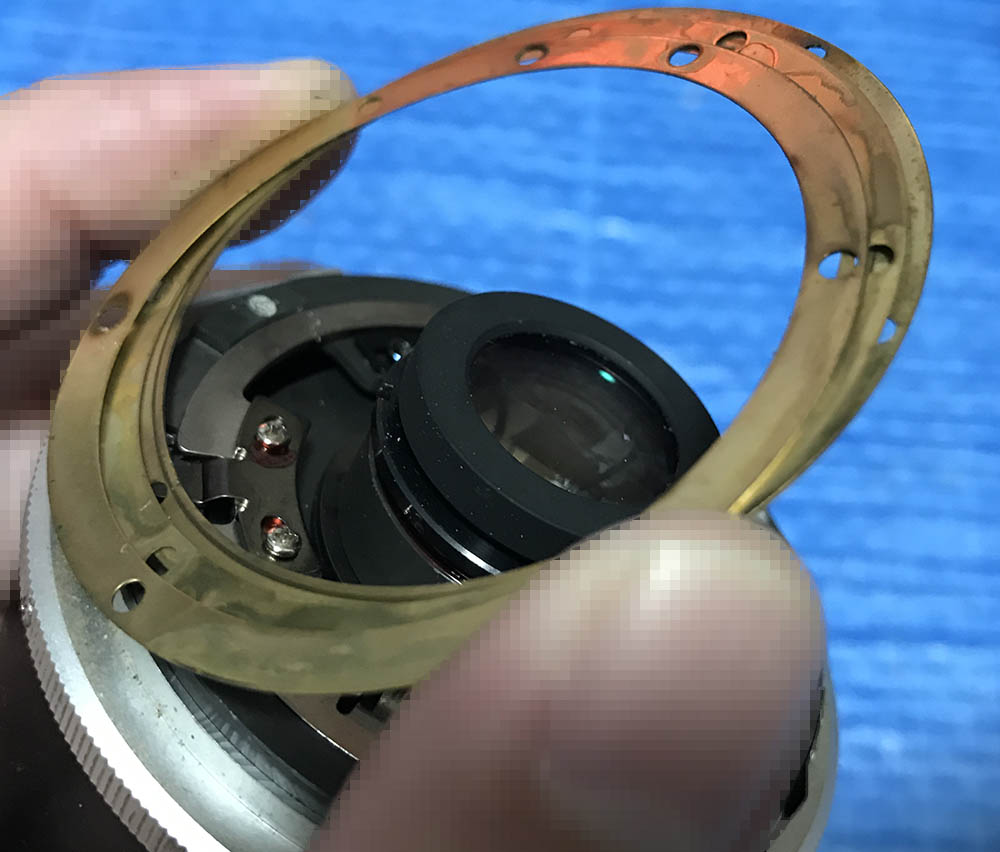
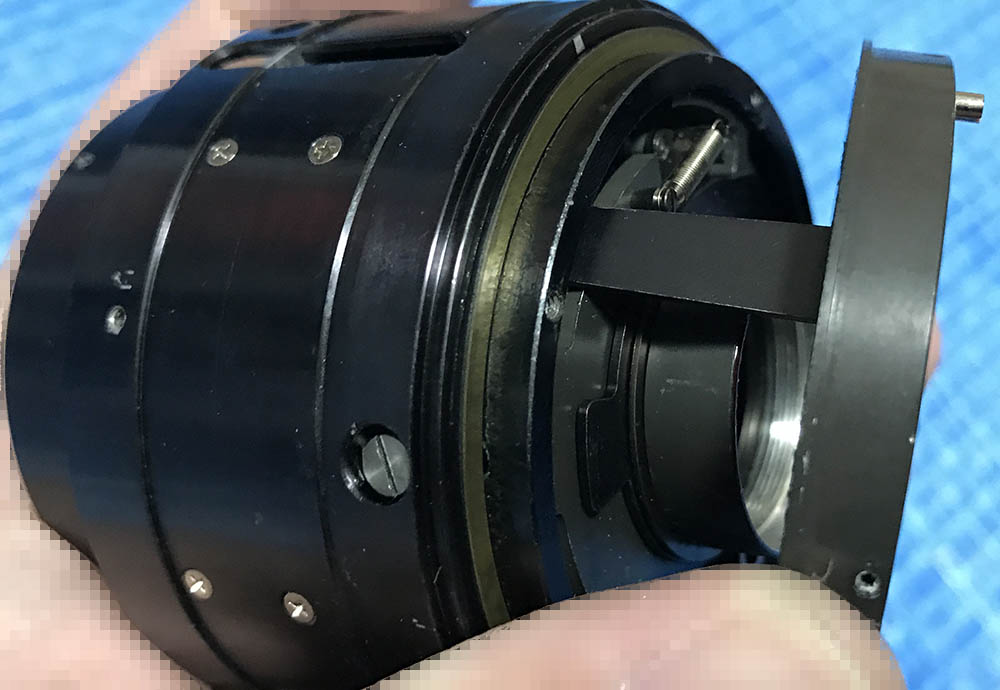
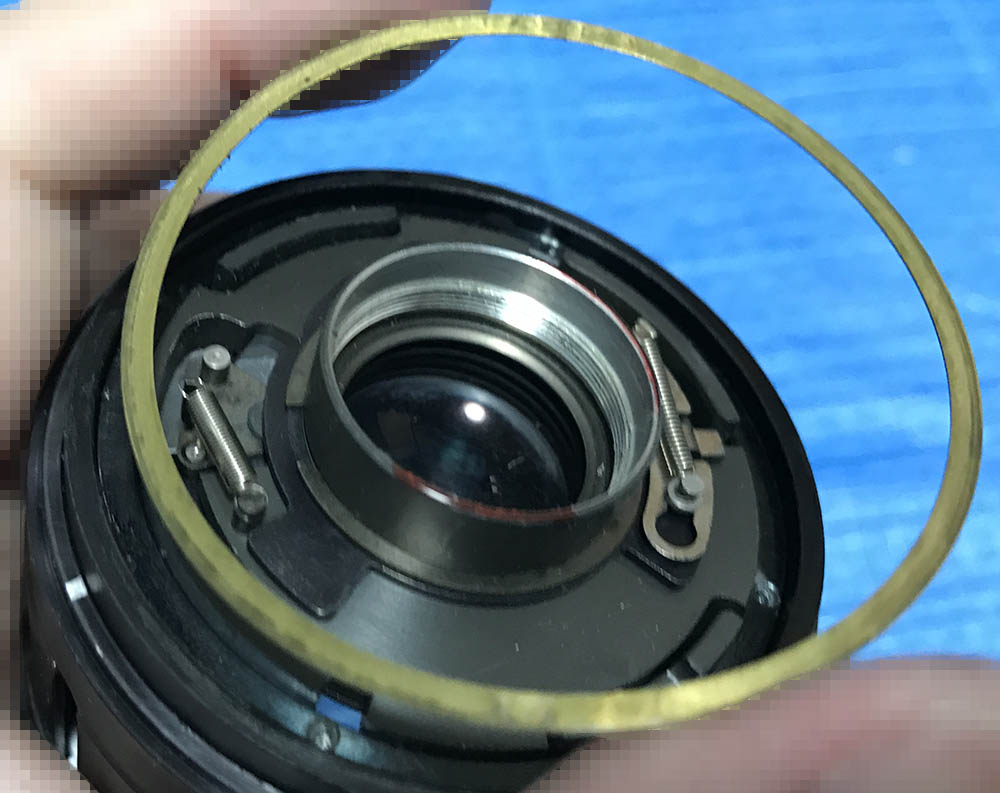
Remove the rear optical cell. You can remove it with your hands, if it’s stuck you can use a strip of rubber to help you grip it better. Put this in a safe and padded box to prevent damaging anything.

It’s still a long way but we’ll get there in a couple of more steps, or not.
Extract these screws and don’t forget where they were originally.
The screws secure the base of the barrel.
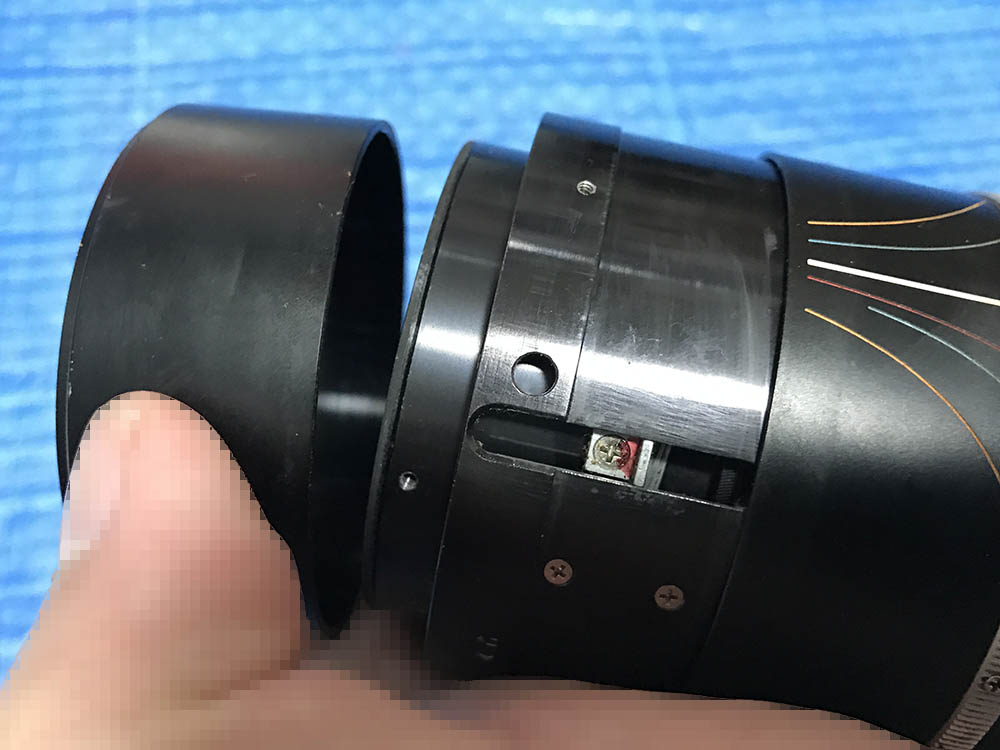
Remove this thin shim. It’s there to help the barrel turn smoother, the brass surface is smooth and greased, helping the barrel turn smoothly.

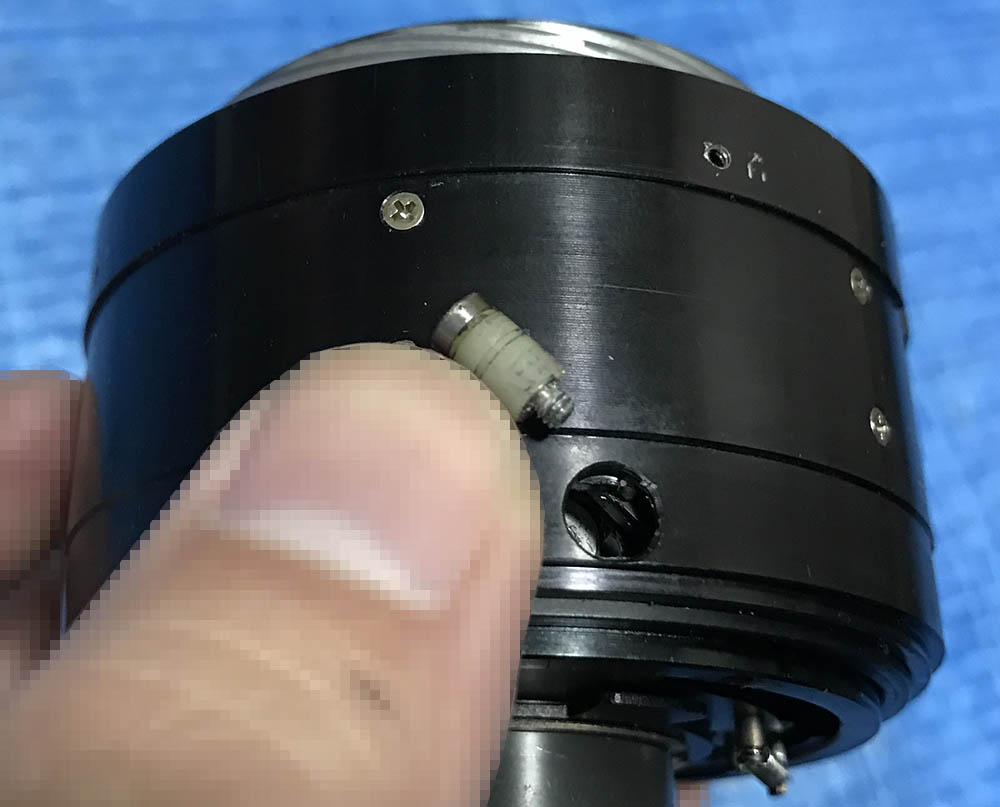
Adjust the barrel until you see these. Use these access holes to reach these, I can see that these had been sealed at the factory so apply some alcohol and wait for it to soften the seal before you attempt to extract these. The screws secure the helicoid key.

Once the screws of the helicoid key are gone you can freely turn the barrel until the helicoids disengage. Just like the previous set of helicoids, mark the spot where these separated as this is also the same spot where they should mesh. It can be tricky with this set but you can do it.
Here’s the helicoid key.

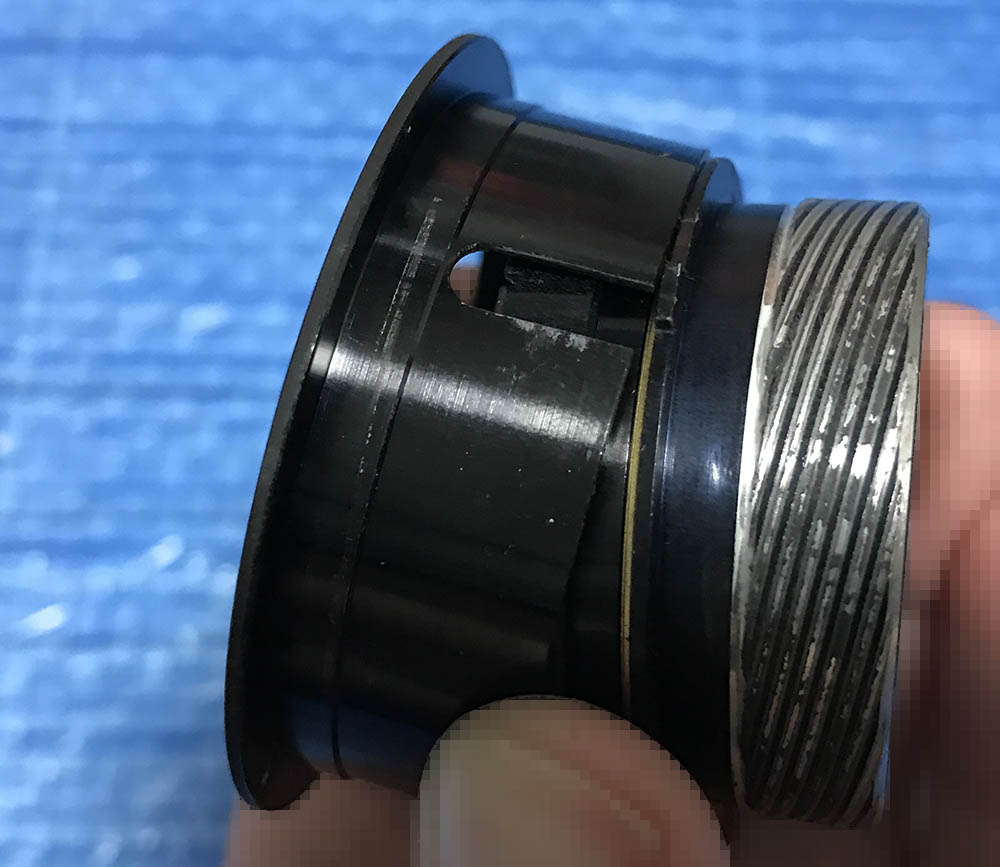
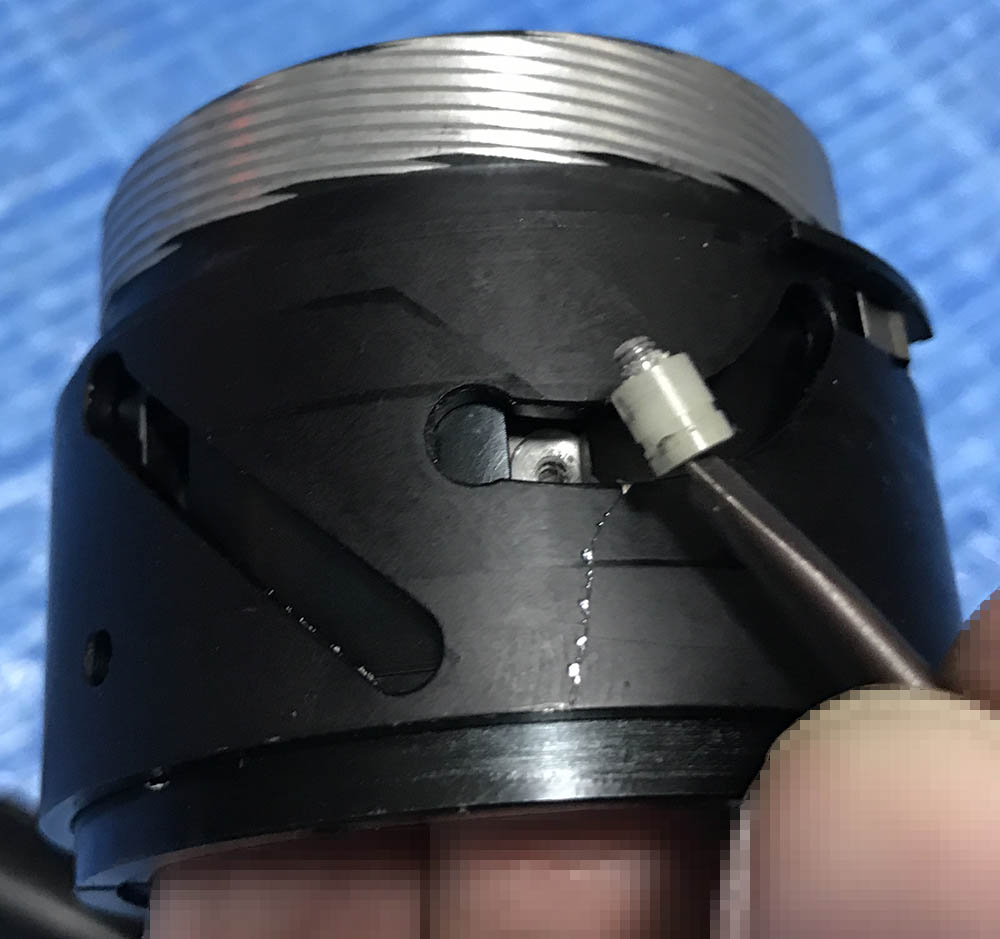
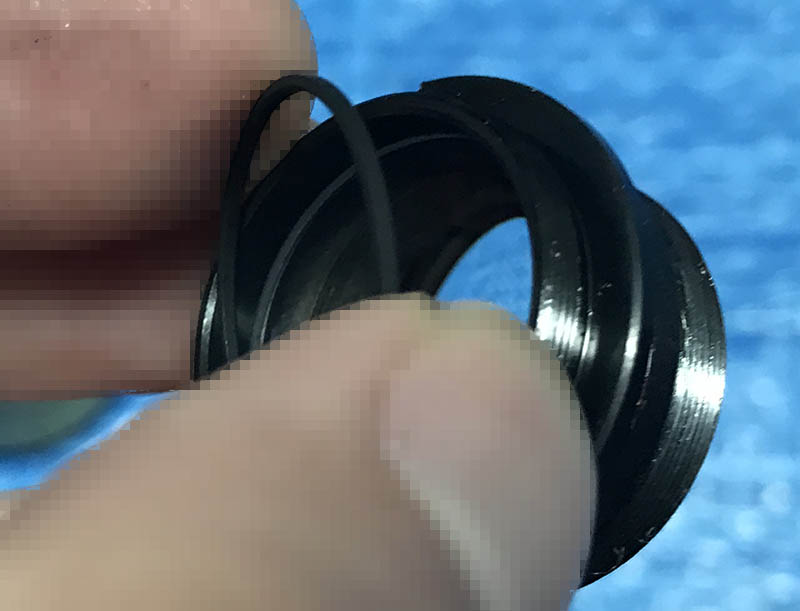
It’s now time to remove the rollers. These are delicate because they have a nylon bush. Do not heat these or you’ll ruin the nylon bush. If this is stuck, a soldering iron will do the trick but you should heat the other end instead. It is usually secured by lacquer or something stronger at the threads. Do note over-do the heating or you’ll damage the nylon parts.
Here it is, note how long it is and there’s a groove on it. It’s responsible for a lot of things and one of it is to keep 2 sets of cams aligned.
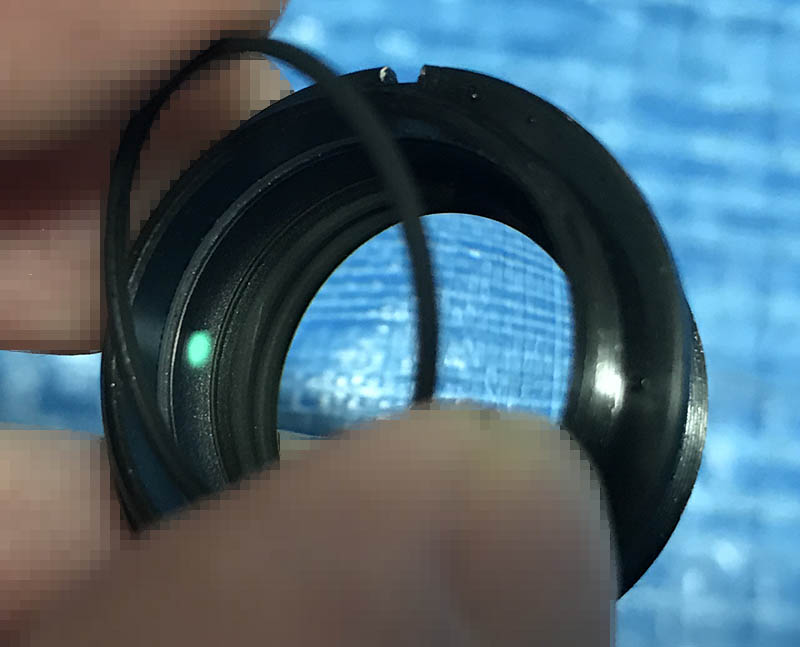
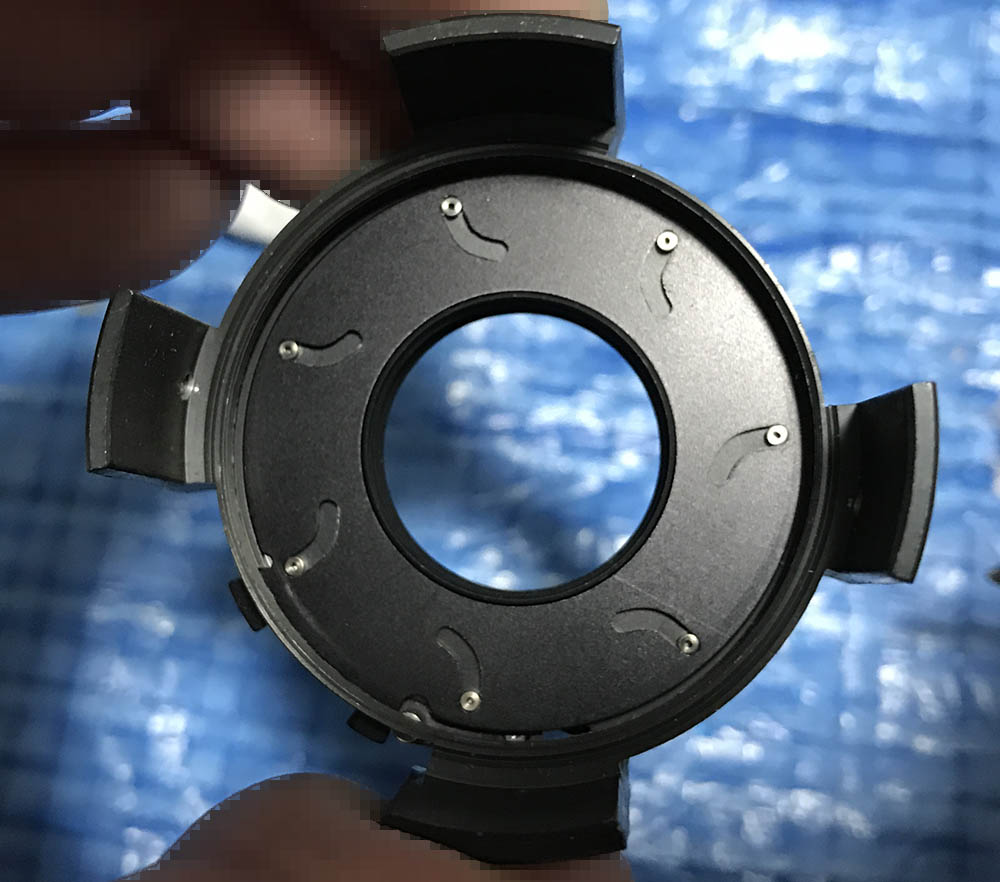
You can now remove the basket. It houses the iris mechanism along with its adjuster and the floating element, too. In order to prevent any mistakes, an important mark had to be made. It doesn’t have to be big so long as you can see it properly. Just align this later and you’re set.
The inner barrel can now be removed.
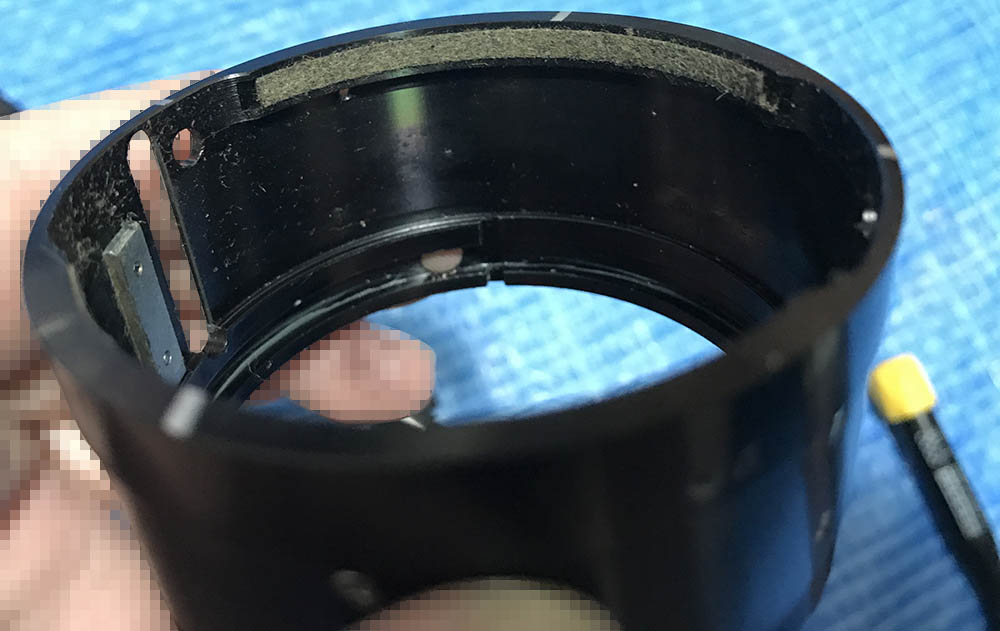
This strip of felt keeps the barrel from sliding. This can get worn with age so I usually replace these with new material. These are also perfect places for germs to breed.
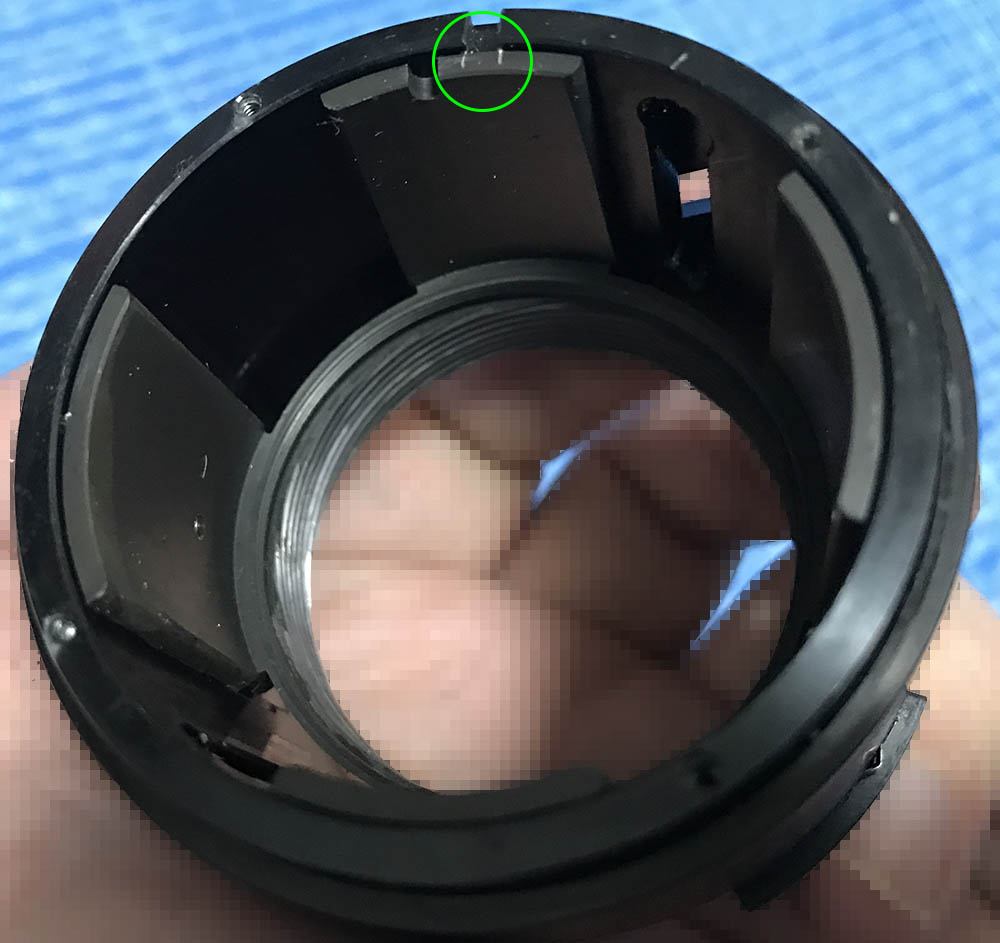
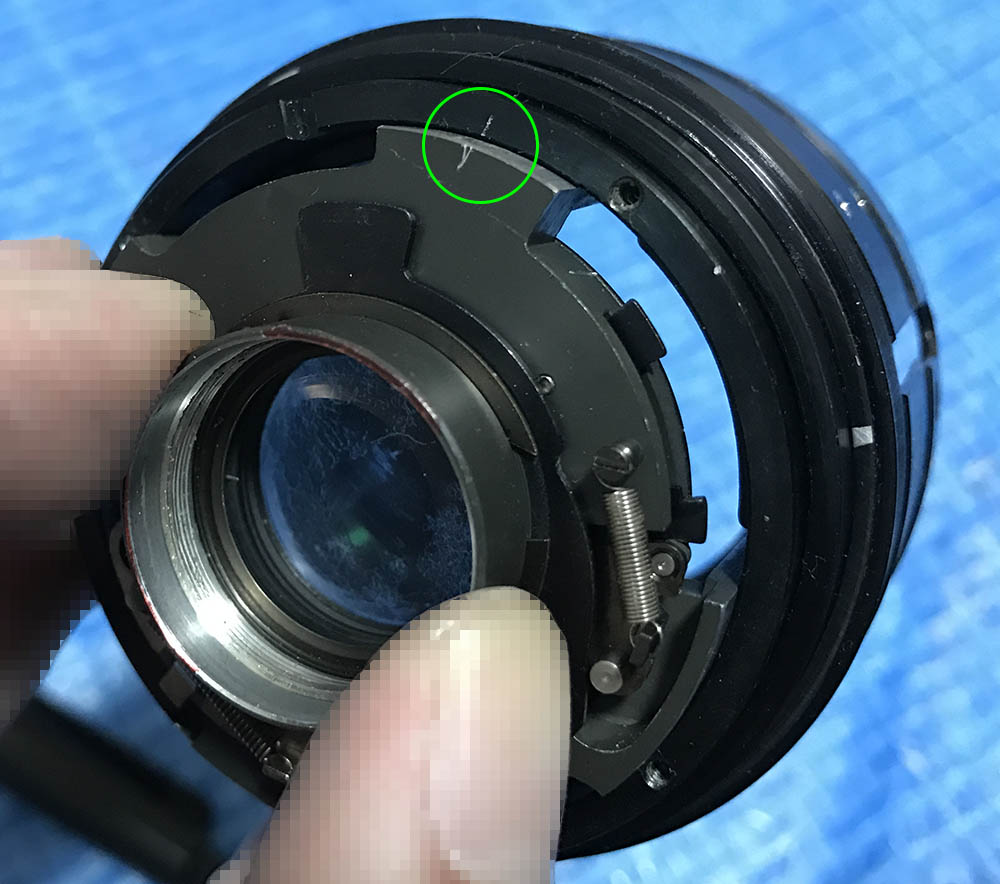
Make a small mark in order to know how things should align before you get them off. Make sure that they’re small as this part slides in-and-out and any roughness on the sliding part will end up making this mechanism feel a lot rougher as you push-and-pull the barrel.

Here are more rollers, remove this as you did the previous one.
It’s also sealed at the threads as you can see from the white residue.

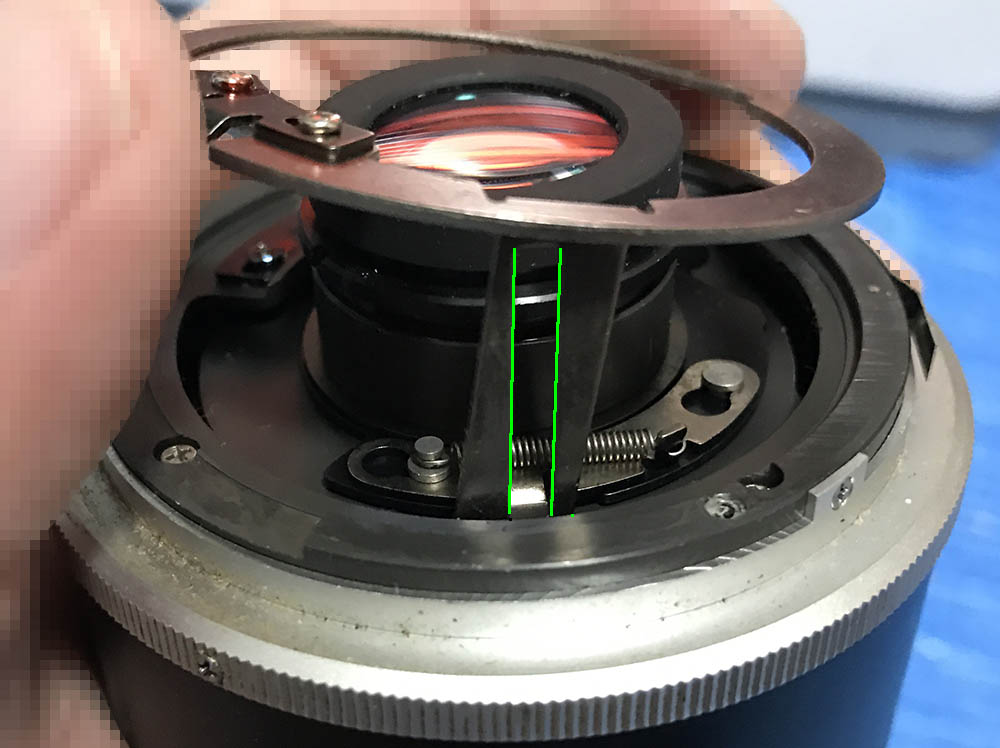
You can now remove this cradle out.
You don’t have to remove the spring but if you had to then mark its position first because this can be adjusted. It’s for the fake “macro” gimmick, it helps you know if you are over-extending the barrel or not.
Separate everything and give them a thorough cleaning. These are filthy so I usually clean them very well.
Clean everything thoroughly and make sure that you don’t leave residue so you won’t contaminate your fresh grease with it. I always pickle these in an alcohol bath to get rid of any residue, this is standard practice for me and it also kills any germs. This is the most time-consuming part of repairing this lens, if you got this far then it’s only best that you do the right thing which is to clean this thoroughly. While this is an easy lens to service, it took me 4 or so hours to service and most of that time was spent cleaning everything. It’s going to take you a lot of time to clean the parts but that’s expected.
Disassembly (Optics):
The optics of this lens isn’t as complicated as most zooms but it’s not what I would call simple since it has plenty of parts and you will have to remove a few things to access them. Once you got these out from the barrel it’s simple to service these provided you have the right tools. Since this does not have cemented groups you won’t have to deal with balsam separation. One thing I always do specially with zoom lenses is I mark the leading edge using my Sharpie pen. This will help me determine which edge should face the front, I won’t have to worry about putting an element back facing the wrong way. It can be a serious mistake if you put an element back facing the wrong way, it can crack under pressure or cause other problems. You’ll find that some of the elements have an obvious curvature so you won’t make a mistake but it is still good practice to take notes just so that you’ll know if you got it right.

This can be a delicate step. Carefully remove the floating element’s housing using a special tool such as a pipe-key. A lens spanner with long-enough bits will do the job as well but it may scar the holes as the bits won’t fit them as good as a specialized tool would.
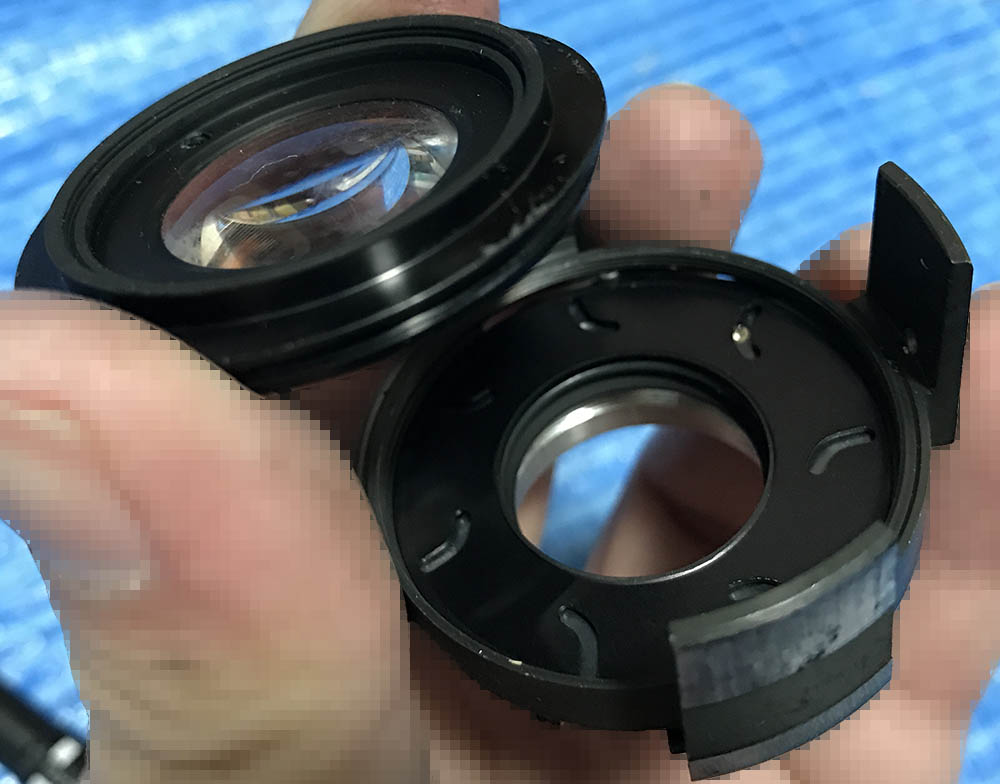
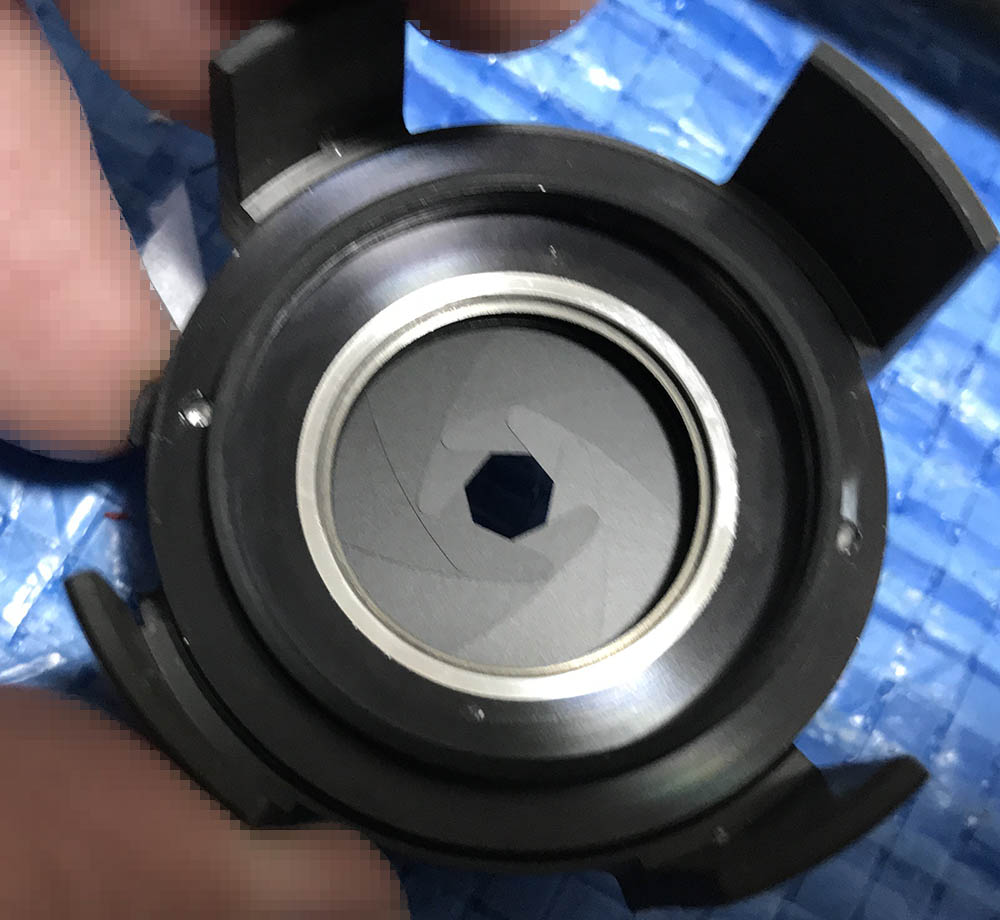
Removing the assembly allows you to access the iris mechanism. Keep it in a safe place while you service the rest of the lens.

Further disassemble the case of the floating element by removing this ring. This will give you access to the element. You don’t have to do this unless it’s really necessary like in the case of my lens.
Make sure to mark the front edge so you will know which side of the group should be facing where. Putting it back facing the wrong way will damage it at worst or give you a lens that renders funny at the least, your time will be wasted opening the lens up again and re-positioning this.
The rear elements assembly can be opened up by removing this collar.

Make sure to mark which side should be facing the front so you’ll know the direction which this element should be facing.
There is a spacer here, don’t forget to mark its direction, too.
Here’s another view.
Here’s another element.

Here’s the last one.
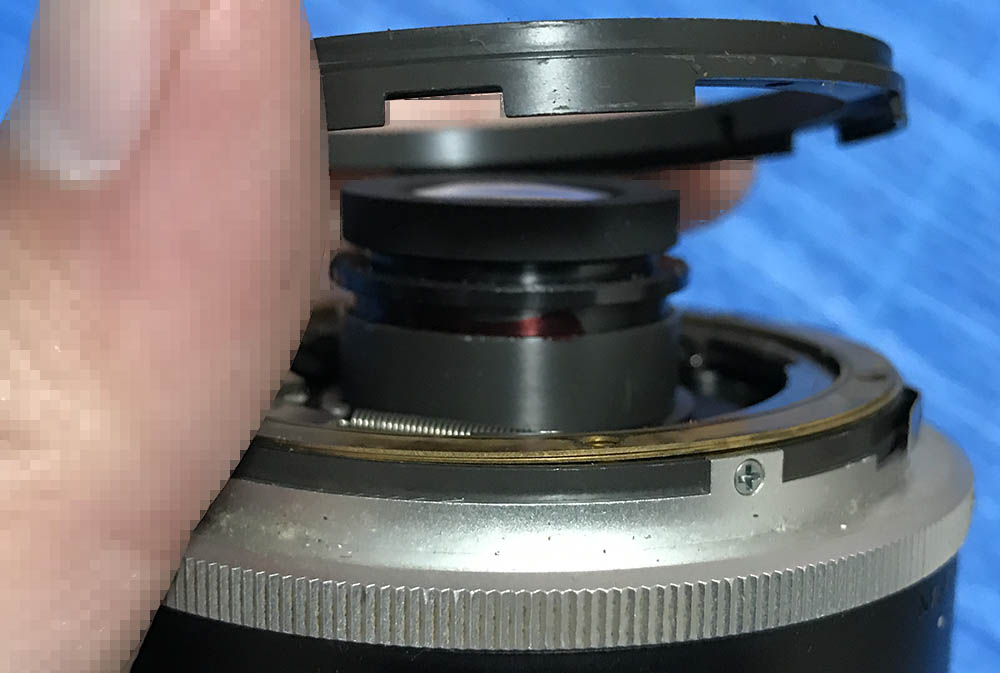
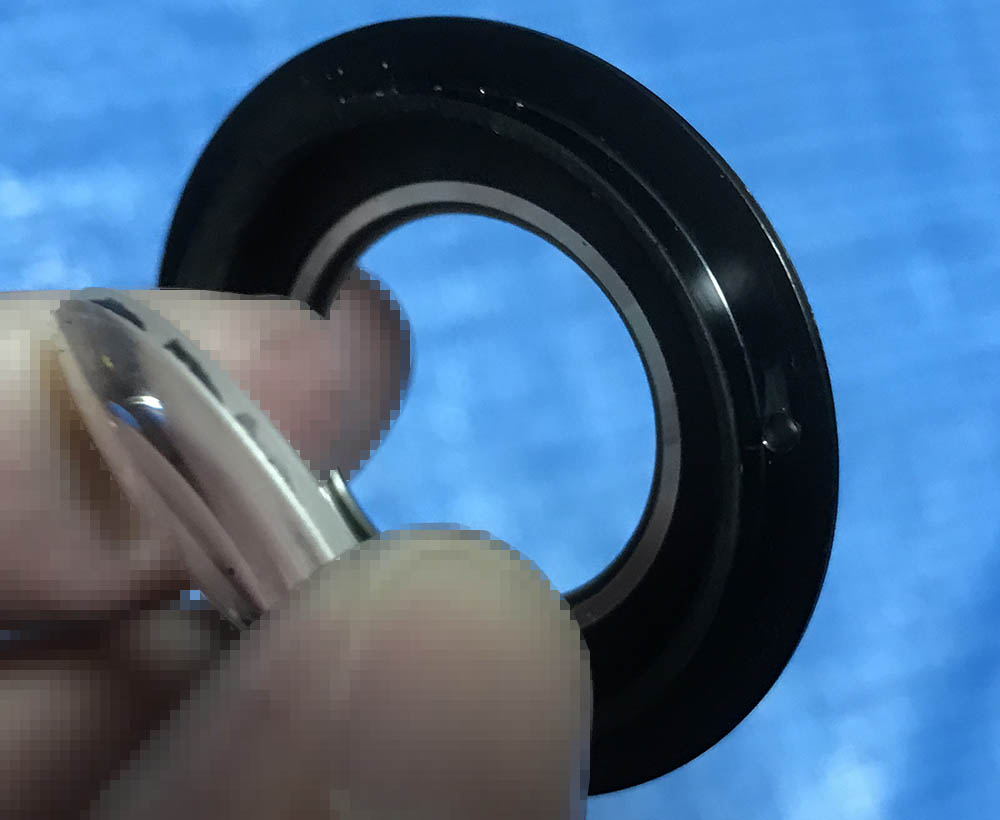
The front element can be accessed after removing this retainer.

Remove the front element with a lens sucker.

The 2nd element can now be accessed. Don’t forget to mark its front edge.
You can then remove the 3rd element and its spacer. Be sure to mark which edge should be facing the front so the spacer won’t be installed facing in the wrong direction.

I just left this element alone since it looks like it’s sealed with its housing. It’s not worth ruining this lens just to remove this thing.
Be careful with cleansing the elements, alcohol will strip the black in from some of the elements’ walls. If this happened to you, all you need to do is to repaint the elements with India ink. This is an unnecessary step unless the elements themselves are heavily-infested with fungi. You’ll want to cleanse the elements as good as possible in this case and stripping the ink is the way to do this properly. To know how I clean fungus from lenses, read my article on how to clean fungus from lenses.
Disassembly (Iris Mechanism):
The iris mechanism was in terrible shape when I got this lens but I repaired everything and now it’s snappy again. I wouldn’t tamper with the iris but it was necessary. If you have to repair yours, just follow and read my articles, look for the ones where I am showcasing zooms and study them so you will have references to follow since they mostly similar.

I disassembled everything down to their basic components and soaked the parts in solvent to clean any stubborn grime and kill any germs.

The iris was then reinstalled, it’s amazing to see how they look like if they’re properly-seated. Damn, that was a rough ride for this lens.
The rotator disc has been reinstalled once I am happy with the iris blades.
Everything looks fine for now, this lens went through the worst and how it’s back to working condition thanks to some love and care.
It wasn’t difficult to service the iris mechanism. In fact, it was the easiest of all the steps in this article. Clean the blades properly by wiping the blades, I used lens tissue moistened with naphtha. Air-drying the blades causes some drying marks to form so I wiped them carefully instead. Be careful it you’re handling the blades, the pegs can snap or you can warp or bend the blades. If you damaged even one of them, the iris won’t work properly.
Conclusion:
This was an unusual experience for me because I disliked repairing zooms. It was easy for me to service this because everything was laid-out very well. Even if this is a relatively-easy zoom to work with, I will never recommend this to a novice. I have always wanted to own one of these and thankfully I got one for cheap but I had to service it. All that effort was worth it, this is a pleasant lens to shoot with and it’s satisfying to know that I have saved this lens from the junk bin. This would have been salvaged for-parts if I did not find this at the right time.
Assemble it back to this state to adjust the focus, you can tighten the screws once you’re satisfied with your adjustments. If you’re new to the blog, read my article on how to adjust your lens’ focus to know how I do it.
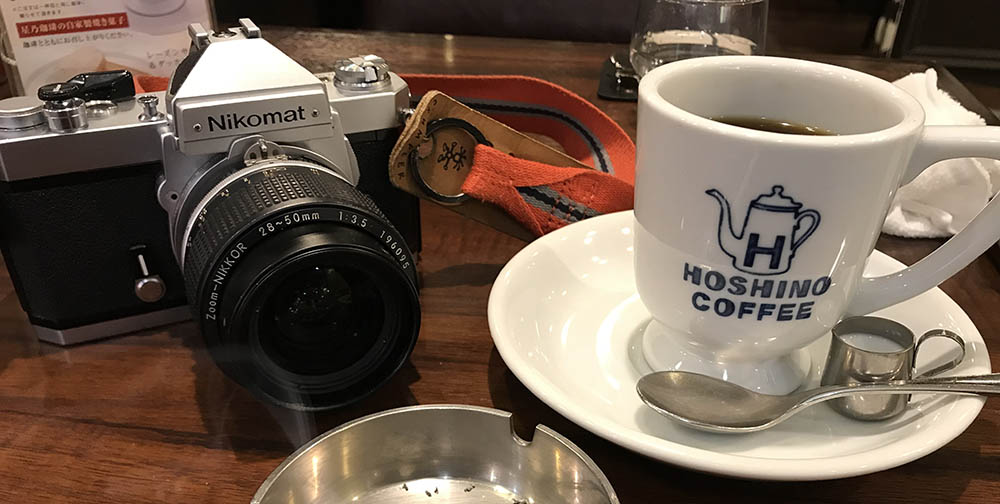
Thank goodness, now it’s back to shooting again for this lens. This is a great story and it’s now time to celebrate with over-priced craft coffee. This is as hipster as it gets.
That’s all for this article. I hope that my work has given more information about this lens, there’s not a lot of information out there about this and it’s even more difficult, if not impossible to find anything about repairing it. If you enjoyed this article, make sure to share this with your friends. If you’re a good soul and you want this blog to continue, please consider supporting my work by “buying me a burger”. The little amount that you send helps a lot in helping me pay for hosting this site as well as help me offset the cost of paying for and developing film. Thank you very much for following and supporting my work, see you again next time, Ric.
Help Support this Blog:
Maintaining this blog requires money to operate. If you think that this site has helped you or you want to show your support by helping with the site’s upkeep, you can make a small donation to my paypal.com (richardHaw888@gmail.com). Money is not my prime motivation for this blog and I believe that I have enough to run this but you can help me make this site (and the companion facebook page) grow.
Buy me a roll of film or a burger?
Thank you very much for your continued support!
$2.00
Helping support this site will ensure that this will be kept going as long as I have the time and energy for this. I would appreciate it if you just leave out your name or details like your country’s name or other information so that the donations will totally be anonymous. This is a labor of love and I intend to keep it that way for as long as I can. Ric.

Mar 21, 2020 @ 00:24:27
In your opinion, which is the best Nikon Ai-s zoom lens?
Apr 03, 2020 @ 03:52:26
80-200 2.8 ai-s
Mar 25, 2024 @ 15:56:57
I’m having a problem with this lens during reassembly. The aperture doesn’t stay wide open when fitting the lens mount. Any idea where the problem lies?
Jan 06, 2025 @ 05:43:38
Firstly, thank you so much for so much effort.
The 28-50 3.5 ais you have stated as 9 air spaced elements, which excited me, but roland vink has 9/7. Battle of the titans?
Any nikkor cemented will outlast me however. Unlike Mamiya’s.