
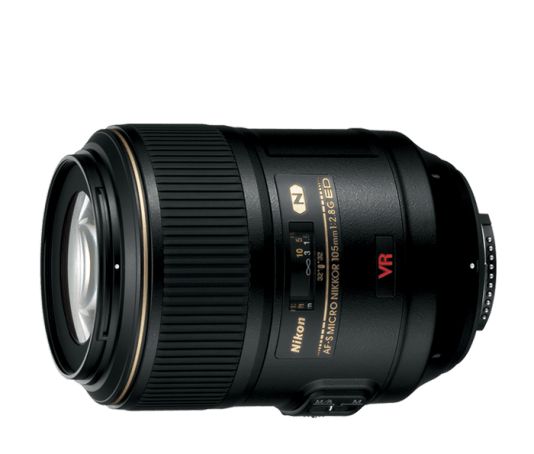
Hello, everybody. We are going to deviate from the classic Nikkors today and talk about a current production lens – the amazing Nikkor 105mm f/2.8G ED IF AF-S VR and the effects of diffraction on this lens. (picture from Nikon USA)
Being primarily a bug photographer in the warmer months, this subject is something that I am very much inclined to look into myself so that I know where and when I should stop down. Stopping the aperture down too much is something that most of us bug shooters are guilty of in the quest for better depth of field.

We will not be discussing about what diffraction is since that subject has been discussed in better detail on other sites, including Wikipedia, so let’s start!
Introduction:
Prior to this lens, macro (micro) lenses do not feature any VR technology. It was seen as a redundant feature for a macro lens, which is true but having VR opens up other avenues for photography in that you can also use this lens for portraiture and general photography now in low light situations.
This lens also focuses fast for a macro lens, hence doubling it’s utility for regular use and sets this lens apart from the other macro lenses available in the market at the time of it’s debut.
Compared to it’s predecessor the venerable Nikon 105mm f/2.8D AF Micro Nikkor, I find that this lens exhibits the effects of diffraction about 1 stop earlier than the older lens. I am also aware that the older lens is around 3/4 stops brighter wide open as well, showing that the actual t*stops is different in both lenses by that much.
Having the above in mind, let us start with our actual tests!
Setup:
My test was conducted with this lens shot at close to 1:1 minimum focus distance and with a ring flash attached to the front. The whole setup was mounted on a tripod and triggered using the amazing ML-L3 remote on the D7200 DX sensor camera.
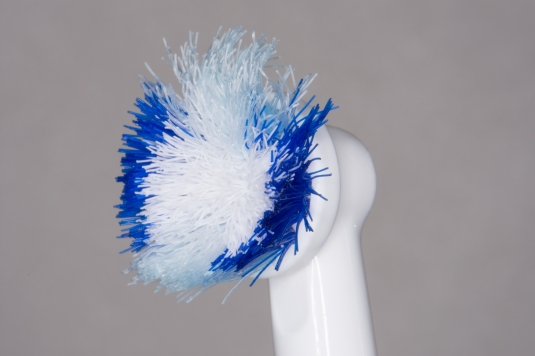
The aperture was set to f/5.6 for the first picture and subsequently stopped down by 1 full f-stop at a time until we reach an impractically low f-stop of f/40 at a speed of 1/200secs. The subjects that I chose are what was available to me at that time, I have dead bugs from my collection but I had not thought of using them at the moment so I chose a plastic toy and my toothbrush as test subjects. The bristles of the electric toothbrush is very good for displaying the effects of diffraction as well as depth of field and the plastic toy was chosen because of the grit.
Tests:
@f/5.6

 At f/5.6, the images look good and really sharp where the lens was focuses but the depth of field is still pretty shallow. The bristles still look a tad blurry due to the shallowness of depth of field.
This f-number is probably what pistil (essential, flower penis) shooters aim for, sharp focus where it matters then sharpness quickly drops to a beautiful wash of out of focus details.
@f/8

 At f/8, the lens reaches it’s peak sharpness across the frame. Notice that the tail of the toy starts to come into focus due to the deeper depth of field.
This is actually where many bug shooters (including me) start shooting from since the depth of field is deep enough to show more of the bug in detail and this is also where maximum sharpness starts to show. Normally at this aperture the individual lenses of a tiny bug’s (housefly) compound eye starts to show in good detail.
@f/11

 At f/11 we can see that the bristles further behind start to get into focus. There is also not a lot of difference from f/8 apart from the slightly deeper depth of field. The image still doesn’t show any effects of diffraction.
This is actually my favourite f-stop for this lens as this is enough to show minute details while having more of the bug in focus as oppose to f/8. The toothbrush picture shows the difference very well.
@f/16

 Now at f/16, which I consider to be the smallest aperture that I am willing to use we can see that half of the bristles are in focus. The effects of diffraction also starts to exhibit in the bristles if you look at it from 100%.
On the plastic toy, it’s a different story since the details are not as fine as the bristles but you can definitely see the (small) effects of diffraction on the individual particles of dirt if you look hard enough.
On this lens, I would definitely not go beyond this f-stop normally. The older lens that it replaced is better in this regard in that the effects of diffraction is not that noticeable at f/16 and only really shows at the f/stops between f/16 and f/22.
@f/22

 At f/22, you can clearly see diffraction at work now on the toothbrush. You do not even need to zoom in at 100% to see the loss of detail in each of the individual bristles on the zone in focus. The plastic toy fared better but you also see the effect around the eye where it was focused.
I would only use this in desperation for cases where focus stacking is never an option.
@f/32


At f/32, the image now looks flat due to the greater depth of field. diffraction is so obvious now that you do not have to zoom in to see it’s effects. The overall loss of saturation and contrast is obvious but these images are probably useable if you do not need to make a big print. For catalogues of numerous small items, this would probably be OK unless you are a masochist and would love to do some focus stacking on hundreds of images.
@f/40
 And finally at f/40. Just take a look at the fin of the plastic toy and see how blurred it is now. The bristles at the furthest end starts to get into focus but those too look blurred. Picky clients will start to notice this and will reject these pictures if you show these to them!
Conclusion:
From the pictures above, we can see that this lens is useable up until around f/22 at most if you want crisp details but you can push it till f/32 if you need to. The smallest f-number is not so bad for people who are not picky but for bug shooters this is a no-go zone.
I hope that you have enjoyed this post and hopefully, learn something new. I will plane to make something similar for the older Nikkor macro lenses (55mm) in the future for your reference. Thank you and share this if you think that this is useful! Rick.
Help Support this Blog:
Maintaining this blog requires money to operate. If you think that this site has helped you or you want to show your support by helping with the upkeep of this site, you can simple make a small donation to my paypal.com account (richardHaw888@gmail.com). Money is not my prime motivation for this blog and I believe that I have enough to run this but you can help me make this site (and the companion facebook page) grow.
Helping support this site will ensure that this will be kept going as long as I have the time and energy for this. I would appreciate it if you just leave out your name or details like your country and other information so that the donations will totally be anonymous it is at all possible. This is a labor of love and I intend to keep it that way for as long as I can. Ric.

Jan 27, 2016 @ 03:03:23
Thank you for the effort and sharing this…more idol.. Doc A
Aug 15, 2018 @ 00:56:18
Thanks for the analysis of the lens. Another “no go zone” for some would be that it is made in China.
Sep 03, 2018 @ 00:17:01
True!