
Hello, everybody! I was watching “Airplane” a while back. It is a silly movie with an equally-silly doctor played by late Leslie Nielsen. It’s a great movie, I found myself laughing at most of the jokes but what really them so funny is how the actors delivered their lines. They appeared serious, they delivered their lines with a straight-face despite all the nonsense. The subtlety, timing and execution was brilliant. I haven’t seen a funnier movie these days. This level of comedy could only be rivaled by Mel Brooks. If you like subtlety and smoothness of delivery then you will love today’s featured lens but there is nothing funny about its delivery, it’s one of Nikon’s better portrait lenses.
Introduction:
The Nikkor 85mm f/2 Ai-S was sold from 1981 to 1995, it’s an update of the Nikkor 85mm f/2 Ai from which it inherited its optical design. The barrel is new, it now has a linear aperture and it’s now able to shoot in PSAM modes with Nikons that allowed it such as a Nikon FA. It’s a bit lighter due to better engineering. Its well-regarded as a great lens but people are polarized by it. Like the Nikkor 85mm f/2 Ai that preceded it, the maximum aperture is just f/2 unlike the older New-Nikkor 85mm f/1.8 which is marginally brighter. It’s not really an issue, I suspect that the better coatings may have even made it better at gathering light wide-open.

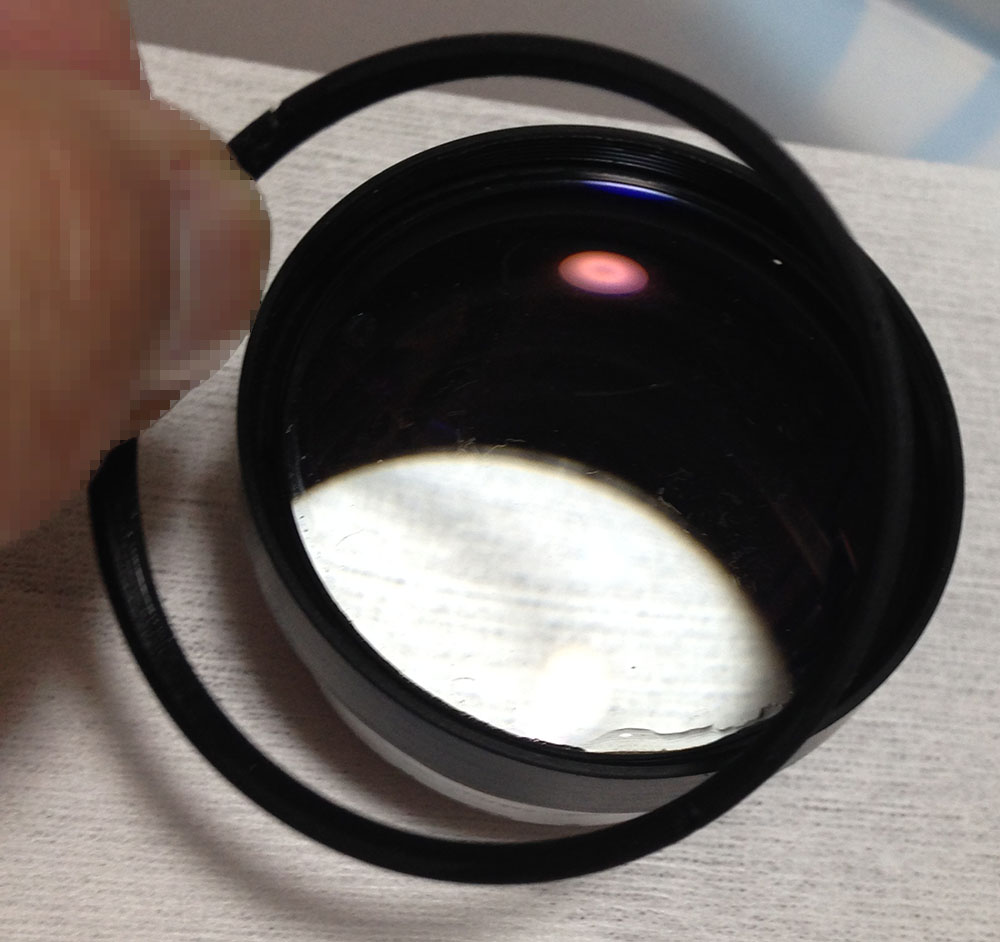
Its coating has a different hue compared to the Nikkor 85mm f/2 Ai, it means that the coatings aren’t identical. That will affect its optical performance to an extent. The bright f/2 maximum aperture means that this is easy to focus specially if you have a split-screen installed. Your view through the prism is clear and it’s easier to focus due to the thin depth-of-field. A faster lens may be more difficult to focus since the depth-of-field is even shallower.
It retained its predecessor’s optical design of 5-elements-in-5-groups so this means that it could take photos just as good as the older model, maybe even better. In my experience, this one performs better then the Nikkor 85mm f/2 Ai since it could give better results at further distances as opposed to what I saw with the latter which has great image quality at closer distances but the performance drops at further distances. I’m not the only person to notice it but I don’t think that is normal and may be due to sample variation. Despite that, both perform quite well as portrait lenses which they were designed to be in the first place.

These aren’t rare, they were produced until 1995 and you could even buy it from a shop brand-new until the 2000s. I love these so much that I had two of them at one point but I sold one of them since this isn’t my favorite lens.
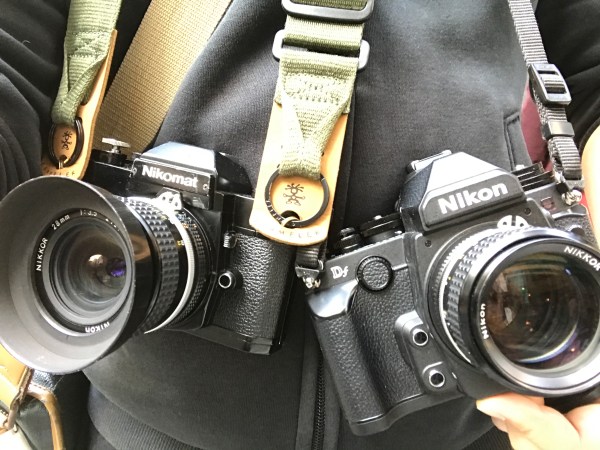
It’s compact compared to the New-Nikkor 85mm f/1.8 which I consider to be quite large, making this smaller may be why it has a f/2 maximum aperture. The lighter, more compact barrel means that it balances quite well with all cameras. Pictured here is the Nikon HS-10, you may want to buy it so ghosts and flare can be avoided when the sun is at an angle.

It works perfectly with a Nikon F100 and you’ll get spot and center-weighted metering with it despite not being able to see the aperture values on-screen. It’s able to communicate with it via the Ai-coupling tab and that allows it to be able to meter with this accurately.
Knowing how your lens performs is key to maximizing it. You’ll know about its strengths and weaknesses. This will help you decide which lens is better for certain assignments. I took the following photos from f/2, f/2.8 and f/4, it shows the most changes in performance with these apertures. Things begin to look generic once you hit f/5.6 and you won’t see much change in terms of rendering characteristics. Read my Nikkor 85mm f/2 Ai article, the optics are similar so what you see there may also be applied here to some extent.


(Click to enlarge)
The corners appear quite dark wide-open compared to the Nikkor 85mm f/2 Ai, I found this unusual since they share the same optical design. Stopping it down to f/2.8 makes things a lot brighter, you’ll only see traces of it by f/4 so it’s gone from f/5.6 and on.


(Click to enlarge)
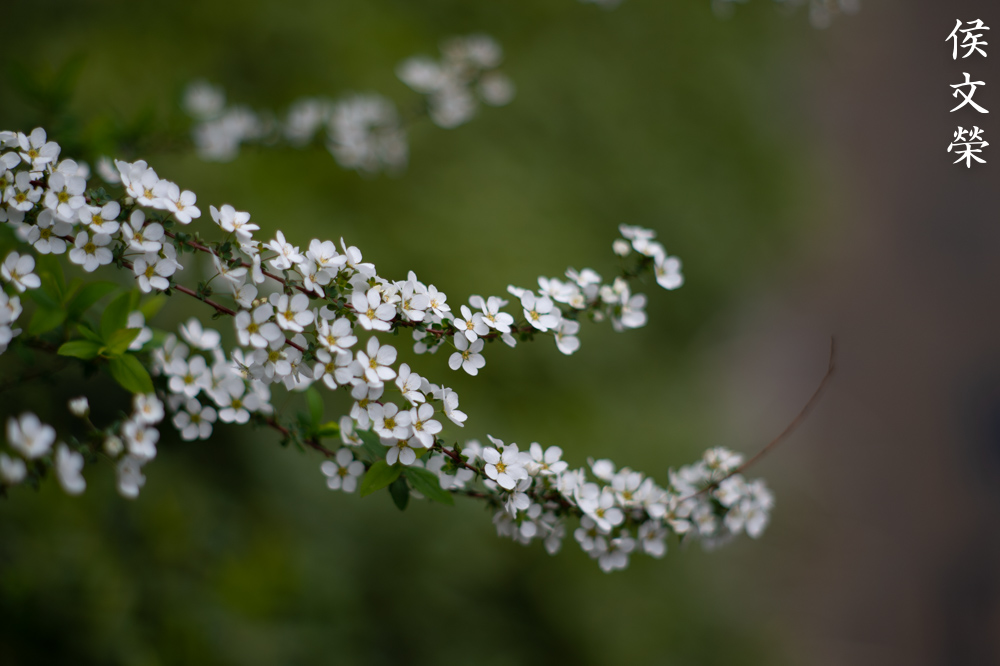
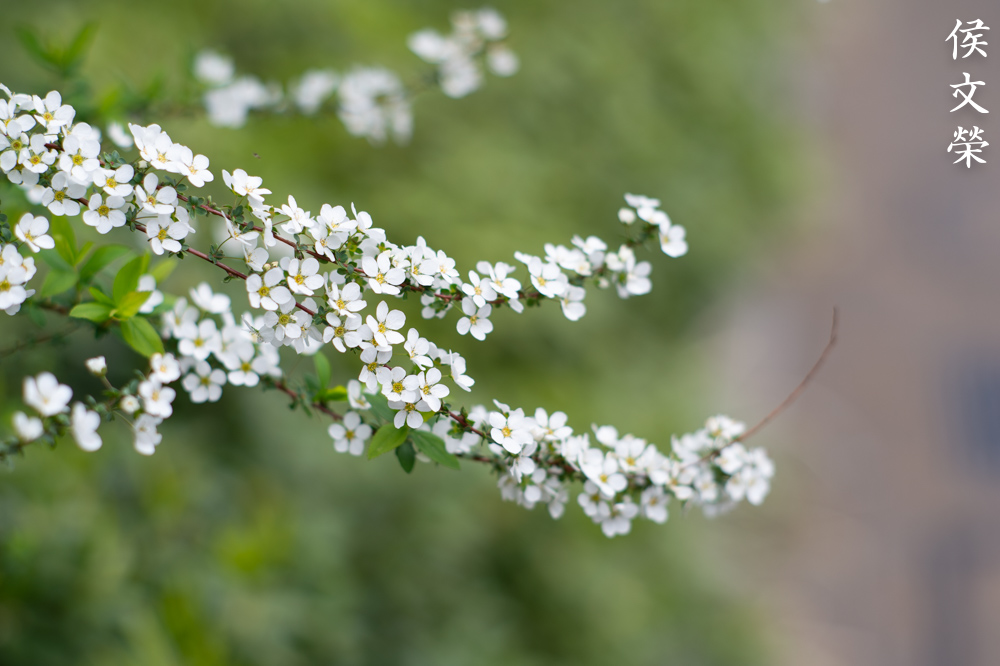
The character of the bokeh is smooth wide-open, the discs look even. There’s only minimal traces of outlines and it looks quite clean. Stopping it down to f/2.8 makes the discs look more angular but cleaner. I don’t like how it looks at f/4 since I don’t like angular-looking discs. Some people prefer this but it’s not something that I’d want.


(Click to enlarge)
The heavy vignetting wide-open can affect your exposure considerably. You won’t get this with the Nikkor 85mm f/2 Ai or at least its better-controlled. It is sharp wide-open but you’ll see some sphero-chromatic aberration but it is not a big deal. Resolution is quite good, saturation and contrast looks nice as well. Stopping the iris down to f/2.8 improves its resolving power and you’re going to get a sharper center and the edges begin to look better. Its center is at near-peak performance by f/4 and the corners look a lot better. The only reasons for stopping this down further is to get better corners and maybe a wider depth-of-field.
The lens was focused at about 11m. Unlike the Nikkor 85mm f/2 Ai, it’s sharp at further distances while the latter begins to show weaker performance. It has a bit of chromatic aberration around the lamps but it’s not too much. It may be a bit blurry due to motion blur but things still look fine.
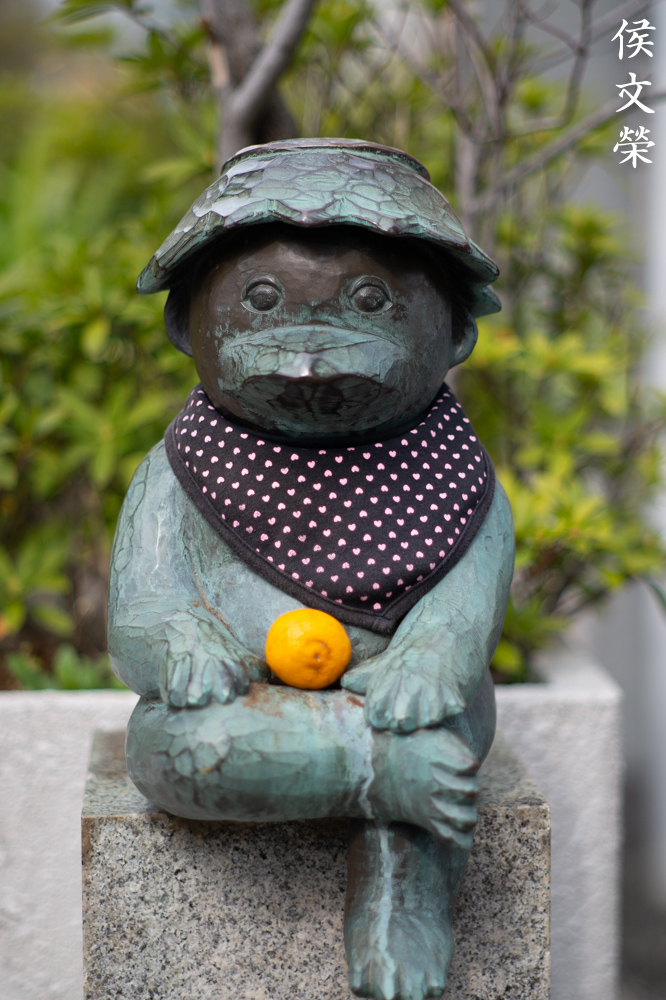
It could render beautifully, with a painterly-like quality. The field curvature is flatter compared to the New-Nikkor 85mm f/1.8 as far as I recall. The thin depth-of-field is useful for blurring background-clutter.

It could occasionally produce outlines in its bokeh, resulting in a rough-look which can be distracting. It’s still tolerable and I have seen worse. It’s sharp where but not too-sharp as to make your subjects look like mannequins.

It’s perfect for environmental portraiture where you could the background of your subject more to give some context. A Nikkor 180mm f/2.8 ED Ai-S is better for tighter framing.

Its ability to isolate your subjects is amazing, you’ll get a nice, 3D-like effect. On another note, I’d like to point your attention to the foliage to the left. It’s distracting and it’s one of the worst that I have seen from this lens.
The shot the photos above wide-open. I had the AF-Nikkor 85mm f/1.8D and it’s terrible compared to this one if I recalled it right. Chromatic aberration was quite prominent wide-open and it wasn’t as sharp, too. Even the older Nikkor-H 85mm f/1.8 Auto performed somewhat better. I may have gotten a lens but the AF-Nikkor 85mm f/1.8D isn’t known to be the best in its class.
Here are some photos that I shot with film. Film has this unique look that’s difficult to simulate with a digital camera, this is because film grain works and reacts differently to light. It can either hide or amplify a lens’ flaws. It’s important that we shoot with film since it was designed to work with it, the results we see will help give it a better assessment since we’re seeing how it performs with its intended medium. I shot these with a Nikon F100 loaded with Fujifilm Industrial 100.

It’s sharp wide-open, notice how beautiful her hair was rendered. You could see the details very well. There’s some spherical aberration resent, you can see that in the flowers at her hair. It’s not a big deal, just stop it down so you could eliminate it if this bothers you.


(Click to enlarge)
The character of the bokeh isn’t the smoothest here in these photos. This is a nice portrait lens and it’s the perfect lens to take if you’d like to travel light.
The 85mm focal length is perfect for environmental portraits. It is between 50mm and 135mm the compression looks just-right for faces when shooting at this distance. A longer lens will make faces look smaller so it’s best to use them for getting a little bit closer to get a tighter framing of the face or shoot a whole-body shot where the face isn’t as prominent and the compression is going to make your subjects appear thinner or taller. You’ll see the effects of foreshortening more with a wider lens such as a 50mm, your subjects going to look a bit chubbier due to it. Foreshortening is used to emphasize and for exaggerating something in relation to the rest of the frame. A wide lens has a lot more of it so people don’t use these much for portraits.


(Click to enlarge)
The background can be blown-away by focusing closer. Learning to position your subjects is important and it’s part of good-framing.


(Click to enlarge)
It can be a bit difficult to track moving subjects at times so my focus is a bit off at times but you’ll get better as you practice. Despite that, it’s great for a lot of applications, not just portraiture.


(Click to enlarge)
These were mostly shot wide-open. This is an amazing lens with film, I love how nice the combination is. People use filters and effects to simulate film’s unique look, why not just shoot with it and get the effect effortlessly?
I highly recommend this lens to anybody who wants a portrait lens. It’s still relevant today and you could save a lot of money with it. It’s price has been appreciating a bit lately as people are finding out more about it. A cheaper option is the Nikkor 85mm f/2 Ai, it has the same optics and should perform similarly to this one. It has a longer focus-throw which some people prefer. When looking for one of these make sure that the iris is snappy when your finger actuates the stop-down lever. It should be dry and the optics should be clean. Turn the rings to see if everything operates smoothly. Getting one of these is a great investment in today’s economy. Happy hunting.
Before We Begin:
If this is your first attempt at repairing a lens then I suggest that you check my previous posts regarding screws & drivers, grease and other things. Also read what I wrote about the tools that you’ll need to fix your Nikkors.
I suggest that you read these primers before you begin (for beginners):
Reading these primers should lessen the chance of ruining your lens if you are a novice. Before opening up any lens, always look for other people who have done so in YouTube or the internet. Information is scarce, vague and scattered (that is why I started this) but you can still find some information if you search carefully.
I highly recommend that you read my working with helicoids post because this is very important and getting it wrong can ruin your day. If I can force you to read this, I would. It is that important!
For more advanced topics, you can read my fungus removal post as a start. This post has a lot of useful information and it will be beneficial for you to read this.
Disassembly:
This isn’t a difficult lens to service so long as you have enough experience. It is an Ai-S lens which means that its objective is incorporated to the helicoid. This makes it trickier to service compared to older Nikkor primes. This isn’t something a beginner should be working on as their first project. It requires special tools and skills to dismantle and reassemble. If yours is broken, get a repairman to service it and make sure that he is of good-repute.
I didn’t dismantle this in the correct sequence since it was stuck so some of the photos won’t make sense to you but I will layout the photos so the order in which they appear will be the correct way to dismantle it. Pay attention, I will not be held accountable if you got this wrong.
This is the correct sequence:
- Turn the barrel to infinity, work on this while it’s at infinity.
- Remove the rubber grip and remove the front part of the focusing ring.
- Unscrew the front barrel and remove front elements assembly.
- Extract the focusing ring.
- Remove the bayonet and remove the aperture ring and the chrome grip.
- Remove the helicoid keys and separate the helicoids.
- Remove the iris mechanism and optics.
Please keep this in mind and refer to the sequence above while you take the barrel apart. I will update this article in the future when I get the chance.
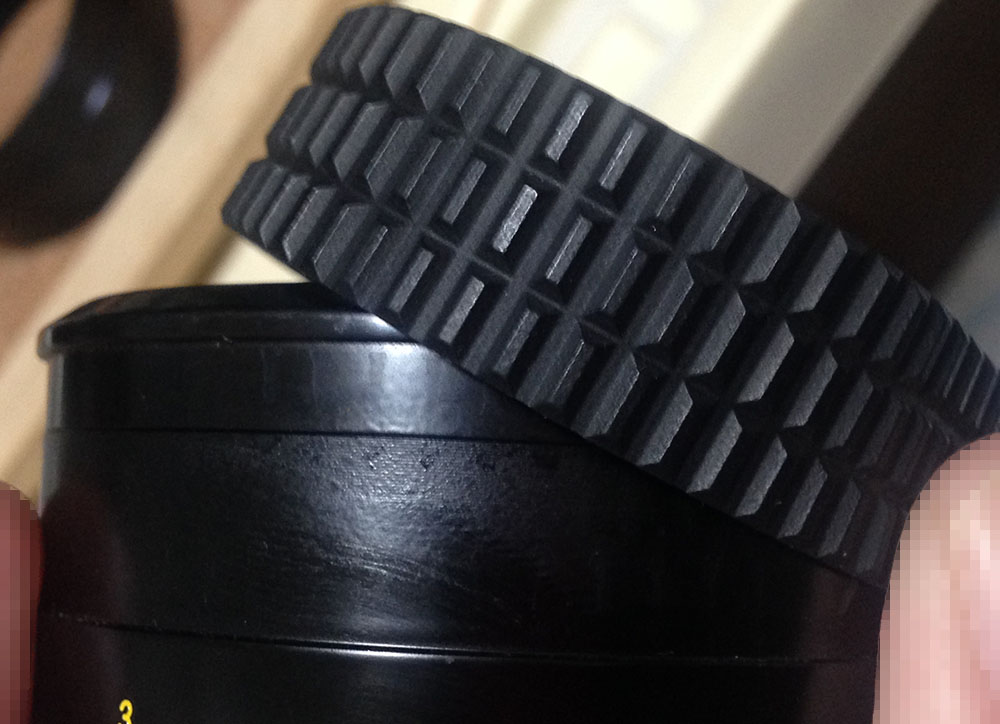
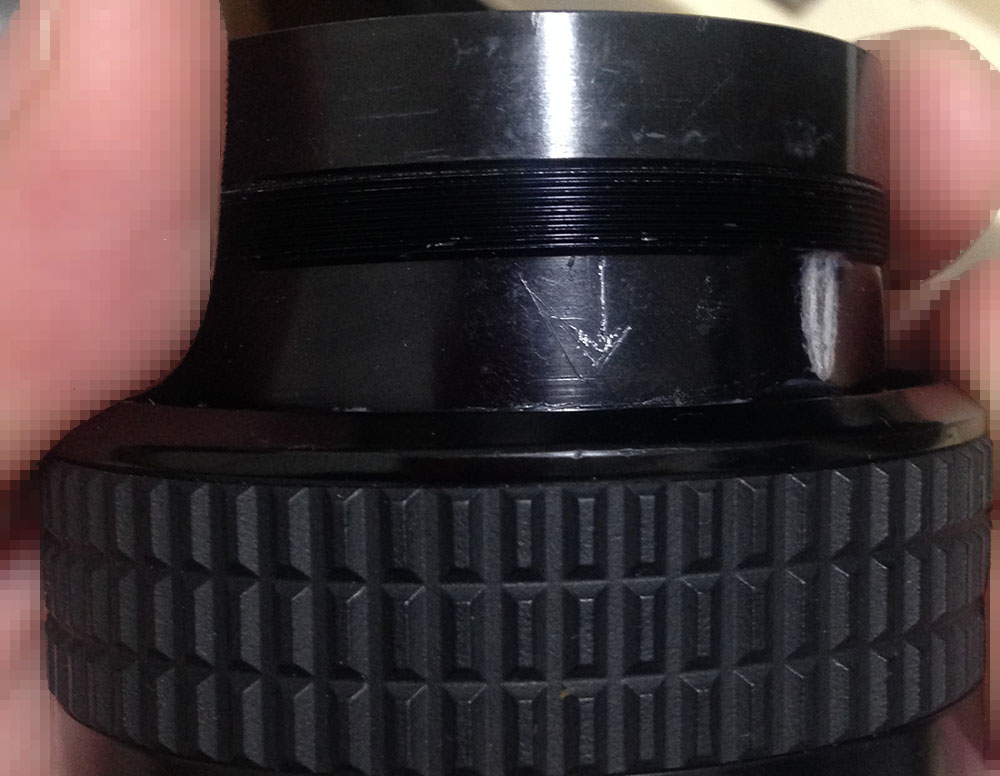
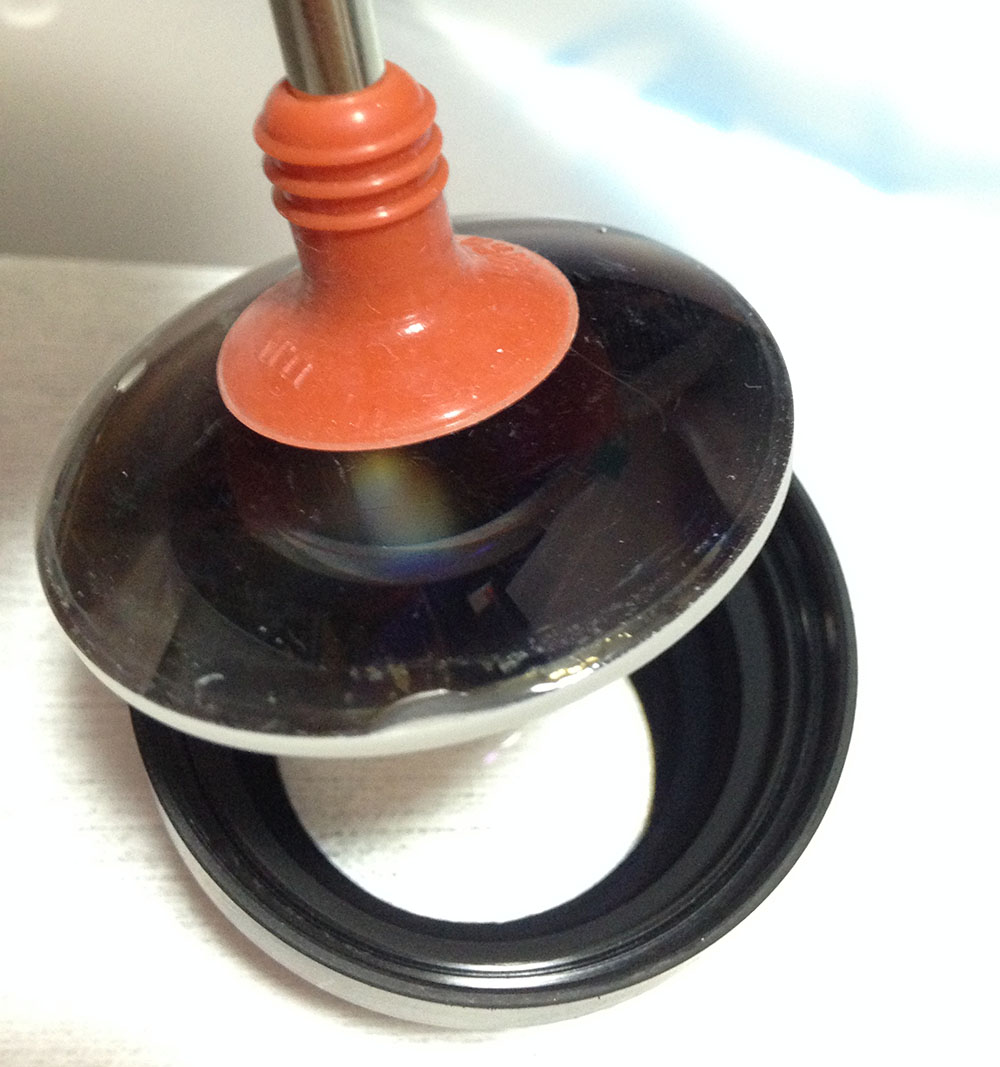
Carefully remove the rubber. Run a narrow toothpick underneath its whole circumference to lift it from the adhesive and carefully pick it off.
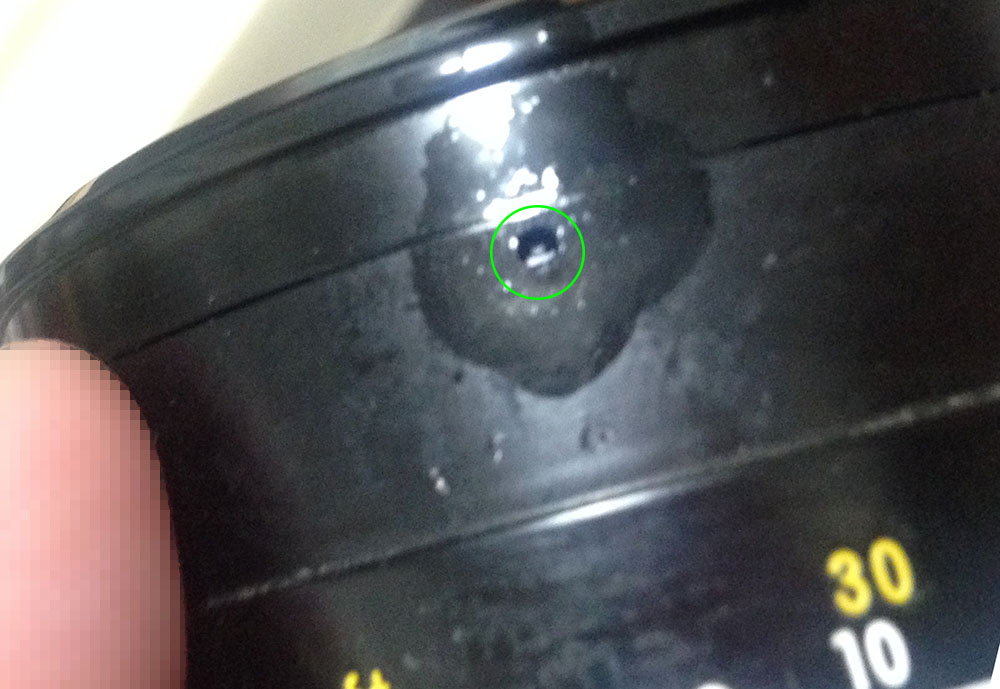
Apply a drop of alcohol into this hole to soften the seal.
Unscrew it. Using a pair of rubber gloves will help your grip. If it’s stuck, do that alcohol trick again later, it may take several repatitions.

Locate and extract this. If it’s stuck, apply a drop of solvent to soften its seal and try again later.

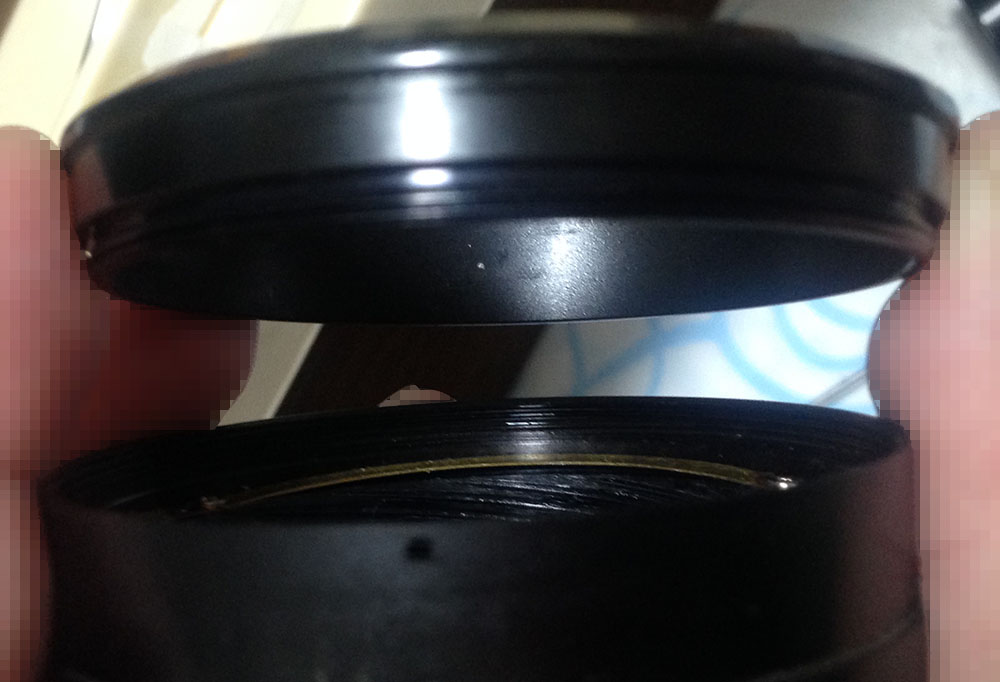
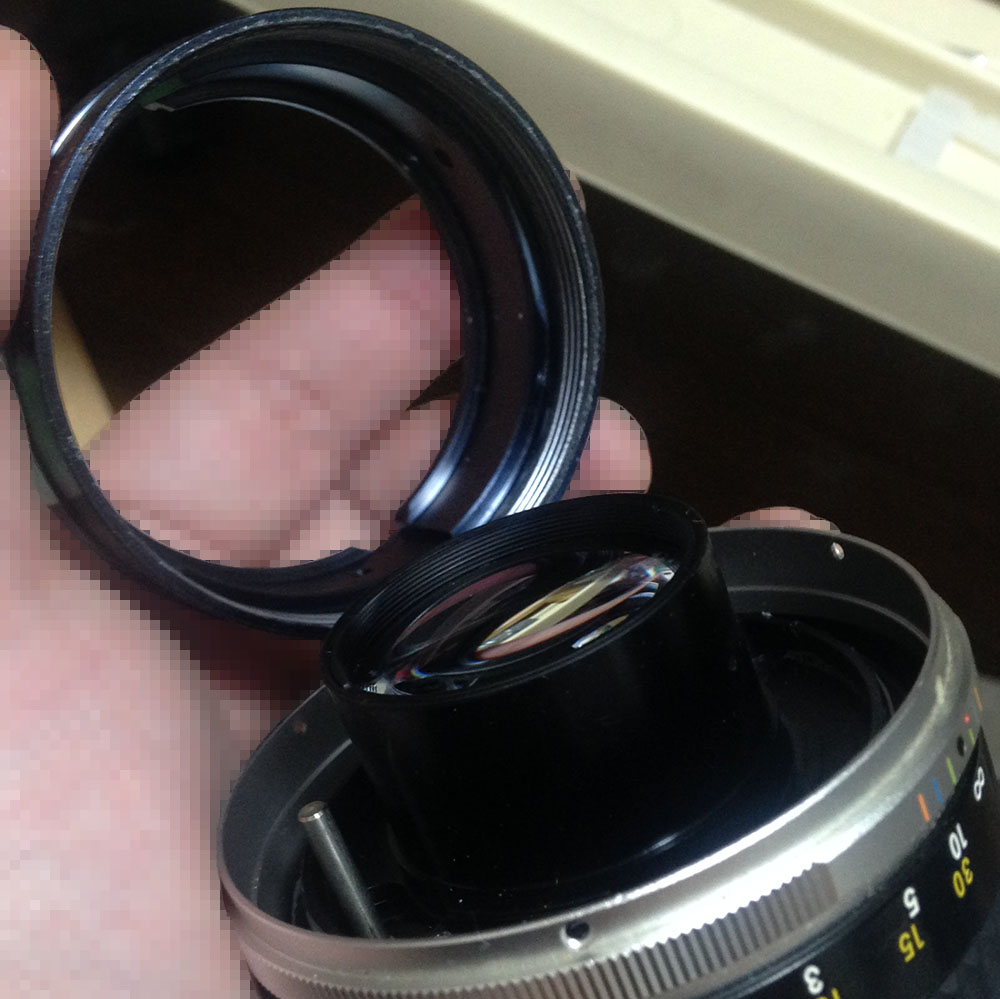
Unscrew the front barrel.
Carefully unscrew the front elements assembly off from the inner helicoid.
From here on, you would have to focus the lens to infinity and do your best not to disturb it while you work on the barrel. This will make taking notes a lot easier as you’ll have a point of reference for later.
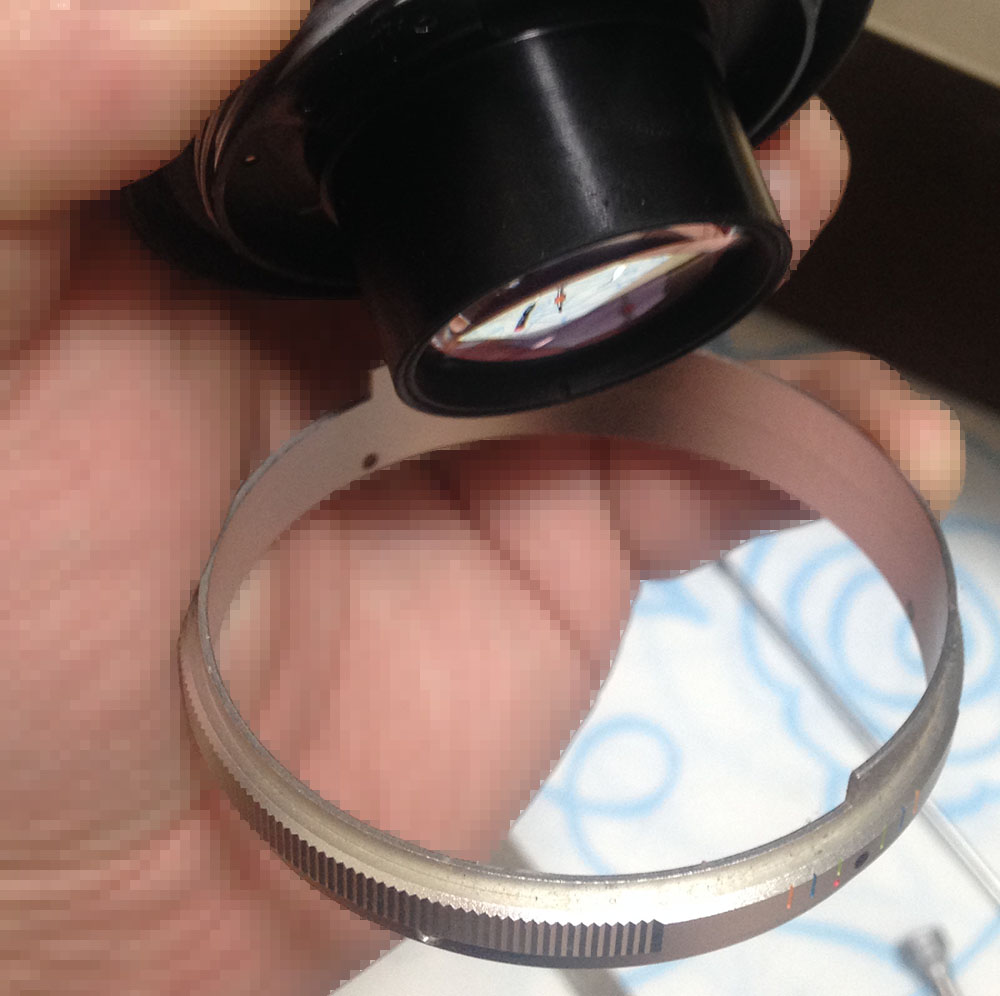
Extract these to remove the focusing ring.
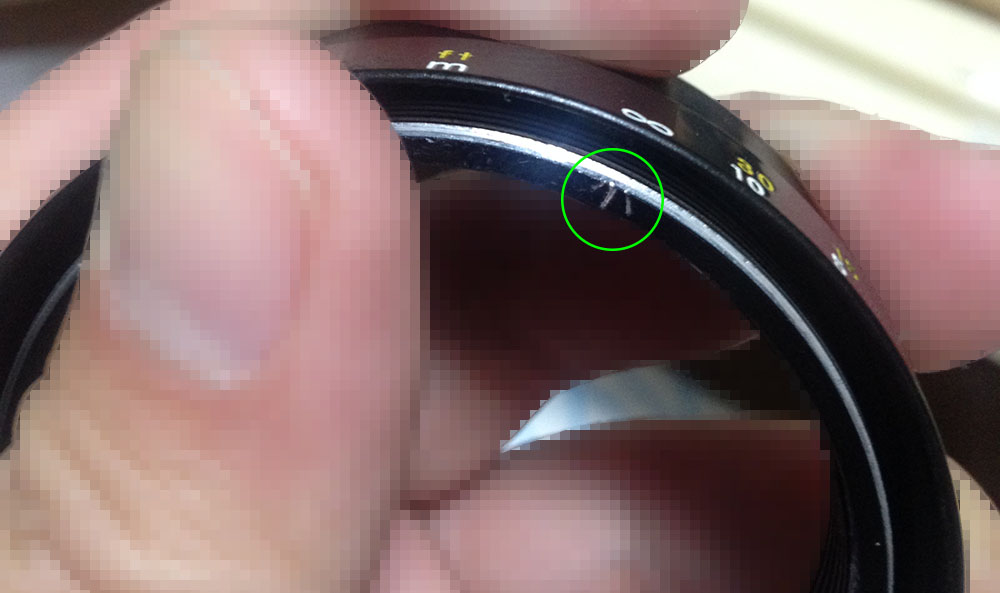
Before you remove the focusing ring be sure to note its alignment.
Remove the focusing ring and clean it properly.

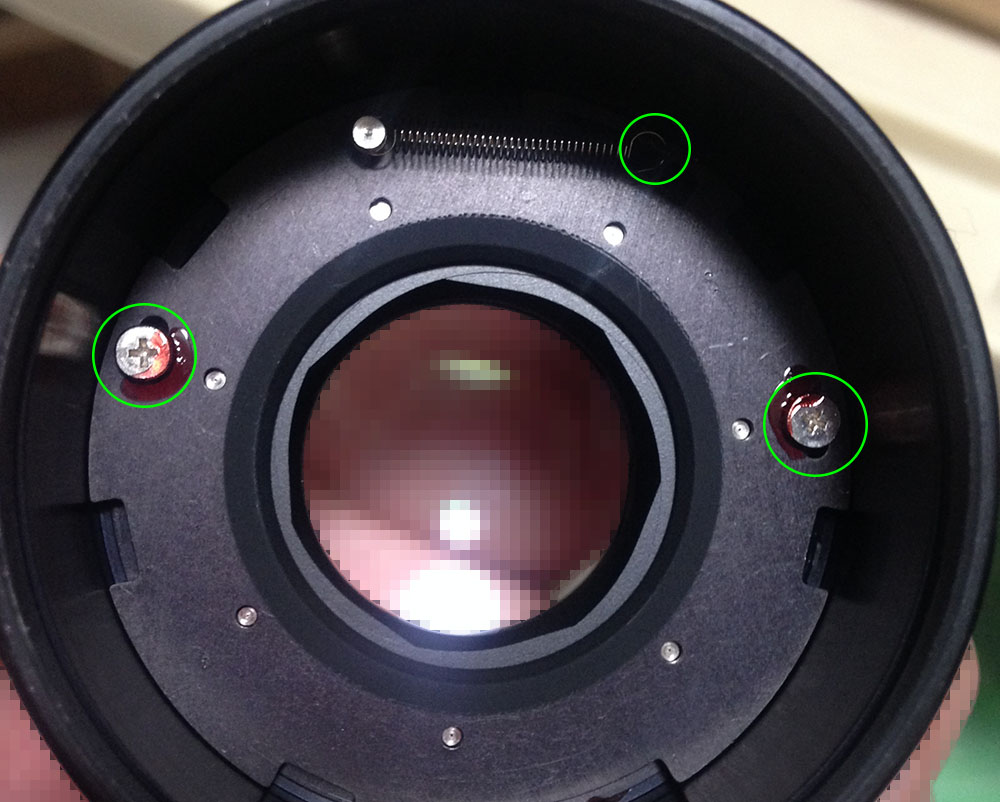
Extract these screws to remove the bayonet mount. Many people strip these because they’re not using the correct type of drivers or didn’t have the right skills. Read my article on how to remove bayonet screws to prevent it from happening to you.
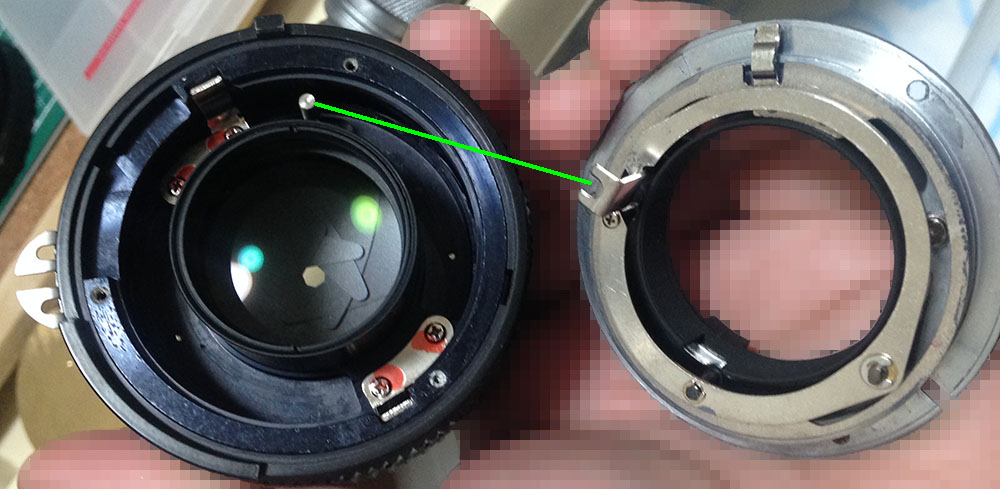
Carefully remove the bayonet mount and note where things were attached. The fork should couple to that in the iris mechanism. There’s a tab here that should be attached to a slot in the aperture ring.

Remove the aperture ring.
Carefully extract these to remove the spring but note its position so you can put this back properly again.

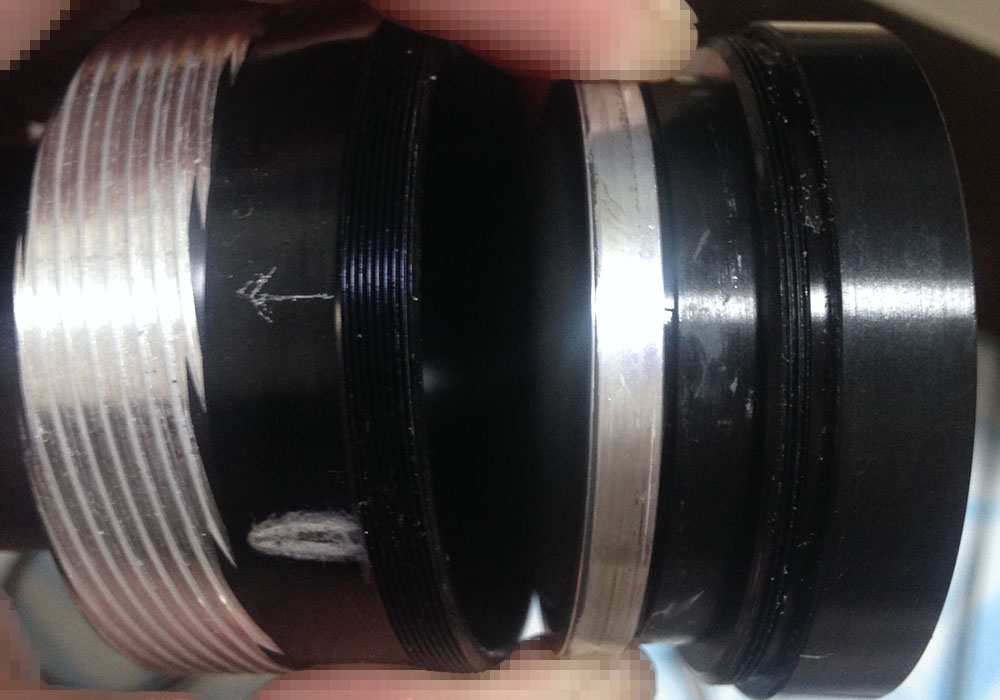
There are 2 helicoid keys here, extract their screws to remove them. These keep the helicoids synced so turning the central one will extend-or-retract the barrel. Note which key came from which slot so you could reinstall the key back to their proper place. This is also a good time for taking notes, see how deep the helicoids and keys are when the barrel is turned to infinity.
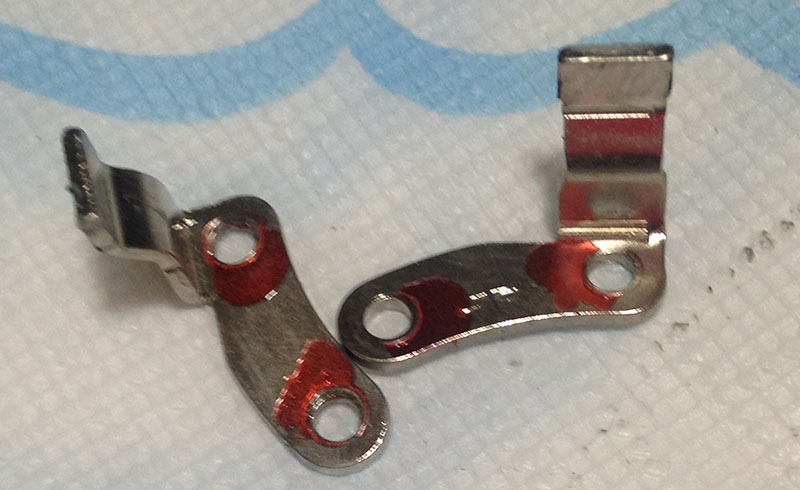
Clean these properly. Note that I placed a small mark in one of them to help me know which one should be placed at what side.

Extract the central helicoid from the outer one. Don’t forget to note where it separated since this is also the same place where these should mesh. Many people forget to do this so they get stuck. To prevent this from happening to you, read my article on how to work with helicoids and follow my guide.
Carefully remove the outer helicoid.
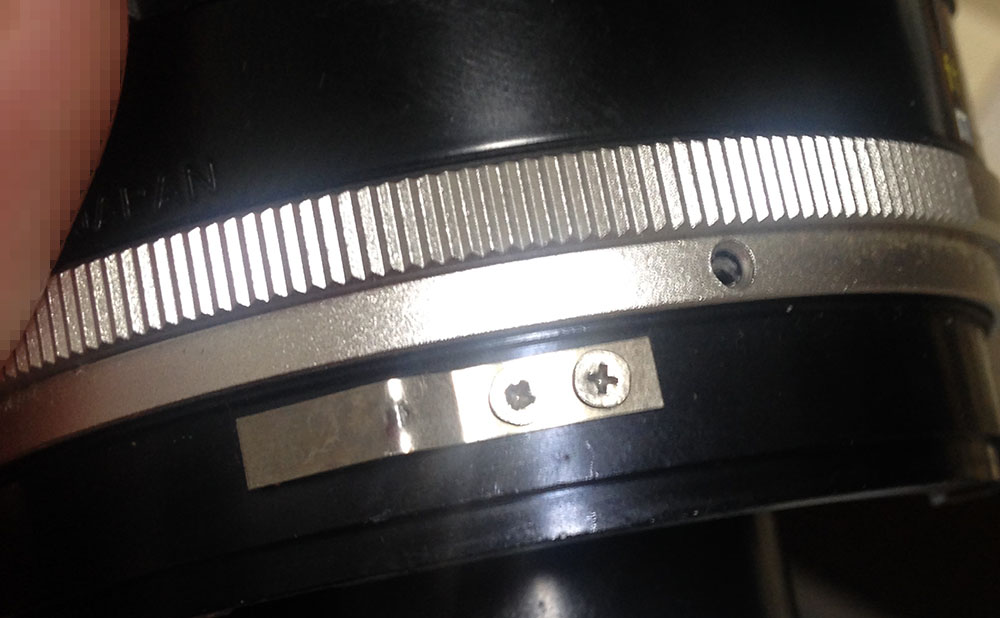
Extract the screws of the chrome grip so you could remove it. It also serves as a helicoid stop so the focusing ring won’t turn beyond its range.
Note the alignment of the inner helicoid so you’ll know if you reinstalled it correctly later.

You’re now able to separate the inner helicoid from the central one. Do not forget to mark where it separated.
Once all of the glass and iris mechanism is removed, clean everything really well and be sure not to leave any residue. Scrub the helicoids with a strong detergent and soak them in an alcohol bath overnight to soften and remove any hardened gunk. Polish the threads with a clean cloth and dry them well before you apply a fresh coat of grease. Don’t use a thick one and do not use a grease that’s too-light, too. Apply a thin coat, excessive amounts will only create a mess and it will also migrate to the iris eventually, creating an even bigger problem later.
Cleaning the iris mechanism can be time-consuming, our buddy Kenneth is generous enough to make a video on how to repair it. Be sure to watch and subscribe to his channel.
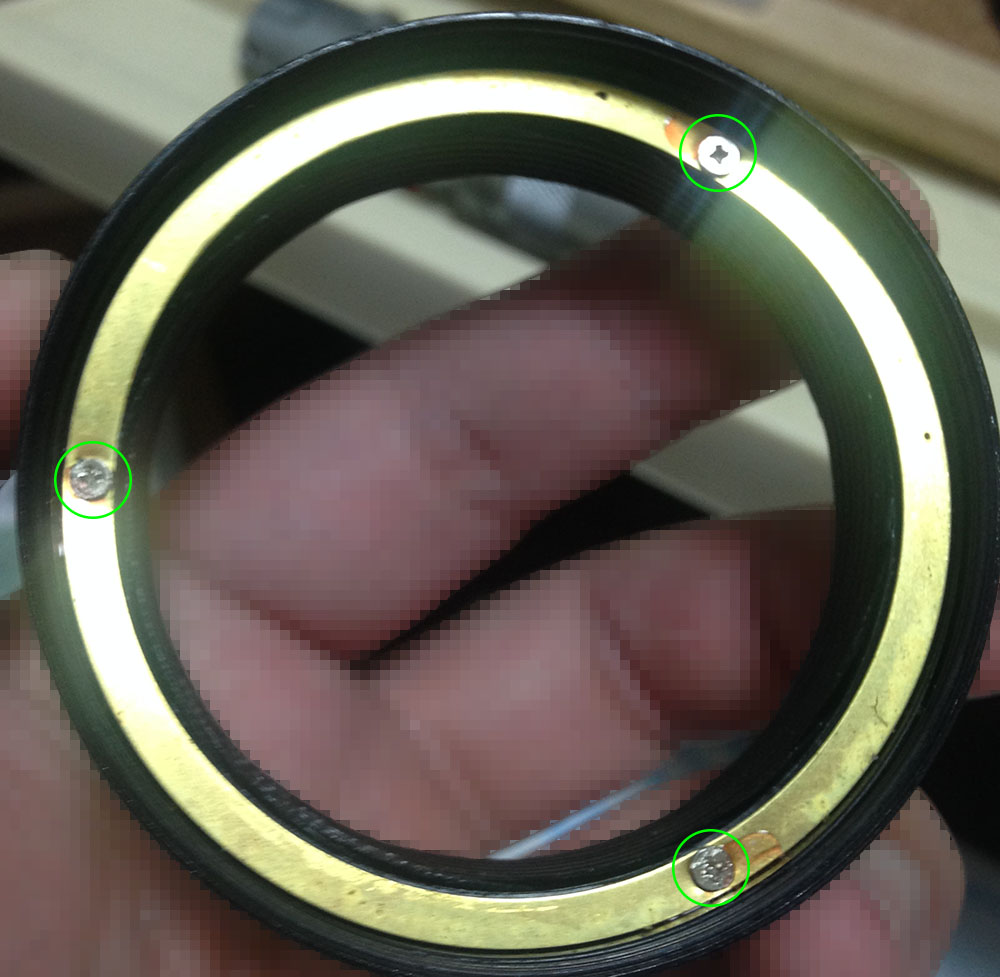
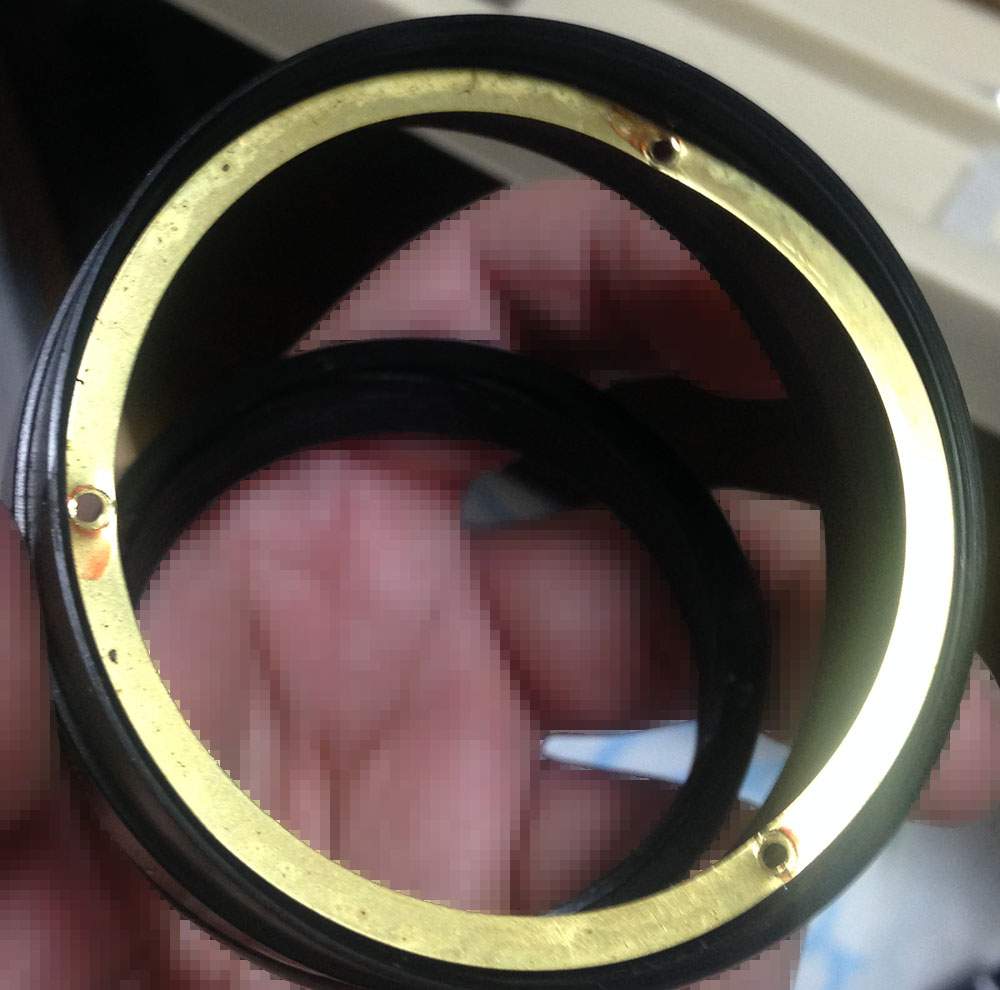
Removing the front lens assembly gives you access to the rotation plates of the aperture assembly. Before removing these, mark them so that you will know how it should be aligned when you reassemble them. The marks don’t have to be big or deep, just a small, shallow mark will do so long as you can see them. Carefully decouple the spring with a pair of tweezers. Extract the screws to open the diaphragm and you’ll be able to access the blades.
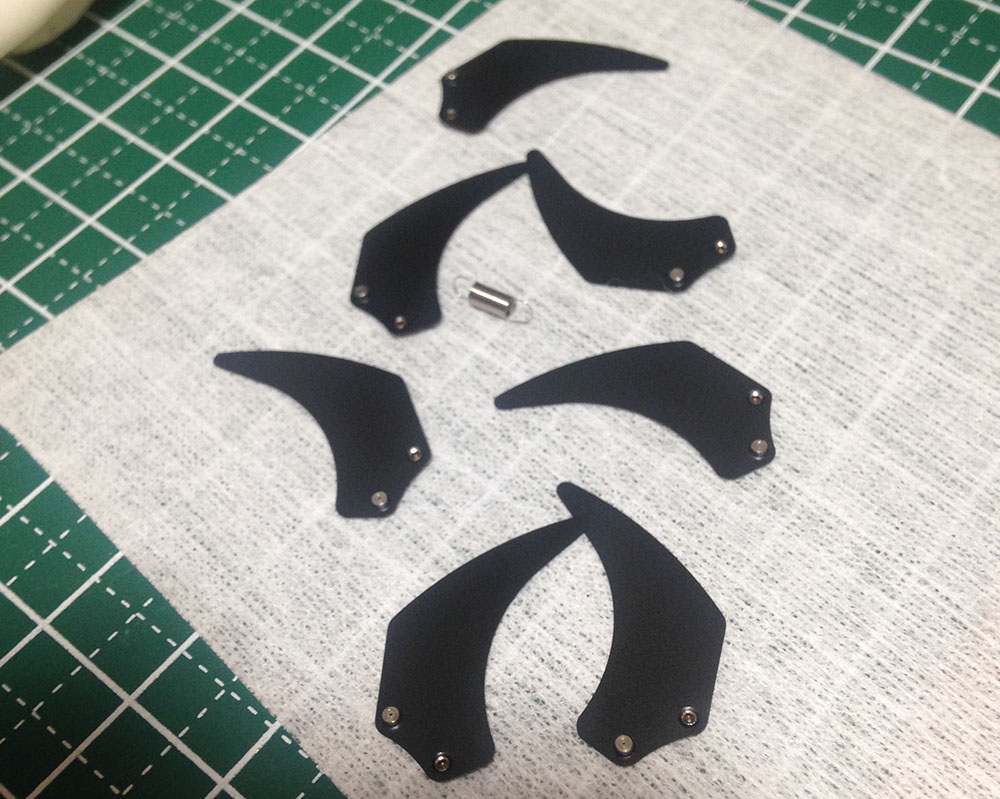
Carefully remove each blade, only handle them by their pins.

Carefully remove the diaphragm plate.
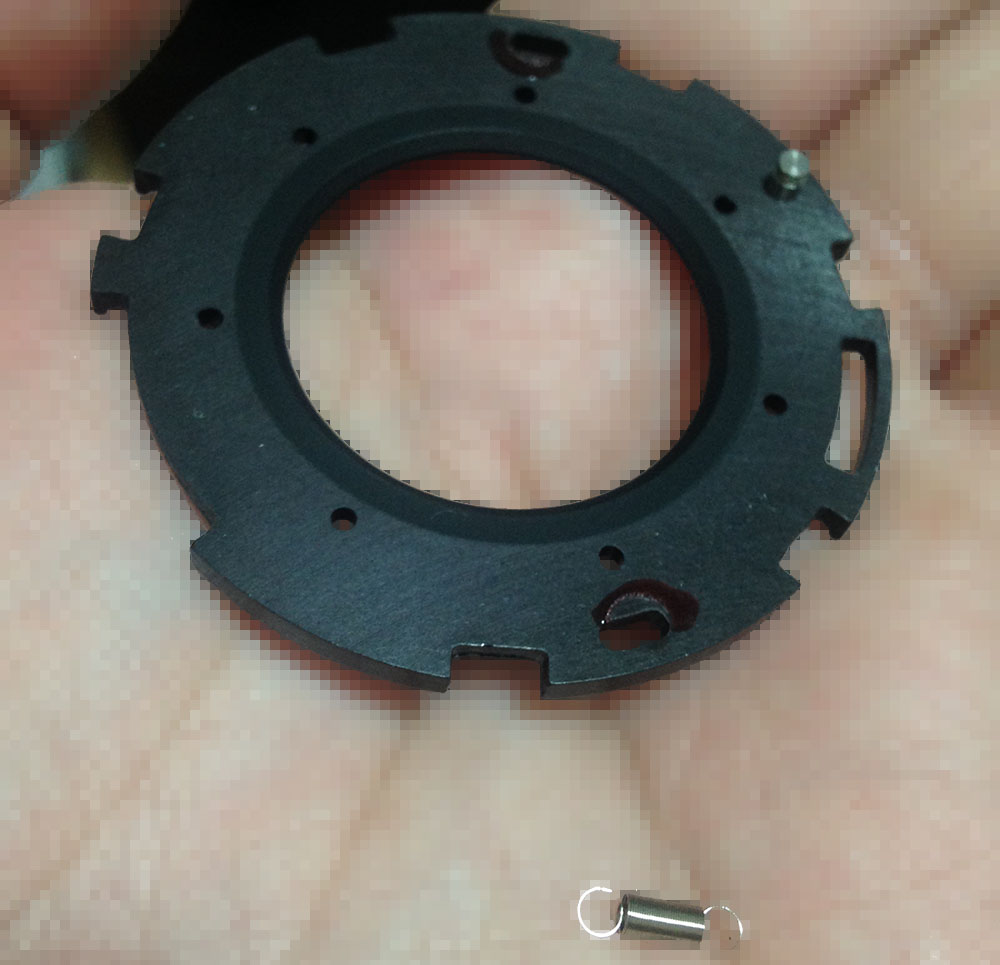
Don’t lose this little spring.

The front element is secured by this retainer. It’s difficult to unscrew since it’s sealed with paint. Applying alcohol to its threads will help soften it, just wait until you’re able to unscrew it easily.
A sturdy lens spanner will make the job easier. Be careful not to scratch the front element.
Extract the front element with a lens sucker.
Unscrew the collar to access the 2nd and 3rd elements.
The 3rd element is glued to the collar so leave it alone. The 2nd element can be difficult to extract since the fit is tight, carefully remove this using a lens sucker.
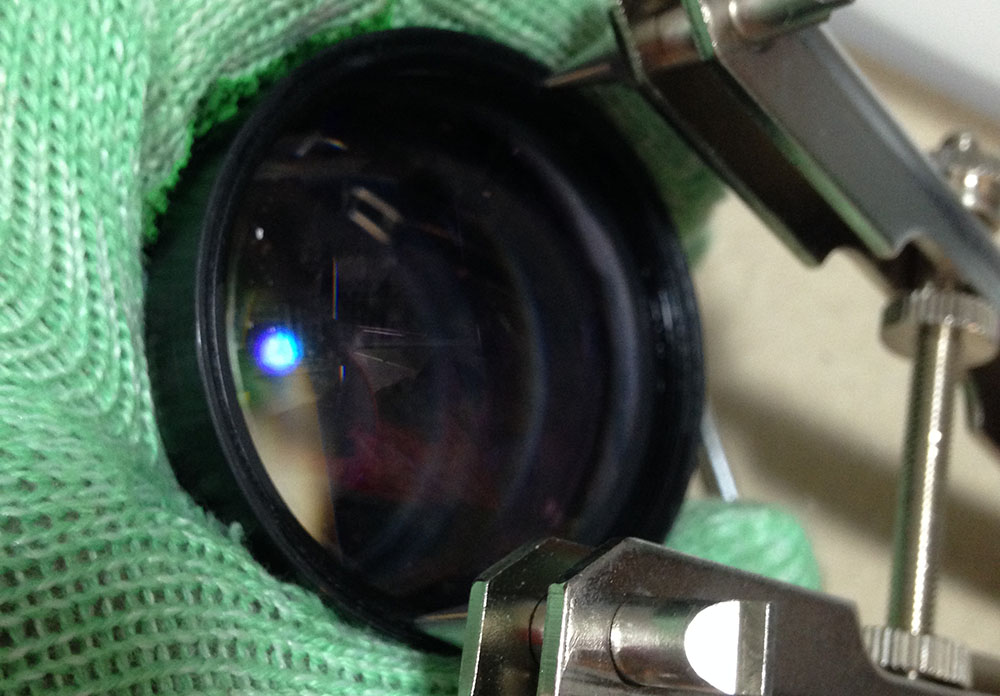
The rear optical assembly can be unscrewed from the inner helicoid.
Unscrewing this retainer can be difficult, repeated application of alcohol is going to work eventually and you’re able to remove it safely. Never flood it with alcohol or solvents.
Clean the glass carefully. If your lens has fungus, read my article on how to clean lens fungus. Don’t use the solution at full-strength, thin it with distilled water. Don’t soak the elements in the solution for too long or it will dissolve the coatings. The cemented group is fragile so handle it with a lot of care.
The blades were wiped clean with lens tissue and naphtha. Reinstalling the iris can be hard, the trick is to lower the objective’s housing over it. Kenneth made a video showing how it’s done, I linked it earlier in this section.
Conclusion:
It’s a fun lens to service, it does not have a lot of parts but this doesn’t mean that it’s an easy lens to repair. Just backtrack on your notes to reassemble it but don’t tighten the screws of the focusing ring and do not attach the front barrel just yet.
Adjust its focus by carefully turning the central helicoid to check the focus. Once you’re satisfied with the results, tighten the screws and reassemble it completely. Read my article on adjusting a lens’ focus to find out how this is done under a DIY setting.

All that work certainly paid-off and I now have an amazing portrait lens for very little money. It’s certainly a very popular lens these days, they are a bit more expensive these days thanks to its new-found popularity.
Thanks for following my work, if you liked this article please share this with your friends so it will get more views. This site earns around $0.30 a day, it’s totally reliant on views. You can also support this site, it helps me offset the cost of maintenance and hosting. You are also helping me purchase, process and scan film. This site promotes the use of film so we’re all in this together. See you again in the next article, Ric.
Help Support this Blog:
Maintaining this blog requires money to operate. If you think that this site has helped you or you want to show your support by helping with the site’s upkeep, you can make a small donation to my paypal.com (richardHaw888@gmail.com). Money is not my prime motivation for this blog and I believe that I have enough to run this but you can help me make this site (and the companion facebook page) grow.
Buy me a roll of film or a burger?
Thank you very much for your continued support!
$2.00
Helping support this site will ensure that this will be kept going as long as I have the time and energy for this. I would appreciate it if you just leave out your name or details like your country’s name or other information so that the donations will totally be anonymous. This is a labor of love and I intend to keep it that way for as long as I can. Ric.

Jan 09, 2016 @ 16:54:02
Great article & very inspiring!
Jan 09, 2016 @ 21:29:03
Thank you! Glad that you enjoyed this!
Jan 12, 2016 @ 09:03:54
This is really great stuff……………many thanks for all the valuable info 🙂
Jan 12, 2016 @ 09:07:04
Thanks, Ron. It will probably take me half a year or so to include the 16 other lenses…
Jan 23, 2016 @ 13:54:24
Great help!
One question regarding this lens – when wide open aperture blades are not perfect round and I’ve seen this issue on three copies of this lens. I measured / compared the settings with another lens @f2 and it seems to be correct.
Any experiences about that?
Jan 23, 2016 @ 14:00:07
Yes! this is very easy to fix but it takes time. You can only fix this by cleaning the aperture blades and re-assembling them back together. this will force the aperture blades to resettle. the cause might be some dirt or rust on the pins or somebody was careless in the factory when they assembled it. y 55mm f/1.2 was like this from f/2 and I had to do this to fix it.
Feb 13, 2018 @ 12:35:32
Hi Richard,
I’m currently rebuilding this lens and am having a difficult time achieving infinity focus.
I have only had to remove the rear element group and remove a small patch of fungus but for some reason upon reassembly it has lost the ability to infinity focus (will focus up to around 75m).
Any suggestions?
Feb 13, 2018 @ 18:27:49
You may have put the rear elements in the wrong direction. Assuming you hadn’t messed with the helicoids
Mar 12, 2020 @ 16:49:29
Hallo Richard,
first of all, I am really enjoying your blog and the stories!
Ran across the German blog “Altglas-Container.de”, Rolf is describing there an issue with the aperture not opening fully when set to 2.0. My lens is having the same issue, and it is my impression, the whole range has “shifted” – from f16 to f22 the aperture doesn`t close much further. Rolf said, you helped him fix the issue, but didn`t remember exactly when I asked him. I followed your description above up to the the removal of bayonet and aperture ring. When attempting to continue dismantling, I got cold feet, because the two screws each holding this little blank metal pieces are very tight, and the threadlock seems to hold them there for eternity… Interesting finding: if I rotate the bayonet a bit (srews removed), everything works well (but unfortunately the three mounting holes are at the wrong position then for the screws…). What are the right steps to fix the issue?
Thanks a lot – Dirk