
Hello, everybody! Do you remember the B-52s? They sang some of the most unusual songs ever written such as “Rock Lobster“, which is basically just a collection of nonsense. Nothing made sense but I liked the song a lot. That’s just an odd song but people seemed to enjoy it. Odd things make for plenty of fun since they’re a break from the usual pattern. I think that modern pop could learn a lot from this so it could break-off from the monotony of what’s making it sound boring. Today, I am going to show you an odd lens, this is a lens that’s a one-off for Nikon and they never made anything like it again.
Introduction:
The Zoom-Nikkor 50-135mm f/3.5 Ai-S was sold from 1982 up to 1984, a short production run by any standard for a mass-produced lens. This was due to a lot of factors and one of them was the big shift towards autofocus back in its day. Despite this, it proved to be quite a nice lens for its time. It’s what I call a “compromise zoom”, a lens that doesn’t quite excel in anything but it has a lot of what’s important in a zoom and does everything pretty-acceptable. It’s quite a good lens for its class, too. It has a constant maximum aperture and that alone made it worth mentioning as one of the better zooms of its time. I have used many zooms from the era and most of them were so-so at best or unusable at worst.
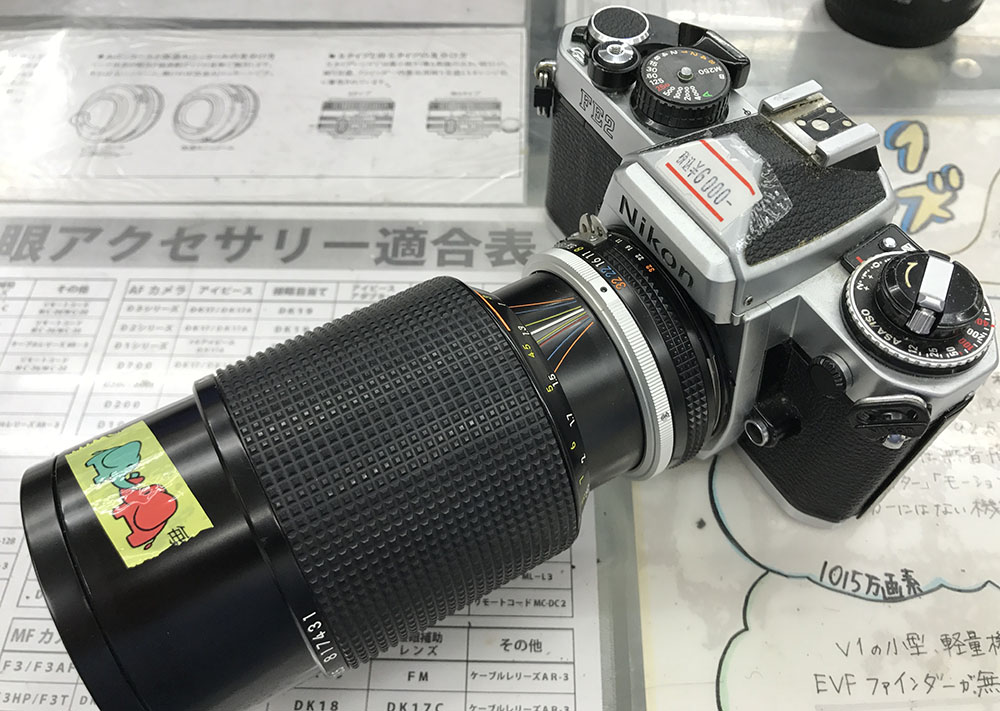
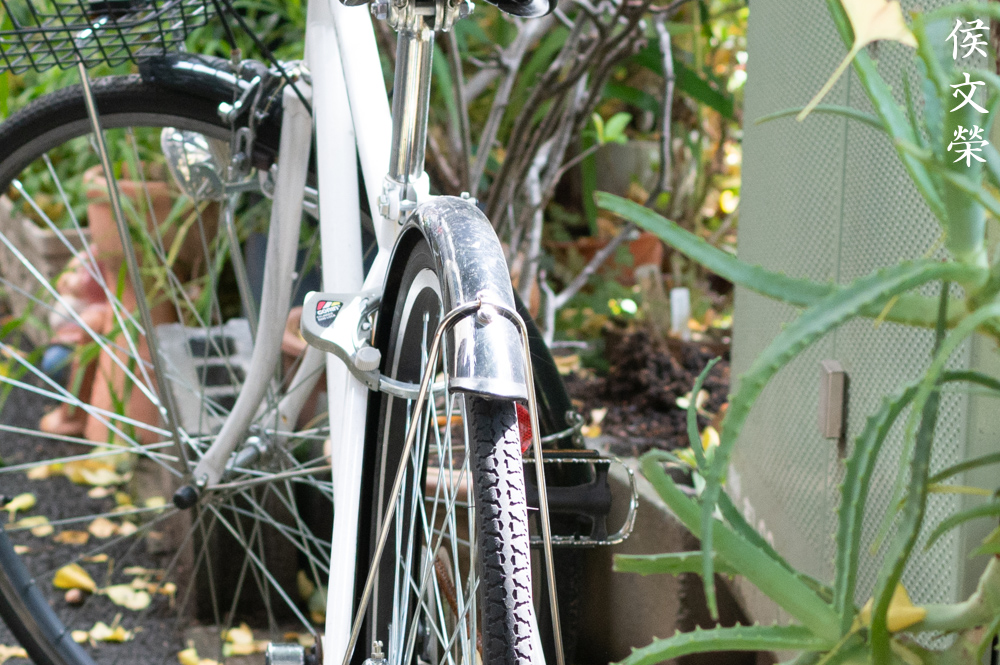
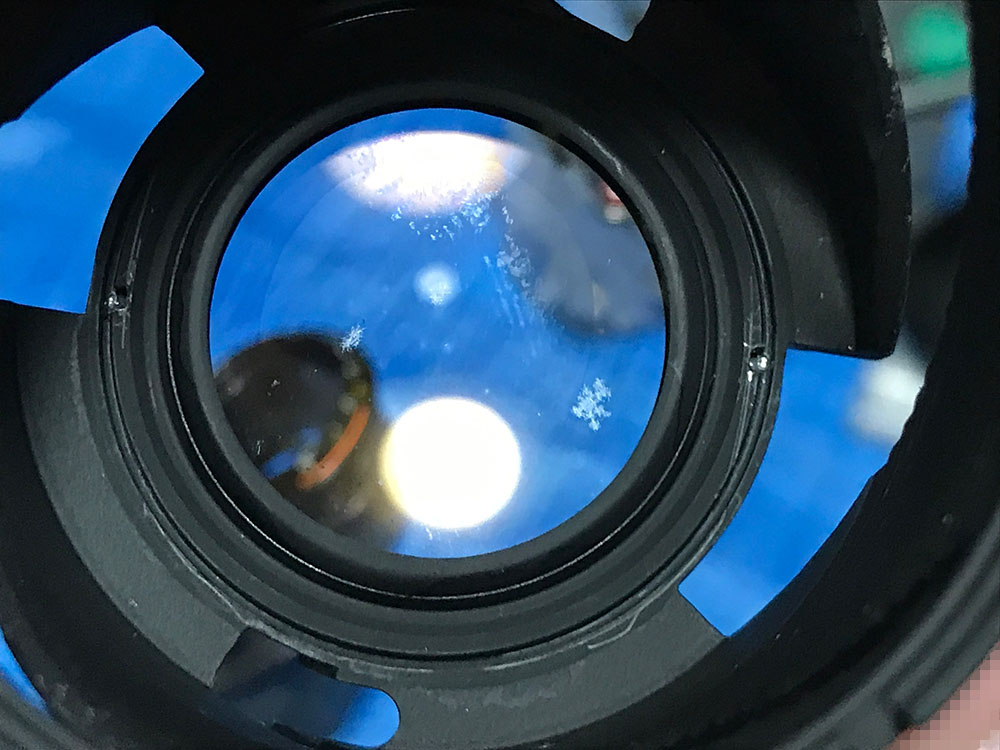
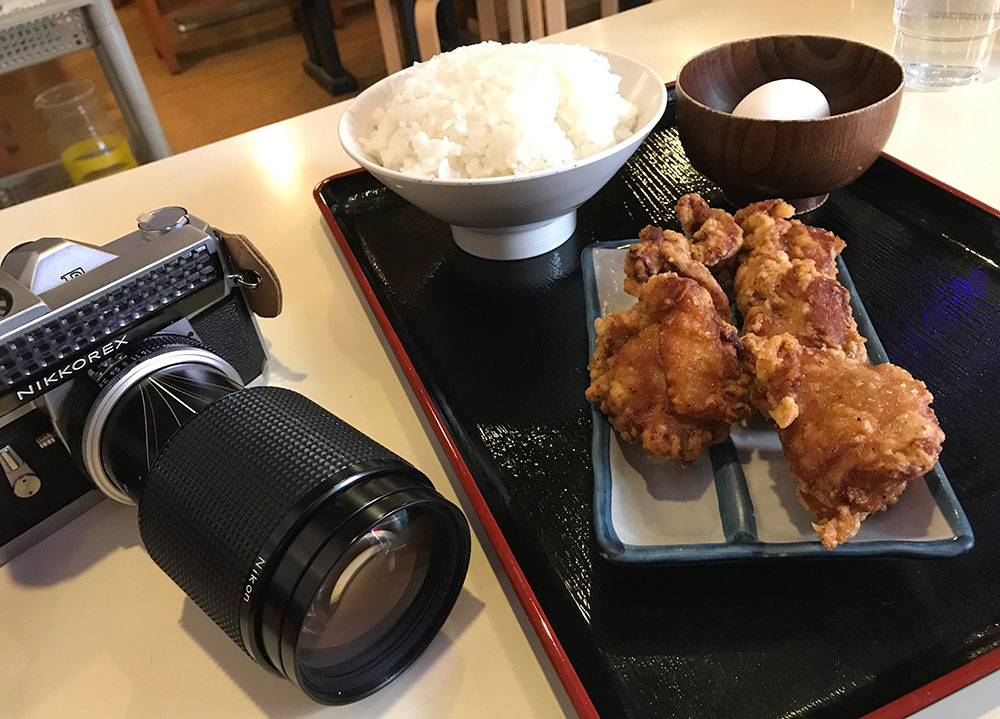
I got the lens for a cheap price since it was sold as junk. Nobody wanted this because of the fungus, the Nikon FE2 was equally dirty so the whole setup is cheap. It’s quite heavy, certainly not your usual plastic lens but it balances quite well with most Nikons except for the smaller, plastic ones.
It has a complicated optical formula of 16-elements-in-13-groups, something that’s impressive and of course, expensive to produce. It’s not a cheap lens, I don’t think this was targeted at the budget-conscious market but more for a higher-end demographic. I don’t know what its true purpose is but I suspect that it was made to be a portrait lens due to its focal range and its aperture size. Its performance and rendering also led me to believe in this theory. Its filter size is quite huge, most Nikkors of its time merely have a 52mm filter size while this one uses 62mm ones. It’s a fat, stubby lens but its barrel isn’t difficult to handle.
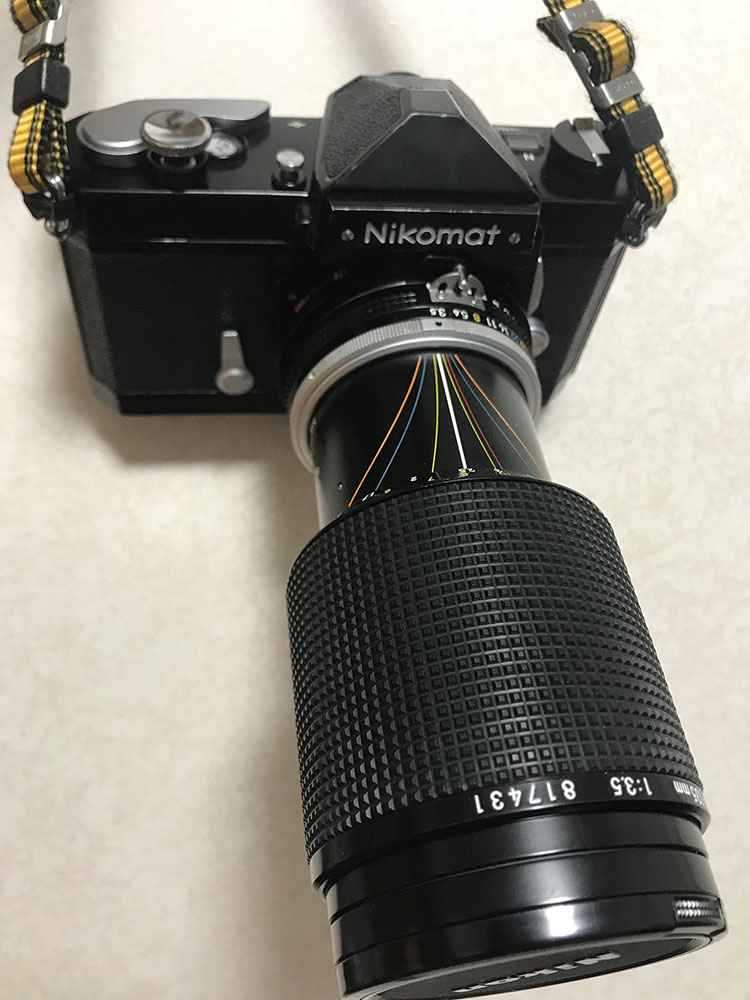
It handles nicely, its weight balances well with its size. The broad barrel is a delight to use. Some people hate this but some people prefer this setup, this makes it easier to zoom and focus since you only need one hand to do both. It allows me to take photos quicker compared to the usual 2-ring setup. This is convenient for action shots but not really good if you need things to be in a steady position since zoom-creep is a problem for pumper-zooms. You are not able to accurately zoom your lens as well since you’re never sure about what is the actual focal length your lens is set.
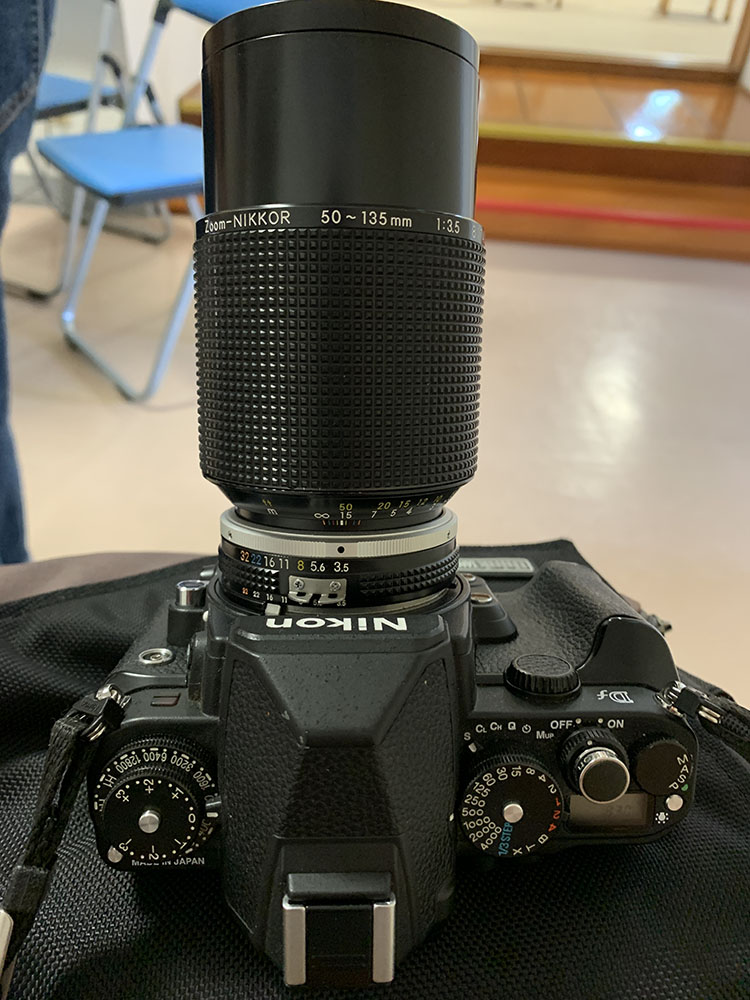
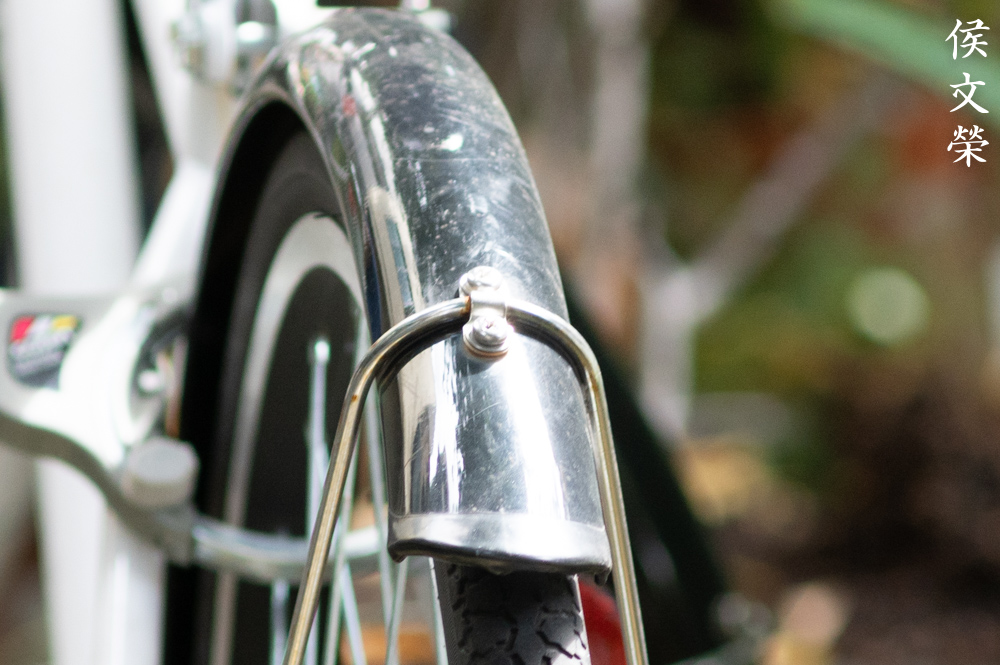
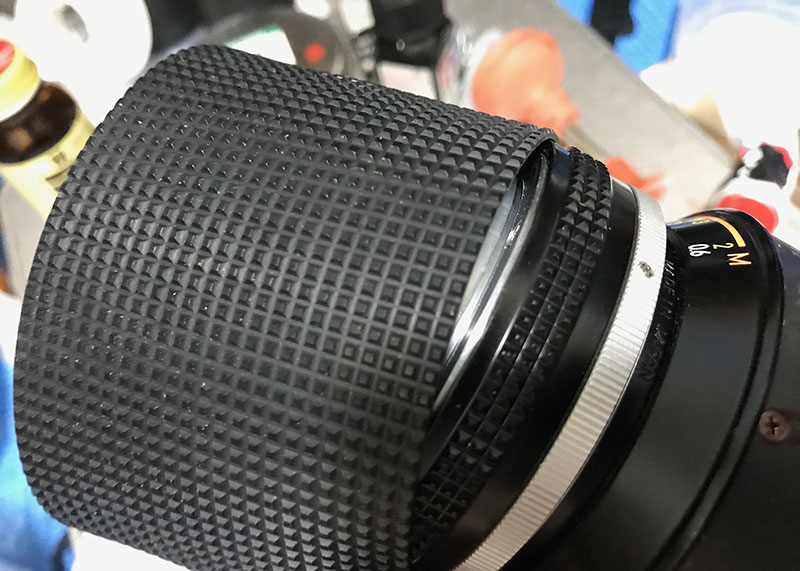
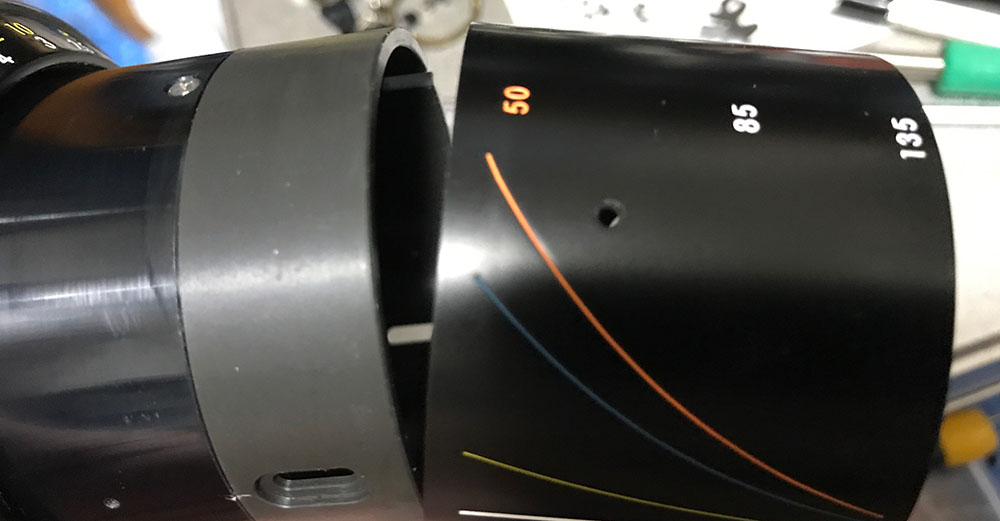
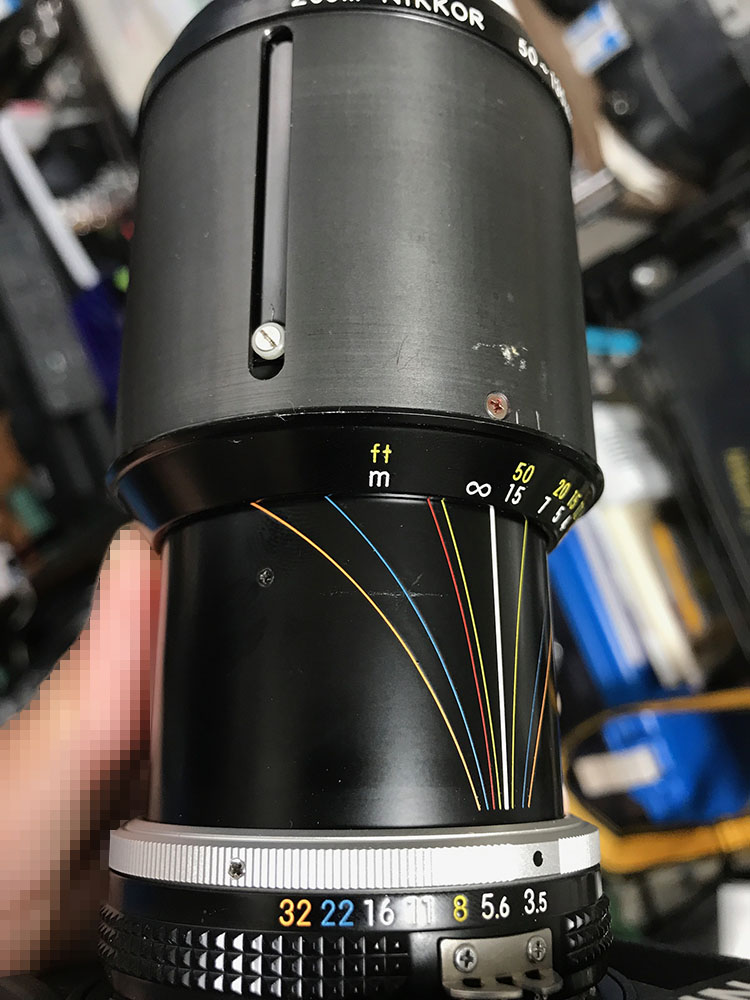
This is how it looks like when zoomed to its wide-end. The beautiful scale is nice to look at and it accurately shows the depth-of-field. Some of the front parts turn as you turn the barrel and this is susceptible to get jammed when pieces of dirt or sand gets in the way. A minor dent will also prevent it from working properly, too.
The focal length is awkward, it sit right at the middle. It’s not going to get to the wide angle range and is not going to give you the reach of a traditional 70-200mm class lens but it has its place in a professional’s bag. This is a nice lens for travel, sports, documentary and journalism where it performs as a versatile mid-range zoom. It’s also a nice lens for use with APSC cameras as it gives you the rough equivalent of 75-200mm. I suspect that this lens was designed to be a portraiture lens because of the focal length, reasonably-big maximum aperture and above-average bokeh quality for a zoom of its class.
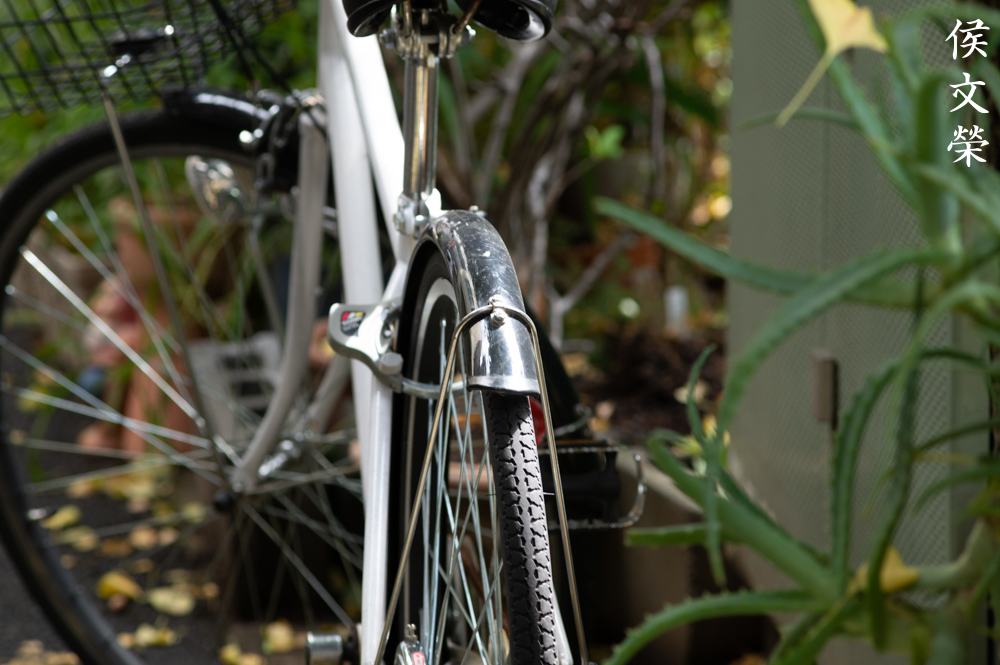
This is how it looks like at the long-end. Zoom-creep is a problem and it will things difficult when you demand accurate framing. Long exposure photos will be challenging to take with this setup and forget about this when taking pictures of the sky.
This lens has a fake “macro-mode” gimmick which enables you to focus this a lot closer. It’s locked to 50mm for some reason, it would’ve been better if it was implemented on the 135mm end. Another good feature of this lens is its non-rotating front ring which makes using a circular polarizer easier. That’s another indication that this lens was made for professional-use.
Knowing how your lens performs is key to maximizing it. You’ll know how to best utilize it and avoid its weaknesses. This will help give you an idea on when to use it and for what kind of look.
These were taken from f/3.5, f/5.6 and f/8. I cropped the photos from the last 2 sets and juxtaposed them beside the originals. They’re close to 1:1 crop so you could inspect the center better. I took these with a Nikon Z6.


(Click to enlarge)
Sharpness is not so bad even wide-open but it could be better. Resolution is not high enough to capture delicate details. Chromatic aberration is terrible and the bokeh quality is mediocre but not bad at all, in fact, it’s better than I expected. Stopping it down to f/5.6 makes the center sharpness better and it is now able to resolve more detail. Chromatic aberration is better-controlled and you get a cleaner image since the corners are now brighter. Stopping it down to f/8 brings the center close to its peak performance which isn’t good in my opinion, but more-than-acceptable. The corners lag-behind and won’t look as good as the center. This lens performs better at moderate distances, it performs pathetically at further distances. Contrast and saturation is nice even wide-open.


(Click to enlarge)
Distortion is quite high at both ends, specially at the longer-end. I wouldn’t use this for architecture at all, there are better lenses for that. Vignetting is surprisingly well-controlled or the falloff isn’t too-high as to make it visible in most cases. It’s mostly gone by f/5.6 and you won’t see any of it by f/8.


(Click to enlarge)
The character of the bokeh is not bad at all, it’s above-average but not really amazing at all. This is probably the best trait of this lens despite it not being excellent at the wide-end. Compared to similar lenses of its time, it’s a great lens in this regard.


(Click to enlarge)
Flaring and ghosts seem terrible, this may be tied to my lens since this was sold as junk with horrible fungal growth. It’s ugly when you have this facing the sun, the worst is at the longer-end where the ghosts tend to be quite big. Stopping the iris down will help with the flaring but the ghosts will end-up looking more solid which is worse in my honest opinion.


(Click to enlarge)
Chromatic aberration is terrible wide-open but it improves significantly by f/5.6 where you’ll just see traces of it. Spherical aberration can still be seen even by f/8 in worse cases but it should not be much of a problem. This is its biggest flaw in my opinion, even more than its poor distortion control.

This is how close you could focus with this thing. It enables you to focus up to 1.3m at 50mm, this is not adequate in my opinion but it’s better than not having it.

The biggest strength of this lens is its pleasing rendering, it’s quite good for a lens from this class and era. Of course, the Nikkor 85mm f/2 Ai-S is better but that’s not fair since that lens was designed to be good at that.

This is a difficult scene to render since there are complex details located in the blurry parts of the frame. It handles it quite well, much better than any other Zoom-Nikkor of its time and class.

It has a nice, natural way of rendering your scene. It’s not over-corrected at all like what many modern lenses tend to be. Cheaper lenses back then tend to have this rather cheap look when the optics were over-corrected to make the resulting images look sharp. This lens doesn’t do that which makes this an ideal lens for portraiture.

Sharpness is quite poor for subjects that are far-within the frame. What you can observe in this frame is the generous amount of chromatic aberration. I don’t like it at all and I consider it to be this lens’ biggest flaw. This would’ve been closer-to-the-top if this issue was better addressed.

Chromatic aberration makes this photo look worse than it has to be but the good news is contrast and saturation looks quite good.


(Click to enlarge)
Here are more photos that I captured. It’s a nice lens but 50mm is not wide-enough for general use, if this would have been a 40-135mm then it would be a lot more useful. The odd focal length is something that I had to get used to, this is best-paired with a 28mm lens and that will give you the best walk-around setup for not a lot of money.
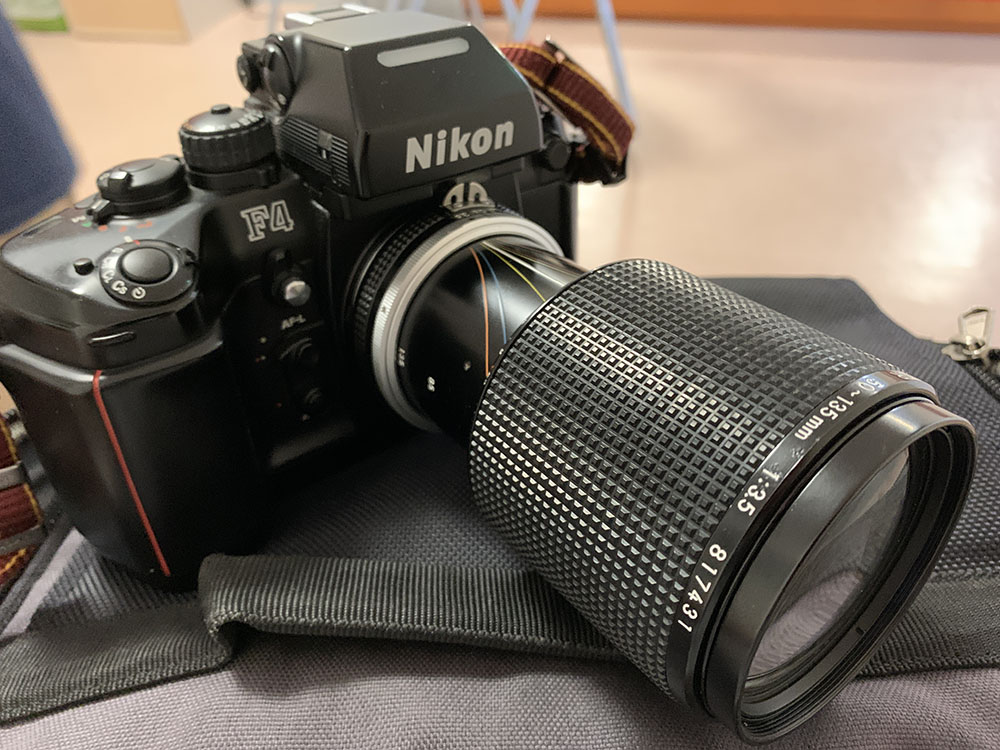
Let’s now see some photos that were shot with film. This was designed to be used with film so it’s only fair that we observe how it performs with it. Film has a unique look that’s difficult to simulate with a digital camera and that’s because of grain. It helps hide a lens’ flaws or it could amplify some of them depending on conditions. I shot these with a Nikon F4.

Sharpness is quite nice and the character of the bokeh is acceptable. It is not perfect but this is above-average compared to other zooms of the era. It will not out-perform specialized prime lenses like a Nikkor 85mm f/2 Ai-S but it’s not ugly either.

The photos it produces look pleasant, with a pleasing and natural look. This is delightful to use as a walk-around lens, pair this with a 28mm lens and it will be everything that you will need.
The wide-end may not be enough so you will have to pair this with a wider lens in order to make your kit complete. In my opinion, 50mm isn’t enough, you will definitely want something wider, at least 35mm in order to capture photos of scenery.

It’s a very useful lens for taking candid photos. For this, 50mm is definitely more than enough.

I could imagine that professional journalists found this lens indispensable, I really enjoyed using it as a walk-around lens when there’s enough light. The maximum aperture of f/3.5 may be limiting and you’ll require a fast film for shooting in darker environments.

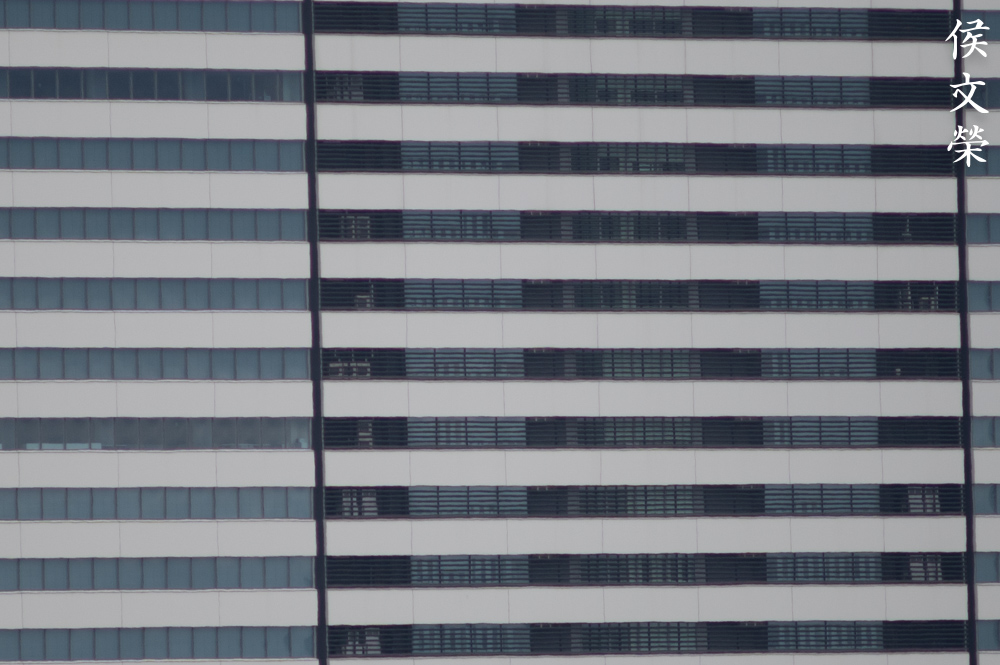
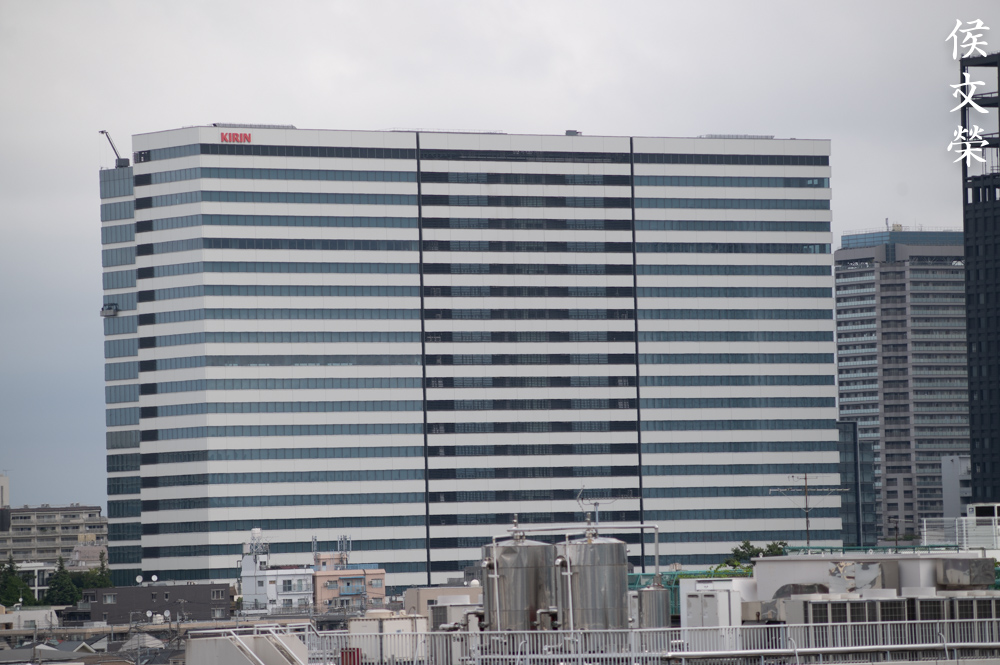
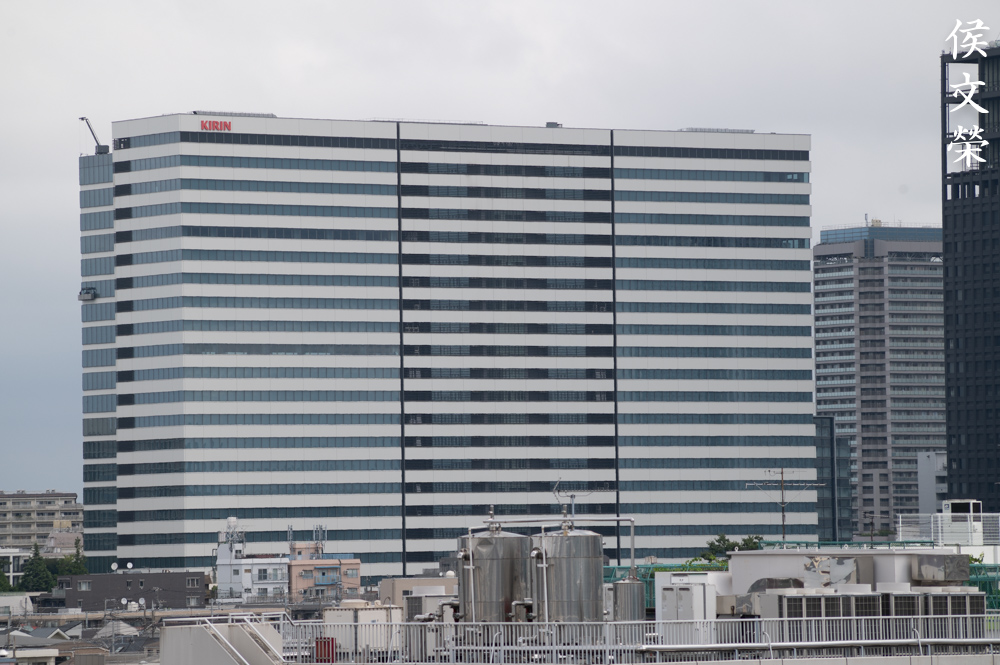
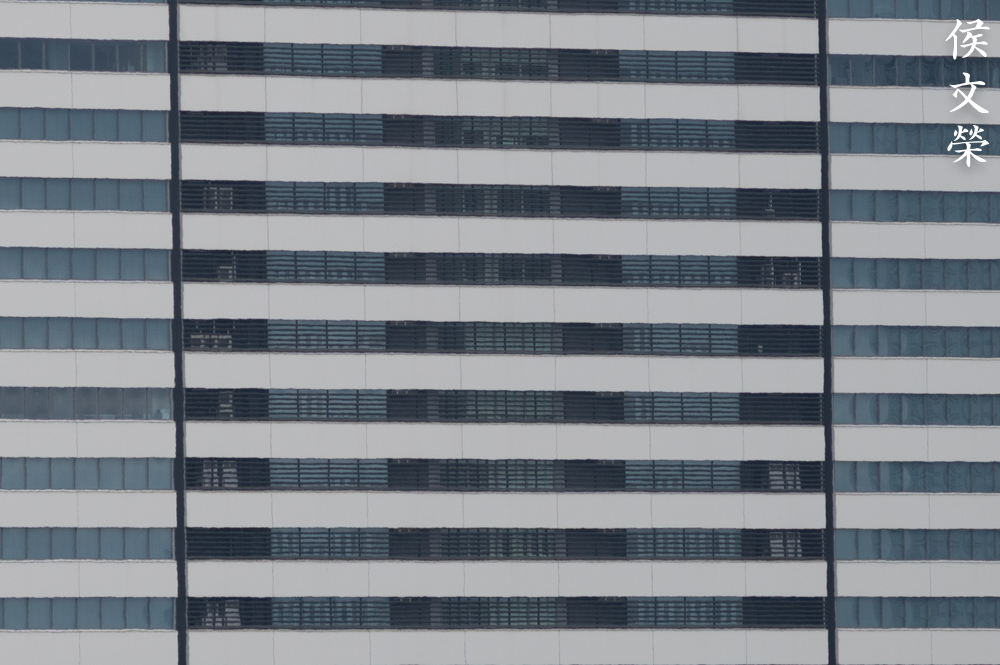
Distortion at the wide-end is obvious and can be distracting if you have lots of lines that are parallel to the edges of your frame.

Here’s another example showing how bad the distortion is. This is probably the biggest thing that bothers me with this lens. Another thing is the slightly short focus-throw of this lens, while it could give you more precise control it could also mean missing several shots since focusing won’t be quick. It was designed as a tele-zoom and most manual lenses of this class tend to be this way so remember this when you’re deciding on getting this lens.

Despite the awful distortion it’s a beautiful lens. This would’ve been a better photo if the stairs and other lines remained straight.

Sharpness is quite good with film, it will be able to give you crisp and sharp photos with no effort at all.


(Click to enlarge)
Here are more photos from the same roll. I love shooting with this lens, film sure is the best medium for this and I would recommend its use over digital for use with this thing. It’s a great combination and you will be able to shoot plenty of nice photos with it. Just imagine if the weather was a bit sunnier, I could have taken better photos with more saturated colors.
I can recommend this lens to anybody who is looking for a nice manual lens that’s tough and has a practical zoom-range that covers normal to moderate focal lengths. That is if you don’t mind the ugly distortion and the unusually high amounts of chromatic aberration, the latter may just be confined to my sample since many people swore by the image quality of this lens. There are no alternatives that I could think of since this is the only lens of its kind that has a constant maximum aperture in Nikkor-land. When buying one, search for one that turns properly and be sure that everything operates smoothly, I mentioned before that there are many moving parts in the barrel and there are chances that you may end up with a lens that has mechanical problems. Zoom-creep is the least of your concerns, what’s worrying is a rough barrel that won’t turn properly. There may be some parts that are dented or some things stuck inside that may have scratched any delicate interior part. This is a tough lens but at the same time, quite delicate. This is best paired with a film camera, I am not saying that you won’t enjoy using it with a digital one but I like the results more when shot with film. These are inexpensive these days, they used to cost a small premium but the hype has died-down. Maybe the collectors have found their copies so the demand has dwindled. A great sample may cost you around $150 but these usually sell for $70 or less, that is if you’re not fussy about the condition of the lens. Look at me, I waited for a long time to buy one and I got one for very little money. Just be patient, it’s going to be worth the wait.
Before We Begin:
If this is your first attempt at repairing a lens then I suggest that you check my previous posts regarding screws & drivers, grease and other things. Also read what I wrote about the tools that you’ll need to fix your Nikkors.
I suggest that you read these primers before you begin (for beginners):
Reading these primers should lessen the chance of ruining your lens if you are a novice. Before opening up any lens, always look for other people who have done so in Youtube or the internet. Information is scarce, vague and scattered (that is why I started this) but you can still find some information if you search carefully.
I highly recommend that you read my working with helicoids post because this is very important and getting it wrong can ruin your day. If I can force you to read this, I would. It is that important!
For more advanced topics, you can read my fungus removal post as a start. This post has a lot of useful information and it will be beneficial for you to read this.
Disassembly (Lens Barrel):
This is not an easy lens to take apart. It has plenty of parts and this will take you several evenings to dismantle completely and clean properly. This isn’t something that a beginner should attempt as their first zoom-lens. There’s a lot of little parts here and you should take care not to put them back facing the wrong direction, for this, you will need to take plenty of notes. Take lots of photos so you’re able to navigate your way back when reassembling this. Be careful when using heat with this since there are plastic and nylon parts in the lens that can melt.
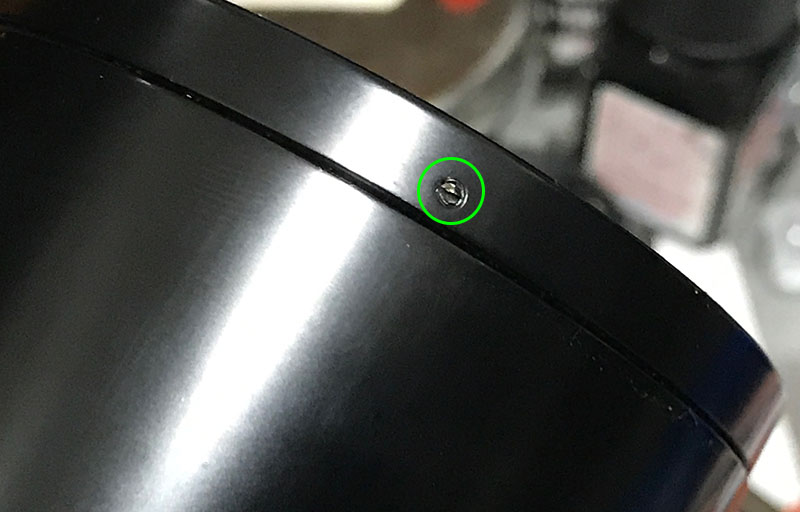
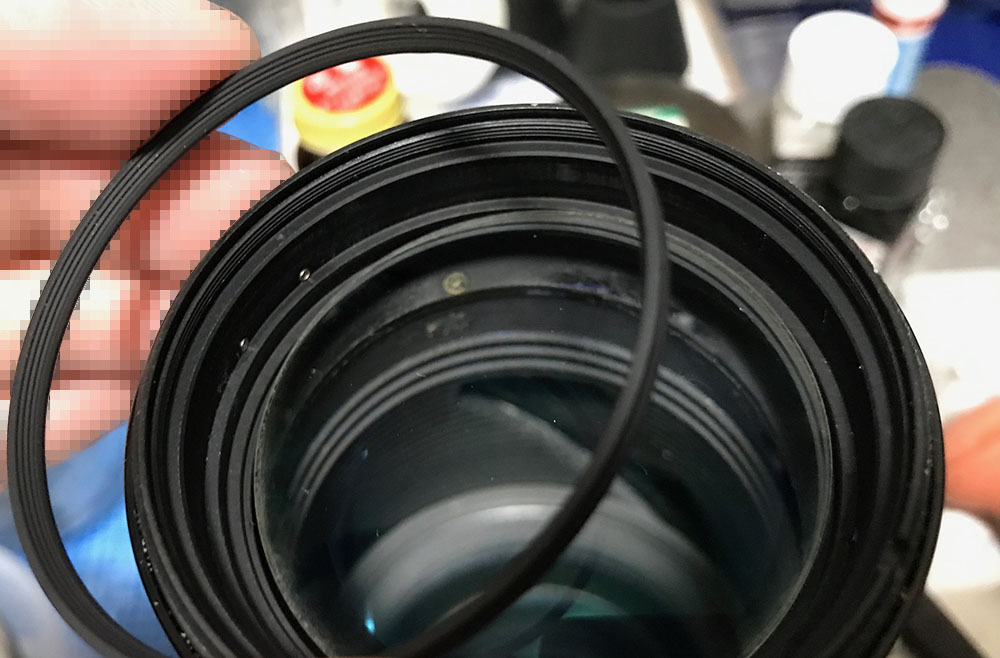
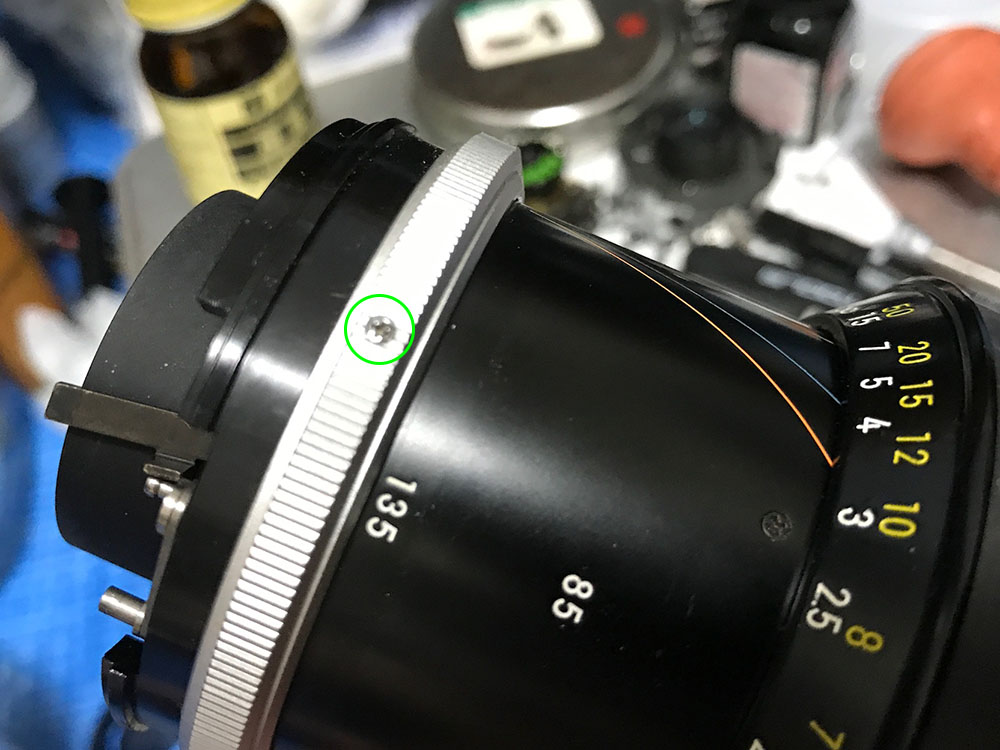
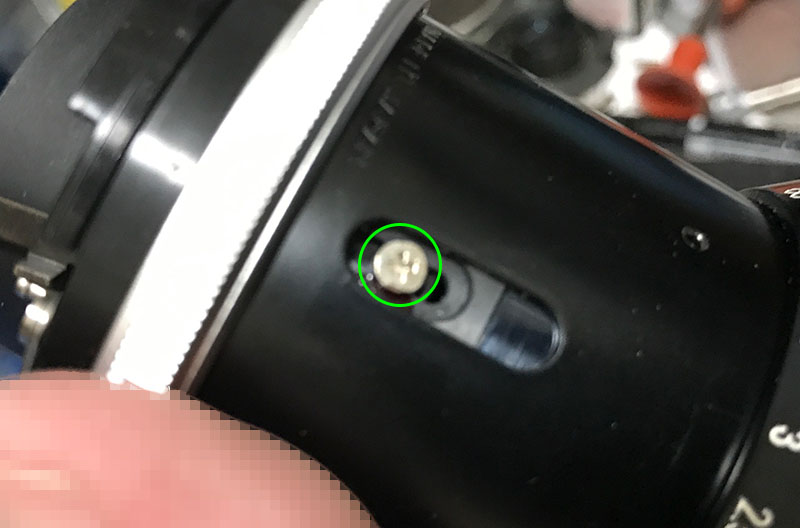
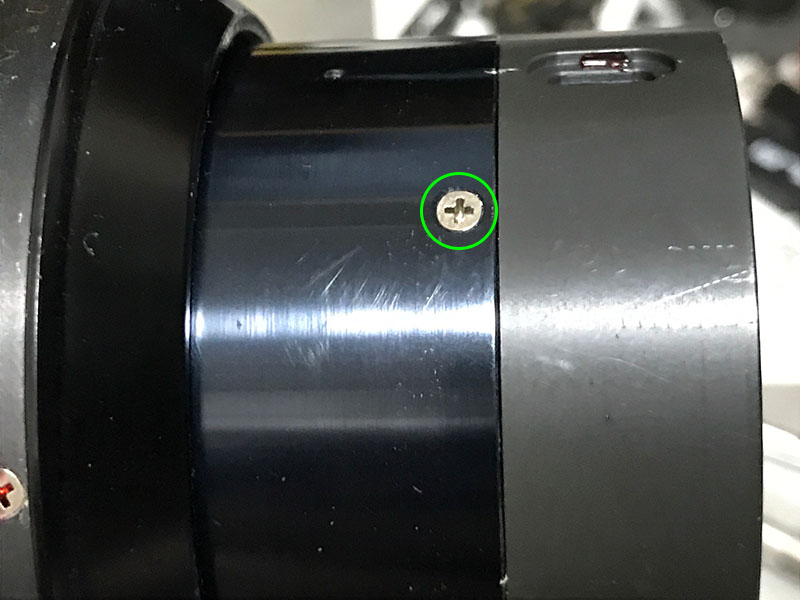
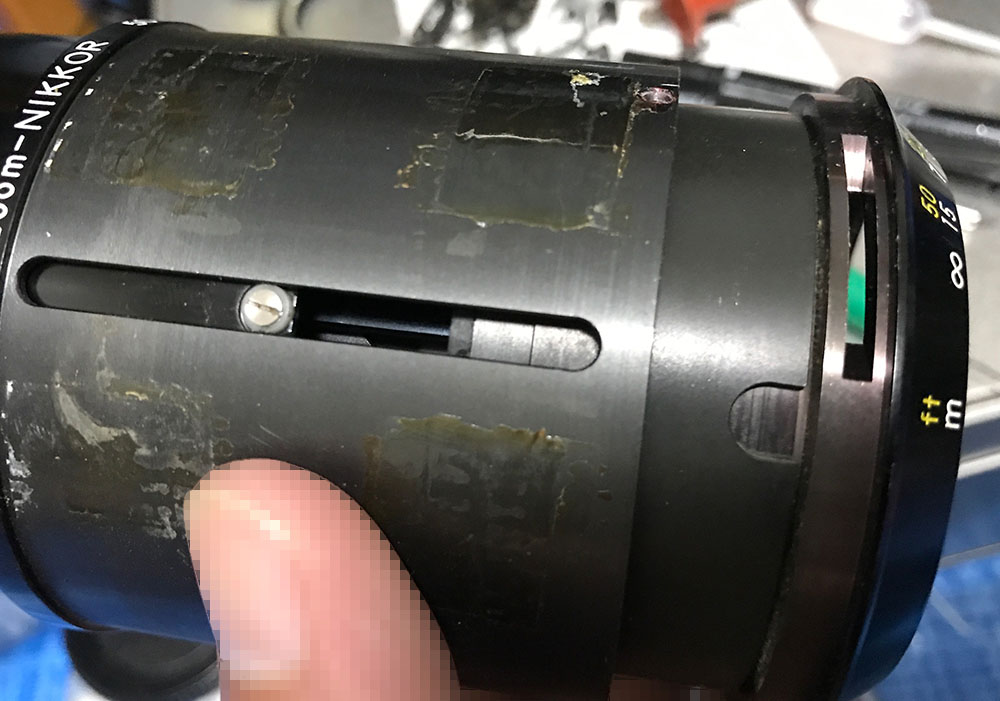
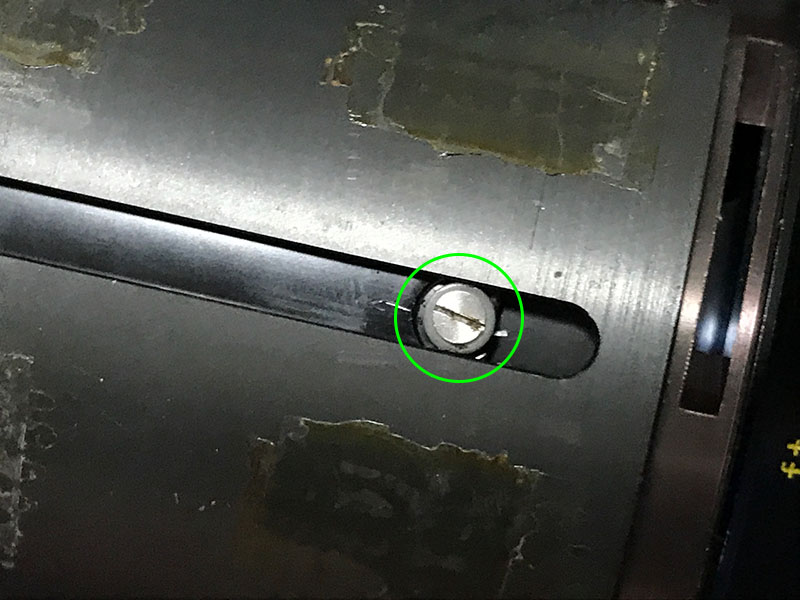
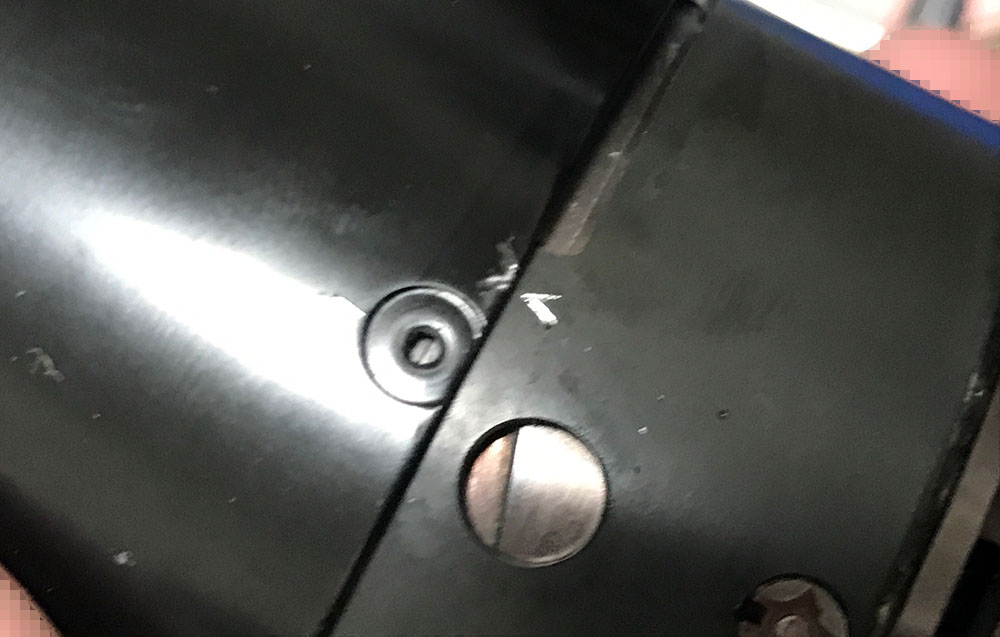
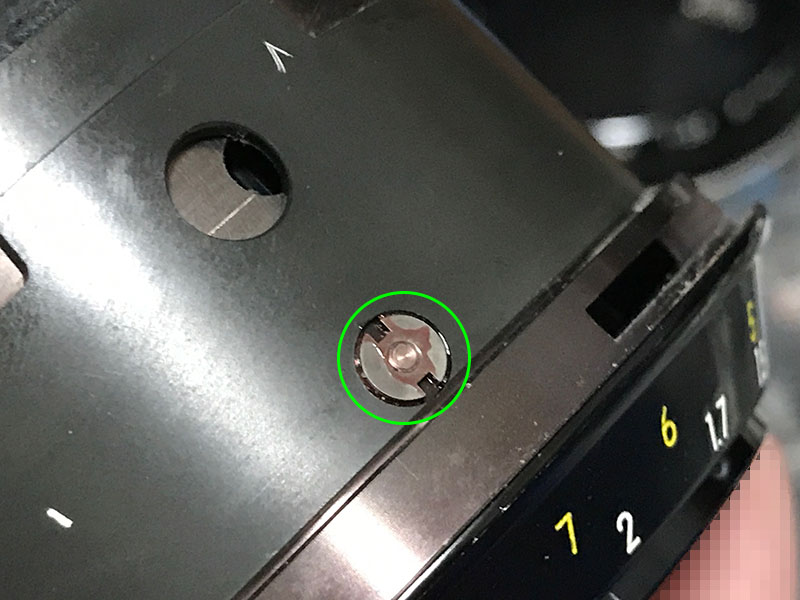
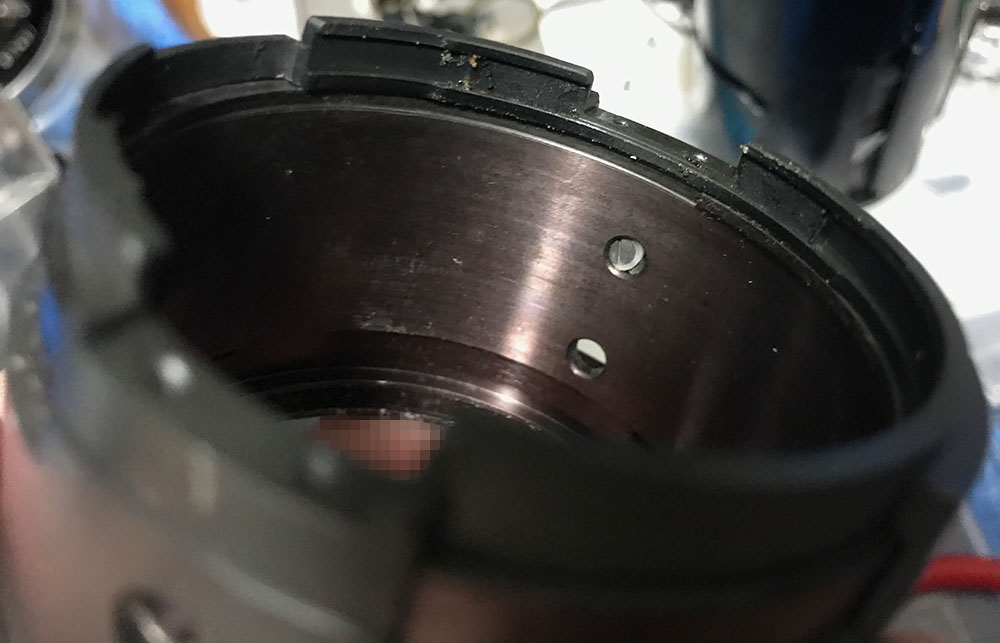
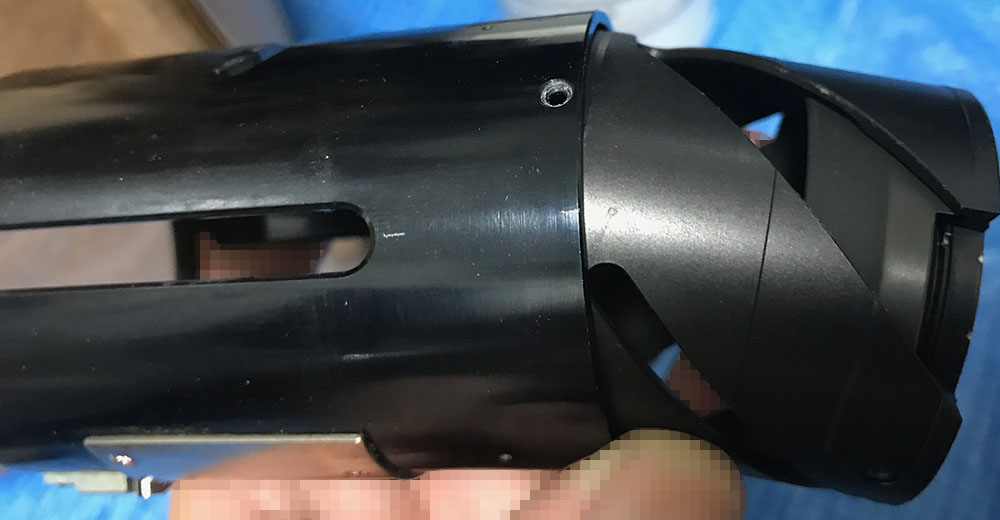
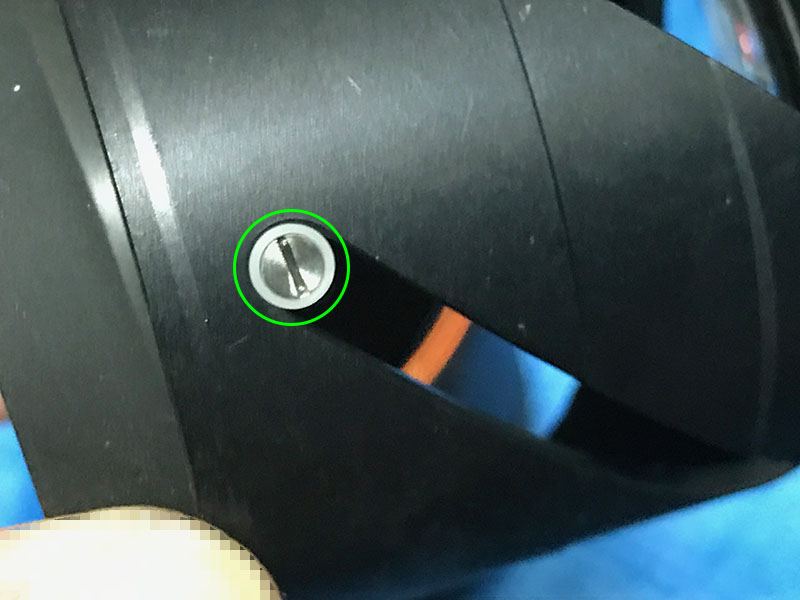
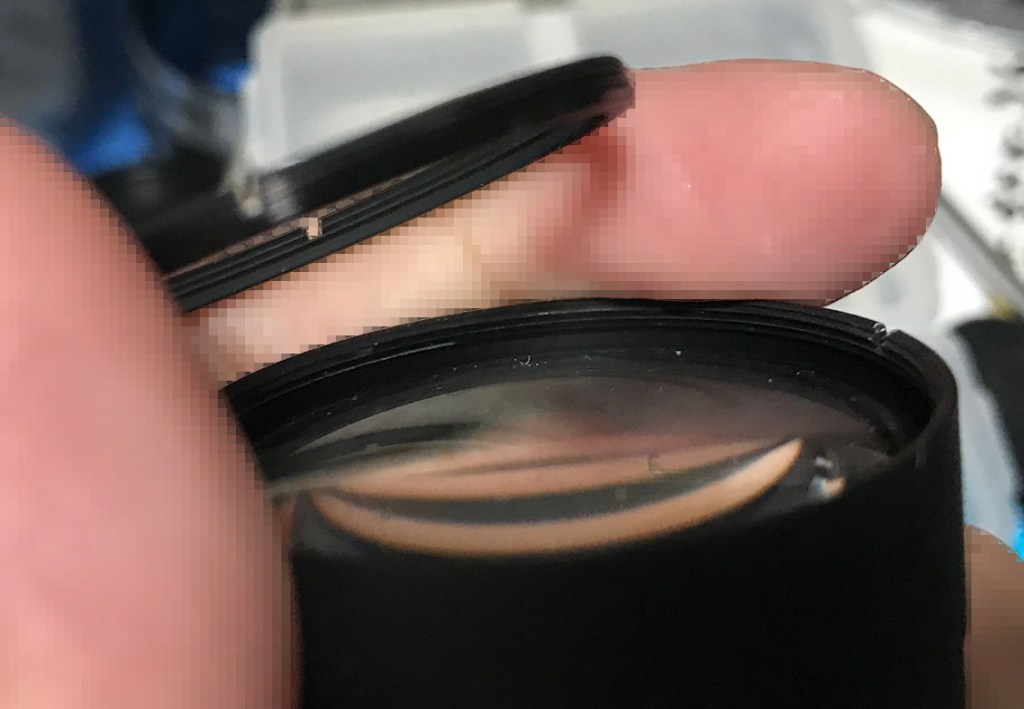
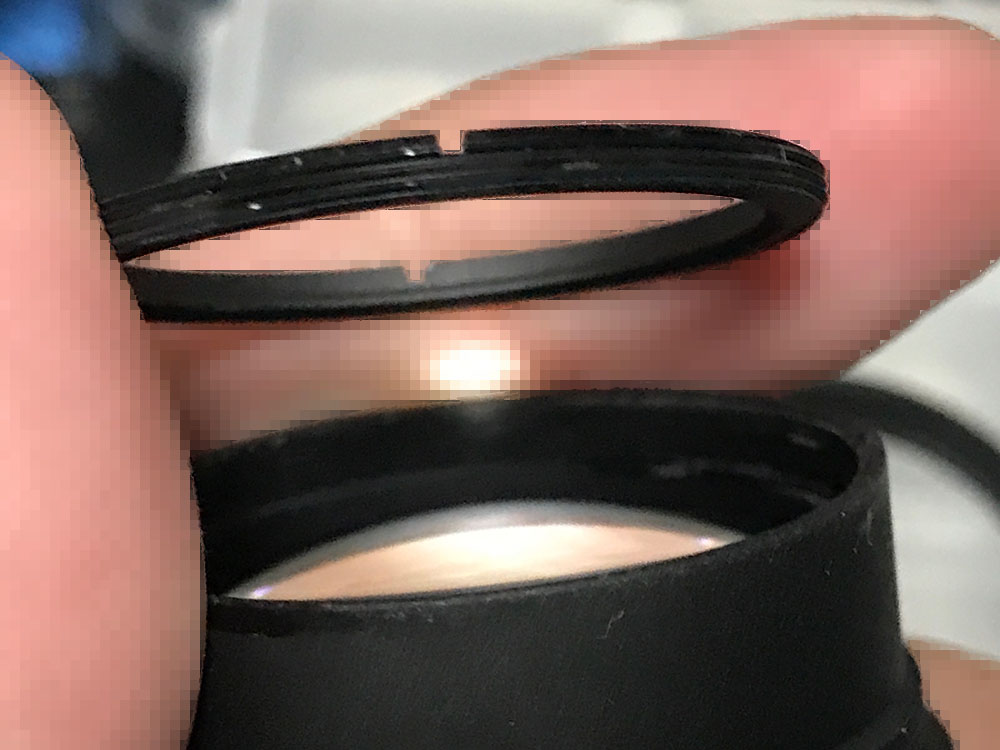
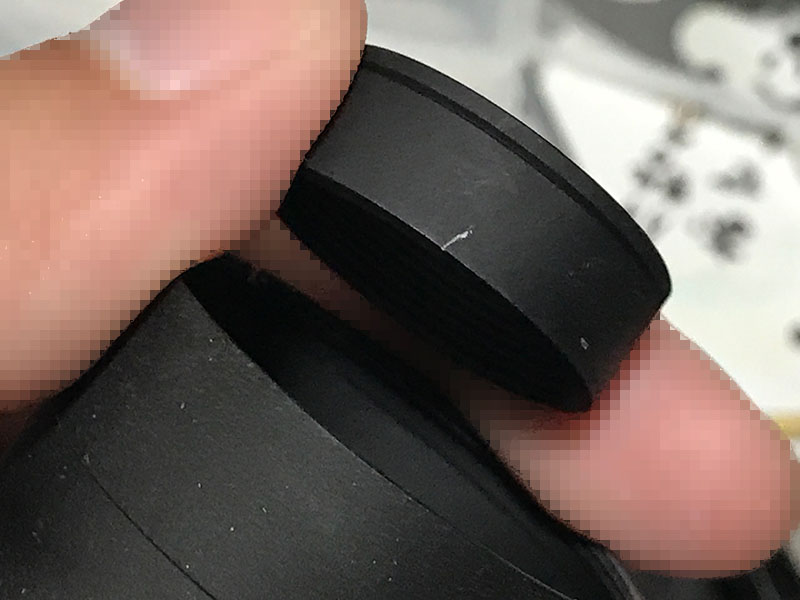
Locate and extract this so you can remove the front collar. Be careful not to damage this since it’s tiny. It may be sealed with paint so soften it with some solvent.

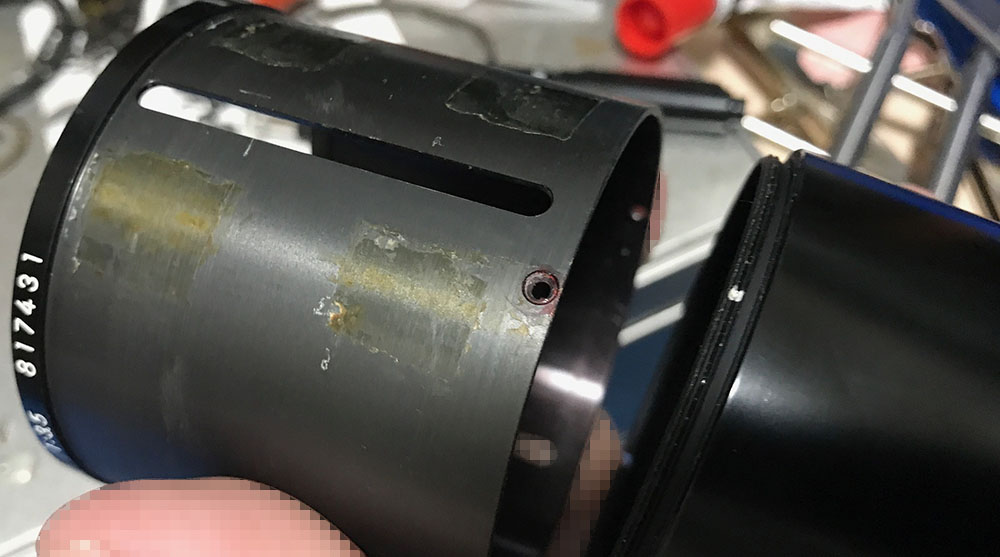
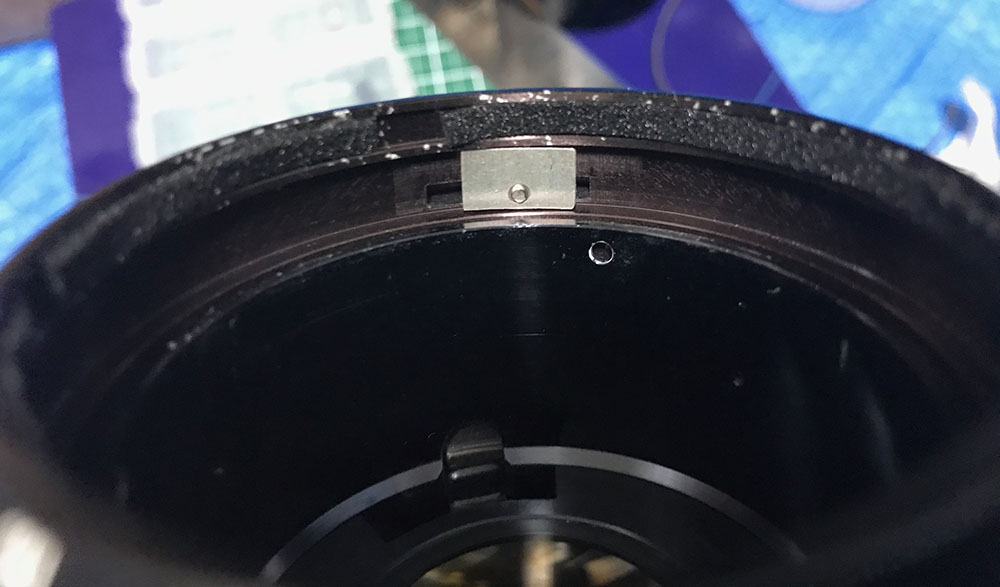
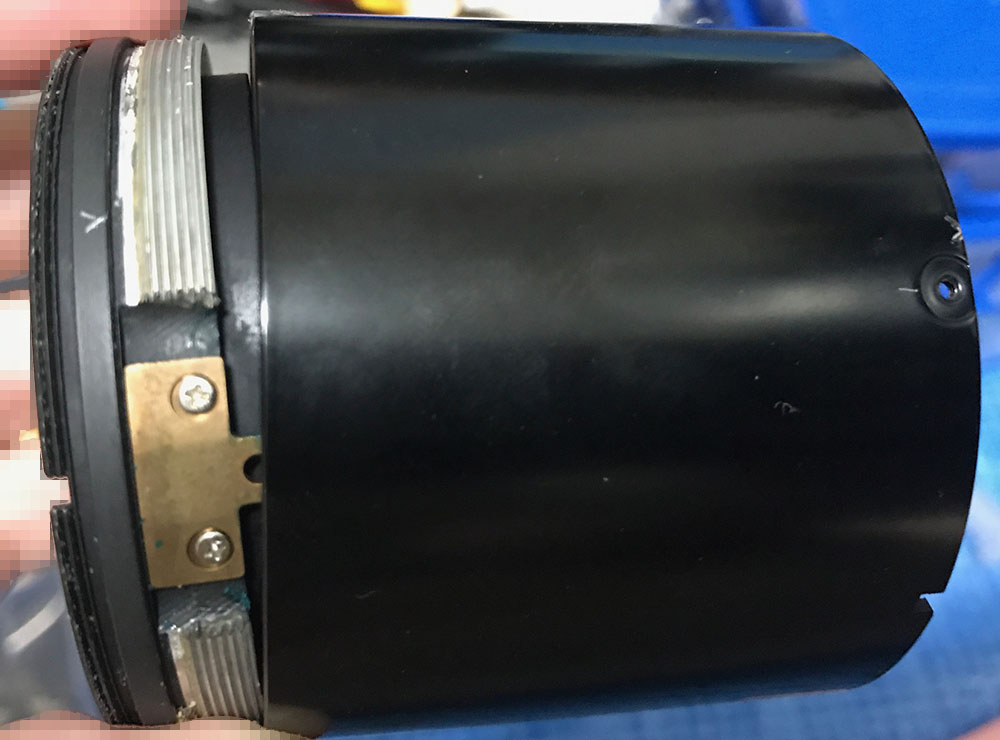
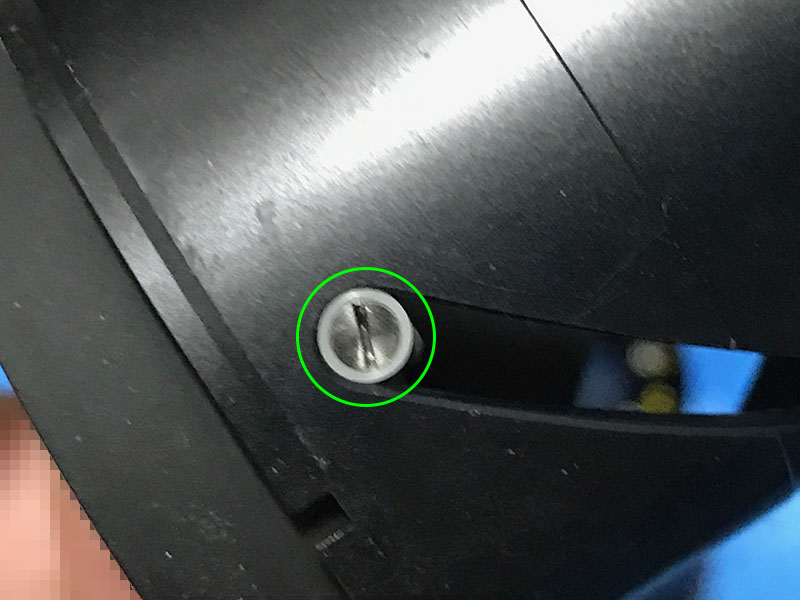
Unscrew the collar to remove it. Be sure to line-up the the hole with the tiny dimple on the thread or else you couldn’t put it back properly.
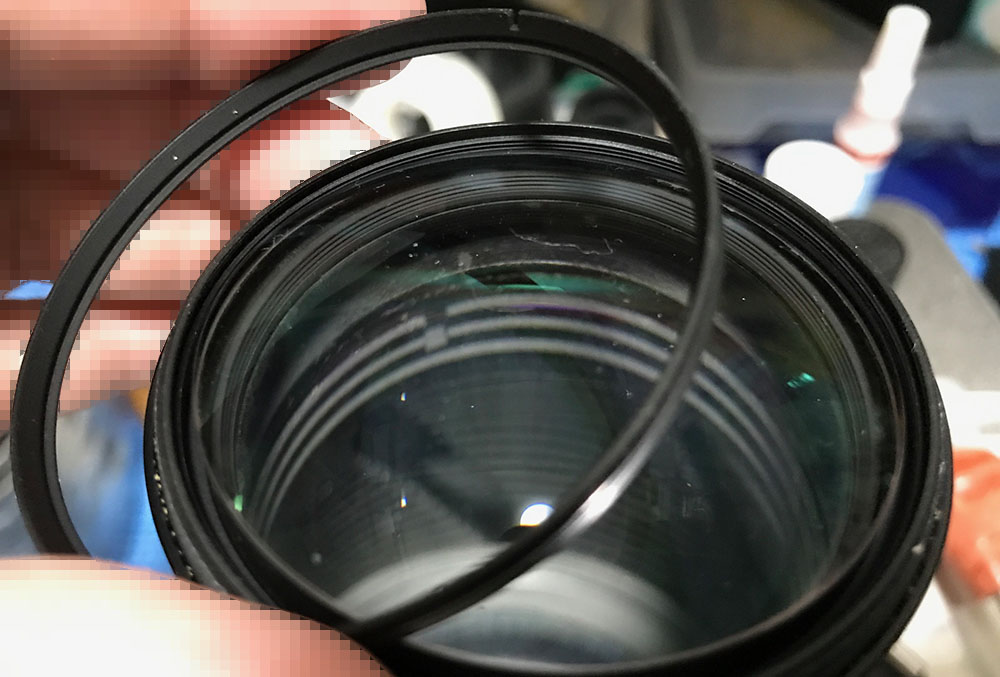
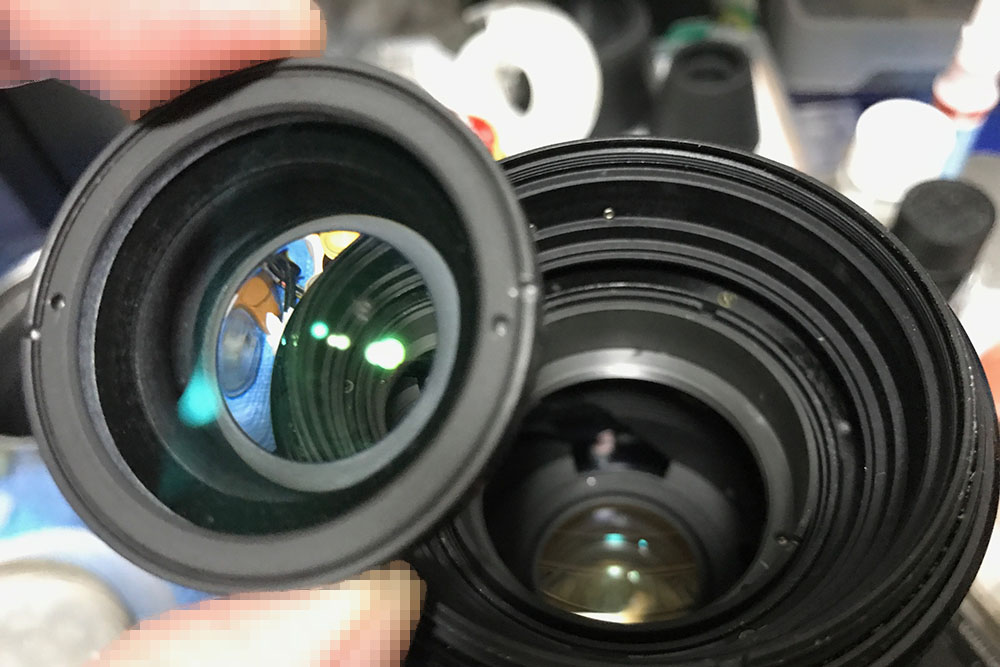
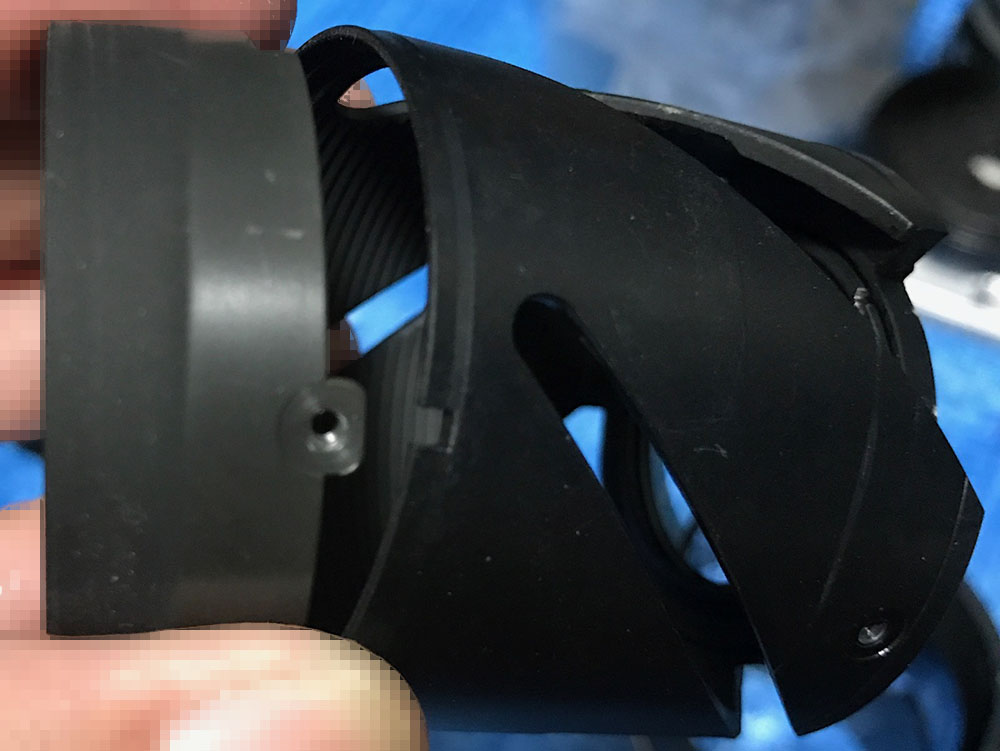
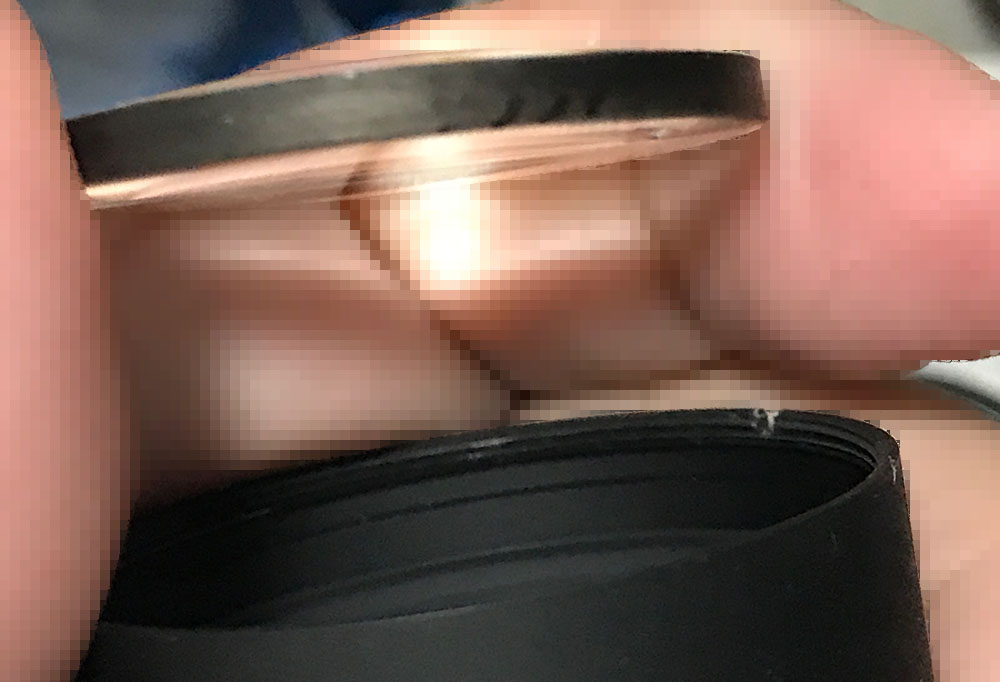
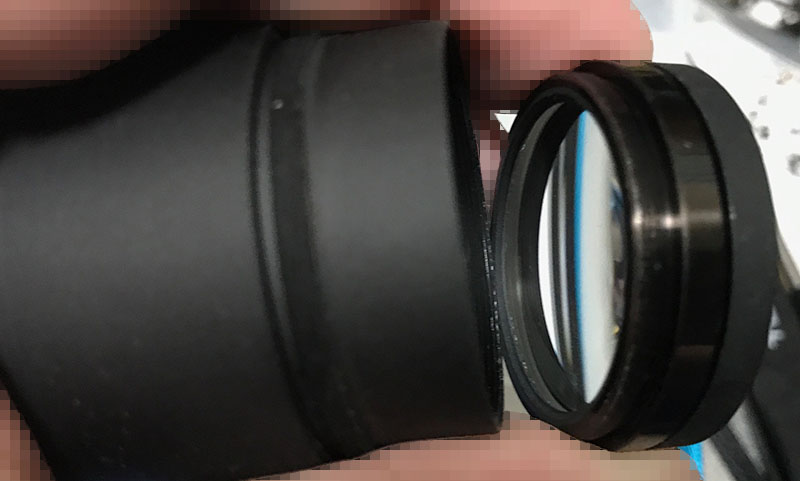
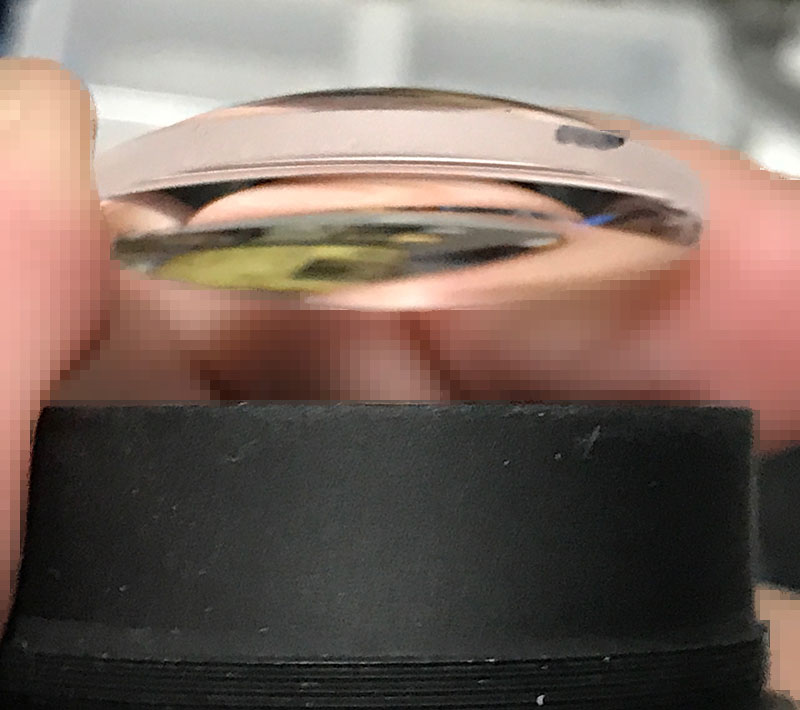
Use a lens spanner to unscrew the retainer of the front lens. Be careful not to scratch the glass as you remove this, a drop of alcohol in the threads will helps a lot in softening any seals.
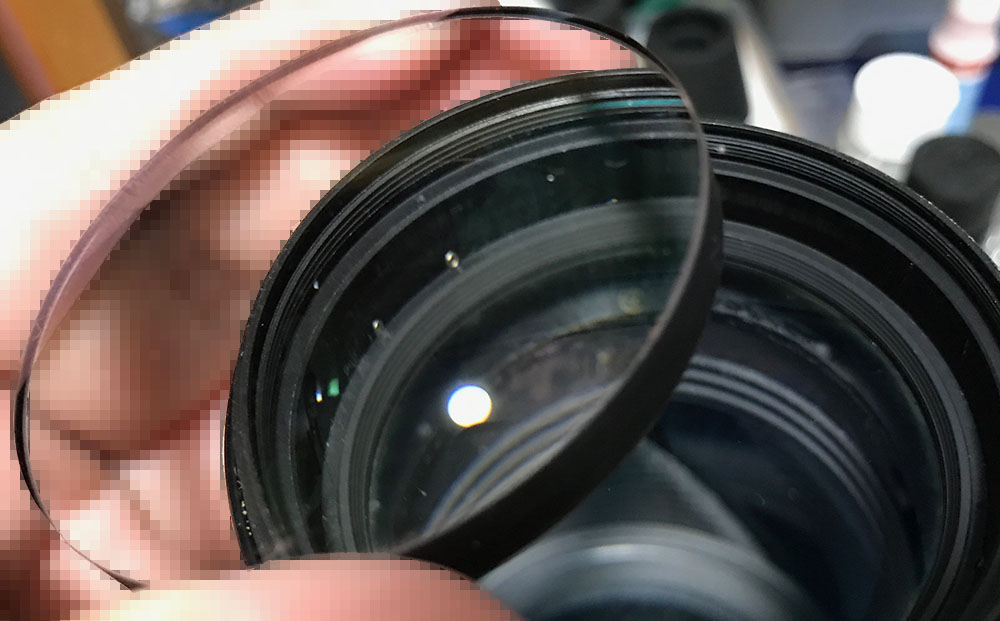
Use a lens sucker to to remove the front element. It’s heavy so make sure it’s safe so it won’t drop to the floor.
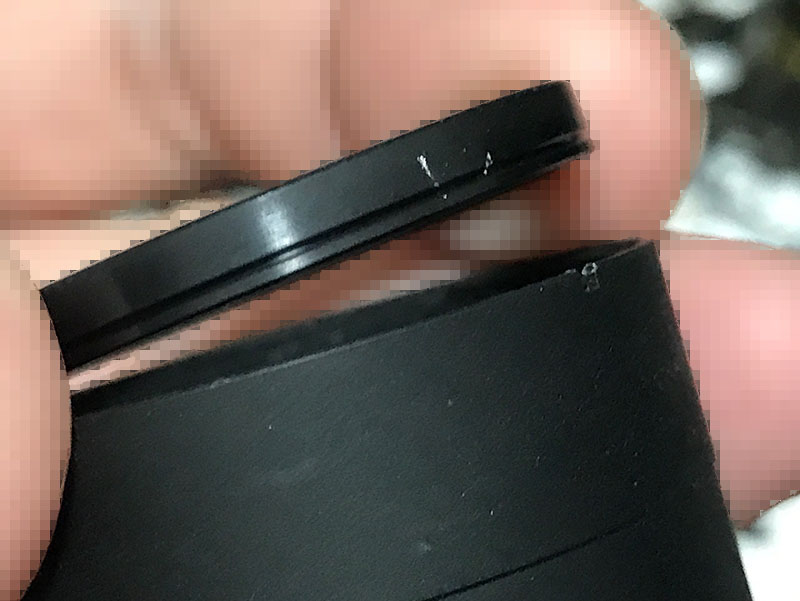
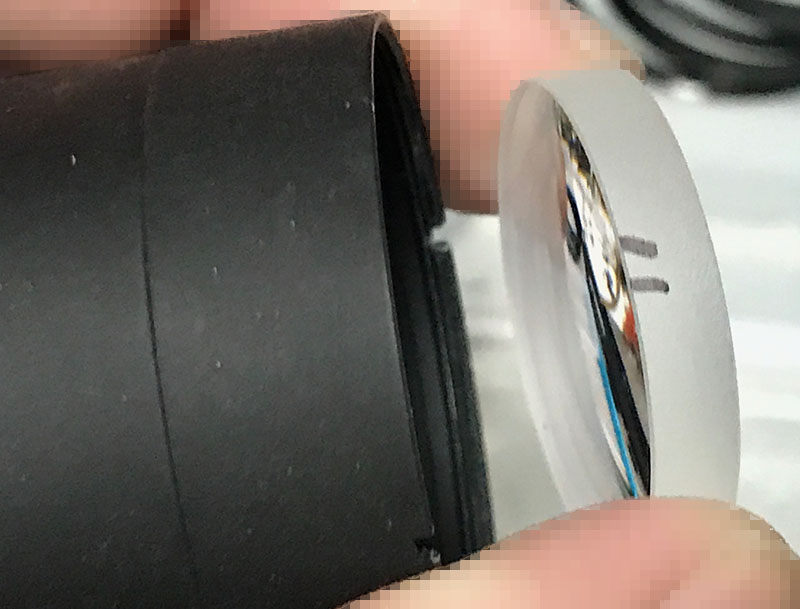
There’s a spacer underneath it, don’t forget to note its direction by making a small mark at the outer wall so you’ll know how to place it back later.
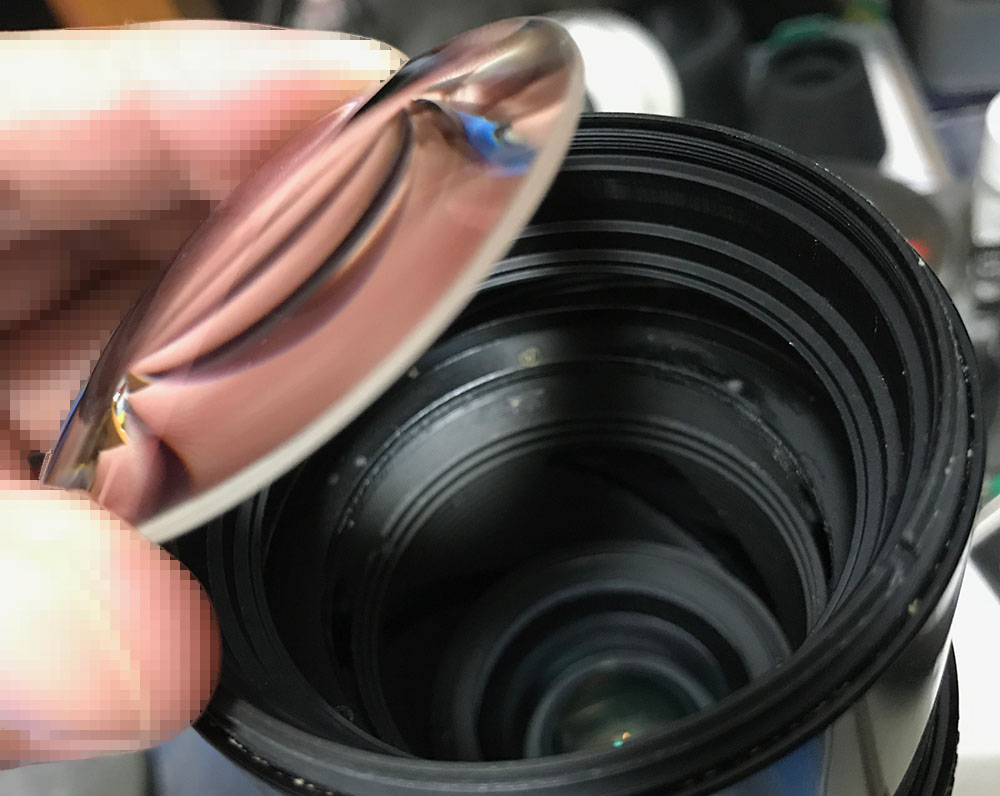
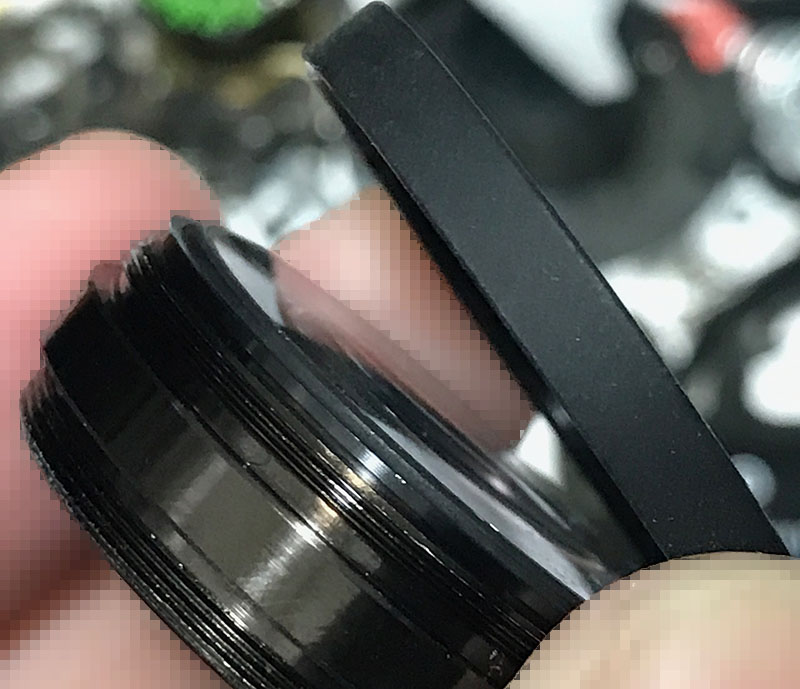
The 2nd element can be extracted the same way, be sure to use a marker to paint a small dot on the leading edge of this element so you’ll know which is the side that’s front-facing.
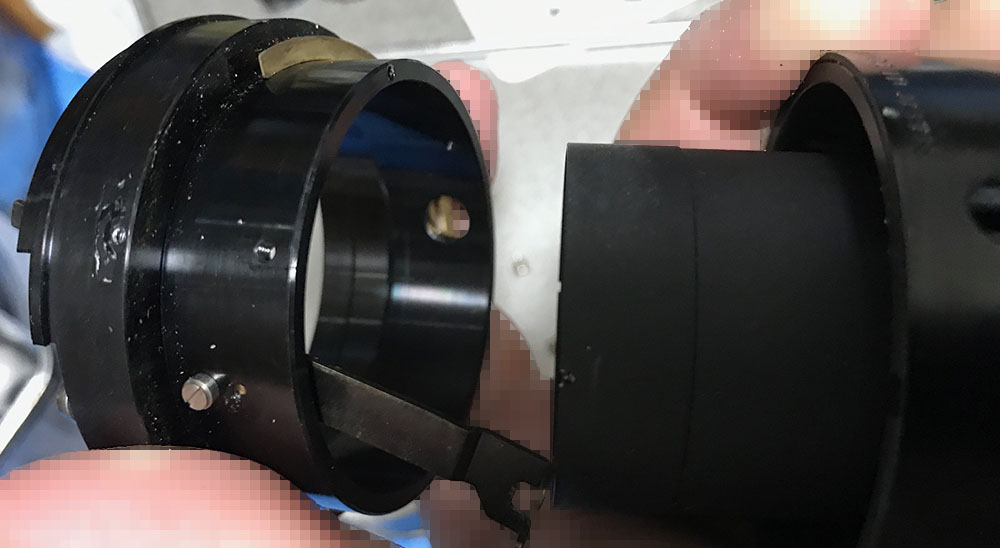
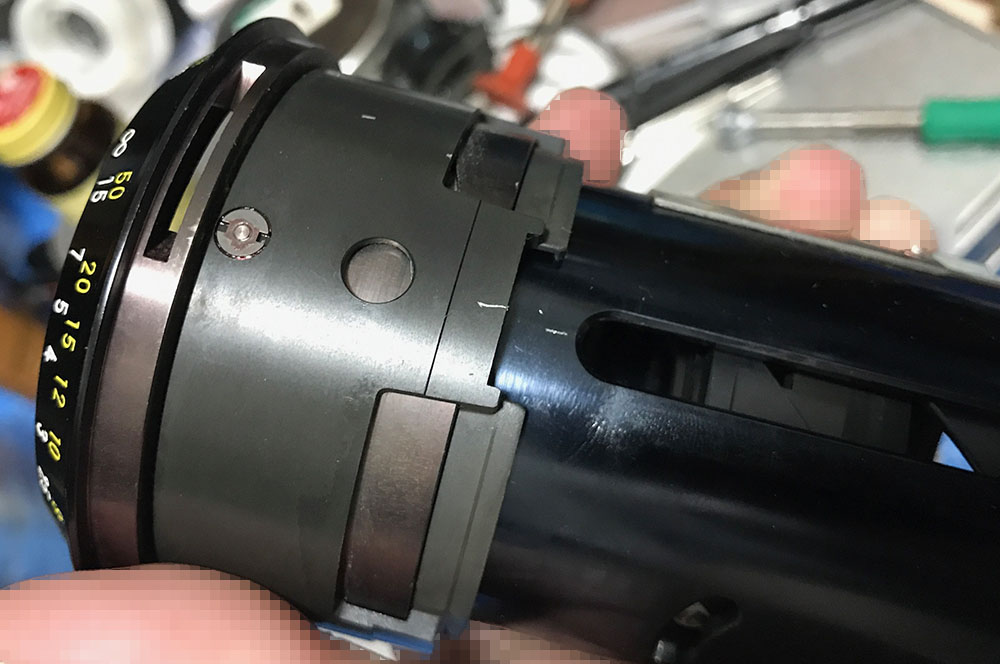
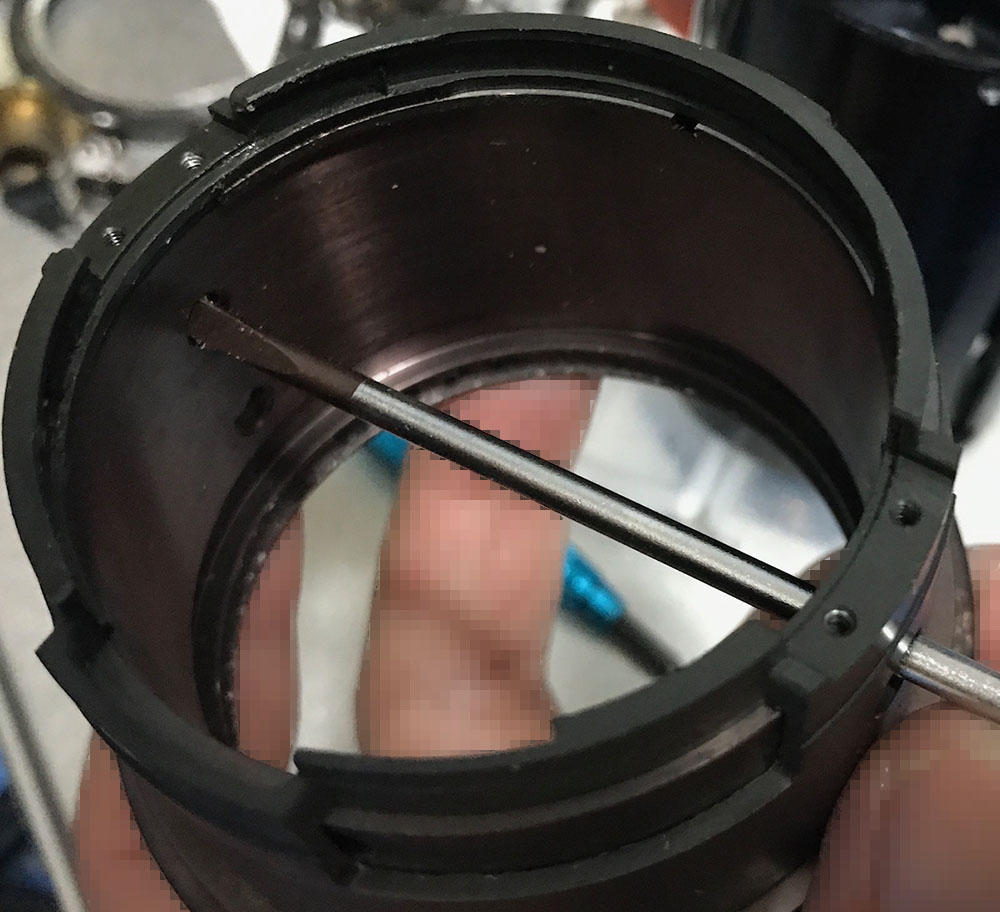
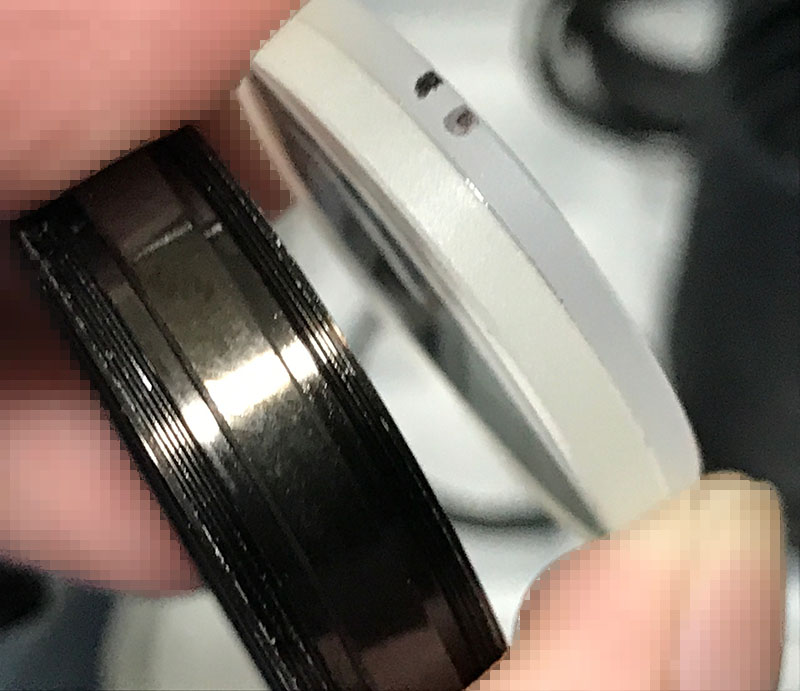
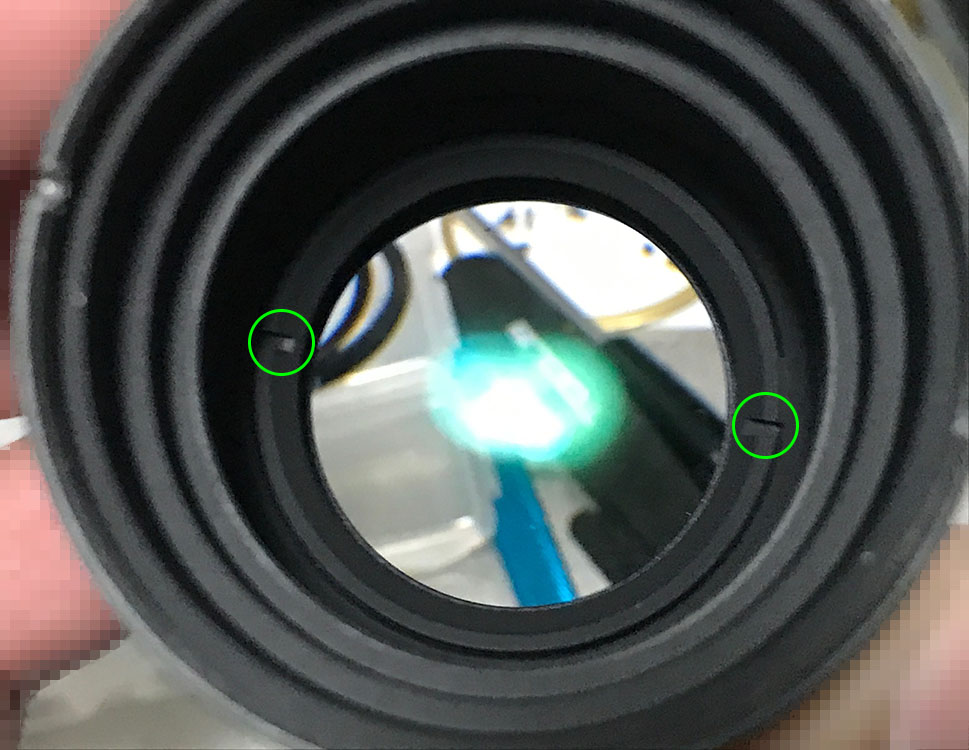
Carefully remove this optical assembly with a lens spanner. Be sure not to scratch anything here, it can be difficult to access these dimples. You need to zoom the lens in order raise this for easier access.
Carefully extract this and keep it in a safe place.
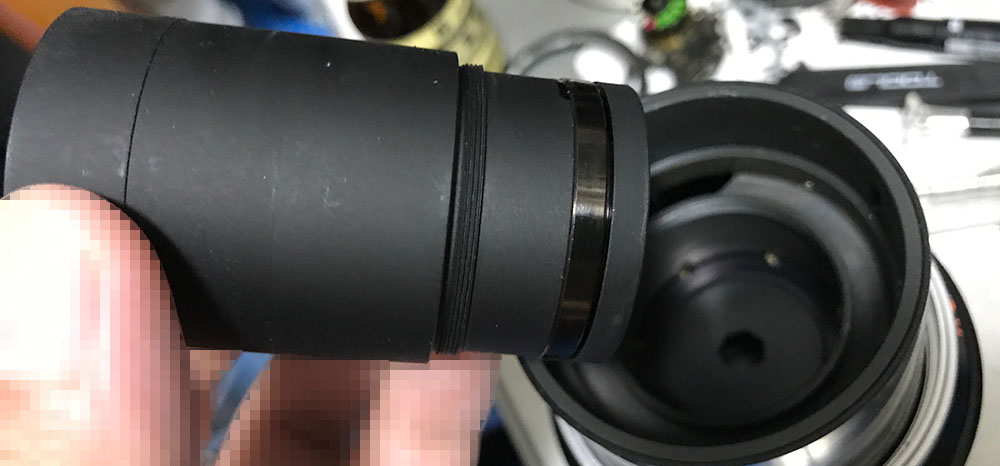
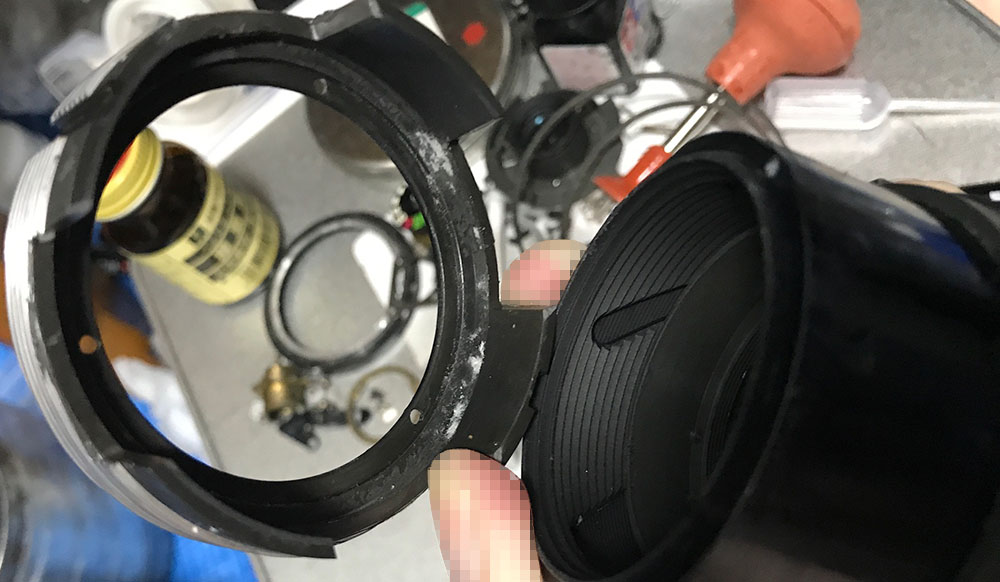
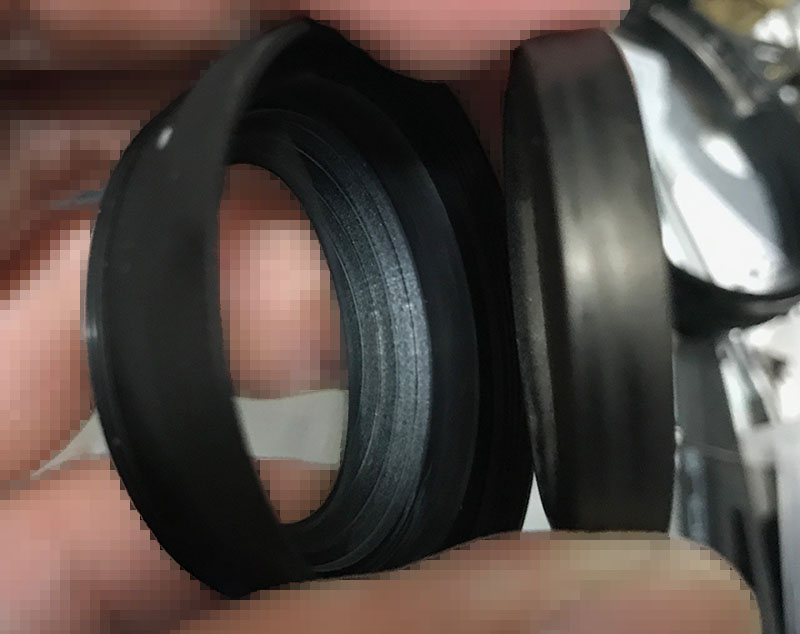
You can remove the rubber grip the same way as I did but this is risky, you could tear this and create an even bigger problem. The proper way to get it out is to remove one of the lips of the focusing barrel and sliding this out in a safe way where you won’t need to stretch this part.

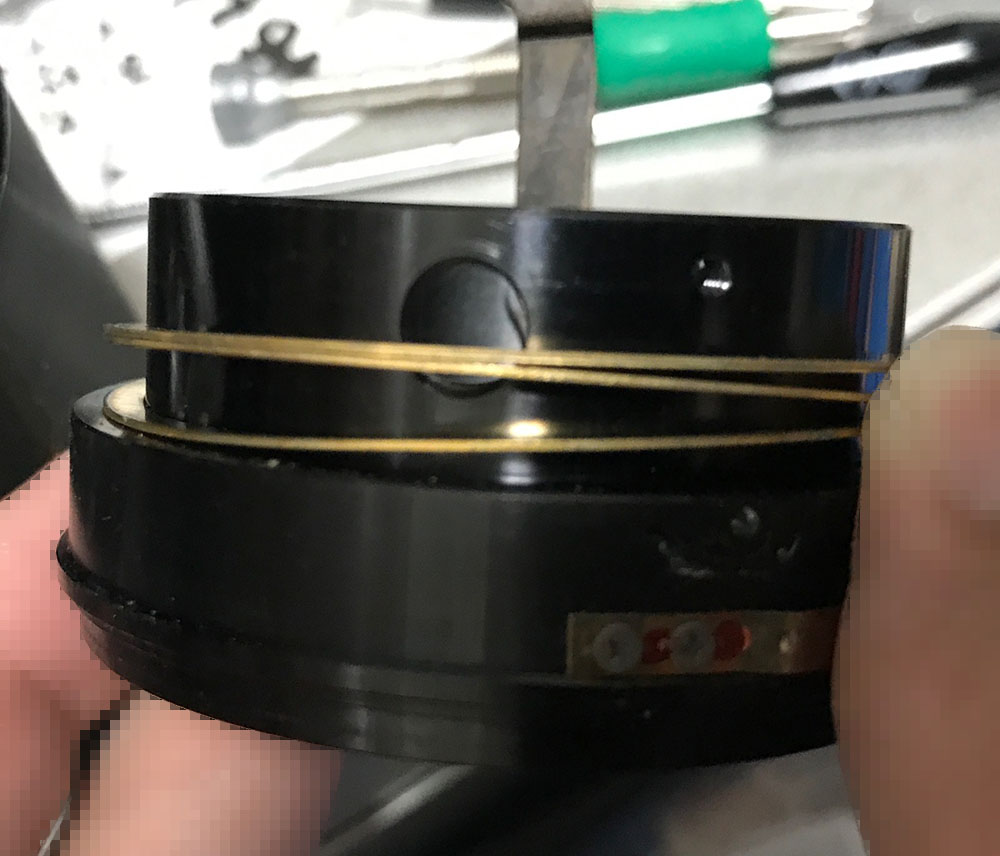
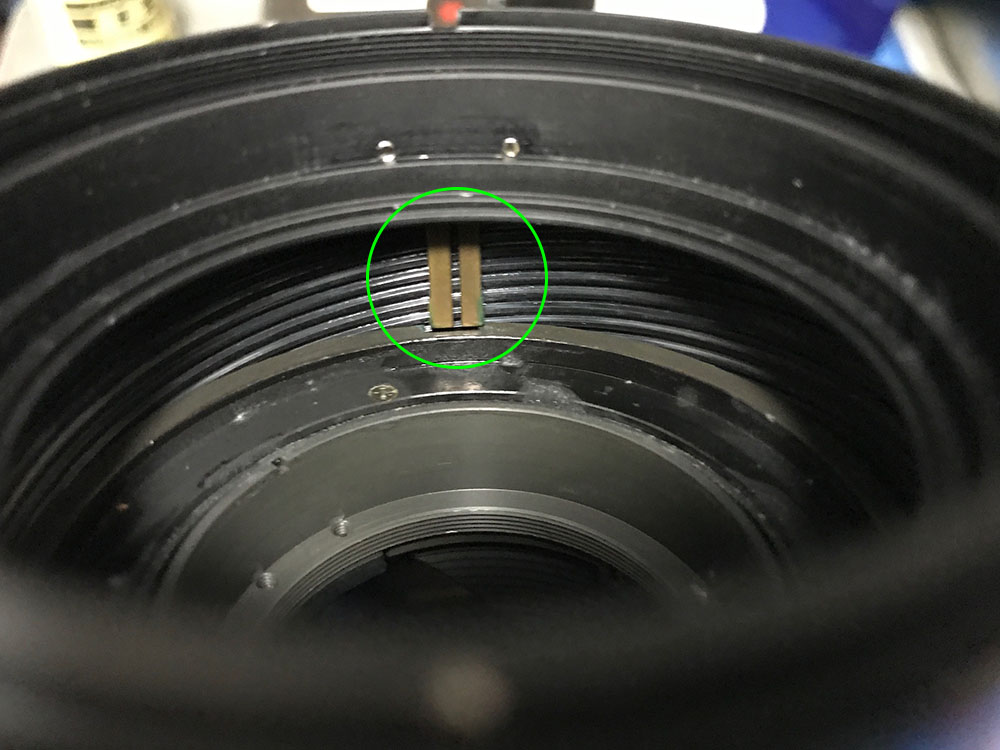
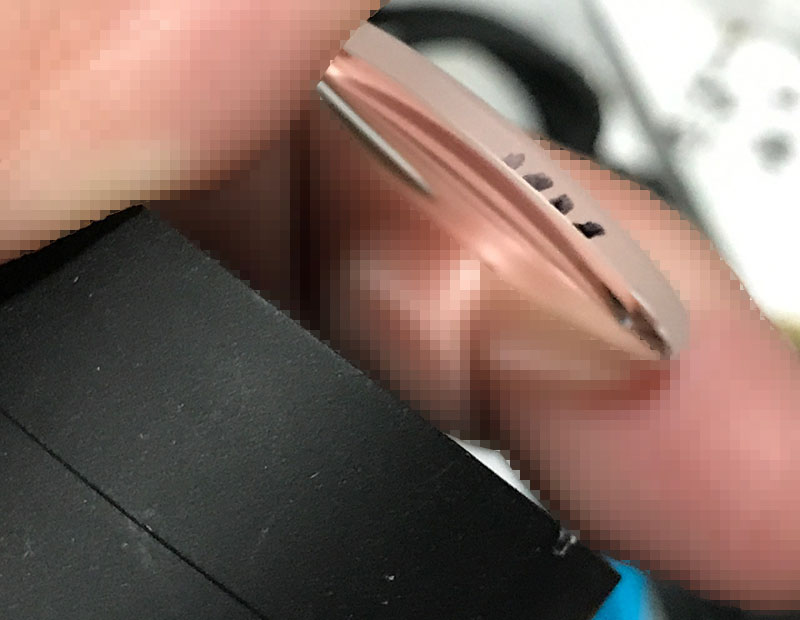
Carefully remove this brass strip that covers the rollers, it’s merely taped to the focusing barrel.
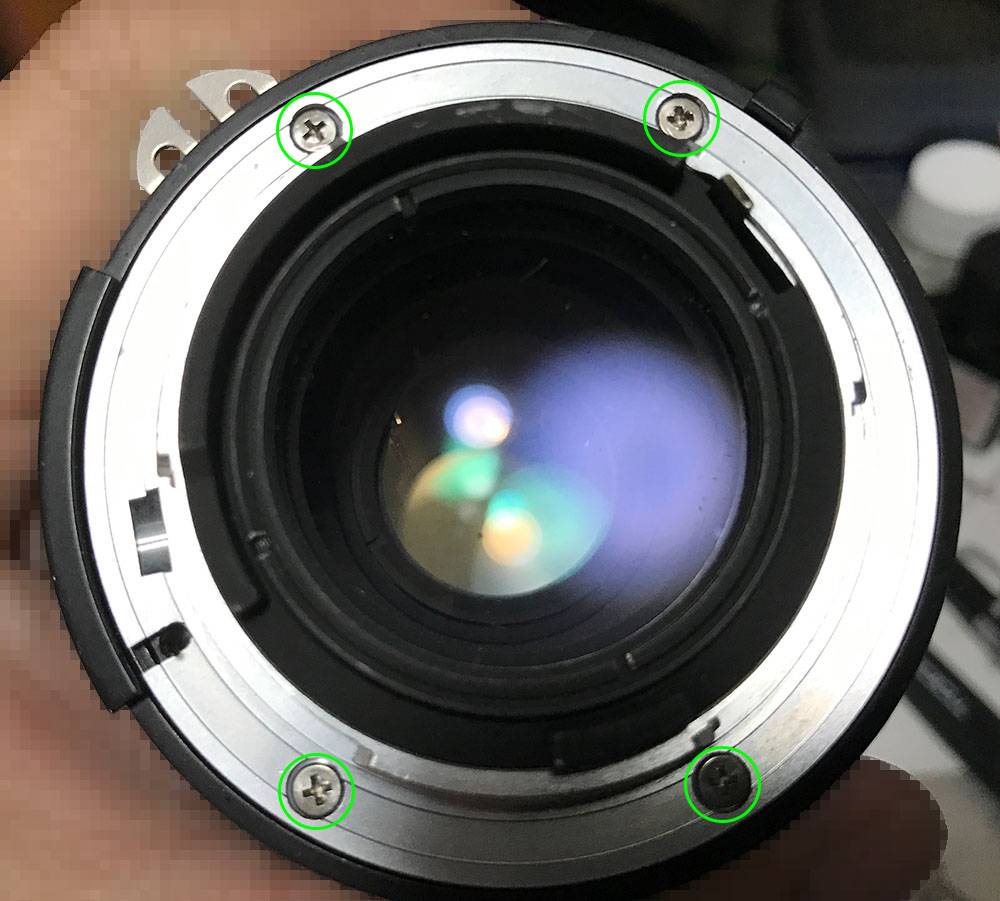
Extract these to remove the bayonet mount. If you’re new to lens repair, do yourself a favor and read my article on how to remove bayonet screws. The screws aren’t ordinary, many people get stuck because they stripped these. I wrote this article to help prevent this problem from happening to you.
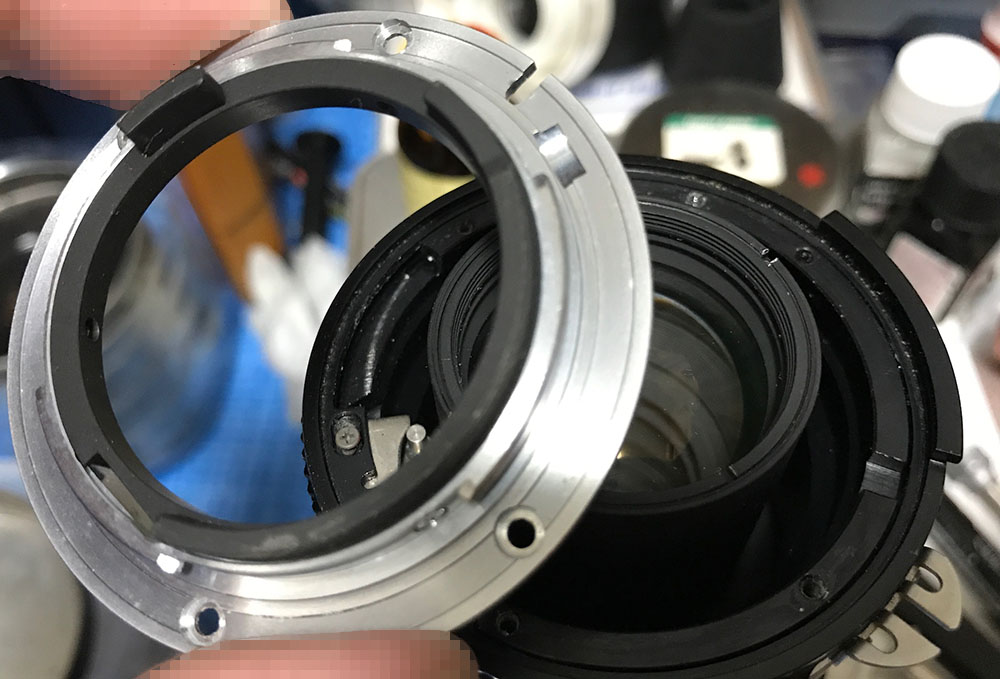
Carefully remove the bayonet mount and clean it properly.

The aperture ring can be easily removed, there’s nothing that will snag but take a couple of notes and photos so you’ll know how things should couple.
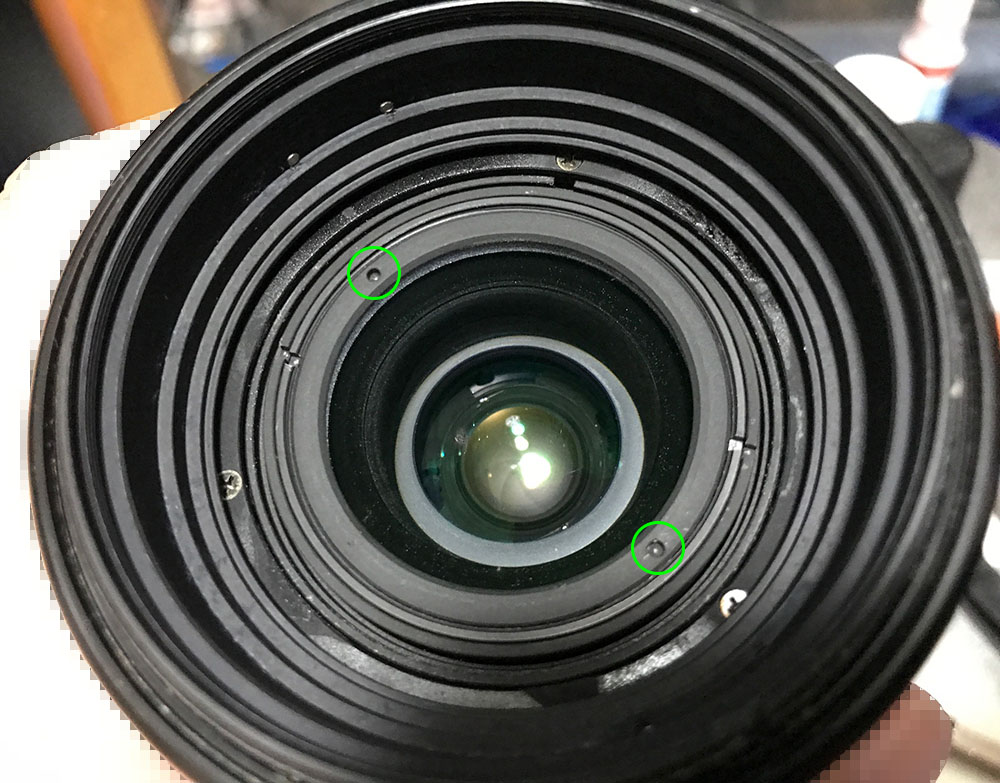
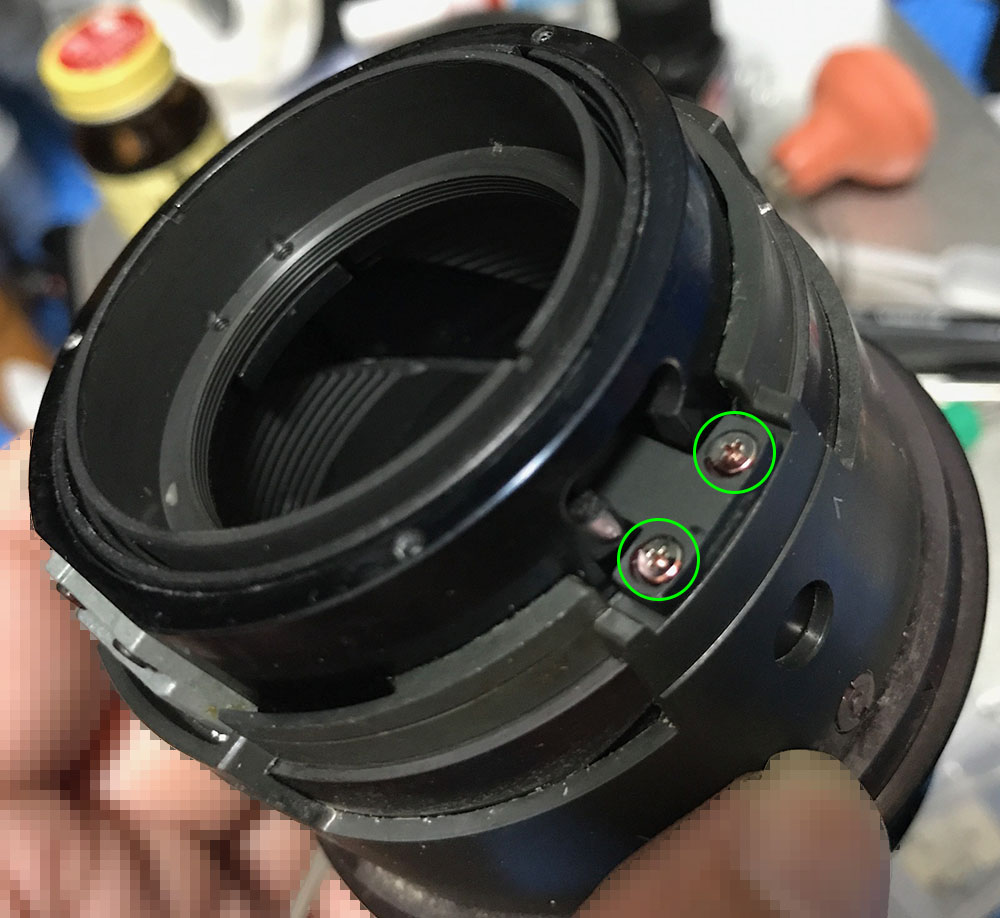
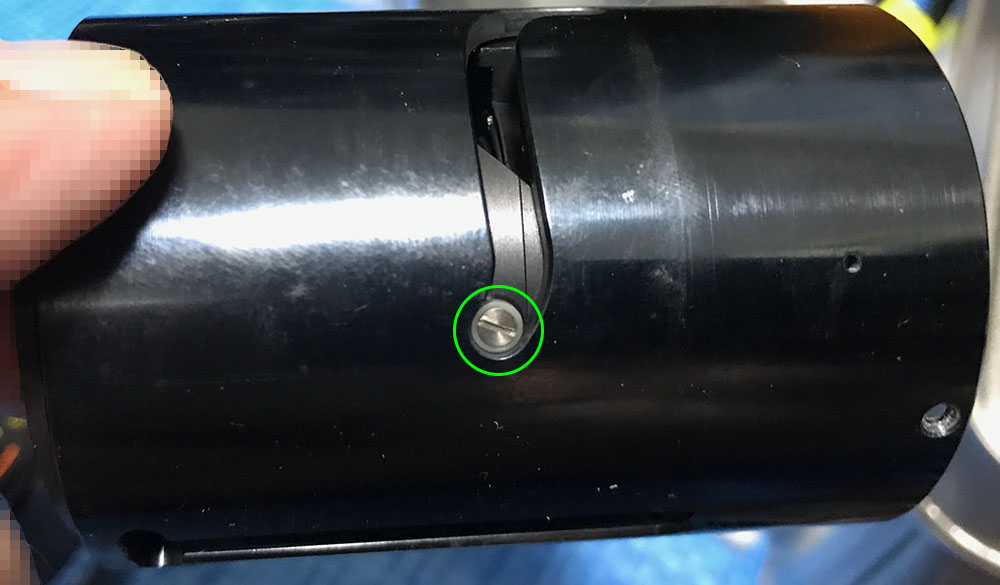
Extract these screws carefully. Be sure that your drivers fit perfectly or you may scar the surrounding metal parts.
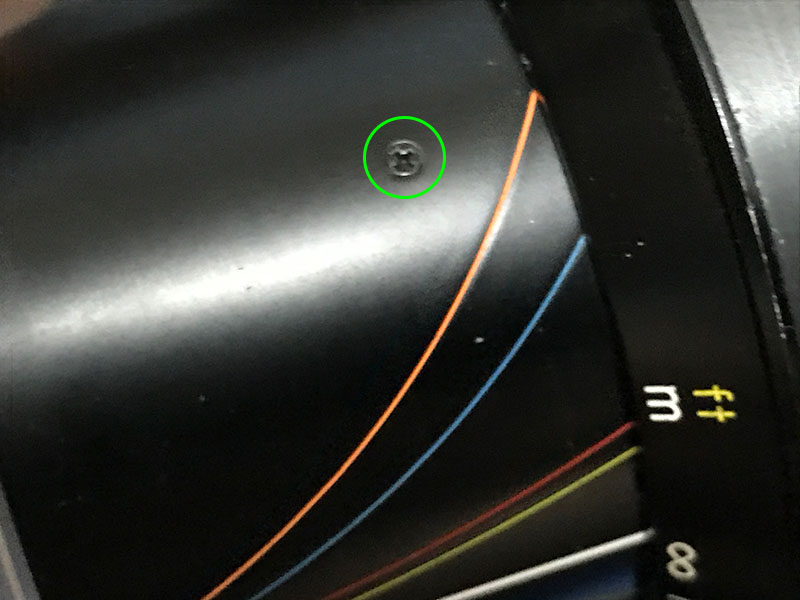
Carefully remove these screws, I think there are 3 of these.
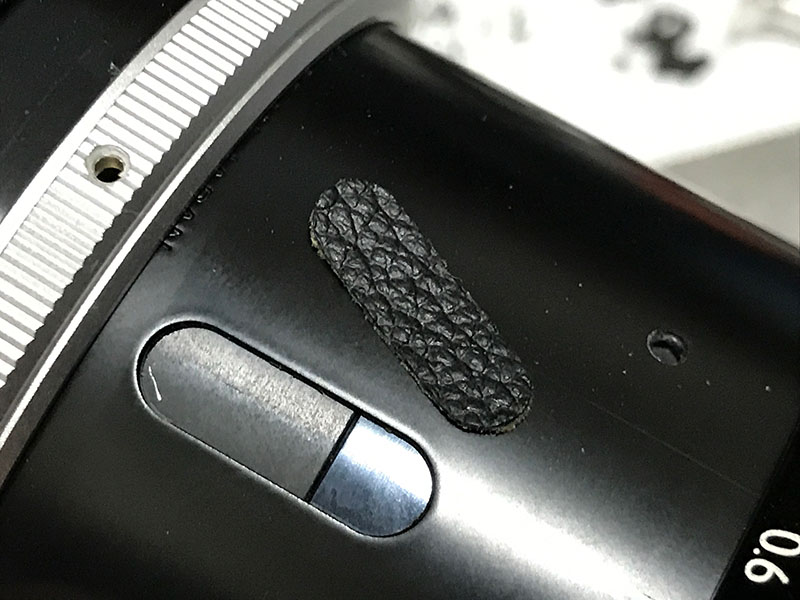
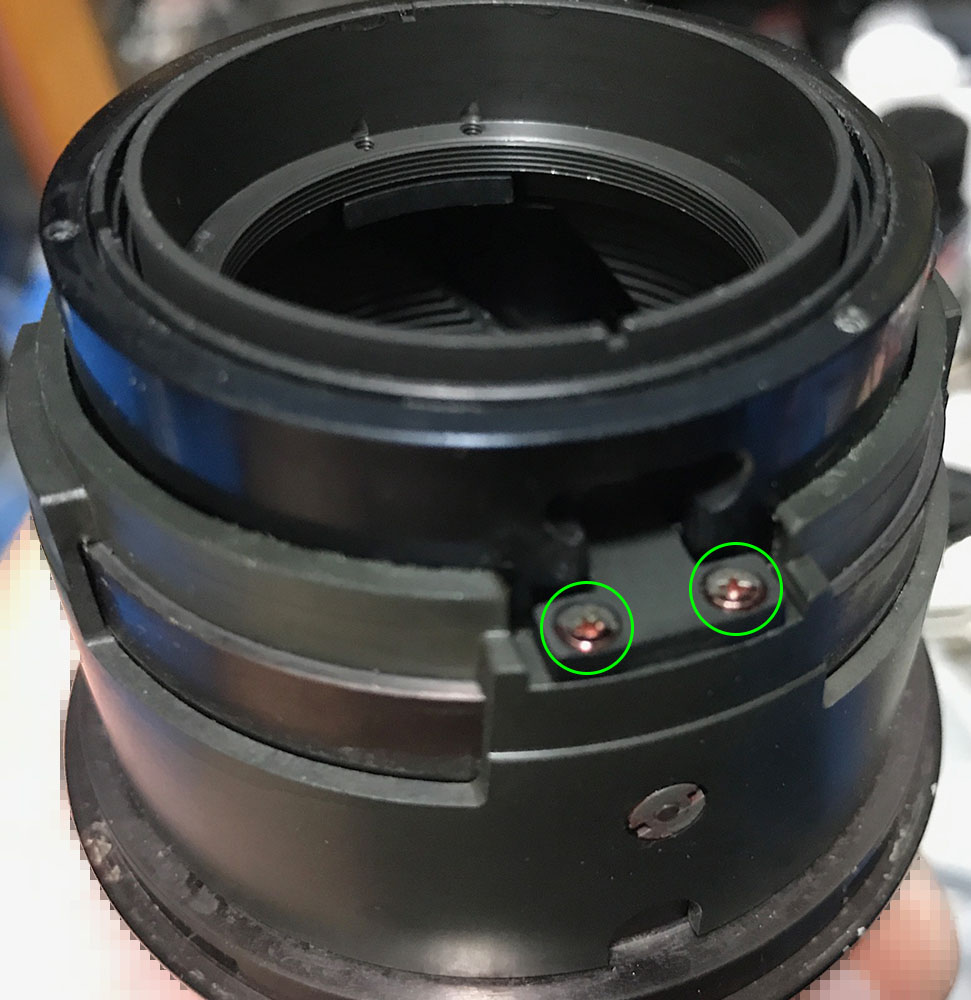
Remove this leatherette cover.
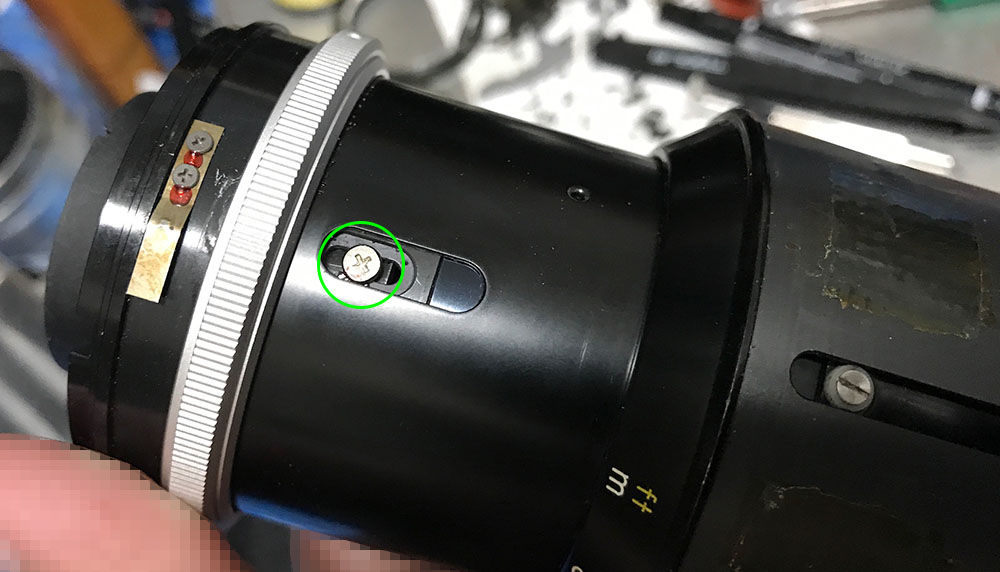
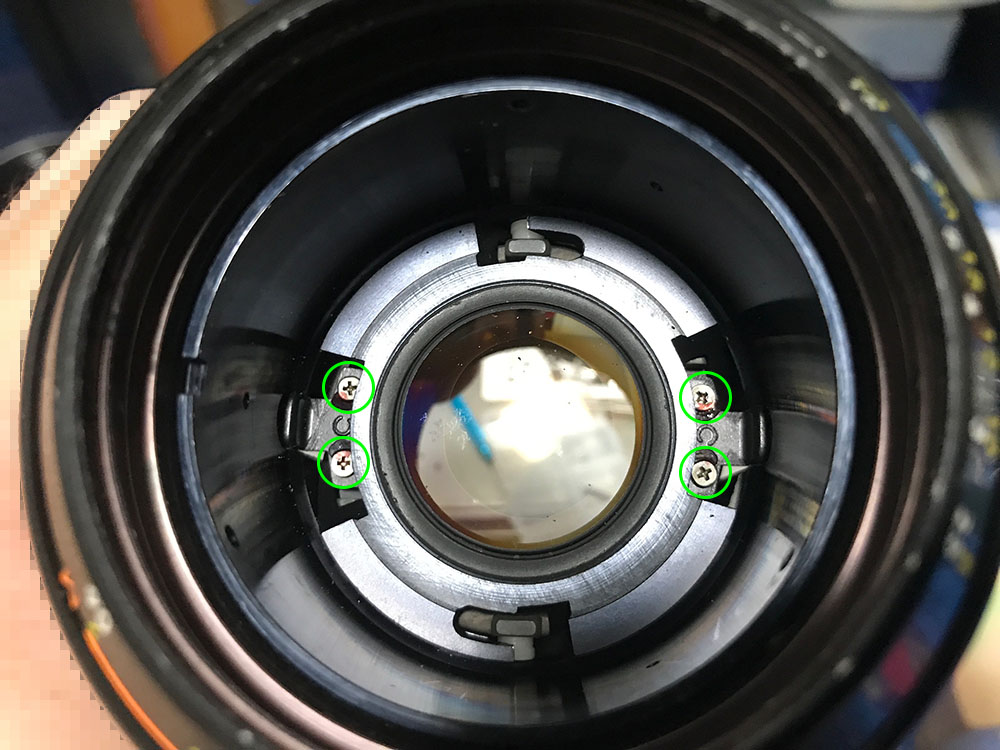
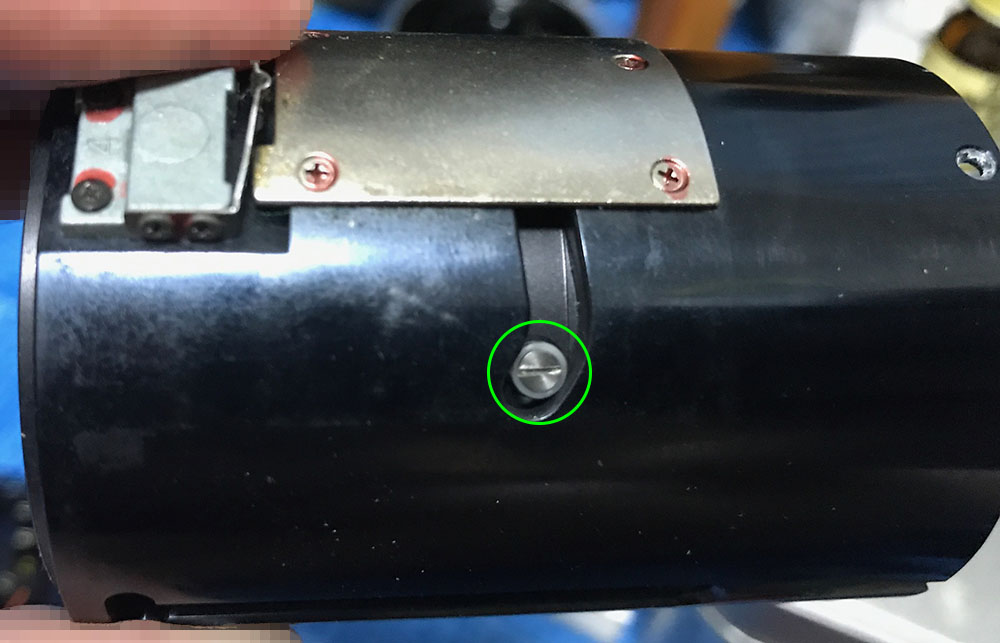
These screws are used to adjust the rear focus of the lens, there are a few of these, maybe 3 if I recall. You’ll need to turn the sleeve to access these once its screws are gone.
Here’s another one, don’t forget this step later since this is the way you can adjust the focus of this lens.
Remove the base carefully but don’t forget to note its position.
Never damage or misplace these shims as they’re used to adjust the focus of the lens.
Unscrew the rear optical block, it’s a big assembly so be sure not to drop it. I don’t recommend taking this apart since you could disturb the alignment of the elements and the performance will suffer after.
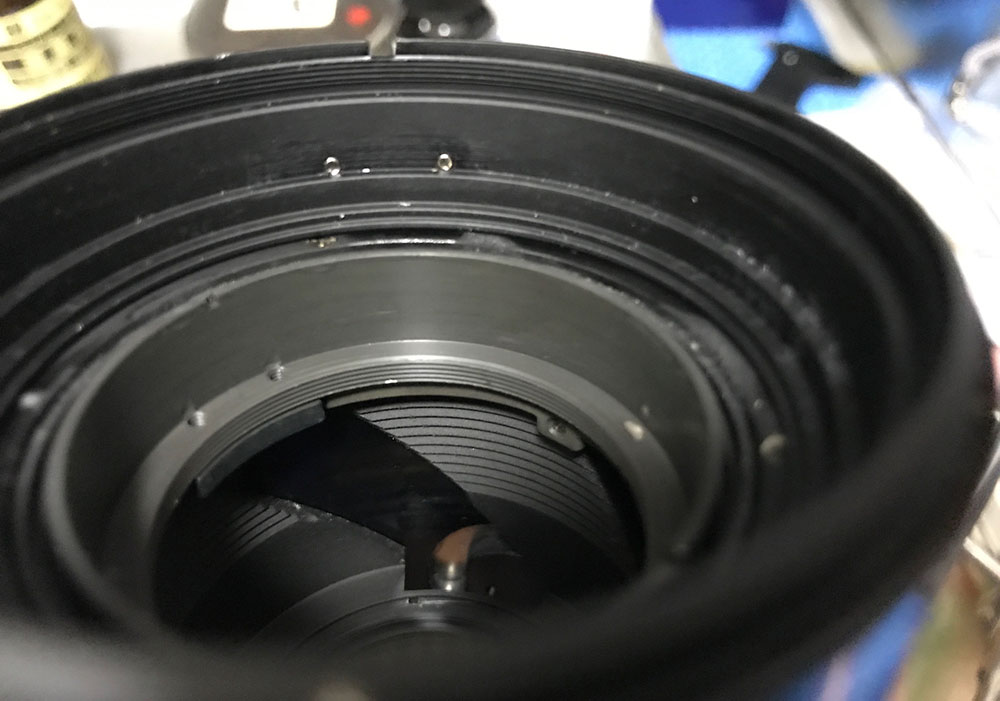
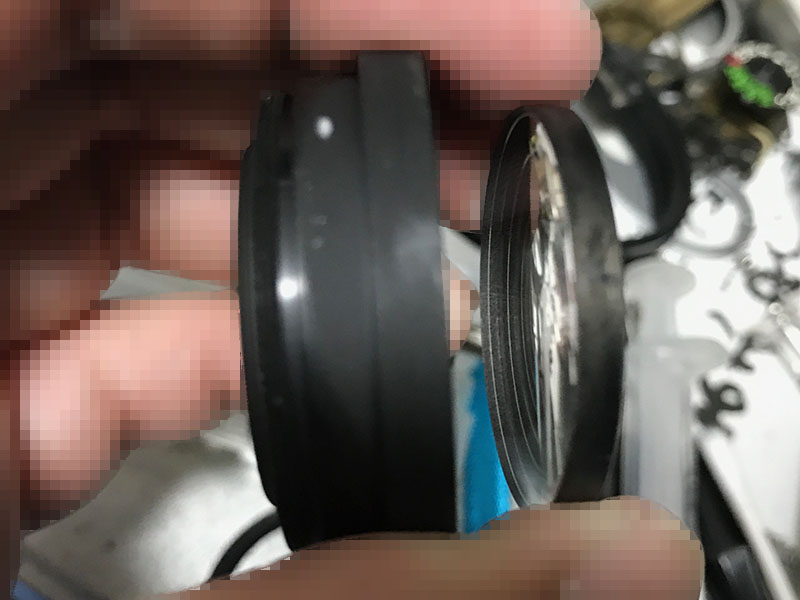
Carefully remove the sleeve and clean the inner surface.
Extract these screws to remove the lower barrel. Note that I made a mark so I will know how these should align.
Carefully remove the lower part of the barrel and decouple the spring so it won’t get damaged.
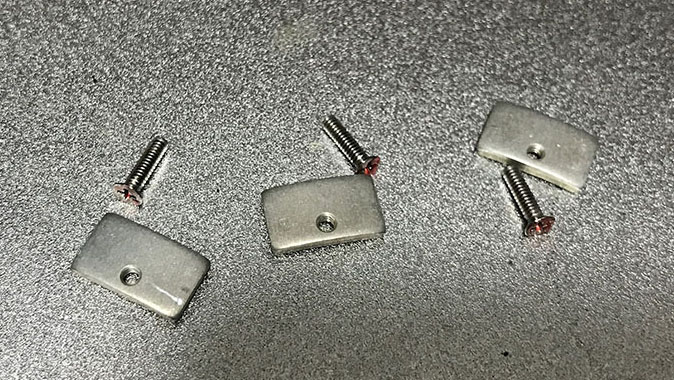
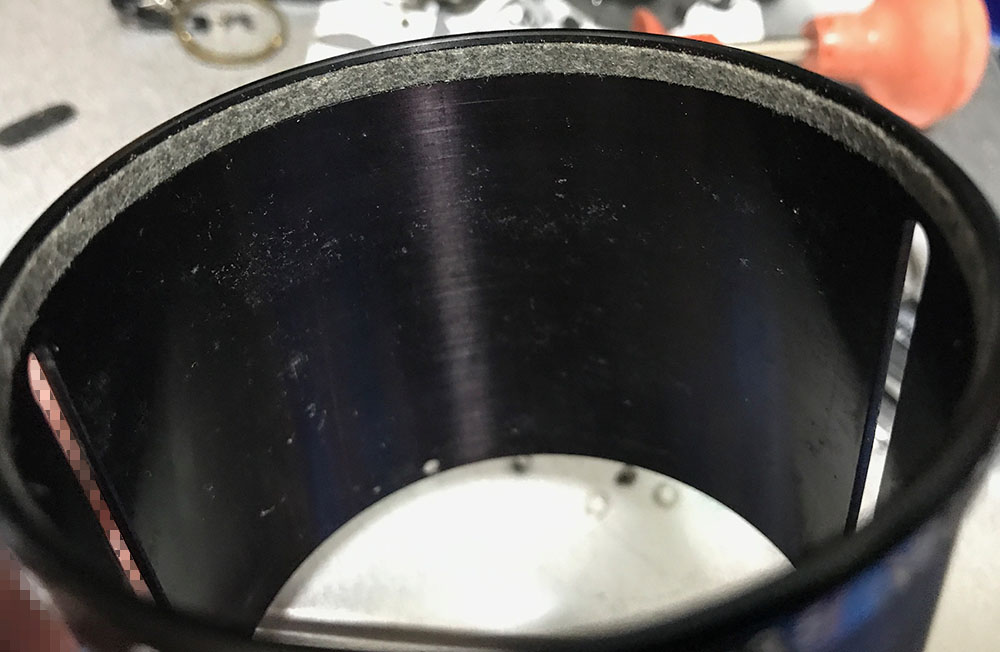
Be sure to note the orientation of this part so you will know how to put this back again later. Visible here is the felt lining used to prevent dust getting in and also to prevent the dreaded zoom-creep from happening. Replace it and make sure that it’s of the right thickness so it won’t be too-tight or too-loose.
Carefully extract these rollers. Again, make sure not to damage them, nylon will melt when you heat it.
I made small marks so I will know how the barrels should align. Extract this with care and make sure not to strip the slot.
The barrel should come-off easily. Clean it well and remove all residue and adhesive from the old tape.
These secure the focusing scale.
Be sure not to lose any of these, to prevent misplacing them you should just put the screws back to their respective abutments.
This is the best time to replace the felt lining. Get a strip from the milliner’s supply shop, bring the original and make sure that it is slightly thicker than the original one but not too-thick or the barrel will be stiff.
Before you go any further, note how much the inner parts move and how it reaches its limits on both ends. Document it so you’ll be able to put this back again properly.
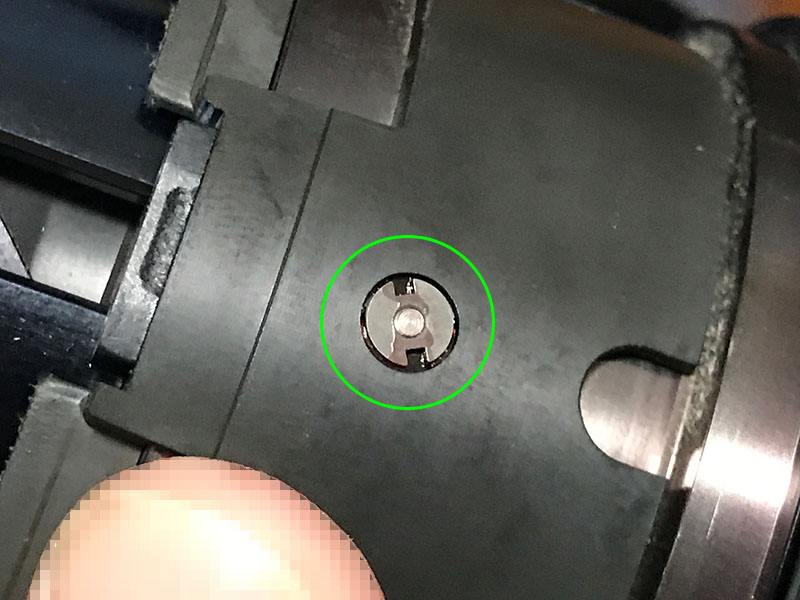
This brass prong is what’s preventing it from focusing beyond its range. The barrel can be separated once the prong disengages. Don’t remove this yet, it has to be documented before you remove it completely.
Go to the other side and make small marks, this is how you could couple the prong again to its slot. The marks you see here are quite big and deep, don’t follow my example, this is my personal junk so I didn’t really mind.
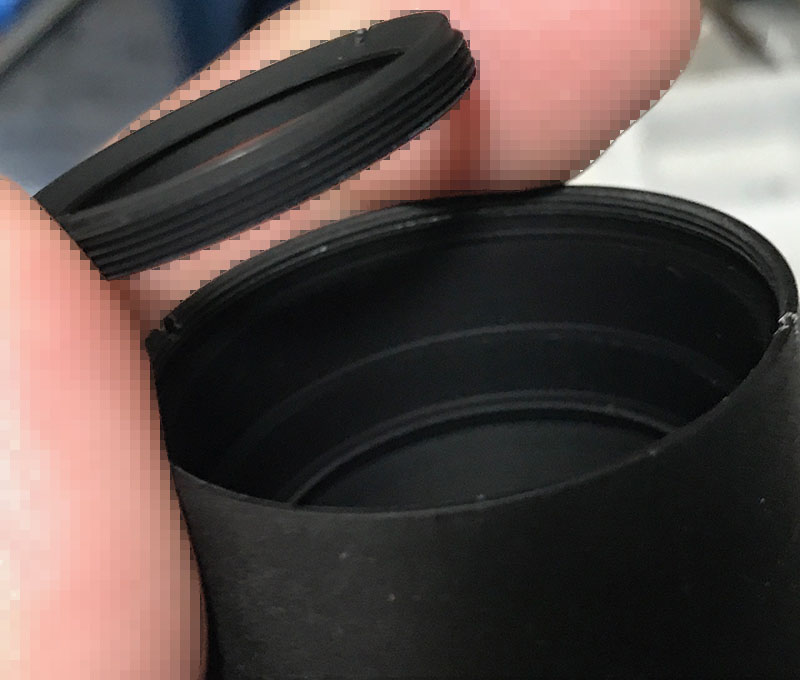
Separate the front ring and make sure to mark where it parted.

You can remove the inner ring once you’ve extracted these.
The whole thing should come-off easily. Don’t forget to note its position, you will have to put it back properly again later.
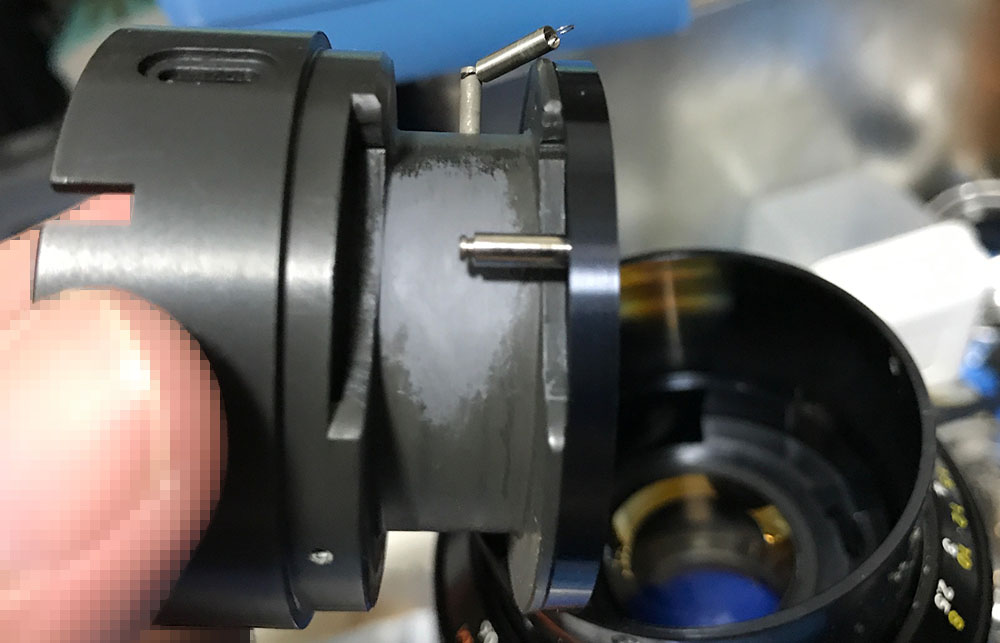
This is tricky to remove, you will need a special opener for this. Fabricate a special tool and make sure that the prongs fit the slots perfectly. Apply some alcohol to soften the seals to make the job easier, avoid heating these.
Here’s another one.
Before you remove the lower barrel of the focusing ring be sure to mark the exterior so you will know how this should align with the inner barrel.
Here’s how it should look like once the nut has been removed.
There’s a nylon bush underneath it, this is the reason why you should never heat the these.
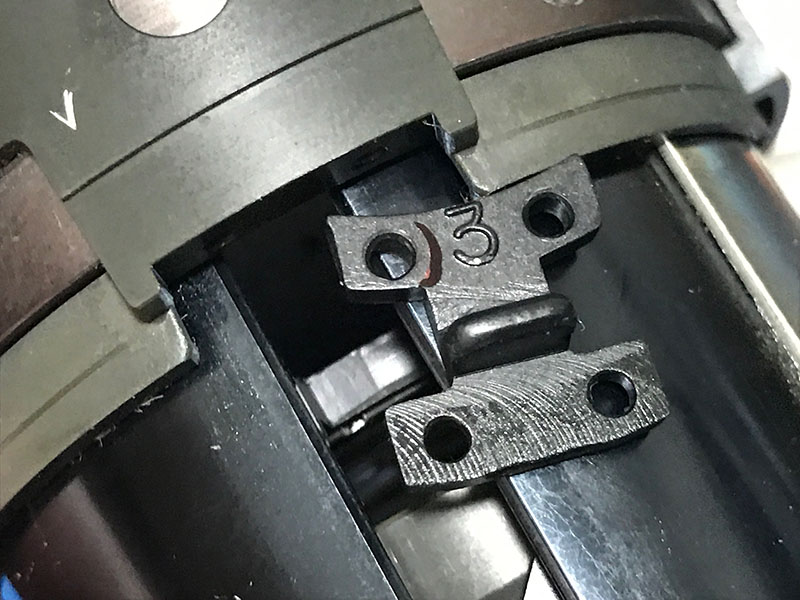
Carefully remove these and make sure that you make a small mark so you’ll know which key belongs to which side since there’s 2 of them.
Here’s the other one.
Deep within the lens are the other screws of the keys. You could reach them by using long screwdrivers.
Remove them and clean them properly.
It can be difficult to see in this photo but there’s a screw here that has to be removed, it can only be accessed via another hole on the other side.
Use a long screwdriver to get to it.
It’s now easier to access these once the other parts are gone. Extract these to remove the sliding barrel inside.
Here’s another one.
Carefully slide it off from the inner barrel but don’t forget its orientation.
You’re now able to remove these rollers now that they’re accessible.
Here’s another one.
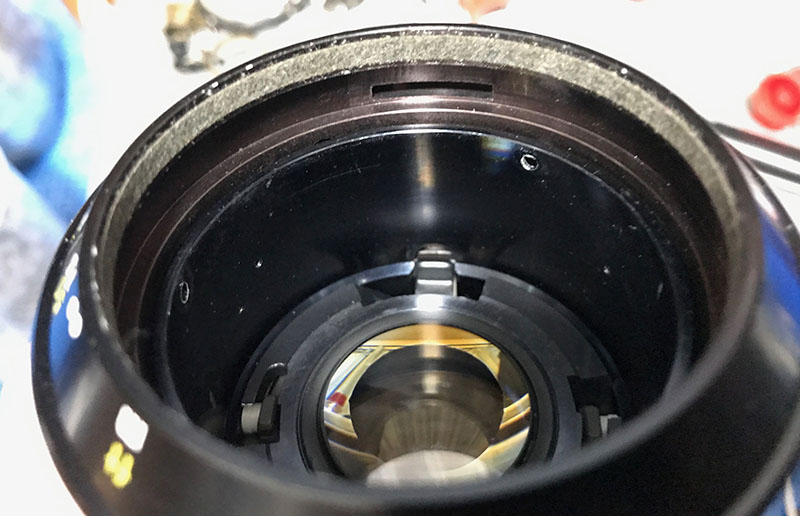
Remove the floating element and its housing.
Clean everything properly and do not leave any residue. I soaked all of the parts in a pot filled with alcohol for a thorough cleaning and scrubbed them after with a stiff brush. Never apply too much grease specially on the parts that are close to the optics. Apply a thin film of grease to any metal-to-metal surface so they slide smoothly. Clean the helicoids very well and apply some grease there, too. I chose a grease that isn’t thick since this lens has a rather long focus throw. Too much resistance will make this difficult to turn.
Disassembly (Optics):
I didn’t have to clean the iris so I will only discuss cleaning the optics here. I spent plenty of time here since there are plenty of elements. Avoid cleaning or dismantling the rear optical block as much as possible, the alignment of the elements here are delicate, you may end-up losing sharpness when you put these back incorrectly. With this said, always take plenty of notes when you dismantle anything. Use a permanent marker to make a small mark at the leading edge of any element that you remove so you’ll know which side should be facing where. Also note their order, if you got these wrong you’re going to waste your time dismantling the lens again and figuring out which element is facing the wrong way at best or crack one at worst. If your lens is affected with fungus, read my article on how to remove lens fungus. Be sure not to overdo it or the chemicals will damage the elements or the coatings.
This element is situated deep-within its housing, only a lens spanner with a pair of long bits will allow you to remove its retainer.
The rear optical block is the most complicated part of the optics. Extract the rear element by removing its retainer with a lens spanner.
Remove and carefully mark the rear element with a permanent marker so you will know which side should be facing where when you put it back.
Remove the spacer but be sure to mark its leading edge.
Remove this assembly.
Remove the retainer so you can extract the element. Don’t forget to mark its position just like the rest of the optics.
Carefully unscrew this off.
You can now access this.
Carefully remove this retainer.
Carefully extract this with a lens sucker.

This can only be extracted with a lens sucker with enough suction to pull it out from the barrel, it was tight on my lens.
A lens spanner with long bits is required to extract this retainer.
Carefully extract this element with a lens spanner.
Carefully remove the spacer.
Remove this with a lens sucker.
Carefully remove this.
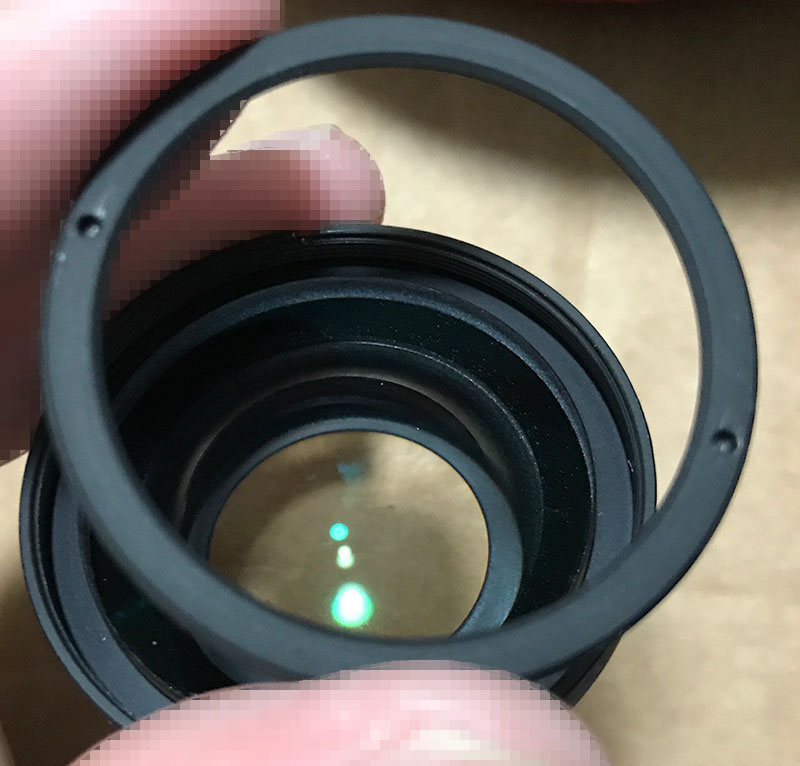
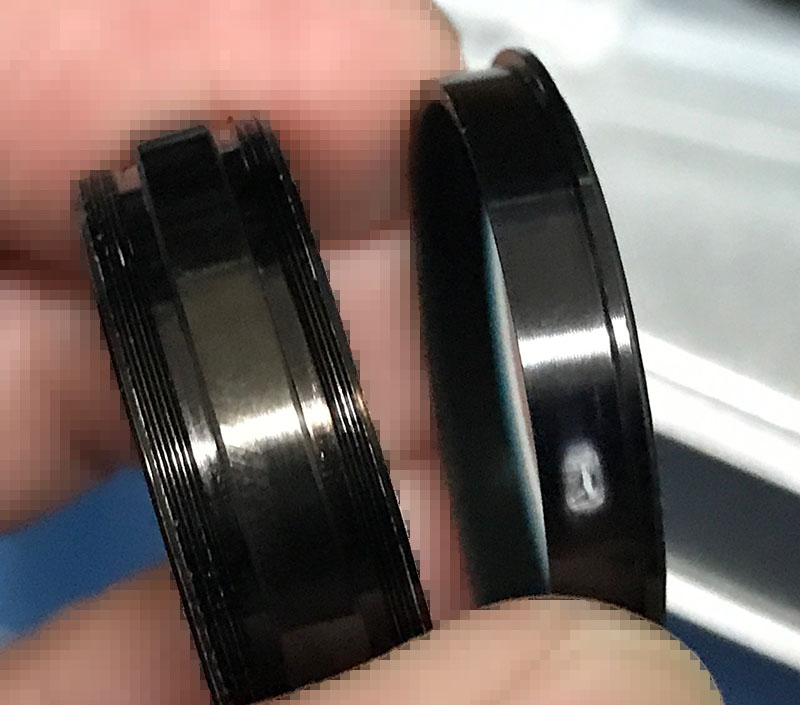
The front optical assembly can be dismantled completely after you remove the front element’s retainer.
Remove the front element.
The 2nd element can now be easily removed.
Putting everything back took longer than anticipated, it’s a complicated lens and it’s easy to get things wrong. Thankfully, I took plenty of photos, they ‘re helpful and I finished the job without any problems.
Conclusion:
Wow, this took me more time to service than anticipated since there are so many mechanical parts to think of but I enjoyed every-bit of it. I learned so many things while working with it since the construction is not as typical as most lenses, specially on the front part. It will give experienced repairers an enjoyable but challenging time, they won’t be bored working with this. This lens is beyond any beginner’s skill. If your lens needs to be serviced, simply bring it to a professional and save money and time.
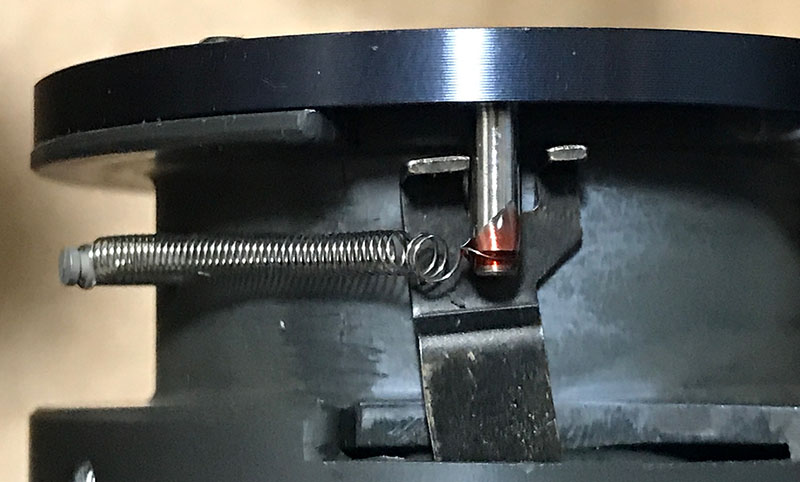
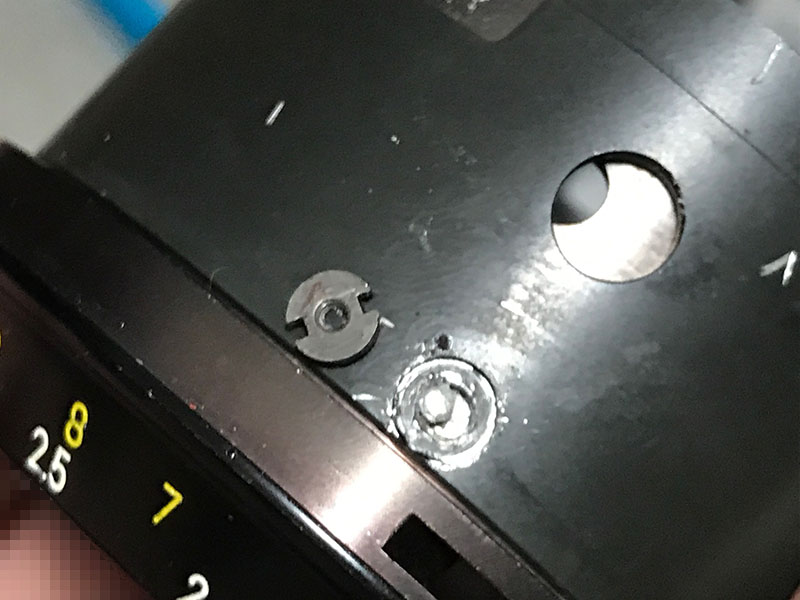
I damaged the spring of the iris, I don’t remember how that happened but it ended up looking like this, what a mistake. To avoid the spring from getting loose again I sealed it with lacquer.
Before you start adjusting the focus of your lens, extract these screws at the sleeve so you could slide it off to reveal some screws underneath it.

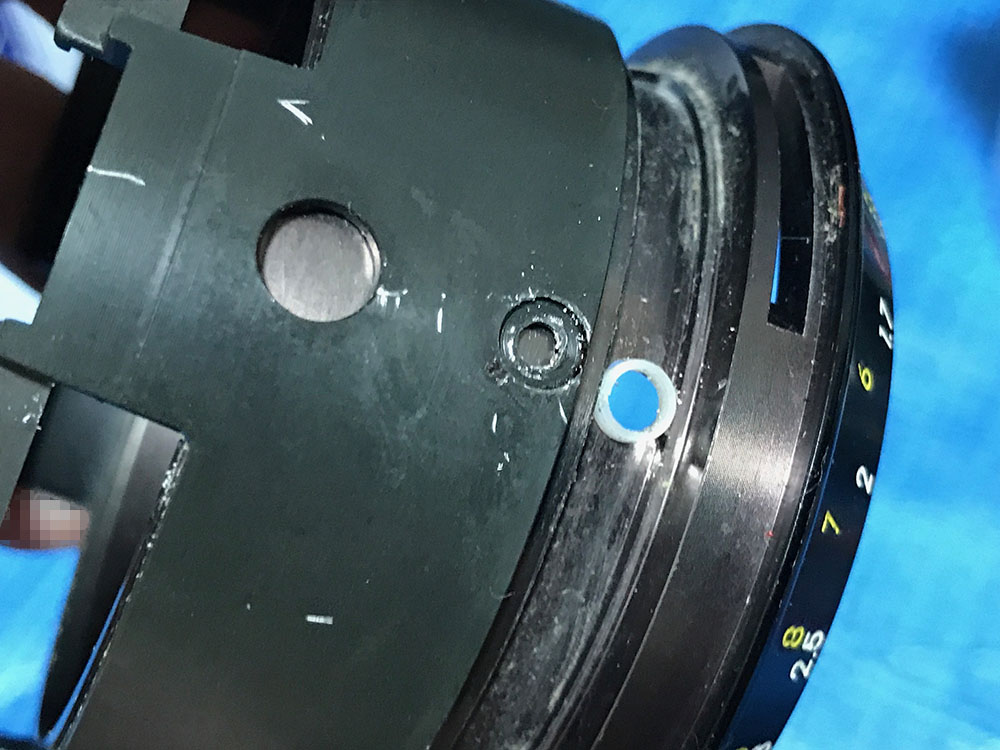
It’s now time to adjust your lens’ focus. There are 2 places where you should be looking at, the rear and the front. Shown here is where you could adjust the rear focus. Turn the sleeve and loosen these so you could push-and-pull the main barrel closer or further from the base. You should do this together with the front which is easier. Make sure to find a good balance, you’ll get it once the lens could focus to infinity at both ends and the difference is not as significant in terms of distance. If the distance is off by a lot then you should get back and adjust both ends until you get everything right. If you have not seen my article on how to adjust a lens’ focus, be sure to read that as it could help you save a lot of time and frustration.

Once you are happy with the focus it’s now time to adjust the scale. I forgot to mention this before but this is also where you could adjust its focus. Turn this to adjust for the front focus of the lens.
It’s now ready for use! What a marvelous lens, it’s certainly worth the time. I had a great time servicing it and it’s been giving me nice results.
Thank you for following my work. If you liked this article, be sure to share this with your friends at social media. This site earns roughly $0.30 a day in views so any view counts. You could also consider supporting my work, it’s helping me offset the cost of purchasing, processing and scanning film. The support also help me pay internet hosting, too. This site promotes the use of film so it’s all for a good cause. Thank you again and see you guys next time, Ric.
Help Support this Blog:
Maintaining this blog requires money to operate. If you think that this site has helped you or you want to show your support by helping with the site’s upkeep, you can make a small donation to my paypal.com (richardHaw888@gmail.com). Money is not my prime motivation for this blog and I believe that I have enough to run this but you can help me make this site (and the companion facebook page) grow.
Buy me a roll of film or a burger?
Thank you very much for your continued support!
2.00 $
Helping support this site will ensure that this will be kept going as long as I have the time and energy for this. I would appreciate it if you just leave out your name or details like your country’s name or other information so that the donations will totally be anonymous. This is a labor of love and I intend to keep it that way for as long as I can. Ric.

Oct 16, 2020 @ 11:01:02
Hi Richard,
Thank you for your detailed repair instructions. You do a good job!
Best regards
Bernhard
Oct 18, 2020 @ 16:01:51
You’re the best Richard…
I got hold of one of these in the late 1990’s, in superb condition, for use on my Nikon FE2 and it was a joy to use MECHANICALLY and ERGONOMICALLY speaking. I loved the idea of this lens for its focal length and reasonably fast minimum aperture. However, as much as I liked it, I soon got rid of it due to its propensity to ghastly flaring and ghosting (yours is typical Richard in this respect) for landscape work, and also for its lack of sharpness at longer subject distances. If only Nikon had re-developed it later on for use in the digital camera age, it would have been a hit with DX users. Just imagine a modern version of that: Nikon AF-P 50-135mm f3.5 VR II for use on a Nikon D500 or D7500 ? WOW !
Feb 21, 2021 @ 19:19:19
Why are the hands pixelated in the disassembly photos? This is confusing me.
Mar 09, 2021 @ 12:03:12
Hi Richard, I have this lens (eBay, quite cheap from Japan) ; I bought it after noticing some images taken with it in Fred Miranda (and there are more in the last day or so). The images are absolutely outstanding, brilliant in fact, I am very pleased with the IQ in my shots, too. Your assessment was quite mild by comparison :-). The resolution and sharpness are attention grabbing, not to mention the colour rendition.
Zoom creep occurs, but a little tape on the barrel fixes it.
Cheers.
Nov 20, 2025 @ 01:06:08
GREETINGS, RICHARD! WHAT A INFORMATIVE WEBSITE. YOUR REVIEW AND EVALUATION ARE SPOT-ON. THE 50-135 F/3.5 LENS IS MY FAVORITE PORTRAIT AND WEDDING LENS OF ALL TIME….. BACK IN THE EARLY DAYS. THE COMBINATION OF THIS LENS AND MY F4S CAMERA WERE INCREDIBLE TOGETHER! MY ONLY COMPLAINT: THE CREEP FACTOR WAS REALLY BAD! TAPE SAVED MY BUTT, BUT THAT GOT VERY OLD, VERY FAST. MY QUESTION: CAN NIKON CURE THIS SERIOUS PROBLEM OR WHO CAN? ANY SUGGESTIONS?
KEEP UP THE GREAT WORK! —– LARS HICKS, Long Beach, CA
Apr 24, 2026 @ 22:44:21
Thanks for the great article! I only needed to fix the zoom creeping problem. After carefully studying your instructions, I simplied the fix to the following steps: Start with removing the leatherette. Then unsrew the 3 screws to free the depth of field ring. Then unscrew the 3 screws revealed by the access hole at the leatherette, but not the 3 screws shown in this guide. There are 3 other screws towards to the front end of the lens, also revealed by the same access hole. Then the whole back half of the lens, including the mount, the rear optics, and the aperture mechanism, can be removed as a whole. Remove the depth of focus ring, then the felt lining can be accessed under the distance scale. I just added a strip of brass shim under the original felt lining. To remove the leaturette, I first heated it up with a heating pad, something like the IFIXIT iOpener, then peeled it off. This process only involves removing 6 screws and does not need to touch the bayonet mount, or the aperture ring, or the focus rubber ring.