
Hello, everybody! I had to quit my job since it does not bring me happiness or satisfaction anymore. The situations and difficult people I had to endure wore me down as it’s unprofessional and toxic. This means that me and my family will have less food to eat for the moment but I also see this as a good chance to start anew since other opportunities open-up and new challenges will enable me to grow more. This and the prospect of making new friends are what’s keeping me optimistic about the future. While we’re on the topic of new beginnings, let’s talk about a lens that signaled a new beginning for Nikon, at least for the F-mount.
Introduction:
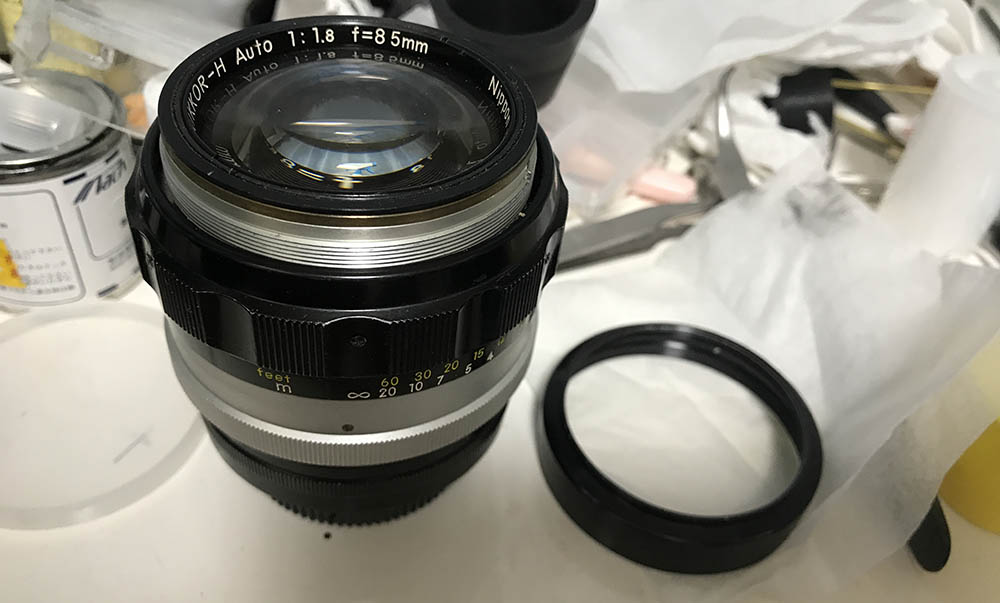
The Nikkor-H 85mm f/1.8 Auto is Nikon’s first 85mm lens for the F-mount. It debuted in 1964 and it took Nikon roughly 15 years to come up with another lens of this class, why it took that long is anybody’s guess. It’s probably due to a couple things, one of those was the unfamiliarity of designing lenses for SLR cameras wherein adequate clearance has to be obtained in order for its rear not to obstruct the flapping mirror’s movement. Whatever the reasons are, this lens is surely significant since the last Nikkor of its class is the older Nikkor-P•C 8.5cm f/2 which was made for rangefinder-coupled cameras. It’s release meant that Nikon F users could finally enjoy shooting with an 85mm lens again for portraiture and other things.

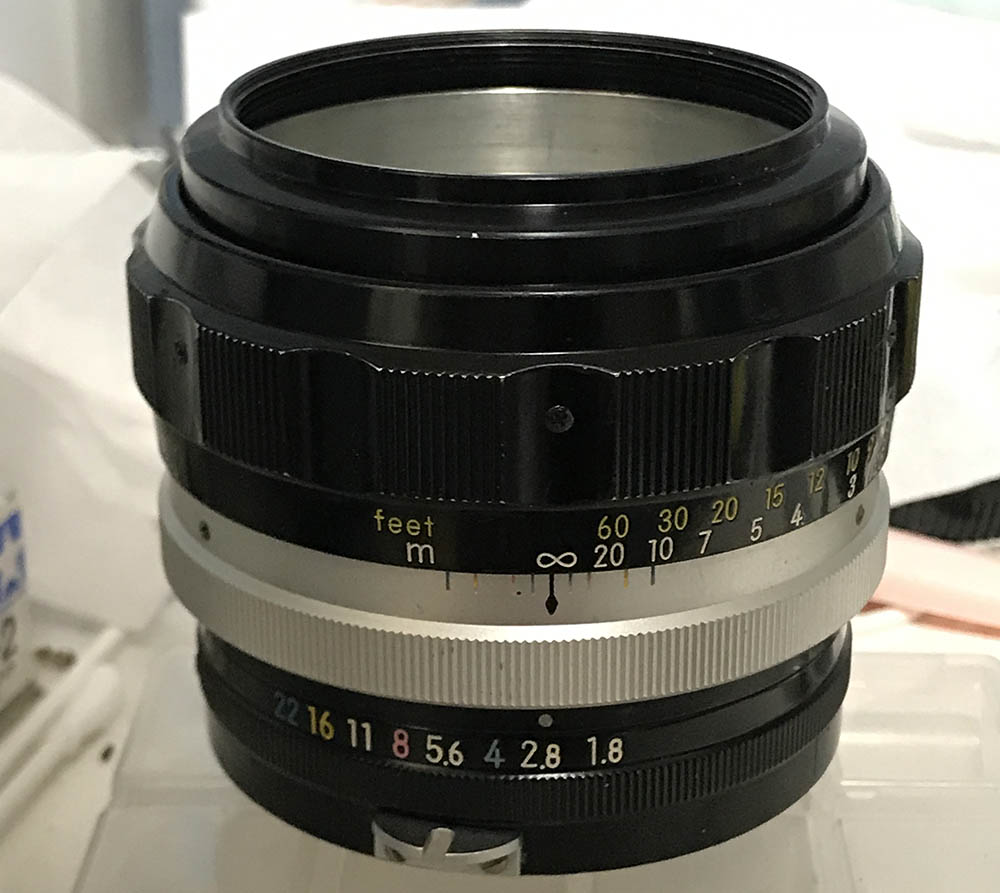
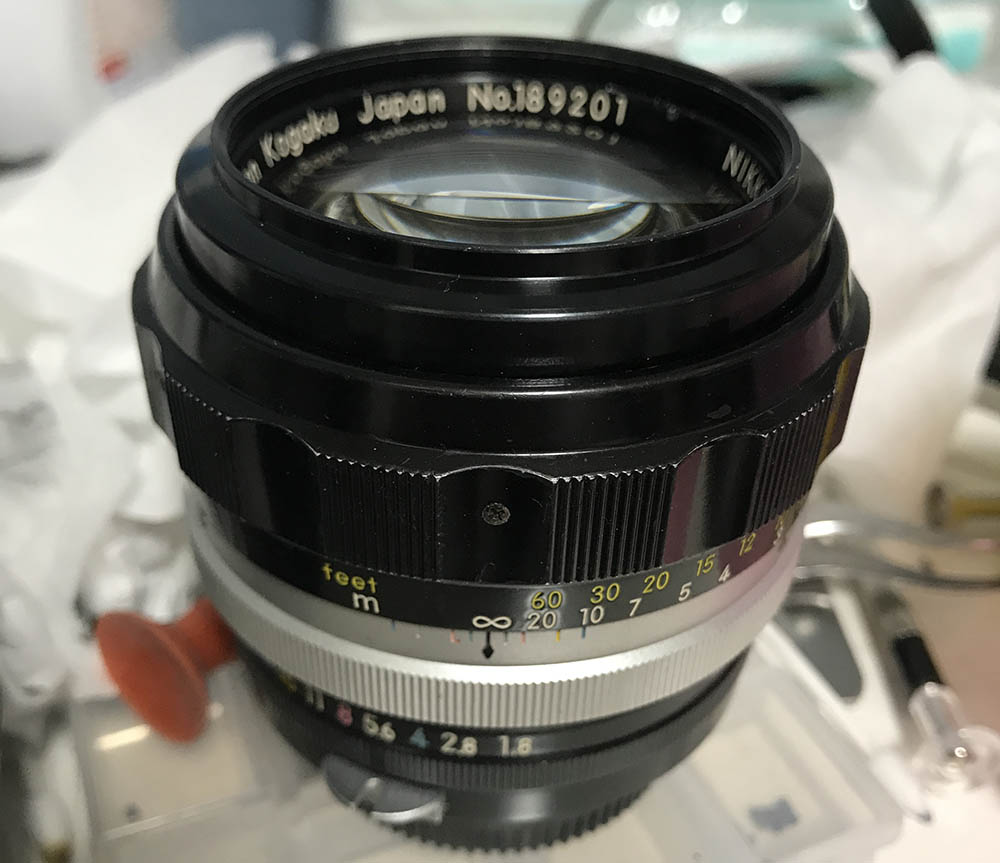
This is the earlier version wherein the information is engraved on the bezel and the walls of the front barrel is plain. Later ones have the engravings at the walls instead of the bezel. Light could reflect from the white paint and it could cause some unwanted artifacts in the photos at extreme cases. I don’t know how much of an impact that could cause but it does make sense. This is a bit rare and it took me a few years to get one that’s cheap. Many of them are in terrible state so I am lucky to get one that’s worth restoring.
It has an all-new optical formula consisting of 6-elements-in-4-groups. This is quite a departure from the Nikkor-P•C 8.5cm f/2 which is of a Sonnar-type design. It’s elegant in its simplicity and the low-element-count means that it won’t filter light as much as more complicated designs. This results in better tonality and brightness since less-is-more when it comes to lens design. This is specially true back in its day when coating technology isn’t as effective as what’s going to be available in the coming decades. Don’t treat what I said to be the truth since I didn’t make any scientific tests with it but I can tell you that this lens is amazing, some people even claim that it performs better in terms of sharpness and tonality compared to the newer Nikkor 85mm f/2 Ai which has a totally-new optical design. I personally prefer the older double-Gauss design that this lens has since the rendering is surreal and exquisite. The descriptions I gave are abstract and open to interpretations and that is what makes this lens special, it’s good but it’s hard to pinpoint why.
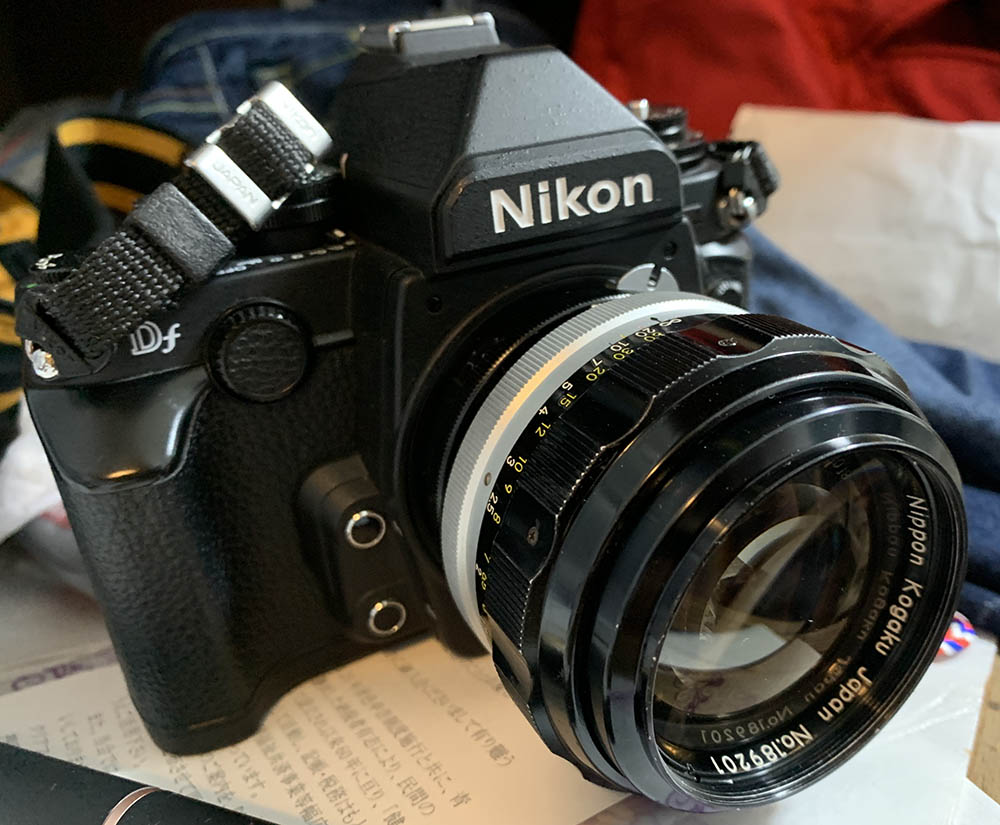
This is a pre-Ai lens so you should only use this with older film Nikons and a few later Nikons that has the ability to mount these lenses like the Nikon Df. Mounting it on a camera that doesn’t support it will only lead to damage. It’s unclear if any of these earlier version with the engravings on the bezel have any Ai-conversion kits available, I have yet to see one. The later ones have it and be sure to get one with the factory Ai-ring installed, they’re a bit pricey and will cost you an extra $30.00 but it’s definitely worth it.

The earlier versions don’t have factory Ai-rings available so you must never use them with Nikons that doesn’t support pre-Ai lenses. The Nikon F3 has a tab that you could flip-up which enables you to mount these and you could meter with the aperture-down button pressed. This is clumsy but you don’t have much of a choice. Older film Nikons work perfectly with it and you’re able to meter properly with the proper metered-finders installed.
Handling is perfect, it feels great and focusing with it is a joy since it’s bright and the longer focus-throw means I could focus with it more accurately. It’s a heavy lens for its size thanks to the size of its optics but it balances well. If you mount it with a tiny camera it would make your setup front-heavy, this is as expected and I don’t see this as a problem at all.
Knowing how a lens performs is important, you will know how to maximize it better and use its strengths to your advantage. You will also learn how to avoid its weaknesses or use it in an artistic way. Many people shoot pictures of charts or other mundane things and study the results but I don’t do that. I would rather judge a lens based on real-world results and the value I could get from it. I shot these photos from f/1.8, f/2.8, f/4 and f/5.6, these apertures show the most changes in its performance. I imagine that these are also the most common values that people would want to use this lens with. If you’re curious, this is essentially identical to the New-Nikkor 85mm f/1.8 when it comes to performance but maybe the latter has better coatings which has a potentially huge effect on its performance but it’s safe to assume that they perform similarly in most cases. I shot these with my Nikon Z6.


(Click to enlarge)
Vignetting is heavy wide-open, but it drastically improves by f/2.8. You will only see traces of it at f/4, and it is all but gone by f/5.6.

What’s interesting is the distortion profile is quite shallow, almost undetectable in real-world photos. That is if you are not taking photos of grids and bricks.


(Click to enlarge)
Well, this is a matter of taste. It’s apparent that the coating is showing its age in these photos, you will see plenty of blobs and flaring, which is typical of older lenses. Some people actively shoot with older lenses to get this effect, just like some women who look for older men to listen to our life’s stories.


(Click to enlarge)
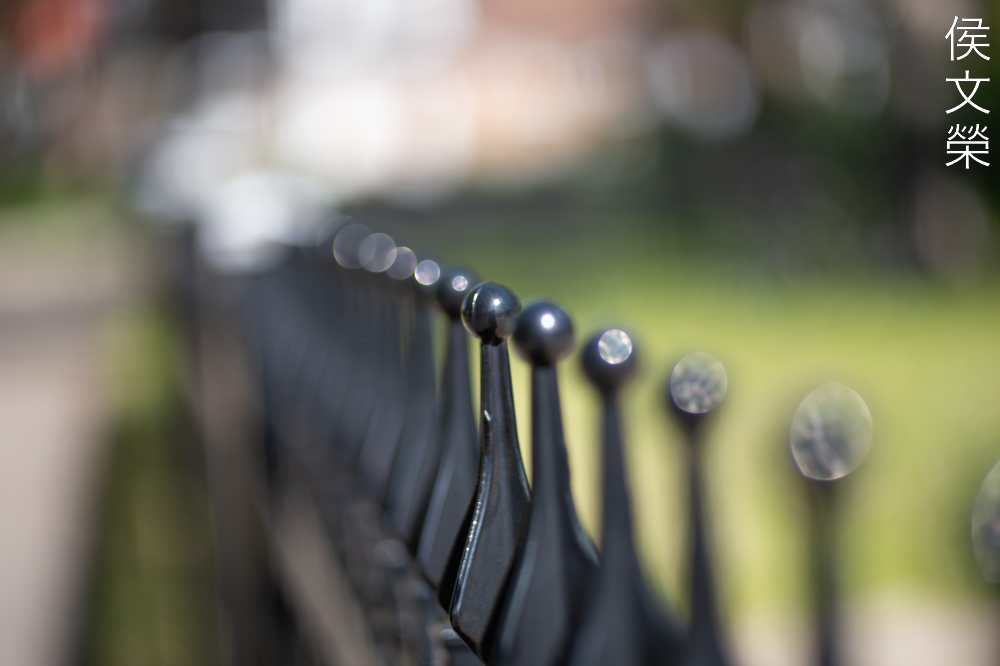
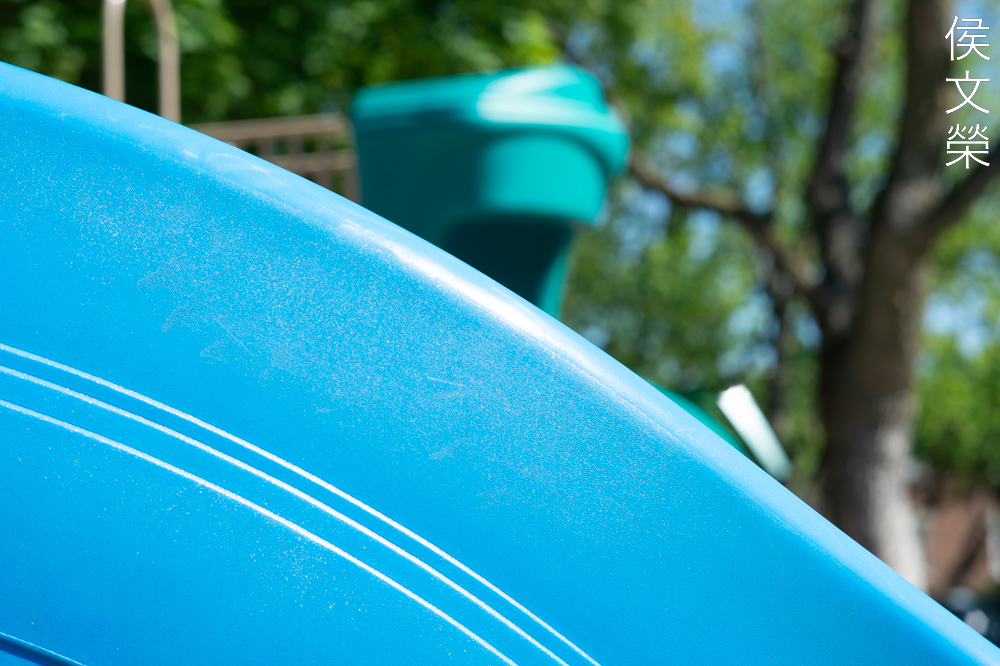
The character of the bokeh is superb. It’s smooth, clean and even. This is an impressive lens for portraiture because of it, you could blur the background into a nice wash of color so your subjects are showcased prominently. You’ll get 6-sided discs with it since the iris only has 6 blades. If this has a 7-bladed iris then it would have been better. Some people prefer an angular-looking iris and this is able to provide it.

(Click to enlarge)
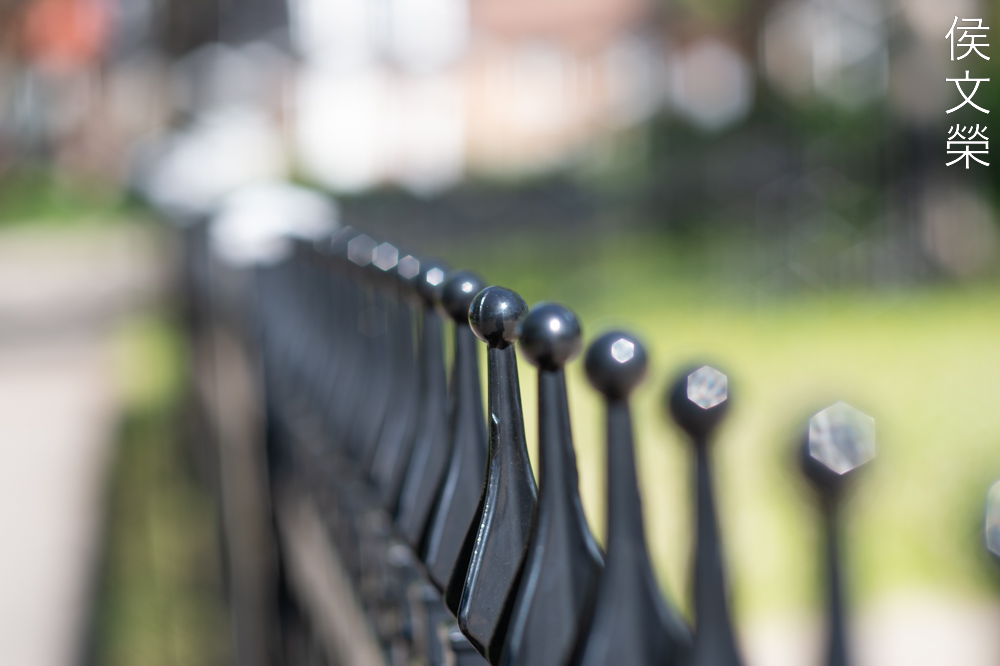
On the flip-side of things, you will have to be careful when shooting at objects that will potentially show a nervous-looking character, such as what you see here. It has every combination that can render ugly and dirty-looking artifacts.


(Click to enlarge)
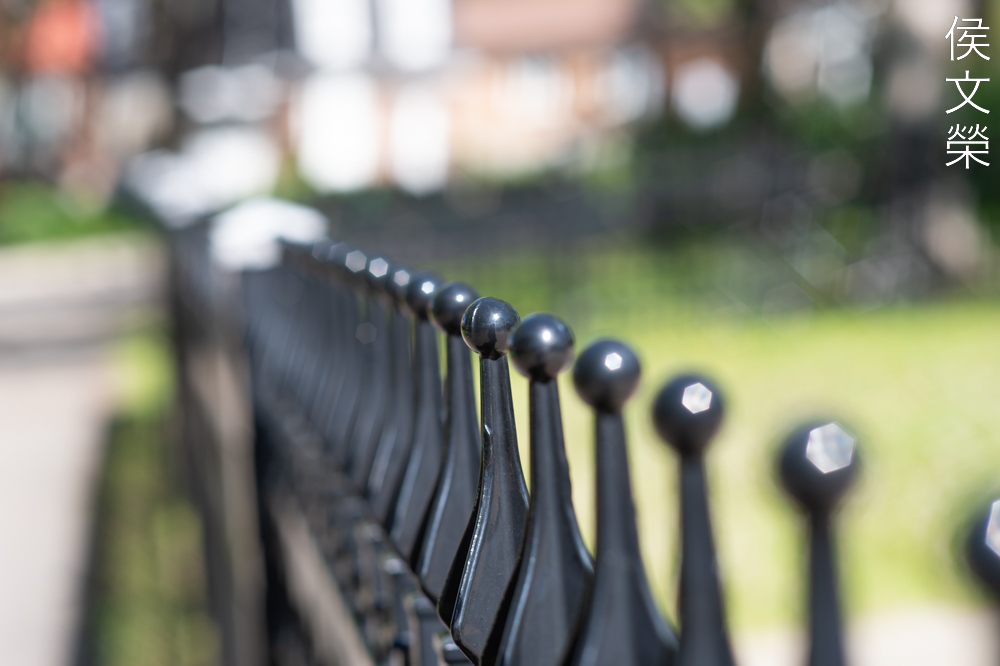
At least to me, in some rare cases I do not like how it renders foliage, specially twigs. It’s not necessarily ugly at all, but I’m just not used to seeing this from any 85mm Nikkor which are all reputed to have the smoothest rendition.


(Click to enlarge)
Despite what you see above, I generally think that this lens has the ability to render a nice looking photo. I would not discredit it for the few things where it failed to satisfy my expectations because it performed well in most cases. Notice that it has the potential of rendering the “soap bubble” look.


(Click to enlarge)
Chromatic aberration doesn’t look too bad, especially at closer distances. This may be just my sample and it may be different for you, but here it goes. It appears well-corrected when shot wide-open, I can barely see any strong traces of it, except when shooting at objects that are a little further into the frame. By f/2.8, you won’t see much of it when shooting at a distance, and it’s gone at f/5.6. If you think about it, this lens was developed for portraiture, so it makes a lot of sense that it performs better at closer distances.


(Click to enlarge)
It’s quite sharp wide-open and the resolution seems decent. You could see a lot of chromatic aberration which can bother some people but it’s not bad at all specially considering that it works well quite well with its overall look. It also has some spherical aberration which could look nice with portraiture. I like how some older lenses could make the skin “glow” and that’s because of the clever use of spherical aberration. The corners appear dark wide-open, I don’t think this is a problem with real-world use unless you are shooting an evenly-colored background. Stopping it down to f/2.8 makes the center look a lot better thanks to the better resolution. The corners look brighter, too. If chromatic aberration bothers you then shoot it from f/2.8, it cleans-up great from this aperture and beyond. Spherical aberration can still be observed, I don’t see much of it but it’s there. The center is performing at its peak at f/4 and the corners look good by f/5.6. I am impressed by its performance even at f/2.8 but stopping it down a bit makes it look even better. My sample isn’t performing as great when focused at objects that are further into the frame but the difference isn’t big, any degradation in image quality is due to more chromatic aberration and astigmatism but it’s not something that I’m going to be bothered with, at least not at this level.


(Click to enlarge)
It performs better at closer distances. Wide-open, it looks sharp at the center where it counts, there’s the usual slight softness but that’s expected, and I would even argue that it’s desirable. This makes the lens a bit more interesting. Stopping it down to f/2.8 makes the center a lot sharper, but the “dreamy-looking” softness covering the frame is now gone. It starts to look more generic from f/4 and smaller. I would like to go back to the statement where I said that the slight softness wide-open is desirable. In creative-type photography, having a lens that have two distinct characters is good because this allows you to play with it more. If your lens renders uniformly across the aperture range then it becomes boring, not creative. It’s the reason why many people shoot with vintage lenses, and why many optics engineers are designing the newer lenses to exhibit the said “characteristics”.

This is sharp wide-open, quite sharp for an old lens, that is. Of course, it has amazing rendering when it comes to the character of the bokeh. It’s still an impressive lens by recent standards, probably not as sharp as most modern ones, but still quite good specially if you consider that it’s made in the 1960s.

At closer distances, the background turns into a painterly-like effect, perfect for portraiture. The rendering looks pleasing, and it will be able to help you focus on the face of your subject. If you look closely you will notice that the orbs look somewhat angular, this is due to the hexagonal shape of the iris. This photo was shot at f/4 and it will look even more angular when you stop the iris down to f/8 or smaller.

Tracking a moving subject is difficult, as to be expected when using a manual lens. This doesn’t mean that it is impossible for photographing energetic kids.

I love how nice this lens renders skin, the lens designers knew what they were doing. I do not judge a lens by how well it performs in charts, but by looking at the kinds of photos it makes. Things like this will not be represented by numbers.

This was shot at f/4. Notice how beautiful and vibrant the colors are. The rendition looks very natural and the tones of the skin are very nice, ass expected from an 85mm Nikkor. You have to see the original file to appreciate how beautiful and sharp it is. Despite being shot at f/4 I was not able to get the man’s face in perfect focus since I was focusing on the lady. For situations like this it may be best to stop your iris down to f/8 just to get a deeper depth-of-field.

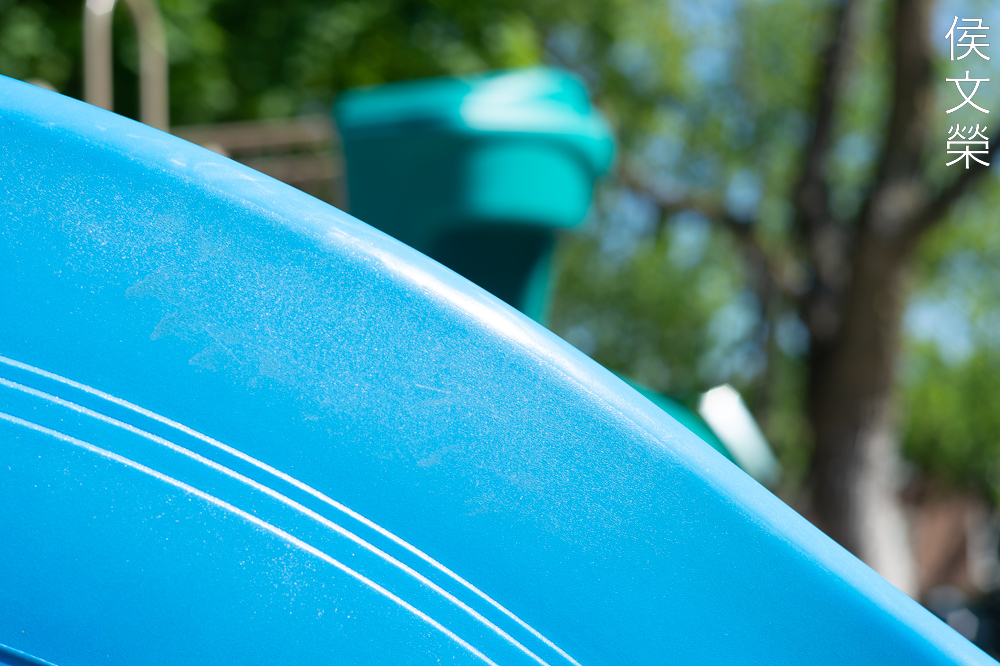
It has that “vintage-look”, meaning it’s not perfectly-corrected. You will see some imperfections but that’s what makes it pictures unique. It has nice separation which gives your photos some “depth”.

It’s too-long for street photography but it’s perfect for candid shots. You can use it for making intimate photos which could help with story-telling.

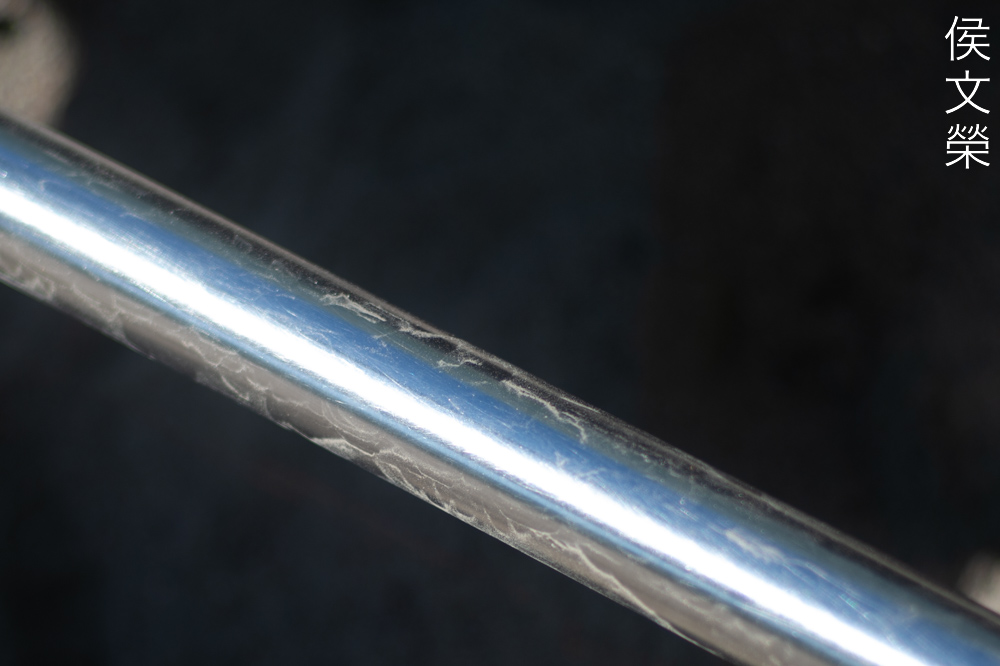
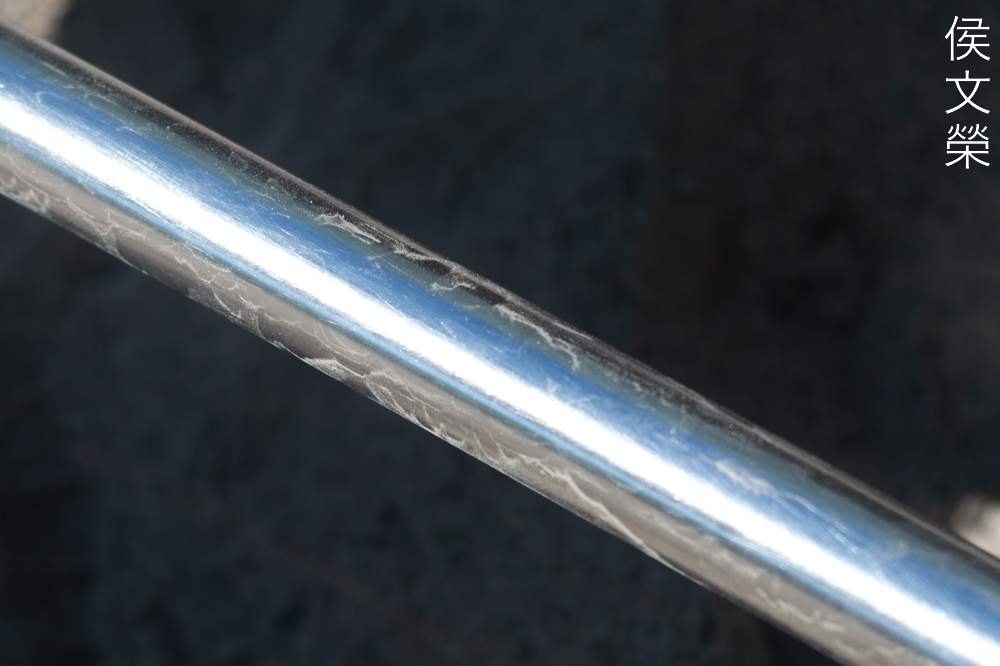
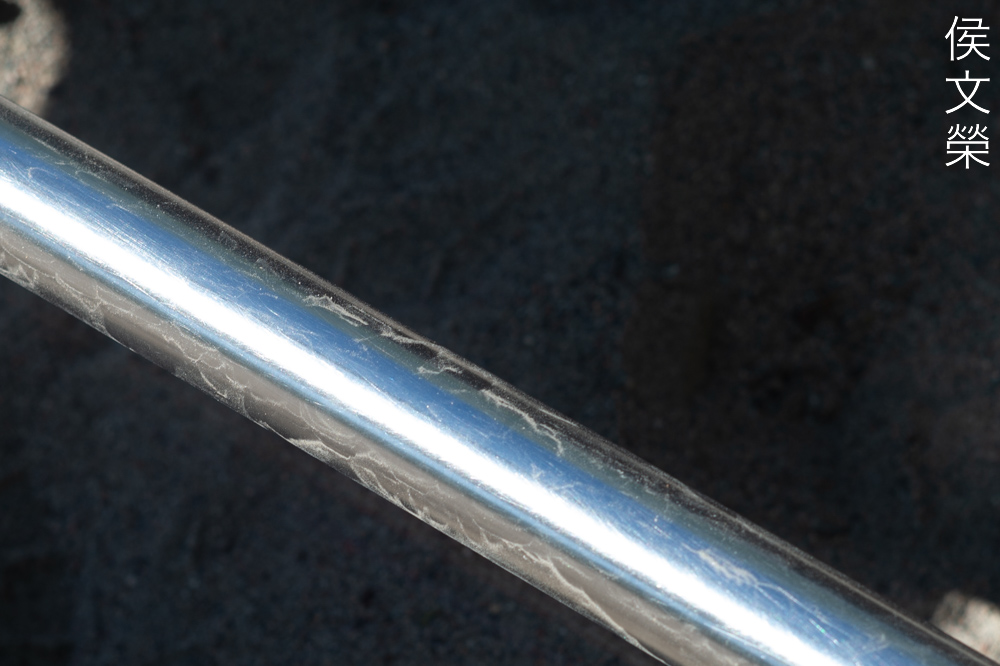
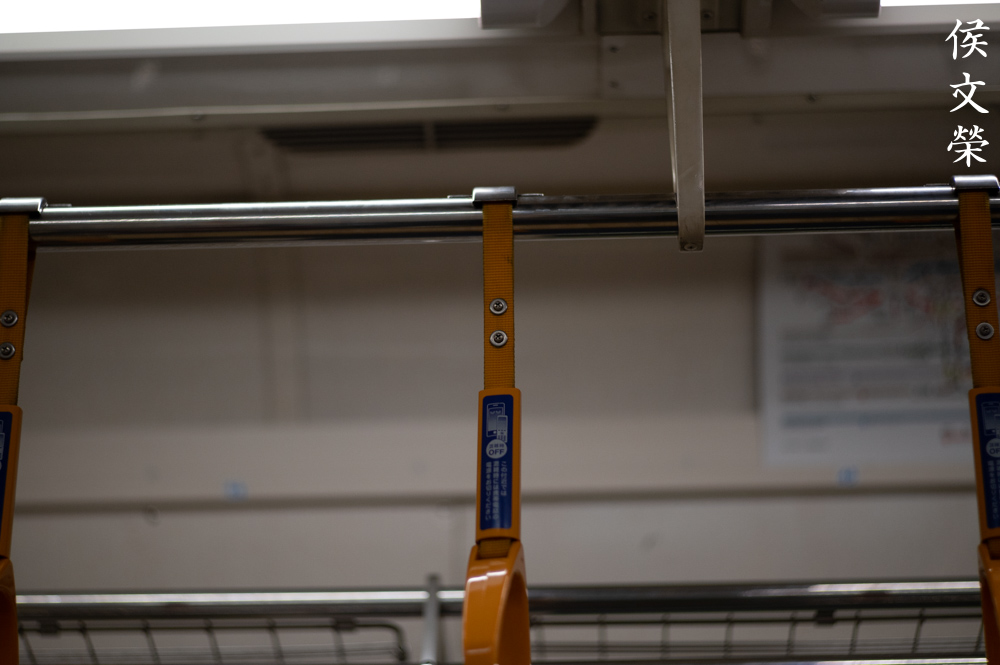
Chromatic aberration can be observed in the chrome details. This can be an annoying thing for some people but I don’t mind it at all, at least for this one and how I use it. Spherical aberration can also be seen but it’s not ugly at all in my opinion.

Of course, this is a stunning lens when used in events as a short telephoto lens. There’s no question that it was the king of portrait lenses during its time.


(Click to enlarge)
This is a nice lens with digital cameras. It’s one of those lenses that will give your photos a unique look which you could use for cinematography. This is going to be one of your favorite lenses if you know how to use it properly. I love this a lot and it will stay relevant for decades to come.
Let’s now see some photos that were taken with film. Film has that unique look because of grain, it helps give character to your photos and helps hide a lot of flaws. Since this was designed to be used with it, it’s best that we see how this performs with its intended medium. This way we could give a better assessment of its performance. I shot these with my Nikon F3 together with a roll of Kodak Gold 200.

This is really a lovely lens. I now know why many people swear by it. I love how it performs with film, it gives you this nostalgic feeling thanks to grain.

It renders skin beautifully, a portrait lens that couldn’t do this is useless.
This is how close it focuses. The twigs look a little bit rough but it’s nothing to worry about, I’ve seen worse examples.

The background turns into a smooth wash of colors, giving you a painterly look. If your background doesn’t look interesting, simple open the aperture up and blur it.

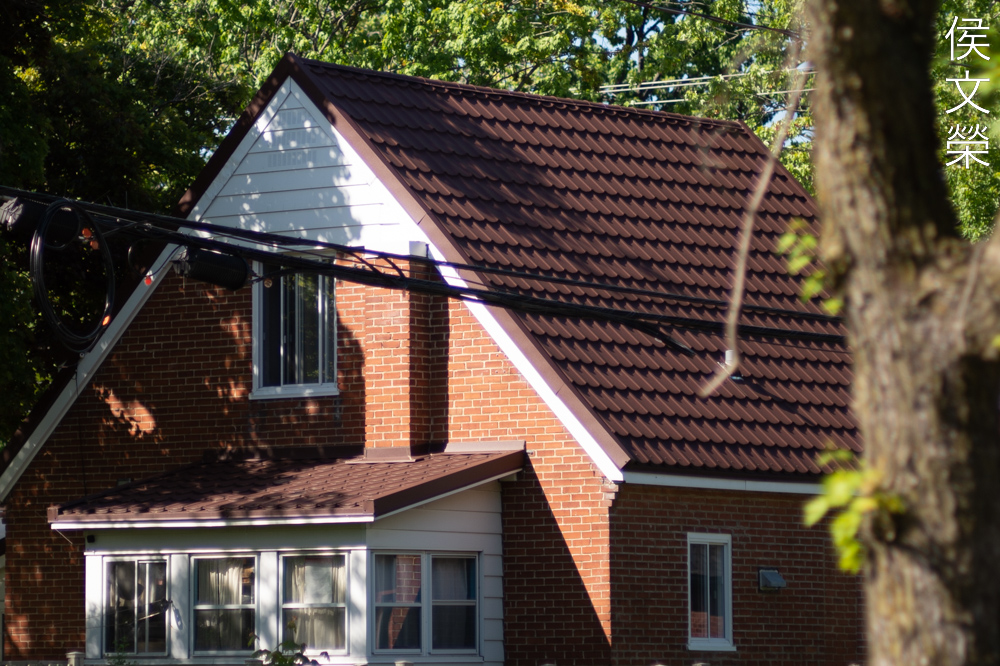
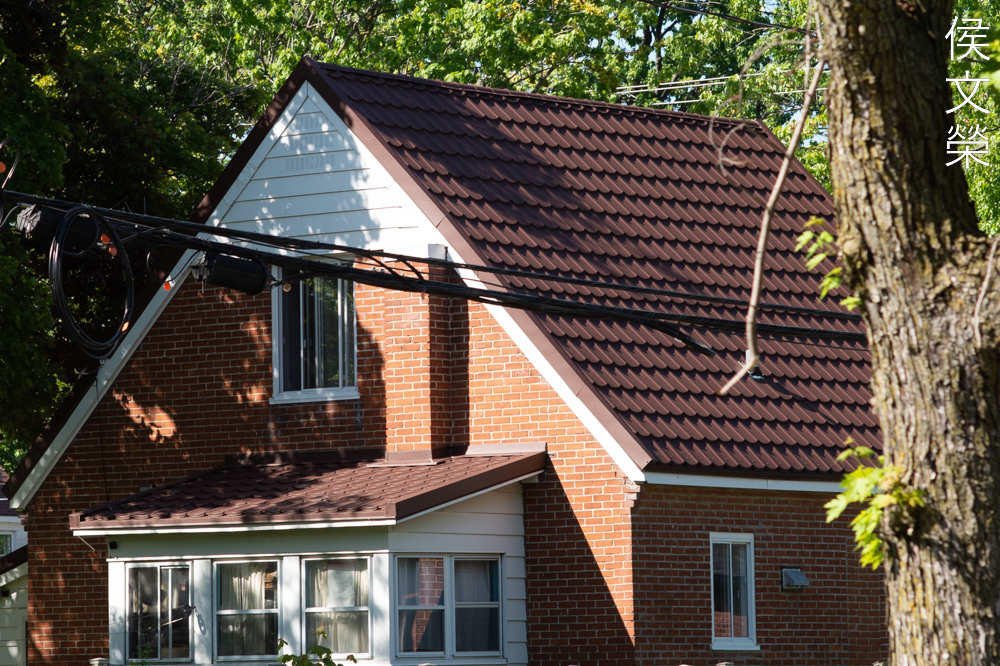
I can notice a little bit of distortion but it’s not terrible at all. Many people think that architectural photos are shot exclusively with wider lenses, that’s not true, if you want a flatter look to a building you will have to shoot it at a distance with a longer lens. To avoid converging lines, just position yourself so you’re shooting at a higher level.

You’ll notice traces of chromatic aberration at the tarp but it’s not terrible in my opinion.


(Click to enlarge)
Here are more photos. This is a lovely lens when used with film, it has that “vintage-look” which helps make your photos look more interesting. People try to simulate this look with digital cameras and fail, why not just use film instead and get it done?
I wouldn’t recommend this lens at all unless you’re a collector. For a bit less, you can purchase the New-Nikkor 85mm f/1.8 which shares the same optical formula with this. You’re also more likely to find one with a factory Ai-ring, too. If you really want this version then look for the later ones, they’re a lot more cheaper and they occasionally have the factory Ai-ring installed, too. I would also look for the ones with the C engraved to their names, those have better coatings compared to the older ones. The Nikkor 85mm f/2 Ai-S is also a great alternative as well but that lens renders differently, it’s exquisite but this one renders in a special way. Whichever version you go with isn’t going to be an issue since all of these are great. Just purchase a hood along with it and enjoy taking beautiful photos with your new toy.
Before We Begin:
If this is your first attempt at repairing a lens then I suggest that you check my previous posts regarding screws & drivers, grease and other things. Also read what I wrote about the tools that you’ll need to fix your Nikkors.
I suggest that you read these primers before you begin (for beginners):
- Essential tools
- Best practices 1
- Best practices 2
- Best practices 3
- Ai conversion
- Working with Helicoids
Reading these primers should lessen the chance of ruining your lens if you are a novice. Before opening up any lens, always look for other people who have done so in Youtube or the internet. Information is scarce, vague and scattered (that is why I started this) but you can still find some information if you search carefully.
I highly recommend that you read my working with helicoids post because this is very important and getting it wrong can ruin your day. If I can force you to read this, I would. It is that important!
For more advanced topics, you can read my fungus removal post as a start. This post has a lot of useful information and it will be beneficial for you to read this.
Disassembly (Main Barrel):
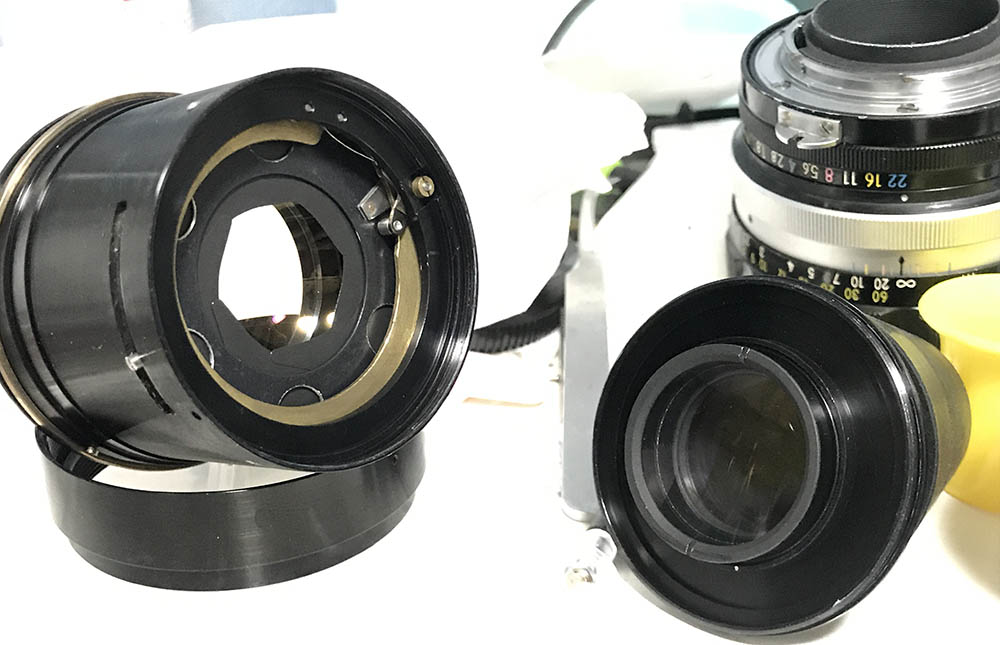
The barrel isn’t complicated at all since it’s of conventional design but there are a few things that you should be careful about which I’ll show you later. I don’t think it’s difficult at all to service this if you have experience but if you are a beginner it’s better that you practice on cheaper lenses first. Since this is of conventional design, we should remove the objective first so it’s safe. It is important that we keep the optics away from the barrel while we repair it to prevent any accidents.
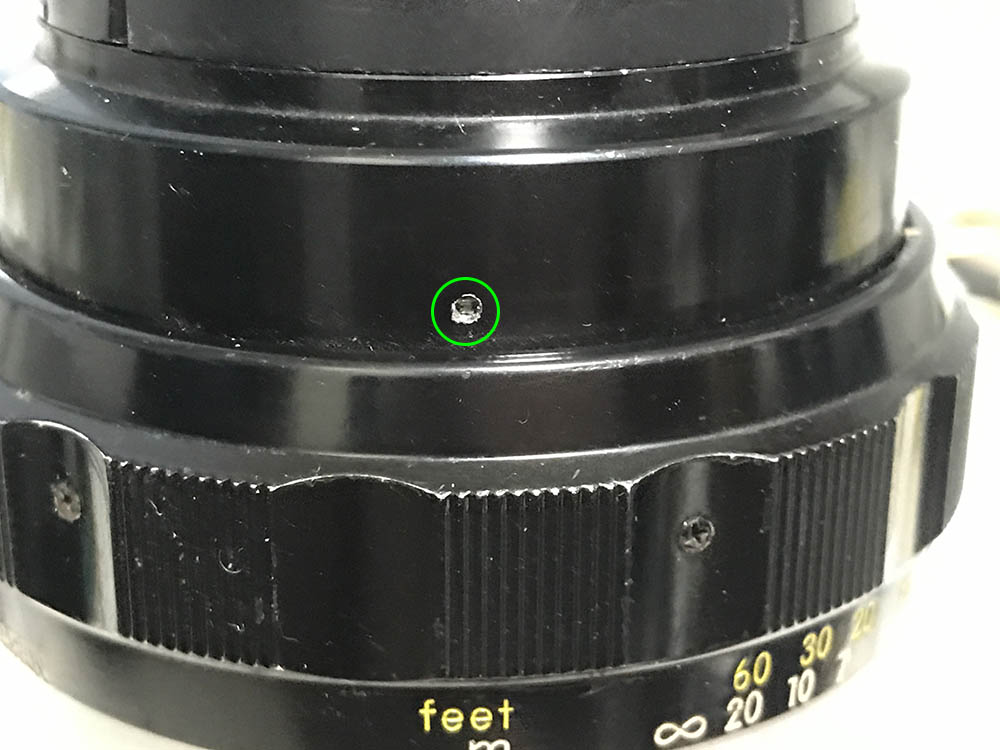
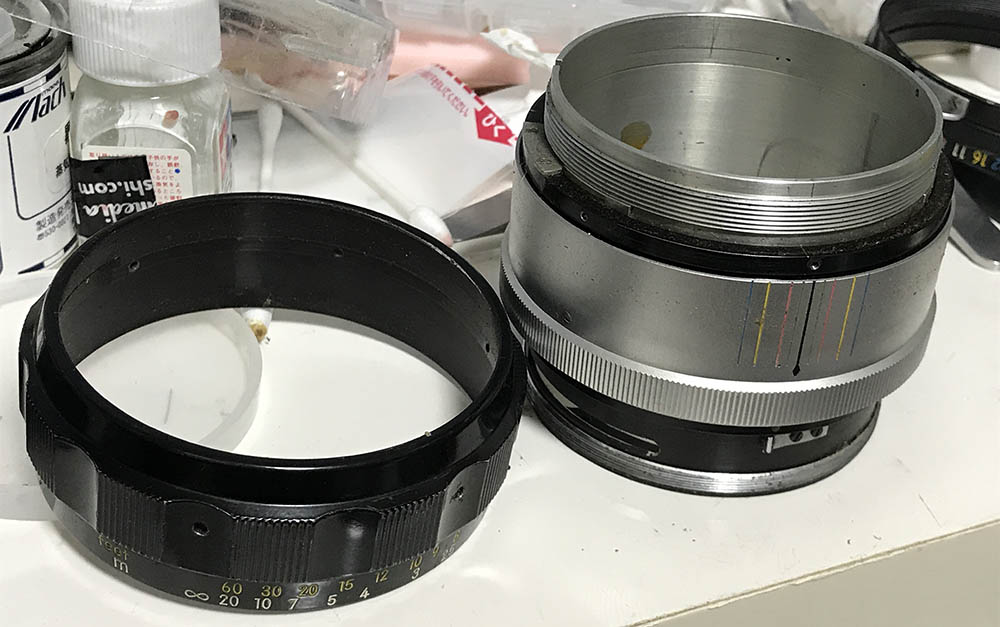
Carefully extract this screw so you could remove the front barrel. This can be difficult to extract since it may be sealed. A drop of solvent will help and be careful not to strip its head.
The front barrel can now be removed. It shouldn’t be too difficult to remove but if it’s stuck, use a sheet of rubber to help you grip it.
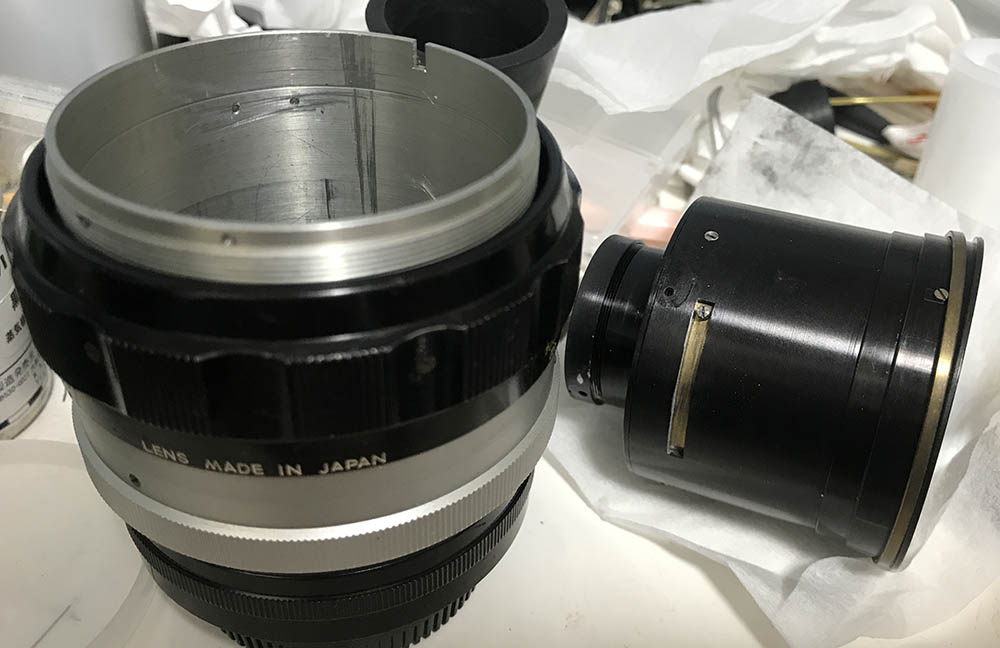
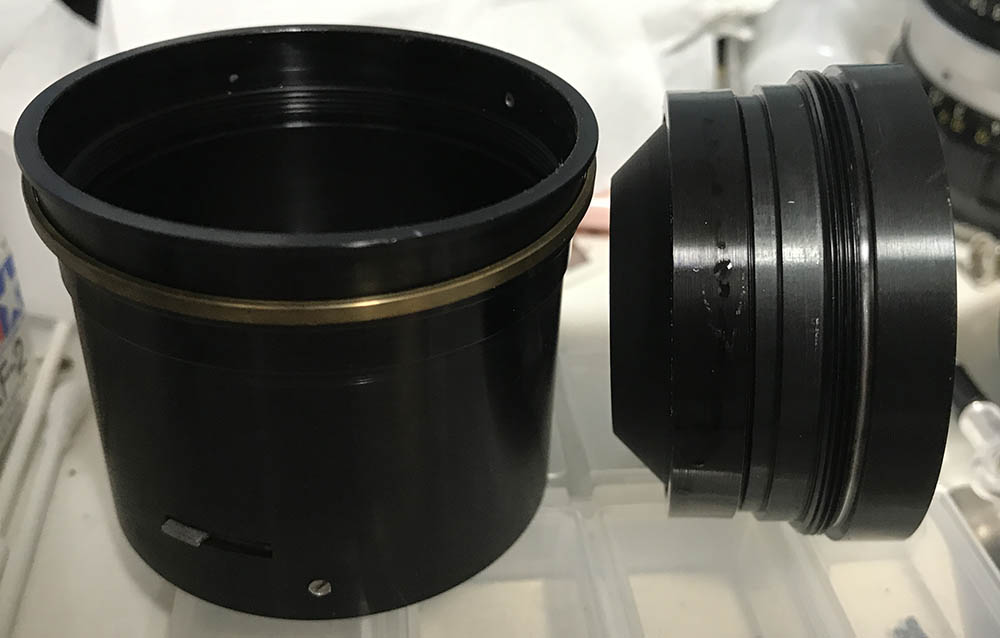
Extract the objective, store it in a safe place while you work with the barrel. This is heavy, don’t drop it. Note that there’s a brass shim underneath it, it’s used to calibrate this lens’ focus so don’t loose or warp it.
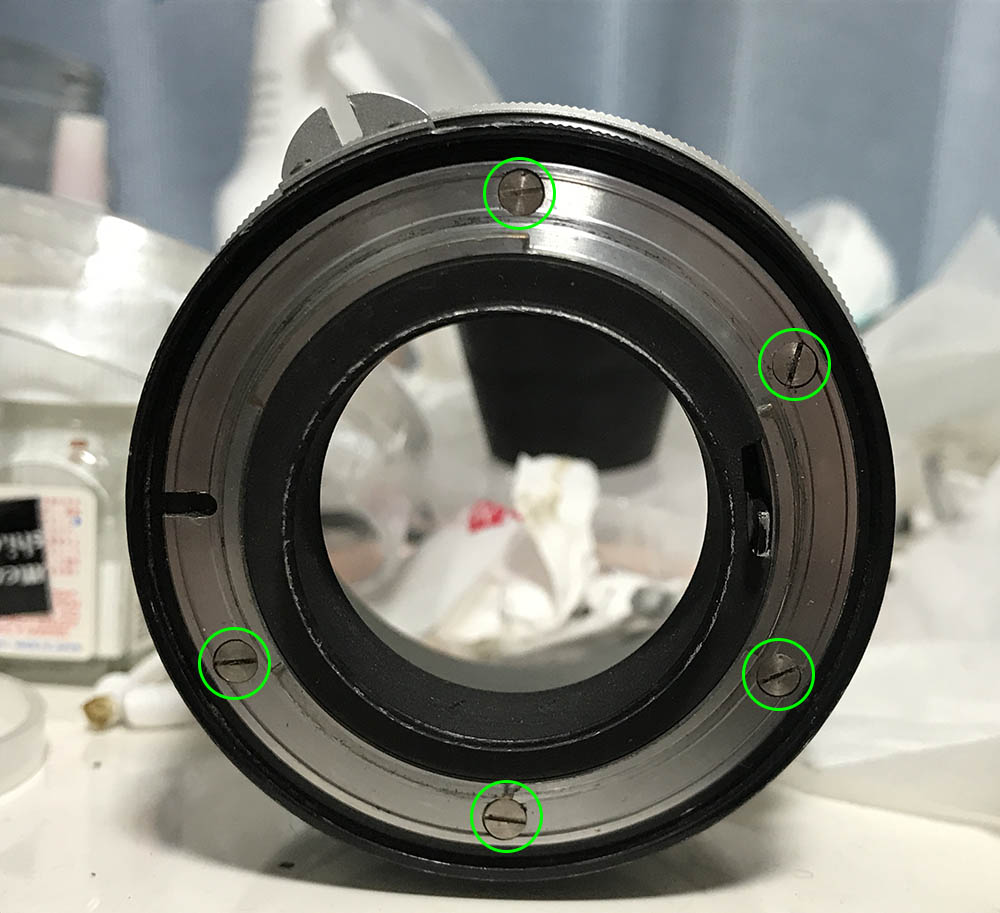
Carefully extract these so you can remove the bayonet mount. Many people strip these because they don’t have the right tools or skills. Please read what I wrote about extracting bayonet screws to prevent any accidents.
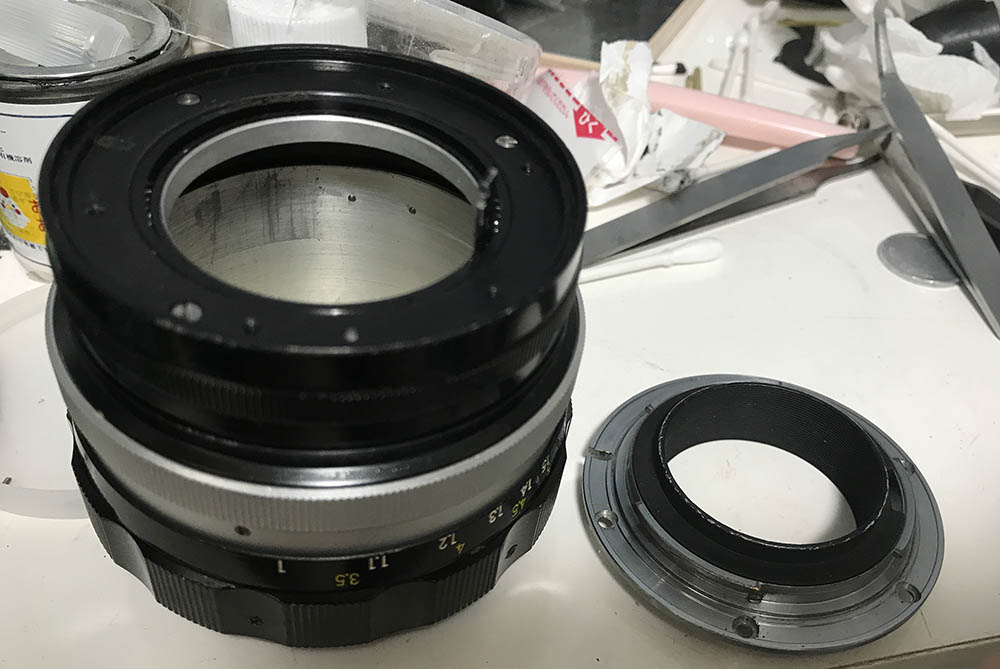
The bayonet mount can be easily removed.

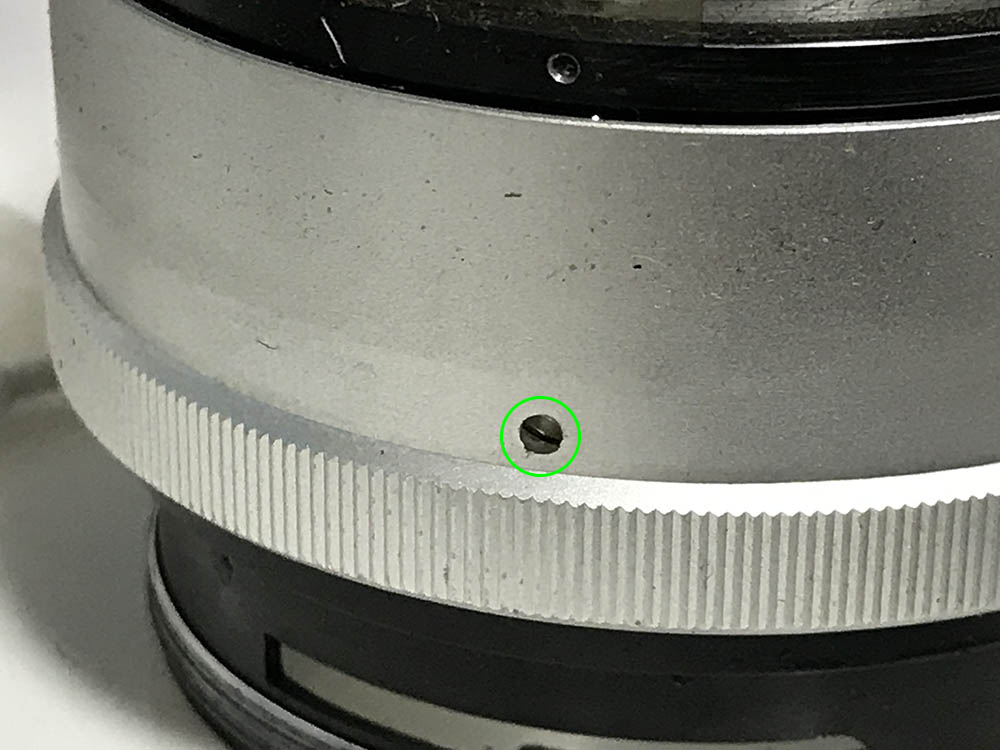
This screw has to be removed in order to safely unscrew the aperture ring. It’s used to link the aperture ring to the aperture fork inside. This enables it to control the iris within the housing of the objective.
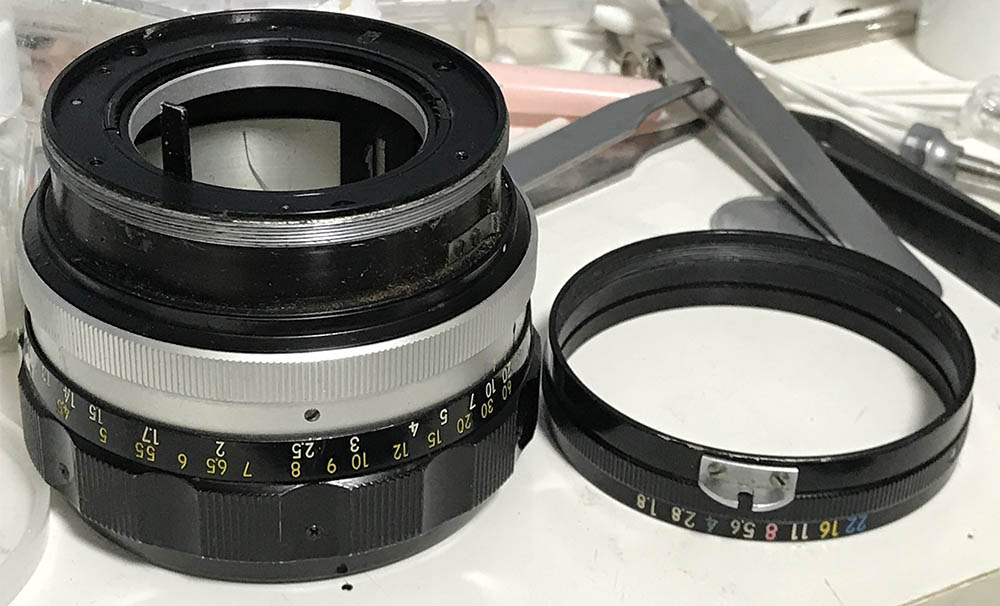
Unscrew the aperture ring. Be sure that you don’t screw this in too much, it should be positioned properly or else that long screw from before won’t get inside its slot in the aperture fork and even damage it.
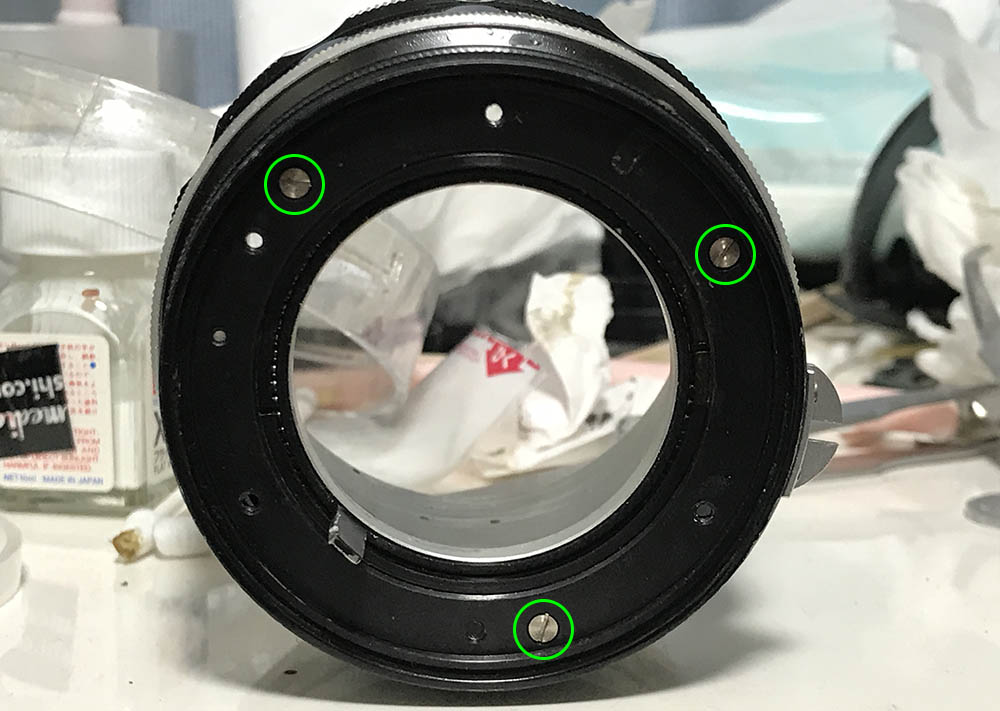
Remove these so you can remove the rear plate.
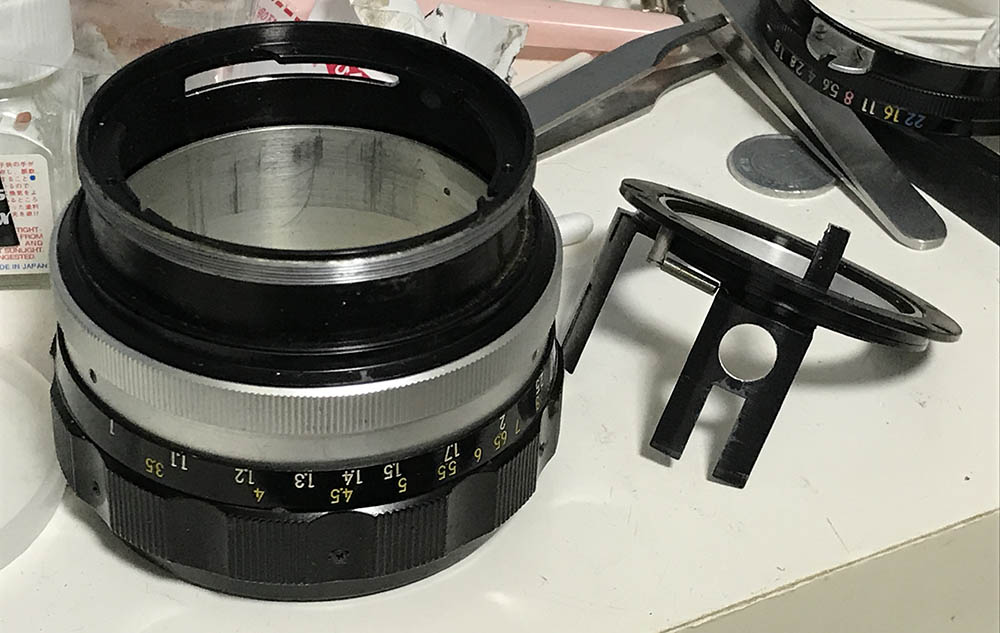
The rear plate houses the stop-down lever and aperture fork mechanisms. I won’t dismantle the complicated mechanism since putting it back takes a lot of time. Only do it if it’s necessary or just flush it with strong solvents. Many people are averse to using petrol-based solvents for the right reason but it’s the best solution at times and should only be done if you know the risks and how to handle dangerous substances. I won’t be held liable for your actions.

Extracting these will allow you to remove the focusing ring. I doubt that the screws are original since they should be slotted just like the rest.
The focusing ring could be easily removed once the screws are gone.
Carefully extract these to remove the sleeve. Be sure that the drivers aren’t too big or too small so you won’t damage the screws or the sleeve.
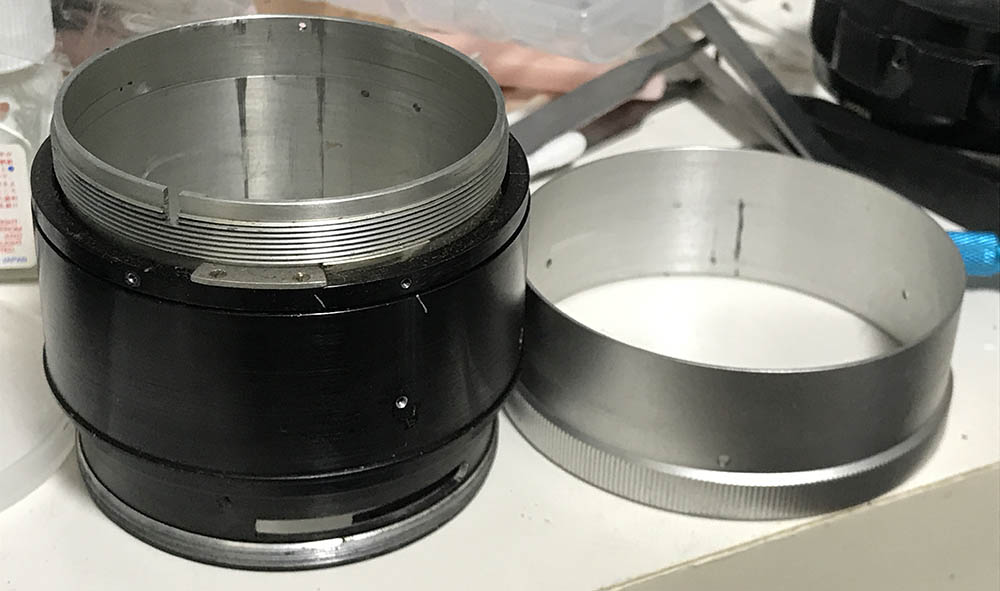
Slide it off and clean it carefully.
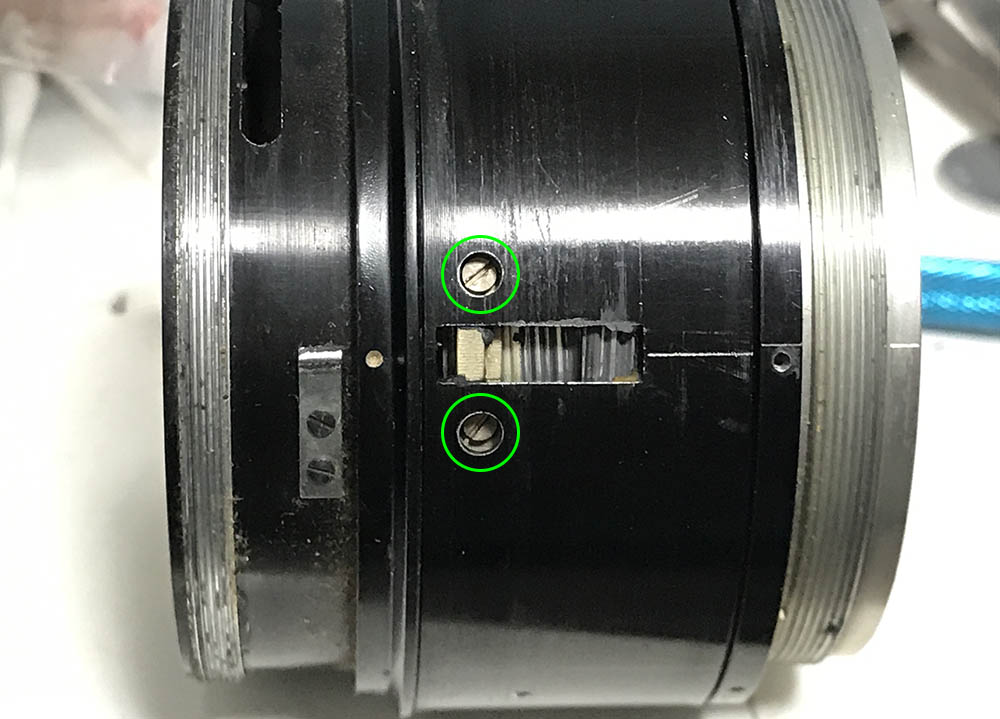
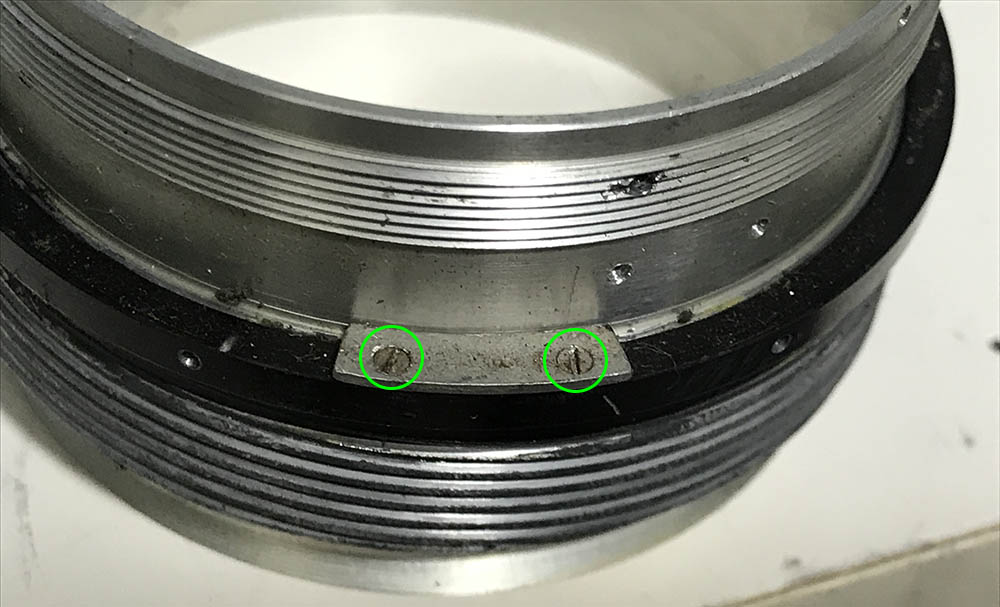
Now that the sleeve is gone you’re able to access these port holes. You could see the screws of the helicoid key through it. The helicoid key is responsible for syncing the rotation of the helicoids so they all turn at the same rate. It’s what enables the barrel to extend or retract. Before you remove it, take lots of photos and notes of the helicoids’ alignment when the barrel is at infinity so you will know how to put them back. This lens was serviced before and it has been marked by the previous repairer so I don’t have to do it. Once you are satisfied with your notes, extract the screws so the helicoids could turn-freely. This will allow you to separate them.
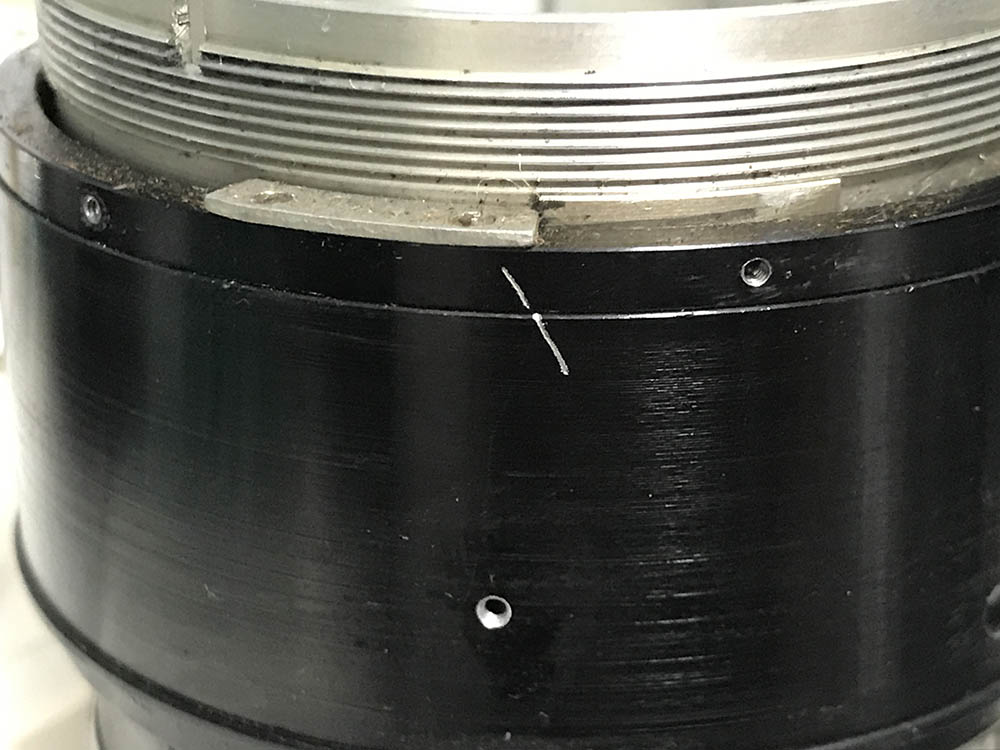
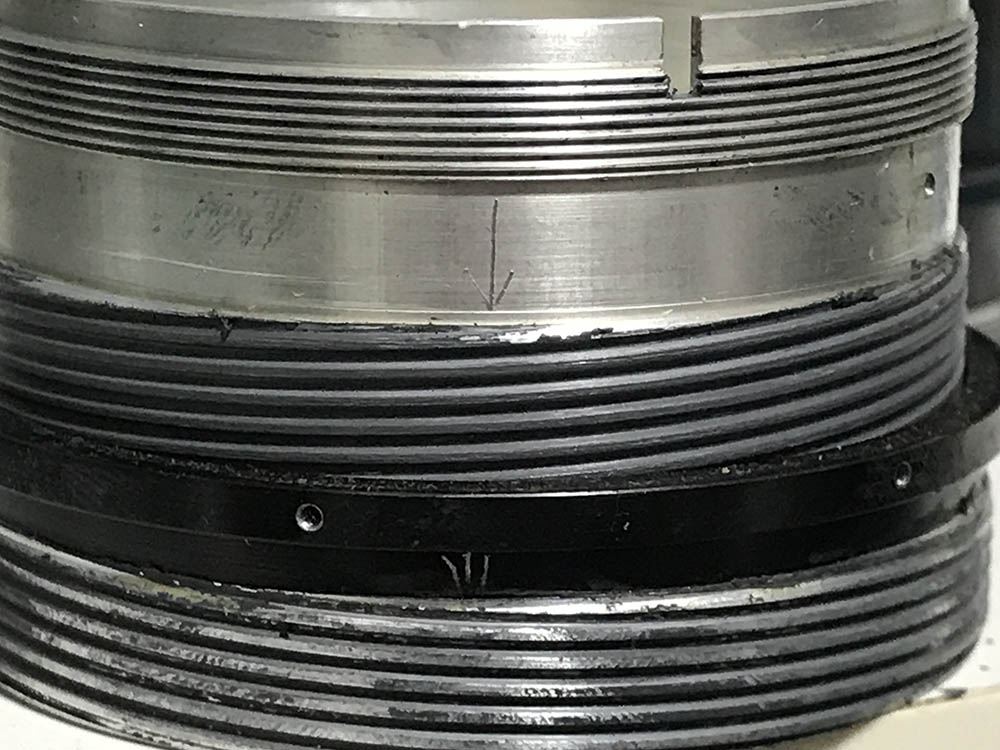
Collapse the helicoid and make a diagonal mark, reproducing this when it’s time to reassemble the barrel means that you got it all correct. If it’s off, you will have to guess how the helicoids should mesh and waste a lot of time.
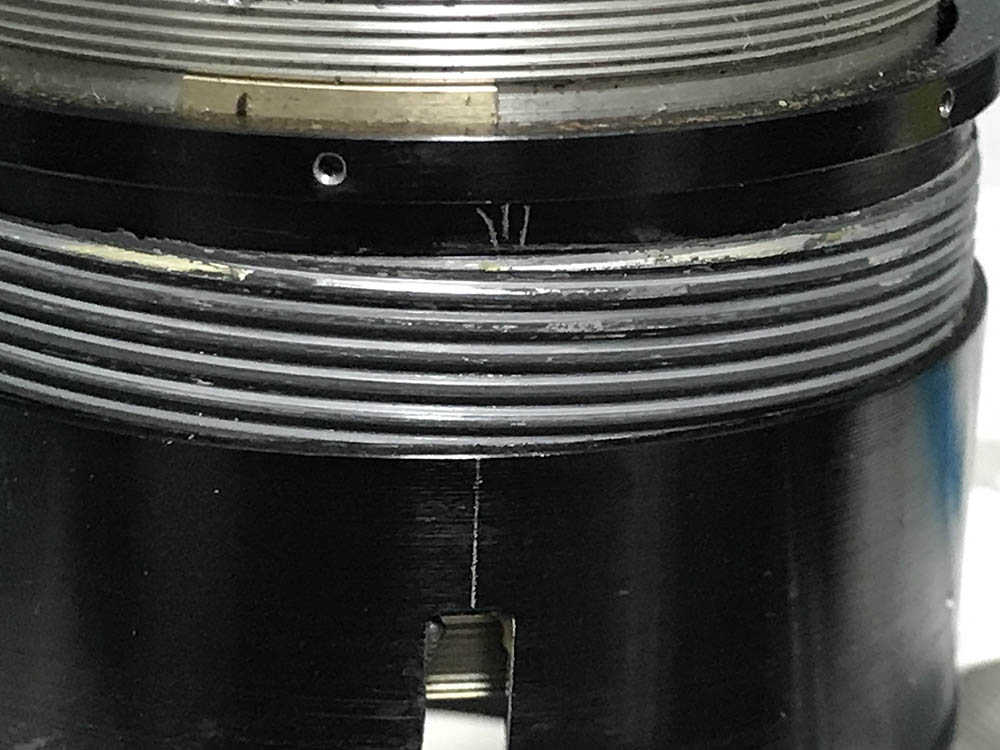
Separate the central helicoid from the outer one and never forget to make a mark on where they parted since this is also where they should mesh. If you haven’t read my article on how to work with helicoids, read that now. People forget to mark this and they end up wasting a lot of time and giving up, this is why many lenses do not function properly. Read my article and follow my instructions so you won’t get frustrated.
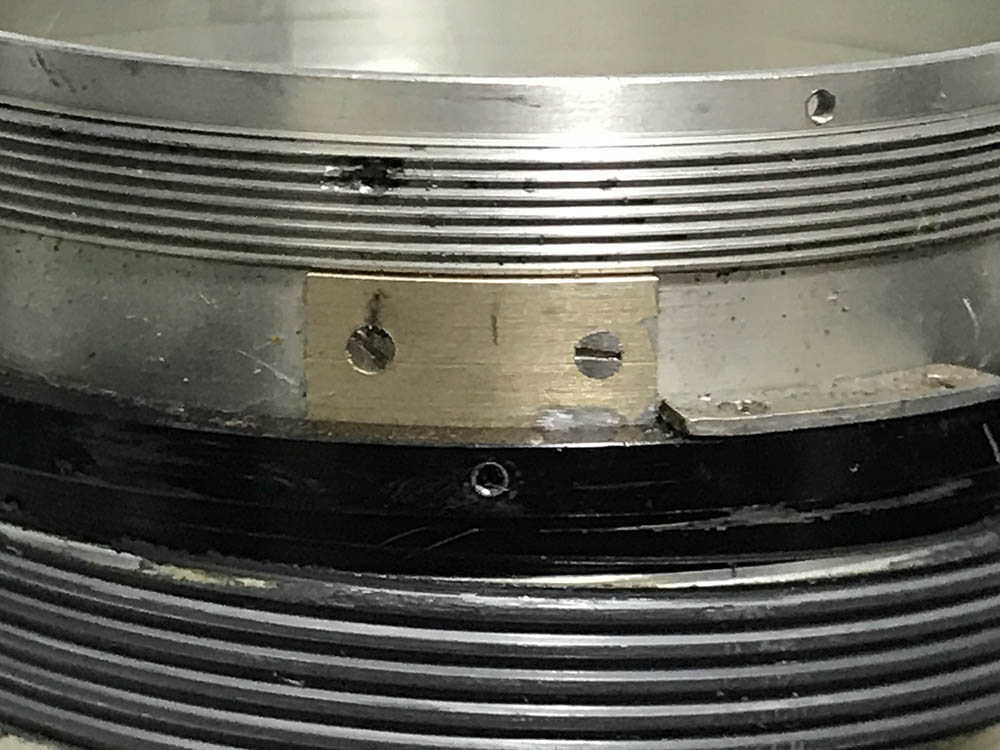
The inner helicoid couldn’t be separated since the helicoid stop is in the way which means that you should remove it, too. It prevents it from turning too much and undo itself, making sure that it turns within the focusing range.
Removing this won’t help since the thread will catch on the opposing part. It has to be removed later in order for you to clean the barrel properly but it’s better to leave it alone for now. When putting this back, be sure that it faces in the right direction.
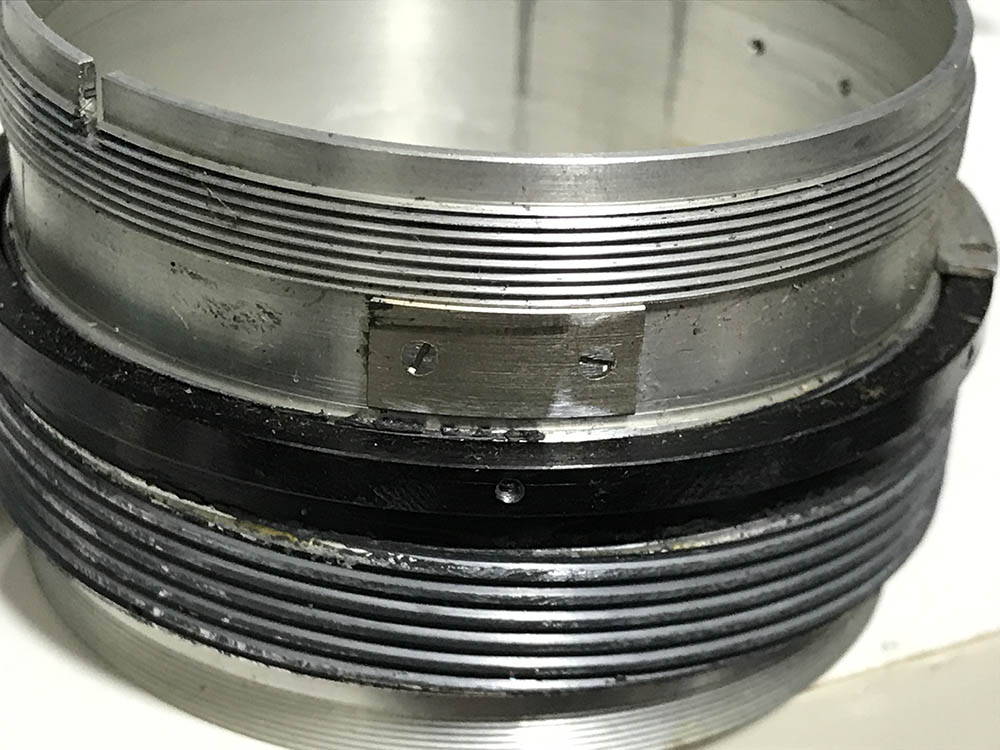
Carefully extract these and you should be able to separate the inner helicoid now that the threads could pass-through the central helicoid’s inner part.
Again, make sure that you not where these separated or you’ll be in trouble.
Clean the helicoids thoroughly and don’t leave residues. Scrub them with a stiff brush and strong detergent then dunk them in an alcohol bath. That is going to get rid of any stubborn dirt and residue. Brush it again and polish the threads with lens tissue soaked in alcohol. Dry them thoroughly before you apply a fresh coat of grease. Use a light one so it focuses smoothly and do not apply too much or it will migrate to the optics or create a mess. You only need a thin film of grease. Reassemble the barrel completely and don’t forget to check if everything is aligned properly.
Disassembly (Objective):
There’s nothing complicated about the objective and its construction, this is as standard as it gets and is similar to many Nikkors of its time. I didn’t have to dismantle the iris on mine since it’s still clean, it’s similar to the Nikkor-S 50mm f/1.4 Auto’s so if you have to clean yours just read that article to get a couple of hints. You must be careful when dismantling this since the chunks of glass are big and heavy, specially on the front assembly.
Extract the rear elements assembly, turn the rear housing until it comes off.
Carefully unscrew the collar of the rear element group to get it out. If it has been sealed at the factory, a drop of alcohol to its threads will help a lot.
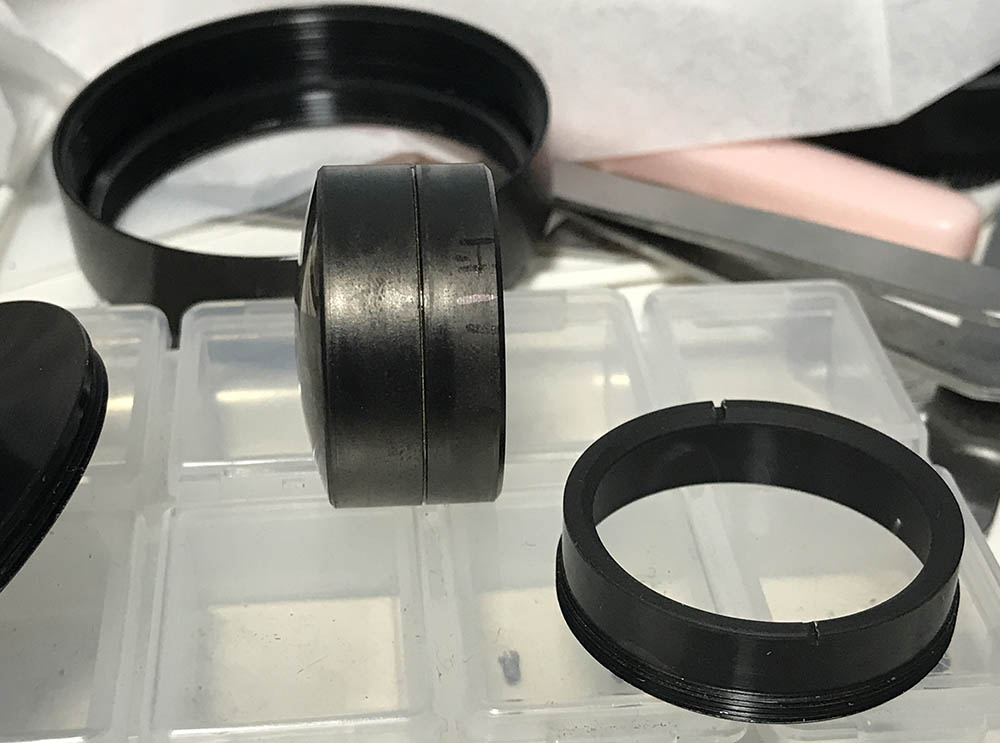
The 3rd group can now be removed. It’s a cemented group so handle it with care. Do not forget to note which side should be facing the front so you will know how to put it back properly.
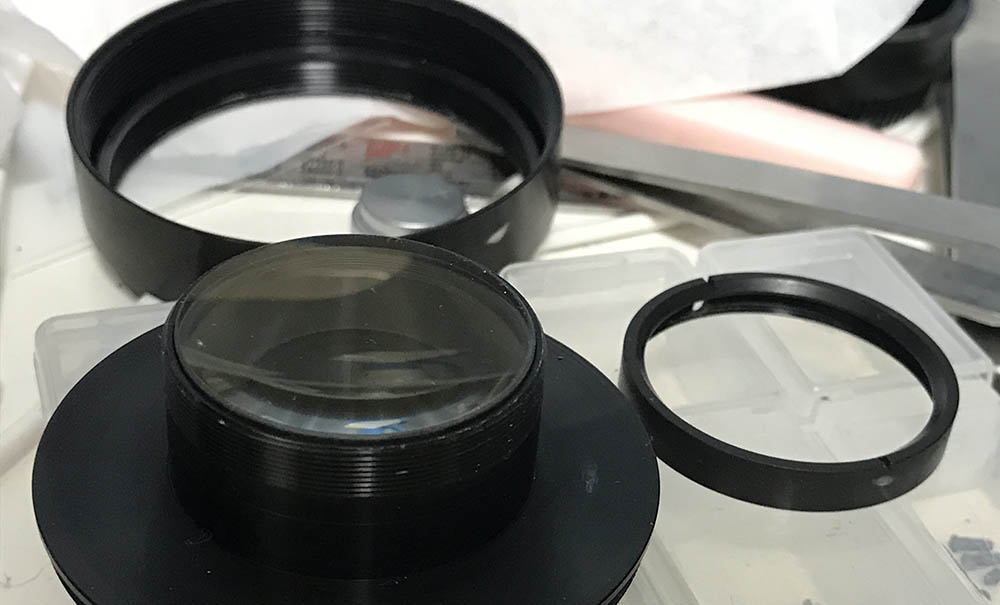
The front elements assembly could be unscrewed with the help of a rubber cup, be sure not to scratch the front element while doing this.
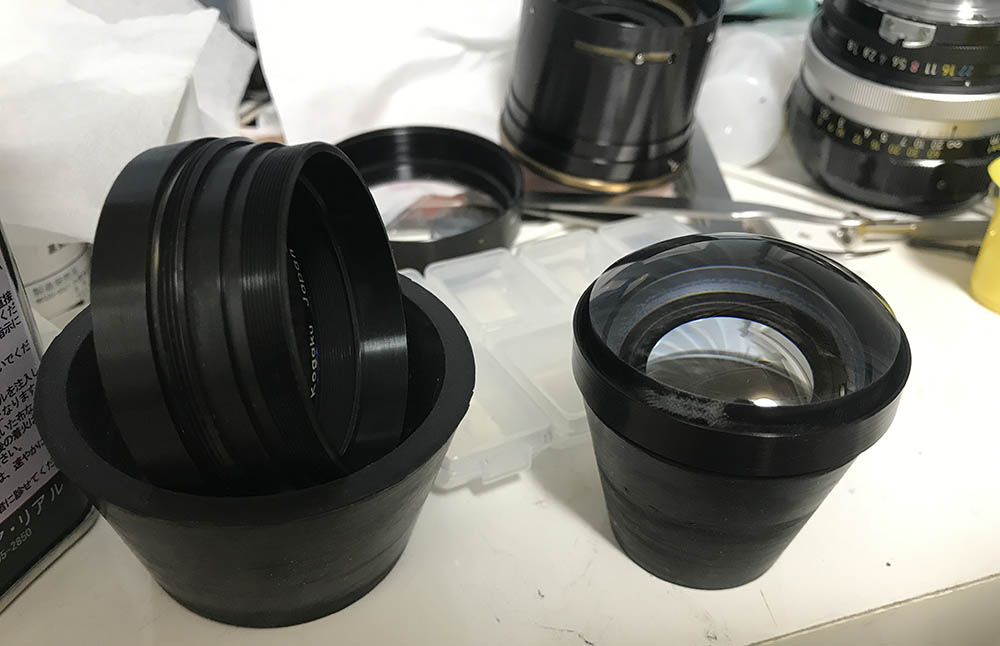
The 2nd group is huge, it’s basically the 2nd and 3rd elements combined to form a single group. Unscrew its housing and do not attempt to remove it. It was glued to its housing and removing it may damage it.
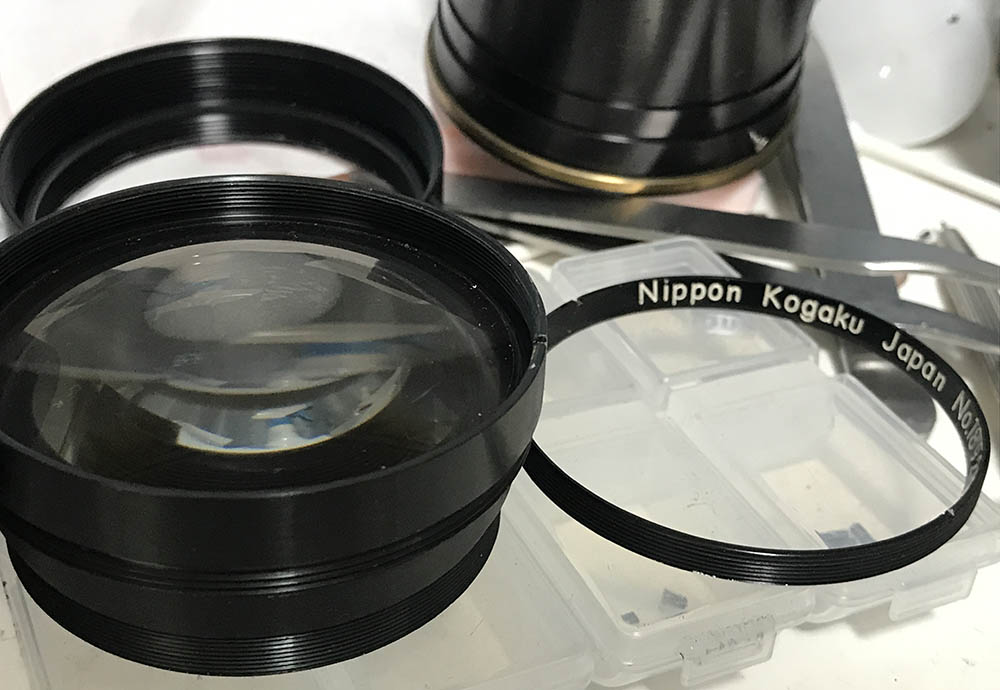
The front element is secured by the bezel, place a little bit of alcohol on the threads to soften the seal, wait for a while then use a rubber cup to remove it. Extract the front element with a lens sucker.
Clean everything very well before you put things back. If your lens needs to be disinfected from fungus, read my article on how to remove fungus. Don’t use the chemicals undiluted or you will damage the surface of the elements. If you still haven’t figured out how to work with the iris, read my article on the New-Nikkor 85mm f/1.8 and see if that helps.
Conclusion:
This is an enjoyable lens to service. It’s not difficult at all and quite frankly I wouldn’t be interested in it if not for its early serial number. I have repaired a lot of Nikkors that this is peanuts for me at this point so it didn’t take me a long time to clean this properly. This is not a project for beginners, practice on cheaper lenses first before you work on this.
Reassembling everything is simple, just back-track until you get everything back. See how clean it is now? The engraved details now look bright again. Putting the objective back into the barrel can be frustrating, the best way to do it for this lens is to leave the bayonet off and slowly place the objective to its proper place while making sure that all of the pins connect to their forks. It may take you several tries but you’ll eventually get it.
This is how it looks now, what a magnificent lens. It’s one of the best lenses I have for portraiture and it’s Nikon’s first-ever 85mm for the F-mount.
Thank you for following my work. If you enjoyed this, share this with your friends. This site earns roughly $0.20 a day from page views alone. Helping this site get exposure will help the community. You can also support this by leaving a small donation, that goes to the maintenance and hosting of this site. You are also helping me purchase, process and scan film. We promote the use of film so the industry won’t go down and you are doing your part by supporting this site. Thank you and see again next time, Ric.
Help Support this Blog:
Maintaining this blog requires money to operate. If you think that this site has helped you or you want to show your support by helping with the site’s upkeep, you can make a small donation to my paypal.com (richardHaw888@gmail.com). Money is not my prime motivation for this blog and I believe that I have enough to run this but you can help me make this site (and the companion facebook page) grow.
Buy me a roll of film or a burger?
Thank you very much for your continued support!
$2.00
Helping support this site will ensure that this will be kept going as long as I have the time and energy for this. I would appreciate it if you just leave out your name or details like your country’s name or other information so that the donations will totally be anonymous. This is a labor of love and I intend to keep it that way for as long as I can. Ric.

Oct 24, 2020 @ 10:54:59
Nice work Richard, I have one of these 85/1.8 Auto-H lenses and it is probably the best pre-Ai lens I ever shot. Mine is Ai-converted, it works great on high res modern digital sensors, and still gives a unique look.
Oct 25, 2020 @ 16:43:10
Richard. Good for you! Life is too short for a toxic work environment. I wish you the best. (and I love your posts on this blog)
Jan 05, 2022 @ 00:57:30
Richard, Many thanks! I just relubed and cleaned my 85mm f1.8 and it’s a hundred percent better, but the f stop ring is still a bit creaky, so I’ll have to go back in a see if I can provide a tiny bit of lube to calm it down. I tried to leave a tip via your interface above but it’s not working properly. Email me and I’ll send you some money! Thanks, Frank