
Hello, everybody! I love eating-out and enjoying the best ramen in town. It’s one of the simplest luxuries that I can get each weekend. However, this isn’t something that I can enjoy recently due to the coronavirus. I’m forced to eat instant ramen from home. While instant ones will never beat the real thing, there are a few brands that make really good ones that can rival real ramen and all you need to do is garnish it properly with meat and vegetables. This is more-than-enough to satisfy my ramen craving. Today, I will show you an interesting story of how a camera company satisfied the budget-conscious. I always thought of it as the best version of Japan’s cheap camera category, it is very much like the premium instant ramen that I was talking about, it’s a king amongst beggars. Read my article before you get angry at what I said, I will make it sure that you’ll understand where I’m coming from.
Introduction:
The Canon 7 is a simple camera to service despite all of its features. This is a direct result of it being designed for cheap mass-production. Everything has to be simple and easy-to-service since production time equals money. It was a small wonder of engineering by Japanese standards back in 1961 when it was sold and it could’ve been a real classic if only Canon gave it better build quality. Despite that, it’s still an enjoyable camera to fix and use.
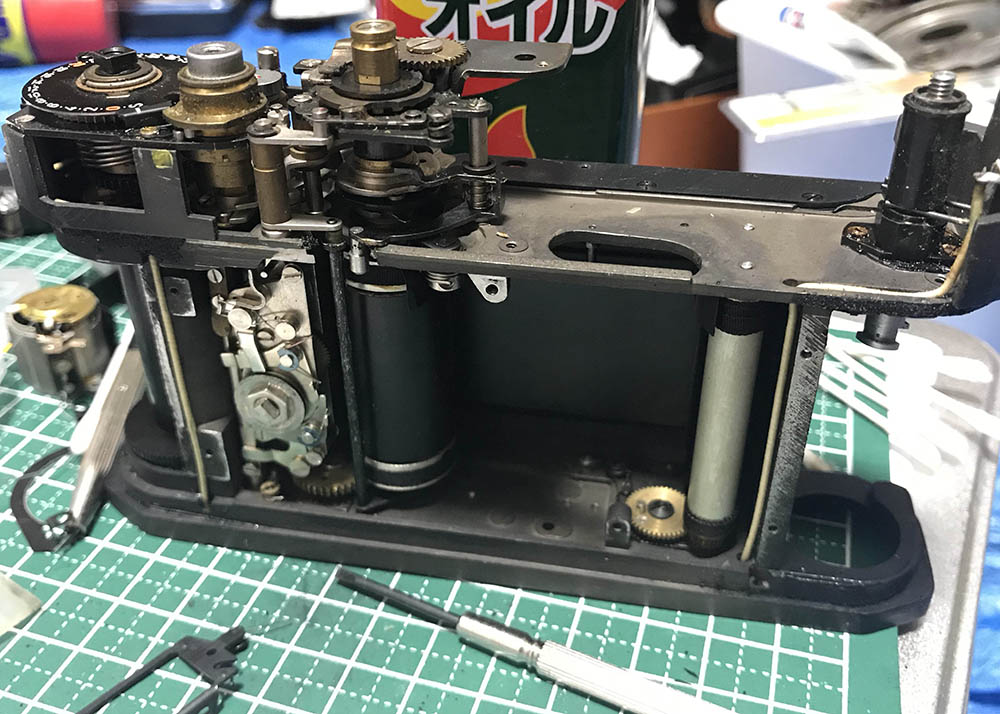
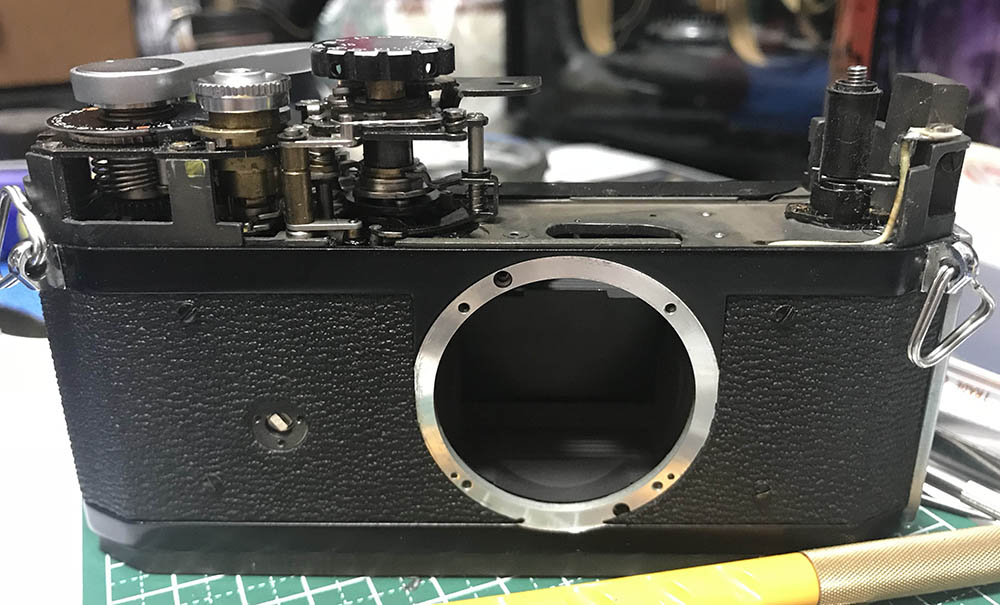
The insides of a Canon 7 is spacious compared to a Nikon SP. This is because its body is bigger and that allowed the engineers to put more things inside it and allowed the people at the production floor to easily assemble, adjust or fix it before leaving the factory.
We talked about how to remove the top-panel and other things in part 1 and now it’s time to tackle the more complicated things within the camera’s guts and how to service them.
Despite being a simple camera to service, I won’t recommend this as a first camera project to novices. You’ll require the proper testers and tools for it. I think that a basic Soviet camera will be perfect for that. This article isn’t for people who want to fix their cameras, it should not be treated like a repair manual of some kind as it’s only written for your entertainment. This is the reason why I left-out some important notes and steps.
If your camera needs to be serviced, send it to a reputable repairer. Do not attempt to repair your camera, ruining it will cost you even more. Think of the tools that you need to invest and the time you’ll need to spend just to get the right experience and skill, it’s not worth it.
Before We Begin:
If this is your first attempt at repairing a lens then I suggest that you check my previous posts regarding screws & drivers, grease and other things. Also read what I wrote about the tools that you’ll need to fix your Nikkors.
I suggest that you read these primers before you begin (for beginners):
- Essential tools
- Best practices 1
- Best practices 2
- Best practices 3
- Ai conversion
- Working with Helicoids
Reading these primers should lessen the chance of ruining your lens if you are a novice. Before opening up any lens, always look for other people who have done so in Youtube or the internet. Information is scarce, vague and scattered (that is why I started this) but you can still find some information if you search carefully.
I highly recommend that you read my working with helicoids post because this is very important and getting it wrong can ruin your day. If I can force you to read this, I would. It is that important!
For more advanced topics, you can read my fungus removal post as a start. This post has a lot of useful information and it will be beneficial for you to read this.
Disassembly (Rangefinder Assembly):
While the rangefinder mechanism of the Canon 7 is technical marvel it’s not something that you will marvel-at once you see what’s inside. It’s a delicate assembly, very-much like any rangefinder mechanism but this one is really delicate. It’s not because it’s a super-precise mechanism but because it was made in a flimsy, toy-like manner. You’ll have to watch your fingers here, it is normal to find things that were merely held-together with glue or tapes. I cringed when I saw what’s inside of it.
You will have to take plenty of notes when you service this. There are many parts here that should align properly and only taking photos and notes will help you put things back the right way during reassembly. Avoid using any strong solvents here as you might dissolve anything.
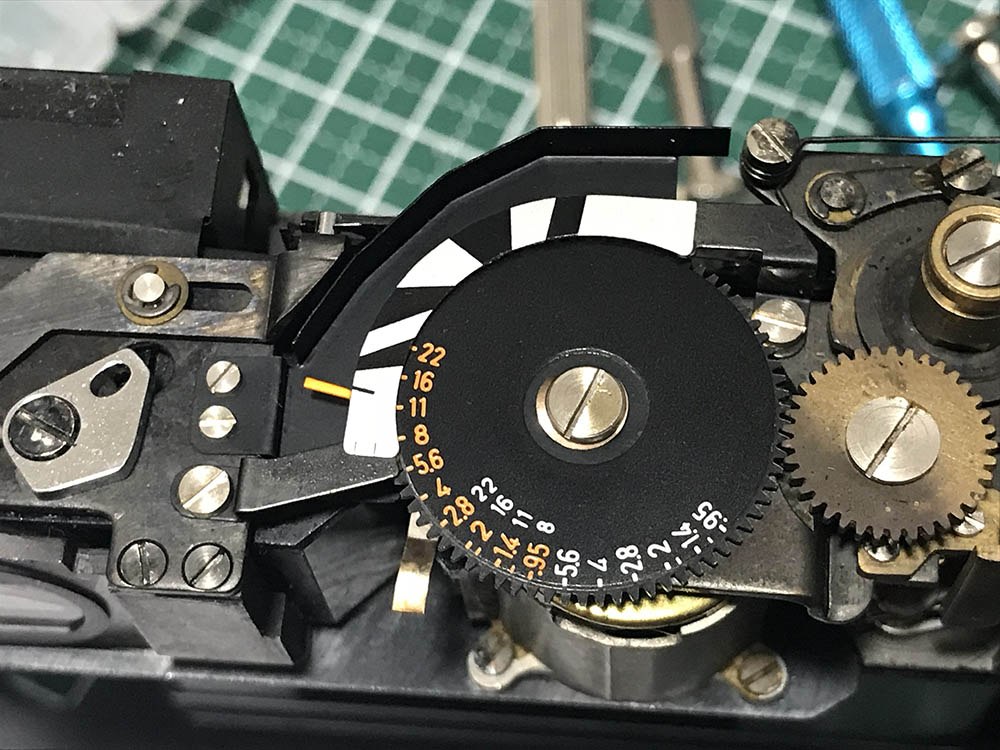
The dial of the light-meter is in the way, the parts here are flimsy. You must be careful not to bend anything while removing anything here.
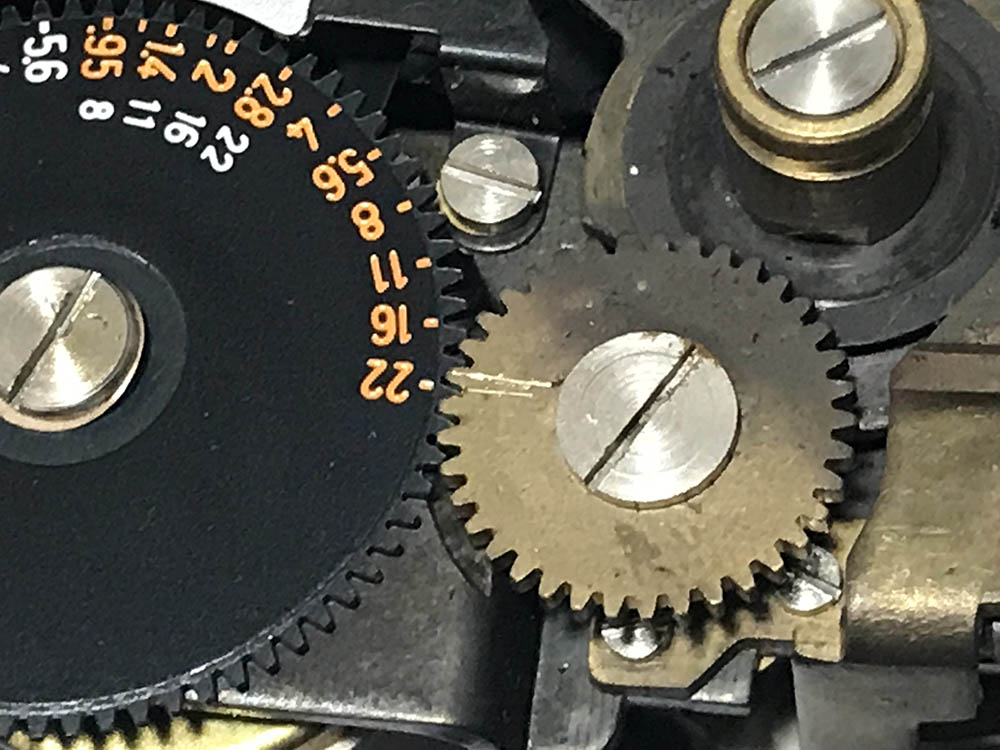
Before you remove anything, mark how the cogs here should mesh so you’ll know how to put them back together again later.
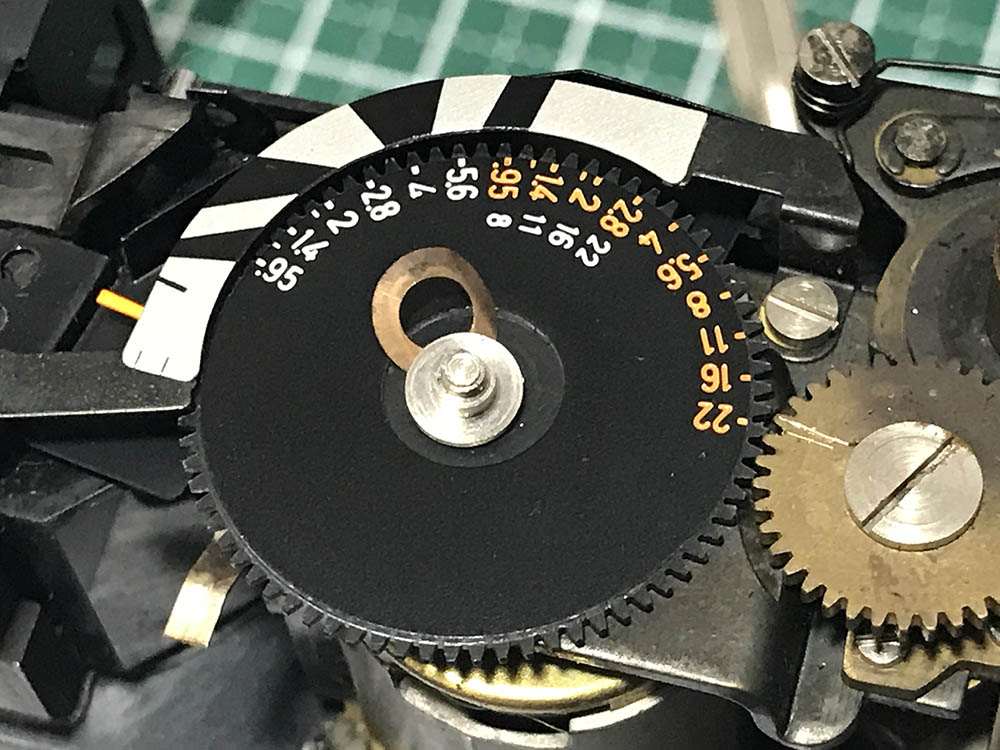
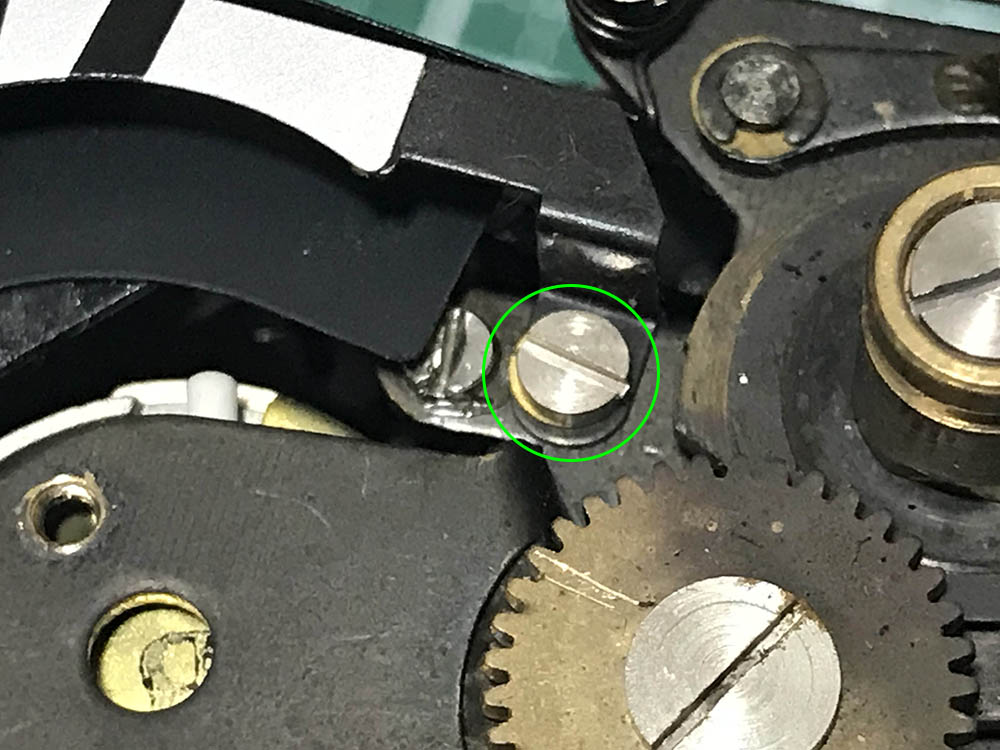
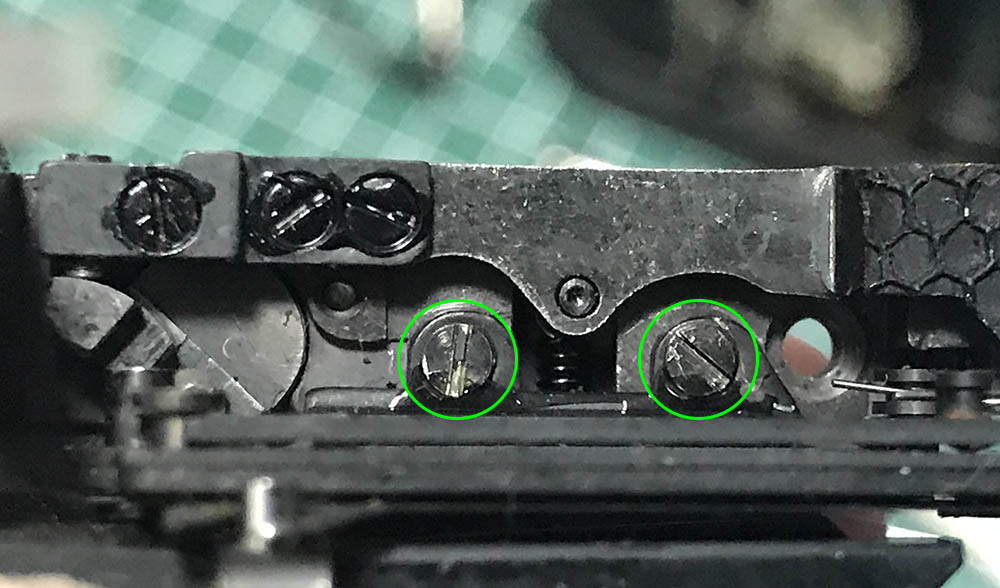
Carefully extract the screw of the dial and don’t lose that washer under the the screw.
You can remove the exposure-range scale by extracting this.
The housing for the needle is secured by these, extract these carefully so the flimsy parts won’t get bent.
Here’s another screw. Be careful not to scratch the viewfinder prism block.
Here’s another screw that you should extract. Be careful with it so the mask of the frame-lines won’t get damaged, it’s very delicate.

Carefully extract this, you can only access it once the light-meter assembly is gone.
Beside the viewfinder prism block is another screw that has to be extracted.
Here’s another one near the eyepiece.
There are 2 more screws that you’ll have to extract. In this photo is the cam used for selecting the frame-lines, it presses on the lever for the frame-lines mask assembly, that enables you to modify which frame-lines will be shown through the viewfinder.
Carefully remove the rangefinder assembly. You’ll need to depress the lever of the rangefinder-coupling arm to get the whole assembly out. You can see the mirror used as a cheap beam-splitter in this photo, it’s merely glued and it’s easy to dislodge so be careful when handling it. This is a cheap camera, I cringed when I saw this contraption. Canon could’ve went the extra mile to produce an even better camera but they couldn’t since they have to get this camera out cheaper than Nikon to go toe-to-toe with its rival. Nikon was the best camera maker in Japan in those days, the 1960s was considered to be a golden age for Nikon.
The frame-lines mask assembly is being secured by these screws. Be careful when extracting these so you won’t scratch the delicate masks. This can be adjusted if memory serves me right.
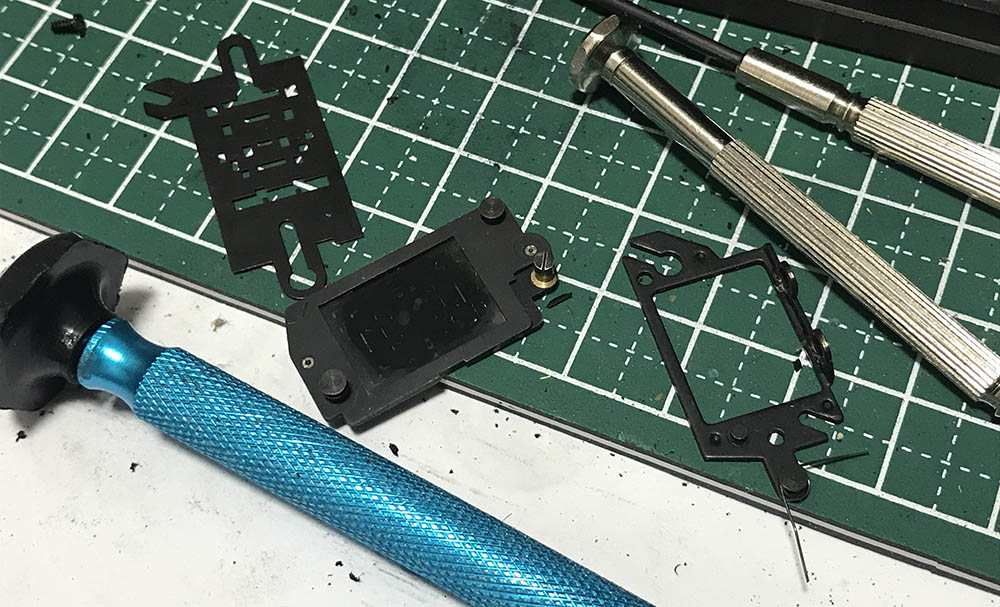
The frame-lines mask assembly can be easily dismantled after the screws of the assembly are gone. Handle the masks carefully, they’re simply etched to a delicate substrate.
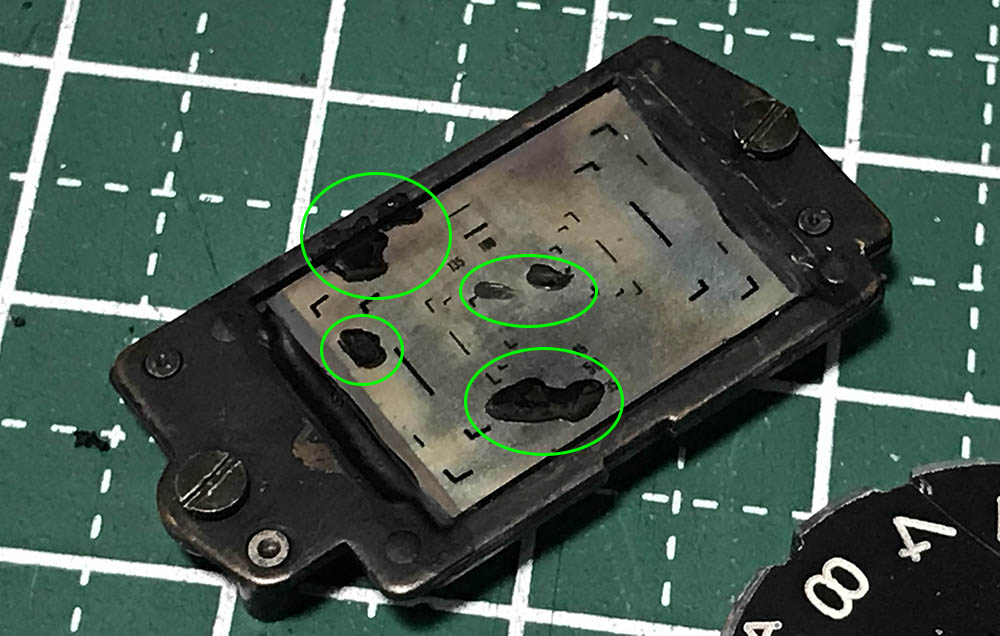
The masks have a few bald-spots in it, they’re probably scratches or some of the silvering has flaked-off. The easiest way to repair this problem is to get a few dabs of black paint and paint-over the bald spots. Be careful so you will not accidentally paint on the parts that don’t need it.
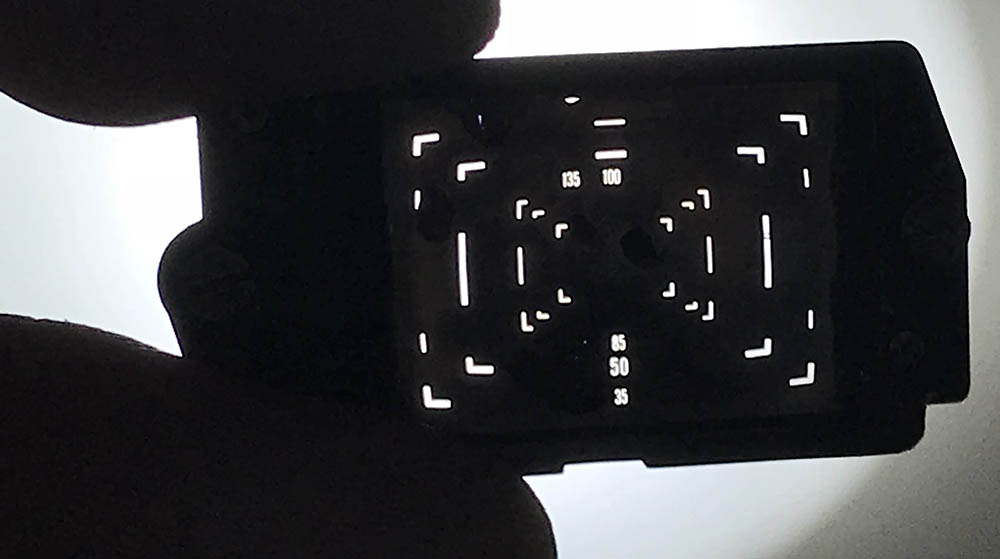
The black paint helped somewhat. You won’t see any holes anymore except for the small ones that I missed. This seems to be a common problem with a lot of Canon 7’s that I usually see on the junk section. For some reasons this part seems to be vulnerable to this issue.
Clean everything carefully. Flush the rangefinder-coupling arm and pivots. Use a small amount of oil on its pivots and that’s it. You won’t need to apply grease or anything else here.
Wipe all of the glass surfaces that are accessible to you. The viewfinder and reflector prism blocks should be wiped-clean to the best of our abilities. The resulting image in the viewfinder will depend on the quality of your job. It’s important not to apply a lot of pressure on the prism blocks as they’re only glued to their bases. The most delicate part is that cheap mirror, it is merely glued and the slightest pressure will dislodge it.
Disassembly (Retarder):
The retarder seems to be quite robust. It doesn’t seem like it will jam and it was made plenty of good-quality steel. Despite its good construction there’s a few things that will make you scratch your head about it. Things like how the spring is attached and how easy it is to dislodge it. There’s also a flimsy damper in the escapement which baffles me to this day. The tension can be easily modified accidentally when you warp the damper spring. Canon sure knows how to make products cheaply and they knew where to cut-corners.
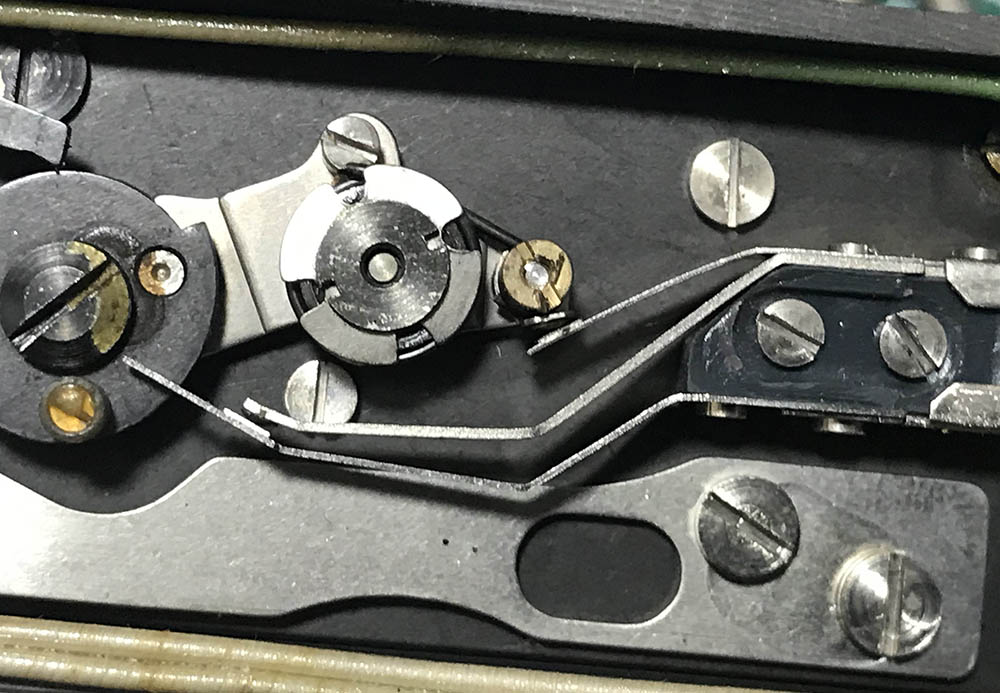
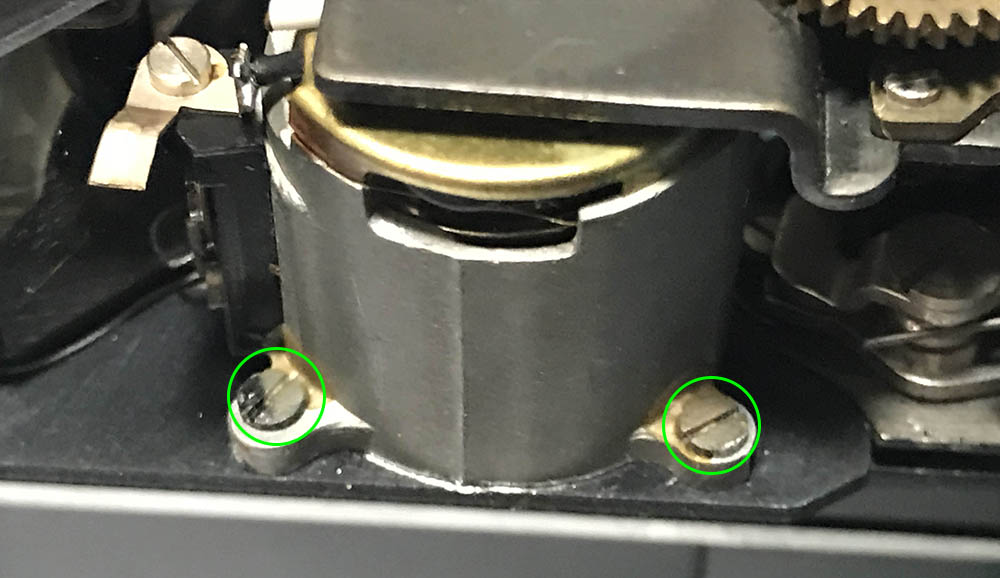
This photo shows the flash-sync contacts and what I suppose is part of this camera’s shutter-brake system. Here are 2 screws that you’ll need to extract in order to remove the retarder, they are the shiny screws at the floor of the camera.

The retarder seems pretty basic, it looks similar to Nikon’s but it looks a lot cheaper. The good thing is the parts were made from stainless-steel and the cogs were made from brass which seems to hold-up well against corrosion. There is a tiny spring here that can easily get dislodged and damaged so be careful when cleaning this thing.
You won’t have to get any deeper than this for most repair jobs. I’m not sure but I think I removed the self-timer mechanism, too. I just wanted to flush it so I removed as many things as I could.
At this stage you can flush the shutter mechanism clean with naphtha. I use a bulb blower to help me flush the rollers and drums. Once you’re satisfied you can proceed to supplying oil to the parts that need them. Only use those that were made for use with cameras and watches, apply a small amount to the pivots and exercise the parts so oil will coat them evenly. I usually leave the camera alone for a few days to give the oil some time to settle before the shutter gets adjusted but some people do it right after. The gears of the film-advance mechanism was greased but only at their teeth. Oil their pivots and don’t apply too much or it will make a mess. The mechanisms at the bottom had to be flushed, too. Applying oil to the parts here will aid the shutter and smooth it operates since the wheels here turn with the shutter. The shutter’s drums and bearings were also oiled after being flushed-clean. You will feel them move smoother after supplying just a bit of oil, you won’t need a lot of it to make a big improvement. Wipe-away any excess oil and you’re done.
Finishing:
Here are the last few things that you should do before you call it a day and reinstall all of the camera’s panels. You should never proceed with this step unless you have the right tools such as a proper shutter-speed tester. You’re going to need a tester that has at the very least 2 sensors, one for the front curtain and another is for the rear curtain. It will be best to have one with 3 sensors with the 3rd one positioned at the center. This is a delicate step and should only be done by a trained repairer. Judging the tension is difficult, if you got it wrong you’ll either tension the springs too much and stress all of the mechanical parts or you won’t provide enough tension to drive all of its mechanisms.
The rangefinder assembly is a delicate, precise assembly. You should treat it with care so you won’t dislodge anything. Don’t apply a lot of pressure when you’re manipulating it or you’ll bend some parts. The same thing goes for its light-meter assembly, there’s a couple of thin, exposed wiring that’s easy to dislodge or disconnect.
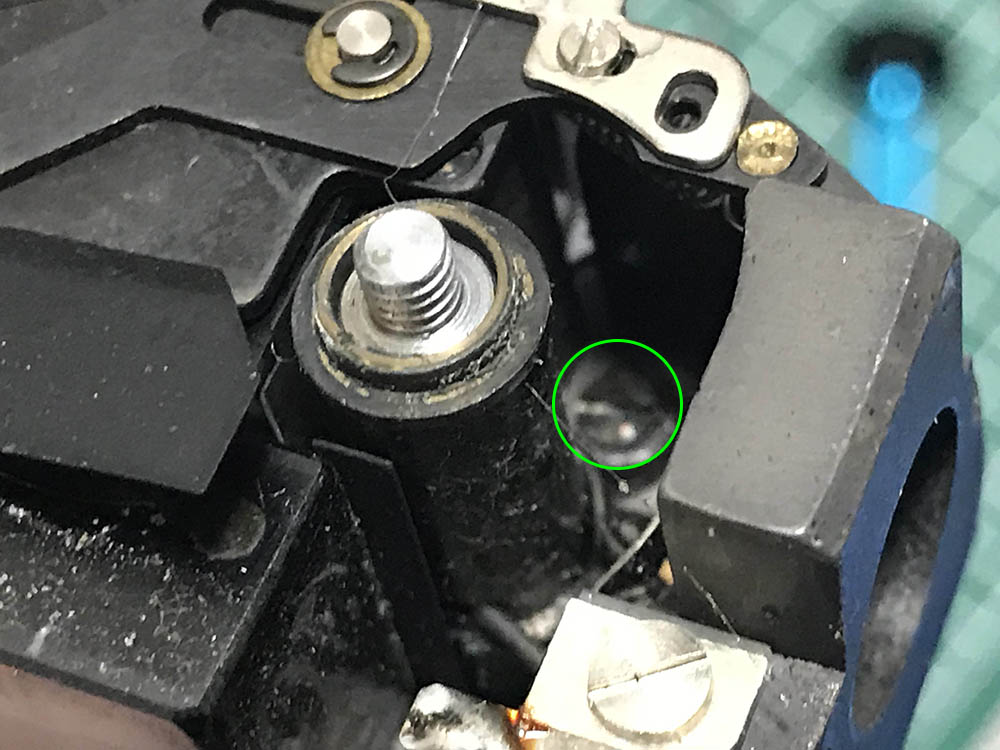
Loosen this so you can decouple the pawls that secure the curtain adjusters. A word on adjusting mechanical shutters, never rely on the number turns it takes to tension the springs neither should you trust anybody who’ll advise you to “listen” to the sound of the shutters for adjusting their speeds. You’re not going to get accurate speeds by following either way.
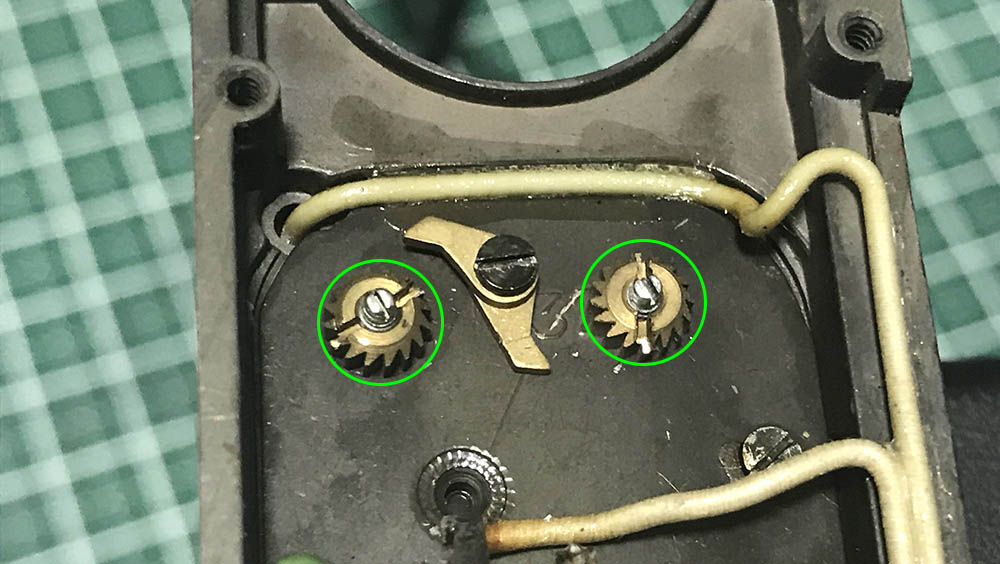
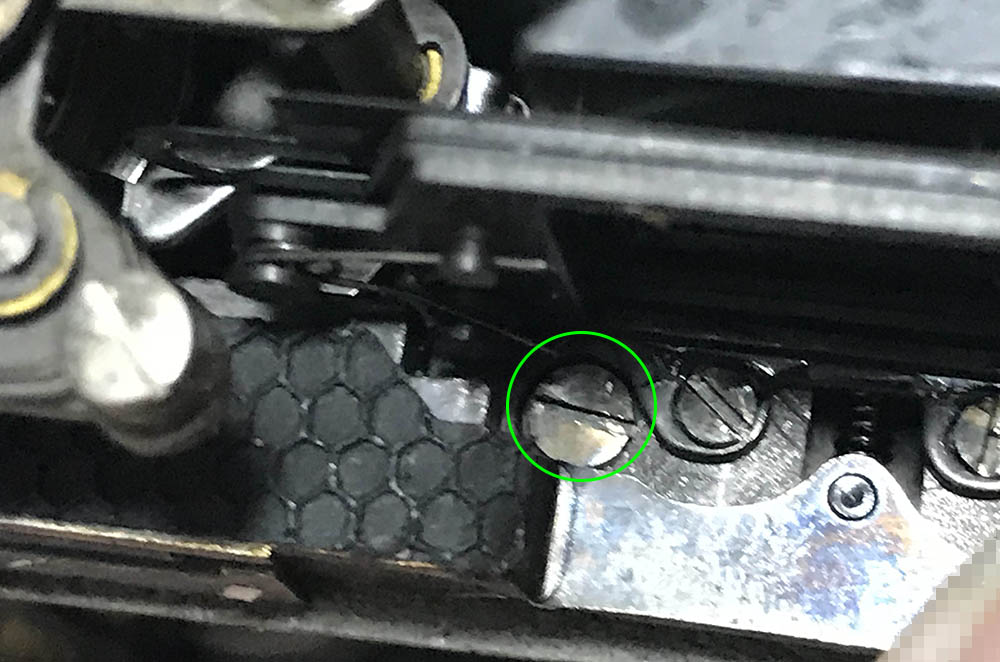
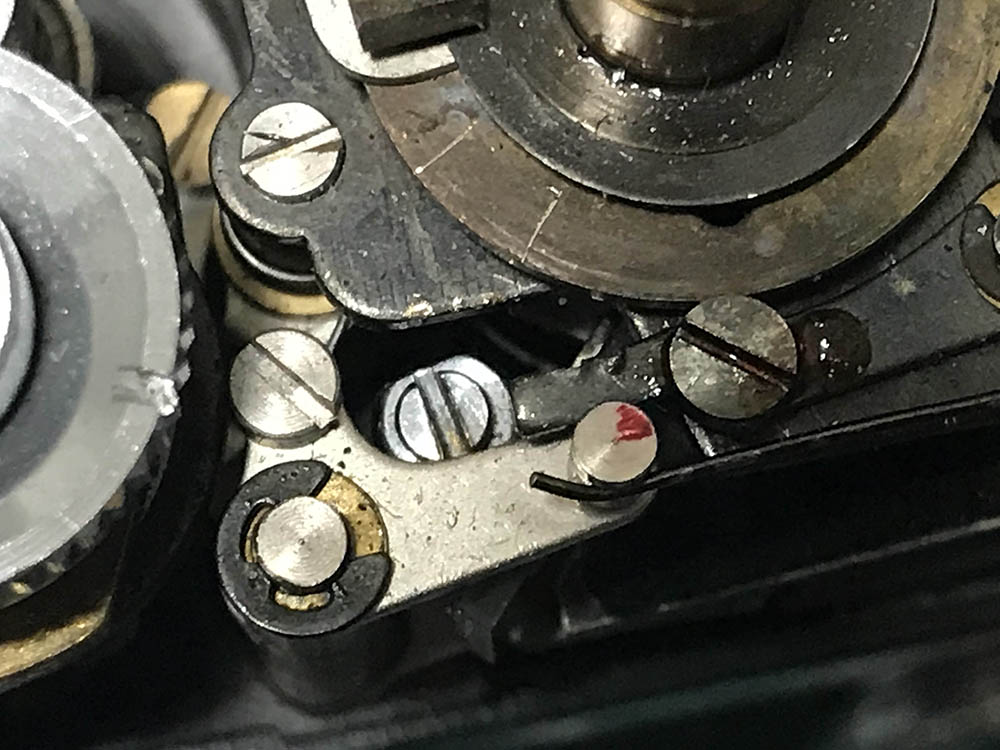
Adjusting these will allow you to modify the shutter’s tension. You first turn the gears to loosen the pins then wind them to give you the desired tension. Test or finalize your adjustments by tightening the screws to lock the pins. I often relax the shutters before I do anything unless the shutters are in good condition, if that’s the case then all I have to do is adjust the curtains until I get the proper tension.

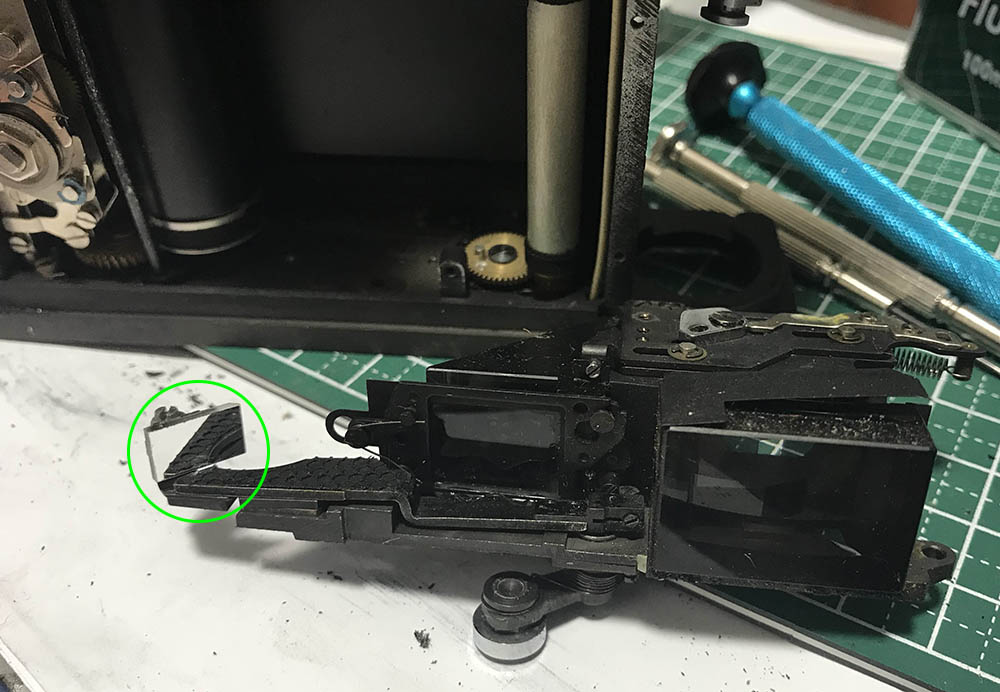
The film-back’s door can be separated after you remove its pin. You do not have to do this but it’s beneficial if you want to do a thorough job. Replace the rotted foam with fresh ones after you cleaned this part thoroughly. Add a bit of oil to the pin and that should make things feel a lot smoother.

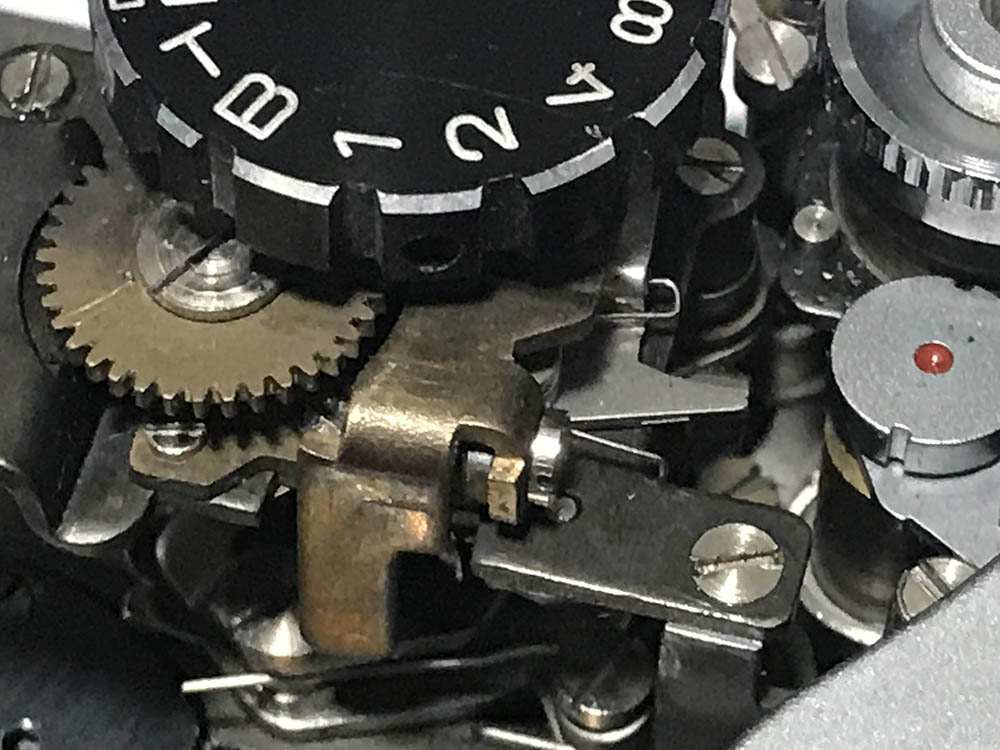
This contraption is for controlling the retarder, it’s an arm with an elbow to connect it to a hook. Be sure that the hook is coupled to the retarder when it is time to reassemble everything.
Reassemble everything up to this point and adjust the shutter. With this you can comfortably cock the shutter and change speeds when you need to. This is the best configuration when adjusting the shutter.
Be sure that this spring is in the right place. I don’t recall what I adjusted in this area and what it’s for so pardon me for not being helpful. It has been a few years since I repaired a Canon 7.
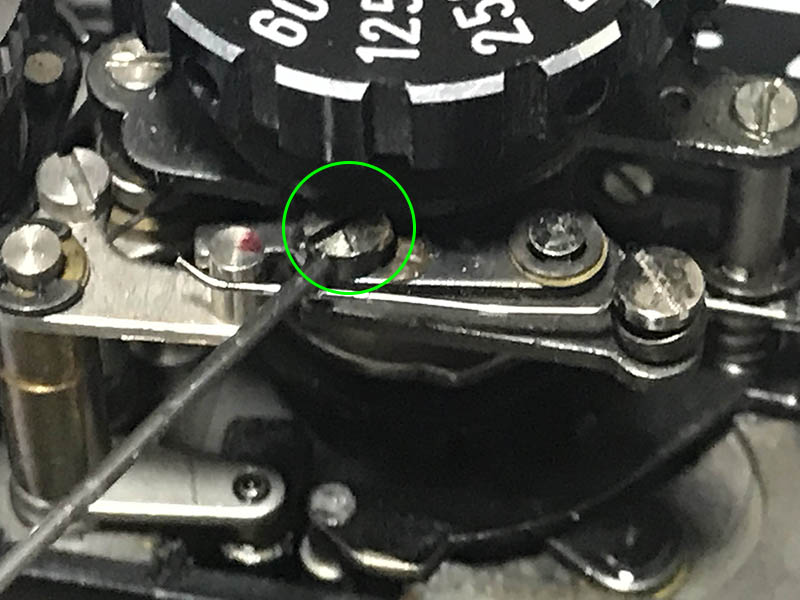
If I am not mistaken, turning this eccentric will adjust speeds from 1s-1/30s. You access these without removing the top-panel, simply remove the dial of the speed-selector and reach for it. It can be difficult to access that way but it’s still better than having to remove the whole top-panel assembly.
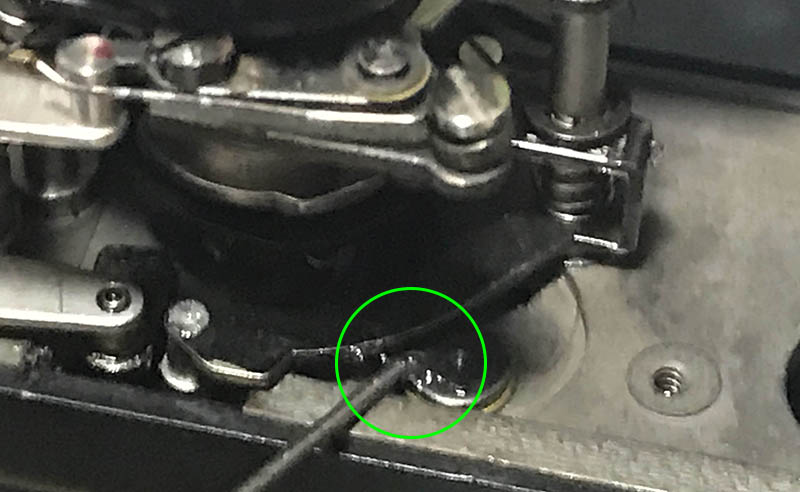
It’s hard to see here but you adjust for 1/250s by turning the screw on top of the rear-curtain’s lever. Adjusting 1/1000s is very tricky, the assembly of the speed-selector dial will have to be removed so you can access a cam there. I don’t recall having to adjust it by much so it was smooth-sailing for me.
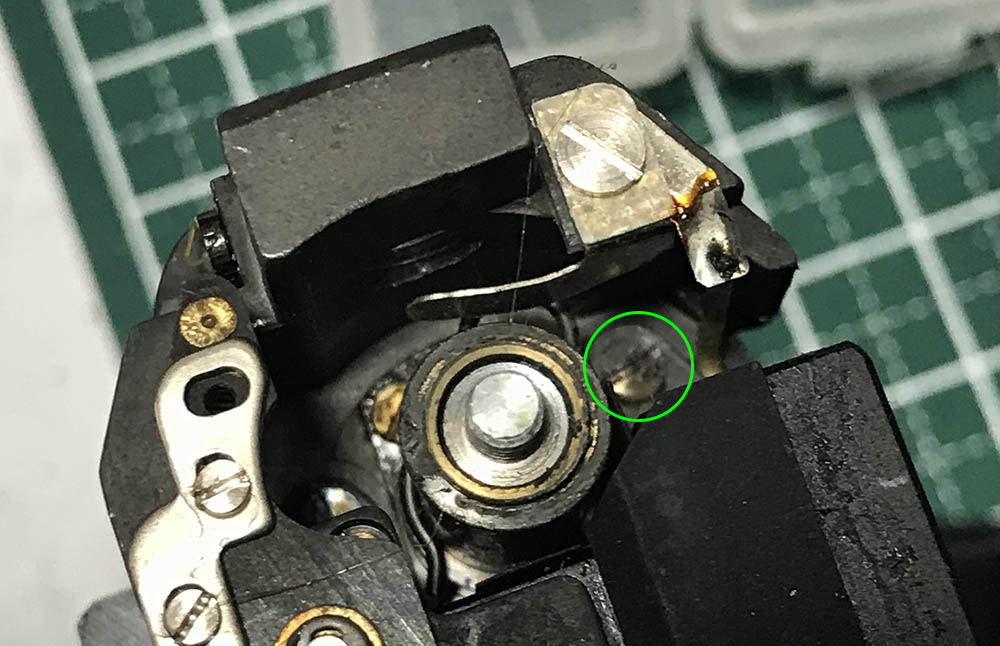
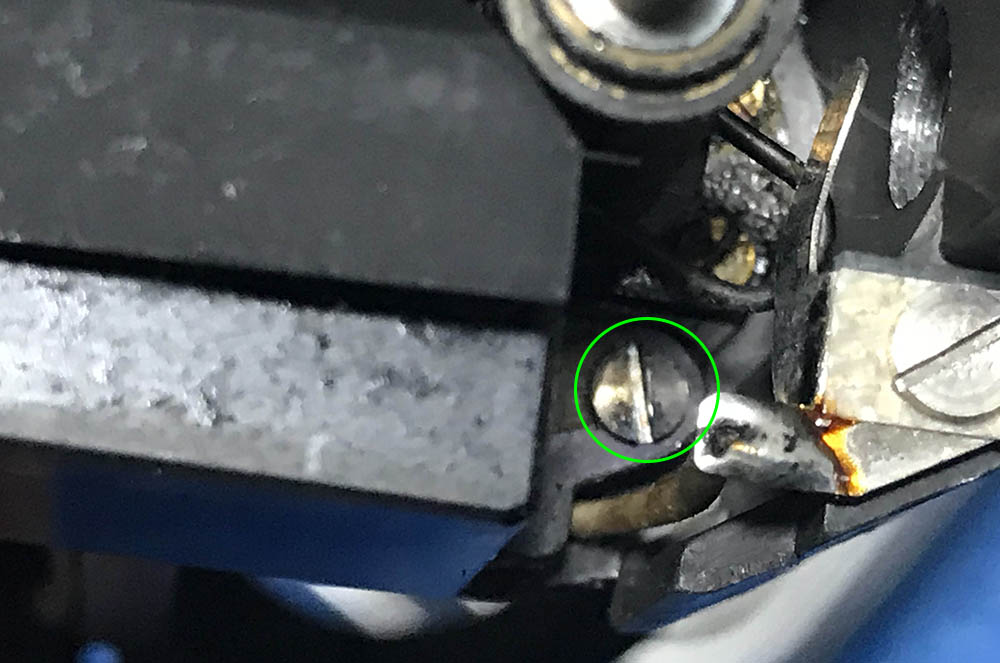
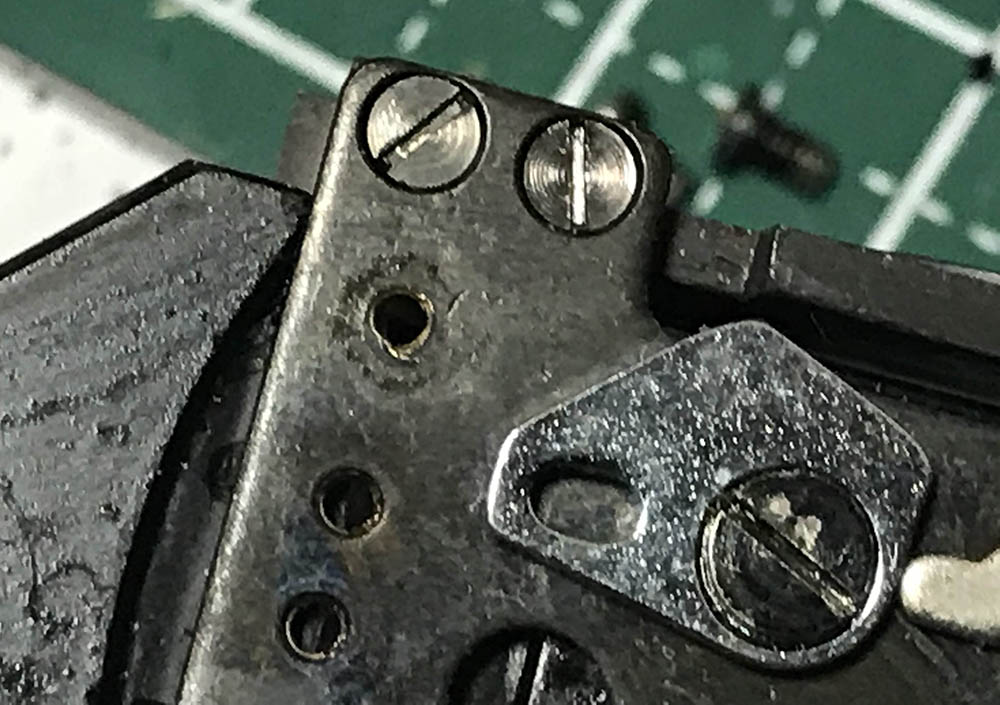
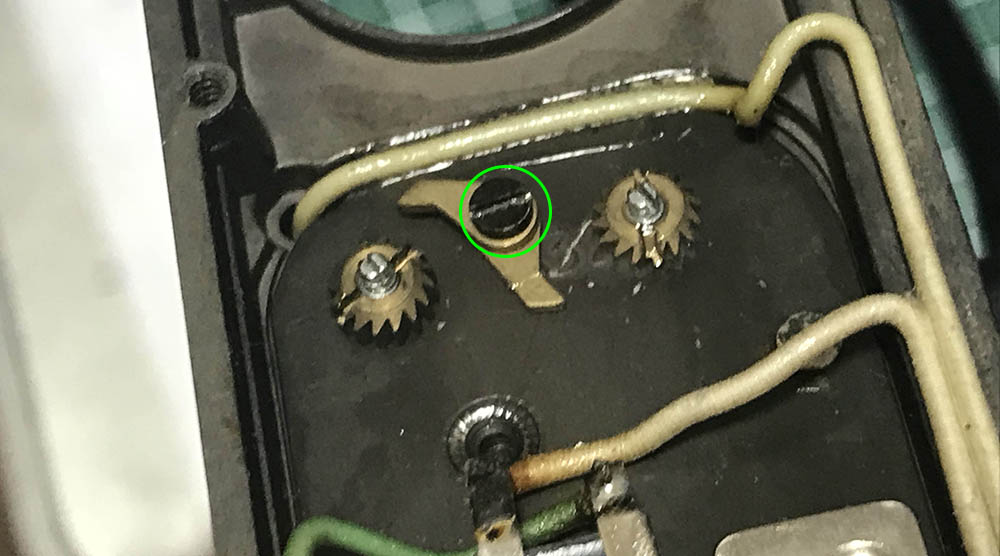
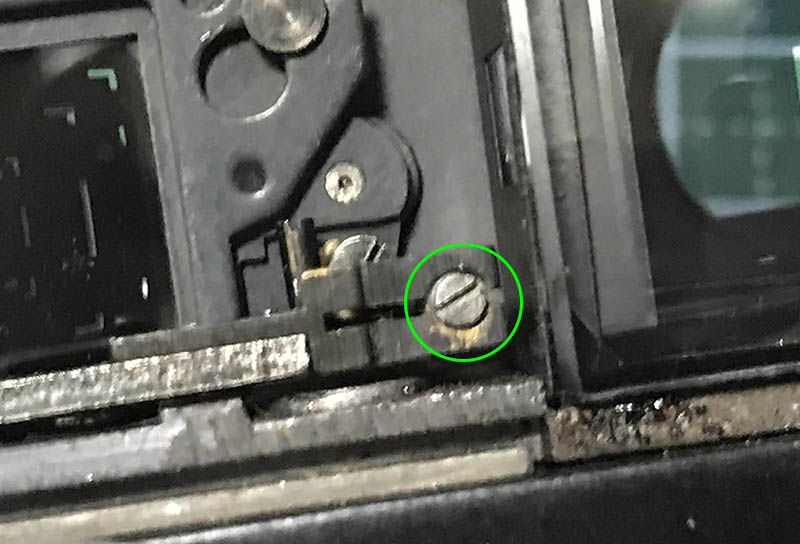
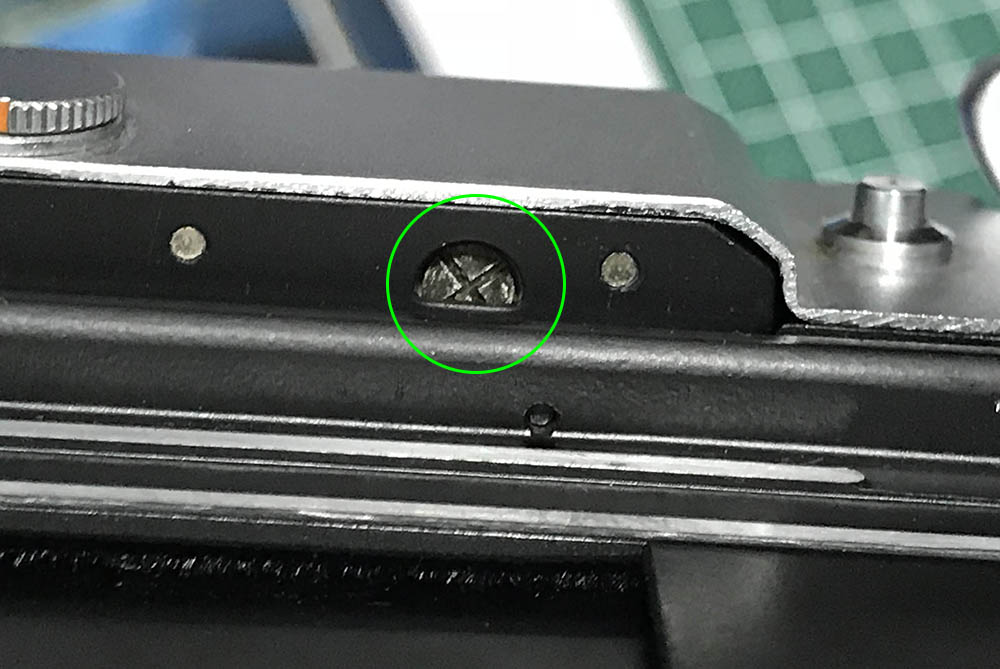
This is the vertical adjustment screw, turning it will adjust the Y-axis of the rangefinder patch. It merely adjusts the height of the mirror’s holder which sounds really cheap. You can either do this while the top-panel is off or you can do it with the top-panel installed. If you chose the latter route, unscrew its cover (the one with 2 holes) and you can access it with a driver. Don’t use a lot of force when you turn this screw or you’ll bend the mirror’s holder or depress it and you won’t get an accurate representation as you adjust it.
This is the horizontal adjustment screw. You turn this to align the X-axis of the rangefinder patch. You can adjust it now or you can adjust it later when all of the panels are installed. Just remove the screw from the face and you can access it with a precision driver.
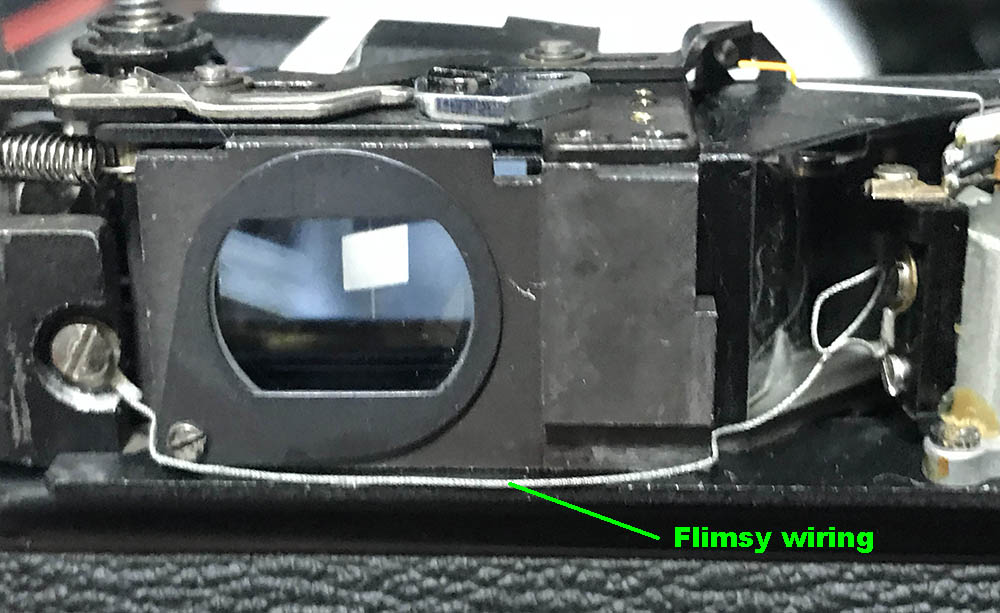
Be careful when putting the top-panel back. There’s a thin, flimsy wire that had to be slipped-under the viewfinder assembly block. This so cheap, that length of wire doesn’t even have proper insulation. I lost a bit of respect for Canon when I was repairing this camera, it’s a lost-opportunity to show how good they were if only they didn’t succumb to marketing and made this one with higher quality.
This screw enables you to adjust the exposure-meter.

This is a clever trick that enables you to boost the exposure-meter’s power. I love this elegant concept, it’s very efficient. Basically, it’s just a relay-switch, when you turn the booster’s dial it will create a circuit. It enables the meter to tap-in on the larger selenium panel, giving it more “sensitivity” when you need to get a reading on indoor scenes. This is useless for lowlight situations and you’ll need a real light-meter to do the job.
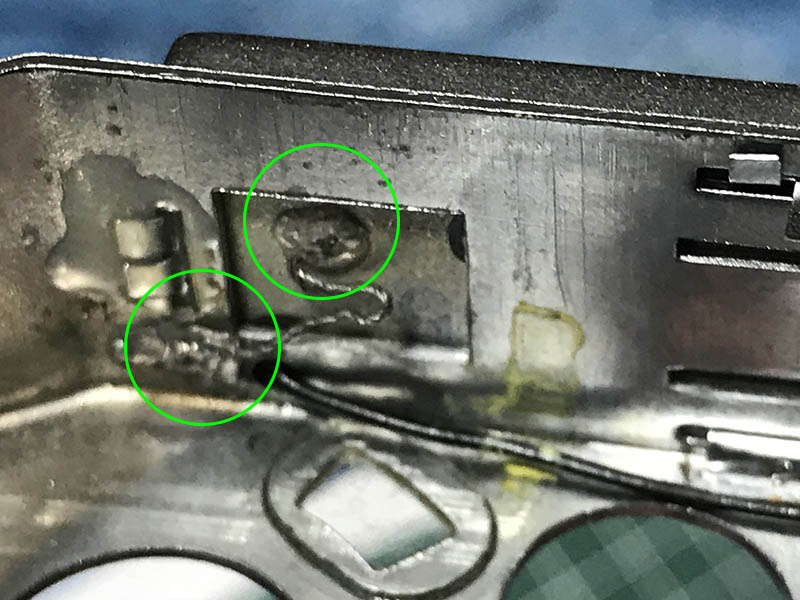
This is how the booster’s panel is connected, it’s just a soldered lead. This is so cheap it reminds me of old the 1960s tin toys. Just look at how everything is held-together, tapes and bent strips of thin metal. I have seen Yashicas with better build-quality than this.

There are times when the conductivity is poor and you’ll need to sand parts of the contacts to help make things better. I tried using a hard eraser but it’s not good-enough for the job.
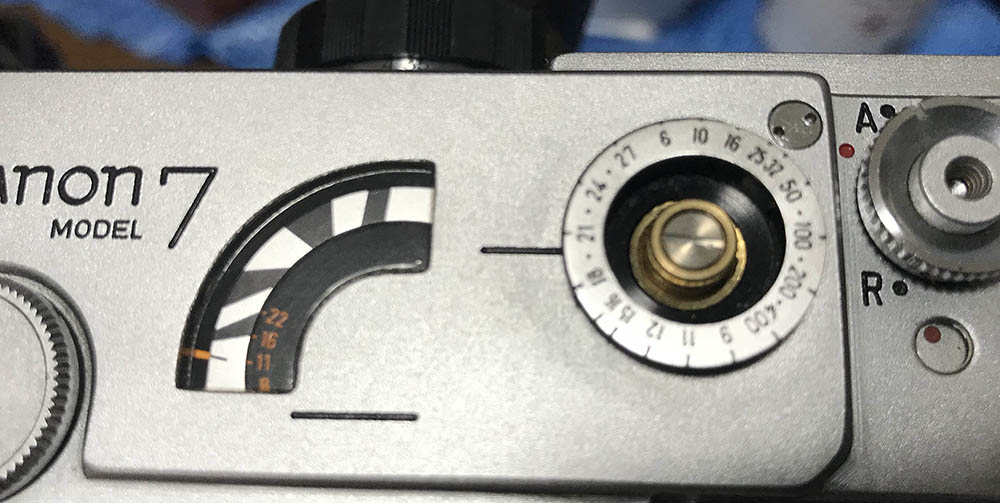
The ISO-selector dial should be fixed in the right manner and this is what I have in my notes. You can offset it if you wish at your own risk. You can see a small, round cover with 2 holes in this photo. Remove that cover and you can adjust the vertical alignment of your rangefinder patch.
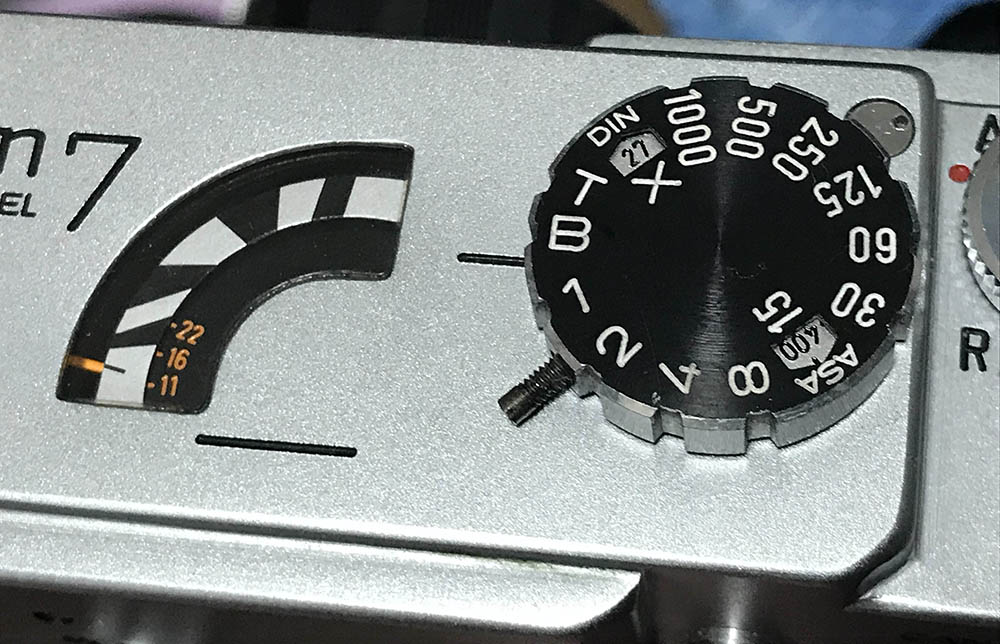
Putting back the speed-selector can be tricky as the screw should clear what is underneath it or you won’t put it back properly.
Once everything is done you can do more tests before you finalize anything. It took me under an hour to adjust everything, it was easy and quite frankly, enjoyable because everything can be accessed and adjusted without having to remove too many things unlike my experiences with Nikons. This is what I liked about the Canon 7 the most, something I wished Nikon thought more about. This was a camera that was made for easy mass-production at a time when things were “made to last”, Canon dared to be different. There is not a lot of reputation to lose and everything to gain at that point in time. Things will change a few decades after and now they have overtaken Nikon as the biggest camera makers in Japan but that doesn’t necessarily mean that they make the best cameras. The latter statement is a bit salty but that’s coming from a hardcore Nikon man.
Conclusion:
This camera took me around 2 nights to clean, lubricate and adjust. I was a bit surprised by how easy it was to service. Repairing this compared to the Nikons is like repairing the Soviet T-34 as opposed to the more complicated but formidable Panzers. I learned a lot repairing this and it proved to be an enjoyable experience despite it being a Canon.
This is me testing the light-meter, it now works better now that the contacts have been cleaned and the connections were re-soldered where needed.
I hope that you enjoyed this article. Thank you very much for following this blog and if you enjoyed this, please share it with your friends. This site gets around $0.70 a day through views and clicks. You may also want to support my work, doing so helps me offset the cost of maintenance and hosting. It’s also helpful as I use your support to purchase, develop and scan film. This is a film-lover’s blog and I hope that it will inspire you to shoot more film. This is my life’s work and I want it to continue helping and educating people. It’s my pleasure to entertain and educate you. Thanks again, Ric.
Help Support this Blog:
Maintaining this blog requires money to operate. If you think that this site has helped you or you want to show your support by helping with the site’s upkeep, you can make a small donation to my paypal.com (richardHaw888@gmail.com). Money is not my prime motivation for this blog and I believe that I have enough to run this but you can help me make this site (and the companion facebook page) grow.
Leave me some tip?
Thank you very much for your continued support!
$2.00
Helping support this site will ensure that this will be kept going as long as I have the time and energy for this. I would appreciate it if you just leave out your name or details like your country’s name or other information so that the donations will totally be anonymous. This is a labor of love and I intend to keep it that way for as long as I can. Ric.

Apr 26, 2020 @ 04:45:34
Dear Richard,
I’ve been loving these pieces, thank you!
Just curious…why there is something about “fans mourn loss of Whoopi Goldberg” at the bottom of each e-mail?
Cheers! John
>
Jul 21, 2020 @ 17:04:59
Hi Richard,
I sincerely LOVE your website! But can’t really stand how you disparage the Canon camera here, yes it was built to a price… As a Nikon *and* Canon lover, having owned (or currently own) the following cameras: F, F2, F3, FE, FE2, FM2, EL, EL2, FTN, FT2, Canon F-1, New F-1, A-1, AE-1, FT, FX, T70, i felt a bit… uncomfortable.
You’re correct in pointing out the mass-production aspects of the Canon 7, though. The earlier Canon P, while being a simpler camera, is supposed to be much better built.
Now, once you got into the early 70s it’s a different game altogether. I marvel at the build quality of my Canon F-1, it looks and feels better than my F2 and F3. The New F-1 is also wonderfully built. I dare to say the build quality of the F-1s is better to its Nikon pairs. My Canon F-1s (new and old) and Nikon F3/F2 are my daily shooters and it would be very, very hard for me to choose Nikon over Canon or vice versa. Moreover considering that i’m a big fan of Canon FD glass, optical quality is just superb.
By the way I own most of the lenses you repair, from your list I own:
Nikkor-UD 20mm f/3.5 Auto
New-Nikkor 20mm f/4
Nikkor-N 28mm f/2 Auto
Nikkor-O 35mm f/2 Auto
Nikon 35mm f/2.5 Series E
PC-Nikkor 35mm f/3.5 (i also own two f2.8 versions)
Nikkor-S 50mm f/1.4 Auto (C version)
New-Nikkor 50mm f/1.4 version 1
Nikkor 50mm f/1.8 Ai-S (Long-Nose)
Nikkor 50mm f/1.8 Ai-S (Pancake-Version)
Nikon 50mm f/1.8 Series-E
Micro-Nikkor 55mm f/2.8 Ai-S
Nikkor-S 5.8cm f/1.4 Auto (two of them)
New-Nikkor 85mm f/1.8
Nikkor 135mm f/3.5 Ai-S
New-Nikkor 200mm f/4 or Ai
Nikkor-H 300mm f/4.5 Auto
If I include lenses I owned in the past, the list would be bigger. As you can see i’m a bona fide Nikon fan and I can dare to say Canon made equally great lenses and cameras from the 70s onwards. Even some 60s lenses would give contemporary (60s) nikkor a run for their money like the FL 19/3.5R (NIkon hadn’t even released the UD 20/3.5), the FL 55/1.2 or the FL 85-300/5, all optically impressive lenses.
So… I know you’re mr. Nikon, but would be happy to see if someday you dissasemble a Canon F-1 or something.
Kind regards,
Flavio.
Jan 27, 2022 @ 22:06:20
I’m surprised you didn’t fry the meter. Hitting the meter with a DVM resistance check is usually too much. they only take microvoltage and amperage.
Jun 09, 2025 @ 03:56:45
so much hate for canon in these unnecessary comments that is hard to believe this person seriousness, sounds like someone deeply hurt by something… so much time in my life spent to get out of religion just to find out my love for cameras and photography is just another religion.