
Hello, everybody! We had some Japanese-style steak tonight for dinner. It’s a fusion dish, a new take on a classic by adding some elements of Japanese cooking to make it more interesting and familiar to local palates. While it is arguably delicious, this is still a new thing. I estimate that it is probably only less than 2 decades old. While that was delicious, it was built on established cooking techniques and dishes, I feel that there’s still a lot of room for improvement. While we’re on the topic of fusion and improvement, I’d like to introduce to you an interesting lens, it’s an early attempt to fuse 2 paradigms. While it’s a good start, it still has lots of room for improvement but the lens had plenty of potential and that’s what’s most important if you ask me.
Introduction:
Today, we are going to talk about the AF-Micro-Nikkor 55mm f/2.8. This lens is not known by a lot of people due to its rarity. It’s only made a few years before it was replaced by a superior design. This is one of the original lineup of AF-Nikkors introduced in the mid-1980s for their new AF cameras like the Nikon F4, these gained an underserved reputation amongst hardcore Nikkor fans due to the use of plastics. Nikon at that period in time was experimenting with AF lens designs so as a result, many of these suffer from awkward handling characteristics which annoyed those who are used to using classic Nikkors.

The AF-Micro-Nikkor 55mm f/2.8 is a rather boring-looking lens. It looks like a tea cup or a salve pot depending on who you ask. But appearances can be deceiving, this lens is a great performer throughout its range until you reach f/11-f/16 where diffraction begins show. This lens can also go to a maximum reproduction ratio of 1:1 without the use of any accessory, it’s the first lens in the 55mm Micro-Nikkor line that’s able to do this natively since the Micro-Nikkor 5.5cm f/3.5 from 1961. It achieves this feat by using a long-telescoping set of barrels to extend the lens to about twice its length. If it all sounds familiar to you that’s because this is the predecessor of the amazing and still in-production AF-Micro-Nikkor 60mm f/2.8D. While both lenses feel similar, they’re different mechanically and optically. Both can extend their barrels using 2 totally different methods.

There’s a little-known “feature” of this lens, that’s the front ring with the “A” printed on it. This ring can be turned by pulling it towards the camera then turning it so the line aligns with the white dot. This ring is for regulating the resistance and feel of your focusing ring. When the 2 white dots are aligned, it add resistance to the focusing ring, it tries to emulate how a manual focus lens feels. When you want to use this as an AF lens, just turn the ring to “A” so the focusing feels lighter. This helps with the autofocus performance, it also prevents the camera’s AF drive motor from being over-stressed (and draining your batteries, too). Many forget about this so they complain about this lens being painfully-slow to focus. Even if the ring was set to “A” the AF performance is still slow so don’t expect a lot from this when it comes to this aspect.
That ridged ring at the front is its focusing ring. This is inadequate, I don’t enjoy using this. If you have accessories mounted to the front it’s going to get in its way which prevents this from collapsing all-the-way. Nikon wasn’t expecting people to use it so they gave us a “vestigial” focusing ring.
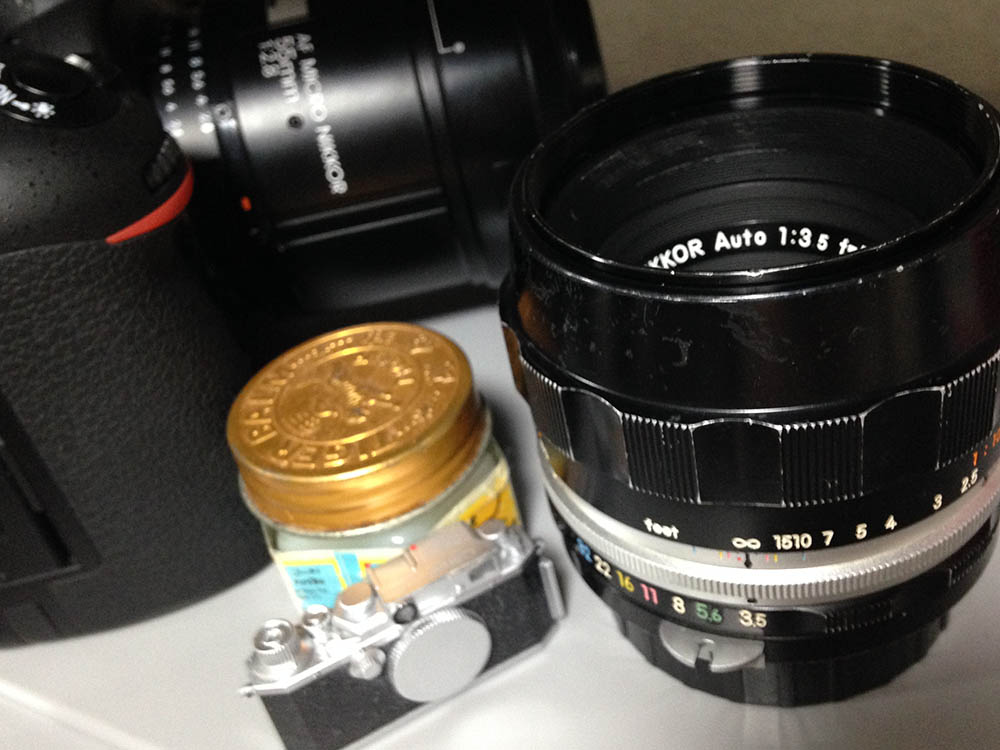
Here is the lens besides the Micro-Nikkor-P 55mm f/3.5 Auto. The older lens is completely made of metal (almost) while our lens here is mostly plastic. The toughest thing here in this picture is that pot of Tiger Balm. Just like all earlier AF-Nikkors, it uses a nipple that you can turn to lock it to its smallest aperture when you want to use the command dial to change your aperture. Later AF-Nikkors use a tab that you slide, it is more durable and is less likely to be knock-off position.

This lens is the last in the long line of 55mm Micro-Nikkors. It succeeded the popular and still in-production Micro-Nikkor 55mm f/2.8 Ai-S. This popular lens family created a new standard in 35mm photography when it comes to optical performance when used in high magnification. This popularized the “normal-macro lens” genre that many manufacturers copied, it was not the first to introduce this concept, that goes to the Zeiss Macro Tessar. This lens line is popular because of their practicality and performance. Today, the AF-S Micro-Nikkor 60mm f/2.8G ED is the latest model in this class but that will soon be replaced with an even better one.
Let us now see some actual photos. It’s important to learn how to use this so you’ll know its strengths and weaknesses. This will allow you to maximize it and that knowledge will help you decide if this lens goes in the bag or inside the dry cabinet. My tests aren’t scientific, my opinions are based from what I see and what things left an impression on me. If you want lab tests, this is not the website for that.


(Click to enlarge)
These pictures were taken from f/2.8, f/4 and f/5.6 (in that order). I would’ve liked to take pictures up-close for this section but it would be meaningless, it is just like every macro lens made in the sense that its effective maximum aperture changes as it extends, we will have to make-do with these photos.
Wide-open, it shows decent to good resolution at the center. It’s quite sharp but you’ll find some color fringing which is quite surprising, it only happens on certain scenes where there’s over-blown highlights. Things improve a lot by f/4 and you won’t notice any color fringing if there’s any at all. Resolution and sharpness improves significantly. At f/5.6, the center resolution starts to peak and everything is beginning to look really good. The lens’ sweet-spot is around f/5.6 up to f/8. Diffraction is going to get noticeable at about f/13 and it’s definitely obvious by f/16.
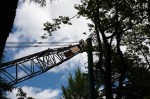
Breaking down the photos you can see that the lens is decent when shooting things that are further-away into the frame like the crane in the first set. It’s certainly not very good for objects about 20m and further. The same can be observed with the hut by the pond. It is a sharp picture but it certainly lacks that certain quality that makes you say “wow”. It’s odd tendency to produce color fringing can be observed in the set with the crane. Strangely, this isn’t coming out as much in the set with the leaf at the foreground. This gave me the idea that this lens was calculated to perform better at closer distances. If you check the set with the boy you’ll see that the lens is sharp right from its widest aperture.
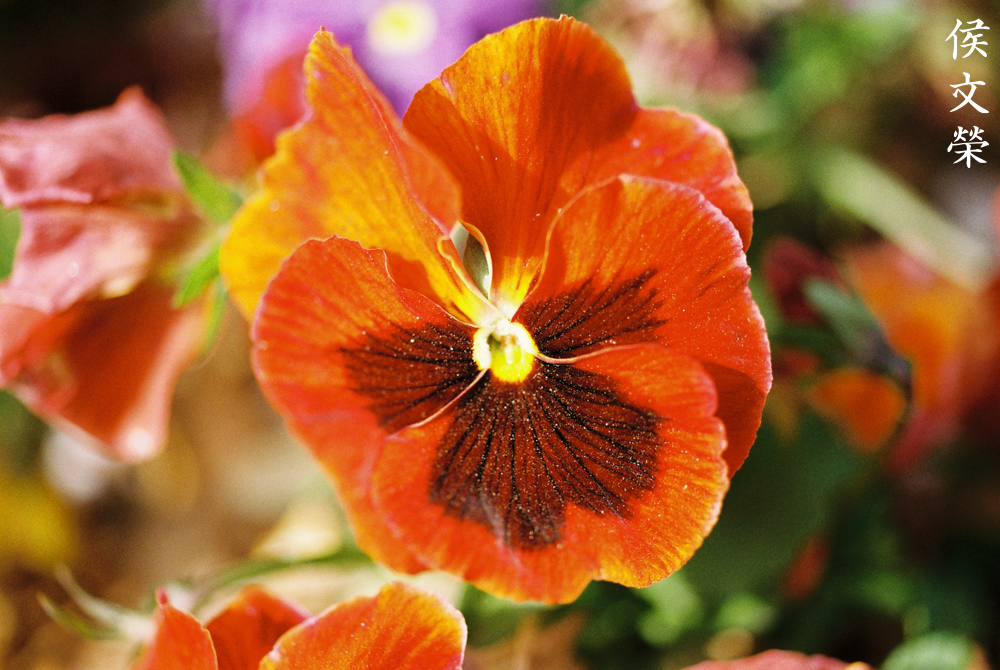
I took these with the iris stopped-down from about f/8 to f/16 unless I said it was shot with a wider aperture. I used a ring light, shooting it this close will be problematic for natural lighting, you’ll have to be centimeters away from your subjects in order to achieve 1:1 magnification.


(Click to enlarge)
These were shot at around f/11. It renders high-frequency details very well. It feels as if you can touch and feel the velvety petals of the flower.


(Click to enlarge)
Here are photos that I cropped really tight to almost 1:1. Unfortunately, that ladybug larva is the only insect I chanced upon that late morning. Because this lens needs to get really close to your subject at high magnification, it is not advisable to use it for shooting shy bugs. Subjects that will stay still for you like snails will be fine as long as you have a proper lighting setup.


(Click to enlarge)
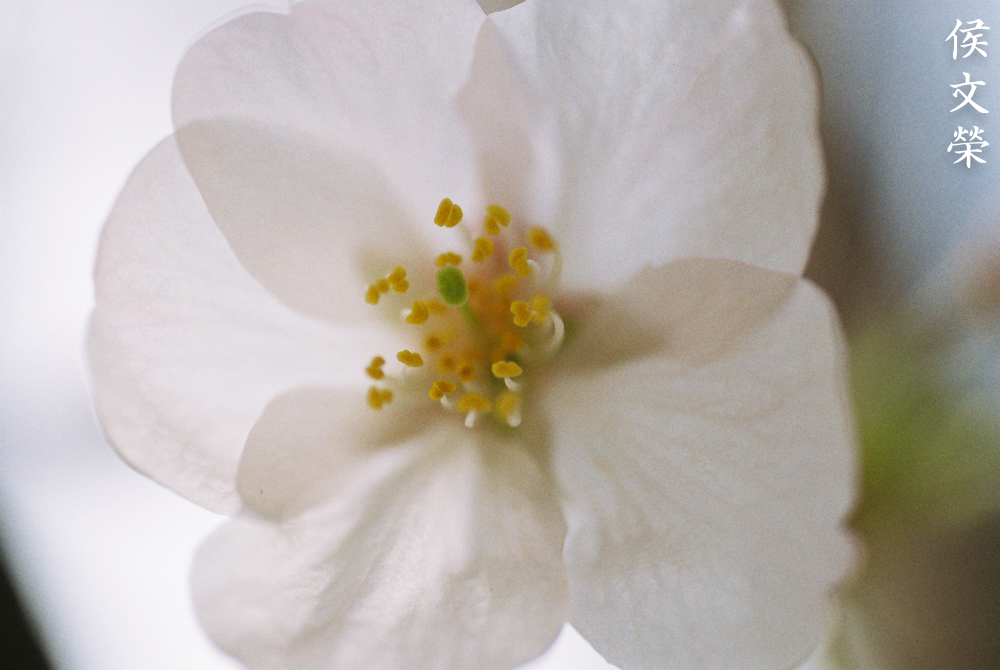
Typical of most macro lenses, this has nice bokeh when shot wide-open. You can say that it’s one of the requirements of a good macro lens. You’ll hardly see any traces of color fringing in these pictures and the overall rendering is delicate and natural.


(Click to enlarge)
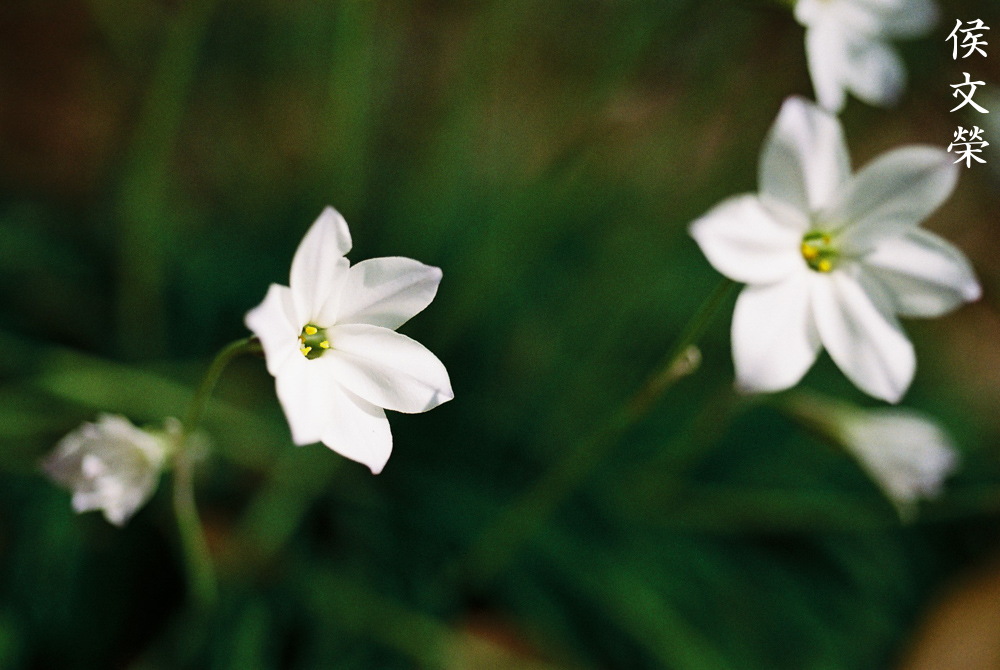
The pictures show how sharp this lens can be when you have good light. It’s sharp, the details look 3-dimensional. Many people usually use this lens for shooting stationary subjects, flat objects for reproduction and other subjects that will require a flat-field. The first lens in this lens was designed to shoot microfiche film for Japanese/Chinese characters, resolution and flatness-of-field are crucial. Chinese characters are more intricate than alphabets that’s why a lens with excellent resolution is essential for reproduction. This set of properties set the tone for the development of all subsequent Micro-Nikkors in this line and you can be sure that any future lens will also be excellent.
How about some photos of insects? I shot these with a Nikon Df and a Nikon SB700 because I wanted to shoot at f/16. The bugs are not moving fast so I didn’t have to exert much effort this time around.

I cropped this to make it the frame match my subjects. It’s pointless to autofocus on the ants but it’s possible if you wanted to. You can even use an extension tube setup with built-in gears so you can autofocus with this lens. It’s not recommended but it’s another option that you have. They’re not cheap, the one made by Kenko is considered to be the best and it will set you back quite a bit.

The resolving power of this lens is immense even at f/16. It’s possible for you to see the small scales of the wings and the lenses of the compound eyes where the highlight hits.

It’s easier to get flat-looking subjects in focus, all you need to do is align it with your plane-of-focus. At this distance and aperture you can easily get the whole insect looking sharp and detailed.

The background is a mesh screen but it’s so blurry that you cannot even identify what that is. This is one of the joys of shooting at closer distances, the separation that you get is a lot more compared to shooting at more moderate distances.

The quality of the bokeh isn’t so bad, in fact, it’s kind of mandatory for macro lenses to have smooth out-of-focus details. It’s not a rule but that’s assumed to be the case.

(Click to enlarge)
These are very tight crops just a bit larger than 1:1 to show you how good it is. In my years of taking insect photos I judge a macro lens’ sharpness by how good it is able to reproduce the fine details of compound eyes and other similar things. It’s safe to say that this lens passed the test effortlessly.


(Click to enlarge)
Here’s the rest of my insect photos. Of course, focusing manually is preferred for really high magnification but you can’t deny how handy it is when just shooting from about 2 feet away from your subjects. It’s a great lens for shooting bugs despite the unpleasant experience of having the use the narrow focusing-ring.
Let’s now see some photos that were taken with film. This was designed for use with film so it’s only fair that we judge this using its intended medium. I love shooting film, it has a unique look that is impossible to replicate with a digital camera thanks to film grain. It can either mask or amplify its flaws.

The bokeh quality is quite good, the background looks smooth.
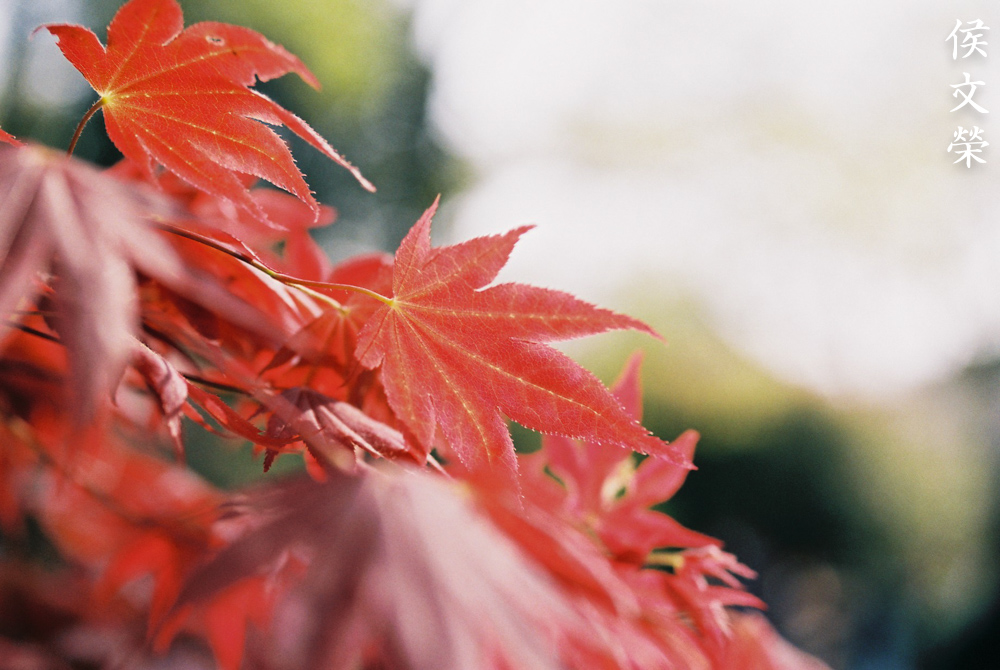
Sharpness is amazing, the resolution is enough to resolve small details on a leaf. I can see a bit of spherical aberration but it’s not so obvious.

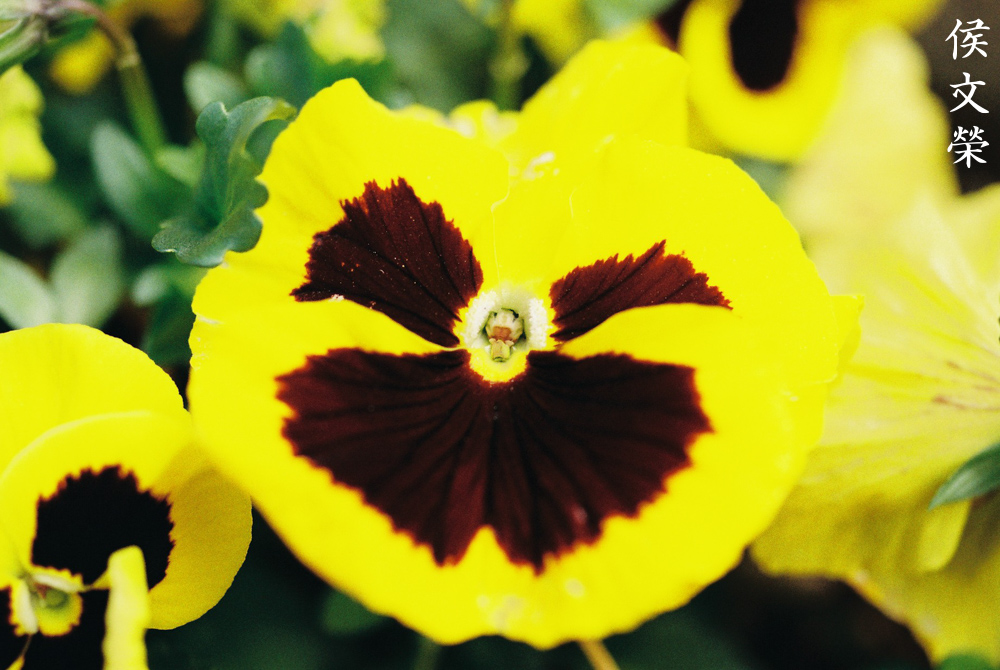
The background looks like a painting, it’s turned into a wash of colors.

The field curvature is rather flat, which is excellent for a macro lens.
The resolving power of this lens is very high even wide-open as apparent in this photo.
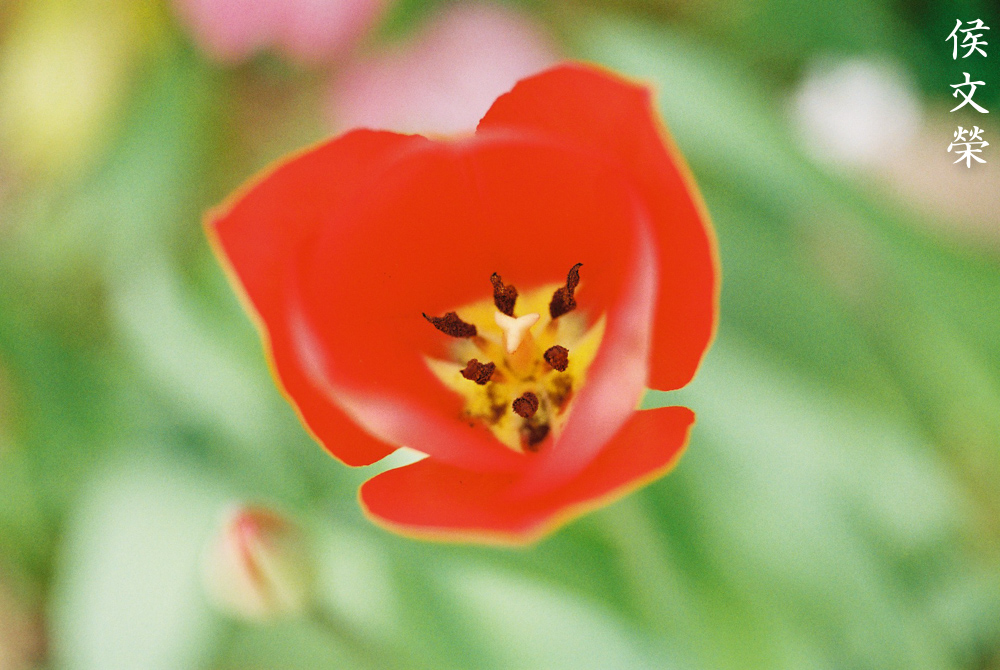
Not sure if this is the same species as the one before this but this should be a good example of how sharp this lens is wide-open. The background looks soft, almost like a painting. Everything blends smoothly without any traces of roughness. This is an exquisite photo if I may say so.
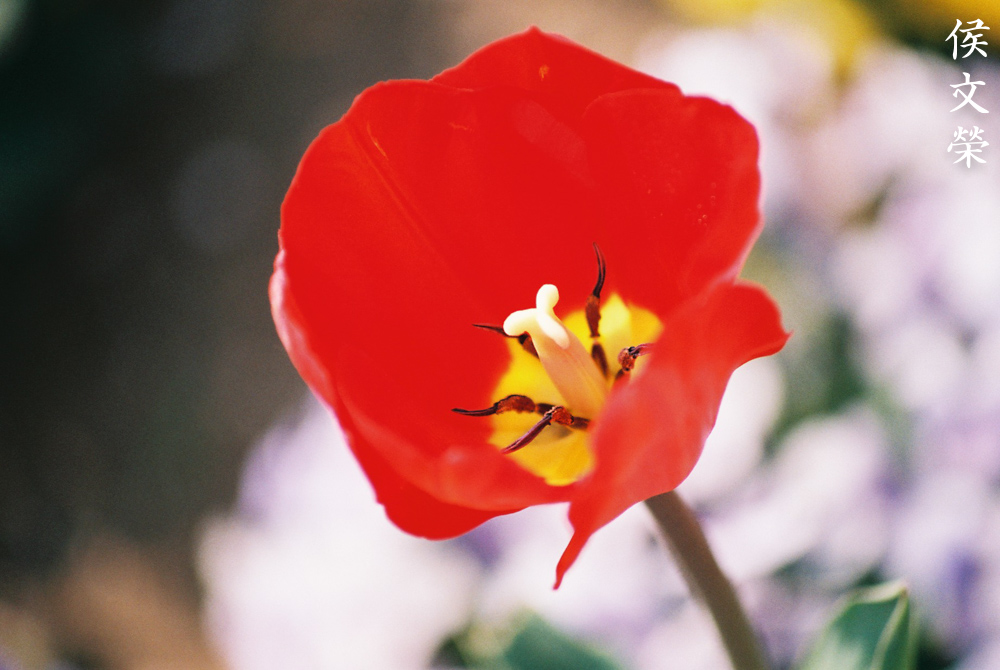
Stopping the iris down is beneficial for macro photography because you are going to want more things in-focus specially at closer distances. I think this was shot at f/5.6, I could afford to do that because it was a sunny day.

The background looks nice but the character of the bokeh looks busy. It was taken with the iris stopped-down to smaller values like f/5.6 or maybe even f/8 and that resulted in this. Twigs and foliage can be difficult to render and stopping the iris down to smaller values won’t help at all. If this were taken at a bigger aperture I could imagine that the background would be smooth-as-silk. It looks interesting but it sure is distracting specially if you print this large, you may trigger someone’s migraine or vertigo.

When you have a challenging background, consider using wider apertures. This should blow-away the background so it won’t look messy. This is what I do when I have twigs and foliage or other challenging details at the back.

Stalks are also challenging to render since they’re long and they will render like a smeary-looking mess if you used a lens that has lesser bokeh quality. I would avoid stopping the iris down beyond f/4 if I have many linear-looking details at the background.
Exquisite, just look at the details of the pollen. This photo demonstrates how flat its field curvature is. I know that this isn’t the perfect subject to show it but at least this shows you how it looks like in actual use. A lens with deeper field curvature will render the immediate surroundings of the center blurry while one with flatter field curvature will render it just-as-sharp because its plane-of-focus is flatter. Did I make any sense? The best subjects for this are coins and stamps, people who collect those value lenses that have a shallow field curvature since they want to have as much things in-focus.


(Click to enlarge)
Here are more pictures for your enjoyment. This is an amazing optic when used with film. It certainly lives-up to the Micro-Nikkor brand. This is what I expected from this and this is what I got from it. This feels like an autofocus version of the beloved Micro-Nikkor 55mm f/2.8 Ai-S. The ability shoot at 1:1 magnification natively is its best feature, making it a really convenient lens. Its bright f/2.8 maximum aperture is also handy when you’re forced to take photos in less-than-ideal lighting situations. If you plan to use it for shooting at really-close distances then consider investing in a ring-flash or anything that will help illuminate your subjects at closer distances.
Now that we have seen what this lens can do and what it can’t, I’m sure that people are asking whether this lens is a good purchase or not. The simple or direct answer is no. It is a great lens optically but mechanically it is a design that’s best left in the 1980s. There’s a better alternative to this in the form of the AF-Micro-Nikkor 60mm f/2.8D which is a better lens in almost every way. I said “almost” because some people claim that this is slightly sharper than the AF Micro-Nikkor 60mm f/2.8D up-close. I have not tested this myself and maybe I will make a test in the future. Just leave this lens for the collectors, I am sure that you will find better use for your money.
Before We Begin:
If this is your first attempt at repairing a lens then I suggest that you check my previous posts regarding screws & drivers, grease and other things. Also read what I wrote about the tools that you’ll need to fix your Nikkors.
I suggest that you read these primers before you begin (for beginners):
- Essential tools
- Best practices 1
- Best practices 2
- Best practices 3
- Ai conversion
- Working with Helicoids
Reading these primers should lessen the chance of ruining your lens if you are a novice. Before opening up any lens, always look for other people who have done so in Youtube or the internet. Information is scarce, vague and scattered (that is why I started this) but you can still find some information if you search carefully.
I highly recommend that you read my working with helicoids post because this is very important and getting it wrong can ruin your day. If I can force you to read this, I would. It is that important!
For more advanced topics, you can read my fungus removal post as a start. This post has a lot of useful information and it will be beneficial for you to read this.
Disassembly (Initial):
This part shows how to remove the lens elements. There are a few ways to go about doing it and I will show you 2 ways, you’ll see both methods here in this section. This lens was riddled with fresh fungi when I got it so I had to get to each element to make sure I did a good job cleaning each element to prevent further damage. I will strongly advise that you do not attempt to repair this if you don’t have the correct tools. If you are a beginner, it’s best to just leave this to the professionals, you can easily damage this if you are careless. The electronics are delicate, it can be bricked by static electricity. If you think that saving a few dollars is a good idea, do think about the cost of losing this or the investment needed when buying tools and lubricants. Just make sure that you give it to a competent repairer or else forget about it. If your repairman isn’t sure how to repair it then just show him this blog and tell him to follow this site.
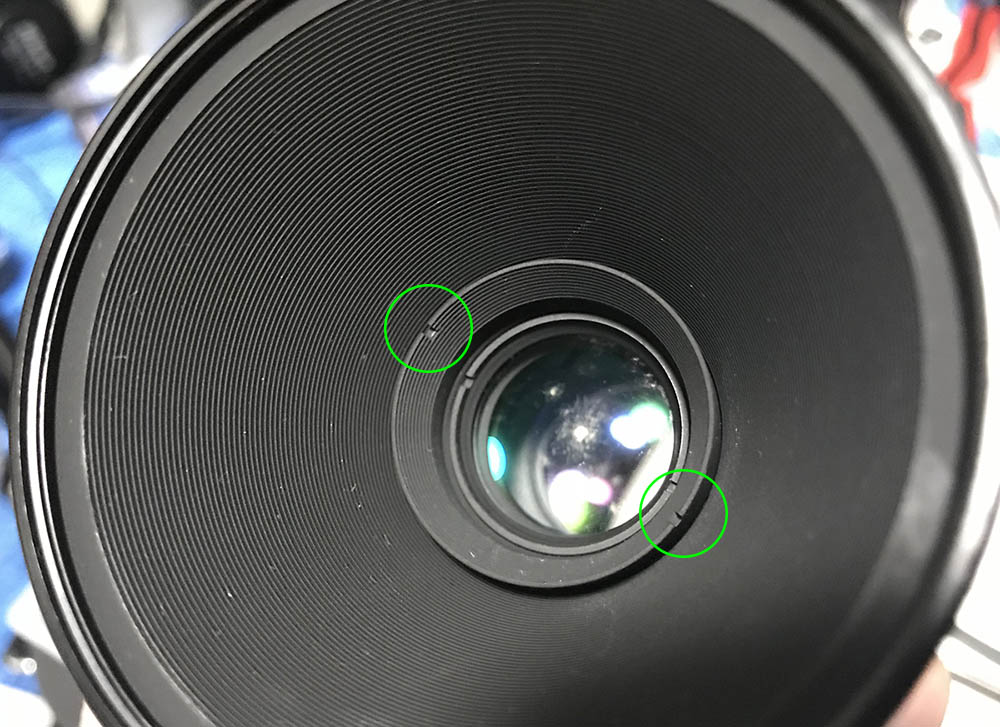
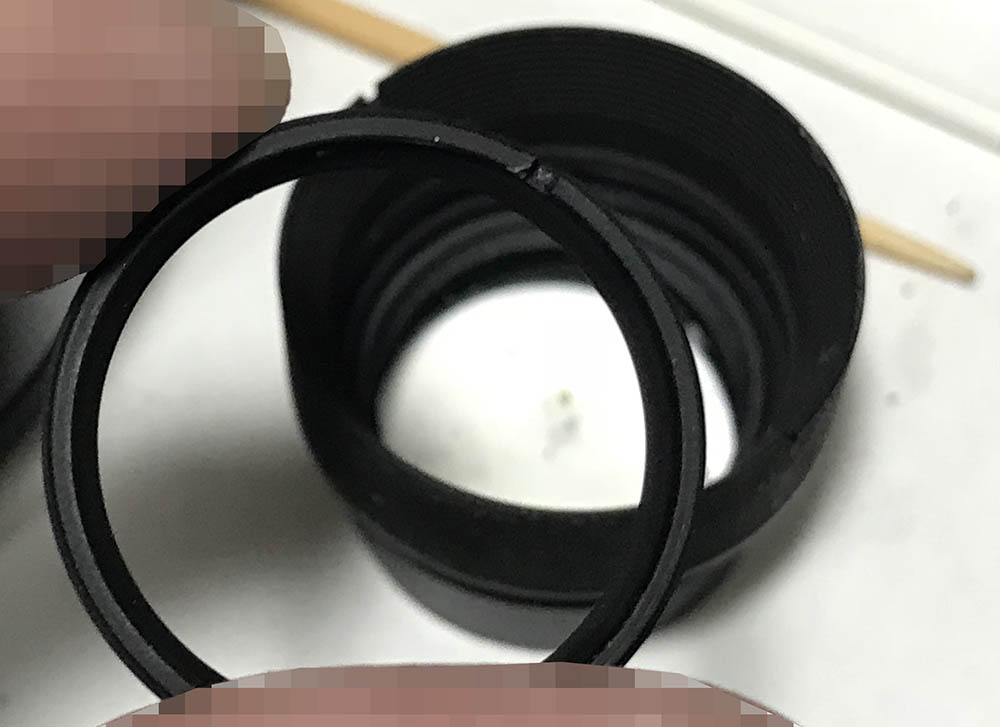
You can remove the front elements cell by using a spanner. Now, what I am showing here is the easiest way but there is an even better and safer way to do this but you’ll need to remove the front barrel. I will show you how later, the way I am showing you here is the method wherein you remove the least number of parts as possible to access all of the elements. Remember what I just said, it will make more sense in the next steps.

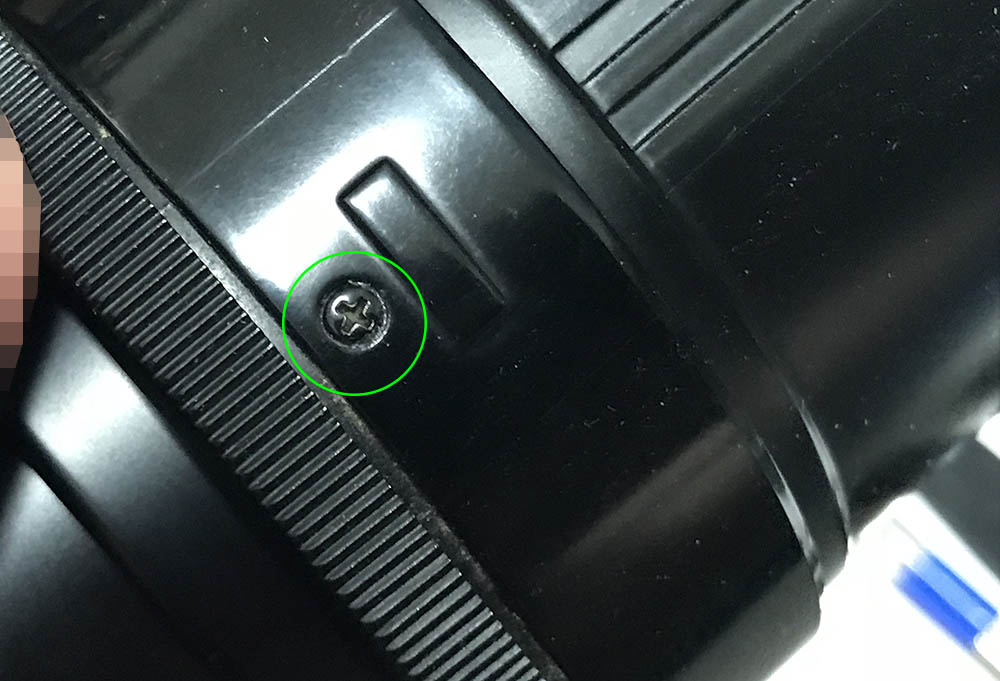
OK, if you want to do it in a safer way, you can extend the lens until you see these screws. Remove these and you can remove the front barrel.

The front barrel can now be easily removed just like this.
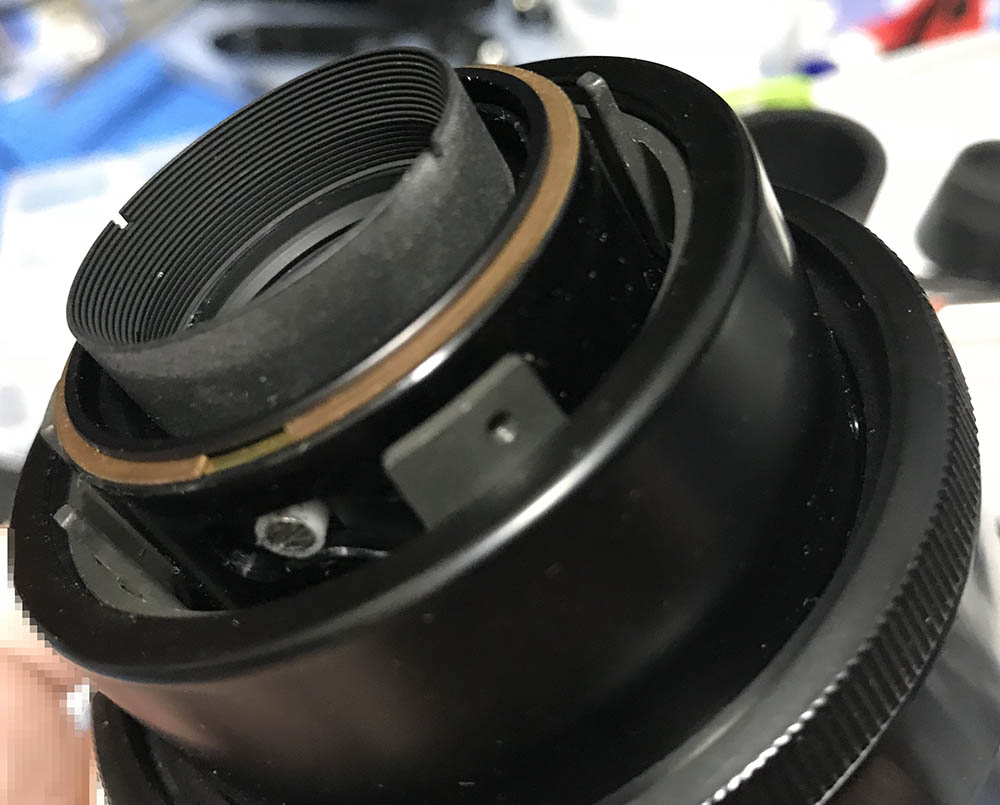
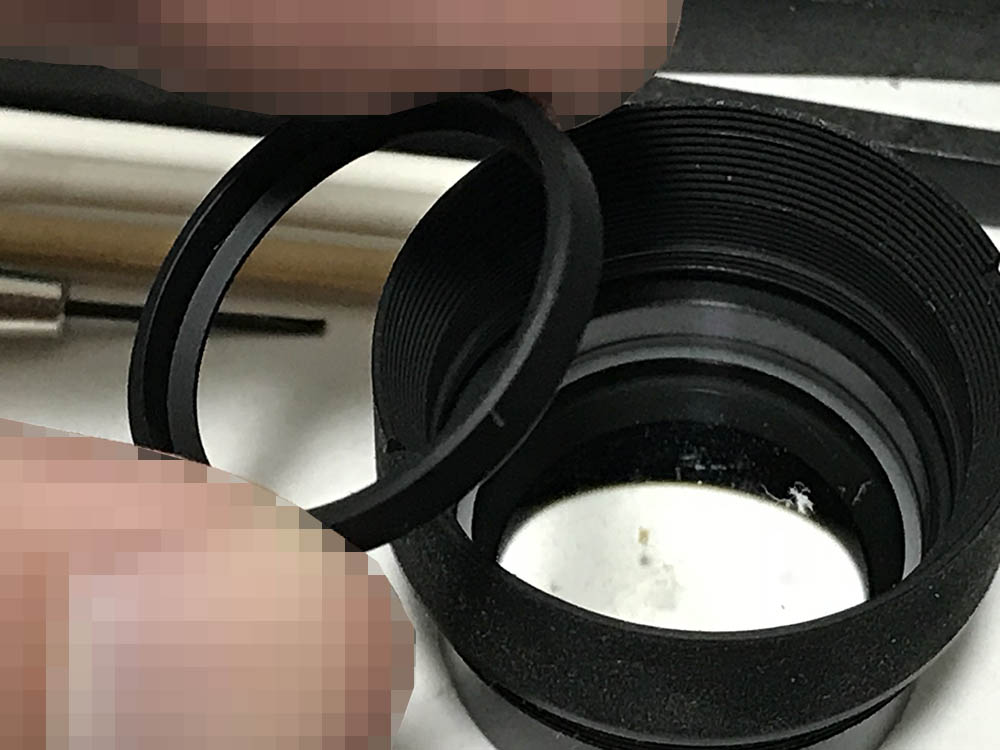
The front elements assembly is easier to access now that the front barrel is gone. At least you don’t risk scratching anything if you do it this way, you’ll get to clean whatever is underneath the front barrel, too. It’s all up to you if you wish to do it this way or not.
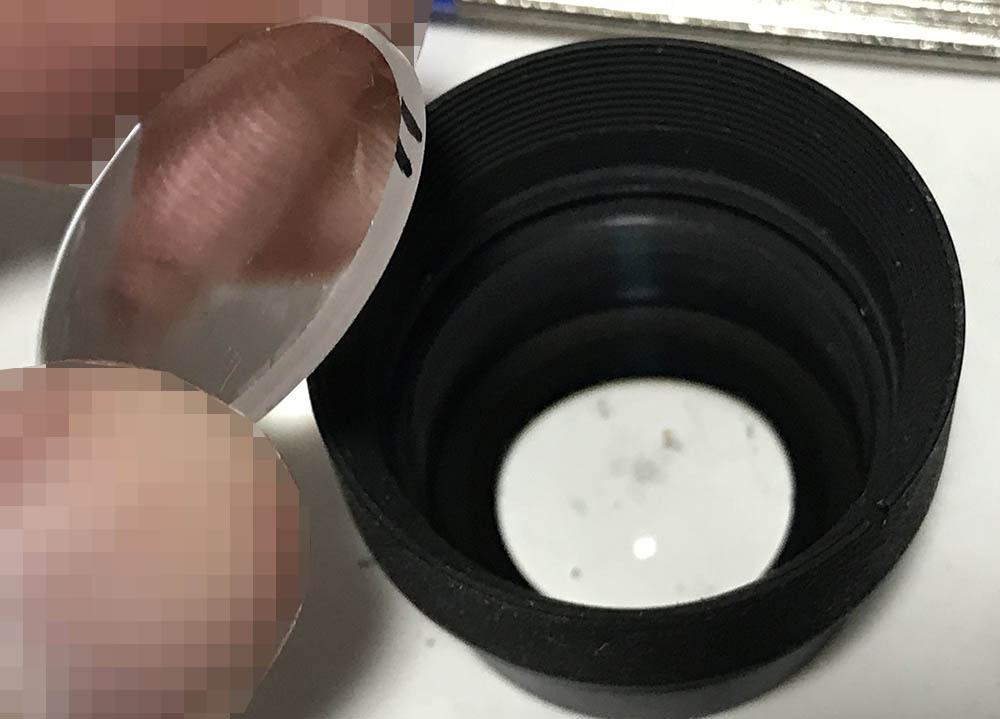
The front elements cell can be safely extracted with your fingers. Take note that there is a brass shim underneath it. Be sure not to lose or damage this. We’re fine with the front part of the lens for now so let’s move to the rear.
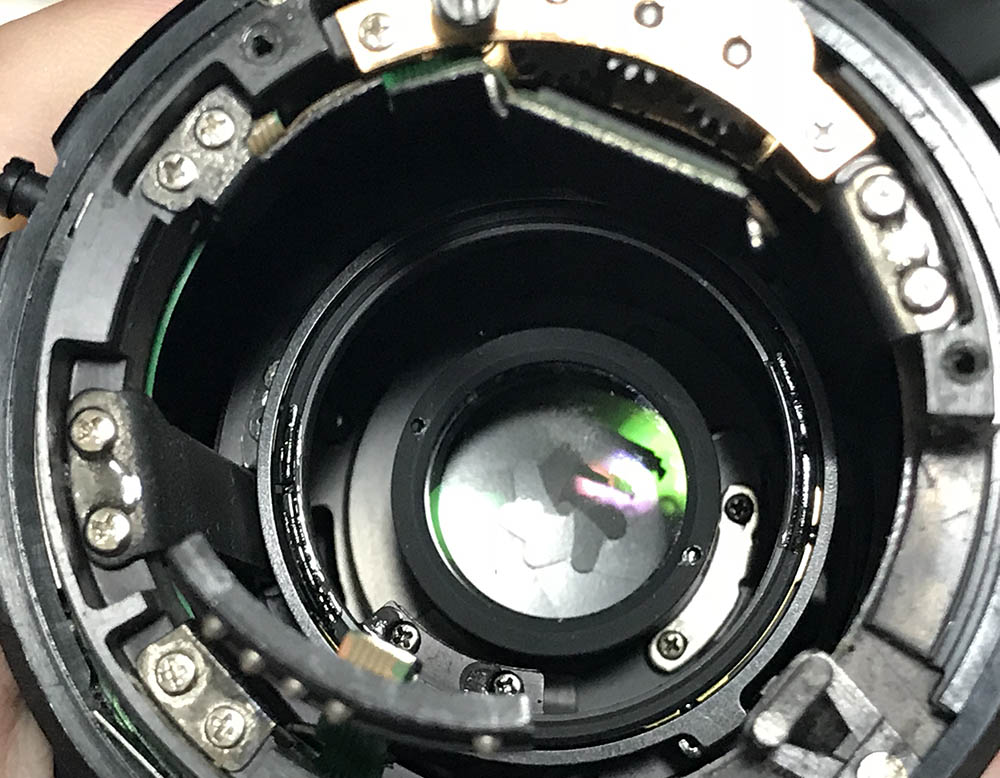
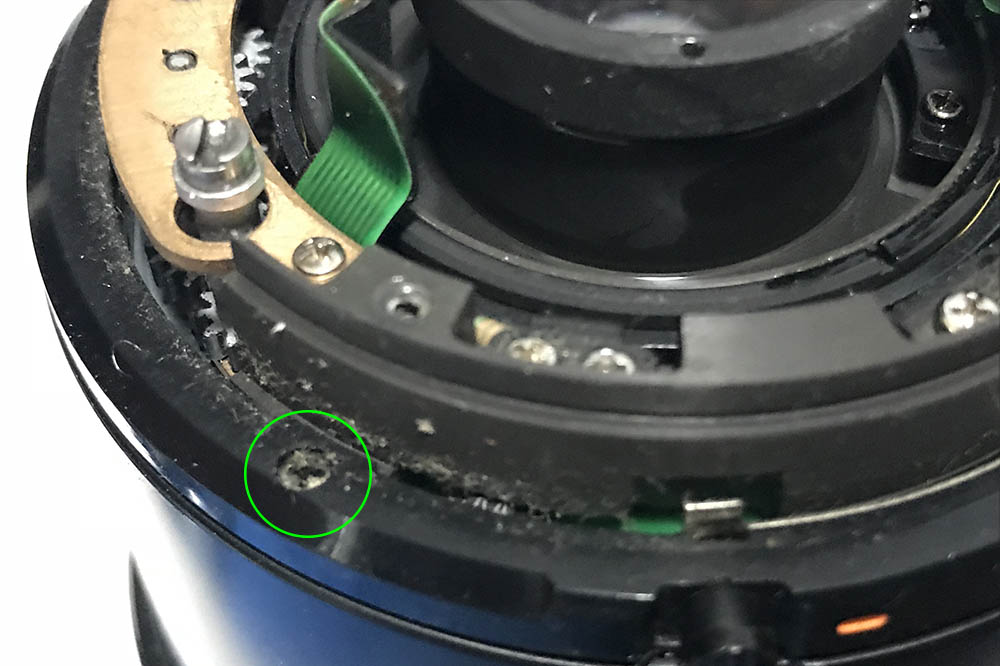
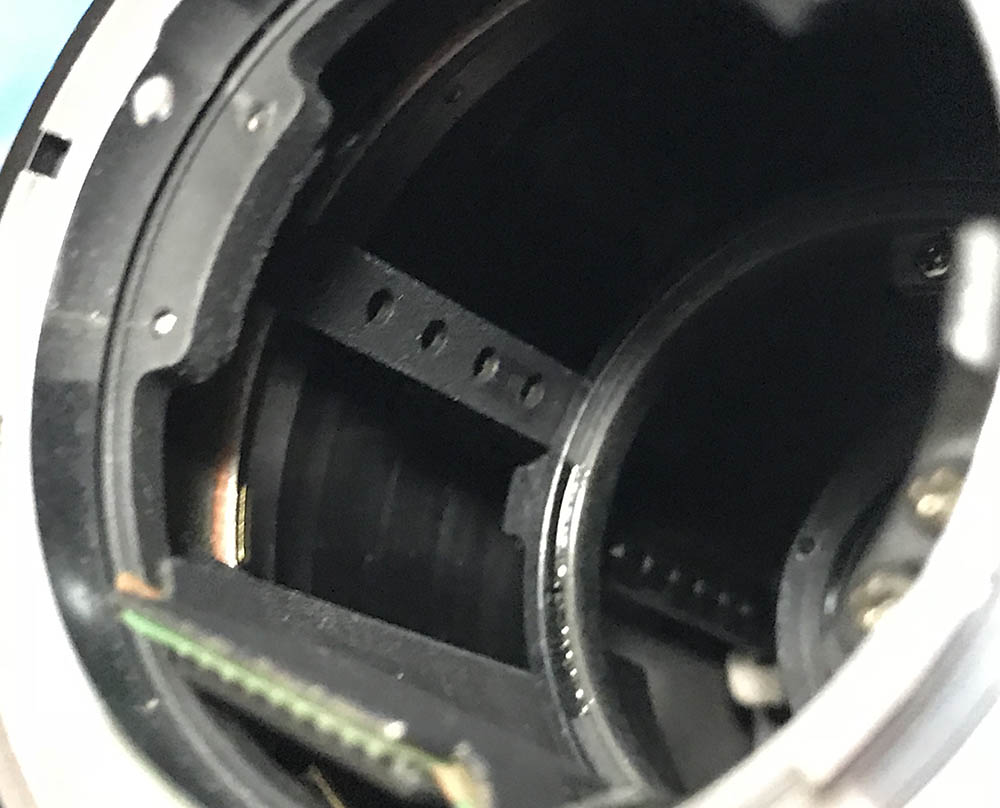
The rear element can be removed without removing too many parts, use a lens spanner to remove this collar if you have enough dexterity. If you want to remove this in a safer manner you’ll need to remove the baffle.

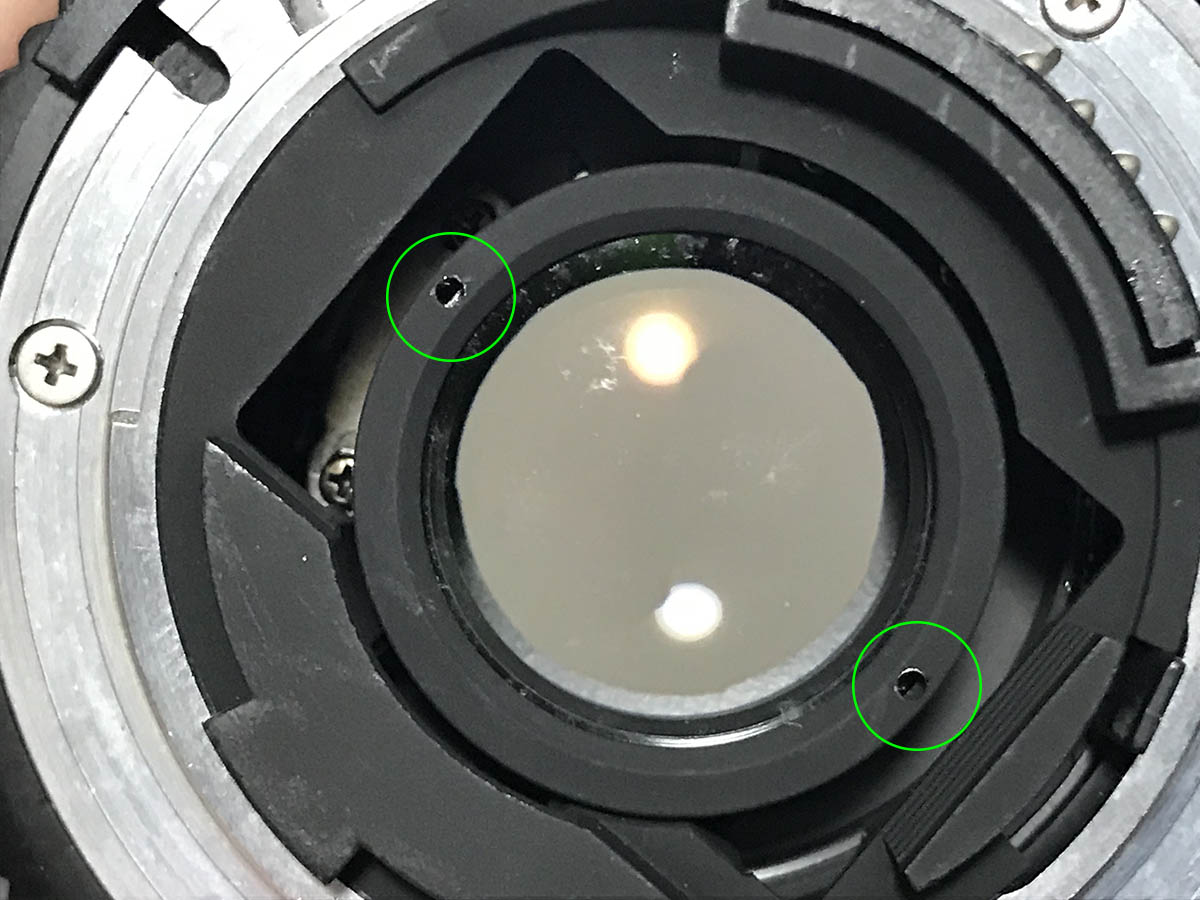
It can be removed by extracting all of the screws at the neck of the bayonet. The larger screws secure the baffle and the smaller ones secure the contact block. You must also free the contact block in order for you to safely remove the baffle or it will snag as you pull it away.
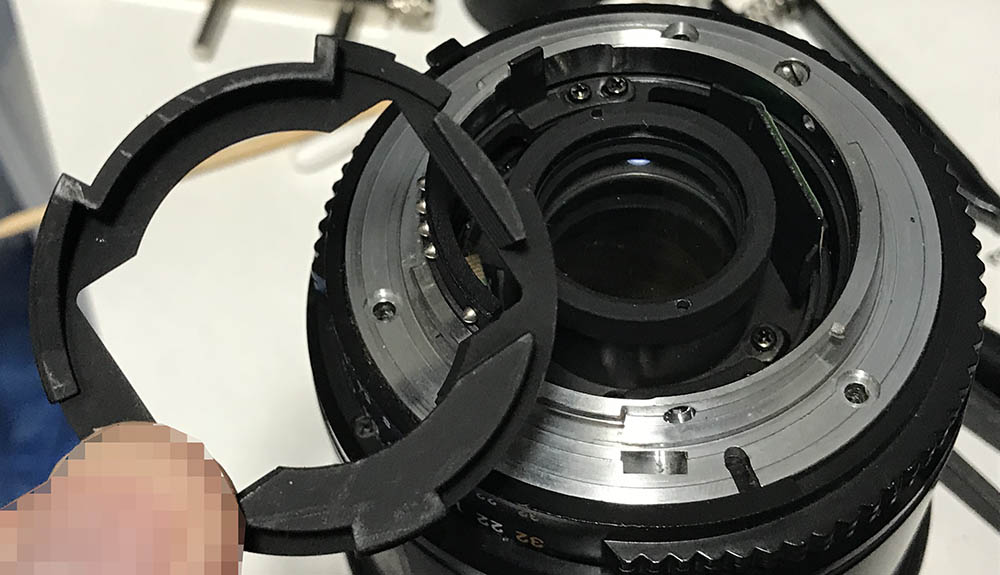
This is how the baffle come off. Be careful not to damage the electronics or the lens won’t be able to communicate with your camera properly and you will end up with a manual focus Micro-Nikkor.
It’s your choice if you wish to remove the bayonet in order to give you more space to access the rear element. I would advise you to do so but this is not necessary if you are gifted with steady hands and if you have the right tools for the job.
Removing these screws can be challenging for beginners, make sure to read my article on how to remove bayonet screws so you won’t get stuck because you stripped the heads of your screws.
Make sure to only remove the cross-point screws and never use a screw to drill the head of the AF motor coupling screw. It’s silly but some do mistake that for a screw.

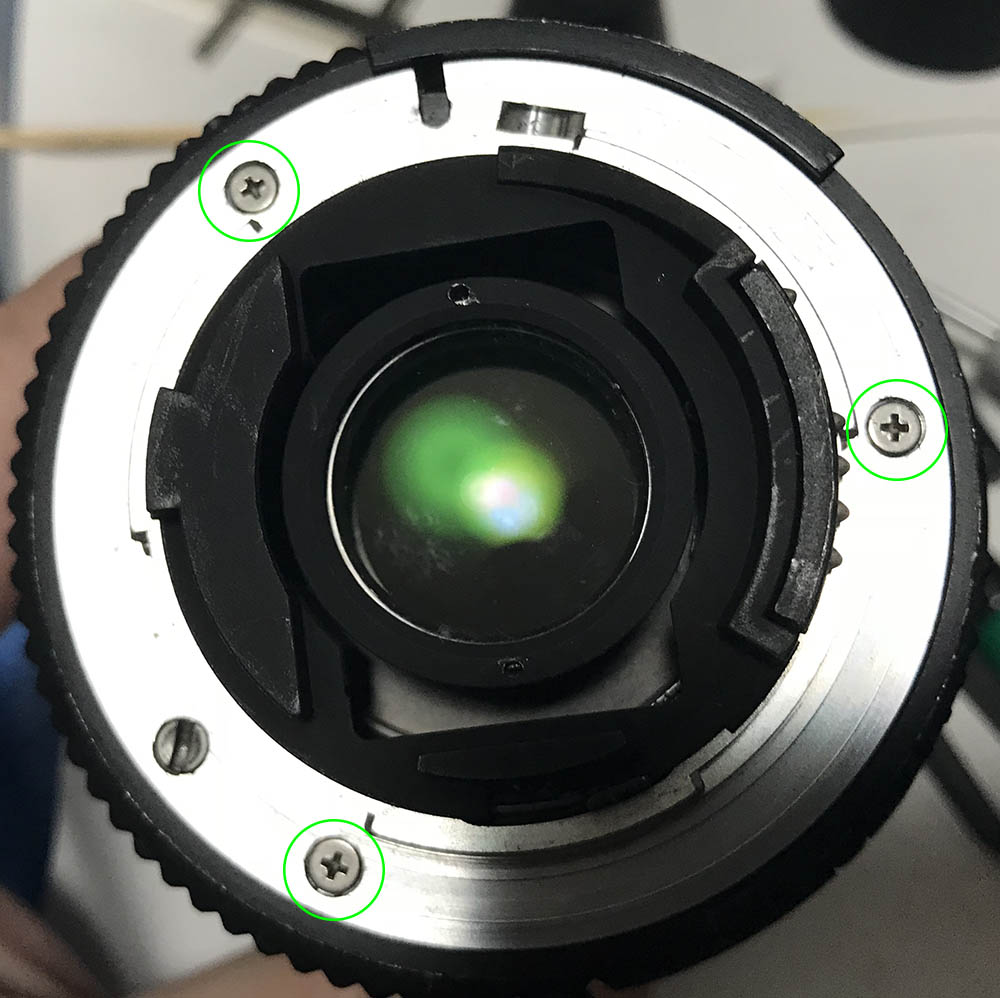
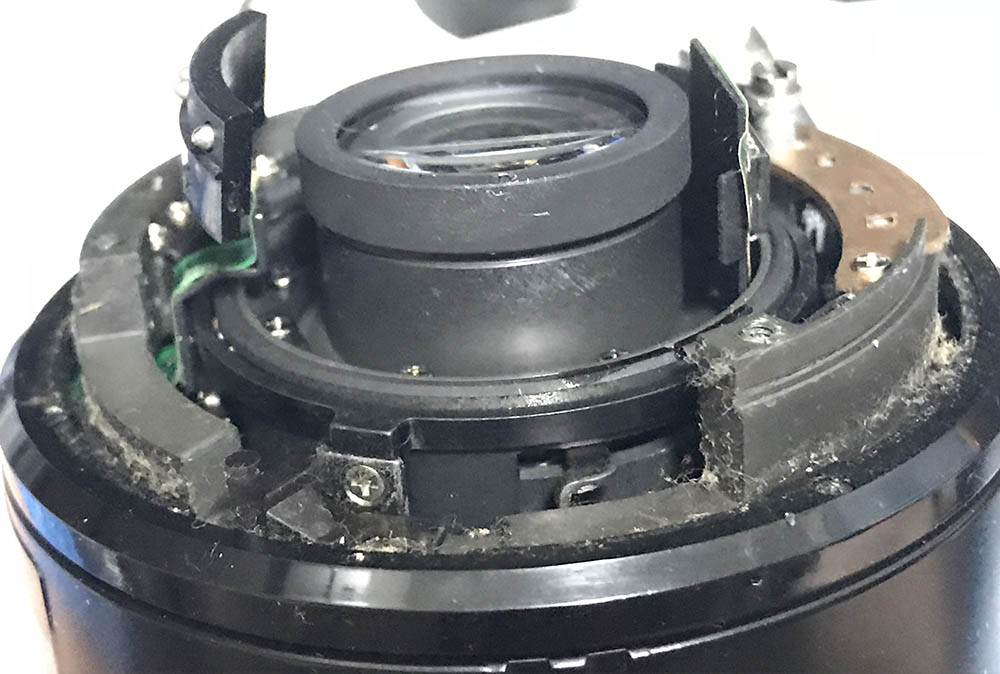
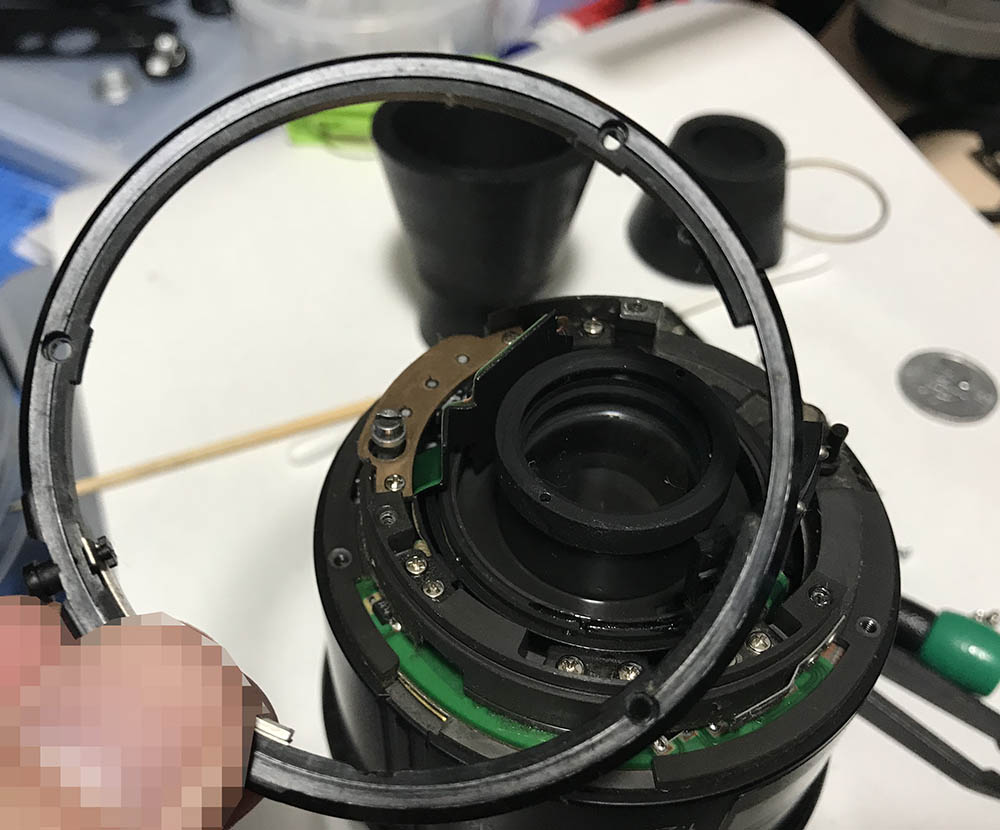
The bayonet can be removed after its screws are gone. Do not damage that long stop-down lever or scratch something with it. Note I extended the lens so that the glass sits deep-within the lens barrel. I did this to prevent it from getting scratched as I work on the rear of the lens.
The aperture ring can now be removed. It can catch the iris regulator so do it carefully so you won’t damage anything.
Study how all the mechanisms inside work. This is a great chance to learn something new. I also took plenty of pictures and notes just in case. See that IC near the rear? Don’t touch it with your hands or you can damage it with static electricity and brick your lens.
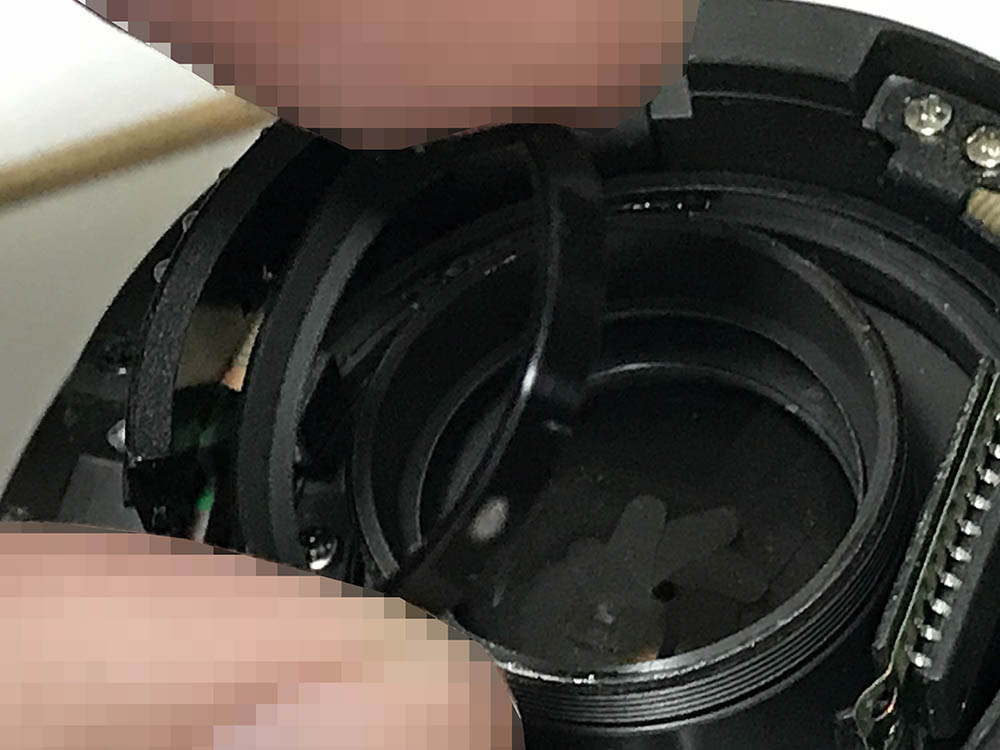
The rear elements can now be safely accessed now that all of what’s in the way are gone. Retracting the lens barrel will pull the rear elements closer to you for easier reach. As mentioned several times earlier, it is not necessary for you to disassemble the lens to this state in order to get to this. I had to do this since I wanted to clean the lens thoroughly so I did it anyway.

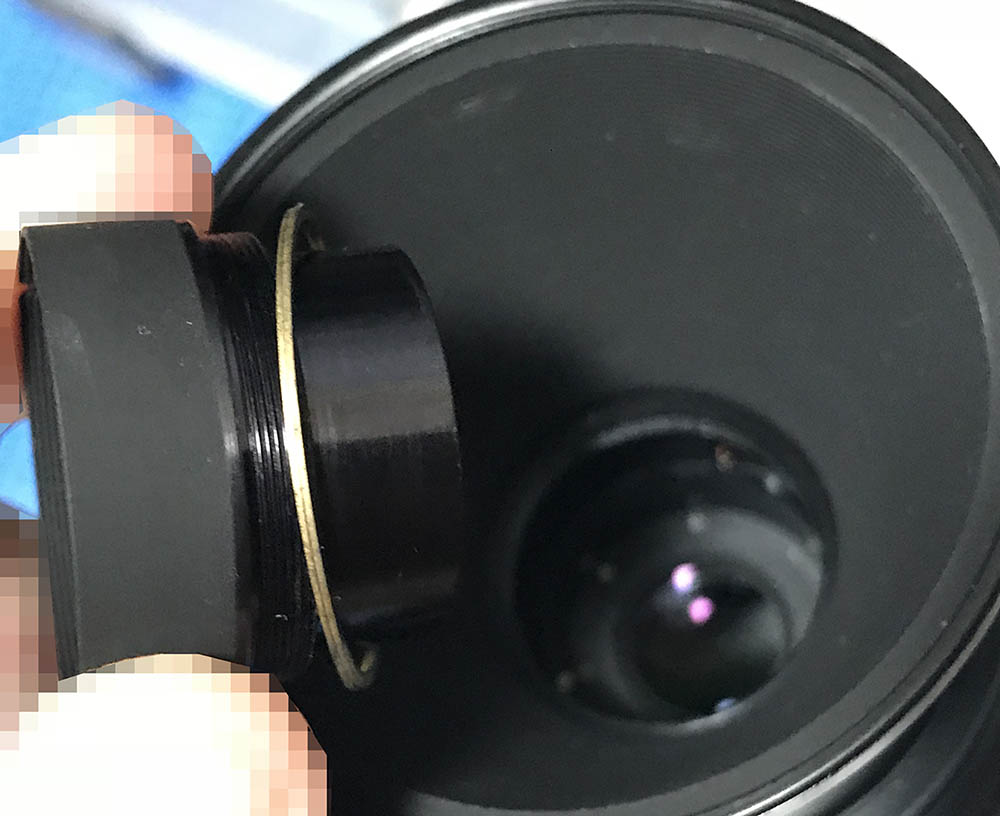
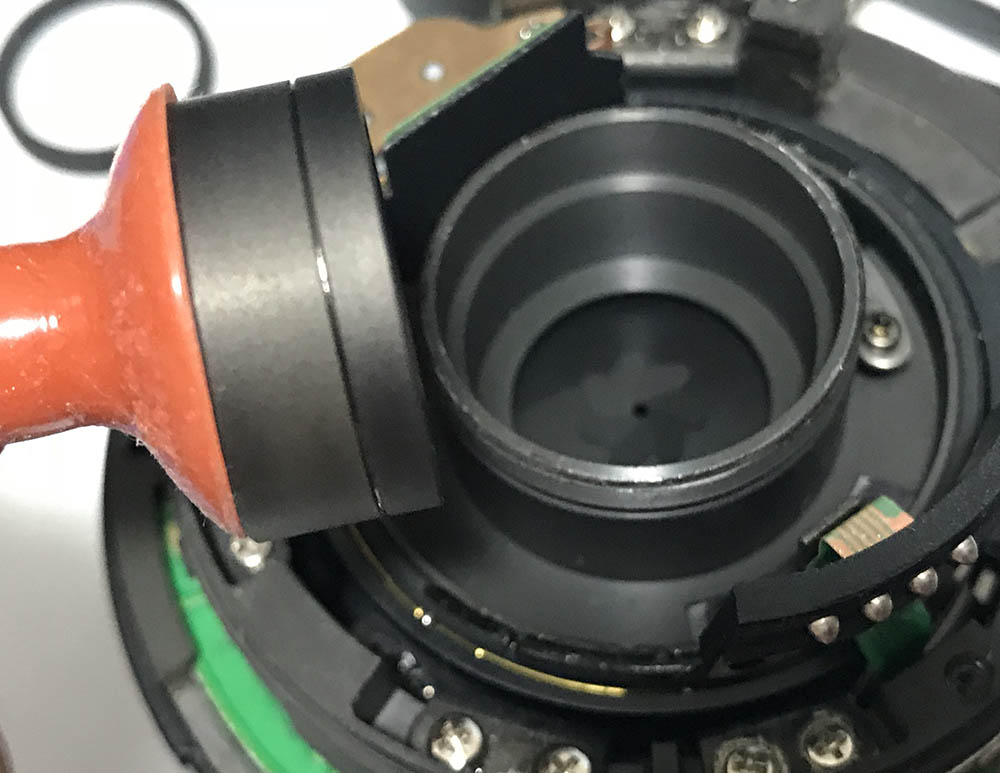
The rear element is secured by this retention collar. I removed it using my fingers but the lacquer seal had to be dissolved with alcohol first. You can use a lens spanner if you wish, just be careful not to scratch the element.

The rear element can be safely extracted with a lens sucker.
There’s a spacer underneath the rear element. Scratch a small mark at the outer wall to help you know which side should be facing forward. Putting this back the wrong way can damage the lens because the curvature of the spacer matches that of the elements adjacent to it. Store this in a safe place so you won’t warp it accidentally.
Here’s the doublet underneath the spacer. It’s a cemented unit consisting of 2 elements. This should never be cleaned with strong solvents because that may damage the cement used to bind the elements. It’s simple to remember which way it should be facing, the element facing forward is shorter. Slowly extract it with a lens sucker, make sure that you don’t accidentally drop this as the sucker can sometimes fail.
The front element’s retainer can be removed with a lens spanner. It can be tough to remove since it was sealed with paint, just place a drop of naphtha to soften the seal and attempt doing this again later.

The front element can now be removed once its retainer is gone. As usual, it is important that you make a small mark at the wall of the element to help remind you which surface should be facing the front, I use a pen marker to do this as it’s safer.
There’s a spacer underneath the front element. Don’t forget to make a mark at the outer wall to help you orient this later during reassembly. The fungus is thriving. They won’t last long because I am going to douse them in strong chemicals. Read my article on how I remove fungi from lenses to see how I do it. I use strong chemicals and it may damage your lens’ coatings if you’re not careful.
The 2nd element can now be safely removed. Note that I made 2 small lines, these will help me later determine its orientation and its order. I would like to make the marks smaller, these are too big.

The 3rd element can now be easily extracted. As usual, do not forget to take notes.

Here are all of the elements. They look dirty here but thankfully they were cleaned and all of the fungus were easily removed. The damage wasn’t bad but it did leave a negligible mark on one of the elements. The black ink used on the walls of the elements are soluble in water and alcohol, be careful not to accidentally remove it.
This is how it looks like after cleaning, no more fungus! You can hardly tell that this was ever infested unless you’re experienced in appraising lenses.
This section alone spanned more than half of the article. For most, this is all that they need to see and know about. If you want to see more, I will highly recommend that you read the AF-Micro-Nikkor 60mm f/2.8D repair article. Both share common traits but they’re not at all similar, they are different in terms of engineering and design but that is not a reason for you not to look at it because you may still pick up some tips there.
Disassembly (Main Barrel):
This part is probably best treated as an appendix. What you see here is not necessary but I had to clean this as much as possible. For those who do not need to do this, it is still a great idea to read this just so that you will know what’s going on. Most of the parts here are made of plastic so they flex and there’s a big chance of cracking them if you’re not careful. The majority of the parts are easy to remove but you will still have to take plenty of notes just in case. The AF transmission can be taken apart and cleaned, take care to only use a very thin oil in small amounts on the pivots of the gears. The teeth can be lubricated with a special grease that’s thin. If you don’t have it then you can use the thinnest grease available to you. This type of grease is usually too-thin for use on manual focus lenses and this is only used by lens manufacturers for things like this.
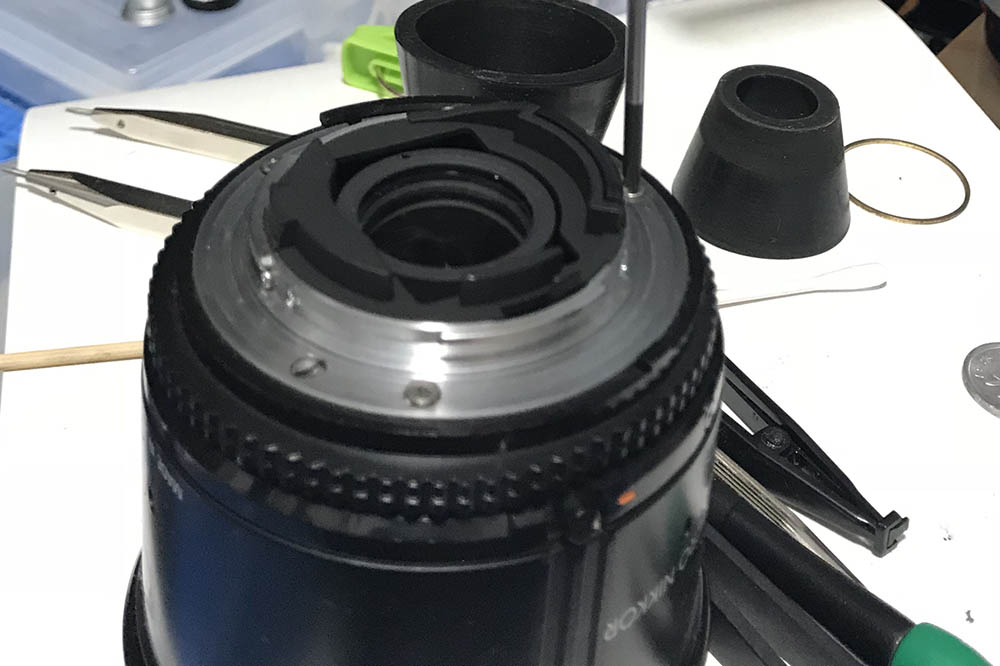
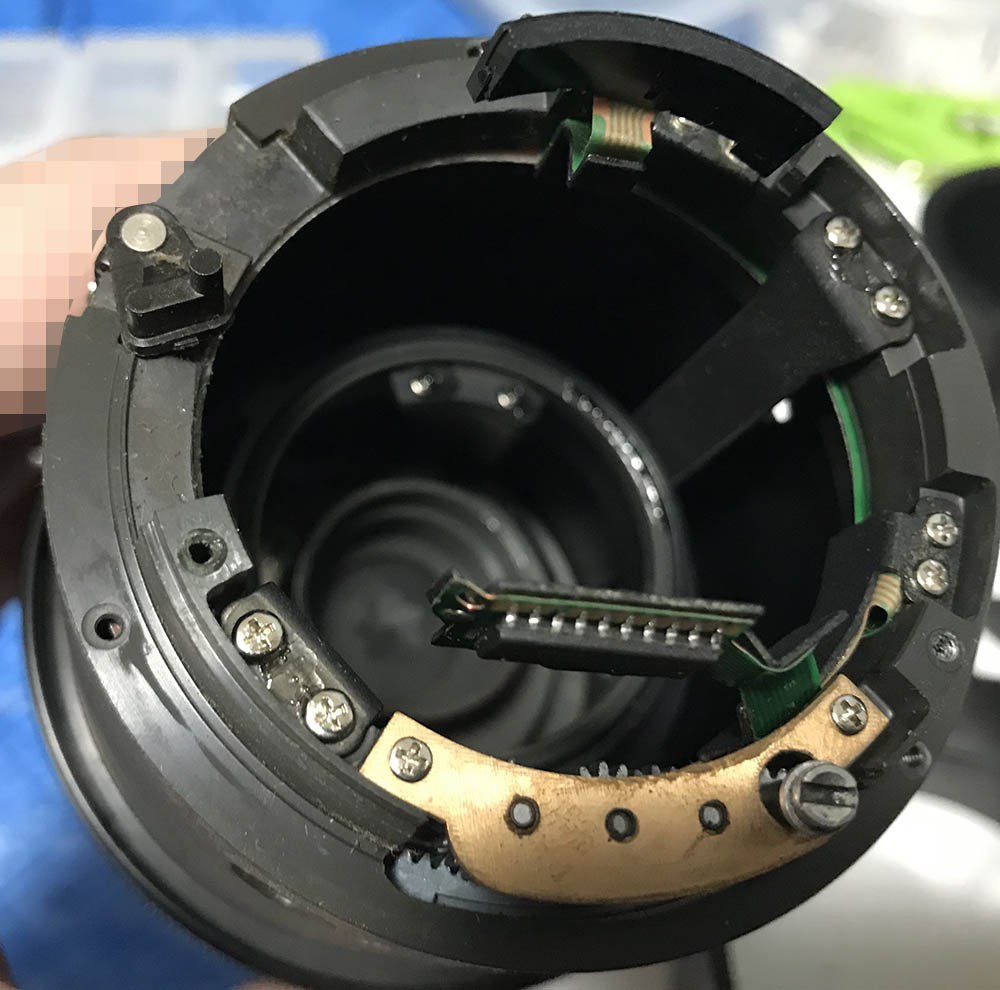
Removing these screws will allow you to remove the plastic ring.
The plastic ring comes off just like this. It holds the spring used for locking the iris to its minimum aperture. That small nipple you see attached to the spring is fragile, it can be snapped easily so be careful when handling it.

Remove these screws so you can remove the outer shell.

You can remove the acrylic window by using your fingernails to pry at one of its sides. It is brittle, don’t force it. Removing the window will enable you to access some screws in the distance scale underneath it. You can adjust it when the screws are loose.

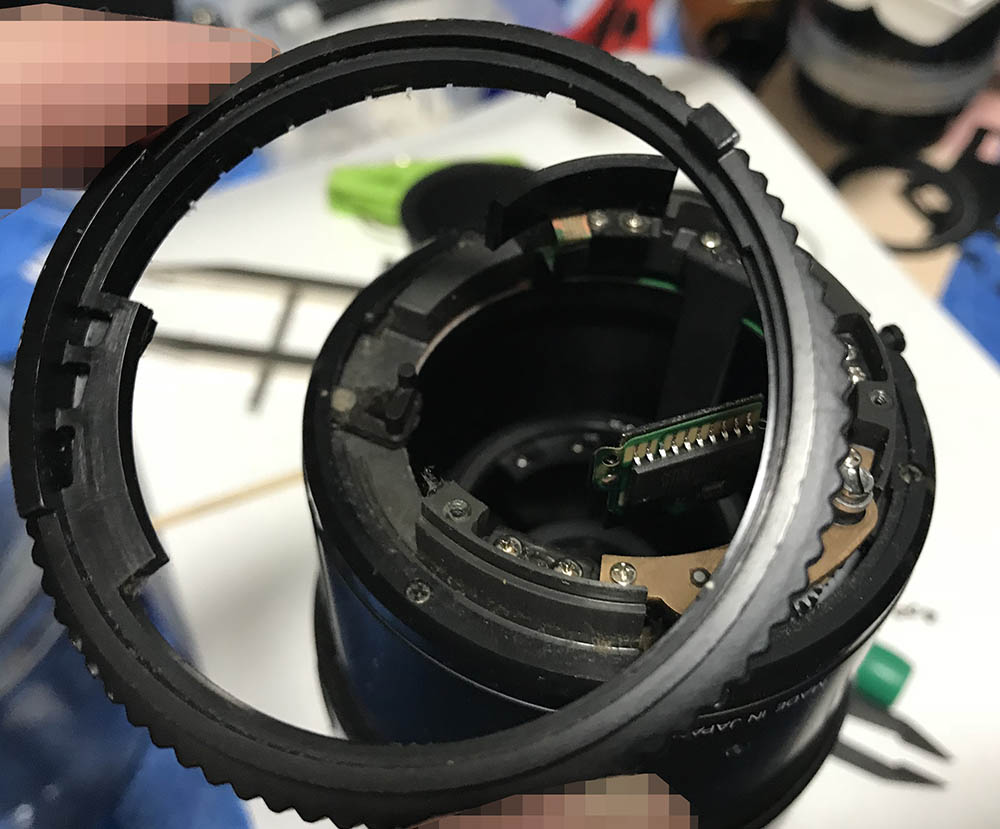
It can be tricky to remove the shell, you’ll have to rotate it to find clearance so you can safely pull it away. You really don’t have to disassemble the lens this far if you have a clean sample.
These screws secure the collar for the focusing ring’s resistance regulator. Do not bother removing these because it’s not easy to disassemble the lens any further. I removed mine just because I had to but putting some of the parts back took more time than expected.
See how delicate everything is at this point? I cleaned the AF transmission so it will move will less effort. It can get dirty after years of neglect. Those long helicoid keys were cleaned with a Q-tip saturated with naphtha, these were lubricated a bit with fresh grease. It is also worth noting that you can also clean the iris at this stage with a Q-tip but carefully go at it so you won’t damage the blades. Removing the iris mechanism is pointless, that will take plenty of time to put that back so it is not worth it unless yours needed to be serviced. Clean as many things as you can while you still have the chance.
Clean the parts thoroughly using lens tissue moistened with alcohol. Clean the inner surface as well, germs tend to reside where the sun doesn’t shine. It’s worth mentioning that oil will make the dirt form a layer of hardened gunk that you can only remove by mechanical means (with a toothpick, etc.) so make sure you use a brush to clean whatever is there. A chopstick cut to the shape of a wedge wrapped with tissue is a great way to clean away any dirt deposits, just saturate it with alcohol and watch all the dirt get shoveled away. You will also want to use alcohol only because the lens is mostly made of plastic, stronger solvents will craze its surfaces. The clear acrylic window is a delicate part not only because it’s clear but the scale was silk-screened. Only wipe it with soft tissue and water to prevent the markings from lifting. Alcohol and solvents are risky, you may end up fogging it or making it look yellowish.
Conclusion:
This is supposed to be an easy task that just got more complicated because I had to clean it as good as possible inside-and-out. It made me wonder how this lens got so dirty but it is now cleaner than what you usually see being sold at the shops. This is a great lens and it’s a pity that the previous owner didn’t give it the proper treatment of at least keeping it in a dry-box, it’s safe now and I assure you that this lens will not suffer again from neglect. Every Nikkor that found their way into my collection is safely stored in a dry-box, my house is like a Nikkor sanctuary in that way.
Most will usually only bother with cleaning the optics but we went the extra mile by cleaning as much dirt as we can, this got more comprehensive than it has to be which is also a good thing since I got the chance to make a better article for you.
Reassembling the lens is pretty easy if you didn’t take it apart like I did but I would like to point out some things just so that you’ll know what’s going on.

Everything looks much cleaner now. While I would prefer to clean this lens down to the last screw, it’s impractical to do so and AF lenses usually aren’t made to be disassembled completely unlike manual focus lenses since some parts will take too much time to disassemble, it will take more effort just to put them back. You’ll also risk damaging the parts that were permanently-sealed at the factory.
When putting the bayonet mount back, make sure that the stop-down lever is reinstalled correctly. This extends to about twice its length so Nikon had to think of a way just to couple the F-mount levers to the iris mechanism so these clever solutions were thought of.
That’s all for this article. I hope that this helped or entertained somebody. It is not the most difficult lens to repair but if yours needs attention, send the lens to a competent repairer. Only the people who have the right tools and experience can successfully repair this lens. It is not worth experimenting with it if you’re just a beginner, just imagine the investment in tools. If this article has helped you, please consider supporting this blog so my work will continue to benefit more people in the future. Your help enables me to pay for this site’s hosting and help me offset the cost of buying, developing and scanning film. Any help, big or small will go to a good cause and it ensures that I can continue to create quality work for the blog. Thanks again, Ric.
Help Support this Blog:
Maintaining this blog requires money to operate. If you think that this site has helped you or you want to show your support by helping with the site’s upkeep, you can make a small donation to my paypal.com (richardHaw888@gmail.com). Money is not my prime motivation for this blog and I believe that I have enough to run this but you can help me make this site (and the companion facebook page) grow.
Buy me a roll of film or a burger?
Thank you very much for your continued support!
$2.00
Helping support this site will ensure that this will be kept going as long as I have the time and energy for this. I would appreciate it if you just leave out your name or details like your country’s name or other information so that the donations will totally be anonymous. This is a labor of love and I intend to keep it that way for as long as I can. Ric.

Feb 07, 2026 @ 10:07:31
I liked your review, but not your recommendation whether to buy or not. I think it would have been okay had you not definitively stated what I, someone you’ll never meet, should do or not do. I’m not sure why, but a few reviewers are kinda arrogant that way (Thom Hogan, Ken Rockwell). Anyway, That’s all I have to say about that.