
Hello, everybody! Hope you are fine, I had a painful back yesterday because I slept in the wrong position. Back pain has always been a problem of mine for years and it comes back occasionally. It’s probably due to the nature of my job where I am required to sit for long hours at work. Repairing lenses and cameras isn’t much help too because I am spending a couple of hours a night sitting with a bad posture. Speaking of back pain, I’ll show you guys a lens that will certainly make your back ache if you are carrying one for too long and that’s the reason why I seldom use this lens.
Introduction:
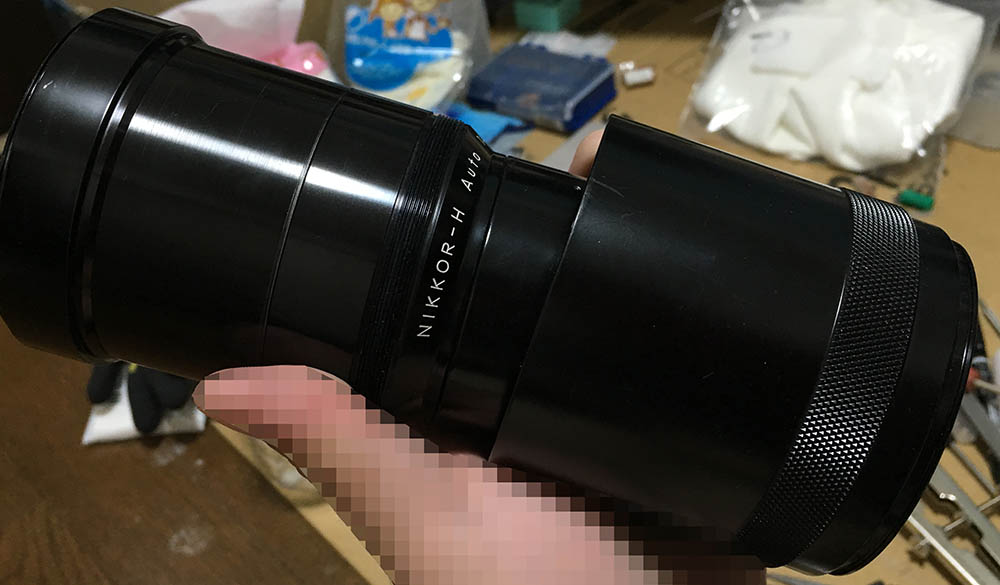
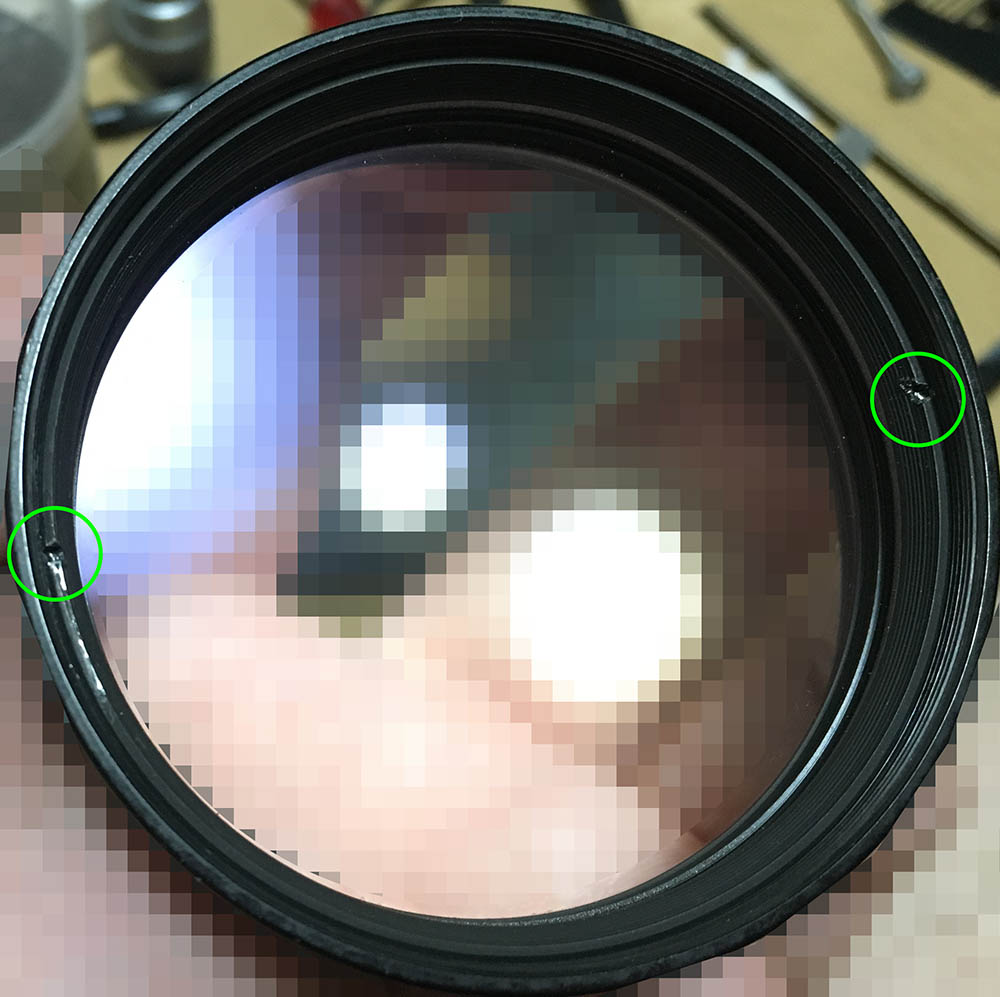
We are going to talk about one of Nikon’s earlier telephoto lenses and it’s no other than the Nikkor-H 300mm f/4.5 Auto! This lens succeeded the Nikkor-P 300mm f/4.5 Auto. They are nearly-identical to each other except the older one only has five elements. It was a unique lens when the Nikkor-P 300mm f/4.5 Auto was released in time for the 1964 Olympics in Tokyo. It was then updated with an additional element in 1969 but its design remained nearly-identical. In fact, it can be hard to tell the difference when you have the two together in a picture. I don’t have the earlier one but people claim that it’s a decent and well-balanced lens even wide-open. This lens is supposed to be the improved version but I cannot do any tests to back it up and my copy of this lens suffered from terrible damage in the rear element which seems to be somewhat common with this lens for some reason.

This is a big lens and it can get longer when you extend the built-in hood. It balances well with my Nikon D750, I can imagine that it can be even better with a bigger camera like the Nikon D4. It’s not something that you’ll want to use today for sports and wildlife or in situations where you’ll need very fast AF performance and super-sharp images but it can be an enjoyable lens to use when you’re just playing around.

The lens alone is a big and heavy piece of equipment but it’s tiny when you compare this with Nikon’s monster lenses that weigh 4kg upwards. This is a “gate-way drug” when it comes to long prime lenses, very much like today’s 300/4 family of lenses.

Its length can be a problem at times when it comes to storing or carrying it but the good news is you have a tripod foot (fixed) so you can attach a sling to it. The tripod foot’s two holes are oriented as such so you can attach your setup in portrait or landscape modes to suit your framing but having to re-install it each time you change your frame’s orientation is tedious, the next version of this lens came with a rotating tripod collar which is convenient.
Now that you have a short background of this lens, it is time to see how this thing performs in real-world situations. I went to the zoo last weekend and I found the chance to use this lens. I’ll have to warn you beforehand that my sample has a damaged rear element so don’t take my samples seriously. The damage is so bad that it may show in my pictures.

Vignetting wide-open can be terrible but it won’t be this obvious in real use. You will not notice this unless you go out of your way to look for it.


(Click to enlarge)
These pictures were taken from f/4.5, f/5.6 and f/8 respectively. At f/4.5, it is a decent performer but you can definitely feel that the look is out-dated in so many ways because of all the flaws evident in the picture such as chromatic aberration. While the center is sharp where in-focus it’s still not as sharp as I wanted. At f/5.6, resolution and sharpness improves a bit but it’s still not a huge jump from f/4.5 but at least the fringing is now not as bad. Haze is also one of the things that improves a bit, you can even see it when viewing the thumbnails. By f/8, things really begin to look much better. Resolution and sharpness has improved considerably and contrast begins to pick-up.
The good news is this lens performs better when shooting at things further-away like the 1st set with the cranes. Sure, it still sucks compared to modern lenses but it’s pretty damn decent. I took some photos of palm barks for the last set so we see the improvements in contrast, resolution and sharpness a bit better. Looking at the photos of the birds, I can say it is pretty acceptable at f/8. From my samples, we can deduce that f/8 is what you will want to use if it’s something important otherwise you can shoot at f/5.6 if you still wish to have nice a bit more blur in the out-of-focus areas.


(Click to enlarge)
Here are some pictures that I took. These were mostly shot at f/4.5 and you can see that it’s decently sharp at f/4.5. You can also notice lots of magenta fringing in the image. It can be nice when you shoot it in the right lighting condition but it’s mostly hit-and-miss. It also has a long minimum focusing distance of about 4m. This is kind of useless for some types of portraiture but it’s ok for full-body shots. The long focal length will also compensate for the lens’ rather slow maximum aperture of just f/4.5, you can get smoother bokeh quality if you know how to compose your shot properly. Focusing can be a bit of a problem if your subject is close because hand-holding the lens is difficult when you are not shooting with a high shutter speed. You would want to use this lens with a shutter speed of no-less than 1/300s ideally. This will help prevent motion blur caused by shaky hands. I did not enjoy using this lens much to be honest because of this.
Let’s now see some pictures that were taken with film. This lens was made for use with film and it’s only fitting that we see some photos that were shot using it. This will help us have a more holistic view of this lens and how this performs. Film has a unique look that’s difficult to replicate with digital and this is why we’re interested in seeing pictures that were taken with film.
(Click to enlarge)
You will have to be careful when taking photos of distant objects because of the effects of pollution and other atmospheric and environmental factors. If it’s spring, pollen clouds will also be a problem. The older coatings isn’t a lot of help in alleviating haze, this is the reason why daylight filters used to be popular back then. It’s quite sharp even wide-open at this distances and you should only be worried about the said effect. Shooting after rain is helpful, I know of a photographer who prefers to do his thing after a drizzle and he is known for his good nature photos. He is a Nikon user, of course.
The pictures were taken with a Nikon F90 and shot with Fujifilm Industrial 100. I had the photos developed at the lab and scanned with the best option available to me – Fujifilm Frontier SP-3000.
Chromatic aberration is not a problem when you don’t have factors that can trigger it in your scene such as over-blown highlights or over-exposed white spots. You can observe some of it in the top-right corner but that’s all that it will do and it doesn’t bother me at all.

This is probably not what you would want to use this lens for but nothing is stopping you from doing it. The quality of the bokeh is smooth judging from the details of the stone wall. I don’t see any ugly artifacts or film grain did a good job of masking it. It looks pleasing to me so far.
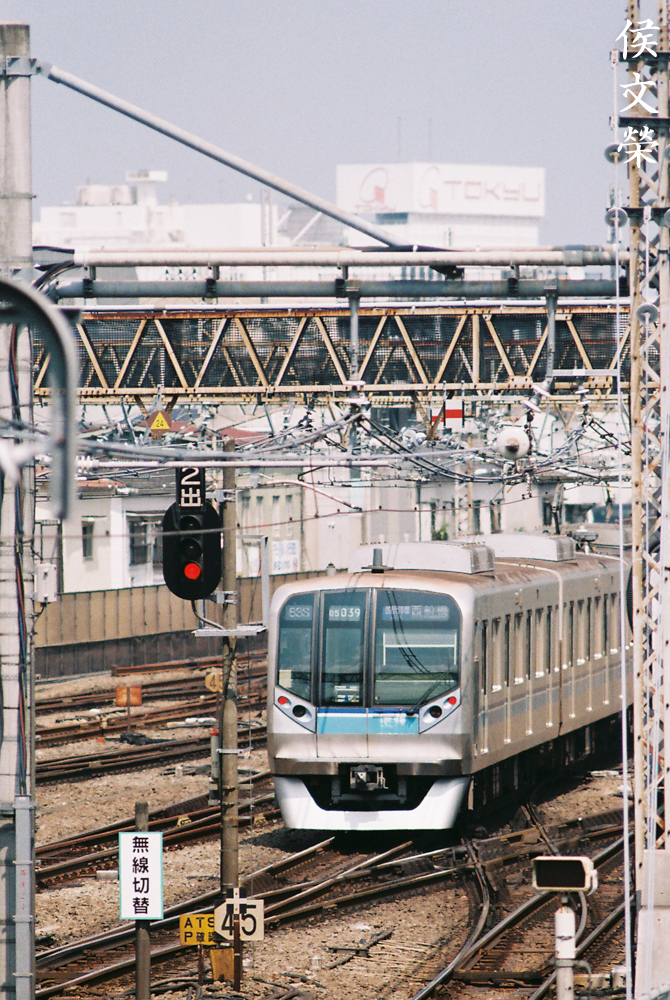
This lens is a good substitute for the more expensive ones for train-spotting. The long 300mm focal length helps give you the reach and compression that are vital for this kind of photography. This was taken at noon so I was lucky to be able to shoot this at f/8. This is the lens’ sweet-spot and you won’t get a lot of chromatic aberration at this aperture. I love how this lens renders, it’s vintage-look gives this picture a special look.

I took this really early in the morning with the sun rising across my position and we still have some fog at the far-end of the scene. I took this wide-open since it was still a bit early and my shutter speed is probably around 1/250s. Note the terrible chromatic aberration in the top part of the frame. This is a sad reality that I have to live with and all I can do is stop the lens down a bit if I can use a higher shutter speed.
(Click to enlarge)
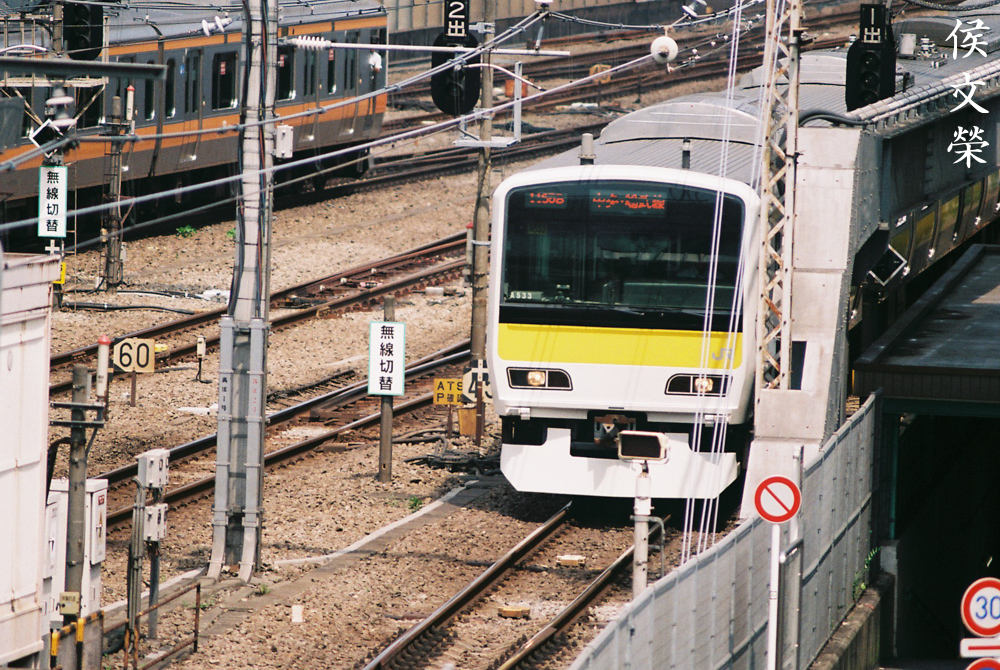
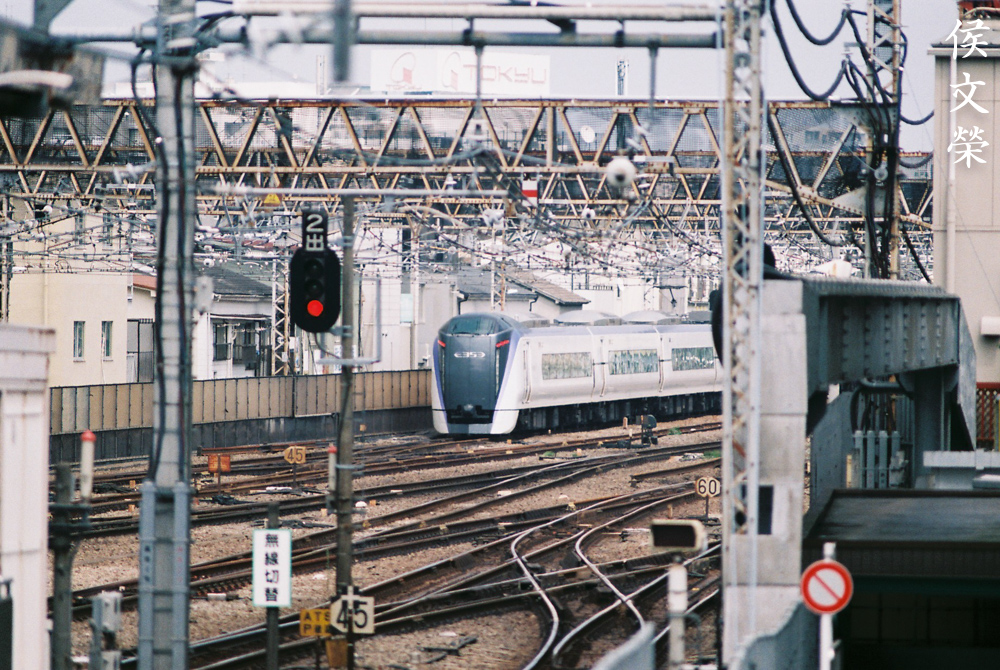
Here are some more photos of trains. This is not my thing but I just wanted to play around with this lens and this is the only thing that I can think of at that moment.
The lens is a decent performer but is nowhere near what you can get with today’s lenses. Even the cheaper zooms will out-perform this lens in every situation. I don’t see why you would want this today apart from collecting it and wanting to try something new. It’s a lens that has lost its usefulness for practical situations but lives on in the hearts of many collectors. Let’s now begin with our repair article.
Before We Begin:
If this is your first attempt at repairing a lens then I suggest that you check my previous posts regarding screws & drivers, grease and other things. Also read what I wrote about the tools that you’ll need to fix your Nikkors.
I suggest that you read these primers before you begin (for beginners):
Reading these primers should lessen the chance of ruining your lens if you are a novice. Before opening up any lens, always look for other people who have done so in Youtube or the internet. Information is scarce, vague and scattered (that is why I started this) but you can still find some information if you search carefully.
I highly recommend that you read my working with helicoids post because this is very important and getting it wrong can ruin your day. If I can force you to read this, I would. It is that important!
For more advanced topics, you can read my fungus removal post as a start. This post has a lot of useful information and it will be beneficial for you to read this.
Disassembly (Front Barrel):
I would like to apologize if this article is going to be confusing to you. I lost lots of images when my old iPhone died and these are all I have. The order of the images will also not make a lot of sense because they weren’t taken in the correct order but I will try my best to make sense out of these so please bear with me. Thanks for your consideration.
This section will likely take up most of your time. I hate working with long lenses like this because the parts are obviously bigger and these are usually sealed on some vital parts. I will not recommend this lens to beginners due to the fact that the glass is bigger and you will require special openers just to open some of the parts. These are mostly openers and spanners that are bigger than your average-sized ones and you may have to fabricate special ones yourself.
Like most lenses, we’ll want to extract the glass first so we can safely work with the rest of the barrel without worrying about accidentally scratching anything. We’ll separate this lens into 2 sections with the usual section for the objective consolidated into the part for the front barrel, the construction of this lens is such that they’re designed as a single unit. You may check my article on the Nikkor-Q 200mm f4 Auto since it is similar to this lens in terms of construction to some extent.
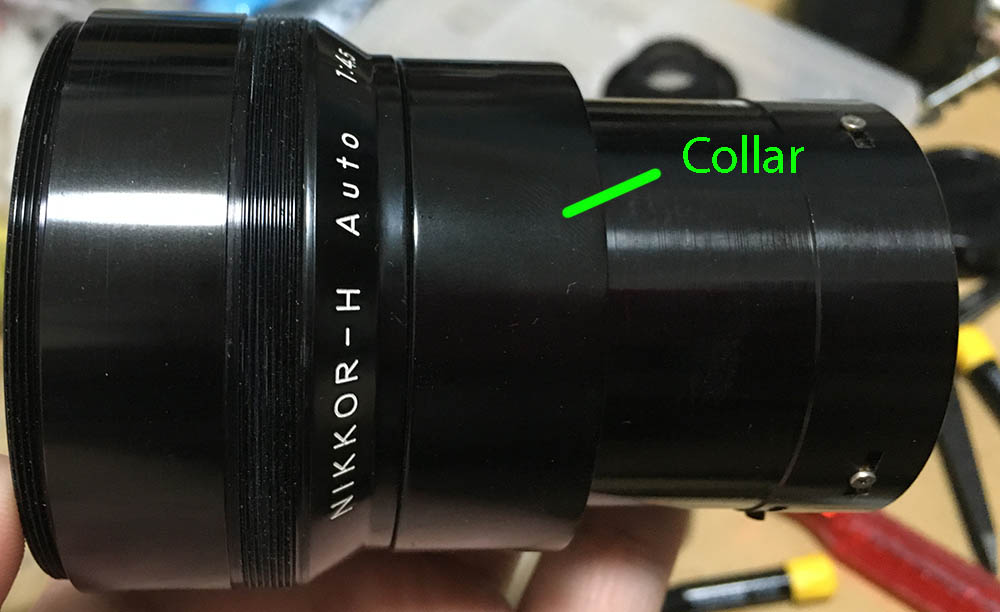
If there’s something that I would like to caution you with this is that one of the rings or collars here has a reversed-thread meaning you’ll have to turn it the other way just to open it. I forgot which one that is but it’s somewhere around the neck of the lens. Just do a quick check by turning the ring both ways and see which way will loosen it.

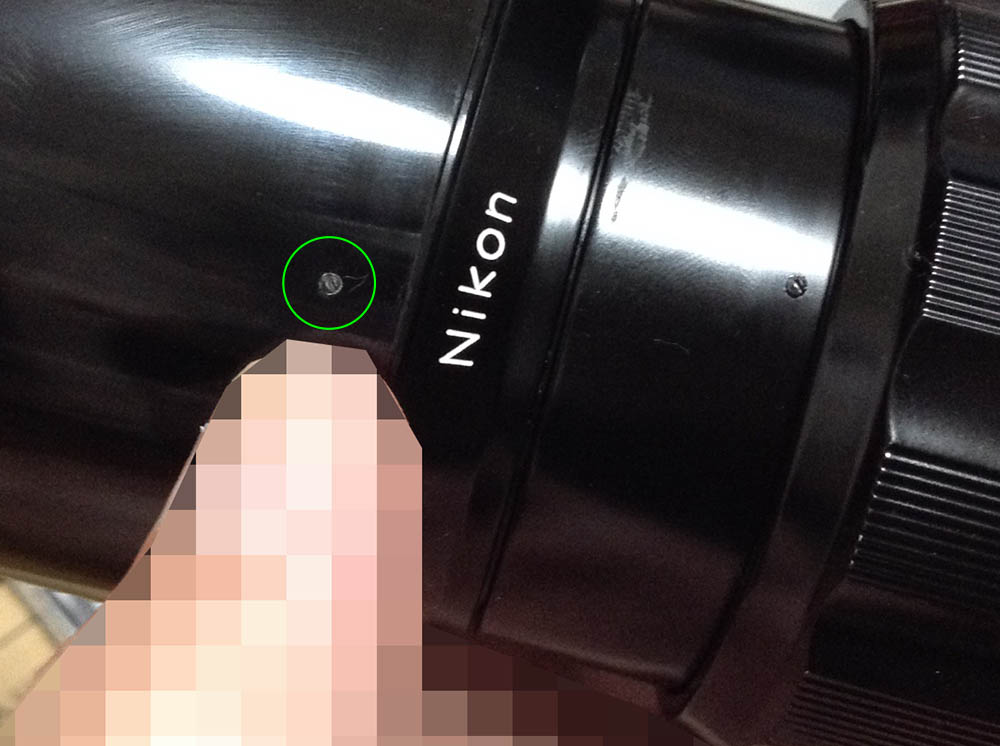
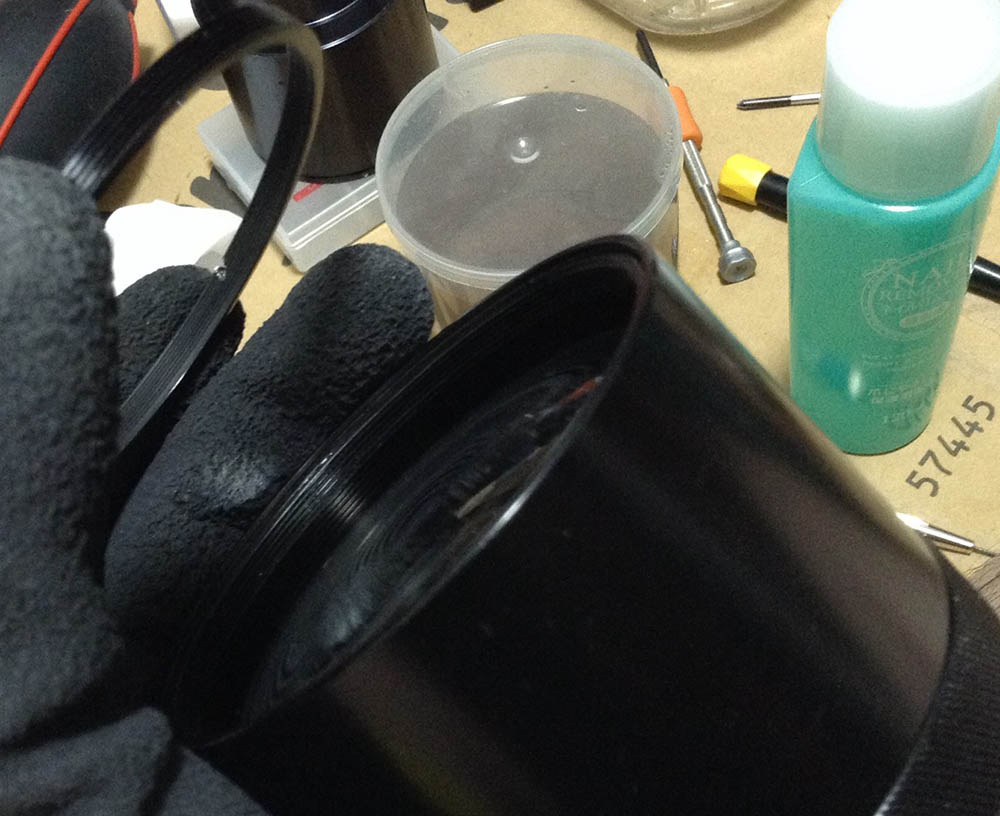
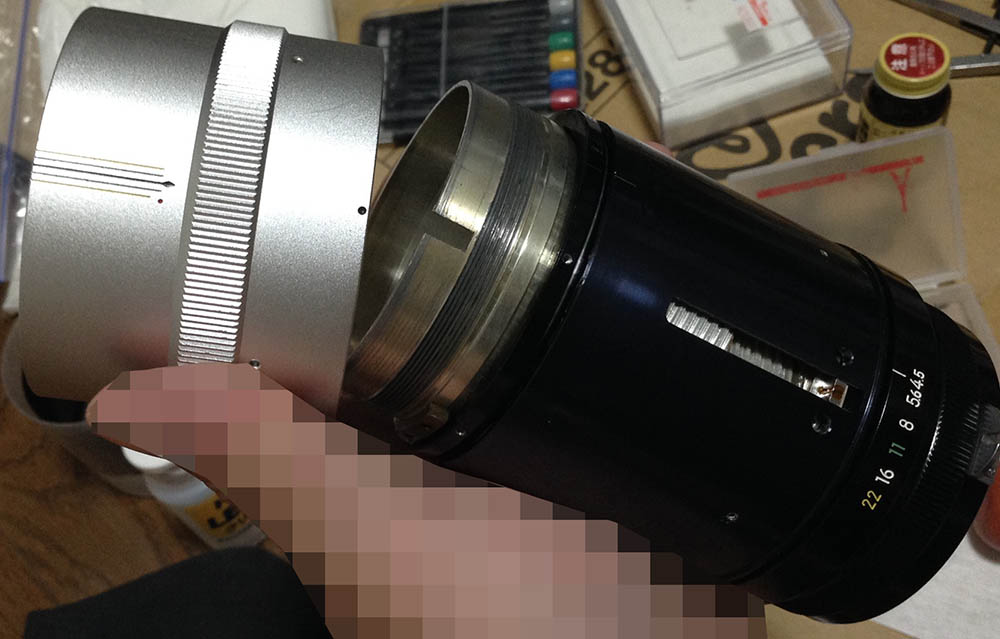
To separate the front barrel from the main barrel, you must first extract the screw at the lens’ throat. The set screw secures the collar which you should turn until the lens separates into 2 parts. Mine was not easy to remove and I had to use some rubber strips to help me with my grip. Place some solvents into the hole to soften the bond. Remember that I mentioned that one of the rings in this lens should be rotated the other way in order to loosen it? Well, this may be the one that I was referring to.

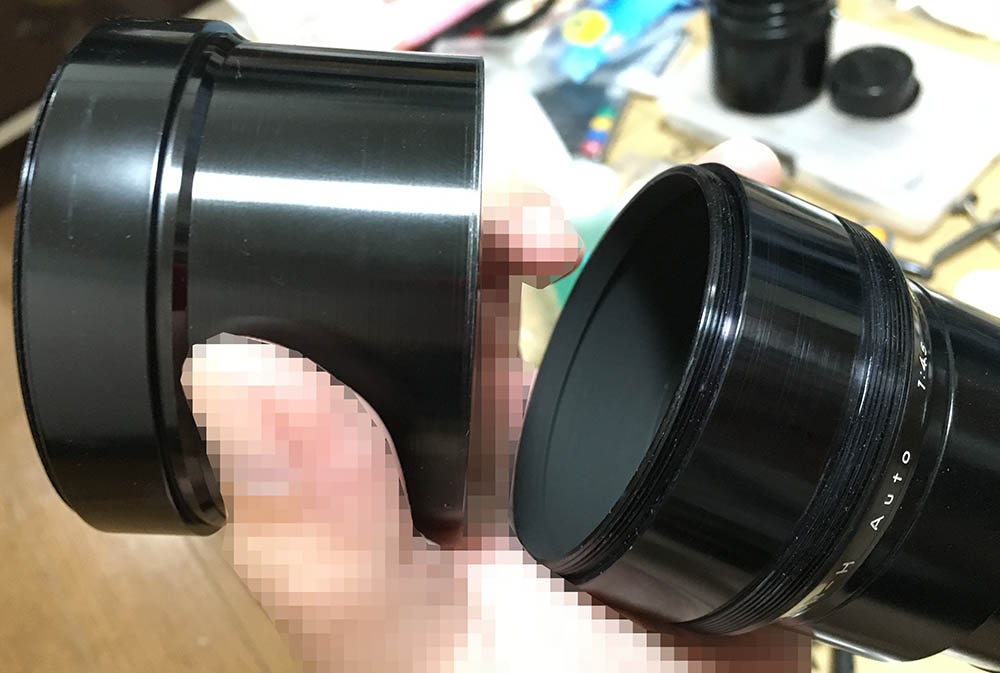
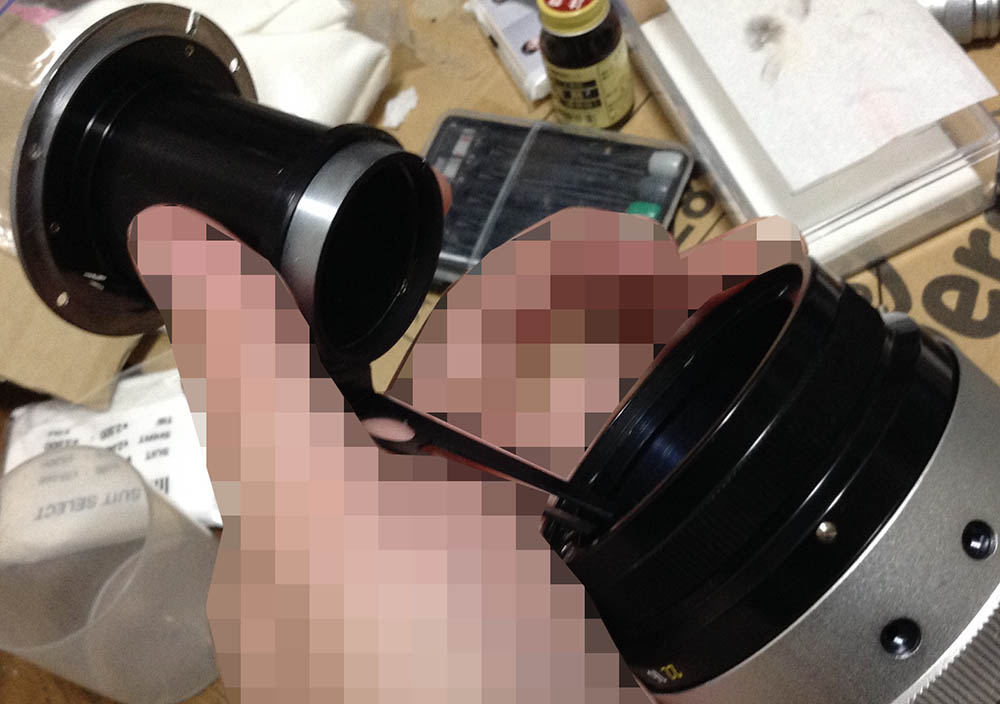
You can now separated the lens into its two basic components. Set the main barrel aside as you work on the front barrel.

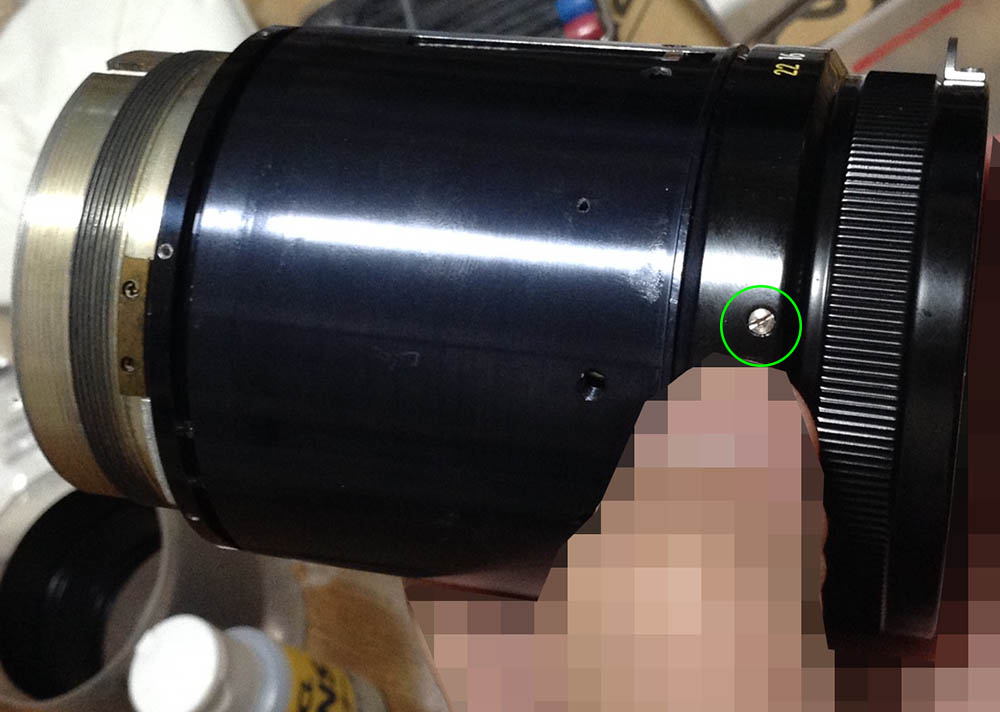
Extract this screw that secures the collar with the name and serial number.
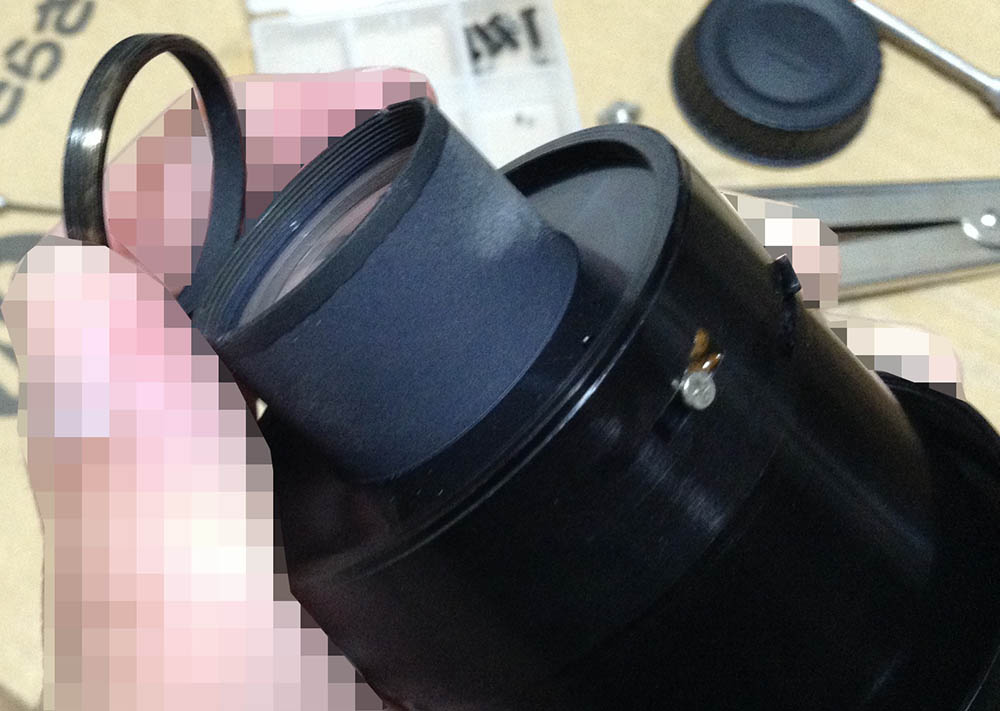
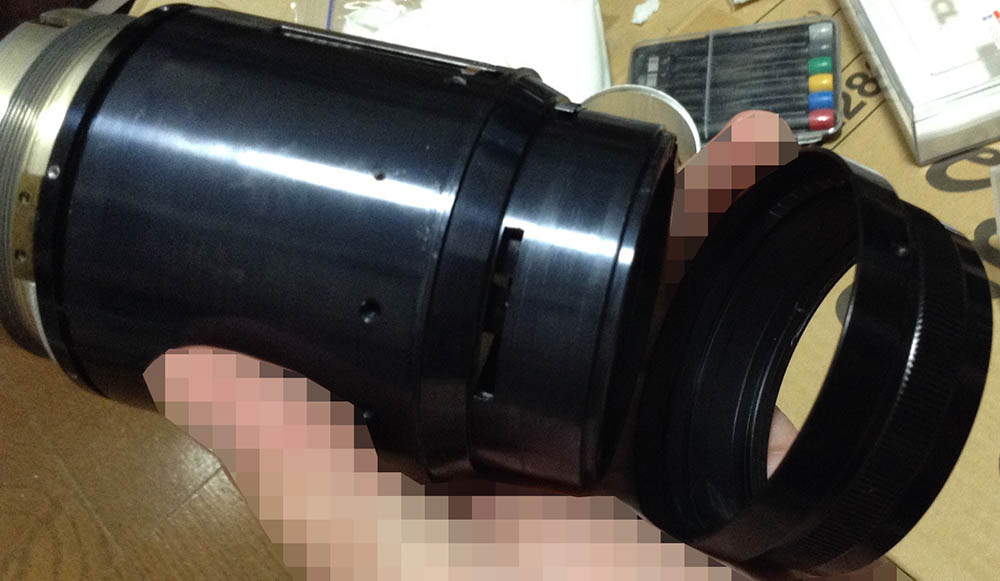
Extract this screw so you can remove the sleeve. The sleeve comes off with the hood as a single assembly, it slides towards the rear over the engraved collar. Like what I mentioned before, I forgot which of these collars should be turned the other way in order to loosen it so try turning everything in the front barrel in both directions to see if any of them turns the other way.
I forgot know how I got it off but it involved turning the sleeve underneath the hood. I also recalled turning the collar with the engravings. Remember, one of the collars here is a reverse-threaded collar so you will have to turn it clockwise in order to loosen it.
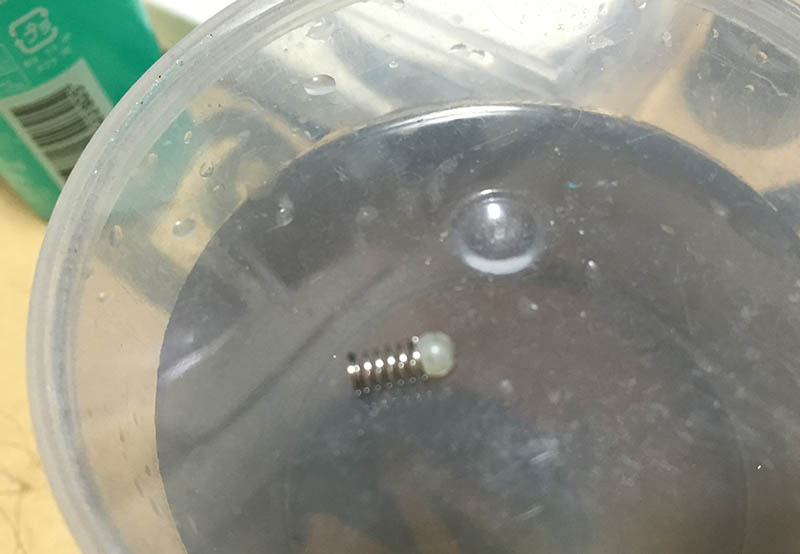
The hood can be further disassembled into its bare components. The spring and ball you see here is used for the clicking mechanism on the hood. These are housed inside the chrome button at the hood. If I’m not mistaken, there is a small metal cup between the the spring and the nylon ball. That cup is not in this picture. It helps center and protect the nylon ball from its spring.
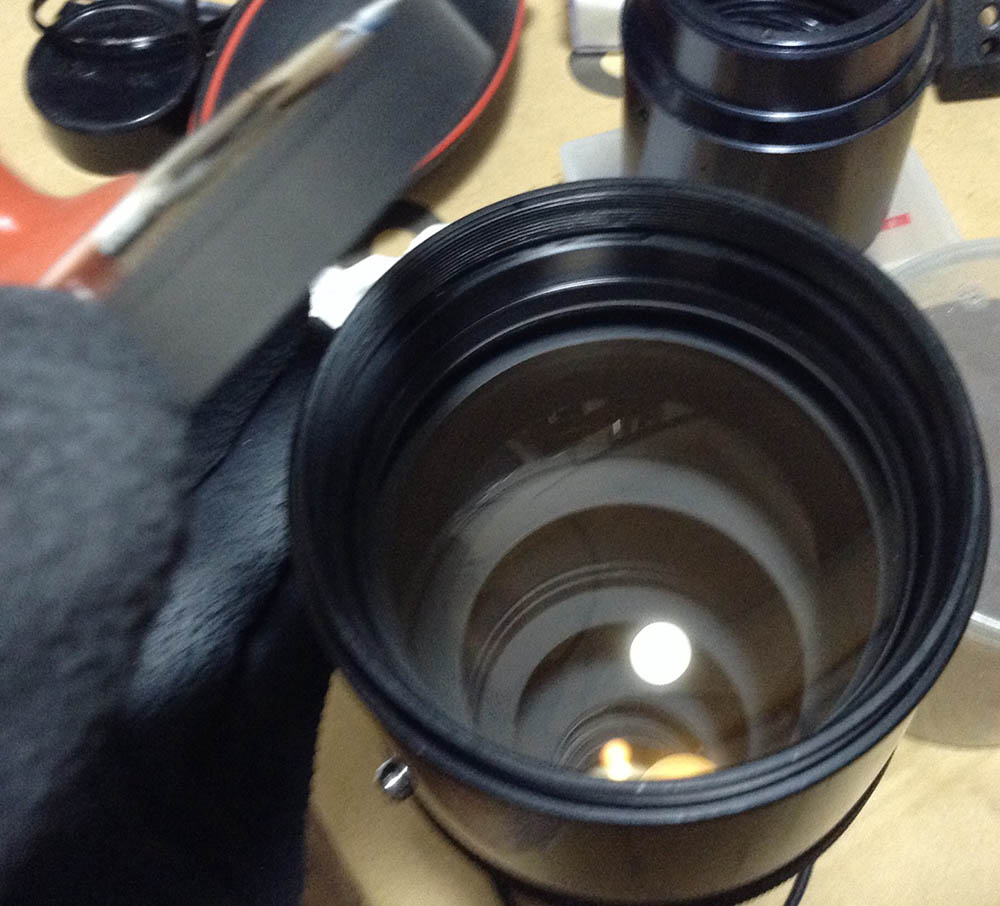
The front comes off like this after you extracted its small set screw. It houses the front elements assembly so handle this with care.
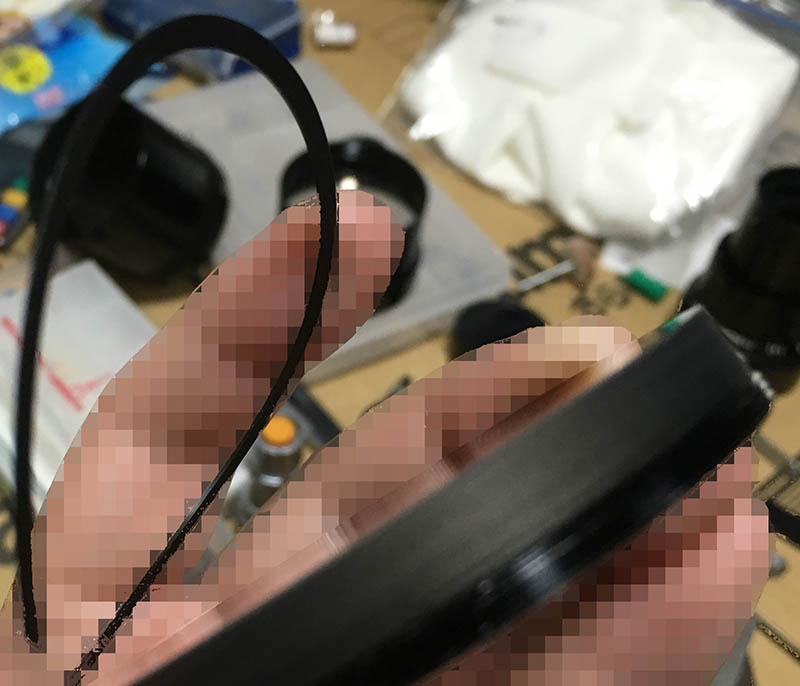
You’ll have to remove this huge retention ring. It can be difficult because of its diameter, you will have to use a larger spanner for this. This can be very tough to remove so just repeatedly apply solvents at the threads and let that work on the dirt or the seal that’s preventing you from removing it. If yours came off easily, congratulation! Before we go to the next step, I would want to warn you about using solvents in this area. Never flood this part because the front group is cemented and solvents will dissolve the cement! There is also a rubber part here that will dissolve easily at the slightest contact with solvents. It seems like rubber but it smells more like gutta percha.
Mine came off just like this but not without plenty of effort.
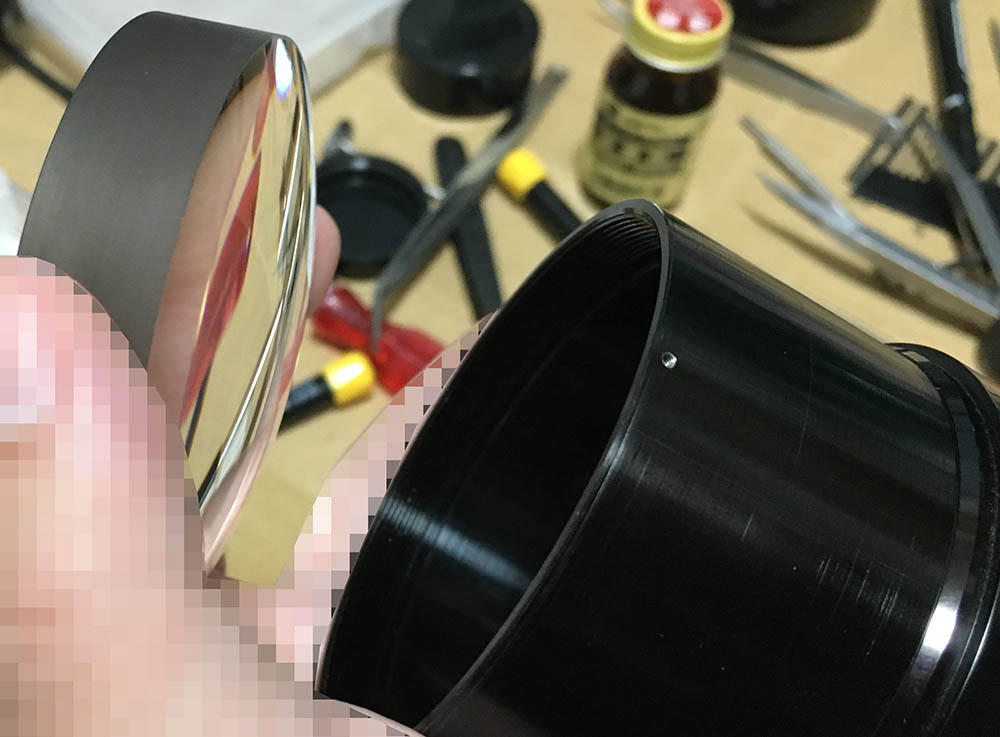
The 1st and 2nd elements were cemented into a doublet and you can extract it using a lens sucker. The fit can be snug or loose depending on the lens so be careful not to drop this thing to the floor.
The 3rd element is a huge chunk of glass and you can remove it using a lens sucker. You should take some notes or use a pencil to make a small mark on the walls of the elements so you will know where they should be facing.
The 4th element is sealed with its collar or at least it seems like it. I carefully removed it from the back of the front part, making sure that I don’t damage anything. Be careful with the bushing. It’s made of something that appears to be gutta percha. It will dissolve quickly in alcohol if you’re not careful so clean this with care.
The broad collar cannot be removed without major disassembly, I just left it alone. If you want to further disassemble the iris mechanism, I suggest that you read the article that I wrote for the Nikkor-Q 200mm f/4 Auto. It has a lot in common with this in a lot of ways specially when it comes to the iris.
The 5th and 6th elements are all housed at the rear of the objective. The 6th element can be accessed by removing this retainer. The 5th element inside can be easily extracted soon after. You can remove the rear assembly of the objective’s housing to clean what’s inside if you want.
That’s it for the front barrel. It is not awfully difficult now that I think about it. Maybe because I have gained some experience with this so it seems easy to me now. I have gotten used to working with bigger Nikkors so I have the proper tools to work with them. If this is your first attempt on working with bigger lenses, just make sure that you fabricate the right tools.
Disassembly (Main Barrel):
The previous section can be a bit frustrating to some, this section is going to be much easier because the steps here will be more familiar. Cleaning all of the parts can be a pain because they’re bigger but it shouldn’t be much of a problem for you.
The bayonet mount assembly can be removed by unscrewing its screws. If you’re new to lens repair, please read my article on how to remove screws from bayonet mounts. This is where many beginners get stuck so make sure you read it so you won’t make mistakes.
The bayonet mount assembly also includes the stop-down lever assembly. I seldom have the need to clean the stop-down mechanism. If it’s gummed-up or sluggish then I need to clean the oil away.
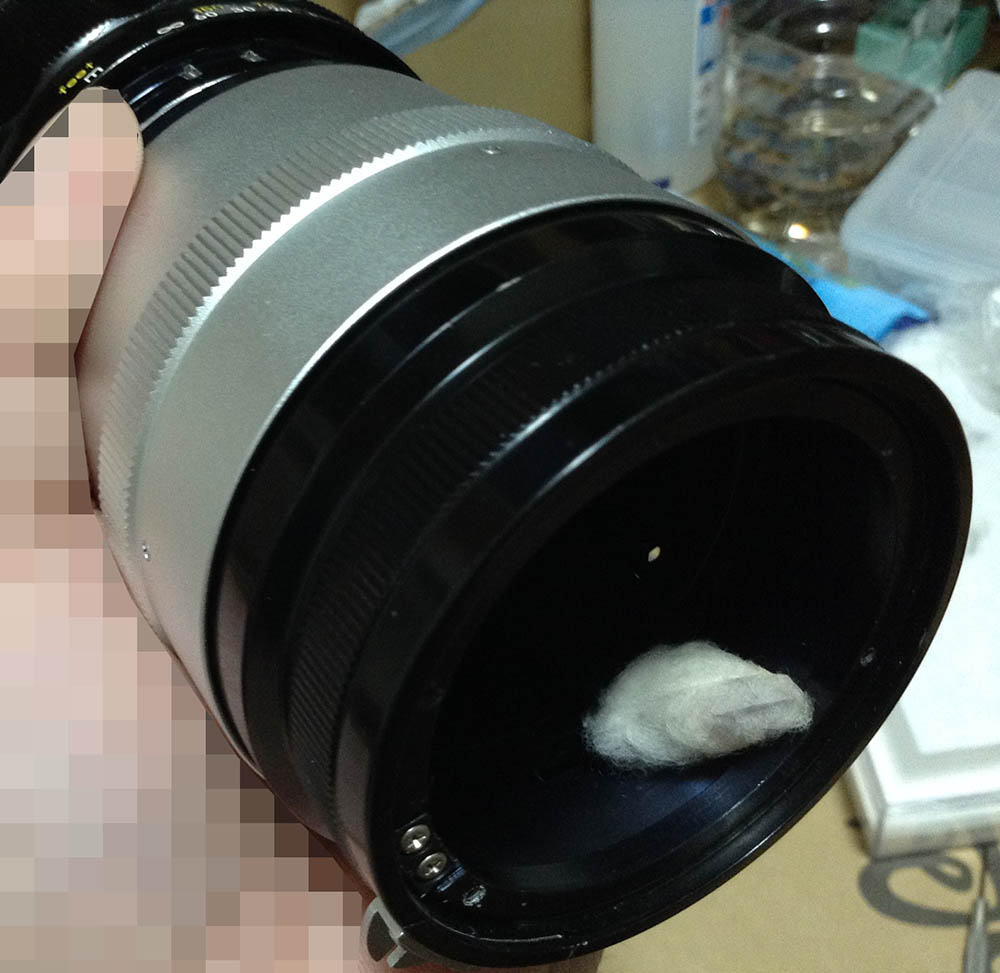
I found this piece of cotton inside the main barrel and I don’t know why this thing’s here. The previous repairer who worked on it sure left me a calling card (for his sloppiness).

Before you can proceed, you must remove this tripod foot because it’s in the way. You can feel that the metal is coated with rubber and this will dissolve in solvents or alcohol so be careful when cleaning this.

The focusing ring can be removed by extracting these screws, I think there are 5 of these around the circumference of the focusing ring.

The focusing ring can now be removed. You can only remove this if it is not obstructed by the front part of the lens.
Once the focusing ring and the tripod foot is gone, you can now remove the sleeve. It’s being secured by a couple of screws that you’ll have to extract.

Once the sleeve is gone, you can now access these holes. These access holes will help you get to the screws of the helicoid keys. Just turn the barrel until you see the screws show up under the holes. Carefully remove the screws so you can free the helicoid key. The key is used to sync the movements of the helicoids so turning the central one will extend the helicoids. Collapsing or extending the helicoids will enable you to focus the lens.
Before you go any further, make sure that you mark how the helicoids were aligned. It’s important to take as many notes as possible before you separate anything.
Oh, I totally forgot about the aperture ring! In order to remove it, you must first unscrew this. This screw acts like a pin to couple the aperture ring to the aperture fork underneath it.
Once that screw is gone you can now safely remove the aperture ring.

Back to the helicoids. Once the helicoid key is gone, you can now separate it into its bare components. For those who are new to this, make sure to check my article on how to work with helicoids. Many get stuck here because they do not have any experience or knowledge with these. Reading my article is essential for every beginner.
This lens requires plenty of grease due to its size but don’t apply to much of it as to make it form a gloop around the edges of the helicoids due to excess grease. A light grease is ideal for this lens because of the long focus throw. A heavier type of grease will make turning the focusing ring difficult.
Conclusion:
Thank goodness we’re done! This was a stressful article to write because my notes aren’t complete. I’d imagine that it was also stressful for you to follow this since the order of the photos don’t make much sense.
Needless to say, this is an important lens that we have to tackle. I have been wanting to write this for a long time but I don’t like to use this lens a lot and I don’t find this as interesting to use compared to the other long lenses that I have in my small-time collection.

It sure made the Nikon D7200 look tiny. With the 1.5X crop factor of DX, it is going to be about 450mm with this setup.
Thank you very much for bearing with me and my rants and please come back again and read my next article. I would also like to thank everybody who donated and support this blog. You guys are all fantastic and you guys help keep me going on. I’ll dedicate the next camera repair article to you, you know who you guys are. See you again, Ric.
Help Support this Blog:
Maintaining this blog requires money to operate. If you think that this site has helped you or you want to show your support by helping with the site’s upkeep, you can make a small donation to my paypal.com (richardHaw888@gmail.com). Money is not my prime motivation for this blog and I believe that I have enough to run this but you can help me make this site (and the companion facebook page) grow.
Leave me some tip?
Thank you very much for your continued support!
$2.00
Helping support this site will ensure that this will be kept going as long as I have the time and energy for this. I would appreciate it if you just leave out your name or details like your country’s name or other information so that the donations will totally be anonymous. This is a labor of love and I intend to keep it that way for as long as I can. Ric.

Aug 14, 2020 @ 17:09:20
Thank you for all the information you have shared on the lenses you have broken down, it’s truly invaluable. I own 50-300mm Ai Zoom-Nikkor f/4.5 and I was wondering if you could d o a tutorial on this lens?
Apr 30, 2022 @ 23:10:33
The engraved ring is an integral part of the front optical barrel, and as you turn it CLOCKWISE, the barrel moves INTO its sleeve. After about ten rotations the optical barrel is free from its threads and can be pushed in and all the way out of the sleeve. You can pull the hood off the sleeve. Be careful as you do this because the nylon ball is spring loaded.
May 02, 2022 @ 02:17:13
While I’m cleaning my 300mm, just want to note that the front 1/2 element dublet and the 5th element have the beautiful golden tinted single coating, while the other elements had none. I am having difficulty trying to some haze on element 6, one of the smaller lens at the rear. Three hours soaking in 50/50 hydrogen peroxide/ammonia solution didn’t work. So I’m going to let it soak for a few DAYS. This worked before on old condensation spots.
Dec 07, 2022 @ 09:50:34
Hello Richard.
Sorry if this isn’t the right way to contact you, but I was wondering if you have worked on the AIS ED-IF version of this 300mm f4.5 lens ?
Thanks in advance.