
Hello, everybody. I’m sorry for posting this late but I was having a problem with the blog so I was not able to post this earlier. For some reason. I can’t access my drafts and my site would not load at all. That was all fixed after I restarted my laptop. I was scared because I have spent a lot of time documenting/writing for this blog and if I lost all of my posts it would mean the end of everything. Now that it is all in the past we can now proceed with our subject for today.
Introduction:
Our subject for today is the amazing Nikkor-Q 200mm f/4 Auto. It’s one of Nikon’s most expensive lenses in its day and it’s the successor to the Nikkor-Q 20cm f/4 Auto which is a revolutionary lens in its own rite. This lens is an improved version and it fixed some of the bigger problems of the older lens so it’s considered to be a different lens in nearly all aspects. Apart from the obvious difference in lens barrel design it also has an improved optical design (slight variation) that makes it a better-handling lens overall. I like how the new focusing ring feels because it’s now broader. It also focuses a bit closer which makes it more useful but is still too-long compared to later lenses from this class. It’s a great lens for its time and many people bought these for taking pictures of sports, news, birds and just about anything that needs a long lens.

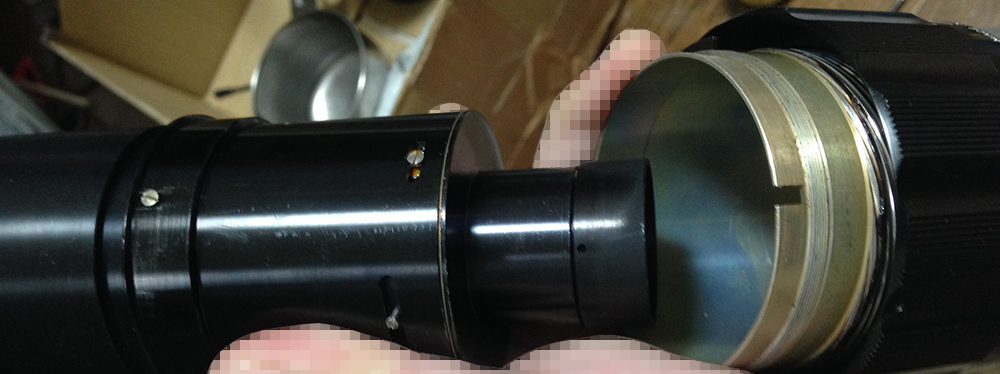
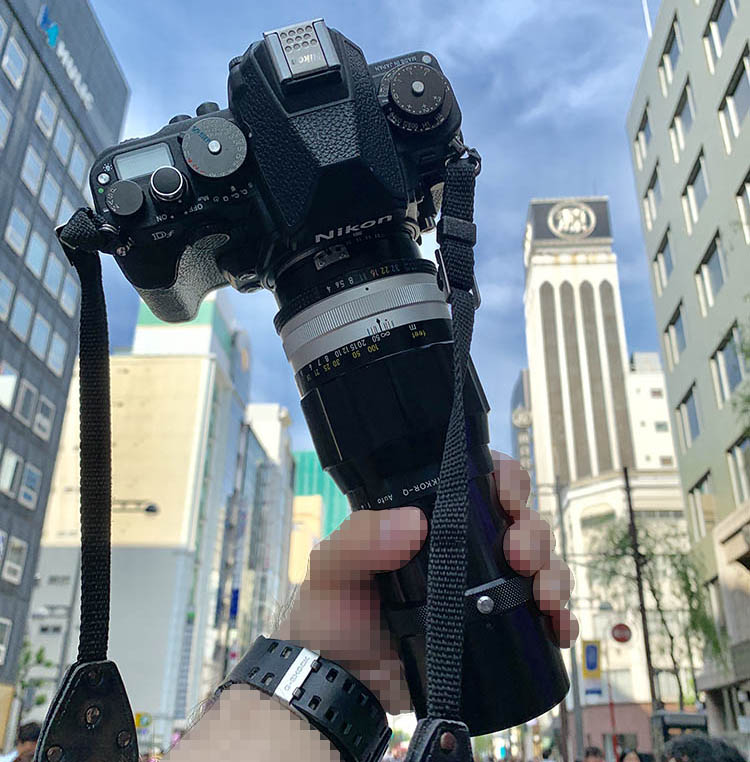
The silhouette of this lens reminds me of a softdrink bottle. It looks sexy and people will surely stare at you when you use this lens. As you can see from the photo, this lens is not what I would call small. It’s heavy, long and big so carrying it all-day can be a problem if you wear your setup around your neck. I wish it came with a tripod mount because it is front-heavy but I guess this lens was designed to be used hand-held so it was omitted.

Here is my collection of Nikon’s 200/4 primes. All of them were bought as junks and were restored during my spare time. These comprise all of the major cosmetic variants for this lens class and we will have a guide for each.
From left to right (chronological) you have:
- Nikkor-Q 20cm f/4 bis – This looks similar to its successor but there are a few small differences between the 2 in terms of construction. The latter lens was made to be more durable and short cuts in production are also made to manufacture this lens faster/cheaper without compromising quality. The very early version of this lens is rare and was made in a batch of less than 800 lenses, the only difference is it does not have the silver knob that houses the spring and bead for the hood.
- Nikkor-Q 20cm f/4 – The subject of this article. Nothing much has changed from the previous version but there were numerous improvements made in production to cut corners and also to make the lens more durable. Note that it’s slightly slimmer than its predecessor so parts are NOT interchangeable in most cases.
- Nikkor-Q 200mm f/4 – This is the last lens from the Nikkor-Q versions. The minimum focusing distance has been lessened to 2m, its handling and construction was vastly improved, the optics were tweaked a bit to offer better sharpness, the C version is probably the sharpest in this range because it uses Nikon’s multilayered coating.
- Nikkor 200mm f/4K/Ai – This version/s represent a big departure from the older lens design because the optics are totally different. The design is also smaller and lighter so for many people this change alone is a big deal when deciding which lens should go in the bag or stays in the dry box. The K (New-Nikkor) and Ai versions are almost identical so I have bunched them together in one group. I also made a guide for this lens, click on this.
- Nikkor 200mm f/4 Ai-S – This is the last version. It’s the same as the old one optically but the construction is totally different. The coatings are probably different on the later ones but I have no data for this. Handling feels the same despite having a new design. It does feel a bit lighter but it’s still a long lens.
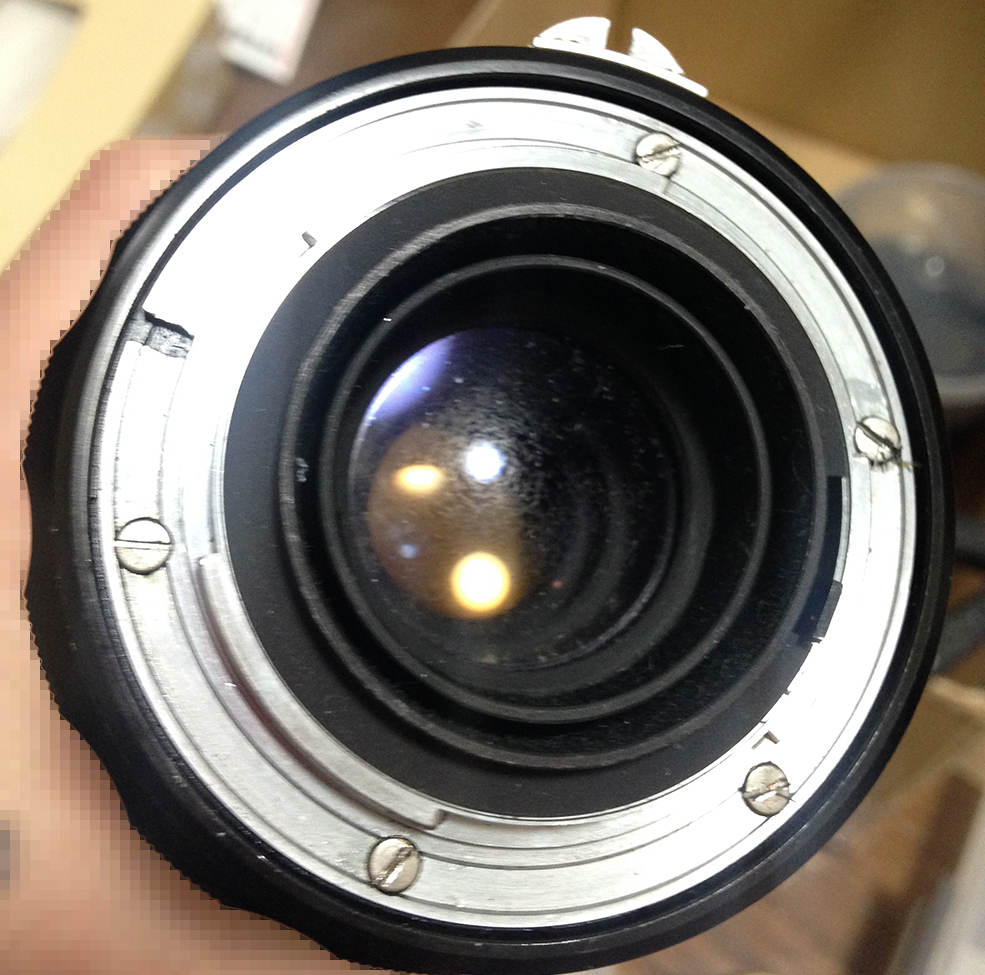
I got this lens for about $3.50 in the junk box of Kitamura’s Akihabara shop. The state of the lens was pitiful as the glass elements were covered in fungus. The exterior looks OK for a lens of this vintage. It is not mint but I will consider this to be in pretty good shape as you can see in the picture above.

The lens is a masterpiece of optical engineering. Nikon made a lens with only 4 elements in it, resulting in pictures with saturated colours. The ergonomics of the lens is also good, the weight balances perfectly on most Nikon camera bodies but a built-in tripod mount is certainly going to be welcome since the whole setup is very front-heavy. I do hate how it has a really long focus throw and it requires some skill to use on closer distances to track a moving subject. This lens was obviously designed for shooting distant objects.


Many people consider this lens to be one of the most important lenses in recent history because this lens was responsible for bringing the telephoto lens to the masses. It was priced realistically (but still expensive) when it was released and was also small enough to be a regular part of the photographer’s kit. The reasonably fast f/4 speed also allowed this lens to shoot most sports as well as for portraiture or landscape. The Tokyo Olympics in the mid 60’s also popularized this lens because photographers can now use telephoto lenses with confidence on an SLR system as opposed to rangefinders where parallax can result in difficult framing and focusing. It was a real game-changer.

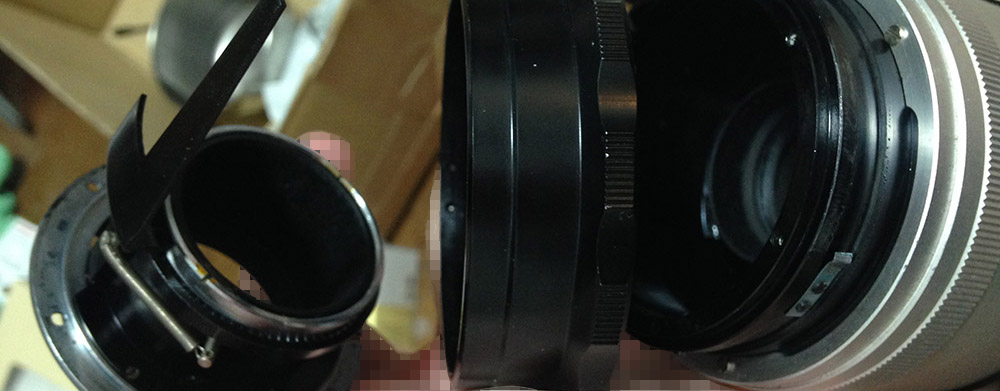
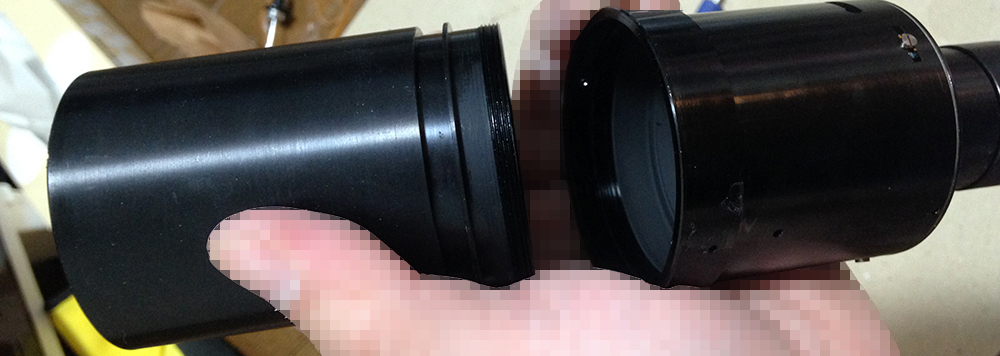
Here it is beside its successor – the Nikkor 200mm f/4 Ai. As you can see in the picture, the new lens is a lot smaller. The optics have been changed by adding another element. The handling has also been improved considerably. For many people this is a good reason to dump the Nikkor-Q 200mm f/4 Auto in favor of the newer one and that is also the reason why you are seeing a lot of Nikkor-Q 200mm f/4 Auto’s being sold in the market today for such a low price. It is not that the older lens performs poorly but its successor is just an amazing lens that it out-performed its predecessor in every way. You can use this to your advantage if you want to own a piece of photography history as well as own a great lens for the price of a premium steak (with potatoes on the side).
Let’s now see some pictures that were taken using this lens. Knowing how a lens works is important so you will know its strengths and weaknesses. This will help you maximize it and you will know when to use it and how. I judge a lens by its utility and not by what its score is according to lab tests so my pictures were taken in real-world scenarios. Nobody takes photos in lab conditions all the time. My tests are simple and I rely on impressions rather than metrics to arrive at any conclusion.
The pictures below were taken from f/4, f5/.6 and f/8. People usually shoot this lens using these apertures so its good to see how this lens performs in these settings. There is not a lot of sense in stopping this lens further than f/11 unless you need to get more things in focus or you’re shooting in a very bright day with a fast film to freeze motion.


(Click to enlarge)
There is some vignetting wide-open but it’s not noticeable because the fall-off is soft. The vignetting improves a bit by f/5.6 and you can only see traces of it at f/8. I’ll say that this is more than acceptable for most cases but if you’re bothered by it then just stop it down to f/5.6 or f/8. Sharpness is great wide-open for an old lens and the colors look great. What it lacks is resolution but it’s still enough for most cases. Stop it down to f/5.6 and everything improves by a bit but you will notice some big improvements in resolution. Contrast and sharpness improves by a bit because it’s already pretty good wide-open. I did not notice any heavy signs of chromatic aberration which is good for a lens of this vintage. The lens is at its peak performance by f/8, this is the sharpest aperture you can use with this lens. I am impressed by what I see, I wasn’t expecting it to be this good.


(Click to enlarge)
The previous set has pictures with subjects that are further into the frame. That is how many people would use this lens but there are some who would want to use this lens for subjects that are closer to the camera. The set above shows photos that were taken at the minimum focusing distance of about 2m to 5m away. My observations from the previous set also applies to this set except that my lens performed better on the previous set but it is still pretty impressive for an old lens. The difference is subtle and you won’t see what is different unless you look for it. This is good news for bird shooters, the bad news is it’s hard to focus really quick with this lens as the focus throw is rather long so you’ll have to pre-focus on something first and then wait for the moment to happen. The quality of the bokeh is good in the sense that I didn’t notice any harshness in its rendering.
Let’s now see some pictures that were taken in real-world settings. It’s hard to talk about a lens and how to use it without using the lens at all to shoot real pictures.

It was hard to focus this but I finally got it after a few tries. It’s sharp in my monitor and I can see the weave of the socks perfectly clear. The JPEG compression sucks so you do not see the details but just trust me that it’s there.

Here’s a picture that was taken at the minimum focusing distance at f/4. The weave of the fake flowers are sharp but some spherical aberration made the weave look a bit blurry. It shows how much this lens can blur the background when you position your subject and the background properly. The quality of the bokeh is lovely.

Here’s a difficult subject to focus since he was moving around so much. The subject looks sharp and the character of the bokeh is smooth. There are lines in the scene and you can also see some leaves and twigs. These will easily show if a lens has bad bokeh quality or not by rendering them poorly with “double-lined” or rough characteristics. We don’t see any of those here and they all dissolved cleanly into the background.

I was expecting to see some chromatic aberration on the mouthpiece and the glasses but I didn’t see anything here. The details look lovely and you can see the pores of his skin if you zoom-in.

This lens is good for stage photography as long as you can use a faster shutter speed with a film that will allow you to do that. You’ll want to use shutter speeds above 1/200s or it’s going to be difficult to get a sharp picture unless you use a flash which is forbidden in a lot of venues as it can be distracting.

While 200mm is too long for tight portraiture as it makes the subject’s face look flat you can get away with it occasionally if your subject has bulky features like this geisha’s B-52 hairdo. She’s a real geisha, one of the few authentic ones who are still in the profession. I love how sharp this picture is. The details on her hair and skin are exquisite and the soft background blur separated her from the background.

The rendering looks very natural as expected from any vintage lens. There are no harsh transitions or a “wall-of-focus” that makes the picture look fake. I love how her skin looks soft with a subtle glow while the details on her lashes are sharp. This is a very good lens for portraiture if you don’t have a lot of money.


(Click to enlarge)
Here are some nature photos that I took using the lens. They’re nothing spectacular but I guess it’s better than nothing. This is a handy lens for bird photography but it is difficult to use if you need to track your subjects. I guess that sports photographers loved this lens in the old days because this was the smallest lens in its class. It’s not the case anymore, its successor – the New-Nikkor 200mm f/4 is a much more compact lens.


(Click to enlarge)
Here are some more pictures that I took using this lens. Despite the clumsy handling, the lens performed great and exceeded my expectations. I wish it was sunnier that day and I could have used a smaller aperture or faster shutter speeds. These should give you a nice idea of what this lens is capable of. I’m sure that you can find a better use for this lens.
Let’s now see some pictures that were taken with film. Film has a unique look that’s hard to replicate in digital because of grain. This lens was also calculated for use with film and seeing the results using film will help us see how this lens works with its intended media. Only by seeing the results that we get from both film and digital can we get a better idea of how this lens really renders. I used a Nikon F4 loaded with Fujifilm Industrial 100 and I had the lab scan the roll using Fujifilm’s Frontier SP-3000.

Here’s a shot that was taken wide-open at the minimum focusing distance. There’s a very small amount of chromatic aberration at the bottom edge of the frame. You will not see it on your subjects so long as your focus is spot-on. The lovely grain of the film also makes the bokeh looks smooth because the pattern of the grain is organic.

The lens renders with a nice “3D-look” thanks to its low-element-count of just 4 elements. I like lenses that use as few elements as possible because of this, the more glass you have in your lens the more light gets processed and so a lens with lens elements will give you a more subtle look.

I love the colors that I get with this lens, the contrast and saturation is nice without being “too loud” like what some lenses tend to do these days, making a picture look fake.

Since this is an f/4 lens you can get more things in-focus compared to f/2.8, this is the only practical advantage that I can think of when comparing it to a faster lens apart from the size and weight advantages that you get from a smaller lens body. You will have to stop a lens down a bit if it’s fast and depending on the lens’ iris shape you may get polygonal or harsh-looking characteristics in the bokeh when you shoot it at f/4. The down-side is you get a darker viewfinder image because f/4 lets in less light and depending on which type of screen you use with your camera your screen will look dark and difficult to focus.


(Click to enlarge)
Here’s the rest of the pictures that I took that afternoon. Feel free to click on the pictures to see the bigger versions. It’s a lovely lens to use if only my subjects would stay-still.
That’s it for the introduction. I tried to get as many picutres as I can to show you what the lens is capable of, I hope that my pictures convinced you that this lens is still useful today despite it being manual-only with no VR and AF. To be honest, I will prefer to have a lens with VR and AF if the lens is as long as this when shooting moving subjects but I am fine with using a manual lens in a studio setting where I can control the shoot. So, is this still a good lens today? Yes it is, specially for the price that this thing is being sold for today. It will save you plenty of money to buy more things like a flash. Just make sure that you get one with the Ai-ring because that will allow you to use the lens on modern Nikons or else the lens can damage your camera. It’s just a bit more expensive but it’s worth it. This lens is still great today and I have read that some people still use it in their kit. My photos are proof that the lens is still amazing and I hope that they inspired you to go out and get one of these or use these lenses more if you already have them.
Before We Begin:
If this is your first attempt at repairing a lens then I suggest that you check my previous posts regarding screws & drivers, grease and other things. Also read what I wrote about the tools that you’ll need to fix your Nikkors.
I suggest that you read these primers before you begin (for beginners):
Reading these primers should lessen the chance of ruining your lens if you are a novice. Before opening up any lens, always look for other people who have done so in YouTube or the internet. Information is scarce, vague and scattered (that is why I started this) but you can still find some information if you search carefully.
I highly recommend that you read my working with helicoids post because this is very important and getting it wrong can ruin your day. If I can force you to read this, I would. It is that important!
For more advanced topics, you can read my fungus removal post as a start. It has lots of useful information, it will be beneficial for you to read this.
Disassembly (Front Barrel):
This lens was engineered in the typical Nikkor way so just imagine that you are fixing a 50mm lens that’s scaled 3x and you are all set. Just with every lens that you want to fix, it is advisable to remove the objective first so that you’ll not damage it accidentally as you go about dismantling your lens.
We usually begin with the front barrel when it comes to Nikon’s primes and this lens isn’t an exception. There is nothing noteworthy but you should expect that glue has been used here and there so you will want to borrow your wife’s acetone (nail polish remover).
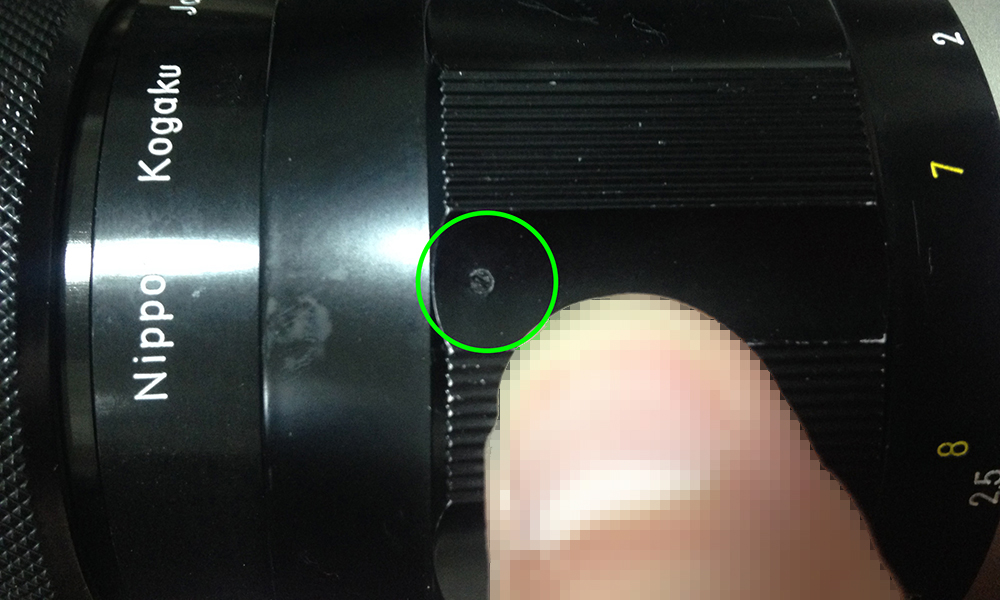
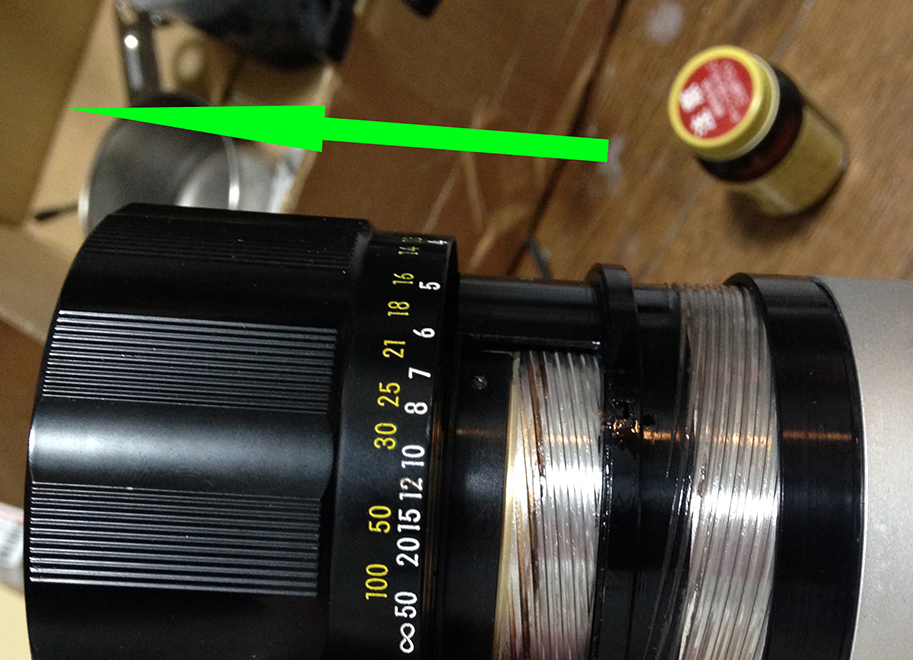
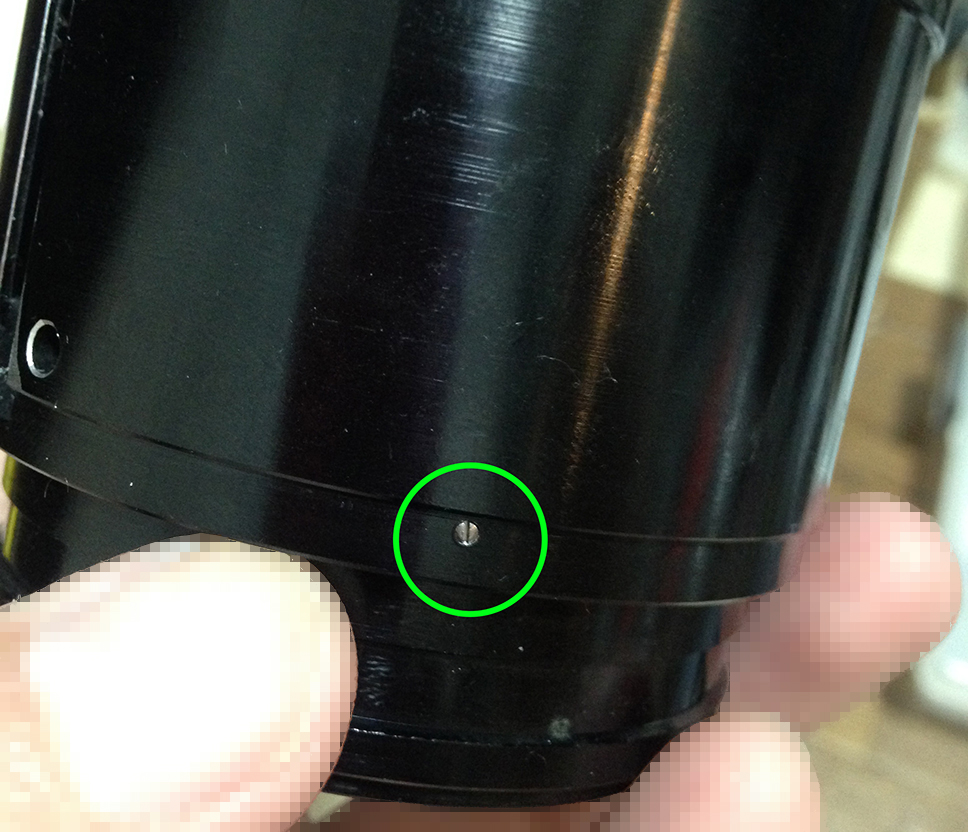
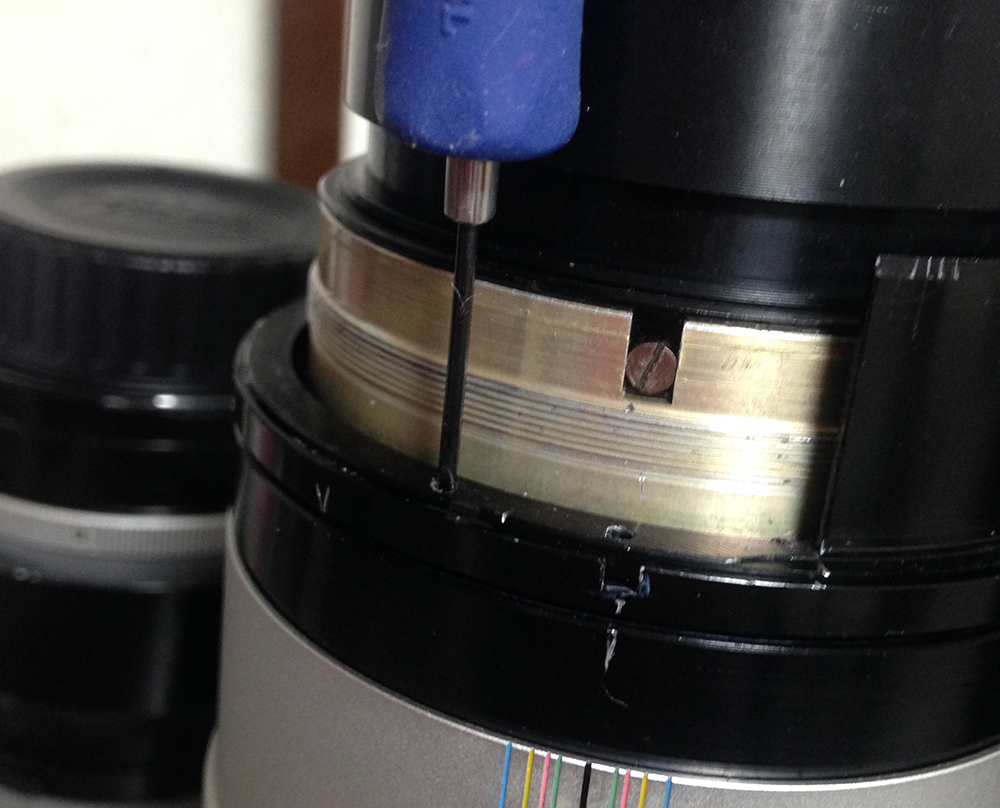
Start by removing this tiny set screw in the focusing ring and be careful not to damage it.

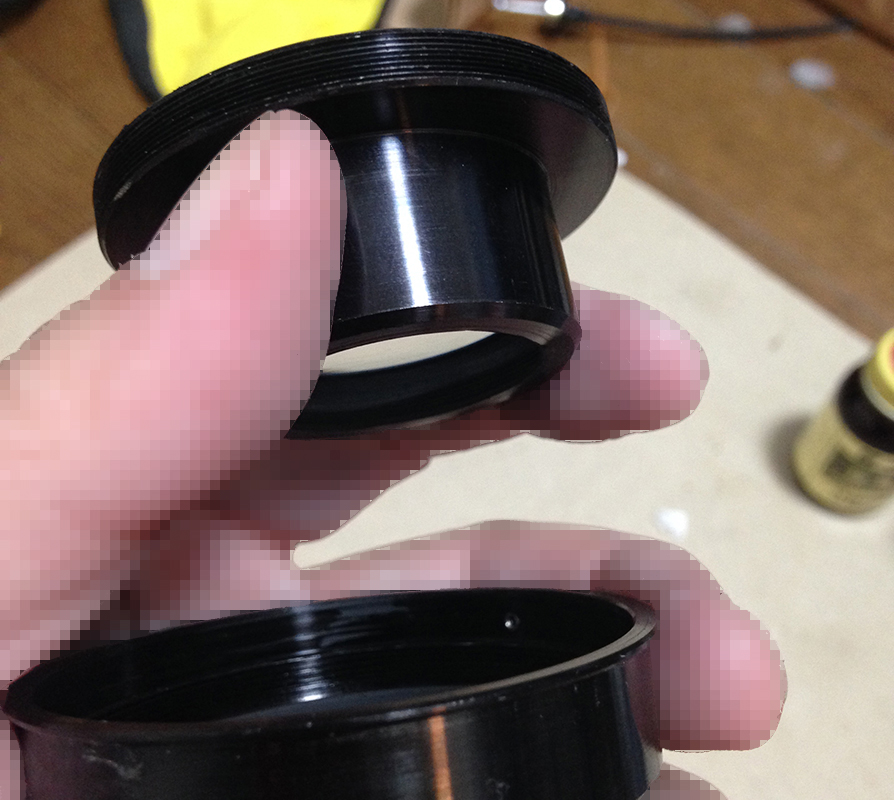
With the tiny set screw gone, you can now safely turn the front cover of the focusing ring counter-clockwise to unscrew it. This part is usually held tight and is frequently glued so use solvents like acetone or MEK (Methyl Ethyl Ketone) to soften it first before you start turning. Note the indentation on the threads, this is where the set screw is sunk into so to prevent the front cover from being removed accidentally.

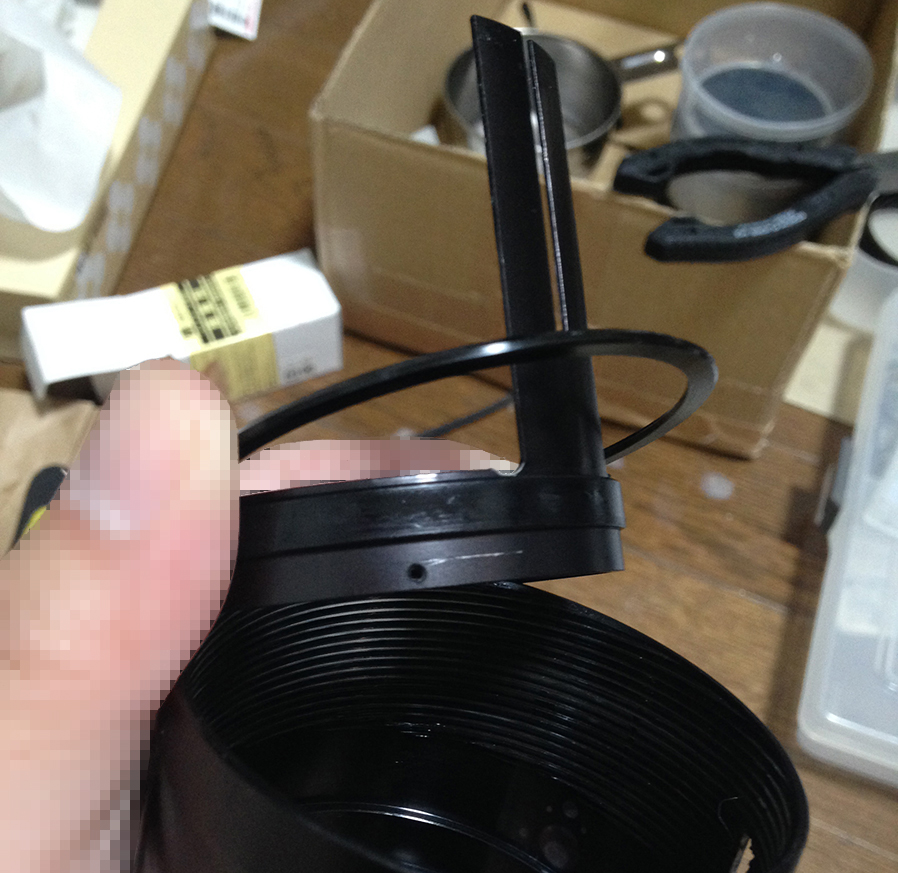
To remove the front barrel, remove another screw that can only be accessed by focusing the lens to its minimum focus distance. Mine was so old that the screw snapped as I was turning it with my screwdriver! I was careful but lenses of this vintage can be fragile at times.

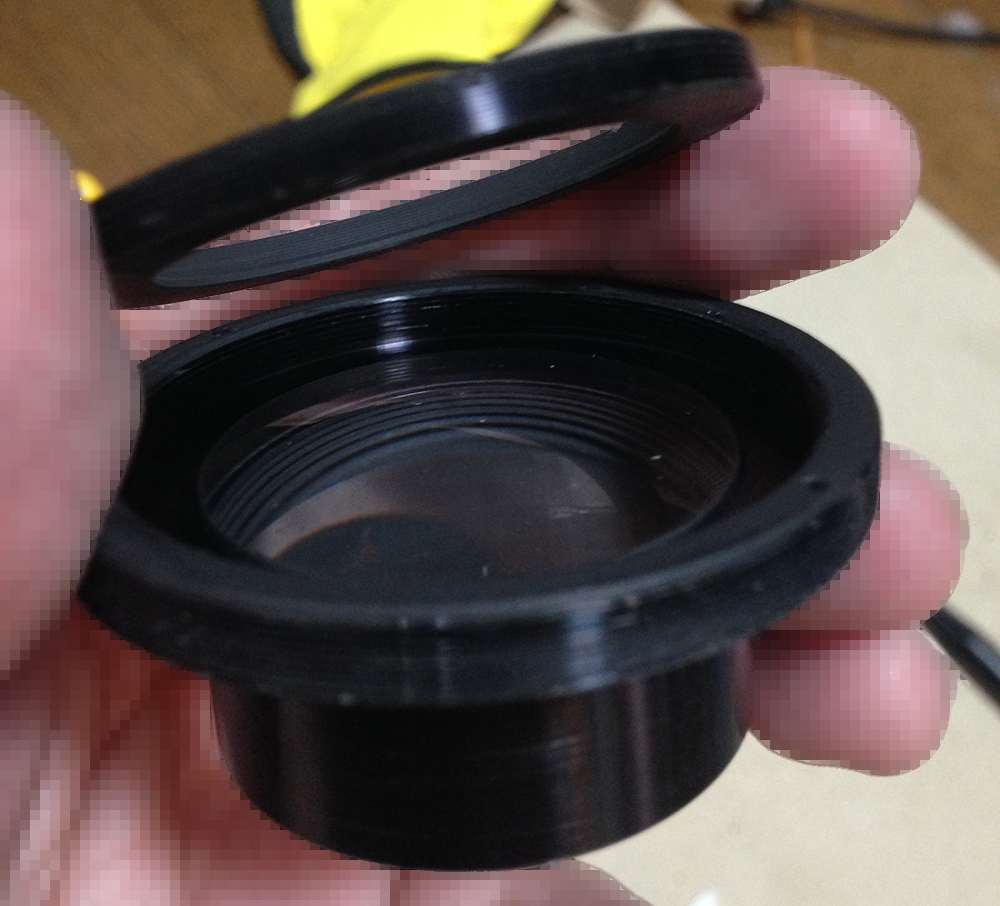
You can now unscrew the front barrel off but be careful not to drop anything.

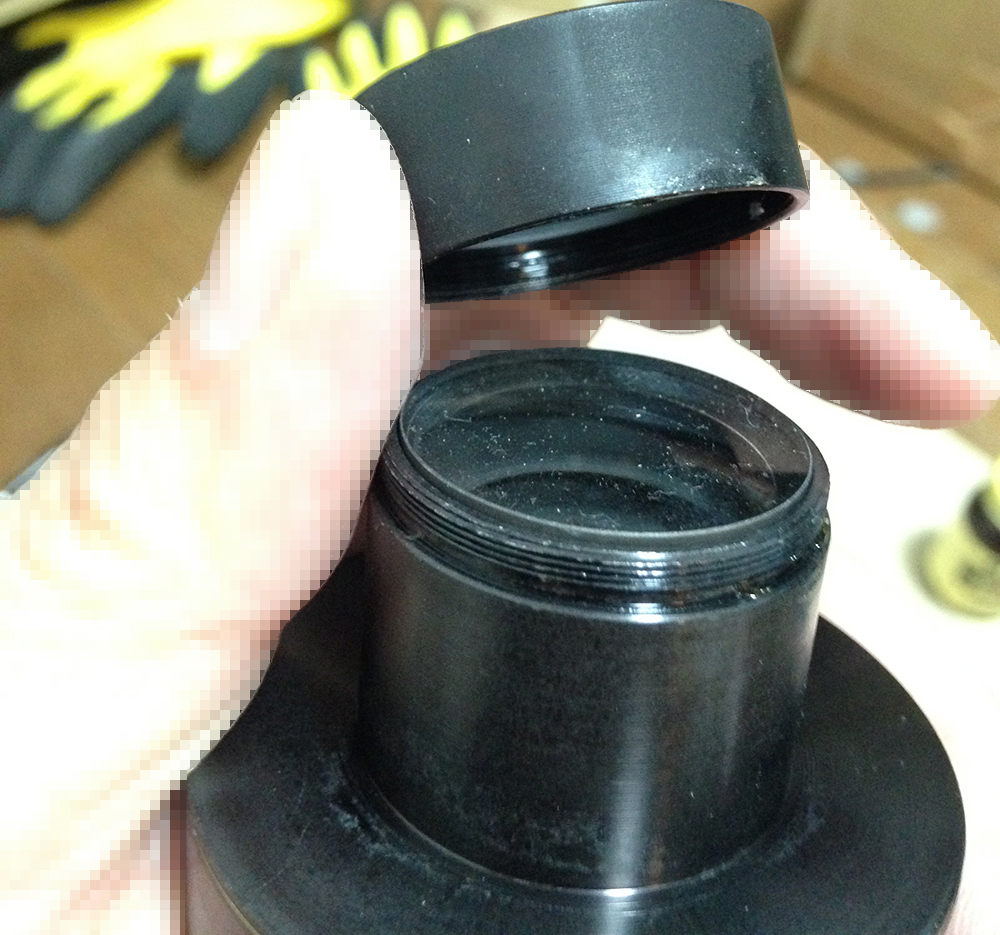
To remove the hood, rotate it until you see a tiny set screw that is securing the filter ring to the front barrel. This may take some time to locate.

With that screw gone you can safely unscrew the filter ring. Depending on your lens the filter ring may be secured by adhesives or may even be over-tightened so use a little bit of alcohol to help you loosen it if yours is stuck.

Be careful when pulling the hood away from the front barrel because you don’t want the spring and bead to fly across the room! Mine did because I did not know what to expect. There may be more parts than the ones shown but these are the only ones that I saw on the floor. This spring and bead mechanism is responsible for the clicking action for the built-in hood.
Be careful when handling your lens at this point. The front barrel is gone so the objective can free-fall to the floor. See the fungus? It’s going to be gone after I am done with this.
Remove these 5 screws to remove the bayonet mount from the lens. This will ensure that you will not bend anything accidentally while pulling the objective away from the lens. If you are new to lens repair please read my article on removing bayonet screws. Many get stuck in this process because they stripped the heads of their screws by using the wrong type of driver or using the wrong techniques. Read my article so you won’t get stuck.
You can now remove the bayonet and the aperture ring should easily come off, too. Just be mindful not to damage the spring.
The objective can now be removed without any resistance now that the bayonet mount is gone. Store the objective in a safe place because you don’t want this to roll off the edge of your work table.
This is just a warm-up, the real work starts from here. As mentioned previously, use a bit of alcohol or solvent to help you soften any sealant that was used on the threads. This is one of the lenses that I hate to work on because of the sealants used. It can sometimes be a tedious process of applying heat, solvent and pressure so you have to be patient.
Disassembly (Lens Barrel):
This is where the fun starts. You can skip this part if all you wanted is to clean the optics. This is as bog-standard as it gets when it comes to Nikkors so there won’t be any gotchas if you are used to working with Nikkors.

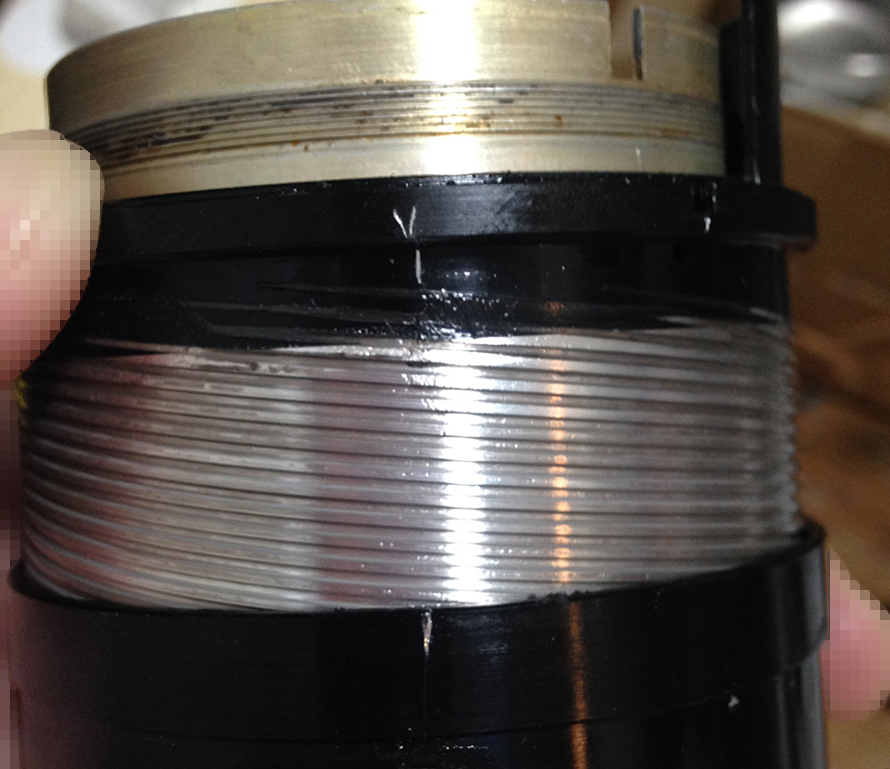
Start by carefully removing these screws that secure the focusing ring. These screws are also used for focus adjustments so take plenty of notes before you remove them. This is just one of two steps for you to adjust this lens’ focus.
The focusing ring should come off once the screws are gone. You’ll also need to turn your lens close to its minimum focusing distance to give you enough room to remove it due to the inter-locking nature of focus ring’s mount so do not force it.

Now, re-focus the lens back to infinity and note the infinity position of the helicoids.

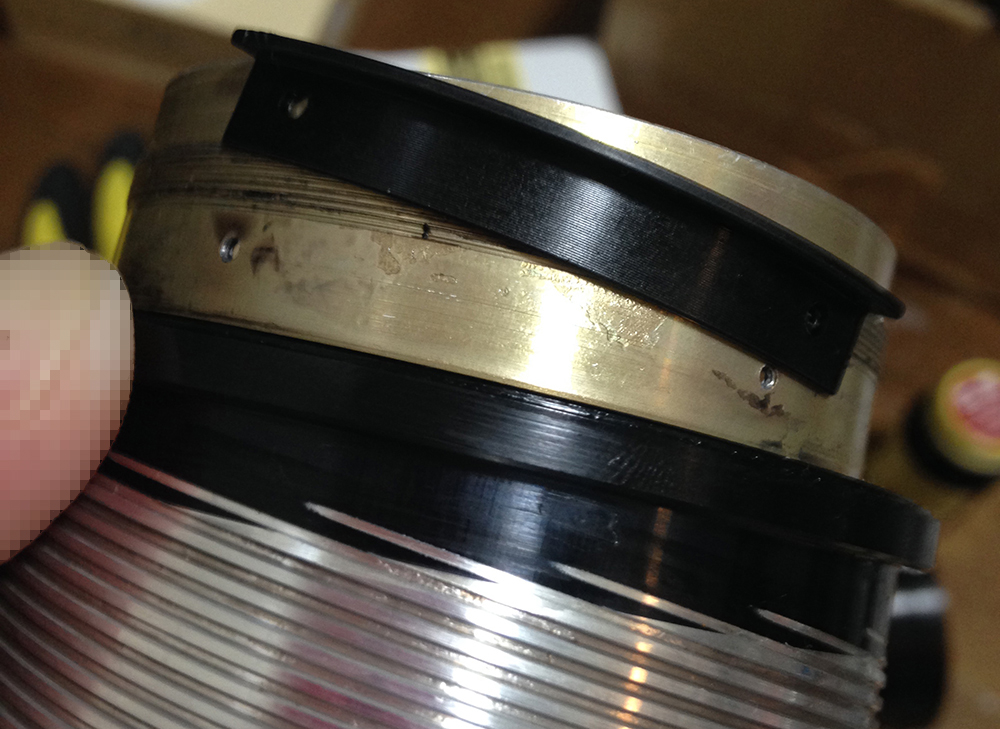
To access the helicoid key’s screws you have to remove these 3 screws that are securing the sleeve to the main lens barrel.

With the screws gone, you can safely remove the sleeve from the lens.

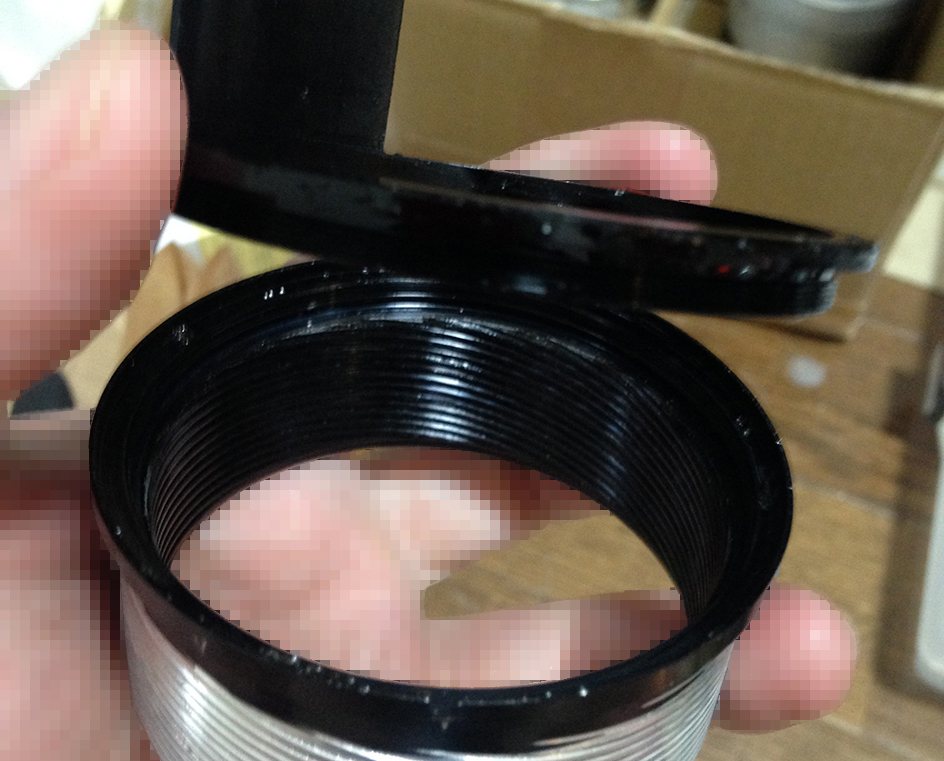
Rotate the barrel until the screws of the helicoid keys line-up with the holes on the main barrel. Carefully unscrew the screws to remove the helicoid key.
With the helicoid key gone you can now separate the outer helicoid. Be careful and note where they separate because this is also the same spot where they should mesh. If you’re new to lens repair please read my article on how to work with helicoids. Many people get stuck because they didn’t mark where the helicoids separated and they don’t know how to look for the correct position if that happened.

The innermost helicoid is best separated by turning it until it exits from the bottom of the main helicoid. You’ll have to remove these 2 screws to do that so that the inner helicoid can pass-through or else the helicoid stop (the one with the screws) will be in the way. It’s responsible for constraining the focusing ring to its turning range.
Be sure to mark where the inner helicoid and the main helicoid separated.

For a thorough cleaning you’ll want to remove this ring from the main helicoid. Unscrew these tiny screws and apply acetone or any strong solvent to soften the seal to remove it. It may take some time for the glue to soften because we are dealing with a glue that has set around 5 decades ago. Nikon also tends to use stronger glues on these parts so do not force your way. Just give the solvent 30 minutes to an hour to work on the adhesive. You may even find yourself pickling this thing in a vat full of alcohol for a night, trust me.
This is the main reason why I had to clean this part despite the effort and potential need to re-align this part again during disassembly. Old lubricant tends to get deposited under this ring and this is a problem for you when this decades-old lubricant gets mixed with your fresh grease and starts a chemical reaction so that the fresh grease starts to gum-up after a few months. I learned this from my old auto mechanic (his name’s Rudy) while he was repacking the old bearings in my old car.

To remove the aperture claw assembly, remove this post first. Don’t use excessive torque when removing this part and specially when re-installing this later because this part can easily snap when over-tightened.
Remove these screws that secure the locking ring of the aperture claw assembly. I believe that a simple copper tension ring is more than enough for this purpose and tension rings will last longer against the wear-and-tear of regular maintenance but whatever.
And there you go, the aperture claw and its locking ring can now safely be removed.
Clean the helicoids very well, I usually soak them in a strong detergent solution for long periods of time (just kidding, a day will do) and scrub-away the grease. This works if the grease used is soluble to it but you will need to use non-polar solvents occasionally and it can be hazardous to your health so be careful. Make sure not to leave any residue and go and pickle it again in industrial alcohol to remove any stubborn grease. I then use a pig-bristle wheel on a Dremel to do my final polishing and then clean them again before the final drying process begins. This is a lot of work but it’s important to work with a pristine set of helicoids or don’t even bother to do it at all.
Disassembly (Objective):
The objective for this lens is huge. The lens elements are heavy so be careful not to drop anything. Despite being large it’s easy to work with because the construction is simple. If you are an experienced repairer then this lens is peanuts for you. A novice will find this challenging because you will need some big lens spanners and lens keys to open some of the parts and retainers, most of which are sealed and there’s a chance that you can ruin yoru lens if your hand slipped.
Separate the front elements assembly by unscrewing it from the objective’s housing. You may need to apply solvent to soften up any glue.
Use a lens opener to unscrew the retainer ring of the front element. Use caution and you should be fine, apply some solvents if yours is stuck.
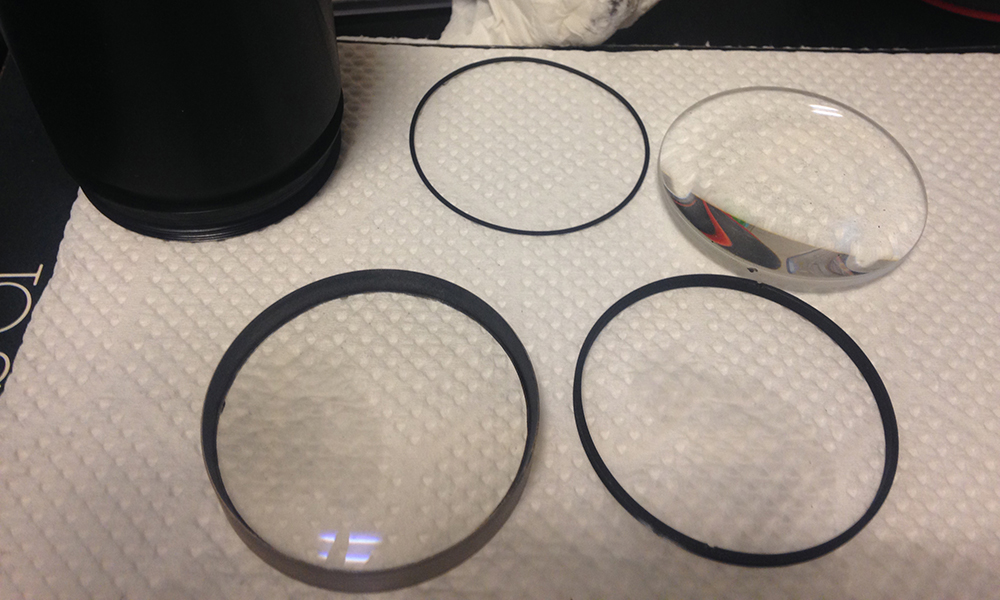
The front elements assembly consists of 2 separate glass elements. Remove them both by using a lens sucker. Be careful when removing the front because you don’t want the 2nd element to drop to the floor. The gasket in the picture on the top row lies between the 1st and 2nd elements. I am not sure what material it was made from, if it’s not metal then do not soak it in any solvents.

To remove the middle element use a spanner with long bits to unscrew it from the main casing. The tips of the bits should fit into these two holes. You can also see the extent of the fungus in this picture. The rear element is even worse.
Carefully pull out the assembly with your fingers or use a lens sucker.
The retention ring took me a long time to unscrew because it was being secured by paint so acetone had no effect on it. I instead used lighter fluid to soften it before I could safely unscrew this thing off.

You can use a lens sucker or simply drop the middle element into your palm. If it is stuck, do not force it. Use your finger to push it from the back and that should do it. Its lips can easily get chipped or get scratched when you use excessive force so be careful.
I usually mark the edge with a soft pencil to indicate which way the element should face so that I will not accidentally put an element back in the wrong direction. The mark does not need to be big, a small 1mm arrow or triangle should be perfect for this.

To clean the rear element just unscrew the retention collar and carefully pull it out using a lens sucker. Mine needed some acetone because it was sealed.

Be careful with the retention collar, mine had felt glued to it but I forgot about it and so I dunked it in the alcohol vat! As a consequence I had to scrape away the old damaged felt and apply a fresh replacement.
That’s all for the objective, if you need to clean your iris mechanism then just read what I made for other Nikkors of the same vintage. The mechanisms are similar and you should have no problems working with it.
Conclusion:
This lens is pretty easy to take apart and re-assemble but surprisingly it took me about 3-4 nights to fix mine. The size of the parts have contributed to it since I cleaned the parts as best as I can and that means more surface area for me to scrub. Also related to the size of the parts, the grease needed to lubricate this is 2-3X more than what I would normally use on the usual small Nikkor prime so I ran out of my regular S10 helicoid grease after I serviced this lens. I recommend that you use a light-type of grease for this lens.
There are a few things that you’ll need to be careful of. One is the felt lining on some of the parts like the baffles and hood. To clean them, just use the sticky side of a scotch tape and use it to pick up any lint or loose fibers.
The helicoids were easy to re-assemble but you’ll have to be careful with the inner ones. Mating it to the main (middle) helicoid can be tricky if you try it the usual way (from the front end). It connects rather easily when you mate it from the other end of the main one so separate the inner helicoid from the bottom instead of the top.
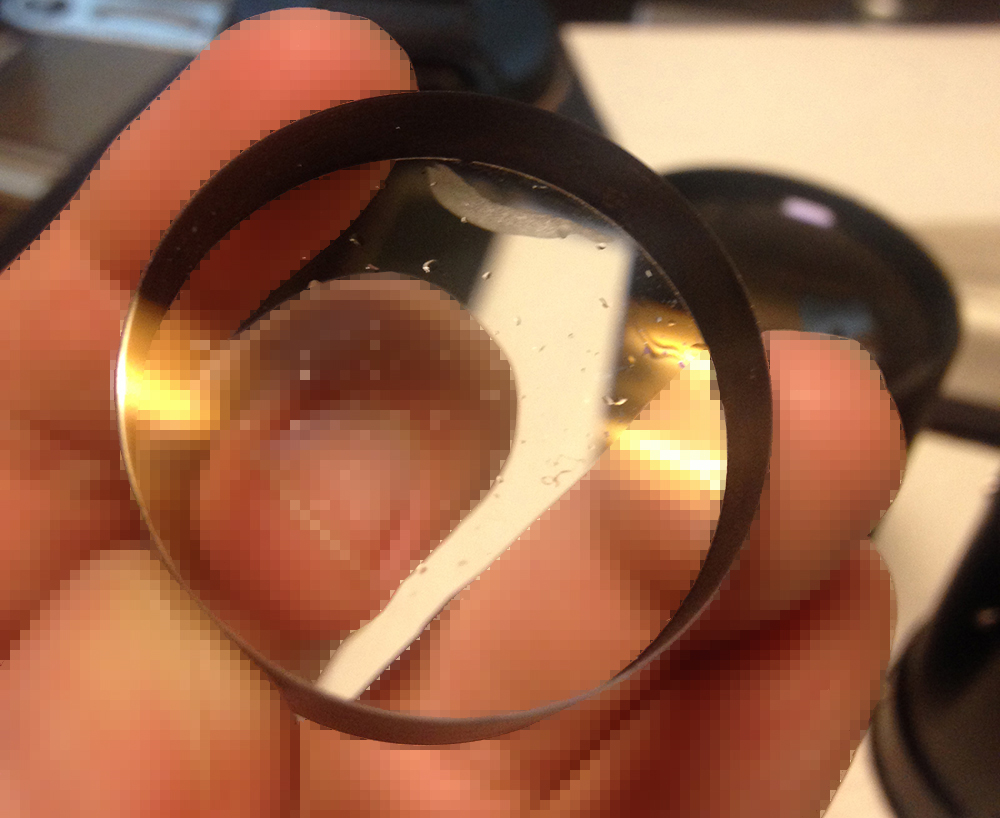
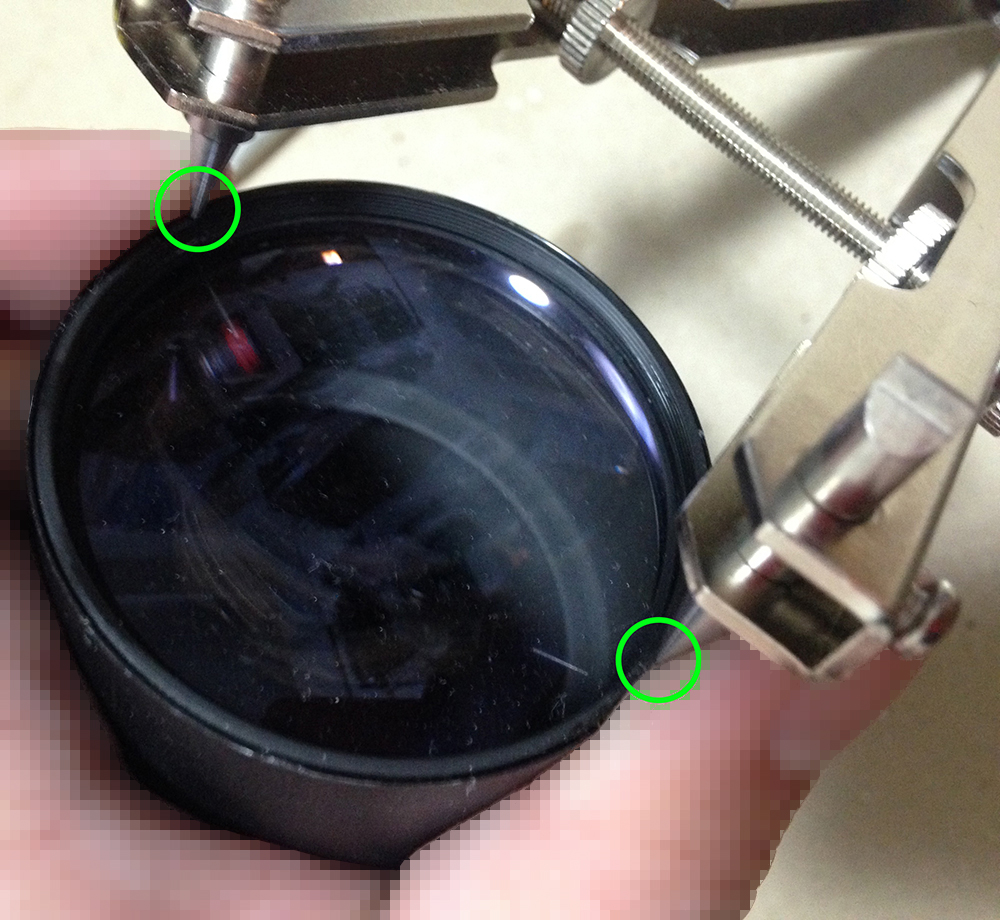
I cleaned the fungus off each element using ammonia and hydrogen peroxide. Check the crescent shaped fog on the lens where water is not forming beads or droplets, that is the place where the fungus damage was worst. It is invisible when dry and won’t affect the image quality but the fungus has etched the glass enough so water won’t form beads and sheets there because it is not mirror-smooth anymore due to micro-etching.
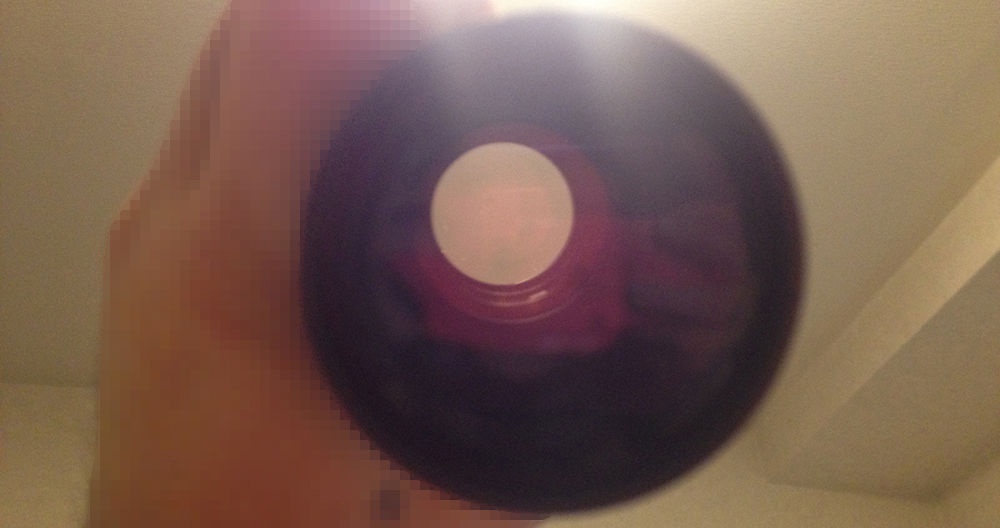
So clean! The only way to know this lens’ history is by using a black light. You will never know a lens’ history when you found one in the used market specially if it was serviced by a competent technician. If somebody like me can manage to clean it to this state then a professional should do a better job.
When putting the lens together, you will need to re-adjust the focus and this is the place where you should do it. Adjust your lens before you put the focusing ring back or else it’s going to be frustrating because you’ll have to remove the focusing ring again just to get back to this point. Read my article on adjusting a lens’ focus to know how to do it in a DIY setting using equipment that can be bought easily or what’s available to you.
Thanks for following my work, if you liked this article please share this with your friends so it will get more views. This site earns around $0.30 a day, it’s totally reliant on views. You can also support this site, it helps me offset the cost of maintenance and hosting. You are also helping me purchase, process and scan film. This site promotes the use of film so we’re all in this together. See you again in the next article, Ric.
Help Support this Blog:
Maintaining this blog requires money to operate. If you think that this site has helped you or you want to show your support by helping with the site’s upkeep, you can make a small donation to my paypal.com (richardHaw888@gmail.com). Money is not my prime motivation for this blog and I believe that I have enough to run this but you can help me make this site (and the companion facebook page) grow.
Buy me a roll of film or a burger?
Thank you very much for your continued support!
$2.00
Helping support this site will ensure that this will be kept going as long as I have the time and energy for this. I would appreciate it if you just leave out your name or details like your country’s name or other information so that the donations will totally be anonymous. This is a labor of love and I intend to keep it that way for as long as I can. Ric.

Mar 08, 2016 @ 20:18:41
Once again, great work Rick.
Thanks for the warning about the ball & spring detent arrangement!
Mar 09, 2016 @ 00:35:34
Thanks, Ron! Yeah, i wonder if I actually lost something…it was a surprise!
May 31, 2016 @ 23:43:17
Hi Rick! Great post! Would love to see the Nikon 200mm f/4 Ai disassembly though as I am facing it as my first project!
Happy to see the joy this historic lenses have to give.
Pablo.
Jun 01, 2016 @ 00:26:27
Hello, Pablo! You are in luck! I am going to write one in the coming weeks for somebody in Singapore!
Mar 05, 2017 @ 06:30:16
Great guide! I have a 200 f/4 Q.C that it will come in extremely handy for. Any chance you have taken apart the 300 f/4.5 ED-IF AI-s, or the 24-120 AF-D ED-IF? Instructions would be greatly appreciated! Thanks!
Mar 05, 2017 @ 10:37:09
Thanks, Gustafson!
I have the 300/4.5 pre-Ai one, unfortunately. Maybe I can find one on the Japanese net for you. Ric
Mar 07, 2017 @ 10:45:23
Thanks, Ric! That is very nice of you to offer and greatly appreciated.
On a separate note, I’ve managed to strip the screws on the mount in some older Nikon hardware, such as the 300 f/4.5 ED-IF and a PK-13 tube. Do you have suggestions for avoiding such occurrences, and how to salvage the situation if it does occur? I’ve tried lightly spraying lubricants on the screws (WD40, lithium grease) and using the correct size JIS screwdrivers, but I still end up stripping screws at a frequency higher than I would like, and would like to eliminate the issue if possible. Thanks in advance!
Mar 07, 2017 @ 13:06:20
Hello, Gustafson! Have you read my screws blog post? You have to apply pressure to the screws. WD40 won’t do anything,too. If you can recall I kept on reminding people to use solvents on these screws or use a mini torch when all else fails. Ric.
Mar 11, 2017 @ 11:52:59
Ric, thanks for the pointers. I did go back and read your guides, and appreciated the suggestions on using long-shaft JIS screwdrivers, and acetone or heat if needed. Also, the specific suggestion of a dremel and the micro screw extractor was helpful. Can’t wait to try those out. As for info on the 300 f/4.5 ED-IF, thanks for pointing me to those sites. I didn’t know those resources existed, and you’ve given me two more places to look for my other lenses!
Mar 12, 2017 @ 02:45:04
Hello, Gustafson.
I will probably make a video one of these days to prevent people from stripping their screws. No matter how hard I warn people, there are people who will always strip the screws. I also found out that there are 2 versions of the 300/4.5 non-Ai. Ric.
Mar 07, 2017 @ 13:11:57
http://lenscleanservice.com/index.php?QBlog-20141125-1
http://taitei.awane-photo.com/tech/file0008/index.htm
Hello, Gustafson.
Unfortunately, there is nothing much on the net about the ED version. I only found these 2. Ric.
Jul 12, 2018 @ 00:23:56
Richard, I want to remove the bayonet ring from my Nikkor-Q 200 F4 so that I can lengthen the detent slot slightly. (so the lens will securely lock to the Nikon to Canon adapter I have.) I have removed the five screws but the ring will only lift out about 1/4-inch before something catches internally and prevents me from lifting the ring free. Any help you can provide would be greatly appreciated. Thanks, John
Jul 16, 2018 @ 15:49:16
Hello, there shouldn’t be any problem if you followed my procedures. Maybe it’s a screw at the aperture ring? Ric.
Jul 17, 2018 @ 00:36:12
No luck Ric. The aperture ring can be lifted up about 1/4th inch also but the bayonet ring still feels like some part is catching internally below the aperture ring. I have not removed the front barrel assembly so I am wondering if I can remove the bayonet ring without removing the barrel assembly?
Jul 17, 2018 @ 00:39:48
Try extending it and try again.
Jul 17, 2018 @ 00:47:35
Thanks very much, that did it!
Jul 17, 2018 @ 00:50:33
Great to know. It just got stuck
Oct 26, 2018 @ 22:20:53
You really helped me salvage a lens! Thank you so much. Mine did not have the glue problems yours did, and the cleanup went very smoothly!
Nov 03, 2018 @ 00:01:41
Congratulations! It may have been serviced previously. Ric.
Feb 06, 2019 @ 16:45:18
Richard, Very good article! I am taking delivery of the 200mm f4 this week and will be converting to AI. Are there any issues you see with removable of the mount and re-assembly once the modification is complete?
Feb 08, 2019 @ 03:50:06
Hello, Dex.
None that I am aware of. it should be OK. Ric.
Aug 01, 2019 @ 22:30:36
Hello Richard,
I only want to do an AI conversion to my 200mm f/4. After removing the five screws the bayonet mount is still stuck, in a loose way. What is preventing the mount from being removed and what is the minimum I need to do to get it off ? I’ve already done two other lenses, a 24mm f/2.8, and a 55mm f/1.2, and didn’t encounter such a problem.
Oct 18, 2019 @ 15:09:15
Tip for dismantling when a spring loaded detent ball is present: Put the whole thing in a clear plastic bag to capture all the flying tidbits.
Jun 05, 2020 @ 23:01:01
Hi Richard,
I just purchased and almost excellent condition Q Auto 200mm SN 1739xx. The glass is perfect as are the aperture blades, however the focus ring is 100% stuck at 12 feet. Am I going to be able to dismantle this lens?.
Jul 21, 2020 @ 15:00:42
Thank you so much, all was as you described, no screw has been stripped!