
Hello, everybody! I was at a Samba festival and it was a good change in my daily routine. I am often busy with work that I neglect so many things and this gave me a little bit of time to charge my mental energy. We sometimes need a change in perspective when in comes to life, doing the same routine day-in-day-out can really burn you out. You won’t notice it until it’s too late so it’s nice to take a break occasionally. While we’re on the topic of changing perspectives, I’d like to introduce to you a Nikkor that does the same thing, I love this lens as it helps me see things through an altered perspective. Read the whole article to find out what this is.
Introduction:
Let me introduce to you the PC-Nikkor 35mm f/3.5! This is both unusual and historically important. I say unusual because this is a specialist Nikkor that was specifically designed for architectural photography so it has gimmicks to help it do that. This amazing lens was also ground-breaking when it came out because it was the first lens for the 35mm format that can give you any control over your picture’s perspective by modifying the vanishing point of your frame and hence – “PC” (for Perspective Control). It’s the first of its kind and it helped take the small format into the realm of technical photography where it was once dominated by larger formats such as 120mm.

Such a lovely lens. This thing is heavy so do not let its small size fool you. It is a gem of a lens that was made with precision in mind. The lens is dirty in this picture but you are going to see it cleaned before your very eyes. It has plenty of knobs and rings to help you operate the lens and that’s part of the appeal of using this thing.
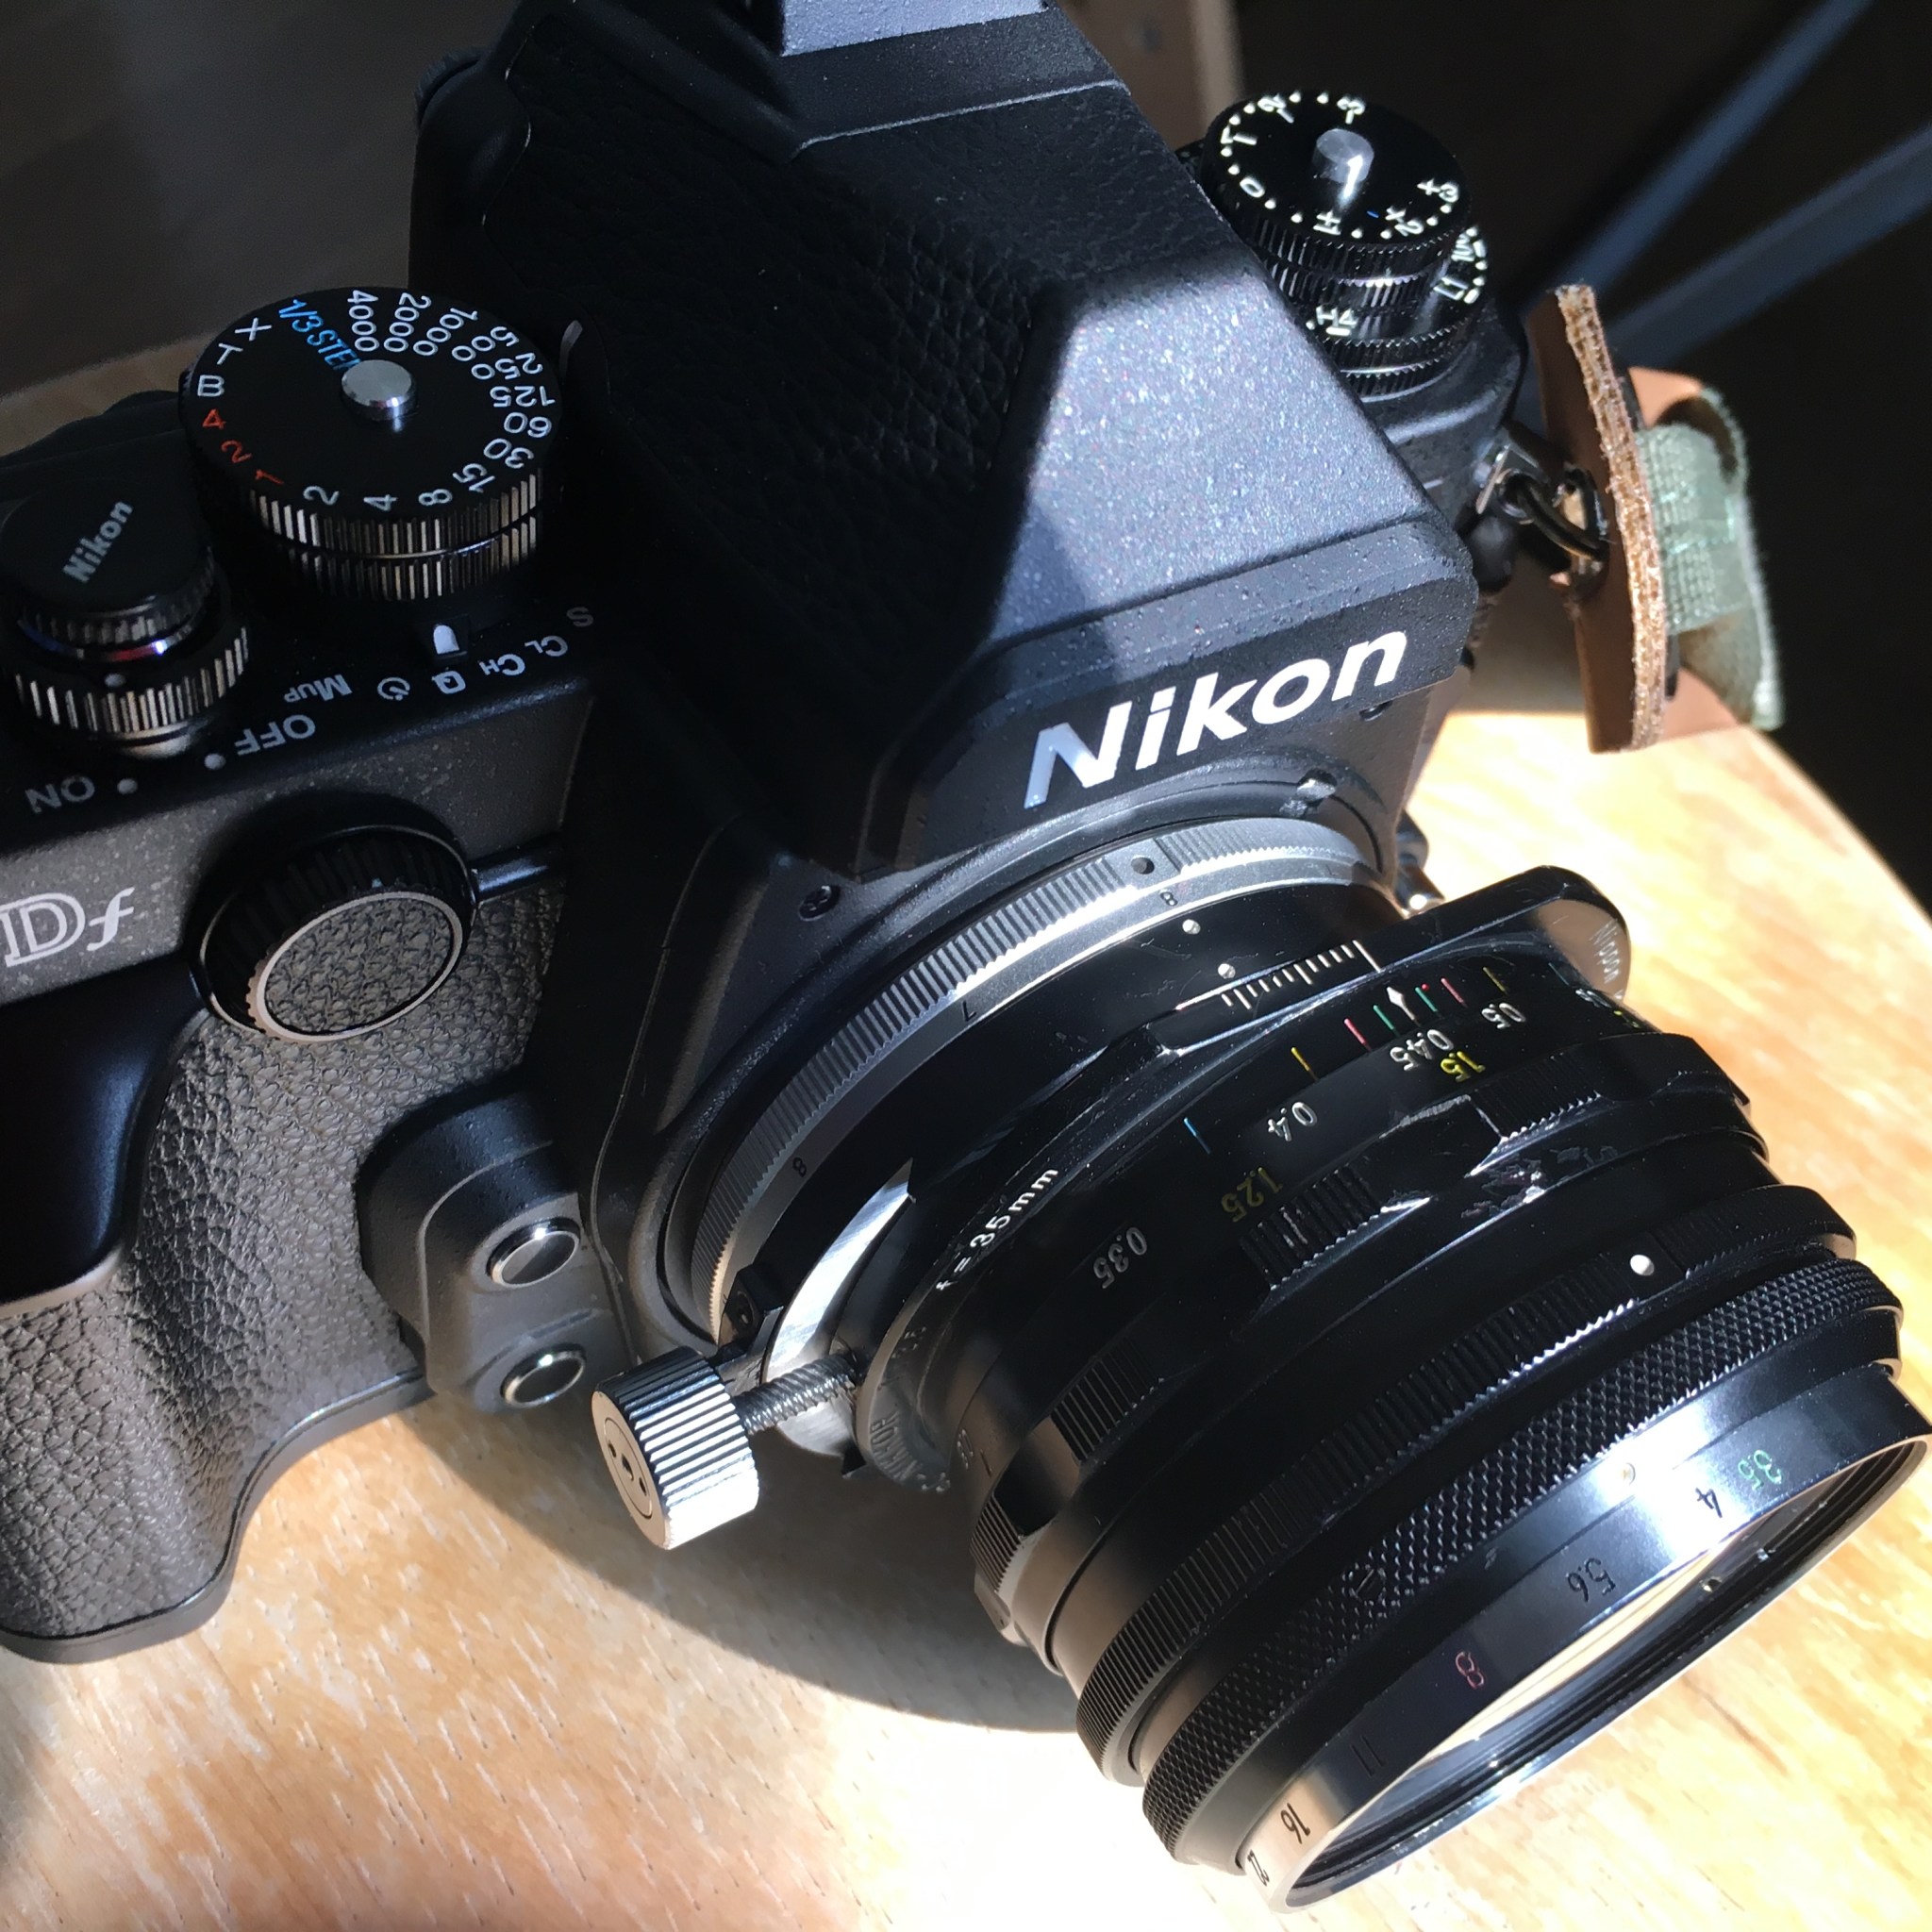
Here it is on the Nikon Df. It’s almost at full-shift here. Turn that large silver knob to shift the lens and turn it to rotate the whole barrel at its center axis. This is useful for manipulating the perspective of your picture. An example would be if you are shooting from a high place and the base of the buildings start to look narrow on the frame due to foreshortening. You can just rotate the lens to reverse the effect so the base of the buildings won’t look tapered. Another example is when shooting down a long corridor, the lines will start to converge strongly at the vanishing point and to counter this effect you’re going to rotate the lens at the quarter position just like on the picture above. This is very useful for advertising because it will not make the corridor look small or look like a scary tunnel leading to somewhere dangerous.

You operate a lens with a preset aperture by turning the aperture ring to the desired f-stop so that you constrain the aperture stop-down ring’s rotation so that it will not rotate past the f-stop that you wanted. You stop the lens down manually before making an exposure or just leave it like that. This will give you a darker viewfinder when you take a peek but it cannot be helped. This only affects cameras that allow you view through-the-lens and rangefinders have no problems with this since you’re viewing through another window.
This is necessary because the automatic diaphragm feature is impossible to implement because the lens’ objective can be moved, making that pointless. Nikon will solve that by using electronic aperture on the modern versions of the PC-Nikkors. The lens beside it is the rare Micro-Nikkor 5.5cm f/3.5. It also has a preset aperture that you manually open and close. That one extends to more than twice its length and that made it necessary to omit the automatic diaphragm feature. Another example is the Nikkor-T 10.5cm f/4, it was made to be cheap so it also has a version for the Nikon S-Mount. Nikon sure saved some money on lens design here.

The PC-Nikkor 35mm f/3.5 on full-shift (11mm~). I prefer not to use this lens like this because the far-end of the frame looks terrible since you’re pushing the optics’ main axis too-far from the center. The result looks smudged but there will be times when this will be your only option.
It’s also worth mentioning that this will not mount properly on later Nikons (film or digital) that does not have a collapsible aperture coupling tab. Keep this in mind so you won’t damage your Nikons by trying to mount this thing. The Nikon Df and the Nikon F4 has collapsible aperture coupling tabs so they neatly get out of the way and you can safely mount this with them. Another thing is that big knob can hit the heads of some Nikons when it’s shifted and rotated to a particular position. It affects all Nikons with long, over-hanging prisms.


(Click to enlarge)
This set of pictures show you the lens in action. The left one is the lens with no shift so we have a natural perspective wherein the building tapers at the top. The photo in the middle shows the lens shifted mid-way so we begin to see the vertical lines straighten-up and they start to look a bit more parallel to each other. The picture to the right shows the lens in full-shift, we have a forced-perspective and the vertical lines of the building are almost parallel to each other, the effect is overdone and the photo doesn’t look natural.


(Click to enlarge)
Here are some more examples. The left-most photo is the un-shifted picture for your reference. The one at the center was fully-shifted horizontally, you can see that mechanical vignetting is really heavy towards that direction. It altered the horizontal lines so they flare towards the direction of the shift. It is handy for long, wide structures such as ships. The one to the right is your usual application for this lens wherein you’ll want the vertical lines in your frame to look more parallel. This lens has a higher-than-usual contrast, you can see it from the deep, blue sky. I see this building regularly and this is a very colorful rendering of this building, something that I don’t see from the lenses that I have used to shoot this thing throughout the years.


(Click to enlarge)
Sphero-chromatic aberration can be seen specially if the lens is shifted. This is quite a lot in my opinion but it’s expected since the optical center is not at its optimum position. Performance is above-average for its age when it isn’t shifted at all. To avoid the ugly smearing and other artifacts, use the shifting gimmick conservatively. Stopping the lens down may help a bit but not with the smeared look that you get at the far-edge towards the shift.


(Click to enlarge)
Vignetting is present but it isn’t a big deal, this lens shifts so the edges don’t darken as much as regular lenses. The vignetting can be seen once the lens is shifted because the edge of the front element is closer to the image center. Stopping the lens down doesn’t change how it looks by much when the lens isn’t shifted. Distortion is mild but observable and the curvature is simple, it can be a problem when taking photos of architecture. This lens is the first in its class so this is kind of excusable.


(Click to enlarge)
This set should show you how bad the smearing is at the edge when shifted. The left-most one was fully-shifted, the one at the center is a bit less and the last one is probably less-than-half. Notice how the image quality degrades in the top-edge and how it gets better as the lens is shifted less. This will not be a problem when printing tiny photos but avoid shifting the lens fully if your picture is supposed to be printed large.
(Click to enlarge)
Flare and ghost resistance is poor but what should we expect from a vintage lens from 1962? This has more to do with the coating used and not the lens design itself. The Beatles haven’t debuted yet and we listened to mono when this was released.
If you study the pictures closely, you’ll notice that the vignetting gets worse as the lens was shifted further from it’s 0mm (no-shift) point. This is natural since the front element is not big enough. The shifted photo look un-natural because of the forced-perspective but this is sometimes required especially for architecture because the building looks “dignified”. This is what people try to achieve in post so that buildings look nice on brochures and ensuring unit sales. If you zoom-into the picture you can see some smearing but this is the usual for these types of lenses and remember that this lens was made in 1962 and it’s the first of its kind, prompting others to copy and surpass it. It was a real game-changer which attracted many people to the Nikon camp.

The center looks great but the image quality degrades towards the direction of the shift. Stopping the lens down will help but not by much if you shifted it to its maximum value.

This one looks surreal but this is probably what realtors wanted to see. The contrast of this lens is quite high compared to other lenses of the same age.

This lens makes is useful for taking storefronts, too. The tiles near the edge look terrible since this was shifted more than half-way but this is ok if your picture is only going to be viewed with a tiny smartphone as an ad.
Let’s now see some pictures that were taken with film. The look of film isn’t easy to simulate because of grain, film is also a bit more forgiving compared to digital depending on which film you use. This was calculated for use with film so it’s only fair that we judge this lens using its intended medium. The photos were taken with a Nikon F loaded with Kodak Color Plus 200. These were mostly taken with the iris stopped-down.

This crab is probably 8m up from the street, shifting the lens helps make the crab look better and not “skewed”. Sure, the lines aren’t parallel but this is a lot better than using a regular lens.

I think I rotated the lens diagonally to get the building to look like this. Your imagination dictates how things should look and you can try turning this to any angle to see how your subject looks.

Not sure what happened here but the results look ugly, it looks like I got the focus all wrong. This was taken at about f/5.6 so the resolution should have taken cared of the details on the building but they look like mushy. Anyway, this is how you would want to use this lens if you’re shooting buildings, you can make them look better for print in brochures.

This one looks much better, it was probably taken at f/11. I think I turned it diagonally to help make things look straighter horizontally, notice how nice the building to the left looks while the clock tower looks terribly specially at the spire. It looks fine when printed small but it won’t look good in a larger print where people can see the poor details of the spire.


(Click to enlarge)
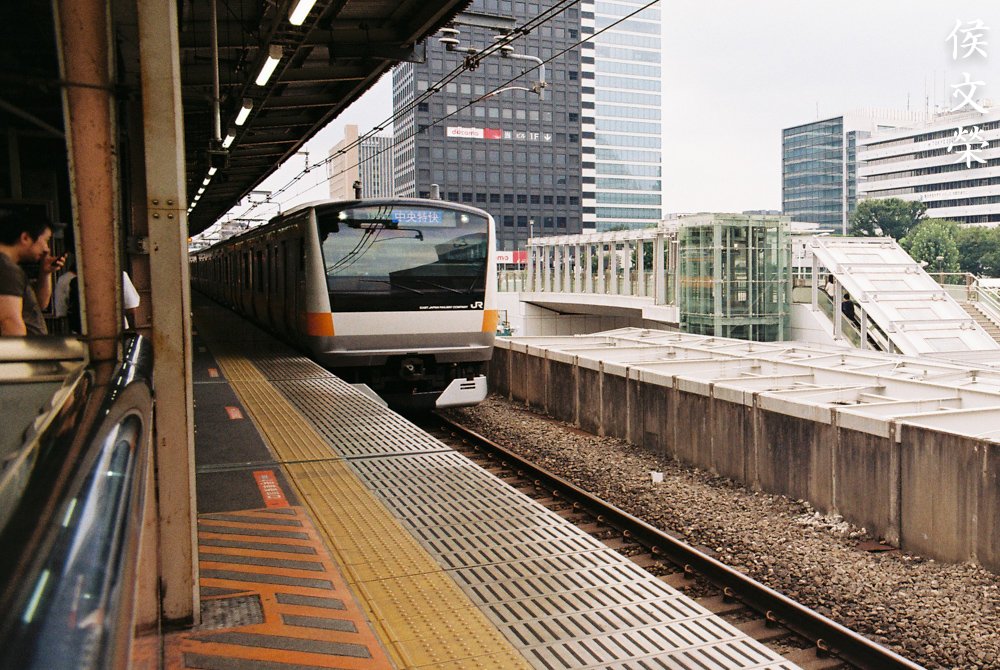
This lens is also handy for taking pictures of your neighborhood. The photo of the train was taken with the lens shifted horizontally, notice how it does not look as tapered towards the end.


(Click to enlarge)
This is a useful lens if you want to take brutalist architecture, imagine these building as old Soviet-style architecture. You may also want to use this as an important part of your kit the next time you visit Hong Kong, the buildings there will look better using a shift lens.
This is an interesting lens, it’s great for people who don’t have much money to spend on a shift-lens. Newer PC-Nikkors can shift and tilt but those aren’t cheap by any standards. They’re amazing lenses but they’re only worth it if you’re going to use them professionally. If you’re only curious and you just wanted to play around with a shift-lens, buy any of the older PC-Nikkors to save you some money. The later ones are excellent and they don’t cost much compared to this one. If you can spend a little more, buy the ones that were made in the 1980s since they’re optically better. Collectors and cheapskates are the main audience for this one, if your living depends on it then just buy the best that you can afford.
Before We Begin:
If this is your first attempt at repairing a lens then I suggest that you check my previous posts regarding screws & drivers, grease and other things. Also read what I wrote about the tools that you’ll need to fix your Nikkors.
I suggest that you read these primers before you begin (for beginners):
Reading these primers should lessen the chance of ruining your lens if you are a novice. Before opening up any lens, always look for other people who have done so in Youtube or the internet. Information is scarce, vague and scattered (that is why I started this) but you can still find some information if you search carefully.
I highly recommend that you read my working with helicoids post because this is very important and getting it wrong can ruin your day. If I can force you to read this, I would. It is that important!
For more advanced topics, you can read my fungus removal post as a start. This post has a lot of useful information and it will be beneficial for you to read this.
Disassembly (Main Barrel):
This lens is unusual so we’ll have to go back-and-forth a little but we always need to separate it into smaller assemblies to make it more manageable as well as protect the objective by separating it and storing it somewhere safe while we work on a different assembly. This is not a simple lens and novice repairmen should not work on this without the proper tools or skills. This is best left to the professional to repair. It has plenty of inter-linking parts and you will spend most of the time cleaning this.

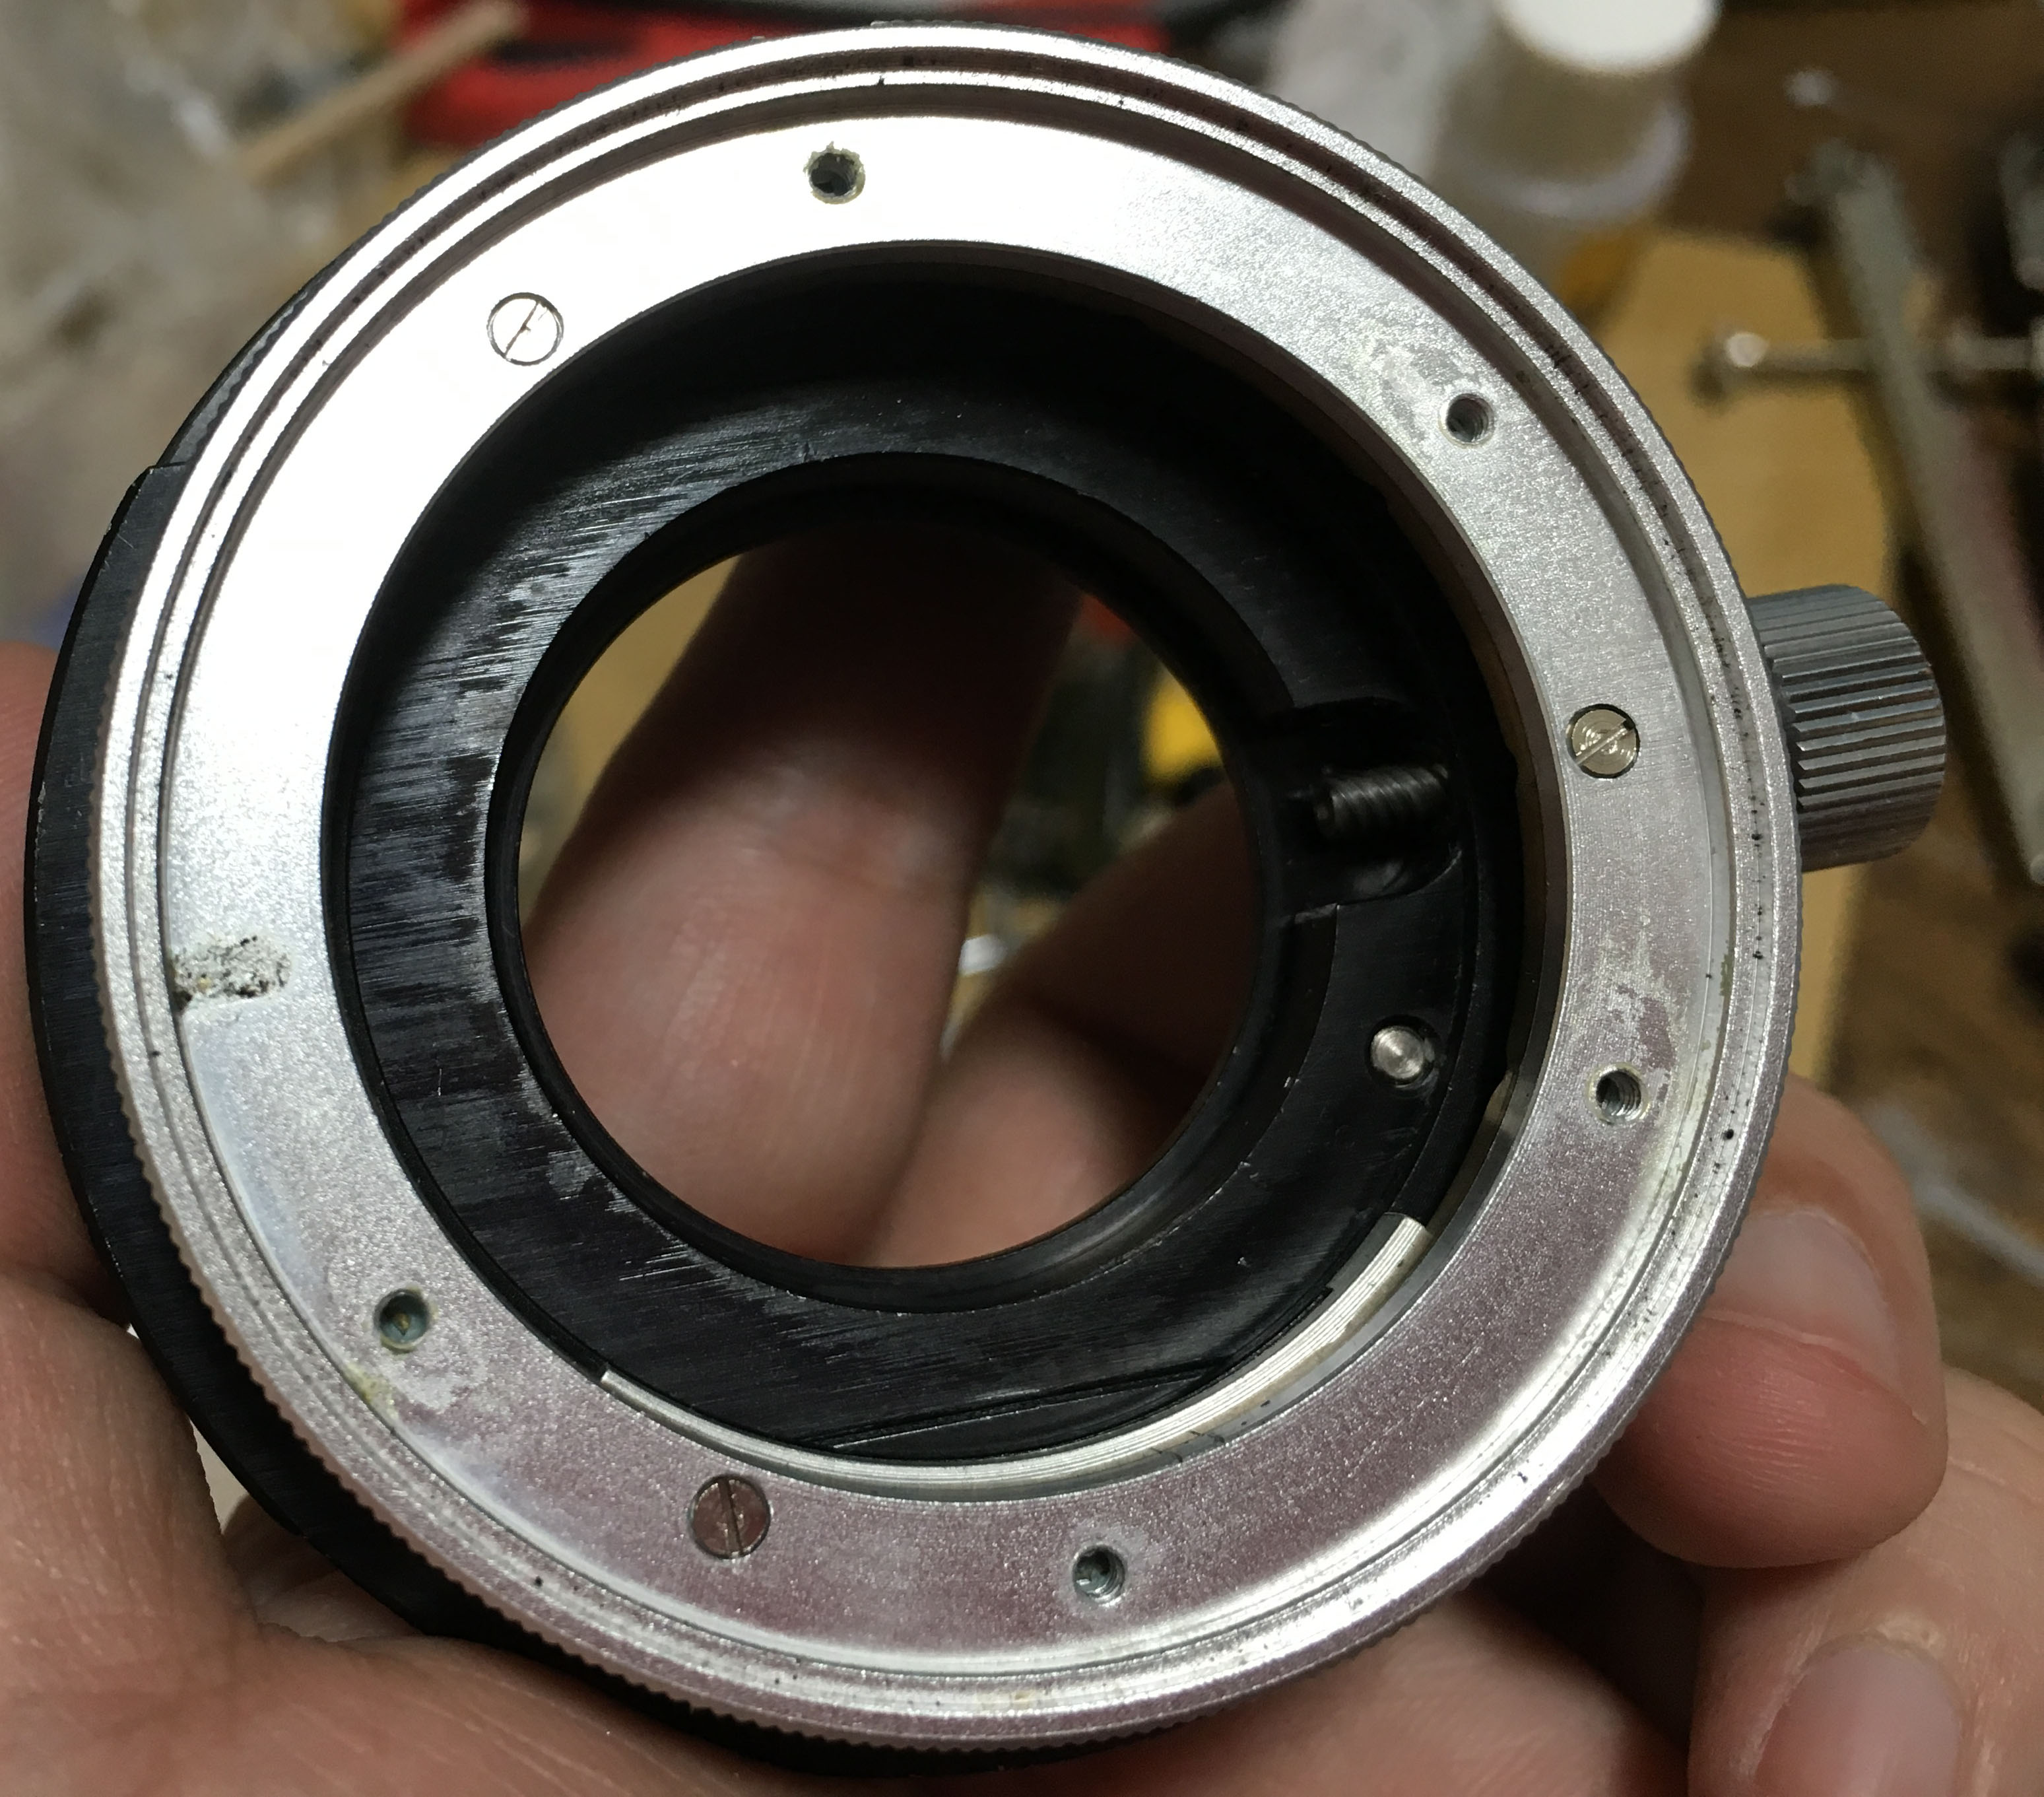
We start by removing a ring that holds the front assembly of the lens to the main barrel. It is a common way for most preset-aperture Nikkors to have their objective/front assembly secured this way.

The ring can be removed easily with a pipe key. It is situated too deep to be accessed by a lens spanner unless you use special tips. My lens spanner has long tips, I can access rings that are 3cm deep. I milled them from the shaft of an old screwdriver.

The front part should come off easily now that the ring is gone. It’s heavy so take care not to drop this.

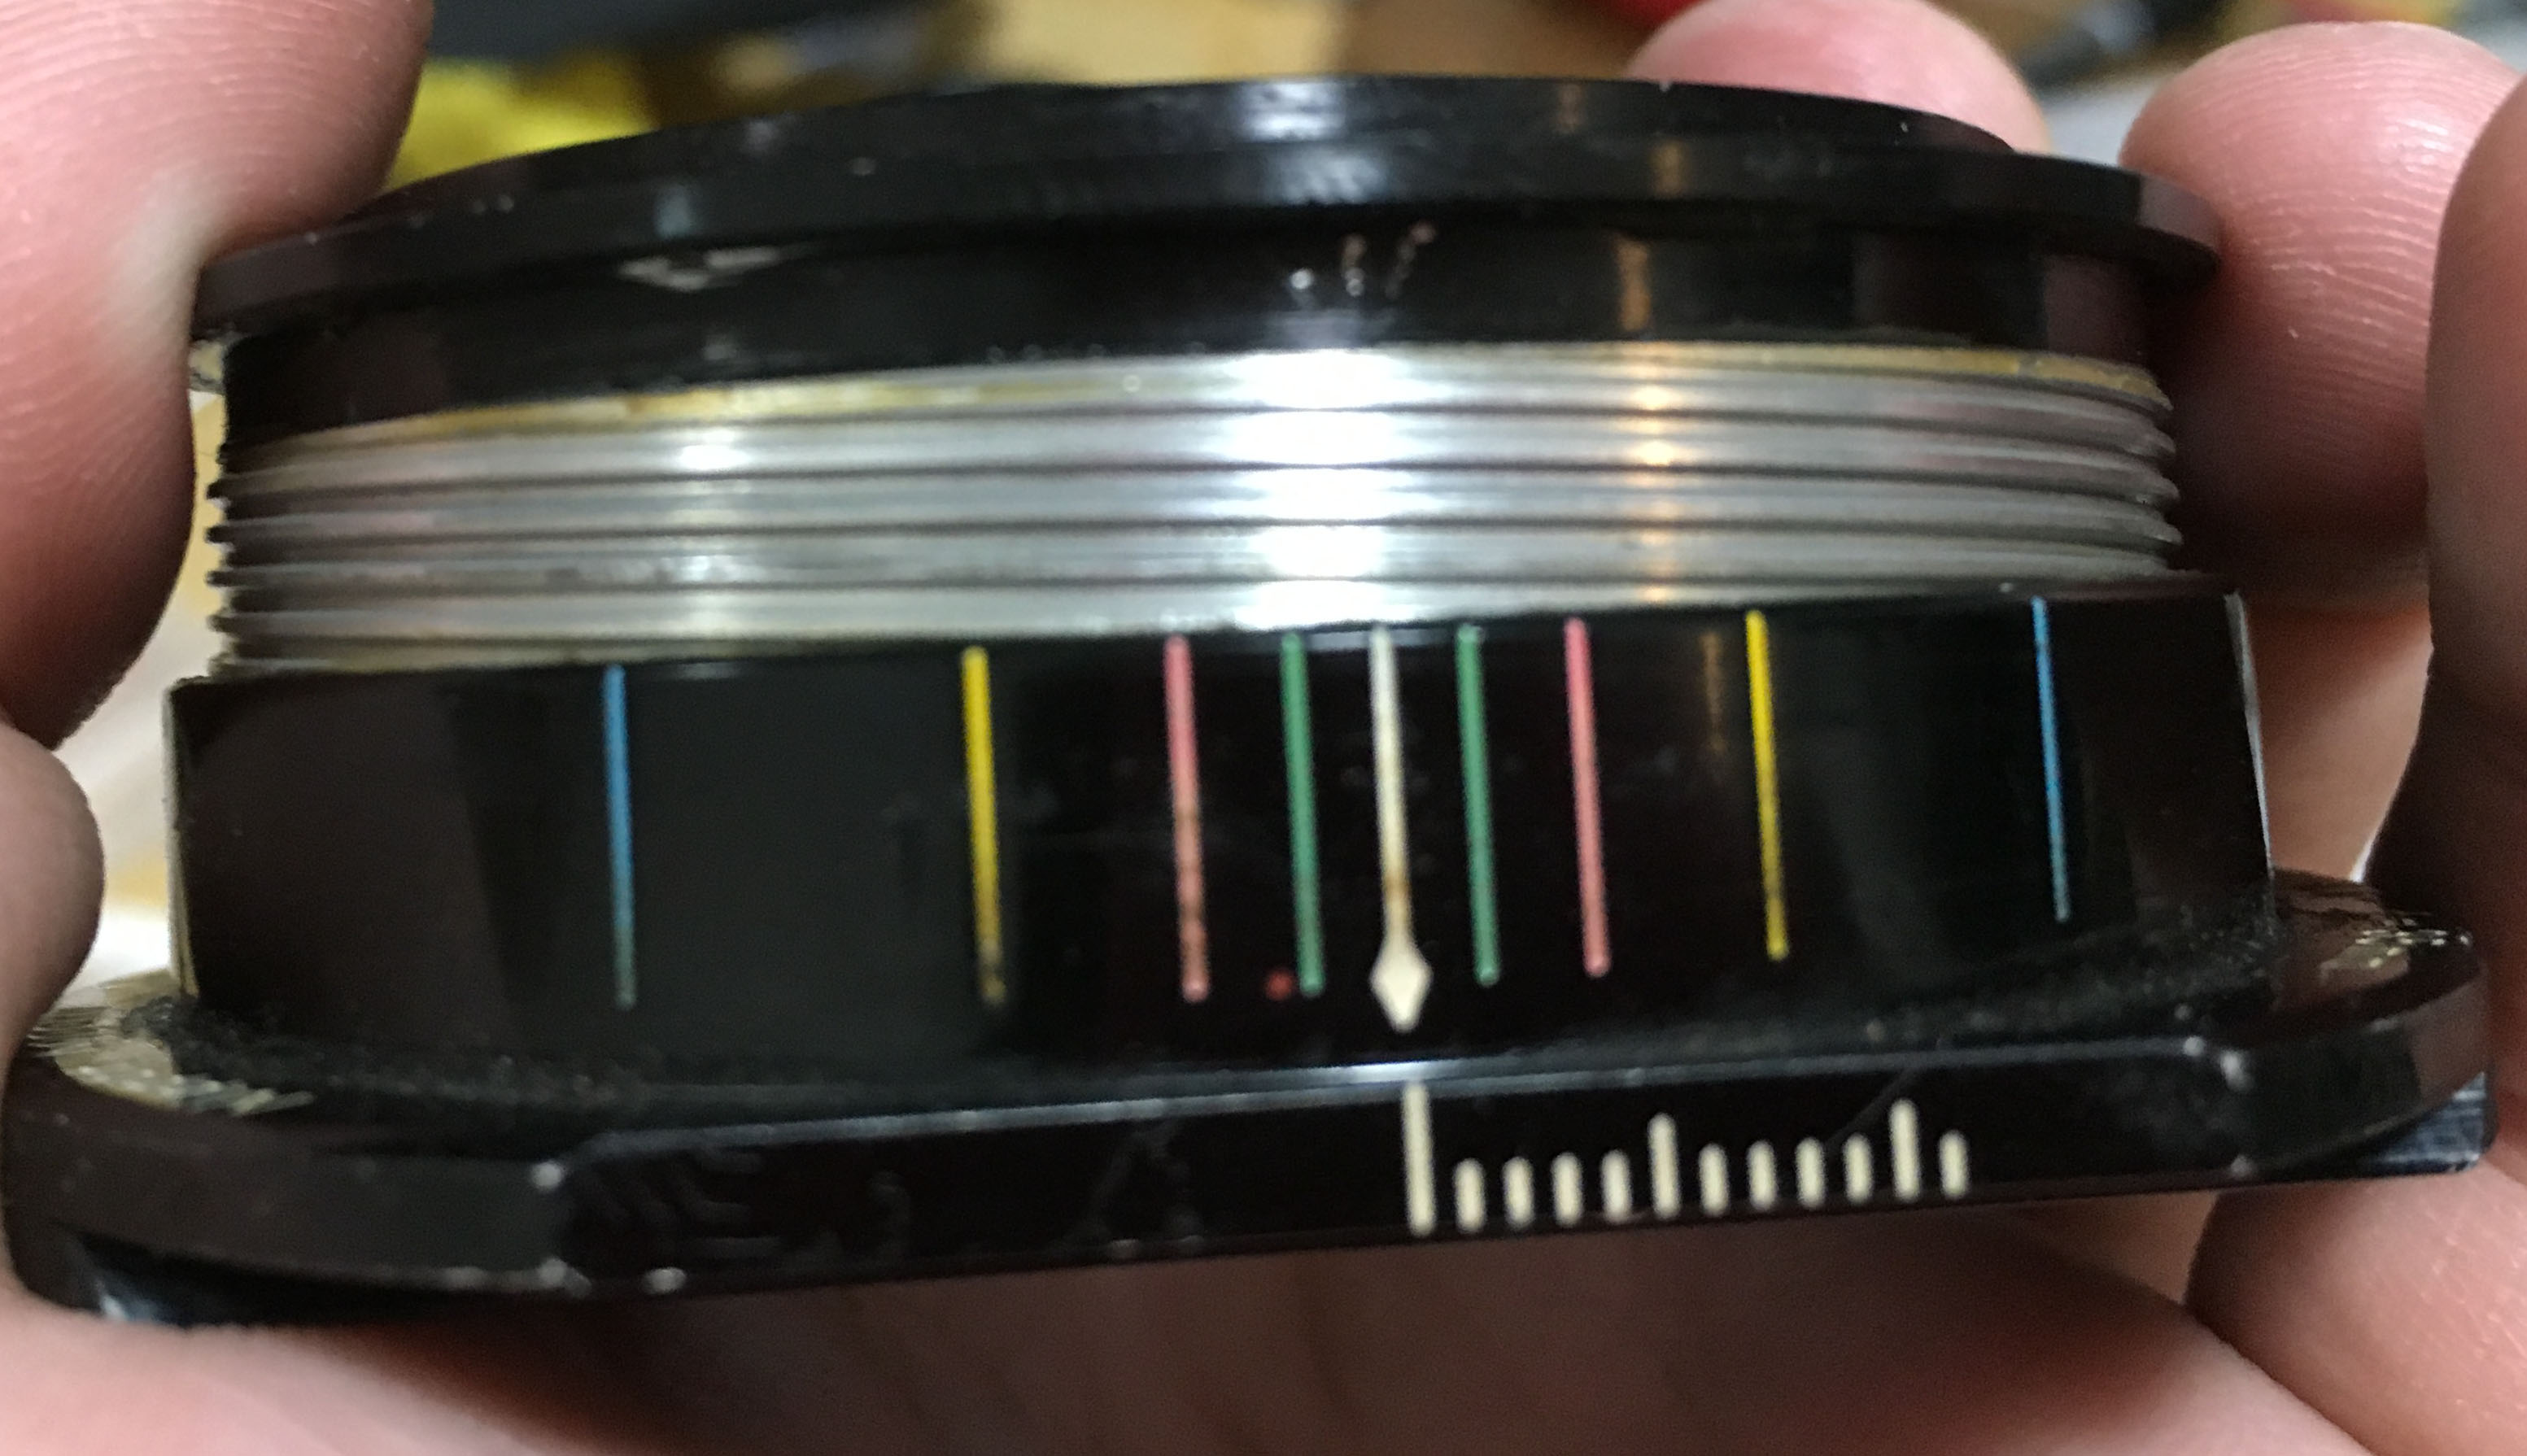
Make sure that the barrel is turned to infinity, also turn it so the number 8 on the chrome ring is centered. You will want to work with the lens while it is at this position so you’ll have a point of reference when you take notes.

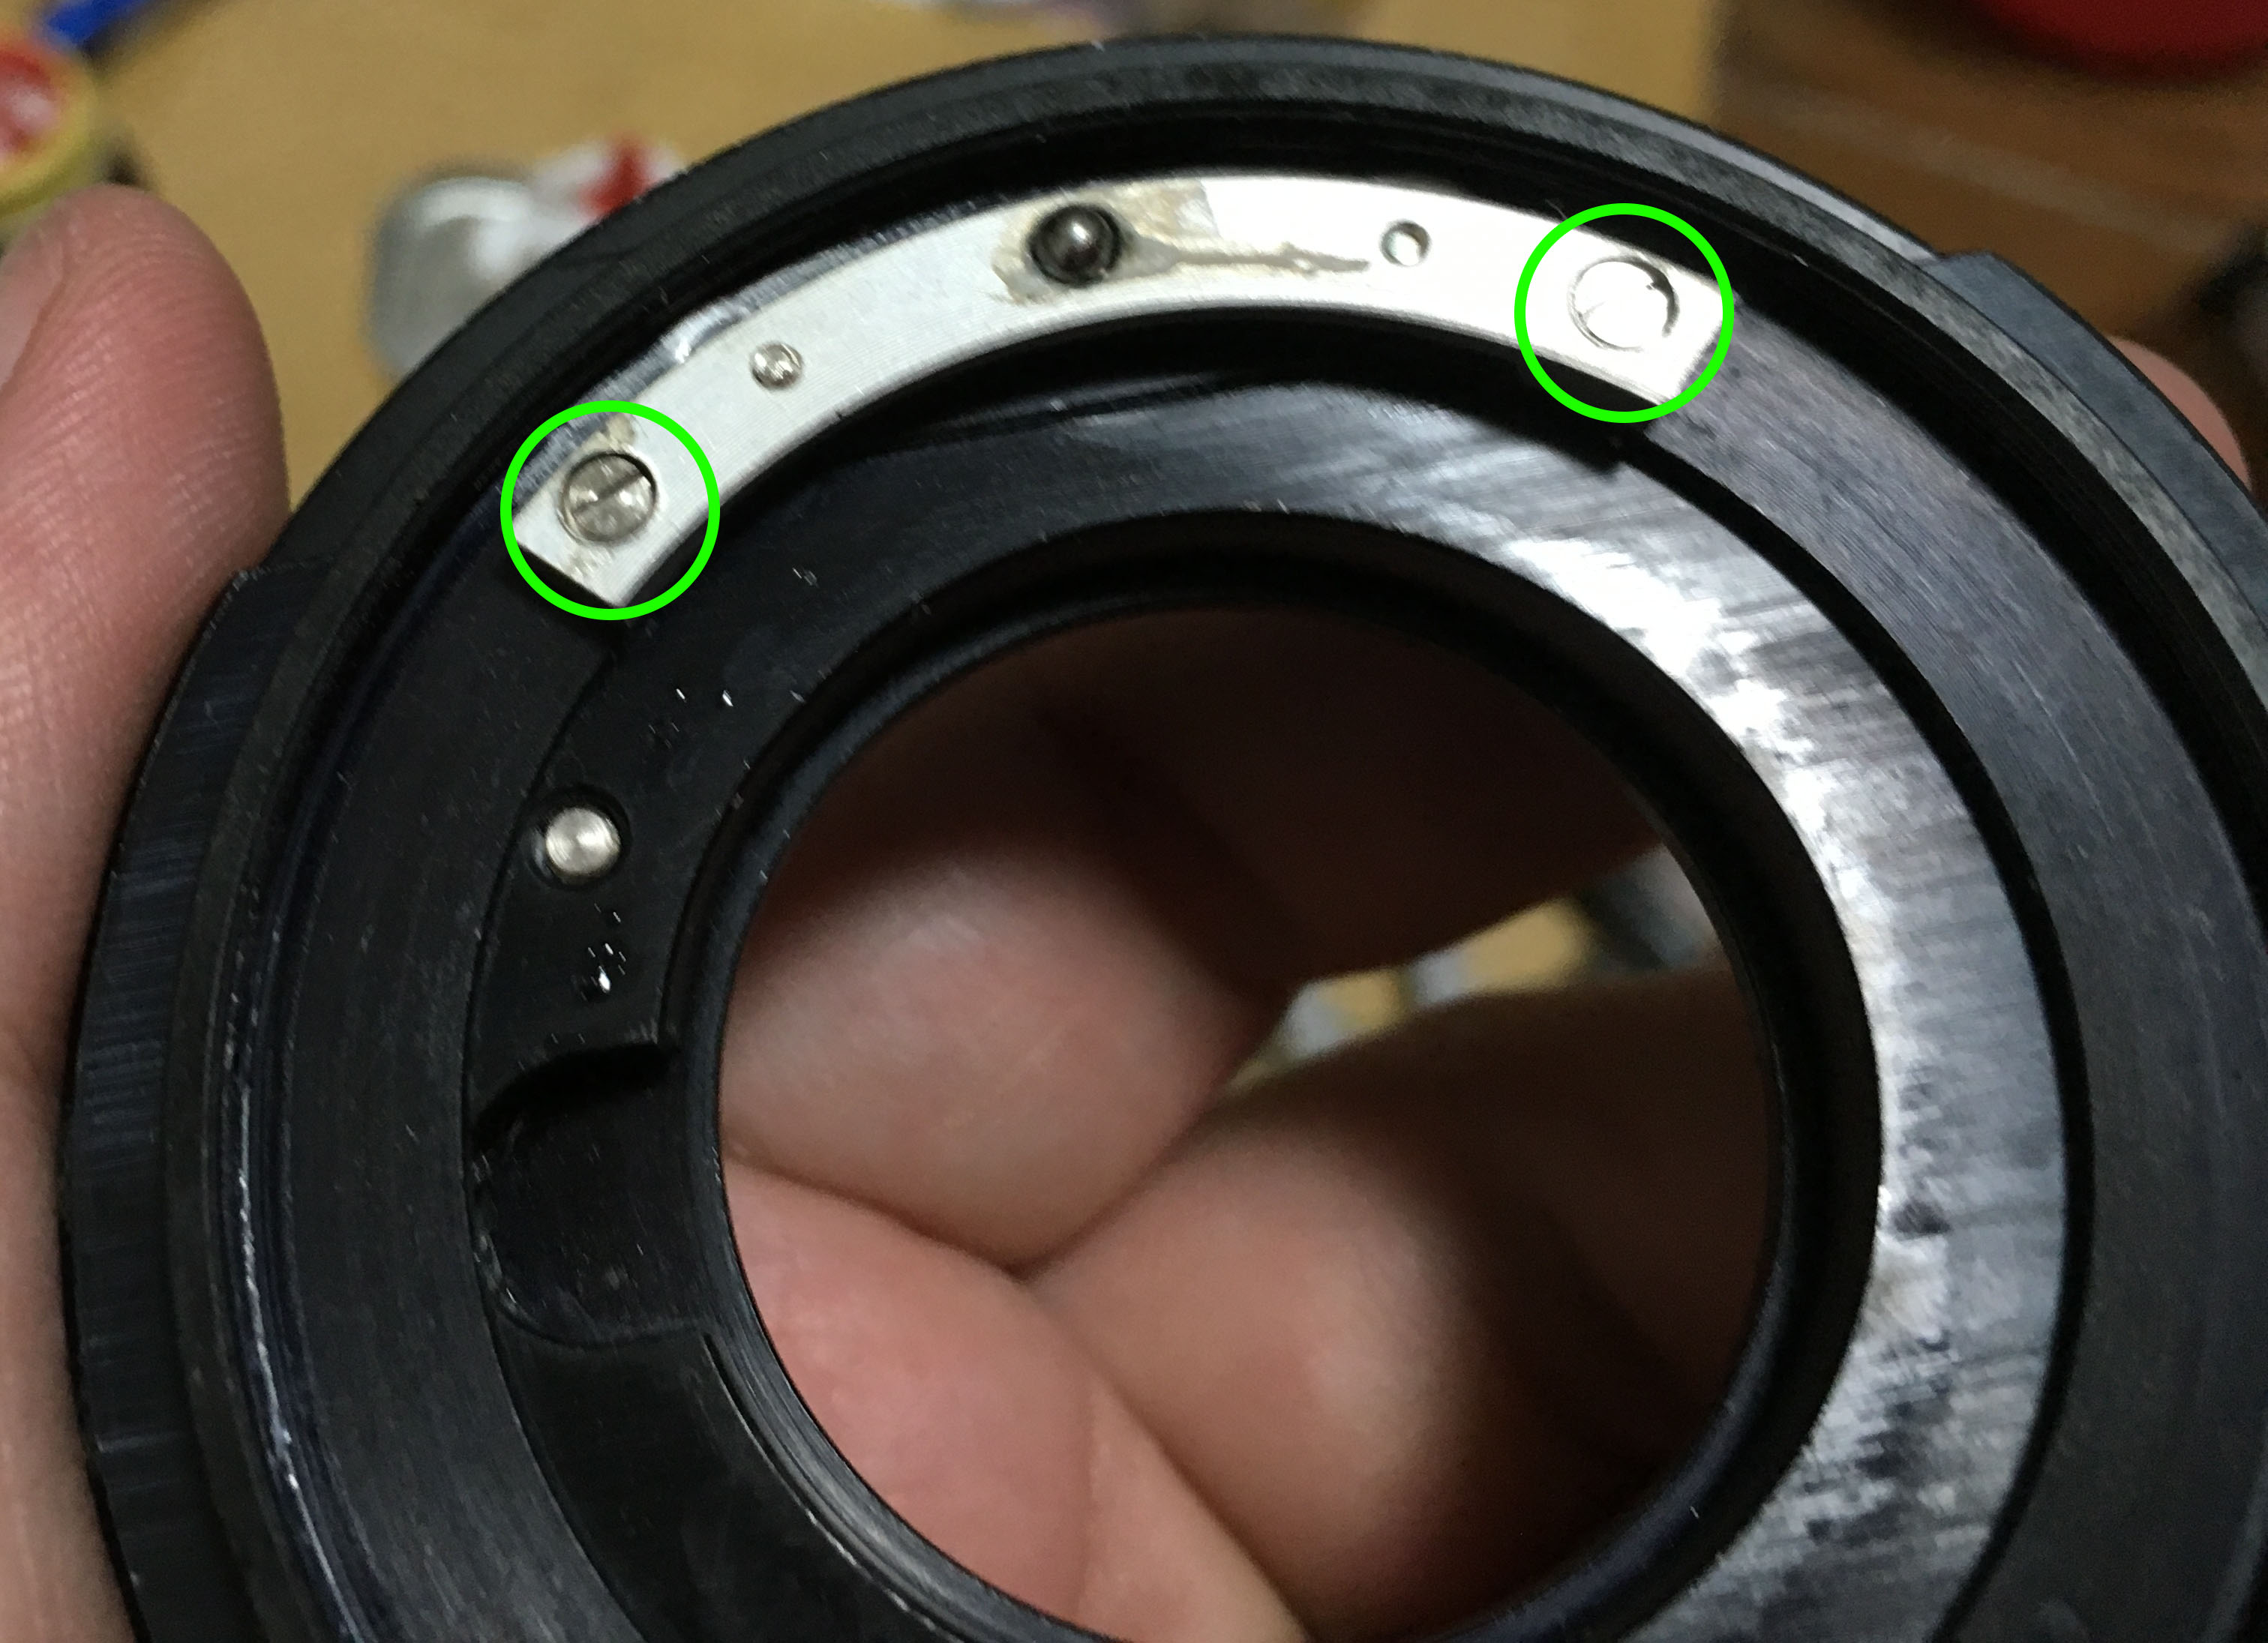
Remove these 5 screws to get rid of the bayonet mount. Many get stuck here because they stripped the heads of their screws. To prevent this, read what I wrote about removing bayonet screws.

The bayonet mount comes off easily since there’s nothing that’s connected to it.
We need to remove these screws to free the rotating collar.
The collar/grip is connected to this brass ring, which we will leave for now because we’re going to get rid of some other things to make things easier to hold.
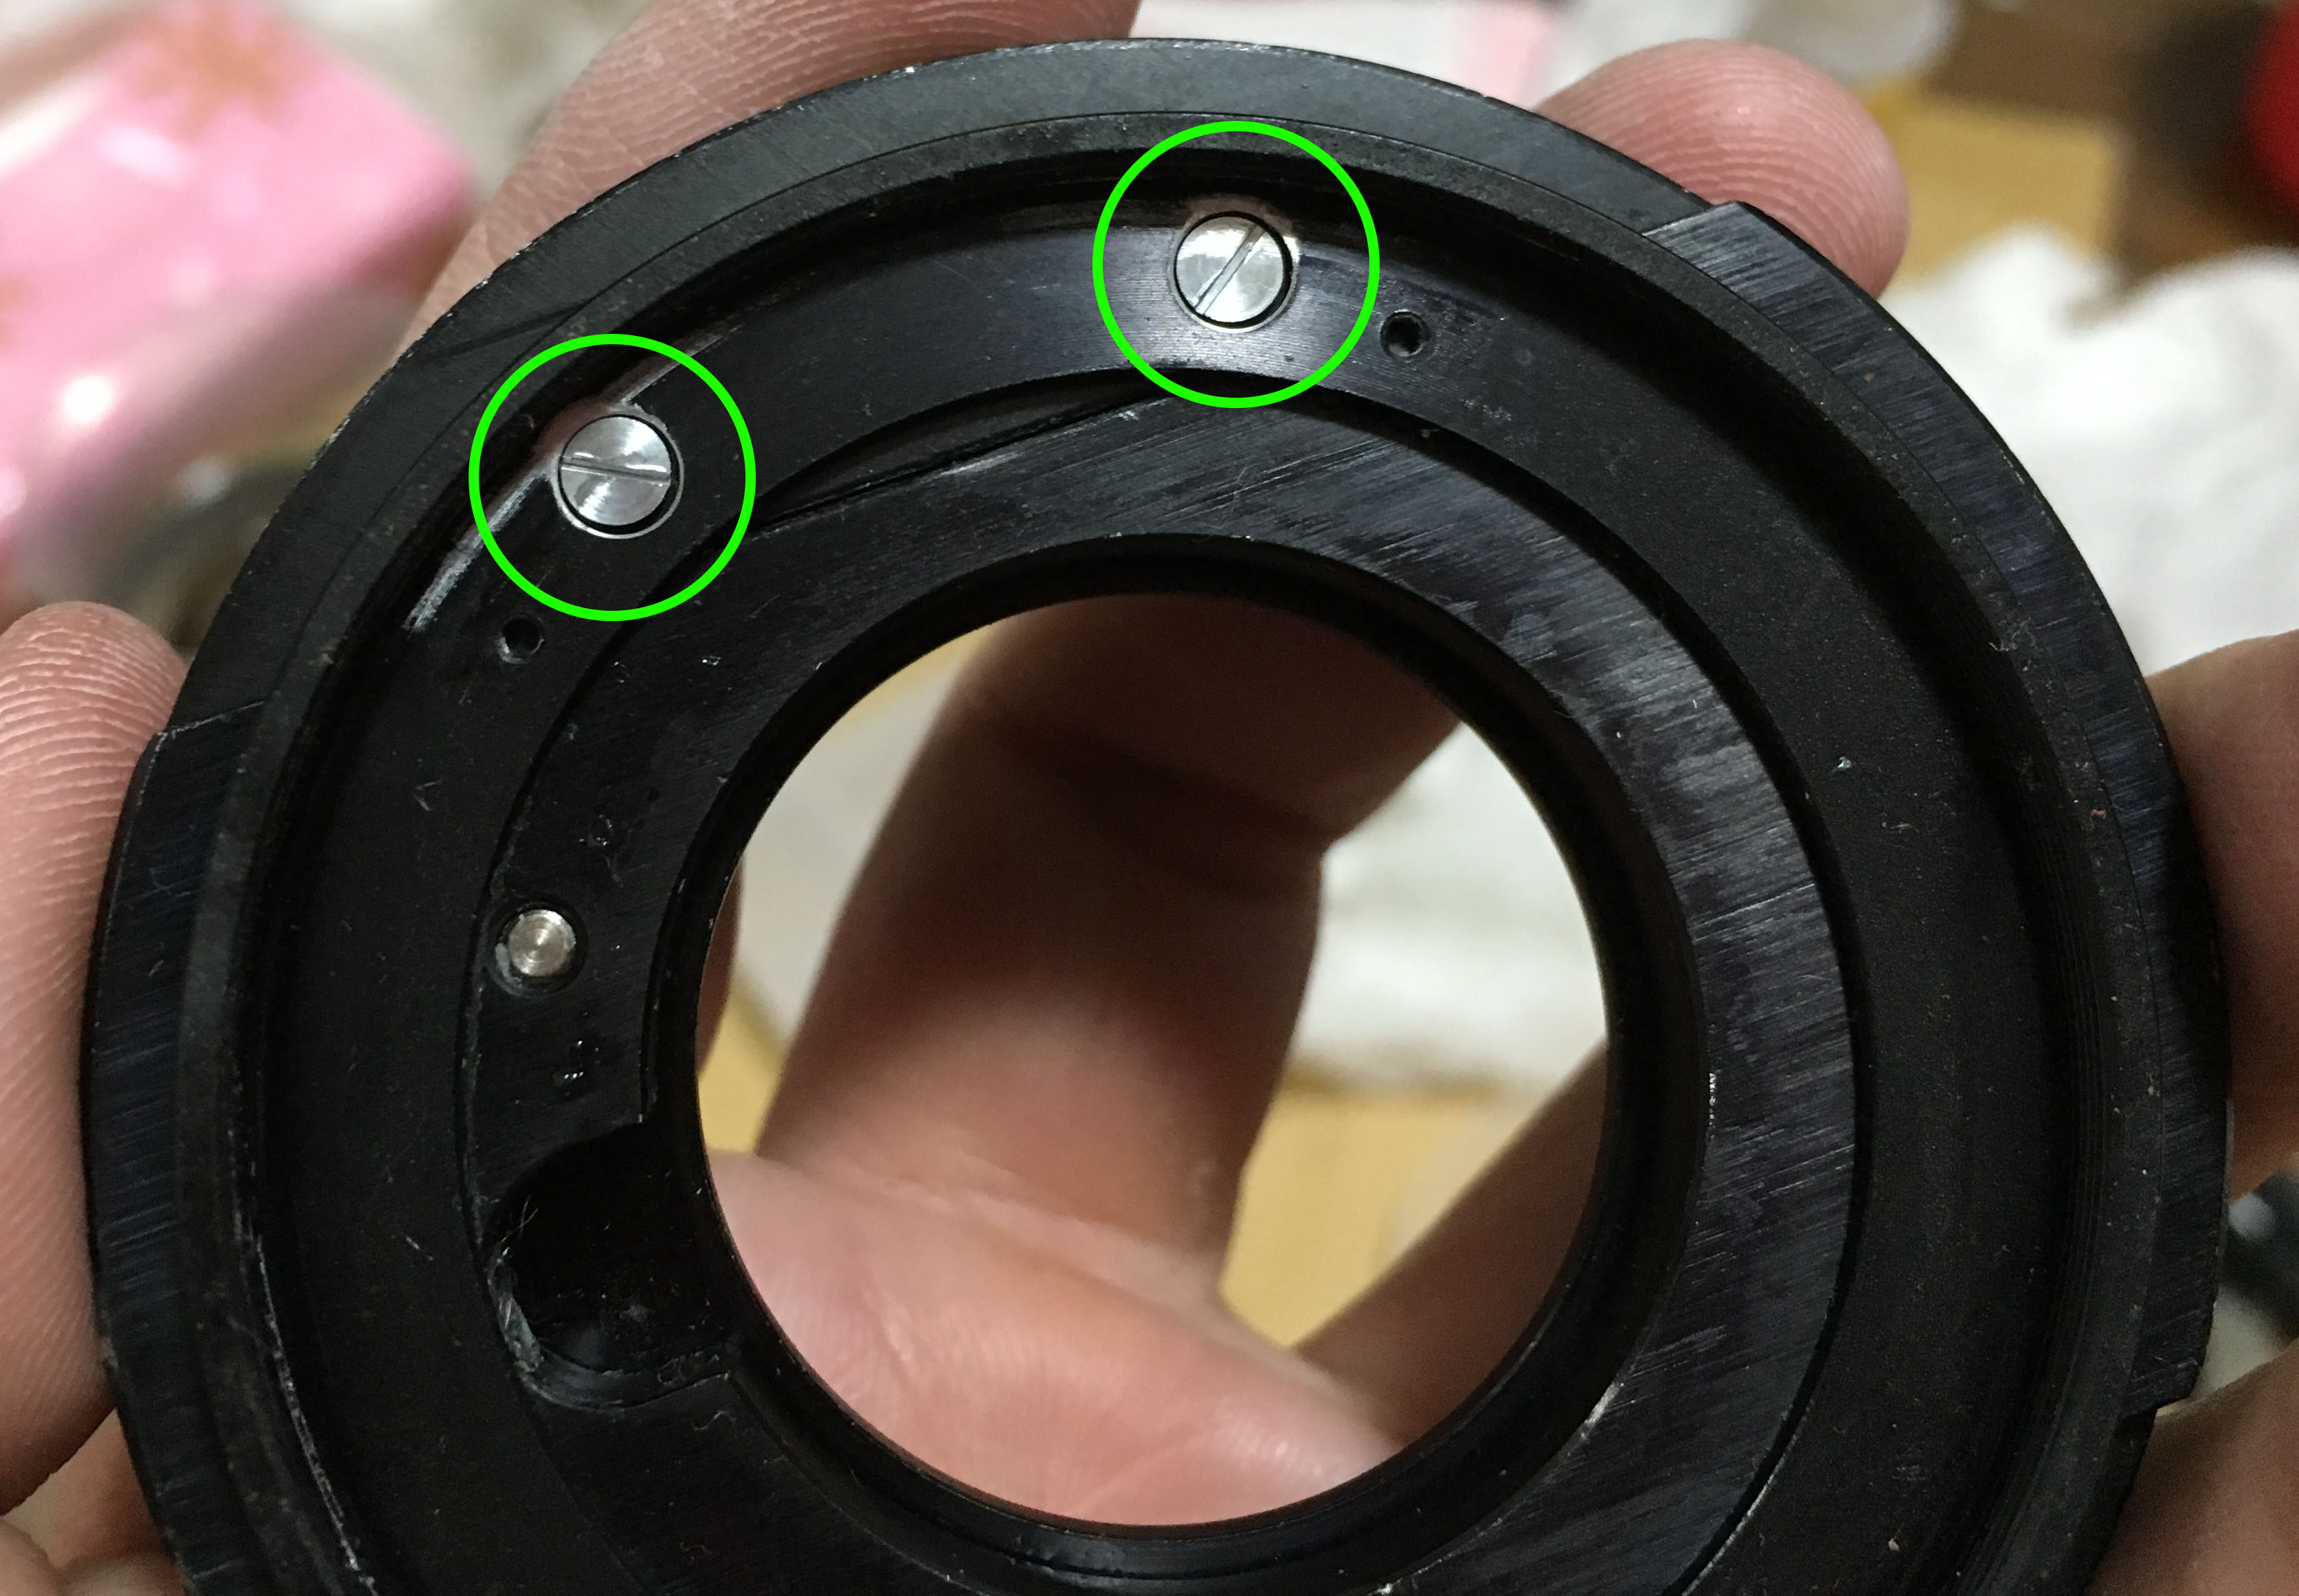
The focusing ring can be removed by removing these screws.

The focusing ring on my lens came off easily since it wasn’t glued.
Extract these screws to remove the knob assembly.

Twist the knob until it comes off. During reassembly, simply screw the knob back into its hole until it’s inserted. Do this while the barrel is not shifted.
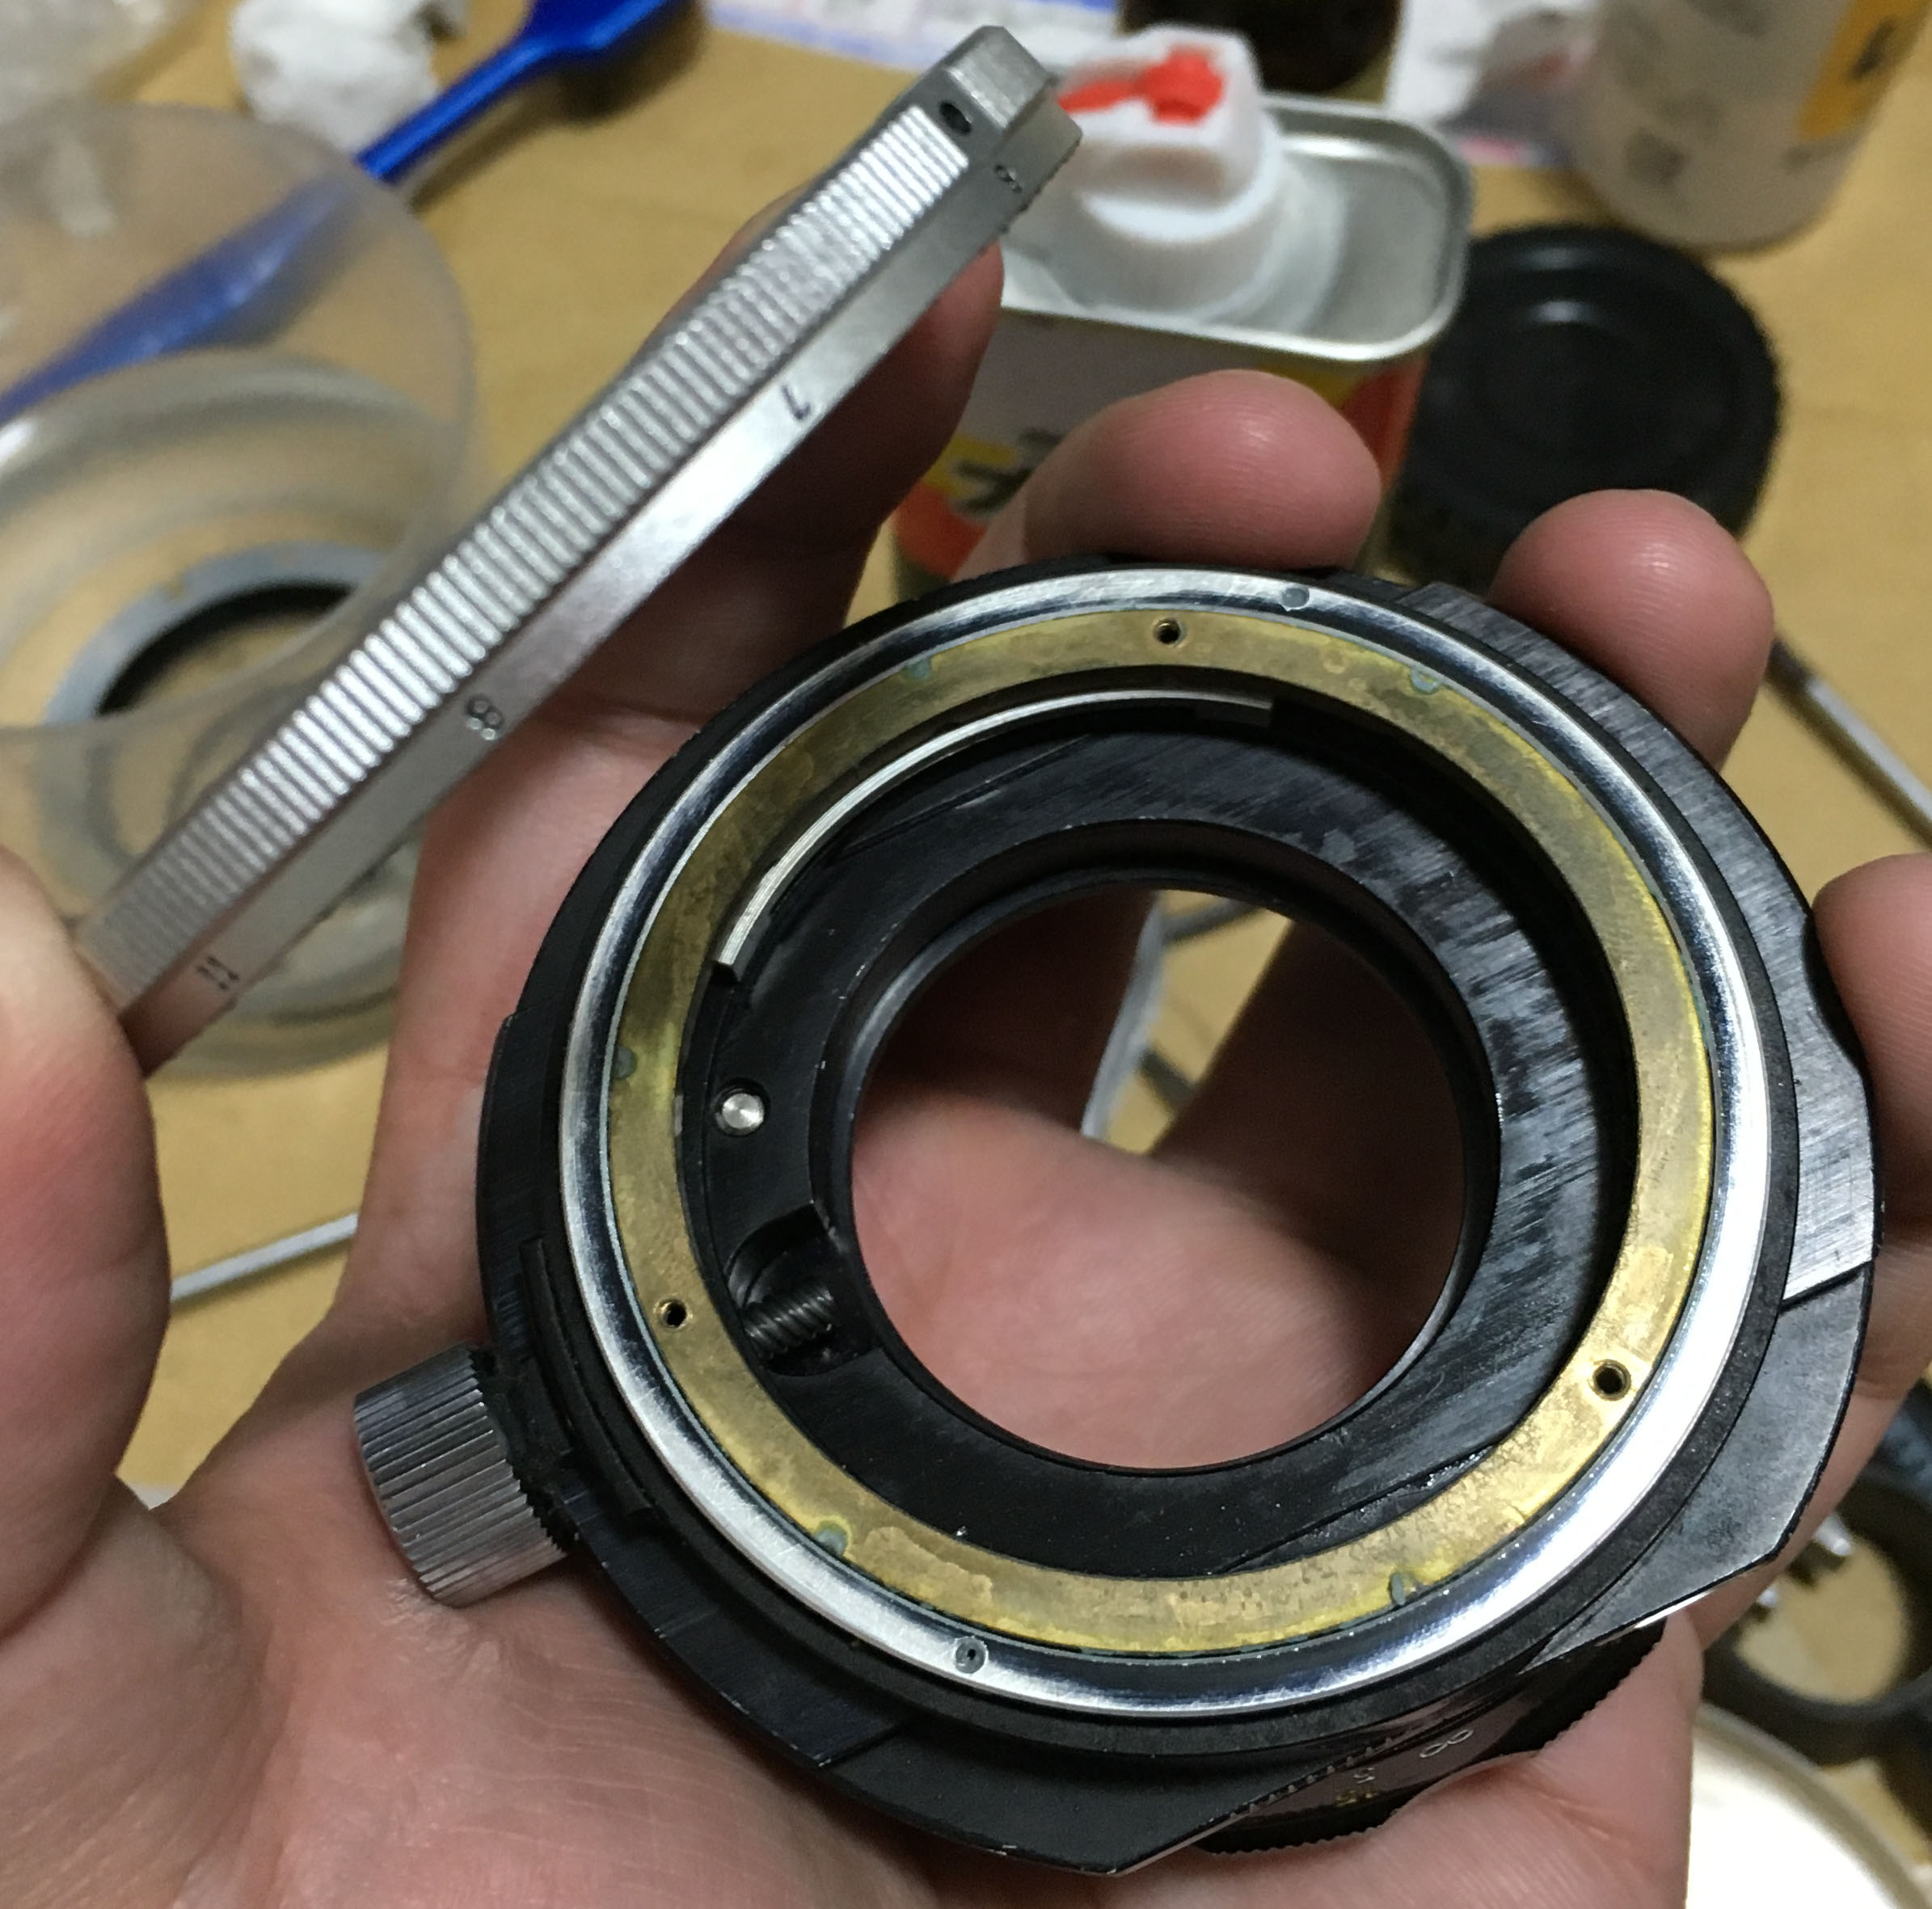
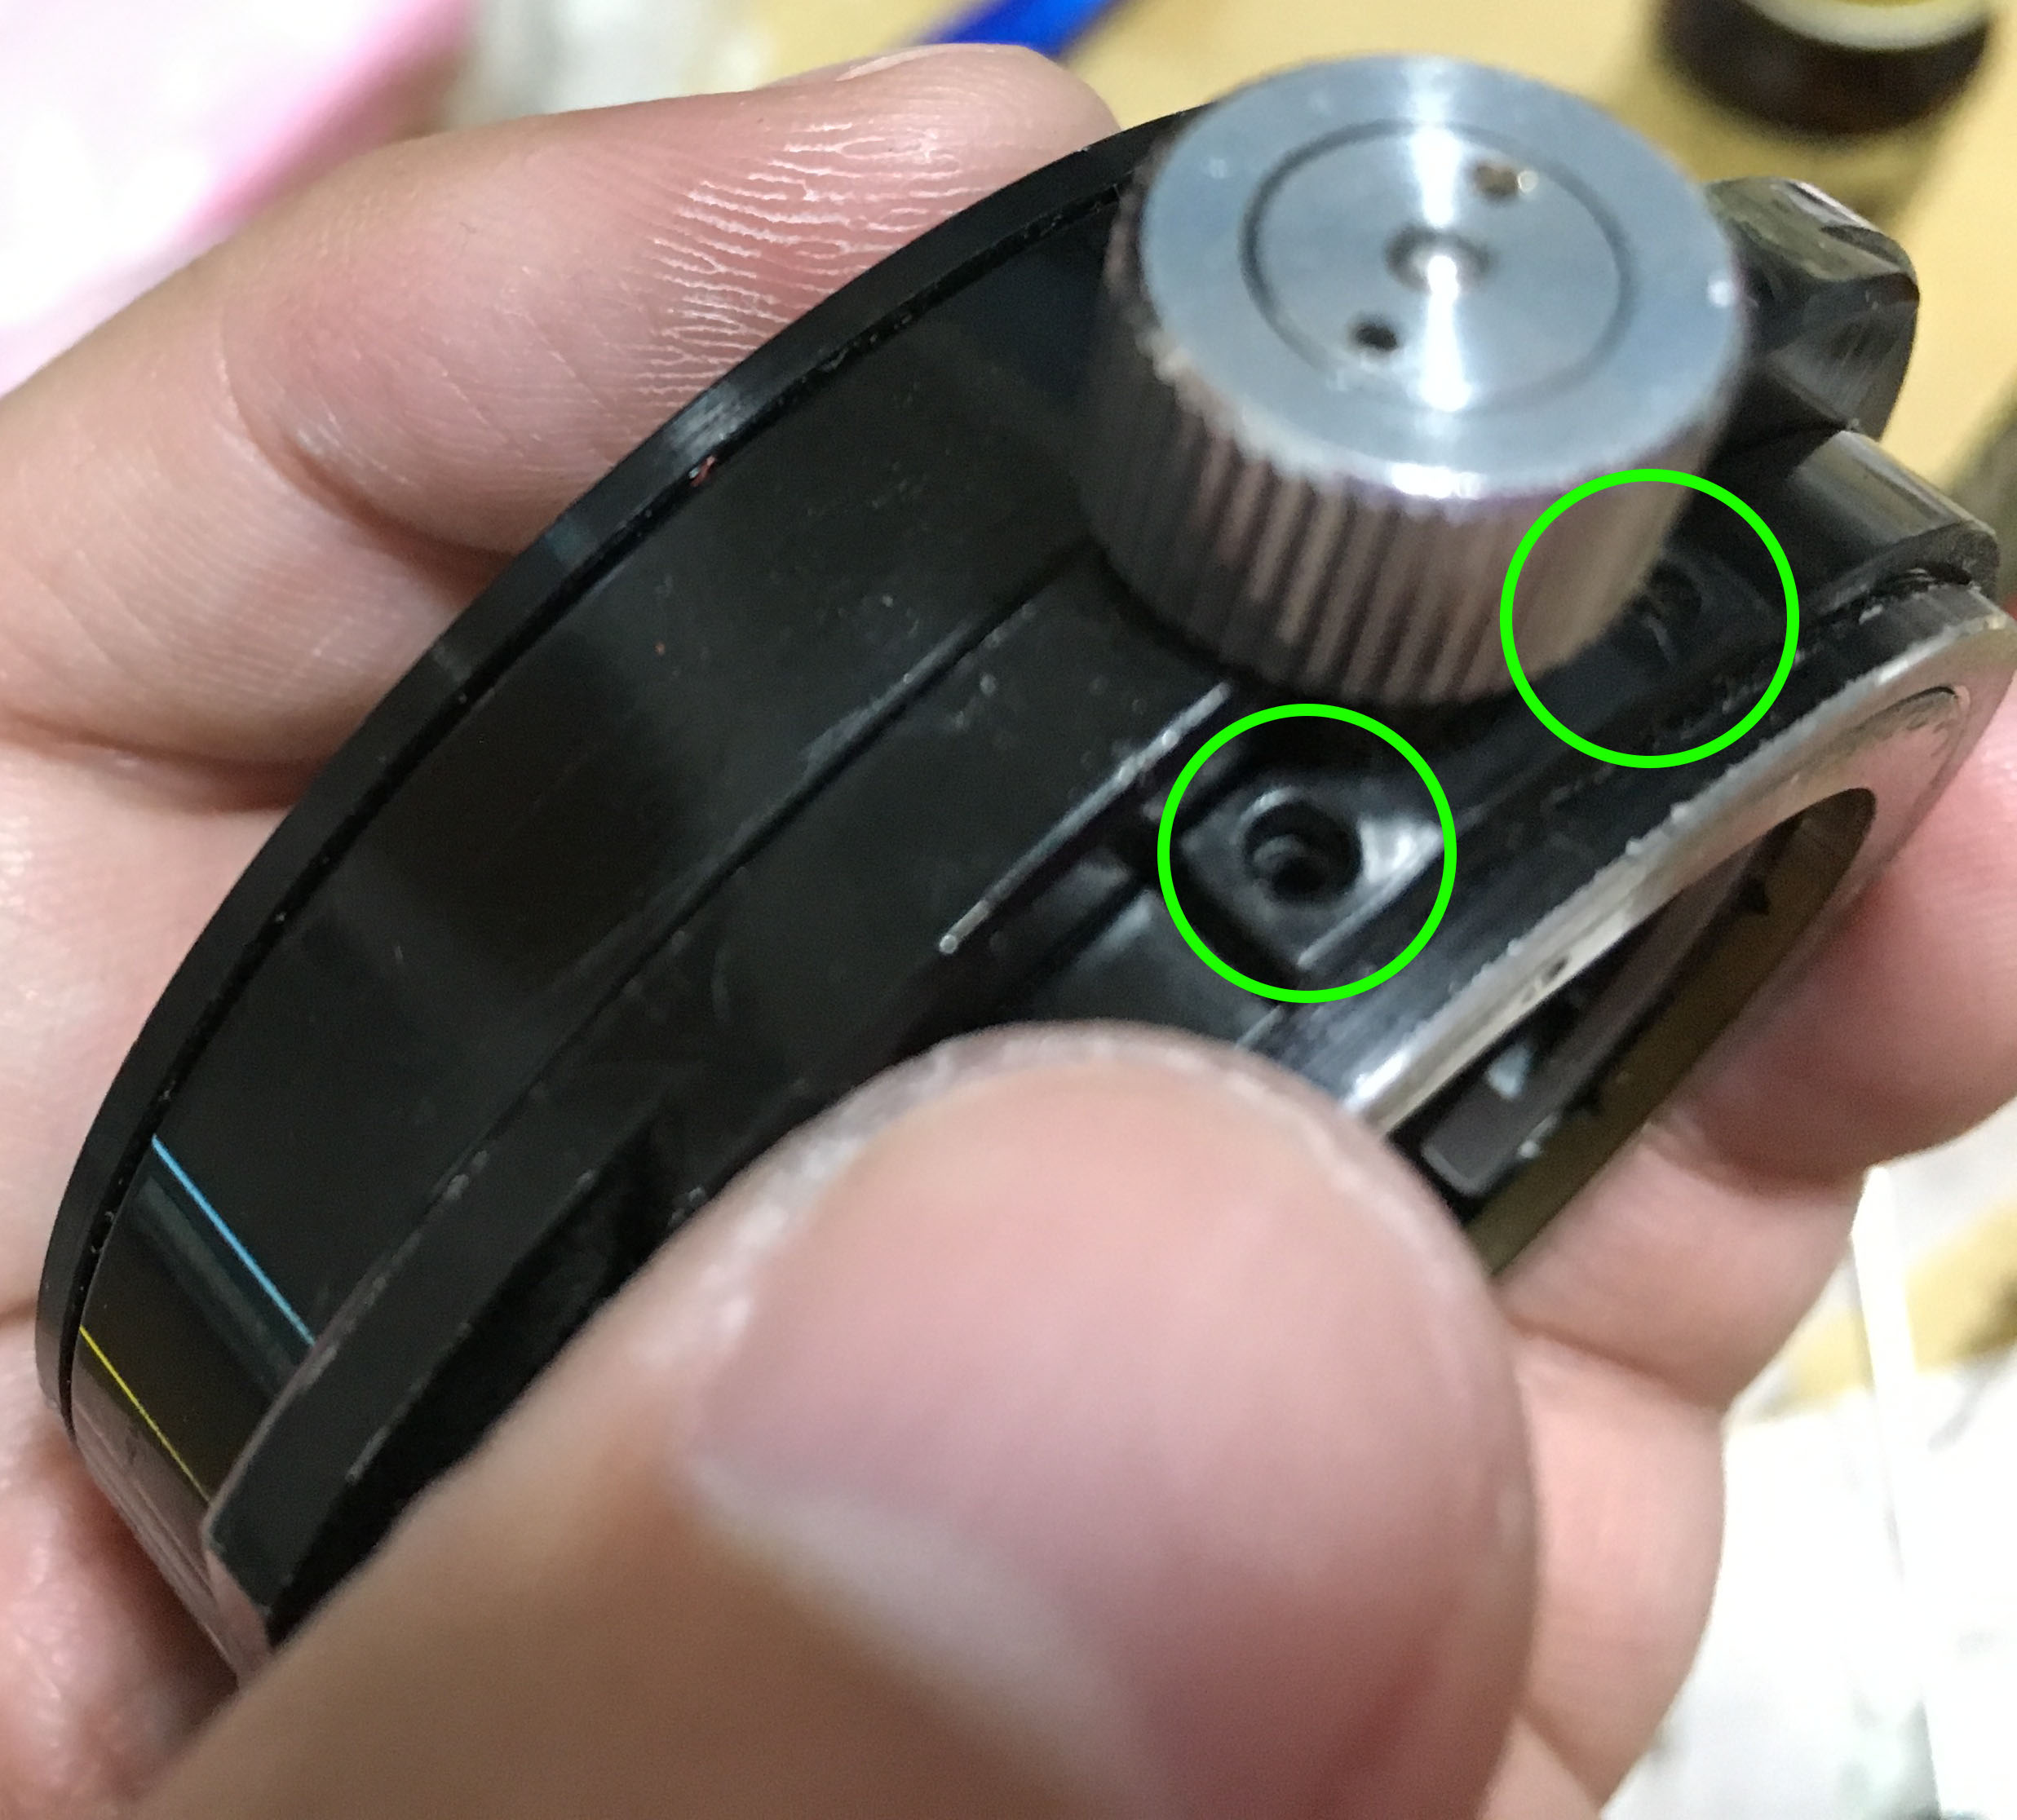
Now that the knob is out of the way, we can now grip it much better without having to think about anything that can get caught or break. Extract this set screw to free the retention collar that houses the rotator mechanism.
Use a lens spanner and carefully unscrew the retention collar.
The big piece of brass comes-off with the collar. You can separate these later and overhaul them separately to remove gunk and corrosion.
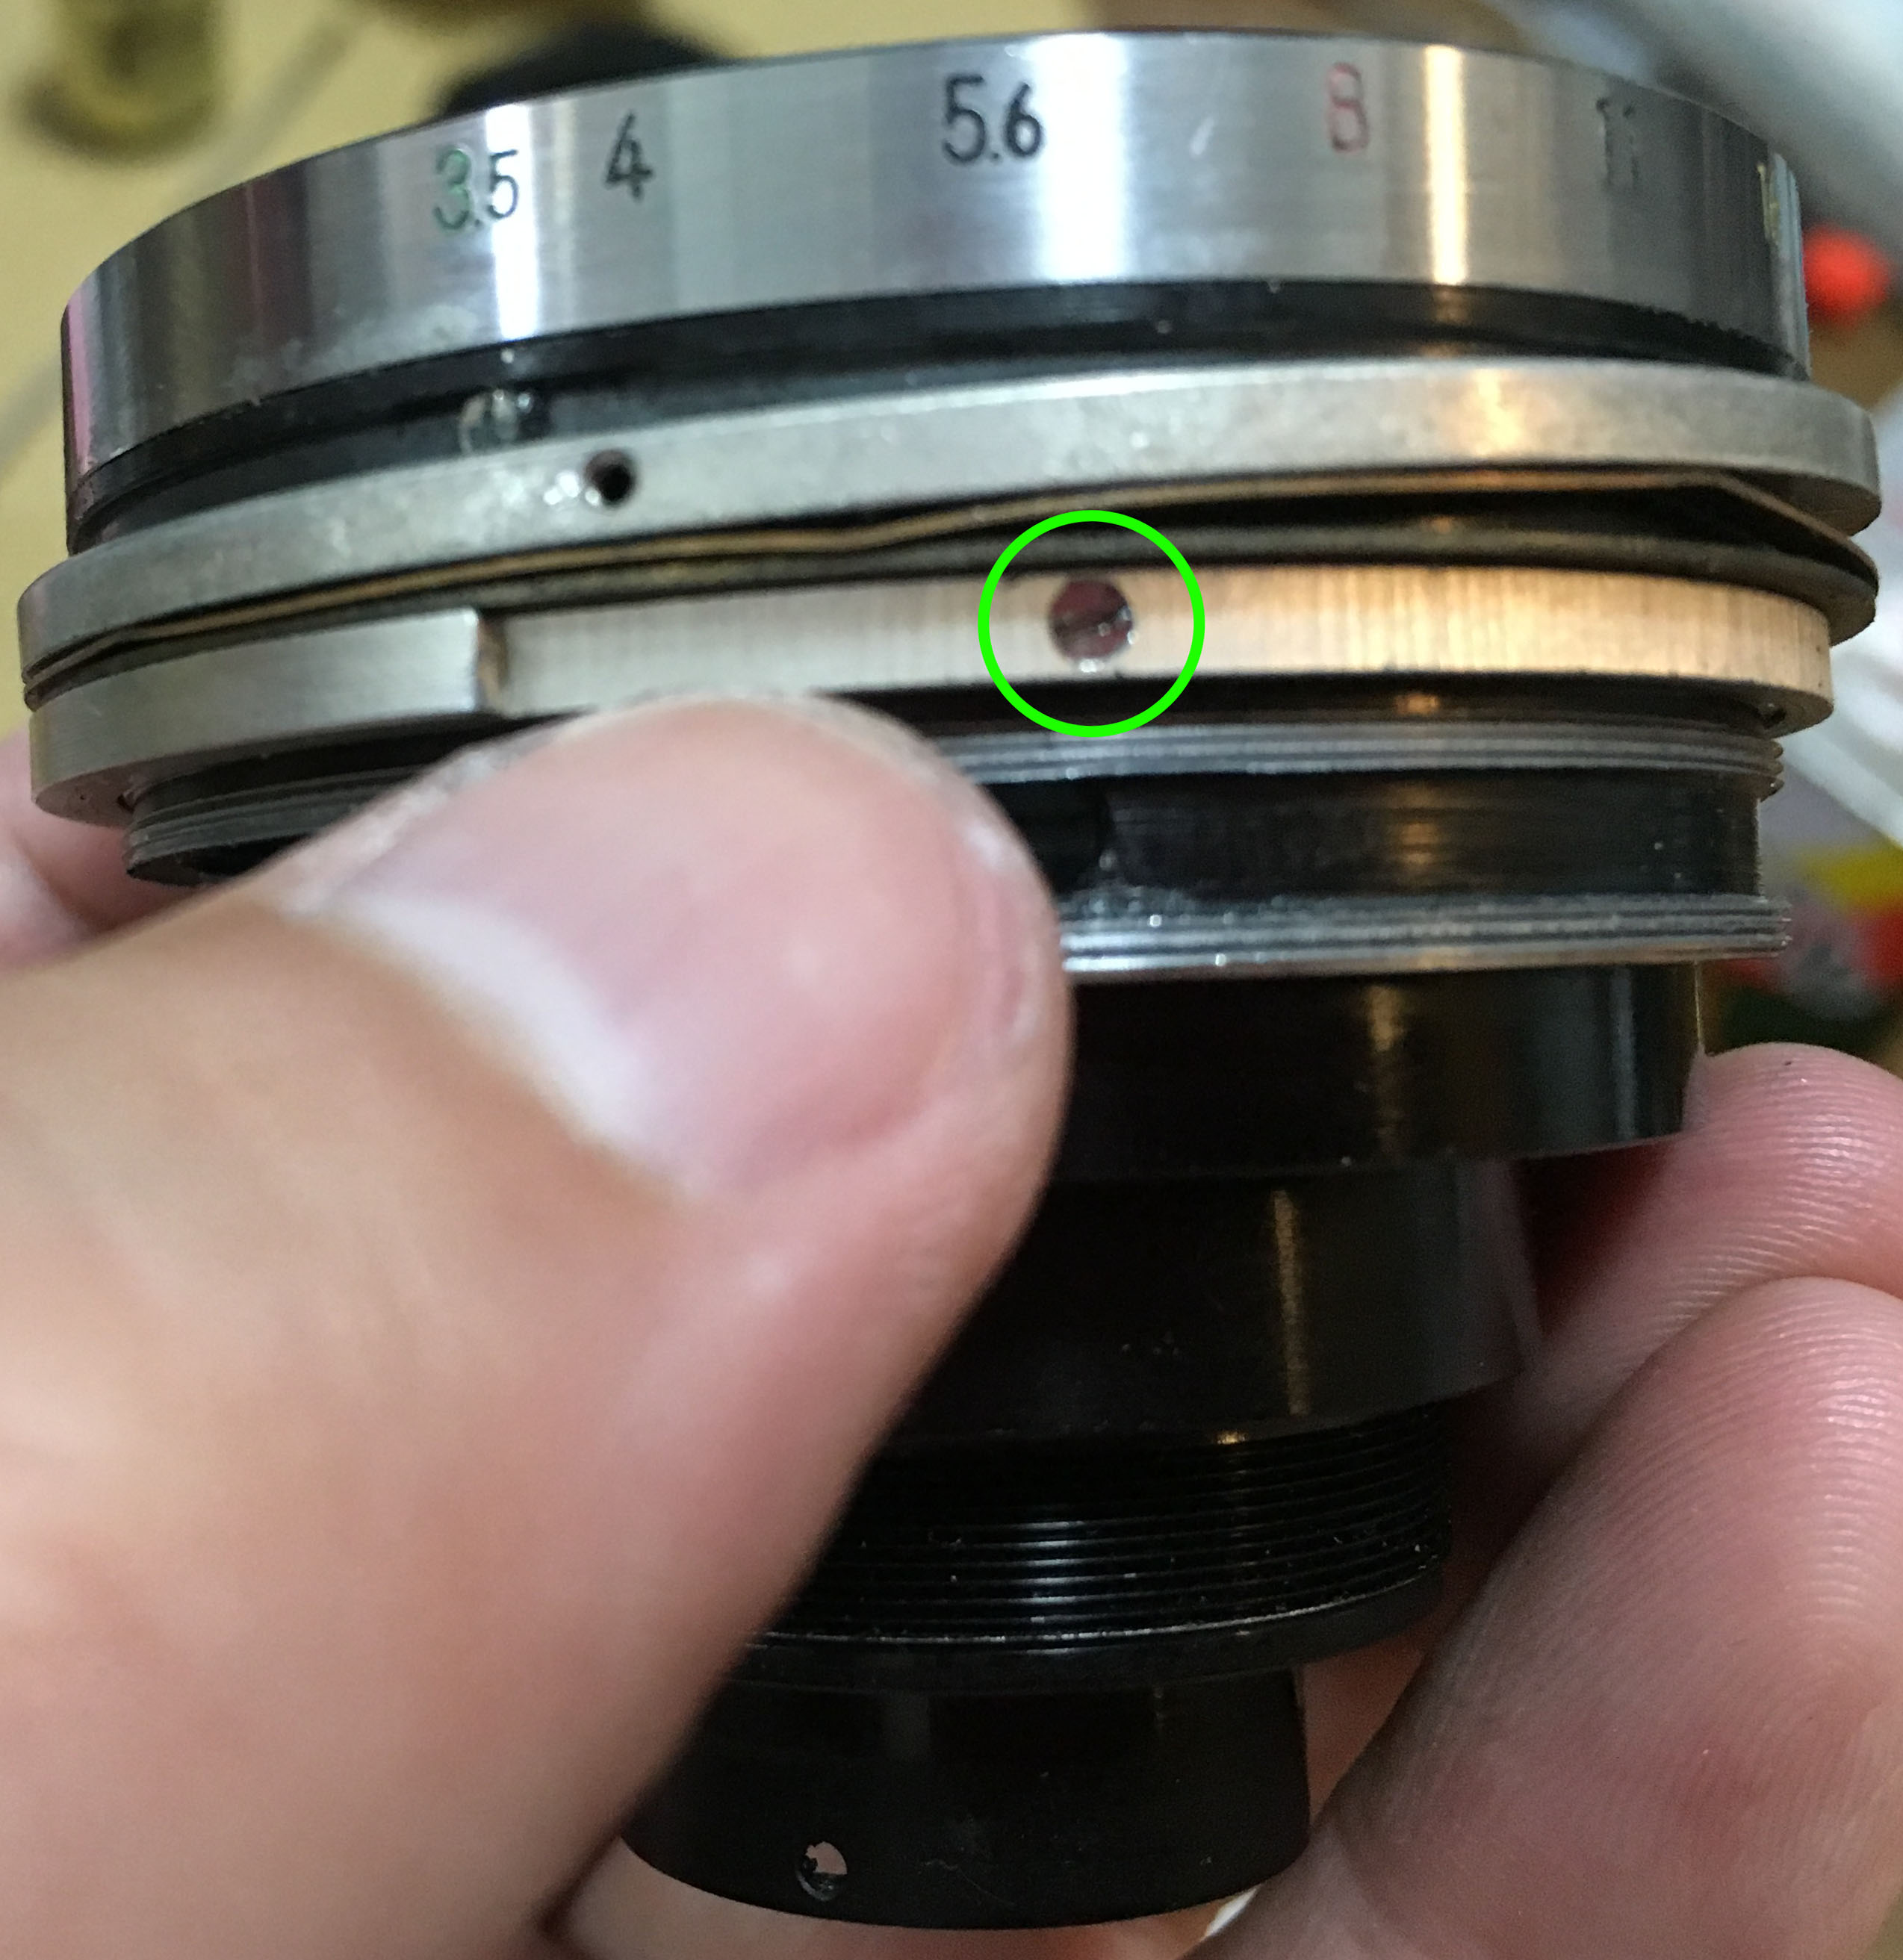
This mechanism with the metal ball is what’s used for the clicking action of the rotator mechanism. If you want the clicking action to be tighter, adjust or bend the leaf spring under it. Removing these screws will give you access to the spring. Be careful not to lose the ball because nothing is securing it.
To dismantle the rail/guide mechanism, extract these. Be careful with these because mine was glued so yours may be as well.

With the screws gone, you can now remove one guide of the “clamp” for the dovetail.
The other one should come off rather easily but be careful because there’s a screw that’s used as a guide and it fits into a slot so you’ll have to play with it a bit before you can get it out safely.
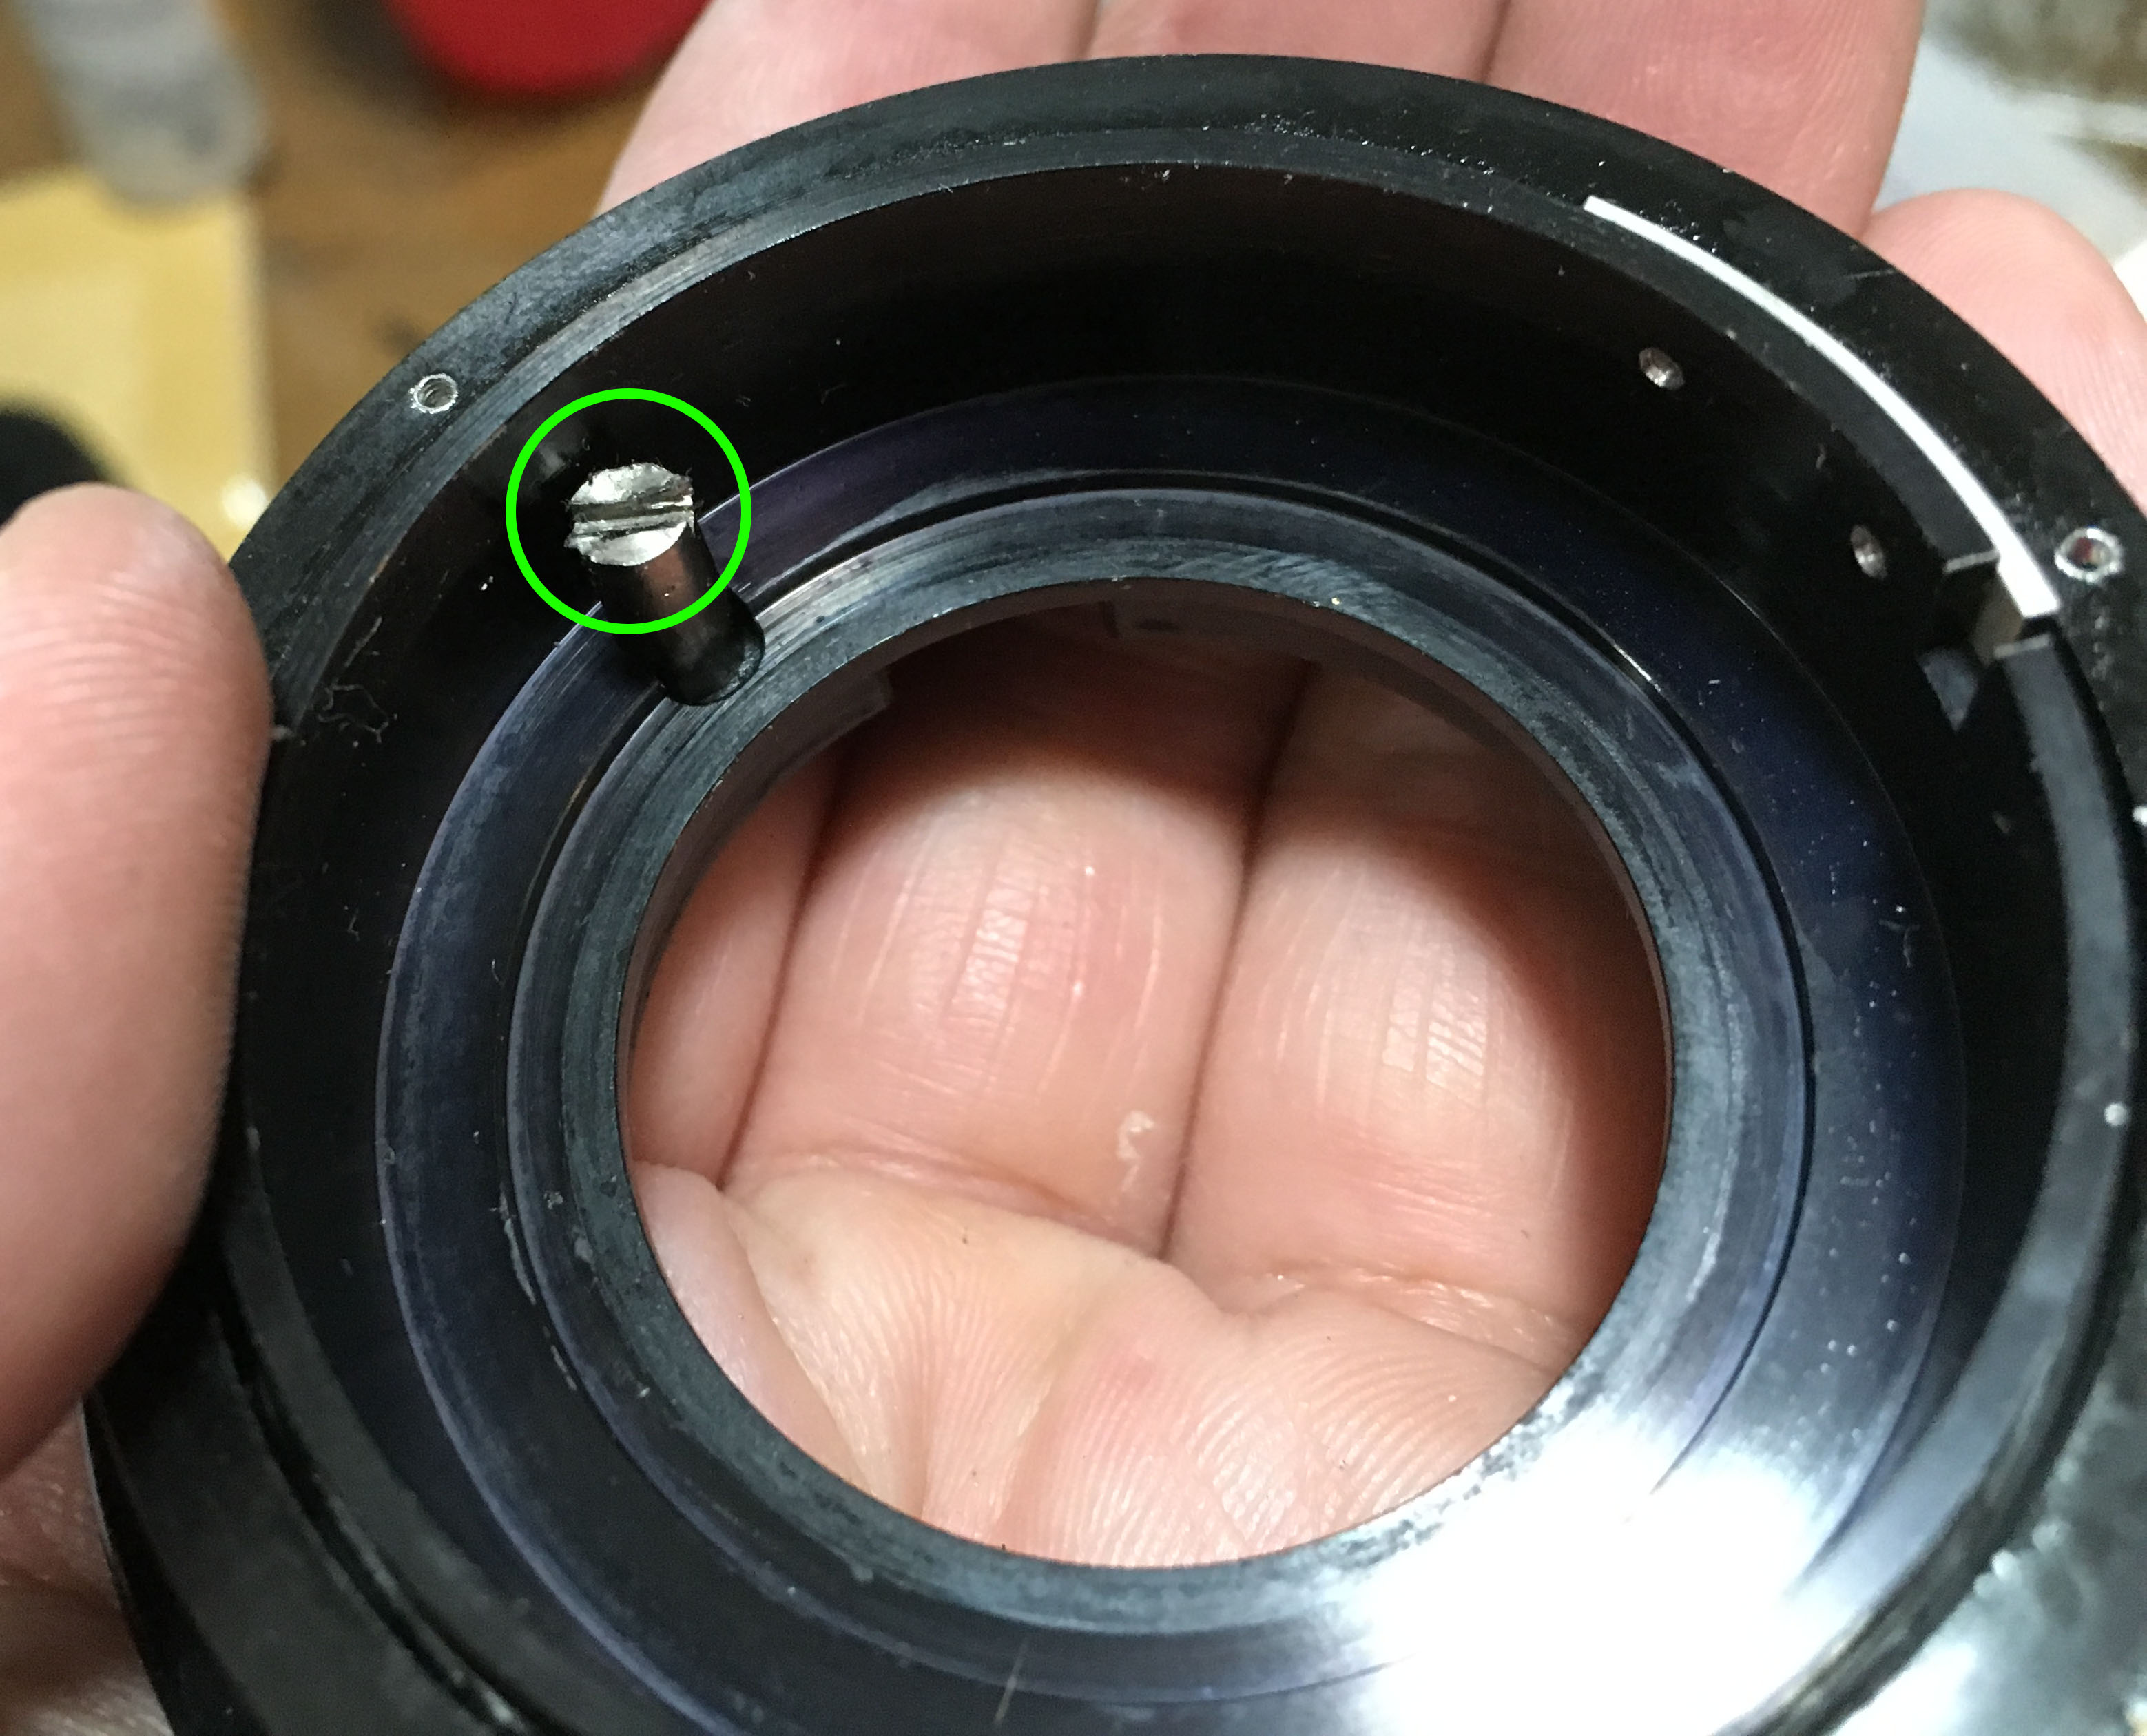
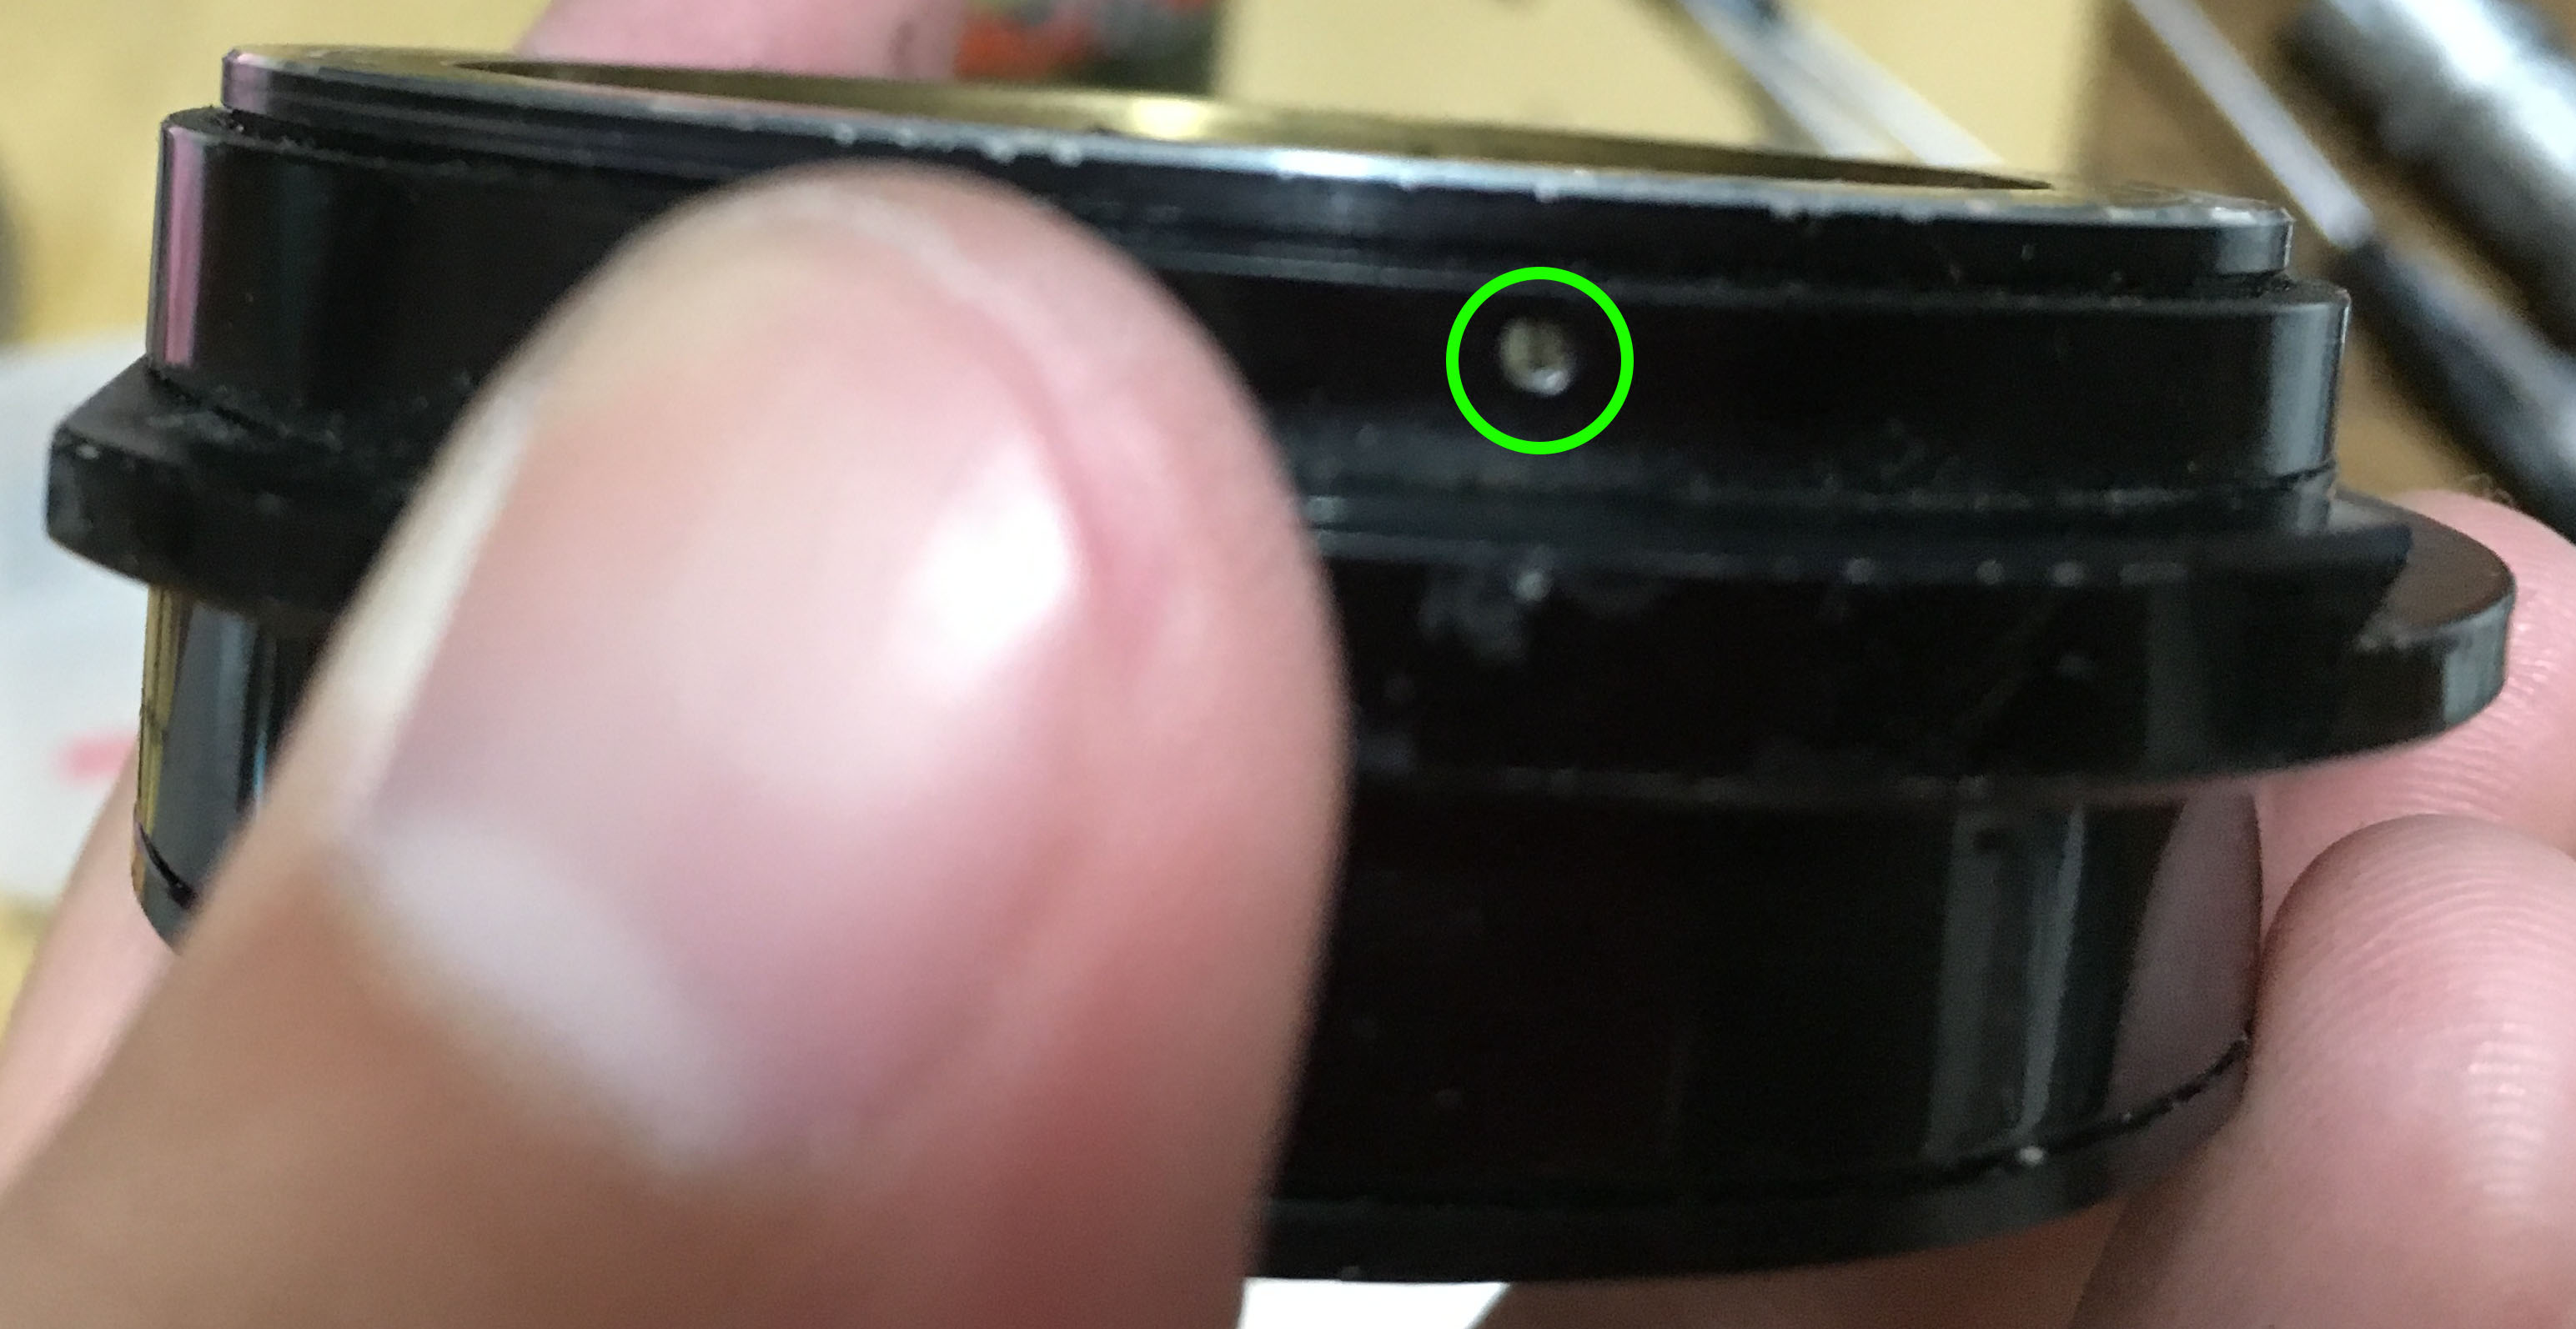
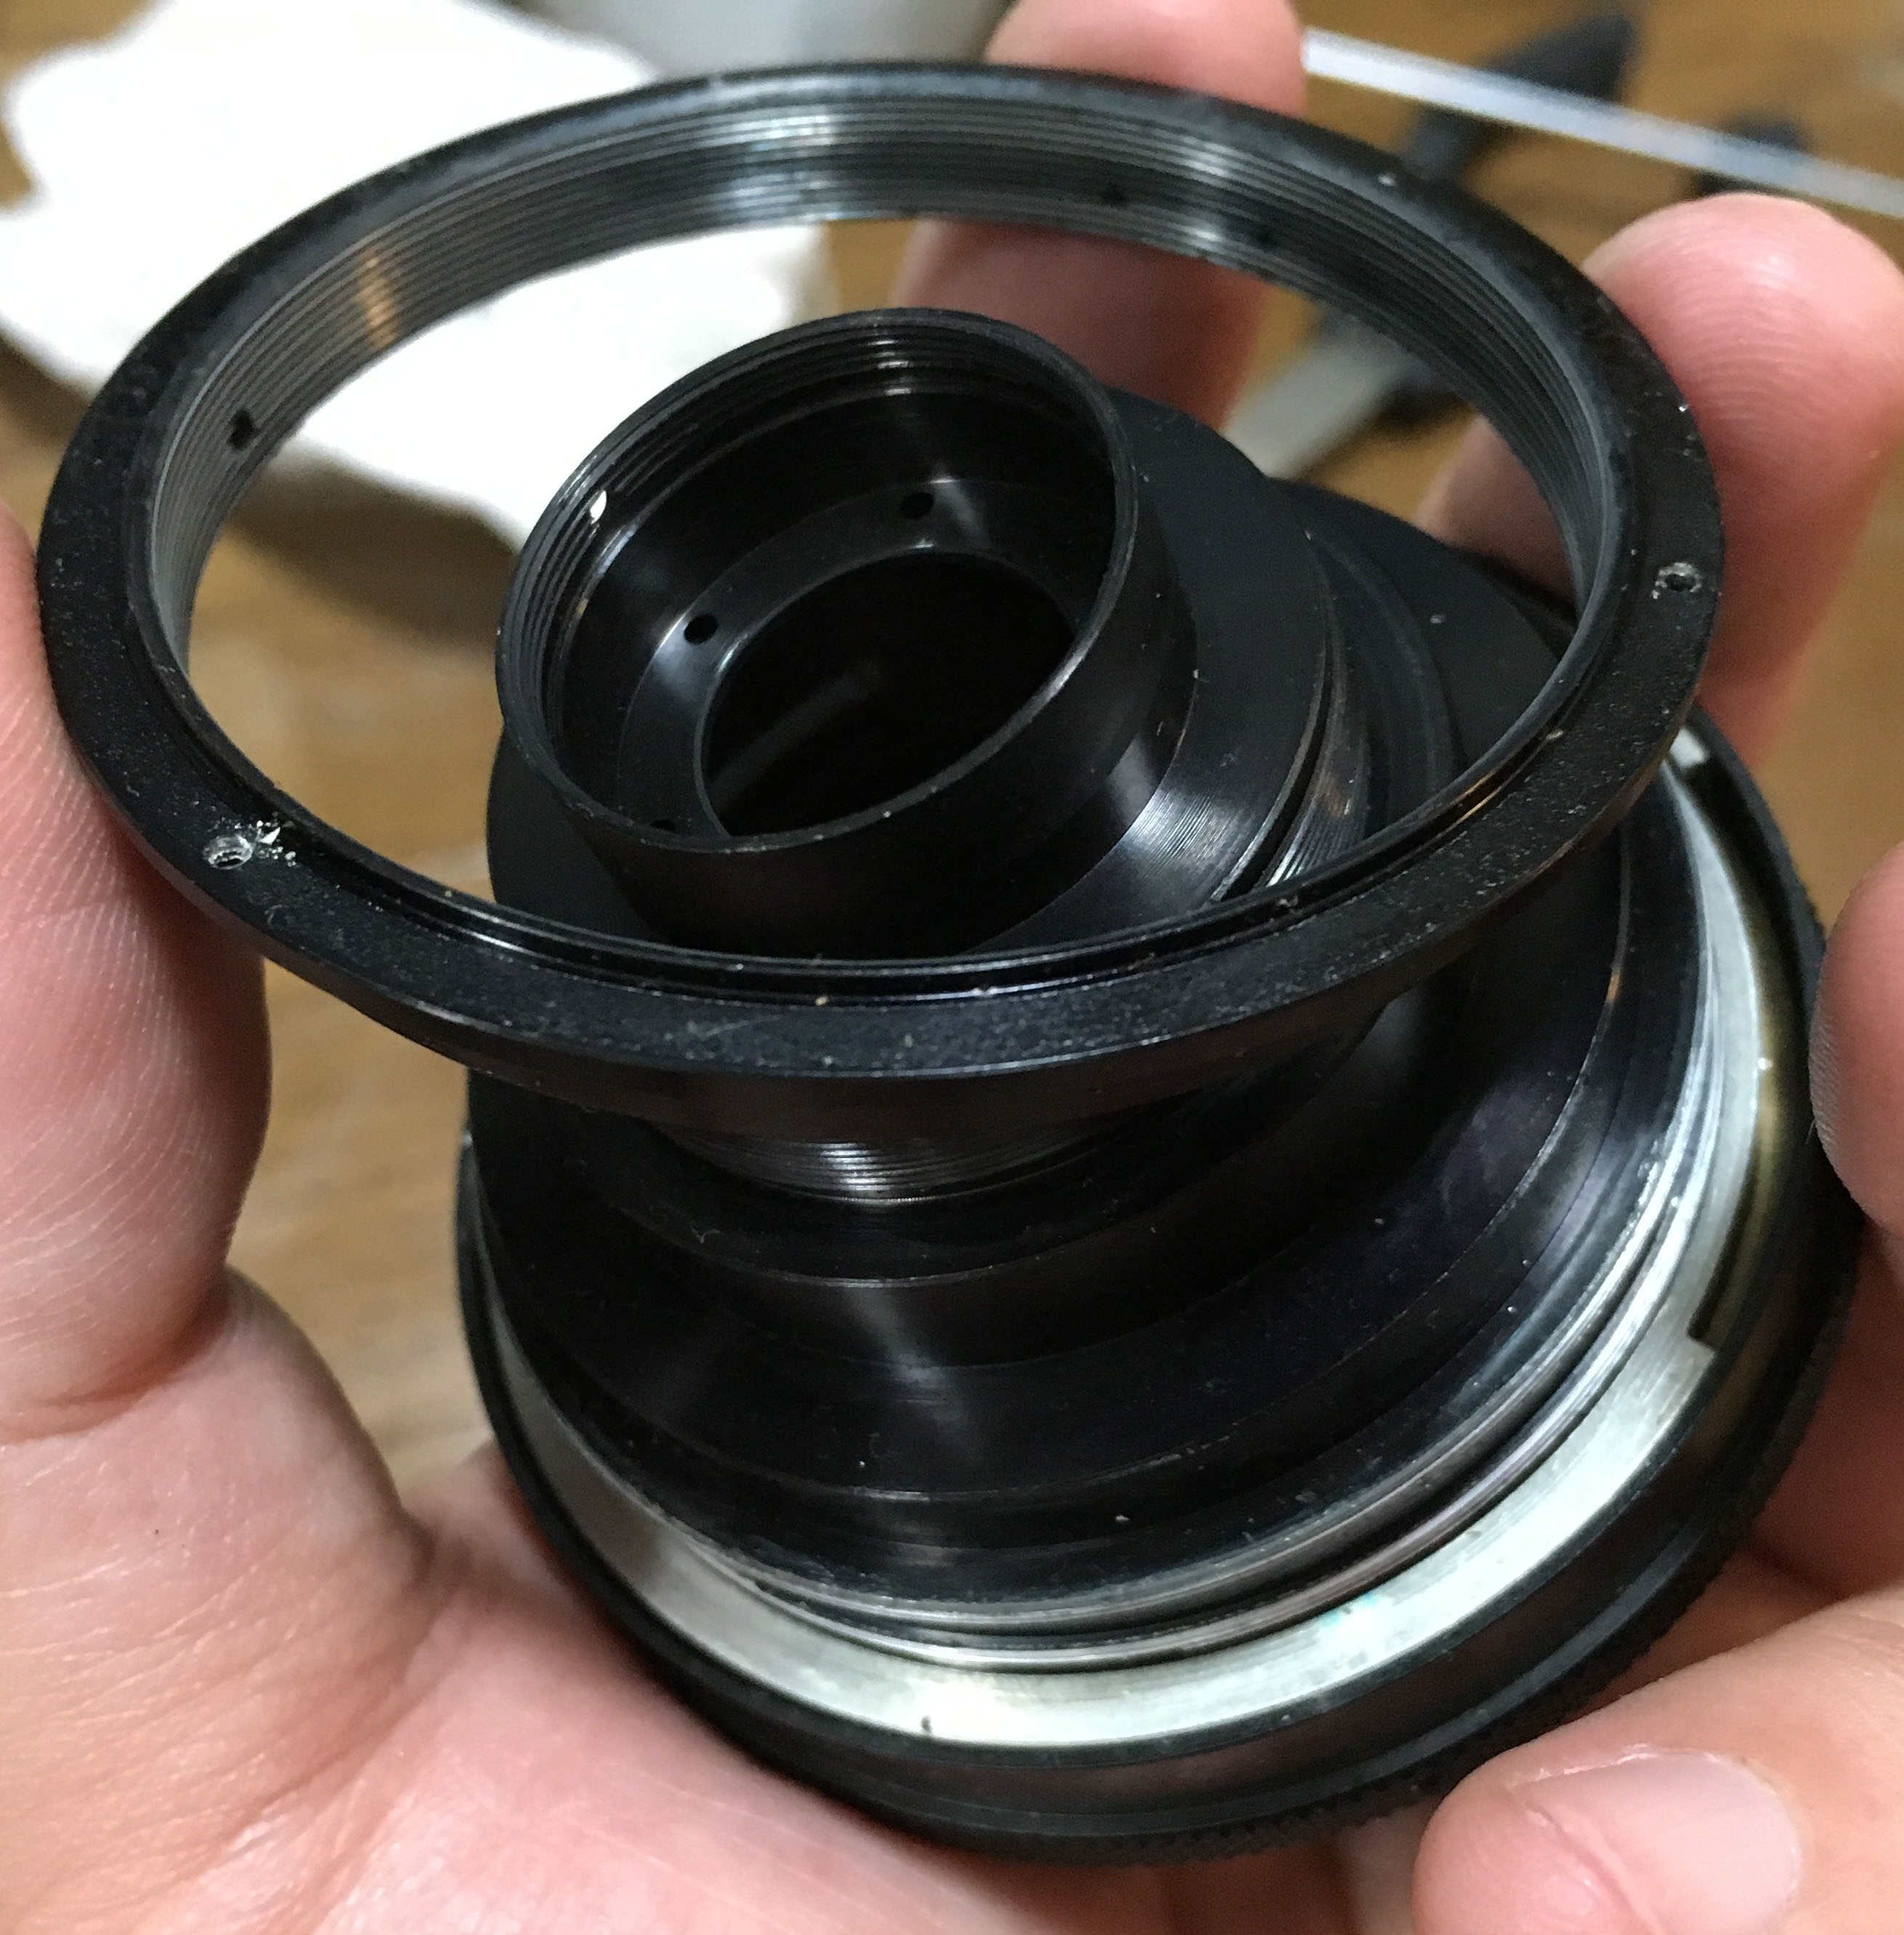
Begin by removing this pillar screw. You may need a bigger screwdriver for this. Be careful not to use the driver at an angle and ruin the slot. This thing serves as a helicoid key so it constrains the movement of all helicoids when you turn the central one.
Once that screw is gone you can now separate the central helicoid from the outer one. Mark where they parted because this is also the same spot where they should mesh. Read my article on how to work with helicoids so you will never get stuck. Many people don’t know how to work with these, my article will help you a lot.
The inner and central helicoids look simple enough. Notice that scratch that I made? That’s for me to know which side should face the infinity mark.
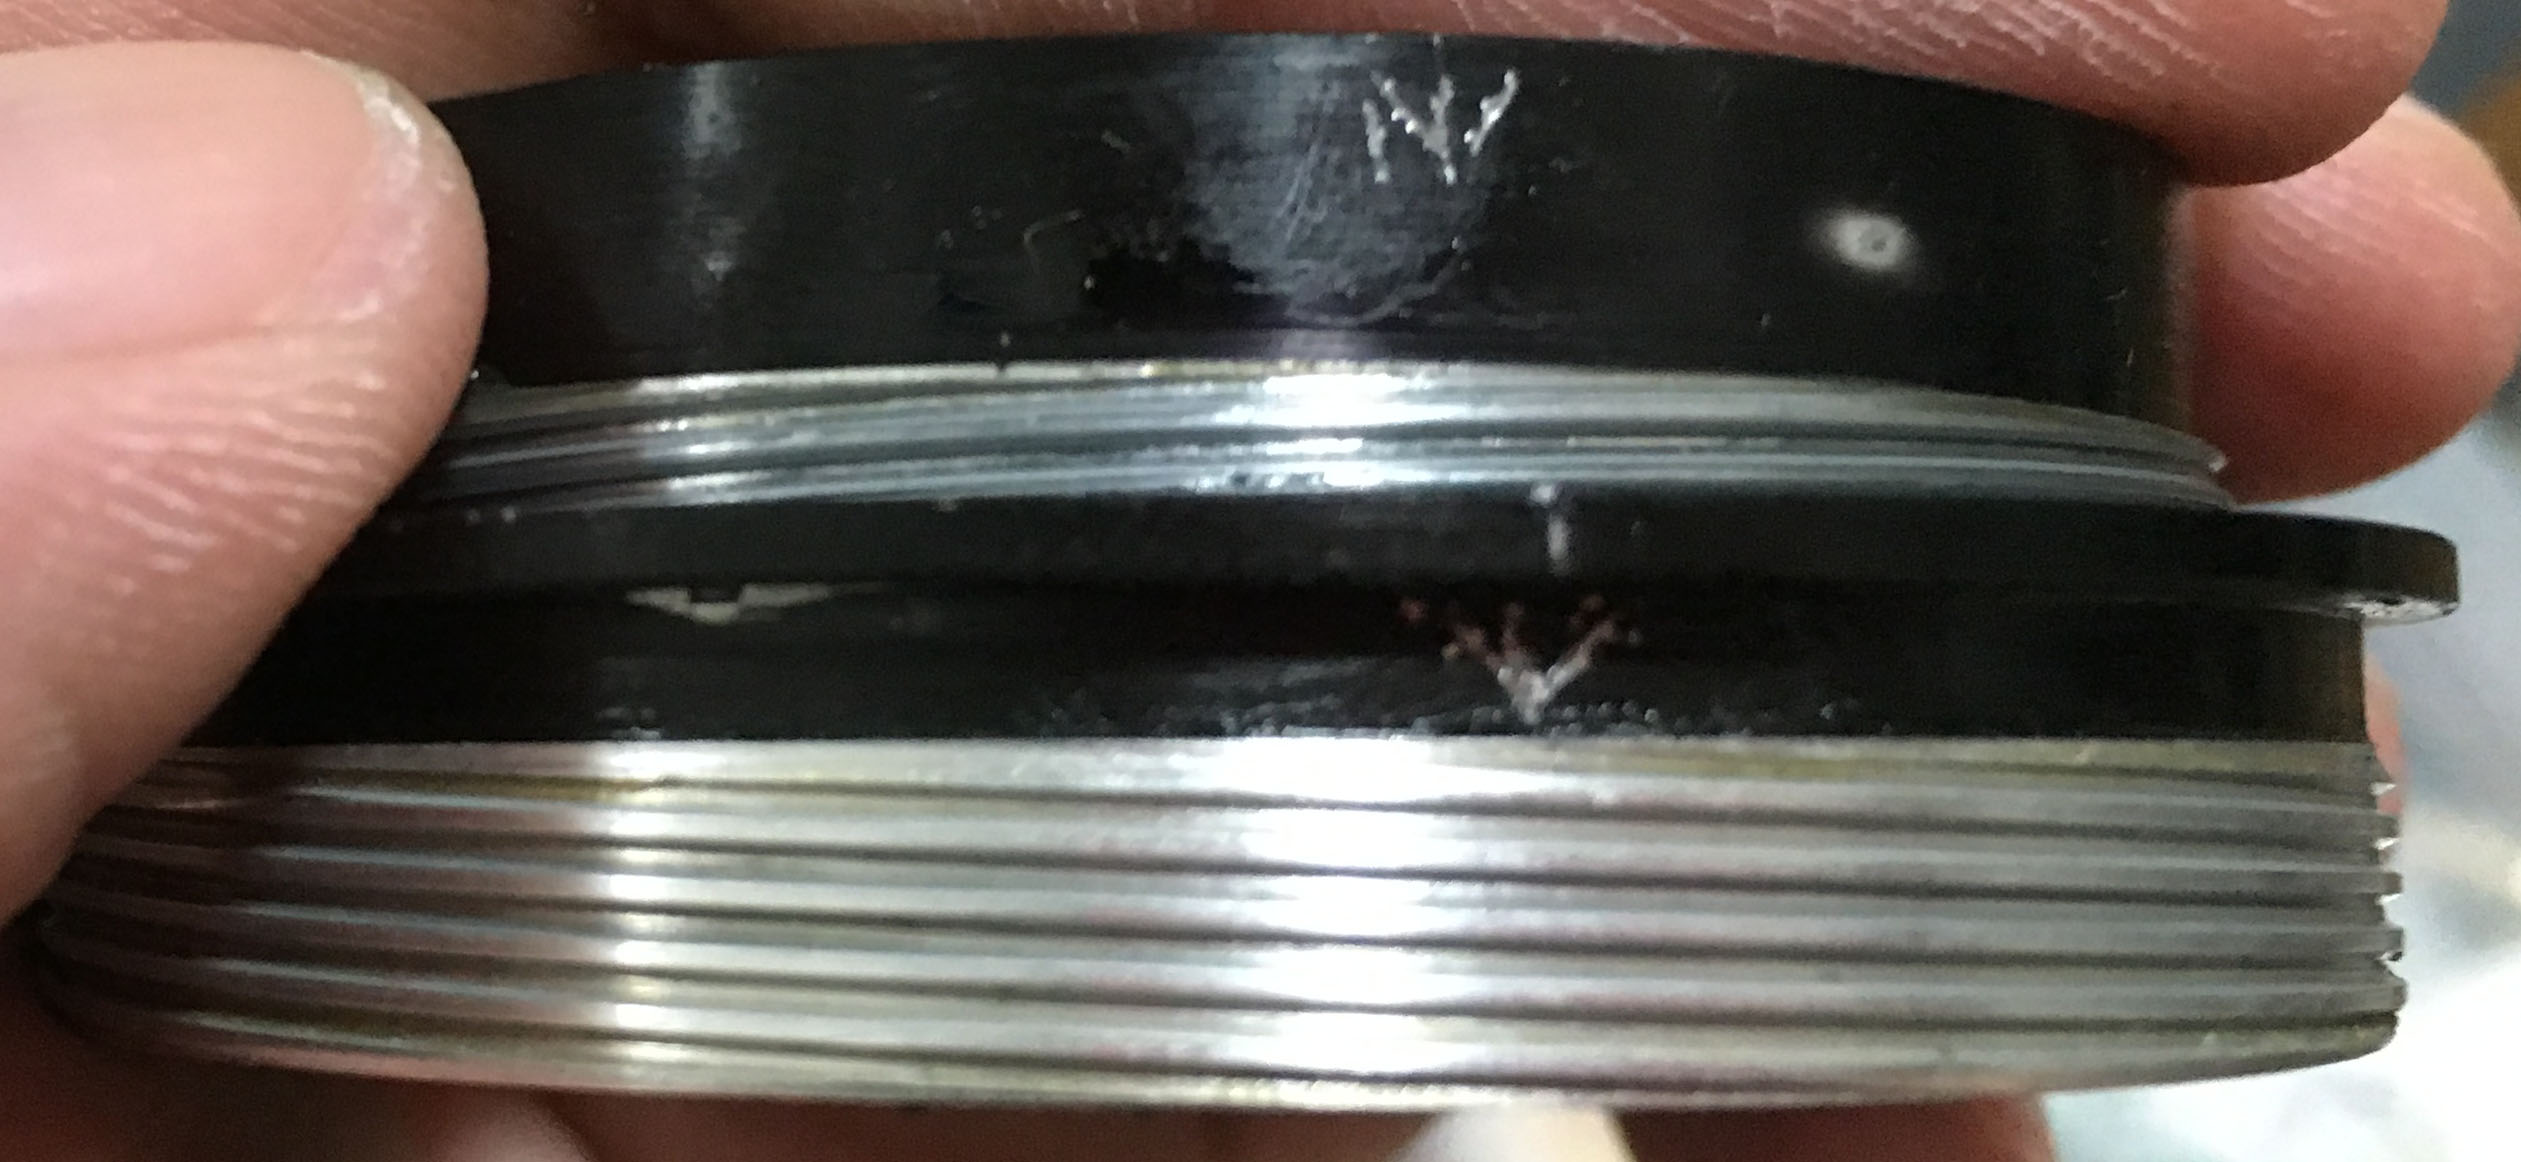
Separate the other helicoids and don’t forget to mark where they separate.
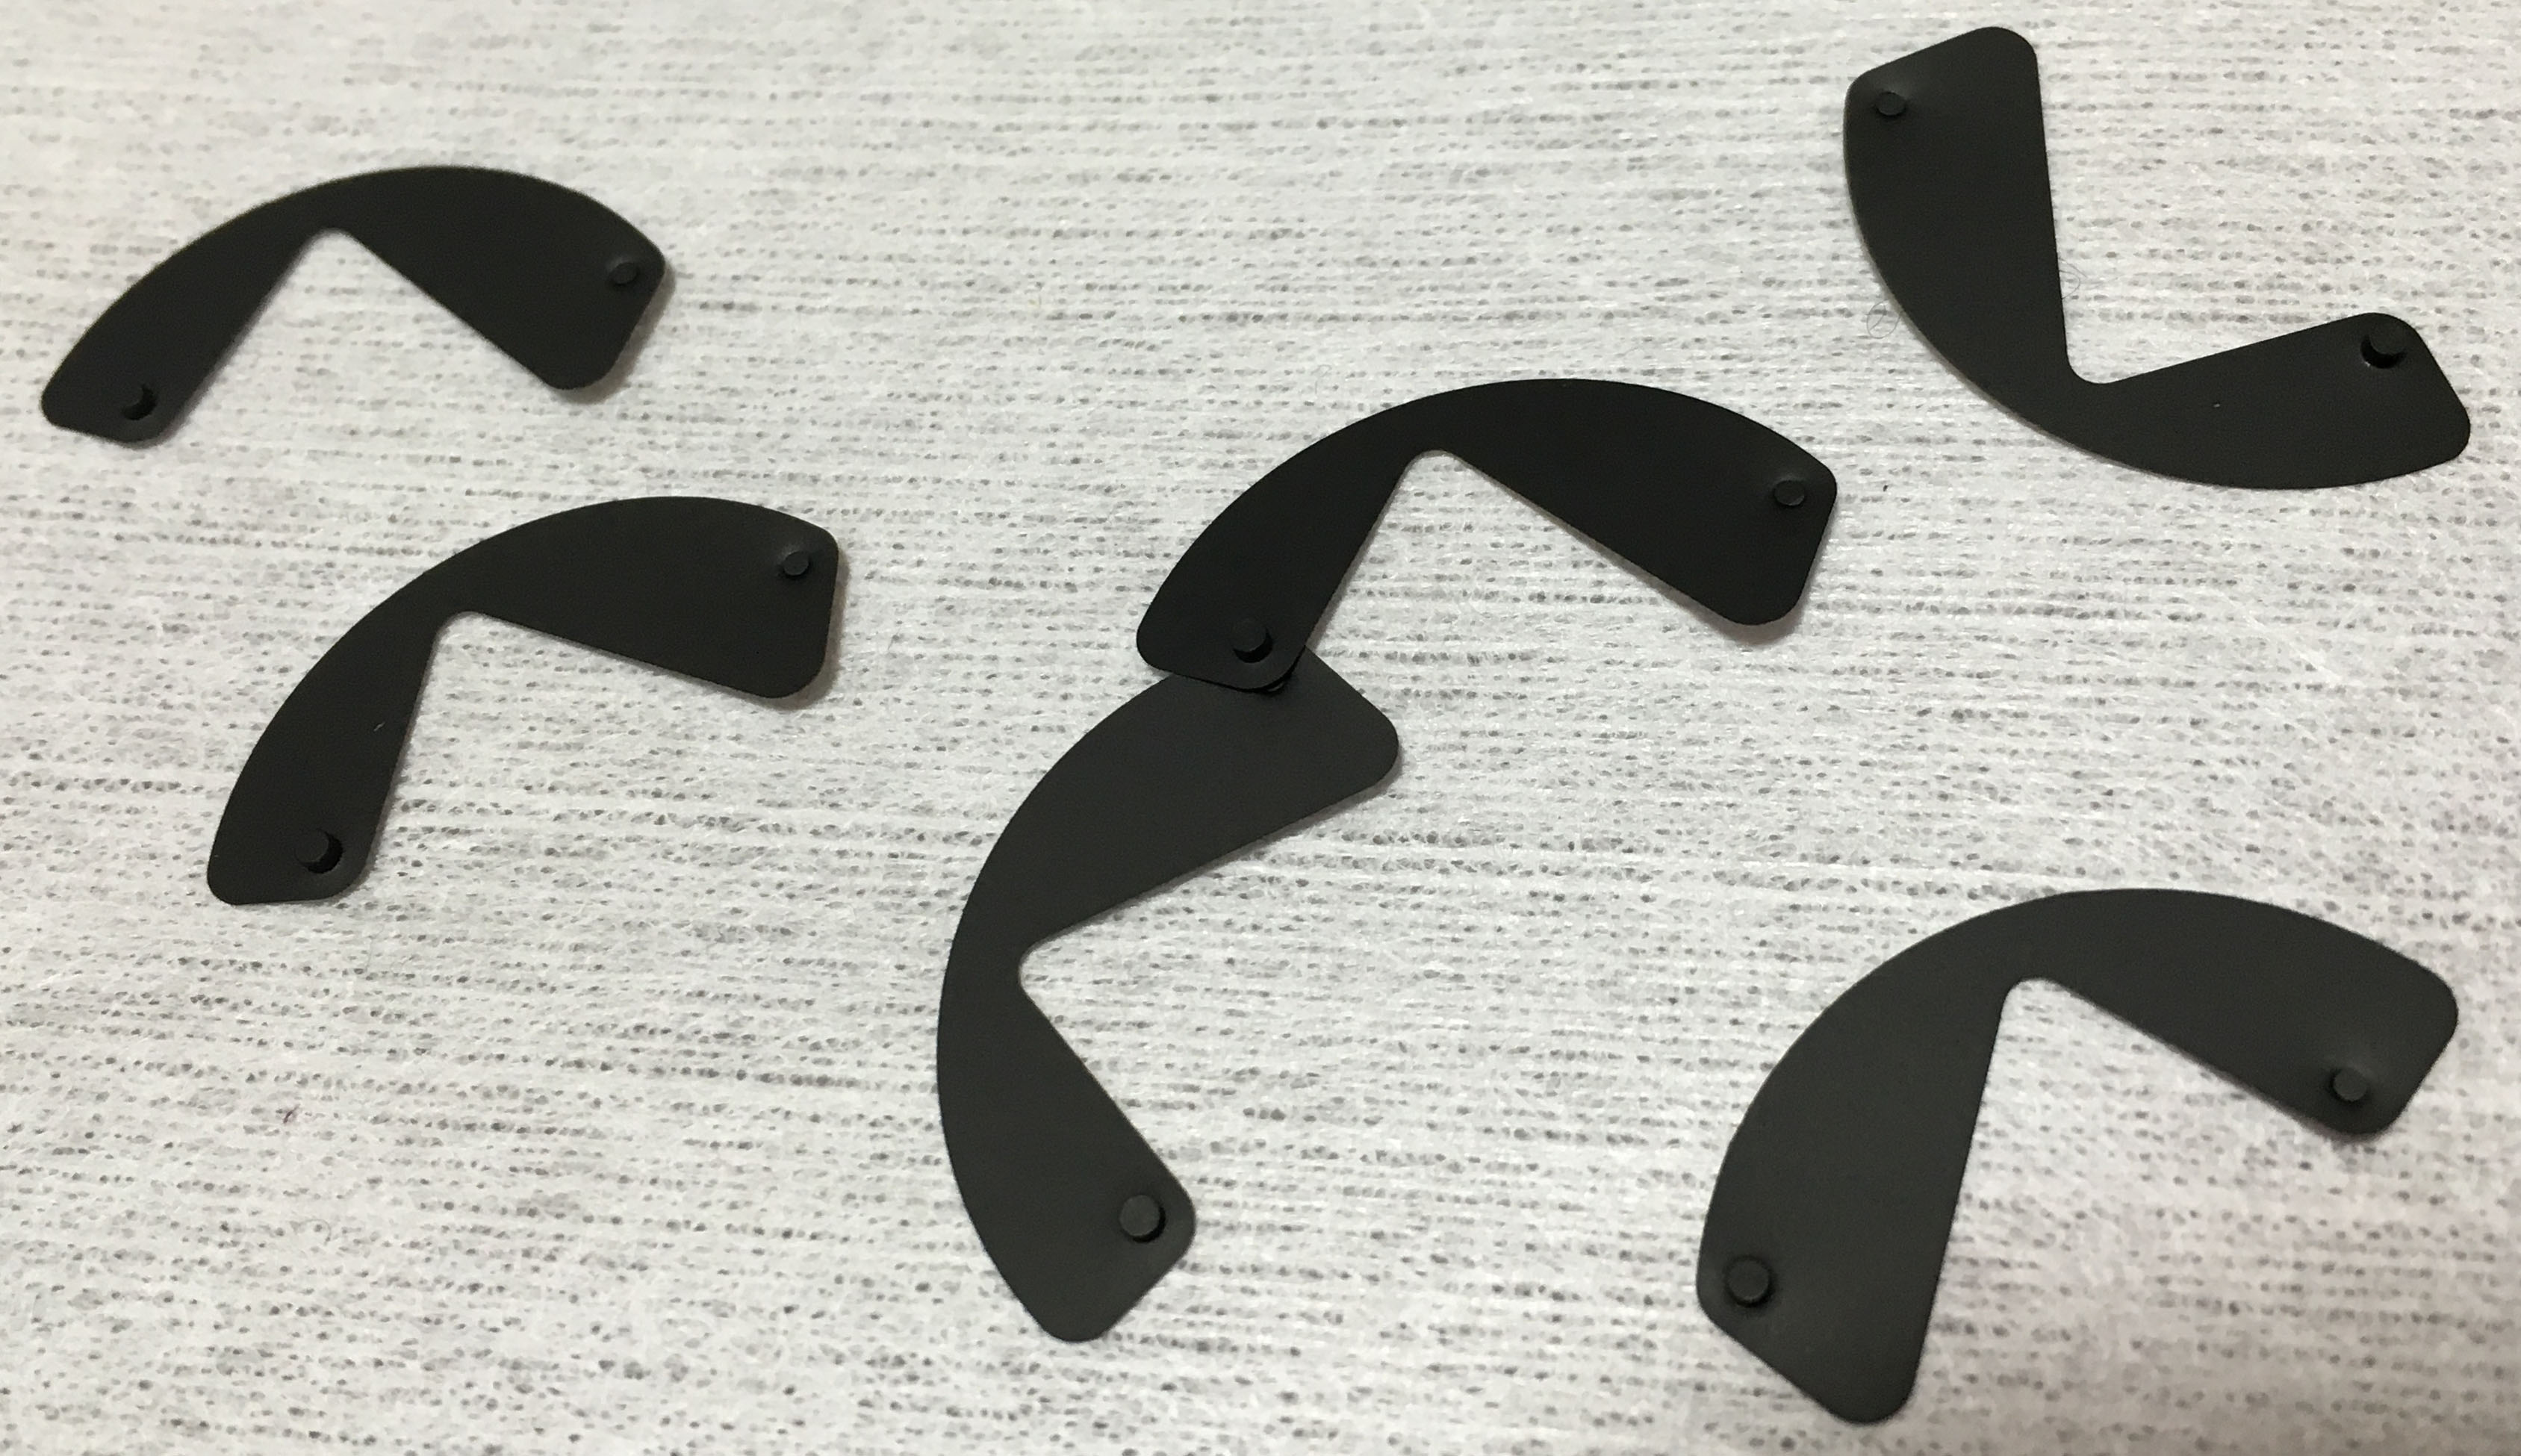
Clean all of the parts carefully. A very common problem for this type of lens is its tendency to move while shifted, there should be a felt lining found on the inner surface of the knob, if that’s worn or gone then there’s nothing to prevent the knob from turning. Replacing it with rubber is a nice solution, I usually use felt for this since it can be hard to find rubber sheets of the right thickness.
The helicoids should be cleaned very well and a thicker type of grease will be the best choice for this so you can make precise turns. This should not be too-thick or you’ll turn the whole lens while turning the focusing ring.
Disassembly (Front Barrel):
I will condense the parts for the objective and the front barrel into one part. You’ll have to work with this assembly as a unit and separating this section into 2 will only confuse you further. This one is pretty simple for me but it can be quite complicated for people who aren’t used to working with preset lenses.
Do not lose this brass shim.

To remove the aperture stop-down ring, extract these screws. You rotate this ring to manually open and close the iris.
Be sure to note its original position.

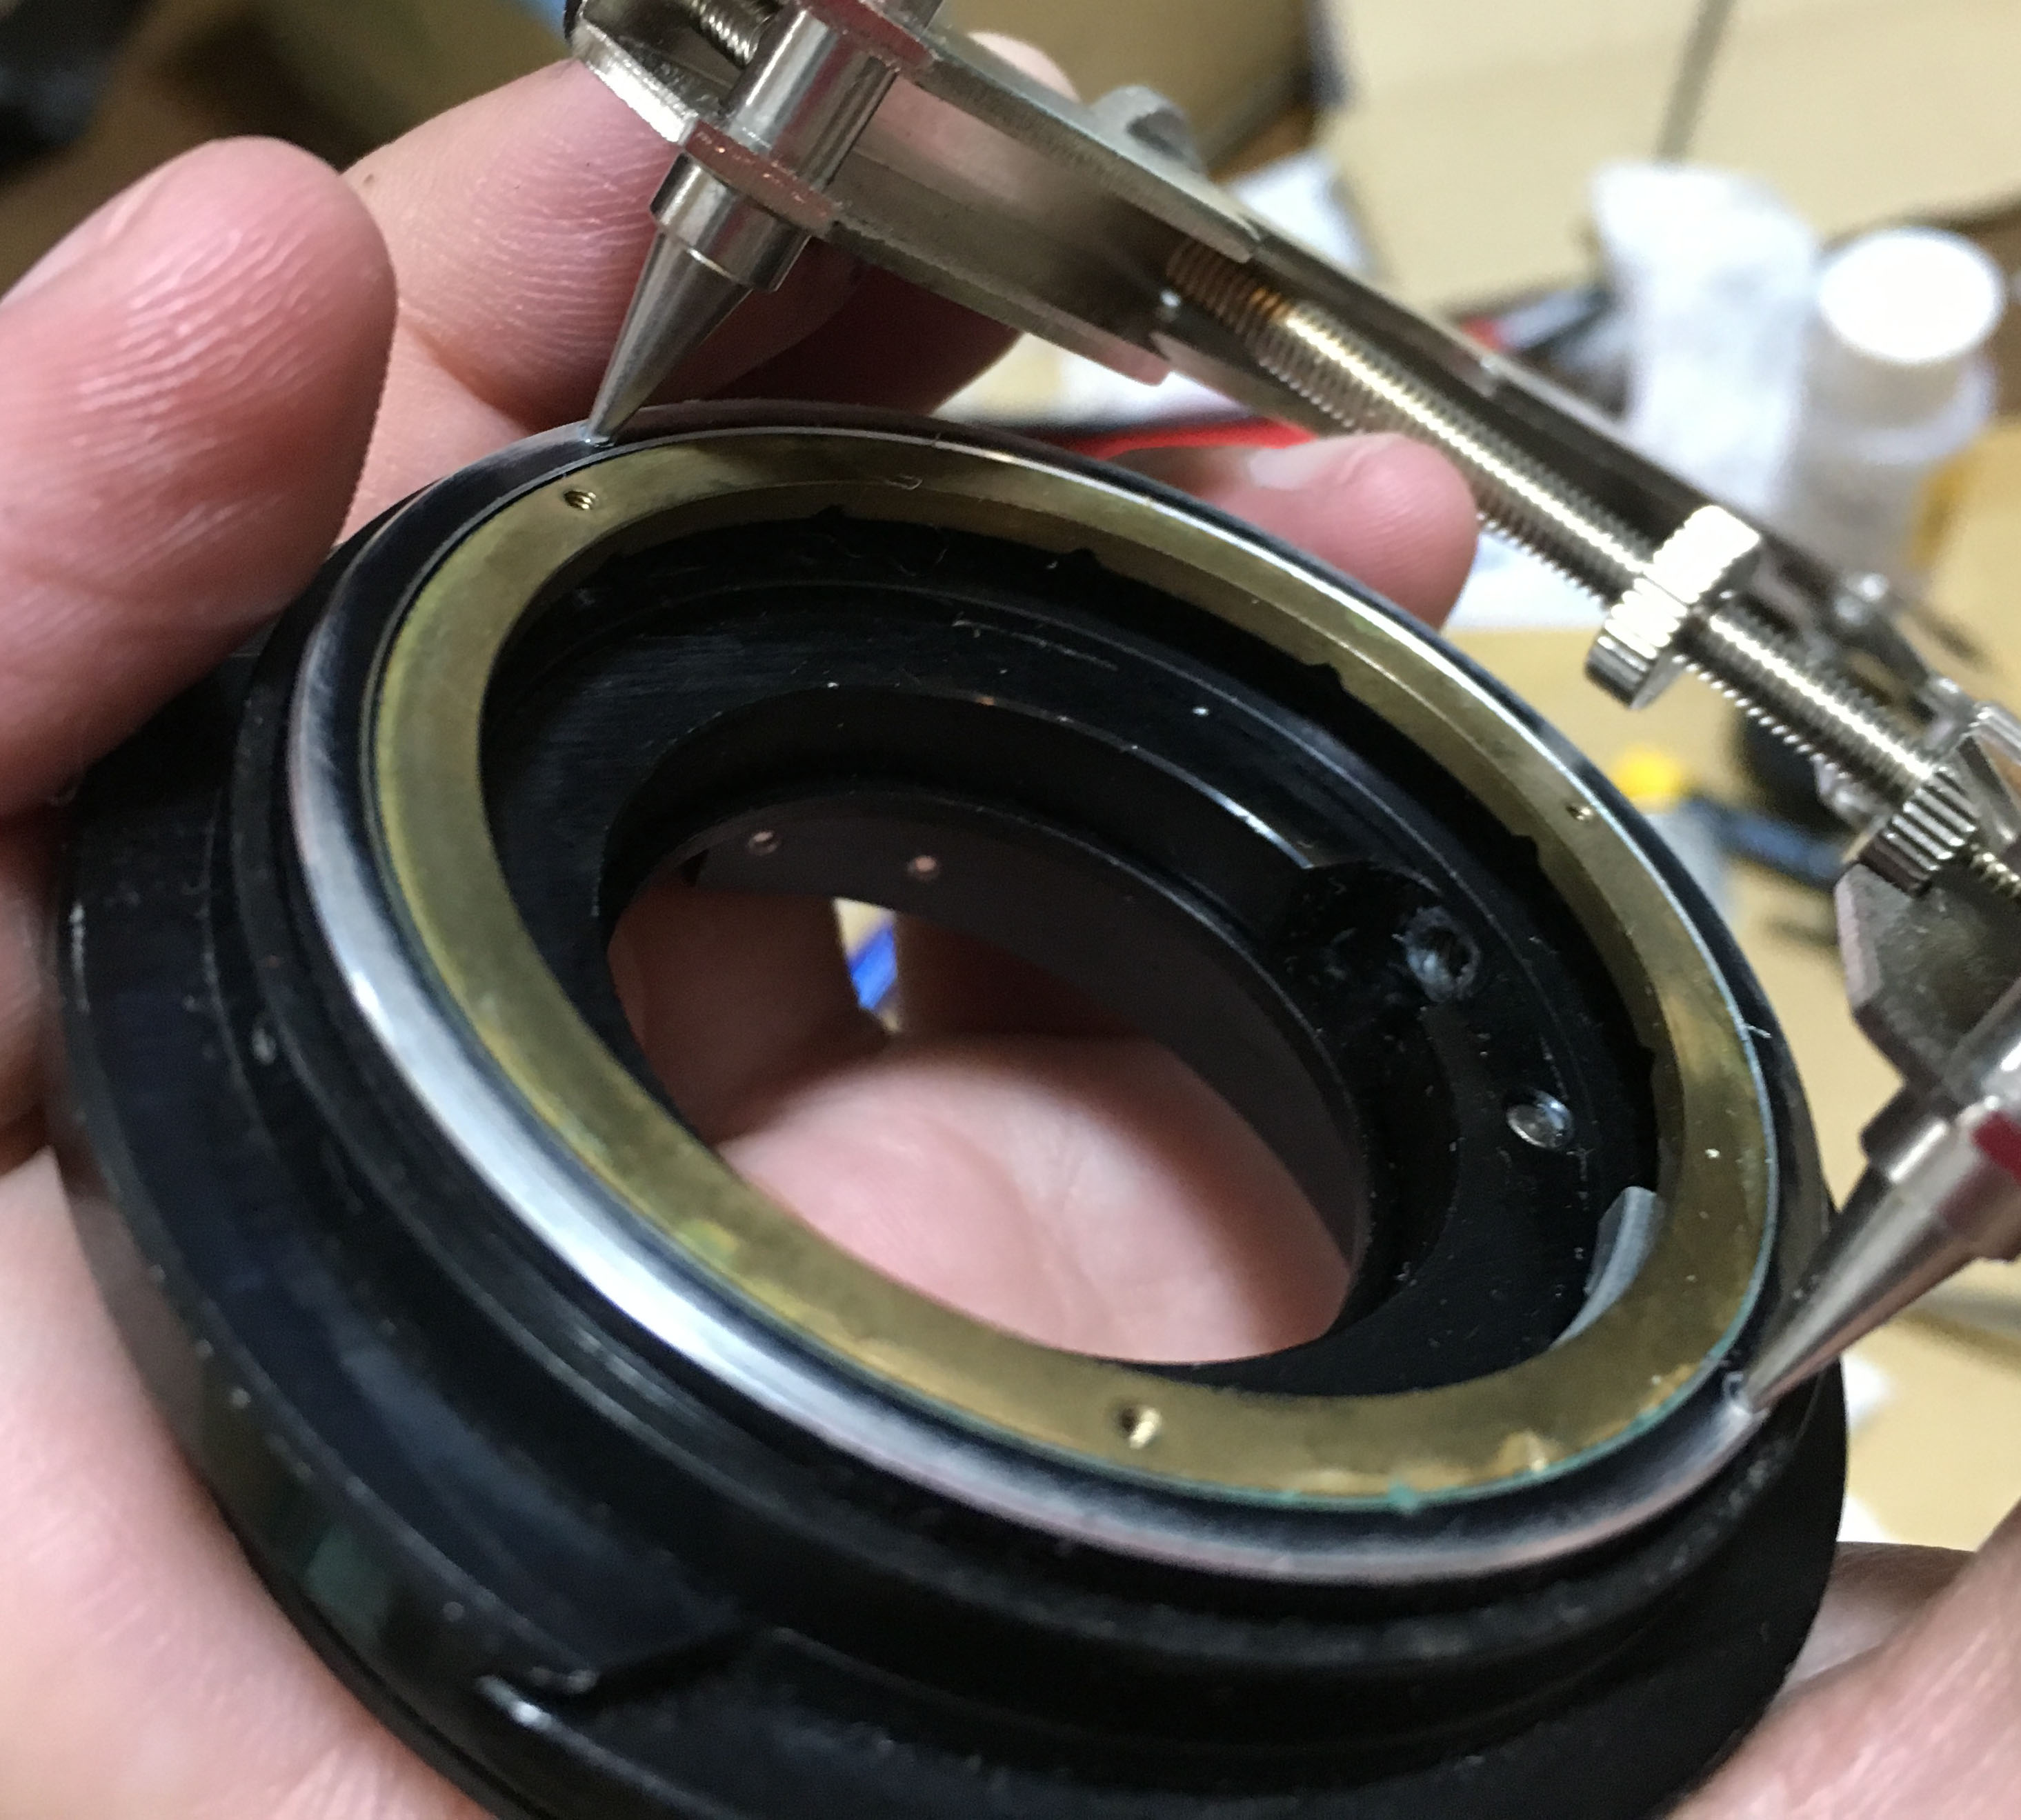
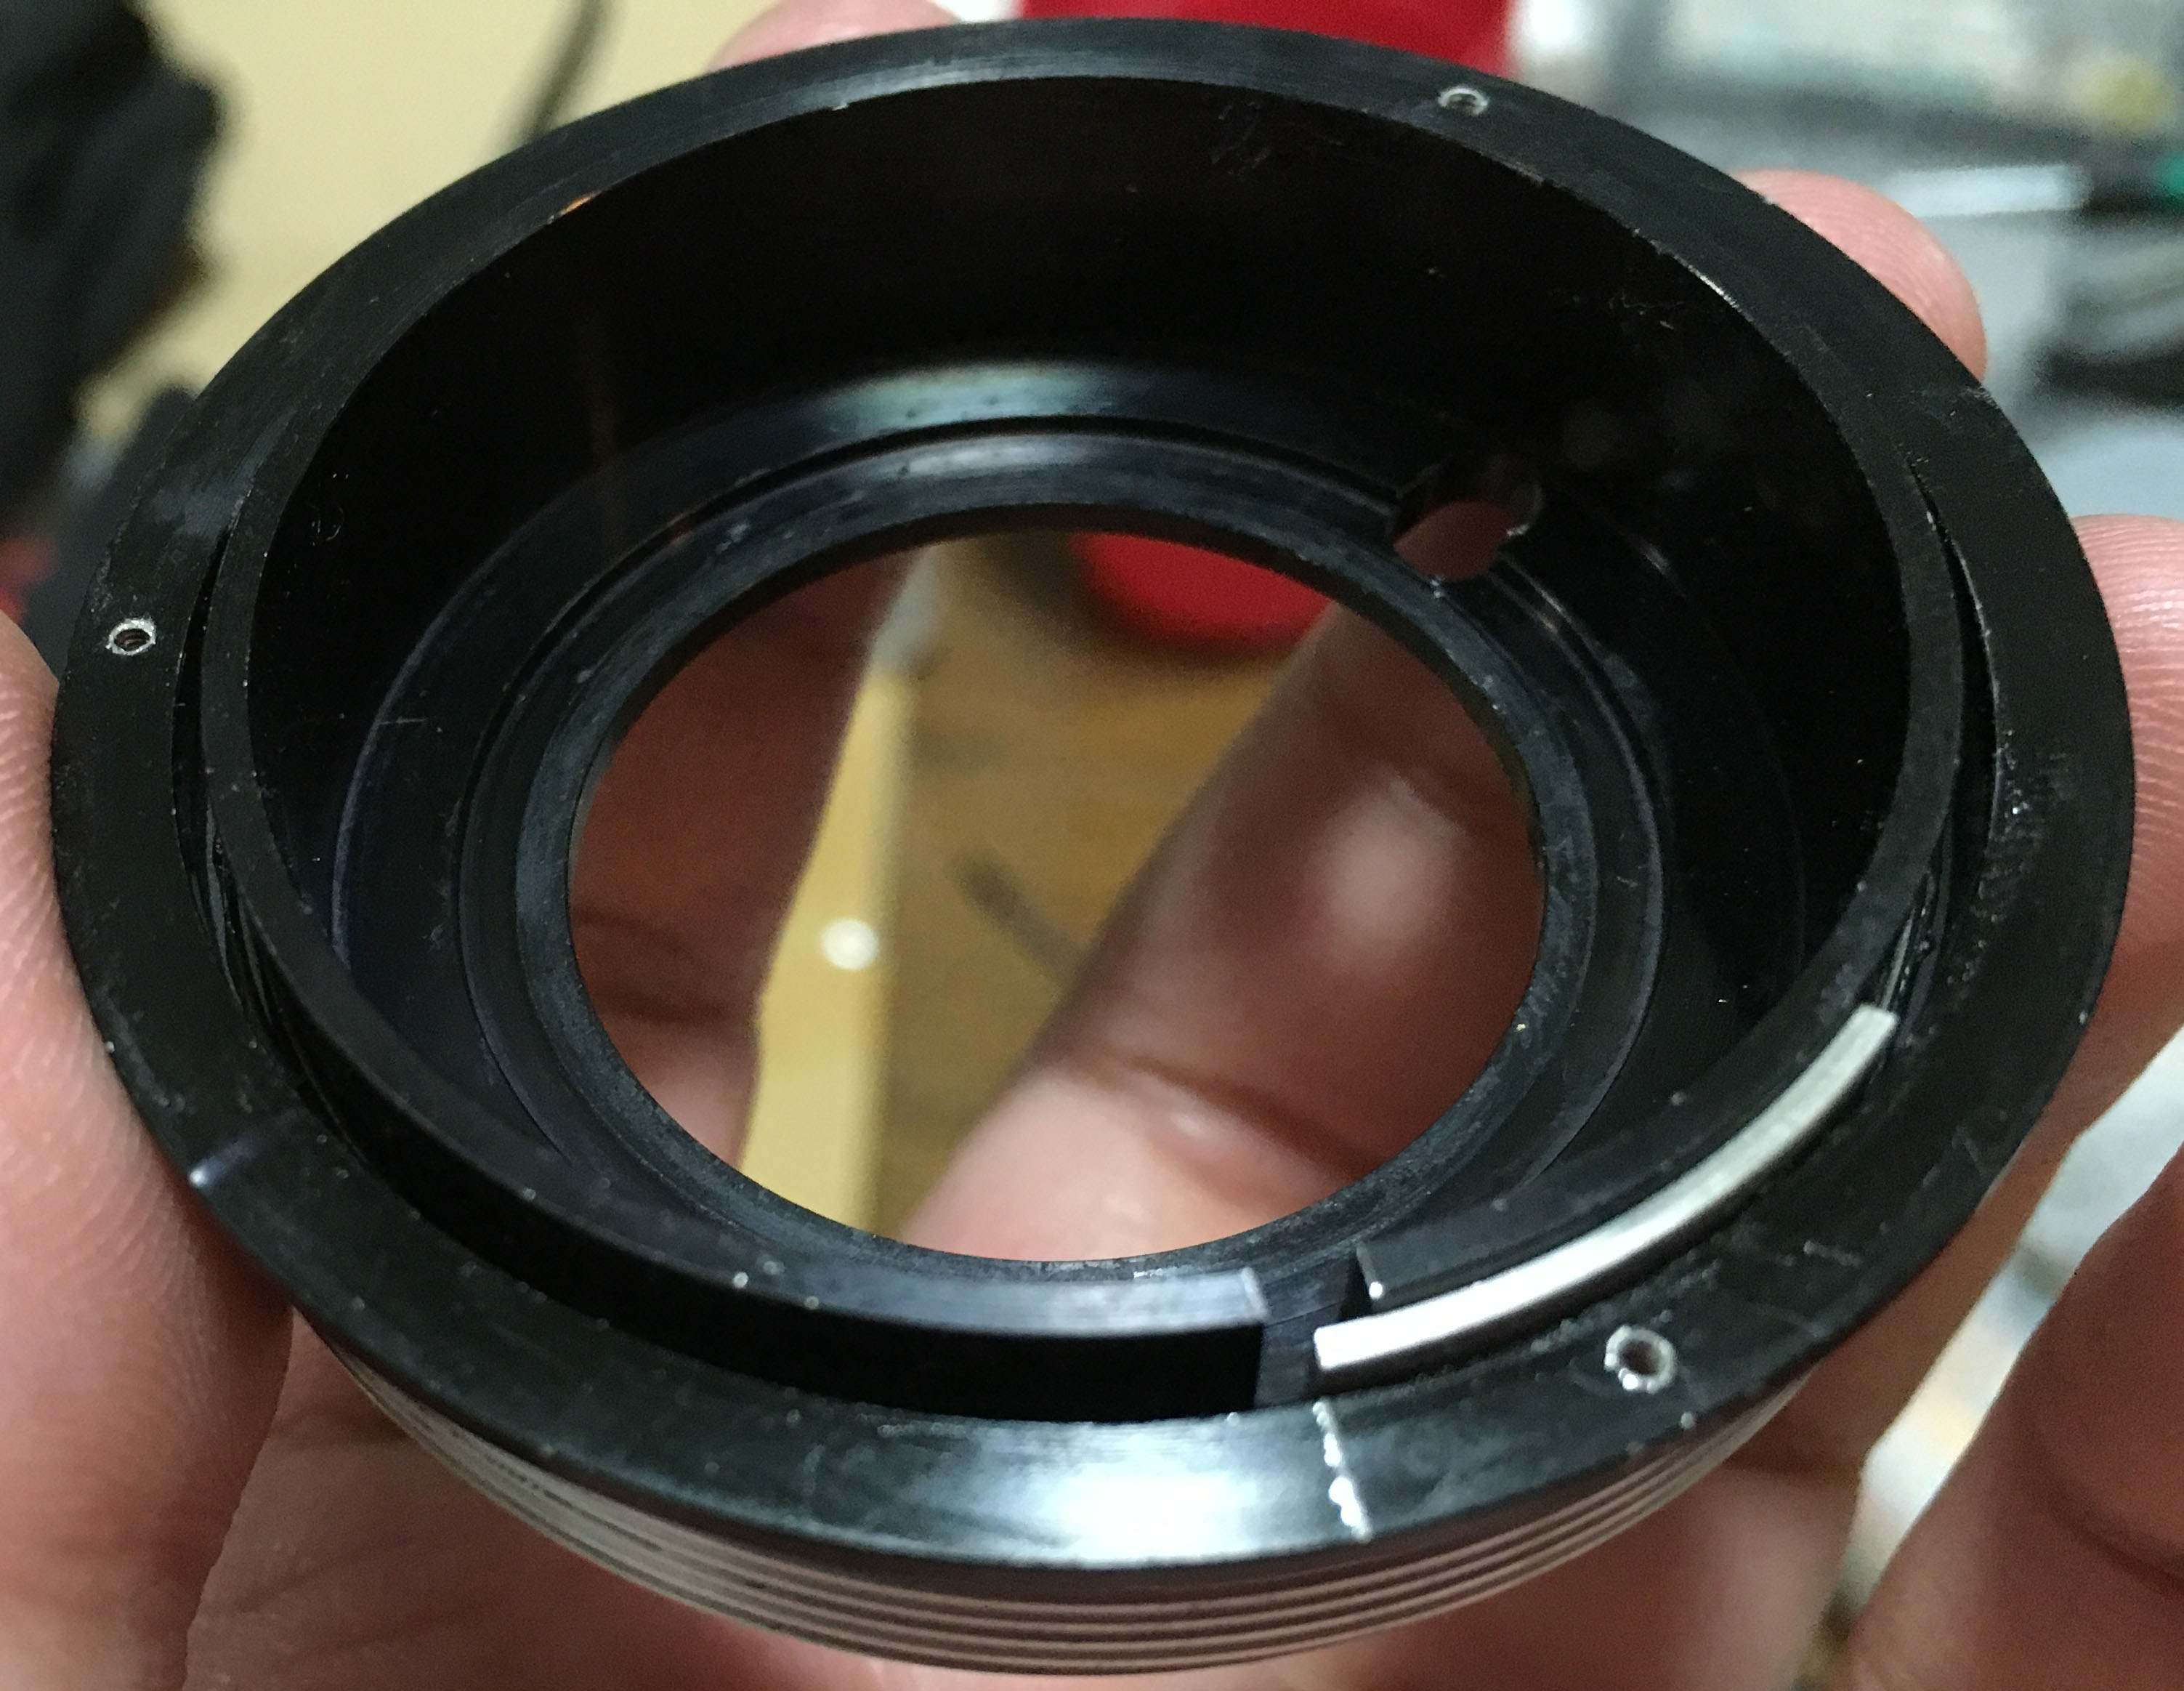
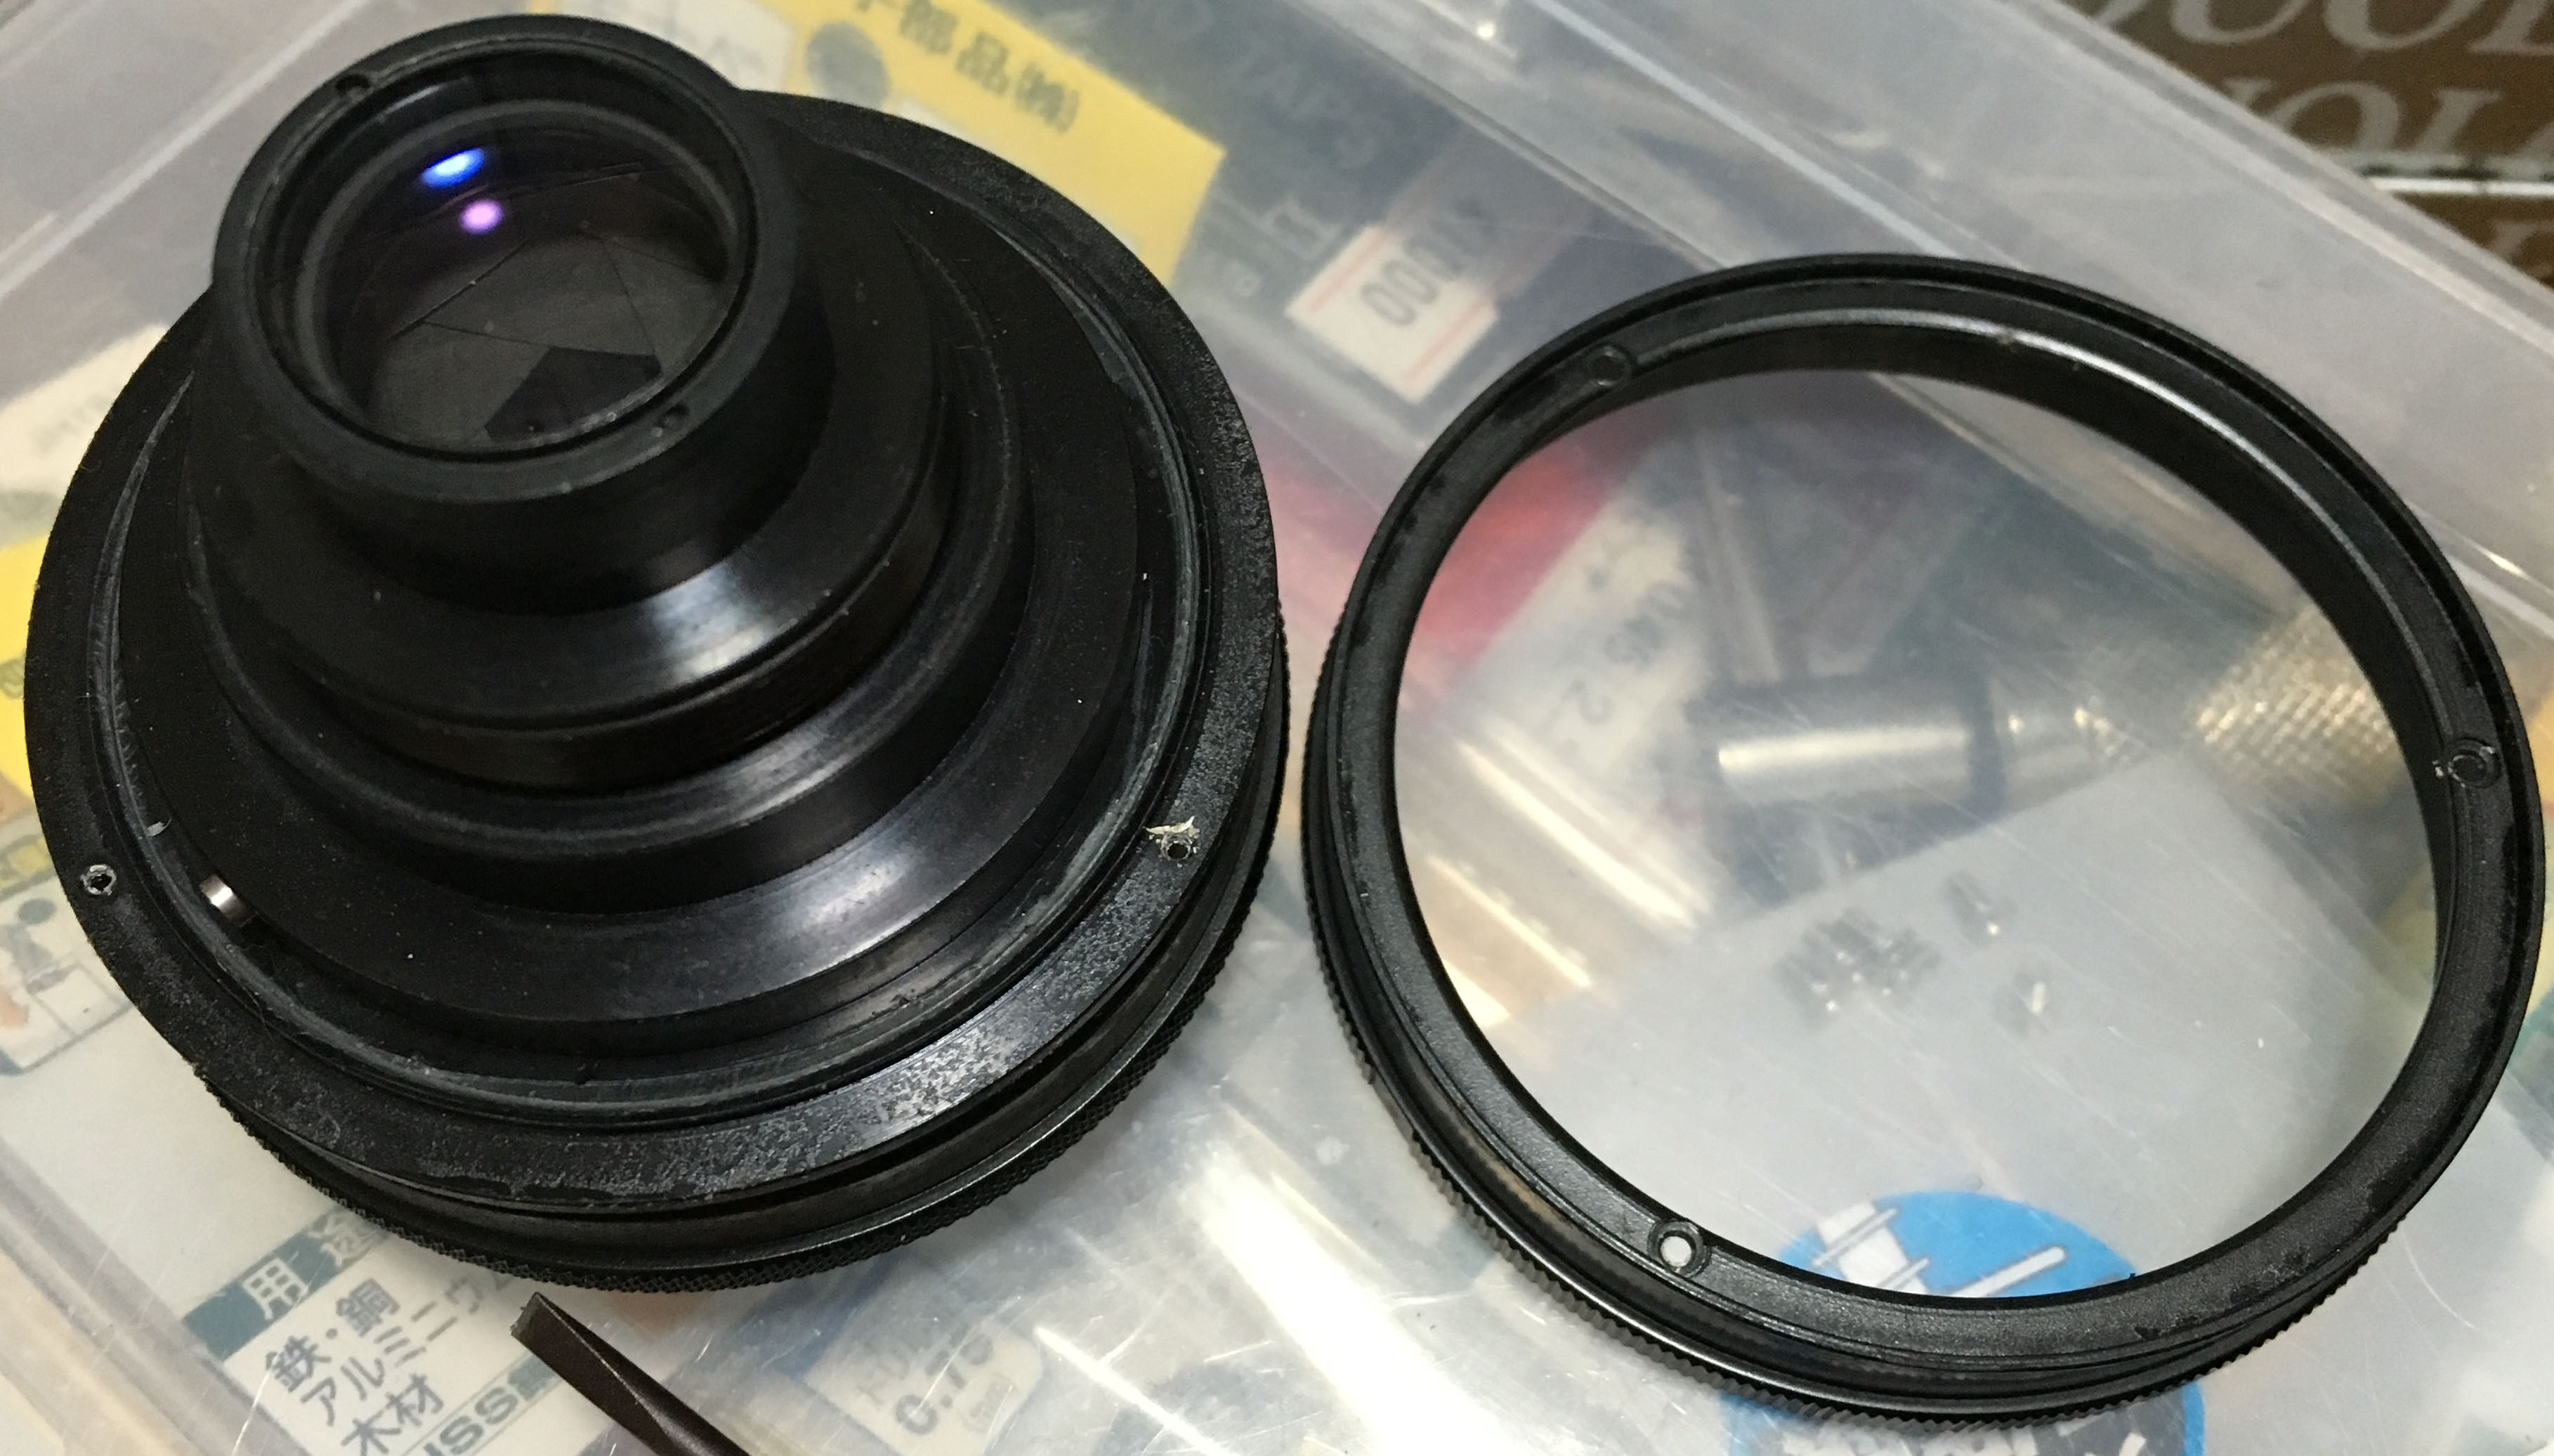
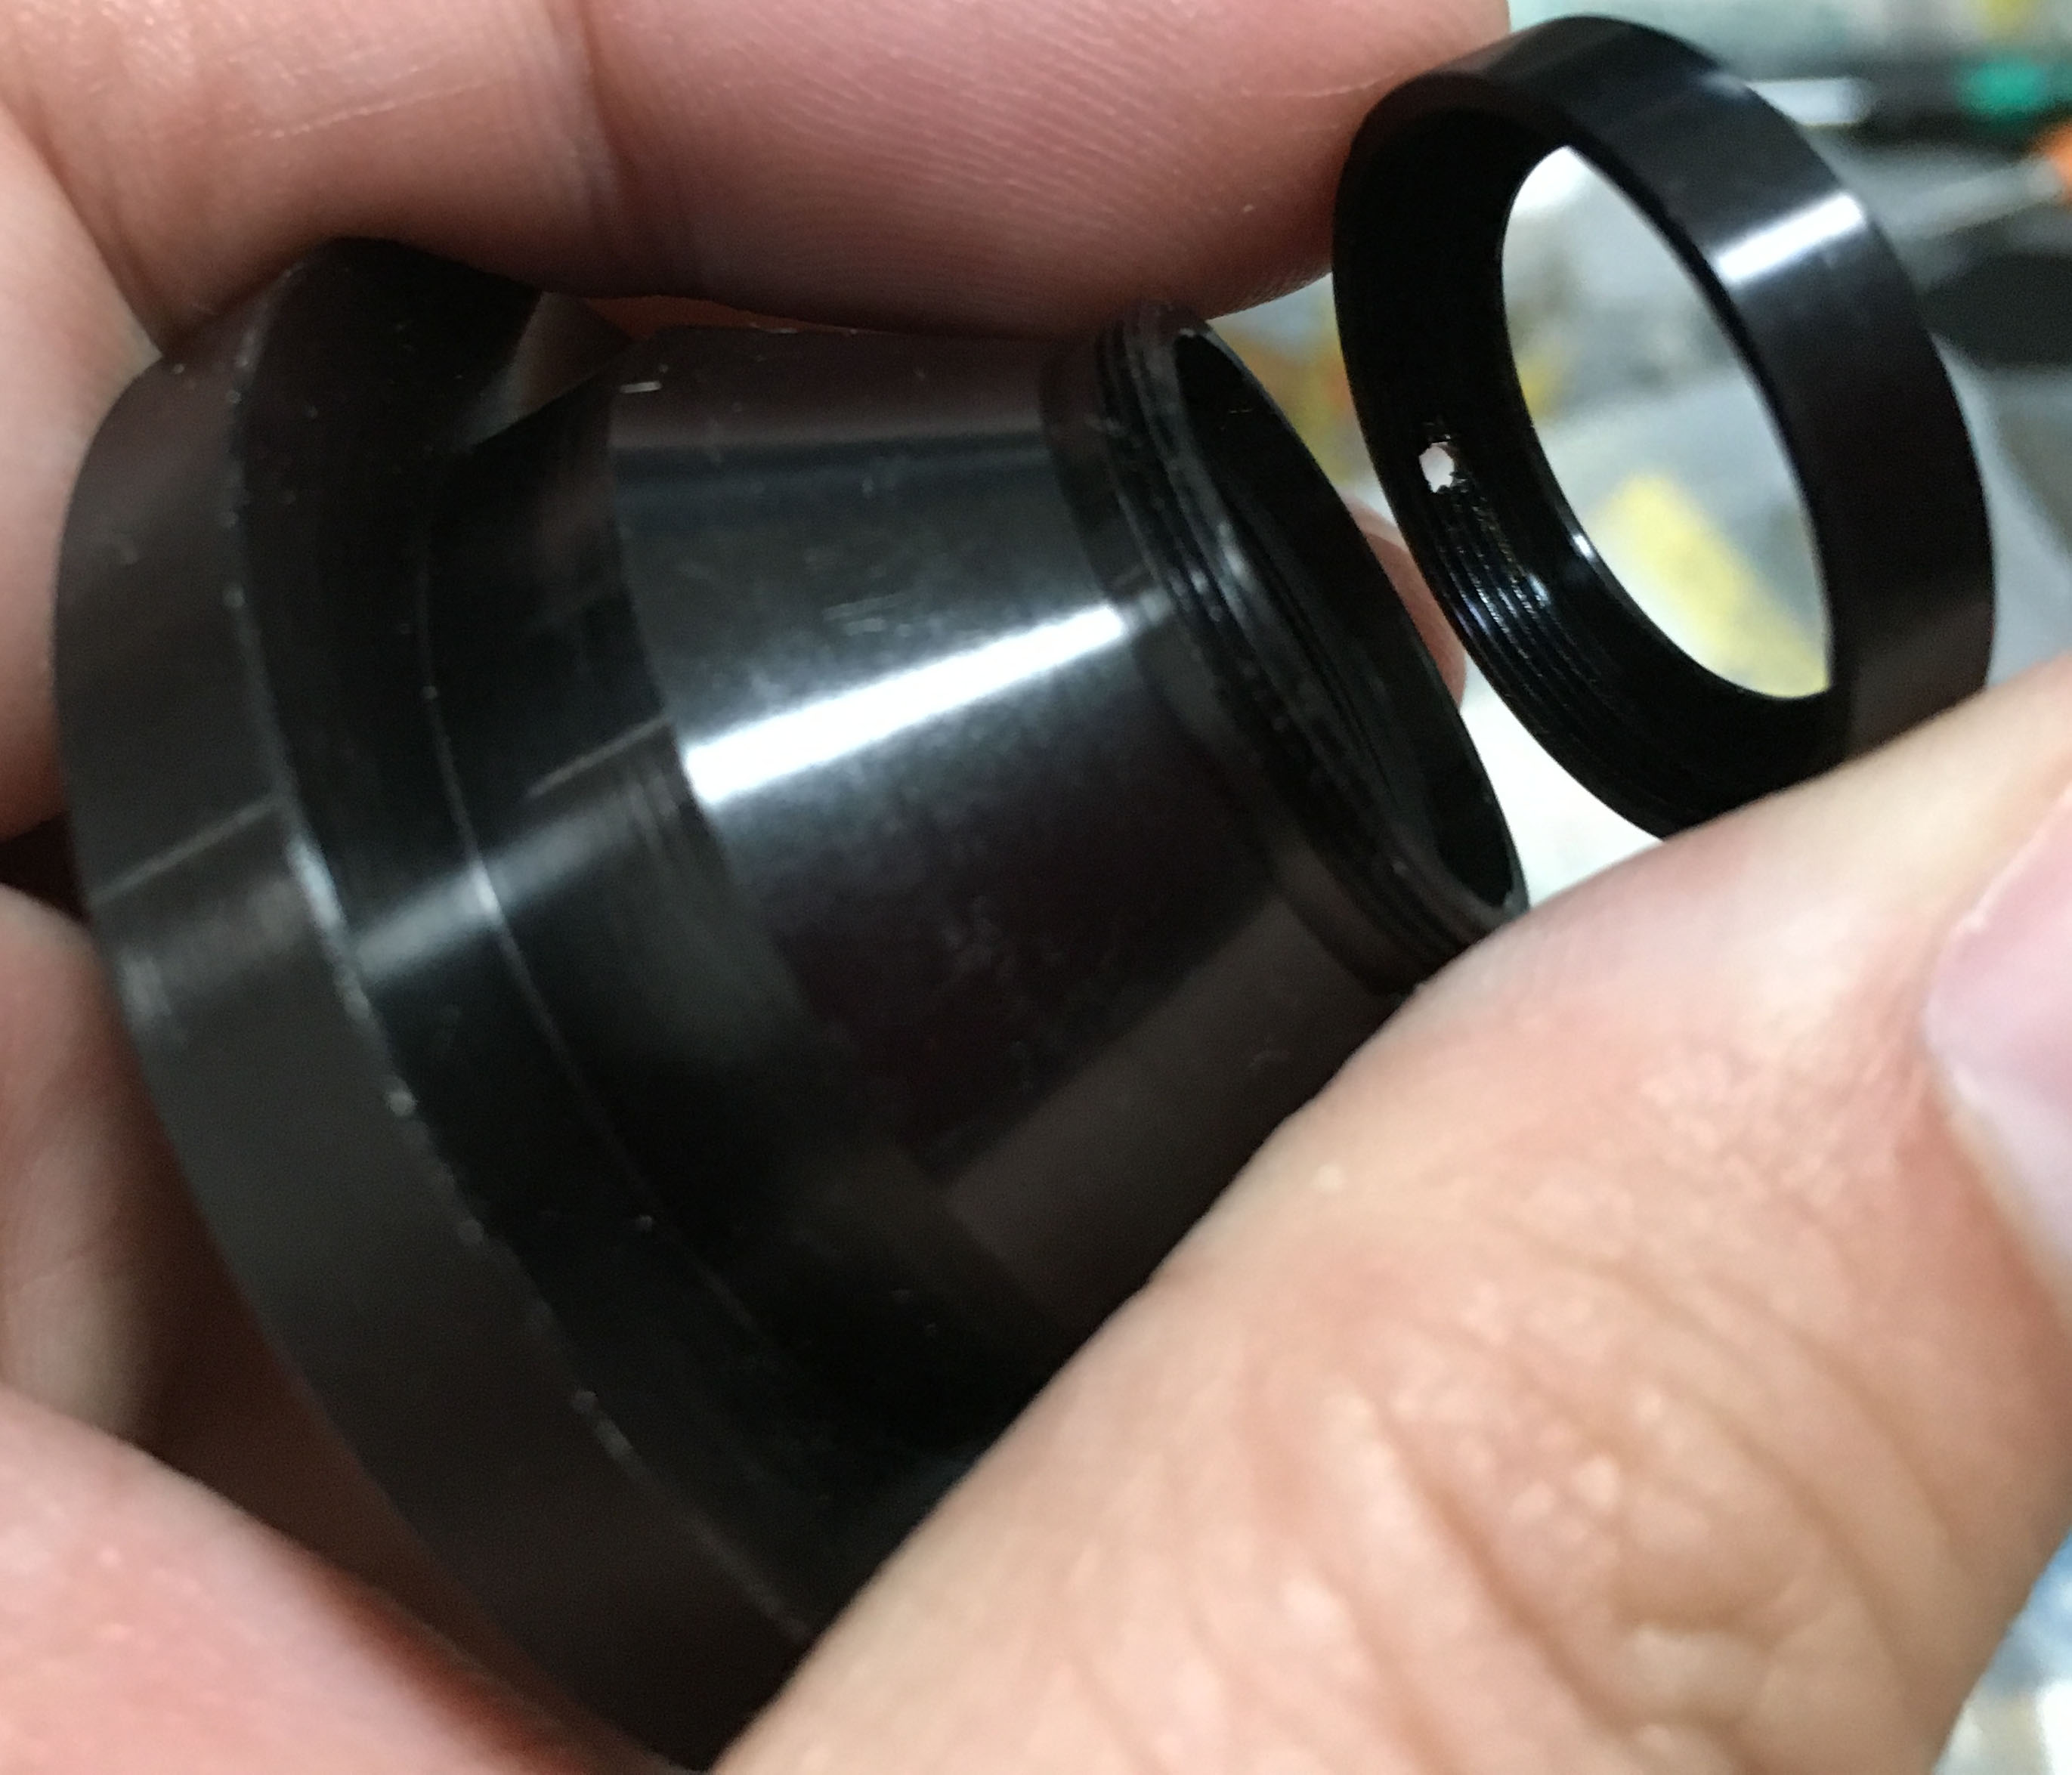
Before we go any further, the front optical assembly should be extracted and kept somewhere safe while we work with the rest of the lens.

The same should also be done for the rear element. I unscrewed mine using my bare hands and if yours was glued then you should place some solvent into the thread before you give it another try.

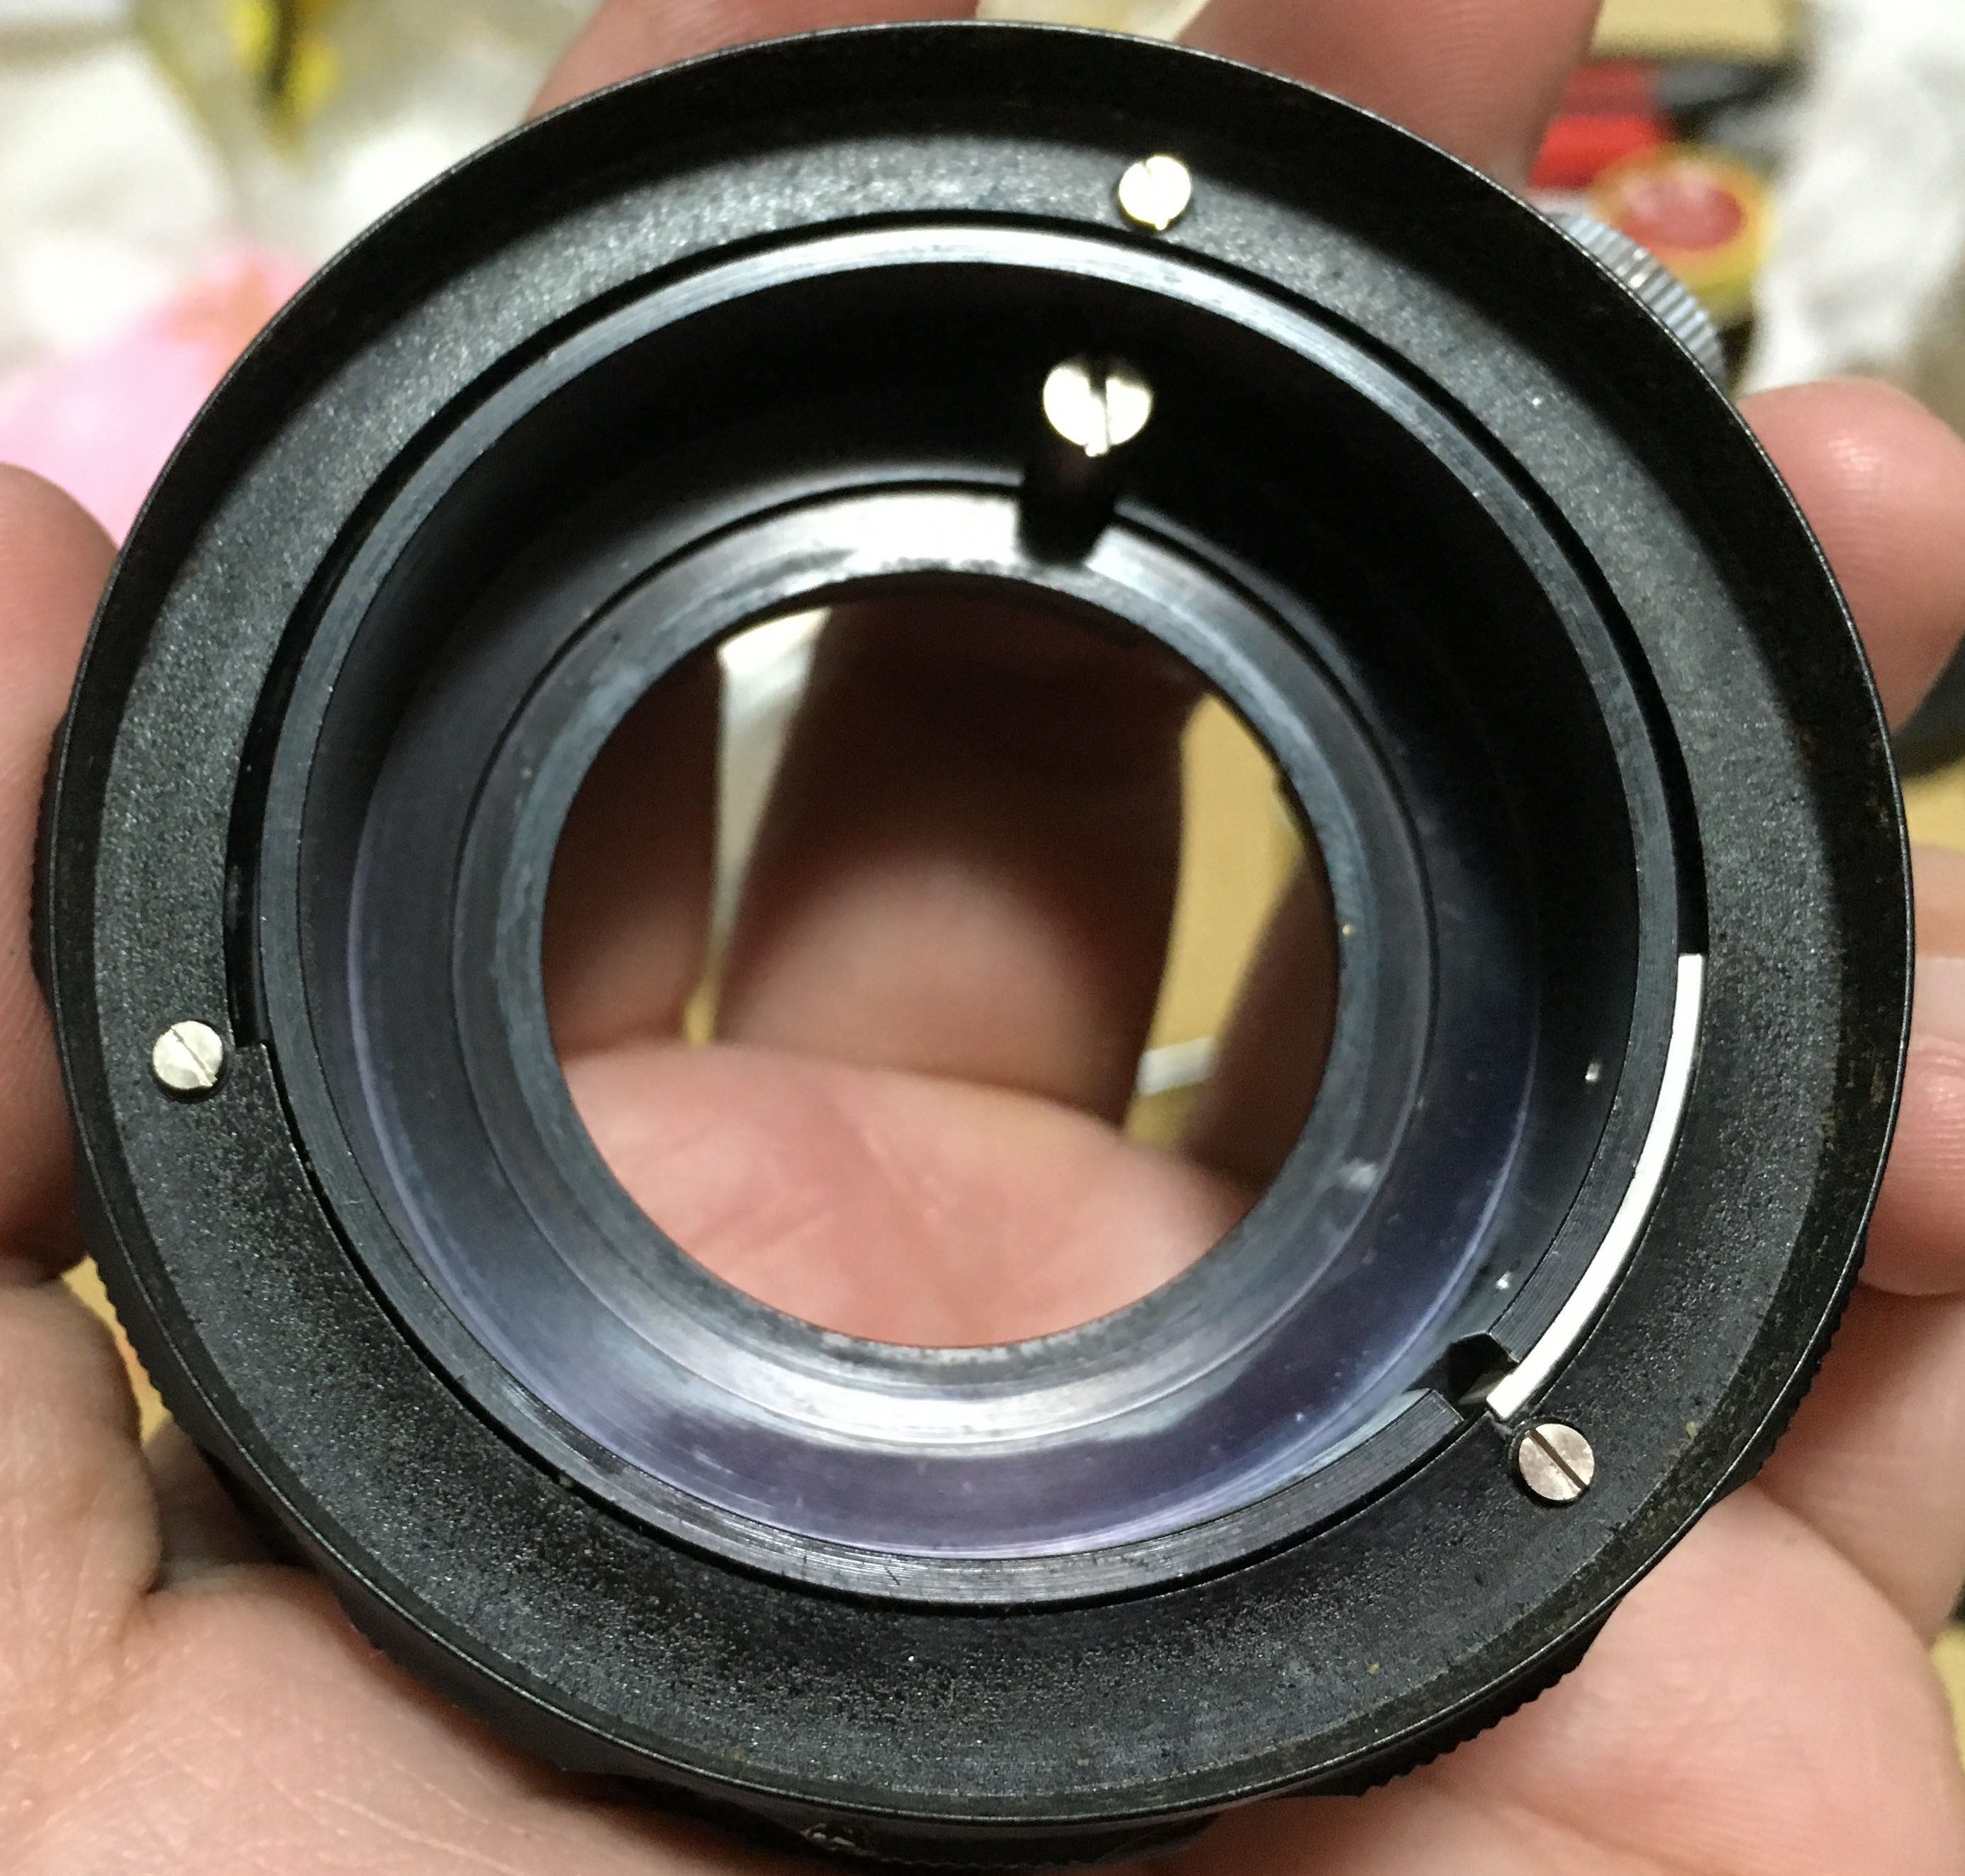
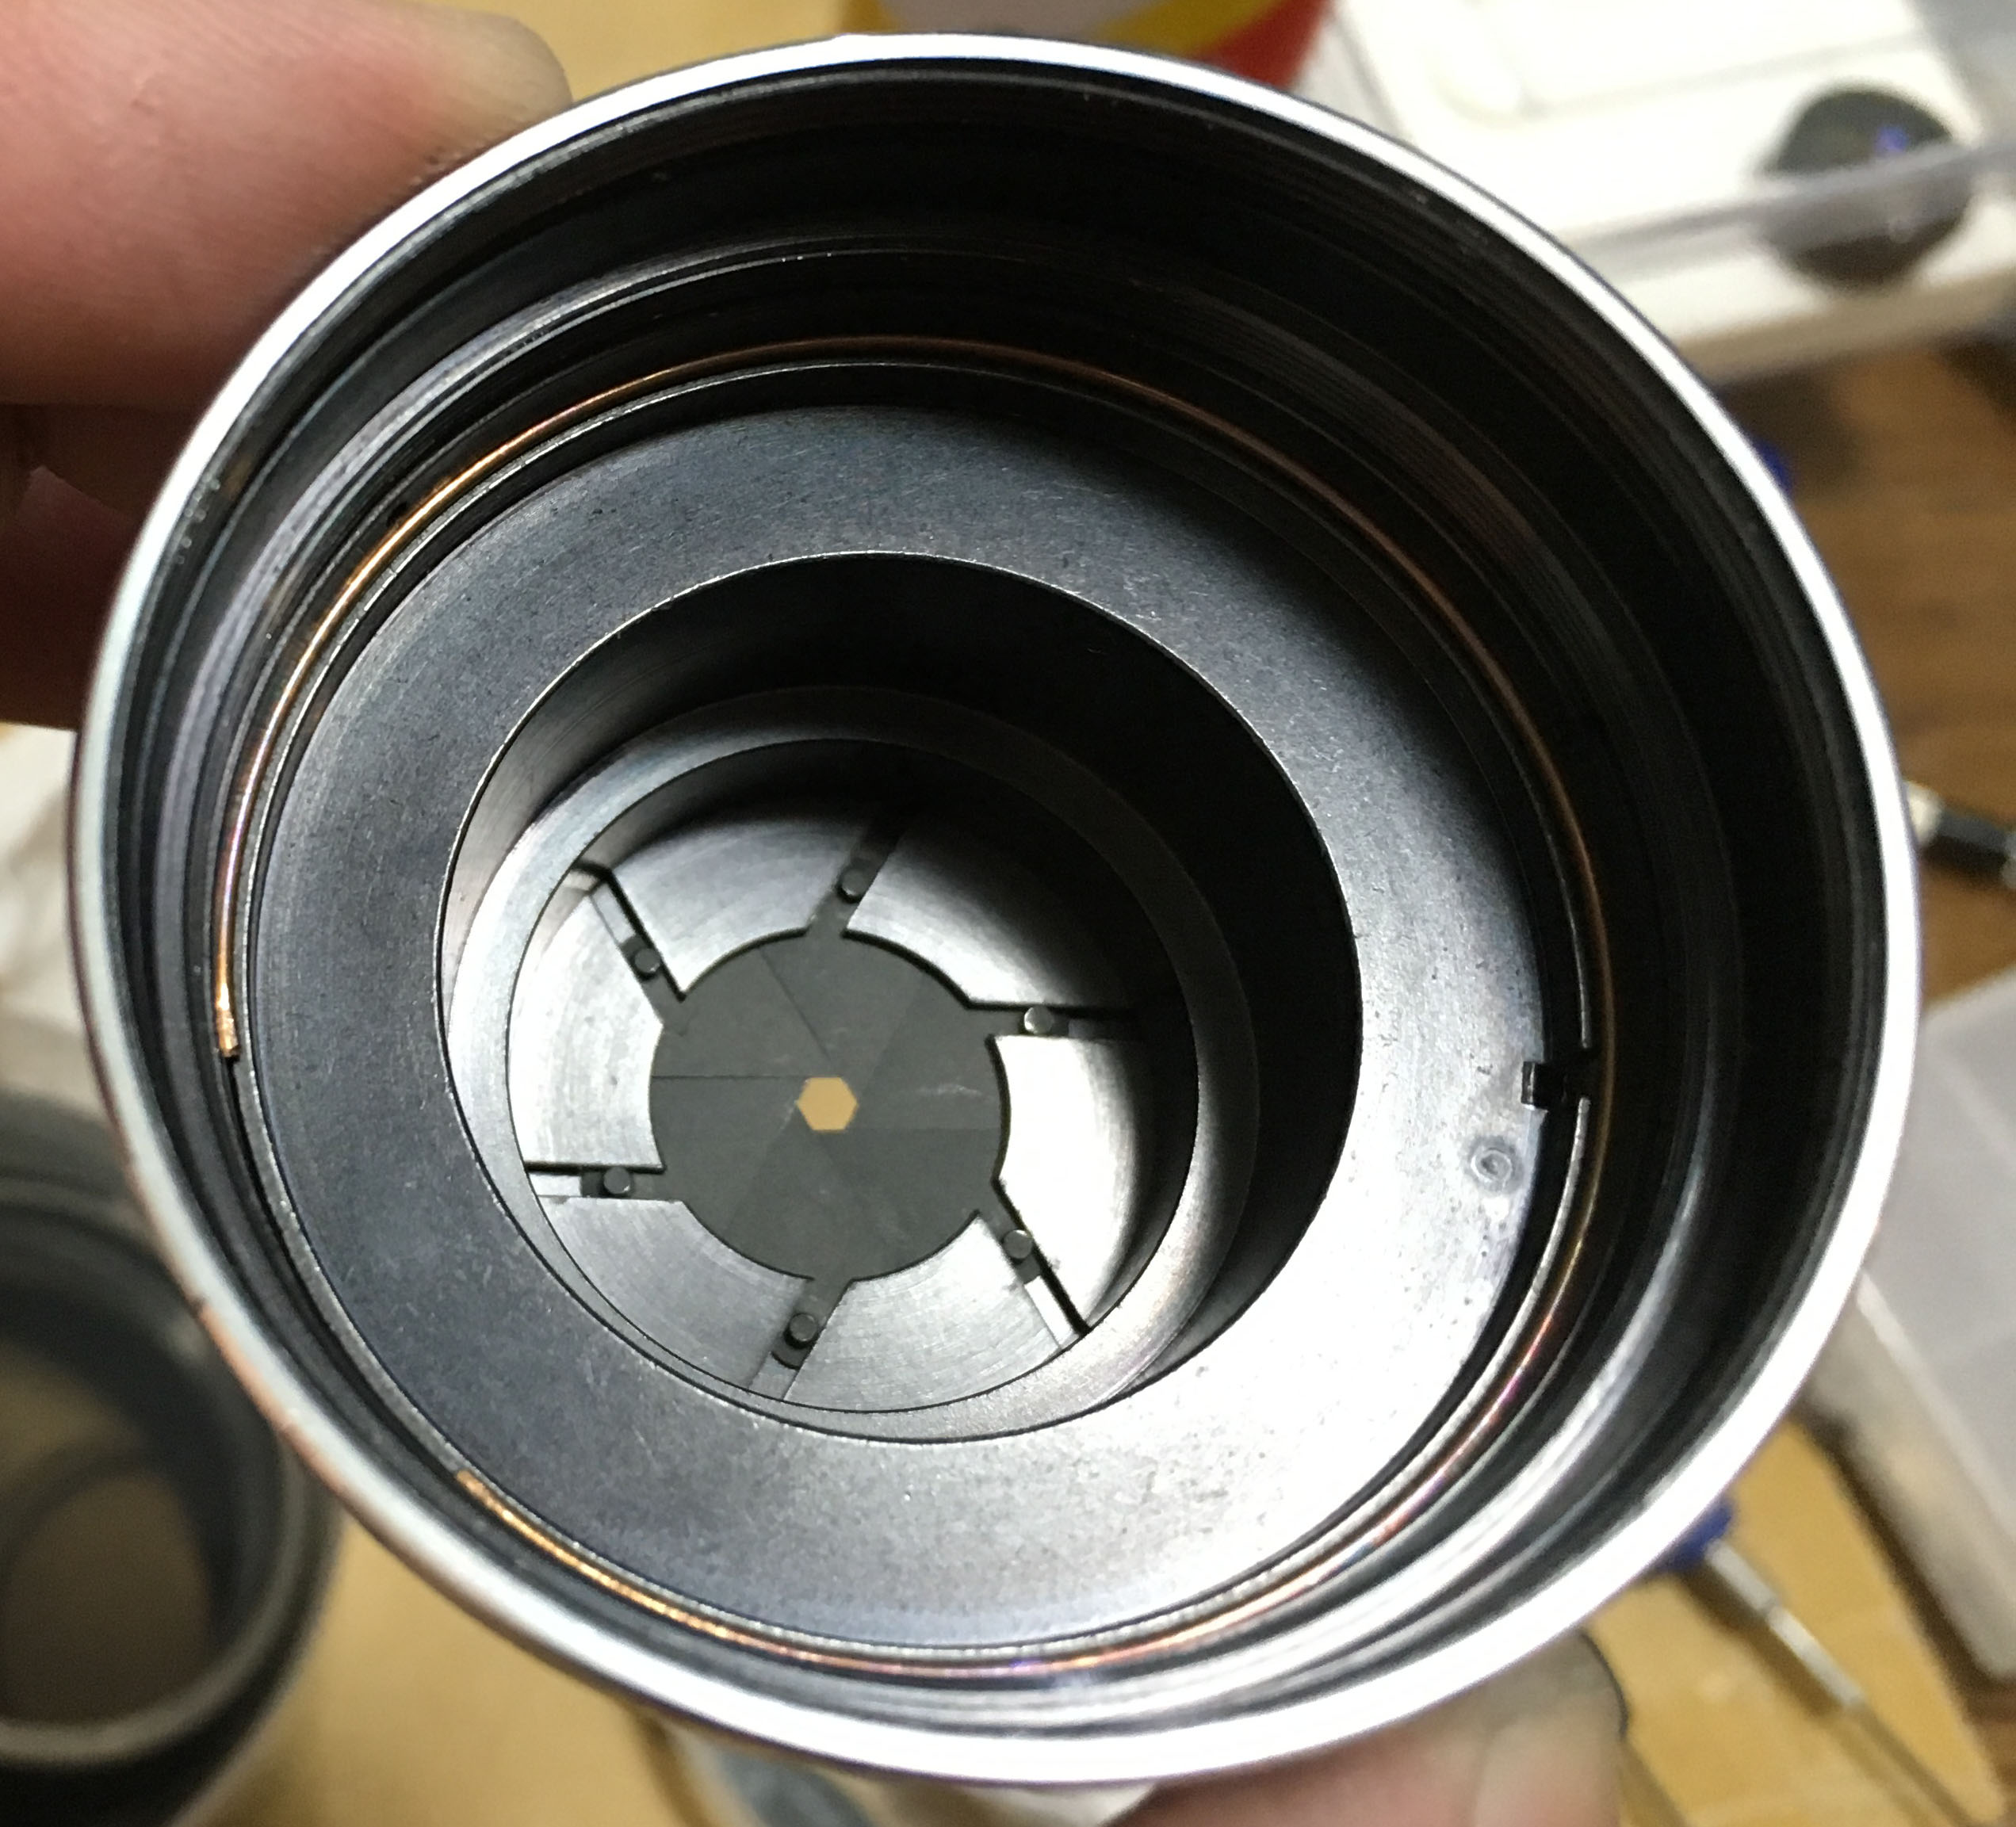
With all that glass out of the way, we can now continue with the mechanism that controls the iris. Unscrew these to free up this ring.

This connects to the aperture stop-down ring, turning it controls the iris.
Carefully unscrew this ring from the rest of the lens and make sure that you don’t damage its delicate threads. Cross-threading this thing will make your lens useless since you cannot open or close your iris properly.

This is the aperture ring and unlike most F-mount Nikkors, preset aperture lenses usually have their aperture rings at the front like rangefinder lenses do. Remove these small screws to detach it from the rest of the lens.

This part constrains the aperture ring so it will not make a full turn. Simply unscrew these screws to get rid of it.

You can now safely extract it.
The stop (from 2 steps back) is coupled to this guide ring. This is responsible for keeping the pressure plate and its spring in place. Removing this ring is easy, just unscrew the small screws that hold this thing in place. Notice that the notch on the ring begins at f/3.5 and ends at the smallest aperture found on the beautiful chrome tip of this lens. Now you see how this ring restricts the motion of the aperture ring.

Be careful not to damage anything while removing this ring.

This ring holds down the pressure plate for the aperture detent mechanism.

This can be tight, be patient while removing this. The aperture detent ring is the silver ring with slots milled into it. These slots correspond to the values in the chrome tip and a tiny screw goes in and out of the slot each time you pull and turn the aperture ring and that gives you the clicking action so that you know precisely which f-stop you are currently at.
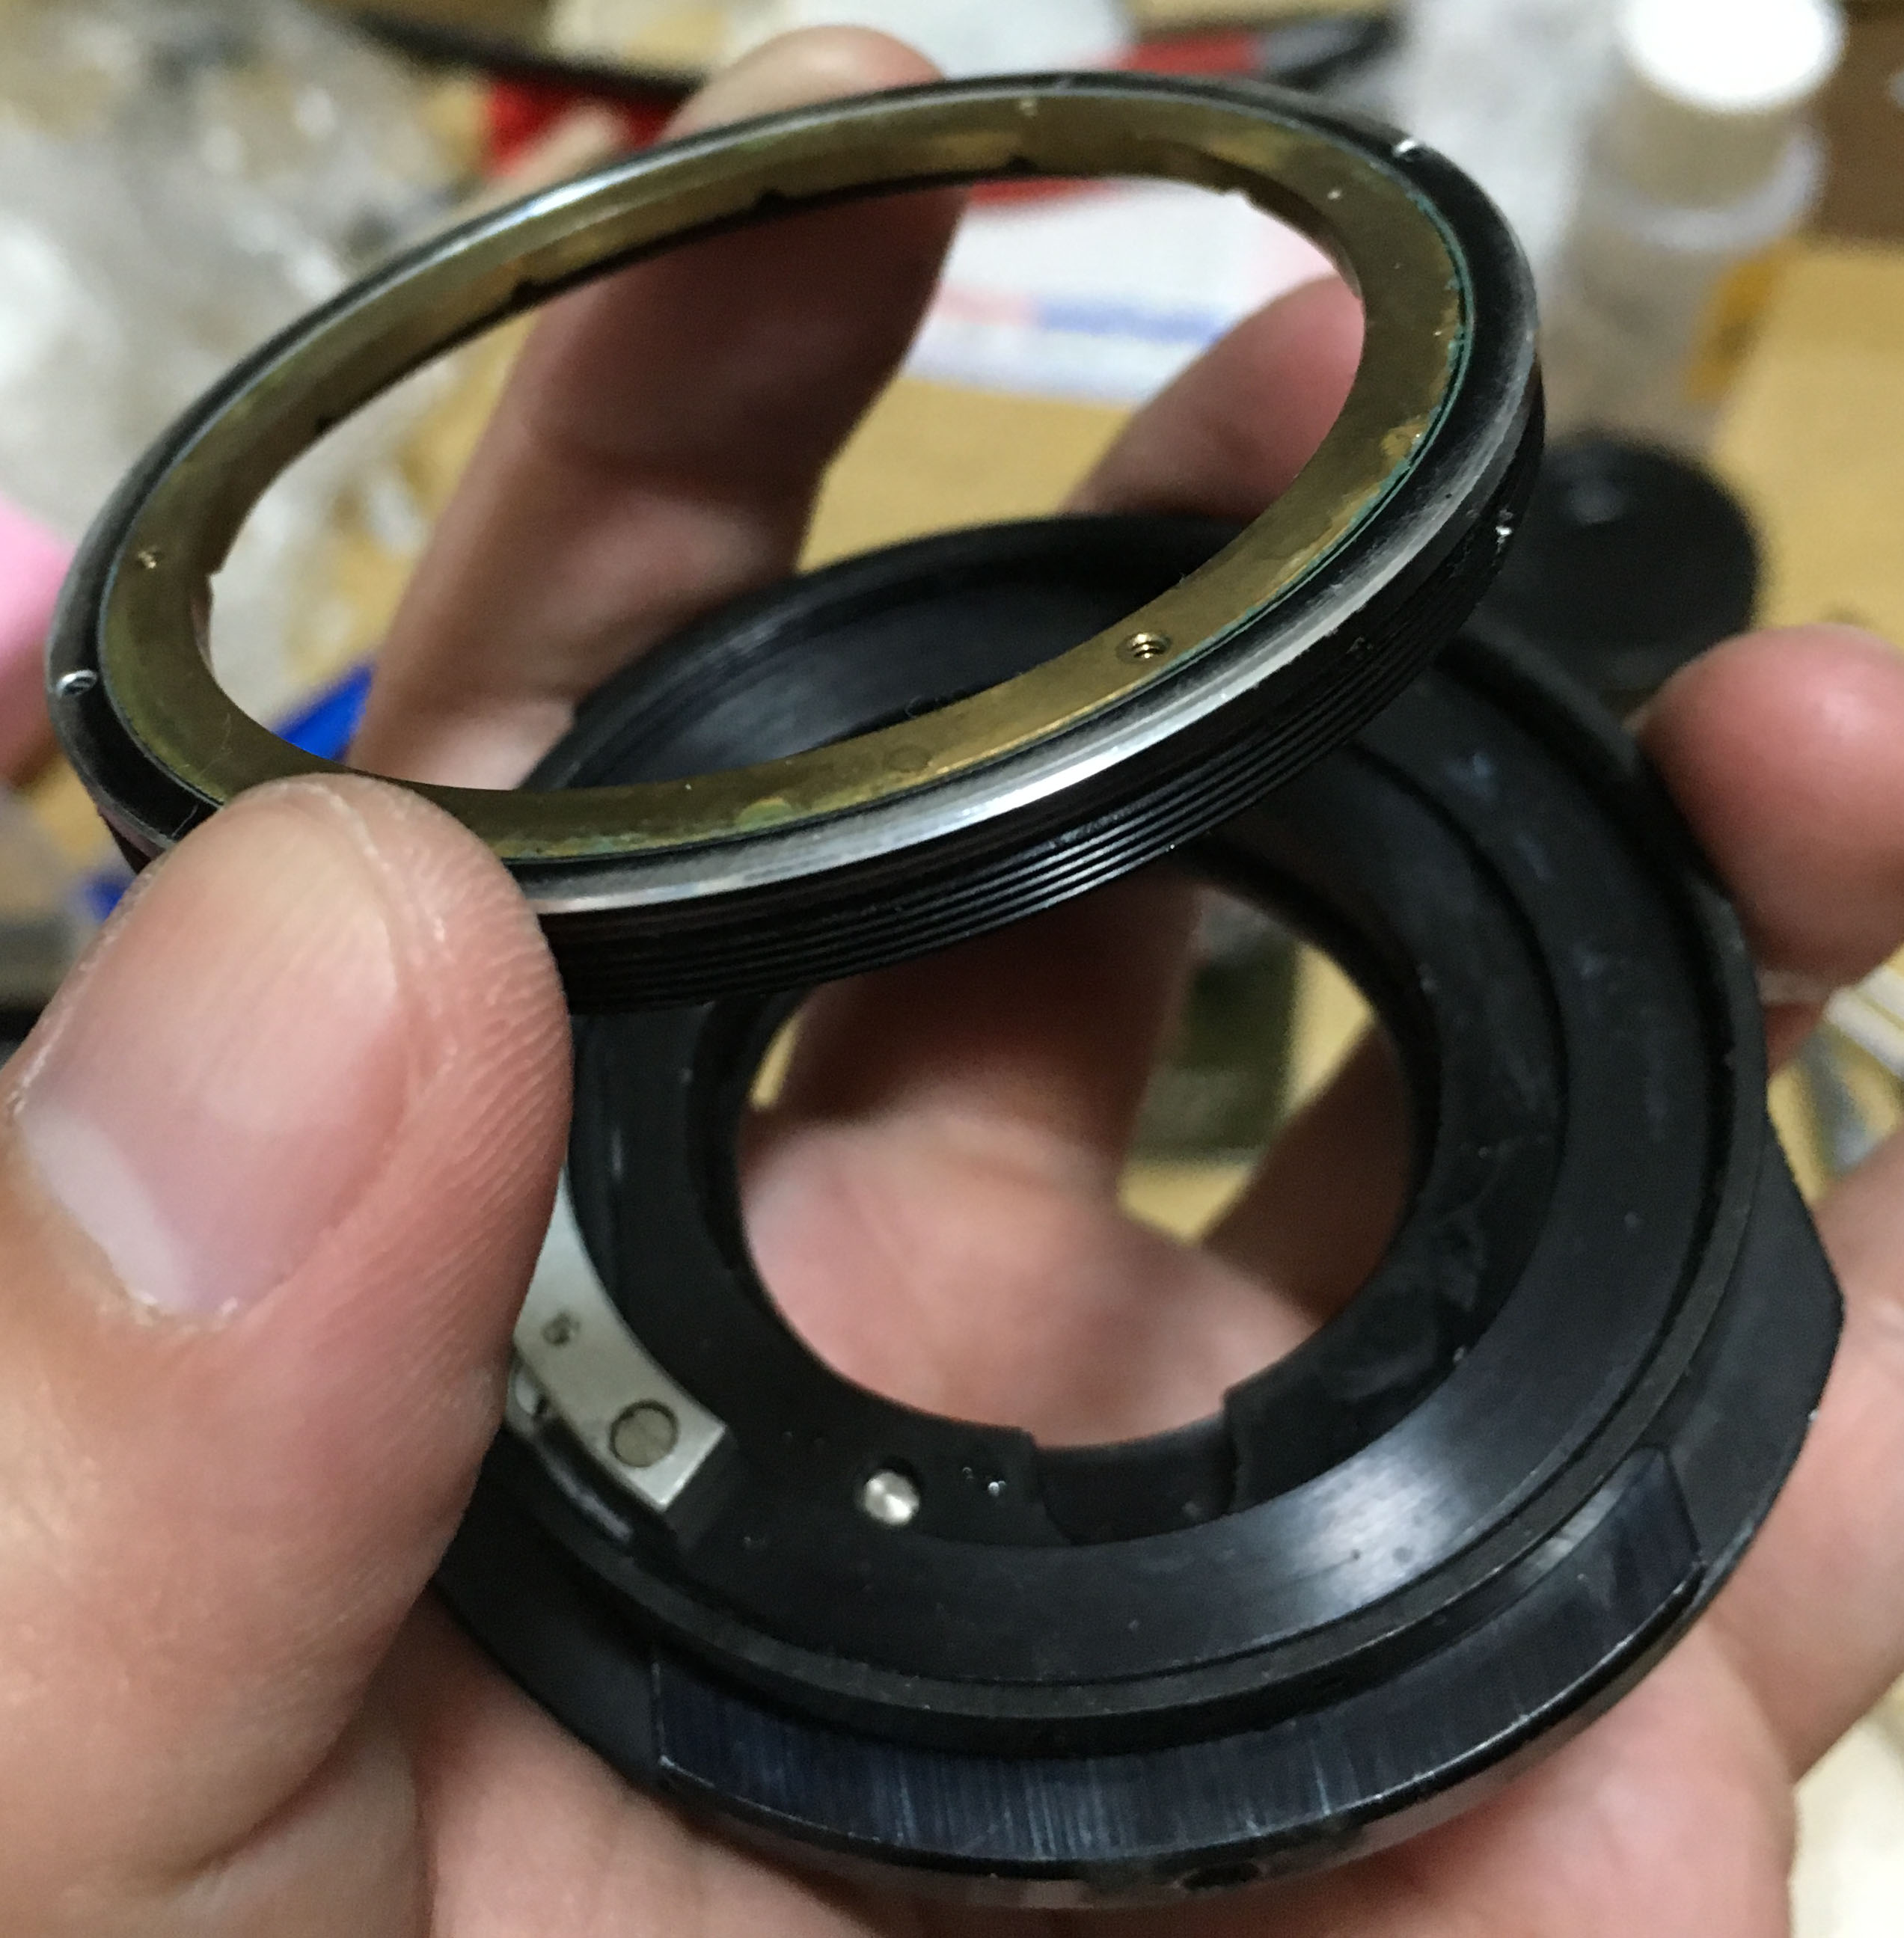
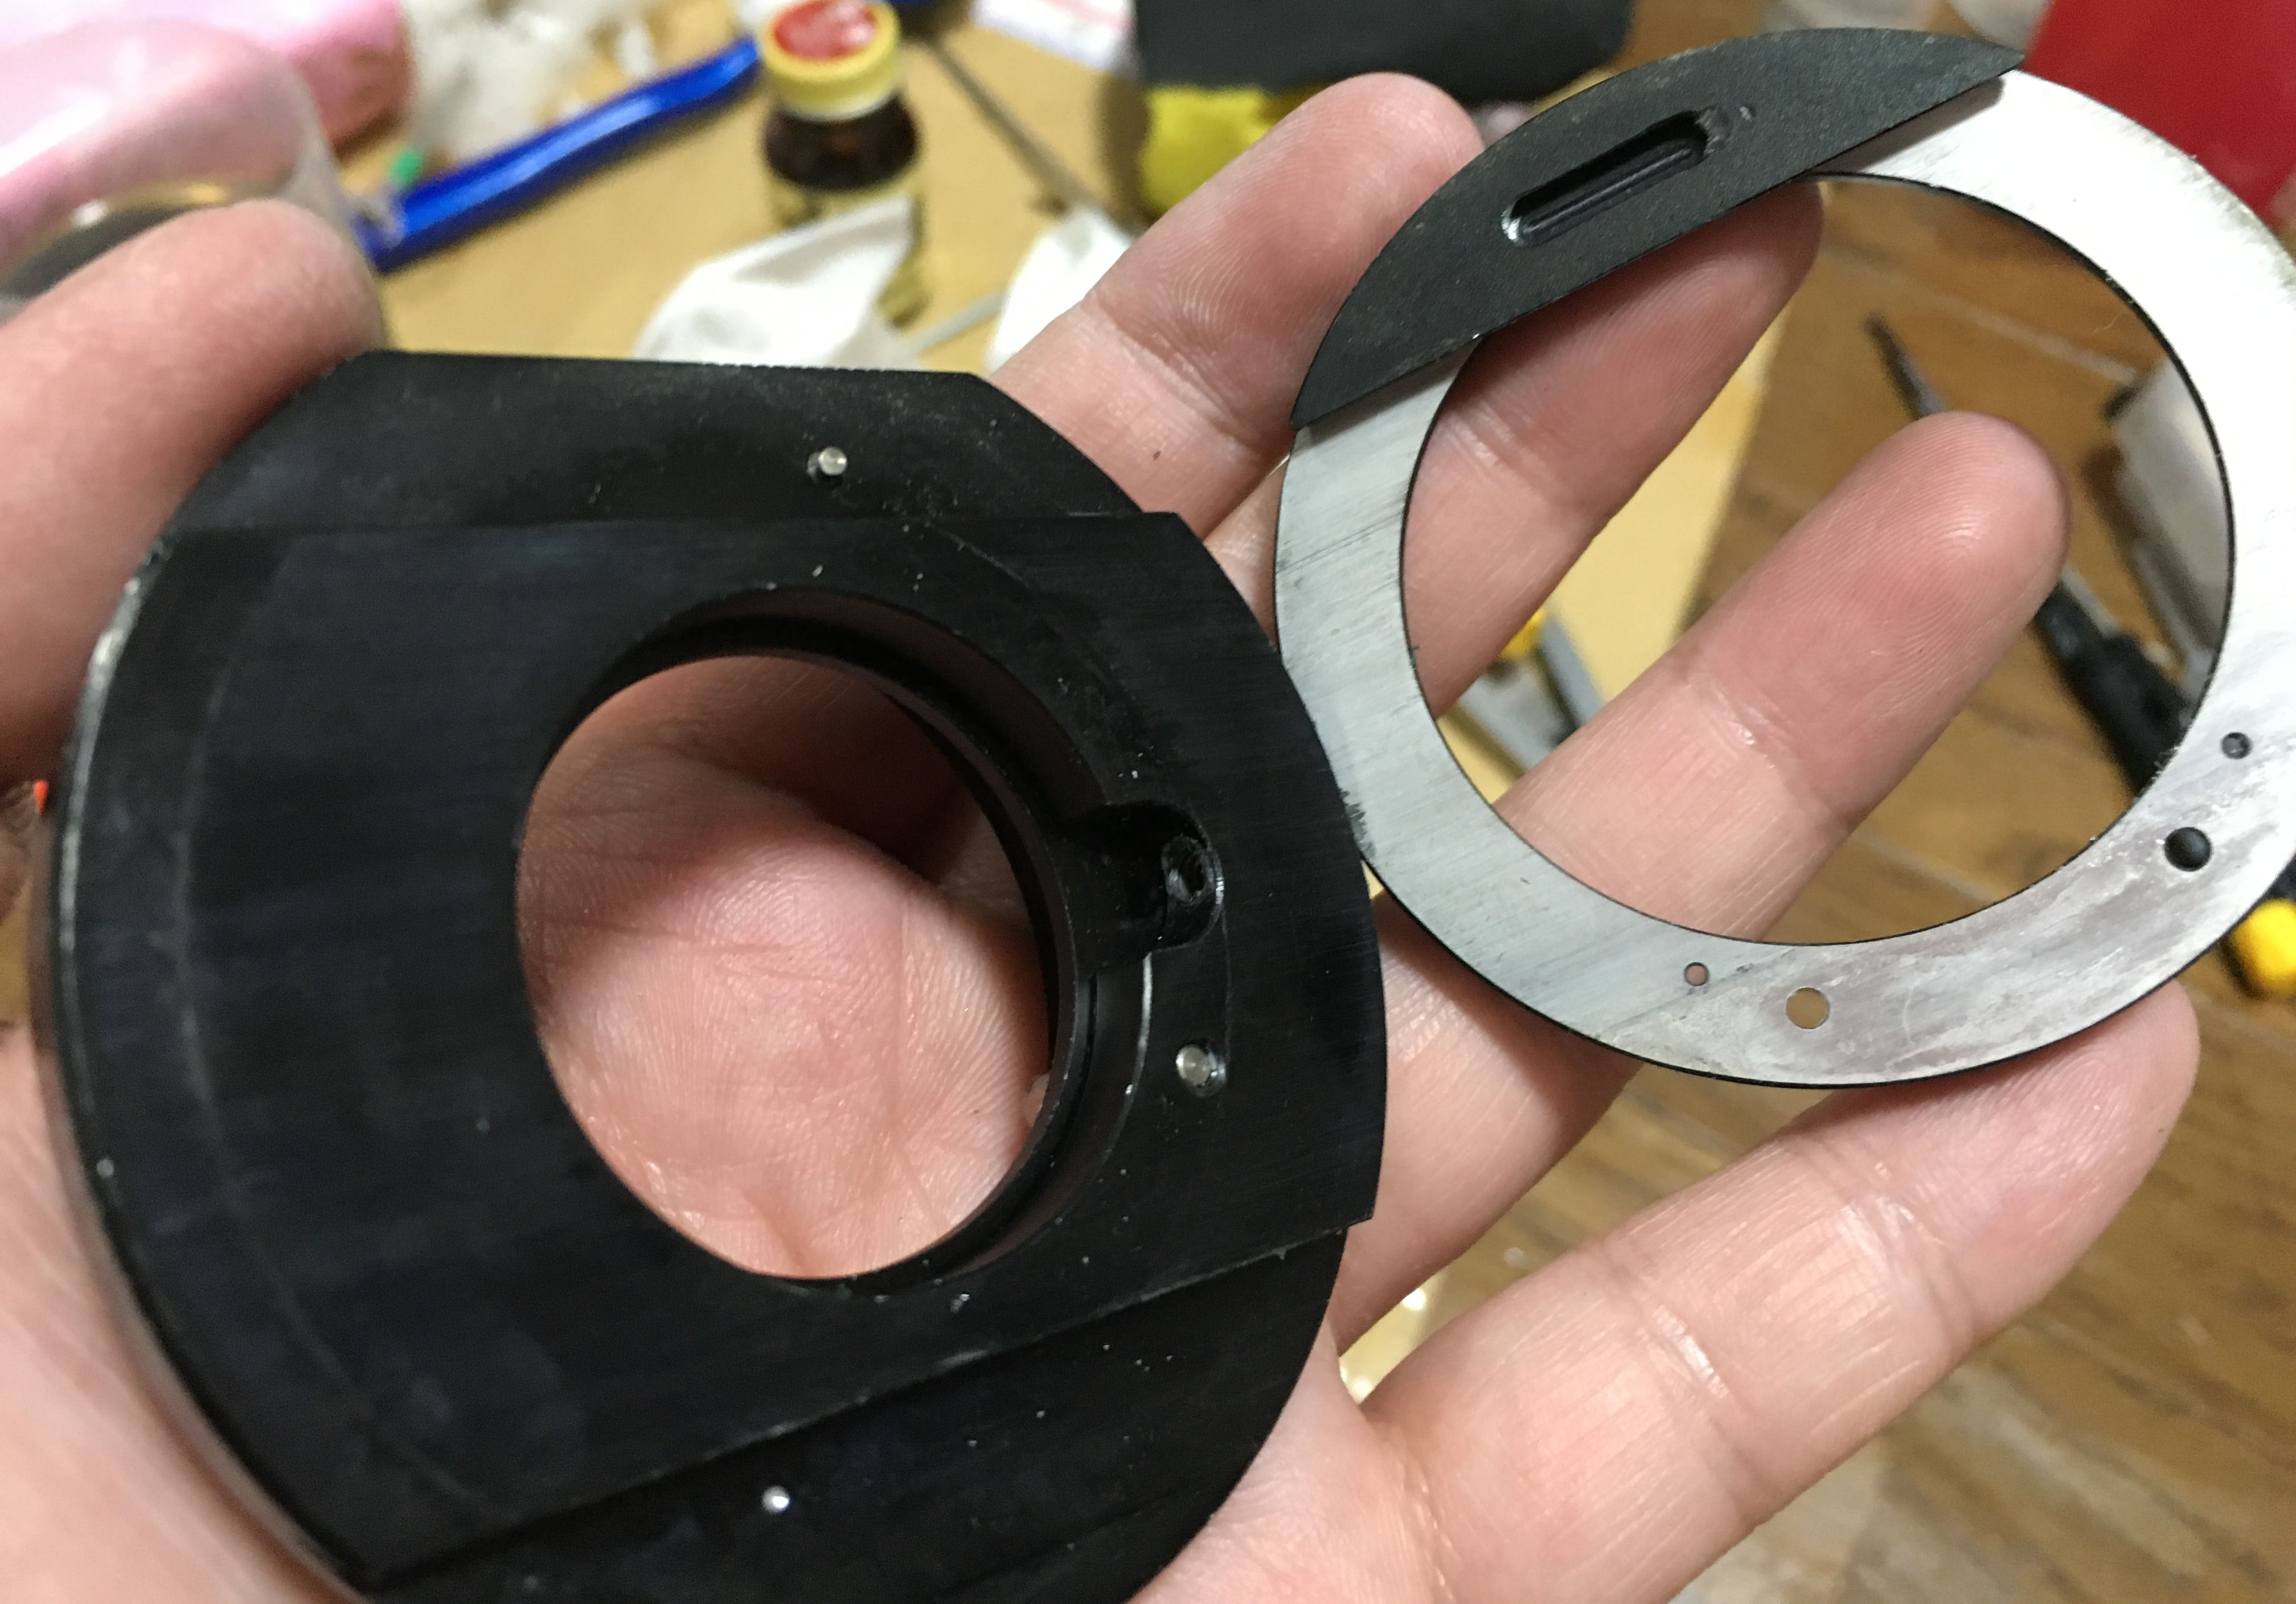
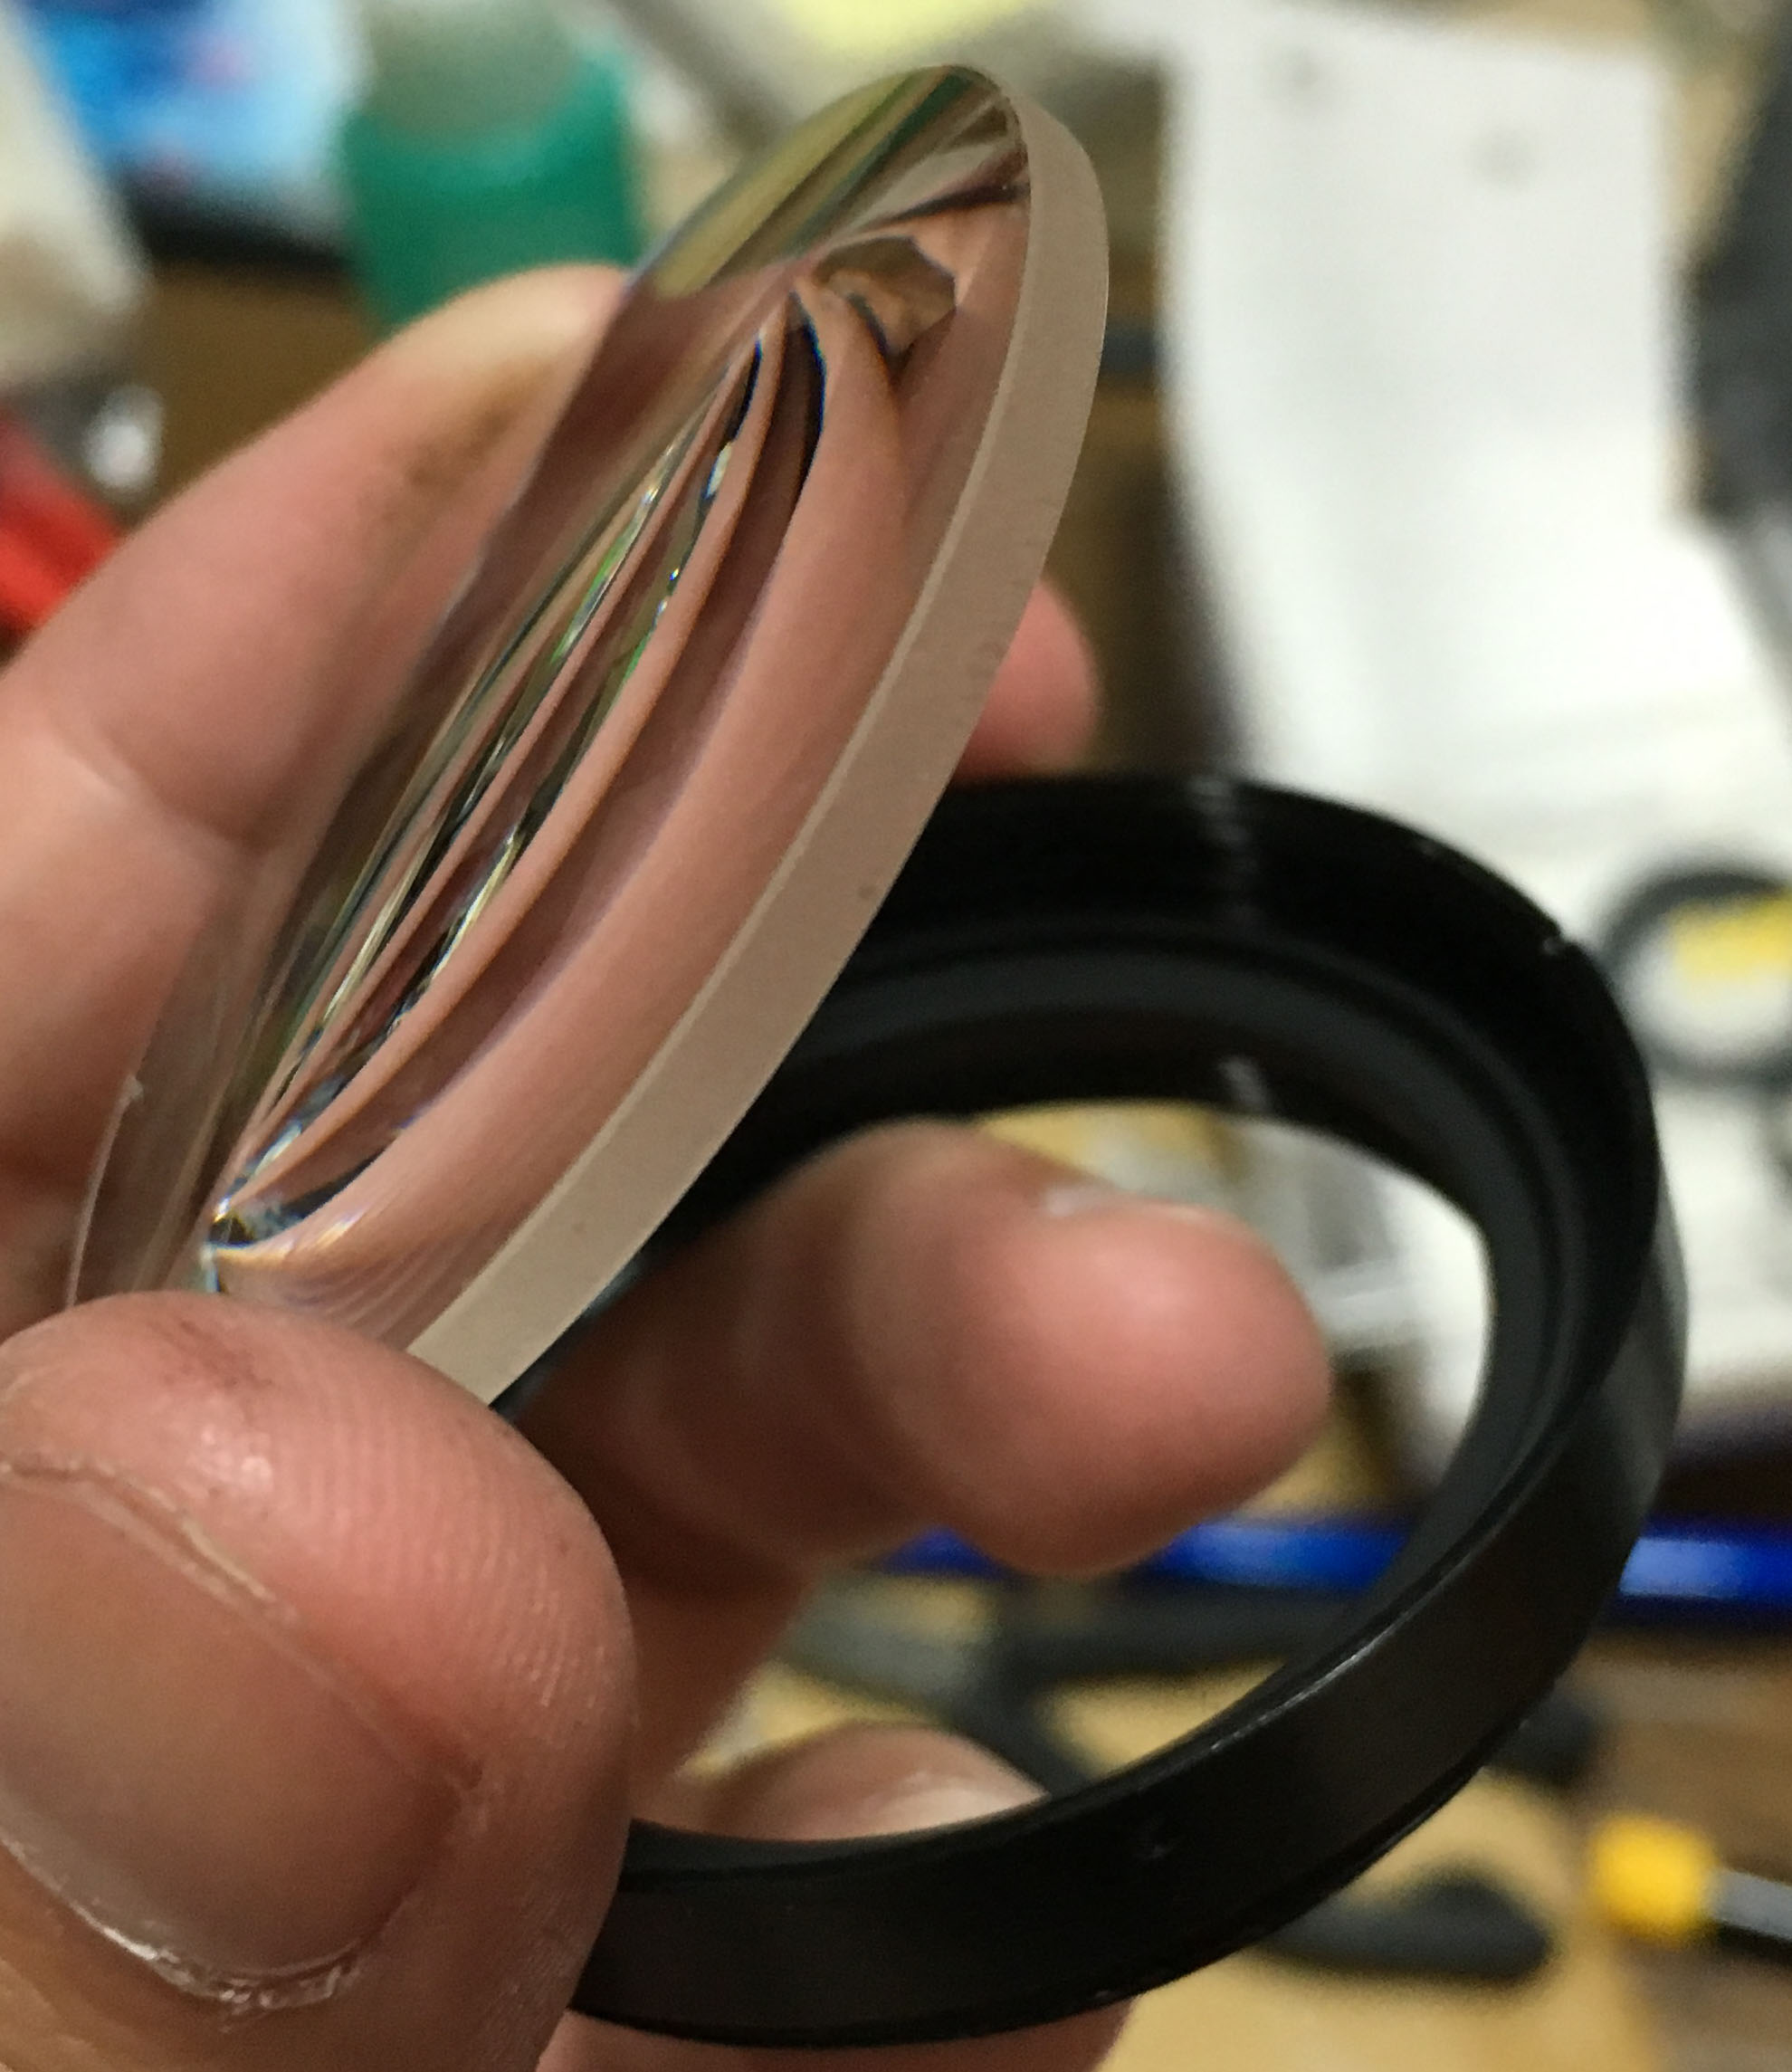
The rear optical cell can be opened by unscrewing this with your fingers. If this will not budge then apply a small drop of solvent to the thread to soften the glue. The rear element might drop to the floor so be careful.
The front cell houses the rest of the glass. Unscrewing this part will give you access to the element at the rear of the housing.

The 2nd group is a heavy doublet. It’s basically 2 elements that’s cemented together to form a single unit. Do not apply too much solvent or alcohol on this part, you may dissolve the cement.

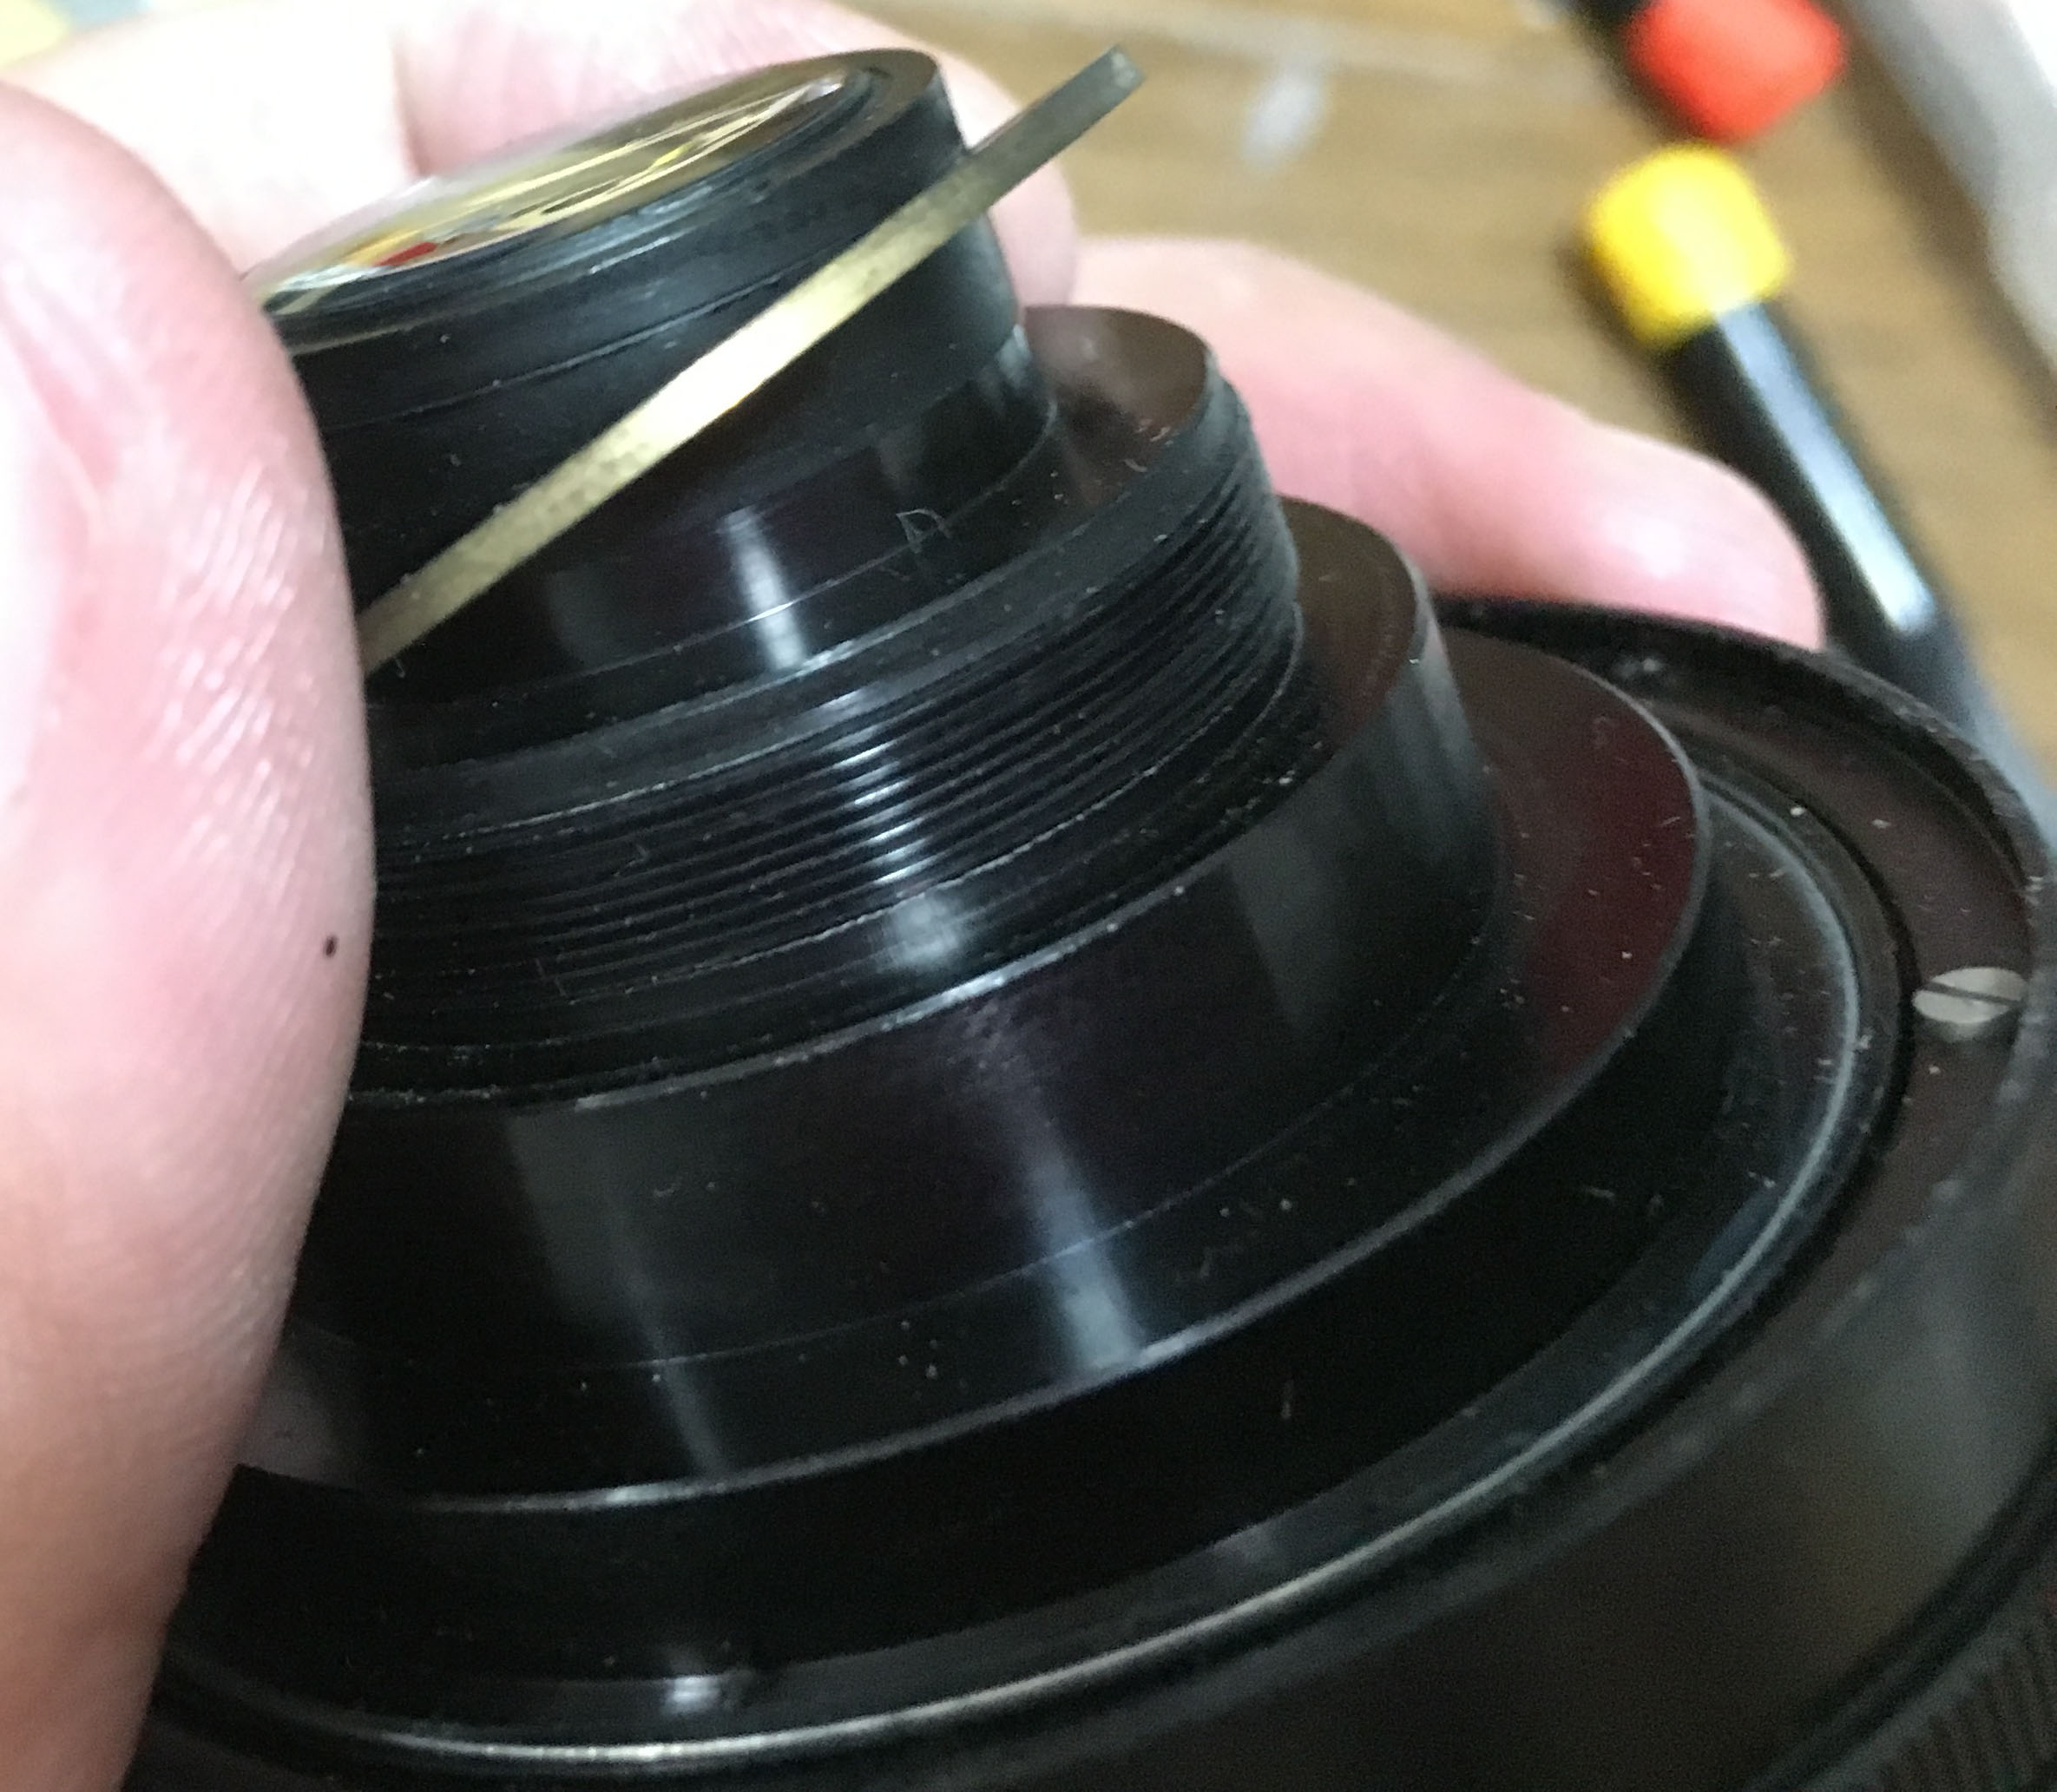
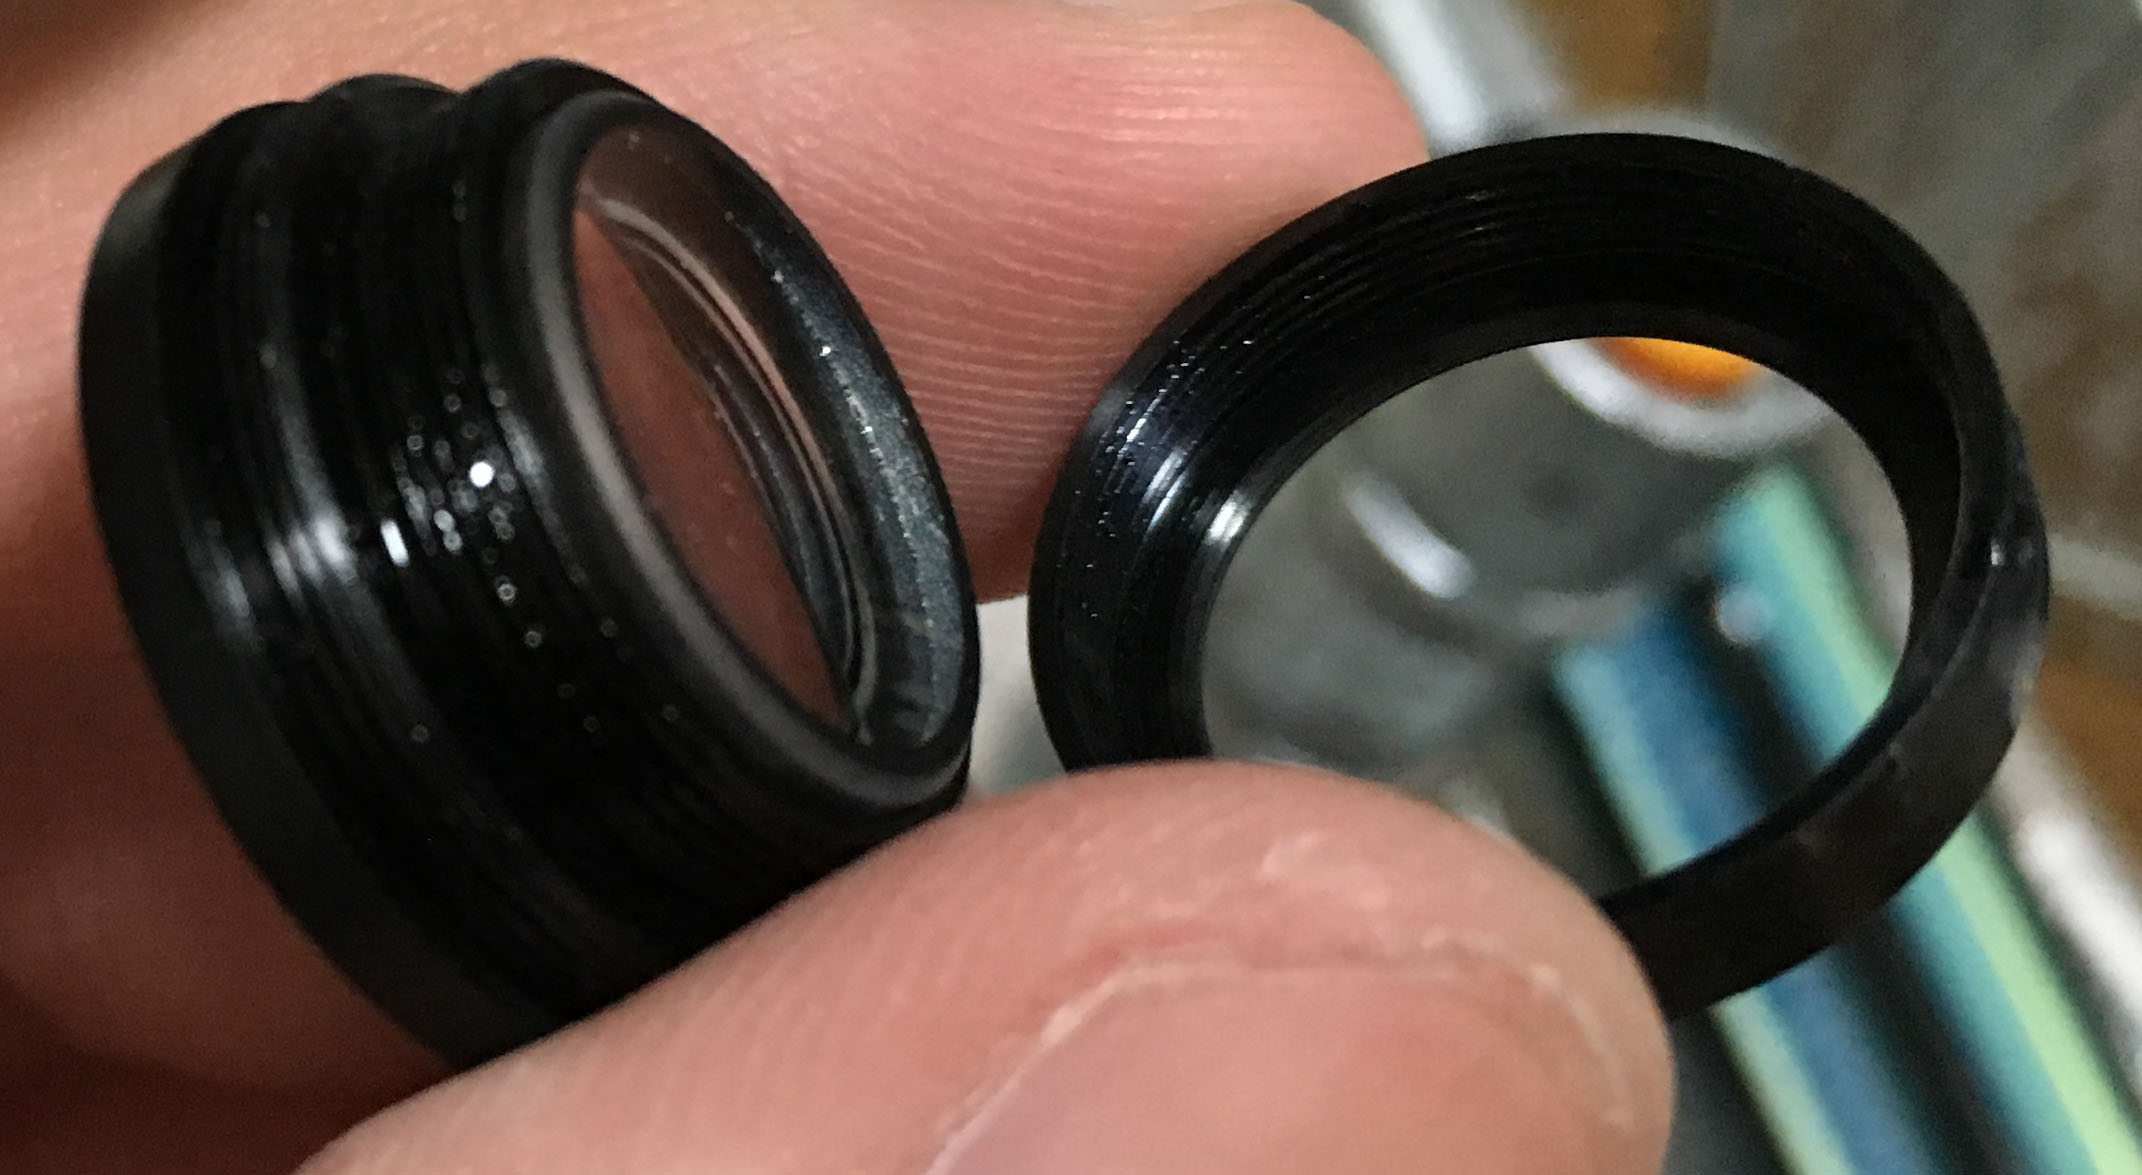
The front element can be accessed by removing this retention ring. Use the lens spanner to open this and be careful not to scratch anything. If this part is sealed then you should do the alcohol routine again on this ring.
The front element can now be safely removed.
This section got a bit more complicated due to the complex nature of this. It is not a conventional Nikkor design and you should take plenty of notes and pictures to prevent any mistakes. Clean everything really well and don’t use too much grease on the parts that move such as the rings and springs. Your lens doesn’t need that at all in order to function properly.
Disassembly (Iris Mechanism):
The iris mechanism is typical of later preset-Nikkors. If you’re familiar with working with rangefinder Nikkors then this should be easy for you. You can read my article on how to work with preset-type irises to give you an idea on how to put things back together again. This can be frustrating even for the veteran repairman and you will need a good pair of tweezers for this. You’ll also need a few special tools to help you push and position things while you work with each individual blade. The iris is typically oily on most old lenses due to the oil and grease migrating to them. Some people like to apply oil to these but it’s best to leave them dry.
To open up the iris, remove this brass ring. Be sure that there are no screws attached to the inner basket / rotation plate or else that screw will prevent you from removing this.
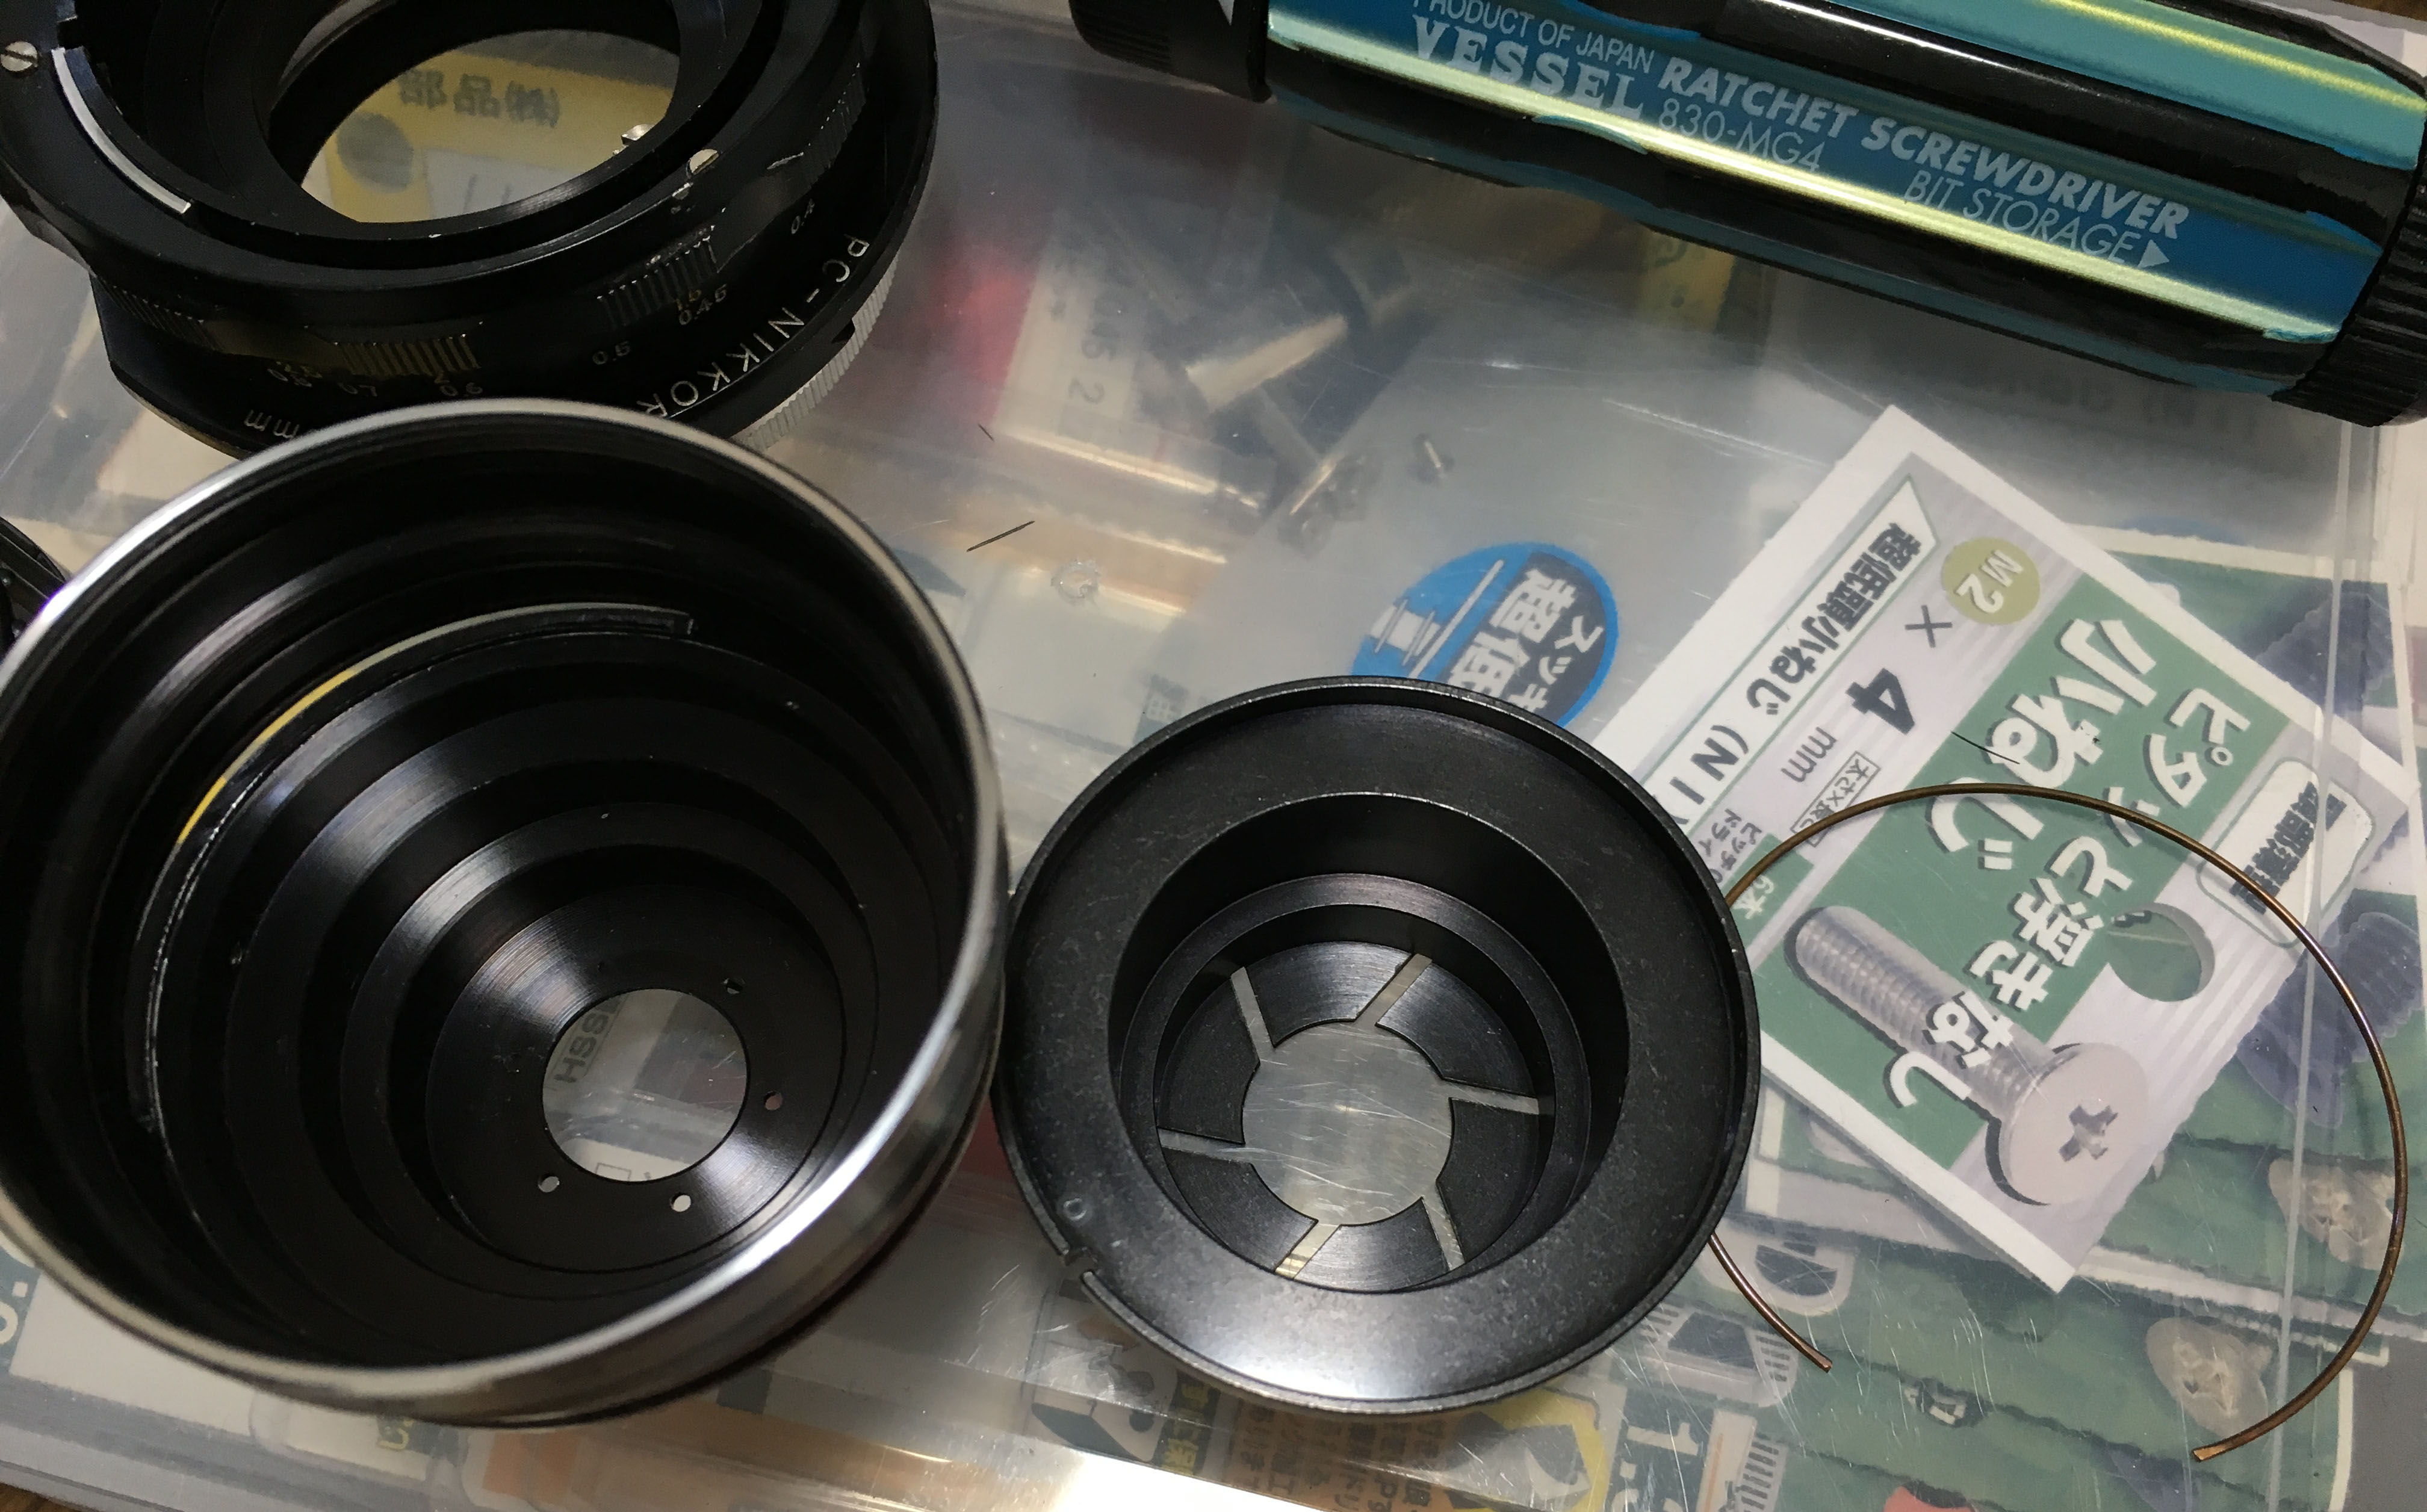
The plate keeps the blades together and never oil this part.
The blades can now be easily removed but before doing it, take some photos of these so you will know how to put them back together again.
Carefully wipe the blades clean with lens tissue and naphtha. Be sure to put them back properly so the blades sit properly and face the right direction. If you put these back the wrong way you can damage the iris and that’s all she wrote.
Conclusion:
Overhauling this thing will keep you busy the whole day and it will be a fun but worthy challenge to experienced technicians. I had lots of fun with this thing.
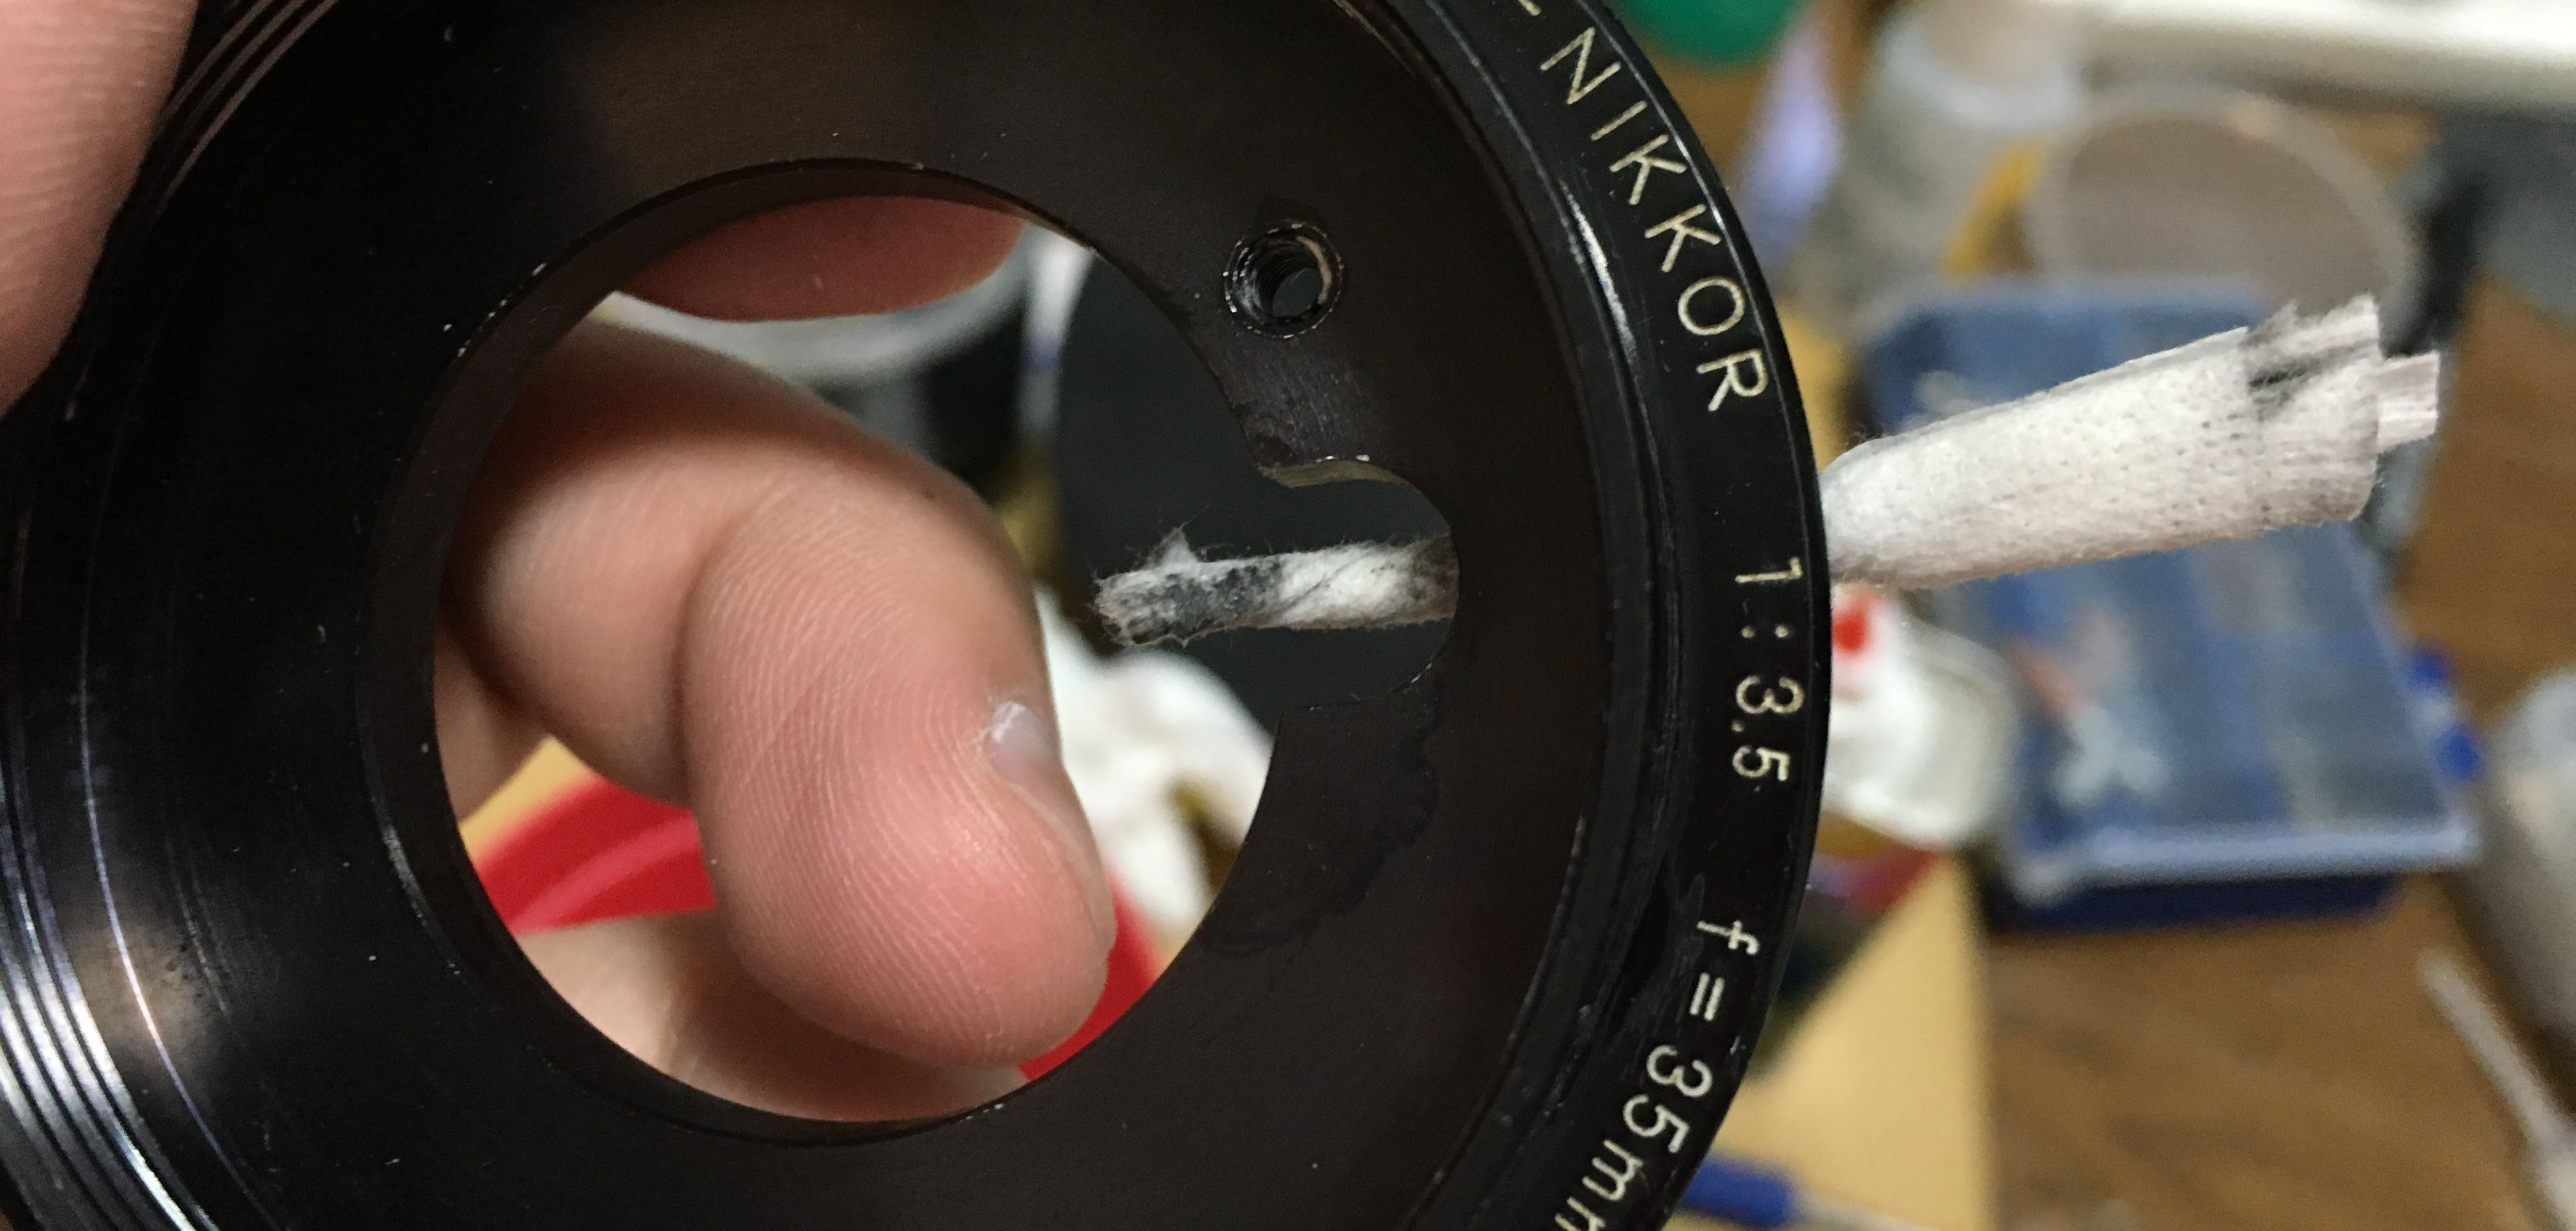
Clean everything thoroughly, clean the hole of the knob by inserting a rolled lens tissue, it took me plenty of tries before I was satisfied. A miniature pipe cleaner like the ones for baby bottles or nipples will also do, even the fancy dental floss that look like pipe cleaners can be handy for cleaning this. I use the heaviest grease available to me for this hole. It is the same grease that I use for tripods and the consistency is gloppy like molasses.
The inner surface of the knob is lined with felt. Most PC-Nikkors sold on the market with loose knobs have worn/damaged linings. I removed the old felt liner and replaced it with fresh material to ensure that this will not slide or turn when shifted.
The dovetail shift rail mechanism can also be shimmed if you want to. Use a very thin strip of plastic and shim the rails from the inside.

It’s now clean. Before I finished this thing, I adjusted its focus using my way of calibrating a lens’ focus. If you are new to lens repair, read my article for it so you will know how to do it in a DIY setting.
That’s all for this article, this one took me a week to prepare because there’s so many parts that had to be documented. There aren’t many articles online about the repair of these lenses so I hope that this filled that void. Thanks to all of my supporters, you keep me inspired so this blog continues to this day. See you again in the next article, Ric.
Help Support this Blog:
Maintaining this blog requires money to operate. If you think that this site has helped you or you want to show your support by helping with the site’s upkeep, you can make a small donation to my paypal.com (richardHaw888@gmail.com). Money is not my prime motivation for this blog and I believe that I have enough to run this but you can help me make this site (and the companion facebook page) grow.
Buy me a roll of film or a burger?
Thank you very much for your continued support!
$2.00
Helping support this site will ensure that this will be kept going as long as I have the time and energy for this. I would appreciate it if you just leave out your name or details like your country’s name or other information so that the donations will totally be anonymous. This is a labor of love and I intend to keep it that way for as long as I can. Ric.

May 01, 2017 @ 05:55:54
came across your blog while doing some search for my 24mm 3.5 pc, it is a bit loose, is it necessary to open the shift mechamis to tighten it? can I just add some thick grease to the rail externally? thanks, Rickard.
May 01, 2017 @ 09:27:32
Hello, Mike.
When you say loose, you mean it cannot hold itself when shifter? I do not know which lens you are talking about exactly but the older ones would need a felt lining under the dial/lock to prevent it from slipping. Ric.
May 01, 2017 @ 15:08:48
thanks, Rich for the quick resposne, sorry, it is old 28mm 3.5 PC, yes, the lens cannot hold when shift to the maximum and slides due to its own weight, is that easy to open the dial/lock? I guess you mean the little knob right?
May 01, 2017 @ 16:01:00
Hello, Mike.
Yes, the silver dial/knob. You can slip a sheet of velvet or felt thin enough to fit under it. make sure it has glue for the final installation but try it without adhesives first. Ric.
May 01, 2017 @ 16:11:00
perfect, thanks very much, will try and let you know
Aug 25, 2017 @ 20:05:39
Richard,
I have the same question as Mike D, but a newer lens, black shift dial, 28mm f/3.5 PC (AIS looks). It cannot hold its own weight. I would appreciate any input. Thank you.
Aug 25, 2017 @ 23:00:34
Hello.
I am not sure about that particular model but there should be some felt on the inner surface of the dial. That felt is the one holding everything up when you shift and if it is not thick enough you will need to replace it. Ric.
Aug 26, 2017 @ 01:20:38
Thanks. The end of the dial has a leather circle, should I lift that o get the dial out and look inside?
Aug 26, 2017 @ 01:30:42
Hello.
I do not know the lens well enough to advise you, sorry. In most cases, you can change the felt without having to disassemble anything. Ric.
Aug 26, 2017 @ 10:32:08
You have been very helpful. I was probably on the same impression as Mike D, used lens, someone put fine oil where there should be thick grease. I’ll figure out a way to get inside the dial, this one is very tight around the edges.
Aug 26, 2017 @ 10:47:37
Hello.
Not sure about the grease. It has more to do with the felt. Ric.
Nov 05, 2017 @ 03:50:40
It says in the Df manual that the 35mm/f3.5 will not work. So, does it? Does it meter through the lens? The reason I’m asking is because I have a 28mm/f4 PC lens, and am considering buying a Df, but would need to be assured that it can meter through the lens.
Thanks in advance.
Evan
Nov 19, 2017 @ 15:44:21
Hi! I’m not sure but I have been using mine without any trouble. Ric.
Dec 20, 2018 @ 17:55:23
Hello Richard, I have PC-Nikkor 35mm f2.8 (with a black knob) which cannot hold its position because of its own weight. I can’t see any felt lining on this lens; would adding some thick grease, as someone suggested, work with my lens?
Dec 29, 2018 @ 02:48:10
Hello, China.
I don’t think the grease will help. Trust me, I did that. If you don’t see the felt lining then it’s likely that it has corroded to nothing. See how thick it should be by gauging the distance between the knob’s inner wall and the stud and find a suitable material. Ric.
Apr 11, 2022 @ 09:04:51
Hello Richard
I recently bought a PC-Nikkor 35mm F2.8 with the black knob and I notice the same problem of the lens moving down due to its own front elements weight. I am still trying to figure out where the felt should be and its while searching for a solution to this that I cam across your truly marvelous site. Any chance you could publish a picture of the felt in the knob?
Thanks, George
Apr 15, 2022 @ 03:47:45
Just an update on my previous question, I removed the vinyl cover concealing the brass screw which locks the knob to the whole unit. I notice that the twisting part of the black knob is further anchored with two tiny screws probably to the housing under the knob, I did not remove that because in the process of removing the brass screw which was very tight, the main screw has moved out a bit as I see an slightly bigger gap between the end of the screw and the optical element on the inside. The tension of the knob now seems perfect and there is no movement of the front element due to weight.
Mar 22, 2023 @ 15:51:02
I have a nice looking copy of this lens, but it is soft on one side of the frame (not in the direction of the shift). Is this common? The optics look pretty simple and I can’t see that my lens has been messed with. Ideas? Thanks for you post!
Jan 23, 2026 @ 13:03:47
Hi. Is the 35mm 2.8 black knob (AI-S?) similar to this one? I want to regrease it. Thanks.