
Hello, everybody! I saw that part 1 is quite popular with my readers and so I made some time to write this part before I take the weekend off. It’s been a crazy week at work as we’re laying the foundations for the next project and I don’t even have enough time for sleep these days. I hope you’ll enjoy this.
Continued:
I showed you how to work on the exterior in part 1 so we will talk about the inner parts of the camera in this article. It’s been easy so far but it’s going to get much more difficult from now as we dismantle the camera down to the bare chassis. Never attempt repairing your camera yourself and just send it to a qualified repairer. You may be thinking about saving a few dollars but I will tell you that you’ll spend much more than that on tools and time. You’re also going to need the right skills that can only be learned through years of experience. Just make sure that you send your camera to a trusted shop. It’s common to find people who will say that they can do the job but the truth is they don’t even know where to start.

The Nikon S2 is one of the most beautiful cameras Nikon has ever made. The lines and curves are clean and the layout is basic, making this camera great for studying the basics of photography because it will slow you down. Your clicks will be more deliberate because you will have the time to think about your shot instead of the instant gratification of modern cameras.
If you haven’t seen my article on the Nikon S, do yourself a favor and read it because there are lots of information there that I won’t repeat here. There is a clear relationship between these cameras despite the Nikon S2 being more advanced and refined. You can say that this is what Nikon really wanted but they didn’t have the right experience and capability back then so they made the Nikon S instead to help get their feet wet in camera making. This is just a small pet theory that I have, a product of me romanticizing this camera but it’s possible. Let’s now continue with dismantling this camera.
Before We Begin:
If this is your first attempt at repairing a lens then I suggest that you check my previous posts regarding screws & drivers, grease and other things. Also read what I wrote about the tools that you’ll need to fix your Nikkors.
I suggest that you read these primers before you begin (for beginners):
Reading these primers should lessen the chance of ruining your lens if you are a novice. Before opening up any lens, always look for other people who have done so in Youtube or the internet. Information is scarce, vague and scattered (that is why I started this) but you can still find some information if you search carefully.
I highly recommend that you read my working with helicoids post because this is very important and getting it wrong can ruin your day. If I can force you to read this, I would. It is that important!
For more advanced topics, you can read my fungus removal post as a start. This post has a lot of useful information and it will be beneficial for you to read this.
Disassembly (Top and Front Parts):
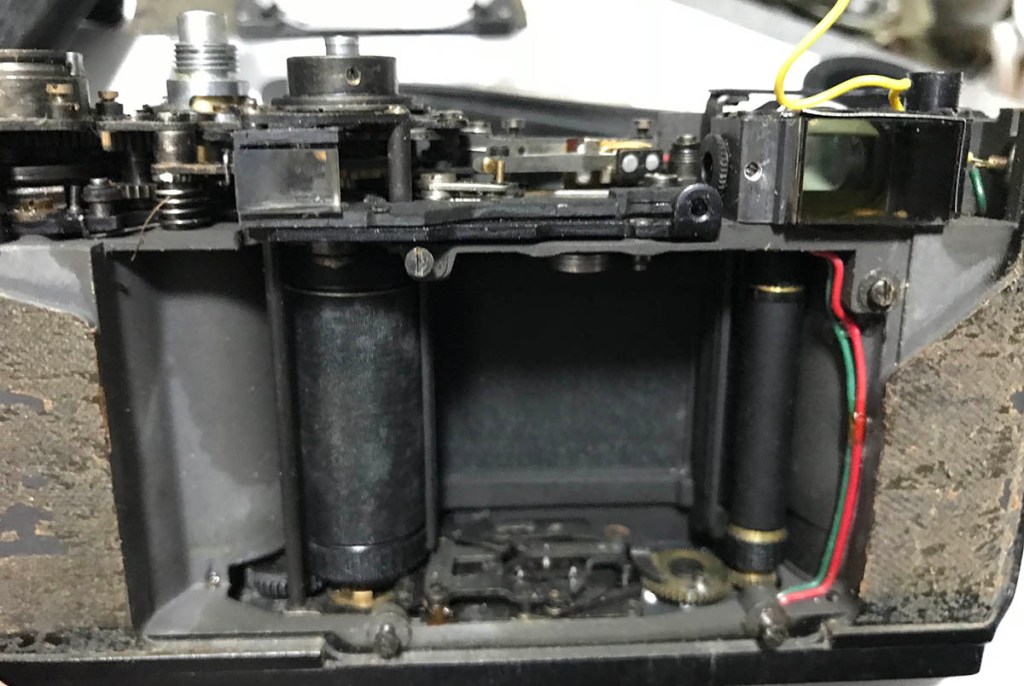
There’s no going back the moment you begin this section, you have opened the camera enough to access its innermost mechanisms. There’s no point it in doing a minor cleaning because you’re just a few more steps away from a thorough cleaning of the top and front parts. There are many small, delicate and precise parts here so you have to be careful. Never attempt to do this if you don’t have any skills or tools for the job because you will surely butcher a camera that could have been restored by a competent repairman.
Remove this ring, it prevents dirt and light from entering into the camera. It is usually dirty in my experience and should be cleaned thoroughly.

The hot shoe mount can be removed after extracting these screws.
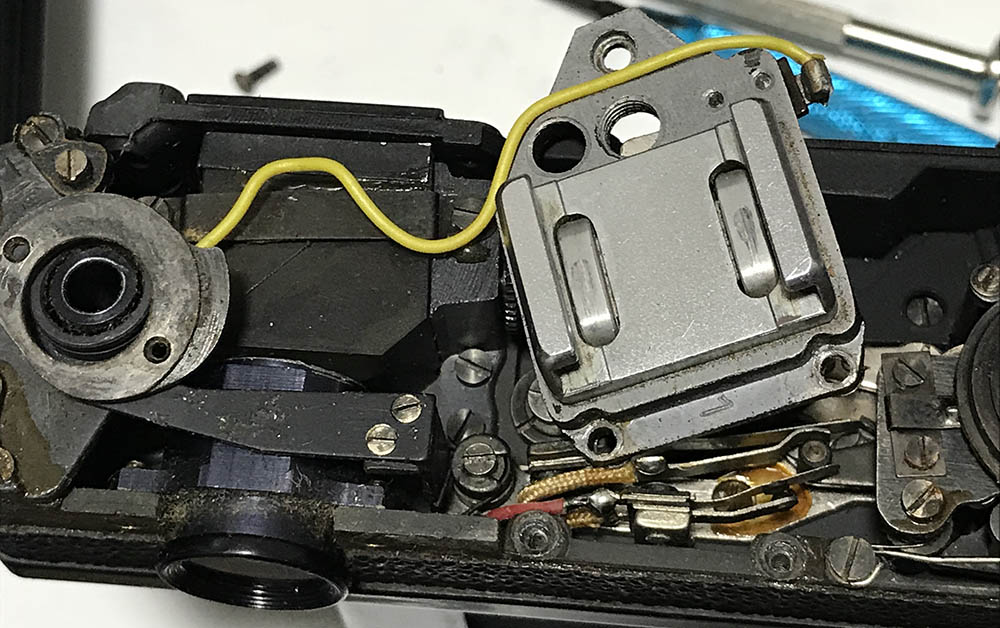
Be sure that you handle it carefully so you won’t damage the delicate wiring on the other side.

The insulated wiring can be removed after extracting these. The insulator is brittle and can crack easily so be careful.
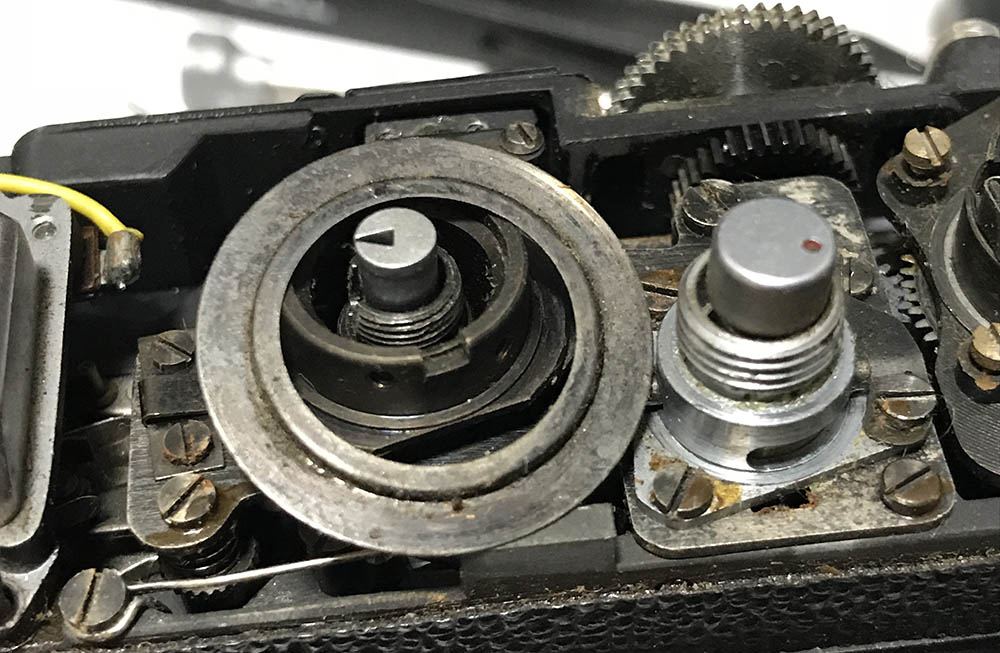
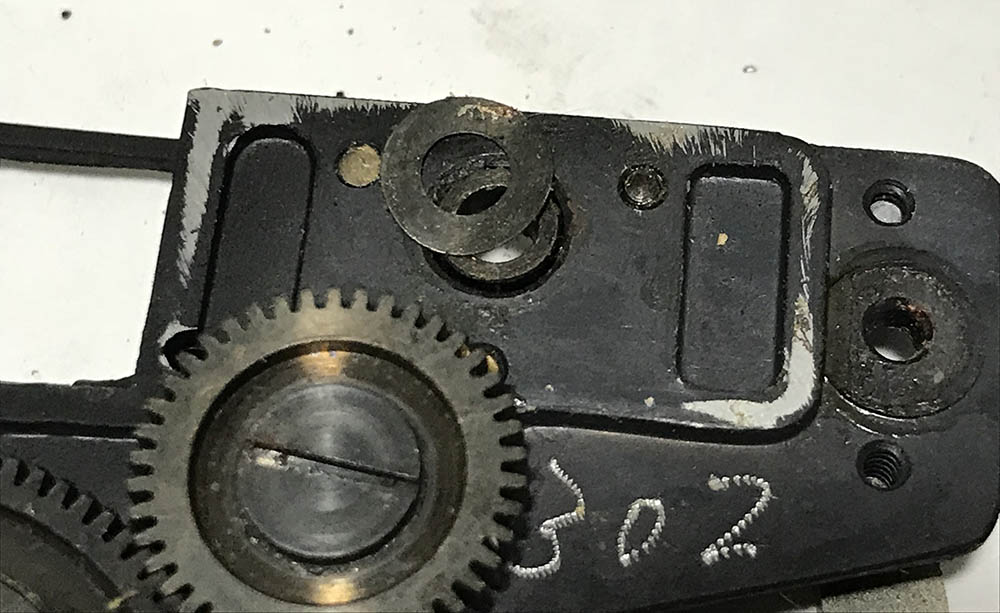
The cam for the flash sync selector dial can now be removed. Clean the cam well before you apply a fresh film of grease later. You can remove this part earlier if you wish.
These screws are sealed so dissolve the seal with acetone first. Use a driver that fits perfectly and carefully extract these, these can be a bit tight.

Extracting those screws will allow you to remove this plate.


(Click to enlarge)
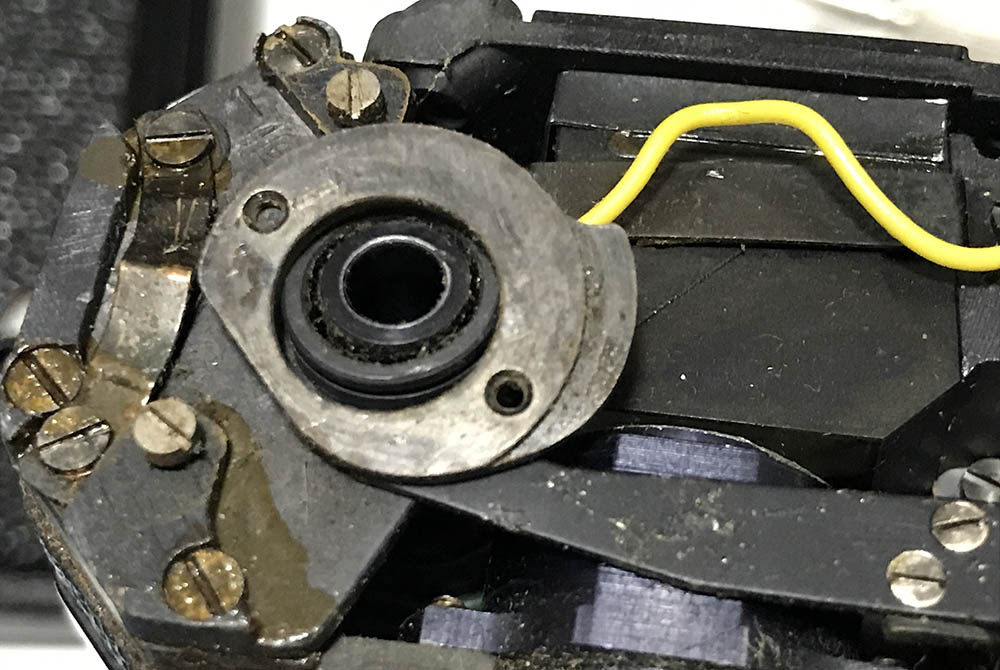
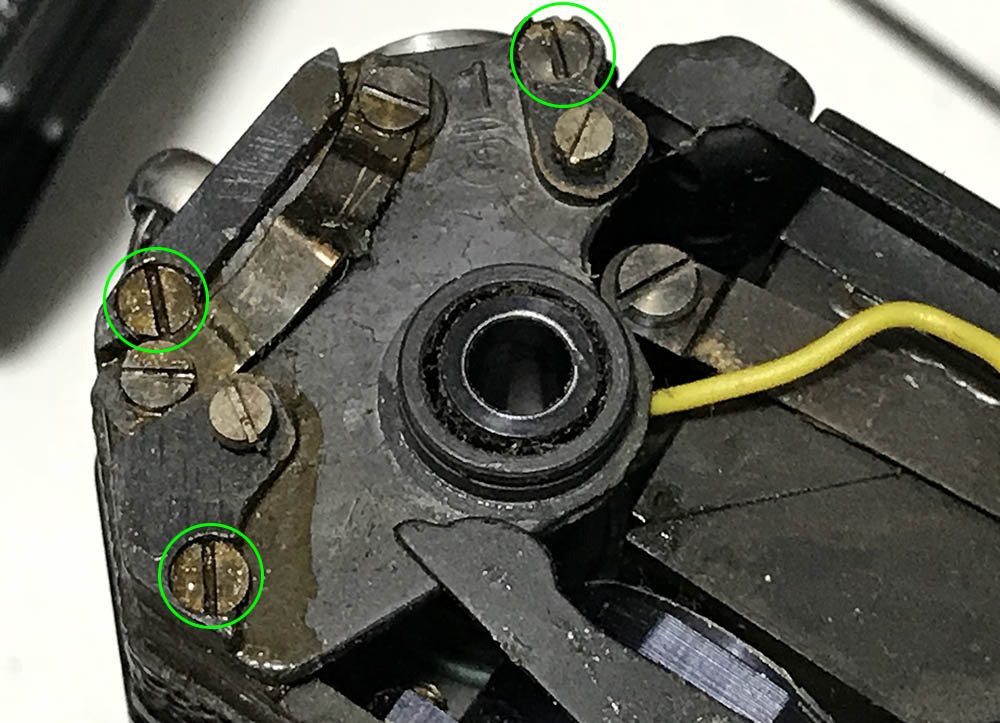
The front plate can be removed by extracting these screws. Dissolve the old cement or seals first before you attempt to remove these so you won’t snap any screws. These cameras are old so treat them with care.
Carefully remove the front plate and don’t exert too much force because the alloy may crack. Go at it slowly and apply solvents on the seams just in case.
This baffle should have been removed earlier so you won’t damage it while removing the front plate. It’s easy to warp this so handle it with care.
Make sure that you take plenty of pictures so you won’t get lost later during re-assembly. A good parts organizer will be handy so you won’t jumble all of the screws because most of them are unique. Putting the wrong screw back in the wrong hole may case it to foul something underneath it. Keep this in mind because you will have to work like this from this point on.
Disassembly (Focusing Wheel):
This is probably one of the most important repair that you can do for your Nikon rangefinder camera because overhauling the focusing gears will give you the best results when you turn the helicoid or the focusing wheel. These small cogs can get gummed-up with old, dirty and dry lubricants and that is one of the cause of a rough-turning wheel. Corrosion is also one cause and it can be fixed by soaking it the parts in citric acid for a short time. You can do an even better job with an ultrasonic cleaner but I find that citric acid is just as good and brushing the corrosion away helps, too. Both methods require a finishing bath that will neutralize the salt and acid so it won’t continue to do its job and not doing it will cause even more corrosion later. There are rare cases when the teeth of the cogs are too-worn to mesh properly and you can solve that only by replacing the gears.

The gear train for the focusing wheel is composed of a main cog, a relay and the big one that turns the helicoid. These can sometimes be worn due to the stress and torque required to turn the helicoid so I usually turn it using my fingers instead of the wheel.

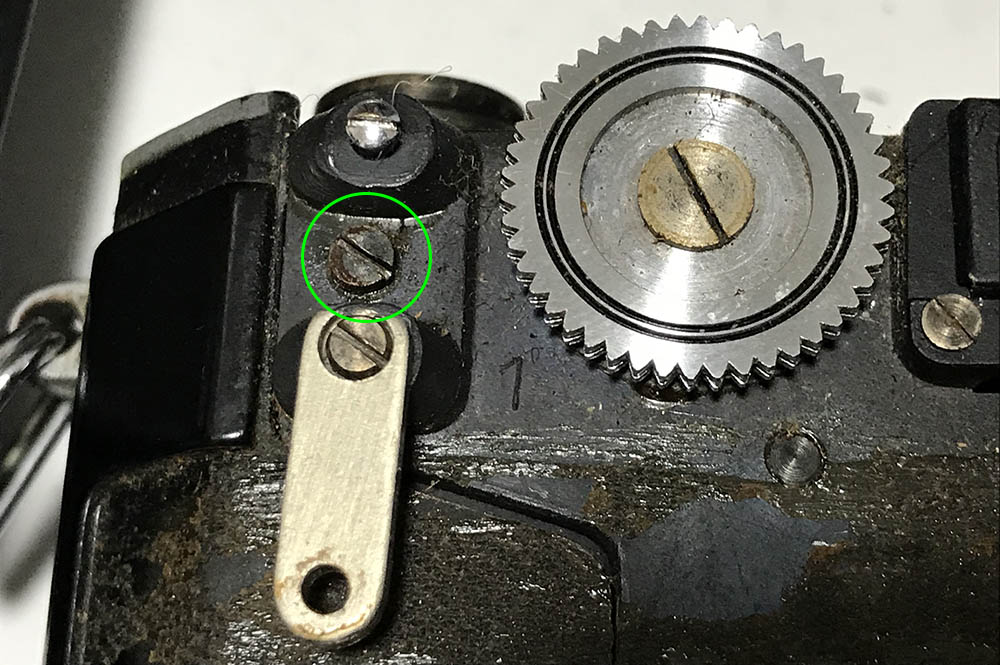
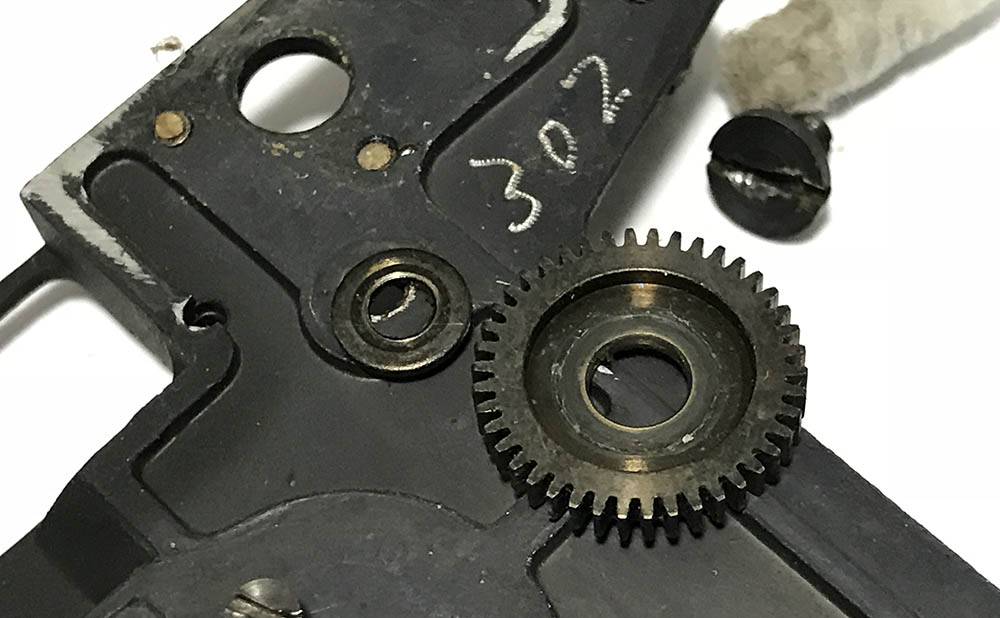
The main cog is connected to the focusing wheel. Carefully remove this and be sure not to scar the slot. Removing this screw will disconnect it from the main cog underneath it.
Removing the main cog will reveal a spring, this makes things smoother as you turn it as it acts like a suspension of some sort. You can adjust it if you know what you’re doing but I will just leave this alone if I were you.
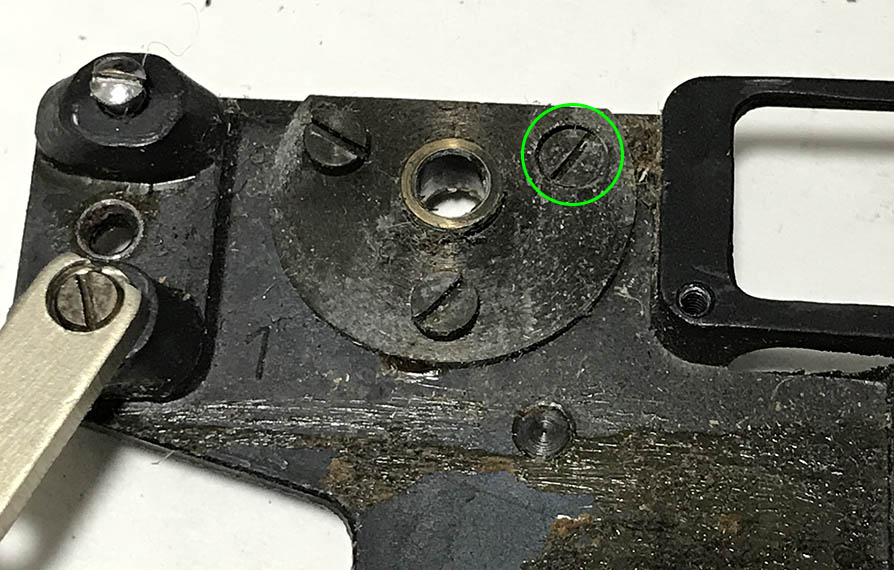
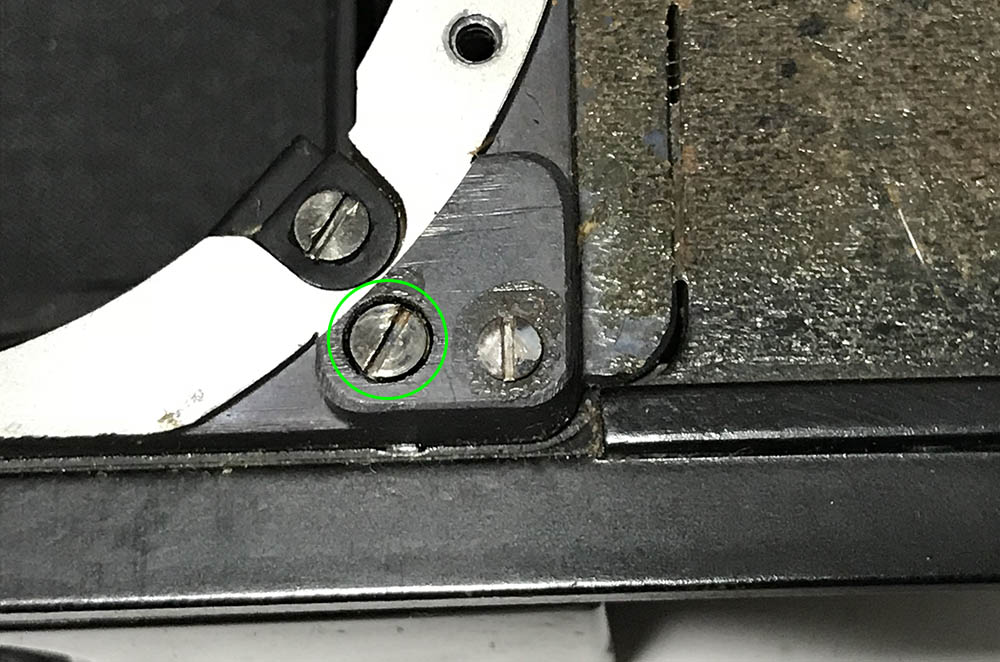
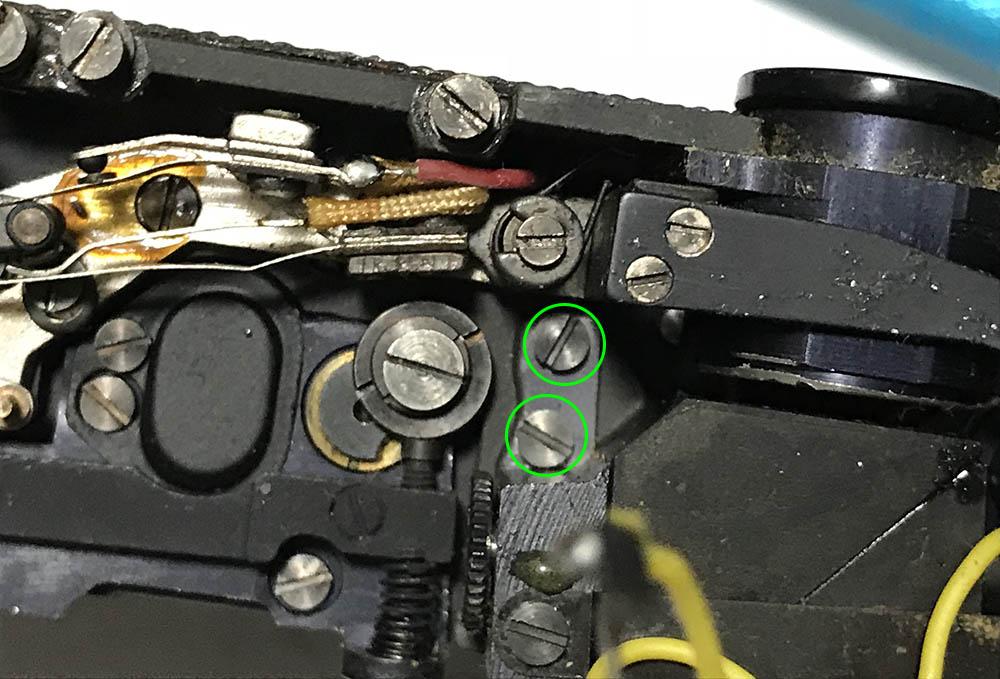
You can remove the plate by extracting these screws. Note that one of them is flushed so the locking lever won’t touch it. Don’t forget to put it back here.
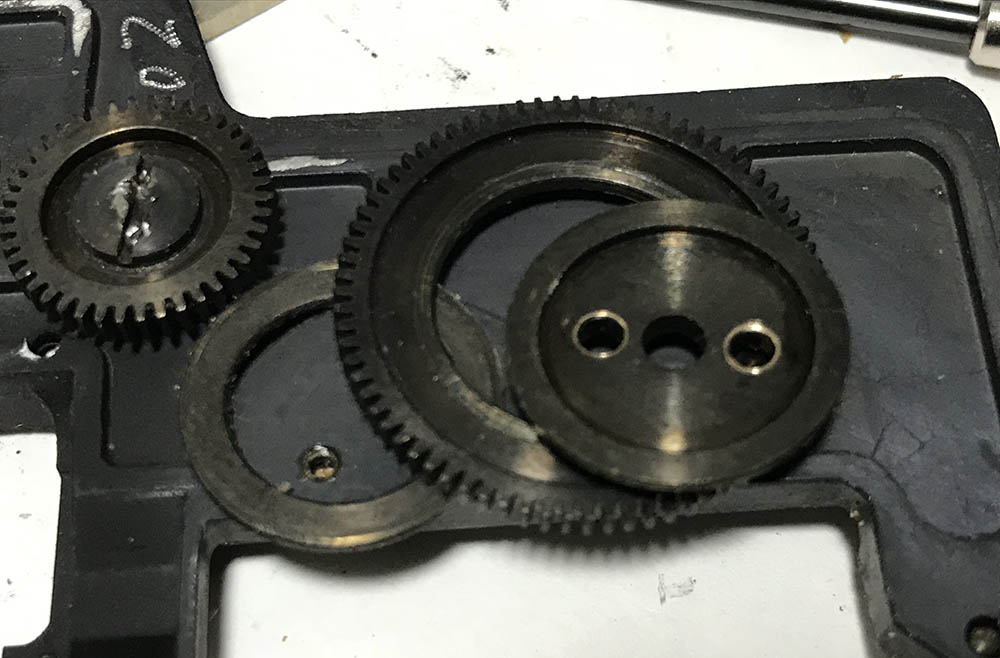
The biggest cog can be removed after extracting 2 large (and tight) screws. I had to heat those screws with a torch first to remove them safely. Don’t lose the washer underneath it.
The relay cog can be removed after extracing its screw. It’s the tightest one, I had to heat it until it’s too-hot for me to touch before removing it. There’s a washer underneath it so don’t lose it.
Clean the parts here very well. Do not apply too much oil on the joints and a small drop is all you need. You can apply a thin film of grease on the teeth if you like, too. Just make sure that you won’t apply too much and don’t apply grease beyond the teeth. Grease on the pivots is a sure way to foul the gears and you will soon find yourself opening the camera again just to clean your mess. Metal-to-metal contact surfaces benefit from molybdenum grease but it can dry easily and turn into a crusty deposit. I tend to use silicon grease, it stays moist and is the best option in my experience.
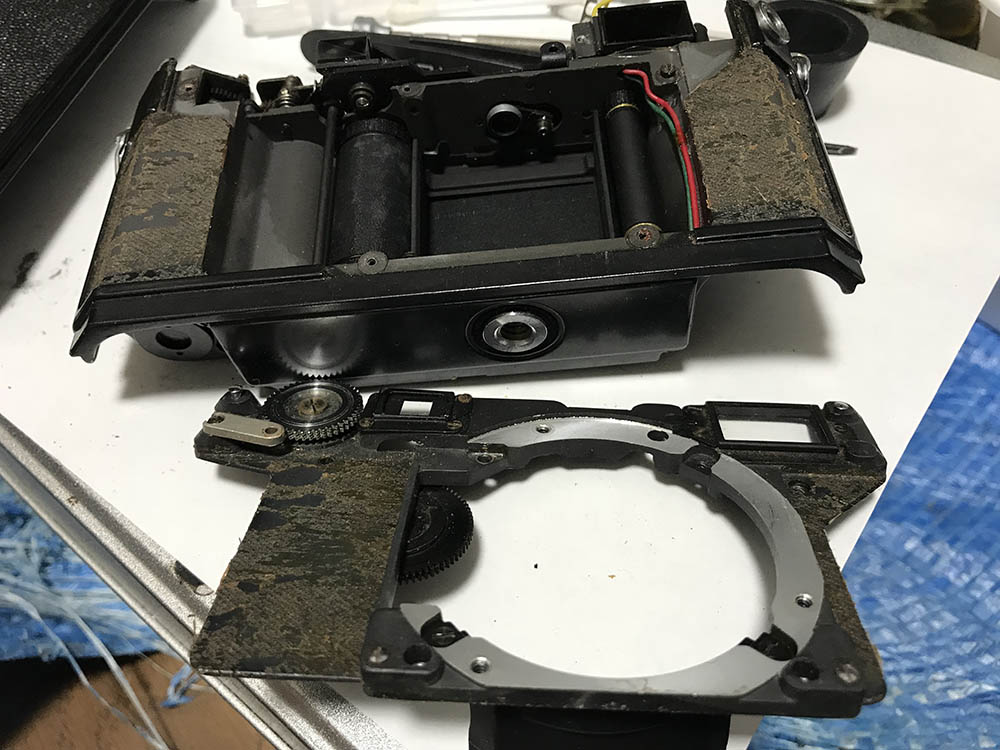
Disassembly (Rangefinder Assembly):
This section is the most delicate one in this article because you are dealing with the actual optics of the camera, a slight slip of your hand will turn the camera into junk instantly. This is a precision instrument and you must take a lot of pictures to note how it was assembled at the factory. The screws are also very confusing to sort so make sure that you organize them carefully. I can only recommend repairing this part for people who have the skills and tools to do this properly, beginners should never attempt this.
Take plenty of photos first before you remove anything so you’ll know how to put everything back together again later. This is a precise mechanism so you will want to take as many notes as possible.
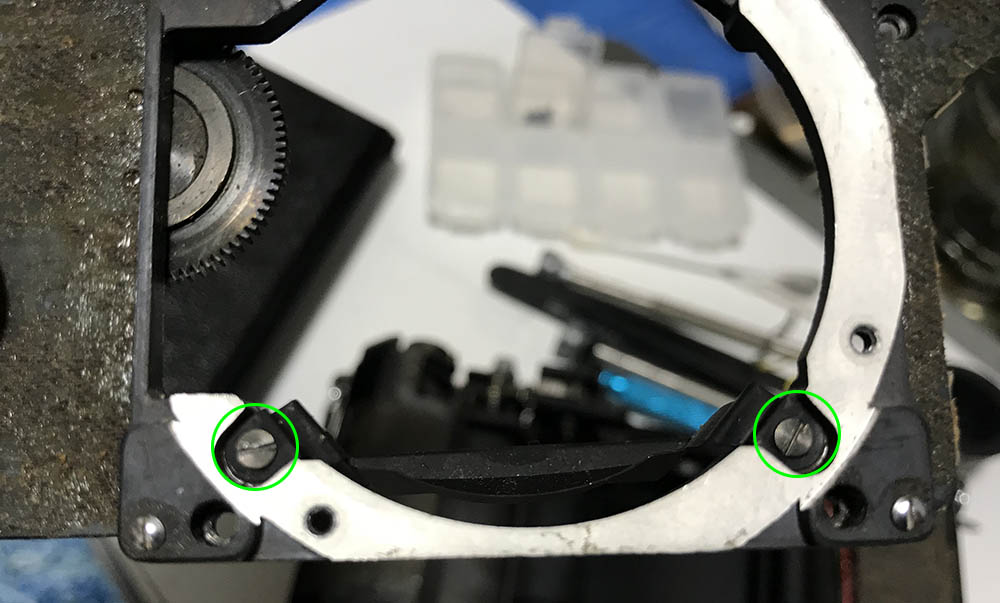
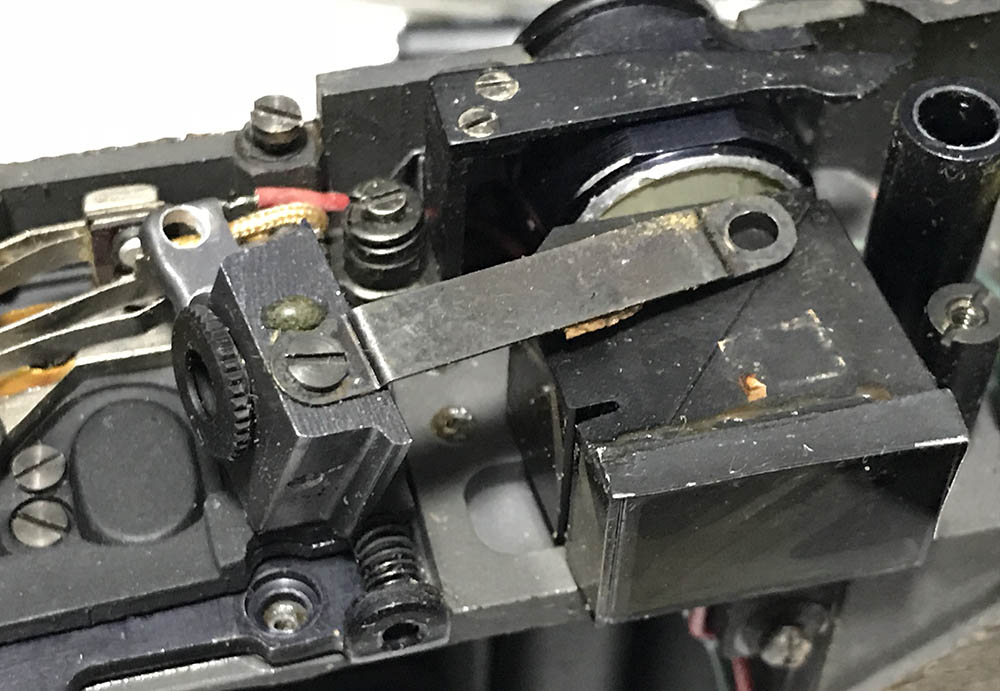
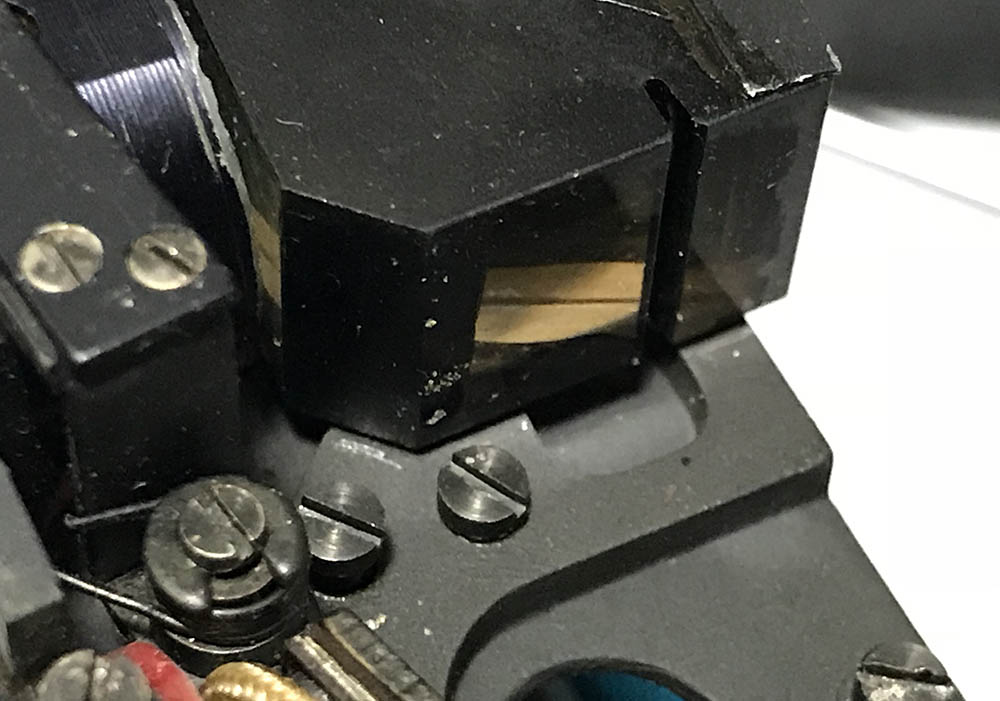
The viewfinder prism/beam splitter block is secured by a brace connected to the housing of the vertical correction lens. The housing can be removed by unscrewing these.

The other end of the brace is connected to this pillar via a screw.
This is how it looks like from the top.
Carefully remove the housing of the vertical adjuster, make sure that it will not scratch the bare glass opposite to it when removing it.
The prism/beam splitter is glued to the main chassis. We will leave this here for now. You can opt to remove later it if you wish but it’s delicate so maybe leaving it there is the best option depending on the circumstances.
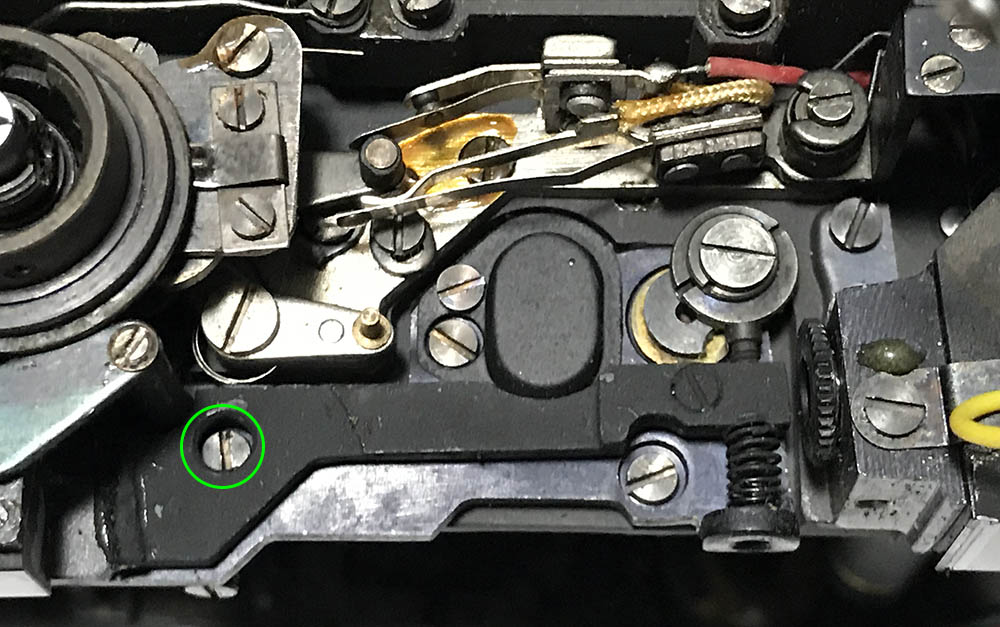
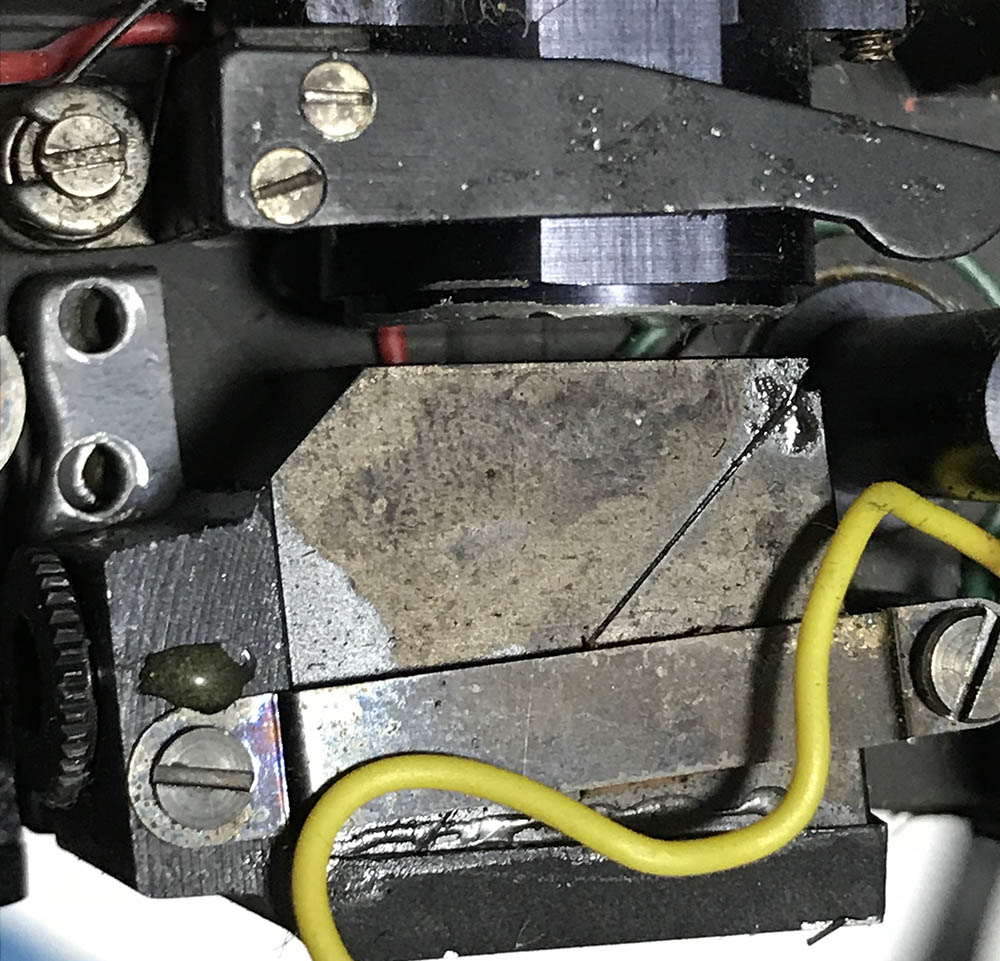
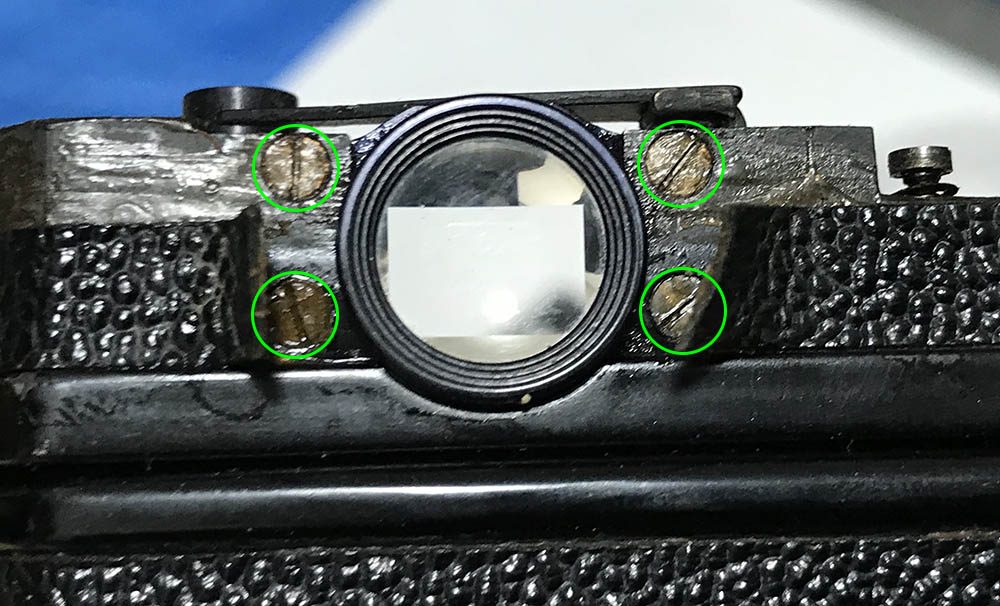
Remove this screw carefully, you may have to depress the lever to do it.

These screws must go, too. The little screw on top of the left one as well.
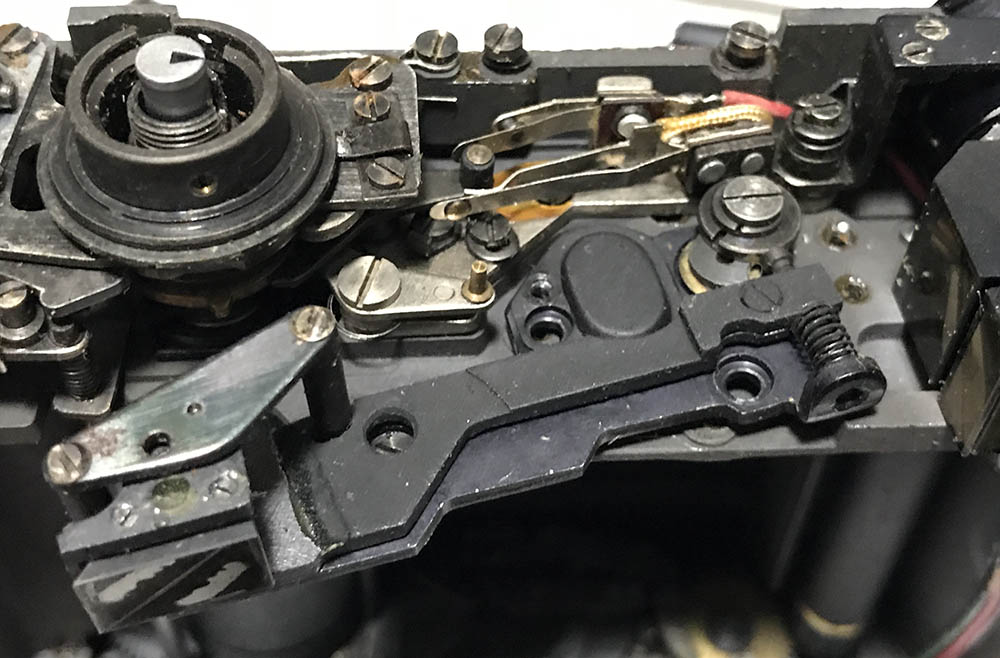
Carefully remove the rangefinder assembly, do not dismantle this further, it can be cleaned as-as. It has many delicate adjustments made at the factory, you will have a tough time adjusting this yourself without the proper tools.
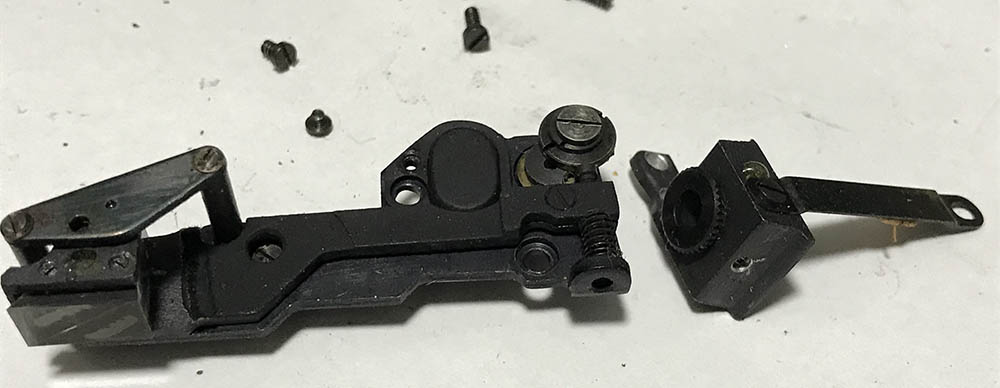
Here’s everything. Carefully clean all the joints and flush any old grease and oil with solvents while taking care not to damage the prism and lens. A little bit of oil goes a long way here, use the best watch repair oil you can get and apply it using the the end of a needle that’s modified so the eye is open. The small U-shaped blunt-end of the needle should hold enough oil to lubricate a single joint. Massage the joint so the oil coats it evenly. The cam shouldn’t be tampered, it’s for adjusting the rangefinder’s alignment at close and mid-ranges. Just clean it and flush the spring.
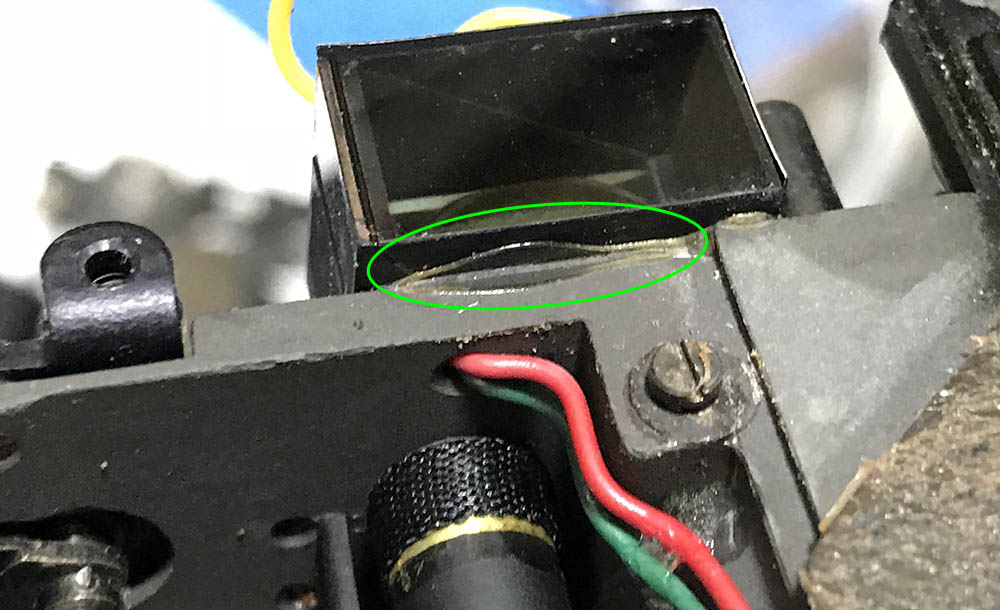
This is the bare spot that serves as the window. Cleaning it will help make it transmit light better, giving you a clearer picture. Take as many photos and notes so you will know how to align this later in case you remove it or when you accidentally dislodge it. Most, if not all Japanese cameras have a round rangefinder patch because there’s no rectangular window between this and the vertical adjuster lens. A mask can be made using a very thin material, it will make the patch smaller but easier to see. I didn’t bother with this, it is a small inconvenience that I can live with.

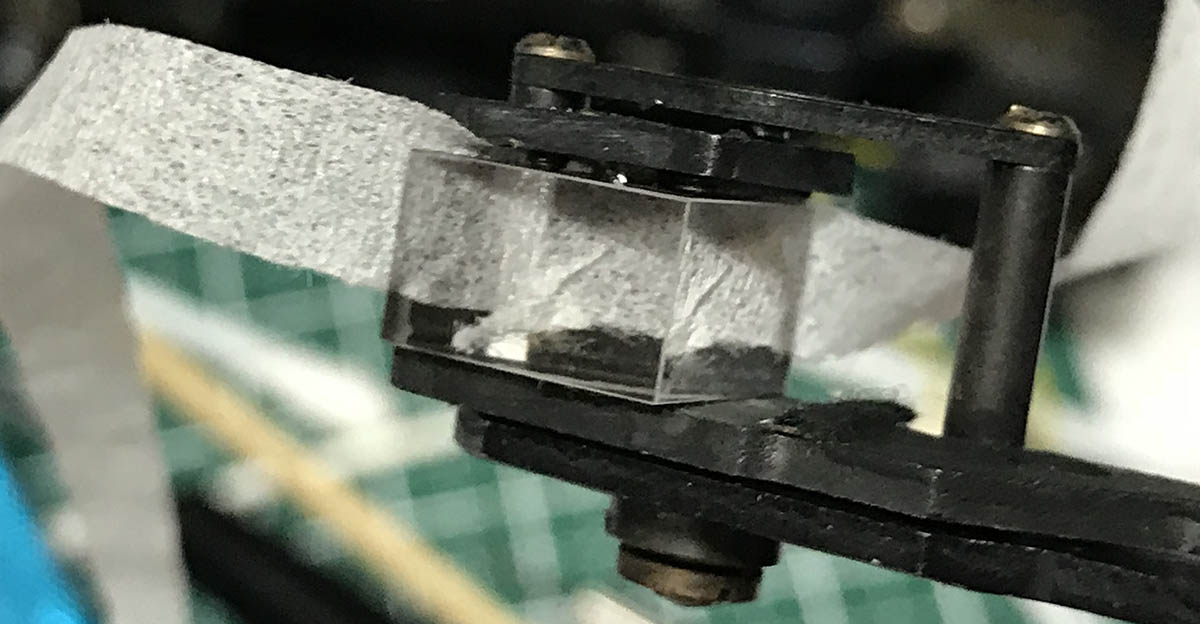
If you have to remove the beam splitter block, apply pressure to it until the whole thing is removed from the main chassis. Only do this if you have to. You can clean all of the bare surfaces without removing this so it’s pointless. Do not forget to re-install the thin baffle at the front end, it’s for preventing reflection and flare from making the patch look dimmer.
The diopter can be removed by extracting these screws, 2 of them are under the leatherette so you’ll have to peel parts of it to reveal them.

You will have to unscrew the flash sync coupling arm to remove the diopter. You don’t have to dismantle this, clean it very well and make sure that your hand is steady so you won’t scratch the framelines. The housing should not be cleaned with a strong solvent because you don’t want to dissolve the glue that was used to seal the whole assembly.
Be careful when cleaning the parts here. You don’t want to scratch anything here with your tools. Expect to use a lot of Q-tips and naphtha to clean and flush the parts here. Be careful with your solvents as you don’t want to ruin the cement used on the beam splitter block or the diopter. The rangefinder arm assembly is the most delicate part here so handle it with utmost care.
Conclusion:
A clean rangefinder is the hallmark of a successful job, you will notice a big change as soon as you peep through it. Most of Nikon’s rangefinder patches are dim by this point due to deterioration and dirt but one of the causes for this is flaring which is caused by corroded coatings on the finder. It can also be too-bright and that will “drown” the patch, one way to remedy this issue is to use a gel filter to help darken the viewfinder a bit. Read my old article on the Nikon S2 front overhaul to know how this is done.
Clean the prism very well, the half-mirror can be accessed using a thin strip of paper or stiff tissue. Clean it carefully so you won’t scratch the reflective side of the prism. Oil and dirt can make it less-reflective which will lead to a dim patch. Do not bother removing this because aligning it will take a lot of time. It’s sealed with cement and the set screws are used to adjust/secure it.
Here’s a map of the whole series:
- Part 1 (Top & Front Panel)
- Part 2 (Internals & Rangefinder Mechanism)
- Part 3 (Film Advance, Speed Selector & Timing Mechanisms)
- Part 4 (Shutter Mechanism)
- Front Overhaul (Rangefinder Adjustment)
That’s all for part 2. If you think that this is difficult then just wait until we get to shutter and its mechanisms in part 3. Please never use this as a repair manual and only treat this as a supplement or for your own entertainment. Use this to help determine if the repairman did a good job on your camera, this is also useful to help you assess if the camera you just bought will need an overhaul to make it work properly again. Thank you for all the support, you are helping this blog to stay alive. See you again in the next part, Ric.
Help Support this Blog:
Maintaining this blog requires money to operate. If you think that this site has helped you or you want to show your support by helping with the site’s upkeep, you can make a small donation to my paypal.com (richardHaw888@gmail.com). Money is not my prime motivation for this blog and I believe that I have enough to run this but you can help me make this site (and the companion facebook page) grow.
Leave me some tip?
Thank you very much for your continued support!
$2.00
Helping support this site will ensure that this will be kept going as long as I have the time and energy for this. I would appreciate it if you just leave out your name or details like your countrym name or other information so that the donations will totally be anonymous. This is a labor of love and I intend to keep it that way for as long as I can. Ric.

4 Comments (+add yours?)