
Hello, everybody! I love Prince’s song “Purple Rain“. It’s long, full of soul and a true masterpiece in its time and even to this day. You can’t find something today that can match this song since they’re mostly made with the help of a single algorithm that record labels use. This is the reason why songs today sound “generic”, as if they were made from a single template. Today, we are going to talk about a lens that’s still amazing to this day since it was made as an artists’ tool, focusing on the “feel” rather than on chart scores that many lenses today seem to fall victim to. And just like “Purple Rain“, this lens has a reputation for purple fringing but we’ll see how that works with the scheme of this lens.
Introduction:
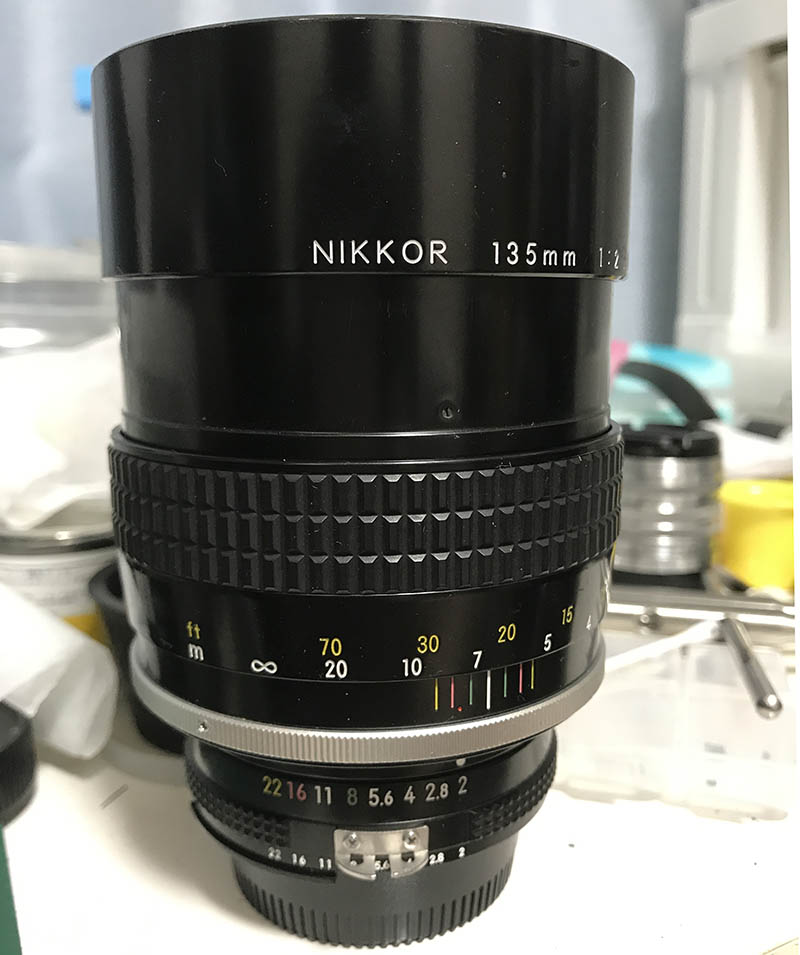
The New-Nikkor 135mm f/2 debuted in 1975, it was the fastest 135mm Nikon has ever made at that point and is a high-point in lens design. It’s big, heavy and impressive with its big front element. People will pay attention to you if you point this to their faces. It’s also the first lens in the 135/2 class which is still being made today in the form of the AI AF DC-Nikkor 135mm f/2D. This lens is the expensive alternative to the New-Nikkor 135mm f/2.8 which is an exquisite lens but Nikon thought that they could make something better and so this lens was designed. The benefit you get from the faster aperture of f/2 is a brighter viewfinder, extra light-gathering capabilities, thinner depth-of-field and smoother blur as a result of the latter. This was a game-changer, it enabled photographers to take pictures that they weren’t able to before.
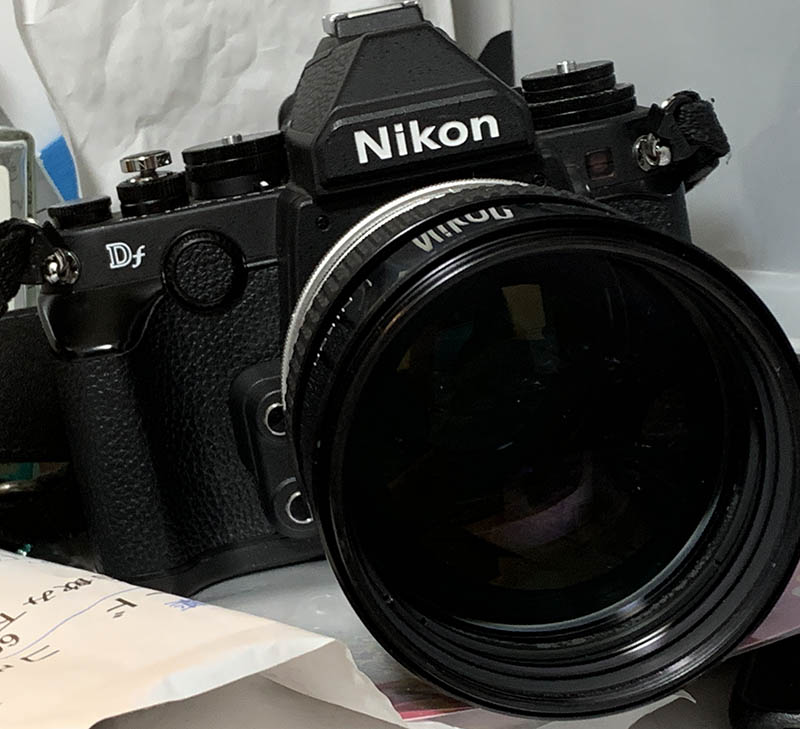
The impressive front element of this lens is huge and clear. You will want to deploy the built-in hood when using this to protect the front element and to shield it from stray light hitting it from an angle which can cause flares and ghosts to appear in your photos. The built-in hood is a nice touch, it is a big help despite being prone to being knocked out of position because it doesn’t click-into place which is a shame.
The optical formula is quite simple, a 6-elements-in-4-groups design. This is one of the secrets of this lens, less glass-to-air surfaces means better colors. I am a big fan of lenses that have few elements because of this. I do not enjoy using lenses with plenty of elements for the said reason that’s why I prefer using older lenses these days. Most lenses these days are over-corrected and that results in the loss of subtle qualities in a photo that makes it unique. It’s one of the reasons why the photos shot with most modern lenses look quite similar. This is all thanks to pixel-peepers and lens reviewers. Good thing is Nikon knew this so some of the newer high-end Nikkors now focus on these important qualities while trying to achieve good scores in the lab. Scores do not mean much if the lens doesn’t render beautifully.
I love the 135mm focal length because it gives me enough reach for great candid photos and the subject isolation with this focal length is amazing. I love taking night-time photos and the fast maximum aperture helps. It can be a bit tiring to carry this all-day but it’s worth it. I know that I keep saying that it’s big and heavy but it’s really amazing how Nikon managed to fit all that glass inside the barrel, this could have been much bigger if not for the talents of the engineers who helped make this possible.
This lens was succeeded by 2 other lenses, the Nikkor 135mm f/2 Ai and the Nikkor 135mm f/2 Ai-S. Both are manual-only, the former is almost identical to this lens while the latter has a different barrel construction and smaller differences inside. It’s safe to assume that the optical formula remained the same since I can’t find anything that suggested otherwise. The last version is the AI AF DC-Nikkor 135mm f/2D which has autofocus and a gimmick which enables it to control its out-of-focus characteristics. That lens is still made to this day and you can buy it new from the camera shop. It’s a great lens and it’s going to be around for some time before Nikon replaces it.
Since we’re on the topic of this lens’ variants, it’s important to note that this lens nearly identical to the Nikkor 135mm f/2 Ai except for a few differences that won’t matter at all since they’re all cosmetic variations like the look of the rubber grip, etc. You can treat them as the same lens and you can even use the repair section and the steps will be the same.

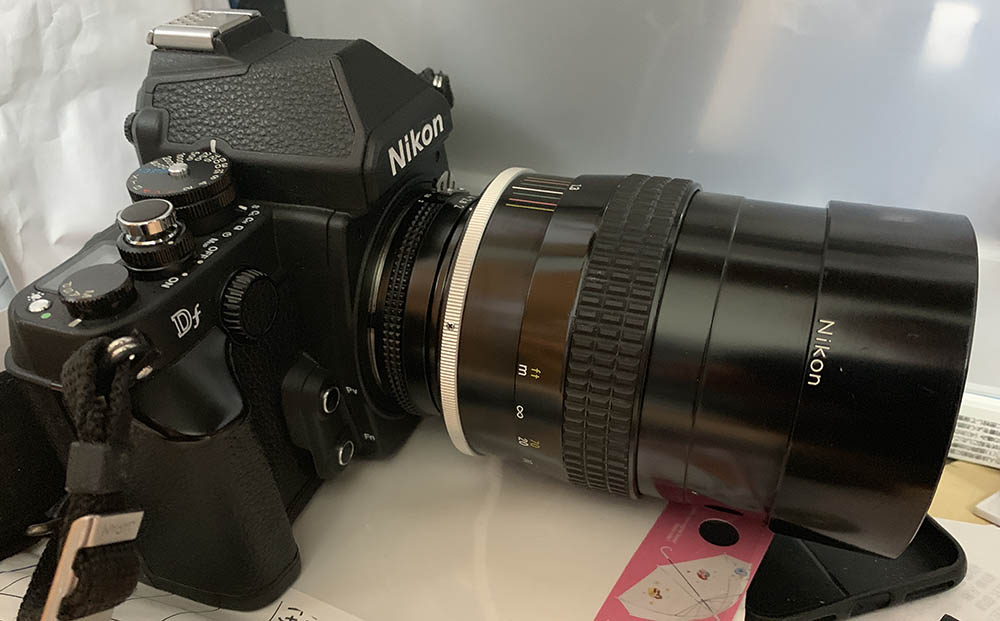
The barrel is fat and stocky but it balances really well with heavier cameras like the Nikon F6. The focus throw is kind of long to me but that’s normal in the case of many telephoto lenses. This will help you with precise focusing but it can be inconvenient when you need to acquire initial focus quickly. It can easily be remedied by pre-focusing your lens to where you need it to be and then adjust it later to finalize your focus. This is a skill that you’ll learn when you’re forced to use manual lenses. It’s sometimes faster because you don’t have to select your AF points and you only have yourself to blame for missing something.
Let’s now see some pictures that were taken with this lens. It’s important to know how a lens works, this will help you maximize its use because you are aware of its strengths and weaknesses. These were shot from f/2, f/2.8, f/4 to f/5.6 from left-to-right. These are the most common apertures that this lens is used and they’re also where the most changes happen a you stop the iris down.


(Click to enlarge)
Vignetting can be observed wide-open, it’s not terrible but it’s kind of high. I will try to avoid shooting it at f/2 if you have something like the sky in your background. The good news is it’s mostly gone by f/2.8 and you won’t notice it from this aperture on. It cleans-up nicely by f/2.8 which is great.

The distortion profile is of the pin-cushion type which is typical of telephoto lenses. It’s not a lot but it’s enough for you to notice it if you have horizontal or vertical lines near the edges of the frame.

(Click to enlarge)
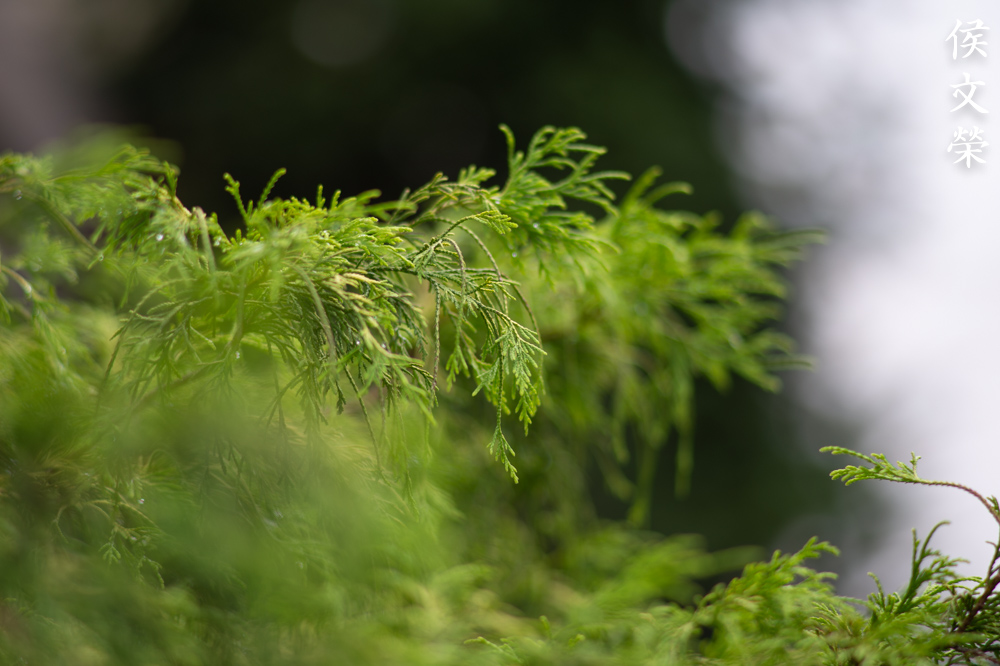
The quality of the bokeh is superb as you would expect from this lens. There is no harshness and the transition is beautiful, smooth and clean. You won’t get any weird artifacts when you have twigs or foliage in the background. I will show you a case when I did trigger the ugly-side of the bokeh quality in another photo later.


(Click to enlarge)
The quality of the bokeh looks gorgeous up-close across the wider apertures. It doesn’t even change much even at f/5.6, the de-focused areas remain very smooth and blurred while your subject gets consistently sharper.

The rendering is beautiful because of the smooth focus transition and that’s the reason why the pictures it takes look so natural and not “forced” in any way like what many modern lenses tend to do. This may be due to the lower element count of just 6 elements.


(Click to enlarge)
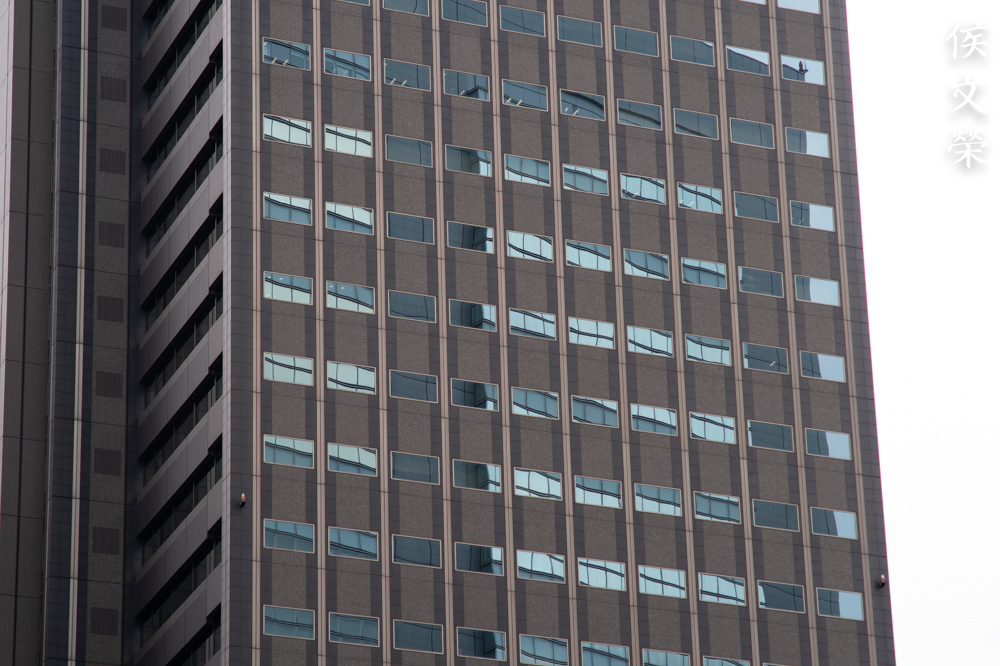
Sharpness wide-open is so-so but quite decent at infinity or close to it. You’ll notice that the center is sharp but sphero-chromatic aberration veils it and the resolution is not quite there. Everything improves considerably by f/2.8 and things look much sharper due to the resolution picking-up. The terrible news is that chromatic aberration remains to be a problem and it won’t go away even at f/5.6 in areas that are blown-out. It can be easily avoided, just under-expose your picture if you have the sky in your frame and anything shiny where the highlights get over-blown. Going back to sharpness, this is performing near its peak by f/4 and is near-perfect from f/5.6 up to the far-corners of the frame.


(Click to enlarge)
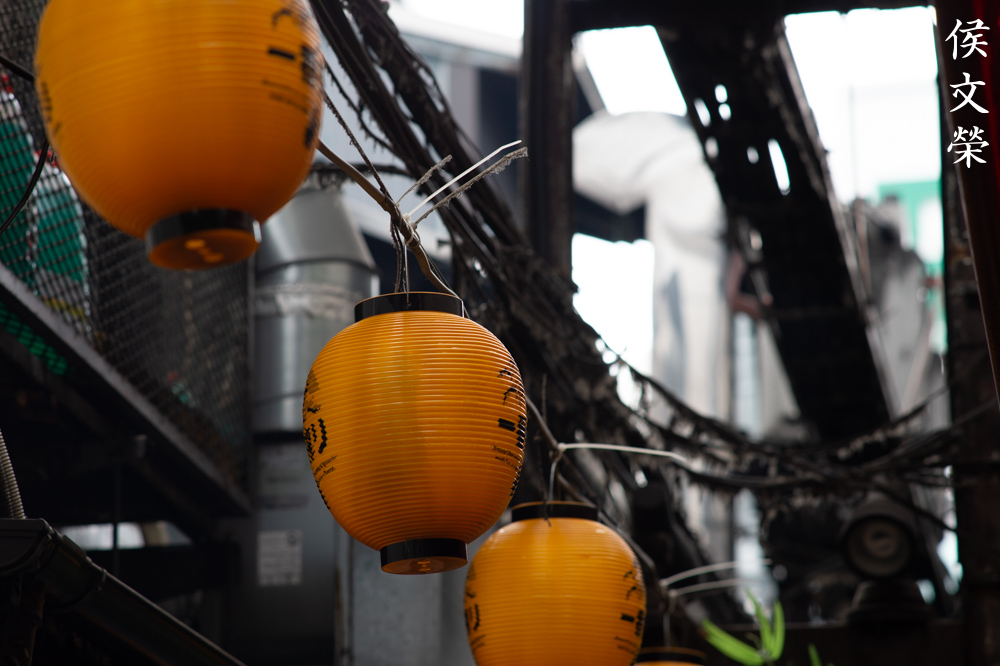
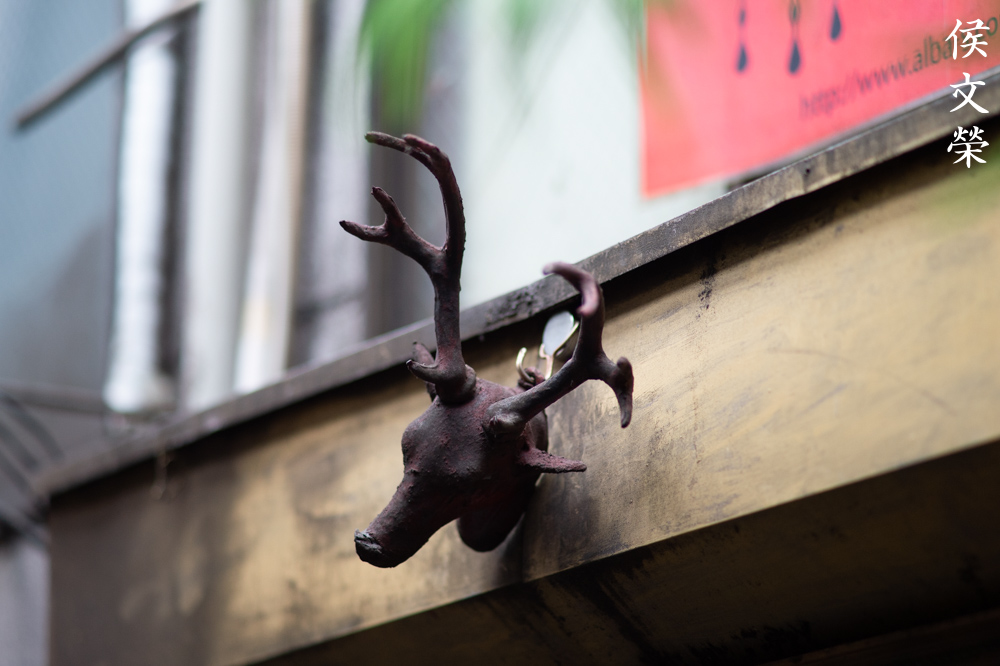
Chromatic aberration can also be observed at closer distances and it looks a lot worse in certain cases. It can be difficult to avoid it in this picture since the sun was shining directly at the subject that’s cast out of bronze.

Here’s how it looks like up-close. Note how the bokeh quality looks a bit bad where the twigs are, this is the worst I can get out of this lens. Sharpness is excellent wide-open at closer distances and this lens performs much better at these distances compared to infinity which is a bit sad.

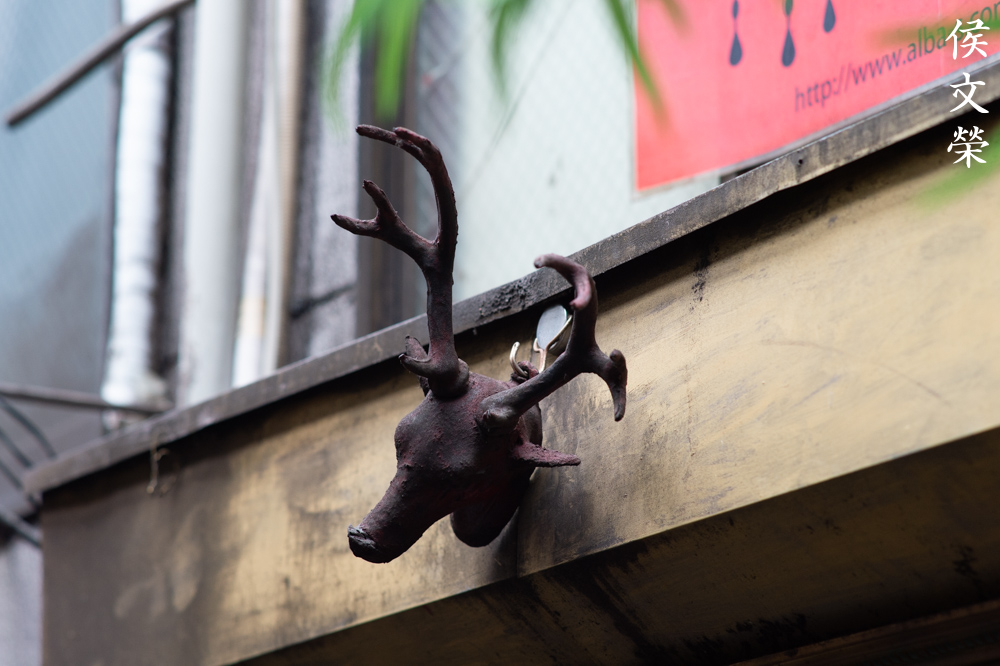
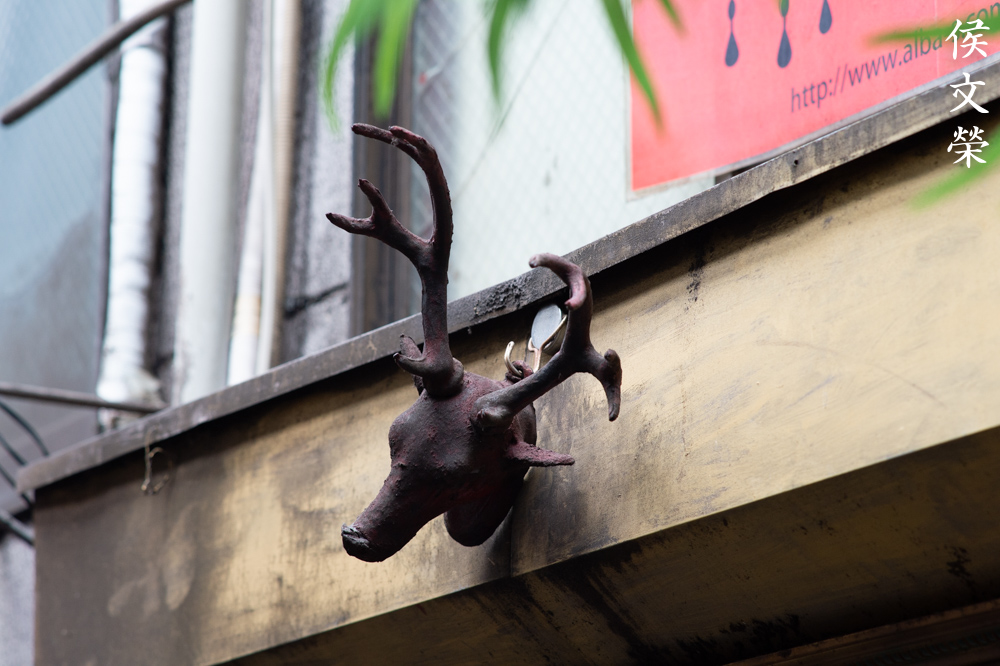
This is an extreme example of how bad the chromatic aberration can be at times when you have areas of really high contrast. You will want to avoid it as much as you can. If you have a scene like this, make sure you stop the iris down to help lessen the effects of chromatic aberration. While this is indeed an irritating artifact it helps in giving something special to a lens’ rendering. It helps with the bokeh quality somewhat and it helps make things softer in a nice way which makes the focus transition smoother. I’m not a designer, I just based that statement on my observation from using older lenses. A lens has to have a good balance of both correction and aberration so that it can render pictures that look natural and not “generic”. This is why we add lots of aberration at post to make our CGI renders at work look more natural.


(Click to enlarge)
Here are some samples that were taken at closer distances. It’s sharper here compared to infinity and it’s excellent wide-open but it improves even more once you stop it down past f/2.8 where the improved resolution helps make the details look much sharper. The lens is performing near its peak by f/5.6 and there’s no point in stopping this down further unless you need deeper depth-of-field to get more things in focus.
Let’s now see some real-world photos. You can’t appreciate a lens if you are only looking at simple test shots, only photos taken from real use will help give you a better idea what a lens is really worth.

Oops, I clicked just a bit too-late and lost the moment! The subject isolation is amazing even at this distance of about 6m. The depth-of-field is shallow, I had a hard time focusing with this lens and tracking moving subjects can be really challenging. I just turned the focusing ring a bit and the focus ended up behind her, missing by about 1ft.

The good thing is you’re rewarded with a good photo when you do get your focus right. This lens will blur your background into a wash of colors like an old watercolor painting. You can use it to tell stories that center around the subject or what he’s doing.

Rendering is exquisite! The pictures you get from this lens looks unique, it’s one of those lenses that enables you to make more creative decisions and it will reward you with excellent portraits because it’s sharp wide-open but it is not so sharp as to render every pore in your subject’s skin. This is good if you’re taking photos of women since they can get really fussy with this.

See how delicate the rendering is? I love how this lens rendered her hair. It looks details yet soft at the same time like healthy hair should be. This is an amazing lens for portraiture and it’s hard to find something that can beat it at this focal length and price.

Amazing! Look at how beautiful her skin was rendered, there’s a bit of glow veiling it, making it look healthy. I missed my focus by 2cm but just imagine if I got her right eye in focus. It’s difficult to focus with this when the subject is close to you because of the thin depth-of-field. Stopping this lens down to f/2.8 or f/4 will be beneficial in this scenario.
Let’s see how this lens hold-up to the 24MP sensor of the Nikon Z6, I used a Nikon FTZ adapter with it and most of the pictures were taken wide-open or stopped-down to f/2.8 or so.

Amazing details even with the iris set wide-open! The background turns to mush while your subject is rendered beautifully. The resolution wide-open is enough to render hair faithfully, too. You can see some green highlights in the goggles due to chromatic aberration but it’s not a big problem here and I will even say that it makes the photo a bit more interesting.

Beautiful photo! Her eyes and hair were rendered exquisitely, this is perfect for showcasing this lens and what it can do to your portraits.

Foliage in the background can be troublesome and it can expose if your lens has terrible bokeh quality or not but this lens handled it perfectly. Check the pretty felt ribbon on her hair, it looks really nice, don’t you think? You can even see the fibers of the ribbon.

Don’t worry too much when you have foliage in the scene, this will render it beautifully, making an interesting backdrop for your subject.

Saturation seems pretty good but a bit too-saturated for my taste. It’s easy to fix this is post anyway so this isn’t really a problem.

I sometimes feel that this lens is too-sharp at times but maybe it’s more due to the camera’s 24MP sensor. I should have over-exposed this a bit now that I think about it.

Over-exposing your portraits a bit helps hide blemishes on the skin and you can even make your subject look a bit younger, too. This is a perfect picture to showcase just how good this lens is for portraiture.

The background sucks but it would’ve sucked even more if this lens doesn’t blow it away smoothly. If my subject is further from the guy behind her, he would end-up looking so blurred you won’t notice him.


(Click to enlarge)
Despite being a bit difficult to accurately focus even with the Nikon Z6 I had a great time with this lens. The results alone showed me that it’s still a great lens for portraiture if your subjects would pose for you.
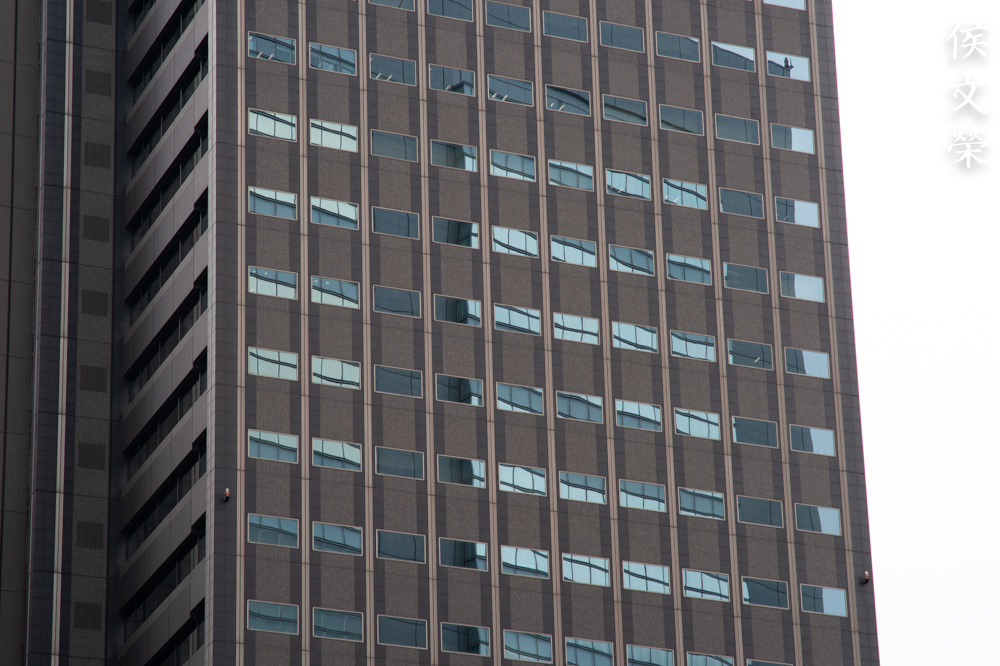
Let’s now see some pictures that were taken with film. Pictures taken using film have this unique look that’s difficult to emulate with digital because of the organic-looking structure of film grain and how light reacts with film. It will help us better assess this lens since it was originally made for film and it’s nice to see pictures taken with this lens under its intended medium.

Chromatic aberration can be observed at the edges of the roofing. I will say that this is kind of severe but the good thing is this scene is kind of tricky in the sense that we have a high-contrast and blown-out element and that will trigger this kind aberration easily.

Amazing subject isolation quality! Having your subject closer to your setup will amplify this effect. You can blur the background into a wash of colors. I see that this technique is getting more popular these days.

You can use this to your advantage so you can blur a boring background. It’s not an excuse for being lazy with your framing but you sometimes have no control over your scene or the liberty to choose your background.

Even if your subjects are a bit further into your scene you will still achieve a good separation effect due to the long focal length and the wide aperture.

The shallow depth-of-field can work against you in some cases. In this photo we have two girls in the frame but one of them is just a step away from our subject. Our subject is focused properly but the other girl is blurred. You’ll have to position them closer together with their faces approximately lying in the same place to at least have their faces in-focus.

This is what I mean. I focused on neither the girl at the back nor the girl at the front. The focus is closer to the girl at the back so this allowed me to get them both in-focus to an acceptable degree. The focus is not perfect but this is better than having one of the girls looking blurred.

This looks trippy. The background is rendered in a painterly-way, the face of the lady is focused but only on the broad side. The short side is blurred due to the thin depth-of-field. This is another challenge of using a lens that has a shallow depth-of-field, you will have to put your subjects’ eyes on the same plane to avoid this or shoot using a smaller aperture. Stopping the iris down to f/4 will easily fix this at the expense of the nice de-focused background.


(Click to enlarge)
Here are some more portraits that were taken with film. I think this lens is best suited for film since it was designed for it. Film is more forgiving and it will help mask any flaws of this lens. It’s amazing how well this lens holds-up today for portaiture use and you can save a lot of money so long as your hand is steady for manual focusing.
This lens is great if you know how to avoid the chromatic aberration issue. I consider it to be one of Nikon’s best lenses from the 1970s but it’s still a good lens today and you can get them for not a lot of money in the used market. I usually see them sold around $270 to $450 depending on condition. For that money you’ll own a really good portrait lens that can blow-away whatever’s behind your subject into a wash of color. This is the bokeh-lover’s lens, so if you are one of them, this lens will satisfy your needs. If you don’t have that much money to spend, the New-Nikkor 135mm f/2.8 will be your best choice and if you’re really cheap, the Nikkor-Q 135mm f/2.8 Auto is the lens to buy. Both are an f-stop slower but you will still get amazing defocus properties from these lenses. The New-Nikkor 135mm f/2 is the cheapest one from the family of 135/2 lenses, both the Nikkor 135mm f/2 Ai and the Nikkor 135mm f/2 Ai-S will cost you more money and the AI AF DC-Nikkor 135mm f/2D will cost you around $800 but you get a lot in return for that, it’s the best one in terms of handling and utility. Just buy whatever your budget allows, it’s not a difficult choice so long as you remember my guidelines. Let’s now proceed to the lens repair section.
Before We Begin:
If this is your first attempt at repairing a lens then I suggest that you check my previous posts regarding screws & drivers, grease and other things. Also read what I wrote about the tools that you’ll need to fix your Nikkors.
I suggest that you read these primers before you begin (for beginners):
Reading these primers should lessen the chance of ruining your lens if you are a novice. Before opening up any lens, always look for other people who have done so in Youtube or the internet. Information is scarce, vague and scattered (that is why I started this) but you can still find some information if you search carefully.
I highly recommend that you read my working with helicoids post because this is very important and getting it wrong can ruin your day. If I can force you to read this, I would. It is that important!
For more advanced topics, you can read my fungus removal post as a start. This post has a lot of useful information and it will be beneficial for you to read this.
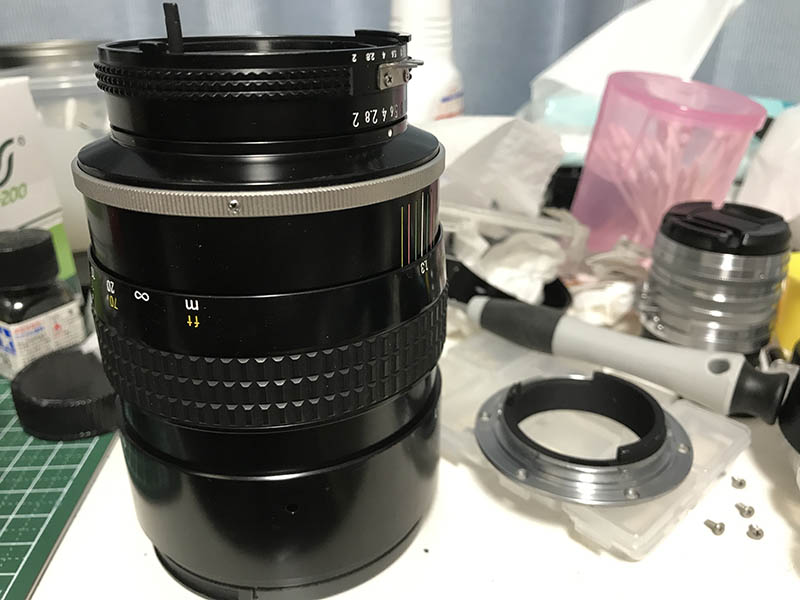
Disassembly (Lens Barrel):
The lens barrel is constructed simply with no clever gimmicks so you do not have to worry too much about disassembly sequences. However, you’ll have to follow my steps here because this is the most logical way to open this lens and it’s also the safest way, too. Like all lenses, we’ll want to extract the lens’ objective first and keep it in a safe place so we can work without worrying about the glass.
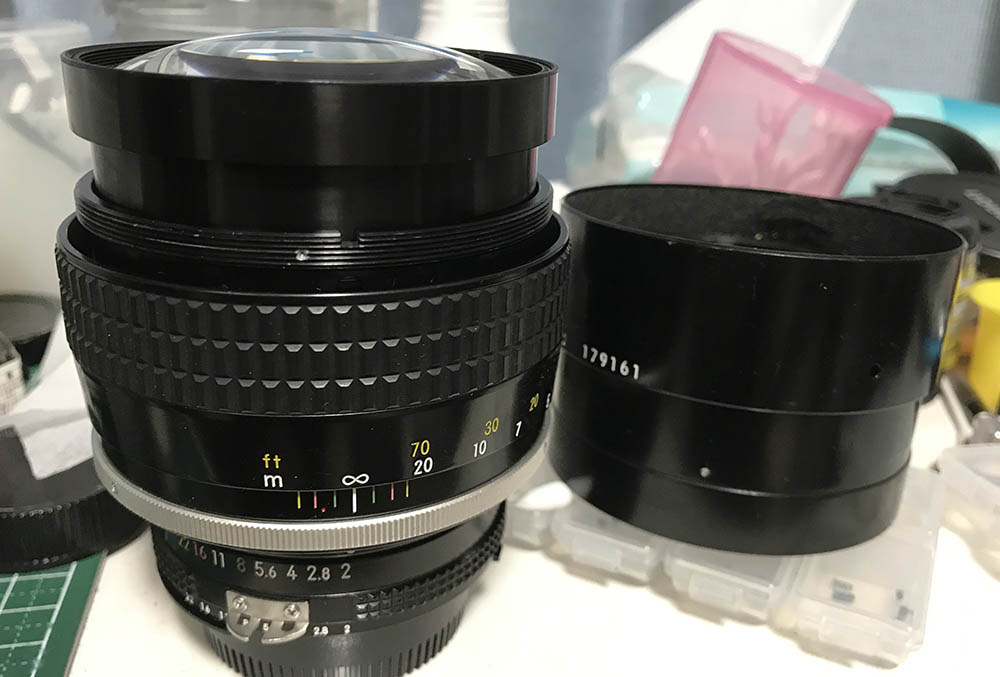
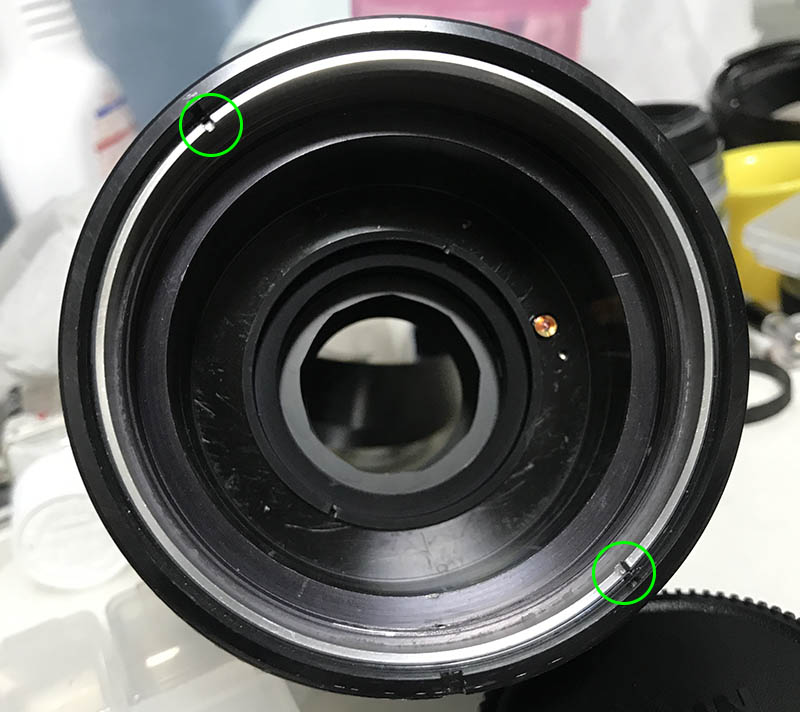
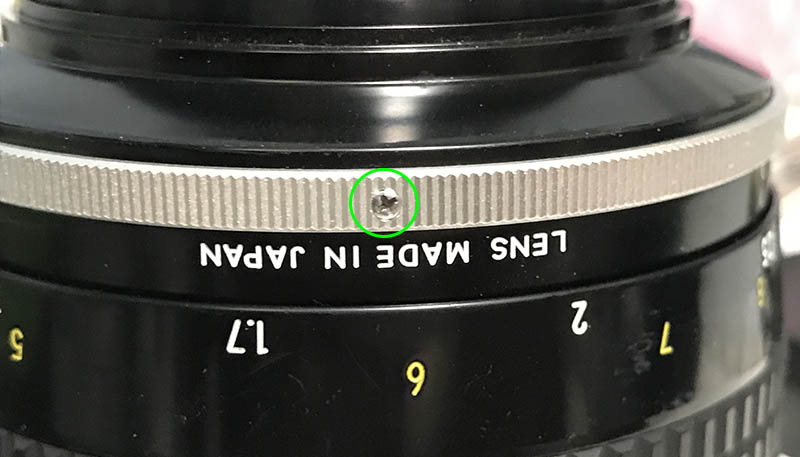
If you wish to remove the hood, locate and extract this screw and turn the front ring to remove it. There may be more than just a screw here so just go and look for them just to be sure. The front ring can be difficult to remove, it is usually sealed with lacquer so applying some alcohol on the seams will help you remove it. Remove the front ring after the front barrel is separated from the rest of the lens so you won’t stress the threads.
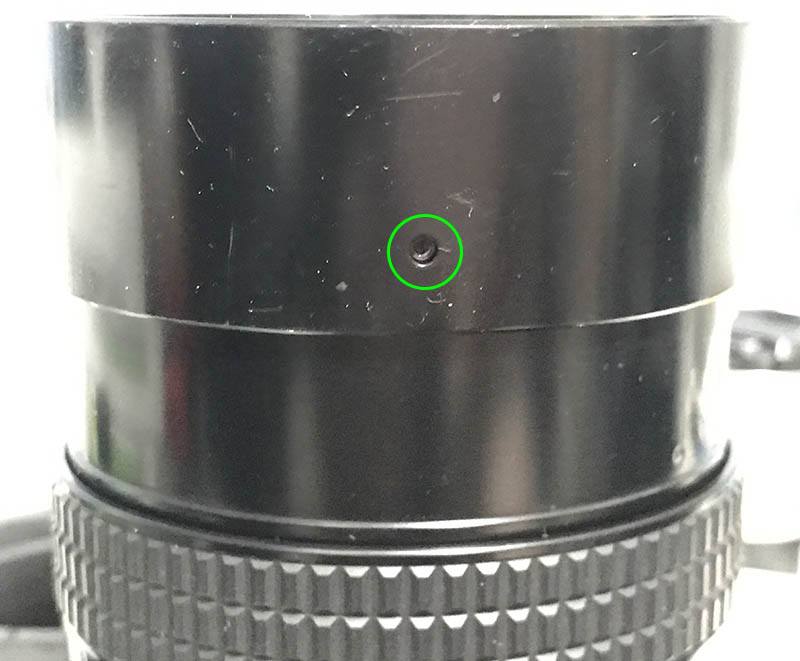
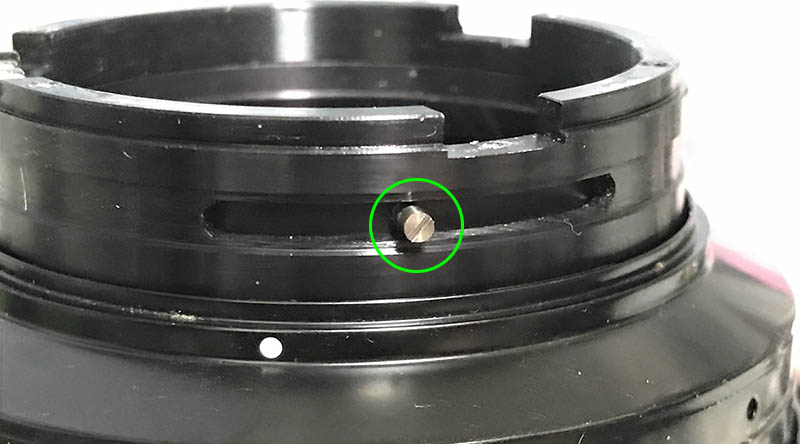
The front barrel is secured by this set screw, extract this to remove the front barrel.
Unscrew the front barrel. The dimple you see here in the threads is for that screw that we removed, it should sink into this depression.
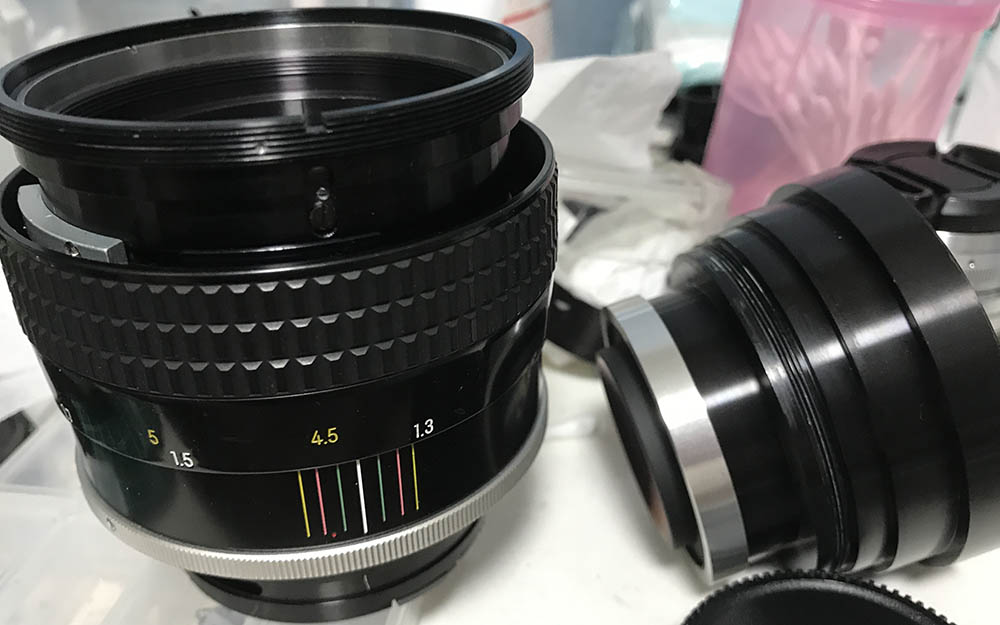
To remove the objective you’ll have to unscrew the front elements assembly first to access its retainer ring. Keep it in a safe place so you won’t scratch it.
The retainer can be removed by using a lens spanner.
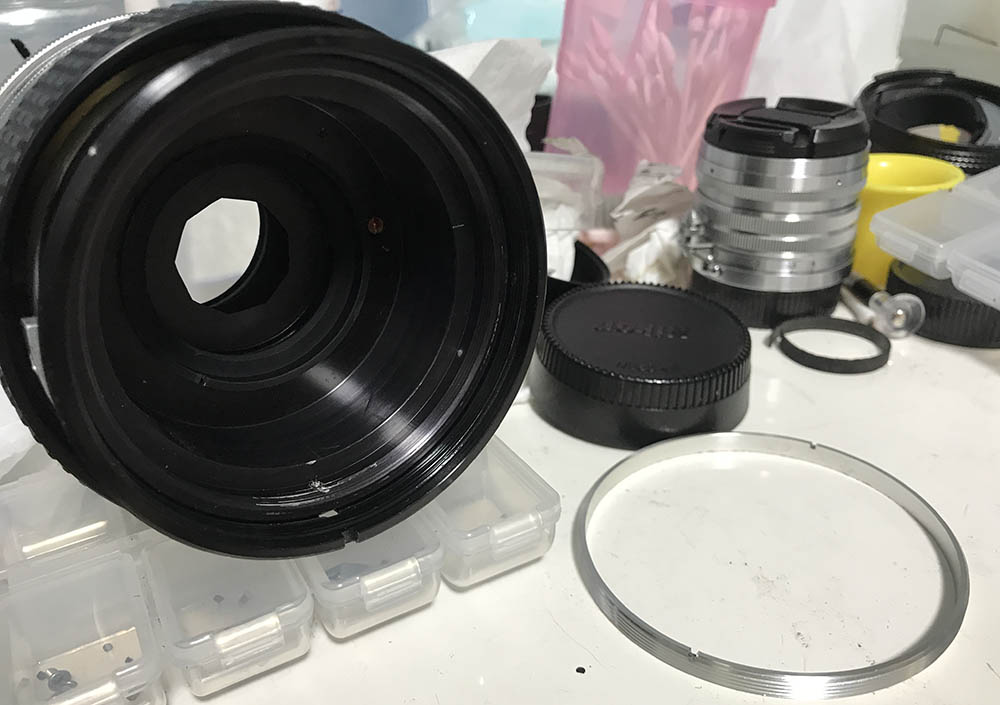
Carefully remove it and set it aside.

The rest of the objective’s housing can now be removed with your fingers.
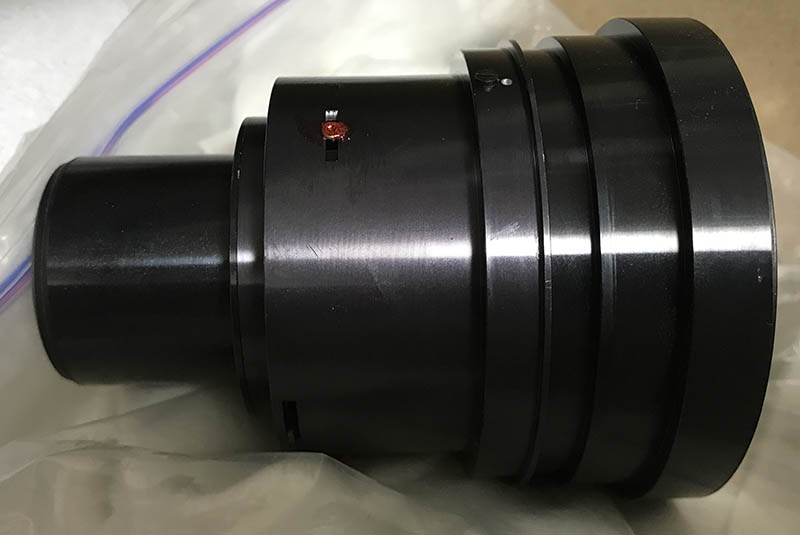
Re-install the front elements assembly to the objective’s housing and store it in a safe place so it won’t get damaged, a box will be handy for this. Let’s go back to the lens barrel after this.
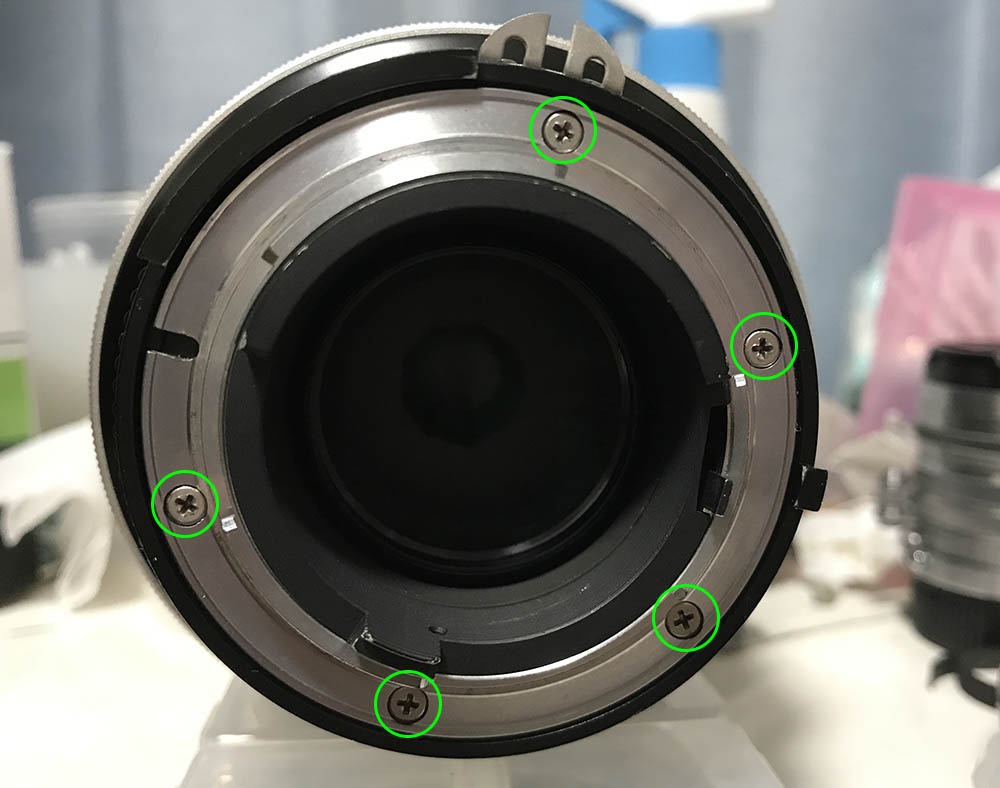
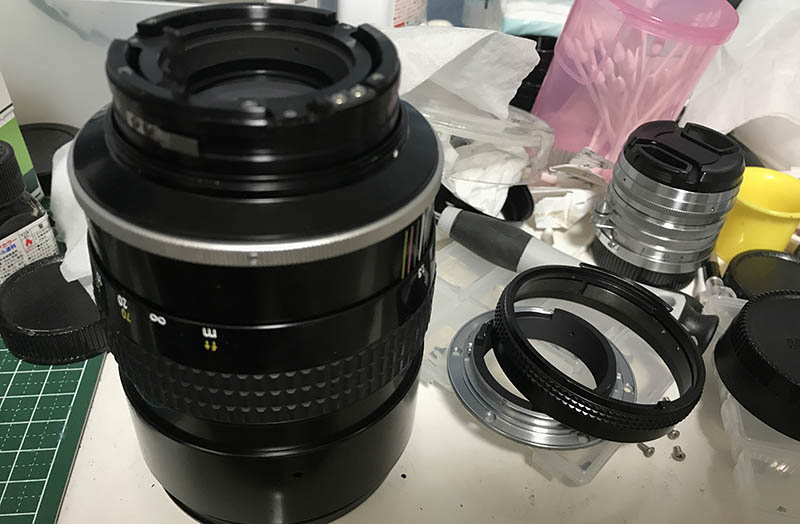
Extract these screws to remove the bayonet. If you haven’t read my special article about how to remove screws, please stop now and read it. There are many people who get stuck because they stripped the heads of these screws by using the wrong type of driver or the wrong techniques. To prevent that fromt happening to you, read and follow my screws article just in case.
The bayonet plate is easy to remove and there’s nothing that will get caught. Please disregard the fact that the front barrel is still attached.
The aperture ring can also be removed as soon as the bayonet plate is gone.

The rear baffle can be removed after extracting these screws.
Don’t forget to take a few notes so you’ll know how to put it back again.
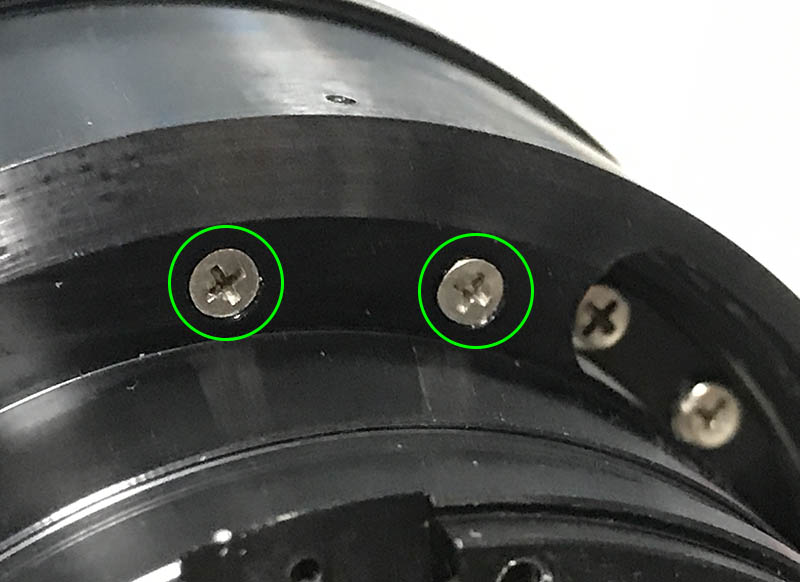
Extract these screws so you can remove the grip and the sleeve. Make sure that you’re using drivers that fit these perfectly so you won’t scar the metal parts surrounding it.
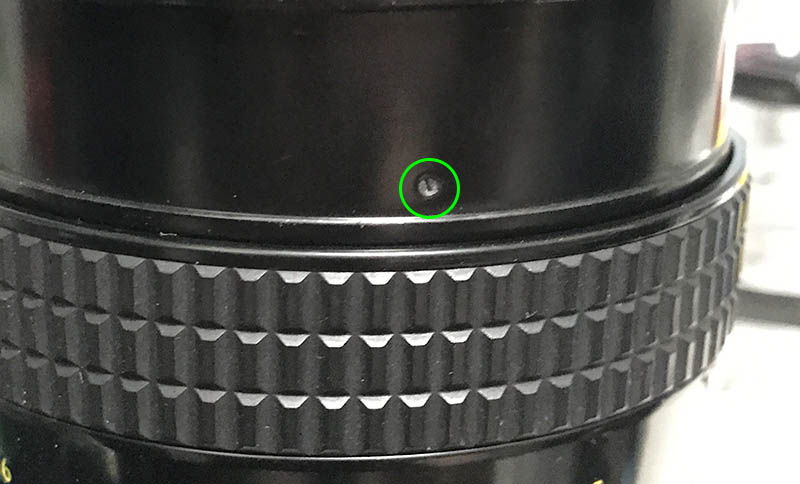
Before you can remove the sleeve you will have to extract this screw. This is in the way so it has to go. This screw couples the aperture ring to the iris, it can be damaged easily so make sure that you remove this carefully.
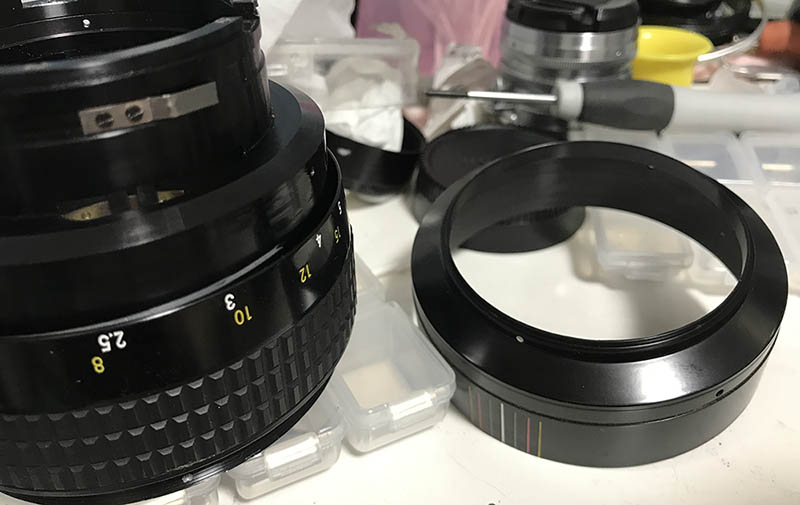
You can now safely remove the sleeve.
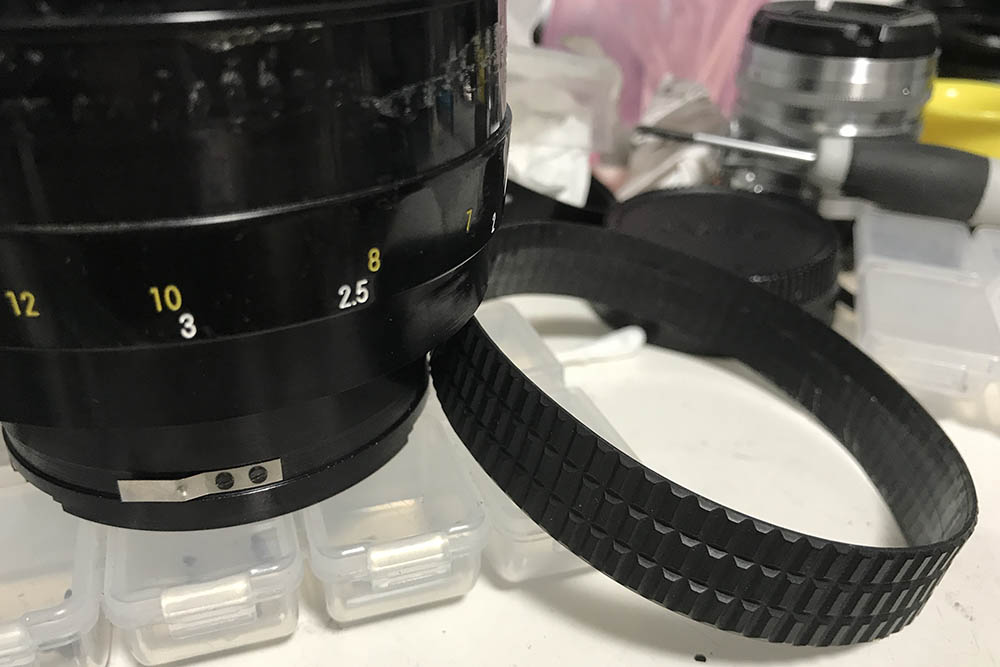
To remove the focusing ring you’ll have to remove the rubber grip first. Use a toothpick to pry and run it along the whole circumference of the grip so it will lift the rubber grip from its adhesive. Make sure that you don’t tear the rubber since these can sometimes turn brittle.

Locate and extract these screws to remove the focusing ring.

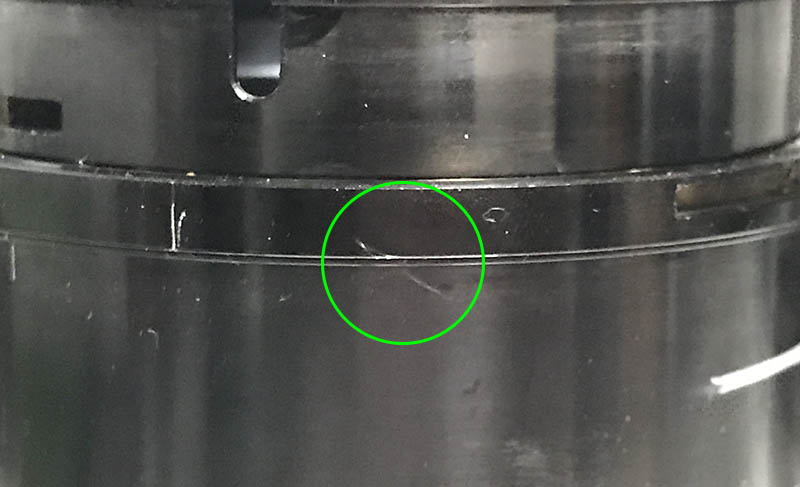
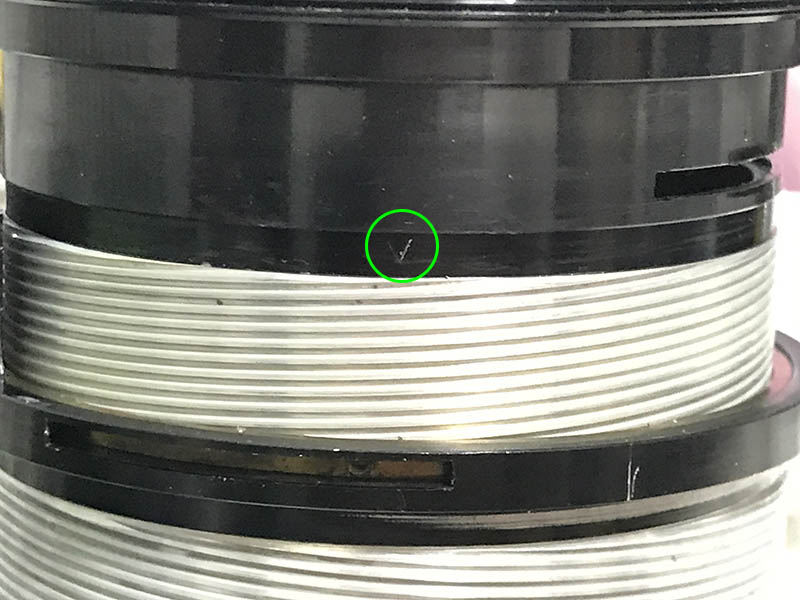
It is important to take as many notes as possible at this stage. You will want to work on the barrel while it’s turned to infinity from this point. This helps give you a point of reference when you take notes. I also made a small mark to help me know how things should be aligned when the barrel is turned to infinity. Also note the distance between the gaps as they’re also important.
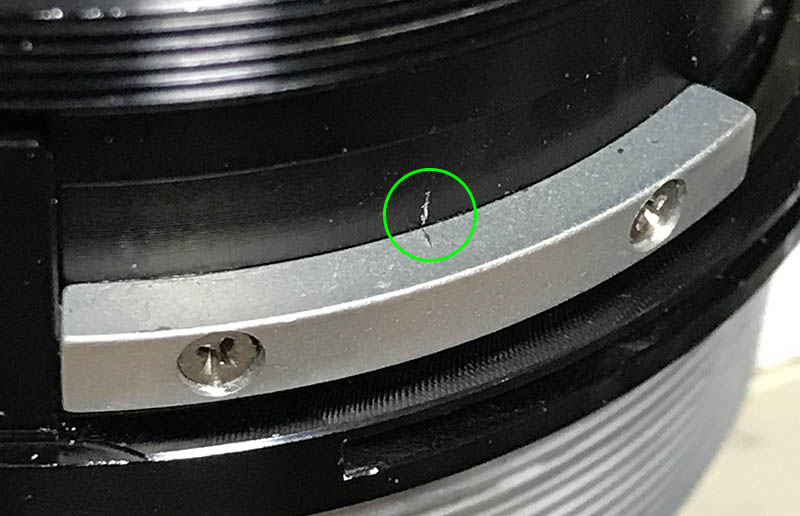
Also take note on how high this helicoid key should be. The helicoid key is used for syncing the turn rate of the helicoids so turning the central one is going to make the others turn in the same rate, extending or collapsing the whole barrel and enabling you to focus.
Once you are satisfied with your notes, extract these to remove the helicoid key. These screws are usually sealed with epoxy or something similar. Use a small butane torch to heat these really good and extract them while they’re still very hot. Epoxy only responds to heat if I remember it, this is the only way you can extract these safely.
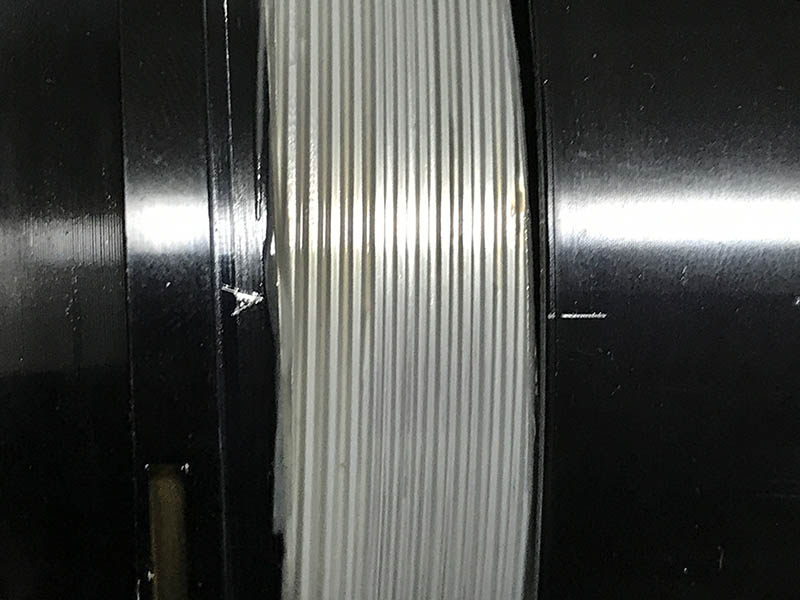
The helioids aren’t constrained now so you can turn them freely. Collapse it as much as you can and make a diagonal mark. These should roughly align when you re-assemble the helicoids later. If the lines are off by a lot you’ll have to re-mesh the helicoids again because you have meshed them in the wrong way.
The central helicoid can now be separated from the outer one, make sure to mark where they separated because this is also the part where they should mesh. Many people forget to do this so they get stuck at this stage. In order to prevent this from happening to you, read my article on how to work with helicoids and follow my tips very well.
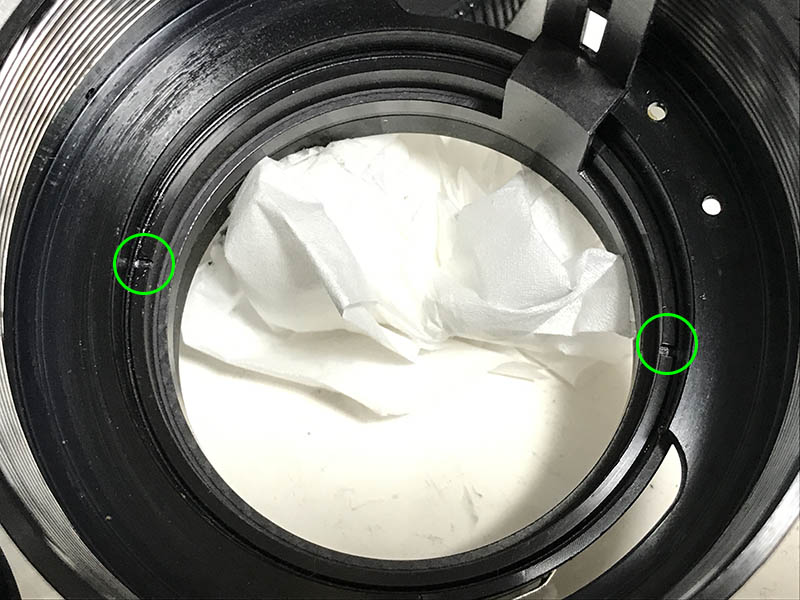
The inner helicoid is constrained by this helicoid stop. This helps prevent it from turning beyond the lens’ focusing range. It can be adjusted so make a small mark to you’ll know how to align it later. You also calibrate the focus of your lens with this part.
The brass part underneath it can be dirty so clean it well. These screws are usually sealed with a strong glue and heating them with a butane torch will make the job of extracting them easier and safer.
The inner helicoid can now be separated from the central one. Make sure to mark where they separated just like what you did previously with the outer helicoid.
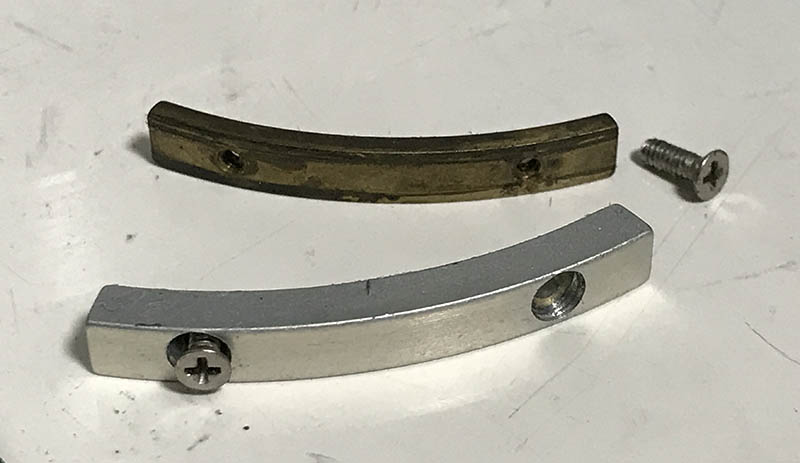
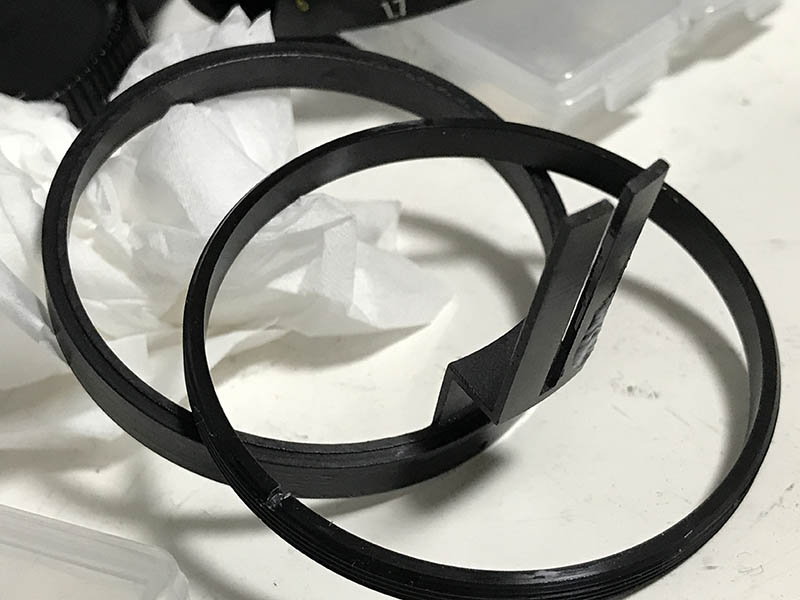
You can now remove this brass ring. This ring is where the focusing ring is attached to. You adjust the scale of your focusing ring with this, you tighten the screws of the focusing ring to finalize your adjustments.
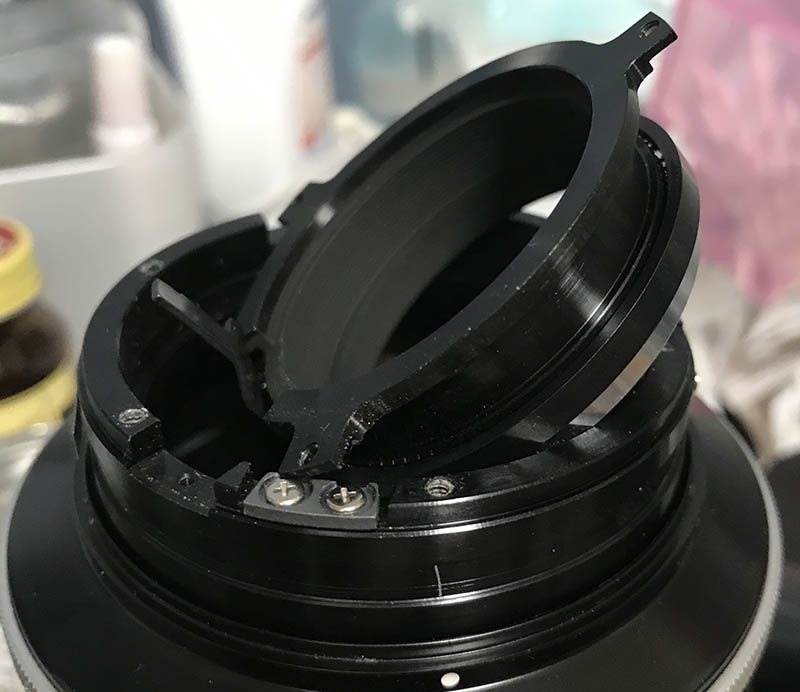
The aperture fork is being secured by this retainer. Use a lens spanner with really long bits to reach this. This may also be sealed so solvents will help a lot to soften the seal. Be careful when unscrewing the retainer, the threads are fine and you can easily cross-thread it.
Clean the aperture fork very well and make sure that it’s safe, warping this will result in an audible squeak and resistance when focusing the lens.
Clean the helicoids really well and make sure that you don’t leave residues so the fresh grease won’t get contaminated. This lens benefits from a lighter type of grease because of its rather long focus throw. Do not apply too much so the excess grease won’t migrate to the iris and cause an even bigger issue that requires a complete tear-down. You’ll want to lubricate the helicoid key and only apply a thin film on its edges. Do not tighten it at first and massage the helicoid key by turning the barrel several times until the grease is even. Tighten it a bit and then turn the barrel some more times and repeat all the steps again until the screws are tight. This will ensure that the helicoid key is seated properly and ensure smooth operation of the helicoids.
Disassembly (Objective):
The objective is massive and many of its parts were sealed at the factory. It’s not difficult to repair so long as you have the right tools and skills. I will not show you how to repair the iris in this article because mine is working fine. Everything seems perfect except for a few particles of dust in the inner part and that was easily addressed with a bulb blower.
The objective is big. It’s not too complicated to take apart but the size of the parts makes things more difficult, a slip of your hand can mean scratching the glass, instantly turning your lens into junk.
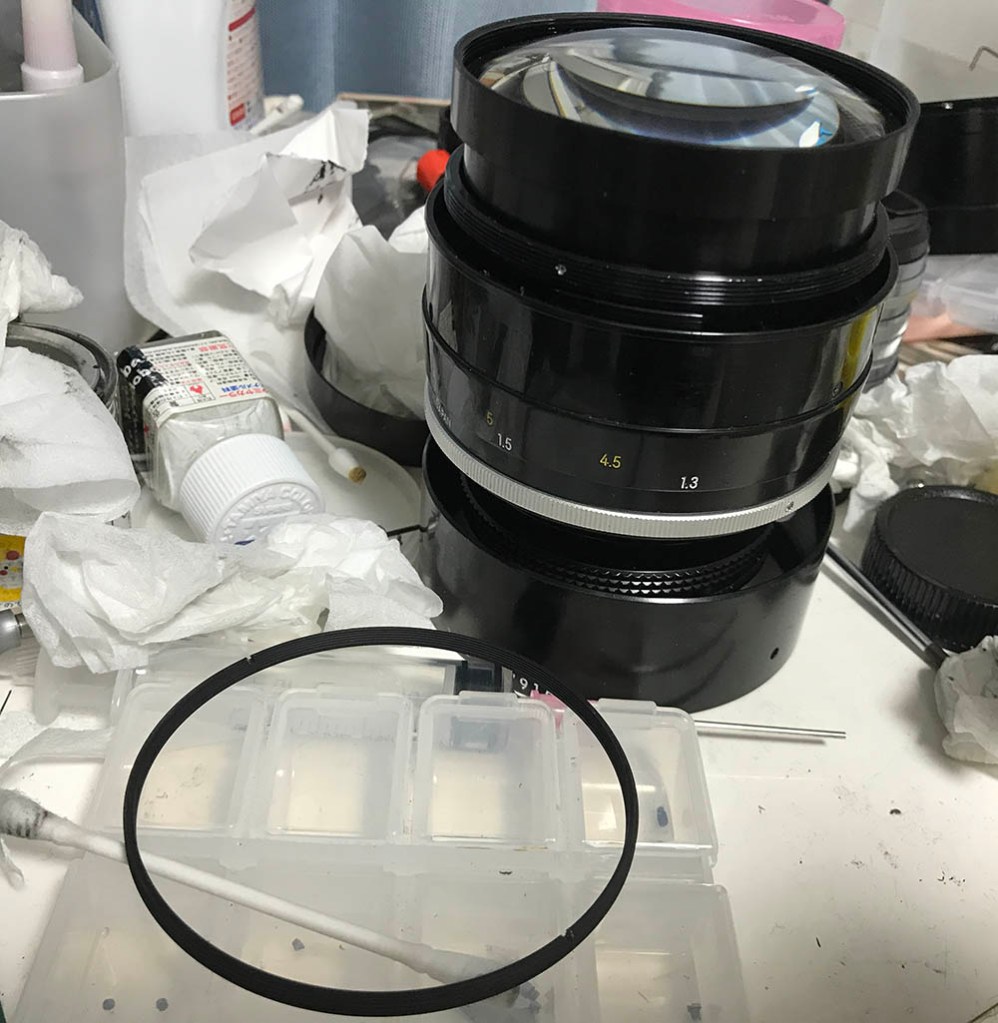
To help me grab the objective better, I re-installed it to the barrel. I placed a few drops of alcohol to the retainer ring of the front element to dissolve the seal and with a lens spanner, I carefully removed it with a steady hand. The retainer ring is usually hard to remove because it’s sealed or over-tightened so make sure that you’re prepared for this.
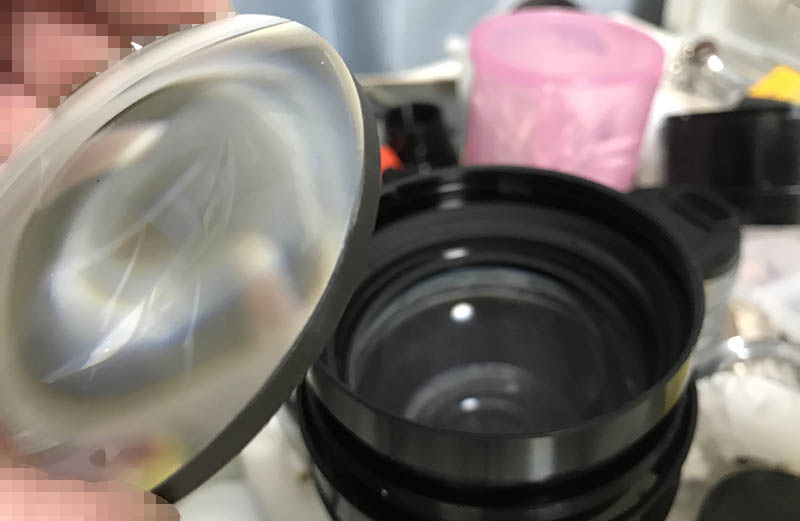
The front element can be extracted using a lens sucker or a suction cup that you see at home improvement shops. Be careful not to drop this, it is heavy and big so the sucker may not have enough suction to grab this. You do not need to remove the 2nd group since you can access it easily after removing the front element, its rear can be cleaned if you extract the front elements assembly.
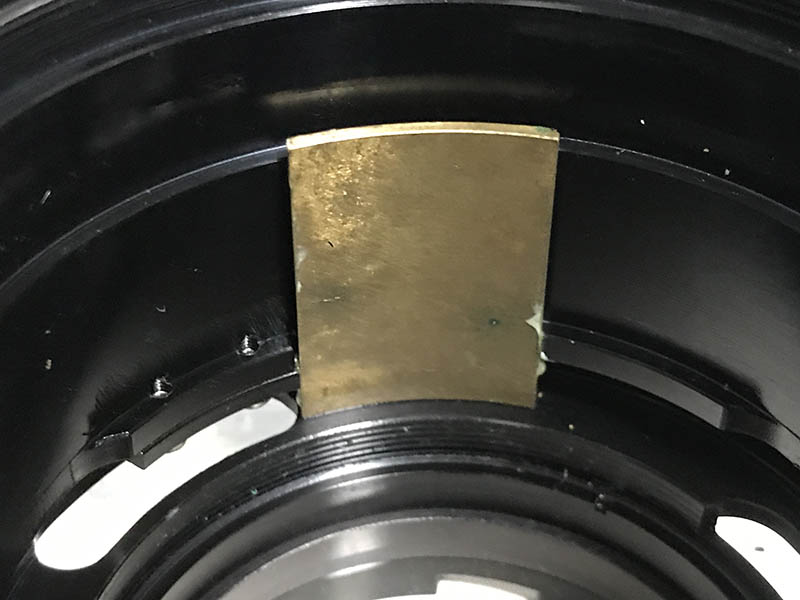
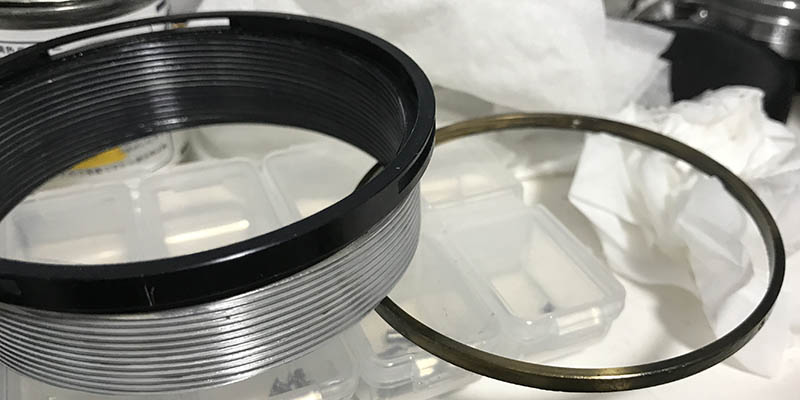
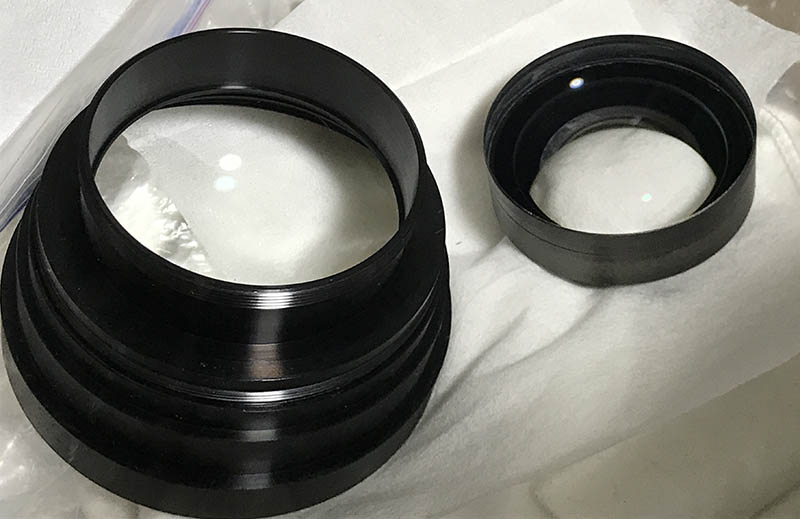
Here’s a picture of the rear part of the 2nd group from the previous section. The 2nd group consists of the 2nd and 3rd elements cemented into a single unit. It’s then glued to its collar (silver here) and you can remove it together with its collar as a single piece so long as the glue binding them is still good. My lens isn’t dirty at all so I didn’t have to open it that far.
It’s simple to extract the 3rd group after its collar is removed. It consists of the 4th and 5th elements, they were cemented together to form a unit. Don’t use plenty of solvents near this part because that may dissolve the cement.
The rear element is easy to clean through the iris, just open it and use a lint-free tissue to clean it while being careful not to damage the iris. If you have to clean it thoroughly like in the case of bad fungus damage, you can extract the rear element after removing its collar. Make sure that you return all the elements facing in the correct direction. I sometimes write a small dot using a permanent marker to help me determine which side should face where.
Conclusion:
This lens took me about 3 hours to repair with most of that time spent on its helicoids and barrel, cleaning can be very time-consuming. Re-assembling it was easy, all I had to do is back-track and leave the focusing ring out. I need to adjust the focus and that was done by adjusting the helicoid stop. After it was adjusted, the focusing ring had to be re-installed and then adjusted so the infinity symbol aligns perfectly. If you don’t know how to calibrate your lens’ focus, please read my article on how to adjust the focus of your lens. It’s a simple method that I use that works great for hobbyists. Just follow all my steps and you should be fine.
It’s now clean and fit for use. It was fun repairing this lens, I saved a lot of money because I bought this in bargain condition. This also happens to be the rarest version of them all so that’s another bonus for me.
In case you’re the type who enjoys viewing videos instead, here’s what our buddy, Kenneth has on his channel. Shown here is the Ai version but it should be similar. Subscribe to his channel, he has lots of good stuff there.
Did you like this article? I enjoyed writing this for you because this is one of my dream lenses. I have always wanted to show you this lens and it took me a lot of time to get one for the price that I am willing to pay for it which isn’t a lot if you guys know me. If you liked this article, please share this to your camera club or your friends at social media. This blog is kep alive by clicks and good-will, you support ensures that this project is kept going. This is my life’s work and I want to make this the best Nikon-related page anywhere in the net. Thank you guys again and see you next time, Ric.
Help Support this Blog:
Maintaining this blog requires money to operate. If you think that this site has helped you or you want to show your support by helping with the site’s upkeep, you can make a small donation to my paypal.com (richardHaw888@gmail.com). Money is not my prime motivation for this blog and I believe that I have enough to run this but you can help me make this site (and the companion facebook page) grow.
Buy me a roll of film or a burger?
Thank you very much for your continued support!
$2.00
Helping support this site will ensure that this will be kept going as long as I have the time and energy for this. I would appreciate it if you just leave out your name or details like your countrym name or other information so that the donations will totally be anonymous. This is a labor of love and I intend to keep it that way for as long as I can. Ric.

Jul 21, 2019 @ 05:17:22
Hi Rick
Another great article as ever. I see you still have the blowtorch in action! A bit scary for me, heating the tip of an old screwdriver – not too much of course – is a little less incendiary while still putting the heat where you need it.
Jul 21, 2019 @ 05:36:40
Thank you for writing this article I noticed the Helicoid’s are very clean on your lens did you find the lens was stiff to focus? I have the AIS version of this lens and I find the focussing quite stiff to focus so now at least I can clean them. This lens is like having two lenses in one, below 10 feet the I mages are sharp but soft, beyond 10 feet they are really sharp. And Nikons description of the lens, they explained that that was deliberate. I compared my lens to the newer auto focus lens but I must admit I like the Bokeh on my lens better. I also have focussing screens installed in both my D300 and my D700 which makes focussing a lot easier.
May 01, 2021 @ 23:17:36
Hello Richard,
Many thanks for taking the time to write the article it is much appreciated, do you know of anywhere to get a new rubber focus ring for the 135 f2 ?
many thanks