
Hi, everybody! I was considering skipping this weekend so I can rest, since I did a report on CP+ 2017 last week I feel that I can wait for next week until I publish a an article that I’m currently writing. I do listen to my readers and friends, there was a considerable interest on this week’s subject so I decided to write this instead and publish it this weekend. You guys know how much you mean to me so I can’t object.
Introduction:
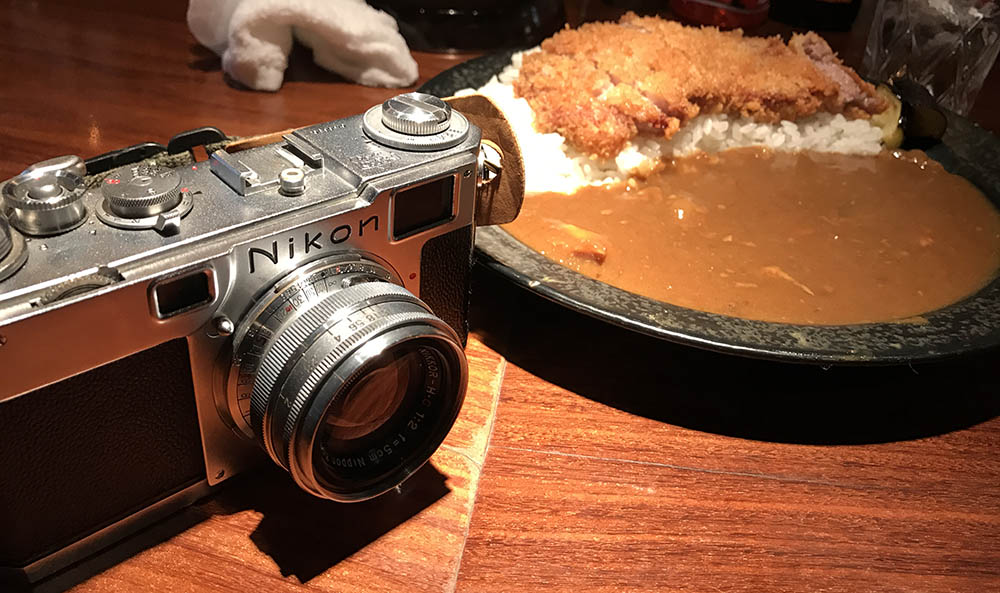
I was looking for a Nikon S2 and I found this one from Sankyo Camera. The camera was sold to me as a set with a Nikkor-H.C 5cm f/2 attached to it. They gave me the best price so far and I got a camera that I always wanted but it has a few issues that has to be resolved. It was fated that this camera ended up with me because it requires a CLA.

This is the camera. It looks nice despite its age and I got it for a nice price. It has a few issues and I will tackle some of them in this short article. If you’re keen on learning more about the Nikon S2, please read this article.
The Nikon S2 is tough, reliable and a fun to use, it also has Nikon’s brightest rangefinder. The handling is a bit quirky, it has separate dials for slow and fast shutter speeds and you’ll have to sync them together before you can use it at the correct speed while switching from slow to fast speeds. You’ll need to reset the film counter manually every time you load film but the advance is automatic. This was sold in the mid 1950s and it was designed a couple of years earlier so this was probably the best that Nikon had. Even with all the annoying quirks, the Nikon S2 is a big leap from it’s predecessor and is said to be the best Nikon rangefinder to use in terms of ease and simplicity.
Above is Tony Bullock’s video on the Nikon S2. He was helpful in answering my questions about Nikon’s rangefinders. His video shows how to operate a Nikon S2 and some of its defining features and I suggest that you watch it.

Time to bring out my cheat sheet, it’s good thing I have this. It didn’t explain much so I had to find how some things work myself. It’s better than nothing though and I find the section for shutter replacement helpful and I think it’s the intent of this repair manual and not the usual front CLA that we want to do. I call this front overhaul because we’ll be opening and cleaning the front parts of the camera. I was into cars and maintaining the valves and tappets of an engine is called a “top overhaul” because these parts are found on the upper part of the engine block and I borrowed the term and logic from that.
The complete repair article is found in my Nikon S2 repair series. Read that article to find out more about the Nikon S2. These articles are just meant to be simple, fun and educational and by no means a real repair article. If you need to repair your camera, send it to a real repairman. They have the skill and tools for this. Trying to fix them yourself will just result in a bad job.
Before We Begin:
If this is your first attempt at repairing a lens then I suggest that you check my previous posts regarding screws & drivers, grease and other things. Also read what I wrote about the tools that you’ll need to fix your Nikkors.
I suggest that you read these primers before you begin (for beginners):
Reading these primers should lessen the chance of ruining your lens if you are a novice. Before opening up any lens, always look for other people who have done so in Youtube or the internet. Information is scarce, vague and scattered (that is why I started this) but you can still find some information if you search carefully.
I highly recommend that you read my working with helicoids post because this is very important and getting it wrong can ruin your day. If I can force you to read this, I would. It is that important!
For more advanced topics, you can read my fungus removal post as a start. This post has a lot of useful information and it will be beneficial for you to read this.
Calibration (Rangefinder):
To determine wether your rangefinder needs to be adjusted focus to infinity and look through your viewfinder and see wether the rangefinder patch is solid or showing double images of an object that is very far. Your subject in which you want to focus on to has to have vertical and horizontal lines and a building will be perfect. If it’s off by a bit then you’ll have to adjust it. Mine wasn’t perfect but it was working fine, I can live with it but I just saw this as a chance to tinker with my Nikon S2 and show you how I did it.
Just like lenses, if you got the infinity focusing wrong then it will affect all of the distances down the scale. What’s 1m in the scale can actually be 1.2m if you get what I mean. This is not an SLR so this makes nailing the focus even more important.
You will need a steady pair of hands, the correct tools and some know-how with working with mechanical things. I will caution you that you should be careful not to scratch anything. If you have to, cover the surrounding areas of a screw with masking tape to help guard it against an accidental scratch.

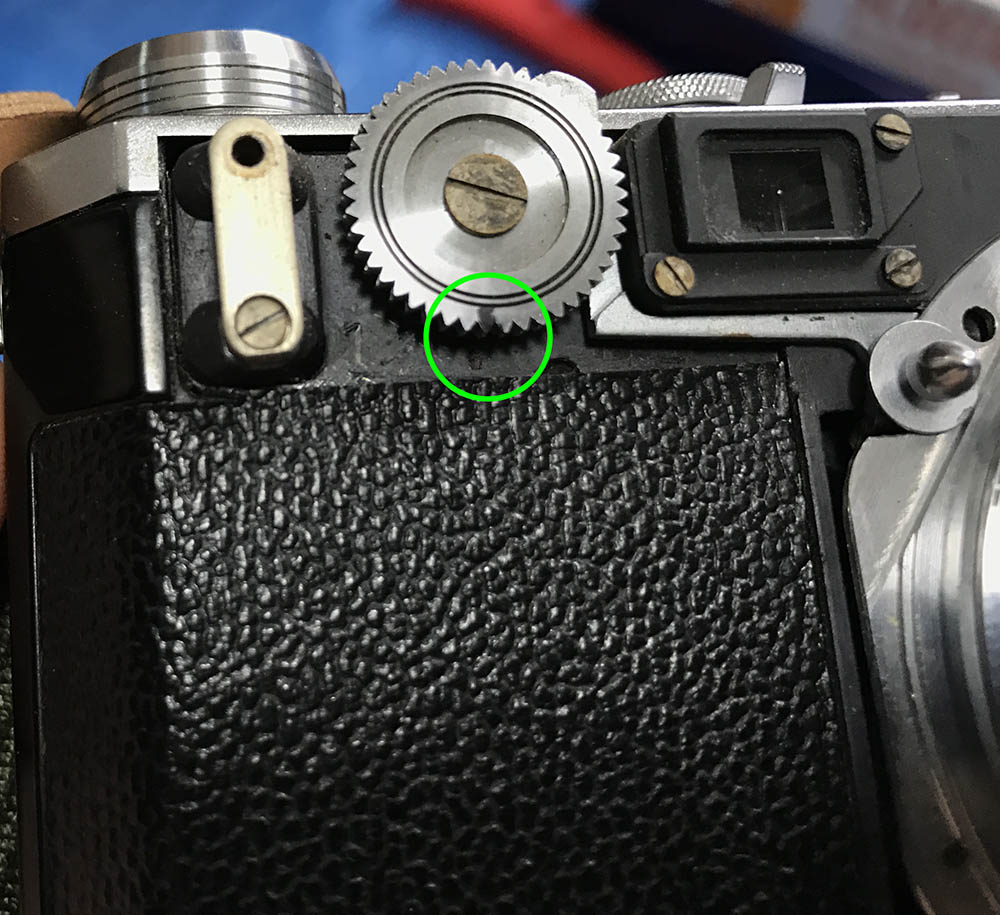
Carefully remove these four screws at the front bezel, don’t forget to set the distance to infinity just in case so nothing moves as you are doing this. You have to use the a driver that fits on the screws and if yours don’t then make one fit by using a file. These screws are so prominent that if you ruined that nice chrome plating or damaged any screw heads then you will have to give the camera a new name – “scarface”.

One of the screws is not like the others. The screw found at the upper-right hand corner of the camera is longer than the rest.

Once all 4 screws are gone, carefully lift the front bezel from the bottom of the camera. It will not go any further, however. The focusing wheel and its locking lever is in the way that’s why. Don’t force your way or you will warp the front bezel, it’s delicate.

You will have to carefully maneuver this corner of the bezel so that it can come off. Press the locking lever to help you get the bezel off.
When putting this back, never over-tighten the screws or else you will leave a depression around the screw and it looks ugly.

Time to adjust the rangefinder. This is a precision instrument so handle this with care. The viewfinder can be recalibrated like this and it makes routine maintenance a breeze. However, to fully calibrate the rangefinder, you will have to open the top panel to access some other parts in the mechanism.
I have outlined 3 things that you’ll have to adjust in order to calibrate your rangefinder and the order that you should go about working with them. I’ll have to warn you that you should work in the order that I outlined because the adjustments are all inter-dependent. Fixing #3 first and then going to #2 will NOT work since they are connected to each other and will throw #3 out of calibration. Just follow my sequence and you should be ok. I colored it in RGB to make it easier to follow.
- Turn and loosen the Tightening Screw (TS) of the Vertical Adjustment Wheel (VAW). A few turns should do the job. The screw is delicate and old so be careful and use driver that perfectly fits the slot on TS’s head
- A word of advise, the VAW sits deep inside the hole so be patient while working with it. Removing the top cover will give you better access to it but that’s too much work for routine maintenance. Get a thin plastic toothpick and pick on the VAW until the image lines up vertically in the rangefinder patch. What I did was I have the camera in my face and focused it on an aerial (antenna) around 4km–5km from where I am. Be sure that the helicoid is focused all the way to infinity for this. Now, with a careful flick of my toothpick, I carefully adjust the wheel until the aerials are focused and not displaying any double images at all. After you are satisfied with your results, tighten TS and be careful NEVER to over-tighten this. That’s all for the vertical adjustment part.
- Finally, we are at the last and easiest step – the horizontal adjustment. I focused the camera on the aerial (infinity) and with a flat-head driver placed squarely on the Horizontal Adjustment Screw (HAS), I carefully turned the HAS until the horizontal lines are perfectly aligned.
It is tedious, but it can be worse for cameras from the other brand. If all you want to do is to calibrate your rangefinder then skip the next section.
Disassembly (Helicoid):
You should make a big decision at this point, do you want a quick-focusing wheel but have a dry-feeling helicoid or have nice and smooth helicoid and a damped focusing wheel. I wanted to turn the lens manually so I chose the former.
This was easy for me but like working on helicoids in lenses, you will always want to mark where it separates. I will not be scratching the beautiful finish of my camera so I am using a permanent marker for marking this.

Carefully remove these screws. Be careful that you do not damage the bezel of the mount because all of the beautiful numbers were engraved on it. You will also want to watch-out for the shims under these screws. Don’t lose any of them because that will prevent your camera from focusing properly.
The focusing wheel and its mechanism is free-turning so don’t have to think about it but I marked which direction should be facing down just in case. I’ll wipe the ink later with alcohol and tissue.

You may be tempted to extract the mount as soon as you removed its screws but just wait for a bit and examine it first before you damage anything. The locking lever is on the way so you’ll need to depress and fiddle with it until you can safely get the mount off. It’s a tight fit so be careful.

You can now access this gear. This is part of the focusing wheel’s assembly and it’s connected to the helicoid directly. I used a cotton swab that’s soaked in lighter fluid to clean up whatever gunk is there. I then lubricated it with fine oil for cameras. A little goes a long way and all I needed was to apply a small drop using the tip of my precision screwdriver. Capillary action will take the oil where it’s needed. Never over-lubricate anything when working with cameras. I remember my days as a boy in my grandpa’s watch repair shop and we would even use a needle to apply oil to the cogs inside a watch movement. If you overdid it, the oil will spatter. Now, turn the wheel so that you condition it with the fresh oil.
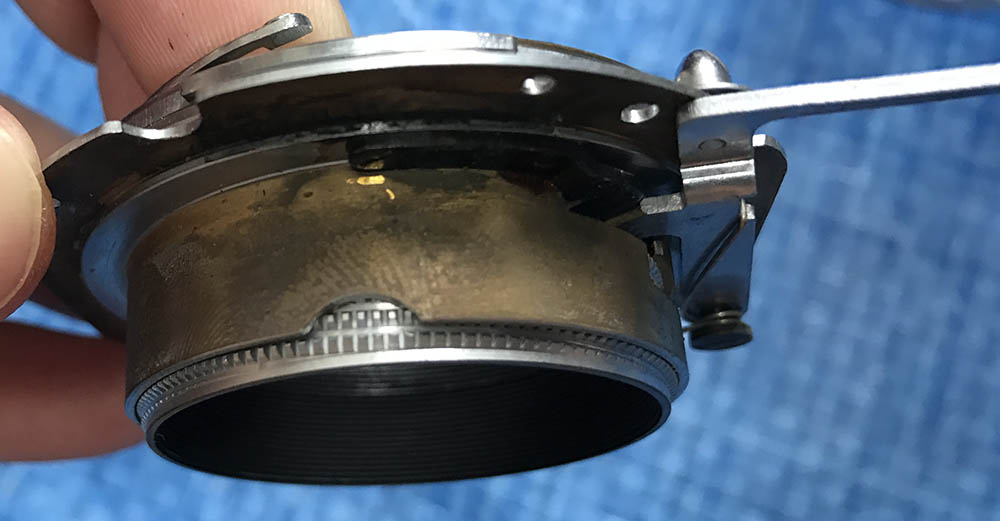
Here is the helicoid. This is very different from what we have been seeing so far on our lens overhaul articles because the male threads are serrated. See the spring? It’s there so that the locking lever returns automatically. Study it and how it works before you dismantle it.
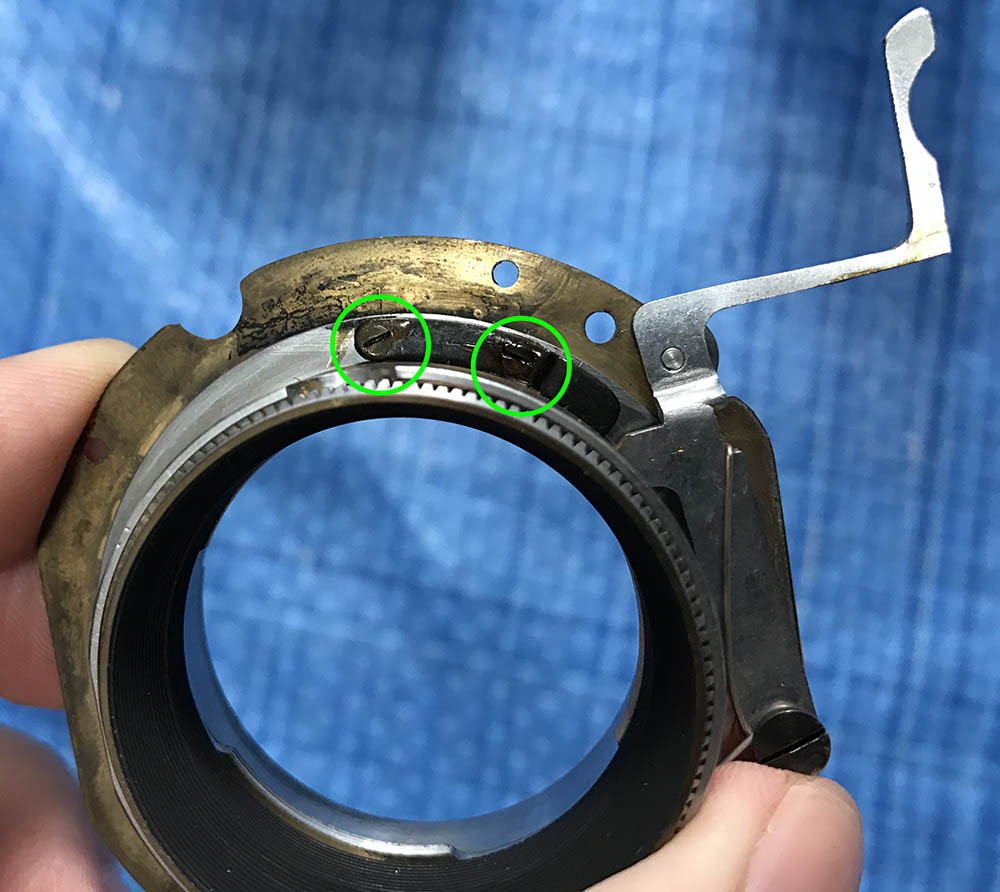
Just like the helicoids on a lens, this thing also has a helicoid lock. It is there so that it won’t go past its focus range from 3ft to infinity. Remove it so you can separate the helicoid.

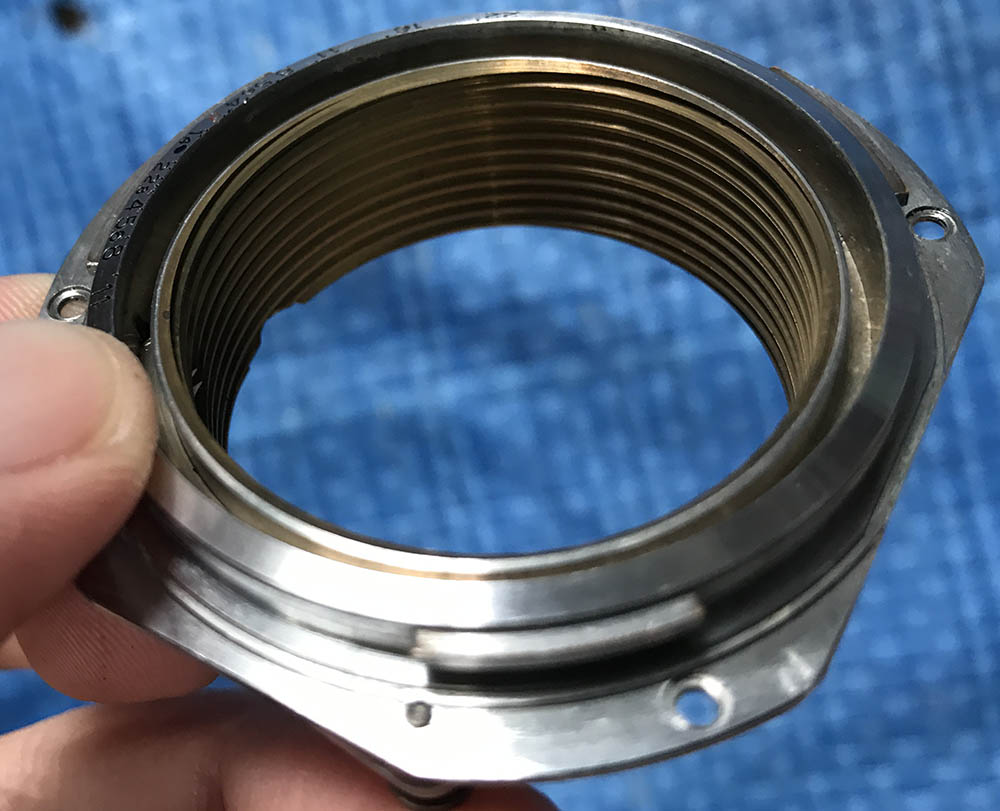
Once the helicoid lock is gone, you can unscrew the helicoid from the mount. You will have to press the locking lever so that the helicoid is unobstructed. This one separated here at around the 3ft mark. I looked at the female half of the helicoid and I counted 3 positions where the helicoids will mate so be careful and use a pen to mark where yours separated!

What a work of art. That groove that you see here is where the helicoid stop and the focus lock reside and how it limits the movement of the helicoid. It looks clean and dry. Nikon intended it to be this way, I guess.
Here’s the other half. I carefully cleaned this with lighter fluid and alcohol just to make sure that no residue is left. This is a difficult part to fabricate.
I lubricated this with the lightest grease I have and I only applied a thin film of grease. It’s not good to over-lubricate it because it will make the focusing wheel more difficult to turn. Using graphite powder is also a good option, it is dry and will stay that way so the helicoid will not gum-up.
Conclusion:
This will be a great exercise for a slow Sunday morning. These cameras are great, they were made tough like the VW Beetles in that they will function forever so long as you maintain them properly. Compared to cameras from the other brands which needs maintenance from time-to-time, this will run for decades without maintenance and the one that we just did together here is probably all that this camera will need for a long time and she will “love you long time” even long after your tired of her.

I can never work with feet so I used a red marker and wrote numbers that correspond to the metric equivalent of the important distances to me on the scale. I can use alcohol to wipe these off later.
This is a very handsome camera and it will make you the talk-of-the-town, if you live in a hipster town, that is.
This simple article is part of a bigger series on the Nikon S2. Please read the whole series to see what’s inside of this wonderful camera.
- Part 1 (Top & Front Panel)
- Part 2 (Internals & Rangefinder Mechanism)
- Part 3 (Film Advance, Speed Selector & Timing Mechanisms)
- Part 4 (Shutter Mechanism)
- Front Overhaul (Rangefinder Adjustment)
Thank you very much for reading this, I hope that you enjoyed it and share this with your friends. There sure isn’t a lot of things online for the Nikon S-mount cameras so I hope that this is going to find its way to somebody who needs this the most. Thank you very much for your support, Ric.
Help Support this Blog:
Maintaining this blog requires money to operate. If you think that this site has helped you or you want to show your support by helping with the site’s upkeep, you can make a small donation to my paypal.com (richardHaw888@gmail.com). Money is not my prime motivation for this blog and I believe that I have enough to run this but you can help me make this site (and the companion facebook page) grow.
Leave me some tip?
Thank you very much for your continued support!
$2.00
Helping support this site will ensure that this will be kept going as long as I have the time and energy for this. I would appreciate it if you just leave out your name or details like your countrym name or other information so that the donations will totally be anonymous. This is a labor of love and I intend to keep it that way for as long as I can. Ric.

Mar 08, 2017 @ 05:32:25
Hi, nice write-up! I’ve done this to several Nikon rangefinders and your instructions are thorough and correct. One thing I noticed is that your Nikon’s helical mount wasn’t shimmed. Often, but not always, there will be very thin washers under each screw between the mount and body. It’s very important to note the location of each washer and return it to it’s original position when placing the mount back on the body. If not, the camera will never focus optimally.
Also, I never use grease on the helical. I prefer a thin coating of graphite or nothing at all. This is a personal preference since I like to focus using the focus wheel and it works best with a dry helical.
Mar 08, 2017 @ 07:16:17
Thank you, Peter!
I got a cheat sheet so that helped me find my way through the whole thing.
Yes, here in Japan many people use graphite that can be bought from the tripod section (for ball heads) for the helicoid. They told me that if the helicoid is damped, the focusing wheel will wear faster.
As for the washer, I don’t have anything at all! Maybe that is the reason why I am having inconsistent readings from the RF. I am pretty good at calculating distances up to 4m accurately by eye so I notice there is something off. I will check my repair manuals for how these things look. I hope that I can find a similar gauged shim. Thanks, Peter for the guidance. I really appreciate that! I hope you don’t mind me adding this to the article. Ric
Mar 16, 2017 @ 22:47:21
Shimming yourself would be very hard without the right equipment. At the factory, each camera was placed on a specialized device to measure focal flange distance. If the distance was not within tolerance across the whole image plane, the mount would be shimmed with very thin washers wherever needed. These shims were fractions of a millimeter in thickness. You might find one to three shims under one mount screw, and sometimes no shims were needed. Evidence of misplaced shims would be uneven sharpness across the image plane, or focal point inconsistency. In general shooting situations you might not notice. And again, your Nikon may not have needed them.
Best of luck!
Mar 17, 2017 @ 00:59:19
Thanks! Unfortunately I found no shims at all. It’s either the previous guy lost them or mine never needed them at all. I am not overly-concerned by the fact but I do have 2 crude devices at home for collimating and I will try to modify it for chart testing and see wether the focus plane is OK. I will be doing the same on my S3 and S that I both got as junks and I hope that they are shimmed if ever they need to have them. Shutter replacement might be a bigger job to look forward to on the S. Ric.
Mar 23, 2017 @ 00:17:21
I had the problem with one S2, and found that “MWS2” machine washers could be used for the helical. With this particular S2, I shimmed it and adjusted the rangefinder to use it with Contax lenses. Worked well enough to use with a ‘C’ontax version of the Nikkor 13.5cm F3.5. It usually has a Zeiss Opton 50/1.5 on it.
http://www.digicanmc.com/HTML/Sec_8/8-13.htm
Mar 23, 2017 @ 06:29:12
I see! I think that I am fine where I am at now with my S2. Thinking about it now, my collimation aids will probably NOT be adequate for this level of fine adjustment. Checking things out at infinity is one thing, checking charts by eye is another. Ric.
Mar 19, 2017 @ 11:18:35
>It has a “C” engraved on it denoting that it was coated with ancient lens coating technology that isn’t up to snuff compared to current ones but that was a big deal in the olden days.
Congrats on the S2 and Nikkor-H 5cm F2. A fine first step into the world of Nikon rangefinders! Regarding the lens coatings used on Nikon rangefinder lenses, the quality is actually very good, and the coatings are generally hard and resistant to scratches. Certainly superior to coatings used on Leica/Leitz lenses of the same period. I’ve heard that Nikon gained a lot of their lens coating know-how from their experience coating submarine periscopes before and during WW2. I cannot vouch for the accuracy of that information, but considering that Nikon did indeed used to make optical components for the Japanese military, it is certainly a plausible story.
Mar 20, 2017 @ 13:24:52
Hello, Jon!
Yes, Nikon’s coatings are tougher than Leica’s. My S.C ghosts and flares. I get a pinpoint ghost when there is light hitting the lens from the side. Maybe I should use a shade! The flare is of the veiling type, which can be pleasing depending on the person’s taste. Ric.
Mar 20, 2017 @ 13:25:37
By the way, My collection has grown! I will make a full overhaul article for the S, including a shutter change.
Sep 16, 2018 @ 16:33:24
I have an issue whereby the thumb wheel turns the helicoid – the lens assembly goes in and out but the rangefinder image stays the same and does not move. I conclude the the rangefinder is separated from the helicoid so does not register. Based on your article, the first thing that comes to mind is the locking screw for vertical adjustment has loosened and the VAW is not turning. Does this make sense to you? Do you have any other suggestions or concerns about this particular problem? Your article is great and has really helped me understand this mechanism! Thanks!
Rob Lilley
Belvidere, New Jersey
USA
Sep 16, 2018 @ 22:19:54
Hello. Glad that you liked it. It sounds like it has been uncoupled. the only thing I can think of is the rangefinder assembly got stuck due to grime or corrosion. that thing needs a CLA. Rick.
Sep 08, 2022 @ 15:08:51
Thanks so much for the awesome instructions. I have just successfully completed the repair of the stuck rangefinder on my S2. I wouldn’t have dared to disassemble the Nikon without your detailed manual. Mike from Czech Republic.
Oct 17, 2024 @ 14:23:14
Thank you for taking the time to write this detailed article! I recently purchased an S2 and have really enjoyed using it. However, a friend’s rambunctious dog knocked it off a table the other day and the vertical adjustment of the RF is way off. I tried loosening the tightening screw and adjusting it as described, but it doesn’t seem to change. If anything, the projected image only moves horizontally. Is it possible I’m not turning the wheel enough? At infinity, an object in the top of the RF patch is just barely visible at the bottom.
Thank you!
Jesse