
Hello, everybody. I’d like to show you this interesting display that I saw on how a piece of optical glass is turned into a lens element, the finished item used on lenses, binoculars or glasses. Nikon (then Nippon Kogaku) was formed to make Japan self-reliant when it came to manufacturing optics for medical and scientific uses. Japan used to import lots of stuff from Germany and that’s draining the national reserve so a solution had to be made. The formation of Nikon not only gave Japan the ability to make her own optics, it also made it possible for Japan to make her own research and development. All of these happened in the years leading to the Great War (WW1) so you can say that Nikon has the heritage and experience in this field so you can even consider Nikon as the “Asian Zeiss”. I need to give you a short intoduction on Nikon’s heritage so you can appreciate that a company with a long history in optics is showing us how their lenses are made.
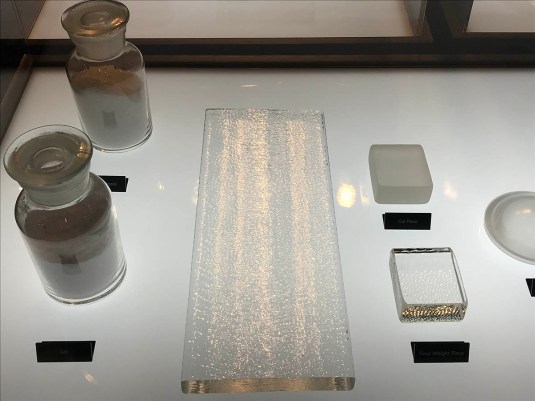 The vials to the left contain some of the materials used in creating optical glass. Its usual component is silica and rare earth elements or other additives are added to alter its base refractive index or other properties. Every manufacturer uses a different recipe for their glass and they even variations within their formulas for special purposes. The big slab of glass you see at the center was cut from a big ingot of cast glass. It’s then cut into smaller pieces like what we see to the right and it’s then ground-to-shape before it gets processed even further. This will be a constant process of refinement before we get to see the final product. It’s very time-consuming and labor-intensive to say the least.
 A lens element is the basic unit in a lens design. Some elements are cemented together to form a more complicated shape and these are called “cemented groups”. A group is just a term used to denote a single unit in a lens design. In our example above, we have a 7-in-5 design which means there are 7 separate lens elements in all and they are arrayed in five groupings or units. The 2nd and 3rd elements are cemented into one single group and is considered to be a single unit and the same can be said for the 4th and 5th elements. This makes this a 5-unit design and hence, the 7 elements in 5 groups name. If the elements in the design above were never glued then this would be a 7-in-7 design. I hope that I made it simple enough for you to understand but that’s basically it.
 Here are the key steps in grinding a lens element after it was shaped from a huge chunk of optical glass. The steps shown here is simplified to make it easy to understand and I’ll add commentaries to help expand on what really happens behind-the-scenes and I hope that I got it correct because every manufacturer does their thing differently.
 The lens blank is basically the state of the glass as it came out from the mold after cooling naturally. Unlike steel, these should never be shocked with water to cool them down as it will cause the glass to crack when it rapidly contracts. I am not sure if Nikon uses a fan to cool these down faster but that is a possibility. Lens blanks can either be cast or shaped. I saw a picture of people shaping square chunks that were cut from a big ingot. The size of the ingot is crucial because it allows the manufacturer to create larger pieces of glass.
 Next step is to shape it by grinding it with a precision optical grinder. The rough pits you saw on the lens blank are basically gone but we’re still left with a matte-finished surface. This will be polished with finer and finer abrasives until it ends up with a mirror-finish. each lens element is fixed into the grinder using pitch (pine resin) or similar stuff and its surface is ground using a small cup.
 The lens element is then ground even further to shape and smooth it even further. This is a precise process because any mistakes here will cause the curvature of the lens to differ from what’s ideal.
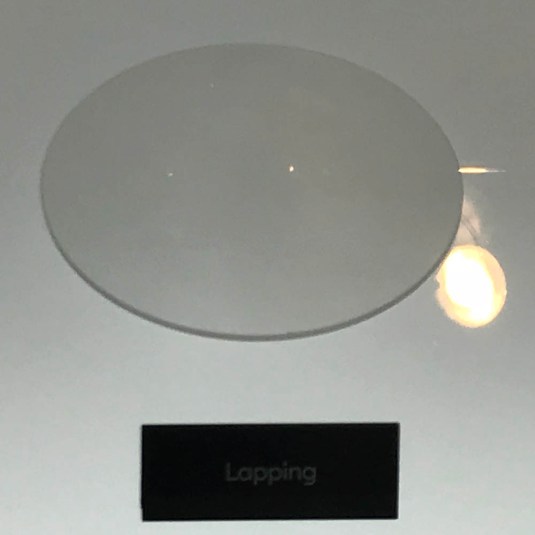 Lapping is the name of the process wherein you polish an object with an opposing object that has the same contour as the object that you want to polish. I know it sounds vague, a simple example is when you polish a male helicoid with its opposing female partner and you apply an abrasive cream like metal polish or lapping compound to the threads so it’s going to polish-away anything that doesn’t match the contours of both threads. I do this a lot with the helicoids for my Nikon and Contax cameras to make them smooth. This takes a long time to process and the usual abrasive used by the industry is cerium oxide that is mixed with water to form a slurry. The opposing surface is usually in the shape of a cup, that is why conventional lenses all have a spherical profile. An aspherical lens is polished differently because its profile isn’t spherical and it requires some manual labor and that is why they cost more to manufacture. This process is very time-consuming and wastes a lot of water and abrasive that is why many big manufacturers filter the washed slurry to re-use the water and sediments to cut cost and help save the environment.
 The lens element is then polished with a finer abrasive or cerium oxide with a finer size in order to achieve a very smooth finish. This thing will then be bathed and cleaned with a solution in an ultrasonic cleaner to remove any sediment or residue before it’s coated. Sorry for the blurred pic!
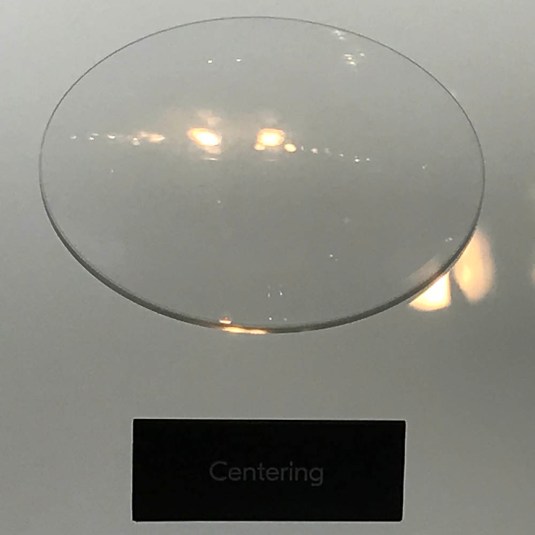 Centering is done with cemented groups wherein multiple lens elements are cemented to form a single unit. Their centering is done using a machine called a collimator. Doing this step manually is not as precise and takes a long time under a microscope. The cemented elements are spinning on a turn-table and then you nudge the elements into position and check the picture formed at the center with a microscope to see if reproduces the pattern underneath it clearly. When this is done, the cement is cured with UV light to make your changes permanent. Canada balsam was used back-in-the-day, the same thing that’s used on microscope slides. This takes a longer time to cure and some people will even claim it doesn’t really cure 100% at all because the center has no contact with air. This step is not done for singular groups so I don’t why it’s here, maybe I am missing something so if you know something that we don’t please don’t hesitate to correct what I Just said.
 The final step is to coat the lens if it needs to be coated at all. The common process today is to vacuum-deposit copper sulfide or other materials on to the glass substrate. I am not sure if people still spray the coating these days like what people did back then. Dipping a lens into a chemical bath and baking it to cure the coating is an older technology. I do not know if anybody still do this but the coatings that were made this way are usually tough. The baking process is like porcelain glazing in the sense that you end up with a resistant layer of thin coating that’s not going to be easily-scratched or rubbed-off. Older German lens coatings tend to be fragile and Nikon’s coatings have always been tough. Nikon made the optics for Japanese submarines’ periscopes during the war and the experience that’s gained from it carried-over to our Nikkors.
There are more steps involved in creating a lens element such as quality control and the use of precision measuring devices like lasers to check for a lens’ curvature, flaws, etc. It will take more than what’s shown in this exhibit to accurately depict what’s going on and it will make this exhibit too-detailed. I hope that you learned a few things about how the lenses used in your Nikkors are made and appreciate just how much effort goes into the process. If you liked this post, please share this with your friends and tell them about the blog. See you again in the next article, Ric.
Help Support this Blog:
Maintaining this blog requires money to operate. If you think that this site has helped you or you want to show your support by helping with the upkeep of this site, you can simple make a small donation to my paypal.com account (richardHaw888@gmail.com). Money is not my prime motivation for this blog and I believe that I have enough to run this but you can help me make this site (and the companion facebook page) grow.
Leave me some tip?
Thank you very much for your continued support!
$2.00
Helping support this site will ensure that this will be kept going as long as I have the time and energy for this. I would appreciate it if you just leave out your name or details like your country and other information so that the donations will totally be anonymous it is at all possible. This is a labor of love and I intend to keep it that way for as long as I can. Ric.

Nov 14, 2018 @ 07:40:08
Really interesting info, thanks for all the detailed explanations,
Mar 26, 2021 @ 14:39:46
they used water in the first process 🙂
.
Mar 26, 2021 @ 14:48:28
from 1961, some things simillar
.