
Hello, everybody! Let’s talk about something more simple. I have been collecting Cine-Nikkors lately and they’ve been all adjusted so I could focus properly to infinity. I will show you how I create my shims in this article.
Introduction:
Shooting with different systems sometimes require different methods to adjust a lens. The methods are vary from easy to difficult and at rare times even impossible depending on the situation. I’ll show you one method I use to achieve this and teach you how I make them. While making shims to adjust a lens’ focus is universal I’ll concentrate on using them to adjust the tiny D-mount lenses in this article and I’ll stay within that context. Do note that what you are about to see here also applies to other applications outside of adjust a lens’ focus and I will leave that to your imagination.
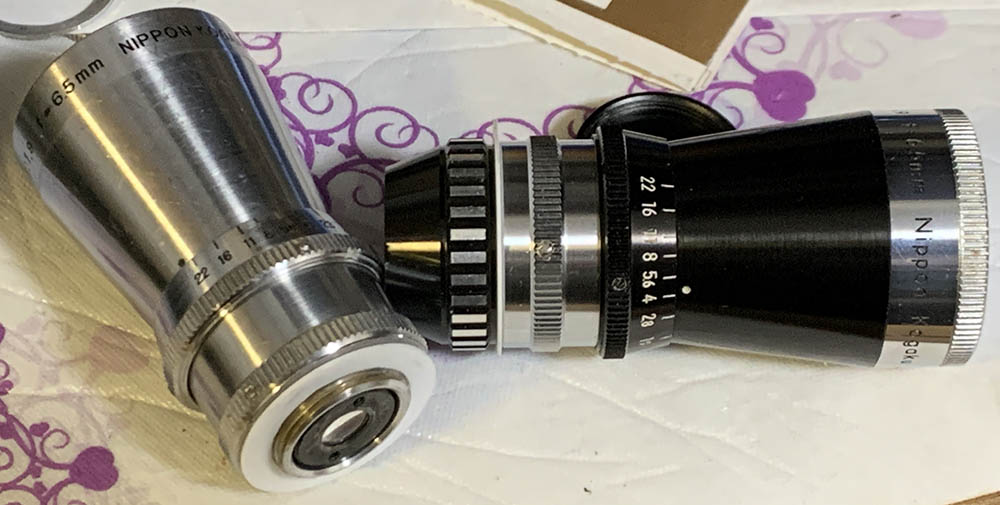
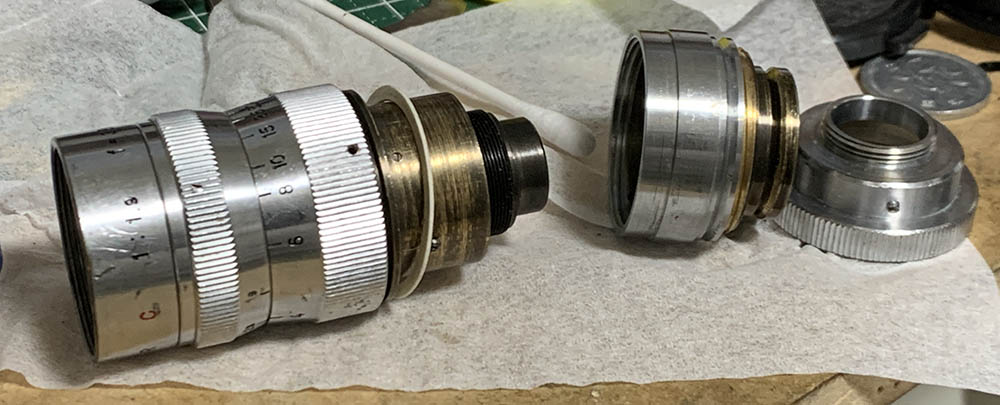
Here are my 2 Cine-Nikkor 6.5mm f/1.9 beauties. Both are fixed-focus lenses which means that there’s no way I’m able to adjust their focus apart from adding shims. Despite being identical optically and and barrels being similar in almost every manner these require shims that have different height with a difference of less than 0.1mm. You’ll have to make custom shims for every lens you own even if they’re of the same model and variation. Do note that the black one has a large cap at the rear and a front cap so it looks different from the earlier silver one. It’s important to note that the sizes of their accessory ring is different so they couldn’t share the same accessories such as filters and caps.
Using D-mount lenses with your Pentax Q requires that you fabricate shims for it. Many, if not all of the cheap-Chinese adapters will focus way beyond infinity which means that the adapters are a bit thinner that they should be. The better ones made in Japan, Taiwan and Germany have better tolerances, some are exact while some only have a difference of about 0.1mm to compensate for any errors. While this is almost true for lenses that won’t allow you to adjust the focus it’s still required for lenses that give you the ability to do it it’s just that the latter is easier to work with because you are able to compensate any differences easier by adjusting them unlike the former which requires more effort to adjust.
Before we continue it’s important that you read my article about adjusting a lens’ focus and the tools required for it. The articles will give you some understanding about the principles behind this operation so what I’m about to show you is going to make more sense.
There are 2 things that you should consider when fabricating shims, the material and tools. The quality of your work is dependent on what you use and the skill and time you put into it. I have years of experience as a scale modeler and as an apprentice watch repairer when I was young. Those experiences help me a lot in this craft. If you aren’t confident at all with your hands then you should leave this to another person to do. Going back to the requirements I will list them in the next section.
For materials you will want to use something that is durable and easy to manipulate since you do not have the means to fabricate them with precision tools assuming that you’re doing this in a DIY setting. Brass, aluminum, copper, alloys and other soft metals are good but they’re not easy to work with. My personal favorite is polystyrene or styrene if you want to be short. They’re cheap and they come in different thicknesses, too. Unlike paper or cardboard they’re tough, they won’t shear or tear when turned and is waterproof. Metal wires of different thicknesses is also handy and cheap. It is sometimes sufficient to rely on these but they are far from ideal. I seldom use them as spacers but I’ll show you how I use them anyway in this article because they have their place in lens adjustment and camera repair.
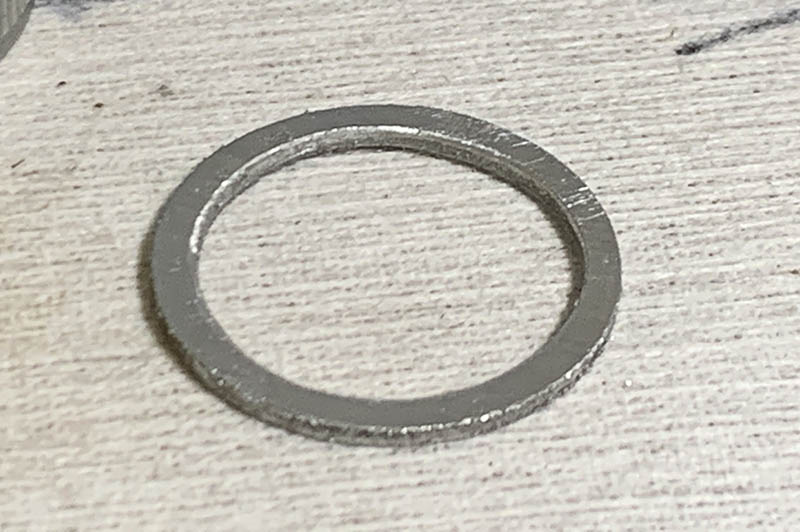
This is a metal shim that I fabricated. Compared to the ones made from plastic it’s more durable due to its thickness, it is also more difficult to fabricate since the material is obviously much tougher. I personally prefer using plastic because it flexes and it won’t scar or bind with the mating surfaces such as the rear of the lens and the throat of the adapter. It’s also important to mention that metal shims will warp when you mishandle them while a plastic one won’t. This usually happens if the shim is thin.
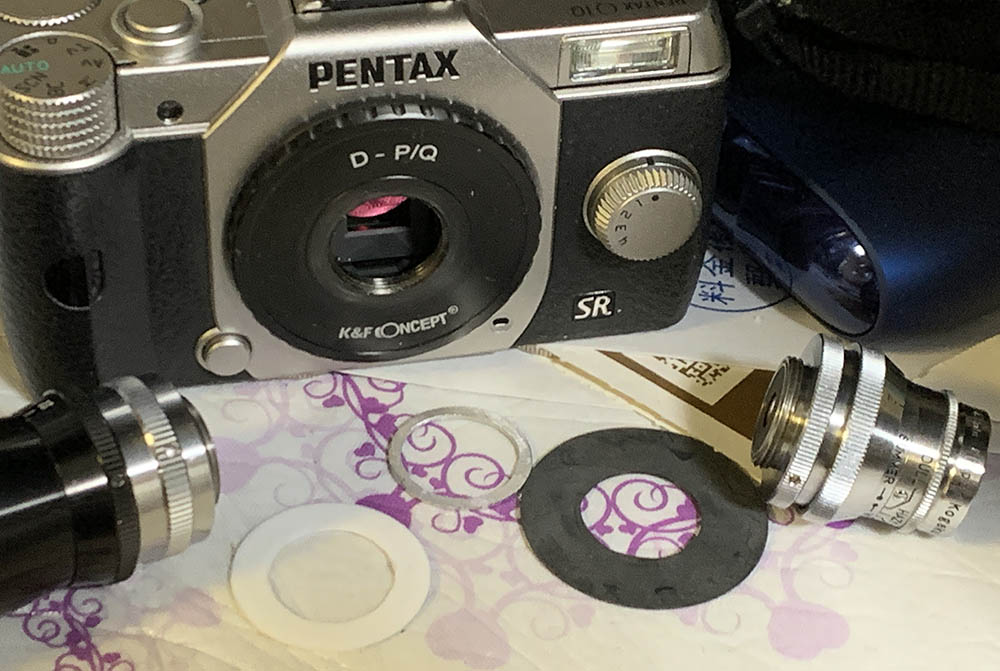
Here are some of the shims that I made. The white one was made from styrene, the silver one is the same as the one in the previous photo and the black one was made from ABS plastic. While ABS plastic is tough it’s more brittle compared to styrene and is considerably more difficult to sand as a result. It’s also more prone to cracking so I won’t be using this material much.
For tools the most important is a micrometer, a digital one is best because the readout is precise. You’ll require all the accuracy when fabricating shims specially for smaller formats like the D-mount where even a 0.1mm difference means a lot. You’ll also require waterproof sandpaper, a round file and sharp knife for shaping the shims. Get at least 2 types of roughness for your sandpapers. As for the file it has to have a round profile at lease so you will be able to shape the inner diameter better and a flat side for cleaning or beveling the outer one. A compass-cutter is handy for thinner ones and will easily help you cut styrene of up to 0.2mm thickness. For trimming 1mm thick material I usually turn them with a rotary tool, attaching my material to a holder meant for disc-cutters. If you want to be consistent with the shape and sizes of your shims you may want to invest on a precision punch-die set or a die-cut machine meant for hobbyists. The die-cut method will require you to mill a master from a hard piece of metal, that has to be precise or the result will not be pretty. I don’t want to invest in any of the methods that require me purchase separate equipment for them since I’m not going to mass-produce these anyway.
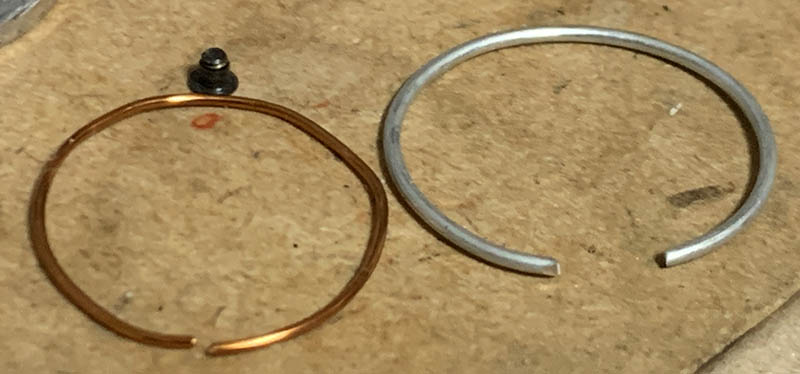
A cheap way to fabricate shims or spacers is to use metal wires of various thicknesses. These aren’t ideal but they have their place in adjusting your equipment. They’re great as temporary shims or even permanent ones if everything works properly. The biggest problem with using these is it’s difficult to adjust their thickness.
How do I determine the approximate height of my shims? I merely point the camera at a distant object and then see if the lens is actually focusing beyond or not reaching infinity. If it’s focusing beyond infinity then it’s closer to the sensor than it should. If the reverse is true then it needs to sit closer to your sensor. The former requires shimming to add that extra distance between the sensor and the lens, the latter requires you to do some tricks in order to get the objective a bit closer to the sensor which could be achieved by adjusting the focusing ring if that’s even possible or trimming extra material from your adapter. If there are shims in your lens you may want to replace them with your own. If you’re lucky to be skilled enough with plenty of patience you can reconfigure the helicoids and see if putting them in another way will get the result that you want. This is not always possible but I do this whenever I see the possibility.
Once you have determined if the lens needs to be further from the sensor it’s time to measure the approximate height of the shim. Turn your lens, unscrewing it from the adapter. Measure the distance required with a feeler gauge or add a few scrap material in the gap created between the lens and the adapter. Another way is to measure the lens’ length, it’s important to get your measurements when the barrel is collapsed (but not reaching infinity). Turn its focusing ring and stop at the point where you get to infinity. Unmount the lens and then measure its current length. Subtract this and the measurement you took before and the difference is the approximate height of your shim.
When it comes to the hole the inner diameter should be about 16.5mm since the D-mount’s thread is a 16mm one. The allowance will allow you to give the shim some room to move when you need to install or remove it. You don’t want to make it too large so it won’t wiggle too much when you install it. The outer diameter doesn’t matter much just make it so that it has enough material to be stable when you handle it. I would say 25mm to about 30mm is just about right. It has to be wider as the shim gets thinner in order for it to stay rigid as you sand it down to the desired height. When it’s being sanded be sure to use a coarser one to get as much material off then use a finer one for actually getting it down to as close as what you need. It takes a couple of trial mounting with the lens and adapter to get this right.
Here’s an example of a styrene shim but this time it was used for securing the front part of the lens. Without this you’ll be able to wiggle the objective and cause focusing errors.
I hope that this article gave you a few insight on how to adjust the focus of your tiny D-mount lenses using shims. This is not the only way but this is certainly one of the better ways to do this and it’s easier to understand for most people. I believe that this is also the most accessible method based on the materials and tools required. Remember, you cannot adjust your lenses to be spot-on at infinity, a little bit beyond that is considered acceptable to give you more room for compensating for any errors. Whatever you do, never do anything destructive to your lens in order to adjust them, you should be able to revert any changes easily and this method gives you that. If you ever need to change mounts and the adapters needed all you need is to fabricate a new shim. Thank you very much and I hope that this article will help you in your adventure with these wonderful little lenses. See you again next time, Ric.
Help Support this Blog:
Maintaining this requires resources and a lot of time. If you think that it has helped you or you want to show your support by helping with the site’s upkeep, you can make a small donation to my paypal.com at richardHaw888@gmail.com. Money isn’t my prime motivation for this blog and I believe that I have enough to run this but you can help me make this site (and the companion facebook page) grow.
Buy me a roll of film or a burger?
Thank you very much for your continued support!
$2.00
Helping support this site will ensure that this will be kept going as long as I have the time and energy for this. I would appreciate it if you just leave out your name or details like your country’s name or other information so that the donations will totally be anonymous. This is a labor of love and I intend to keep it that way for as long as I can. Ric.
