
Hello, everybody! I’m always amazed at how smart my little girl is. She’s somewhat of a mascot when I go shopping for cameras and other junk since she occasionally tags-along, people associate her with me. The shopkeepers know her because they’ve been seeing her since she was a little baby, only a few-months-old. She sings a lot of songs, can draw quite well and very observant. It’s like she’s a teen in a preschooler’s body. Many small things amaze us, phones, bugs and other things. Despite being tiny they have a lot of things going on. Today, I will show you something small but size can be deceiving because this one has many features that many of its bigger contemporaries don’t. Read the whole article to know what this is.
Introduction:
The Pentax Q10 was sold in 2012, replacing the Pentax Q. The Pentax Q10 was replaced by the Pentax Q7 under a year later. I have always wanted to buy this but I did not want to divert my focus from Nikon at that time. It’s excellent and unique, the whole system punches above its weight in terms of features but sadly the whole series only lasted for a few years with only 4 models made. That made it so appealing back then but that wasn’t enough to make me part with my money. Fast-forward to 2021, these are now cheap and I also have a new alibi to purchase one – vintage Cine-Nikkors. The Pentax Q and the Pentax Q10 are your best options if shooting with D-mount lenses since they have sensors that’s closer to the size of 8mm (standard) than other interchangeable lens mirrorless cameras and you could get really close to the sensor with it just like what the D-mount lenses require since they’re made for 8mm. If you ever recall using one you will remember how close the rear of the lens is to the aperture of the movie camera, that is just about 9mm or so, maybe even less.

This is the tiniest setup I have, the Cine-Nikkor 13mm f/1.9 is really tiny but it compliments the Pentax Q10 well and the retro-look of the camera makes this even look more appealing. Using manual lenses with the Pentax Q10 is great since its features are comparable to that of many higher-end models or even surpass them. Features such as focusing-aids, manual-lens data input are very helpful. While the in-body shake reduction (SR) feature is nice I won’t use that feature much and I’ll explain that to you in this article.
As previously mentioned, this is a premium camera packed in a tiny body with a tiny sensor to complete the package. I think that one of the main reasons why it never sold well after a few years of its introduction is its rather high price. It’s about $700.00 new if I recall or maybe a bit more than that. It was going against the likes of the Fujifilm X20 which is a brilliant camera and what I consider to be that company’s best in terms of value back then and even today if that is still being produced. The lens selection is another thing, while it appears complete there are a couple of things that you’re going to crave for. The good news is it’s trivial to adapt manual lenses with it so people who have specific creative and practical needs will just buy used cine-lenses and have a good time with them.

Tiny camera for tiny hands. It’s so compact my child is not straining when handling the whole setup. This Cine-Nikkor 6.5mm f/1.9 is by no means tiny but it is still smaller when you compare it to lenses made for larger formats. It has a fixed-focus which means there’s no way of adjusting how it focuses, you adjust its depth-of-field in order to determine what’s in-focus or not. It’s trivial to check your focus, an easy way is to just use the focus-magnifier or you could simply rely on focus-peaking but it’s not going to be accurate.

The heaviest D-mount Cine-Nikkor is the Cine-Nikkor 38mm f/1.9 which will give you the equivalent field-of-view of a 210mm telephoto lens on 35mm. Focusing with this takes a lot of practice.
This is going to be a bit technical. All adapters being sold for using D-mount lenses with the Pentax Q system won’t be able to focus exactly at infinity, they will either overshoot it by a bit or a lot and sometimes not even reach it at all. This is why it’s important to adjust their focus to that one adapter that you shoot with the most. I will explain how it’s done in a separate article.
Why the Pentax Q or the Pentax Q10? Well, the Pentax Q7 and Pentax Q-S1 that followed it both have larger sensors. It is best to get as close as possible to the actual frame-size of standard 8mm if you want to shoot with D-mount lenses. The sensor size of the later Pentax Q models are a bit larger and causes mechanical vignetting, the image-circle formed by the projection of the lens won’t be enough to cover the entire area of the sensor. The older-type sensors are already a bit larger than the frame-size of standard 8mm so you will get dark corners when using some D-mount lenses, what more if the sensor-area is greater? Not only that but you’ll also get a better-built camera because their chassis were all made from a magnesium-based alloy. One more reason is the price, these are cheaper compared to the later models. I got mine for $80.00 with shop warranty, complete with everything included in the box.
I don’t intend to shoot videos at all with this camera but this video is for people who are considering this. This was shot with a Cine-Nikkoe 13mm f/1.9 which is about 72mm in practical use due to 5.53x crop-factor of the Pentax Q10. This is a bit wider than what you should get with standard 8mm and the next section should help clear things out for you.
Here’s a simple illustration comparing the size of the Pentax Q10’s (and Pentax Q) with standard 8mm film. This means that you’ll a 1.29x increase in frame-size. You’ll have to consider this when you want to calculate the exact equivalent field-of-view that you’ll get with a 35mm system. It also affects the effective f-stop of your lens which means that f/1.9 is actually quite slow. The reverse is also true, a relatively-slow f/5.6 for medium-format will allow you to gather more light compared to an f/5.6 lens on 35mm. While it’s true that “crop-factor” isn’t relevant at all in actual use it’s still very helpful to understand this so you’ll have a point-of-reference when you are coming from a larger format.
| Format | Width | Height |
|---|---|---|
| 8mm (standard) | 4.8mm | 3.5mm |
| Pentax Q & Pentax Q10 | 6.17mm | 4.55 |
| Factor | 1.285416666666667x | 1.3x |
Please note the red numbers, you will soon understand their relevance later in my video. I’ll show you why they matter when you are shooting with the Pentax Q10 with D-mount lenses and how it affects your framing and even how your lenses perform.

(Click to enlarge)
The Cine-Nikkor 6.5mm f/1.9 and similar lenses from other brands are known to cause severe mechanical vignetting so I’ll use it to illustrate my point. The photo on the left was shot wide-open while the other one was shot at its minimum-aperture. The corners will look more defined as you stop the iris down.
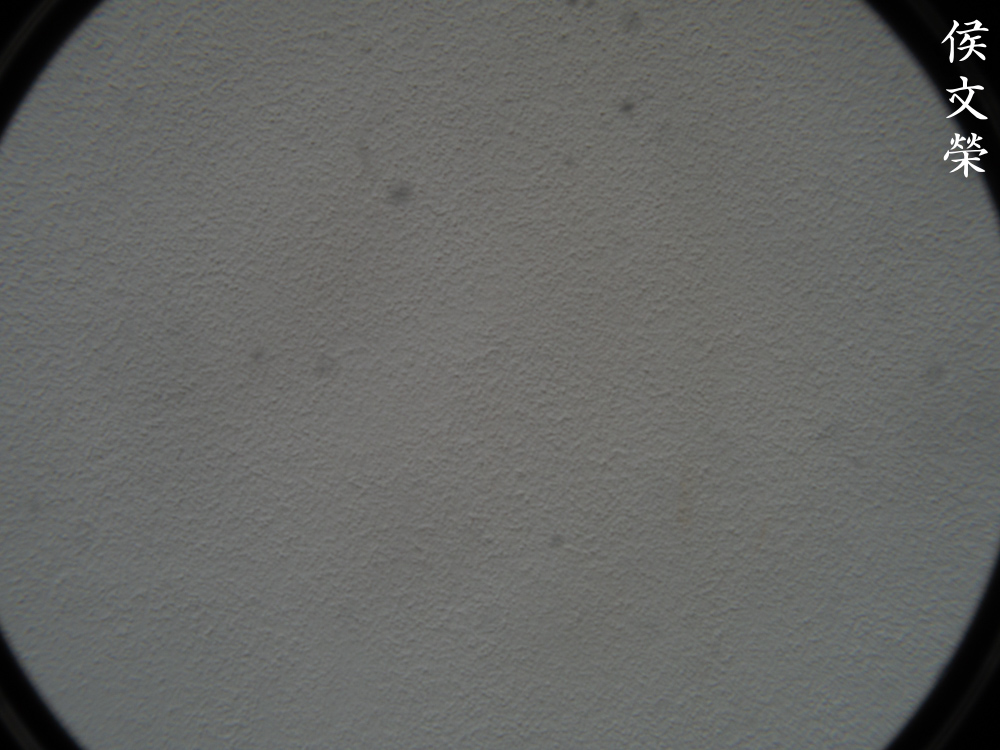
This is not related to our current topic. Note that dust and dirt will easily cause spots to form no matter how small they are. This is one effect of shooting with a smaller format, things like these will get magnified easier.
One nice feature of the Pentax Q family is the ability to shoot with several aspect-ratios, let’s examine how these look when you’re playing with D-mount lenses and how it affects the mechanical vignetting produced by these lenses.

In its native 4:3 aspect-ratio, you’re using the whole area of the sensor to capture so this is what you’ll get. The corners appear to be rather dark due to severe mechanical vignetting.

It’s not any better at 3:2 but it’s not as severe as the previous one since you’re capturing with a smaller area.

Things look a lot better when you’re shooting at 16:9 but the corners still look terrible. This gets worse as you stop the iris down.

The results look the best when shooting with the square-format (1:1) since you’re merely using the center portion of the sensor. It’s still there but at a much smaller amount since the corners are cut.
Here’s my humble video, it has no production value at all but it’s informative. I made this for people who intend to use cine-lenses with these cameras and I will share to you my experiences and opinions on the subject along with some of my preferred settings. Please watch this video as I will talk about the vignetting issue and how it related to the in-built Shake Reduction feature of the Pentax Q10.
Now that you know what’s causing the corners to get clipped I’ll now show you some photos that were cropped to approximately 0.8x so we can get a bit closer to the size of standard 8mm film. Again, these were shot with the Cine-Nikkor 6.5mm f/1.9 since it is the best example for this exercise.

Maybe I should be cropping closer to 0.7x because the corners still appear a bit dark in this photo. Notice that we are starting to see a lot of optical aberrations and a general lack of resolving power. This is as expected since the sensor is smaller and we’re shooting with a digital camera which has another layer of glass in front of the sensor. This affects the performance of the lens as opposed to using it with its native medium – film.


(Click to enlarge)
Here are more cropped examples that were shot with the Cine-Nikkor 6.5mm f/1.9. Note that the corners look terrible, that’s because we are seeing things that are not supposed to be projected onto the capturing media. If you could live with it and just crop the photos more then you’ll get to see how this lens should performs, at least closer to standard 8mm.
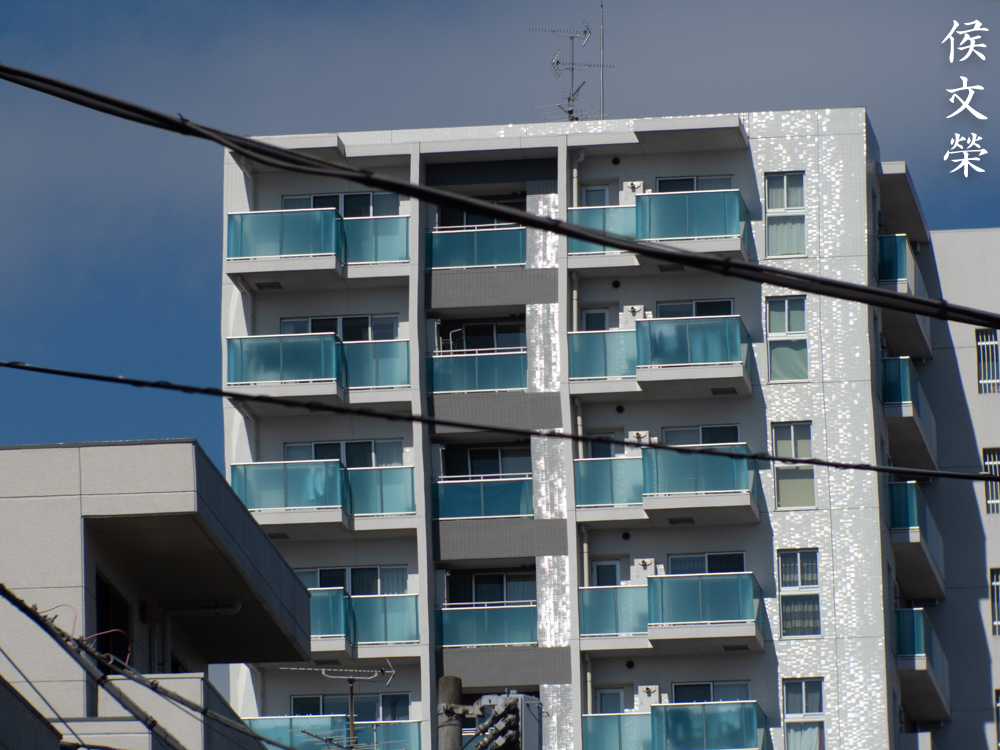
If there’s one thing that I do not like about electronic shutters this should be it, notice that the building appears “wavy” instead of being straight. This is what we call the “rolling-shutter” effect which is something that many people who did videography with a DSLR back in its infancy were all familiar with. I thought that this has been fixed a decade ago with most cameras but it seems that Pentax missed the memo. This is severe, something that could ruin an award-winning shot if you’re not careful.
Let’s now talk about using this camera in practical use and see some photos that I took with it. I’ll share my experience with shooting it using cine-lenses. My opinions come from the point-of-view of somebody who has been using 35mm or full-frame almost exclusively so please keep that in mind. Most of these were shot with the Cine-Nikkor 13mm f/1.9 but a few were taken with the Cine-Nikkor 38mm f/1.9


(Click to enlarge)
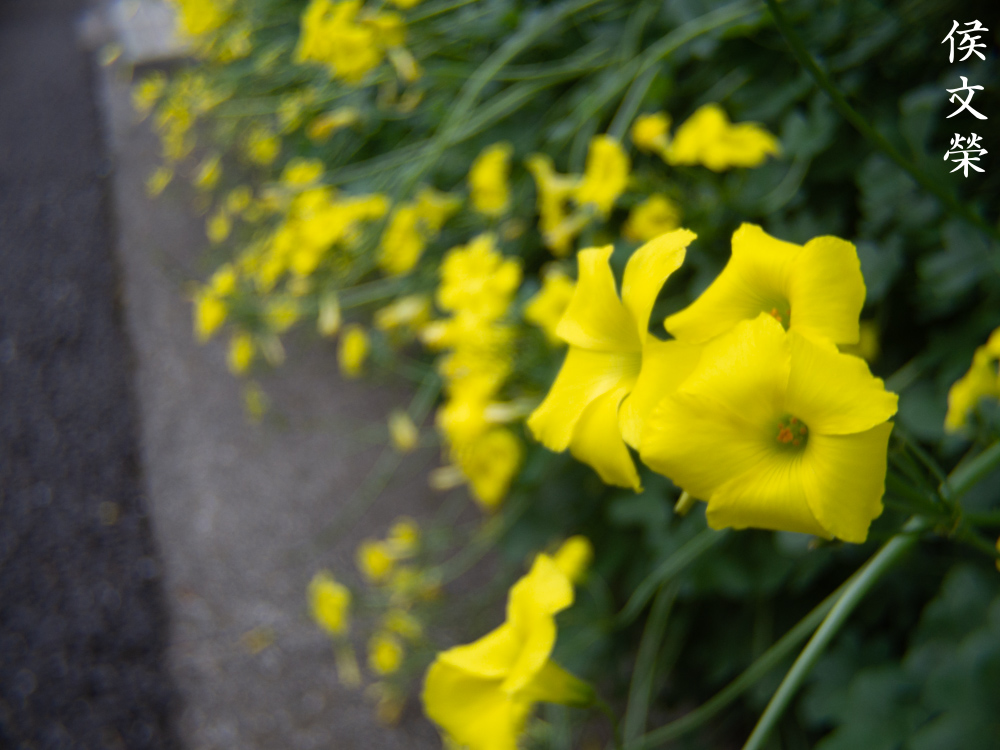
Despite having a seemingly “fast” nominal aperture, the Cine-Nikkor 13mm f/1.9 won’t give you blurry backgrounds. It struggles doing so but positioning your subjects closer to you helps. Even with that you won’t get smooth blurs as you would when shooting with a larger format.


(Click to enlarge)
Most, if not all vintage cine-lenses tend to be rather soft wide-open and stopping them down is essential if you require sharp details. Lack-of-resolution is a constant problem due to the size of the format along with the quality of the glass used in these vintage cine-lenses.


(Click to enlarge)
It’s easier to produce optical aberrations when shooting with a smaller format, spherical aberration and flare could be easily triggered specially when shooting wide-open but this is also true when you stop the iris down at times. Many of the Cine-Nikkors that I’ve tried have a slight bluish-tint to the photos they produce. This is common with many vintage Nikkors because they were calculated for use with black-and-white film.


(Click to enlarge)
Tonality isn’t really great, these photos remind me of the results that I’d get from older CCD-type DSLRs from about 14 or so years ago. Since most vintage cine-lenses tend to give you subdued-contrast it helps render some of the subtle tones better but only marginally if you ask me.


(Click to enlarge)
Since the Pentax Q10’s sensor is able to capture beyond what all D-mount lenses are designed for we’ll can observe an enormous amount of performance loss as we approach the corners and the character of the bokeh starts to look really interesting, too. Some people like this but not me.

The LCD of the Pentax Q10 is tiny and the resolution is pathetic which makes it difficult to use when focusing. You may get fooled into thinking that your photo is sharp when you look at the playback. This and glare makes it challenging to shoot with vintage lenses with this camera.

It’s even more difficult when shooting with the long Cine-Nikkor 38mm f/1.9 since it’s not forgiving when focusing with it, even a slight error will result in your photo being useless.

I consider the Cine-Nikkor 38mm f/1.9 to be the best in the main-line of Cine-Nikkors made for 8mm because it’s sharp specially when you’ve nailed your focus. It’s not easy even when the subject is walking slowly but you’ll get used to it. I am used to shooting with manual lenses, even on rangefinders and cameras with no viewfinders but shooting with the tiny LCD of the Pentax Q10 is even more troublesome than I initially expected.

This photo is the sharpest amongst 3, I took several photos just so I could choose the one that’s focused properly. This is quite annoying since there’s quite a bit of lag when taking several photos in-succession.
I forgot to mention that the Pentax Q series has some of the noisiest files you’ll ever work with but I’ve thought of that as an opportunity to experiment with trying to simulate film and the look of its grain. Let’s now see how it looks like.
The texture of the noise looks a lot like grain after processing it and the effects of compression made it look even more convincing. This reminds me of my photos that I took with Kentmere 100.


(Click to enlarge)
Here are more examples. I think I am enjoying this a lot, it feel really nostalgic because I miss shooting with black-and-white film. The texture that I get from processing the noise and the optical aberrations I get from these lenses help me get the rustic results that I wanted.
I highly recommend this to anyone who wants to shoot with D-mount lenses mainly since it’s the only practical option around and it has plenty of great features packed inside its small chassis. Cinema-lenses weren’t meant to be used for capturing still photos and nobody cared to use them since the advent of modern videocams, these were even given-away for free before these tiny cameras came to be. Forget using the Nikon 1 with D-mount lenses, that is better used with the larger C-mount variety and you won’t be able to get really close to its sensor with D-mount lenses anyway. If I convinced you to buy a Pentax Q series camera, be sure that all of the features work. The LCD should be clear, with no discoloration. Operate the SR and make sure it works, the flash is also one more thing that you should check. These are cheap these days, they’re plentiful in the used market. Be patient so you could get one for a nice price. Happy hunting.
Help Support this Blog:
Maintaining this requires resources and a lot of time. If you think that it has helped you or you want to show your support by helping with the site’s upkeep, you can make a small donation to my paypal.com at richardHaw888@gmail.com. Money isn’t my prime motivation for this blog and I believe that I have enough to run this but you can help me make this site (and the companion facebook page) grow.
Buy me a roll of film or a burger?
Thank you very much for your continued support!
$2.00
Helping support this site will ensure that this will be kept going as long as I have the time and energy for this. I would appreciate it if you just leave out your name or details like your country’s name or other information so that the donations will totally be anonymous. This is a labor of love and I intend to keep it that way for as long as I can. Ric.

Apr 05, 2021 @ 19:57:53
Thank you for this review.
I have all 4 Pentax Q cameras (Q, Q7, Q10, Q-S1) and i use them regularly with vintage lenses (d-mount, C-mount and all other bigger Mounts)
Best regards
Bernhard
Mar 10, 2024 @ 20:04:55
Thanks for this amazing blog!
I recently got my Pentax Q10 with a D mound Kern 13mm/f1.9 lens, using a cheap adapter. But once I put the adapter on, somehow I cannot release the shutter. Do you think it is the problem of the adapter, and do you have any recommendations for that?