
Hello, everybody. For today’s short post, I will be showing you how I adjusted and cleaned my Nikon F’s frame counter. My F’s frame counter is a little bit offset by less than 1mm. It may not seem like a big deal, but the arrow on the counter is always pointing in between 2 numbers. This makes it hard to judge which frame I am currently at and this is driving me crazy! The camera is old and it is likely that the frame counter housing moved a bit when the previous owner was using it.
Fortunately for us, this is a very simple thing to fix and since I am detailing this camera to make it look as good as I can I also taking this opportunity to clean other things within the same assembly as you will see later.
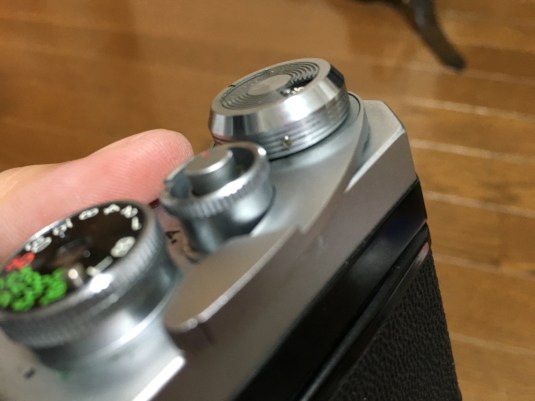 First, loosen up these 3 tiny set screws on the frame counter housing. You do not need to remove them from their holes so you won’t have to place them back later. I really dislike these things because they are small and delicate. These set screws secure the housing to the camera by locking the whole thing into the groove underneath.
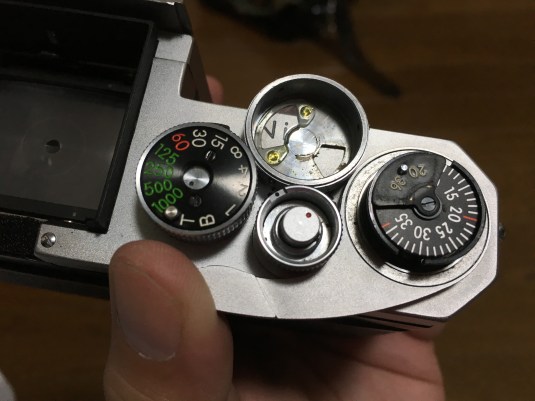 Simply pull the frame counter housing from the camera as it was not screwed or glued into place. Look at the picture and you will also see the film capacity indicator switch. This does nothing underneath and it just placed on top of the film counter dial. Be very careful not to lose this part as this is not secured by anything at all.
As you can see from the picture, this camera has accumulated a good bit of crap under the frame counter housing. I blew away plenty of dust bunnies prior to taking this picture and that should give you an idea of how dirty this thing is. The crown of the shutter was really dirty as it had some caked dirt in it. I got myself a clean toothbrush and started scrubbing the crown until the dirt loosened up and used a rocket blower to blow them all away. For the grime on the film advance lever, I simply used the same toothbrush to remove the big chucks of dirt and then finish it off by rubbing it with a clean Q-tip saturated with alcohol. The film counter dial was also scrubbed as well as anything else that I could access at this point.
I could have gone further and removed the top-right plate and cleaned the mechanisms housed inside but I got lazy. The camera so far is working properly mechanically so I did not bother with it. If you need to, then you have to remove the film advance lever, shutter speed dial, shutter button assembly and some screws here and there and the plate can be safely removed.
By the way, if you are not a part of this blog’s Facebook page then please head over to this link to get updates on new posts as well as interact with other people in the page. You can ask questions there and sell stuff if you wish so long as it is a classic Nikon or Nikkor.
That’s it for today’s short post and I hope that you enjoyed and learned this. Next week we will be looking into another lens! The Nikko 135mm f/2.8 (K to Ai-S models)!
Help Support this Blog:
Maintaining this blog requires money to operate. If you think that this site has helped you or you want to show your support by helping with the upkeep of this site, you can simple make a small donation to my paypal.com account (richardHaw888@gmail.com). Money is not my prime motivation for this blog and I believe that I have enough to run this but you can help me make this site (and the companion facebook page) grow.
Helping support this site will ensure that this will be kept going as long as I have the time and energy for this. I would appreciate it if you just leave out your name or details like your country and other information so that the donations will totally be anonymous it is at all possible. This is a labor of love and I intend to keep it that way for as long as I can. Ric.

Nov 14, 2018 @ 19:51:12
Hi Richard, I’m a big fan of your articles.
I own a Nikon F3. A wonderfull camera. Unfortunately the shutter counter is ‘broken’. when i open the back the counter didnot jump back to zero. The ‘pin’ is okay. I’m affraid it’s a spring issue.
I’m waiting for an article of you how to dissamble a F3, i want to try to fix it by myself.
Nov 15, 2018 @ 04:31:46
Glad you liked it, Paul.
I don’t have anything on that yet and I pray that I won’t have to repair an F3! I am not sure how this works on an F3 but there’s a ratchet and pawl mechanism there and the grease might have solidified. Ric.
Oct 01, 2019 @ 16:30:19
I have a Nikon SP has the same counter i believe My counter is Stuck at 30 Exposures. any idea on how to reset it. Where is the Reset Button when opening the back. ?