
Hello, everybody! Do you remember when Hulk Hogan and the Ultimate Warrior teamed up in 1990 for the Survivor Series? I think that is one of the most important events in sports entertainment history. There will be a falling-out between these two not too long after which is very sad because we would have seen the best tag team ever beating everyone else for more years to come. It’s unfortunate, but it gave us this vision of what an ultimate wrestling duo should be. Many great partnerships do not last very long, such as Hall & Oates, Wham! and Modern Talking. The same can be said for this partnership in Japan at a time we now call the prewar years. It was a time when Nikon and Canon joined forces to compete with the world.
Introduction:
The Seiki Kogaku S or S1 as many people call it was made from around 1938 for up to a few years. It has a limited production run so you won’t find many of these. Seiki Kogaku is the company that would become Canon, as Nippon Kogaku would become Nikon. This is the 2nd production model of Seiki Kogaku, the old one is the famous Seiki Kogaku Hansa. Anything before these 2 designs are considered prototypes so the collectors community don’t even consider them to be commercial models. This is a historically important camera because it’s the first model from Seiki Kogaku that has slow speeds. It also has a few features that make it innovative compared to the older Seiki Kogaku Hansa.

It has retained the unusual bayonet made by Nippon Kogaku but it now has to film counter dial under the winding mechanism instead of the front. The unique pop-up viewfinder is still there but the top-plate has been replaced with a more familiar shell like what you’ll find on the Leica IIIa. These are the most obvious changes that you will see externally. In this photo, you’ll see that it’s paired with the Nikkor 5cm f/2.8, it is a remarkable lens for its time, even rivaling the original Zeiss Ikon Tessar 5cm f/2.8 that it copied from.
The quality of the materials are poor compared to what you will see from a German camera, the quality of the workmanship it’s not even close, too. Despite that, it’s still a better camera compared to the numerous Soviet clones of the Barnack. There is no doubt that it’s a good camera when it was new, I’m pretty sure it is accurate enough to take decent exposures, but who knows? Japanese products had a reputation during that time for being poor copycats very much like the CCP (Cheap Chinese Products) that we are all used to seeing these days.

I find it unusual that the camera has no strap lugs at all, you are forced to use the “never-ready case” that comes with it. The tripod socket underneath the camera has a huge size that’s incompatible with modern attachments, that makes things even worse. I’m just lucky that my camera came with that case despite the leather and cloth having a bit of fungus and a few live bugs, they have emigrated all the way from Japan.
Are you curious to see what’s inside this camera? I’m sure you are, that’s why you are here. Before I begin, please be aware that this is a very valuable camera. I got mine for cheap because of its poor condition, it’s never going to sell for under $1,000.00 even without a lens. I was lucky that I got one for a decent price or else everything is just going to be a dream. If you are one of the lucky owners of this camera, please don’t attempt to repair it yourself, bring it to a real repairman who knows what they’re doing.
Before We Begin:
If this is your first attempt at repairing a lens then I suggest that you see my previous posts regarding screws & drivers, grease and other things. Also read what I wrote about the tools that you’ll need to fix your Nikkors.
I suggest that you read these primers before you begin (for beginners):
- Essential tools
- Best practices 1
- Best practices 2
- Best practices 3
- Ai conversion
- Working with Helicoids
Reading these should lessen the chances of ruining your equipment if you’re a novice. Before opening up anything, always look for other people who have done so in YouTube or the internet. Reliable information is scarce, vague and scattered but you can still find something if you search carefully. Just make sure that whoever makes those videos know what they’re talking about and are showing the correct techniques or tools, if not, then they are just teaching you how to destroy your equipment.
I recommend that you read my working with helicoids article, it’s very important. Doing it incorrectly is a sure recipe for disaster, you may end up in a situation where you won’t be able to reassemble everything back together again correctly because your lens won’t be able to focus properly.
For more advanced topics, read my fungus removal post as a start. It has a lot of useful information, it will be beneficial for you to read that.
Disassembly (Top Shell):
Before you begin working with this camera you must ask yourself if you have the right tools, experience, skills and confidence to start and finish this project. This is a very valuable camera and many of them are in very poor condition just like what you will see here. Corroded cameras will require special care because the parts can break without any notice. It is important that you go at it slowly and apply some oil diluted with lighter fluid (50:50 ratio) at problematic parts such as screws and everything that needs to be turned in order to remove them. You must also have the discipline to know when to give up because if a part is stuck you might destroy it if you use force.
We will service this just like any other Barnack clone so you can start from the top or the lower shell. It’s not a big issue but I prefer to start from the top shell. The biggest difference here is the addition of the focusing unit, that is something you don’t see regularly with other Barnack clones.

Unscrew that’s pushpin from this assembly carefully. It will be helpful if you can drop some fine oil into it, that will help soften whatever is there so you won’t damage it as you remove it.

Go underneath the focusing unit and locate this grub screw, do the same treatment with the oil on it so it will unscrew safely. This screw prevents the focusing unit from getting undone accidentally.

Use a rubber tool and unscrew this guard ring carefully. As you can see, somebody else was here before me and he has done a sloppy job.

Once that ring is off you are able to completely unscrew the focusing unit off from the camera. It should not take a lot of effort to do this.

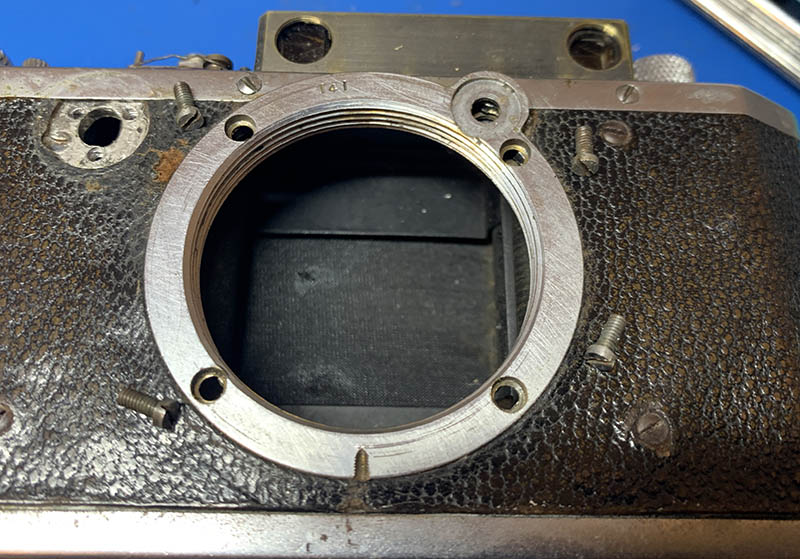
This is how it looks like underneath, the focusing unit merely screws into a 39mm lens mount. It looks like a generic mount used by many old cameras but it’s not, the thread pitch is different. This mount is going to be named the “J-mount” in the coming years. Store the focusing unit in a safe place while you work on the rest of the camera.
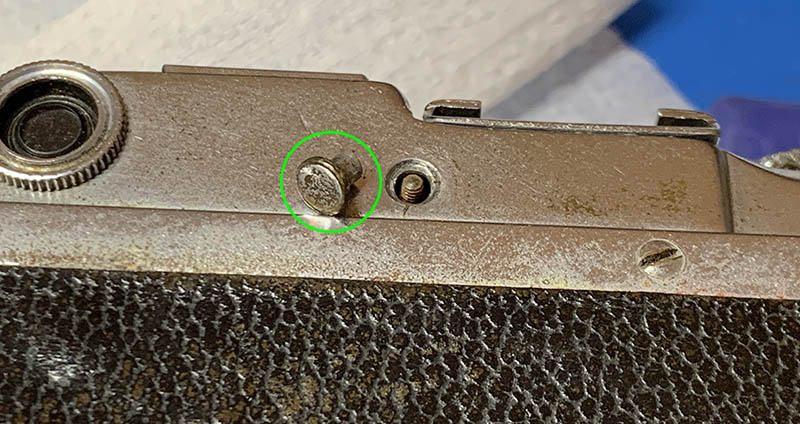
Carefully unscrew this button for the pop-up viewfinder. It can be difficult to remove but you should be able to get it off with perseverance or by using a special tool like a flex-clamp.

Use a rubber tool and carefully unscrew the guard ring for the viewing window of the rangefinder.

This is difficult to remove but I managed to get it off using special tool and a lot of lighter fluid and oil. It is screwed into the rangefinder mechanism very much like what you see in many Barnack clones.

Simply push the adjuster for the vertical alignment prism from behind with a Q-tip to get it off.

Locate and remove the screw you see here. Actually, it’s not here at all because it was lost and I will have to find a replacement for it from my spares box.

It’s not necessary to remove the eyepiece in order to get the top shell off but you can remove it anyway.

Locate and extract this screw so you can remove the shutter speed dial. You will have to cock the shutter a bit to expose this for easy access.
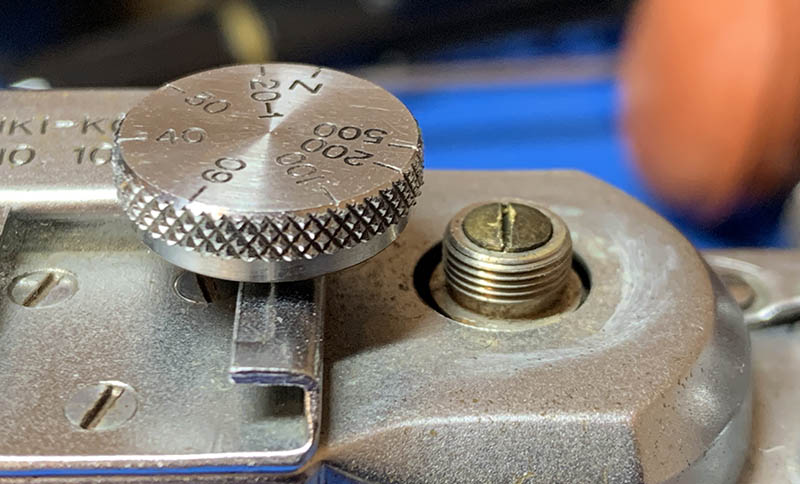
Once the screw is gone you can turn the shutter speed dial counterclockwise until it’s off.

Extract the screws of the accessory shoe so you can get it off.
At this point, you are now able to remove the upper shelf effortlessly. You will need to depressed the lever or pin of the pop-up viewfinder in order to get it out of the way. Notice that the ring that is connected to the eyepiece at the other end is unsupported in any way. I am unsure if you need to remove the eyepiece at all, maybe the ring will get in the way if you did not remove the eyepiece?
Pull the pop-up viewfinder off along with its spring. Clean the glass with a Q-tip and be sure that it’s clean before you continue. I tried to dismantle this even further but it seems that everything was glued, I do not think it’s possible to go any further than this.
Set everything aside in a safe place so you can continue working with the rest of the camera without fear of accidentally damaging anything.
Disassembly (Lower Shell):
This section should be familiar to you if you are used to working with older cameras. It’s almost identical to the Leica except for a few very minor details. Since the material used to wrap the shell is leather, you’ll need to be careful when using alcohol or solvents. The good thing is it will not crack, unlike vulcanite.
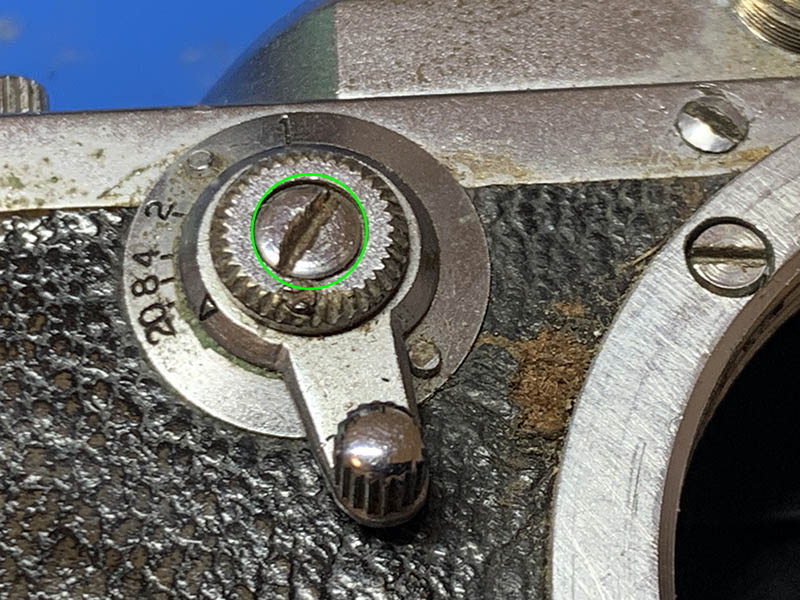
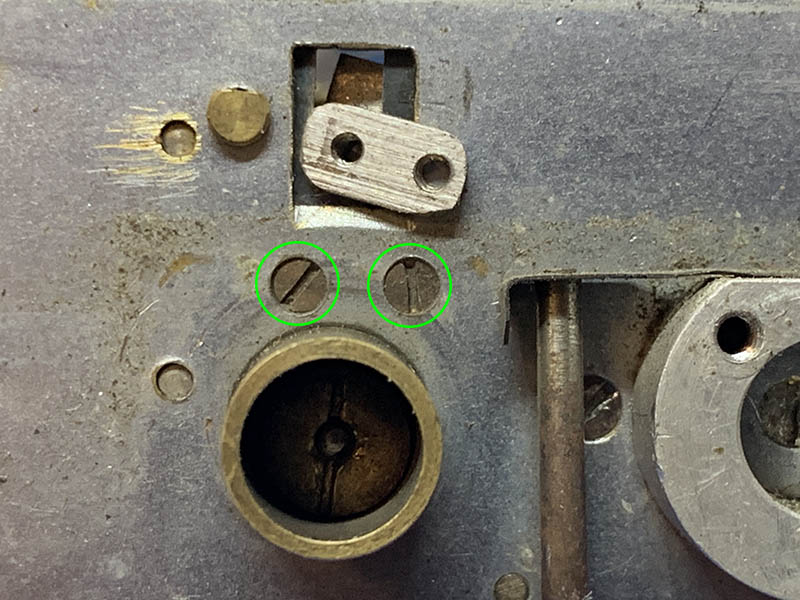
Carefully extract this big screw so you can dismantle the slow speed selector assembly.
Notice that there are several holes underneath it where the worn set screw sinks into. I do not know why it has several holes here instead of just one.
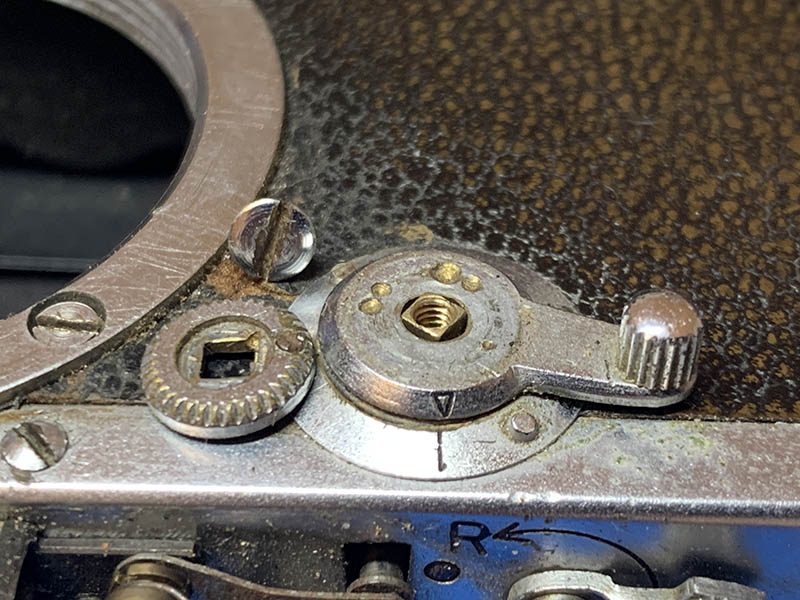
Lift the selection lever off to reveal the spring and the screws underneath. My goodness, the screws have all been filed smooth, one of them is even flush with the surface of the plate. Why would anyone do this thing? Don’t they have precise parts at the factory during that time?

I was able to remove the 2 screws safely but one of them had to be extracted because it does not have a slot anymore. This is the only way to extract a screw safely, do not listen to people offering weird advices such as grinding the head off and the like, they all won’t work and will only make things worse.
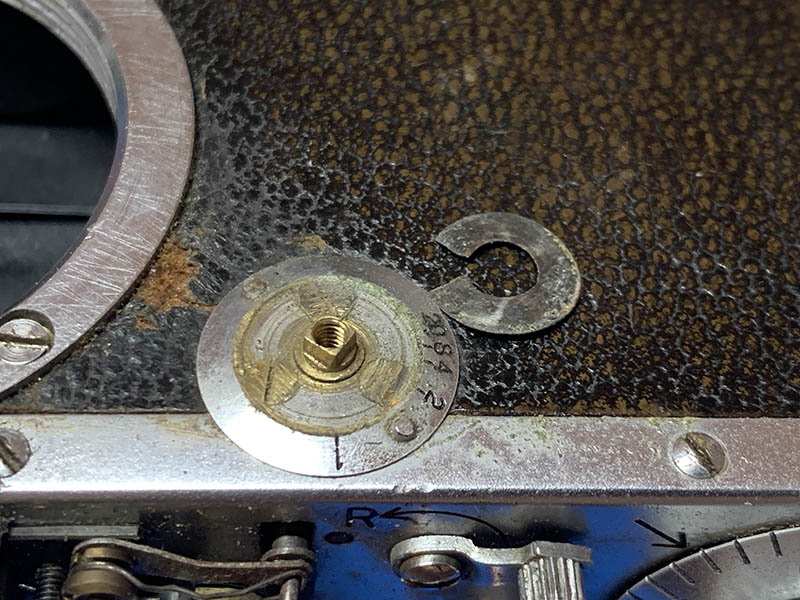
Pull the parts out so you can access another screw here that you must extract.
Carefully extract these screws at the lens mount. If they are stuck, just apply a drop of lighter fluid and oil to help penetrate through every crevice and hope that they will come off effortlessly later.

Slowly lift the lens mount plate with your nails to remove it, being careful not to disturb any shims under it. I did not find any in my camera but there should be at least a few of them here, perhaps the other guy lost all of them. If you found any, please mark their positions because they are precise adjustments made to make your camera focus properly. The 2 metal plates you see here secure the plate from behind, clean them all up and store them in a safe place.

It’s now time to remove these 4 screws at the face of the camera.

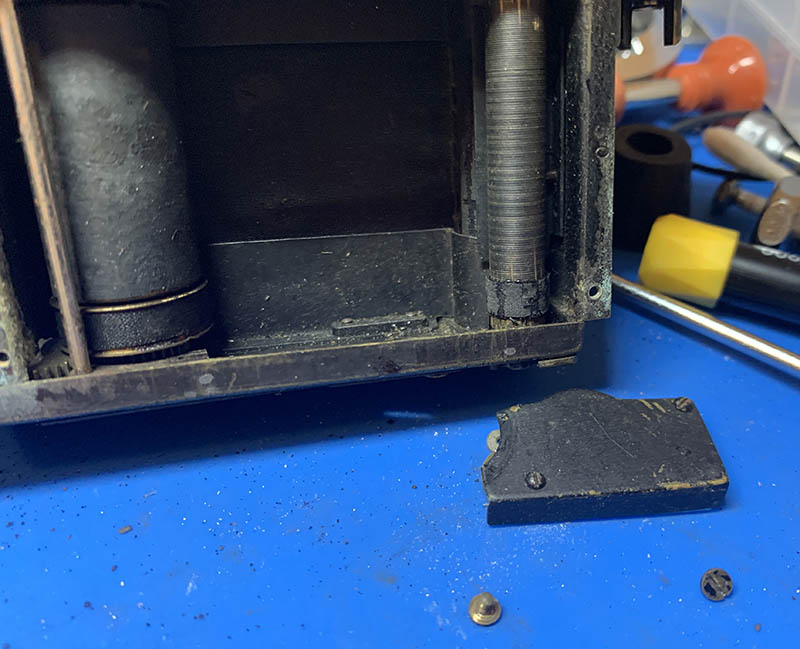
Carefully pull the lower shell off from the chassis to reveal everything underneath. The pressure plate will also come off just like how you see here, make sure that you don’t lose any of its springs. The springs are all rusty I was contemplating on replacing them but thought that I don’t want all that hassle.
Clean the outer surface of the shell using pure alcohol but be careful not to leave it soaking or the leather will begin to rot. It’s also a good idea to put it under the sun to kill any fungus or bugs in it. You shouldn’t wash it with water in any case because that will also degrade the leather.
Disassembly (Miscellaneous Assemblies):
I don’t know what to call this section because this is where I remove miscellaneous things that don’t have much of a theme so I bunched them all up in this part of the article. Most of the things here are familiar to those who have experience working with older cameras but there are a few things that are unique such as the rangefinder mechanism. Even with that, it’s still pretty close to a Leica.

Extract these screws so you can remove the slow governor assembly.
Carefully remove the slow governor assembly from the floor of the shutter crate but be sure that it won’t snag on anything such as the slow speeds lever.

The slow governor mechanism has surprisingly survived all these decades looking new but it will require a bit of flushing with lighter fluid and some minor lubrication at certain pivot points.
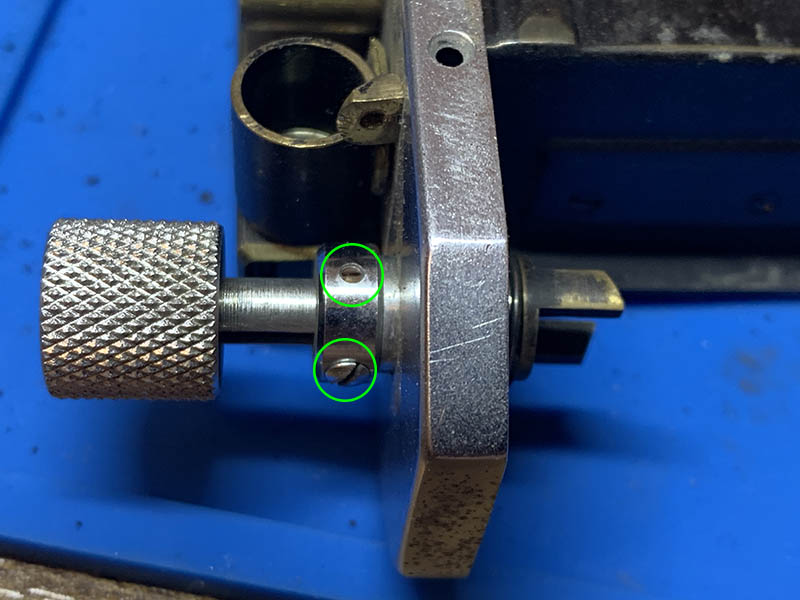
Extract these screws so you can dismantle the film rewind dial.

This is how the sequence looks like. I find it odd that there are no washers or shims here, perhaps the old bastard who worked on this previously lost them all.

Extract these screws to remove these plates, clean them up very well because they’re usually greasy.

Let’s go to the other side of the camera. Carefully unscrew the film advance dial, you do this by gripping it tightly with a rubber sheet and then grasp the gears underneath it with another rubber sheet. Doing this will help prevent the gear’s teeth from being damaged.

Remove the film advance sprocket assembly and do not lose that ring.

Separate the gear from the spigot like how you see here. You’re not able to further disassemble this part, just leave it alone.

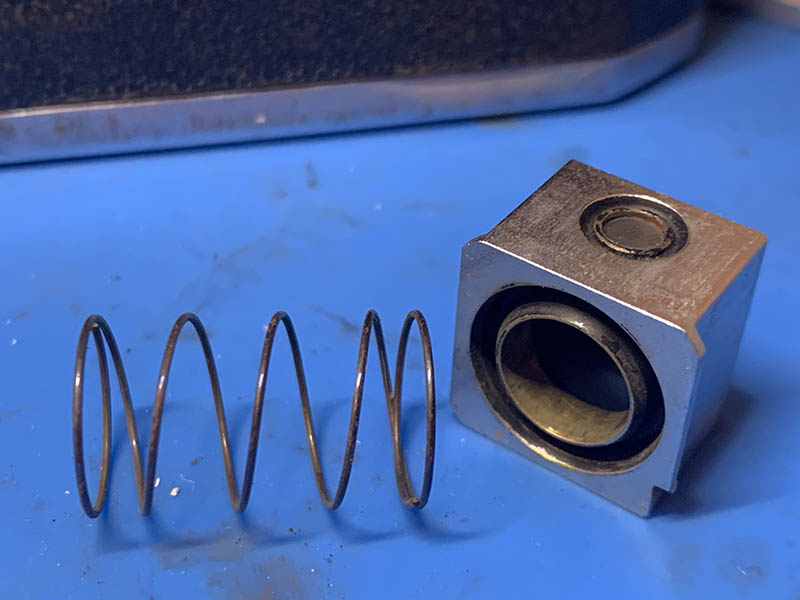
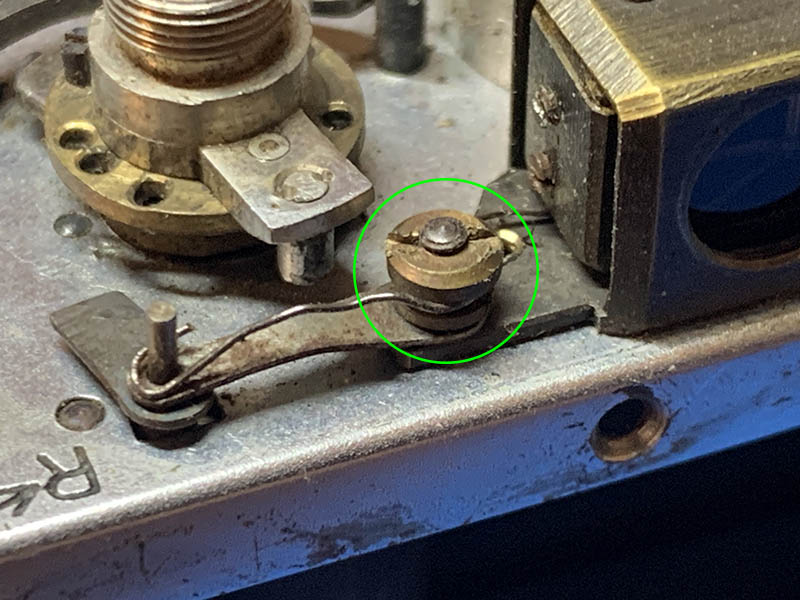
Extract these screws so you can remove this coil. Clean everything up and store the smart parts safely.

Before we go further, I’d like to show you this lever. The push-pin of the focusing unit depresses this part as it turns, it then operates the rangefinder’s arm inside assembly. This works a little bit differently when it is compared most Barnack clones because it lacks an arm with a roller.

This is how it looks like from underneath, we cannot remove it just because the rangefinder mechanism is still installed on the camera.

These screws secure the lever that I was showing you a while ago, carefully extract them.
Dismantle everything here but make sure not to lose or damage any parts. Go to the opposite side and extract another screw there. You can remove the rangefinder assembly after this step.
Once the rangefinder mechanism is gone you cannot access these 2 screws, extract them so you can get to the lever and remove it. These screws secure the cover of the lever.

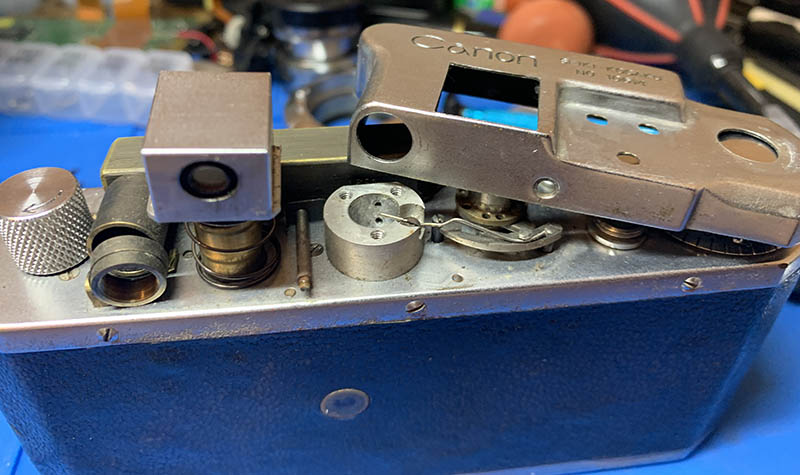
This is how everything should look like once you get to this step. Put the rangefinder mechanism inside a safe container so you won’t damage it while you work with the rest of the camera.
At this point, you have all of the major parts out of the way and ready to be cleaned. I scrubbed them all using a strong toilet detergent, followed by rinsing and hot water. A final dunk in an alcohol vat will help remove any residue and the parts were all blown dry using canned air in order to remove all moisture. It’s going to help prevent any rust from forming. You may want to polish some of the parts if you wish to but I skipped that part altogether.
Conclusion:
This is a very fascinating project. I am not into Canon equipment but I can’t resist working on this because Nikon and Canon both had a shared history at one point. I find it interesting how they have found ways to avoid infringing on the German patents, despite being a mere copy of the original German machine, they have managed to make something interesting out of the experiment. I’ve also learned a great deal about early Japanese camera manufacturing from this project, I can see that they have given everything possible to produce something that can compete with a big boys. It’s also my pleasure to present to you this super rare article about something so intriguing. If you think that this is all I’ve got, just wait until you see what’s in store for you in the later parts. Please come back regularly for more updates about this camera.

The leather covering seems to have been preserved really well despite an ugly patch at the front. It looks like pig leather judging on the texture. I’m not so sure how I’m going to treat this nor how I should repair that ugly patch that I have mentioned previously.
Was that a tease? There’s more coming and we will strip this camera down to its smallest components. It’s one of my biggest articles for my readers, did you enjoy it? If you do, please leave me a tip, imagine that I am an attractive waitress. Your support helps keep the site alive, I would not have have made this last for as long as it did if not for your support. It helps me offset the cost of hosting this media-heavy site. Please share the word with your friends and do not download my work. I only earn a few cents from each unique visitor to this site, downloading my work won’t help me earn enough page views to support anything. It is something that I take great pride in and I consider this to be my life’s work. That’s it for today, see you all again next time, Ric.
Help Support this Blog:
Maintaining this site requires resources and a lot of time. If you think that it has helped you or you want to show your support by helping with the site’s upkeep, you can make a small donation to my paypal.com at richardHaw888@gmail.com. Money isn’t my prime motivation for this blog, I believe I have enough to run this myself but you can help me make this site grow.
Leave me some tip?
Thank you very much for your continued support!
$2.00
Helping support this site will ensure that it will be kept going as long as I have the time and energy for this. I’d appreciate it if you just leave out your name or details like your country’s name or other info so that the donations will totally be anonymous. This is a labor of love and I intend to keep it that way for as long as I can. Ric.

2 Comments (+add yours?)