
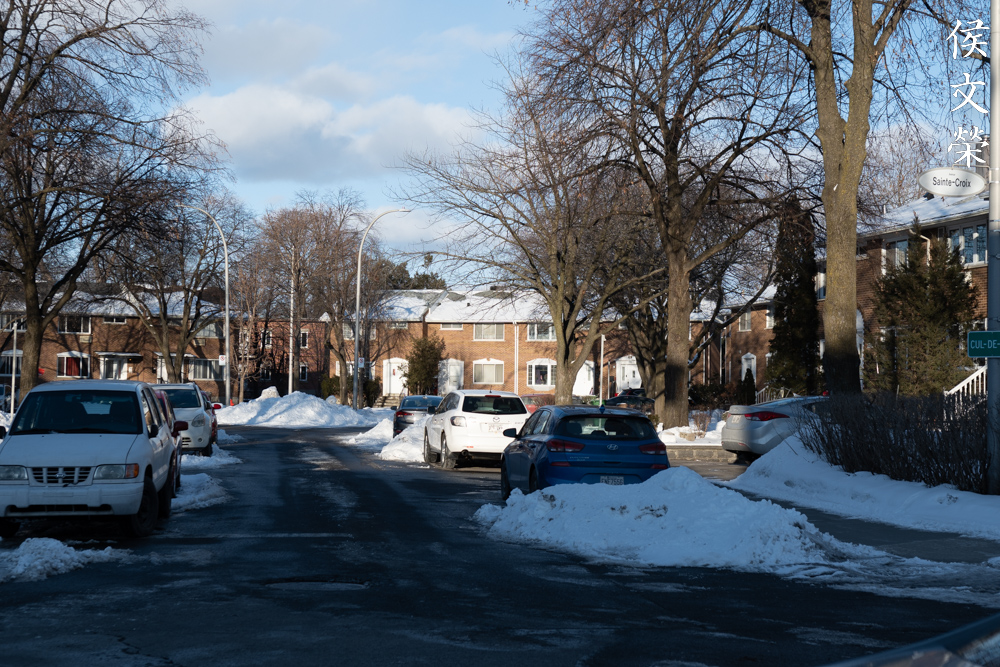
Hello, everybody! I had a dream a few nights ago about a girl that I was infatuated with when I was young and impressionable, I think I was in my early teens at that time. She felt out of reach to me, as if I was not good enough for her affection. It’s a feeling that many teenagers know very well and it’s part of growing up, feeling insecure and unsure of the future. Today, I’ll introduce to you one such idol of mine from some years ago. Back then, I was not sure if it’s the right equipment for me and I couldn’t afford it at that time. I wanted it so bad but it was never meant to be. Just like my crush from many years ago, time caught up so she doesn’t look that pretty anymore and so this lens isn’t so imposing anymore. But unlike that girl, this lens eventually became mine and using it definitely reminded me about why it was so special for me back then. Please read the whole article to know why this lens is so special.
Introduction:
The AF-S DX Zoom-Nikkor 17-55mm f/2.8G was made from 2003 to 2022, a long time for a DX Nikkor. I can even find some old-new stocks as of writing, that’s how recent its end-of-production is. It was Nikon’s flagship normal-zoom at a time when they could only manufacture and fit APS-C sensors for the cameras they were making. For film, Nikon had the AI AF-S Zoom Nikkor ED 28-70mm F2.8D (IF) instead. This lens was hailed as an engineering marvel at that time, both mechanically and optically, a real flex. Since Nikon is known more for optics, they had given everything they had on this lens. Nikon’s cameras were amazing but at that period, the rival’s cameras are better in terms of tech, so they played their best card.

In its time, this lens is the best DX Nikkor money could buy, it’s the best in its class optically and the build is nothing short of amazing. That makes it an expensive lens so it was never spoken of by the pedestrian photographers who could only afford third-party lenses. Sure, some cheaper brands have better features like vibration-reduction, but optically, this Nikkor reigned supreme. Even rivals from the other top brands fell short in terms of optical performance and that’s not an overstatement on my part, go search online. It has been somewhat of an obsession for me but I am finally able to buy one in junk condition for $50.00! I had to wait for more than a decade for this deal.
It has a complicated14-elements-in-10-groups design, with an impressive amount of 3 aspherical elements and 3 ED elements. At that time, it’s Nikon’s best DX-mount lens, I don’t think they made anything like this since. It’s still is the most expensive APS-C Nikkor that I know of, even used. Very ambitious, it’s like Nikon was making a statement. You will later see what kind of performance this is capable of.
There is also one interesting feature about this lens. You can shoot with it using a full-frame camera from 35mm-55mm without vignetting, this is something that is not recommended but it’s a curiosity for some people who just want to know everything about this lens.

To move all those glass and tubes, Nikon used an SWM (Silent Wave Motor) from the first generation. This motor is notorious for squeaking and breaking down eventually. I can say that it’s the weakest part of this lens. The motor is also prone to being busted even when the lens is just a few years old. Some people say that the later production copies have tougher motors, perhaps it was addressed eventually. The squeak is caused by the surfaces of the motor getting contaminated by moisture, dirt or oil. If you hear something like that, skip it, it’s not called Silent Wave Motor for nothing, it will soon stop working, or not at all. There are people who have owned squeaky lenses that lasted for many years without issues but don’t risk it.
Here’s a bonus, for those who have been in the hobby long enough to remember things, Nikon joined the full-frame club later that its rival, Canon. They never had the means to produce a full-frame sensor during the formative years of digital photography, something that it was criticized for by many supporters. That’s the reason why Nikon’s marketing focused on the DX-mount instead (understandably). You’d hear a lot of talk about how the cropped-format is smaller, smarter, gives you better reach and how it’s similar in many cases with the larger 35mm format, as if they’re identical. Of course, we all know that most of these aren’t entirely true now, the debate has ended years ago and people know better. The filthy shills in marketing changed their tone once Nikon unveiled the game-changing Nikon D3, at that point, they started praising the merits of a larger format. Sony sort of did the same, too. These days, there’s only one company that is selling people this bullshit, but they’re not as noisy as they were because people now know better.

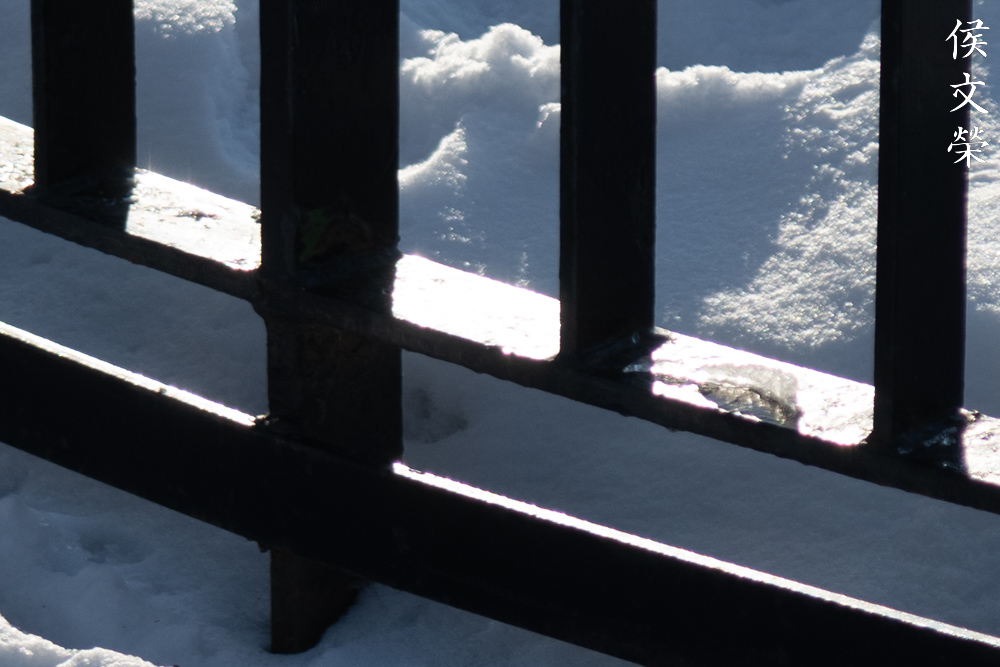
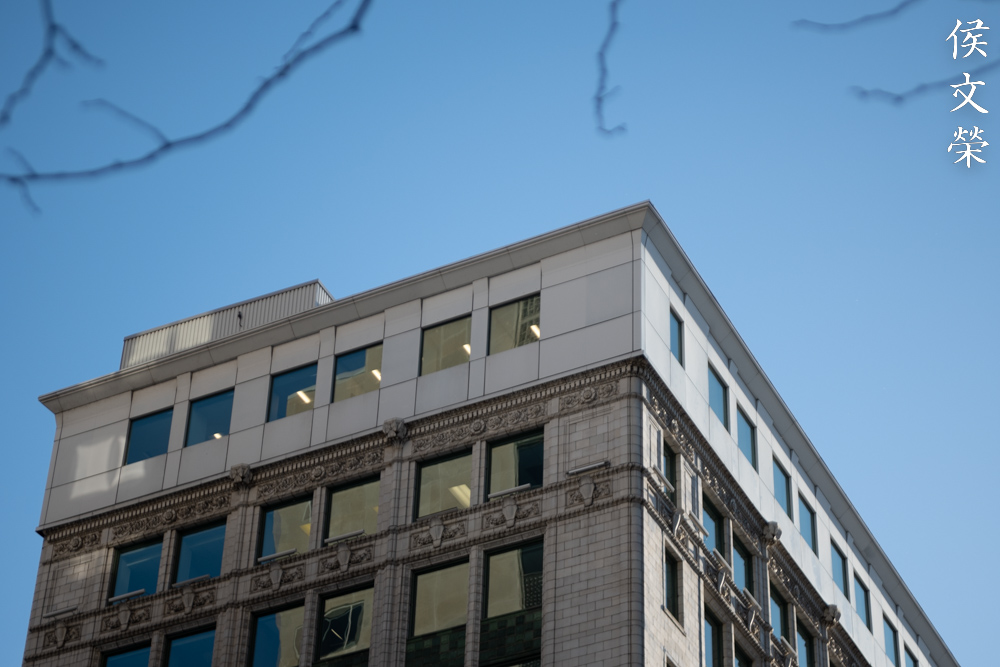
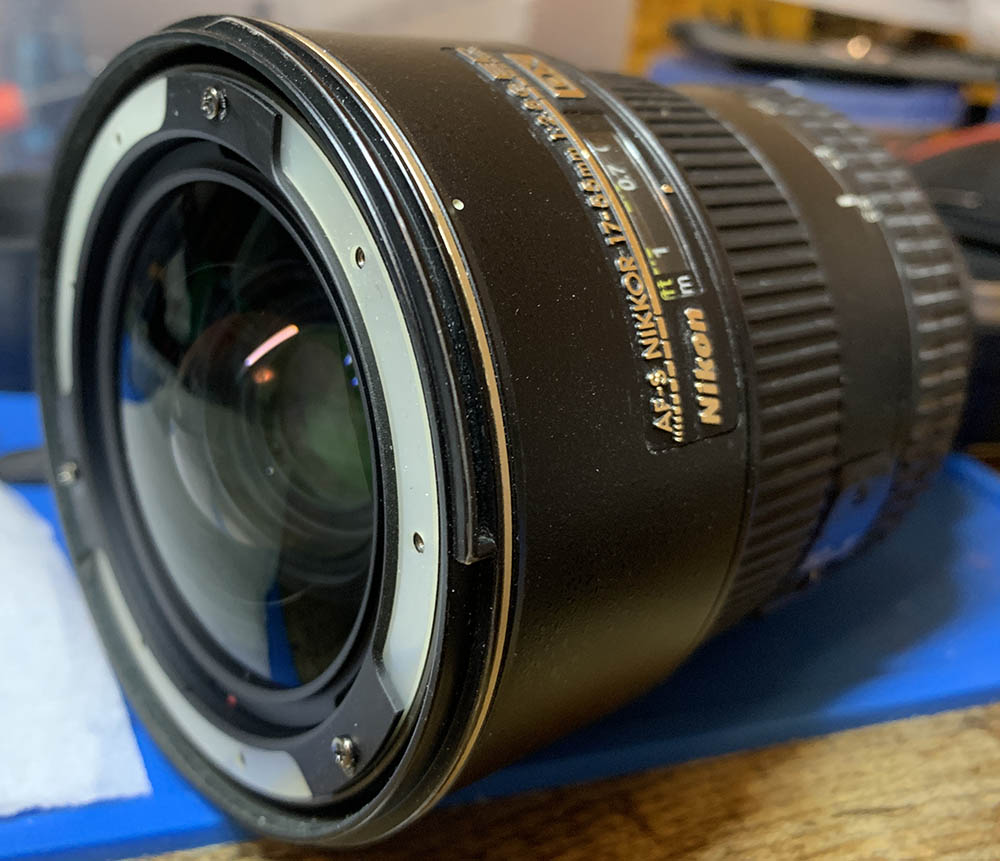
The barrel feels solid, it’s dense as if the whole thing is single piece of cast metal, it’s mostly like that and I will show you later in this article. It’s a minimalistic lens, with no aperture ring because it’s a G lens. There is only a focus-selector switch on the side of the barrel and that’s it. Also visible in this photo is the rubber seal for preventing fine dust and moisture and creeping into the mount.
Not having an aperture ring means that you can only control the size of the iris using the camera’s dials. I don’t mind this at all, Nikon did not design the DX-lenses to be used with film Nikons anyway. This is also an advantage in a way because it makes the barrel more rigid and there are less ways for moisture or dirt to get into your setup.

As of writing, there are no DX mirrorless Nikons that have in-body-image-stabilization (IBIS), this makes it appealing to shoot with something like a Nikon Z6 instead because it has this important feature. It’s not a big hassle because we’ve all coped with it throughout the decades but this is still something that is worth mentioning since it is significant enough to influence how and what you shoot with.
Since this is a DX lens the files you are going to get will be cropped. It’s hard to imagine the crop-area if you are shooting with an SLR but when you mount it on a mirrorless full-frame camera such as the Nikon Z6, you will see things as you should as if you are shooting with a DX-mount Nikon. Turning this cropping of the files to OFF for both full-frame mirrorless and DSLR Nikons is doable but you’ll get bad vignetting of the mechanical type since the sensor is capturing everything but the lens is incapable of projecting the required coverage to the senor.
Of course, the best way to use this lens is to shoot it with a DX DSLR like the Nikon D7500, I don’t have it so the next-best thing I have is a Nikon Z fc. Handling feels a bit strange because of the Nikon FTZ II. The balance has been shifted a bit, specially considering that the camera is lighter than the lens. If you want to shoot this mounted on a tripod you will need a Nikon FTZ instead because of the additional tripod foot. It is important not to support a heavy lens with the plastic Nikon Z fc or you will stress the chassis too much.

The Nikon HB-31 is mandatory not only for shielding the front element from stray light but also for extra protection because the front barrel extends. It mounts to the front of the main barrel, it’s rigid so there’s less chance of damaging anything delicate if you banged your lens. I could not find a genuine hood so I am using a cheap Chinese one. The fit is horrible as it’s too tight, stay away from these if you can spare a few more dollars for an original accessory.

Going back to the topic of adapters, a Nikon FTZ will be better for this lens because it has a foot, that will help support the lens when you put it down on a flat surface, it’s safer this way since you are not putting stress on the camera’s mount. You should also use a sling instead of the traditional straps as well in order to support your setup better. Either way you choose just make sure that you hold your setup by the lens. It is too heavy to be left dangling.

If you want to use this for shooting film you should use a Nikon APS-C SLR like a Nikon Pronea 600i. This camera will enable you to use this lens properly since they are both compatible. You will also not get any cropping because the format of the film is sort of the same as an APS-C sensor. In my experience, this is a sluggish setup and you could only autofocus using the central area.

I was lucky enough to get my hands on a couple of rolls of Fujifilm’s Nexia D100! Not only that, one of the local labs here still process and scan APS-C film! How good can that be? It’s expired but at least we’ll get to know how it performs with film.
I paired it with my Nikon Z fc, I wanted to see if the high-resolution sensor can out-resolve this lens. Since this lens has been reviewed by many throughout its 2-decades of production, mostly focusing on its use with a DSLR, I’ll mainly comment on its performance and handling when using it with a mirrorless camera.
Knowing how your lens performs is key to maximizing it. You’ll know its strengths and weaknesses. This will help you decide if it’s the right tool for the job. I shot these from f/2.8, f/4, f/5.6 and f/8 because we’ll see the most changes happen within these apertures. I also assume that people would want to shoot with it using these settings, too. Since this is a zoom, the sets are organized from 17mm, 35mm and 55mm for your convenience.
A caveat, this lens needs to be re-centered precisely when you remove the front and rear optical blocks, I did some crude adjustments myself but they are not sufficient so it will definitely impact the results you’ll see here. Read my guide carefully so we will not have to deal with this.


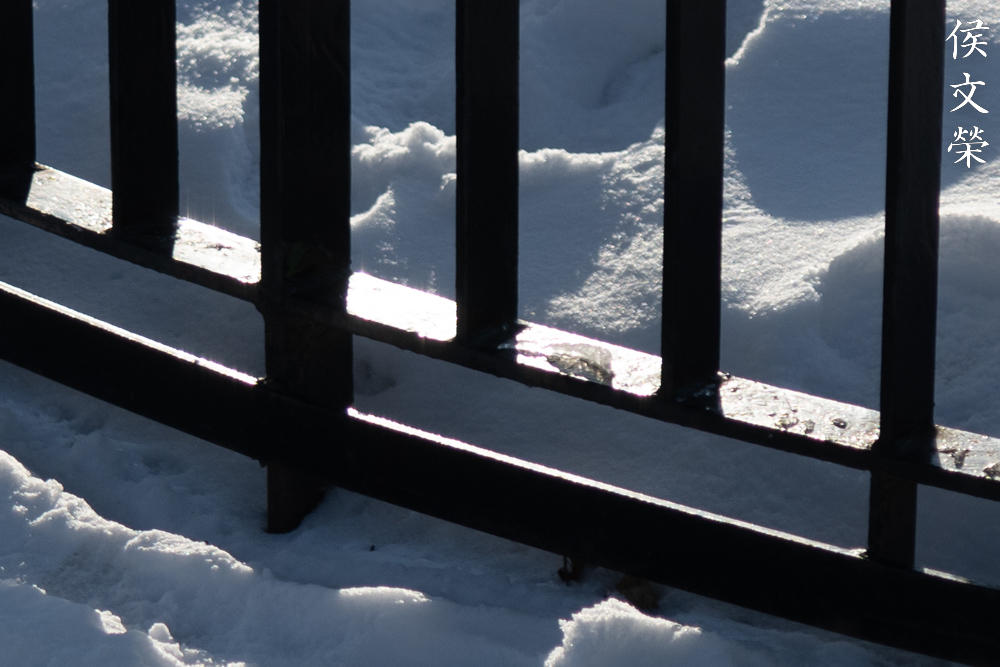
(Click to enlarge)
The barrel distortion is immense at 17mm, with a slightly complicated profile, too. Distortion is not as bad at 35mm, I guess this is the best focal length if you need things to be straight. I was expecting some form pincushion-type distortion that is visible at 55mm but I was surprised to find almost none of it. Maybe it’s because the brick wall that I shot isn’t perfectly straight so it’s not as obvious, if that isn’t the case then its performance at the long-end is indeed impressive in this context.


(Click to enlarge)
Vignetting isn’t much of a problem at 17mm, you’ll only get some of it at f/2.8 and it goes away by f/5.6. I wish it’s just as good at 35mm but that’s not the case. Well it’s darker at f/2.8, it cleans up nicely by f/4. At 55mm, it doesn’t look too different as it is at 35mm, the only difference is you will see traces of it at f/4.
This is all insignificant when shooting at the real-world scenarios, this is actually good and that explains its big filter size. You see, back in the day when normal-zooms for APS-C cameras were a hot topic, this lens has the biggest filter size of them all at 77mm while the ones from other brands have much smaller sizes. We now know why that was necessary.


(Click to enlarge)
While resistance to flare and ghosts looks impressive even for today’s standard, it’s not immune to them. I think it’s more susceptible to flaring than ghosts when shooting in tough situations. It does not have the phenomenal Nano Crystal coating that would come a couple of years later. It’s still pretty good and you’ll be amazed at how good this lens is, except for the flare part which is one of its weaknesses as you will see later in my example photos.


(Click to enlarge)
The character of the bokeh is exceptional, this is also where its rivals all fall behind. I remember that what Tamron had that time is a bit sharper at times but it’s not as smooth as this one. I tried really hard to get it to render ugly looking blurs but I just couldn’t, even that 17mm, it’s still good at its worst performance.


(Click to enlarge)
You’ll see some occasional outlines in the orbs and also some slight concentric rings if you are not careful. I am not sure where that comes from because it does not have any aspherical elements at all. Don’t worry about it because whatever you will see from it can be ignored because the effect is so negligible.
Since it has 9 blades and all of them are curved, you will not get striking sun-stars from it, the good thing is you’ll get smoother blurs in return.


(Click to enlarge)
Chromatic aberration can be seen in high amounts when shooting at f/2.8. You’ll still see some by f/4 and it will only go away at f/8. This is not much of a problem at 17mm but it gets progressively worse as you get closer to 55mm. This is disappointing, I guess it’s not as perfect as what I’d hope for.
Perhaps one of my biggest issues with this lens is how poor it handles chromatic aberration. Well it’s not as bad as some other lenses I’d expect it to fare better because it’s a flagship product. While this is indeed an issue for me because it can be difficult at times to avoid it completely especially when you have the sky as your background, it does help somewhat in helping render a pleasing and smooth photo. I guess you should not worry too much about it because it’s trivial to correct this using software these days.
This is an example of how it looks like when shooting in more decent situations. While the photo is sharp, you will see that there are hints of purple at the edge of the box. It doesn’t look so bad, right? I think this is tolerable, even for professional work.


(Click to enlarge)
Here’s another example, maybe I’m just too picky because I’m expecting too much out of this lens. This is after all Nikon’s best lens for the APS-C format.


(Click to enlarge)
Sharpness at the center looks great at f/2.8, it just lacks a little bit of resolution which you won’t notice at all unless you pixel-peep. Stopping it down to f/4 will give it more resolving power which results in better performance at the center, I can see that it’s almost performing at its peak in the center. The center looks slightly better at f/5.6 and it looks magnificent at f/8. If you’re main concern is the center performance, it won’t benefit you much when you stop it beyond f/4. There’s really no point in doing so unless you need to get better performance at the corners, which we will discuss in the next paragraph.
The corners look impressive even at the extremities when shooting at 17mm at f/2.8. Sure, it will never be as good as the center but it’s still some of the best I have seen from any manufacturer. The performance is astounding even if you pixel-peep at f/8. Unfortunately, you will not see this happen at 35mm and it’s even worse at 55mm where the corners look even worse. This is not to say that it’s a failure just because it isn’t able to sustain its performance throughout the whole range, this is just Nikon prioritizing where the performance at the corners count the most. This is going to be great news for landscape photographers or photographers who shoot groups of people so the faces at the corners won’t look like mush. It’s truly a professional’s lens in this regard when you think about it.


(Click to enlarge)
Interestingly, my copy performs a little bit worse at 55mm when shooting more distant subjects. This may be due to me not being able to re-center the optics precisely.
Enough of all the theoretical talk, that’s now see how this lens performs in real scenarios. We can talk all we want about sharpness, chromatic aberration and other things but if a lens sucks in real use then it’s no good at all. It’s like having the sharpest knife but it won’t be able to cut fish and tomatoes cleanly.

It renders colors really well, very neutral with a pleasing character. It’s also evident that subject separation is beautifully executed, you are able to isolate your subjects without ever hitting a “wall-of-focus”. You are going to see a smooth transition from what’s in focus to what’s blurry.

Please pardon me for showing this rejected photo, it just has a lot of things going on that’s interesting. If you look at the blurry parts at the left corner you’ll see that it has rendered the blur really well. Also notice how sharp it is, it’s best if you can see the RAW file for yourself, but that’s not possible here unless I saved a high resolution photo as a link. I love this picture a lot despite her shutting her eyes, it has all the great attributes that I love about this lens.

I’m showing this because of how it’s able to render both sharp and fuzzy details exquisitely. Examine how the feathers on her headdress looks like, it has a subtle bloom that gives an impression of softness. This is a very desirable trait of a professional-grade lens for portraiture.

While it’s sharp, it’s not going to render the skin of your subjects like stucco, some lenses do that but this one won’t. It’s sharp but not to the detriment of using it for portraiture.

Surprisingly, this lens is also able to render overblown skin highlights with a subtle bloom over it, just like many vintage lenses do. If this is indeed the case then the optical designer is a genius, he has successfully traded some aberration correction in order to achieve this. That may explain why chromatic aberration is not effectively eliminated completely by this lens, it’s a delicate balance that’s done deliberately.

Because 55mm in APS-C will give you the same field-of-view of an 82.5mm lens in full-frame format, you will be able to sort of mimic the framing of an 85mm lens, but that won’t give you the same compression. It’s not noticeable at all but it’s technically never going to give you the exact results as if you were taking a photo using an 85mm lens with a full-frame (35mm) camera. That’s why the effects of foreshortening is somewhat visible here.

I love how pleasing this lens renders people, it’s really an artistic tool rather than a technical one. I’m now able to understand the greatness of this lens, I could never justify its cost before because I’ve never used it at this capacity. I am now a believer, its cheaper plastic rivals won’t be able to match it completely.

Here’s another example of how good its subject isolation properties are, you will be able to present your subjects better with it.

Its ability to separate your subject from the rest of the frame can go against you just like what you see in this photo. To prevent this, you should either stop the aperture down even more or have both people at roughly the same plane so the other person won’t be too blurry.
Of course, you can use the middle of the range like 28mm to get more things inside your frame. It’s really convenient to work with a zoom when shooting events because all you need to bring is one lens. That’s a great justification for investing in an expensive professional zoom over 3 separate prime lenses.

Learning to use a zoom is not easy if you have not grasped the fundamentals of framing. Foreshortening is a tool that can work for you, it can make your subjects look larger-than-life when shooting at 17mm. If I took this with a longer focal length then the people at the back will look larger instead.
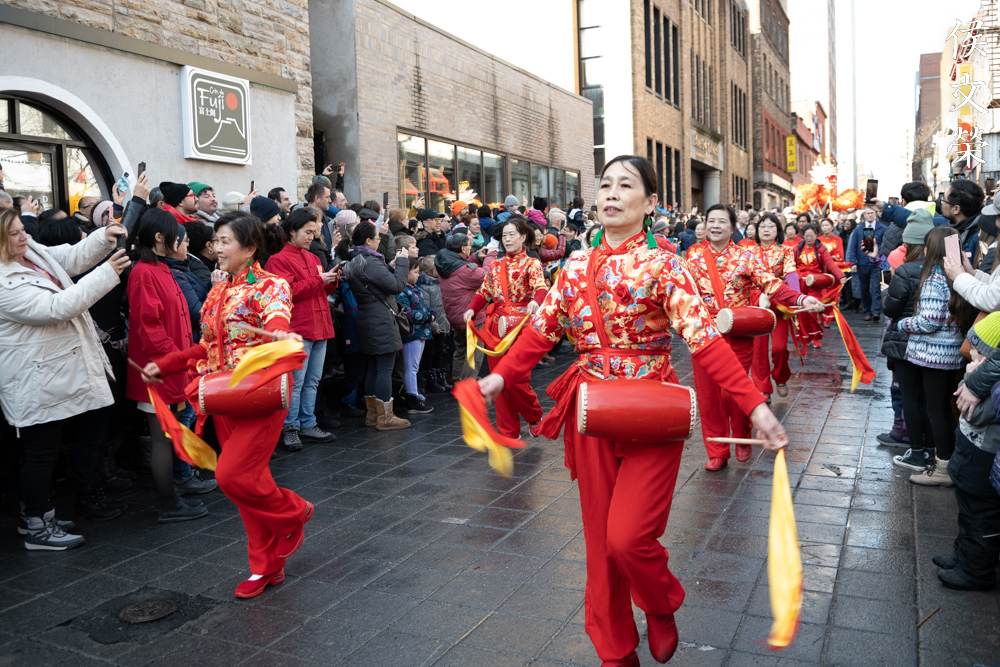
Also worth noting about this picture is how vivid it’s able to render the colors of the mythical Lion. It’s as if you are there in front of it during a sunny spring morning.

It’s able to track erratic moving subjects when shooting with the Nikon Z fc, you will just have to set it up properly. I find that using Pin-Point Autofocus gives me the most reliable results because you’re telling the camera exactly what it needs to track. The Wide-Area Autofocus mode works nicely as well but it’s not the best mode for something like this. In order to make most of the autofocus modes work better, you’ll need to configure your autofocus settings accordingly and use the AF-Lock button to activate or lock-on to the point that you have selected. I will not go into explaining how to do this, just read the manual.

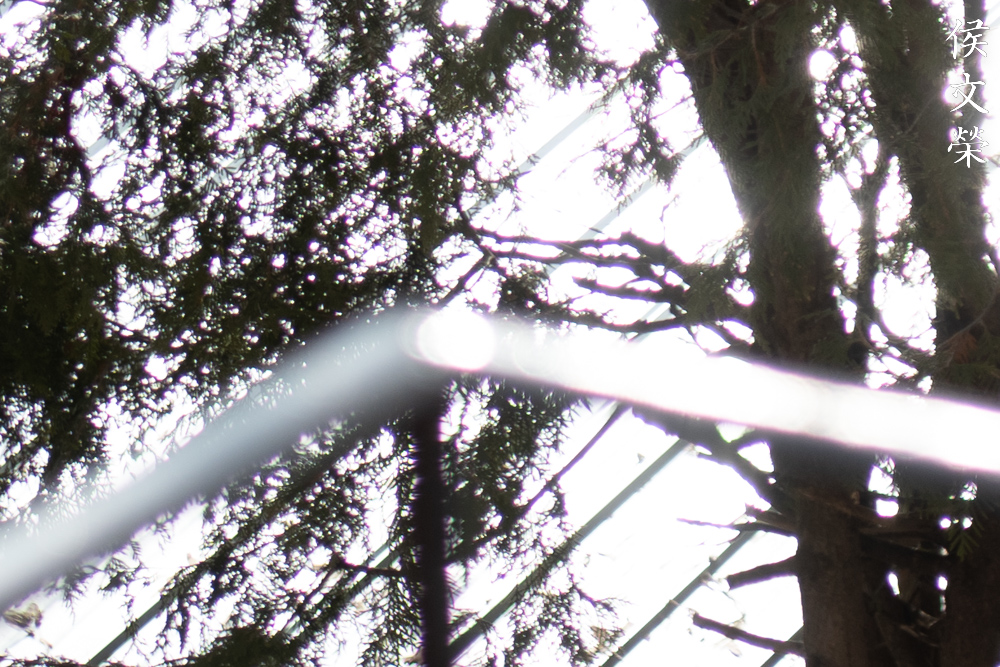
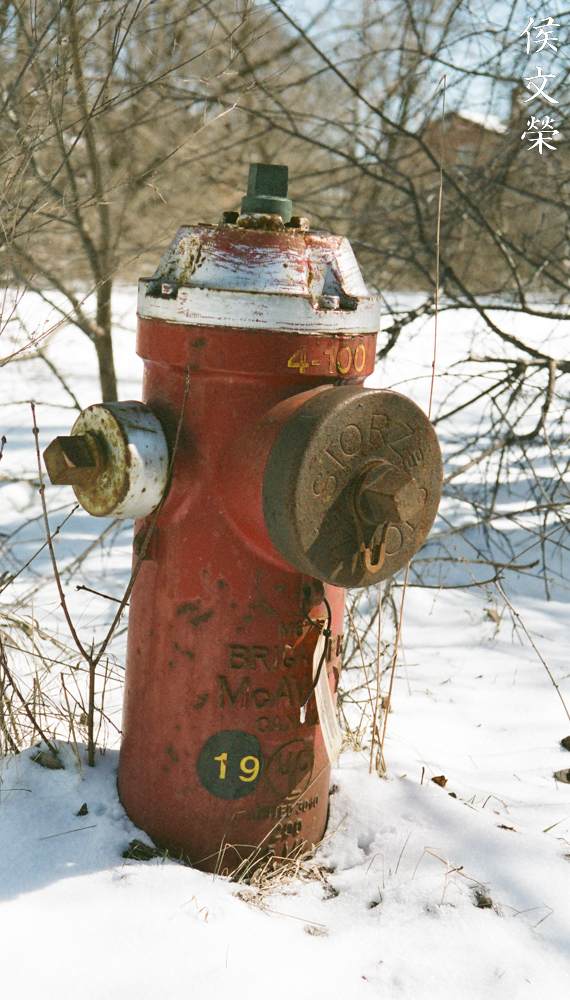
I’m showing this because I tried really hard to make the twigs look ugly but I just couldn’t!

The absence of VR is more apparent when you don’t have enough light in the scene. This is by no means a real lowlight scenario and the Nikon Z fc is already struggling to give me a smooth photo. This was shot at ISO4000 I am already upset at how mushy the photo looks. Back in the day, the solution to this was to use a flash but that’s not something polite to do in this situation, you may get kicked out of the venue.
I took this using the Face-Detect Autofocus mode and my setup was able to reliably track one of the eyes of the talented performer with the red pants. It may miss occasionally especially when there’s not enough light. I’m not sure if the motor of the lens was able to keep up 100% of the time but my impression was it sort of did in most situations. There were times when the camera was not able to detect the correct face that I wanted, but that’s nothing to do with the lens anyway.

Here is an example of a missed shot. This would have been a beautiful photo if only I got the focus right. The setup focused on the left shoulder instead of his face, I don’t know which mode I was using here but I am still upset with everything. I don’t think shooting in bursts could have given me a lucky shot.
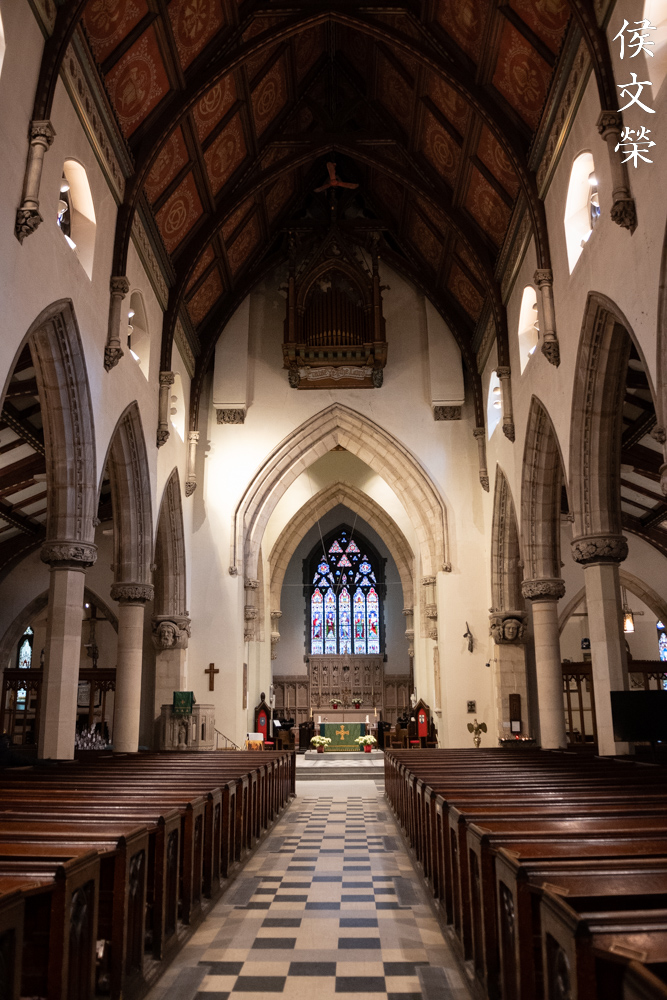
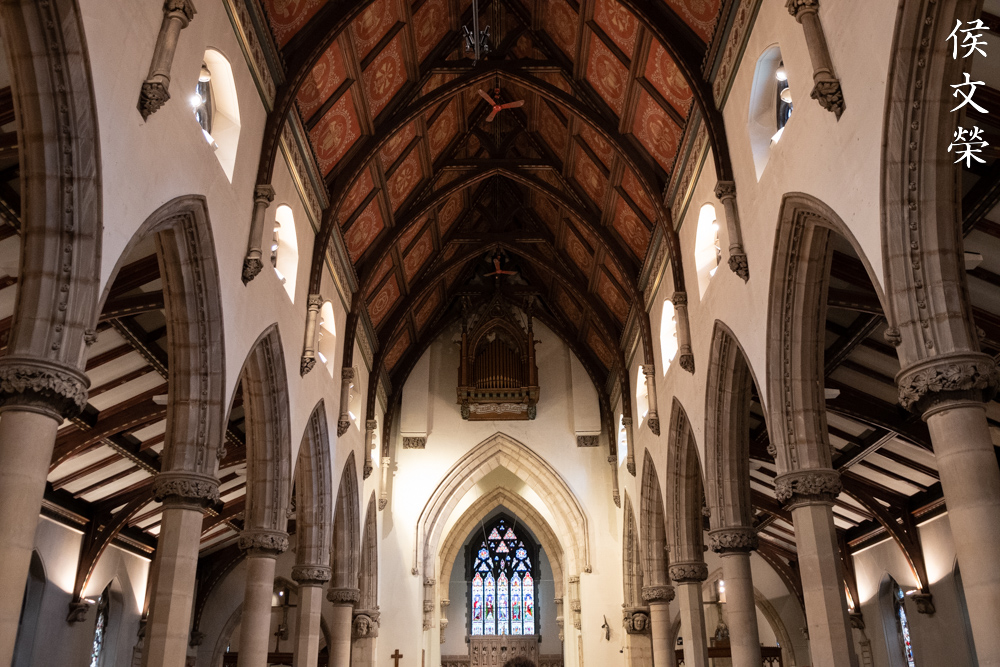
While this lens has generous amounts of distortion at 17mm, I was able to sort of hide it in this photo. It’s mostly consisting of curved lines and the pews aren’t perfectly straight either. I don’t think I could be this lucky if the scene has a more rigid look to it.
Another way of making the effects of distortion less obvious is to angle your lines very well. You can also frame it so your straight lines are never parallel to the edges of the frame.
You have 17mm at the wide-end which is equivalent to 25.5mm on full-frame (35mm), that is going to be wide enough for most interior shots.
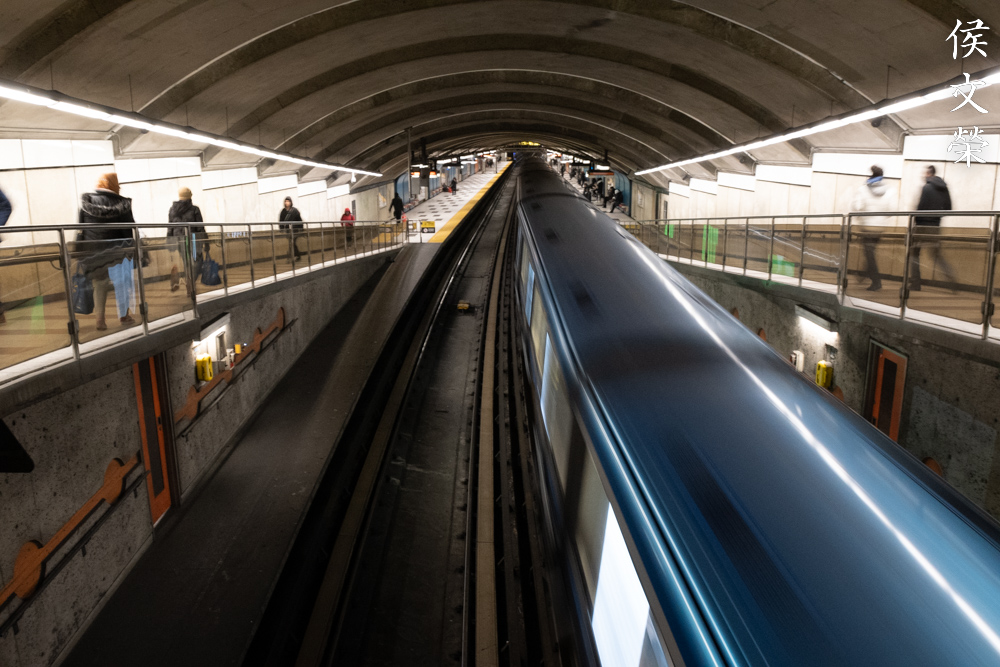
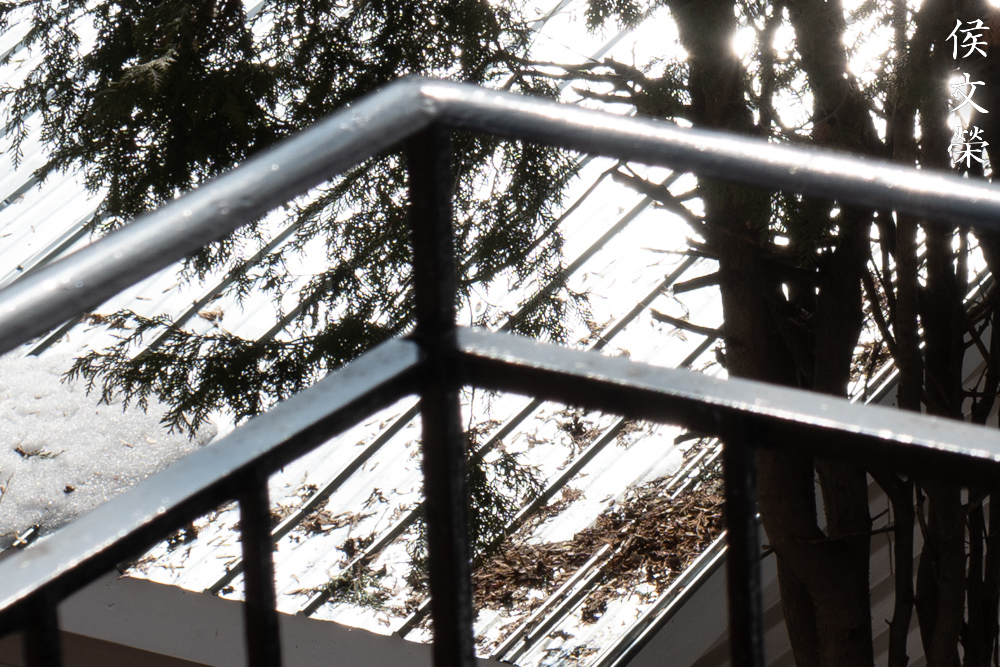
When shooting at 17mm, you are able to drag the shutter a bit when you need to. I shot this at 1/10s just because I wanted to capture the motion of the train. Without VR it is very challenging so you should use a couple of tricks like leaning over the railings just so that you can get more stability.
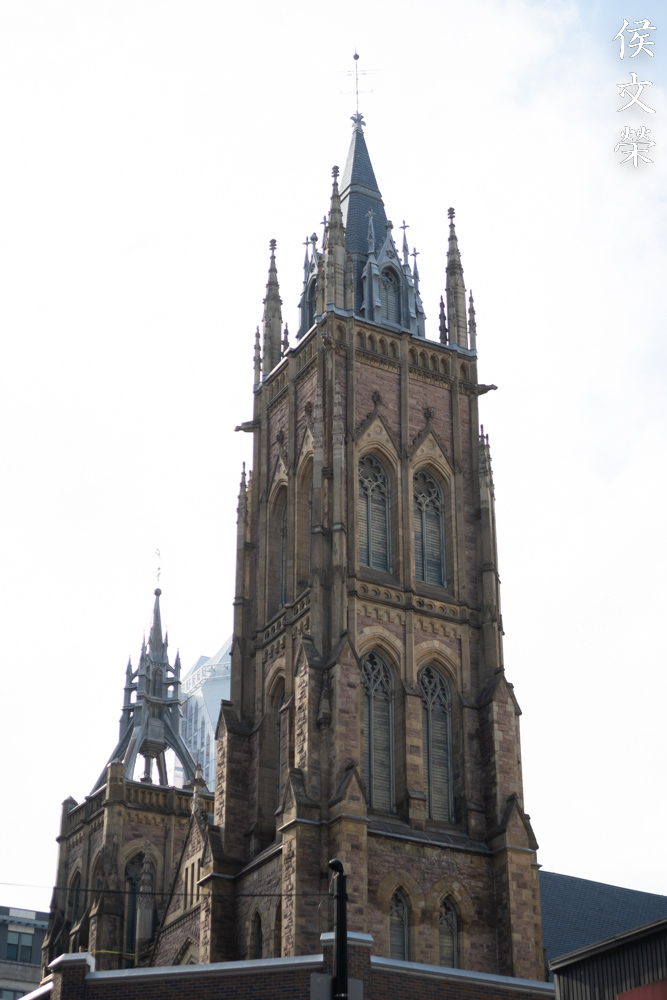
This photo illustrates how chromatic aberration affects the edges of the tower. I took this just to show you how it looks like, but if I were shoot this for real I would stop the iris down to at least f/5.6 so we’ll not see any noticeable amounts of chromatic aberration.

This is very convenient as a walkaround lens, all you need to bring with you is a camera and a lens. You’re going to fulfill most of your needs with just a single setup, it’s probably a good travel lens, too.


(Click to enlarge)
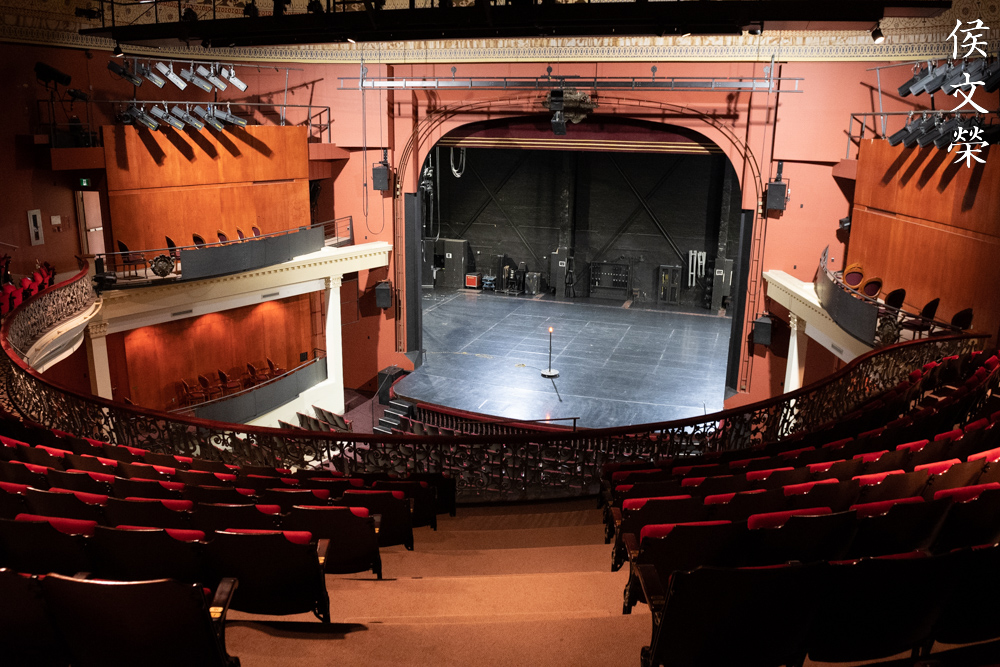
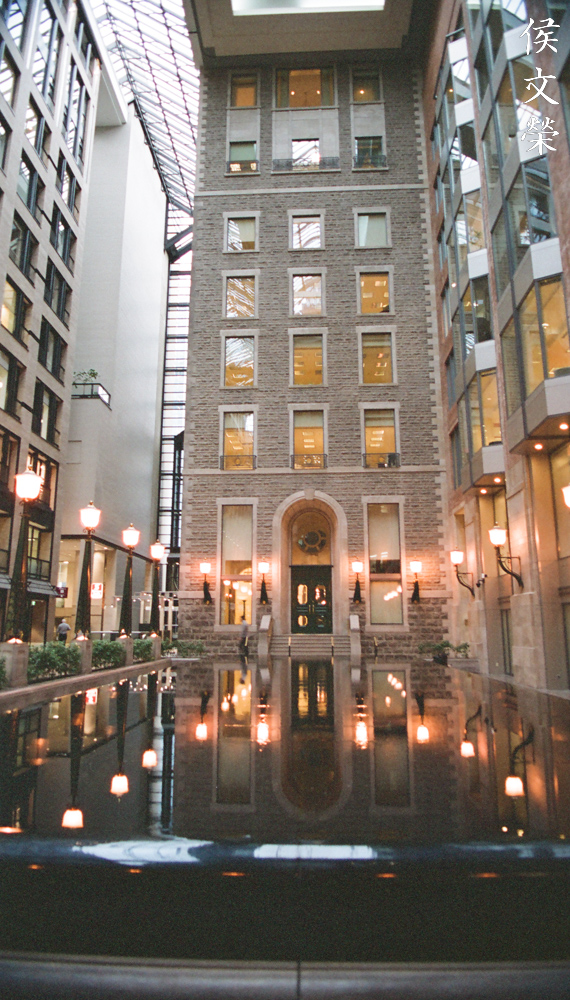
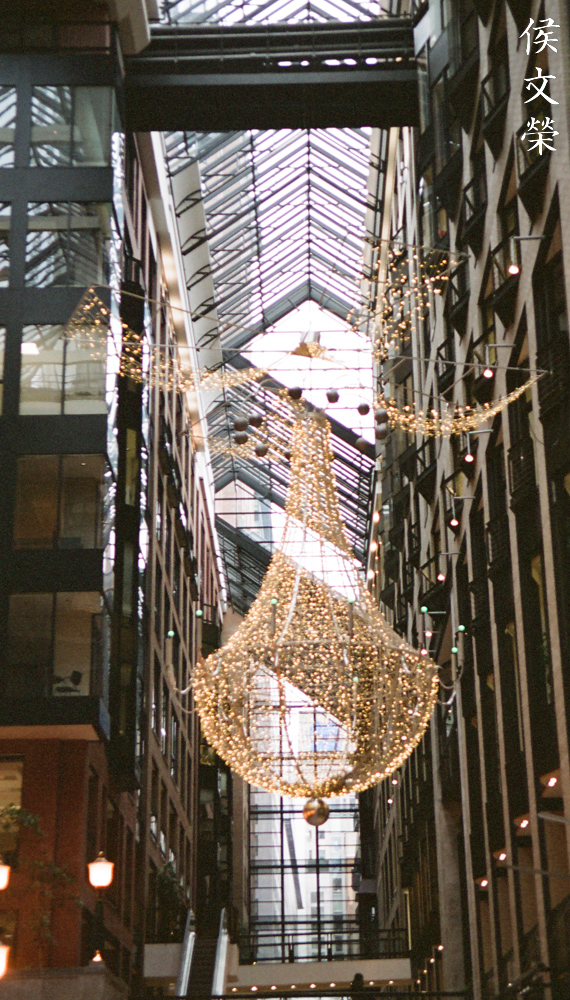
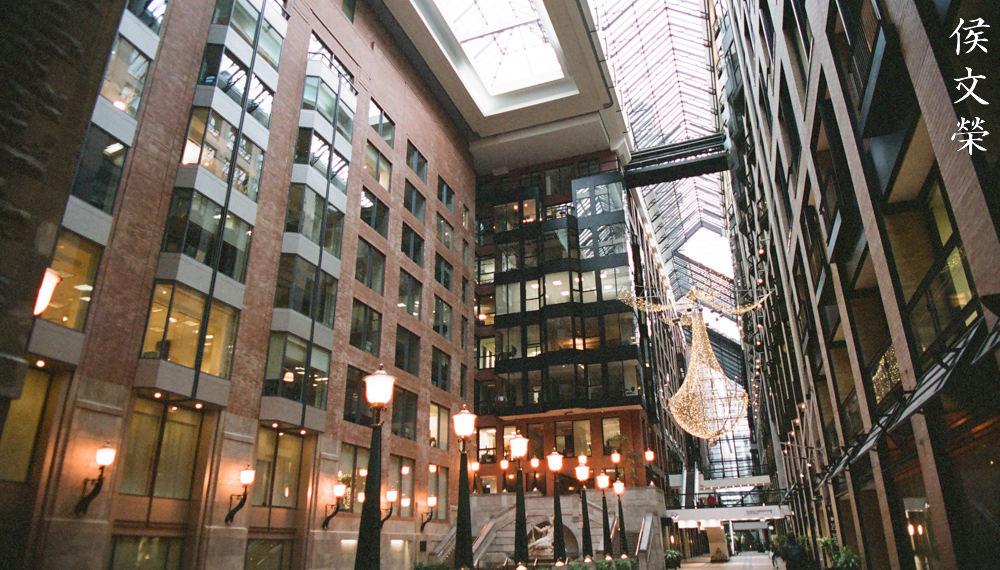
Here are more photos. Since this article is centered around using this lens with the Nikon Z fc, or any of its kin like the Nikon Z50 and the Nikon Z30, all of my commentaries are going to be confined in this context. I can say that I have really enjoyed shooting with this lens so long as I got enough light to work with, this is very sad because I’d like to enjoy the lens even further but the lack of VR became a bigger issue than I have anticipated, specially when using a flash it’s not an option. I could tell that the issue came from the limits of my camera’s sensor and not the lens itself. That seriously threw me back to the days of the Nikon D90, where I will never shoot beyond ISO1600. Although I could cope with it, it’s not something that I’d want to experience today in 2024! Perhaps the solution to this is the high-megapixel Nikon Z8, with that I would be able to shoot with it in cropped mode while still maintaining a 20MP file. Despite this little bit of inconvenience I still think that this lens still has a lot more to offer today, Nikon never made anything that took over its place in either F-mount or Z-mount. Even if such a lens existed it will never replace this, it is a real classic, something that videographers even took the time to adapt for shooting with cine cameras. It’s truly the best and only one of its kind.
Let us know see how this performs with film. I do not think this lens was ever designed to work with film, I am just curious and I want to see if it will work with my Nikon Pronea 600i. Do note that the film I used is already expired for almost two decades, but was stored properly until recently. I will focus my comments within the context of using this lens with the APS-C format more than the film itself as it has an unusual film ratio that’s elongated horizontally.


(Click to enlarge)
This is how it looks like at either end of the zoom range. Since the ratio is wider than what we’re used to, I was able to get more things inside the frame. This meant a lot of negative spaces which you can use for a lot of creative expression.
This lens performs nicely with film. The colors don’t look great but that’s more of an issue with the film. It looks sharp where it counts and the blurs look smooth.

There is a little bit of distortion happening in this photo which you can see at the bottom of the gray box. I don’t think it’s that much of a big deal because you wouldn’t even notice it if I did not tell you about it.

I like this picture a lot. The 17mm end is wide enough for a lot of use cases, even with the wide ratio that we get with using this film format. I dislike this ratio to an extent because I prefer a more squarish one but that does not mean that I will not enjoy a good photo that was taken with it.

It’s amazing to see how sharp this lens is even when shooting with film, I could see a small details in every brick when looking at the original scan.

Not having VR is the biggest problem when shooting with film because you are usually locked with using a film that is not going to be fast enough for a lowlight shooting.

Otherwise, it is a great lens if you have enough light to work with.
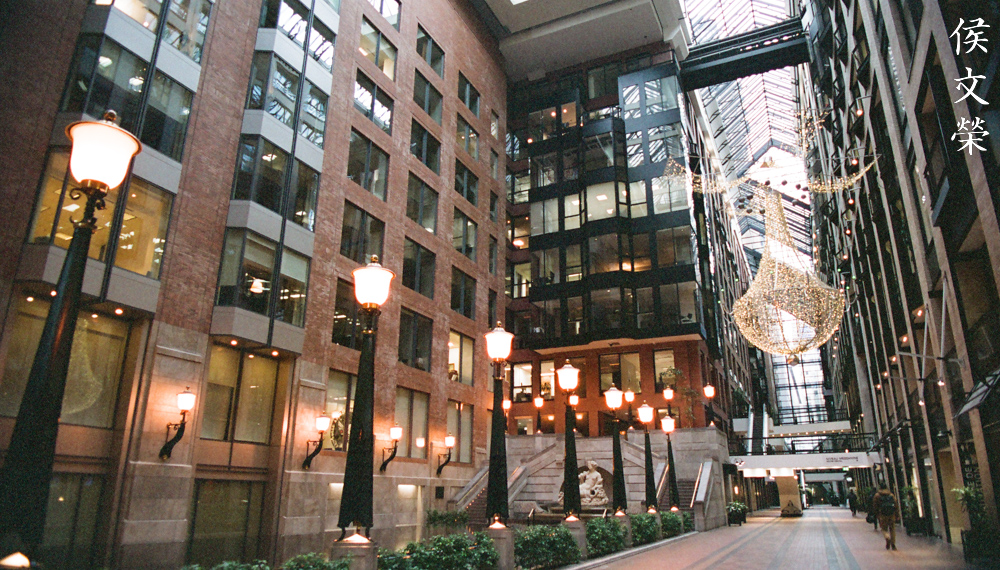
You will be able to get away with using slower shutter speeds when shooting at 17mm. The weight of the lens alone is enough to help stabilize things. I would like you to pay attention to the glass roof. Note that you can find obvious amounts of chromatic aberration there. I am actually surprised because I usually see less of it when shooting with film.
Chromatic aberration looks even worse in this photo, look at the roof. Other than that, this picture looks nice. It would have been better if I had a tripod with me at that time so I can close the aperture more.

The effects of distortion isn’t obvious in this photo because my straight lines are not parallel to the edges of the frame. But if you look closely, you will know this the towers curve a little bit outwards.

I think it’s a viable lens for shooting architecture with an APS-C camera, the wide aspect ratio helps a lot.


(Click to enlarge)
Here are more architecture photos that were taken with this setup. Probably the most interesting photo in this set is the one with the flare and ghosts. It appears to perform nearly identical with film or digital. It’s a pity that we don’t get to shoot with APS-C film more these days because I surely enjoyed my time with it.


(Click to enlarge)
And here is the rest of the roll. This time, we’re looking at photos that were taken indoors and with not a lot of light. I would not call this really a true lowlight situation but this is the darkest I would go using the setup without the help of a flash. The lack of VR is the biggest obstacle that I had, I’m not making excuses but it’s really a big issue when shooting with film. Maybe if I have an 800 speed film than this wouldn’t be much of an issue at all.
I can only recommend this lens to people who knew what they are doing because this is a DX Nikkor. It’s not uncommon for people who initially got into photography through the DX format to upgrade soon to the bigger FX format once they get more involved, and if someone bought this lens, that definitely shows the person’s level of commitment to the smaller DX format. While many people stuck with their DX setup for shooting birds, sports, insects and other specialized disciplines that requires you to get closer, I don’t know of anybody who deliberately shoots with the DX format for serious work in the realm of events and other more orthodox types of photography. This may be appealing to the DX specialist who will want to have a normal zoom for the times when he just needs to take casual photos. For me, its usefulness has already been surpassed by more practical lenses right after Nikon unveiled the FX format. Despite that, I know that there will be some people who will want to shoot with this just because of its unique optical qualities. While I was doing some online surfing, I was actually surprised that a few videographers liked to take videos with it. Cinematographers are a special tribe, these people really know their lenses very well. I should know, I used to work with them all the time. They know their lenses inside-and-out because they need to shoot a whole sequence that feels connected, and that includes the look and feel of the shot. If the continuity is lost because a shot felt different to the next one then that’s not a good thing. If you are reading this article because you want to have the ultimate DX Nikkor experience then this lens is for you. When looking for one, you will have to make sure that the motor does not squeak at all and it moves in a free and confident manner. A little bit of hissing sound is normal but something that sounds labored and stressed isn’t. Operate both zoom and aperture rings and make sure that they both work properly and the rings don’t feel stuck at any point, if it did, then something is snagging inside the lens. Actuate the iris by operating the aperture lever at the mount and make sure that the iris is dry and snappy, there should be no signs of sluggishness at all. Any issues regarding the aperture is very troublesome to correct, it will be very time-consuming. Finally, check the optics, it should be clean from fungus and any damage. A little bit of dust inside the lens will not matter much so long as they are not really big. A particle with the size of a flake of dandruff is definitely going to register in your photos. Just use your judgment and you should be fine. These are still expensive today but they are getting cheaper lately. I would say that you should never spend more than $200.00 for a good working sample that shows signs of use but still operates perfectly. I got this for around $50.00 because it’s a beater but the SWM motor works flawlessly. The biggest surprise to me is the iris, it’s a very sluggish despite not showing any signs of oil and dirt. It will be also nice if your lens will come with the hood, too. Do not rush to buy one of these, just wait and you will be lucky enough to find one with a good price and condition. Happy hunting.
Before We Begin:
If this is your first attempt at repairing a lens, I suggest that you see my previous posts regarding screws & drivers, grease and other things. Also read what I wrote about the tools that you’ll need.
I suggest that you read these primers before you begin (for beginners):
- Essential tools
- Best practices 1
- Best practices 2
- Best practices 3
- Ai conversion
- Working with Helicoids
Reading these should lessen the chance of ruining your lens. Before opening up anything, always look for other people who have done so on the internet. Information is vague and scattered but you can still find some information if you search carefully.
For more advanced topics, you can read my fungus removal article. It has a lot of useful information, it will be beneficial for you to read this. I also recommend that you read the working with helicoids article since it is very important!
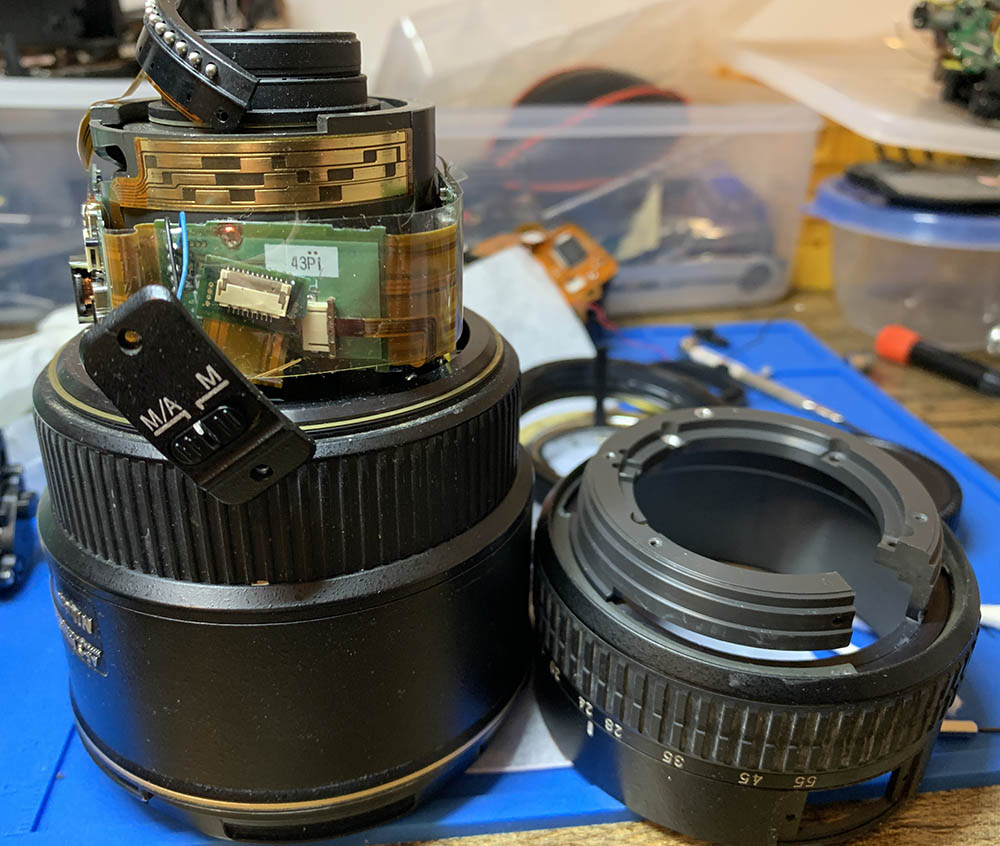
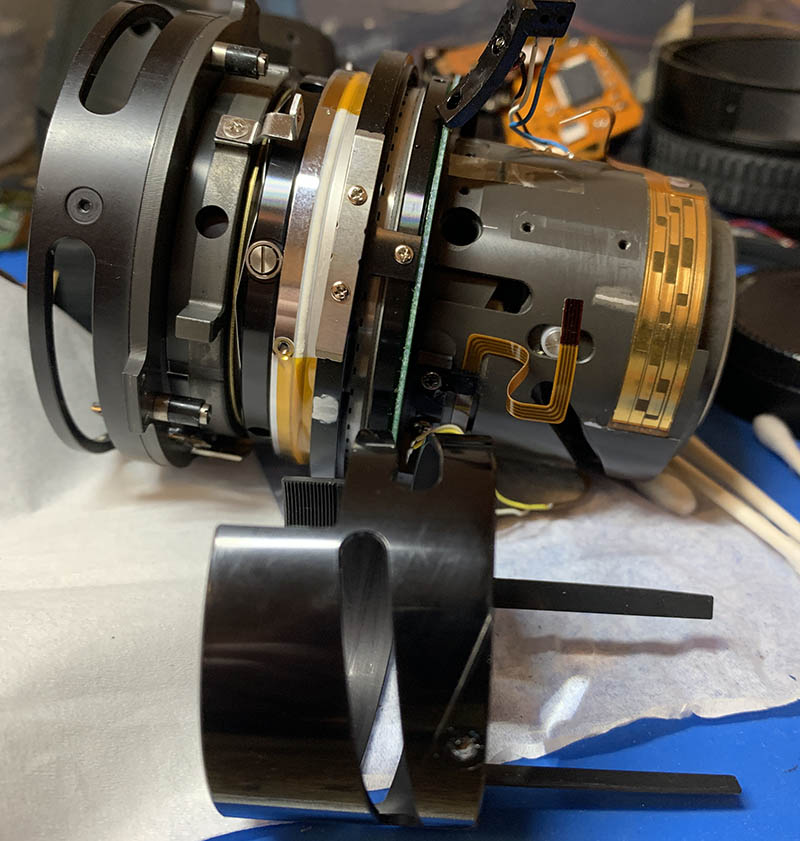
Disassembly (Rear Barrel):
This is definitely one of the most complicated lens that I have ever serviced. Its construction is complex so this is not something that a beginner should work on. Before you continue, make sure to discharge static electricity through a ground or wear rubber gloves. You will need special tools and don’t forget to take a lot of notes and photos as you go. Be aware that you will need to stick to one end of the focal and focus while you take notes so your point of reference does not change.
Some people will start from the front but I chose to start from the rear. This section will how you how to dismantle the rear barrel so you can service whatever is there. This is also the best place to start when you need to get really deep into this lens.
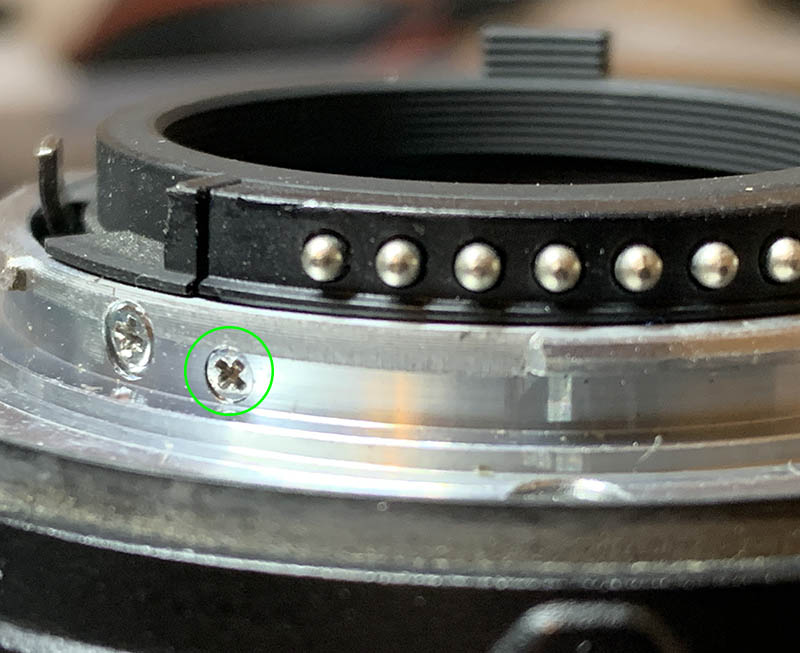
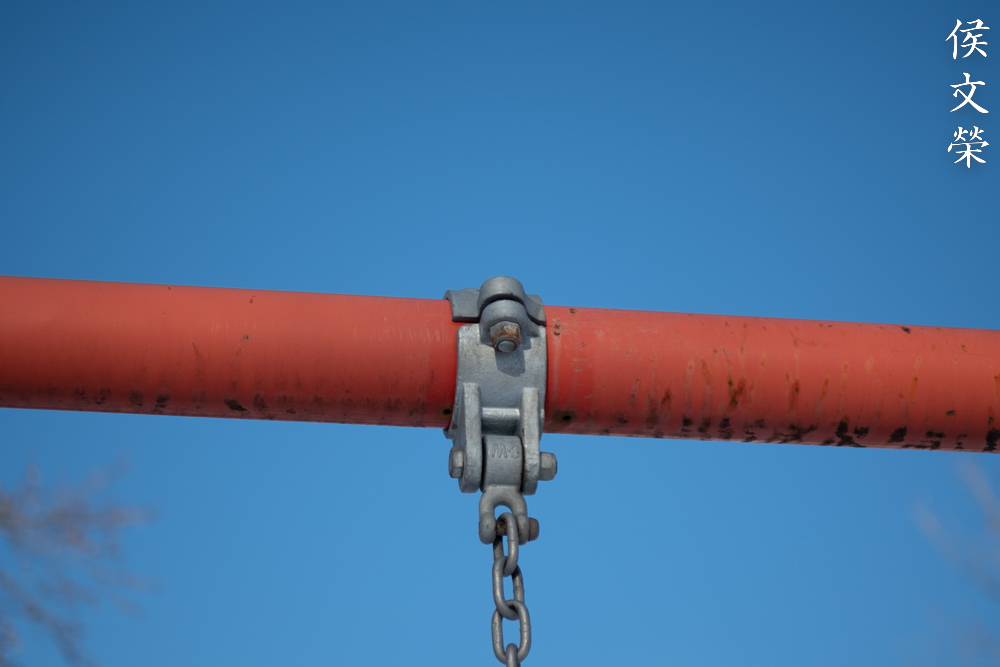
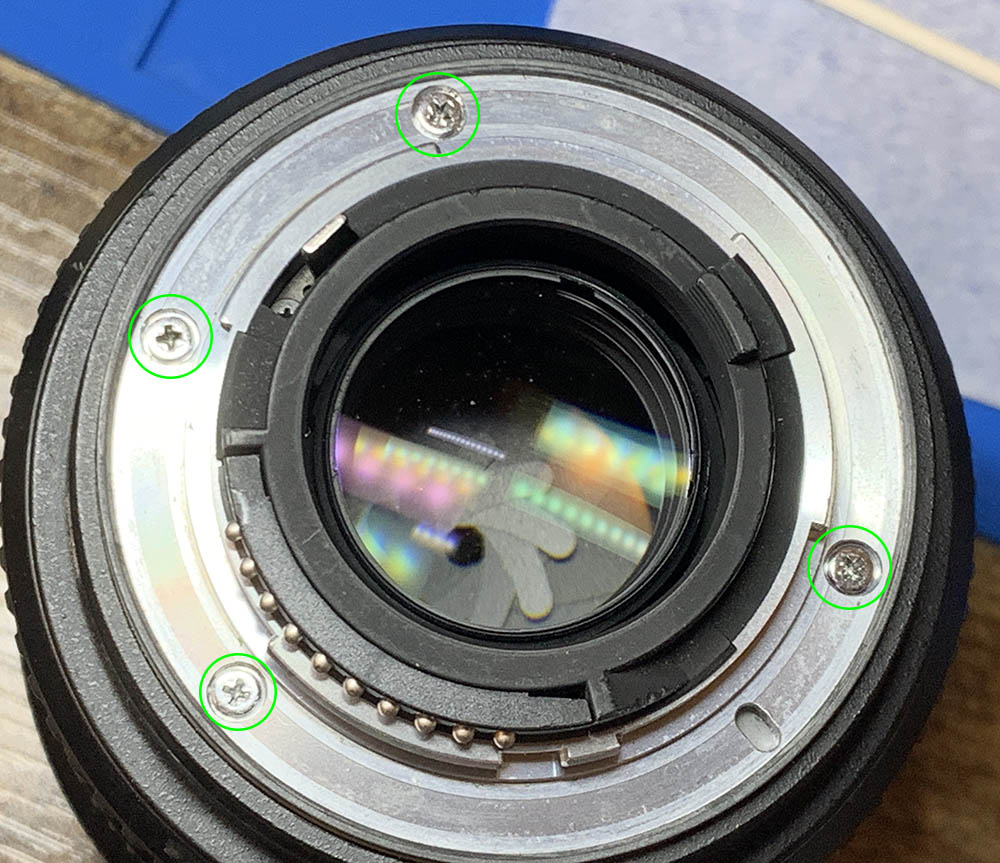
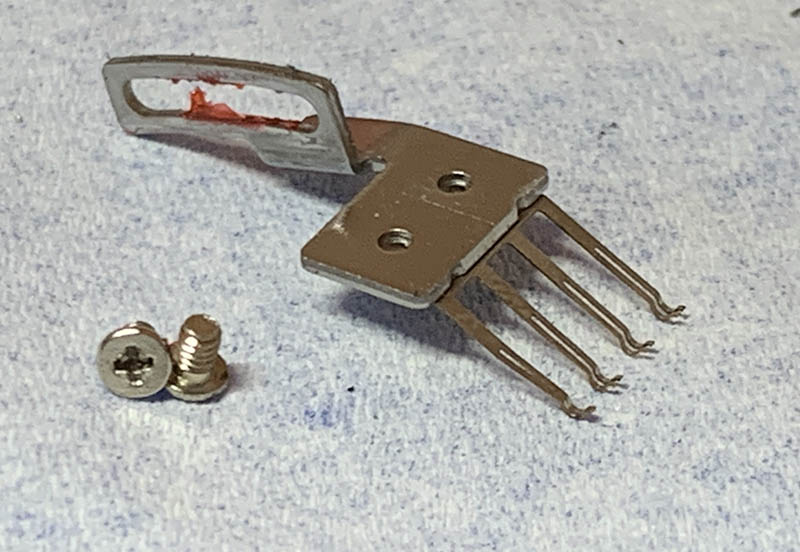
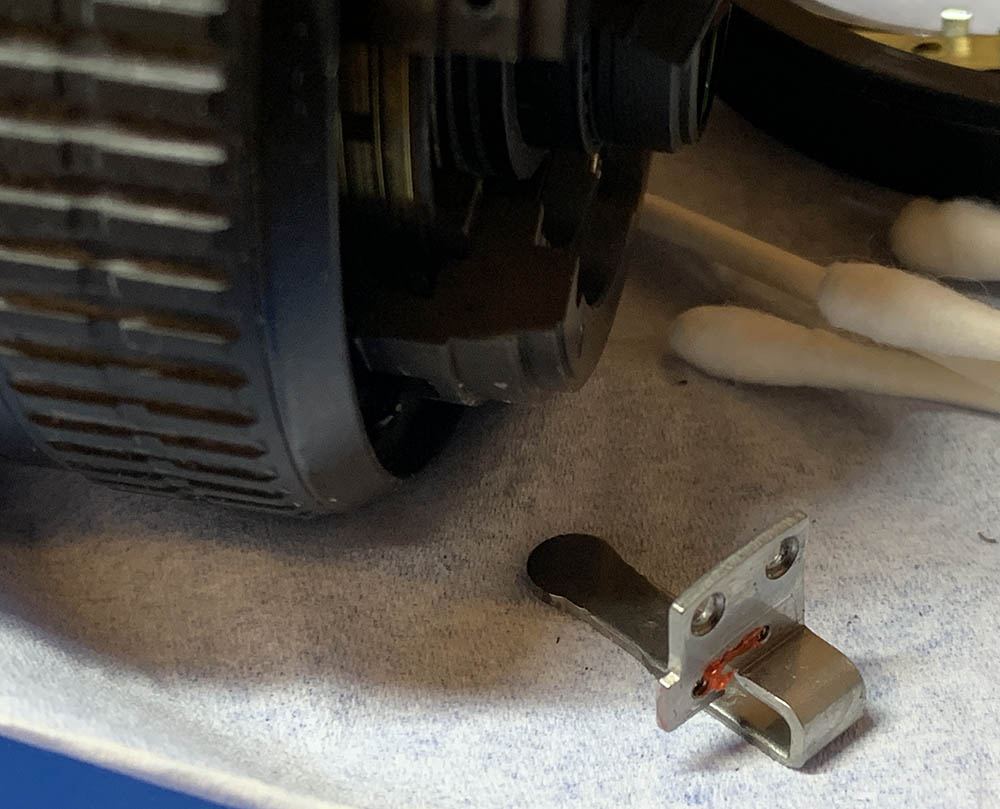
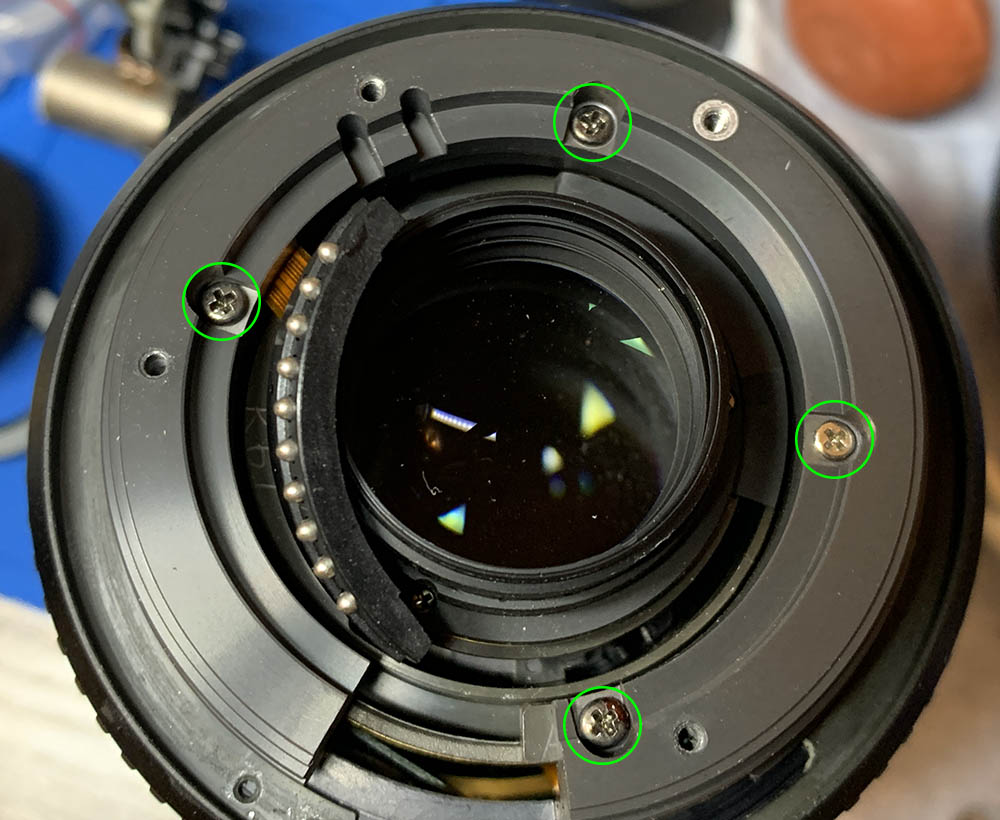
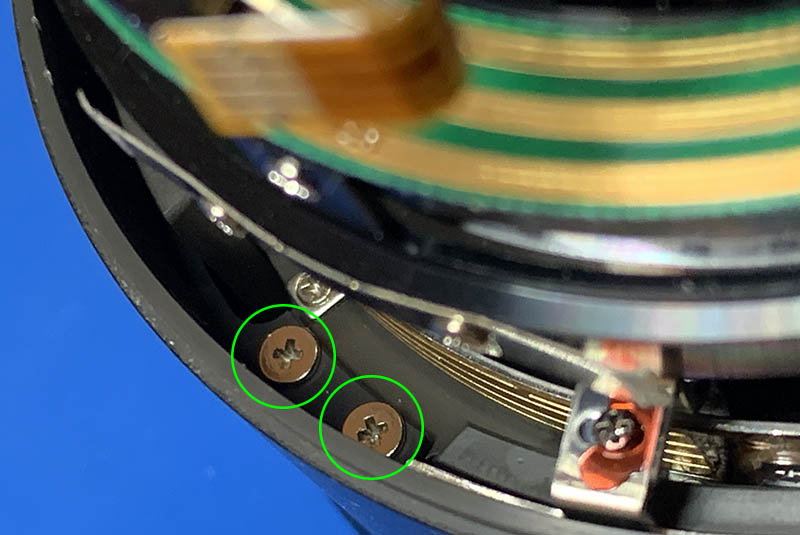
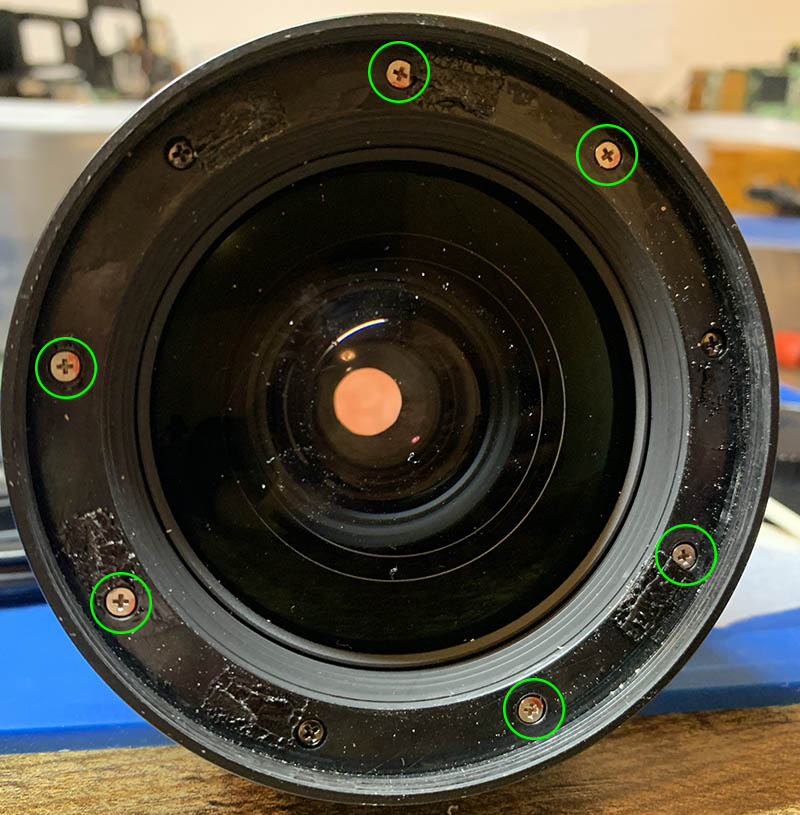
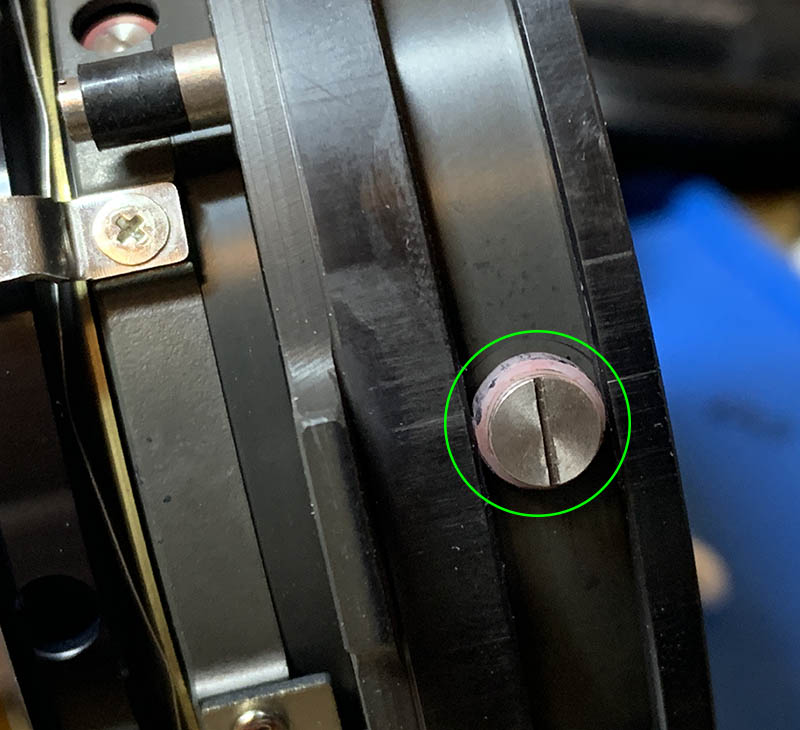
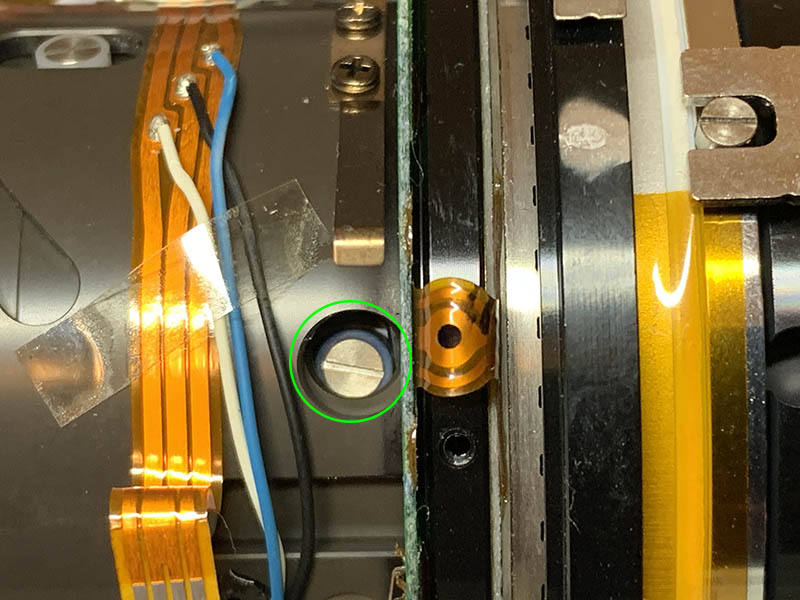
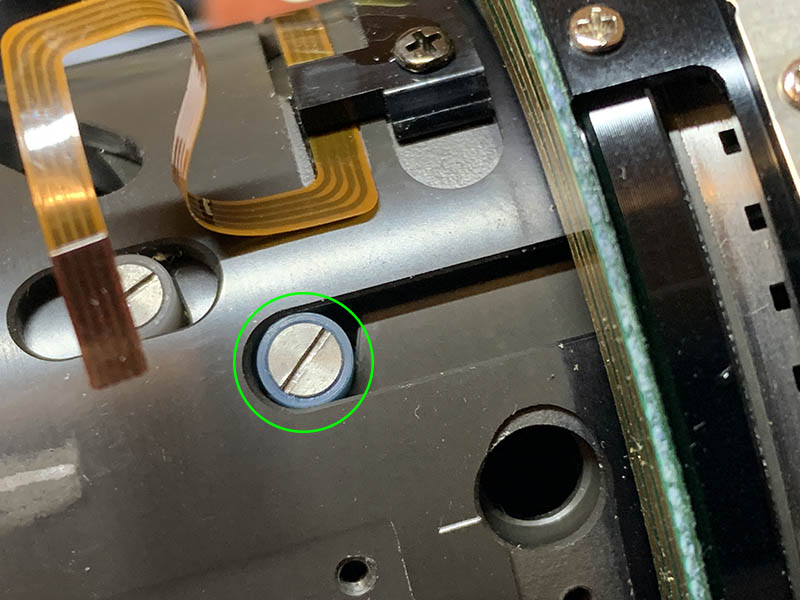
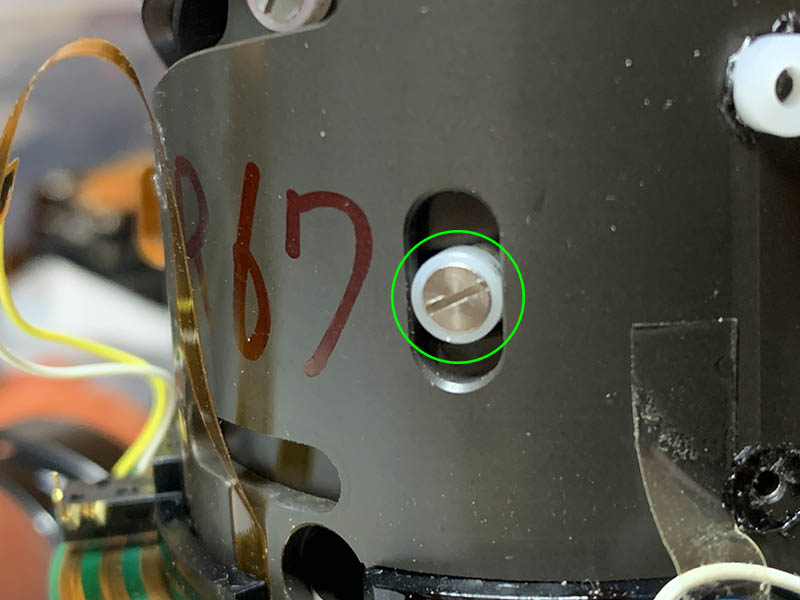
Remove all of the screws around the throat of the mount, specially the ones that I have encircled, these are the ones securing the baffle.
Carefully remove the baffle with your fingers while avoiding pulling the contacts apart from the mount.
Carefully extract these screws from the bayonet, read my article on how to remove screws so you will not strip their heads. Do not ignore this warning.
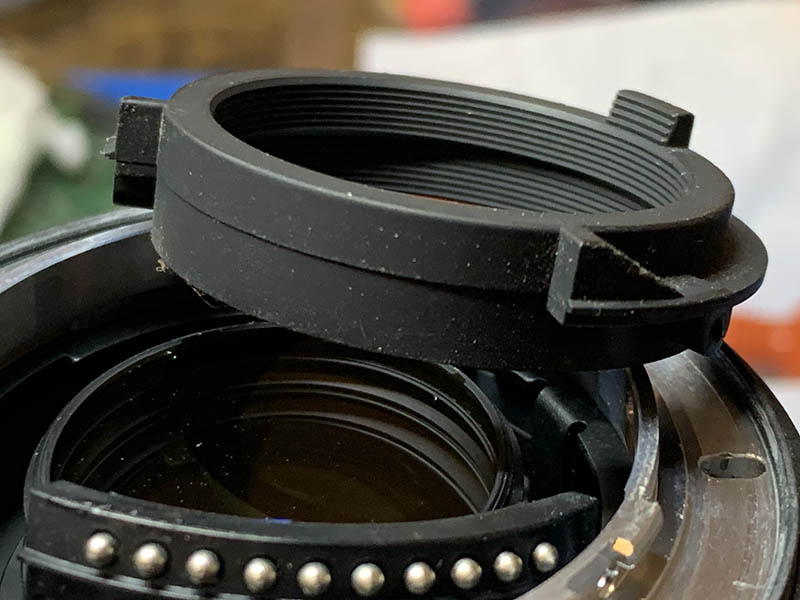
Gently pull the bayonet mount off so you won’t damage the delicate iris mechanism. Note that there are shims underneath it, these are used to adjust the focus so make sure not to damage, warp or lose any of them, you will never find replacements for these.
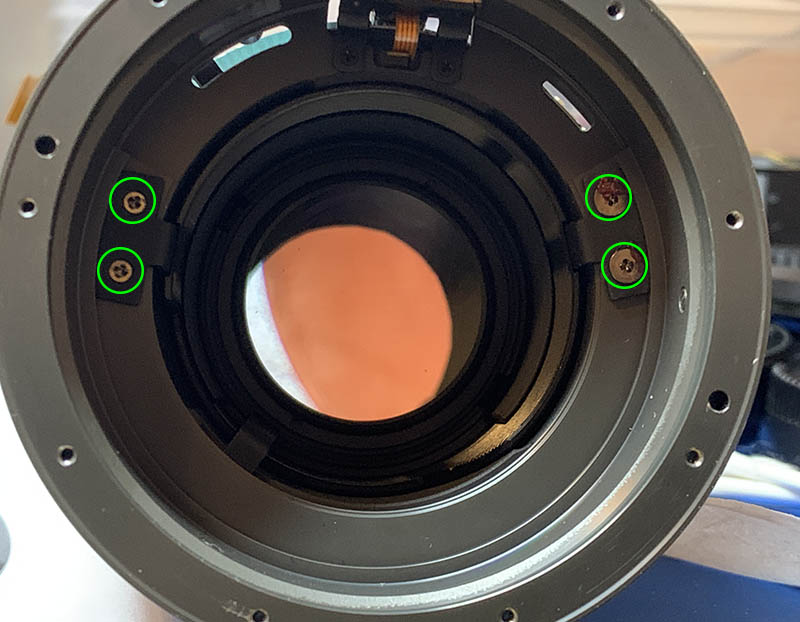
Extract all 3 screws that are securing the plastic collar and remove it from the main barrel.

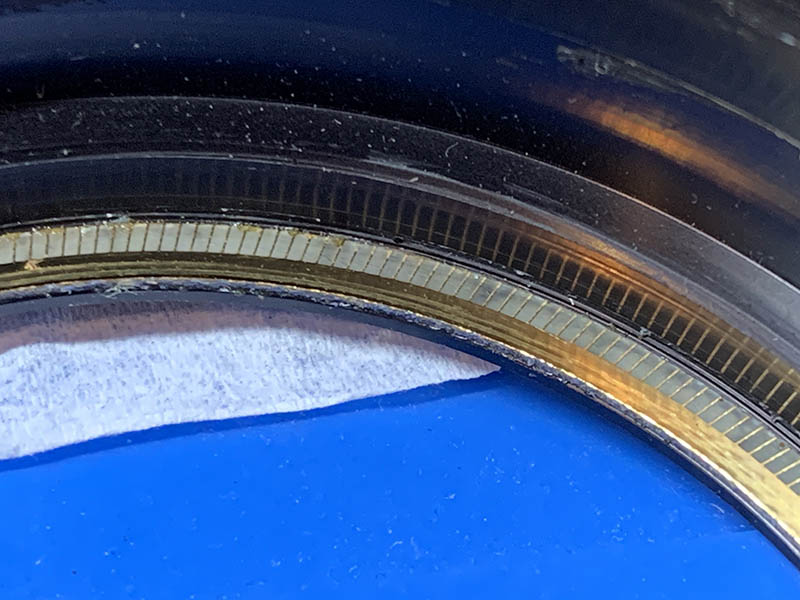
Turn the zoom ring until you can clearly see these, extract the little screws after you have taken notes, the screws secure the zoom-brush, it’s adjustable and it tells the camera which focal length you are on. Mine looks like this, I made a few marks to serve as guides to help me later when I reinstall it.
Carefully turn the zoom ring to give enough clearance so you can safely remove the brush. It’s a delicate part as you can see here so be careful not to bend anything.
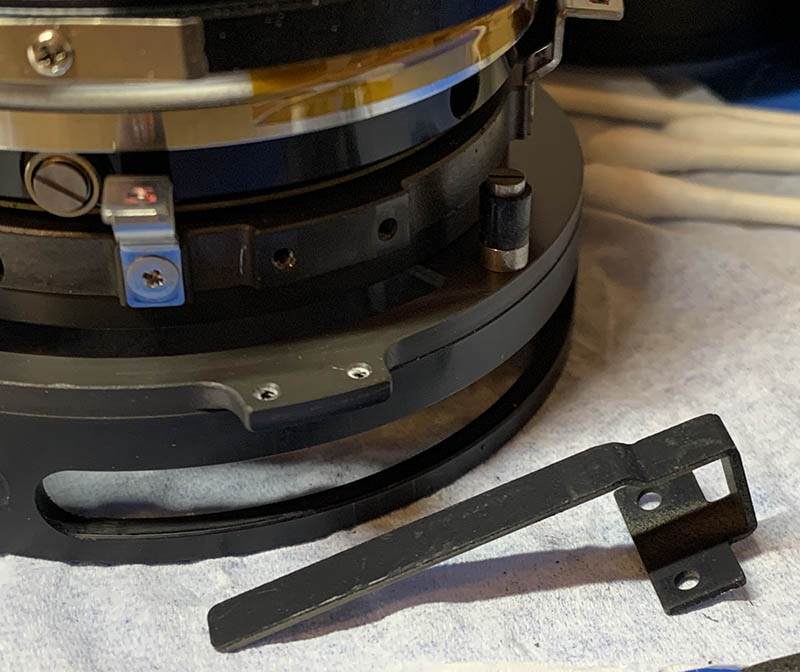
Once the brush is gone you can safely remove this key, it couples the barrels and cams, enabling the ring to operate the zoom cams.
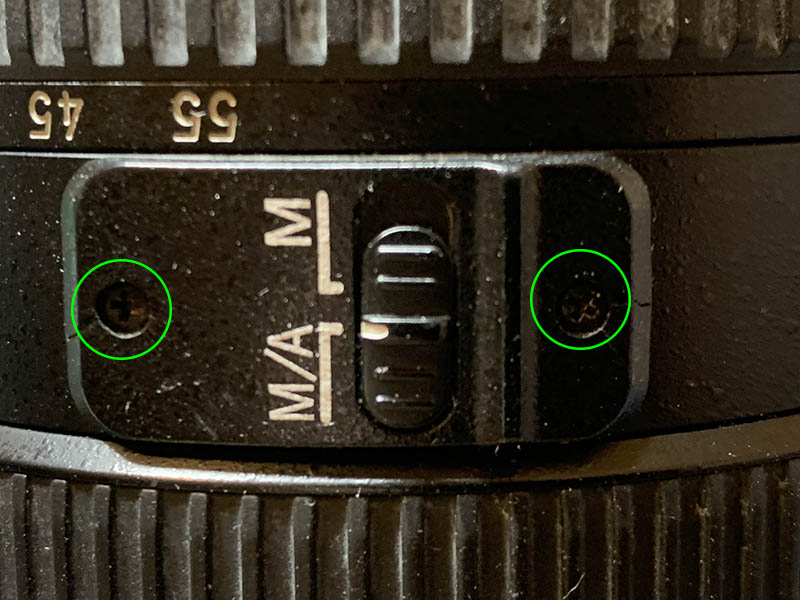
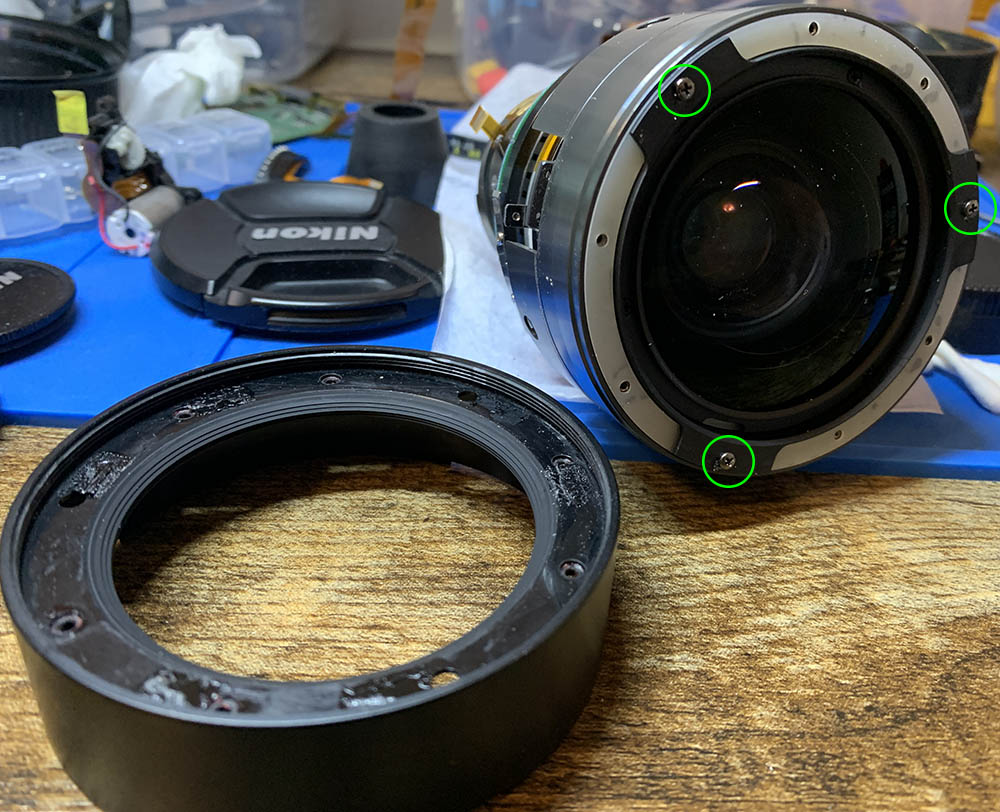
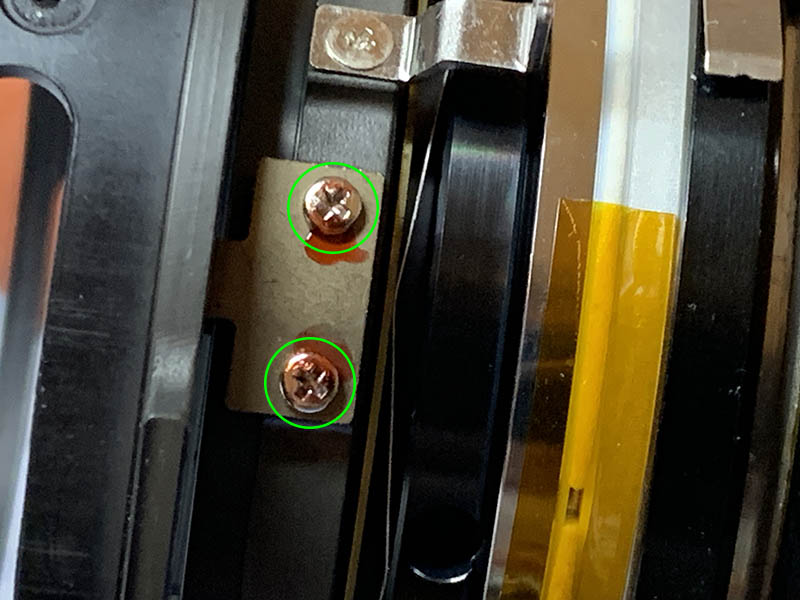
Carefully extract these but don’t remove the selector assembly yet as you will soon find out why. As you can see, mine already has cracks around the screws, never overtighten them.
Carefully extract these to remove the lower barrel assembly.
While removing this, carefully slip the selector plate onto its hole to safely separate them. You don’t need to do any further dismantling of the rear barrel assembly, just clean it well to remove gunk but be careful not to remove any grease that was applied at the factory.

Extract the screws of the rear optics assembly carefully to remove it. Be careful not to lose or damage the shims.
Set aside everything, put them in a safe place before you continue. The SWM motor is very delicate, don’t touch it with your fingers, oil and sweat are enough to make it fail! Blow away any dirt that you see but do not blow too hard or the dirt will get dislodged in difficult-to-access places.
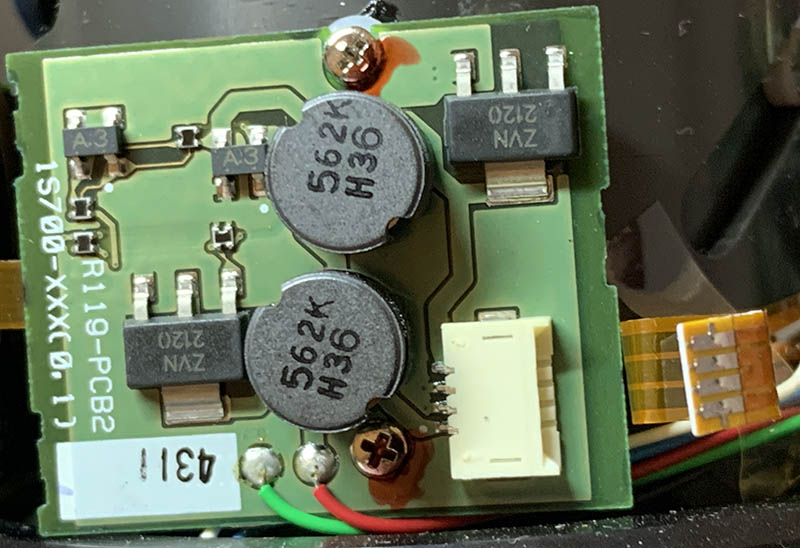
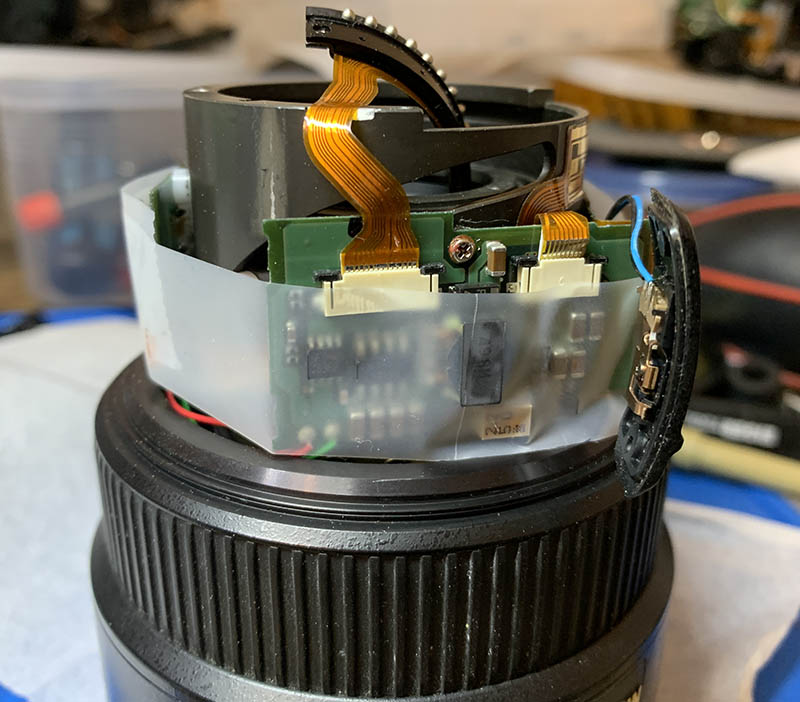
Disassembly (Electronics Harness):
This is the “brain” of the lens, it can be daunting to work on it because of the delicate electronics, using a pair of rubber gloves for insulation or grounding your fingers first are both important. If you do not have prior experience with electronics, do not attempt anything here.
The harness can be removed safely without unsoldering anything, but it can be tricky. Study the layout of the wiring and where things are connected and you should get an idea as to how it’s done. For this, I also used my expensive pair of plastic tweezers to minimize the risk of static electricity shorting the harness. It is also important not to be quick to pull any ribbons out, some of them are locked so you should push the locks out first before you pull the ribbons, you can easily identify them when you look closer using a good loupe. Finally, do not remove anything unnecessary, just deal with things that had to be undone. Take lots of notes and photos because you will definitely need them later during reassembly.
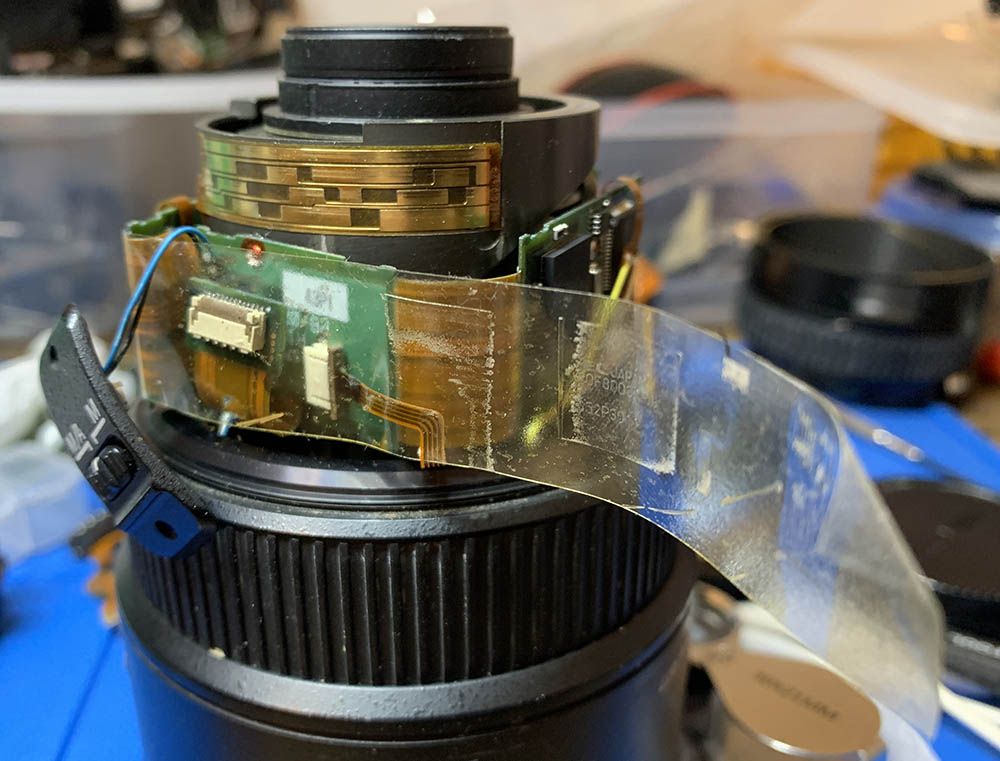
Carefully peel the tape away so you can access the delicate electronics.
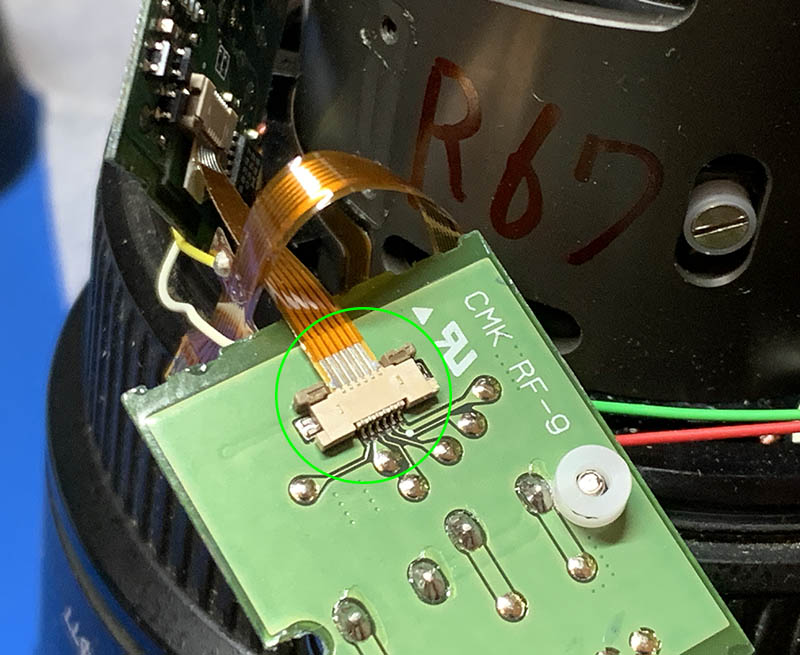
(Click to enlarge)
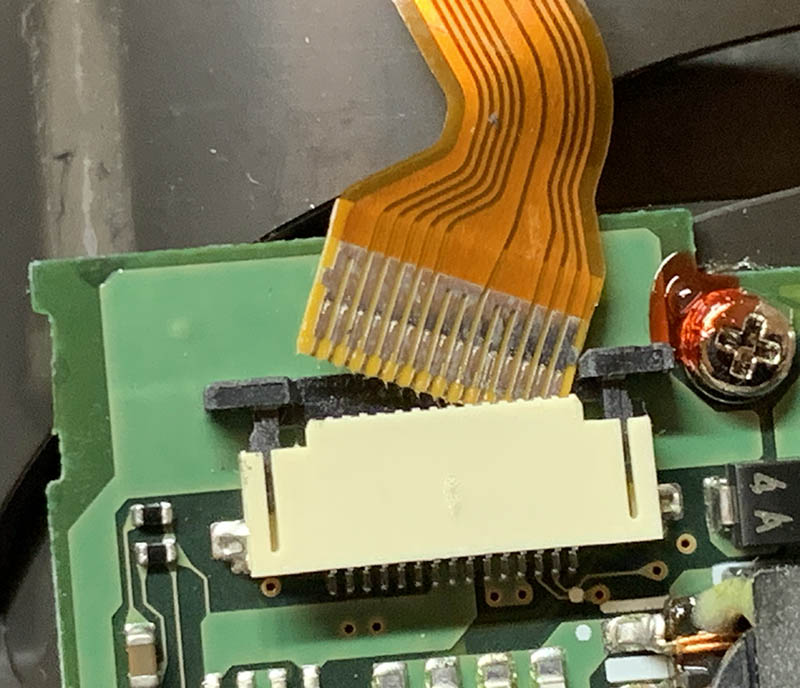
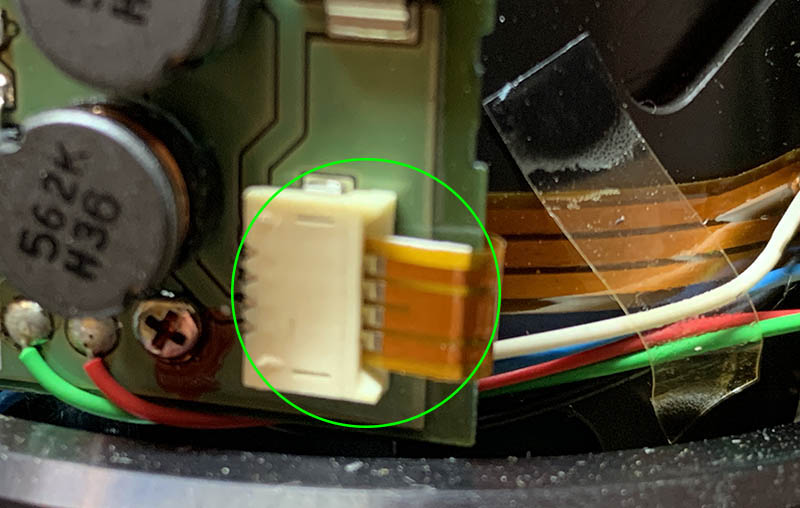
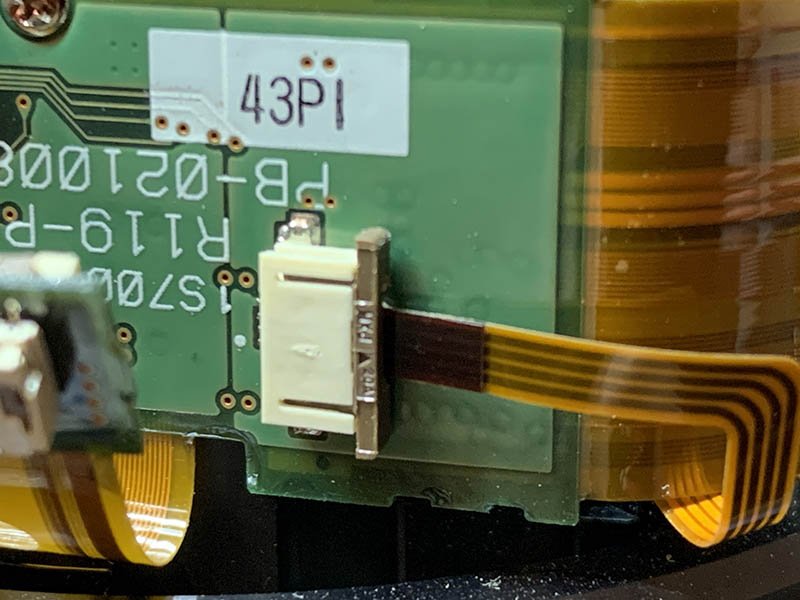
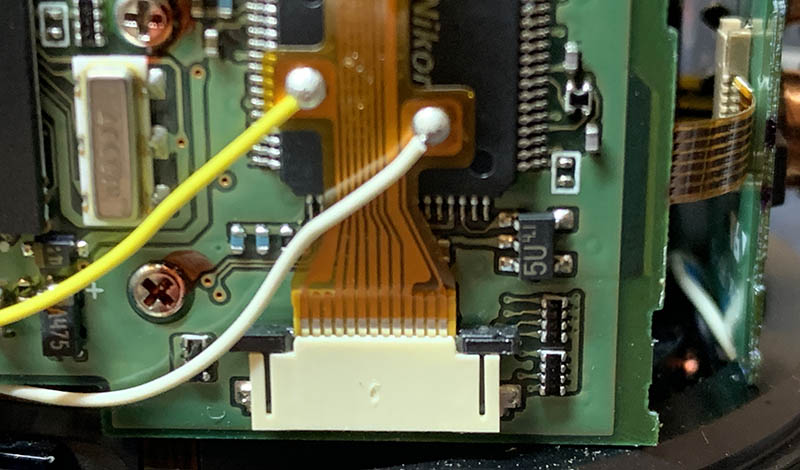
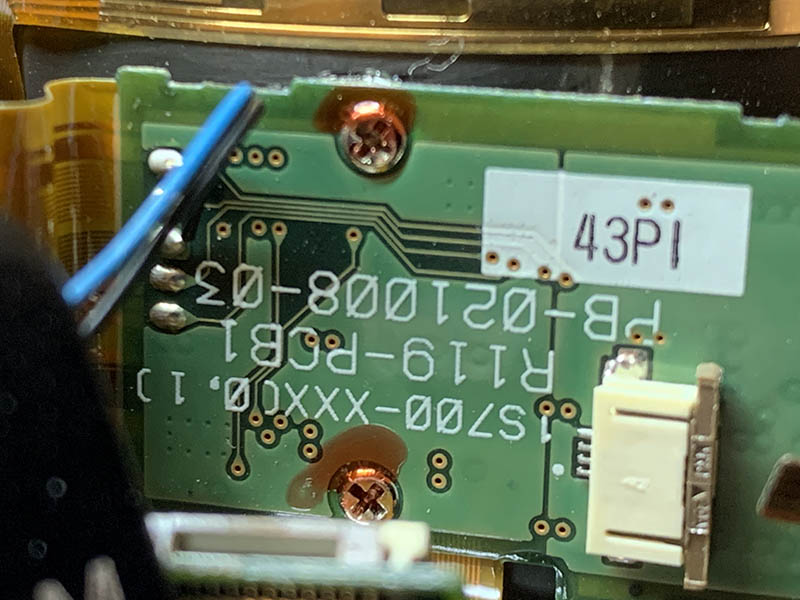
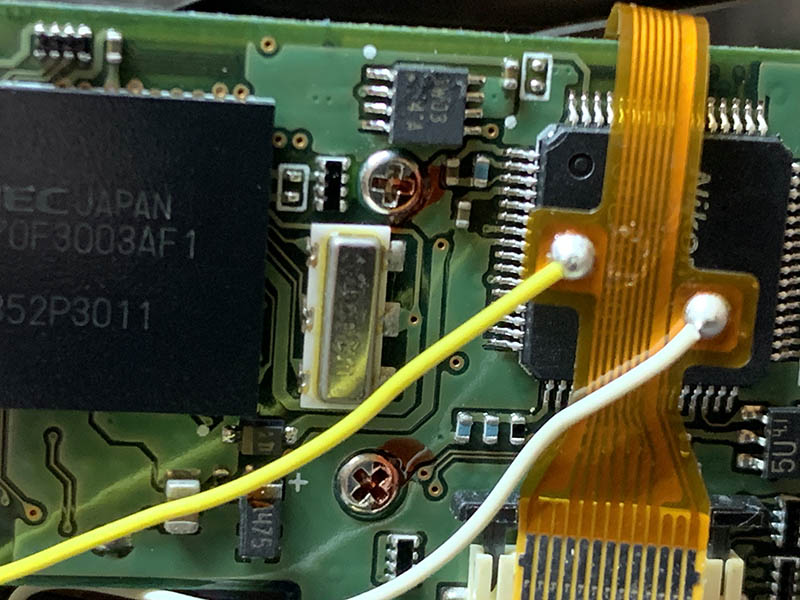
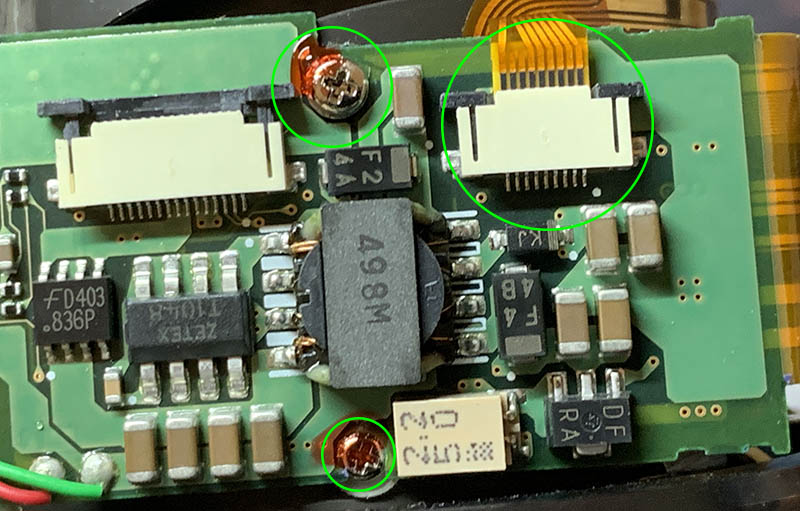
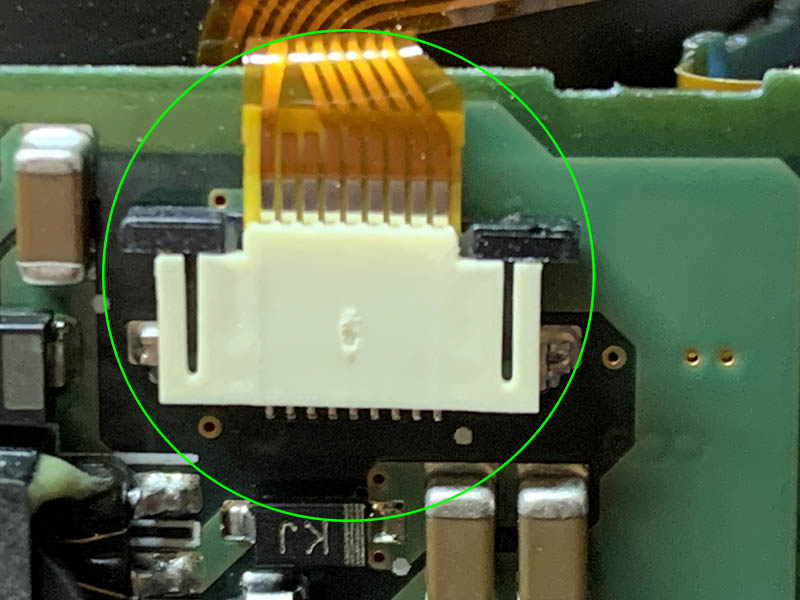
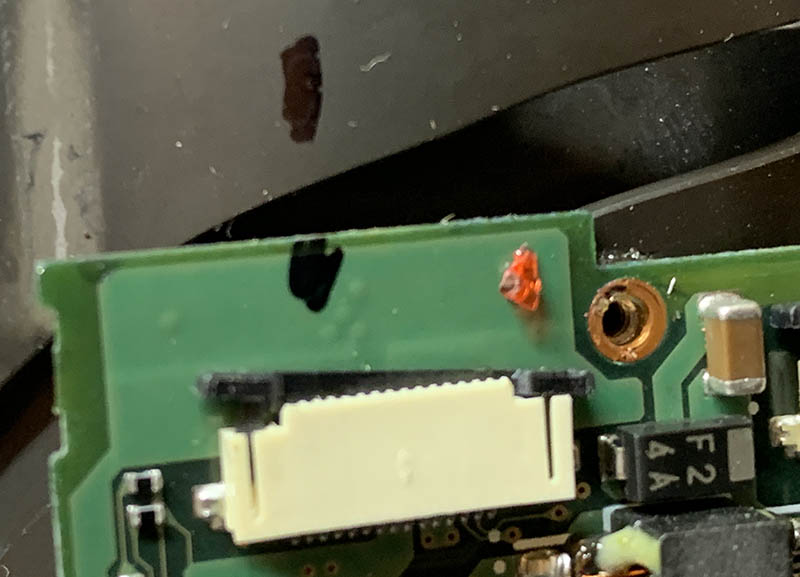
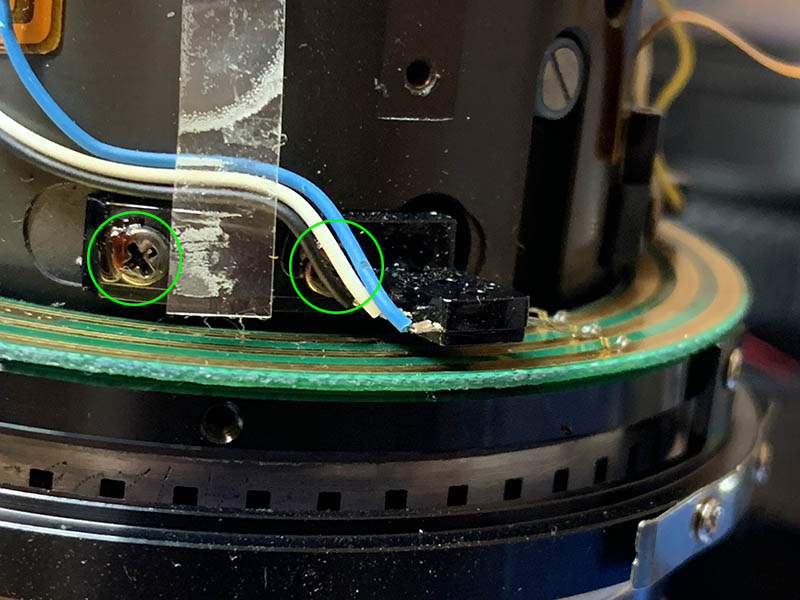
Carefully remove the pictured connectors in this gallery. if a connector has locks, push the locks so you’re able to remove the connector ribbons safely. It’s best to use non-metal tweezers for this operation. Once the connectors and ribbons are undone, you can safely extract the screws securing the circuitry boards.
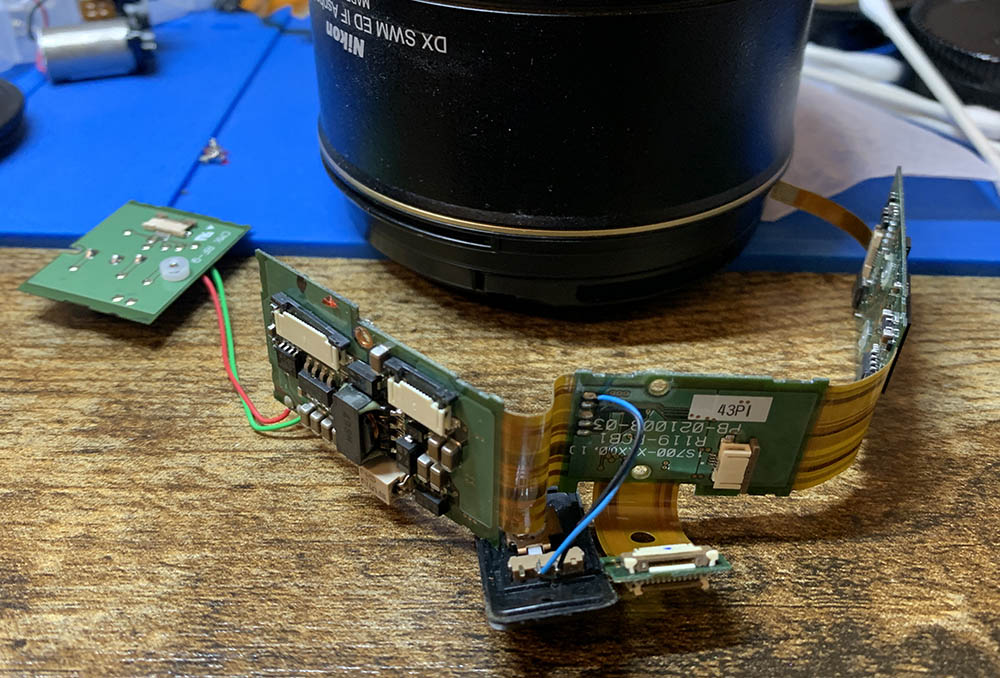
You will need to be dexterous with your fingers to safely remove this assembly. You will not need to use a soldering bolt for this if you can pull this trick just like I did here.
Store the harness in a safe, dry place. If you have an antistatic plastic bag, put that inside of it. If you see a couple of dirt, just blow them away with a lens blower.
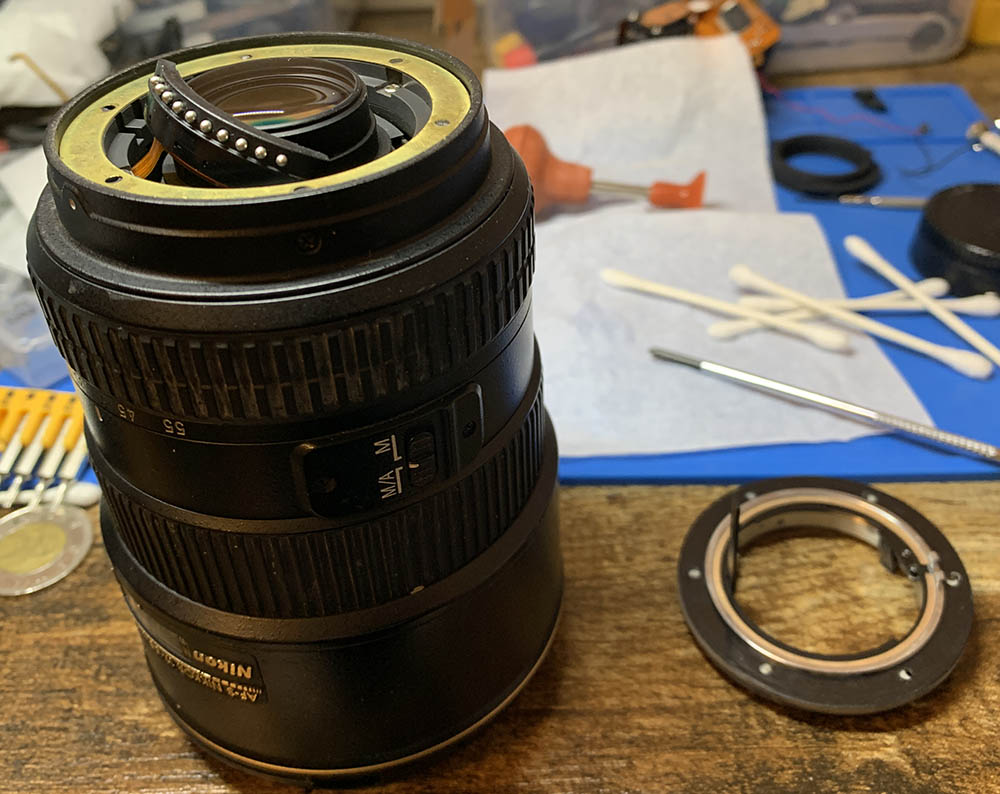
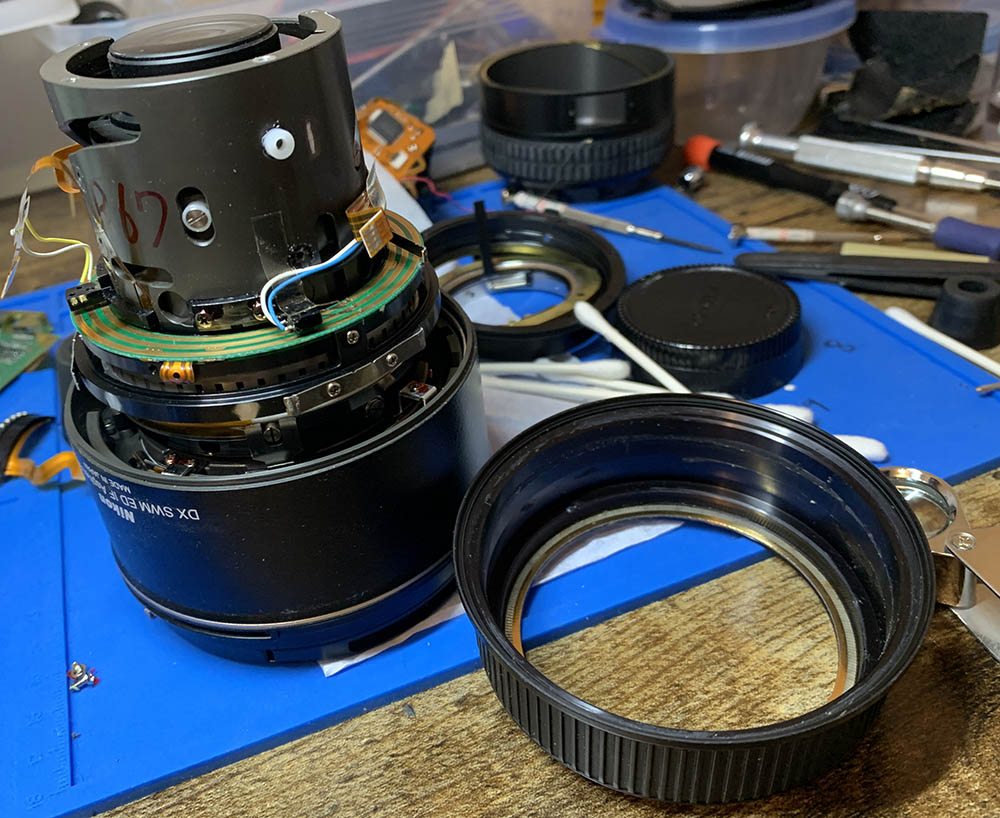
Disassembly (Front Barrel):
We will remove the parts closer to the front of the lens, as you can see, you won’t be able to get this deep unless you went through the previous section, that is if you only want to remove the very front. That may be enough if you only need to access the area just under the front optics assembly, you are lucky if that’s all you need to do.
To many, this is the point-of-no-return because once you’re done with this step you are left with the very core of the lens, which is an intricate assembly of tubes and cams, it can’t get more complicated than this.
Pull the focus ring off carefully so you won’t damage the springs and contacts. These are usually filthy so I always clean the crevices. When putting this back, you will notice a slight resistance, you will need to push one of the springs to make way for this.
By the way, there is a delicate brush here and you should be careful when you remove this so you won’t bend any of the fine feelers.
This is the contact board for the focus, wipe it clean with some alcohol while being careful not to damage it. You will be surprised at how dirty these can get from continuous contact with the brush.
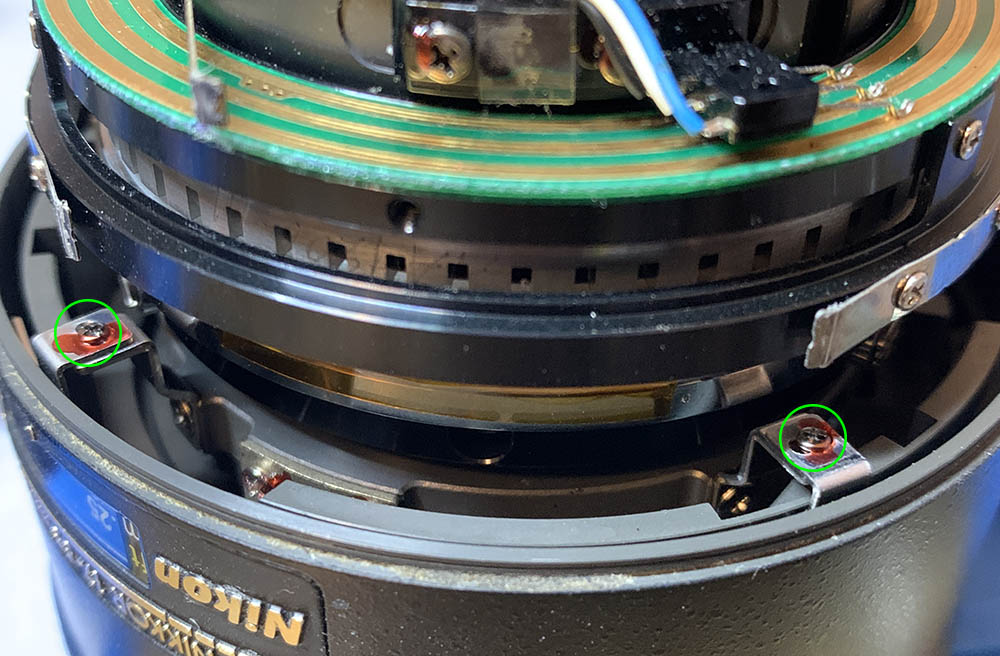
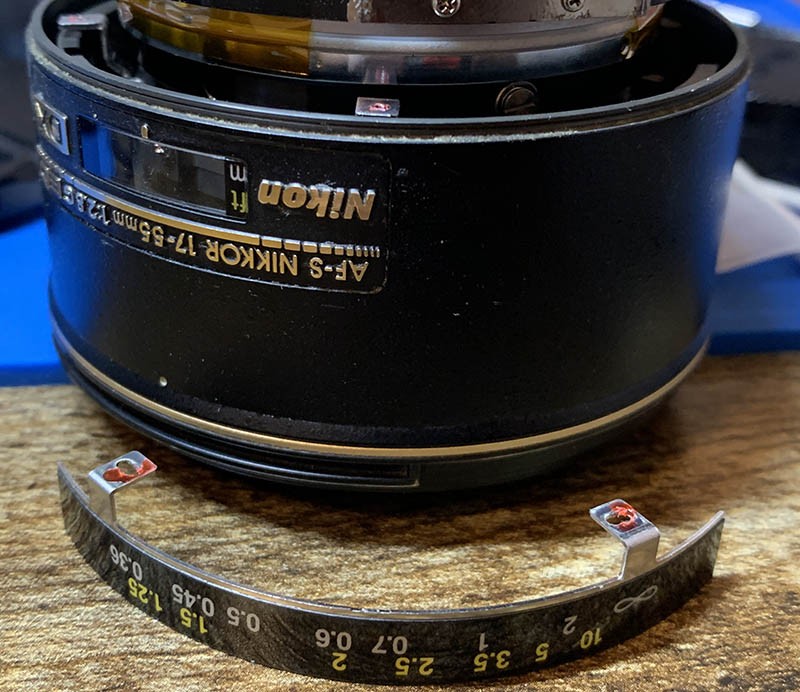
Extract these screws carefully to remove the distance scale but don’t forget to note the scale’s position. It is adjustable, while not as important compared to a manual lens, you will still want to do this correctly.
It can be a bit tricky to remove this, just be patient, go about it carefully so you won’t damage the small parts that are close to this thing.
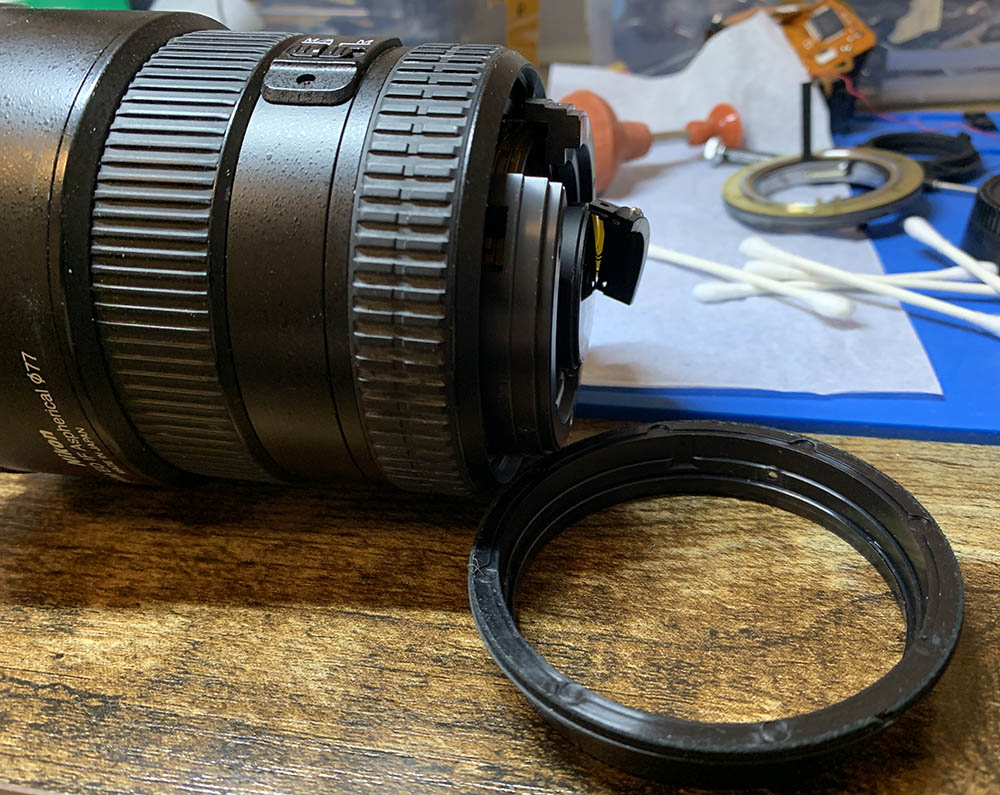
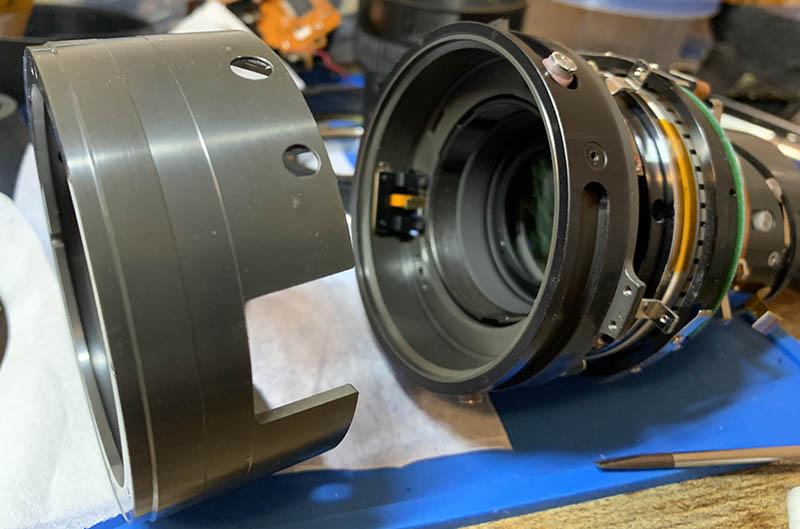
To remove the main barrel, locate and extract these, there are 6 of them. Use a longer driver with a thin shaft in order to reach these, it will also help if they are not magnetic. Make sure that you do this with a careful hand because it’s easy to damage anything here.

Carefully pull the barrel off and wipe any gunk you find. Do not use strong solvents when cleaning the clear part.
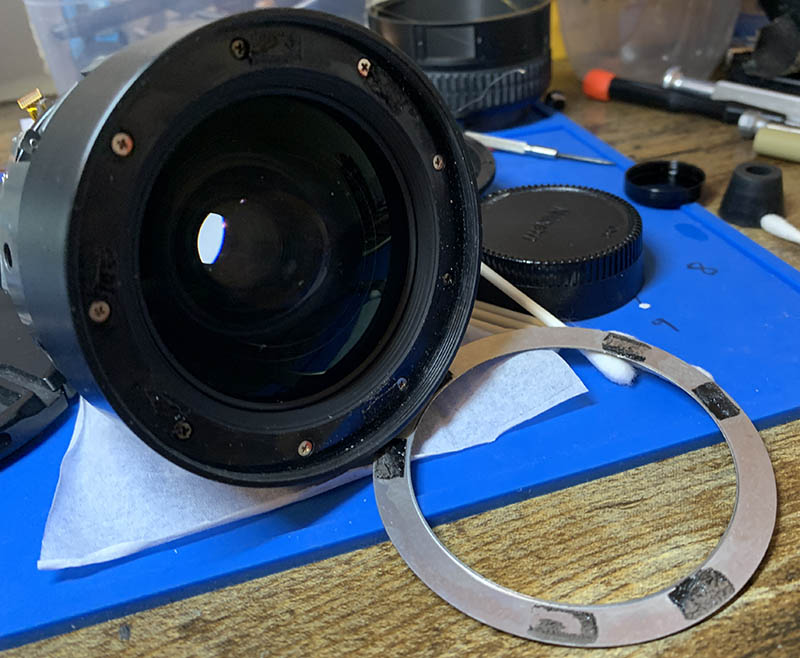
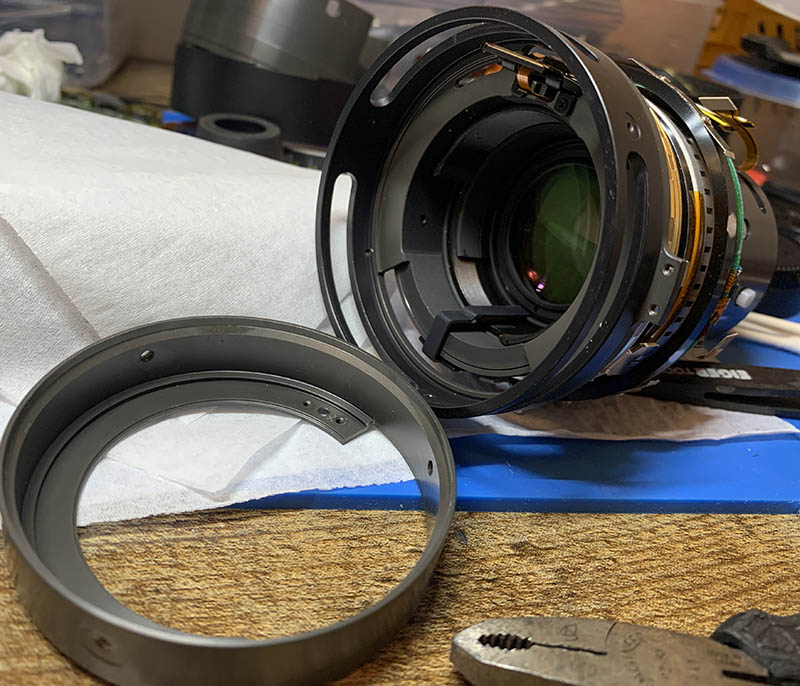
With a bent dental spatula, carefully pry the cosmetic ring off from the front barrel. It will be best if you can find a plastic tool for this so you won’t scratch anything. Do note that the ring is made of a very thin sheet of aluminum, bending it will make it look ugly. If the adhesive is too strong, drip a small amount of alcohol on outer edges to help soften the glue. Wait for a couple of minutes then try again.
Extract these to remove the front barrel. Clean this part well of caked gunk.
Removing the front barrel will give you access to these. Extract them to remove the front optics assembly. Do note that the front optics assembly is adjustable, but you don’t need to mark it because you will need to readjust the focus later when you reinstall it. You will se how it’s done later.

Be sure not to lose any of the shims here, be very careful so you won’t damage or warp them.
To many people, you don’t need to go any further than this, unless you need to access the deepest part of the lens. Remember to take care not to short or damage the remaining electronics, most specially the delicate SWM assembly.
Disassembly (Inner Barrel):
To me, this is the most frustrating part of servicing this lens, there’s just too many things going on here. I took plenty of notes as I went along for reference. There’s normally no other reason to go this deep, but if you need to clean fungus in the inner elements or service the iris mechanism. Sometimes, it’s not worth it, find ways not dismantle as many parts as you can, unless you can’t safely access the part that you need.
Take as many notes as you can, with the tubes and cams at the same position/orientation. This way, you’ll always have a constant point-of-reference, it can be confusing if you don’t. You will need to remove a lot of rollers in this section, all of them were sealed at the threads. You’ll need to be careful when using heat here because the rollers may melt. This is true with strong solvents, too. No acetone!
Extract these screws to remove the keys. Do not forget to mark which key should go to which hole since they are identical.

Carefully extract 3 of these so you can remove the thrust cam. These were sealed so you may want to use a bit of alcohol to loosen them a bit, that is if you can reach the threads without making a mess.
Remove the cam and set it aside.
Extract these rollers, there are 3 of them. Again, they can be hard to remove, be careful not to damage the slots or you won’t be able to remove them safely. What you can do is heat these from behind but do not use too much heat or you will melt the plastic parts.
Remove the ring.
Dissolve the red lacquer with alcohol and Q-tips before extracting these screws.
Remove this long key once the screws are gone.
You will have to turn some of the cams and barrels in order to reveal these rollers. They aren’t positioned evenly so you will need to turn the inner cam for each roller to be accessible through their own holes.
One of the holes is obstructed by this brush so carefully extract these screws to make some space.
Once the rollers are gone you will be able to remove this floating group and its housing.
Turn some more parts again to make these accessible and extract them carefully. They can be hard to get out so applying some solvents through their backs will help dissolve the locking agent. Only a small drop is needed for each hole, which can be accessed using a syringe.
Remove this cam with your fingers, don’t forget to note its orientation first before you do that.
Extract these rollers, there are 3 of them. They can difficult to remove so be careful.

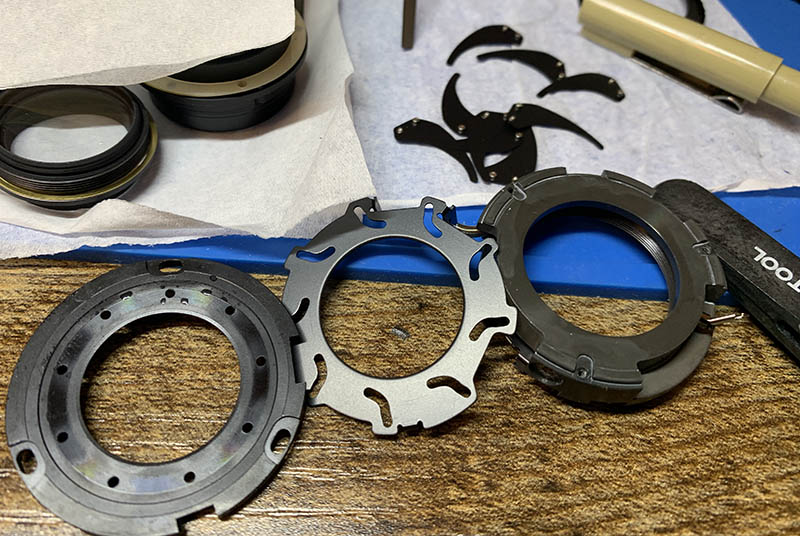
You’re now able to remove the iris mechanism along with one of the optical groups. Be careful when you do this so you won’t drop the whole thing, catch it with a piece of cloth.
This is it, it’s almost bare. Keep the rollers that came from the same part together so you don’t mix them up. The rollers and inner barrels have some lubrication of some kind, they are very thin so do not wipe off anything unless it’s filthy or moldy.
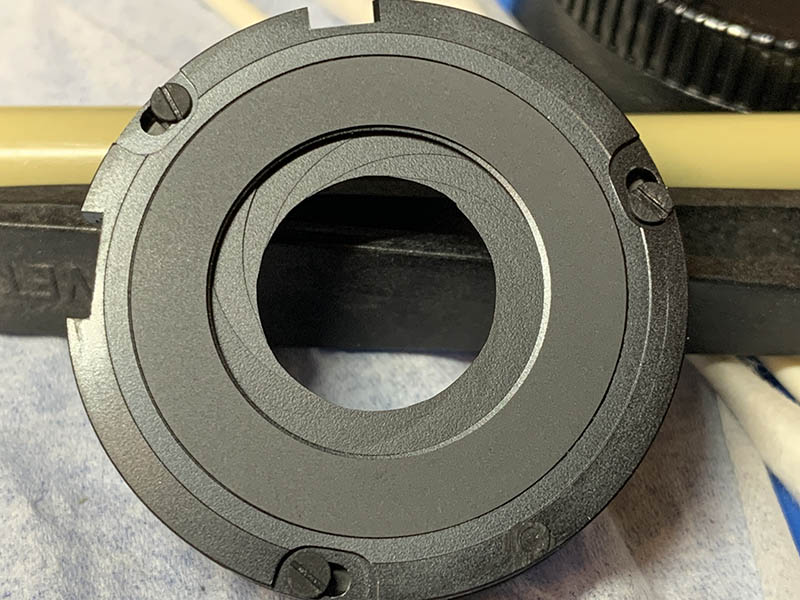
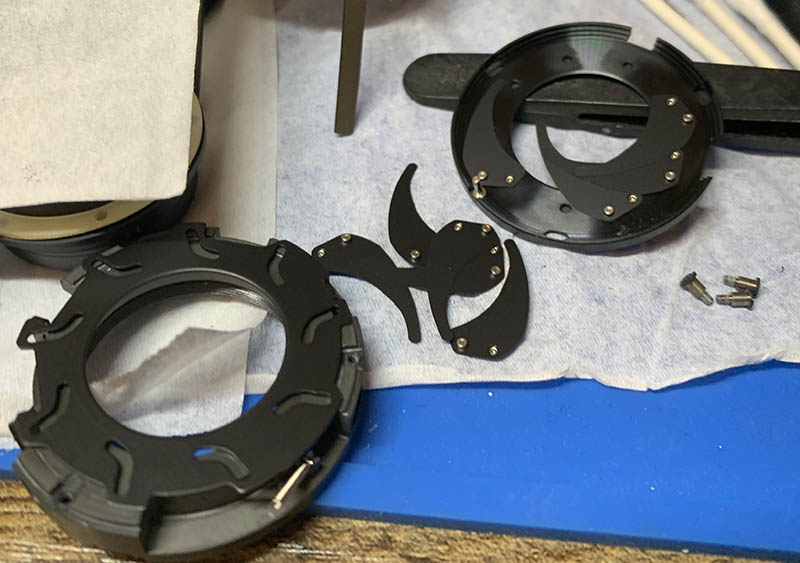
Disassembly (Iris Mechanism):
The iris mechanism is the most complicated I have seen in any Nikkor! It has shock absorbers and there’s no less than 3 springs here. I do not know why the design got this complicated but I am sure that the iris mechanism could have been designed in a more simple way. This is overengineering for nothing from the looks of it.
There are 9 blades in the mechanism and they are very delicate, their ends are covered by a ring made of very thin plastic. You will want to remove this cover early on but be careful not to tear it, the safest way to peel it off is to use a very sharp tool to lift it off.

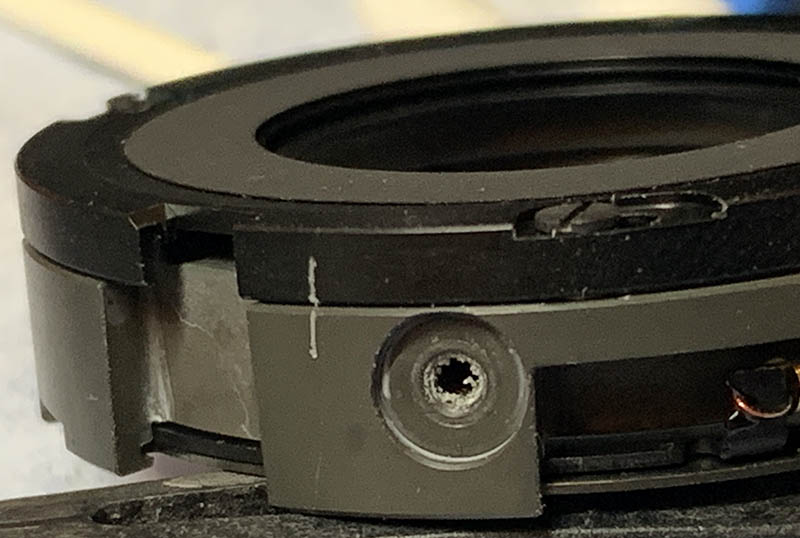
You can remove the optics and its housing with a rubber tool but be careful so you won’t damage the iris mechanism, it’s very delicate.
Carefully extract these screws to completely dismantle the iris mechanism.
Make a mark so you will know the alignment. The top cover/plate rotates freely so this isn’t an adjustable part but you will still need some kind of guide just in case.
Remove the top plate and you will be able to completely dismantle the whole thing.
The blades are delicate, it’s best to handle them with care. If any of the blades won’t come off, remove the protective sticker at the other side of the top plate carefully then push it out with a sharp tool. Do not use any tools to pull the blades out, you will warp them easily this way.
Clean everything very well with pure alcohol and never leave any residue.
When reassembling the iris mechanism, don’t forget the direction of the blades. Secure the ends of each spring to their posts with nail polish so they won’t get loose, if that happens, you’ll need to open the lens again. Finally, when putting back the cover, never burnish it because that will interfere with the movement iris. It’s enough to make the iris mechanism work in a sluggish way. Operate the iris mechanism again and see if it actuates in a snappy way, there should be no sluggishness.
Conclusion:
Wow, that sure was so tiresome, I certainly will not want to service this lens ever again. I’ve spent 2 nights working on this, one night to dismantle it and another night spent putting things back. I am lucky that the optics are relatively clean, with just a thin condensation on some of the inner elements, no fungus and no balsam separation, the only real issue here is the iris mechanism. I’ve gained a lot of experience and some important insights about this lens so I am not all that upset at all. You also got the chance to see how the lens works, another quality content from your truly.
Secure the electronics and wirings with tape so they won’t catch on anything.
Reassemble everything up to this state without the front barrel, this is how you can adjust the optics. You need to find the right alignment of the front optical group. It’s very difficult because you will need special tools and setup but you can at least make a good guess.
That’s all for this article, it’s a long one because we went all-the-way. I don’t know if there are others like it online but from my search, this has got to be the most extensive one, even going down to the root cause of one of its most famous afflictions – the overexposure/sluggish iris syndrome. Did you enjoy this? I sure hope that you did because plenty of effort went into this article. Share this one with your friends, if you’re really happy with my work, why not support it? Doing so helps pay for the hosting, this is a media-heavy site and the bandwidth needed to cope with the traffic is immense, that’s according to my host, who will remind me occasionally to upgrade my plan. I only earn a few cents for each unique visit because I’m not getting paid by any sponsors so the ads you see are all that I am counting on. With that said, please don’t download my site, it hurts the blog in a huge way if everyone does that. I am also aware that some people are making monetized videos with what they learn here, I don’t mind at all but please state where you got the information, doing so helps keep this site alive through awareness. Thank you very much, the support is well-received, without your help we won’t have lasted this long, the best photography repair and review site on the planet. See you again next time, Ric.
Help Support this Blog:
Maintaining this site requires resources and a lot of time. If you think that it has helped you or you want to show your support by helping with the site’s upkeep, you can make a small donation to my paypal.com at richardHaw888@gmail.com. Money isn’t my prime motivation, I believe that I have enough to run this by myself but you can help me make this site (and the companion facebook page) grow.
Leave me some tip?
Thank you very much for your continued support!
$2.00
Helping support this site will ensure that it will be kept going as long as I have the time and energy for this. I’d appreciate it if you just leave out your name or details like your country’s name or other info so that the donations will totally be anonymous. This is a labor of love and I intend to keep it that way for as long as I can. Ric.

Apr 25, 2024 @ 13:21:33
There are two aspects of your articles that amaze me. How did you learn to dismantle and reassemble these complex devices? So many tiny screws and bits of loose!
The other aspect is how did Nikon (and other camera makers) design such complex mechanical devices in such confined space. Rotating and sliding tubes that have to move at different speeds to maintain focus and include mechanical connects for the aperture and in modern lenses, electrical motors. Just amazing how they have evolved.
Thank you for your write-ups.
Rex
May 01, 2024 @ 11:49:41
Thank you so much for this ultra-detailed write up (or tribute?). I had a similar sentimental story to yours with this legendary lens. When I first picked up photography 10 years ago, this was the one lens that I drooled for and yet, was so out of budget for me.
Fast forward to 2024, I finally had the financial freedom to purchase a used one for cheap. The only downside is the internal element seems to be coated in oil(?) and I had to figure out how to dismantle this intricate lens.
Still, I am grateful to have found your website and your sensible writings especially on this lens. Confirmed my subtle doubts about the viability of this heavy lens when it’s been more than 20 years old. It feels amazing to use & the colour just feels right, even when compared to my other newer Sigma 17-50, even though the Sigma has OS and does feel 1/3 stop brighter.
Jul 09, 2024 @ 17:37:13
Thanks for your article ….
I own one of these , it came with a D300 I bought about 15 years ago …
Ive moved up to the D800E for obvious reasons , and on my first trip with my FX body , brought it along ….
Tried it with the DX setting on my D800 , but eventually turned the FX back to it full potential…
The images I then created are probably the best i’ve done in a long time … Infinity focus on certain landscapes are Amazing … You can crop to the back of the landscape and see details I thought were Impossible to extract…
I was Luckey enough to have Nikon Canada service it about 5 or 6 years ago … So it still running smooth …. I have not lately used it but your article will surely motivate me to bring it along on my future photo adventures …
May 20, 2025 @ 15:56:14
Hello,
thought I’d drop by and leave a comment on this excellent article. I have owned this lens twice, once ten years ago when I used it with a D3300 and a D7200 until I “upgraded” to a D610/D750 with a 24-70 2.8 in 2016, and from 2023 when I found an incredible deal I just couldn’t pass up (a D200, the second 17-55 2.8 and a 70-300 Tamron). This one I still own and shoot with it, used it with the D200, D3200 and D7500.
I have to admit I wasn’t impressed with the first time, but I’ll put that to my inexperience with that lens, at that time I was all hyped up by FF so I gave up on it too quickly.
However, the second time around, I had learned a lot since then so to be short I have to say I really, really like this lens. It’s my go-to lens of choice that stays glued to my D7500. As you say, it renders skin tones really nicely, I like its rendering in general photography and best of all, it has the fastest autofocus in the mid range zoom line, quicker than the 16-80 that is my opinion overrated.
As for resolution, it more than holds up to modern sensors, where I will differ a bit from you is that I think that a 17-55 and D7500/D500/Z50 II combo is certainly capable of low light shooting, I have no trouble getting sharp shots in dim lit venues, the offside being that you need to crank up ISO often, not a problem up to 12800 in my finding. I also find that VR isn’t as big an issue provided again you crank up ISO accordingly.
The last thing I wanted to touch on is that I read all sorts of nonsensical comparisons in the web, such as “the 18-55 AF-P is better”, “the 16-80 is better”, “the 18-140 delivers the same images”… To which I say a resounding no. The 18-55 AF-P while better than the previous iterations, is still pretty much a sunlight-only lens, the 16-80 isn’t as well built and focuses notably slower, the 18-140… stays in the box which is all you need to know about what I think of it. I’m puzzled as to how such myths got started in the first place, but anyway, whatever they say, I’ll keep this one on my bag for sure.
Aug 22, 2025 @ 11:05:09
Just wanted to chime in with my experience.
My 17-55 also had a slow aperture mechanism. After manually pulling the aperture lever with my finger a couple hundred times, the blades started moving quickly again. I repeated this a few times and then left the lens on the camera body so the blades would stay at their widest. Now the lens works perfectly. I suspect that if I leave it on the shelf for a couple of months, I’ll need to do this all over again—but I’m really happy there’s an easy “fix,” at least in my case.
Mar 18, 2026 @ 01:54:41
Thanks for the details. I have two sets of screws left to get the aperture out. There’s a lot go8ng on here.