
Hello, everybody! Do you know what’s a “chastity belt“? They are metal or leather underwear for women in the Middle Ages up until recently In some cultures. They ensure that the wearer is celibate while these special panties are on. Not so common is the male counterpart, it forces a religious person to be celibate. Why are we talking about such unusual topics? Our star today has some kind of a “chastity belt”, too! It’s quite a surprise because I have modified it to protect something precious. know more about it hear in this article and read until the end.
Introduction:
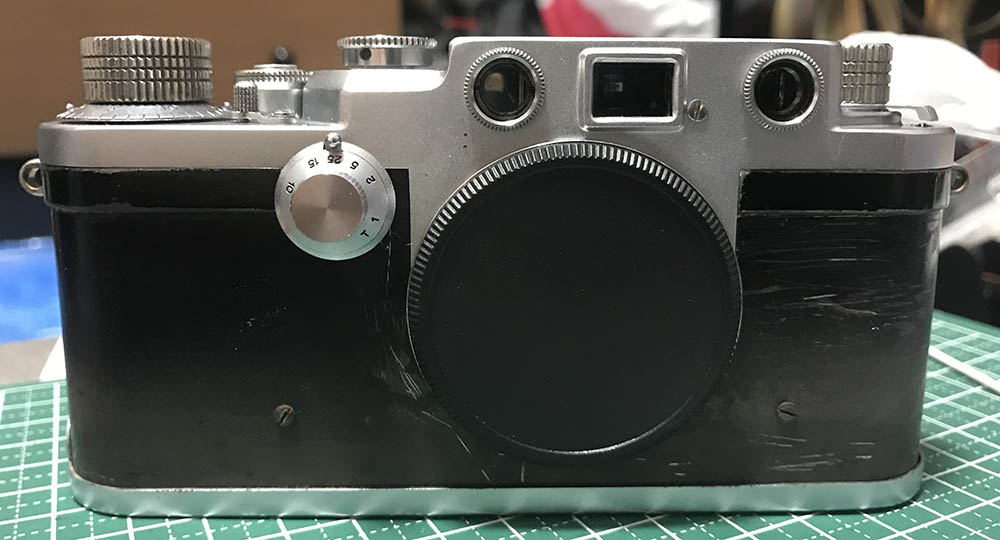
We ended part 1 with the removal of the outer casing, in this part we’ll see how the internal mechanisms can be dismantled. If you have worked on similar cameras before then they should come as no surprise to you because they’re very similar. Some things may be a little bit different but they should not matter at all in the grand scheme of things.

I got to this point by the end of this article, waiting for the replacement leatherette from the amazing and reliable Asahi Aki, who gave me what I exactly needed. His kits are exquisite and reasonably priced, he is the best guy in the business, I highly recommend his services and products.
This article won’t go into the details of replacing and adjusting curtains, those steps are documented by a lot of people throughout the years and some of them made a better job than I did. If you are interested in reading my take, read my article on the Nicca 3S, there’s not a lot in common between these two cameras but the shelter mechanism and how it works is explained in better detail on that article.
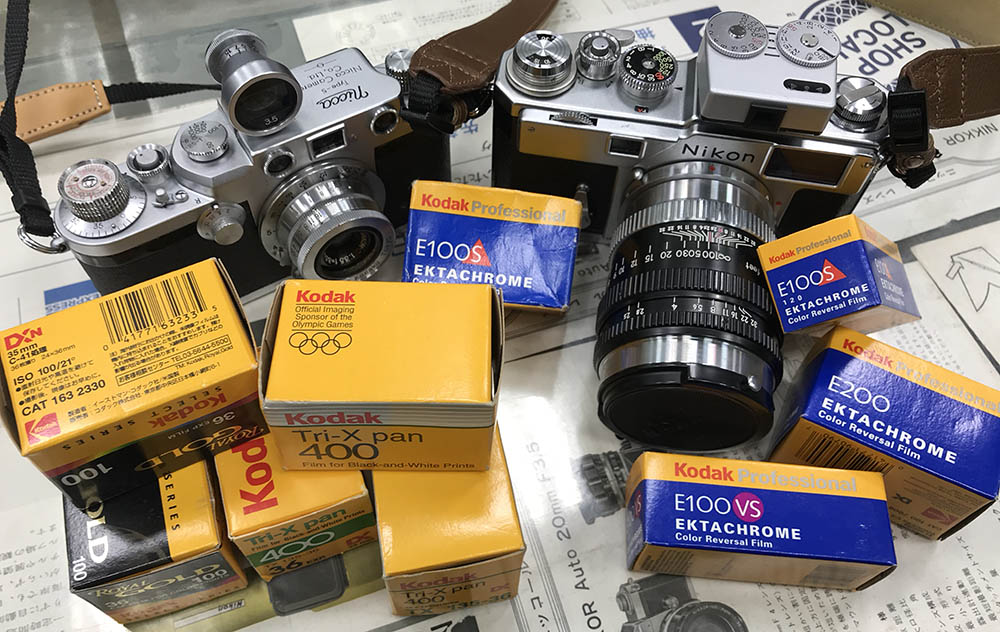
I really miss this camera a lot, I should not have sold it. If you ever find one of these for a reasonable price just buy it and have someone competent service the camera. You may also want to look for the one that’s designed with an advance lever instead of a winding knob, that is more convenient for a daily camera. It is not going to gain you any respect from any Leica snob but the fact is this camera is superior to theirs. Any practical person will want to use their money smartly and this is the best way to enjoy shooting with older screw-mount lenses. Forget the Canon rubbish, this one is built much better. Now you know the secret of many vintage camera lovers in Japan. Have fun looking for it, it’s worth all the effort.
Before We Begin:
If this is your first attempt at repairing a lens, I suggest that you see my previous posts regarding screws & drivers, grease and other things. Also read what I wrote about the tools that you’ll need.
I suggest that you read these primers before you begin:
- Essential tools
- Best practices 1
- Best practices 2
- Best practices 3
- Ai conversion
- Working with Helicoids
Reading these should lessen the chance of ruining your lens. Before opening up anything, always look for other people who have done so on the internet. Information is vague and scattered but you can still find some information if you search carefully.
For more advanced topics, you can read my fungus removal article. It has a lot of useful information, it will be beneficial for you to read this. I also recommend that you read the working with helicoids article since it is very important!
Disassembly (Top Parts):
This is probably where you will spend most of your time with because of all the moving parts, you should document every step and study each mechanism and how they work before you dismantle them. There’s not a lot of things that I should remind you about, if you have taken ample notes and photos then that’s enough to guide you through the whole process up until reassembly.
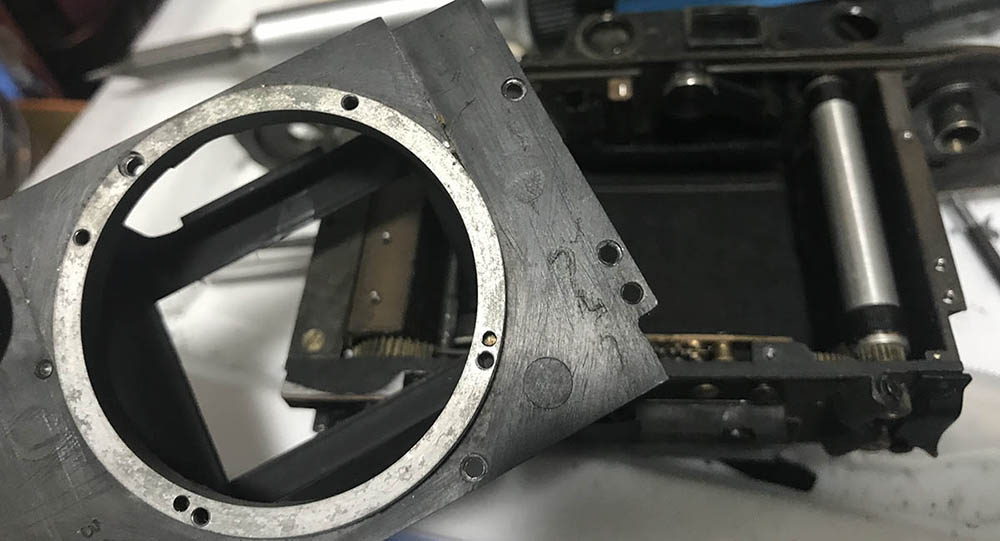
Carefully remove the front plate once the screws are gone.
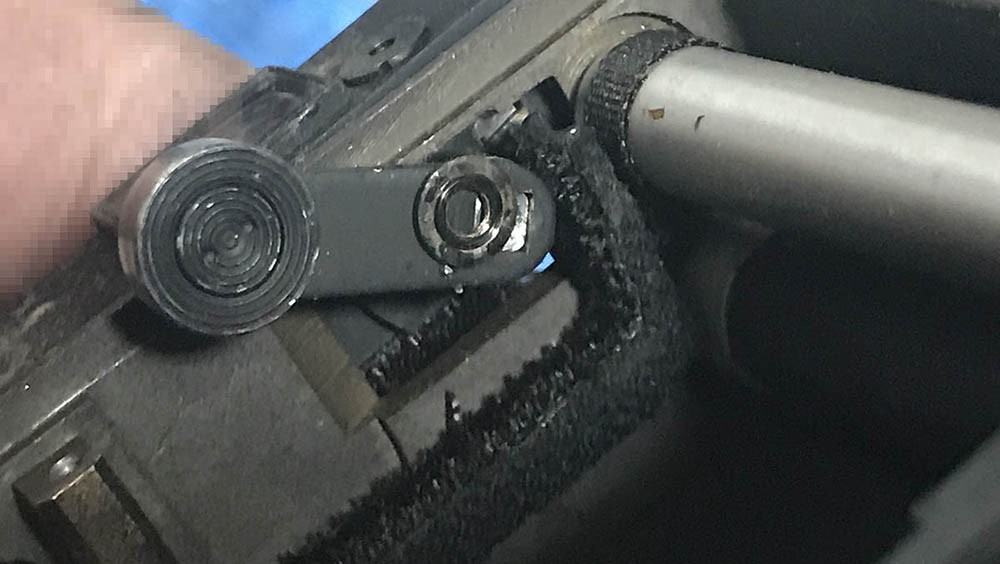
Note that the magnifier lever is coupled here.
Inspect everything very well before you dismantle anything, take us many pictures as you need.
This is typical, I have seen this many times from many different cameras.
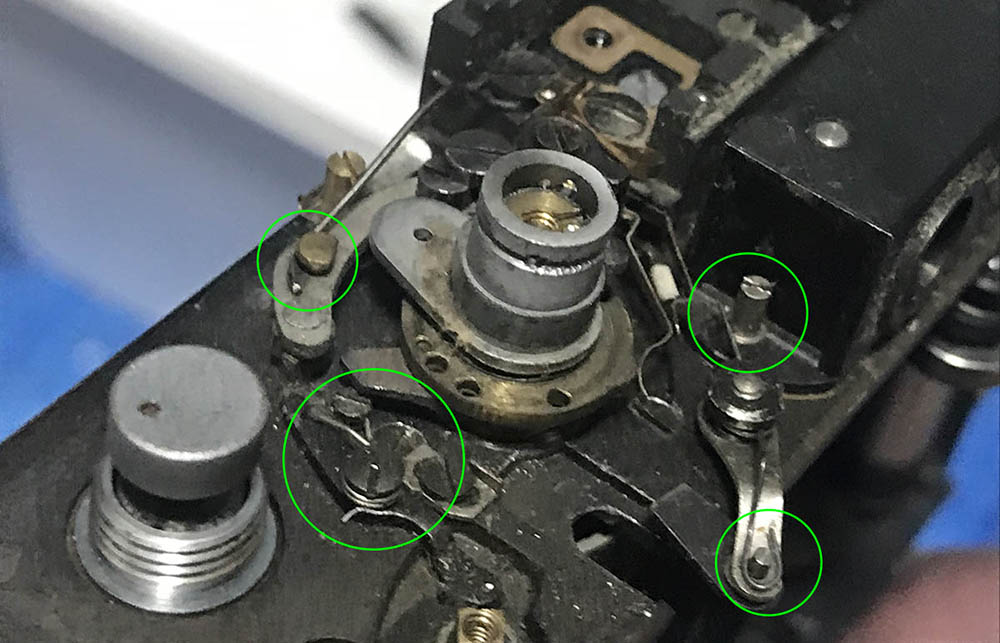
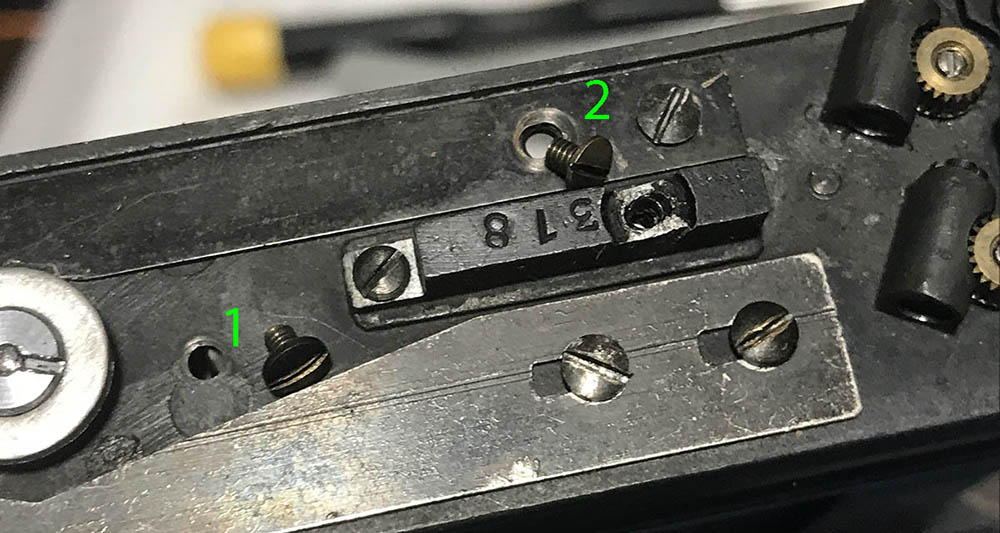
Things that you should be aware of, you should make sure that they are at the right places.

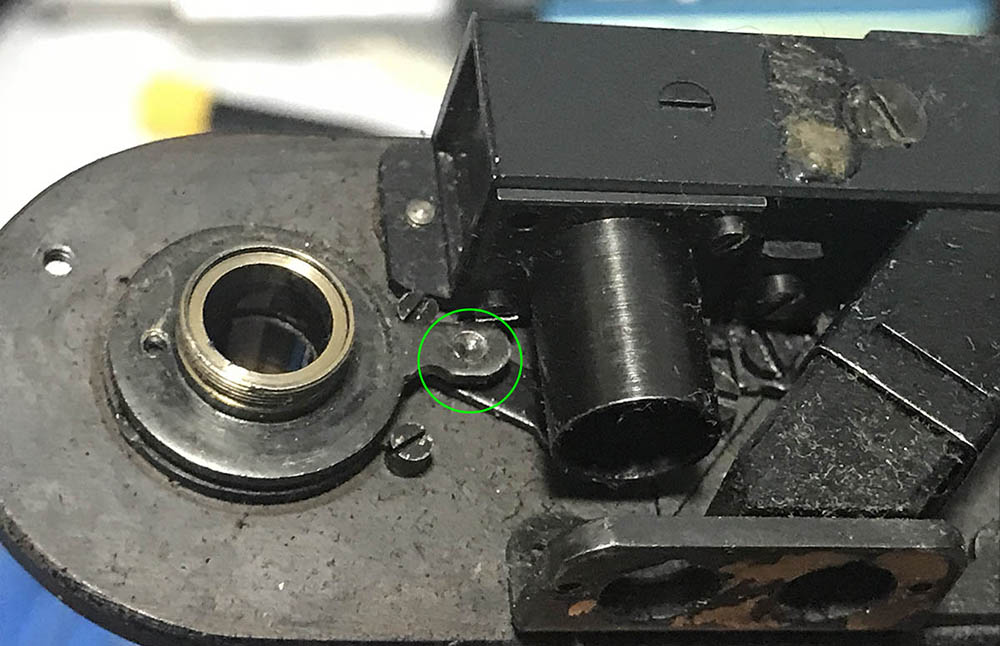
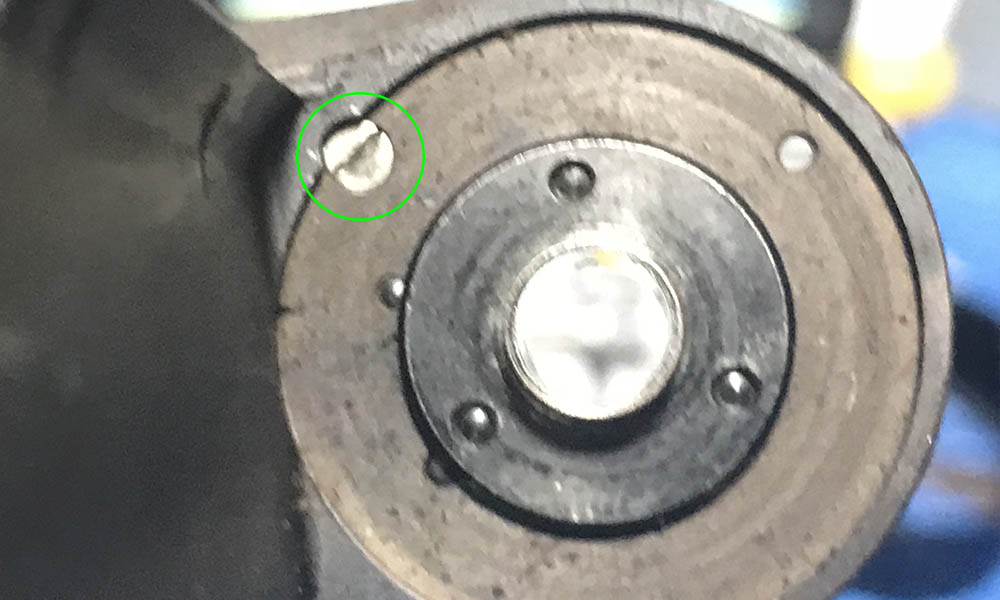
It’s another view, note that the spring should be resting on this screw.

Carefully remove this lever and it’s shaft, make sure not to warp anything.
Extract this.
Carefully extract this.

This one, too.
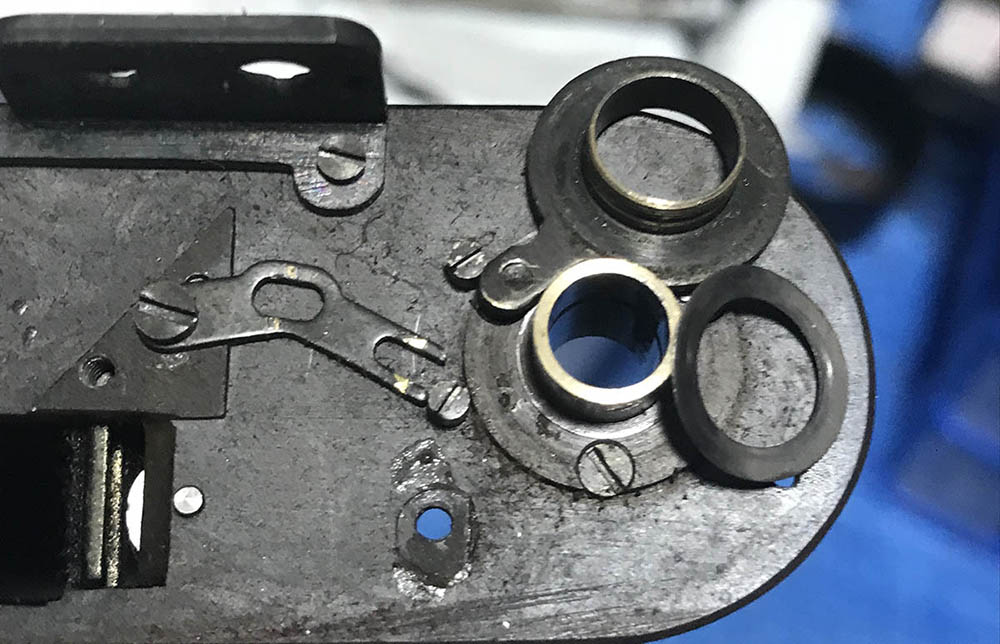
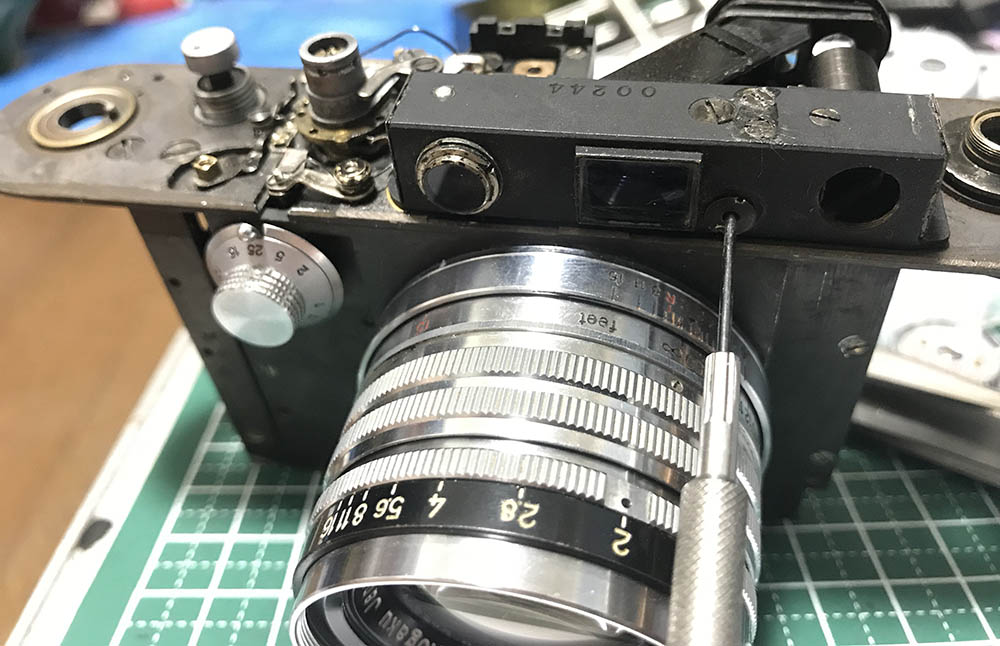
This part can be tricky to reach but you should extract this screw.
Note that there’s a shim underneath the screw. Once the screw is gone, you can remove the rangefinder arm.
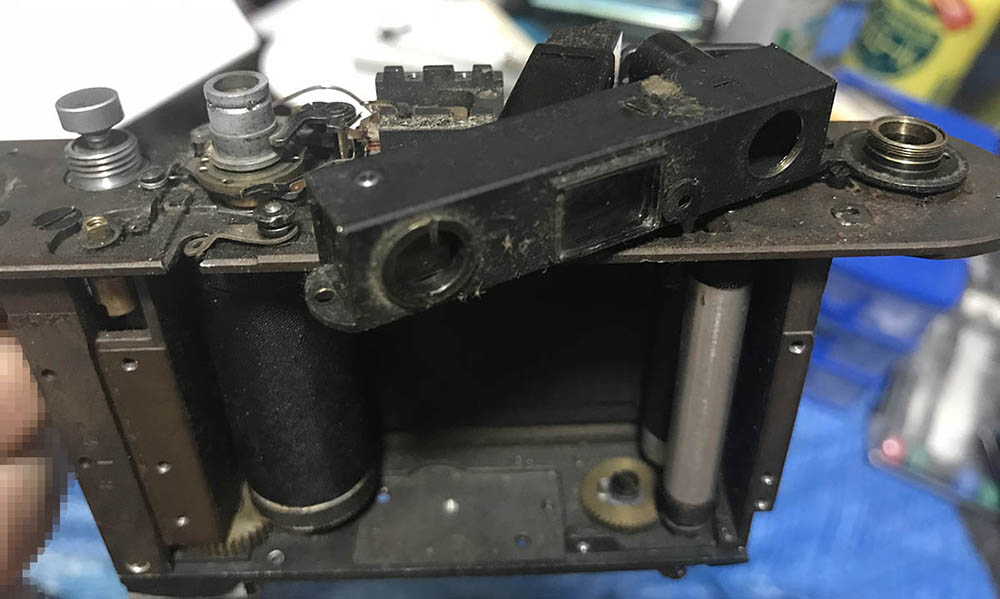
Carefully remove the rangefinder assembly, if we need to wiggle some things just to give away.
Dismantle and clean this part, make sure not to lose anything.
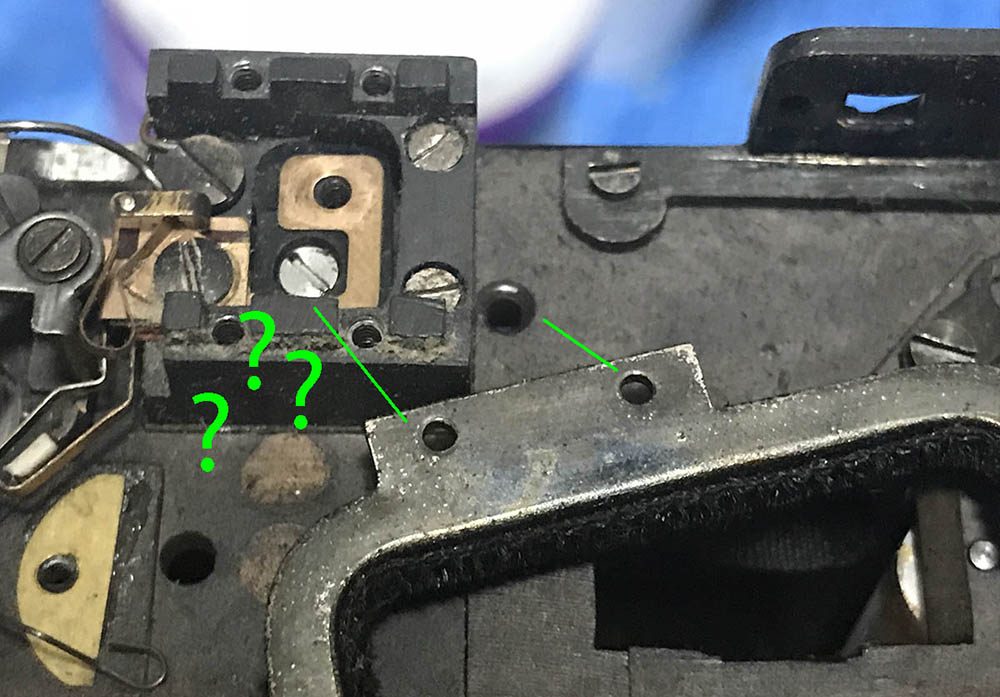
I’ve forgotten how I got rid of this, if I’m not mistaken, 2 screws here hold it in place. There’s also a piece of metal that secures it from the other side, it’s attached to the screws.
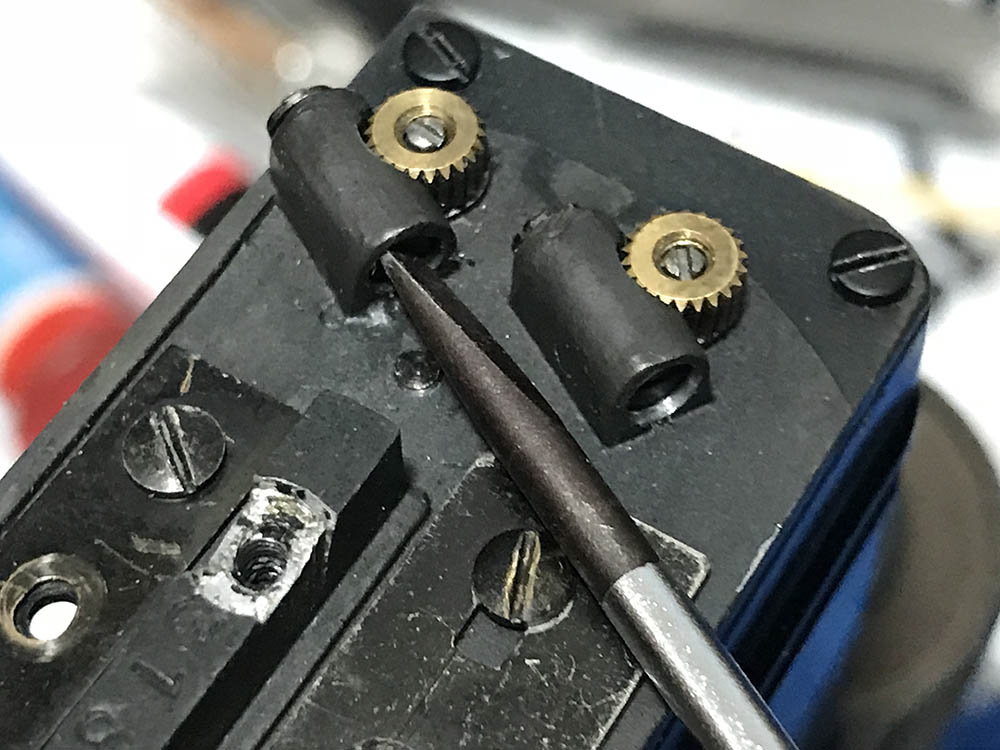
Once you have stripped the major assemblies from the top of the chassis you should clean off all the dirt and flush any minor moving parts before you proceed. The speed selector mechanism and other moving parts can can be dismantled but I don’t usually go that far, cleaning the bearings of the shutter drums are essential to a complete cleaning of the camera but you also risk not being able to put things back later. If you need to apply oil to some of the pivots here, only apply a very small amount because that will spread over time and use, applying too much will just create a mess and may even cause oil splatters to occur.
Dismantling (Rangefinder Assembly):
Many, if not all cameras of this age will require the replacement of the half-mirror. Before you even begin opening your camera you should be confident that you have the correct replacement part. If you are not sure about the measurements of the half-mirror, open the camera up to this point and and give the right measurements to a provider. These are clones so there will be some size differences, you’ll be lucky if the replacement parts came in with just a little bit extra that you can grind with a file, the worst case is when a half-mirror is too small. An exact measurement could be obtained by using good Japanese calipers such as ones made by Mitutuyo, cheap Chinese calipers are cheaper but they are no good. I have been using a Mitutuyo for a very long time.
Carefully extract these.
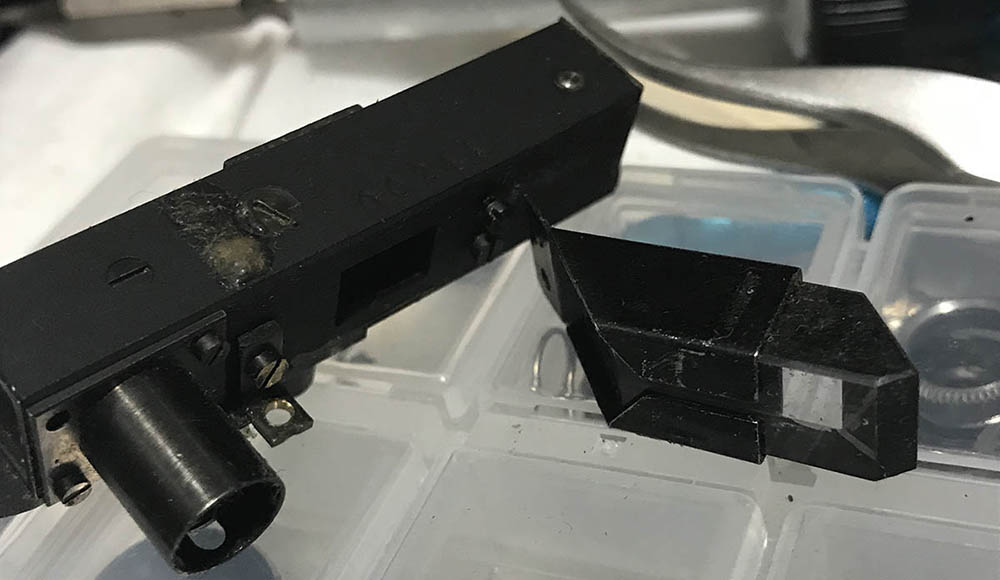
Removing the two screws will allow you to remove the housing of this prism. Set it aside in a safe place so you won’t damage it.
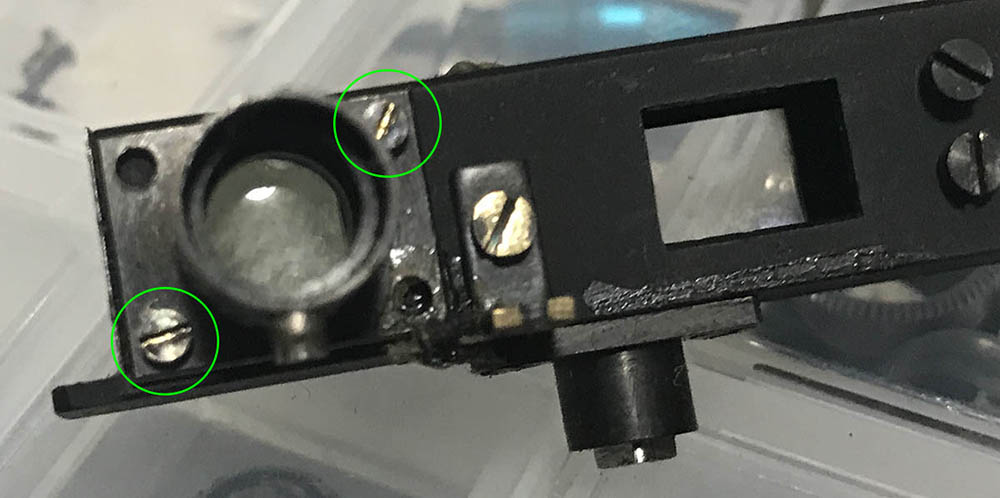
Extract these screws carefully.
Remove the magnifier assembly.
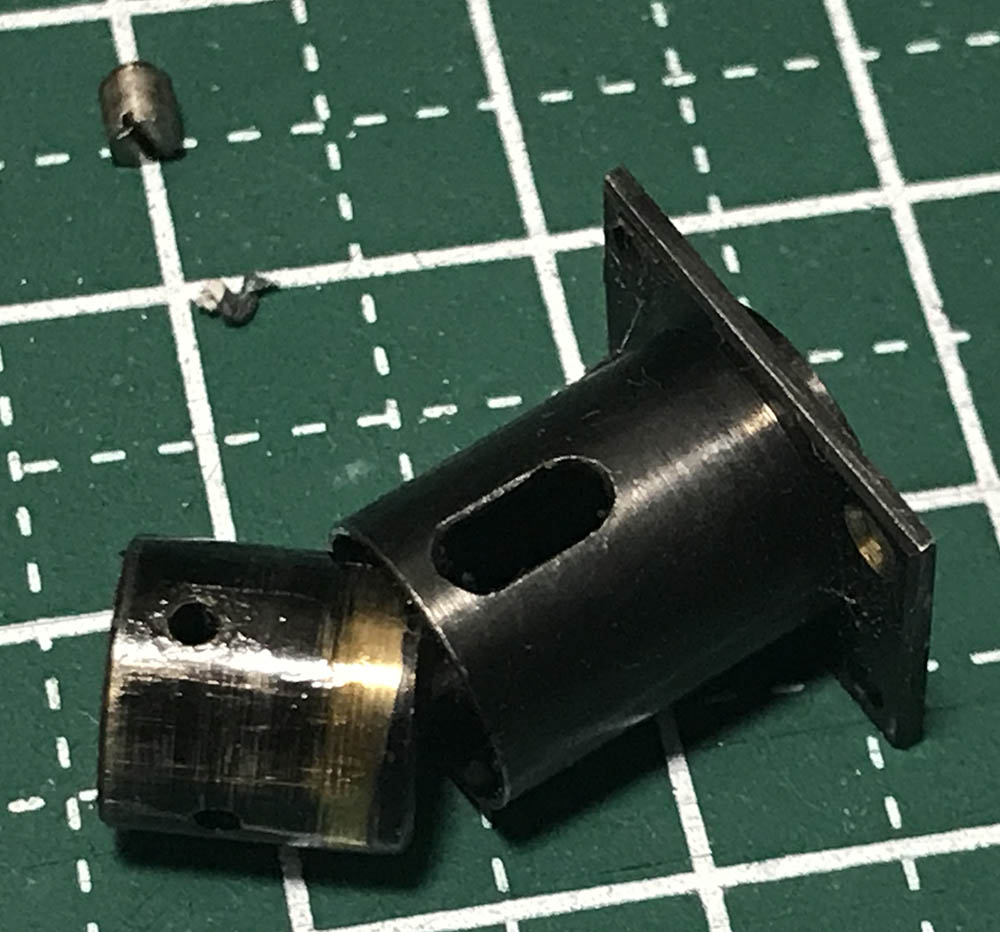
This is how you can further dismantle it.
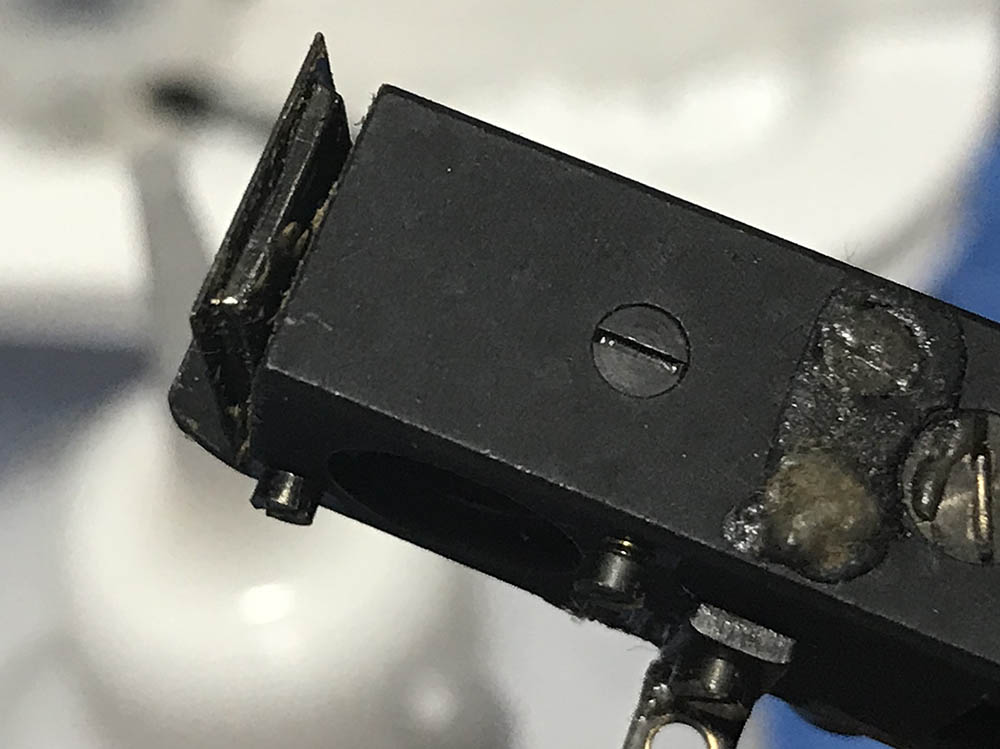
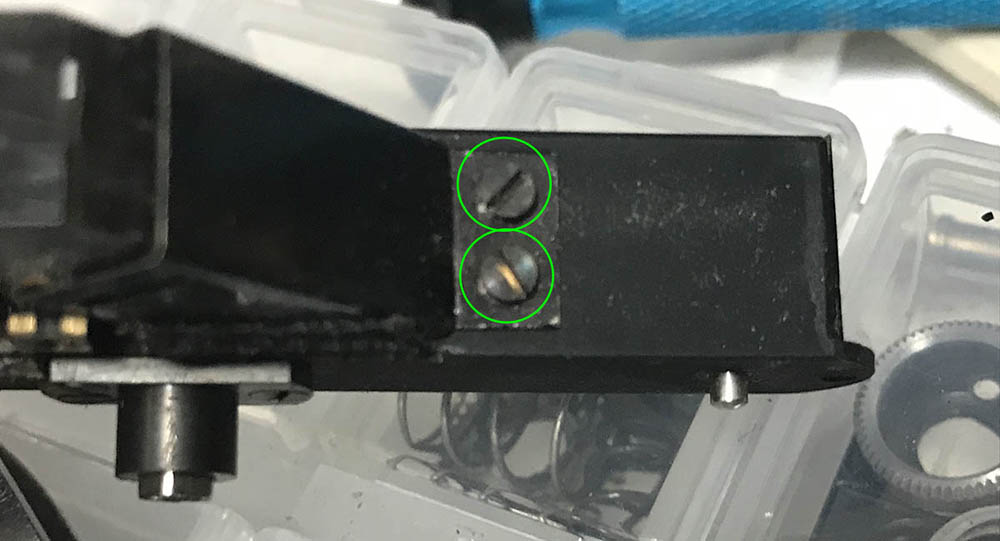
Use a sharp knife to pry open this cover. Note that some of the screws here are sealed, we’ll get back to them later.
As usual, the beam-splitter it’s in a sorry state so it has to be replaced. Be sure to note which side of the mirror is facing where, if you made a mistake here you will regret it for the rest of your life.
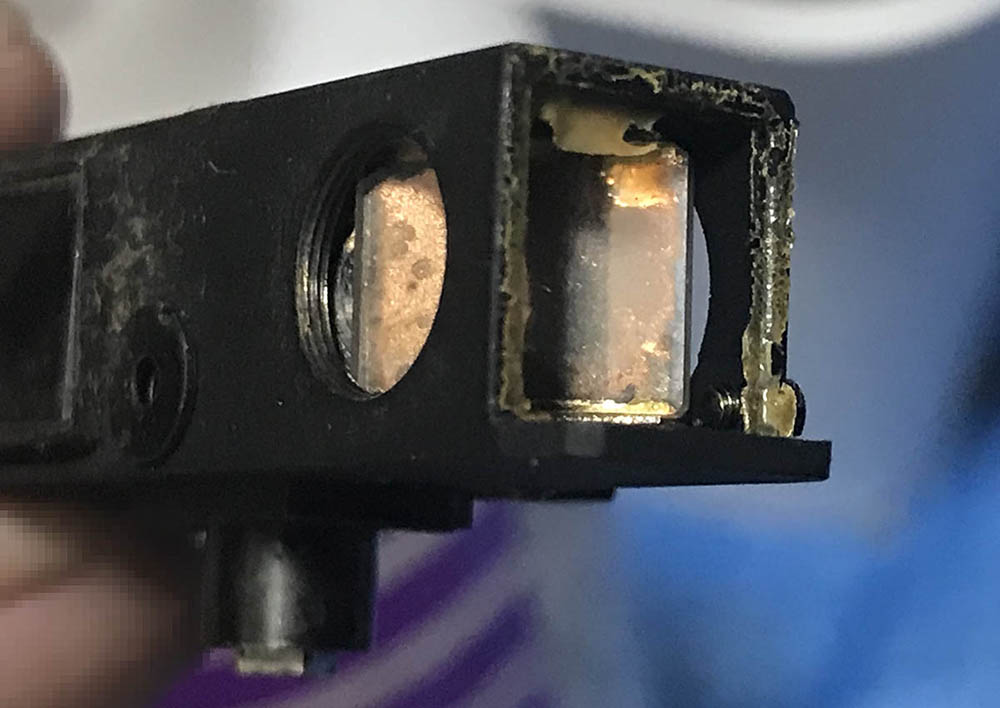
Carefully pull it off using a pair of tweezers.
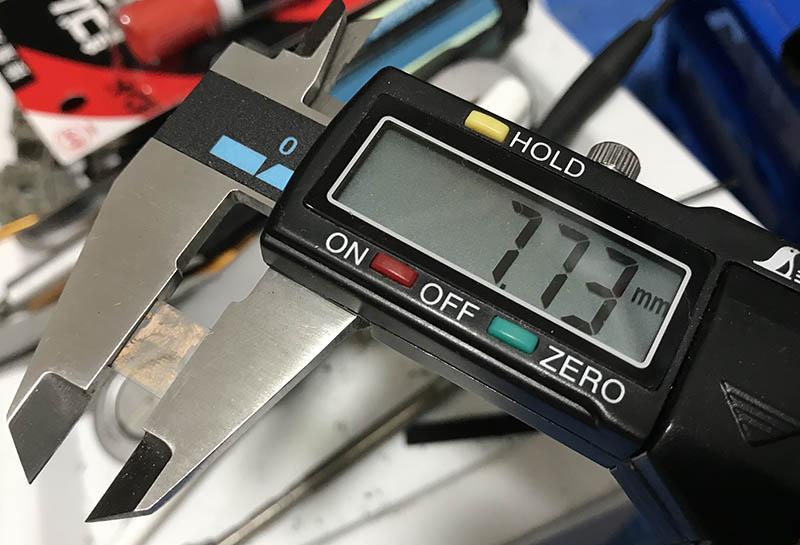
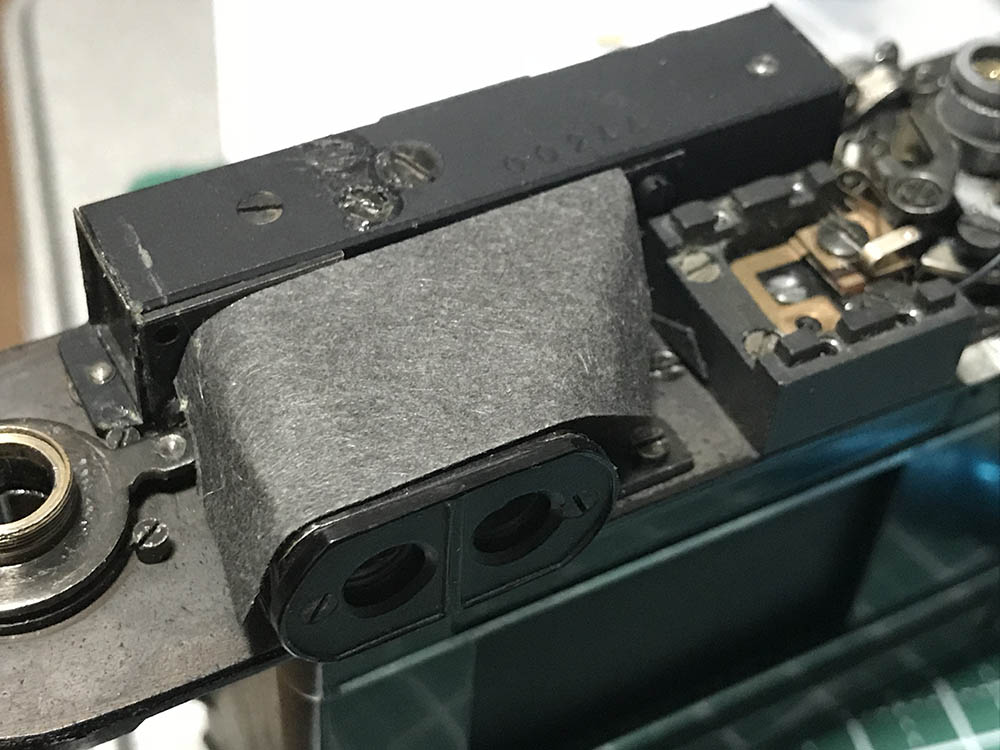
This is how tall it is.
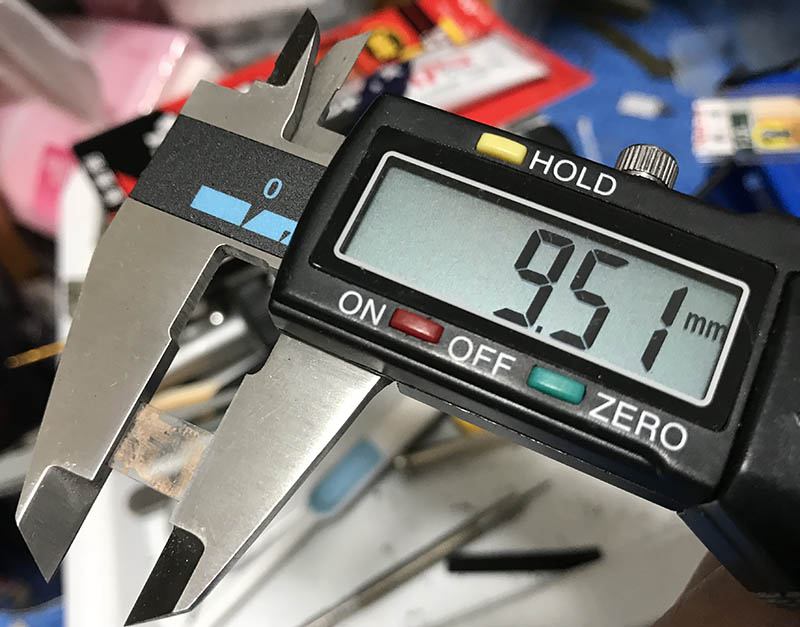
And this is how long it is.

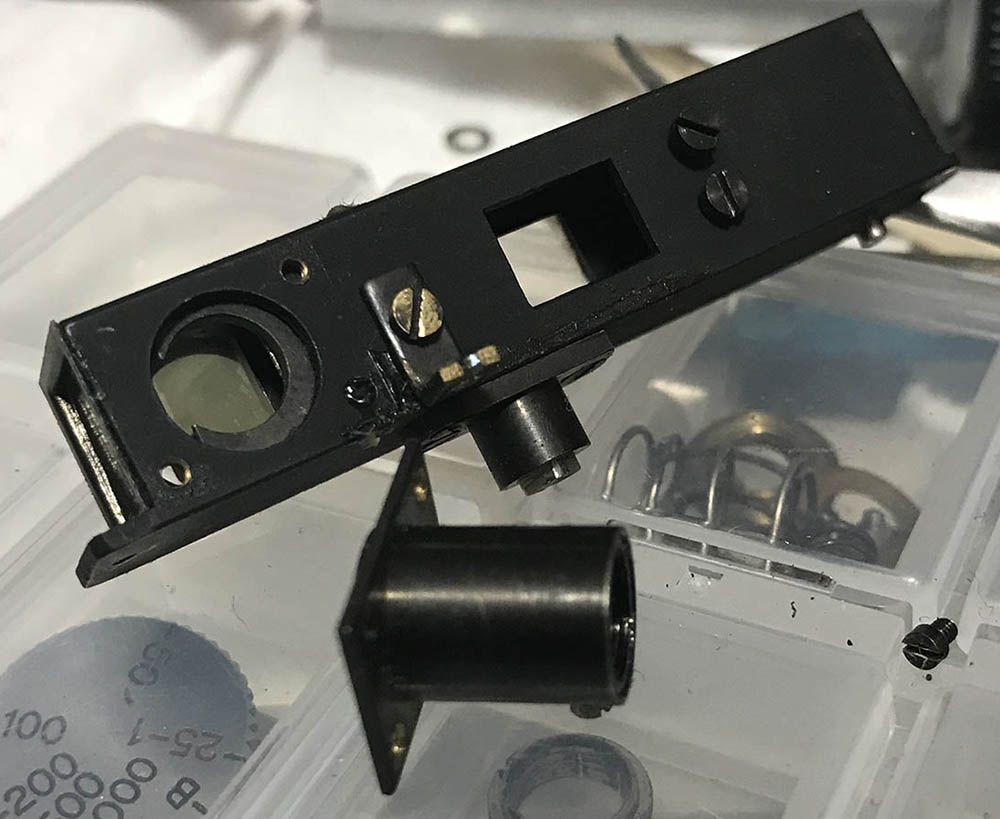
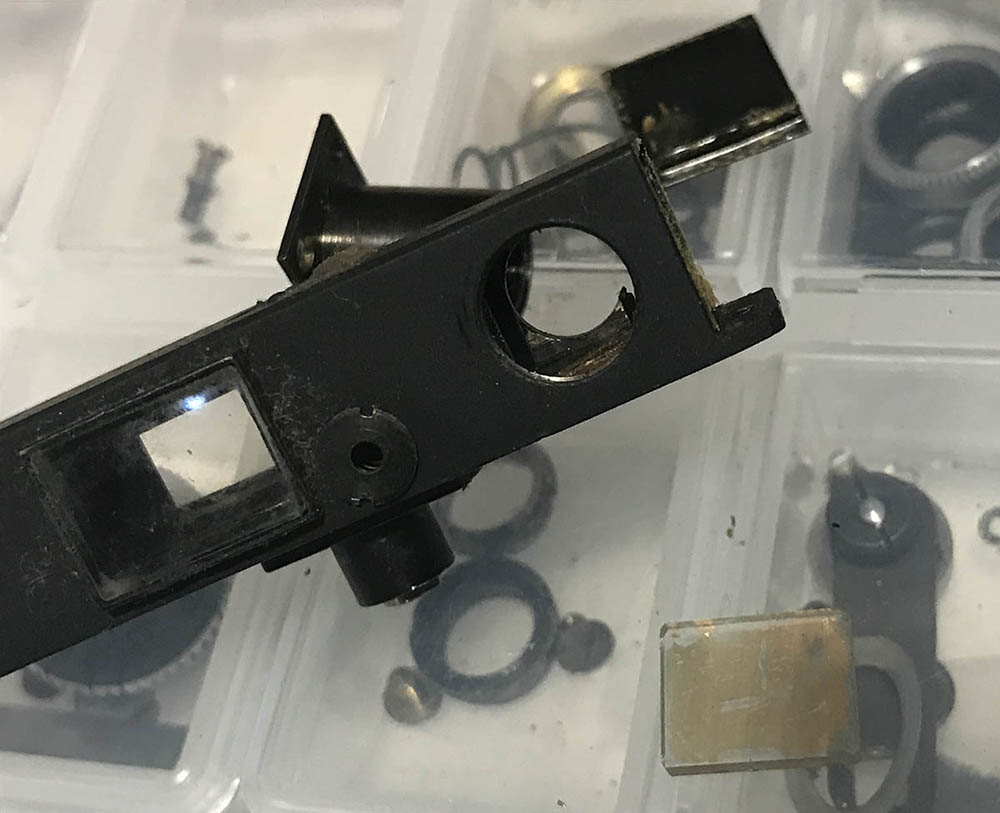
Pry open the other end of the rangefinder housing.
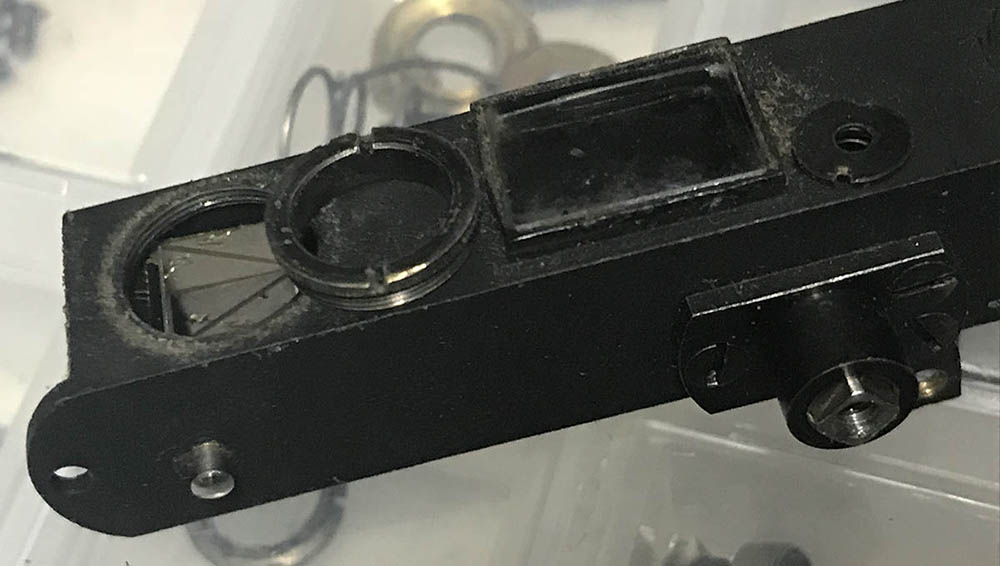
Carefully unscrew this thing.
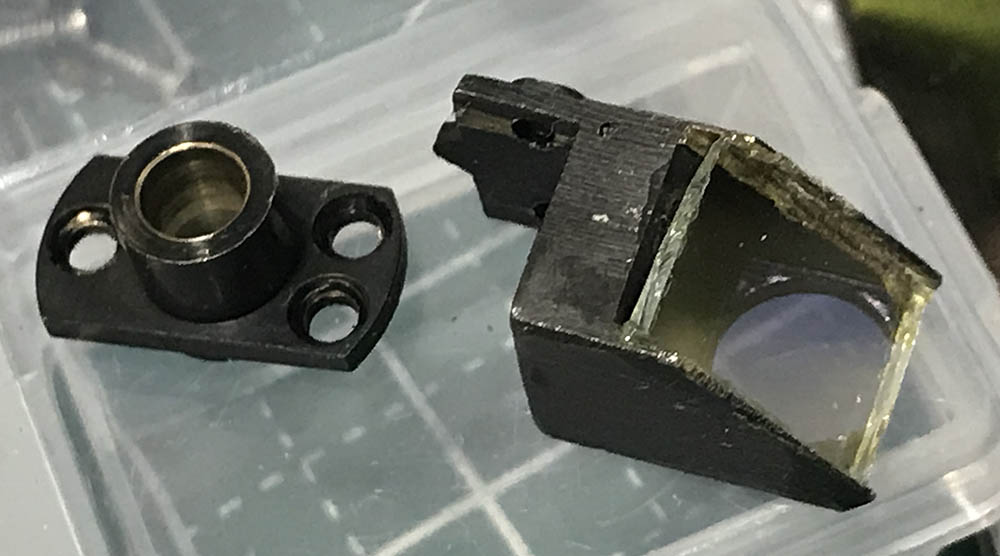
You can even go further and dismantle everything. Note that beam-splitter is replaced with a new one, it’s important to get one made by a master. Contact cement is used for attaching their placement half-mirror, never use cyanoacrylate or instant glue because that will fog the glass and ruin it forever.
Clean everything very well and make sure that you don’t leave any dirt behind because it will be visible in the viewfinder and magnifier each time you look through them. The housing of the mirror is adjustable, it can be done by loosening the sealed screws at the top of the rangefinder assembly’s housing and moving the housing of the mirror until you get things right.
You should go lightly with the oil here and only apply the best watchmaking oil you can afford. Only put a very small amount of oil on the pivots and exercise them well to spread the oil more evenly. The only part that needs to be greased here is the tube for the magnifier, you’ll only need a very thin film of grease for this part.
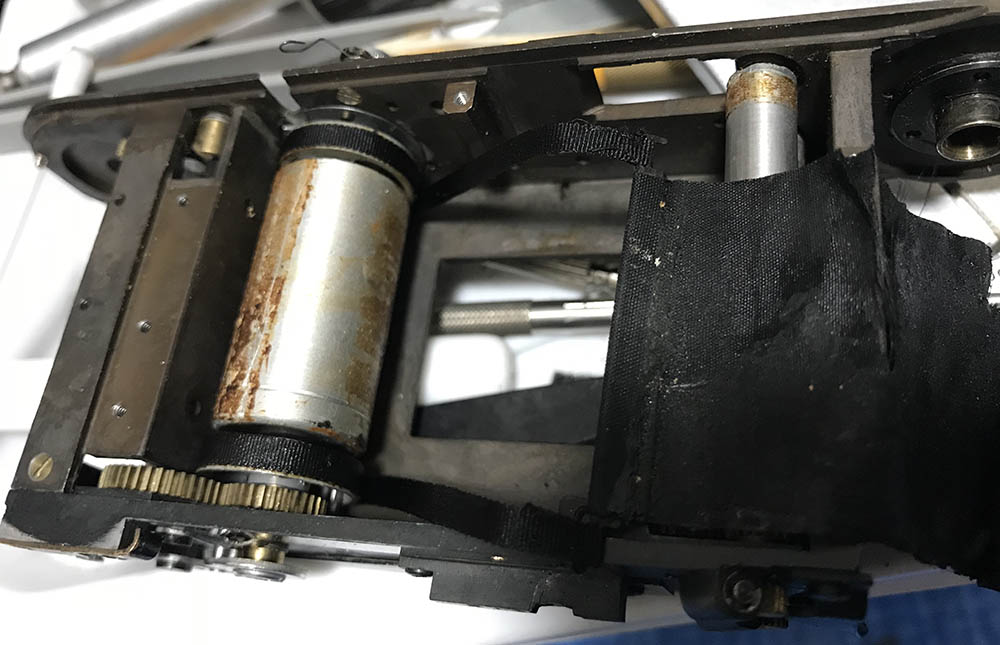
Disassembly (Slow Governor and Curtains):
I will not go too deep into this section because I don’t see the need to take the whole shutter apart. That’s only necessary if the camera is absolutely filthy, this camera is still clean enough in my opinion. You’ll have to use plenty of Q-tips and solvents when cleaning the old residue from the shutter drums.
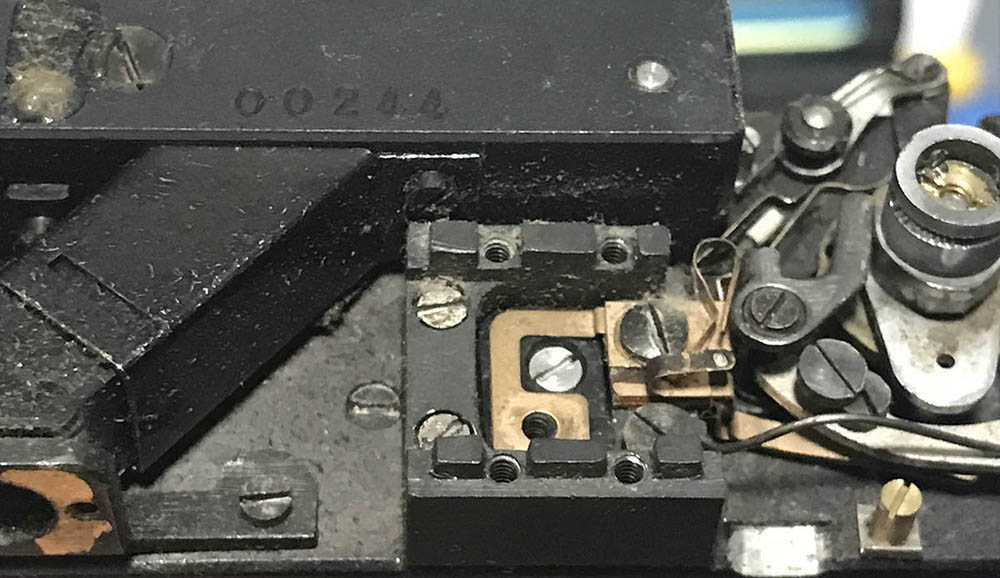
Carefully exactly screws so you can remove the slow governor. The slow governor is adjustable, you adjust it by loosening these two screws and nudging the whole thing back and forth until you get your desired results.
Carefully remove that slow governor, you do not need to dismantle it any further but you need to clean it very well by flushing it with lighter fluid. Most of the payments here are designed to run-dry but there are a few spots where you will need to apply a very small amount of oil.
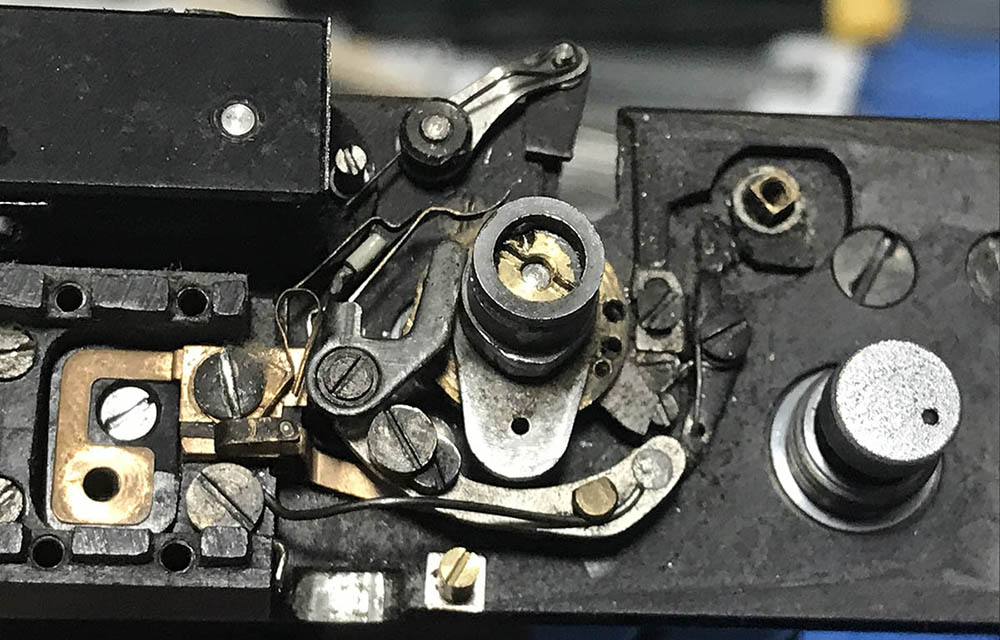
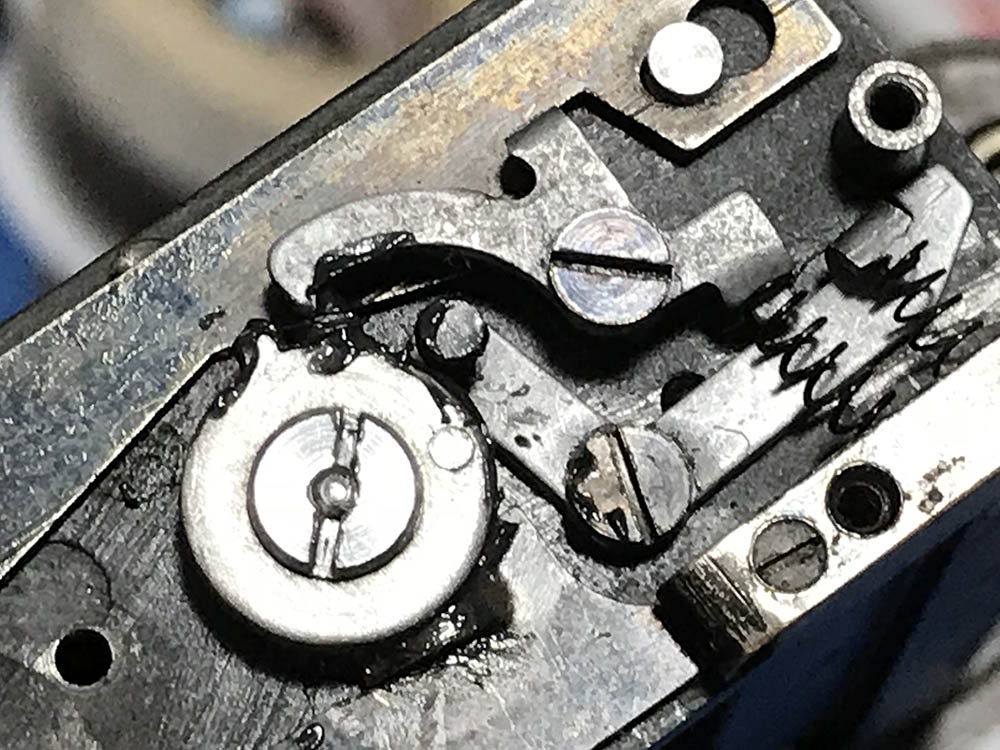
Before you go any further, study the shutter mechanism and how it operates. I rarely had the need to go further than what you see here.
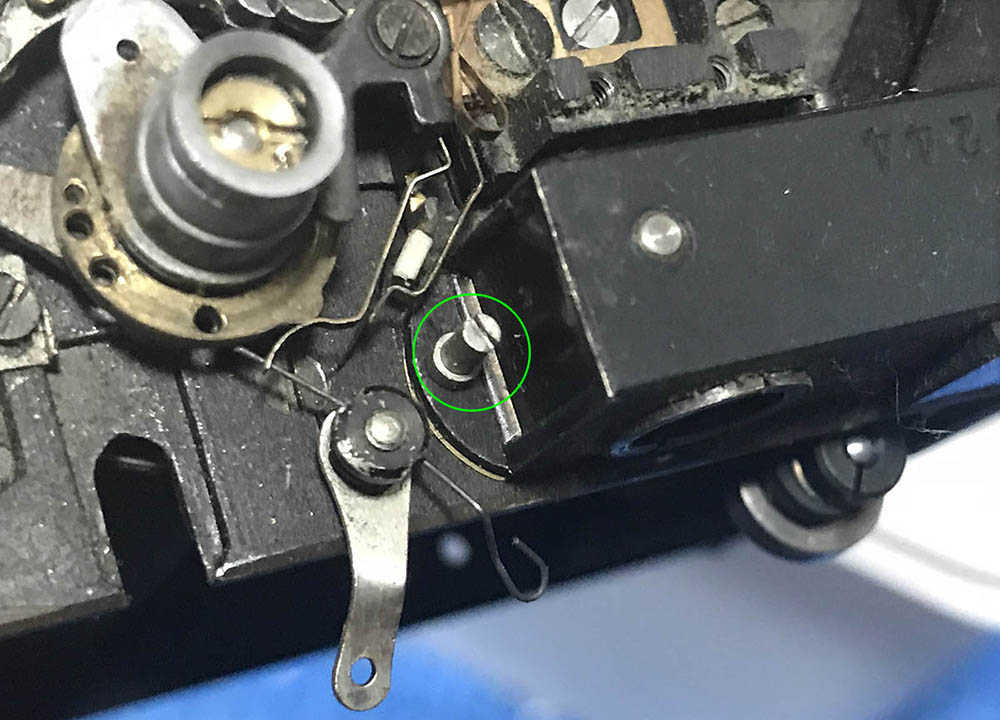
Note the position of this post on the shutter is relaxed.
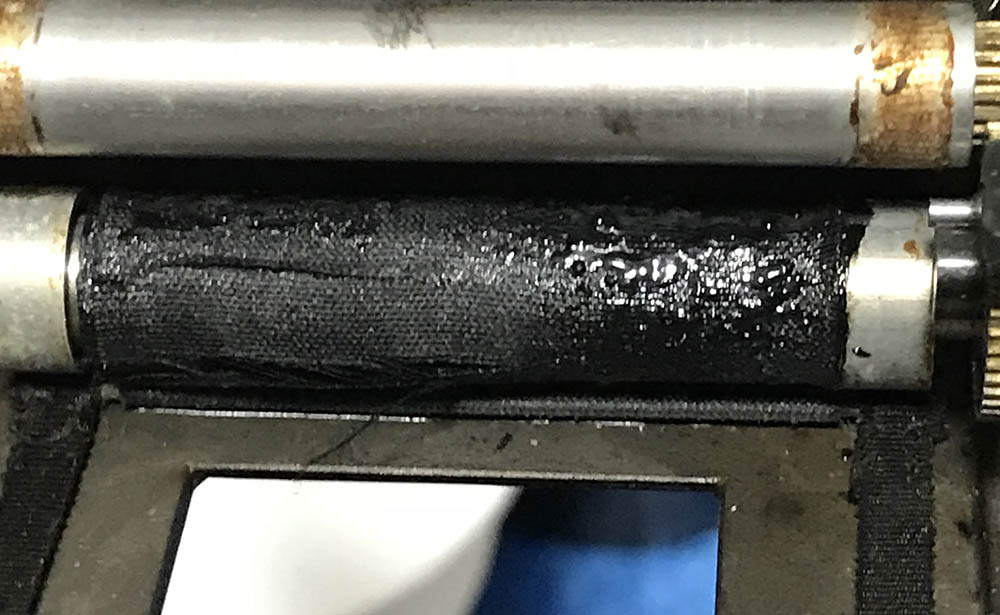
The shutter is in the poor state and should be replaced, before you remove anything make sure that you have marked where and how the shutters are attached.
Once you are satisfied with your notes, carefully remove the old shutter and clean everything with alcohol and other solvents, make sure that the drums and springs are clean.
Clean the drums as much as you can and don’t leave any residue. It will take you the whole afternoon but the results will be worth it. Flush the gears with lighter fluid and blow them clean. You then scrub it with a very small toothbrush to remove even more gunk.
Disassembly (Adjustments and Curtain Replacements):
This section will describe the steps that I did in order to finish up this project. You cannot do this without a reliable way to test the shutter speeds of your camera. You’ll need a camera tester that has at least two sensors, one sensor in each edge of the aperture. This will allow you to measure the opening and closing curtain’s speeds independently.
I had nothing to do at that time so I fashioned the replacement curtains from titanium, I took them from a spare Nikon F that I have in my parts box. I’m just lucky that everything fit nicely so I didn’t need to adjust the length of the curtains and its ribbons.
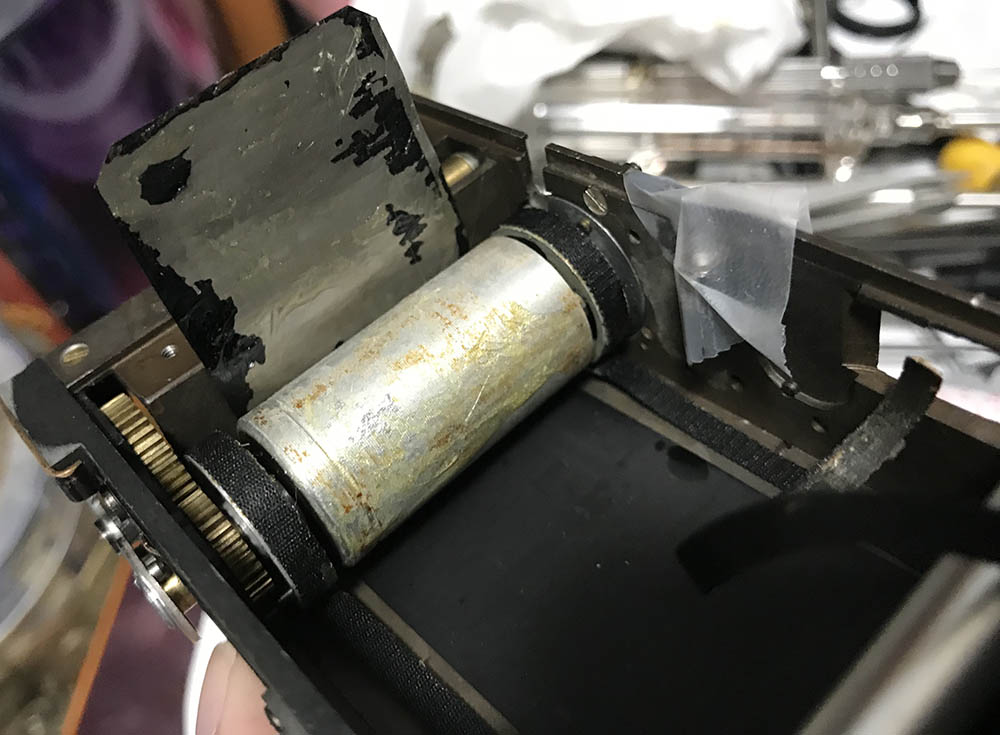
I replaced the curtains with titanium ones from a donor Nikon F, it’s a good fit.
Everything was clean thoroughly, the correct type of grease applied and oiled anything that requires it.
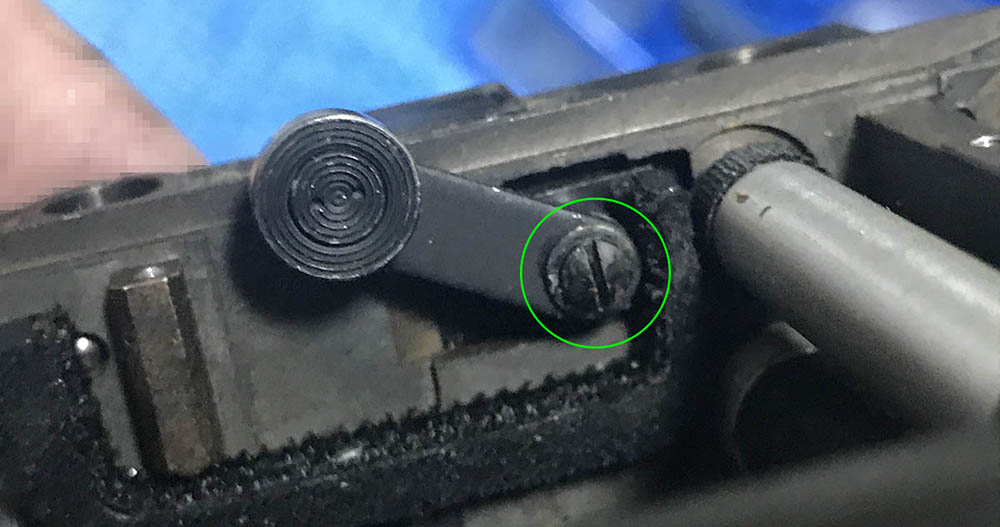
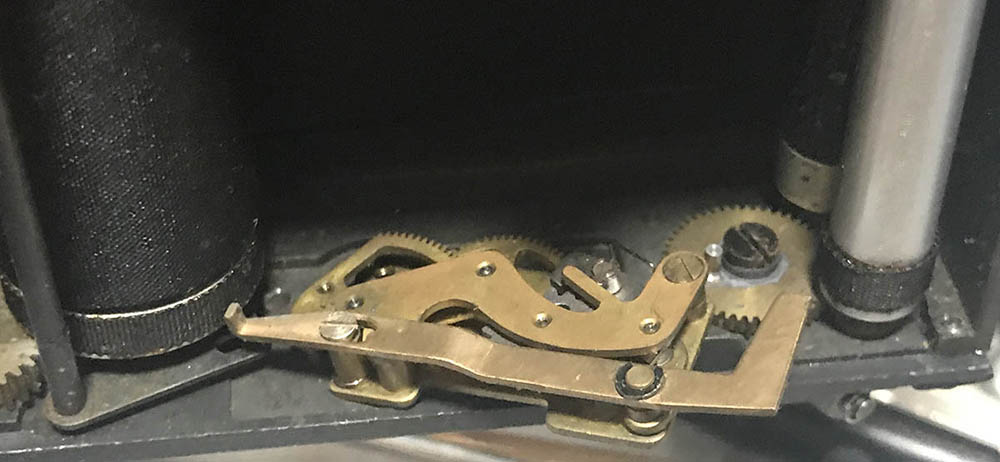
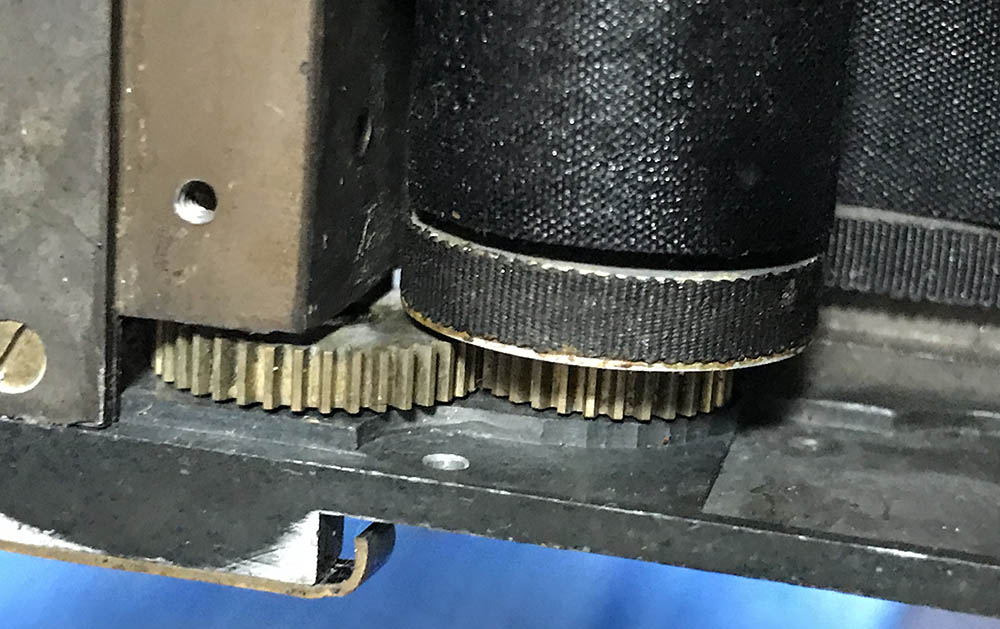
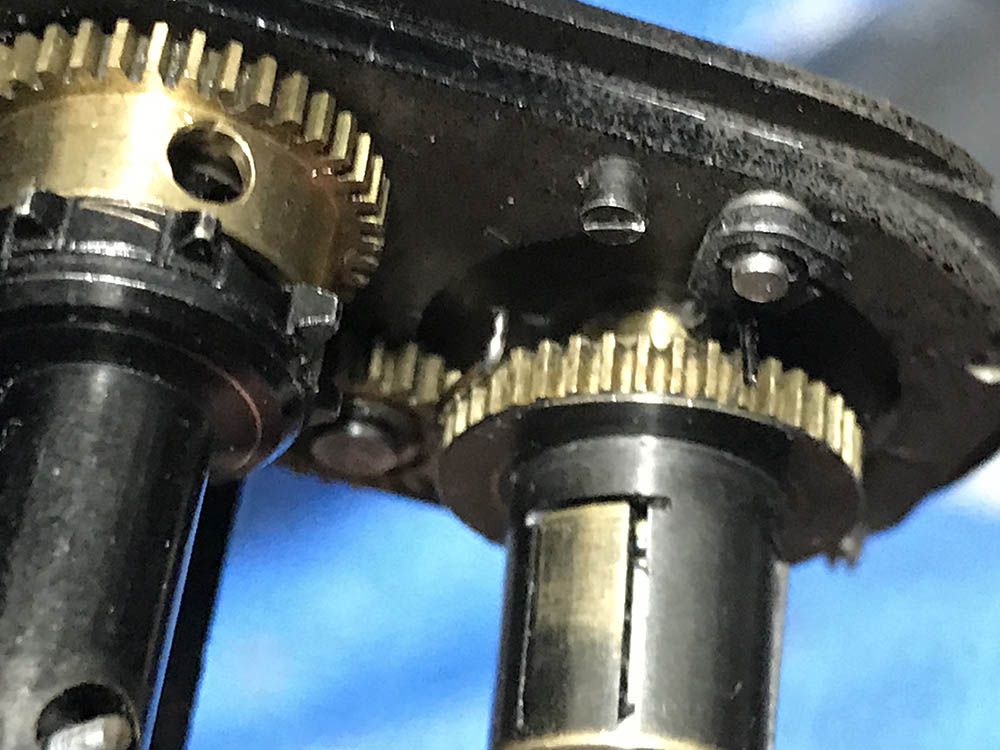
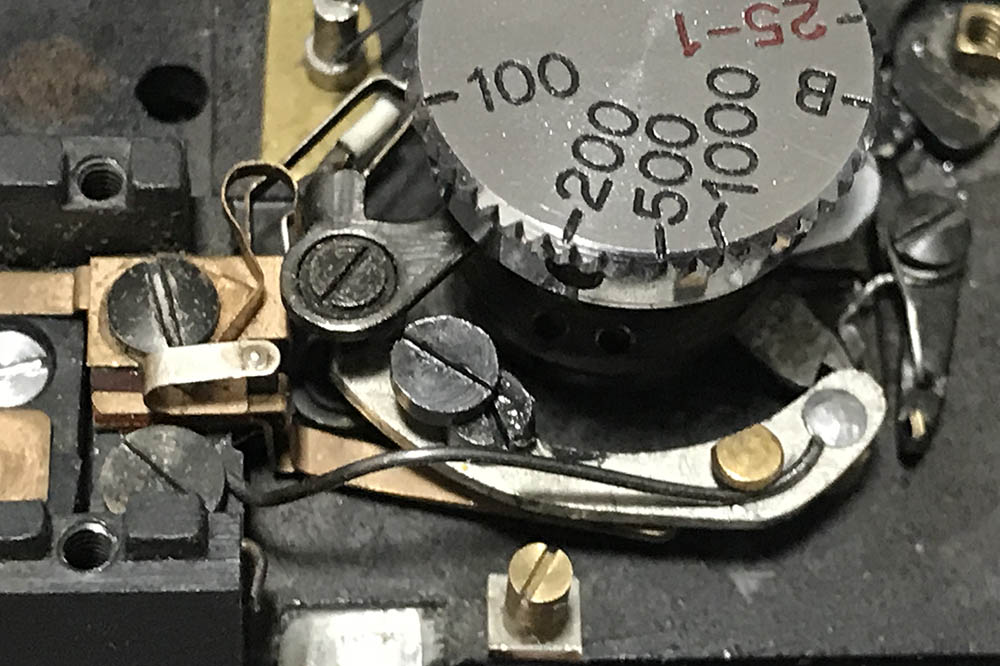
You adjust the shutters by turning these worm gears,

This photo to show you which which ones affect which curtains.
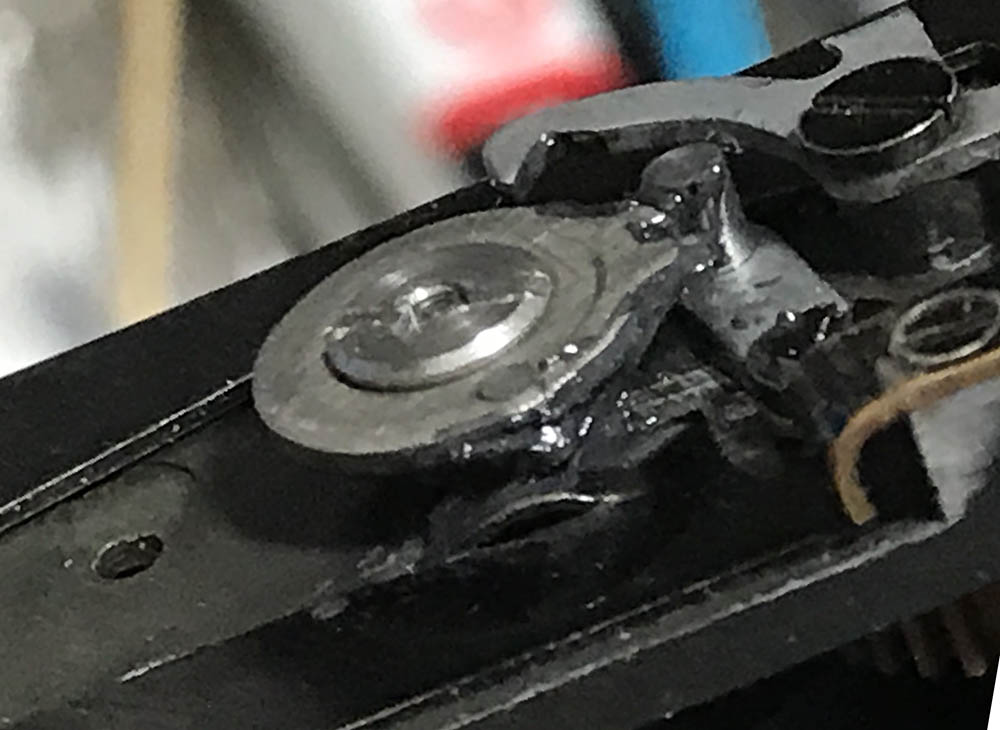
Apply a little bit of grease here, this is way too much so I removed the excess grease.
What a mess, clean off any excessive oil or grease because they will creep into places that you don’t want them to.
Reassemble everything up to this point and reinstall the shutter dial so you can make adjustments easier.

Don’t forget to reinstall the slow speed dial, it’s adjustable money is about this position.
Everyone is familiar with how a Leica shutter works so there’s no need for me to explain everything here. If you’re following my work, you should know that I have already written several articles that includes details about this.
Disassembly (Rangefinder Adjustments):
This is a mandatory step each time a rangefinder camera is serviced. You’ll need to readjust the optics, it’s not difficult to do so long as you have the right conditions such as a view of a very far away place. Distant objects such as communication towers that are more than 4km away will be enough. You should also use a lens that is known to be accurate to help you drive the rangefinder arm.
The rangefinder is adjusted in this manner, this one is for the horizontal alignment.
A cover has been fashioned from a dark paper scrap, this will make sure that everything is dark.
I use a flex clamp to make sure that this is held securely in place.
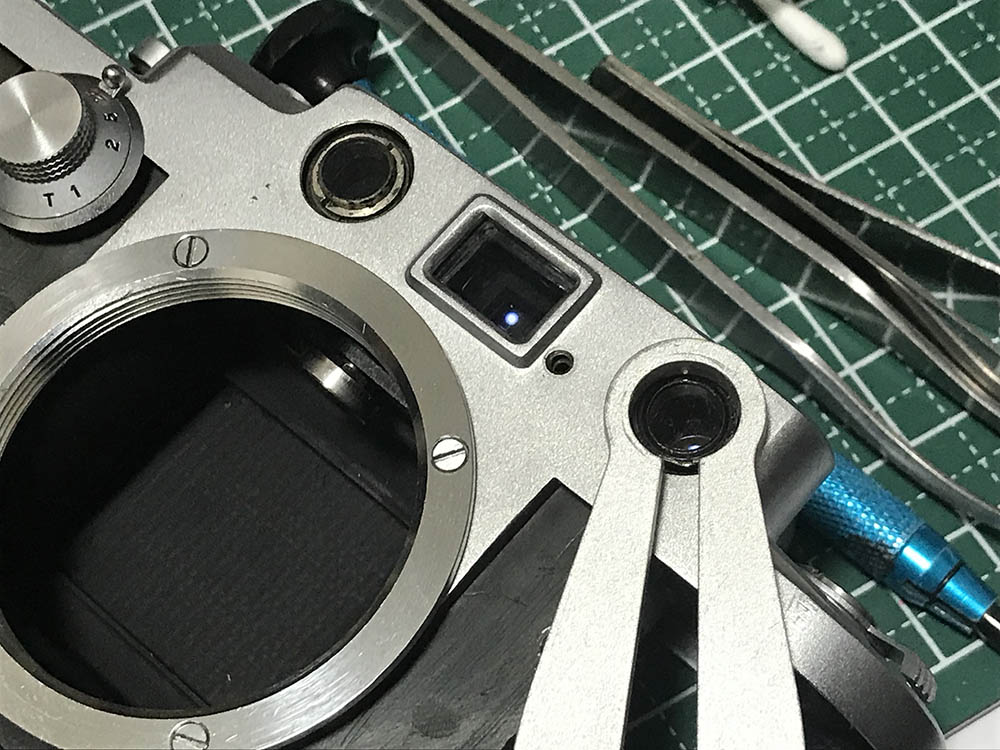
Once you are satisfied with your adjustments you can put the top shelf back. Check and see if things are still good. If the alignment is off you will still be able to make slight modifications through the access hole for the horizontal adjustment screw. The horizontal adjuster can be accessed easily so it’s not a problem.
Conclusion:
This project took me several nights to complete, with most of that time went to cleaning small parts. This was very enjoying, I did not experience any major troubles at all. The titanium shutter modification give it a certain personality, I will never ever fear for my curtains when shooting on a sunny day. I do not wish to do this for every camera that I will work on because silk shutters still have their place today.

The shutter speed dial has being repainted. I have also re-tapped the threads because they appear to be a bit loose.
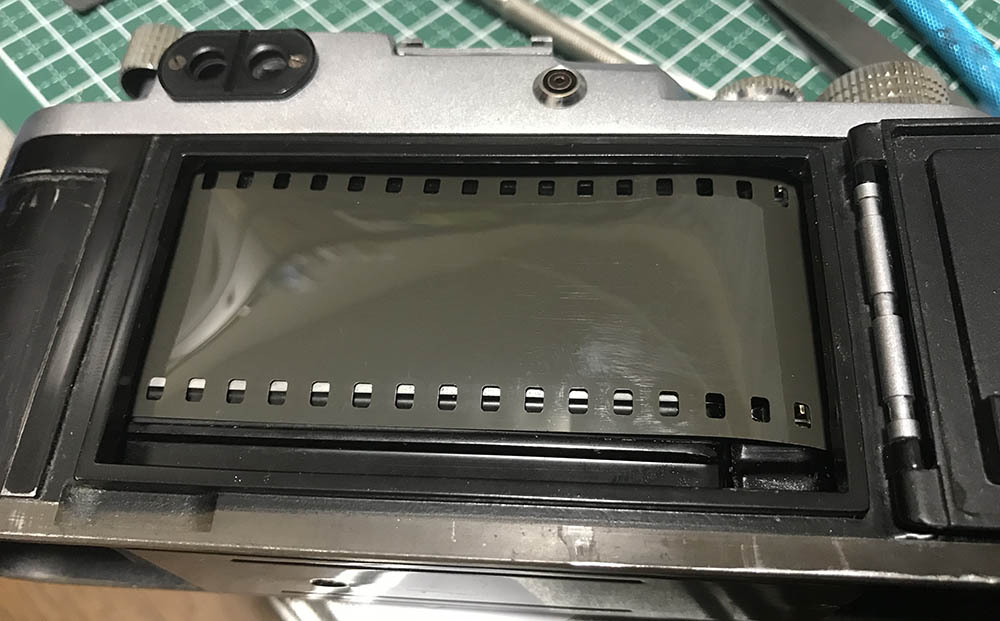
Before you completely reassemble everything, make sure to run a roll of scrap film just to make sure that everything is running correctly.
And here it is now, waiting for its new covering courtesy of the one–and-only Aki-Asahi. He is the best in the business, he has been very reliable and he has helped me with several projects, thanks to his products.
This is the story of how I met and restored my most-used screw mount camera. I have owned it for a few years and have ran plenty of rolls through it. It was my favorite because it’s reliable and the back opens, I use that all the time when adjusting and checking lens’ focus.
This article is shorter than I expected, something like this will usually take up another part. Did you enjoy it? If you did, please consider leaving me a tip. Your support helps me offset the cost of maintaining this site, this is a media-heavy site so I have to pay extra for the bandwidth and storage. I cannot do this alone and it is all thanks to you that we have reached a decade of quality content. That’s all for this article, I will see you again next time. Please come back often because I occasionally upgrade some of my older posts. Wishing you a happy day, Ric.
Help Support this Blog:
Maintaining this site requires resources and a lot of time. If you think that it has helped you or you want to show your support by helping with the site’s upkeep, you can make a small donation to my paypal.com at richardHaw888@gmail.com. Money isn’t my prime motivation, I believe that I have enough to run this by myself but you can help me make this site grow.
Leave me some tip?
Thank you very much for your continued support!
$2.00
Helping support this site will ensure that it will be kept going as long as I have the time and energy for this. I’d appreciate it if you just leave out your name or details like your country’s name or other info so that the donations will totally be anonymous. This is a labor of love and I intend to keep it that way for as long as I can. Ric.
