
Hello, everybody! Have you ever eaten a “Dubai Chocolate“? They are sold as luxury sweets, which makes them expensive and rare for a time. Influencers and marketing have sold it as a “Louis Vuitton” of candies! I have never seen sweets go for that much, it’s ridiculous! I’ve eaten a few myself but I couldn’t get why it is so expensive, especially considering that ingredients are mostly cheap like sesame paste (mostly). It felt like a scam in many ways, pretty much like Leicas in the past few decades. It’s all just to make a statement or for laundering money. Today, I’ll show you something of a scam but it’s from Nikon this time. You will also know why I made that statement and I am sure many people will agree with me and back me up.
Introduction:
The 1 Nikkor 32mm f/1.2 was sold from 2013 and was produced up until the Nikon 1 system’s death. It’s a very expensive lens for that time (and even today), it was marketed as the pinnacle of the system like the Nikkor Z 58mm f/0.95 S Noct is for the Nikon Z is today. It boasts impressive stats, engineering, and style. Many people lusted for it because of its very bright f/1.2 maximum aperture. It will surely compensate for “Little Peter“, enabling one to magically take amazing photos while using it. To me, it’s merely vanity and a flex just to show people that the system can also be for serious photographers. During its time there were lots of people discrediting the Nikon 1 system as being cheap, and for amateurs. They were not wrong for saying that, but they weren’t exactly correct, too. Unfortunately, what sealed the system’s reputation isn’t anything I’ve mentioned, it has more to do with the stupid choices the engineers took to save money. It’s going to be a very expensive mistake for Nikon since many were sent back for servicing. Customers were obviously upset, like I am today. I’m just sick and tired of repairing cheap 1 Nikkors at this point. Doing a lot of replacements for the fucking plastic gear can be tiring.

Unlike all of the 1 Nikkor lenses that we have feature to this point, the 1 Nikkor 32mm f/1.2 sports a metal shell. That makes it feel more like a “premium” product which makes it stand out from the rest. It also has a real focusing ring that actually does something, not the fake ones that the other1 Nikkors primes have. I seldom use it because it doesn’t feel right as it’s electronic. It has no helicoid from what I can see. It’s very heavy, even heavier than many similarly sized F-mount Nikkors despite having a smallish objective (but it’s still large for 1 Nikkor!). This made it require a huge 52mm filter size which is good because I have lots of them around, plus the accessories!
It has a 9-elements-in-7-groups design which is complicated for a 1 NIkkor lens. They really want to make it a point that people know that it’s not the typical dinky 1 Nikkor. The top it off with a cherry, Nikon gave it a Nano Crystal coating in one of the interior elements to fight off flare and internal reflections. It’s only one of the two 1 Nikkors out there with such technology. Since the Nikon 1 system have a crop factor of 2.7x it’s going to give us an approximate field-of-view that an 85mm lens has in 35mm format. This makes it some kind of an 85/2 lens for the CX system. Who knows what we could have had if Nikon continue to develop this system.
Now, if all I’ve just mentioned above points to the direction that this is a premium product then why did I say that it’s like a scam akin to the infamous Dubai Chocolates in my opening paragraph? The reason is simple, the stupid engineers at Nikon went all the way to make the ultimate 1 Nikkor but forgot to give it the the premium internal parts that it so deserves, especially considering how much of these cost, it does not make any financial sense at all because they only saved a few cents by cheeping out on parts but the cost of repair and honoring warranties is several times more expensive. Who thinks like that? I wonder if the guy who is in charge of making such decisions still works for Nikon, I would have fired him then. This is so stupid, what a shame. It’s as if nobody learned any lesson.

The front is not recessed as much as I wanted it to be so you must install a hood at all times to protect it from stray light. It’s deep enough for it to avoid getting physically touched. It won’t extend in any way, it’s going to rack the optics in-and-out as you focus, and will always go back to infinity when you turn off the camera. That means that the front element will somewhat be safe while the camera is not in use. Yes, it is not sealed from dust nor moisture in any way.
It comes with a special plastic hood which you must attach at all times. Not only does it keep away stray light, it will also protect the front element from damage. Alternatively, you can always use another hood if you can’t find one of these so long as it could be attached to a 52mm thread.
As far as ergonomics is concerned, the lens feels nice to hold. The focusing ring isn’t bogus, it focuses by-wire so it’s not all that great, it’s still better than nothing. It overrides whatever focusing mode you are in and will also magnify the general area where the focus point is at. This is very useful, I think it’s genius but it can also be annoying at the same time depending on condition.

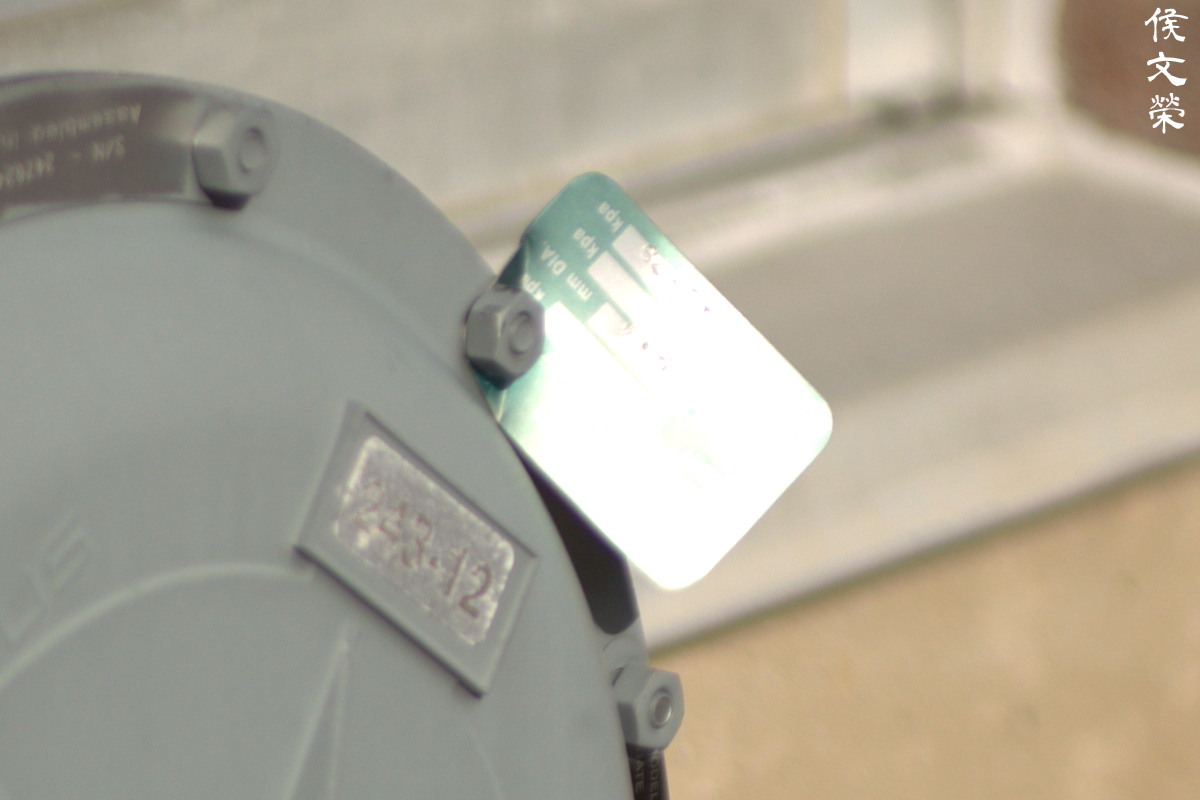
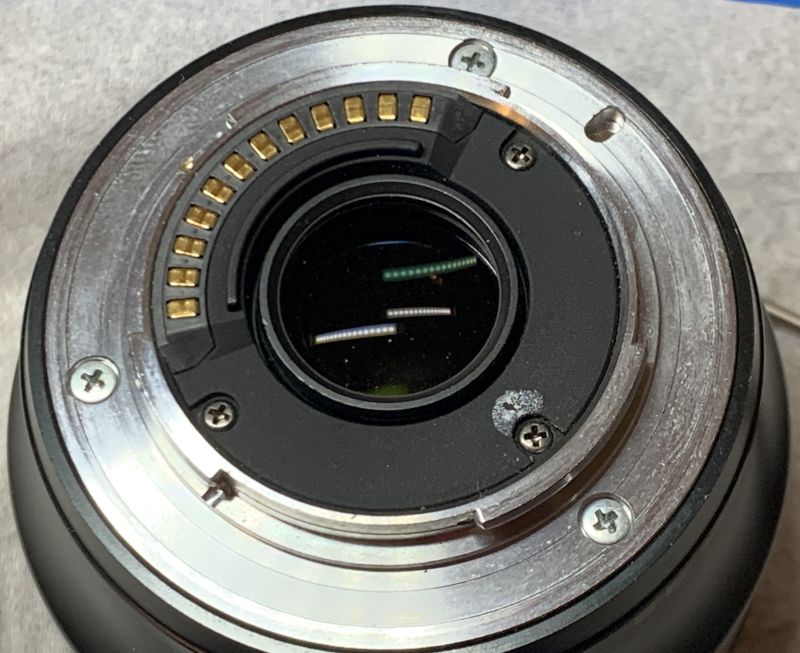
If the aperture isn’t completely closed when you’ve bought it, that is very likely a sign of a broken lens. It’s a sure sign if you are able to see any amount of light coming from the other side, no matter how small. It can also happen if the lens was removed while the camera is still turned ON, so you must find a camera to test it with to see if it will close.

So long as you see this error message, it’s a sure sign that the lens is busted. It can be the aperture gear or the cables, or even both!
These pictures, and my findings should not be reflective of how this lens really performs. That’s because it has been tampered with before I got to it! All this means is that one of the adjustable part inside is not up to spec according to factory standards so the lens’ performance is suspect! However, this is still useful for use as a reference point so you’ll know what to expect from it.
Let’s now see how this lens performs. It’s important to know how your lens performs, this will help a lot in understanding where it excels and it will also give you the insight so you’ll know where it fails. I captured these photos from f/1.2, f/2, f/2.8 and f/4, these apertures show the biggest changes. It’s also likely that a photographer will shoot within these apertures on a regular basis. I must also mention that I have skipped the numbers between f/1.2 up to f/2 because I wanted to simplify things, but I will mentions some of my findings later in the commentaries. These were taken with a Nikon 1 J5.


(Click to expand)
It’s hard to judge how much vignetting it contributes but all I can say is that I wasn’t able to find any signs of it even at f/1.2, at least not in the amounts that can be observed in real use. I’m sure that it’s there but I wasn’t able to find it.
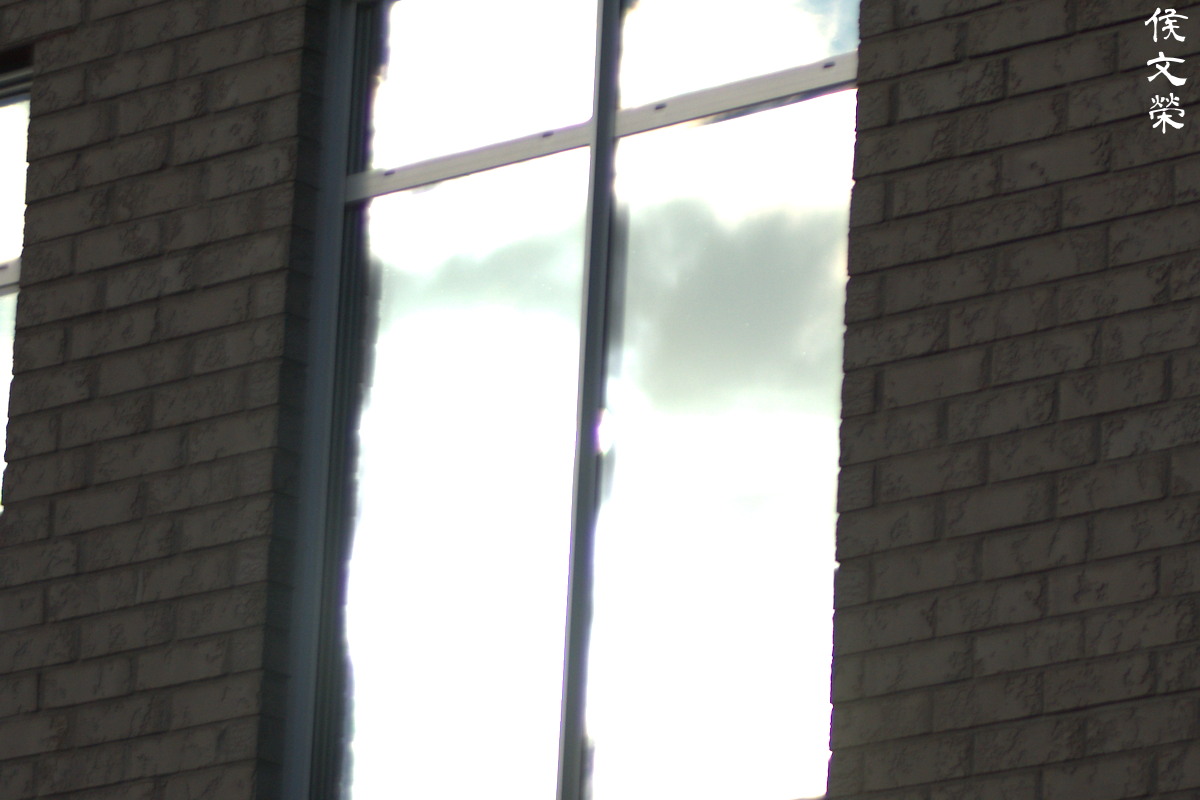
The effects of distortion can absolutely be seen here even if my brick walls aren’t really straight. It’s not so bad but you will be able to notice a little bit of bulging at the center, which should be easy to take care of with software in post.


(Click to expand)
It’s generally resistant to internal reflections, flare, and things of that sort. However, it’s not 100% immune to these and you will have to be careful when shooting in difficult situations. What you see here will never be done in actual use, there are the most extreme of cases! I can say that it’s not so bad at all, specially if you consider how large the front element is.


(Click to expand)
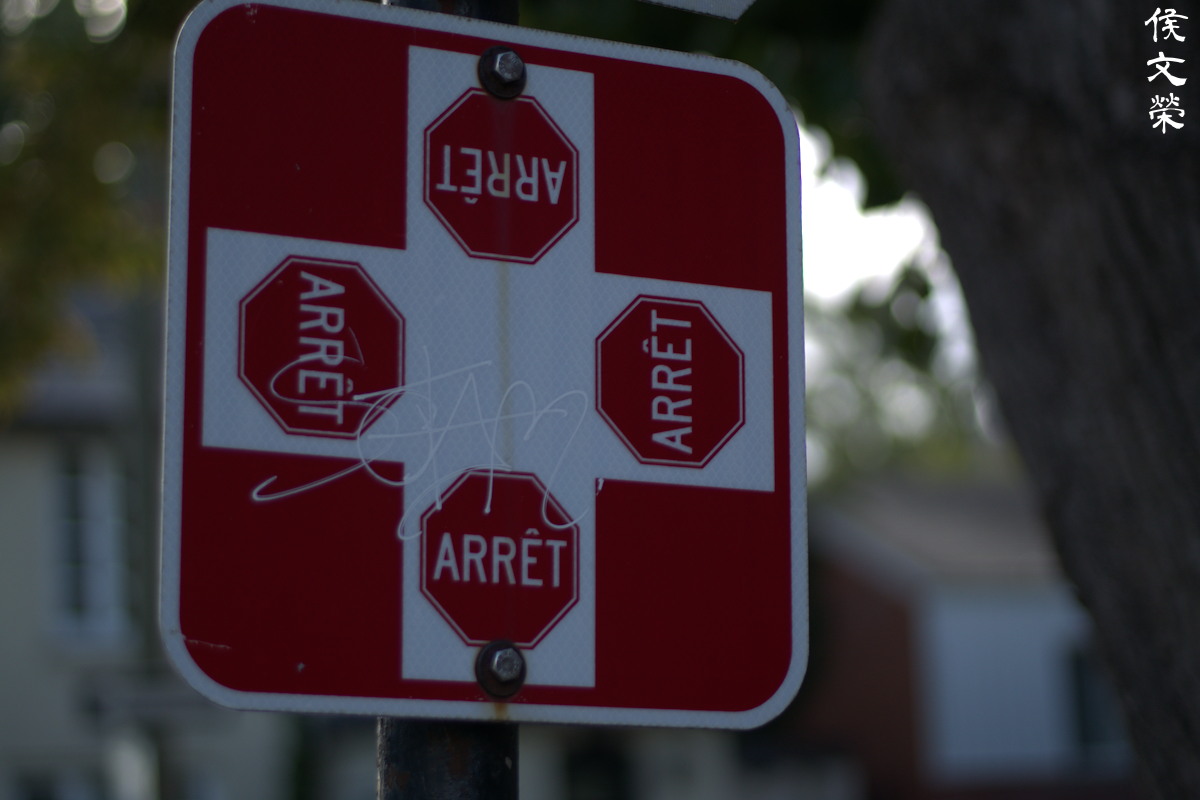
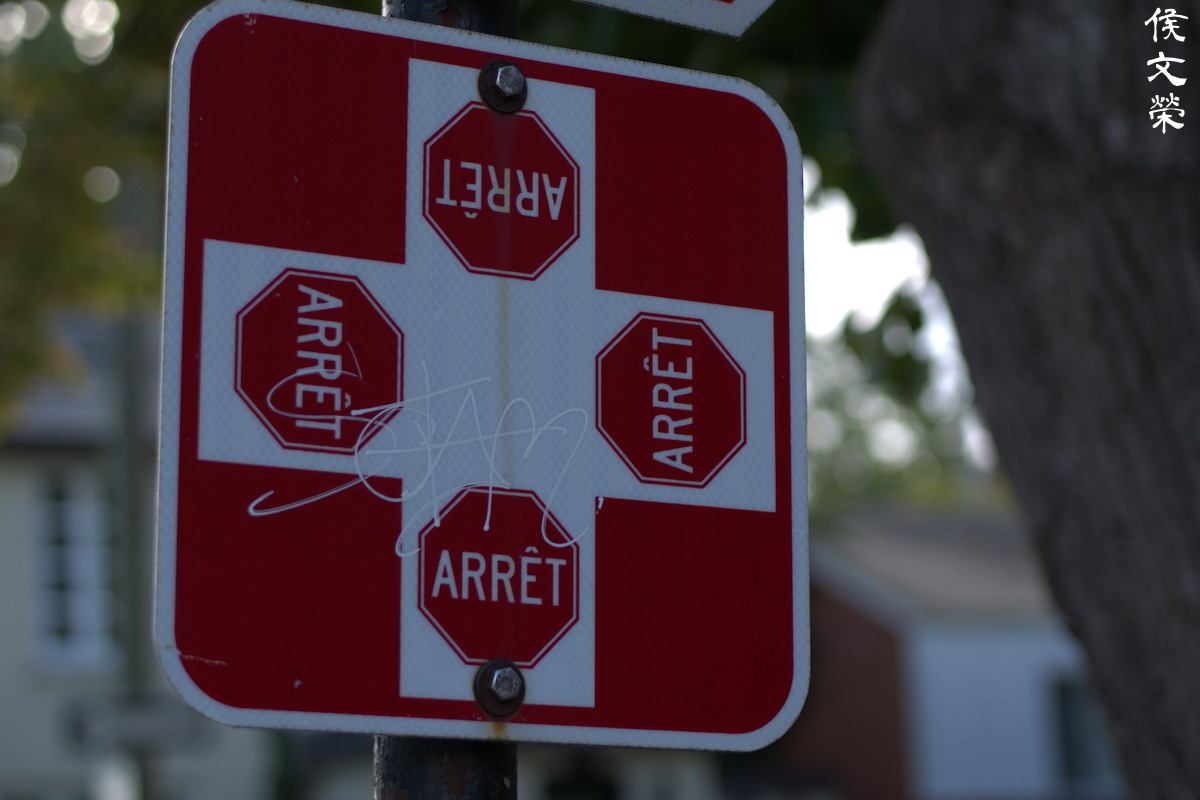
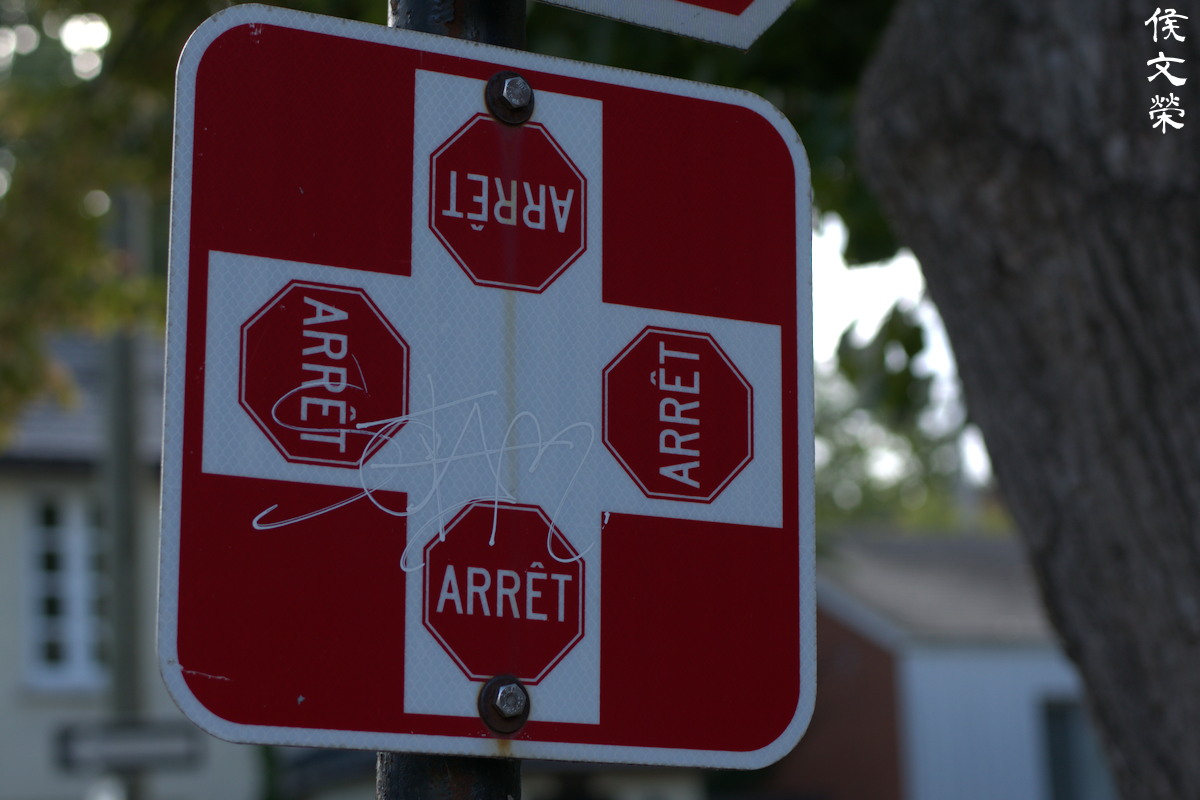
The starbursts it creates don’t look good, at least to me. I wanted a more pointy look which looks cleaner. It is subjective so I will leave the final judgement to you.


(Click to expand)
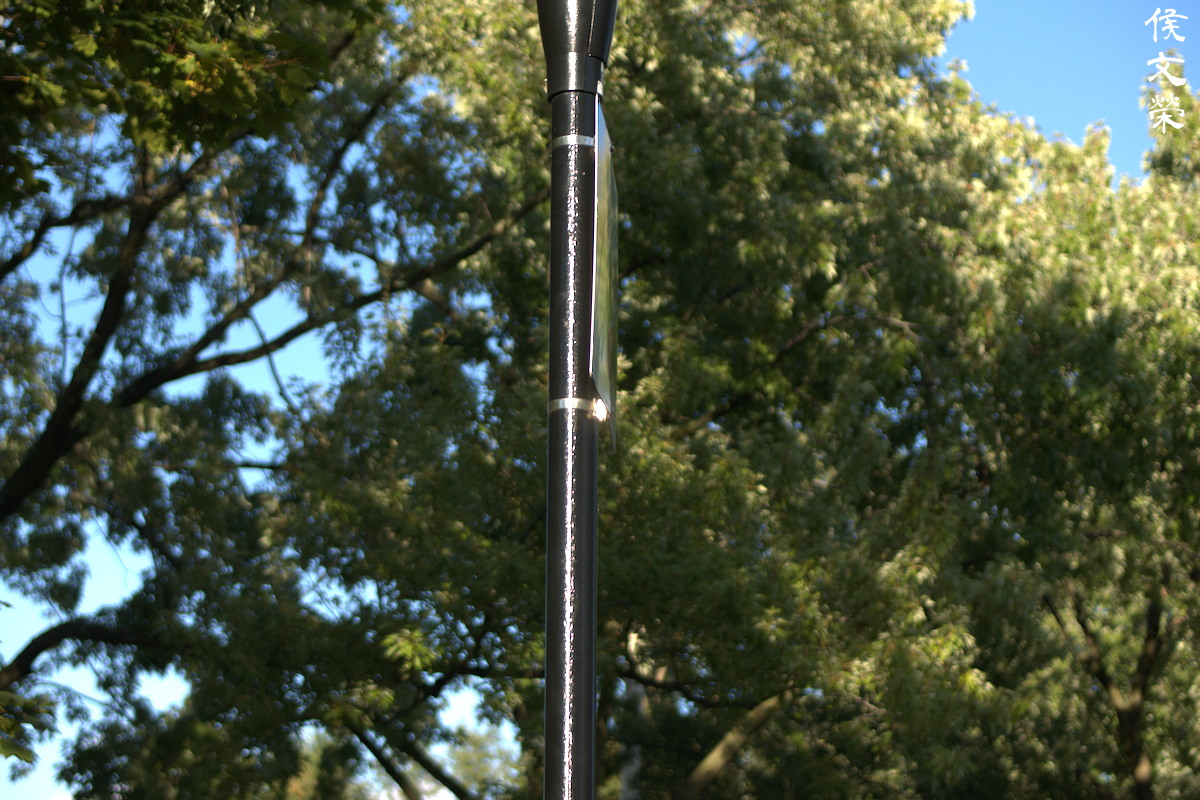
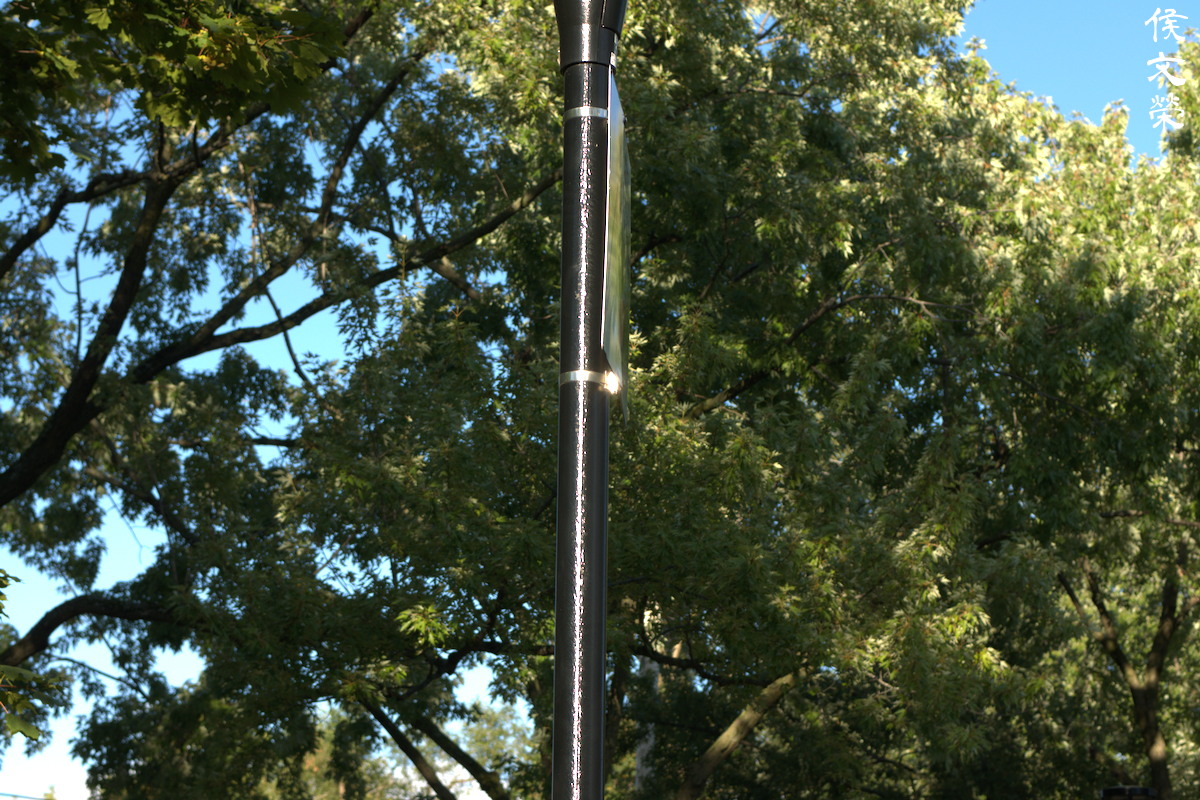
This is a useless attempt in trying to illustrate how coma looks. I will probably take better examples later, I will update this around Christmas time, that’s when the whole street lights up.


(Click to expand)
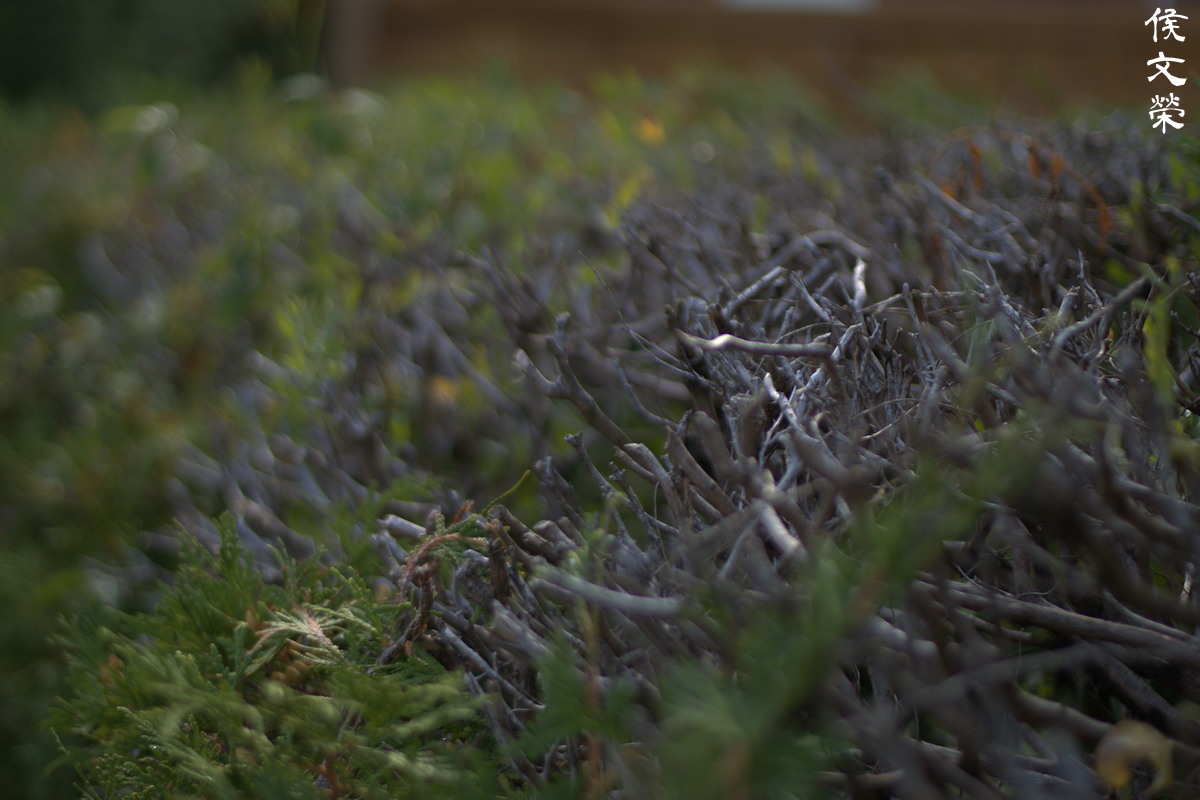
Of course, it’s as smooth as it gets! There’s nothing much to discuss here, just see photos so you’ll know what to expect.


(Click to expand)
The focus transition is also as smooth as butter, it is gradual so you won’t see any abrupt transitions. This is exquisite, it’s something that will make you want to pay the premium price just to own this lens.


(Click to expand)
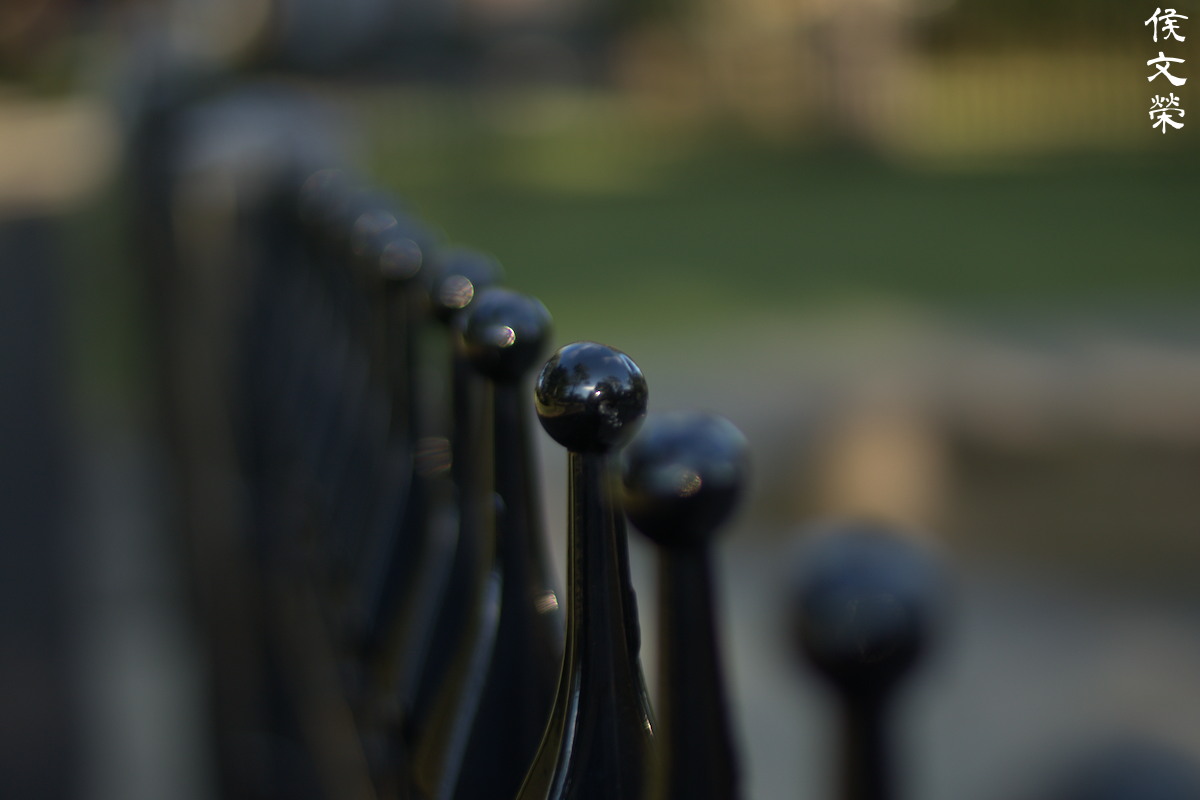
Despite having rounded aperture blades the orbs will have a slightly political look to them. They’re still as round as they could be so this will translate to smoother blurs when you’ve stopped the iris down. There’s no sign of concentric rings, the orbs also look clean with only a slight falloff that you can ignore.


(Click to expand)
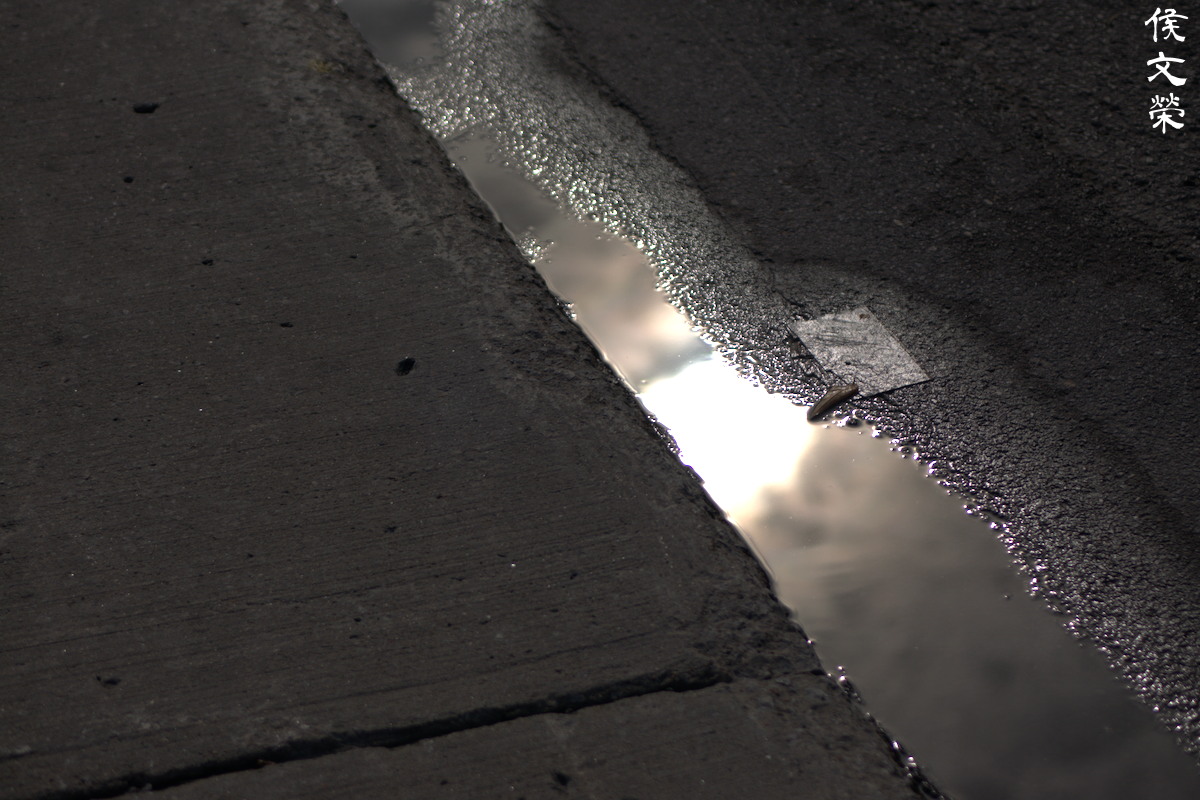
You will see some purple blooming near the area where things are in focus while you’re shooting at f/1.2. In the exact spot where things are in perfect focus, the effect is negligible except in extreme scenarios. It’s all but gone by f/2, you will only see it around the area where you are focused at. It won’t go away even if you’ve stopped the iris down to f/4. The set with the puddle should clearly illustrate the issue for you. It’s not something that you should not be worrying about in actual use.


(Click to expand)
Sharpness is acceptable when shooting at f/1.2, but it’s visibly soft and the contrast isn’t that good. You’re not going to notice it unless you’re zooming close and looking at a large monitor. The corners don’t look as good ask the center but they are not totally trash. The center looks amazing at f/2, that’s where you’re able to see all of the details better thanks to the improved resolution. Contrast also improves significantly and you won’t get that slightly hazy look when shooting at f/1.2. The corners suddenly look much better, I am deeply impressed by this development but they are still not as good as the center. You’ll still see some improvement at the center as you stop it down to f/2.8, it’s not as drastic but you’re able to squeeze a bit more from it. This appears to be its peak in terms of sharpness and resolution. The corners are as good as the center at f/1.2 now, or at least close to it. You’re now able to see small details rendered better because the resolution is now able to support it. I don’t see any benefit in stopping the aperture down to f/4 as far as the center is concerned, it may even be detrimental because you may find traces of diffraction if you’re looking at the right tests. The corners tell a different story, they now look so much better. We can say that there is a difference of 2-3 stops between the center and the corners.
What about the numbers between f/1.2 and f/2? I don’t have any tests to show but I can tell you that the center looks a little bit better at f/1.4 and we see less of the haziness at this aperture. Things look cleaner at f/1.8, which looks very similar to f/2. It’s safe to say that you should be shooting this from f/1.4 as much as possible, even if you have enough light to shoot wide-open. Being able to shoot at f/1.2 doesn’t mean that you should be doing it all the time, that’s how you use ultra-fast lenses in the field. I’m only shooting at f/1.2 here in this article just so can see how it really looks like.

You won’t be able to focus really close with this, I think you can only go as close as 0.6m or so. That’s not a problem because this is not made for close-ups.

I have never seen a lens render an ear of corn so beautifully. This was shot at f/2.8 so everything around the center looks amazing. Stopping it down this far removes some haziness so we get more contrast. It’s also worth noting that the saturation isn’t overpowering, it’s a bit pale.

The smoothness of the blurry parts is one of the selling points of this lens. People forget to mention that the smoothness of the transition between what’s in focus and what’s not is even more impressive, it’s very smooth. It has an exquisite way of rendering such details and it’s something that only a few people see.

Chromatic aberration seems to be kind of tolerable in actual use, but it’s something that you should think about. Stopping the iris down helps a lot but there are times when it will be impossible to get rid of even if you stopped the iris now by 2-stops.

This scene is a nightmare when it comes to triggering out-of-focus artifacts. There’s all sorts of nasty and difficult details that can cause smearing or the “double-line bokeh” that is the stuff of nightmares. We do not see any of them here, everything just melts away cleanly. What I’m more concerned of is the amount of green fringing that’s visible in the distant building. But don’t panic, it’s organic. This very thing will help this lens render smooth skin as you will see later.
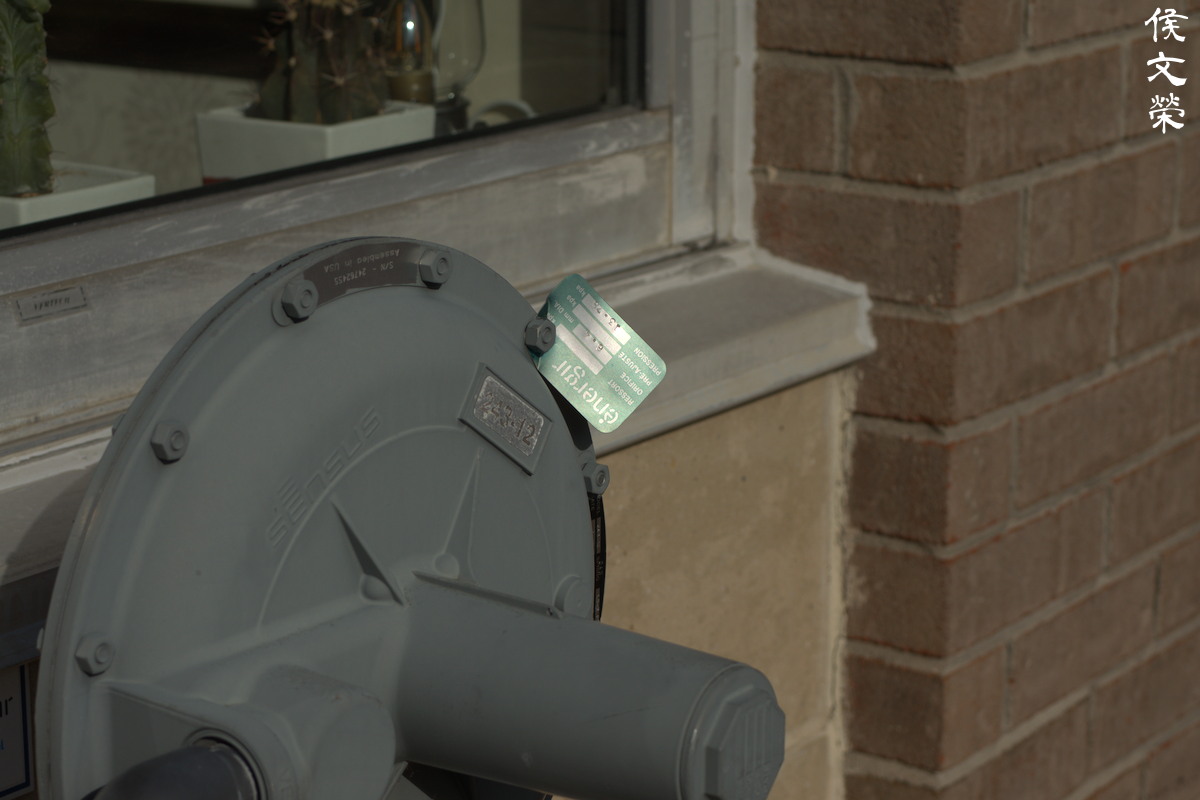
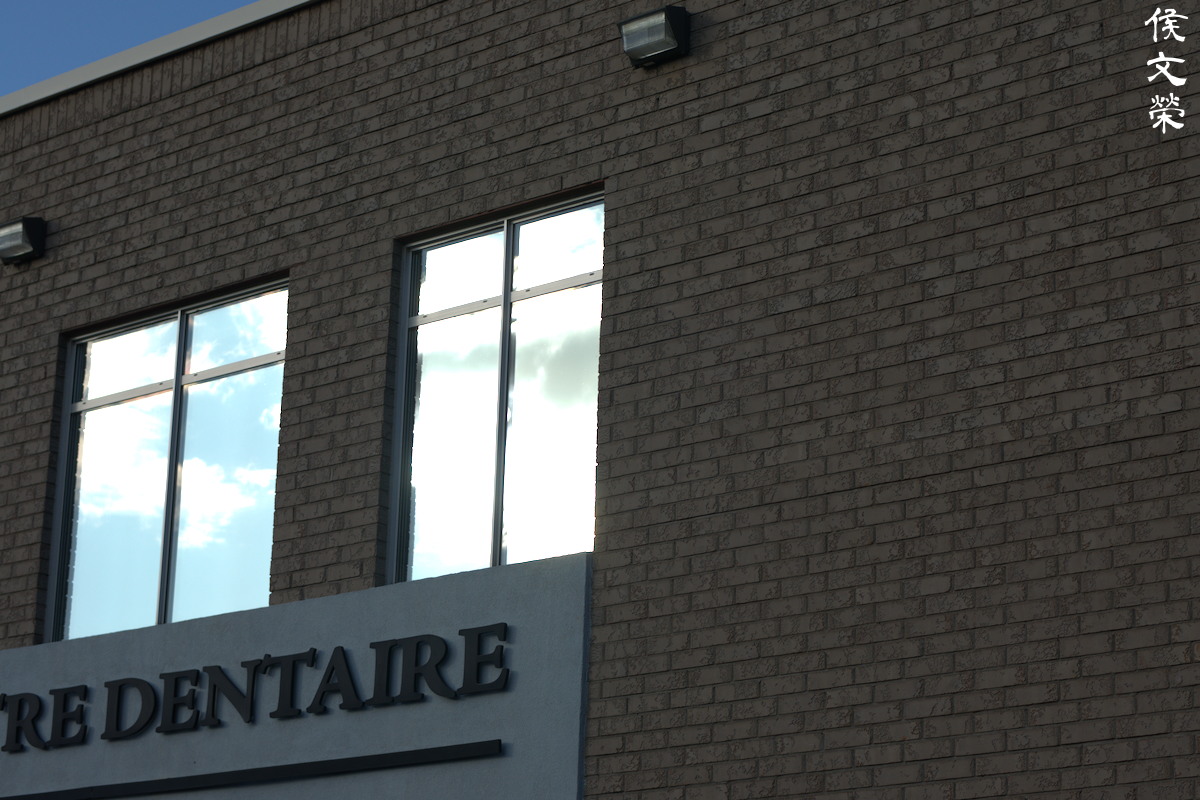
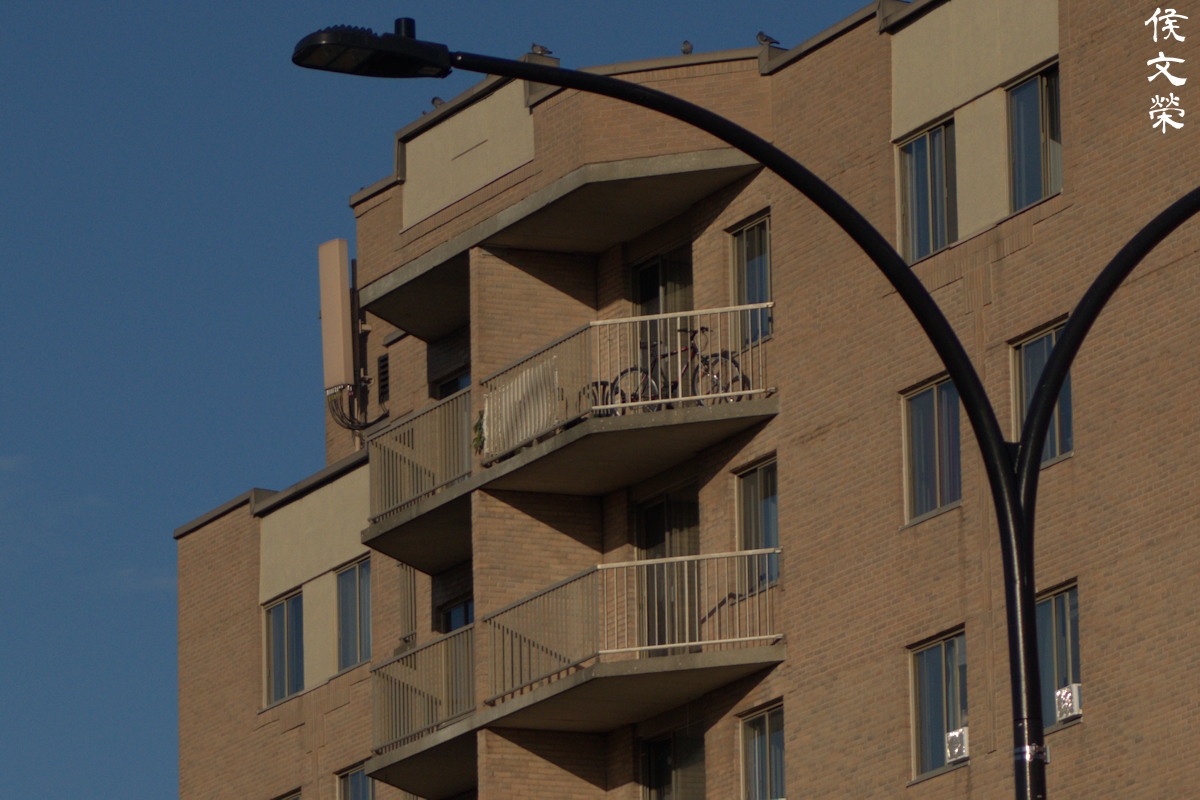
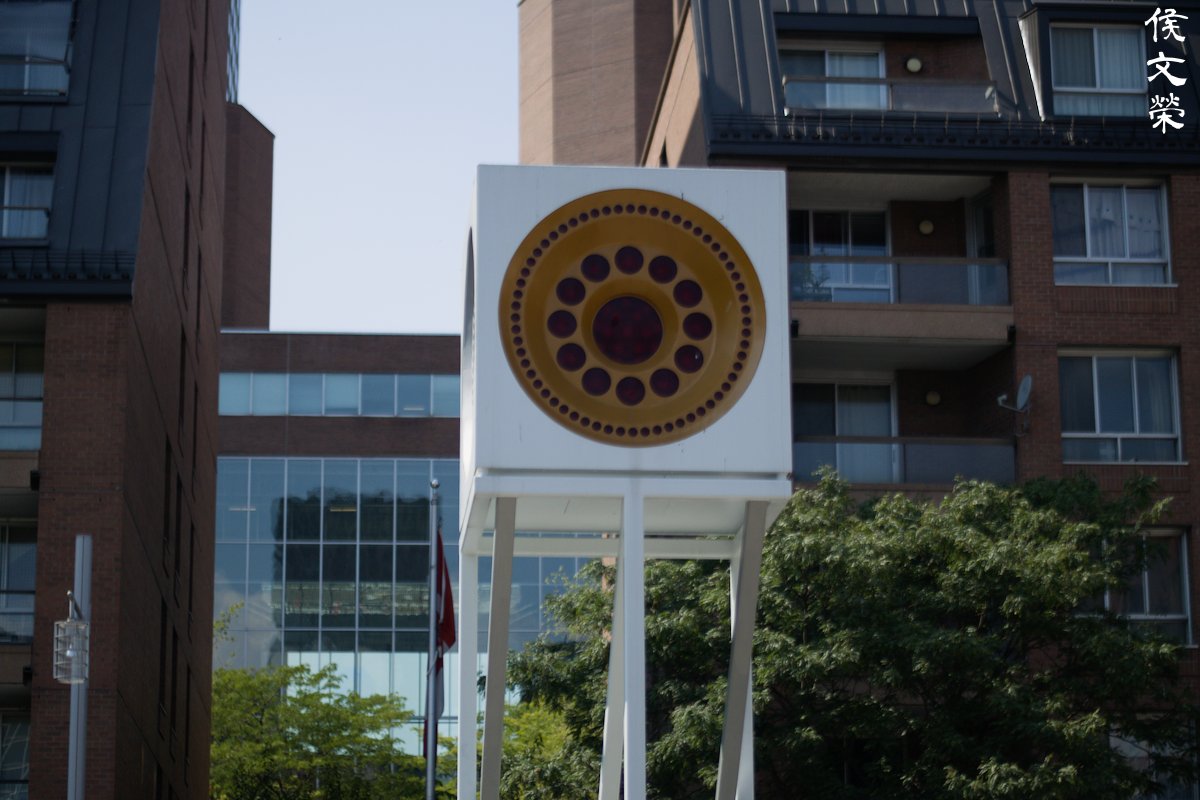
There’s only a little hint of distortion in this picture. I cannot think of any use case for this lens at all when it comes to shooting architecture. Maybe it’s okay for taking photos of interiors, but the cheaper 1 Nikkor 18.5mm f/1.8 does a much better job here.
This lens is not for shooting during a sunny day, it’s easy to expose all of its flaws because it’s not a lens for really bright situations. Stopping it down doesn’t make much sense either, just use a zoom for this. If you have something this fast but don’t capitalize on it then you’re just wasting money.

A white wall during a sunny day is like Kryptonite to this lens if it were to be Superman.


(Click to expand)
These were shot at f/3.2. The lens renders distant objects beautifully at this aperture, even the corners do not look so bad. Stopping it down to at least f/4 should bring the corners closer to what you see near the center. You should not be shooting with bigger apertures when taking photos of architecture anyway, it’s only acceptable at night when you don’t have enough light and most things are hidden in the dark.
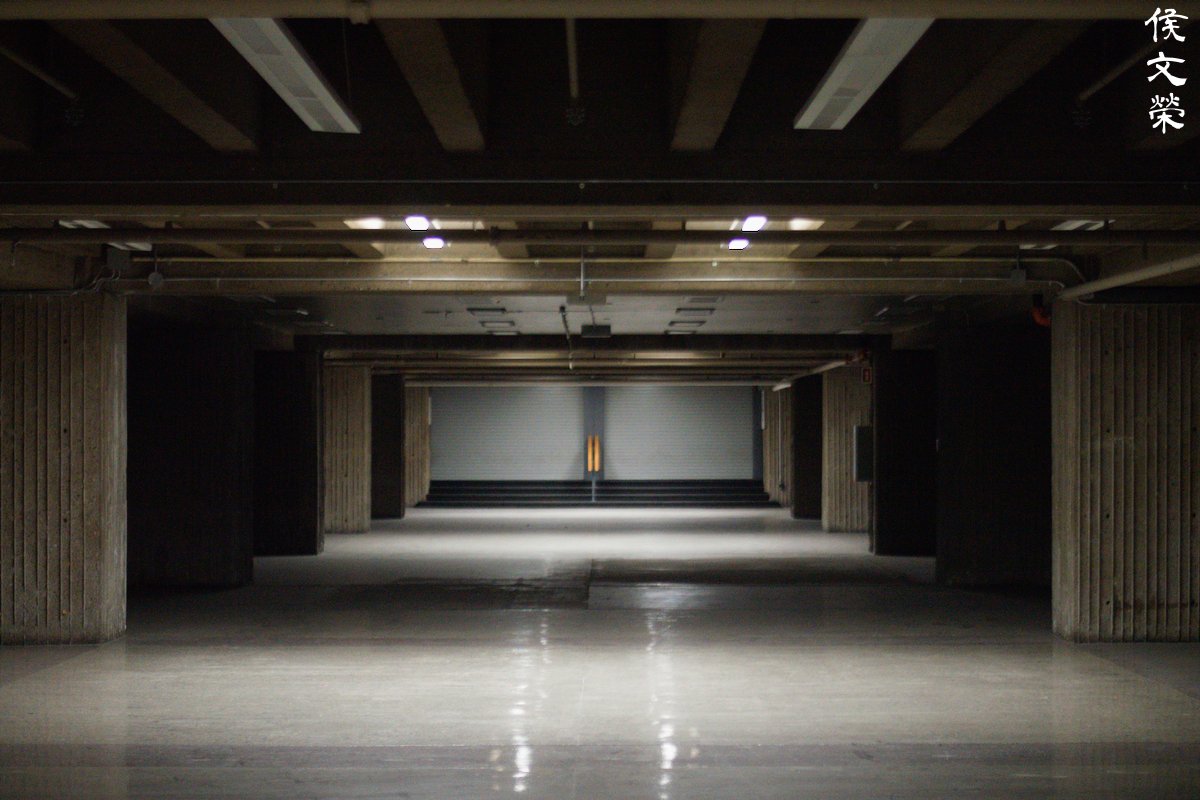
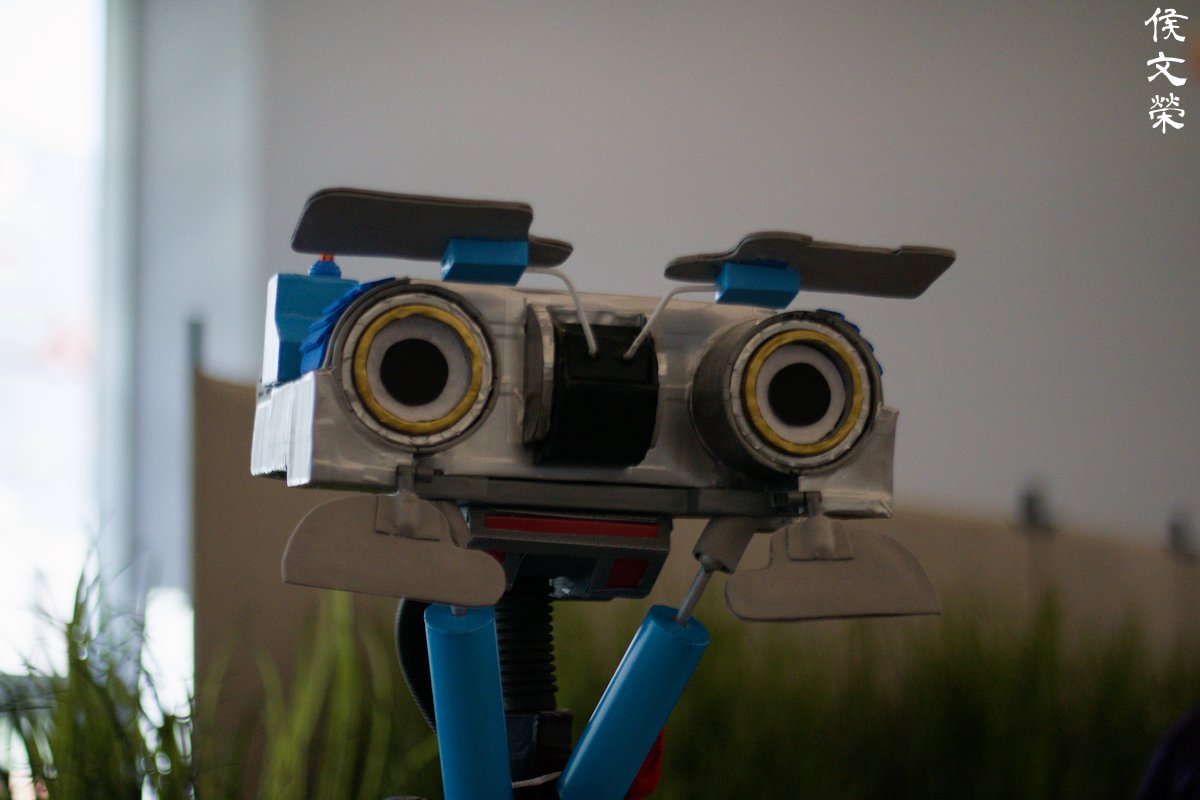
The next gallery shows how good this lens is when shooting in the dark. I took all of the photos at f/1.2 to showcase how it performs in its ideal use case. The lighting was horrible, everything was lit using a strong kind of purple lamp. The colors that you see here were edited by altering the white balance in post.


(Click to expand)
As you’re able to see, this lens is amazing in lowlight. Since the dinosaurs are probably about 2-3 meters away from me the separation isn’t as strong and the depth-of-field is also deeper as one would expect. I’m very surprised to see how beautiful my pictures turned out when I got home because they look terrible in the LCD screen of the camera. It’s very sharp even at f/1.2 and the resolution is adequate to render a nice, pleasing photo.
I’d imagine that the most intended use for this lens is for portraiture so I took a couple of people photos for us to examine. The lens itself is amazing but everything will be affected by how good is the auto focus system of your camera. I found out majority of my “soft” shots weren’t soft at all, they’re just not focused at the right place. Disclaimer, I used my Nikon 1 J5 and its face detection mode. It’s definitely not good at all when you compare it with the more recent Nikon Z cameras. The focusing box sticks to the face but it’s not accurate at all.


(Click to expand)
Being some kind of an 85mm lens equivalent for the Nikon 1 system pigeon-holed it for portraiture. This is how it looks like when you frame your subjects with it. These are the most common framing that one is able to do with such a focal length.
How time flies, my readers saw how my little baby turn into a young lady. It’s hard to imagine how long it been, me and my readers are in it for the long run.

This is a perfect example of what I meant by face detection is unreliable, leading to misfocused pictures. I wish I knew about it before so I would not have wasted my time. Notice how his eyes look soft but look at his belt, it’s focused properly. This is so annoying because it’s hard to see it with the camera’s tiny screen.

Here’s another sad case. The focus isn’t at her eyes, it’s around her left wrist!

The background is a total mess but the lens is able to melt everything down into something no one will ever recognize thanks to its really bright maximum aperture. This makes it desirable for portraiture.

This is a good lens for reportage if you need to get more reach, it’s a shame that we do not get anything that’s longer than this. You’ll be forced to use a zoom lens instead which brings its own set of problems.

Ugly backgrounds will turn into blurry patches of color when shooting at wider apertures. Since this has a crop factor of 2.7x it also affects its light capturing abilities and how blurry it could make the background looks. It effectively works like an f/3.3 lens when you’re shooting at f/1.2 because of this.

Environmental portraiture is also something that you can use this with, but the 1 Nikkor 18.5mm f/1.8 will be the better lens for such a task.

That susceptibility to chromatic aberration is somewhat of a blessing when shooting portraiture, it gives the skin a soft glow. What is ugly when shooting a white wall in a sunny day it’s pretty for (light) skin. It’s something similar to what many members of the “Leica Church” will try to use for justifying how superior their Aryan glass is. Well, here’s news for you, the Japanese are disciples of the Germans. The student will soon surpass the teacher and make more affordable products, too.

You must stop your aperture down if you want more things to be in focus, this is more obvious when you are taking pictures of a group of people.


(Click to expand)
This lens behaves a little bit differently when shooting outdoors, it has a tendency to render pictures with lower contrast, and a more “delicate” look. You should capitalize on this trait and choose to work outside if you wish to take pictures that look like this. It may be the case that it’s designed to to do this.


(Click to expand)
Here are more photos. Notice that the pictures that don’t show much of a human face is focused properly so they look sharper. I guess it’s part of learning how to use this lens. Now that it happened to me, you’ll know how to avoid this mistake. Despite that problematic issue, it’s easy to see how much potential it has and it’s capable of when shooting under ideal circumstances.
This is a very good lens but it’s not cheap. In addition to that, a 1 Nikkor 18.5mm f/1.8 will do whatever it does, except go to f/1.2 which is vanity. If you need tighter framing, it’s always possible to walk closer and that will do the job at no cost at all. Only a real Nikon 1 fanatic will look for one of these. If you’re lucky to be able to afford one, it’s the best portrait lens for the system. These are sold from $300.00 up to $450.00 depending on condition. I got mine from one of our dear readers for less than $140.00 because it has the “Lens Error” issue which comes up sporadically for no reason at all. Never pay more than what I told you, I see many people selling these lenses for crazy prices, waiting for a sucker to part with his money. If you’re looking for one, be sure that the iris is working properly. Test it all you have to and see if it will give you a “Lens Error“. The iris should shut completely when the camera is turned off, and it should change its size if you change its setting. You should also be able to shoot with it in the dark, if it only works outdoors then it is definitely broken. Turn the focus ring to see if it’s working. Finally, check and see if the glass is clean. I have never seen balsam separation with these but it’s best to be safe. Fungus is also a concern because it eats away at the delegate internal coating, avoid buying one that’s infested. A quick check of the iris must be done to make sure that they are complete and undamaged. With its big front element it’s easy to burn the thin iris blades just because somebody forgot to cover the lens while shooting outdoors. The hood is a bonus, you can easily source one anyway, I even got mine new. Do not fall for the trap, just wait and it’s possible to get one for a reasonable price.
Before We Begin:
If this is your first attempt at repairing a lens, I suggest that you see my previous posts regarding screws & drivers, grease and other things. Also read what I wrote about the tools that you’ll need.
I suggest that you read these primers before you begin:
- Essential tools
- Best practices 1
- Best practices 2
- Best practices 3
- Ai conversion
- Working with Helicoids
Reading these should lessen the chance of ruining your lens. Before opening up anything, always look for other people who have done so on the internet. Information is vague and scattered but you can still find some information if you search carefully.
For more advanced topics, you can read my fungus removal article. It has a lot of useful information, it will be beneficial for you to read this. I also recommend that you read the working with helicoids article so you will not get stuck because you couldn’t reassemble the helicoids back properly.
Disassembly (Front):
Servicing this lens isn’t difficult but you will require special tools and experience. in order to do the job in a satisfactory manner. The most common issue with these lenses can only be repaired from the back but I will also show you how to service this from the front as a bonus. I will not delve any further than what I’m about to show you here in this section because there’s no point in doing so. Now, before you get all your tools ready, let me remind you that this is an expensive lens. If you do not have the right tools, parts, and experience to service this, please find a repairman to do the job for you. Not only will it save you time, it’s also going to be cheaper. And if he is not familiar with this lens, show him my blog so he’ll know his way around.

With a pair of sharp tweezers, use it to lift the cover off from the front element’s retainer. This will prevent it from getting crumpled later when you use a rubber cup to remove the front half of the objective.

Do the same for the front bezel/beauty ring. Be very careful with it because it’s made of foil so it can be easily crumpled. Extract and remove these screws underneath then remove the front baffle.

Underneath the baffle you’ll find these screws, extract them all to remove the front ring. The main board is vulnerable at this point so be very careful not to brick it. Using plastic tools at this point makes sense. It is also important to be very careful with your rubber tools so you won’t dislodge anything here.

Carefully unscrew the front part of the objective with a rubber cup. You can also use a lens spanner but it’s overkill at this point. Underneath the objective’s housing is a thin aluminum shim that you should not warp nor misplace. This is the only thing that’s used for adjusting the front focus of this lens.
That’s it for the front. There’s nothing much to add since everything is simple. I’m lucky that I do not have to open the optics any further. If your lens has fungus, please read my article on how to remove fungus. It is also worth noting that the inner coating of this lens is extremely delicate and it’s best left alone if you’re only seeing a small growth of fungus. Cleaning it will risk leaving a bald patch in the coating which looks ugly but it won’t affect the images in any manner.
Disassembly (Back):
To many people who ever contemplate on working with this lens, the issue is always the stupid nylon gear that Nikon used that gets cracked. This section will tackle how to do it in the easiest way. There is a better way of doing it which lets you get to it from the front but it’s more of a hassle, and potentially dangerous for people who don’t have the right experience. I said better because you won’t have to disturb the glass elements at the rear that’s used for focusing. I just happened to realized that somebody else was here so I was just at the right place to correct what he did and I will show you what happened. Before you continue with this section, be sure to have a replacement gear with you at this point.

Extract this one so you can free the contact block or you will damage it in the next steps.
Extract the screws of the rear baffle (the black part) to remove it. You can also remove the bayonet screws, read my article on how to properly remove screws so you won’t damage these. Many people do not read it so they end up stripping the heads of their screws, don’t be one of them! Pick the baffle with your nails.

Lift the bayonet plate off carefully so you won’t catch the contact lock or other parts. Underneath, you are able to find shims, do not lose nor damage any of them.

Don’t bother removing the rear optical block, there’s nothing to gain from doing it unless it’s dirty or has a defect that you need to fix.

Extract these screws so you can remove the shell.

Carefully lift the shell off and make sure not to damage anything in the process.

It’s optional to remove the seal, I got rid of it so it’s easier for me to see what’s there. The seal is covering a couple of access holes to some screws. The element underneath is adjustable so this is the only way it’s going to moved the lens is calibrated for optimal performance.
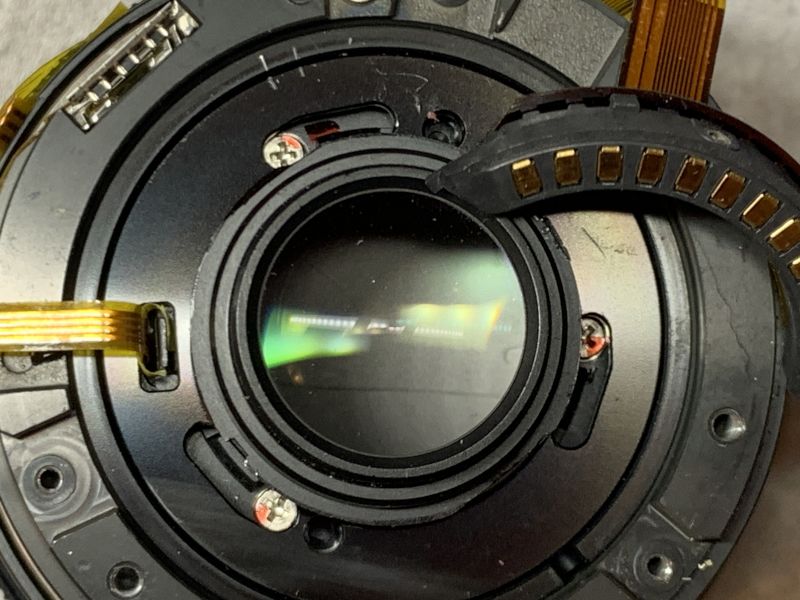
This is what I am talking about. Everything looked fine from here but somebody has been here as you will see later.


(Click to enlarge)
Carefully extract these rollers so you can remove the cradle holding the read optical block off. As you can see, all of them have scars that indicate that they have been tampered with. This is bad news!

This is how it looks like with the rear part gone. You won’t be able to remove it properly because there is a cable running through it so everything is hanging in a precarious position.
This is the adjustable element that I was referring to. You loosen these screws then nudge it until you are able to get a sharp image, or at least something with not a lot of astigmatism. You will need a special tool for it and the only way I was able to do it is with a magnifying glass and pray for good luck. Since the lens has been worked on by another person before, I doubt that this is in its correct position from the factory.
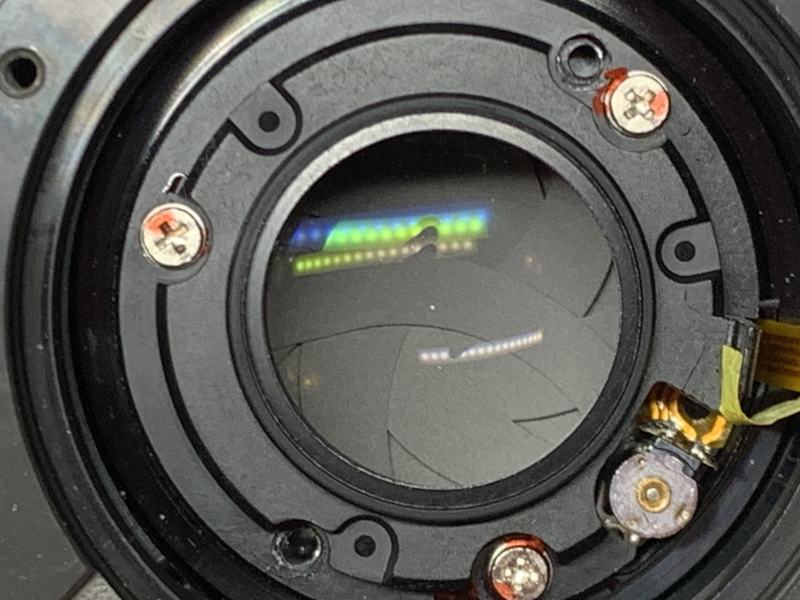
The trick is to center it as much as you can, then take a few shots until you are happy. Repeat the process until you are satisfied. It’s tedious but what else can you do?

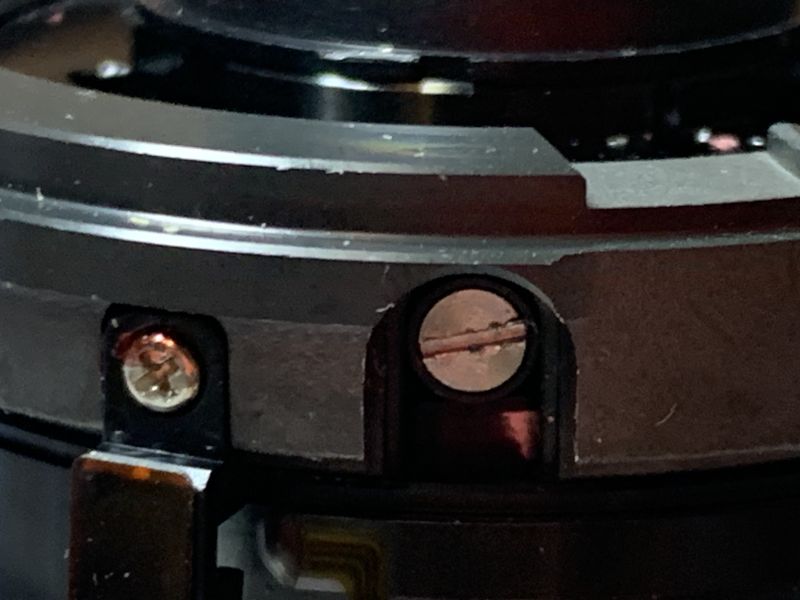
Someone else has been here, and it’s not Nikon! It’s a butcher who does not have the proper tools and so the head of the screw is stripped! I’m lucky that I was able to remove it. This screw is very tiny and I’ve lost it! I was able to find a replacement. This is a special screw, it’s an M0.8 one.
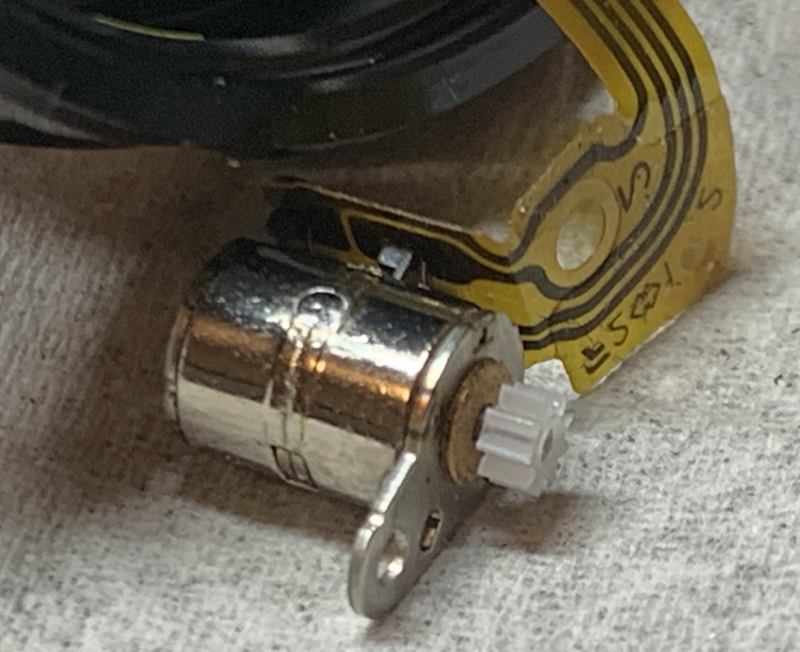
Once the screw is gone you will be able to remove the peanut motor. Be very careful when handling it as it is left attached to the lens, that’s why everything is dangling in a precarious state.
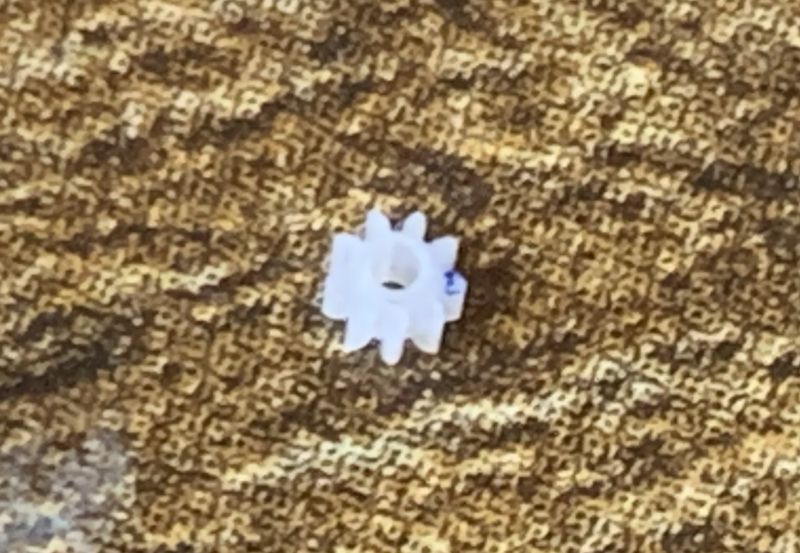
The damn gear looks to be intact without any damage like cracks. It also appears to be a little thicker, it’s still the same nylon gear that the others have so it will break eventually. I can’t find anything wrong with it despite seeing the ominous blue stain in one of the teeth. That’s probably why the lens error message will only appear sporadically and will go away once the lens is shaken.
I replaced it with another nylon gear, something that will eventually break in the future. Why didn’t I buy a metal replacement instead? If I were to use a metal gear, that will wear the opposing cog faster. That will be an even bigger problem because I won’t be able to find any replacement for it. I do not mind changing this again so long as I protect the other one. It’s all up to you but that’s my justification for using this.
Conclusion:
I have finally worked on one of my dream lenses. I’ve always wanted one because I was curious and I did not see a lot of information about how this thing works internally, and so I must find out from myself. It’s not what I would call a difficult project by my own standards. In fact, it’s quite easy except for the cable of the motor getting in the way all the time. I also felt nervous while working on this because it’s not cheap. I probably spent about an hour or so, most of that time was spent looking for spare parts to replace some of the damage parts that the previous guy ruined. Because of that, one lens had to die.

It’s a darling to shoot with and I think this will be one of my favorite lenses for the whole system. It’s kind of big and heavy, that’s all.
We’re now at the end of another amazing article, something that you will never find anywhere else. I have a review and a repair article presented to you in a single page. This is the type of quality content that you will only find in this website. If my work has inspired you or has helped you with this hobby, please do not hesitate to leave me a little tip. Your support is the only reason why we’re able to operate for a long time. I only earn a few cents from views and visits to my site. Other content creators are also using my site as a reference for their paid videos, some are way too obvious. To be honest, I do not mind that much but it’s better to lead your audience to this website. That will help everyone in the end, we all win. Thank you for supporting my work and see you guys again in the next article, Ric.
Help Support this Blog:
Maintaining this site requires resources and a lot of time. If you think that it has helped you or you want to show your support by helping with the site’s upkeep, you can make a small donation to my paypal.com at richardHaw888@gmail.com. Money isn’t my prime motivation for this blog, I believe I have enough to run this myself but you can help me make this site grow.
Leave me some tip?
Thank you very much for your continued support!
$2.00
Helping support this site will ensure that it will be kept going as long as I have the time and energy for this. I’d appreciate it if you just leave out your name or details like your country’s name or other info so that the donations will totally be anonymous. This is a labor of love and I intend to keep it that way for as long as I can. Ric.

Aug 31, 2025 @ 21:23:05
I share your frustration about this damn cog problem. It’s the main reason I abandoned the Nikon 1 system. My 32/1.2 lens had the problem too. Although I was fortunate enough to be able to send it for repair under warranty, I lost all confidence in the lens afterwards, knowing it would only be a matter of time before the cog failed again. Such a shame!
Sep 04, 2025 @ 00:52:02
Hi Richard. Thank you for anther excellent piece. Enjoy the coffee. You mention “a better way” to replace the blasted gear by going in from the front–but you don’t explain how to do it. Could you add instructions and possibly a photo or two on that? Cheers.
Sep 08, 2025 @ 21:47:31
Hi Richard
Big fan of yours
Are you living in Montreal?
Oct 18, 2025 @ 08:45:25
hi Richard, somehow the gear is slightly bigger than the gear I used for 30-110 hence it doesn’t fit. Did you use the same gear as the other models as well?
Cheers