
Hello, everybody! Have you heard the late Marlene Dietrich? She was a famous singer and actress from Germany in the 1930s, but she left for the United States in 1937 just 2 years before the war started. She is known for being the favorite singer of both Allied and Axis forces that fought in the Western Front. She is capable of singing in both German and English which contributed to her popularity among soldiers. Her case is rather unusual during those times and her talent serves as a commonality between people who are bent on killing each other, for duty or liberty. Our subject today is similar to Marlene, it has German roots but it is also 100% Japanese. Not only was it made for the Nikon but it’s also adapted for the Leica. It was also considered to be a very capable lens of the time for either camera system. This is the story of a great and rare lens that you will only get to know this intimately from this site.
Introduction:
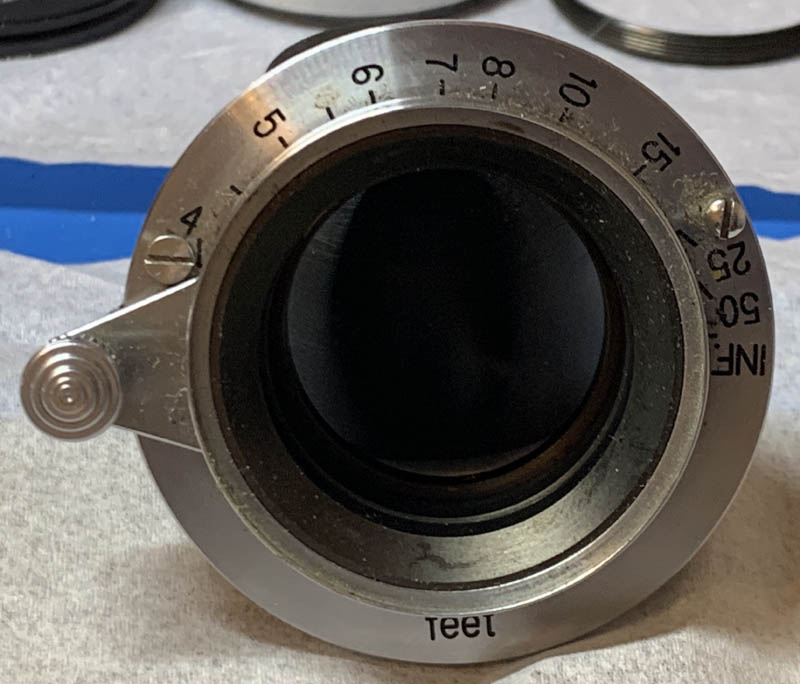
The W-Nikkor•C 2.5cm f/4 that came out in 1953 was also sold for the Leica mount. This variant is not as common as the one made for the Nikon mount so it’s more expensive due to its rarity. Nobody knew if it was made until the end of production nor how many of them were ever sold. This makes it very valuable because every serious collector wants one.

The lens is tiny, it’s definitely the smallest W-Nikkor ever made for the Leica mount that I know of. Unlike the W-Nikkor•C 2.5cm f/4 for the S-mount, this one has an aperture ring that’s easier to access so I like it more specially considering that I take sample photos at various apertures for this blog. Anything else is in a familiar layout that’s typical of LTM lenses of that time.
It has a 4-elements-in-4-groups design which is a copy of the famous “Topogon“. The W-Nikkor•C 2.5cm f/4 (S-mount) version uses the same exact design so you can read that article to find out more about the optics. I won’t be repeating what I’ve just written not so long ago.
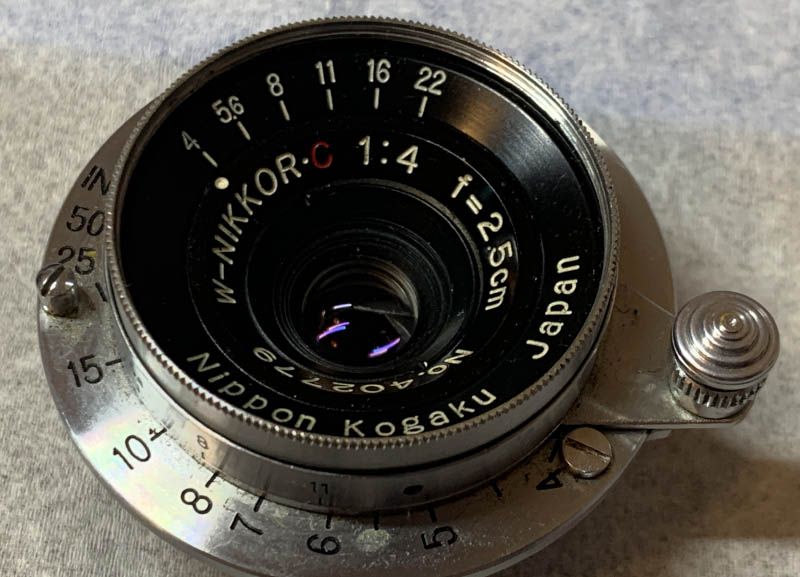
The front is heavily recessed so you won’t be needing a shade to cover it. One more thing that makes it a lot more convenient compared to its S-mount sibling is the ability to mount screw-in accessories. It takes conventional attachments without the use of a special adapter unlike the latter.

The rear part extends well beyond the lens mount but it’s not that deep compared to the others such as the Nikkor-O 2.1cm f/4 which extends almost to the surfaces of the shutter curtains.
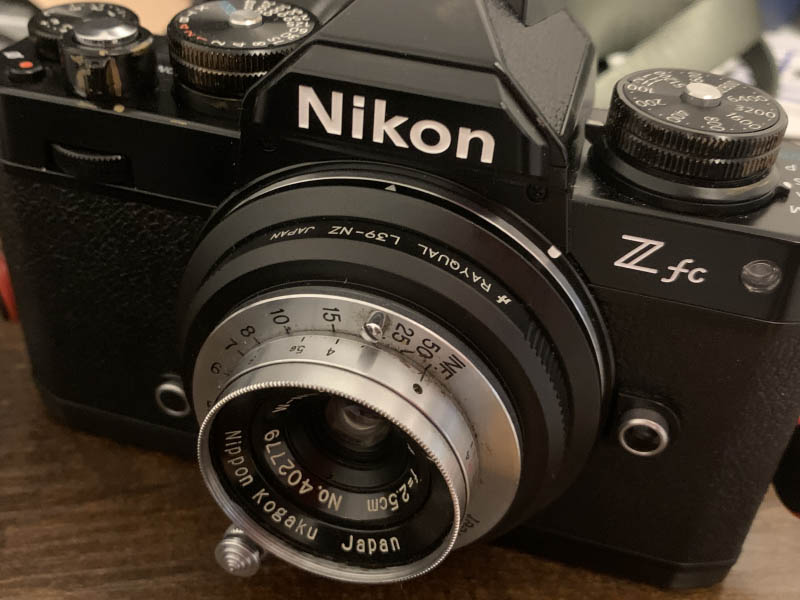
This lens is the better version for adapting to mirrorless cameras. The Nikon S-mount version isn’t so bad at all but it’s just so annoying to constantly fiddle with the aperture ring which can be tedious. When used with a Nikon Z fc it will give you an equivalent of 36mm because it has an APS-C sensor. In order to use it to its full potential you must adapt it to a full-frame camera such as the Nikon Zf.

Of course, the best way to enjoy this lens is shooting it with a film camera such as the Leica IIIf. The setup looks really good and the lens doesn’t stick out too much which makes it a very compact kit.
For convenience, shooting it with a Voigtländer Bessa R will allow you to have TTL metering so you won’t need to constantly look at your meter’s reading to make sure that your exposure is correct. I do not like it as much as the Leica IIIf but it makes life so much easier.
Since I’ve written an article on the W-Nikkor•C 2.5cm f/4 for the Nikon S version, I won’t be repeating the tests and other commentaries I’ve made there and I will just focus on the ergonomic differences between this and the other version.

You won’t be able to focus closer than 0.9m because of the camera’s rangefinder, but it’s possible to take photos of things that are closer than 0.9m while still being sharp by using the focusing scale. This picture was shot at around 1.3m or so.

The ancient coatings are ineffective but at least it’s able to subdue flare to some extent.

I don’t know what you would use this for, we call these “God rays” in my profession. I really do not know what I could do with this except for special effects.

A bright reflection is enough to trigger some flare, even if you’ve stopped it down to f/11.

This is probably the ugliest artifact I’ve ever saw this lens produce, a blob with ugly grind marks.

The lens is able to render beautifully if you don’t have anything that could trigger artifacts, I love how the colors look vivid yet natural.

You have to be careful when framing with the viewfinder because you won’t be able to see the corners if you are wearing glasses. This can lead to some framing issues.

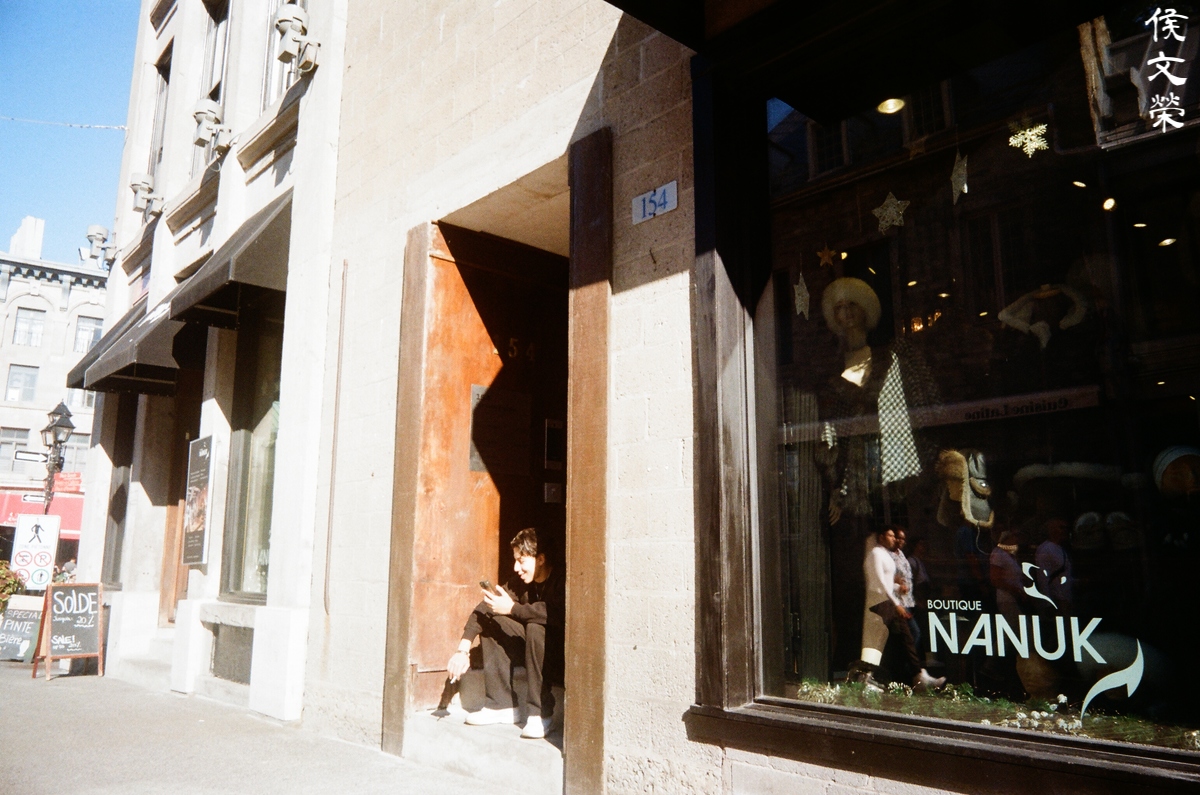
It’s a great snapshot lens in a way that you could shoot from your hips without ever looking through the viewfinder for framing. That makes it an excellent camera for taking candid photos even if you get closer to your subjects. This is not a creep shot, but you get what I mean.

It has a nostalgic feel to the pictures that it takes. It definitely has that “vintage look” that hipsters want.

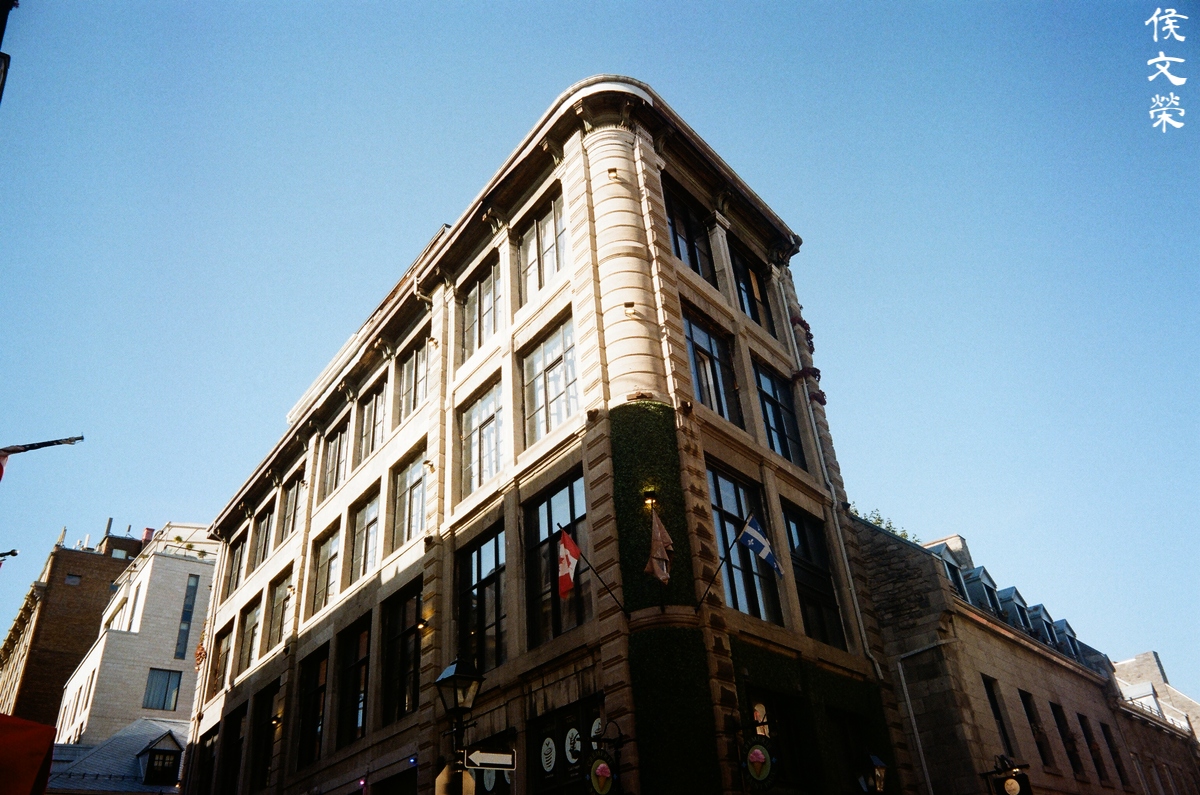
It’s sufficient for most architectural use but 2.5cm won’t give you what the Nikkor-O 2.1cm f/4 could. Both are considered ultrawide angle lenses in their time, similar to what we have now with 14-17mm lenses. It’s amazing how the goal post has moved after a couple of years of being normalized.

It’s easy to take crooked pictures when framing with the special viewfinder. There’s no guides nor lines to help you with the process. Brightline finders excel here, which my Leica nor viewfinder don’t have.


(Click to expand)
Here’s the rest of the roll. I don’t see myself using this lens often, I prefer shooting with a Nikon that’s all. I did have a great time with it since my setup is super compact. I think this is one of the better Nikkors for Leicas that’s why nobody wants to sell theirs.
I can’t recommend this to anyone unless you’re a serious collector just because it’s not cheap. There’s lots of cheaper alternatives that were made by other brands. This advice is only for people who want to shoot with an ultrawide angle lens for their Leica thread mount cameras. Otherwise, if you could afford one it is one of the best lenses you’ll ever own. These aren’t cheap, they usually go for $2000.00 but I was lucky to get one for a reasonable price that included the special viewfinder, I think I paid $1,100.00 for it. I would say that it’s a good deal. If you’re looking for one, make sure that the glass is clean and there’s no cracks or any signs of damage. The iris must be free from oil and should not be damaged. Turn the aperture ring and see if it works properly. The focusing ring must be smooth and not jammed. Make sure that the parts are complete and there’s nothing missing. Test it with a digital camera and make sure that infinity can be achieved and the minimum focusing distance agrees with what the distance scale says. You’d be lucky just to get the special viewfinder because it has an engraved “L” somewhere indicating that it’s for a Leica. It’s not mandatory but it just makes your set complete. These also have hoods as well, they’re rare but you’re able to use the ones that come with other Leica mount Nikkors anyway. Remember, don’t pay a lot since you’re only feeding the “Camera Mafia“, people who manipulate the market to their favor. They are scum, the most disgusting sort of scammers out to get your money. Look at me, I waited for one and got lucky. I call this good karma because I’ve helped so many people through my work in this website.
Before We Begin:
If this is your first attempt at repairing a lens, I suggest that you see my previous posts regarding screws & drivers, grease and other things. Also read what I wrote about the tools that you’ll need.
I suggest that you read these primers before you begin:
- Essential tools
- Best practices 1
- Best practices 2
- Best practices 3
- Ai conversion
- Working with Helicoids
Reading these should lessen the chance of ruining your lens. Before opening up anything, always look for other people who have done so on the internet. Information is vague and scattered but you can still find some information if you search carefully.
For more advanced topics, you can read my fungus removal article. It has a lot of useful information, it will be beneficial for you to read this. I also recommend that you read the working with helicoids article so you will not get stuck because you couldn’t reassemble the helicoids back properly.
Disassembly (Focusing Unit):
This is not a difficult lens to service so long as you know what to do. Like most Leica mount lens from this era you’re able to separate the focusing unit from the objective easily, it’s very rudimentary. If you’ve fixed a Leica mount lens before this should feel familiar to you. You’ll need to be careful with the alignment of the helicoids so you must take a lot of references before taking things apart, especially with the focusing cam’s position so you will be able to focus properly with it again. This is not something that a novice can work on because you’ll require special tools and experience in order to do a good job. These are also not cheap so just send your lens to an expert. If they haven’t service anything like this, show them this article so that they will know the best approach to servicing this lens.

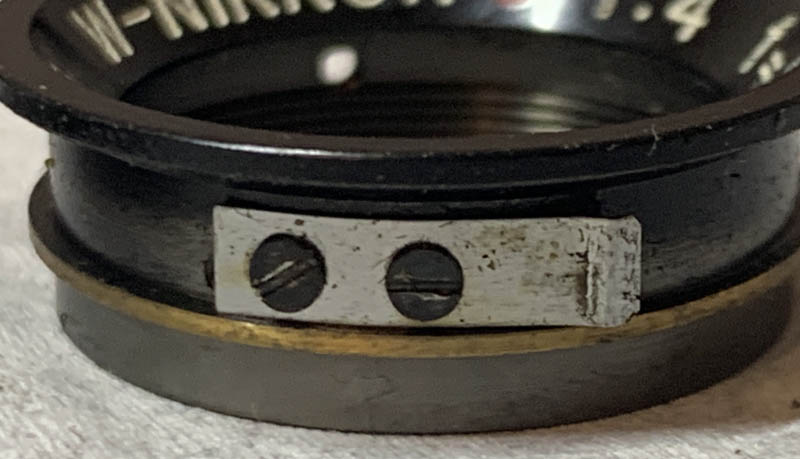
Locate and extract these screws, mine has two. Be careful not to strip these screws because they are delicate. You will need to drill them out if you botched the job.
Do the same for this one, this screw simply ensures that the objective is aligned correctly but it is also involved in securing the objective in a secondary way.
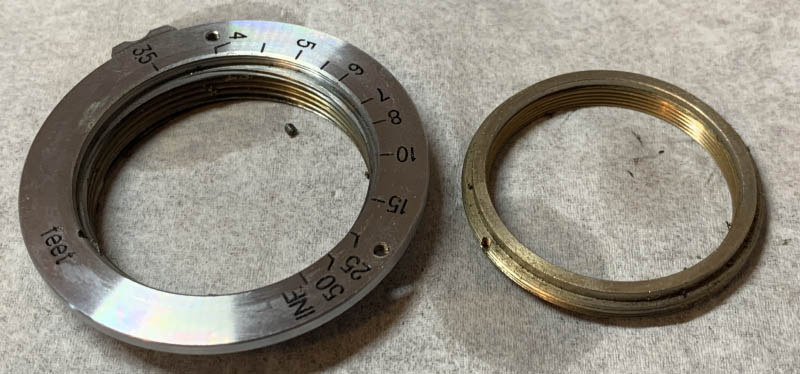
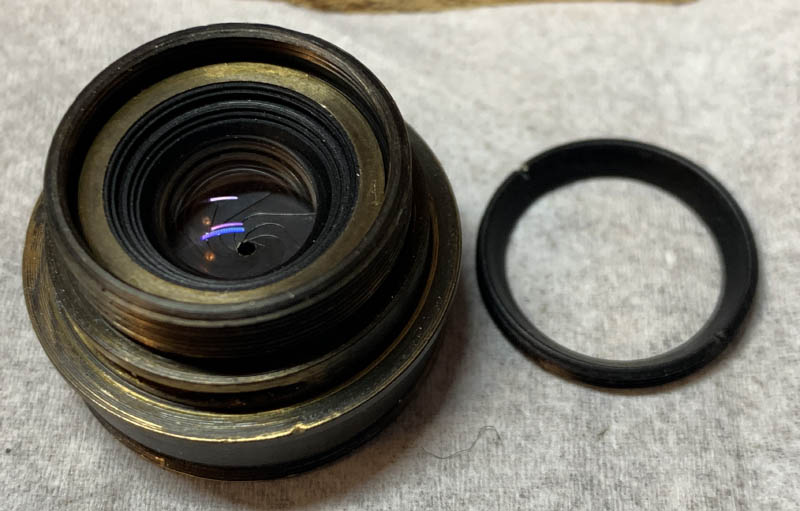
Unscrew the collar off from the rear and that should allow you to remove the objective. Note that it has a shim between the objective and the focusing unit, do not lose it or else you will have to make one.
Take note of how the parts are aligned when at infinity. It’s also a good idea to remove the big screws. The screws are best left alone unless you need to do a complete cleaning.

After marking the original position of the focusing ring at infinity, loosen its screws so you can lift it off. Do not disturb the alignment of the helicoid so you will know its exact position at infinity.
The focusing lock button can be dismantled in this manner. This is only done for extremely dirty lenses.
This is your last chance to study and take note of how the helicoids are setup (at infinity).
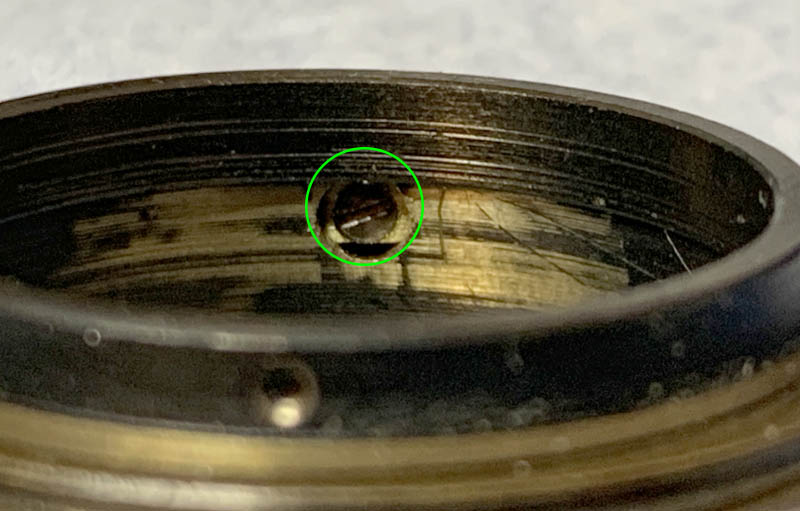
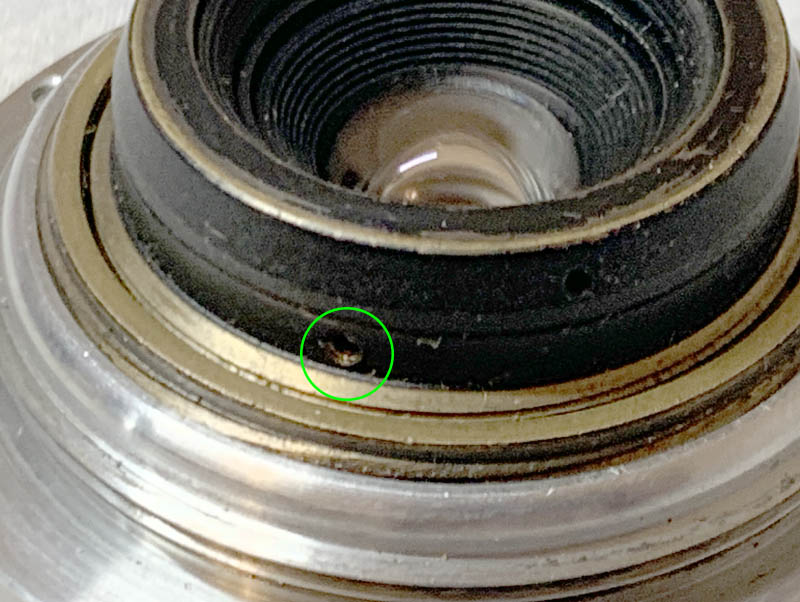
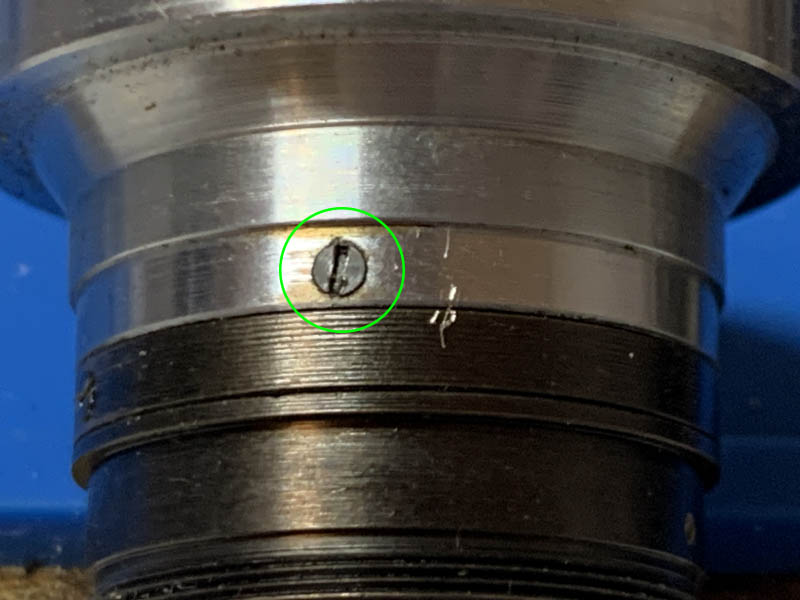
You will need a special screwdriver with a long and thin shaft to access and remove this screw. This is the only thing that syncs everything together, it’s attached to a small brass block on the other side.

Once the screw is gone you can extend and remove the inner helicoid. Please read my article on how to work with helicoids because many people get stuck here. Please do not ignore this warning and mark the place where it separated.

Do the same for the focusing cam, which is just a smaller helicoid.

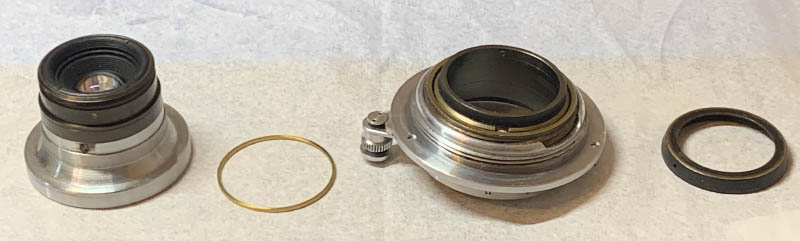
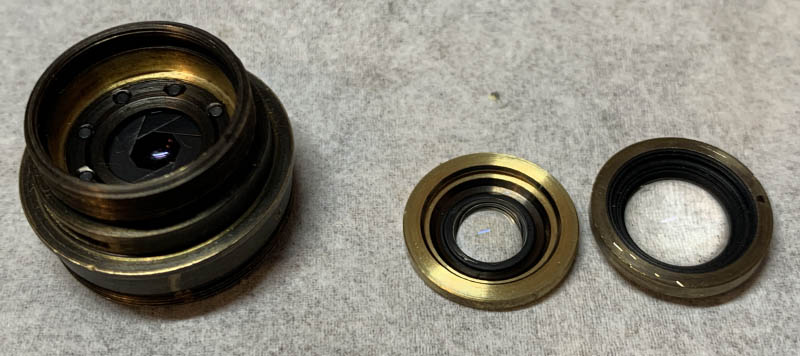
Here you are, this is what you should have by this point.
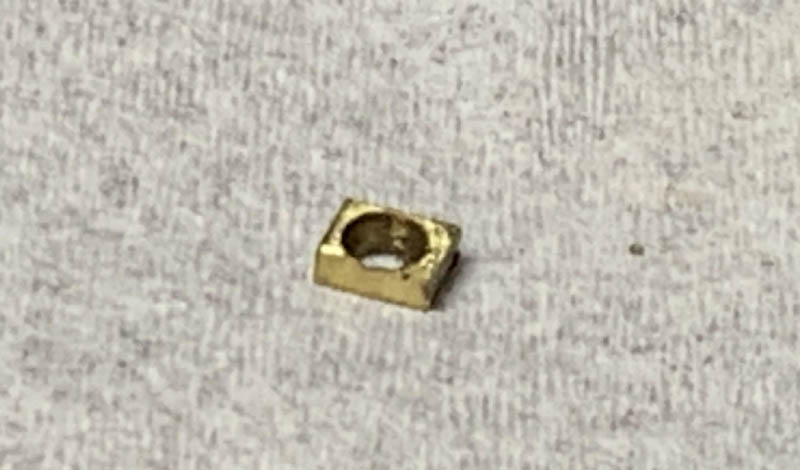
This is the tiny brass block that I was talking about before, be sure not to lose this.

An optional step is to remove the main (female) helicoid. It can be done by unscrewing this, be careful not to strip the head or you will be in big trouble.
Unscrew it off from the lens mount. This will enable you to clean everything thoroughly, mind was full of germs so I had to go the extra step just to make sure that I won’t get sick using my camera.
I cleaned all of the large parts with a strong toilet cleanser – the grainier, the better. I scrubbed everything using a brush then rinsed them all very well with hot water before making a final rinse with pure alcohol to remove any remaining residue. Special care must be used when cleaning the helicoids, the threads are fine in some places and they can be caked with gunk, using a wooden toothpick helps here for stubborn deposits. Dry them well before you continue. When lubricating, be sure not to apply too much, all you will need is a thin film of fresh grease. Mate the helicoids then exercise them by turning several times, this will ensure that the grease is evenly distributed. Wipe away any excess. If you have applied too much grease it will settle in the iris mechanism eventually, necessitating the need to open it again, just to give everything another overhaul.
Disassembly (Objective):
This is probably the most complicated part of the whole repair process because everything is small and it is not easy to take apart the optics without a special tool. One must be very careful when cleaning it, the glass is very thin in some areas and you could easily break it if you’re not careful. The aperture mechanism is tiny but it’s not difficult to put back if you have enough experience with these kinds of lenses. It’s better to leave it alone if the glass isn’t dirty or the iris isn’t oily. You must also be very careful when cleaning the bezel because it’s just brass that’s been painted. I’ve had the unfortunate incident of stripping the bezel, it was so clean that even the paint has disintegrated into nothing so I had to repaint everything myself.

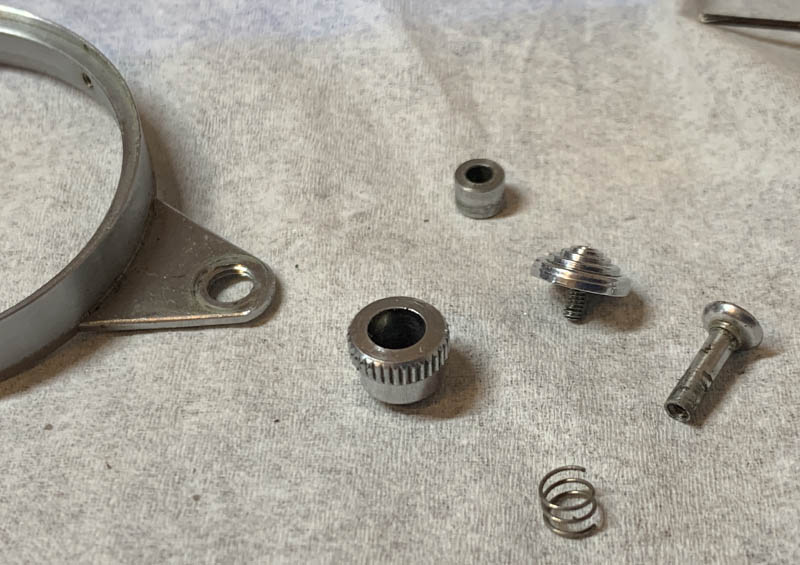
Turn the aperture ring until this hole is above the tiny screw. Extract it so you’re able to remove the inner cup, this screw also ensures that the aperture display/detent spring is aligned perfectly. Use a rubber cup to turn the inner cup of the aperture ring until it comes off.
Unscrew these so you can remove the aperture ring from the objective. Don’t forget to note the original alignment so you’ll know how to put it back again later.

This is what you should have. Note that the inner cup is made of brass and is merely painted over, do not clean this part aggressively nor leave it soaking in alcohol, vinegar, soap, or solvents for too long. I forgot to remove it from the ultrasonic cleaner so now this part is bare brass, so I have to paint it!
Note the original position of the spring before you remove it.

This screw serves as a pin to couple the aperture ring to the iris mechanism inside. Remove it as soon as possible so you won’t risk damaging the delicate parts inside.
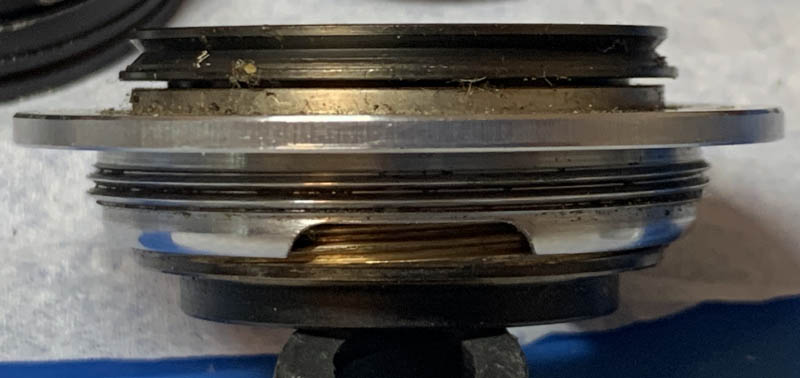
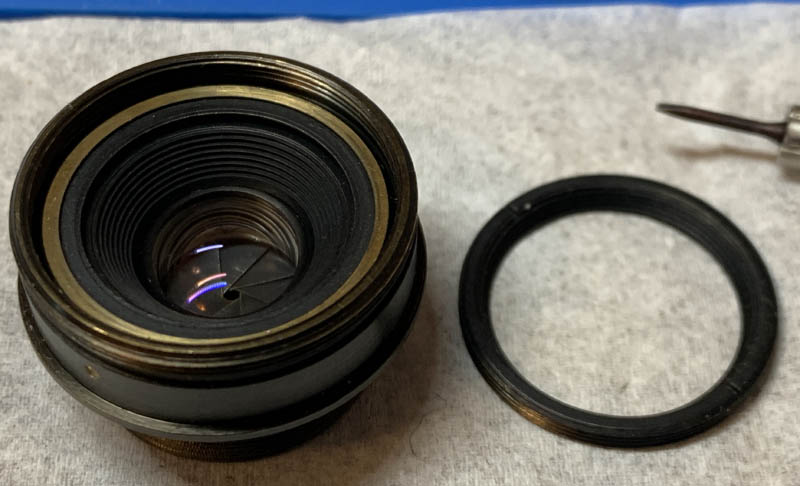
The front optics are secured with this collar, use a lens spanner to carefully remove it.
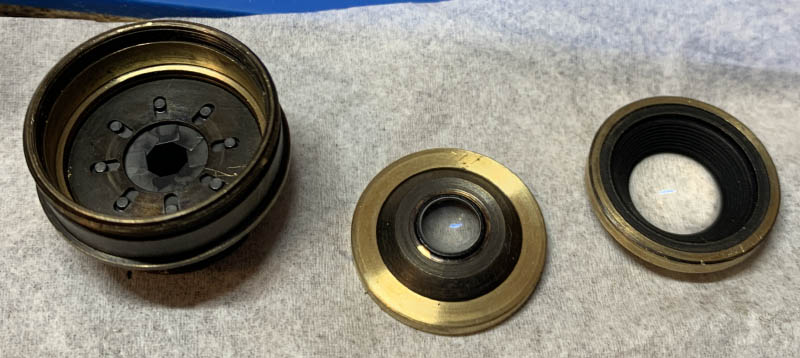
The 1st and 2nd elements and their housings are merely pressed into the objective’s housing. It can be a bit tight so you will need some special tools to remove them. Mine was excessively tight for some reason.
The rear optics can be removed just like how you did it with the front one.
And it’s exactly the same for this part. Again, this is excessively tight so I had to use a special tool. Do not push it from the other side, as tempting as it is because the glass is very delicate!
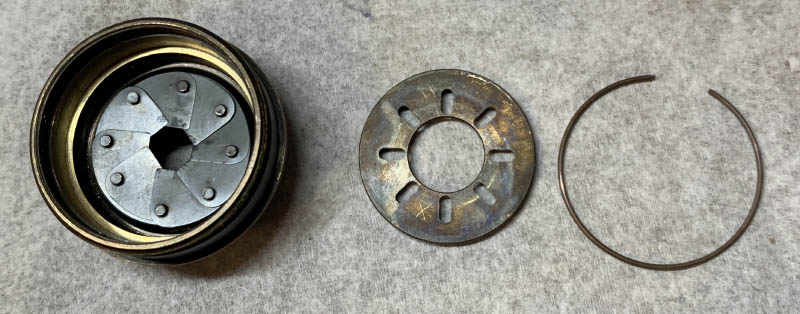
The iris mechanism can be dismantled by removing this circlip. Note that the diaphragm cup is concave, it should be facing this way, with the concave side covering the blades. It’s identical to the S-mount version.
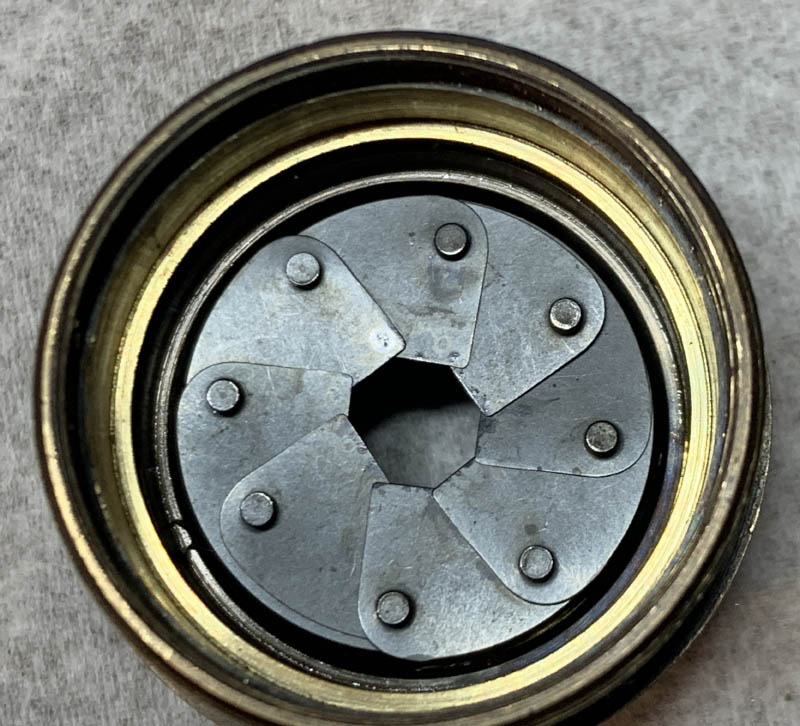
Study how the blades are installed so you will know how to put it back again later.
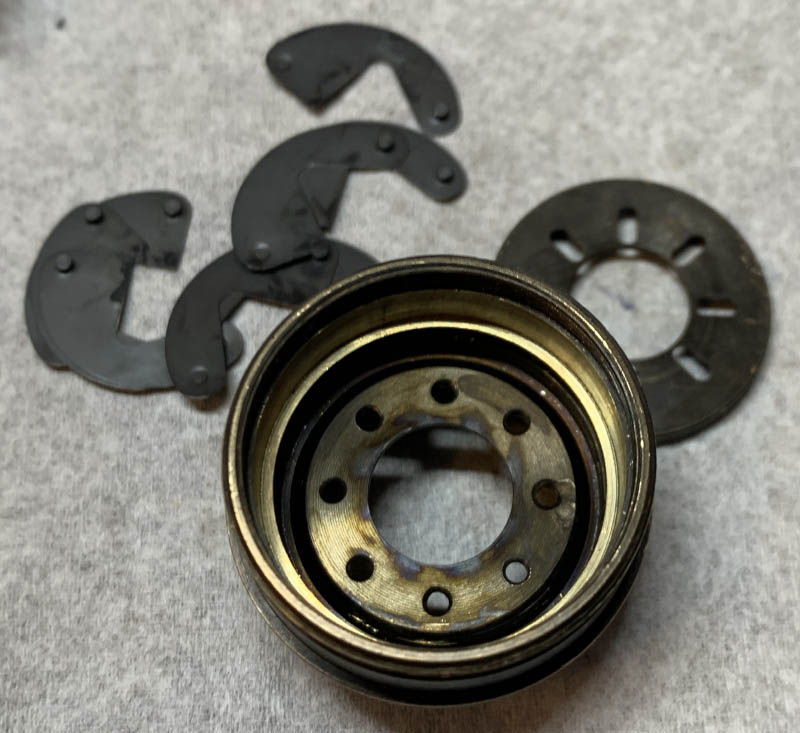
Carefully dismantle the iris mechanism and make sure to handle the blades only by their pins.
Like what we did with the main barrel, clean everything really well. You do not need to lubricate the iris at all because it’s designed to operate without grease. If you must, a small amount of powdered graphite is enough to make it operate a bit smoother, just don’t forget to blow any excess powder off. The only part that will need a bit of lubrication is the aperture selector ring, be sure to only apply the bare minimum, it’s too close to the iris mechanism. Even a very thin film is more than enough, you will not notice it but that’s all that’s needed for the part to turn smoothly.
If your lens has fungus, read my article on how to clean lens fungus, just make sure that you dilute it with distilled water so it’s not going to be too strong as it may damage the coating.
I must mention it again, be very careful when cleaning the bezel, only brush it with dishwashing soap and toothbrush because the paint job is delicate, it’s simply painted over brass without any primer at all! Don’t soak it in alcohol or solvents for a long time or avoid it at all!
Conclusion:
This one took me more time to service only because I had to repaint the bezel. Otherwise, this one should only take me less than 3 hours to overhaul it completely. Despite the setback, I’m super happy just to get a chance to service one of these. It’s a very rare and valuable lens that many collectors would love to have in their collection, I feel blessed.
Where else could you find something like this? Such quality content can only be found here! Thanks to all of my readers who share my work and support this site. I offer original content which takes plenty of time and effort to create, your support is helping me make this possible because we have been online for a lot of years and will be online for decades to come. This website started out as a tutorial just to help people remove their screws safely but it has grown to this humongous collection of valuable resource. In the next article, I will show you another exciting article with such quality that you can only expect from me. Thanks for your support and enthusiasm, see you again in the next article, Ric.
Help Support this Blog:
Maintaining this site requires resources and a lot of time. If you think that it has helped you or you want to show your support by helping with the site’s upkeep, you can make a small donation to my paypal.com at richardHaw888@gmail.com. Money isn’t my prime motivation for this blog, I believe I have enough to run this myself but you can help me make this site grow.
Leave me some tip?
Thank you very much for your continued support!
$2.00
Helping support this site will ensure that it will be kept going as long as I have the time and energy for this. I’d appreciate it if you just leave out your name or details like your country’s name or other info so that the donations will totally be anonymous. This is a labor of love and I intend to keep it that way for as long as I can. Ric.
