
Hello, everybody! Have you heard the “Great Leap Forward“? It’s the biggest socio-economic experiment ever done in the history of mankind. It is tragic because during the years between 1958–1962 the Chinese Communist Party killed an estimated 55,000,000 people through famine, chaos, violence, and execution. It was all done for the sake of catching up with the rest of the world, including Russia which is now a power that can project her influence globally. A centralized economy fails dramatically, and this one did just that at its end which somehow lead the disastrous “Cultural Revolution” a couple of years later. Did they get to create such wonderful products in an attempt to industrialize at such rate? I don’t think so because every consumer goods they’ve ever made are crap, and I am old enough to remember how bad they are. Today, I will show you a lens that reminded me of that insane era of human history. However, this lens did better in terms of advancing the impression of consumers about the “CCP” or “Cheap Chinese Products” because its much better in terms of construction and the quality ain’t that bad either. It’s a step in the right way.
Introduction:
The TT Artisan 50mm f/2 has been available for a few years now and it has quite a following because of its excellent performance relative to its affordable price. I don’t know what TT meant, is it “Total Trash” or is it a “Tiny Treasure“? I don’t care, but this one’s definitely better than the 7Artisans that we’ve just took apart. It is a much better lens in terms of production but it still sucks compared to Japanese lenses. I am not sure if this lens was made and designed in-house by the brand at all or was it made by that big Chinese optical company that’s tied to their military which supplies the very lenses that many other companies rebrand to sell elsewhere. It does show signs of common manufacturing techniques and parts so I assume that some of the parts did came from that place at the very least.

The barrel is completely made of metal, which makes it unnecessarily heavy. I said that because there are a lot of things inside that shouldn’t be made that thick. The focusing ring is closer to the camera and the aperture ring is closer to the tip. They have made it like this because it’s cheaper to make. All the numbers are shallowly etched with laser compared to the engraved ones we’re used to seeing from vintage lenses. The aperture ring is so narrow for no reason which makes it feel cheap.
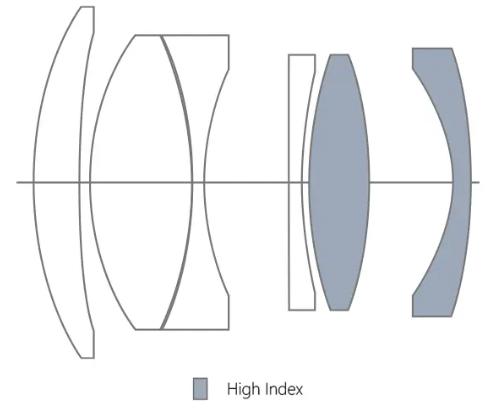
It has a 6-elements-in-5-groups design, two of the elements are made with “High-Index” glass but I’m not sure if they have sourced the glass ingots from another forge such as Hoya of Japan or they have made it themselves. There’s a high probability that this lens is sold by another manufacturer, all you’ll need to do is check the drawings of the optics and compare.
I have only taken apart two modern communist Chinese lenses, and have seen a few other lenses done by other people. While this one is better than the majority it still sucks, it sucks so bad that TT Artisan doesn’t trust its own quality control! They have an excuse ready which you can see in the screen capture below.

They have even went out of the way to create a video explaining how to adjust the focus of your lens! It is the first time I’ve seen something like this from any manufacturer! One would expect that a lens works as intended right out of the factory, but this one leaves the fine adjustment work to the consumer.
You will soon see the other forms of slop done to it, which baffles me because I got a brand new lens! I’m now curious to see how they’ve managed to create the more complicated autofocus lenses.
Here’s a word about how the communist Chinese companies do business. They won’t stand by their own name, all they want is your money. Once they have your money, it’s as good as gone. Good luck chasing after them for warranties or any issues after the fact! For this very reason, it’s better to buy them used. It will save you money and you’re able to check it out for yourself. The best part is you are not helping the economy of an oppressive regime who does genocide on its Turkish Muslim population (the Uyghurs). It’s a real genocide and ethnic cleansing but nobody talks about it because there’s no money to be had.
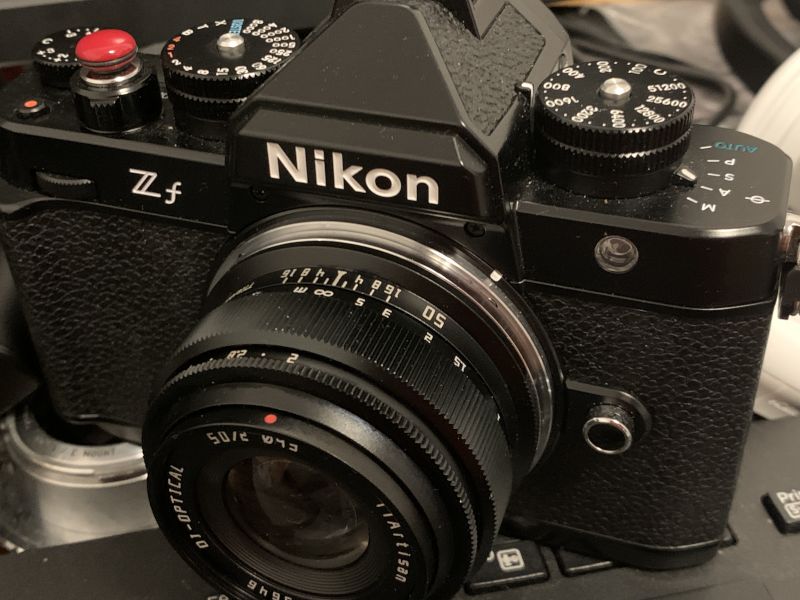
Since it covers 35mm (full-frame), it’s best to shoot it with a Nikon Zf. It has a stabilized sensor which is a big help when shooting in the dark. Not only that, the camera is heavy enough so the lens balances very well with it.

When shooting with an APS-C camera such as the Nikon Z fc this lens acts more like a 75mm f/3 lens due to the 1.5x crop factor. The balance isn’t that good because the setup is front heavy. It won’t matter which camera you’ll use so long as you turn the focus peaking ON to help you focus, that’s going to help a lot.
It feels very awkward when you handle it because the aperture ring is so narrow and it’s positioned closer to the tip like a rangefinder lens. Not only that, everything turns the other way and not the Nikon way! It’s not so much a problem because I also shoot with Pentax so I can easily get used to it. What’s what’s super annoying, or should I say unacceptable is the fact that all of its rings feel super heavy to turn because they were drowning in the thick grease inside! This doesn’t make sense, the fucking Chinese already made lots of these by now yet they didn’t even notice how heavy the rings are?


(Click to expand)
This is how the distortion looks like. It may not look much to you but it’s noticeable in your photos. There is way too much of it coming from a lens that’s designed recently. You won’t be using this for fine art and architecture, it won’t matter for general photography.


(Click to expand)
The corners look really dark when shooting at f/2, the falloff reaches the center in a ramped curve. Even if you’ve stopped it down to f/2.8 the corner still look excessively dark at the extremities but the center will look much brighter. You will see a huge improvement at f/4, the dark corners are now contained but you’ll still see the dark parts which is kind of annoying. You will still see faint hints of the vignetting even at f/5.6 it’s as if the darkness really won’t go away. It really sucks because you will still be seeing that even at f/8, I do not think it will go away completely. This hints that it has a decent performing center, but the corners will remain ugly up until f/5.6 where it begins to look acceptable. We shall see if this is true later.


(Click to expand)
The coatings are ineffective, maybe insufficient is the better word. While it does the job somewhat but it’s doing it in a pacific way, it’s not even trying. Some people will find this appealing, I guess there’s always a lens for each person and for every purpose. Maybe people who shoot indie movies will like it.


(Click to expand)
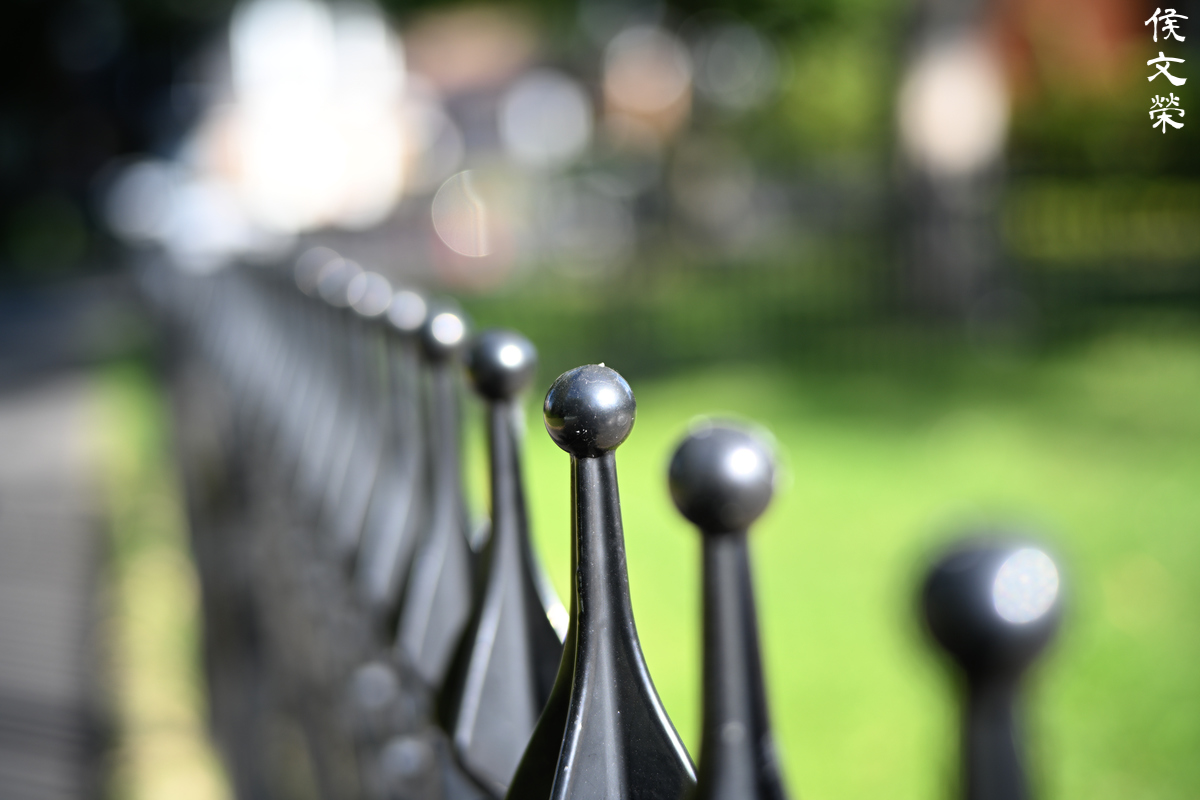
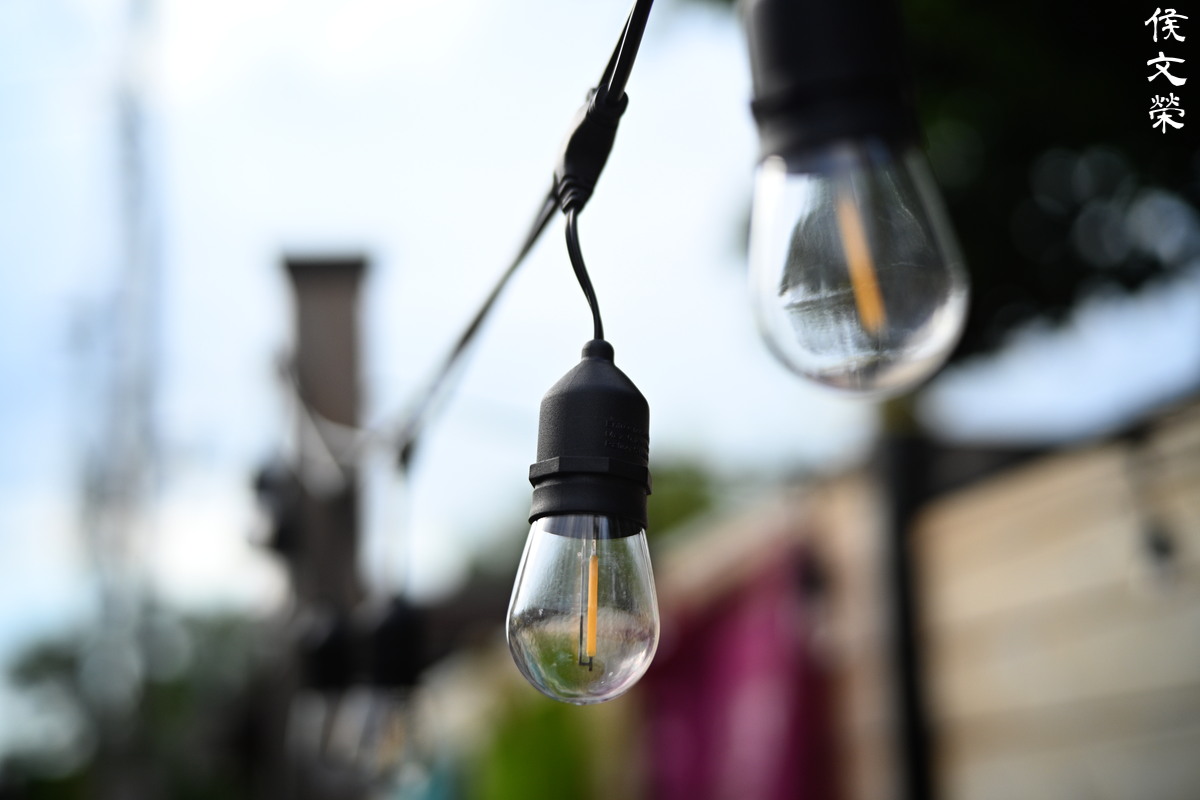
The character of the bokeh appears look smooth. I don’t find it offensive nor do I consider it as exquisite, I think this is one of the selling points of this cheap lens. The aperture has many curved blades so it helps a lot. The discs remain rounded as a result of the aperture being as circular as possible. A polygonal iris will give you another look.


(Click to expand)
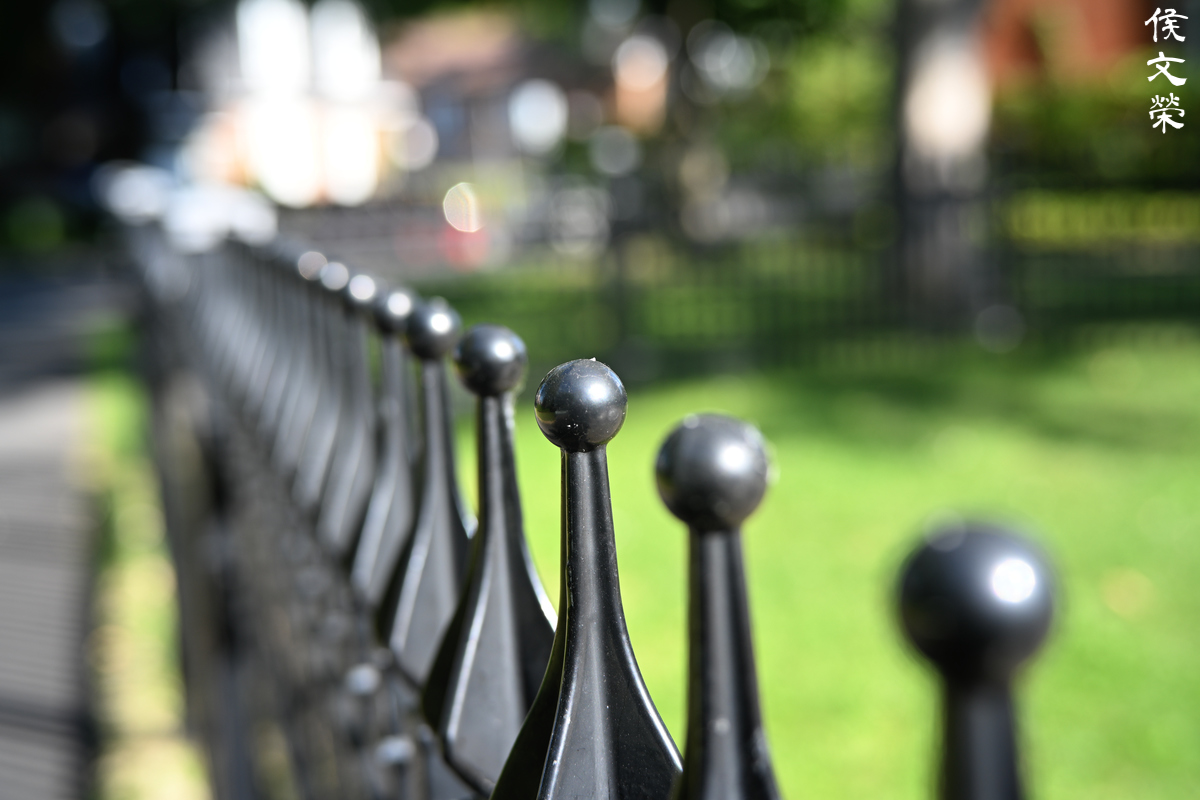
I like how the discs look clean, and the outlines are almost invisible. Stopping the iris down will make the discs look a little bit polygonal, you’re a madman if you’re able to detect it at this level without zooming.


(Click to expand)
It has an an odd-looking coma shape which seems to improve by f/4. It’s either I’m doing it wrong or this is just the way it is. I don’t think it’s that much of a problem, a faster lens will definitely look worse.


(Click to expand)
Here are more pictures showing how smooth the bokeh looks like. It looks a lot better compared to many older 50mm lenses made during the Silver and Golden Age of Japanese optics. I would consider the era of the Nikon F to be the Golden Age while the 1980s is the former, at least that’s my interpretation.


(Click to expand)
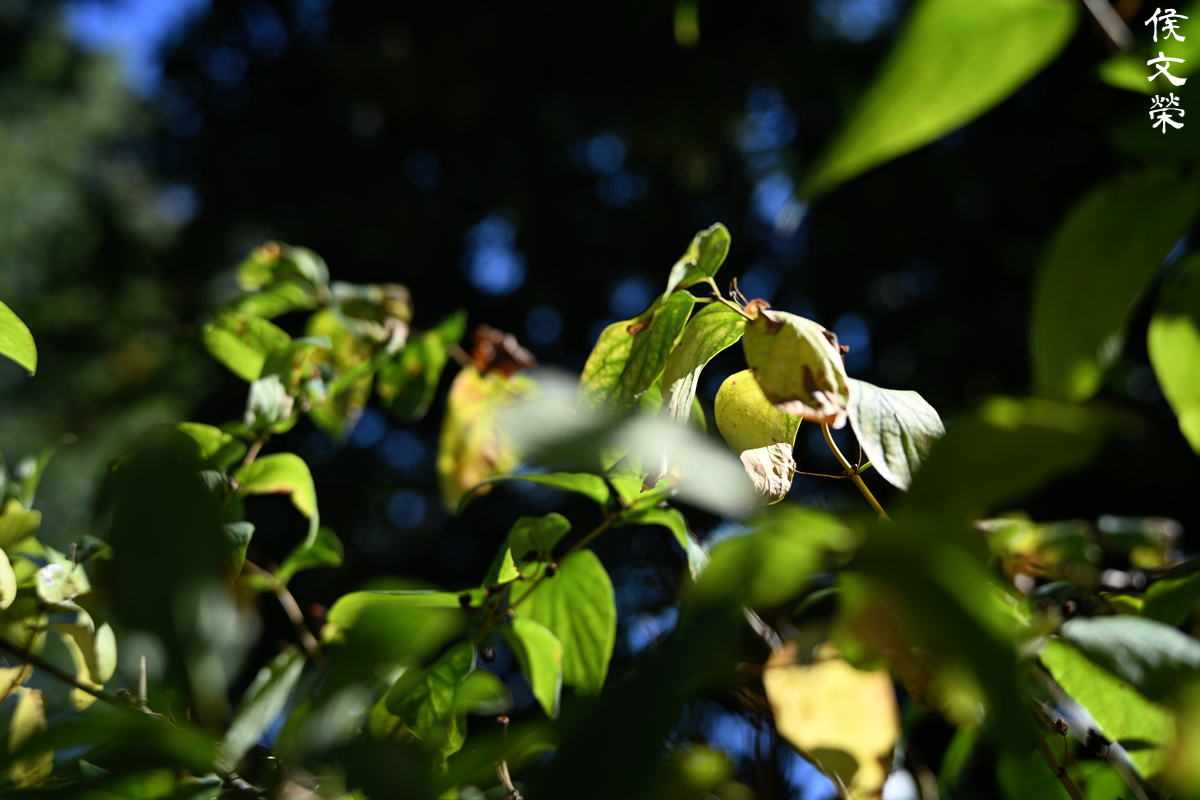
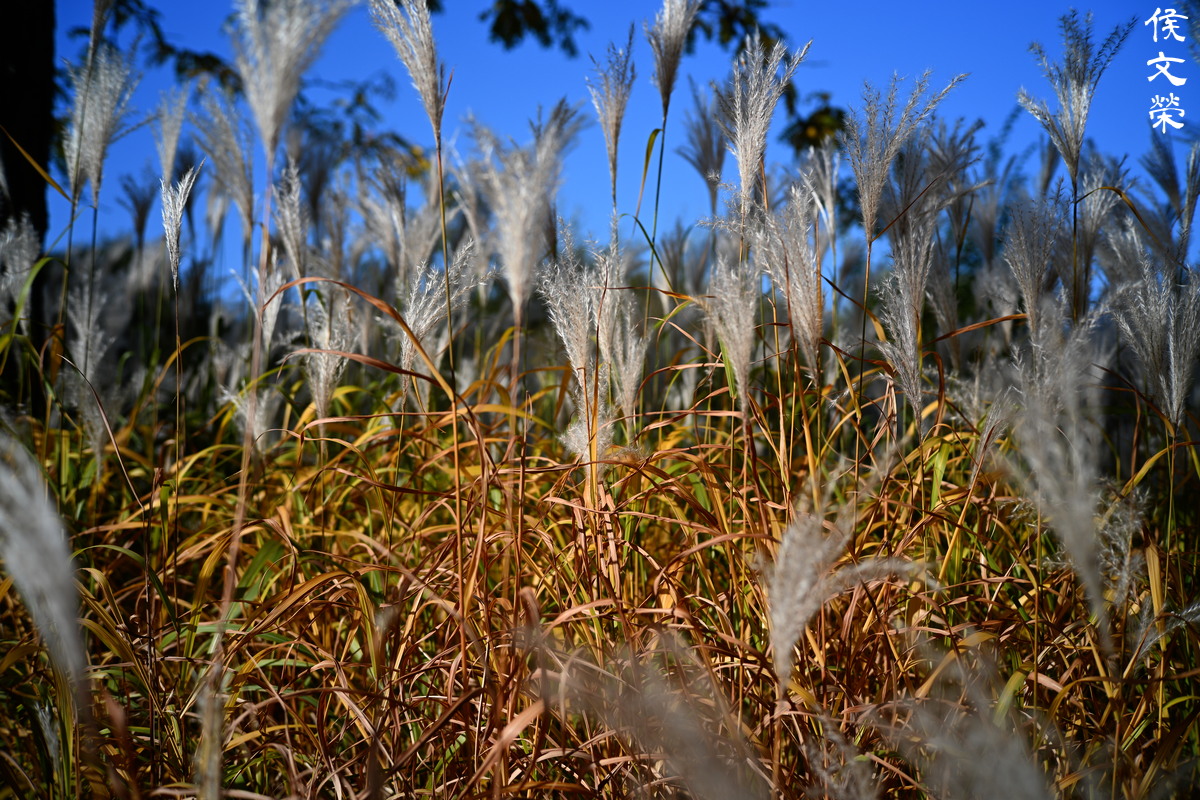
It handles chromatic aberration impressively, I struggled a lot but it’s only visible in the areas where you’ll see the blurry and sharp parts meet. In short, it won’t matter at all when taking real world photos. I didn’t even see it in the leaves at all, this is impressive. The only areas where it can be observed are the corners, I already told you that the corners won’t be as good as the center in my speculation, but I wasn’t even able to trigger it in a severe manner. We can safely say that this is a non-issue.


(Click to expand)
Sharpness at the center is impressive even at f/2, the corners look somewhat okay but the extremities are ugly. Stopping it down to f/2.8 makes the center look even better thanks to the improved resolution, the far corners still look ugly even if there’s a little bit of good things happening there. Everything between it and the center looks acceptable. The center shows peaks out at f/4, this is as good as it will ever get. The far corners now look usable at most but still looks ugly. You won’t see any improvements at the center by f/5.6, the corners are where you will see the positive changes happen, they’re now decent but still lagging behind the center. They will only look better at around f/11, which is way too small in anything other than a sunny day or when shooting inside the studio with strong lights. Sharpness looks consistent across all of the distances within its range as far as the center is concerned.
This is the best trait of this cheap lens, the fact that it could deliver such performance at such a low price is where the value is at. It’s not perfect at all, but it corrects all the flaws that matter to the hobbyists. This is how many third party Japanese companies played with the big names 15 years ago. You will be able to shoot a whole book or portfolio with this lens alone. This makes it great for students, too.

The corners look perpetually dark, it can be useful sometimes for creative use but I’d rather not have it at all in my photos, or at least not looking this dark.

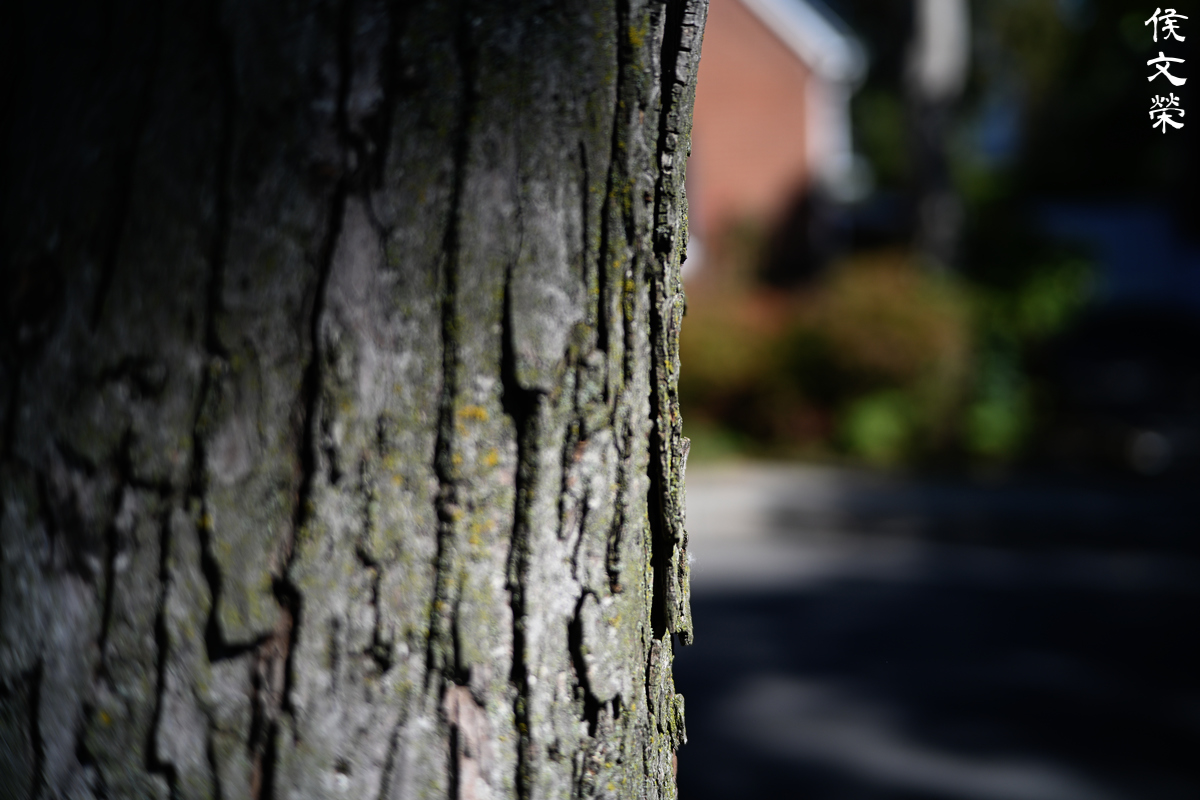
This is as close as you can get, it wasn’t advertised as a macro lens anyway. The center looks very beautiful in my monitor when you zoom to 100%, I’m able to see every delegate detail of the flower.
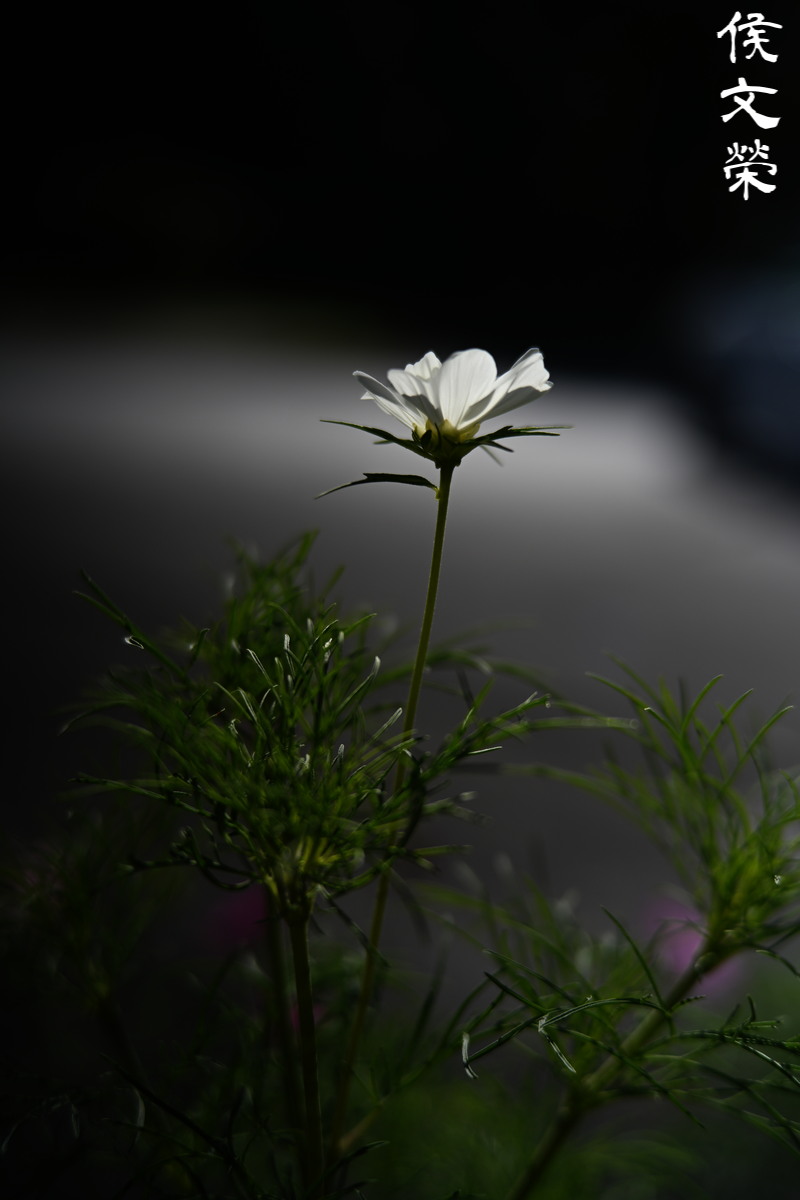
Shots like this that have small details with high frequency is a nightmare for lenses with poor bokeh, this is impressive for a lens that costs less than a week’s worth of groceries.
The good performance at the center coupled with the smooth blurry parts helps create dreamy photos. It is such a waste that we are not able to shoot this lens with film, unless you are shooting with a Leica, that is if this lens is available in that mount.

It’s nice for taking portraits, I was able to focus quickly and accurately after overhauling the lens. Yes, you heard me correctly, I had to overhaul a new lens for it to work this well. I guess that’s the biggest problem that I have with it. You shall soon see why later.

It’s great for reportage if you’re used to shooting with manual lenses. Mirrorless lenses can be difficult for many people when shooting with a smaller aperture because it’s harder to accurately focus with your eye since the depth-of-field won’t be as shallow as shooting with a larger aperture. You’ll get used to it.


(Click to expand)
Compared to a lens with autofocus the amount of rejects are quite high because you’re the one doing all the work. That’s why I miss shooting with a DSLR sometimes because I’m not looking at a tiny television!

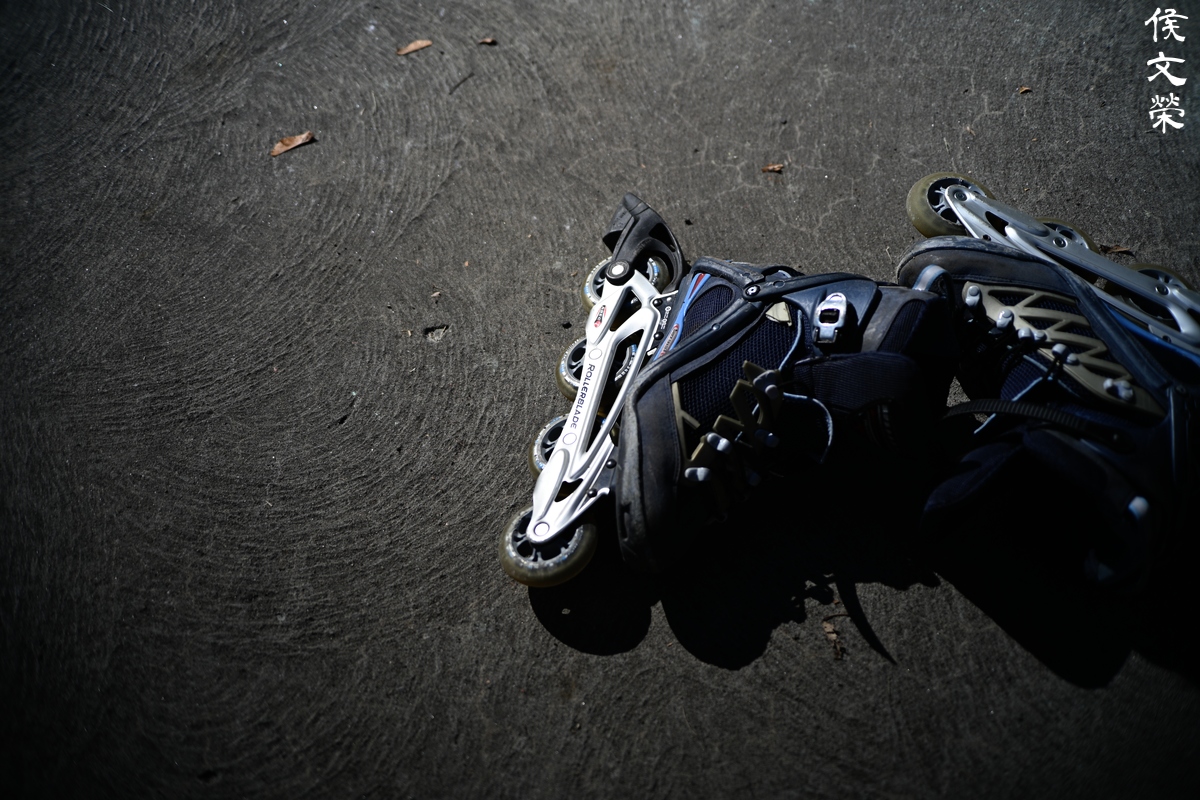
Having the maximum aperture of f/2 will theoretically make this a great lens for lowlight use but the dark corners will be your biggest problem. They are exceptionally dark, this is coming from a person who have reviewed hundreds of lenses, which means it really is that bad.

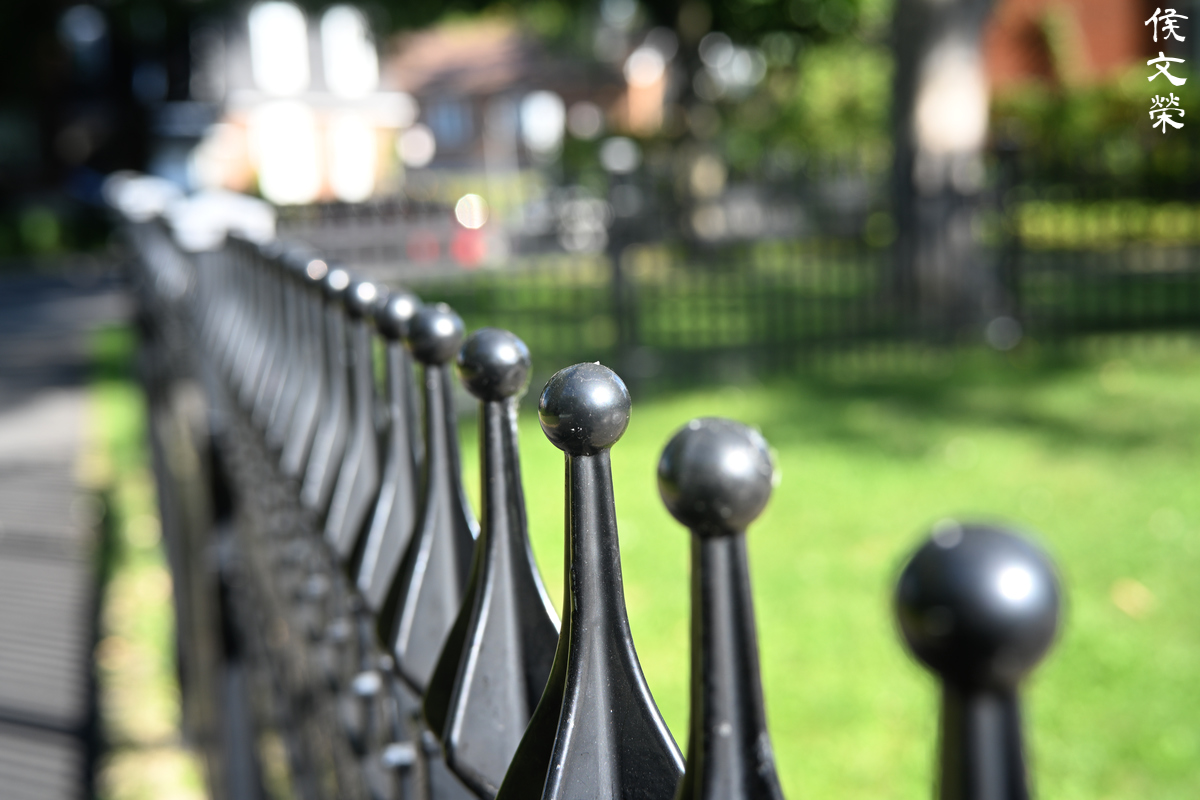
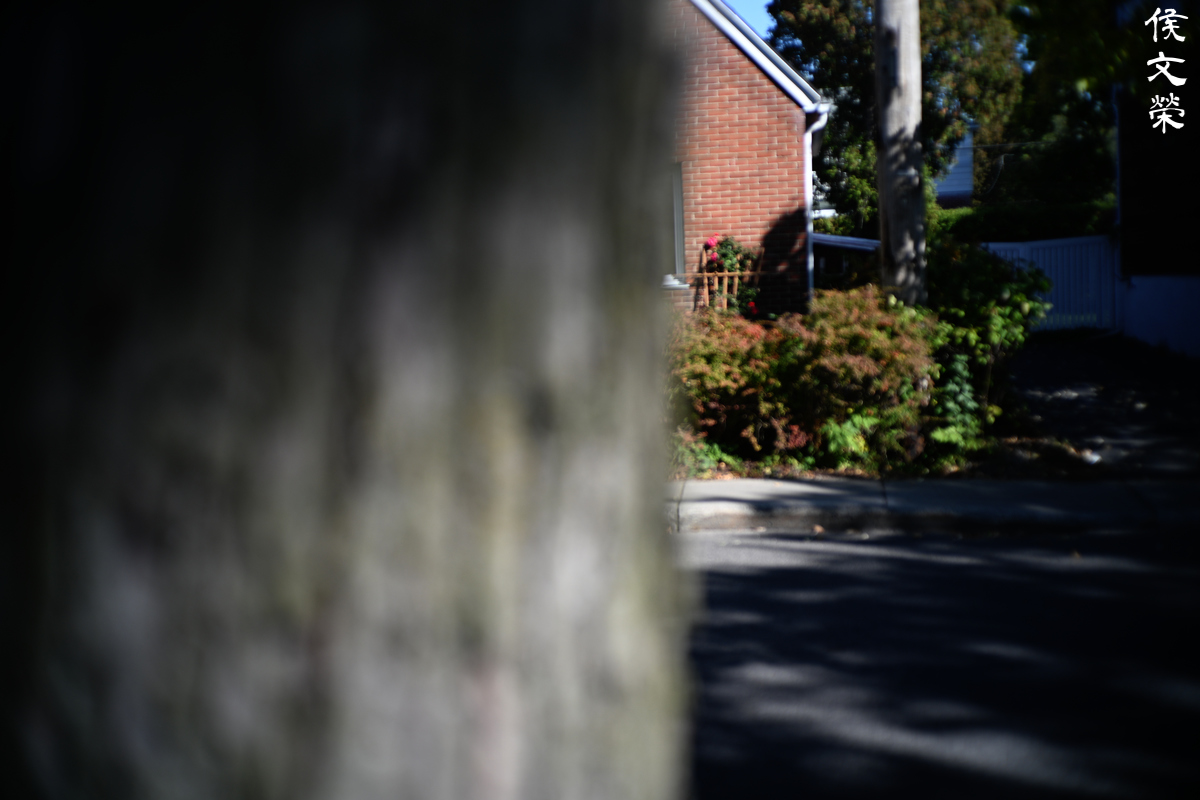
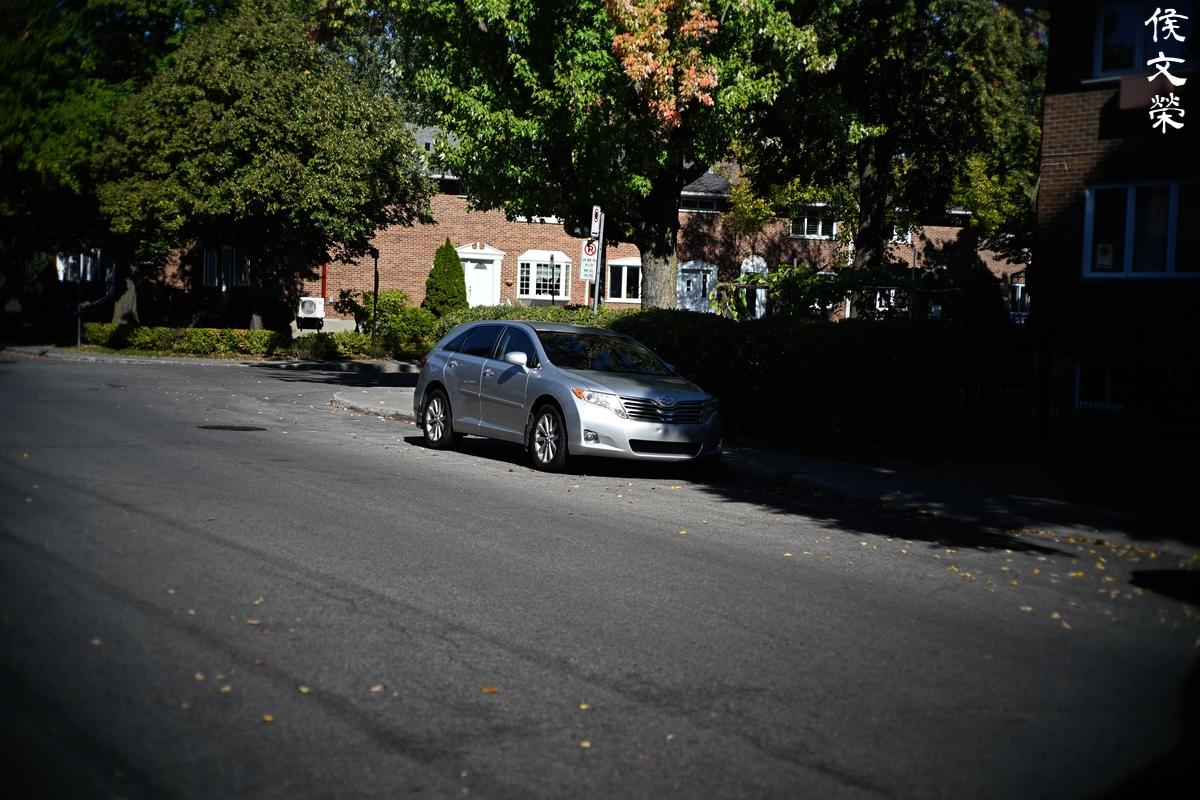
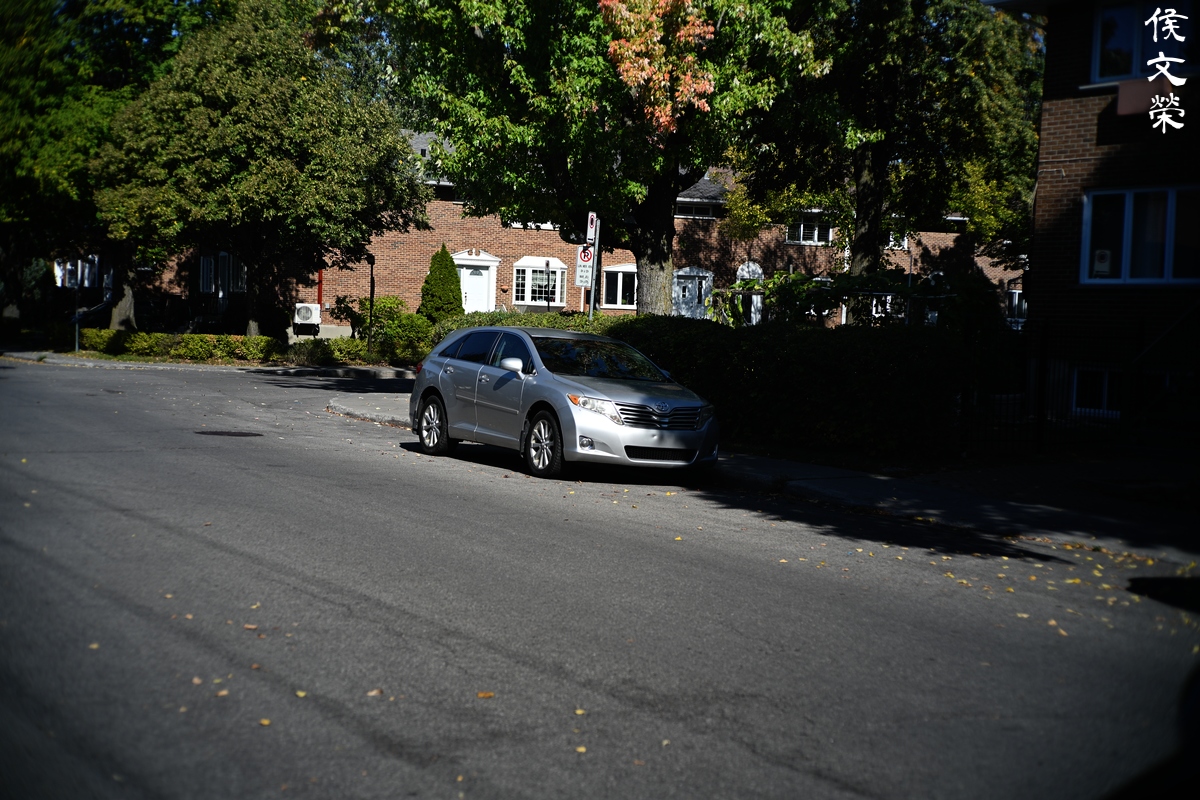
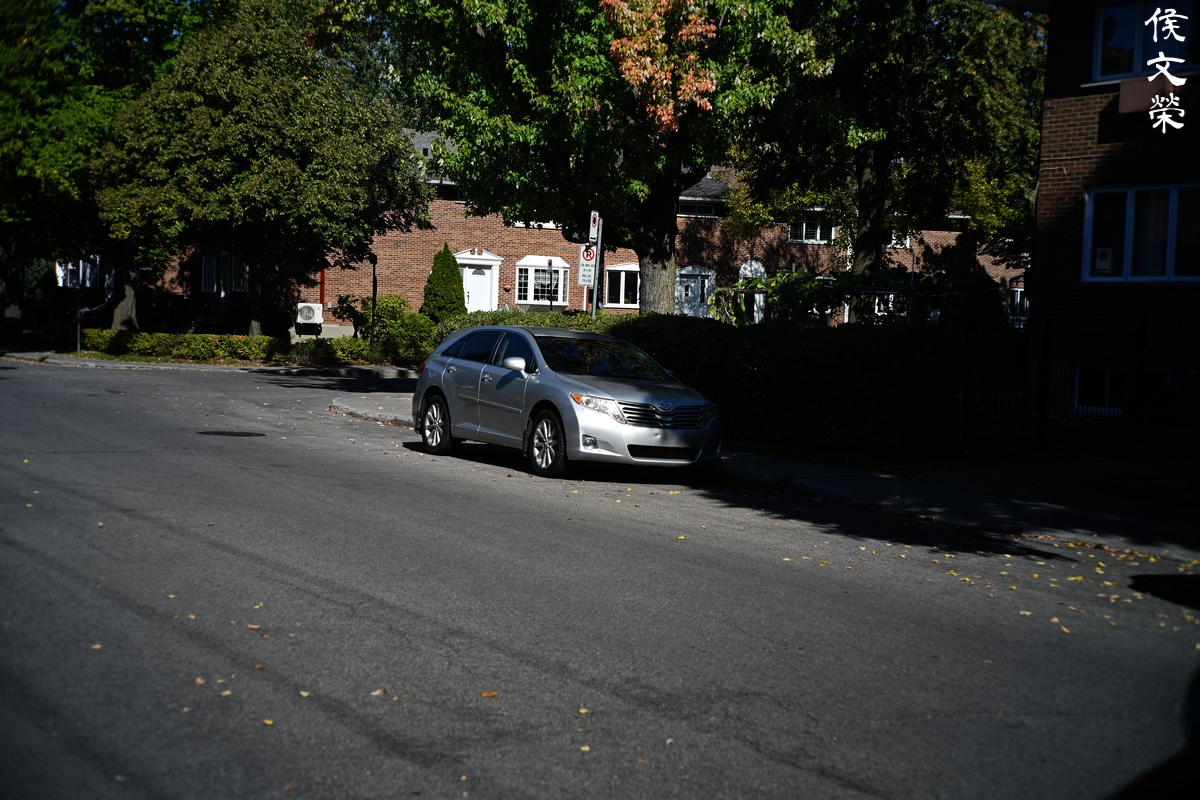
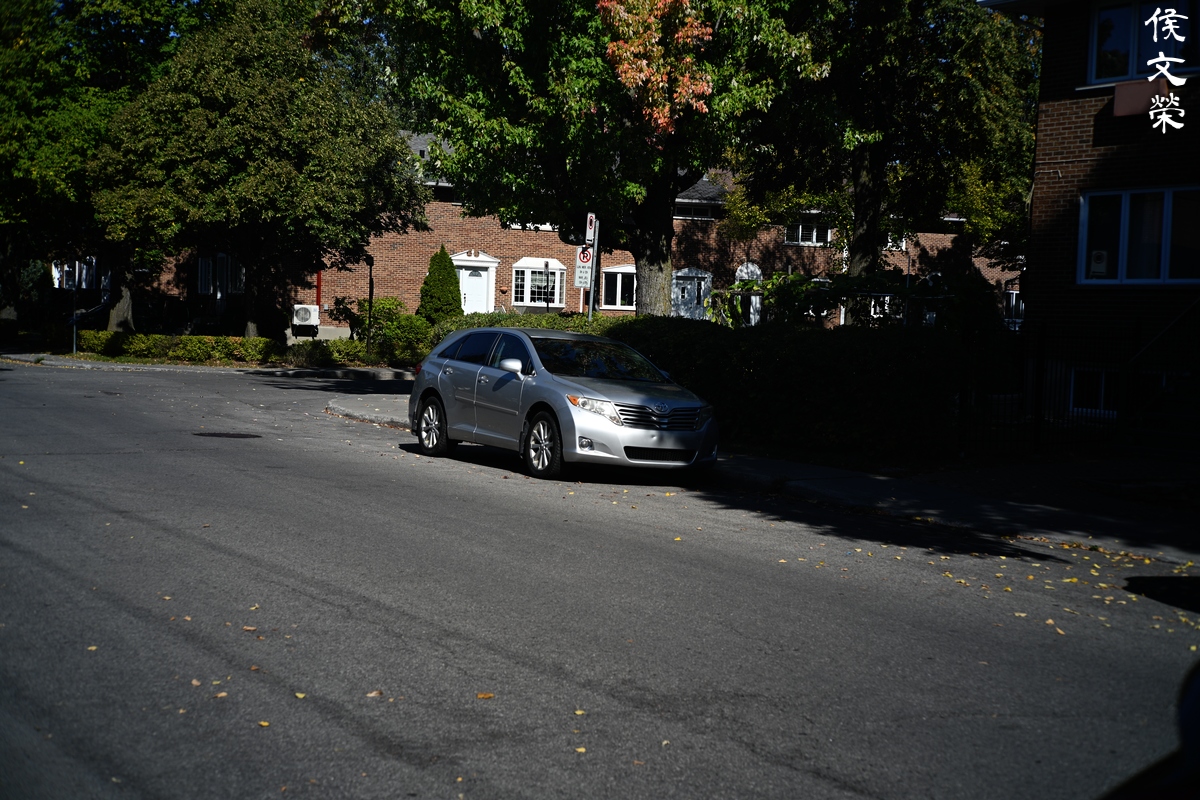
However, the dark corners are sometimes useful for seeing such as this. It makes it look claustrophobic, it can also help lead the eyes of your viewers towards the center.

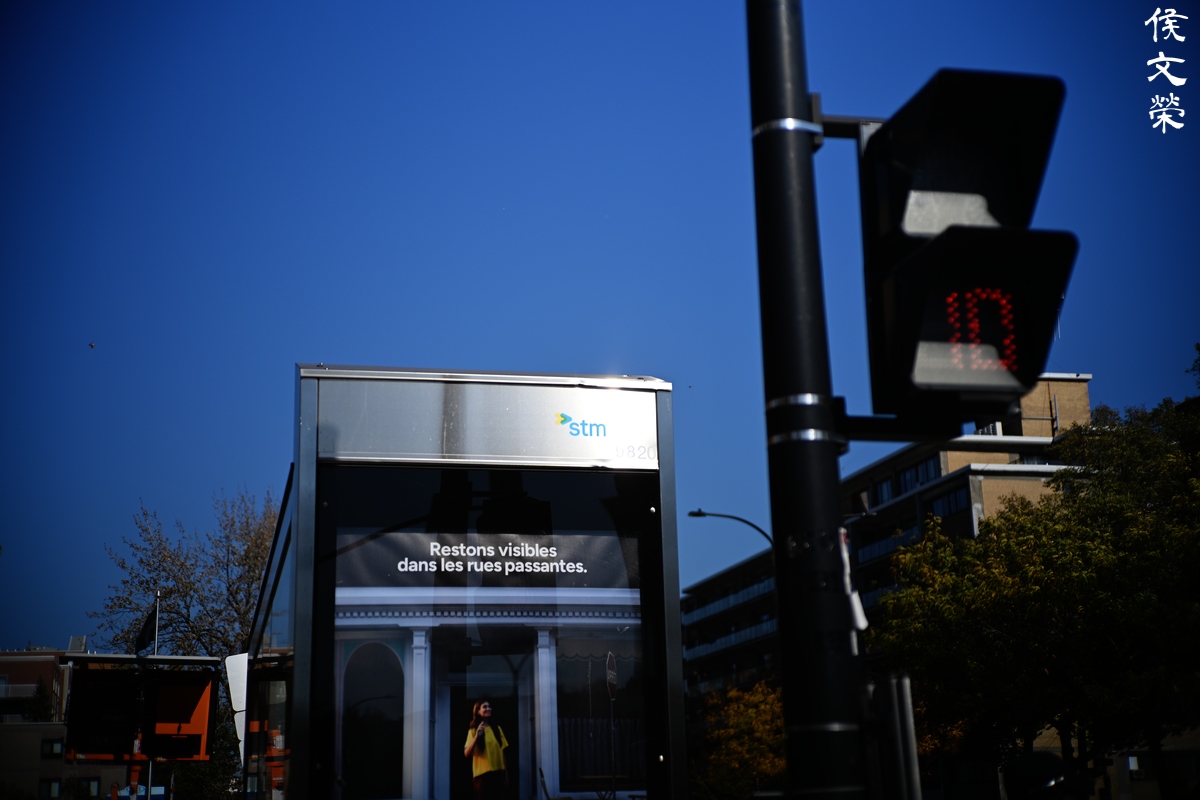
This is another good example. An old and decrepit subway system looks even older thanks to the darker corners. It may be good for storytelling if you’re shooting a movie.

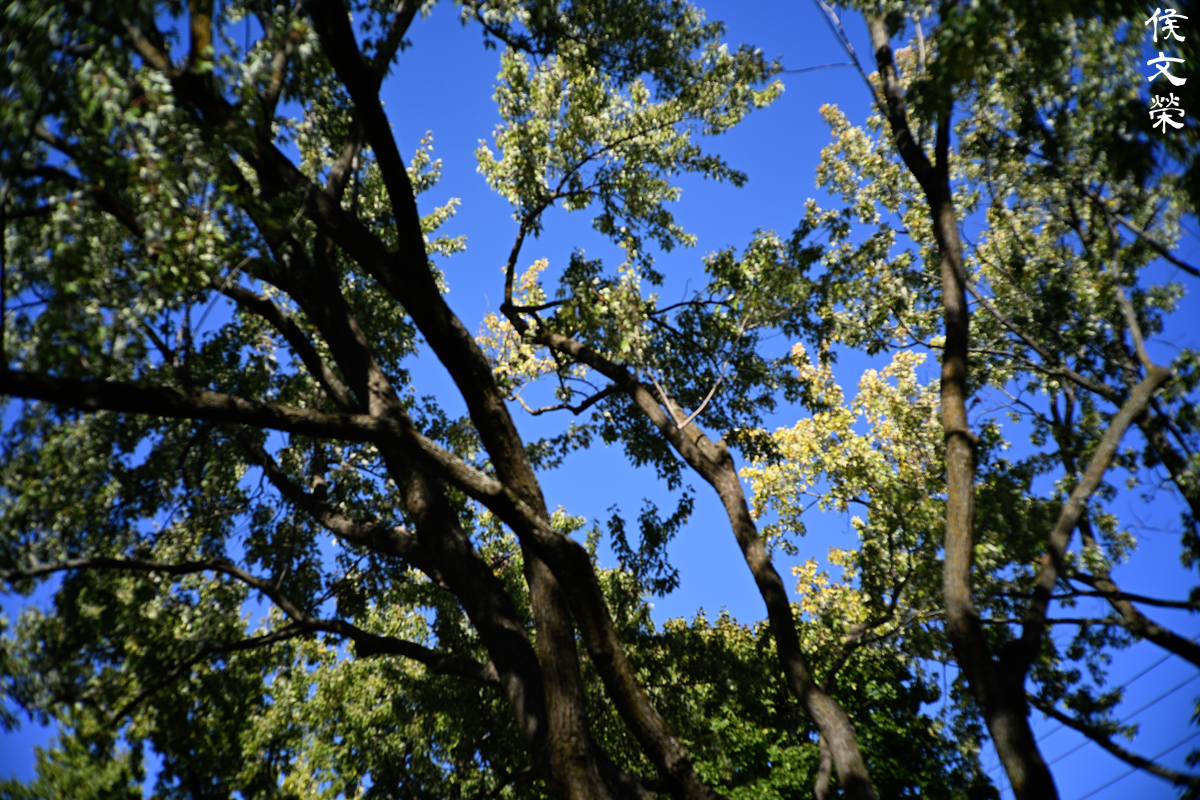
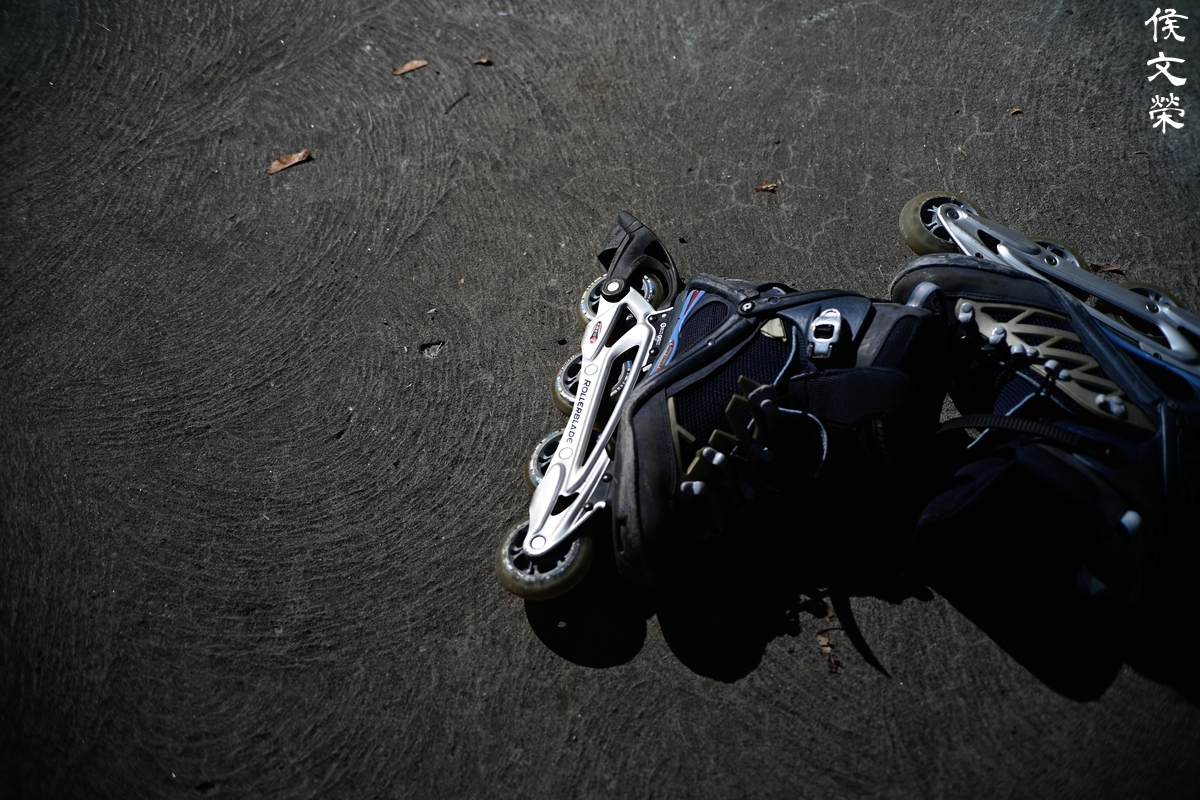
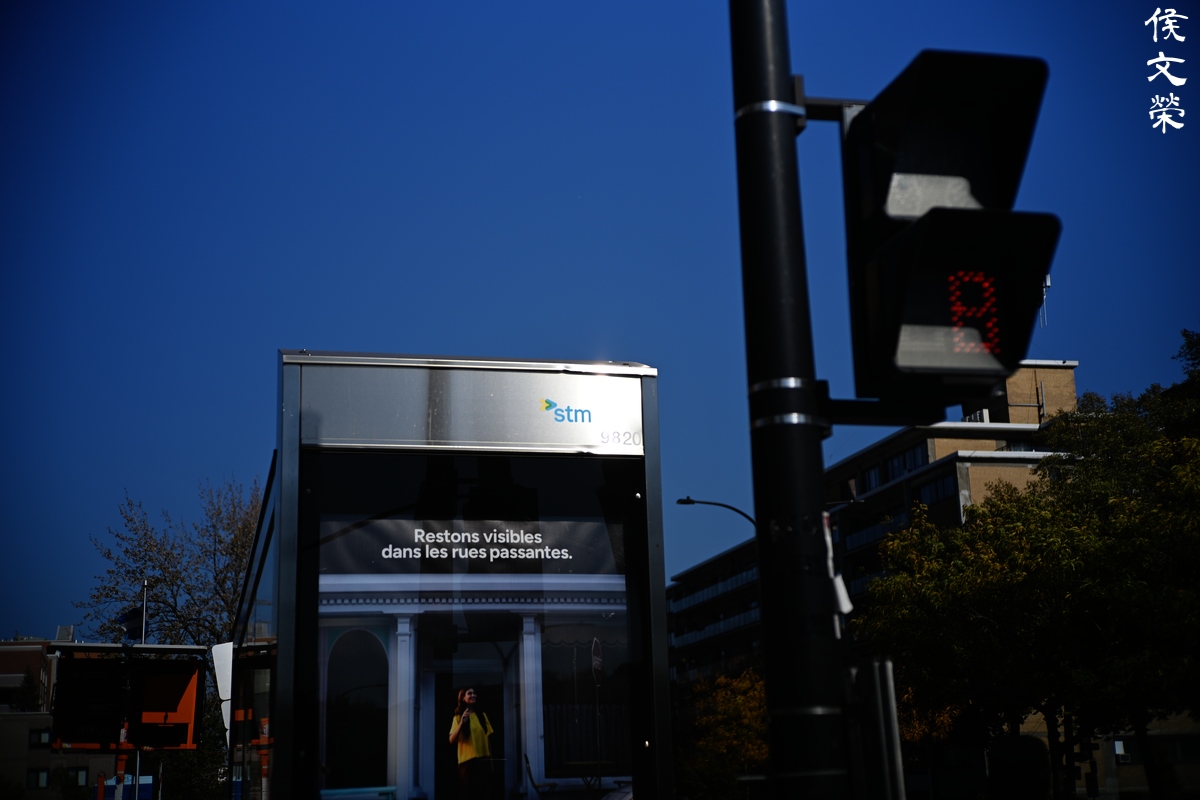
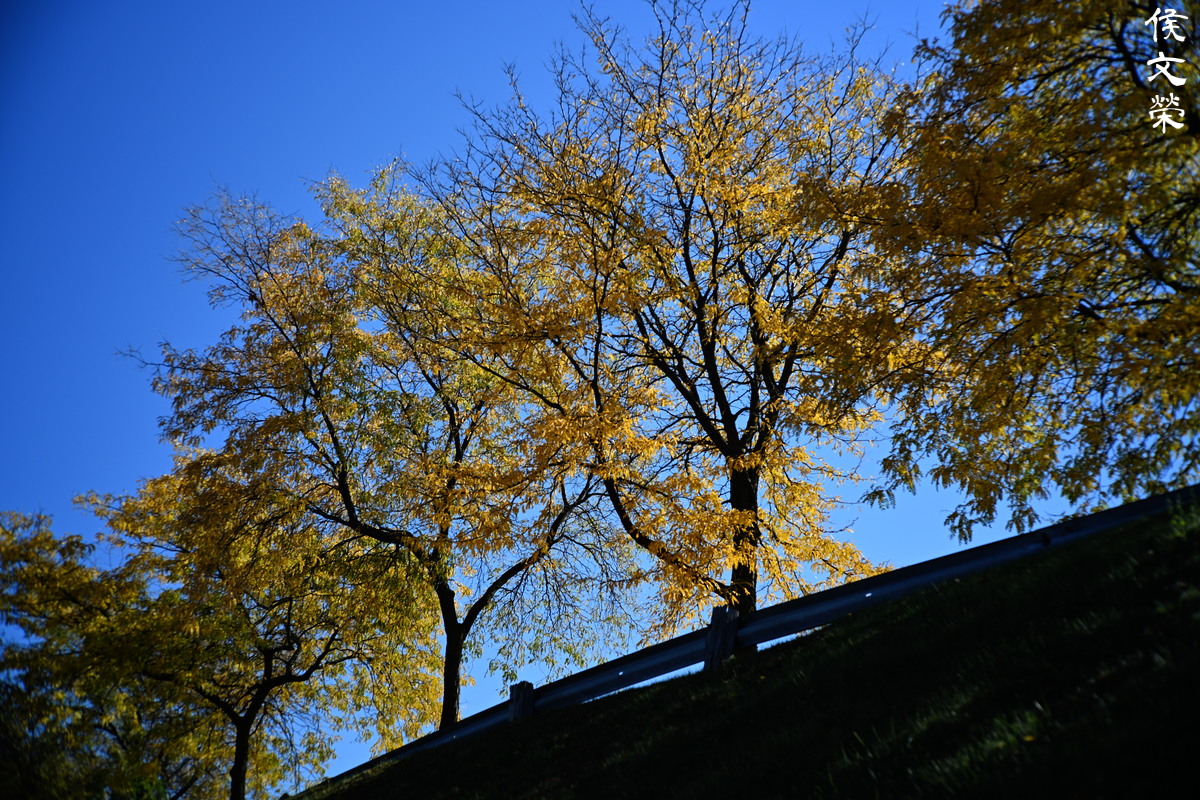
It’s so annoying, even if the iris is smaller than f/5.6 you’ll still be able to see the dark corners. This is the most annoying part of shooting this lens with the sky as the background, even on the cloudy day.

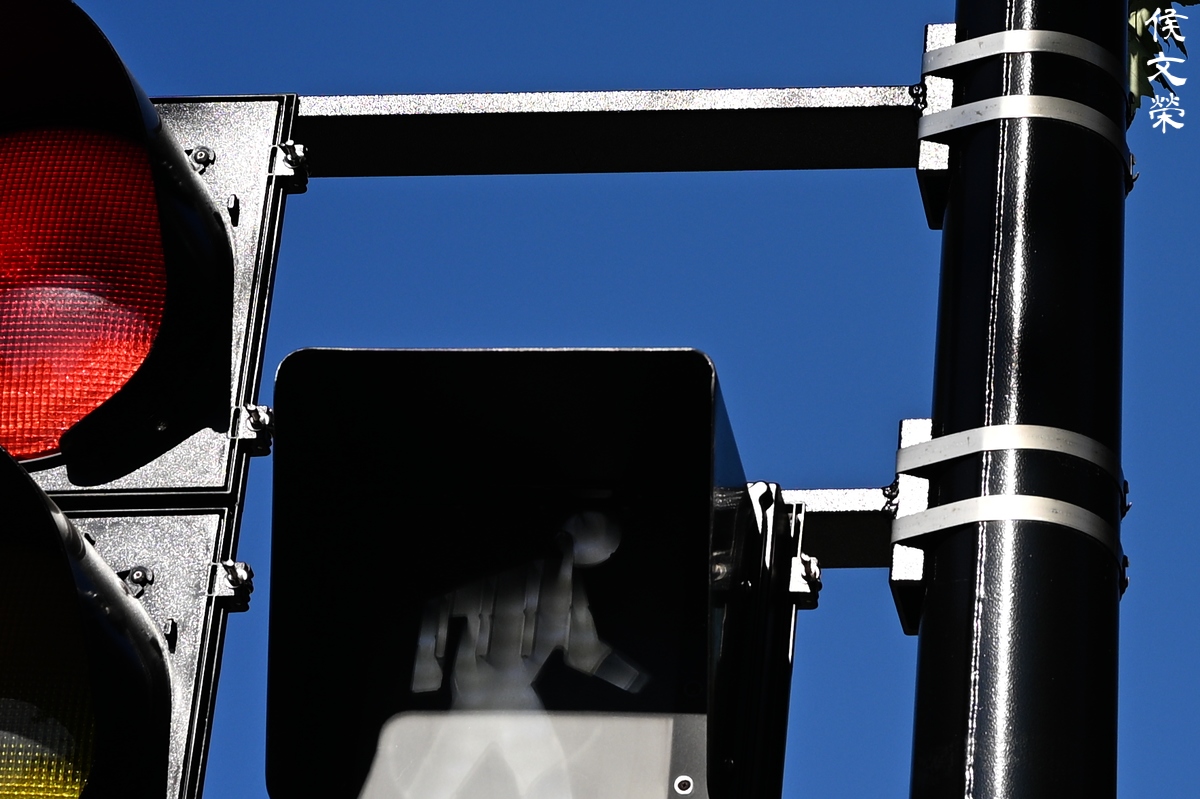
You will have to stop it down to at least f/11 to get something looking decent at the corners. I don’t think this is something that many hobbyists care about anyway.

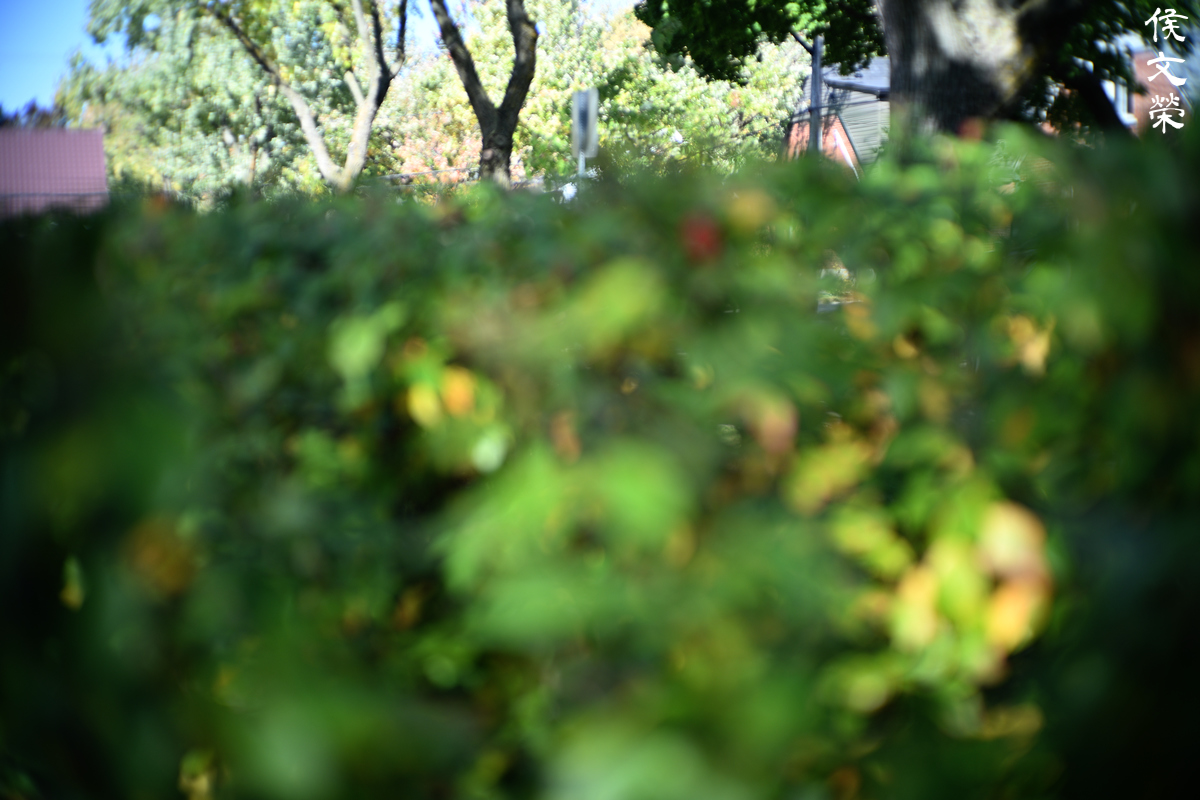
The biggest consolation one could get from this is that chromatic aberration won’t be a problem at all. It’s the most annoying thing when shooting foliage on a sunny day.

I believe I shot this at f/16. At this aperture, I don’t think the corners will look dark.


(Click to expand)
Here’s the rest of the set. I think this is a nice lens for people who shoot mirrorless cameras but who want to save some cash when looking for a manual 50mm. I enjoyed the small size but I am not happy with the position of the aperture ring and how the rings turn the other way. I’d probably keep this one just in case I’d need something small to take with me, and unlike the stupid 7Artisans 35mm f/1.4 II, it covers 35mm.


(Click to expand)
As expected, it works like a short telephoto when used with a Nikon Z fc. The flare looks worse which can lead to lower contrast across the frame in some cases. This is because we’re looking at a smaller from of the whole frame. Otherwise, everything looks nice as you can see from the picture of the pumpkins.
If you don’t have much money to spend but you have time to deal with the quality issues and some slop, this is the lens for you. However, you can spend the same amount of money to buy a real vintage lens, an adapter, and a few accessories and achieve the same thing! The former will allow you to use that vintage lens with film, you will also be able to use it with other mirrorless cameras as well after buying an adapter for the other body. If you’re stuck with a mirrorless system, be it with Fujifilm, Sony, or others and you are looking for a nice 50mm that works natively with your cameras then this one is not bad at all. Just be sure that you got one that is not defective or overly greased, making it hard to turn like the one I’ve got. These are very cheap but you could even get them for less by buying them used. Many people get tired of them or have had the bad luck of buying a defective copy. Just test the lens and make sure that it works, check if it’s able to focus properly, too. The numbers and scale may not correspond to what’s really happening, I have such a low opinion of these Chinese lenses that I stopped caring. This is a perfect lens for students, a traveling amateur on a trip to Europe, a professional on an assignment in a dangerous part of the city. It is a great lens for such scenarios just because they don’t cost that much.
Before We Begin:
If this is your first attempt at repairing a lens, I suggest that you see my previous posts regarding screws & drivers, grease and other things. Also read what I wrote about the tools that you’ll need.
I suggest that you read these primers before you begin:
- Essential tools
- Best practices 1
- Best practices 2
- Best practices 3
- Ai conversion
- Working with Helicoids
Reading these should lessen the chance of ruining your lens. Before opening up anything, always look for other people who have done so on the internet. Information is vague and scattered but you can still find some information if you search carefully.
For more advanced topics, you can read my fungus removal article. It has a lot of useful information, it will be beneficial for you to read this. I also recommend that you read the working with helicoids article so you will not get stuck because you couldn’t reassemble the helicoids back properly.
Disassembly (Focusing Unit):
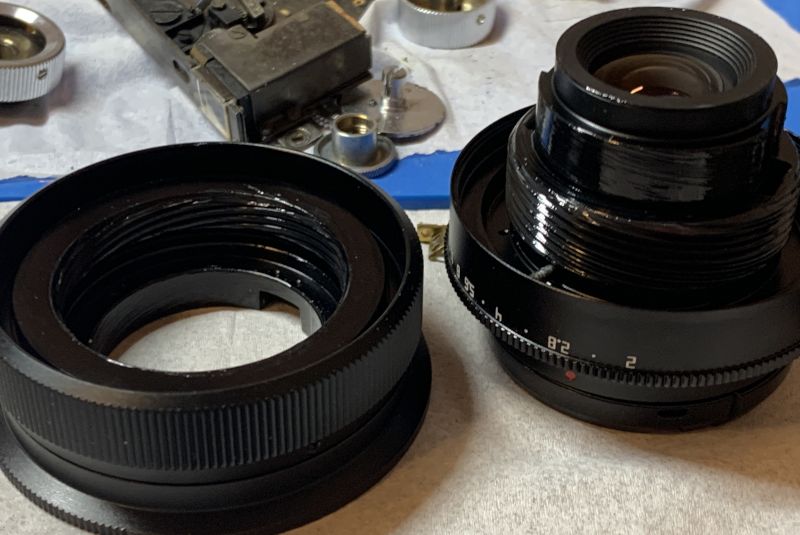
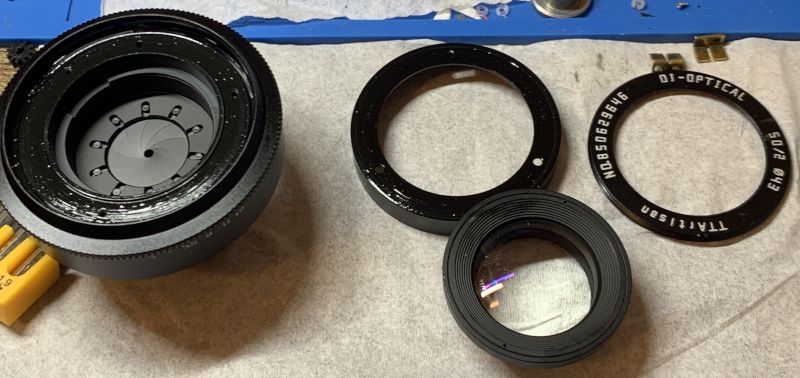
The barrel’s construction shares a few things in common with many lenses from that country so it should not be too difficult to service if you have the right tools. It’s unheard of to service brand new lens but you will soon see why I did it and I am sure glad that I took the time to do so. Everything starts by separating the lens apart into its two basic components.

Unscrew the rear baffle to access these screws. You can use a rubber tool to unscrew the rear baffle, there is nothing securing it nor it has been sealed with anything. These are Torx screws, they won’t wear out and get stripped as easily but they still require some skill to remove them. Read my write up on how to remove screws so you will know how to deal with these safely.

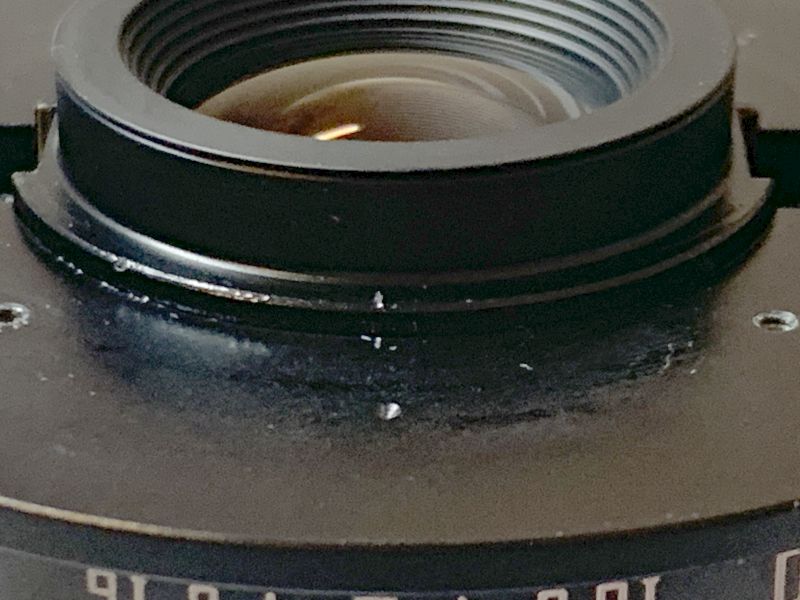
As soon as I’ve removed the bayonet mount, I’ve discovered a thin amount of oil in some parts. This is not looking very good judging from my experience working on another communist Chinese lens previously.
While the lens is at infinity, measure its height and also take as many notes as possible so you’ll know the original alignment and positioning of the parts. The inner helicoid of my lens when this deep.

A pleasant surprise, this lens actually has a real helicoid unlike the 7Artisan 35mm f/1.4 II one from before! Extract these screws and carefully pick out the helicoid keys with a pair of tweezers.
Carefully separate the lower helicoid from the rest of the lens. Don’t forget to mark where they’ve parted, this is also the same spot where they would mesh. Many people forget about this so they are not able to put everything back properly again. Read my article on how to work with helicoids so you will know what to do and prevent any problems later.
I’m not surprised to see that it’s drenched in grease, it’s exactly the same scenario that I saw with the shit lens that’s called the 7Artisan 35mm f/1.4 II. I don’t know who does the hiring and training, maybe they’ve hired somebody who used to work in a Chinese restaurant to assemble their lenses. This is disgusting, it’s unacceptable in any way, but this is communist China we’re talking about where morals take a back seat. It is all about profit over there, gone are the classical teachings of thousands of years of philosophy. That is why Taiwan, Japan, and Korea are the only countries that could claim to be the pillars of East Asia.
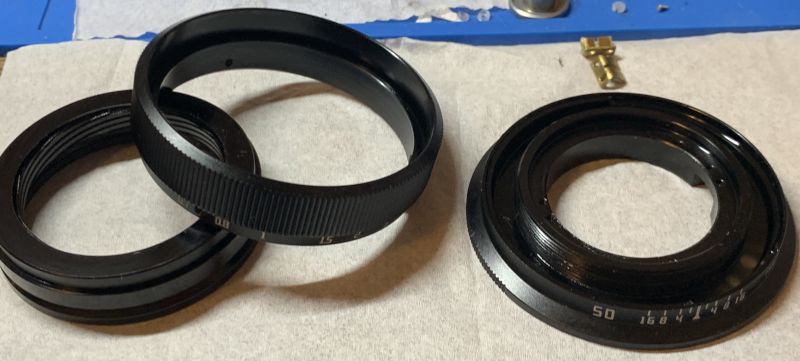
While the lower helicoid or focusing unit is at infinity, take as many pictures and notes before you remove the focusing ring. While removing the ring be careful not to disturb the alignment of the focusing unit. It’s kind of tight but all you need to do is to push the focusing ring forward until it comes off. Turn the central helicoid until it separates from the bottom one and don’t forget to mark where they have parted. While it is merely a threaded ring with only one entry point (like a screw) you must still be careful just in case.
Set everything aside so you’re able to work on the front barrel without any stress. You may even want to soak the disgusting, oily parts in a cleaning solution now in order to remove most of that yucky grease.
Disassembly (Front Barrel):
This is where the complicated parts are situated. The optics are housed inside the inner helicoid to save a lot of work and money, while this is standard in some Japanese and German lenses, how it’s done here is kind of annoying because you’ll have no choice but to strip it down completely just to change the grease! The only complicated part here is iris mechanism so you’ll spend some time putting it back. You will also need to be careful with the detent mechanism because there’s a spring, just do things slowly to prevent a tragedy triggered by a missing part.
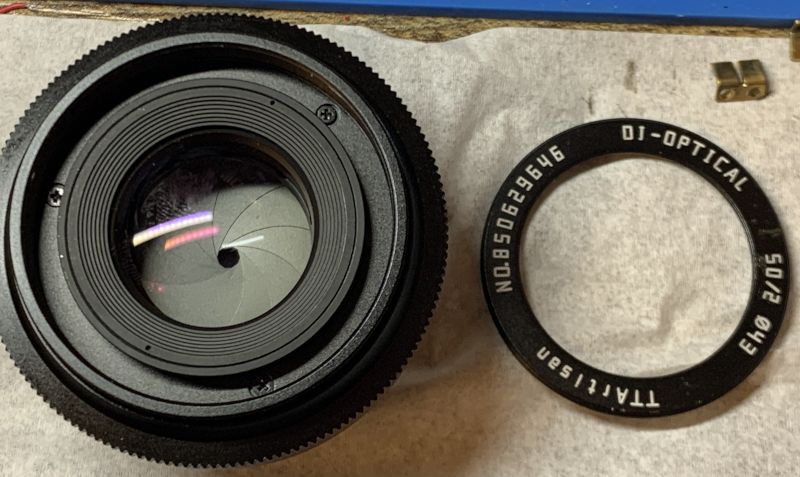
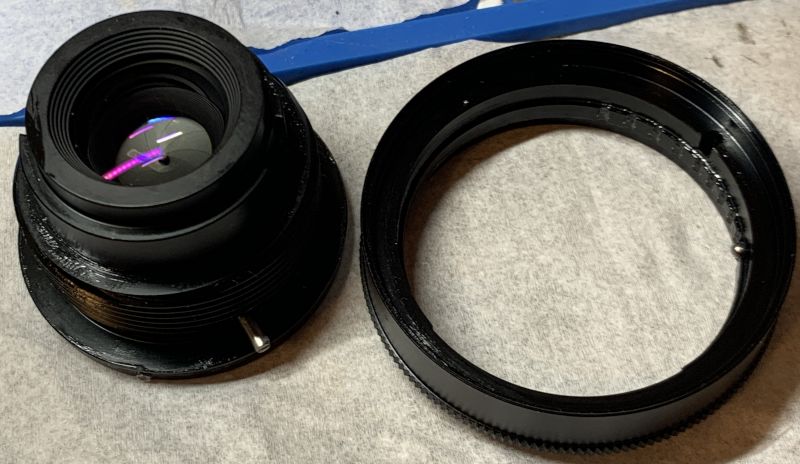
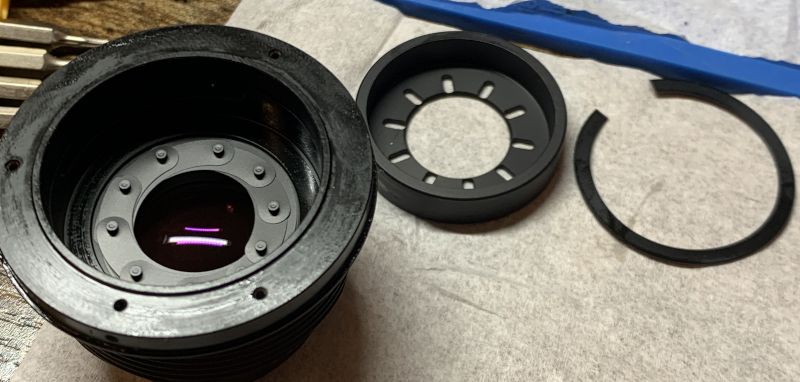
Use a rubber tool and unscrew the bezel, or what some people call the “name ring“. The bezel is the only thing that secures the front optics so you have to be careful or it will come off without warning. Just pull it off to be safe and set it aside in a clean place.
Extract the screws you see here to remove the front barrel. This lens was so oily that you’re even able to see oil dripping so dangerously close to the iris mechanism! This is disgusting.
Slowly pull the aperture ring off and be really careful because it’s spring-loaded. There is a metal bearing ball and spring underneath it that can fly across the room and be lost forever. That’s used for the clicking action of the aperture ring.
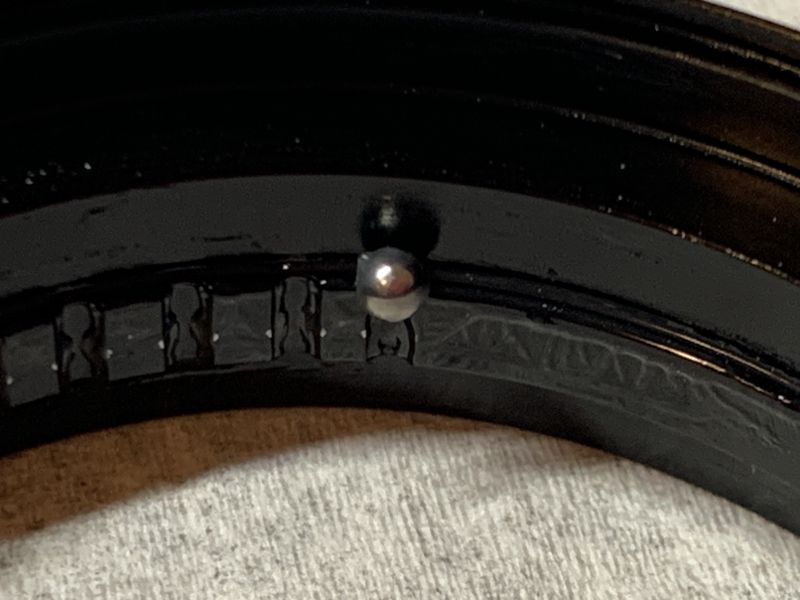
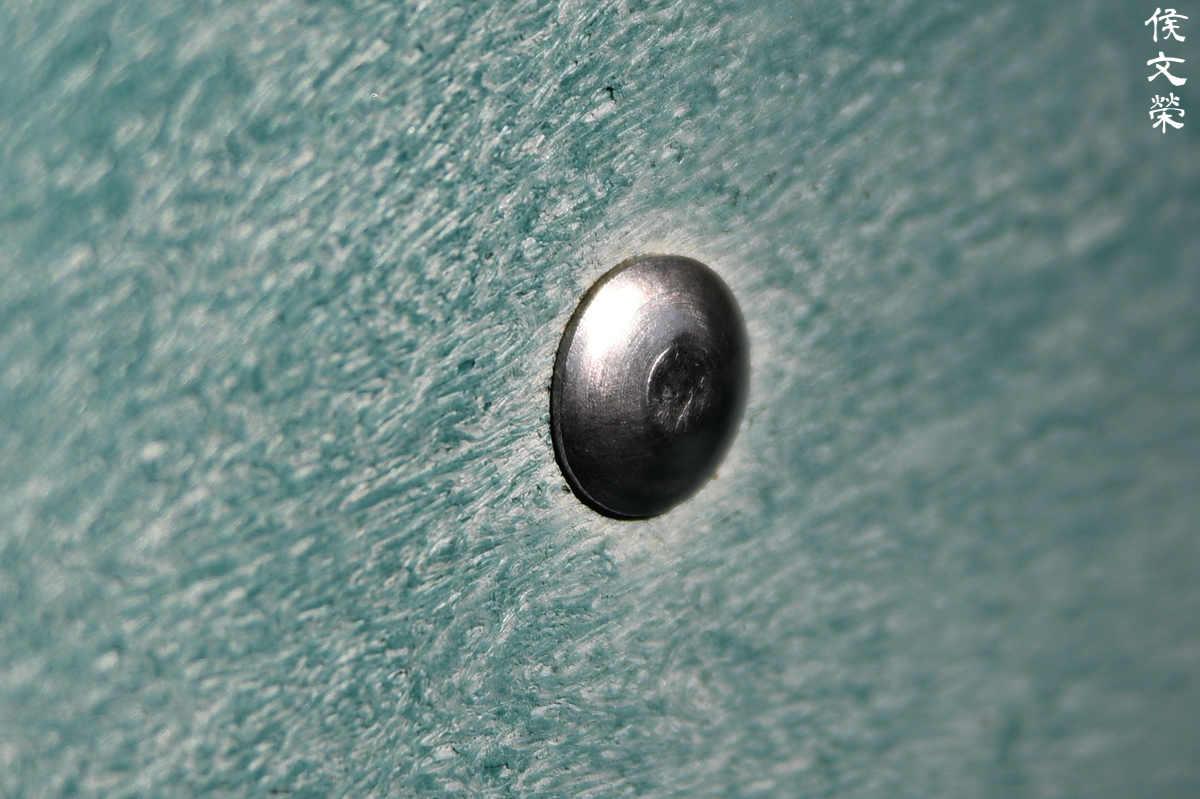
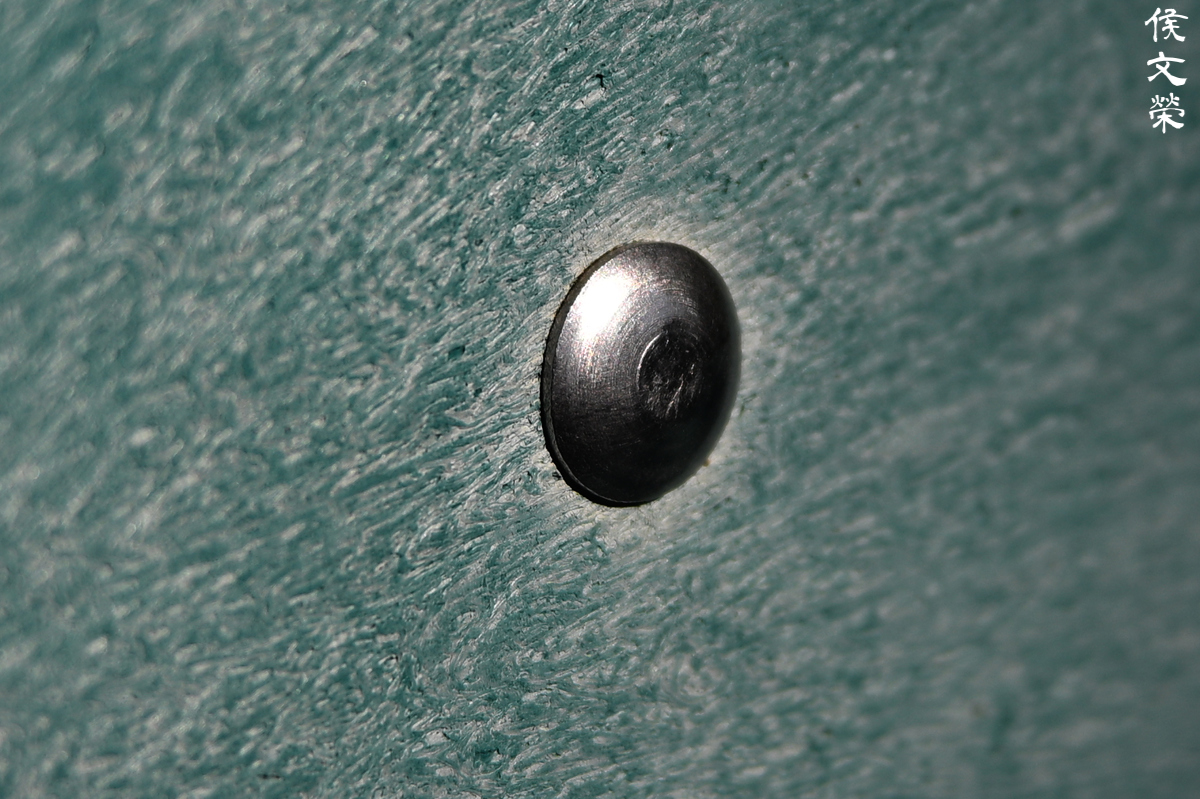
The interior was so full of thick grease that it prevented this bearing ball from getting lost.
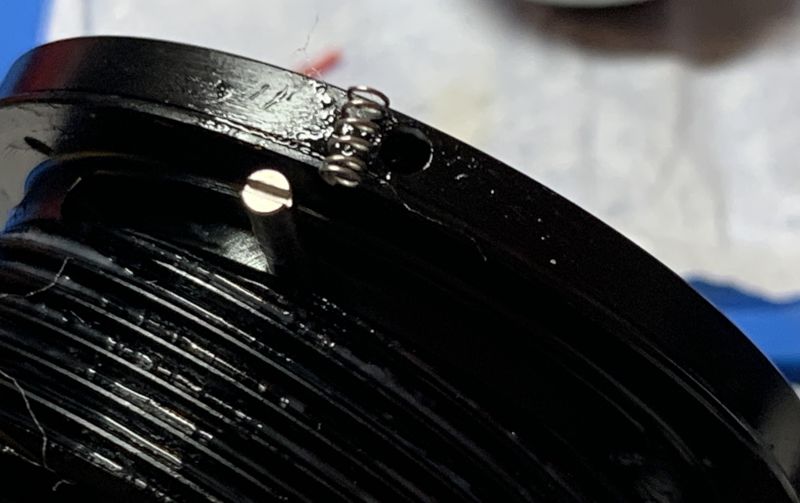
And this is the spring underneath it. If you are unlucky enough to misplace or damage them, just replace them, both have a diameter of 2mm which are easy to source. I’ve lost both of them but I was able to find replacements in my spares box.
Carefully remove this circlip and you can pick the diaphragm plate off with a pair of tweezers. The circlip does not have holes nor notches so your tools won’t be able to catch up properly, that makes it tough to remove without leaving any marks. You can remove the aperture blades at this point.
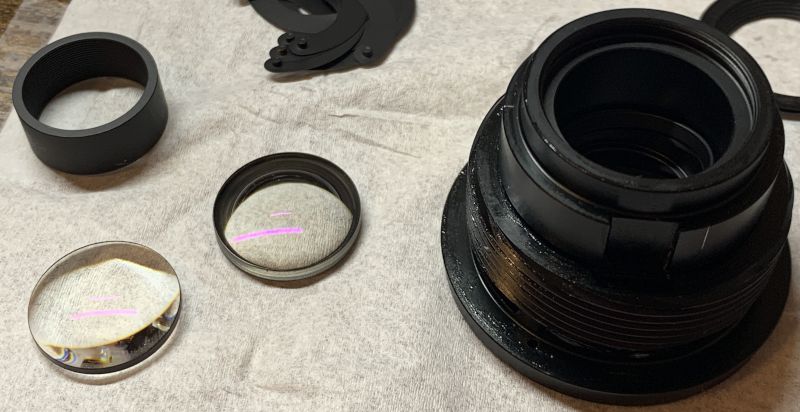
Use a rubber tool to unscrew the rear cover, then use a lens sucker to remove the rear element. There’s a thick spacer underneath it which leads you to another glass element. Do not forget to mark the direction of both elements, a pencil or a marker is more than enough for you too write something in their walls.
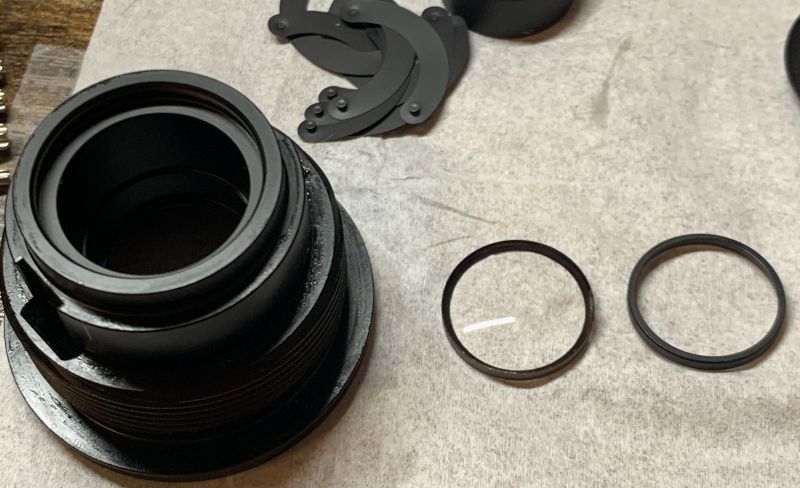
There is another spacer, then another element underneath it. It can be tight so you can push it with your finger from the other side to dislodge it. Never forget to mark which side should be facing the front. It is kind of tight and it won’t go back easily so you must be careful and push it with a soft rug until it seats in its own hole perfectly when you are reassembling the lens.
Carefully clean everything and never forget to get rid of every oily residue after rinsing. The lubrication is nasty and won’t come off easily even when treated with alcohol. That’s how much lubricant there is, it’s a huge mess inside! Dry everything very well before you apply a fresh coat of grease. Don’t apply anything to the aperture ring’s inner surfaces and only apply a very thin film on the focusing cams. If you use high quality grease with a thick consistency then you won’t have to apply too much in order to get it working in a smooth and damped manner. It’s my mistake because I don’t have a grease that’s thicker than what I currently have so my focusing ring turns easily with a dry sensation. I could feel every imperfection when I turn the focusing ring.
Conclusion:
I probably spent around 3 hours working on it, with most of that time spent cleaning all the gunk that the stupid factory have added. This just goes to show that merely copying something won’t be enough. You’ll need the exact reason why it’s done that way. The good thing is it looks like they are improving quite fast from reverse-engineering and copying original designs, the bad thing about it is they will just need a few more years before they actually start rivaling what the established offer (like cameras), and they all have a link to the military just as how Nippon Kogaku was before the World War II.

I had a great time shooting with it despite all the issues I have mentioned in this article. If you’re willing to look the other way, maybe it’s not that bad at all? It’s probably the same thing as buying or supporting an economy that you know to be inhumane and hostile to whatever the free world stands for.
I guess that’s it! The only reason I’d buy this is to let you guys know more about what these lenses are all about so you’ll have the knowledge as to why they’re cheap. I hope that you guys enjoyed this and please do not forget to share this with your friends. You can also support this site because your help ensures that we are able to continue hosting the wonderful resource that has helped and entertained so many people. It’s not a lot, you’d probably give more coins to that dumb kid bringing you beer from the tap back to the counter. Your help is used to help offset the cost of purchasing, developing, and scanning film, which isn’t cheap in this part of the world. Thanks again for everything and see you again in the next article, Ric,
Help Support this Blog:
Maintaining this site requires resources and a lot of time. If you think that it has helped you or you want to show your support by helping with the site’s upkeep, you can make a small donation to my paypal.com at richardHaw888@gmail.com. Money isn’t my prime motivation for this blog, I believe I have enough to run this myself but you can help me make this site grow.
Leave me some tip?
Thank you very much for your continued support!
$2.00
Helping support this site will ensure that it will be kept going as long as I have the time and energy for this. I’d appreciate it if you just leave out your name or details like your country’s name or other info so that the donations will totally be anonymous. This is a labor of love and I intend to keep it that way for as long as I can. Ric.

Feb 21, 2026 @ 20:51:57
I don’t know the details of each specific company, but it’s very likely that most of the optical glass for several Chinese brands comes from CDGM Glass. It has grown a lot in the last decade; they even have offices outside the country now. Like Hoya, they produce a lot of glass for the automotive industry these days, it’s all full of cameras that have to withstand somewhat harsher conditions than a conventional photographic lens. The last Hoya catalog I looked at has a lot of new glass designed for that industry.