
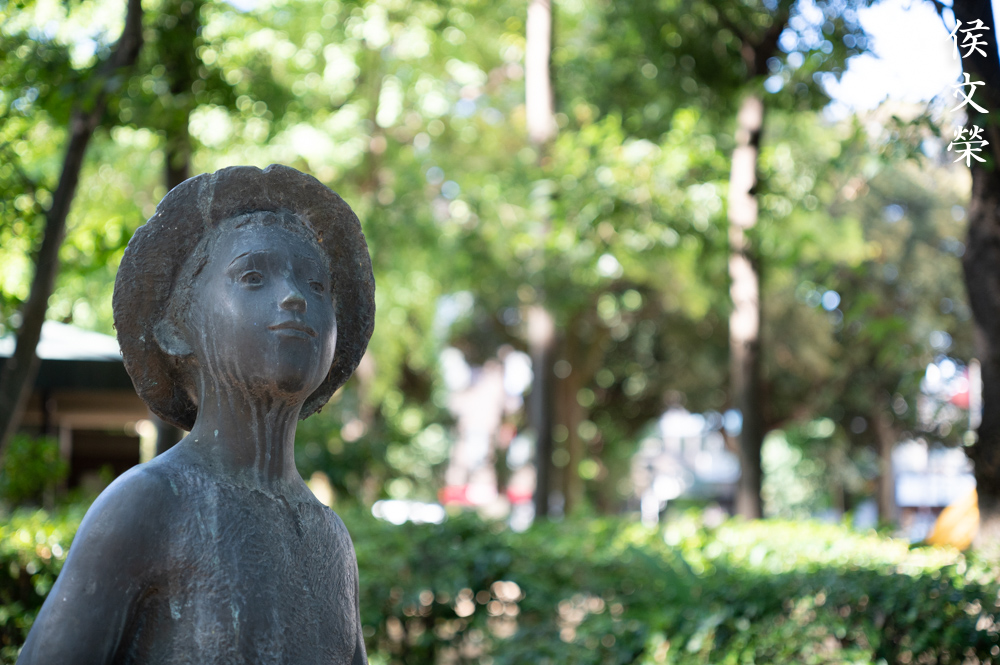
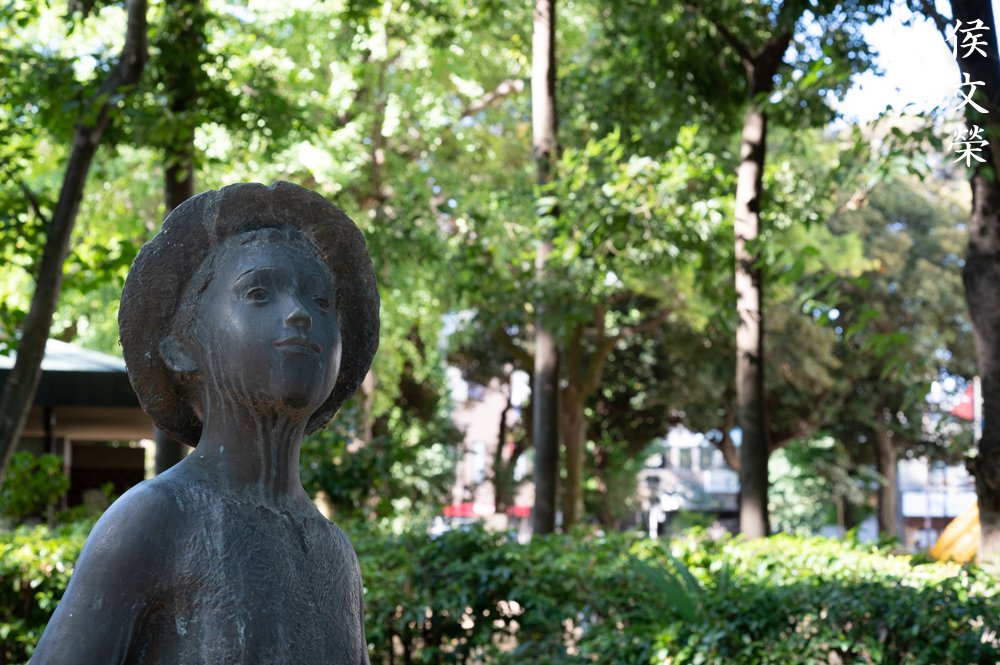
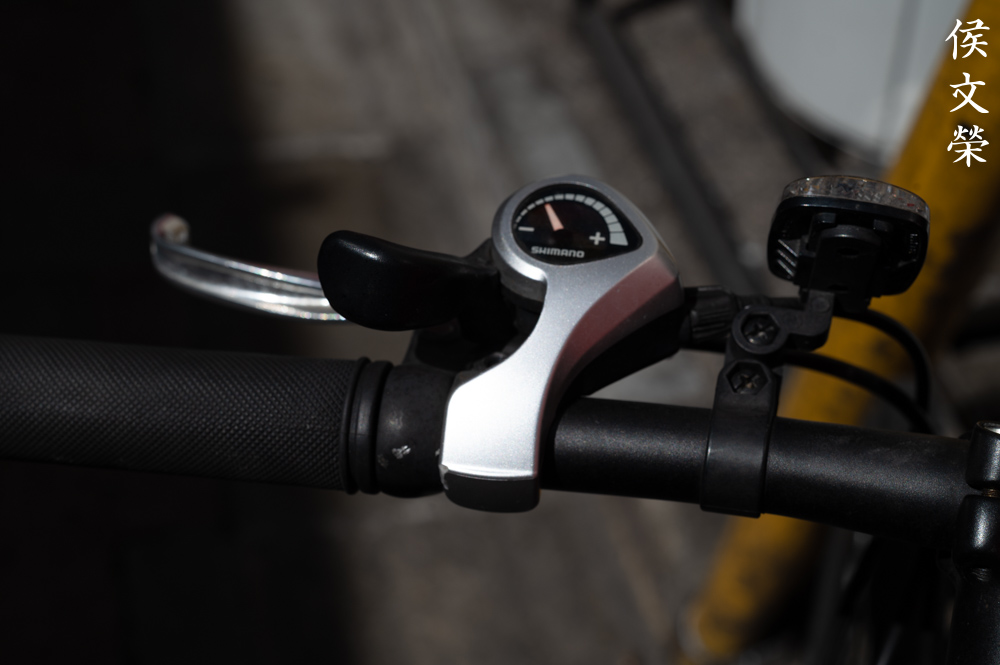
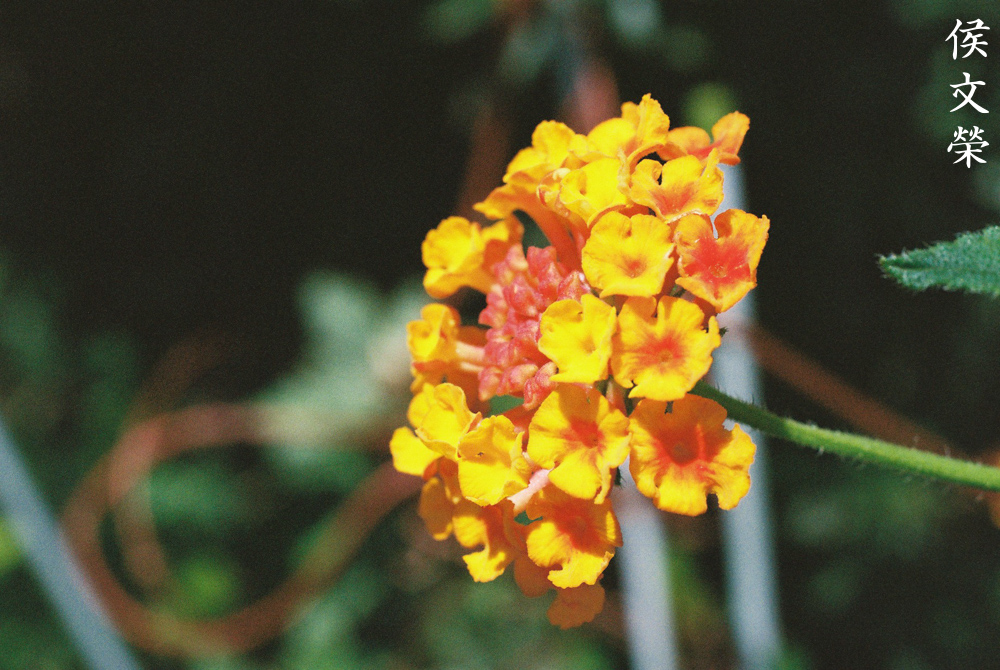
Hello, everybody! I was watching a documentary on the different types of passata, the tomato paste used in Italian cooking. They are fundamentally the same but there are numerous variations that makes each one special. I am not an expert in Italian cuisine but I do cook, which I am pretty good at and I can tell you that small differences go a long way. Small things such as the hardness of the water and where your salt came from matter at the end when it reaches your mouth. People who enjoy food will notice these subtle differences but those who just wanted to have a full stomach won’t. That is not a bad thing, it’s just differences in the way we perceive things. Today, I’ll show you a lens series which has small variations within its production but you can treat them all as the same lens.
Introduction:
The Micro-Nikkor 55mm f/3.5K/Ai is merely a cosmetic upgrade of the Micro-Nikkor-P.C 55mm f/3.5 Auto. An excellent lens by all standards, many people claim that this performs slightly better compared to its predecessor when it comes to resolving objects that are further into the frame. I cannot confirm this myself but all I can say is that better manufacturing capabilities can be the biggest factor to this claim. Going back to the exterior, the new-look was needed to make this lens look in-line with the rest of the catalog. This set the final look of this lens for years to come until the last one was assembled. It’s the last model of the venerable 55/3.5 class of Micro-Nikkors.
It feels solid in your hands, a real tool for professionals. If you took care of this lens it will outlive us all and it will still be relevant for decades to come. The tough build of this lens is something that we don’t see these days as we are constantly introduced to plastic lenses on a constant basis. The build is all-metal apart from the optics, a true classic.
This series was introduced from 1975 and lasted until 1979. Within 4 years we got 3 minor iterations of the same lens, the latter being just a simple and subtle change in markings so we could consider these to be the same lens in every manner. The optics stayed the same with its predecessors so how this lens performs shouldn’t be too-different from the rest which is to say that it has excellent image quality. Nothing differed much mechanically inside-or-out, even the dimensions are quite similar. There are numerous changes in terms of screws count, shape and size of things and how they were mount, I could safely tell you that these internal changes don’t matter fundamentally except for the first version of the Micro-Nikkor-P 55mm f/3.5 Auto which is a special lens, it has a gimmick that compensates the size of the iris when you focus it in-or-out.
It handles perfectly with all Nikons. It’s such a joy to use and everything just falls into the right place. It feels dense despite its size but it’s not heavy at all so you could use it without hurting your neck. It doesn’t feel cheap in every way, it actually feels premium. The front is recessed so a hood may not be a necessary accessory. This is a good thing but the downside to this is it gets in the way when you’re focusing really-close to your subject, obstructing light and even touching the subject itself.
This is how much it extends. The focus-throw is rather long, typical of many if not all macro-lenses. This allows for precise focus specially on close-ups. I love how damped it feels, it requires a bit of torque to turn.
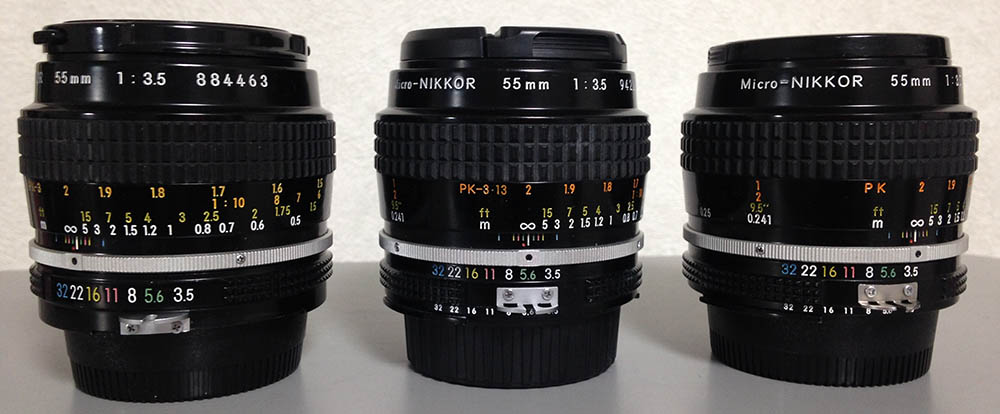
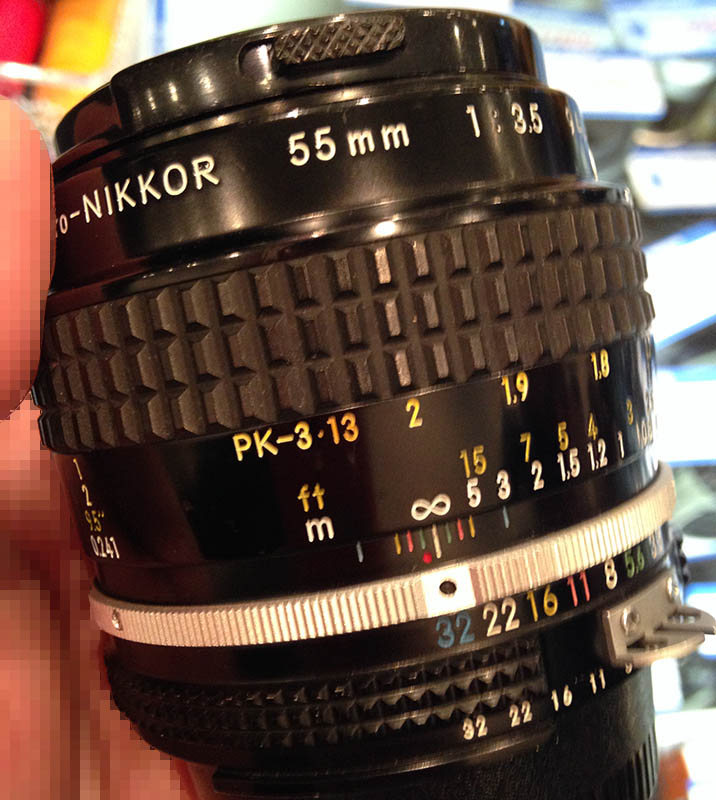
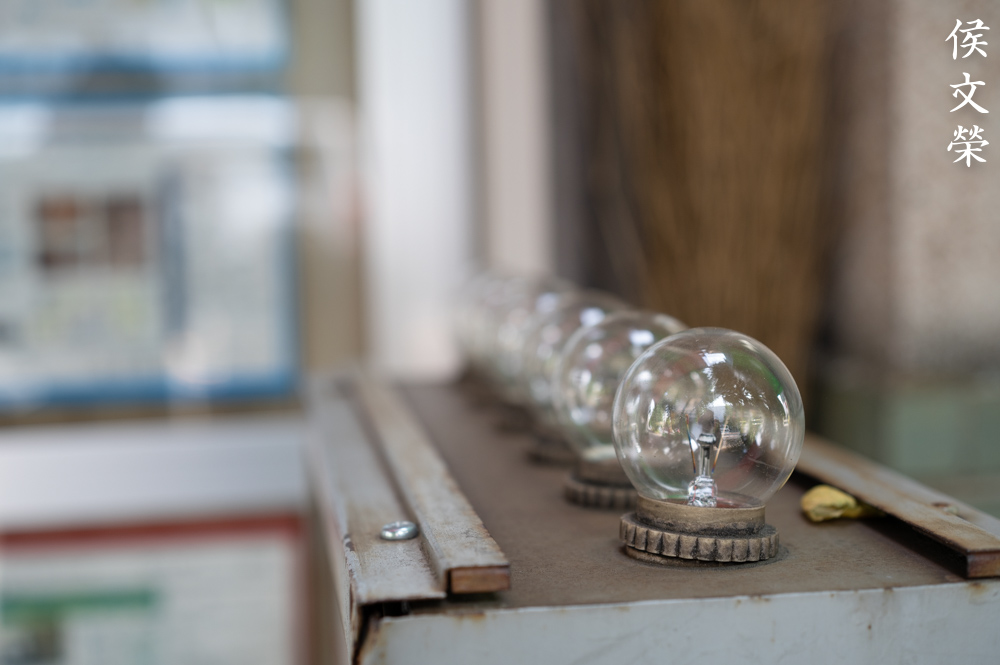
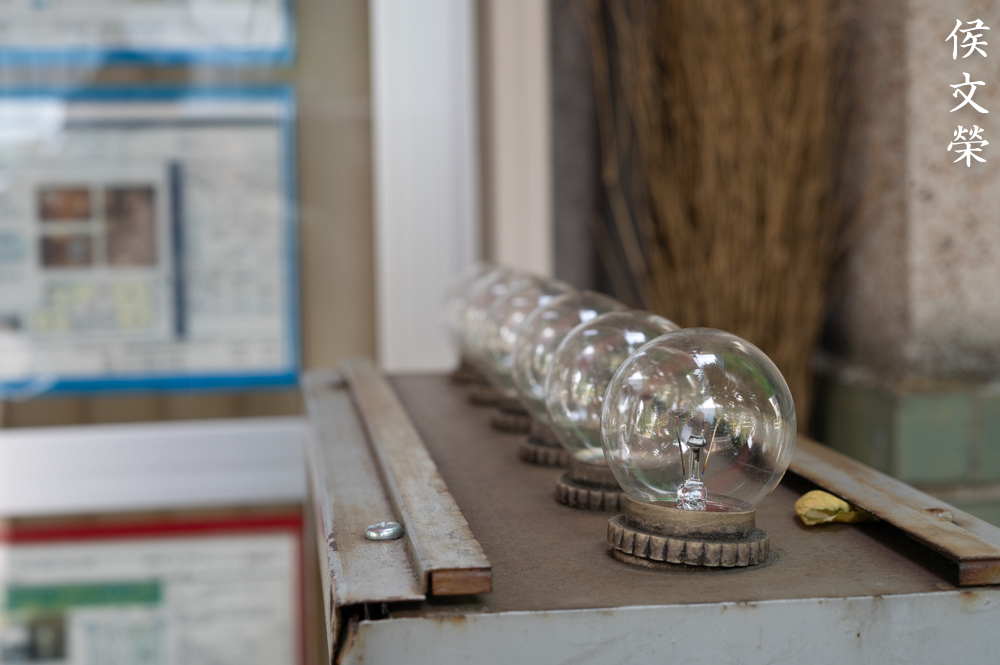
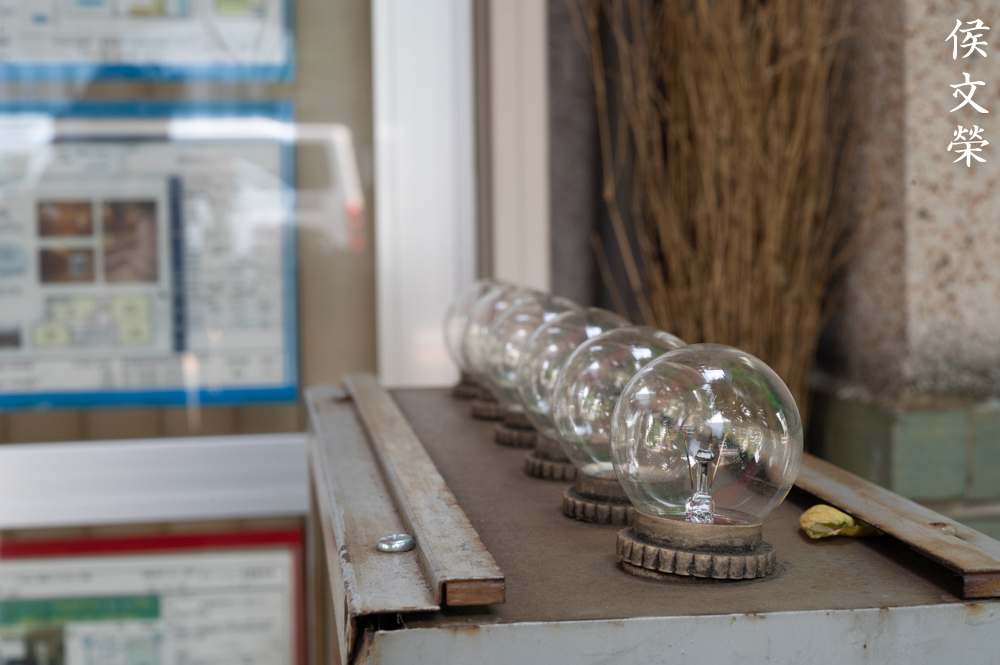
These are the major variations of this series. The left-most lens is the oldest, the Micro-Nikkor 55mm f/3.5K (New-Nikkor). It set the look for the rest of the production. The one at the middle is the Micro-Nikkor 55mm f/3.5 Ai, this is basically just a minor update. There are a few differences internally but all of which are merely minor revisions to make production easier. The one at the right is the later version of the Micro-Nikkor 55mm f/3.5 Ai, this one has a different marking for use with a different extension tube. The rarest is the one at the center, with an estimated production of 8,600 or so samples. This means nothing to the casual user but collectors fuss about these details.

There’s no major differences when viewed from the back. They are mostly identical but that doesn’t mean that all parts are interchangeable. I tried to swap some of the parts out of curiosity and some of them won’t fit. There’s a bit of difference in the size of the barrels and even a tiny amount made this an impossible task without modification.
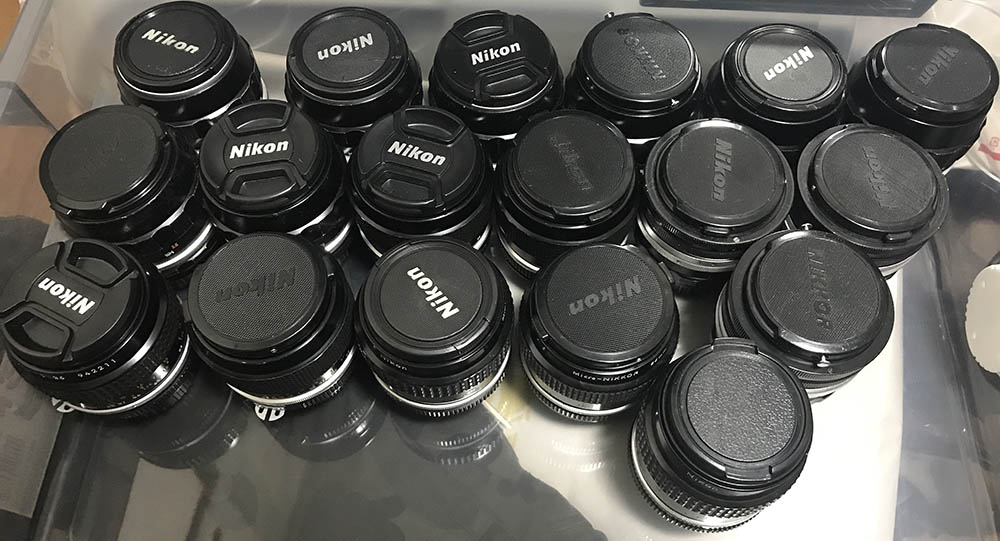
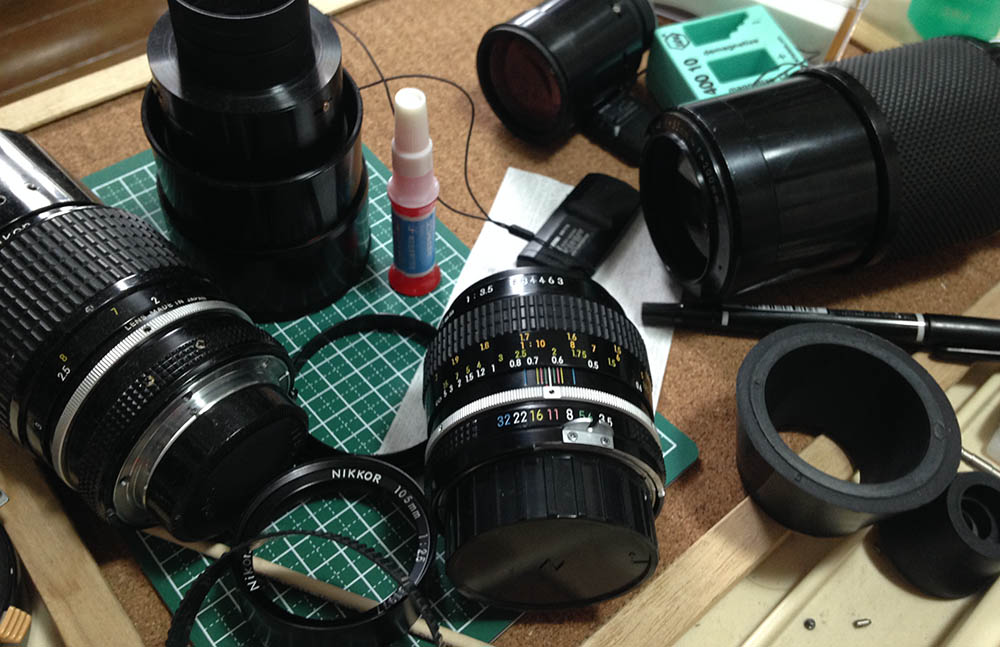
This is all, if not most of my collection. I am a fan of this lens family and it’s my obsession to collect each variant. I believe I have all of them but one, it’s beyond my pay-grade for now but that’s going to be part of the collection at the right time.
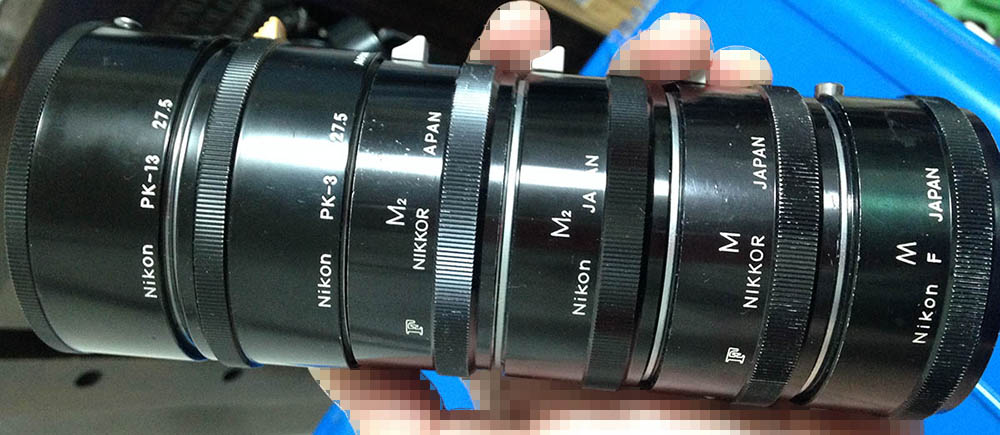
These are Nikon’s extension tubes and they were sold with Micro-Nikkors of the 55mm class. These will allow the lens to get to 1:1 magnification, its use is almost-exclusive to this lens family. With it, you’re able to actuate the iris so you could view through-the-lens with the iris wide-open and the camera will actuate the iris just-before exposure time. This allows you to view your scene better. The downside of using this is you’re going to get a darker view since you’re effectively reducing the light that reaches the film or sensor. If you’re focusing at or beyond 1:1 magnification, the view could be so dark it is difficult to focus without the aid of additional light. I won’t recommend to add anything more with it to get higher magnification as the barrel’s tip will touch your subject.
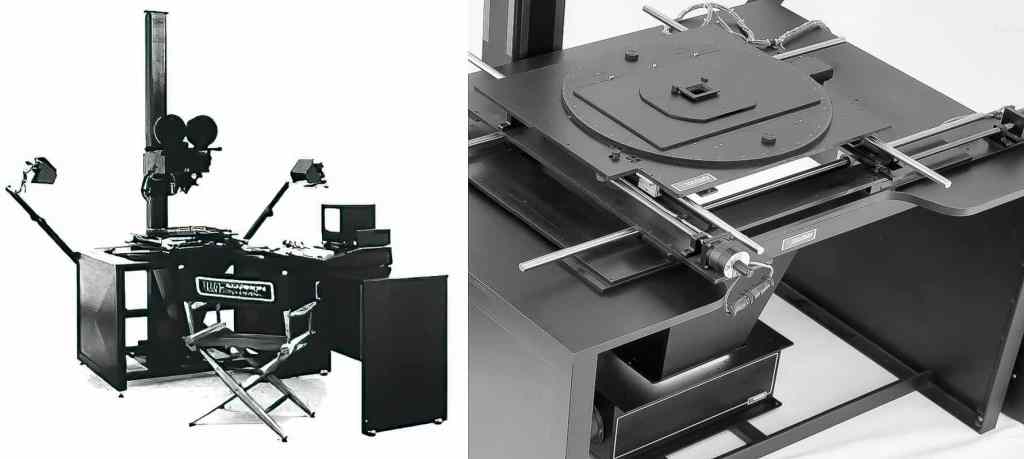
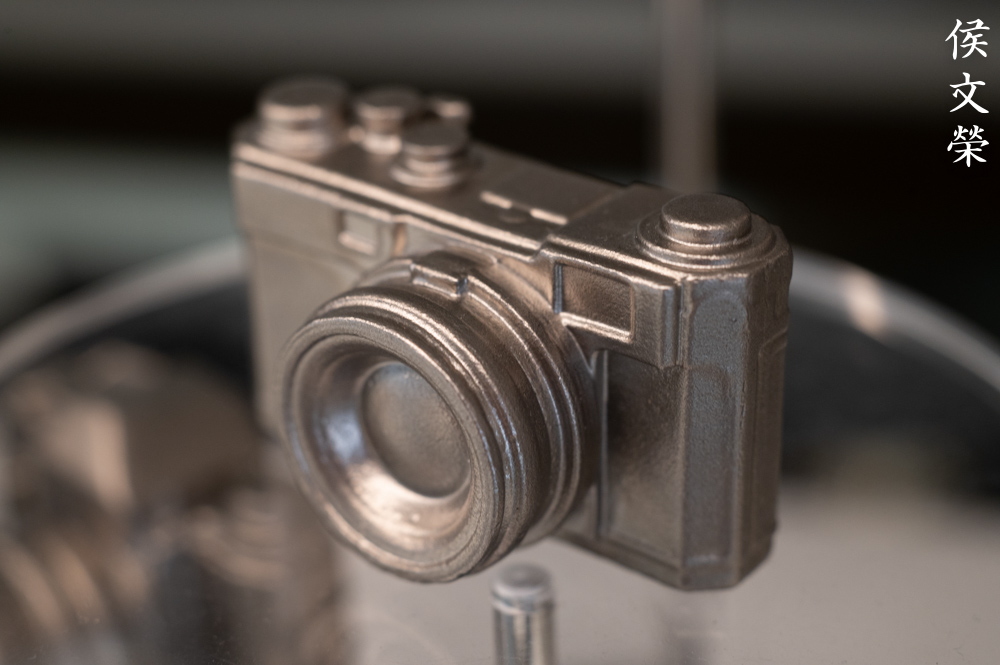
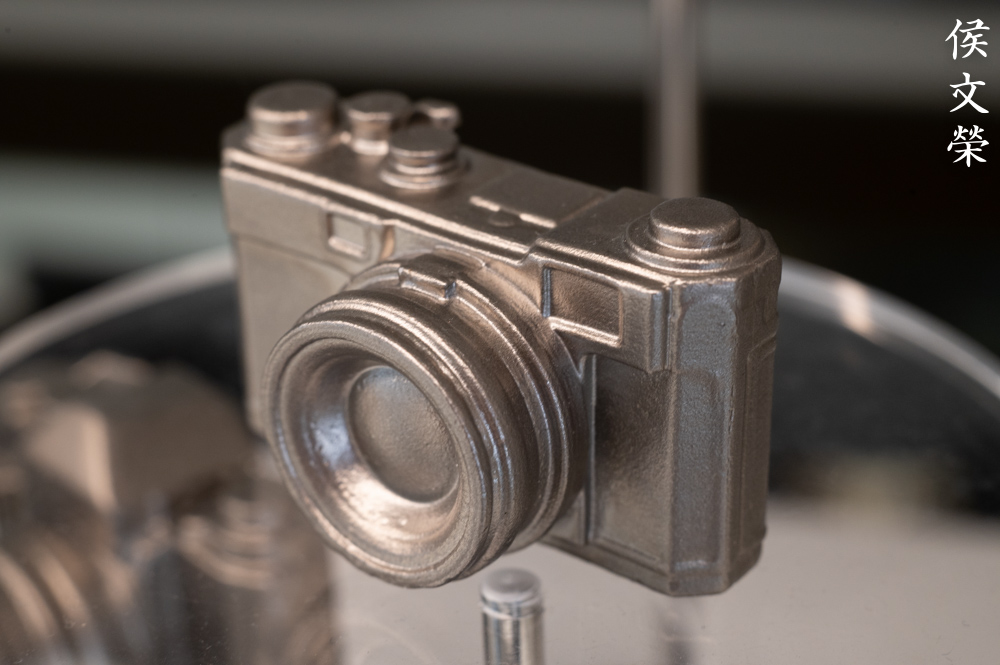
This is a Marron Carrell MC 1600, Matt S. shared his experience with us on the comment section and it reads:
“Many, many years ago, I used to do a lot of rostrum camera work in Sydney and London. Rostrum cameras were widely used in the AV/slide production industry which was quite big in the 1970s and 1980s.
Rostrum cameras were made, mostly in the USA, and the main brands I encountered were Forox, Marron Carrell and Mangum Sickles.
You could load up a few hundred feet of tungsten reversal stock and shoot all-day creating special effects and graphics. We also used to shoot a lot of slide duplicates, using dedicated duping stock.
The standard lens, if my memory serves correctly, was usually an 80mm Nikkor enlarger lens, with a screw thread. It was on a bellows that could easily get to 1:1 magnification and even closer.
However, if you needed a wider field of view, you could take out the carrier plate, and fit a different one with a Nikon bayonet mount. You could then attach the so-called “wide-angle” lens, which was one of these, the Micro-Nikkor 55mm.” Matt S.
Thank you, Matt. Your input is valuable to all of us here. This is a testimony to the excellence of this lens, rivaling the performance of Nikkors that were designed for industrial use.
Knowing how your lens works is key to maximizing its use. You’ll learn how to use it properly and it will help you decide which lens is the best one for a job. I took the following photos from f/3.5, f/5.6 and f/8 since you will see the most changes happen within these apertures. I also imaging that these are the most common apertures that people would want to use this lens with. It would have been nice to observe the effects of diffraction on smaller values but that may be too much for our mini-review. I shot these with a Nikon Z6.


(Click to enlarge)
Vignetting is average, the falloff is quite even so it’s easy to clean in post. It’s not bad at all but this will be bothersome if you’re shooting documents. The edges of your frame will look darker and this is a problem in reproduction. Stop the iris down to f/5.6 and most of the vignetting is gone, you’ll only see traces of it at the corners. By f/8 the frame looks even but you’ll still some at the corners if you strain yourself. Don’t worry, it’s good-as-gone by f/8 if you illuminate your frame properly.


(Click to enlarge)
Sharpness is excellent wide-open and the resolution is perfect. Contrast and saturation is quite high but the photo still looks natural, not over-corrected. There are some hints of spherical and chromatic aberration which we’ll see more of in the next set. Stopping the iris down to f/5.6 makes the center look much better. This may be due to deeper depth-of-field. The corners improve quite a bit and you’ll notice more improvements there compared its center which is now performing near its peak. This lens is sharpest at f/8 where its resolution is at its peak at the center and the corners look great, too. I don’t know if you could notice it but my lens performs slightly better at distances that are closer than 3m. This is not saying that this lens performs poorly for shooting distant objects, it’s just that it’s much-better at closer distances.
(Click to enlarge)
Chromatic aberration is controlled very well, it’s nearly-absent when you’re shooting at close-distance which makes this perfect for shooting jewelry. It’s technically near-perfect at closer distances and at the plane-of-focus where it counts the most.

The only thing that I didn’t like about this lens is chromatic aberration isn’t as well-corrected at further distances. You can see that here at the corner, it looks terrible and quite distracting. This isn’t the lens’ fault since this wasn’t designed with rendering further objects as a priority. The good thing is you won’t see much of it when it’s focused-down to closer distances.

This is a 1:1 crop of a stink bug. If you’re bothered by chromatic aberration, stop the iris down beyond f/5.6 and you won’t see it. It handles this well, you won’t see much of it at closer distances at all.


(Click to enlarge)
Flare and ghost resistance is quite nice considering the age of this lens. The left-most photo was shot wide-open and the next one was shot at f/22. You’ll get to see subtle-looking blobs when you have the sun within your frame. It is not a problem since you won’t be using this lens like this often. The great thing is it doesn’t look bad at all and you could even use this as an element in your photo. It won’t flare much but you’ll see small amounts of it, though. You won’t need a hood with this since the front element is recessed.

The field curvature is quite flat, this makes it perfect for shooting art, coins, stamps and other things that should lay-flat. This lens was originally made to copy documents faithfully so this is a requirement.

(Click to enlarge)
This lens renders some of the best blurs that I have seen, quite surprising as it was not intended as an artist’s tool. Nearly-all macro-lenses render great backgrounds and this was set as a standard by this lens’ predecessors. It has smooth rendering at every distance.

This photo has lots of difficult-to-render details at the background. The lines will render with outlines and smudges if a lens renders poorly. This got the whole thing perfectly, quite impressive for a lens that was developed not as an artist’s tool but as something to reproduce documents.
This scene is difficult to render because of the background but it looks great in this photo. There’s no smudging on the twigs and everything is kept at a minimum or none at all. This will rival the best 85mm lenses out there for smooth background rendering.
Let’s now see some real-world photos. I judge a lens by its utility and value. Many people go for metrics but lenses are also tools for the artists and so it is important to use them in that manner, too. A lens may have stellar scores on lab tests but the photos it produces don’t look special at all. Let’s now see if this lens is still relevant in 2020 for practical use.

I shot this at around f\5.6 or maybe even at f/8. Even at these apertures I was not able to get sufficient depth-of-field, I would’ve used a flash for this but I did not have one with me. While the results look sharp and the background is smooth, I don’t like the shape of the 6-sided iris. A 7-sided one would have made this photo look even better.

Here’s a cropped photo of a beetle. It’s able to resolve all the tiny details and you could even observe the tiny hair-like things on the legs which I was not even aware of when I took this photo. If I had a flash with me at that time it would’ve been possible for me show all of this in greater detail since I could shoot with a faster speed and use a lower ISO value. I had no choice so I just shot this with a higher ISO value, something that I wouldn’t normally do.

I focused on the eyes and they’re sharp but the rest of the cicada is blurred. This is a tough on, maybe a longer lens would’ve been better for this task. It would’ve allowed me to flatten the composition and shoot further which is a big deal since that would allow me to get more depth-of-field.

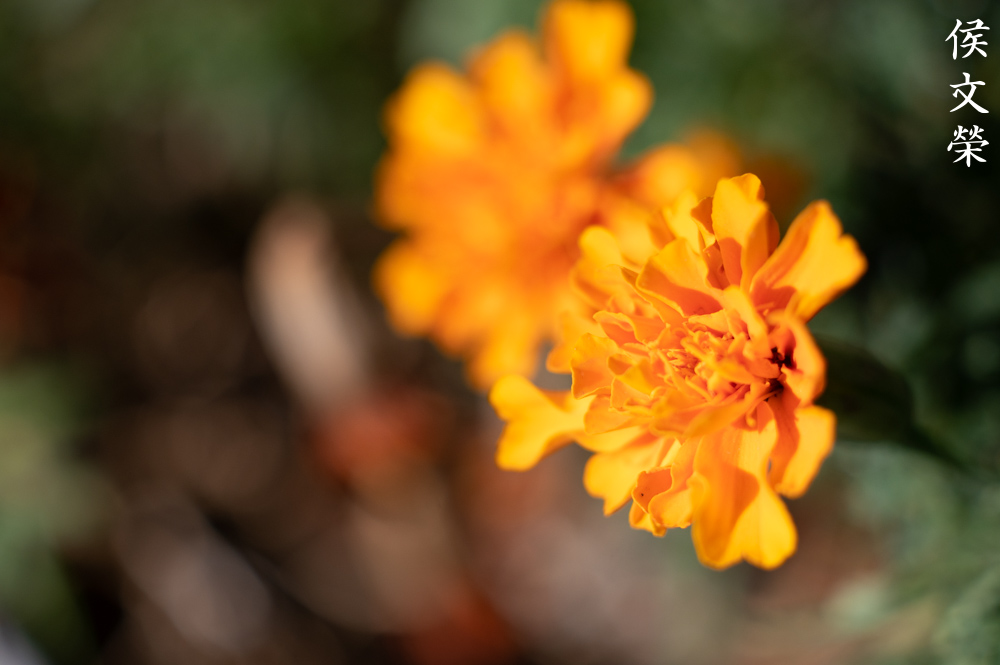
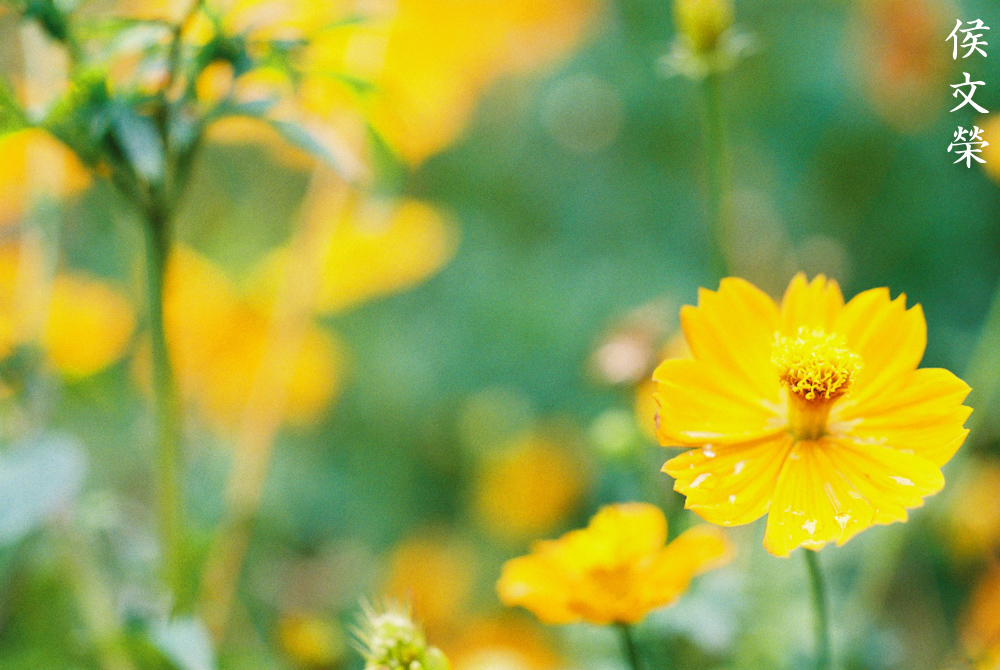
Some people love shooting flowers. This lens was able to resolve all the fine details of the petals. The focus shifted thanks to the wind but at least there’s still enough of what’s focused for us to study.

This is a difficult photo to render with film but the Nikon Z6 did a great job.
The character of the bokeh looks smooth, it’s exquisite!
Shooting at this magnification is challenging due to the thin depth-of-field. I don’t like shooting this lens with any extension rings because of this since it would make the depth-of-field even shallower. It’s nice for reproduction, it could be mounted steadily and the subjects are usually flat so this wouldn’t be much of a problem.

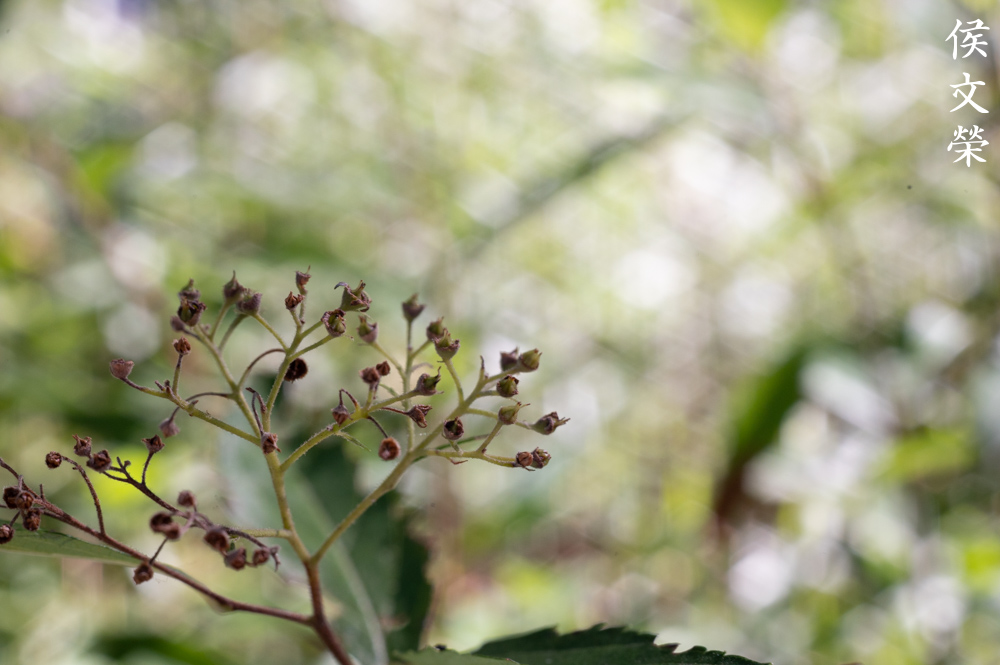
The background is challenging to render since foliage has a high frequency but this isn’t a problem for this lens.

The quality of the blur looks painterly, it’s like a portrait lens for flowers or bugs.

The resolving power of this lens is amazing, you could see all of the smaller details on the surface of the phone’s panel. What makes this even better is it is able to render this scene in a natural way, not overly-corrected.

This lens has some of the best bokeh quality I have ever seen in a Nikkor. It also has a special way of rendering things, it’s sharp but not unnatural like what many modern lenses tend to give you these days.

Here’s another example, see how smooth the lines look? A lesser lens won’t be able to render these as clean as this could. The gradation looks clean, no smudging, smears or harsh look at all.

The character of the bokeh is the best-kept secret of this lens if we’re talking about using it as a normal lens. It’s near-perfect, making many faster lenses look like over-priced accessories. If you’re itching for German optics it may be a good solution for that to a certain extent.
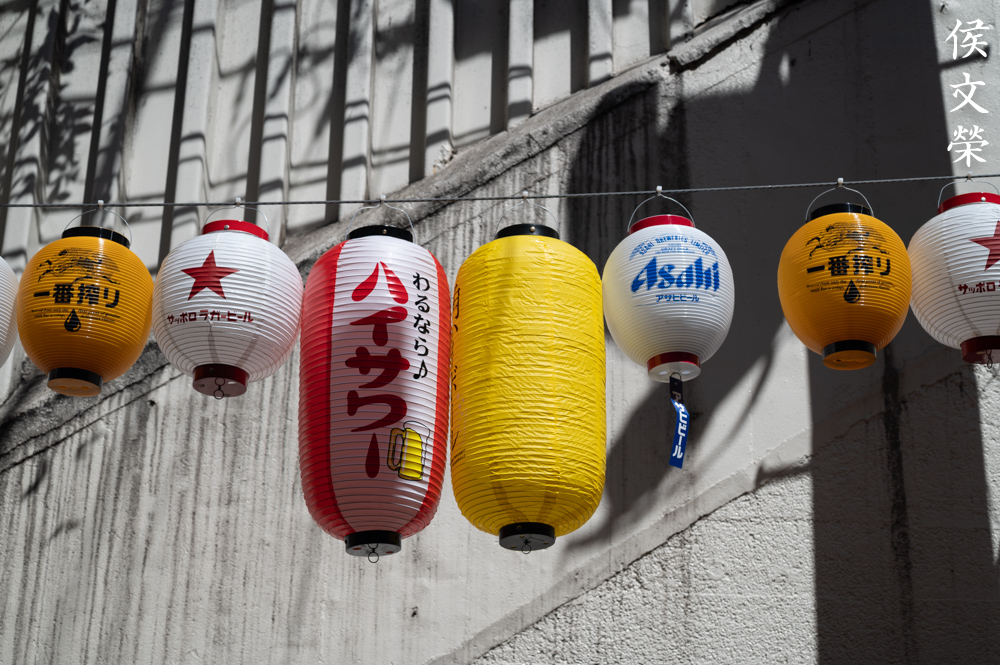
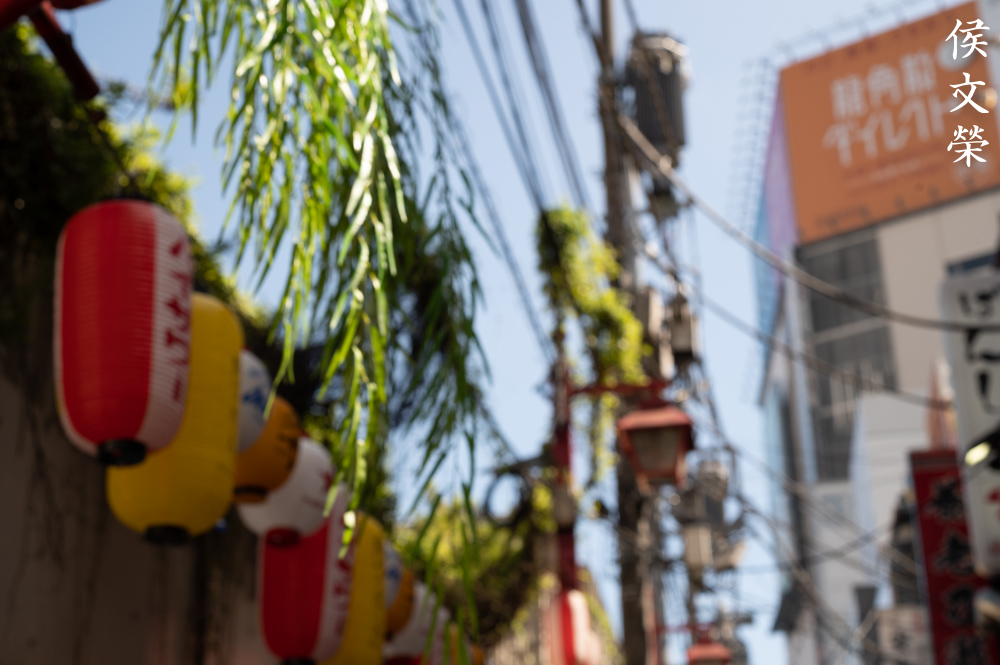
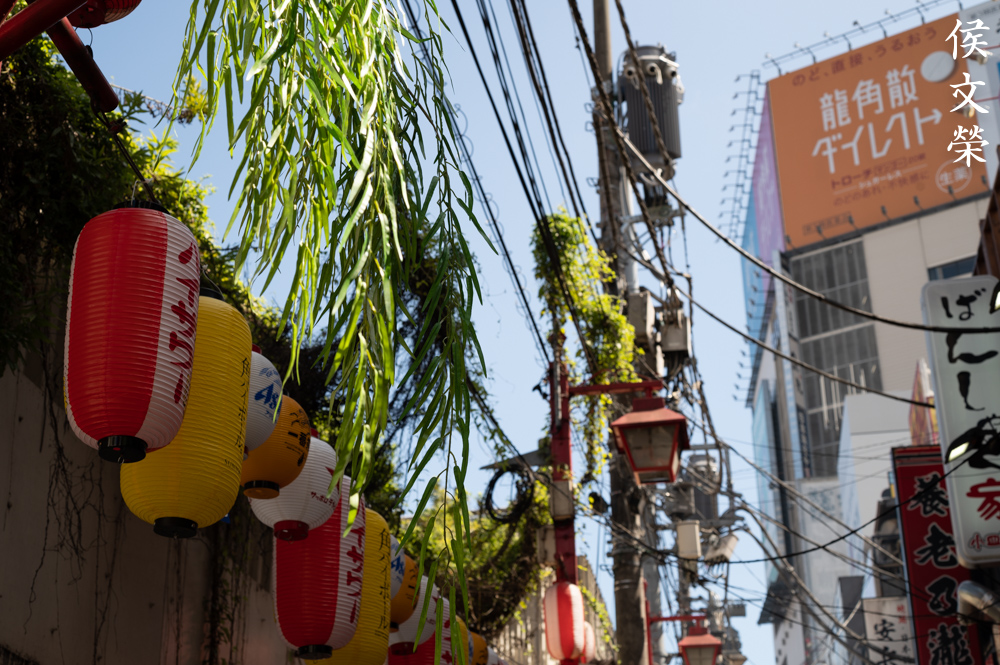
The resolving power of this lens is great. You’re able to see the small details of the lanterns. Even newer digital cameras with high-MP sensors won’t out-resolve this lens.

Taking photos of storefronts may be a thing if your client demands it. This is perfect for taking this kind of photos since you could give an accurate view of the establishment without distorting or exaggerating lines. The view will look natural as if it was viewed by somebody walking across the street.

The lines remain straight in this scene. This is awesome if you’re shooting a feature of a building such as this mechanical crab. The details look great, it could resolve the smaller spines on the fake shell.


(Click to enlarge)
Check these photos out and observe how nice the output is. This is a really versatile lens and it will do its job admirably. Its high resolution and smooth bokeh quality is key to this look, helping create exquisite-looking pictures. It doesn’t feel old at all and I prefer how this renders compared to the legend that is the Micro-Nikkor 55mm f/2.8 Ai-S. This lens has so much more going, I could tell that the bokeh quality feels smoother with this lens but that’s just me and my preferences.
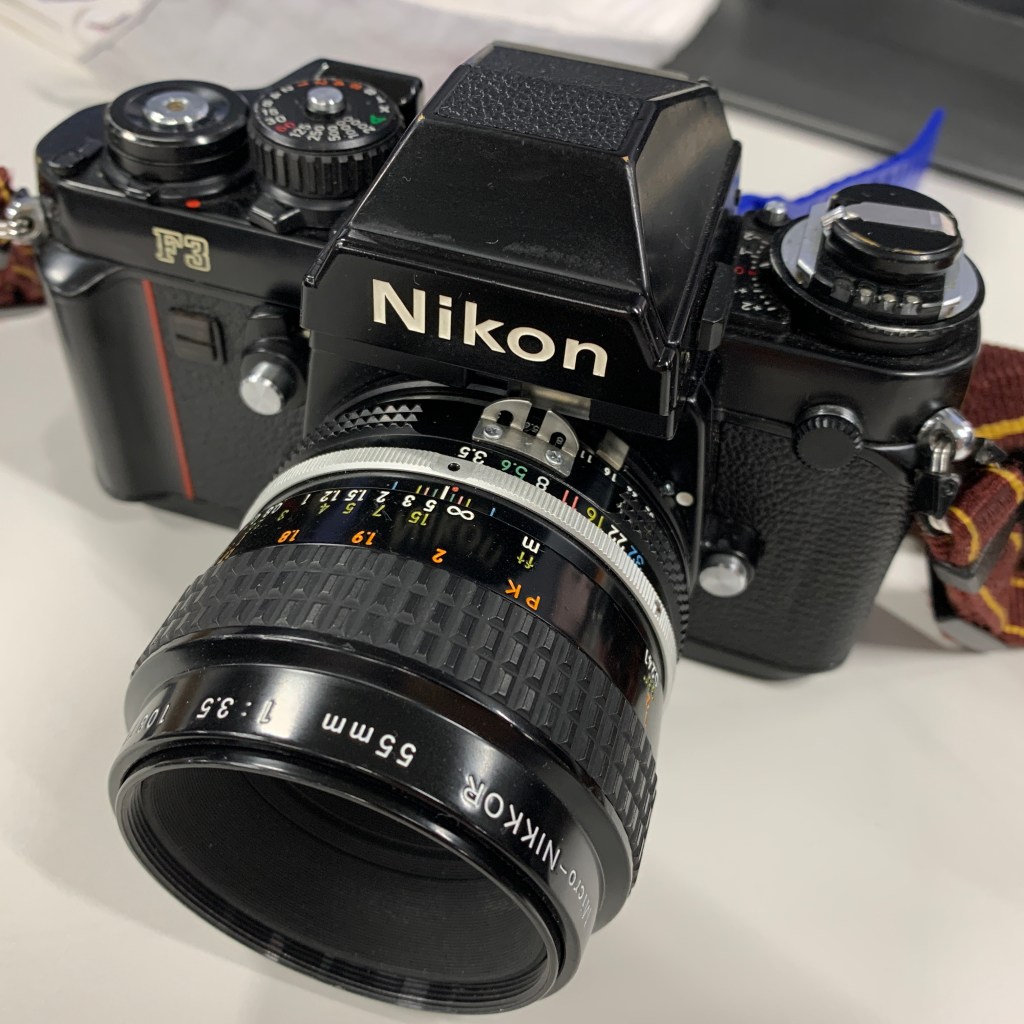
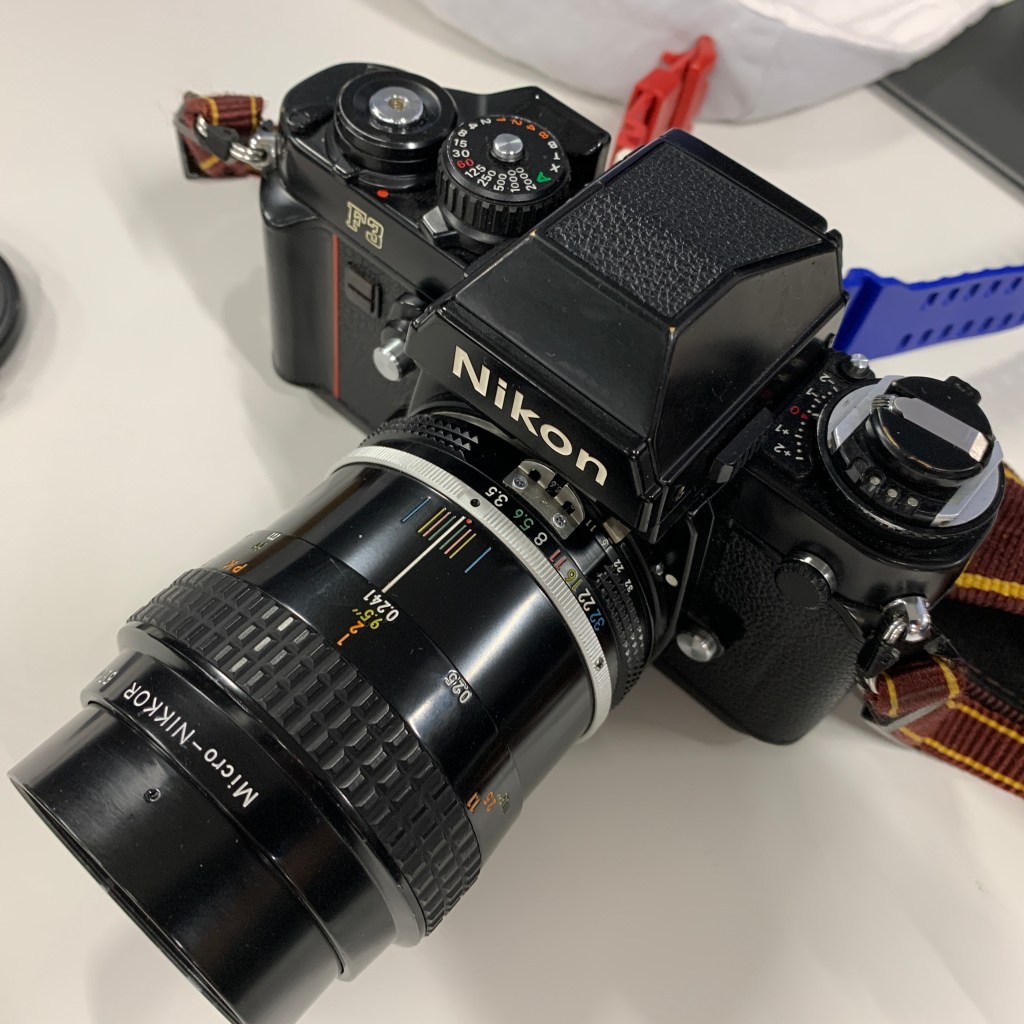
Now for some film photos. I love shooting film, it has that amazing look that is organic, something that’s difficult to simulate with a digital camera. That is because of grain, you’re able to hide some flaws with it, too. This lens was designed for use with it and it’s only fair that we judge this with its intended medium. These were shot with a Nikon F3 loaded with Kodak Ultramax 400.

Nobody shoots macro photography with film these days since it’s simply not practical. The amount of throw-away frames is quite high that it’s not worth wasting film over so a digital camera is better for this application. This was only taken to give you an idea as to how this lens renders in this application using film. It doesn’t look as harsh compared to what I’m used to these days when I am shooting smaller things with a digital camera.
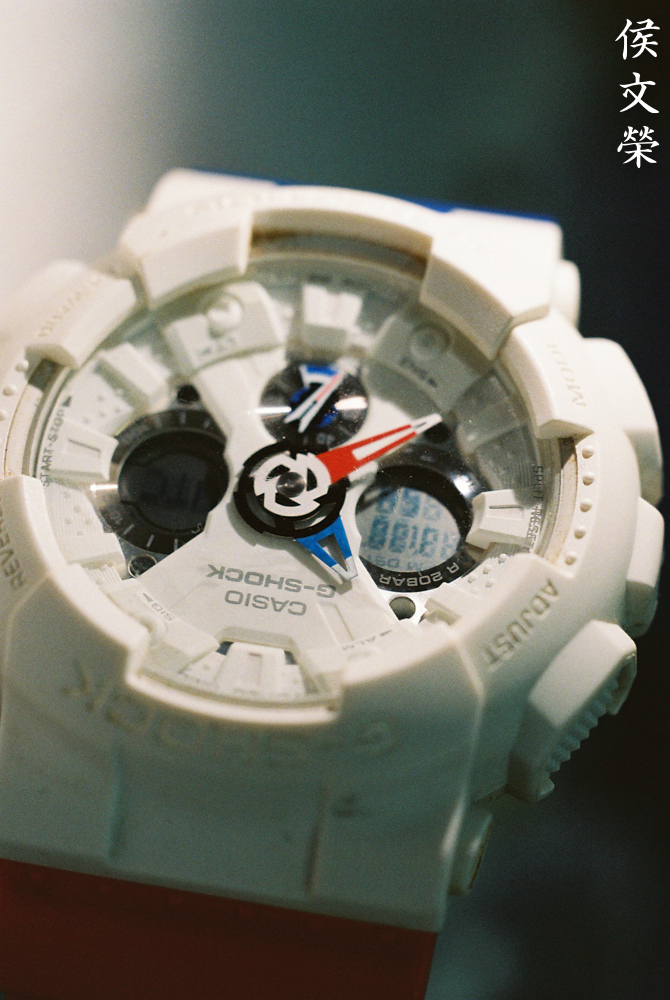
I was bored at work so I took a photo of my watch. Watch photography is an interesting hobby for those who have the money, I could only show you my dirty, cheap, plastic watch. One application for this lens is jewelry photos. It has a flat-field and the 55mm focal length won’t flatten the perspective like what a longer lens would. A wider lens would make this look unnatural and the lines will look exaggerated. This is the perfect focal length for the job. It has low-amounts of chromatic aberration which is ideal since jewelry tends to be shiny. The only challenge is depth-of-field which can be solved with a technique called focus-stacking which we won’t discuss in this article.

It’s sharp even at the corners. The rendering of the bokeh is quite smooth, it looks like this was shot with an expensive German lens. This is the secret of those who know this lens well.
Here’s another shot showing the corners. The thin depth-of-field is difficult to work with even at this distance. If you absolutely need every word in the tablet to be clear you’ll need to position the lens or your subject at the same focal-plane as your setup. This will be tricky since the depth-of-field is thin, the only way to remedy this is to stop the iris down to something like f/8 or smaller.

The very low amount of distortion is perfect for product photography, if the intent is to shoot for catalogs where accurate representation is important.

Food photography is also a great application for this but I would want to use a wider lens for this, something around the 45mm range. Avoid using a lens that’s longer than 60mm for this kind of job, you will want the viewer to see the food in a natural manner as if he is there at the table. A longer lens will make the food look tiny, like a miniature. Wider lenses will only work if you want to exaggerate the look of the food, like what you see on burger photos at the fast-food chains, only to be disappointed when you get the real thing.

The really-low levels of distortion makes this perfect for reproduction. This is not only ideal for small items like stamps but also for paintings and other larger things. All you have to do is to walk further and to shoot straight.

This functions really well as a normal lens for general photography. Take a look at this photo, the rendering is so exquisite it feels so life-like. Not only is this lens able to reproduce details accurately, it’s also able to draw nicely.


(Click to enlarge)
Here are more photos from the same roll. This is an amazing lens with film, I highly encourage everyone reading this article to shoot yours with it. This is not something that many people use this lens with but I hope that you’re going to be motivated by these photos.
This is an excellent Nikkor, it’s something that stood the test of time. There’s hardly any equal to this lens in Nikkor-land when it comes to utility and the quality of the images it produces. They’re not expensive today so there’s no reason not buy one of these. While the optics remained relatively similar to the older Micro-Nikkor-P 55mm f/3.5 Auto from which this was derived from it certainly performs better due to minor tweaks to the optical design, better coatings and manufacturing. The later Micro-Nikkor 55mm f/2.8 Ai-S is great but this one has an endearing quality to it that’s absent with the later lens. I would prefer the older lens any day. The only inconvenience of using this is the rather-slow maximum aperture of f/3.5, it’s not bad for general use but I don’t like how it darkens the viewfinder. Using extension tubes will make it even worse to the point of being useless. If you’re using older Nikons you’ll require special focusing screens in order to focus properly. A standard split-prism one won’t do as the center will turn black due to the lack of light. This is not much of a problem for general use since it’s bright-enough, it can only be annoying when focusing since the depth-of-field won’t be sufficient and I often had to spend more time confirming my focus with it. This isn’t really a problem when using digital cameras since there’s that useful focusing aid at the bottom of the viewfinder for confirming your focus. When buying one, I highly recommend that you inspect the iris well, making sure that it’s dry. It also has the tendency to get stuck, turn the focusing ring and be sure that it is smooth. The long helicoid could seize if the grease is bad. Make sure that the rear element is perfect, a scratched one is no-good. If you’re planning to use it with digital Nikons or ones that come with an Ai-interface, search for those with the factory Ai-ring so you could safely mount it to your camera. I will never recommend using a pre-Ai lens on an Ai-compatible Nikon unless it could support it such as the Nikon F3 or a Nikon Df. Go ahead and buy one today, it may be the best thing you could purchase for under $80.
Before We Begin:
If this is your first attempt at repairing a lens then I suggest that you check my previous posts regarding screws & drivers, grease and other things. Also read what I wrote about the tools that you’ll need to fix your Nikkors.
I suggest that you read these primers before you begin (for beginners):
Reading these primers should lessen the chance of ruining your lens if you are a novice. Before opening up any lens, always look for other people who have done so in Youtube or the internet. Information is scarce, vague and scattered (that is why I started this) but you can still find some information if you search carefully.
I highly recommend that you read my working with helicoids post because this is very important and getting it wrong can ruin your day. If I can force you to read this, I would. It is that important!
For more advanced topics, you can read my fungus removal post as a start. This post has a lot of useful information and it will be beneficial for you to read this.
Disassembly (Main Barrel):
The construction of the barrel is conventional. Experienced repairers won’t be intimidated by it. Since the Micro-Nikkor-P 55mm f/3.5 Auto, the design of this lens family hasn’t changed much so if you’re familiar with that one this will be peanuts for you. The only thing I’ll warn you about is the amount of glue used on the New-Nikkor version, that one was made to the standards of the day in Nikkor-land and by that I mean that sealants were used liberally. If you had to work with that version just be sure to drop some alcohol to the threads of anything that you want to remove in order to dissolve the seals. I would even use heat on the screws of the bayonet and the helicoid key, they were nasty and epoxy was even used to seal them. The only way to get it to soften-up is to heat the screws, from their heads or the tip, whichever one is accessible to you. Like all lenses, take plenty of notes as you go. I didn’t have to clean the optics of my lens so I won’t be showing you how to clean it. The Micro-Nikkor-P 55mm f/3.5 Auto’s objective is similar to this one, if you need to dismantle yours then read that article to see how that’s done.
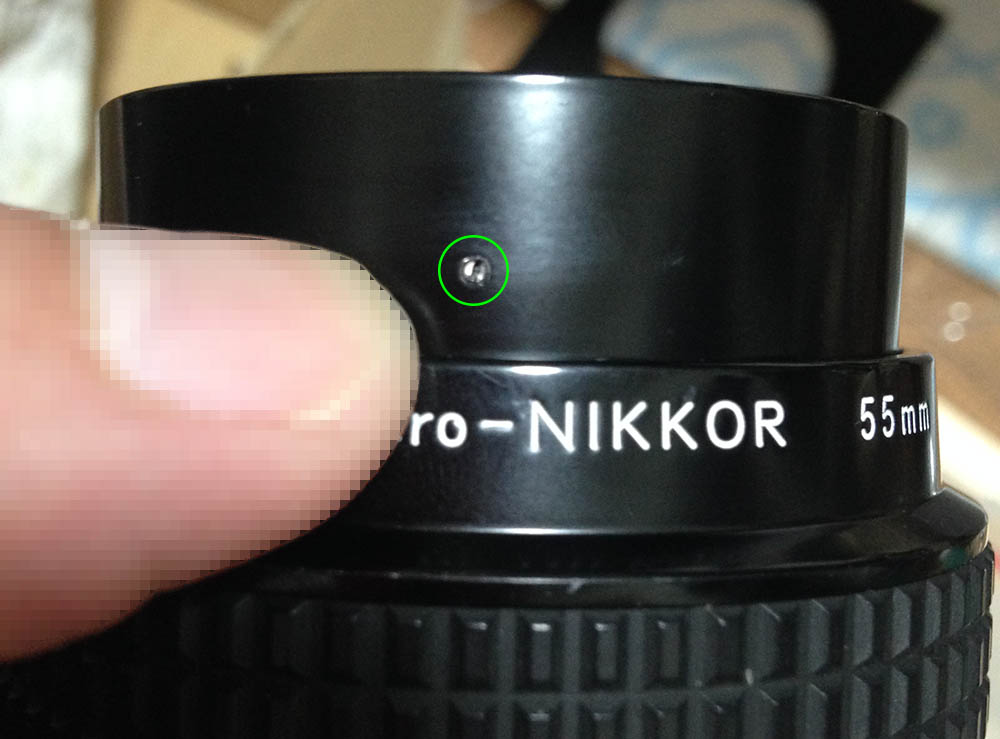
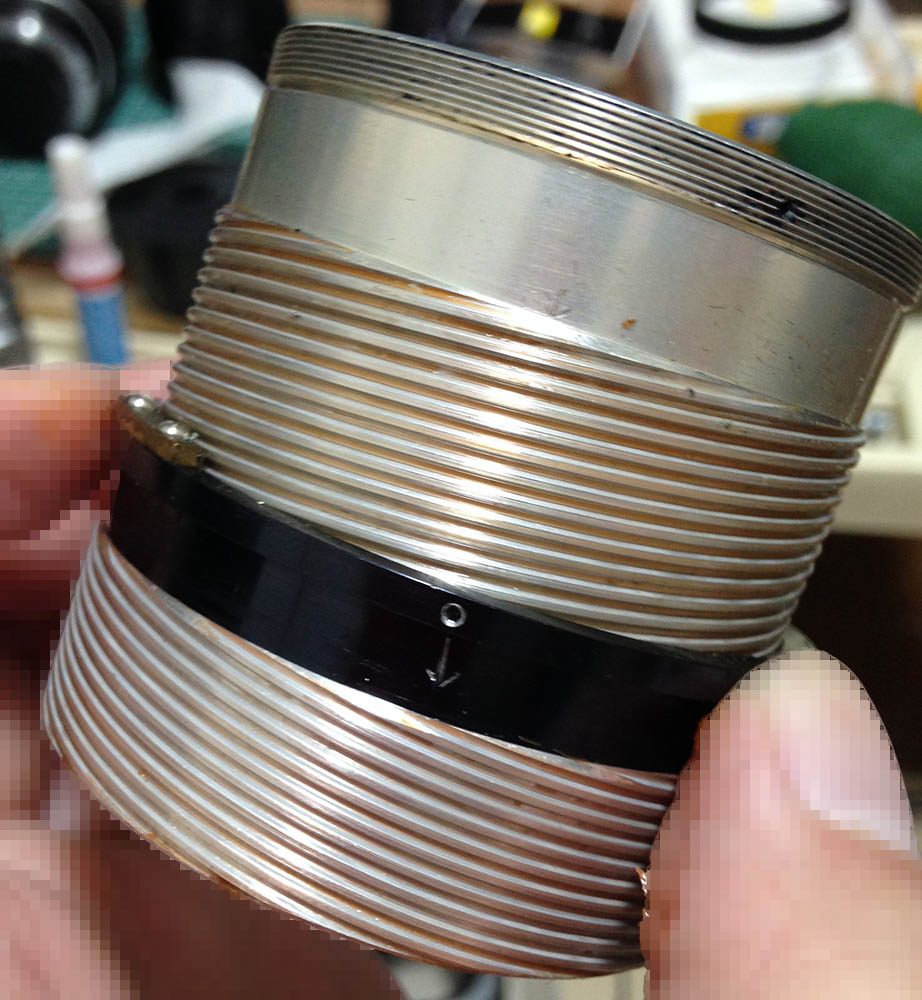
Locate this grub screw and carefully extract it. It may be sealed by paint so I advise you to place a drop of alcohol on the hole to soften anything that was used to seal it.
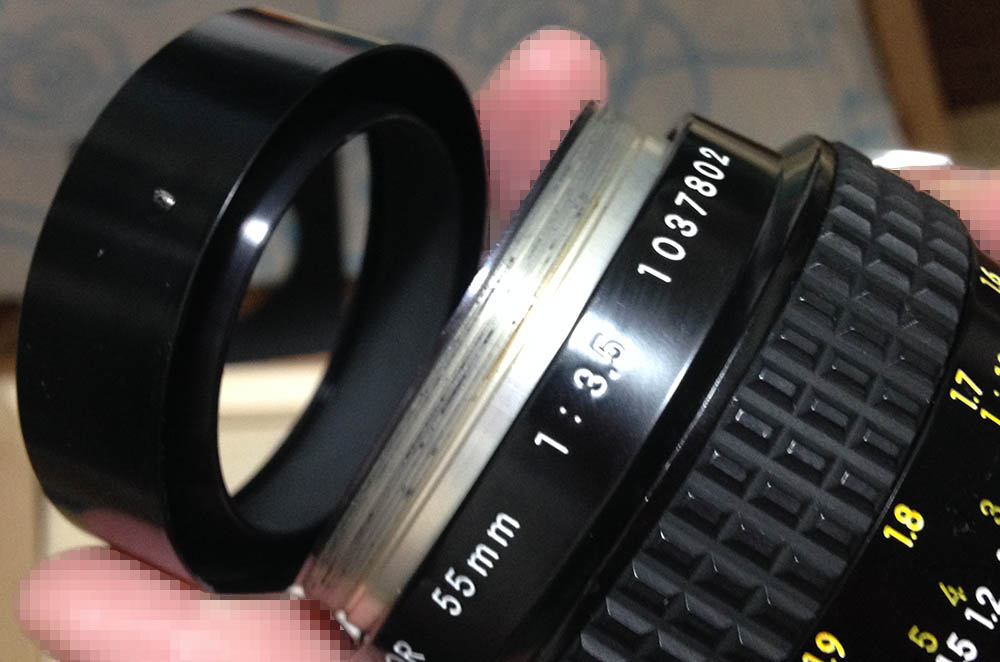
Unscrew the front barrel off. If it’s stuck, inject some alcohol to its threads. I usually don’t need to use force to get it off but a pair of rubber gloves helps.
Carefully remove the objective and keep it in a safe place. Be careful so you won’t scratch the rear element.

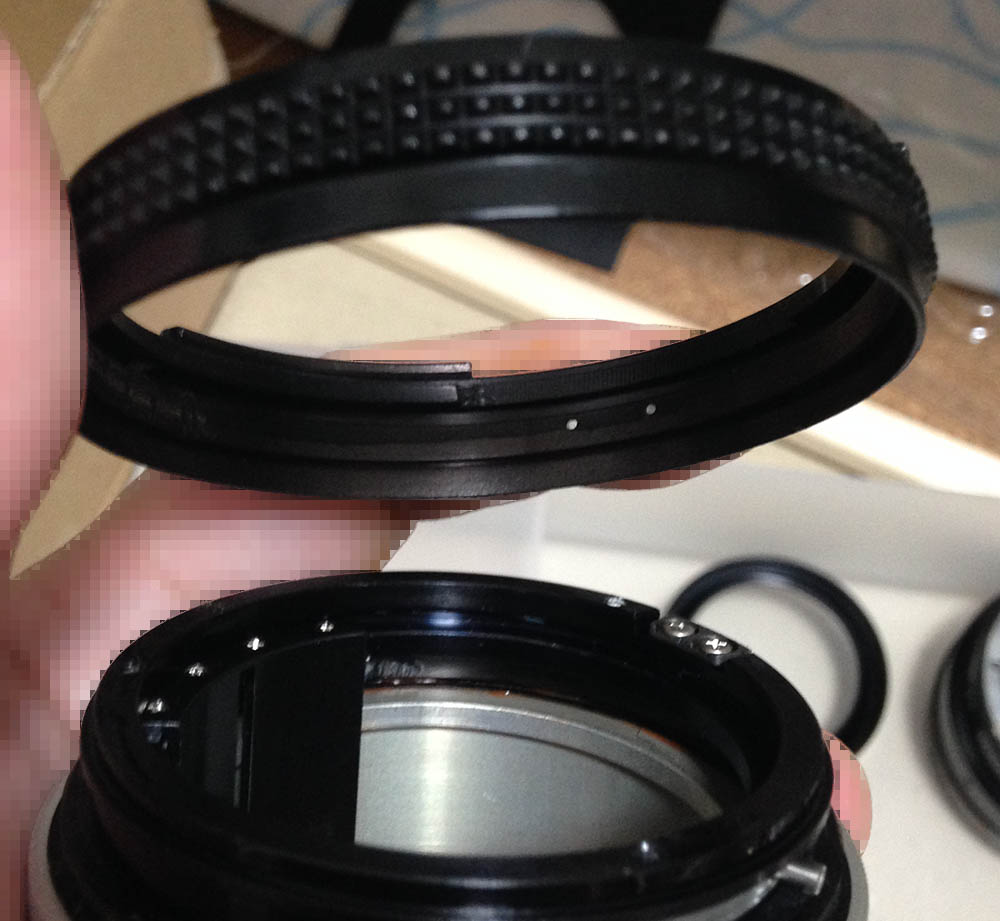
Carefully lift the rubber grip to reveal these screws and extract them. When removing the rubber part, run a thin toothpick underneath it and carefully lift it from the focusing ring.
Once the screws are gone you can safely remove the focusing ring. Scratch a mark on the lip of the central helicoid where the focusing ring was attached so you’ll know how it should be aligned when the barrel’s turned to infinity. This will help you determine if you got it right later during reassembly. The mark doesn’t need to be big, even a small scratch is enough so long as you’ll be able to see it properly later.

Carefully extract these. Make sure that you use the correct-sized driver, it is very important because a smaller one will strip the heads and a larger one will damage the surrounding fluted details on the shiny grip. These can be a bit difficult to remove on some lenses so heating them with soldering iron is the safest way to remove them.
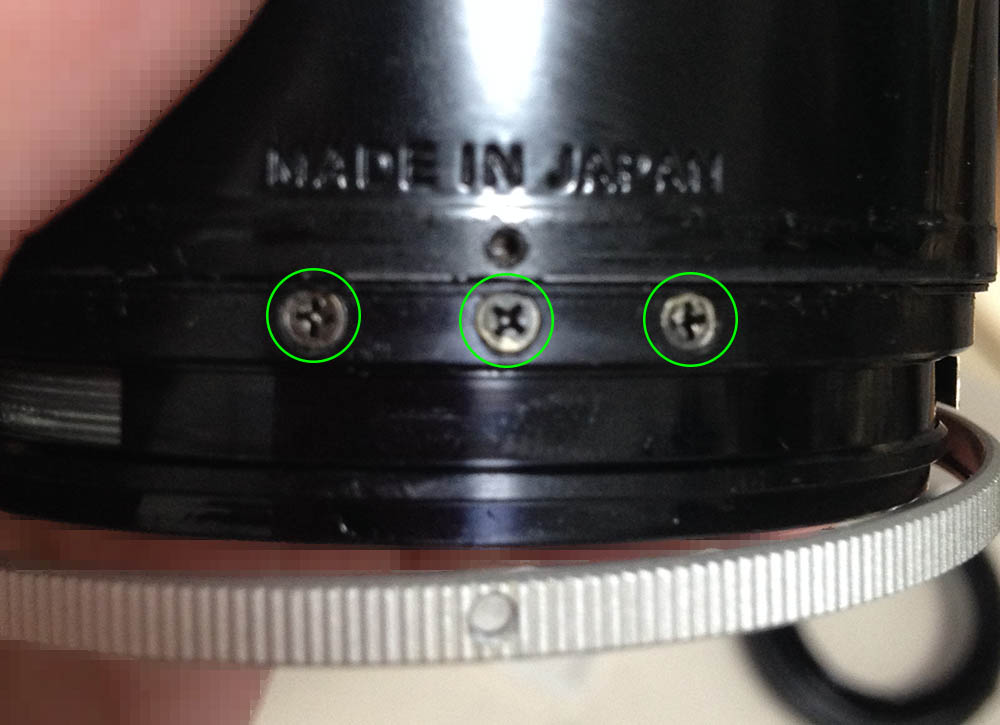
Extract these. This one has 3 screws but earlier ones may have 5 of these. If you haven’t read my article on how to remove bayonet screws, read it so you won’t repeat the same mistakes that many people get into. Using the wrong type of drivers will strip these so read my article to prevent this mistake.
Once the screws are gone you can safely remove the bayonet mount.
The aperture ring can now be removed.
Slide the chrome grip off to reveal these. They’re notoriously difficult to get off so heat them thoroughly from the other end before you extract these.
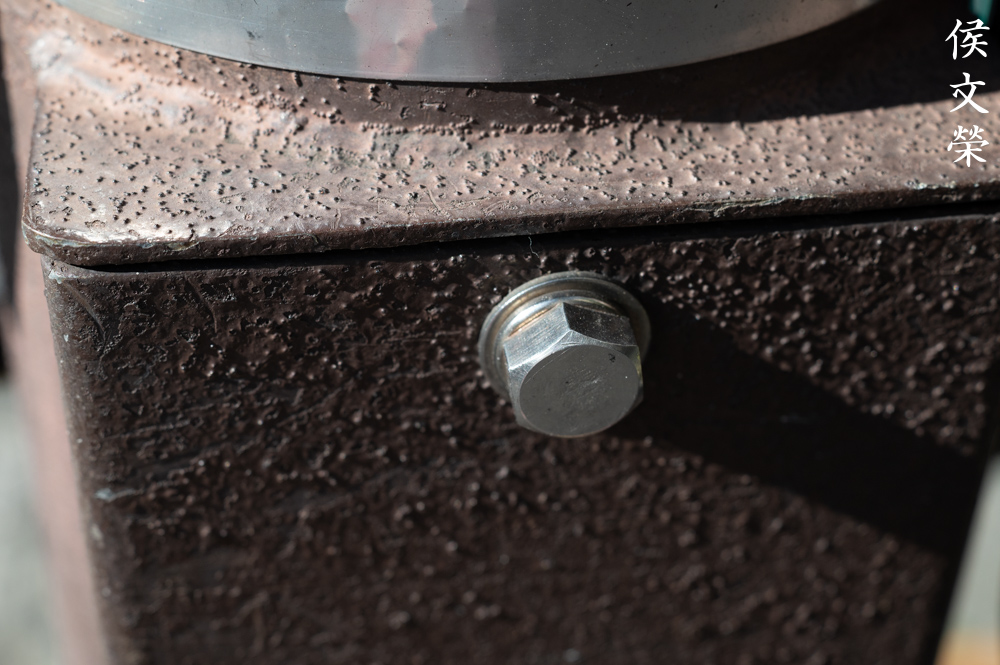
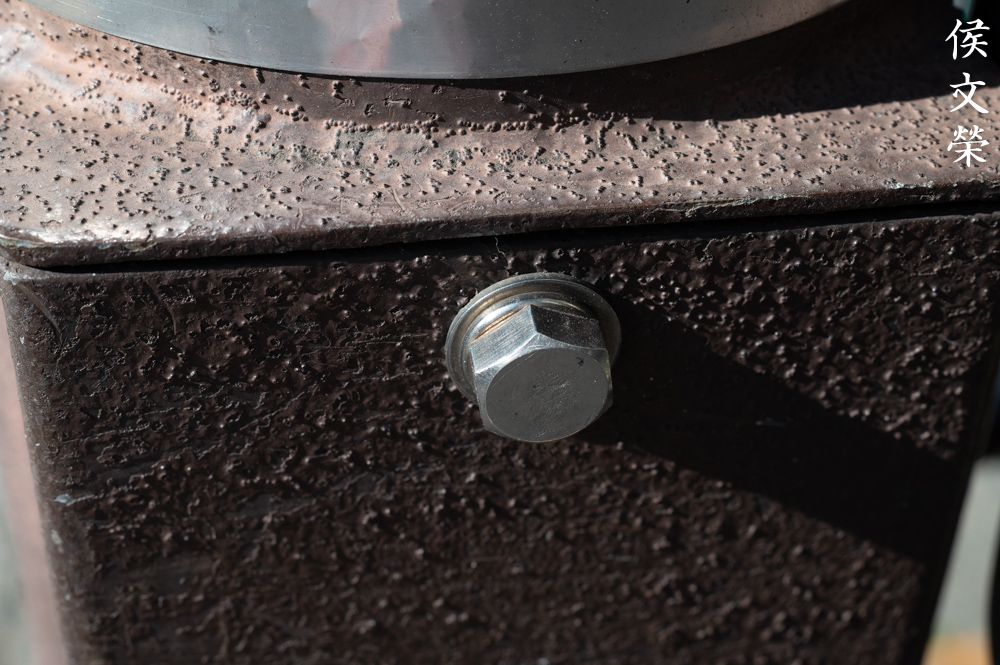
Those screws secure the helicoid key. This constrains the movements of the helicoids so they all turn at the same rate, enabling you to focus. It’s long in this lens since the barrel extends quite a bit.
Once the helicoid key is gone you can now separate the central helicoid. Be sure to mark where these part since this is also the same place where they should mate. If you haven’t read my article on how to work with helicoids, it is best that you read it first before you continue. Many people get stuck here and reading my guidelines should help you prevent that problem.
Do the same for the inner helicoid.

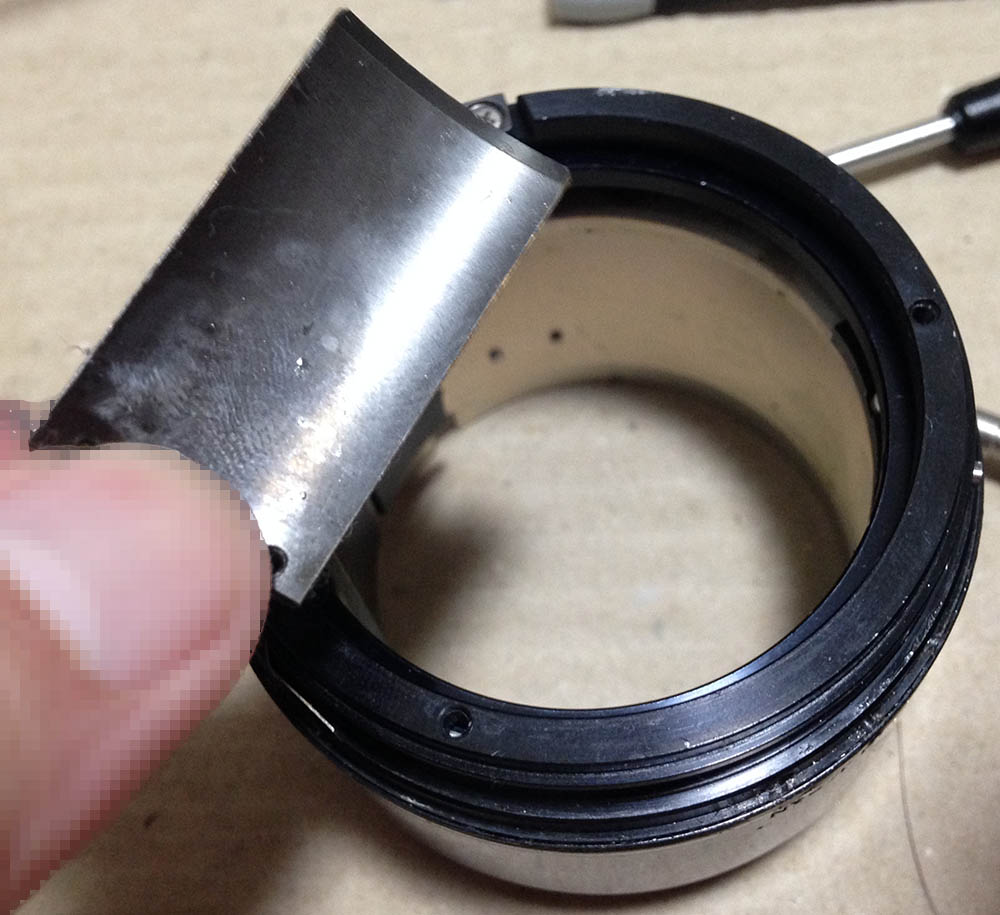
Carefully extract this. Be careful not to snap the neck of this screw. Heat the other end and it should be easy. This couples to the aperture ring, turning it will enable it to adjust the size of the iris since it links to the iris mechanism inside of the objective. This is also the perfect time to note how high the ring is sitting within the barrel as you should be able to put it back the same way later.

Unscrew this ring and you should be able to remove it.
Carefully remove the sleeve and clean all of the gunk underneath it.
That’s all for the main barrel. Clean everything well and never leave old oil or grease specially in the helicoids so you won’t foul the fresh grease you’re about to apply. Clean the parts with a strong detergent and brush them with a stiff-bristled brush. Polish everything with a clean rag and make sure that no residue is left before you apply your fresh grease. Use a grease that is not thick since the helicoids are quite long. Thick grease will make it difficult to turn which will wear things out easier.
Conclusion:
Despite being familiar with this lens family I had a good time repairing this. I didn’t learn anything from this project at all, it’s just fun to work with and that was enough for me to enjoy it. This may be a nice project for repairers with intermediate skills. Beginners shouldn’t even consider this, a simple or cheap lens may be the best one to build their experience with. Experts won’t be challenged by this at all except for restoring badly-damaged ones.
There’s not much to it, it’s a simple lens with conventional construction. It’s only composed of several dozens of parts which falls-into-place perfectly.
Now that this lens has been restored properly I could enjoy using it like the lens was new. You don’t need expensive gear in order to take good pictures.
That’s all for this article. If you enjoyed this, please share it on social media. If you loved this article, do consider supporting my work. It ensures that it’s going to stay-alive for years to come. You’re helping me pay for hosting and maintenance. You’re also helping me purchase and process film, this site is dedicated to spreading the use of film and you are helping the industry, too. Thank you again for your continued support, see you again next time, Ric.
Help Support this Blog:
Maintaining this blog requires money to operate. If you think that this site has helped you or you want to show your support by helping with the site’s upkeep, you can make a small donation to my paypal.com (richardHaw888@gmail.com). Money is not my prime motivation for this blog and I believe that I have enough to run this but you can help me make this site (and the companion facebook page) grow.
Leave me some tip?
Thank you very much for your continued support!
$2.00
Helping support this site will ensure that this will be kept going as long as I have the time and energy for this. I would appreciate it if you just leave out your name or details like your country’s name or other information so that the donations will totally be anonymous. This is a labor of love and I intend to keep it that way for as long as I can. Ric.

Sep 12, 2020 @ 20:48:52
Hey Ric,
Many many years ago, I used to do a lot of rostrum camera work in Sydney and London. Rostrum cameras were widely used in the AV and slide production industry which was quite big in the 1970s and 1980s.
Rostrum cameras were made, mostly in the USA, and the main brands I encountered were Forox, Marron Carrell and Mangum Sickles.
You could load up a few hundred feet of tungsten reversal stock and shoot all day creating special effects and graphics. We also used to shoot a lot of slide duplicates, using dedicated duping stock.
The standard lens, if my memory serves correctly, was usually a Nikon 80mm enlarger lens, with a screw thread. It was on a bellows that could easily get to 1:1 and even closer.
However, if you needed a wider field of view, you could take out the carrier plate, and fit a different one with a Nikon bayonet mount. You could then attach the so-called ‘wide-angle’ lens, which was one of these, the Micro-Nikkor 55mm.
Aah, those were the days….
Feb 26, 2023 @ 08:28:41
I have two of these lenses. First I cannot believe the resolving of this old lens . I’m thinking I have the non ai and the ai versions both . I used the ai version on my d850 and shot a photo of a super small bee type insect. We call them seat bees .
When I cropped in on the photo I had perfectly focused this small bees eye . It was without the extension tube so further away. But I cropped the photo and it was still super sharpe with a beautifully rendered background. Love the photos from this lens .
Apr 08, 2023 @ 18:41:04
Dear Sir, very glad to discover your passion blog of all Nikon cameras and lens. I am a novice to this passion.
Is it very expensive to repair Nikon FM2n and Micro-Nikkor 55mm f/2.8 lens in Tokyo-Japan?
Are you able to recommend a repair shop in Tokyo for my old FM2n and 55mm f/2.8 lens ?
Thank you much.