
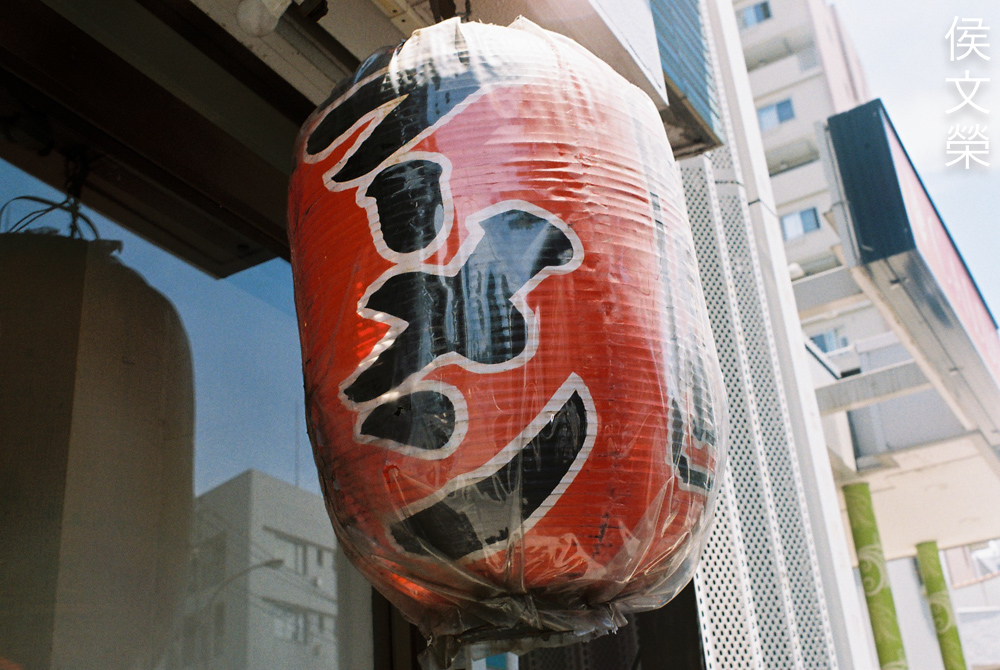
Hello, everybody! Do you know Teresa Teng (鄧麗君) from Taiwan? She was a famous singer who made her name in Japan but set out to conquer the rest of East Asia with her beautiful voice. Her song is filled with emotion that it melted the heartless communists across the sea, reintroducing the warm feelings of love and playful youthfulness. Needless to say, her songs have been covered by many people, from the little country of Taiwan to the rest of the world. Unfortunately, she suddenly left us in 1995, leaving a big void in many people’s heart. She would be celebrating her birthday in January 29, 2 days after posting this article if she’s still with us. I hope that this article has introduced to you one of the most beautiful and the best singer of Asia, please listen to her voice. And just like the wonderful songs of Teresa, our topic today has been remade in numerous versions, spanning decades, with several variations, too. While not as well-loved as our timeless genius, it was considered by many to be one of the bests in its time. Stay and read more about this great lens.
Introduction:
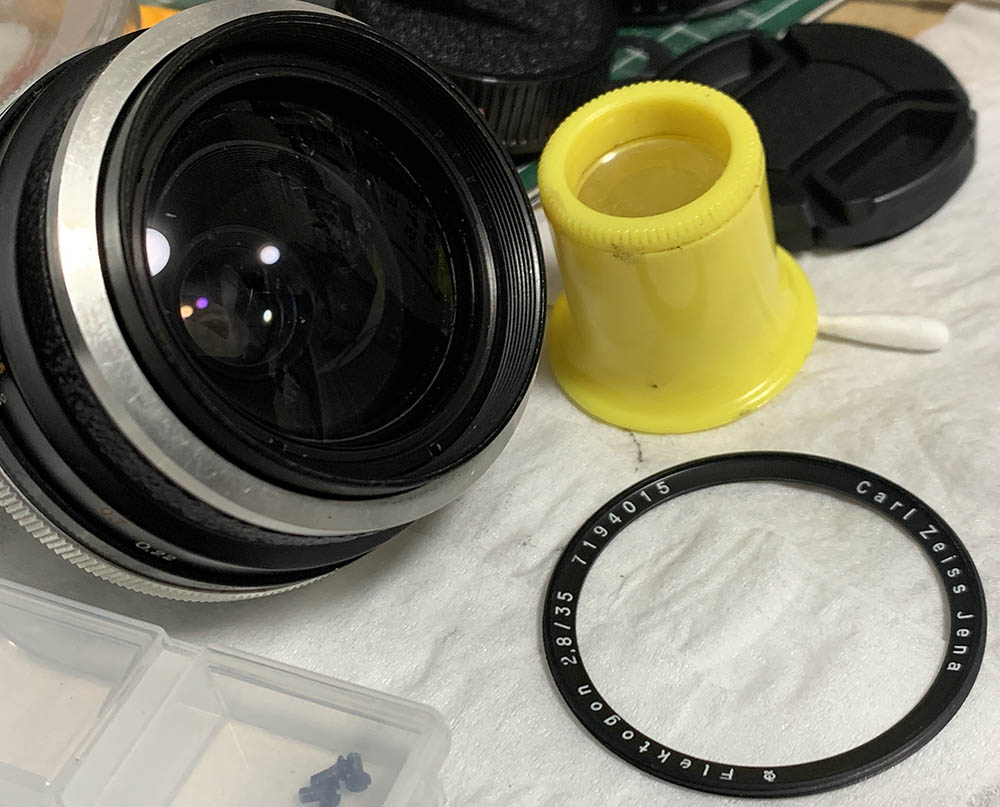
The Carl Zeiss Jena Flektogon 35mm f/2.8 came in many variants, this one was made in the early 1960s, it’s speculated to be made from 1961 up until 1964, with reports saying that it was till for sale in the 1970s. It was made by the East German counterpart of Carl Zeiss so it has the Jena name. By many accounts, this is said to be the best version from the golden age of photography, along with the next version that has the striped barrel commonly called the “Zebra” by many. Both lenses share the same optical formula and they are also regarded as the best in terms of quality because the products coming from this factory after this period begin to gain a reputation as being “hit-or-miss” to put it lightly, such is the virtue of a command economy that many disillusioned people fantasize about to this day.

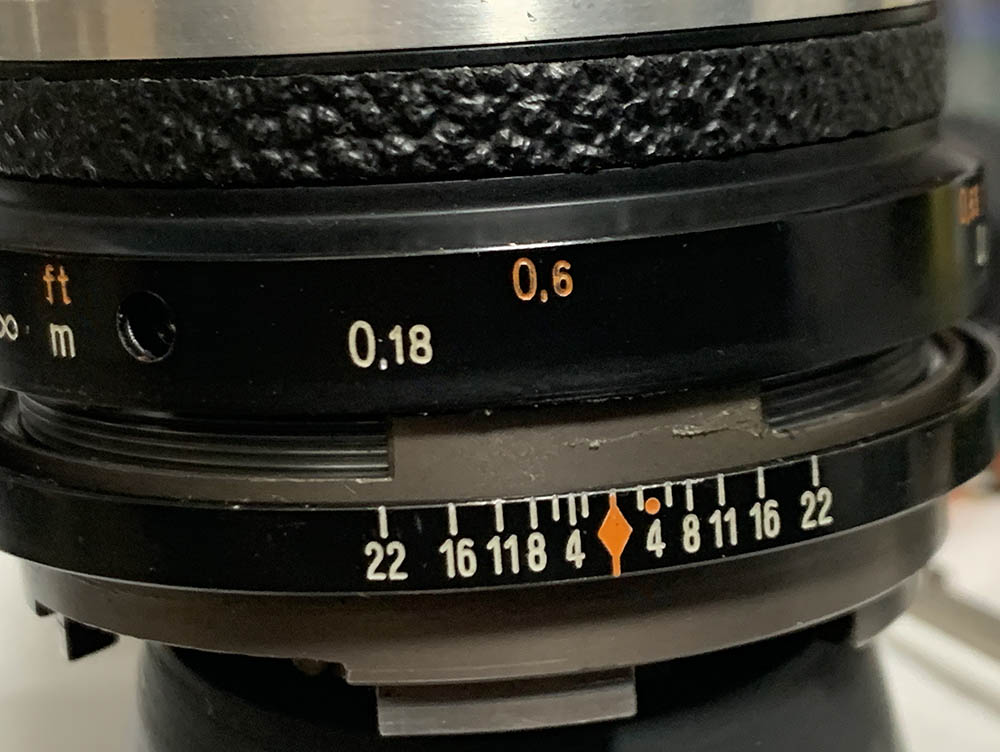
It’s well-made, the all-metal construction makes it durable. The rings set the aperture opening and focus, it also has a huge button for depressing the shutter, which is coupled to the operation of the iris. You will know more about this button later.
It has an elegant 6-elements-in-5-groups design, an improvement of the original design from 1951. There are some people who are passionate about the topic of which version is better, some saying that the old, original design is superior in term of rendering while some people claim this one to be better. It’s a toss, I have both versions myself and I can say that I like this one more. Maybe I just have a bad copy of the old one? Whatever that the case may be, the Flektogon name is synonymous with performance and being the pioneer of wide-angle lenses for the coming SLR era, something that it shares with the Retrofocus design, an invention of the late genius Pierre Angénieux.
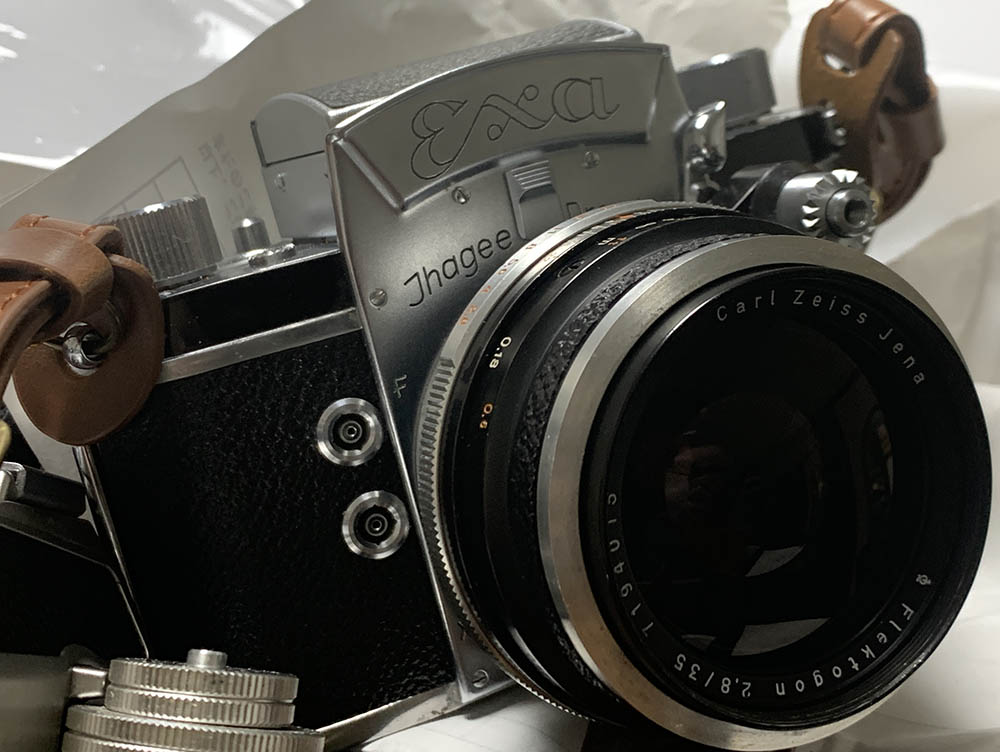
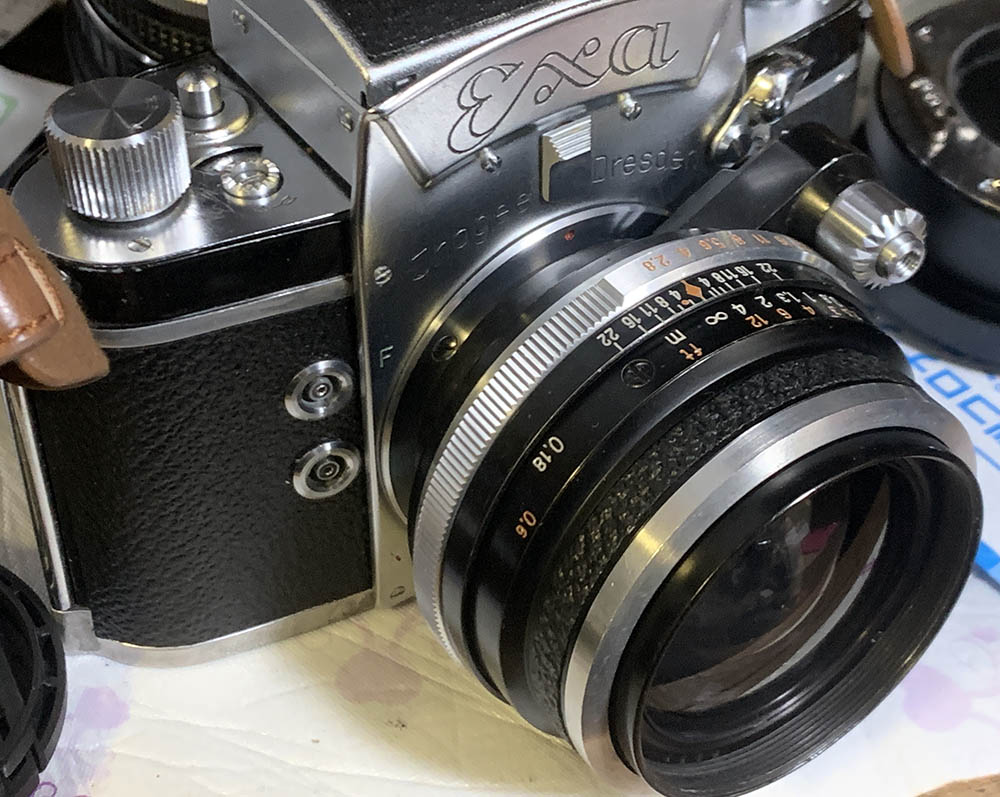
Handling is kind of strange because I’m not used to shooting with Exakta-mount lenses. When focusing with this you’ll want to stay-clear of the aperture ring because it rotates slightly when as you focus. This thing only happens when it’s wide-open, it stops the iris down for you as you get closer to its minimum-distance, a trick that many macro-lenses employ. Using this with my Ihagee Exa felt natural, the waist-level finder won’t be much of a problem since it has a wide field-of-view, it will test your patience when you’re shooting with a longer lens.

The only way to enjoy this lens for digital photography is to use and adapter with it, in my case, I used my Nikon Z6. It’s not as cumbersome as it looks, in fact, I had a great time with it. I did not have to deal with the quirks of its operation, I just shoot it like any preset lens. There’s a switch around the shutter button, it can be set in such a way that it will actuate the iris when you depress the button, or do nothing. It’s really useless when adapted.
Learning how your lens performs is the key to maximizing it. You will learn how to utilize its strengths and avoid its weaknesses. This knowledge helps in determining which lens to bring on an assignment. I shot these from f/2.8, f/4, f/5.6 and f/8 since these are the most common apertures that people would want to use it. The photo were shot with a Nikon Z6, some of the photos were cropped close to 1:1 magnification so we can see the details better.

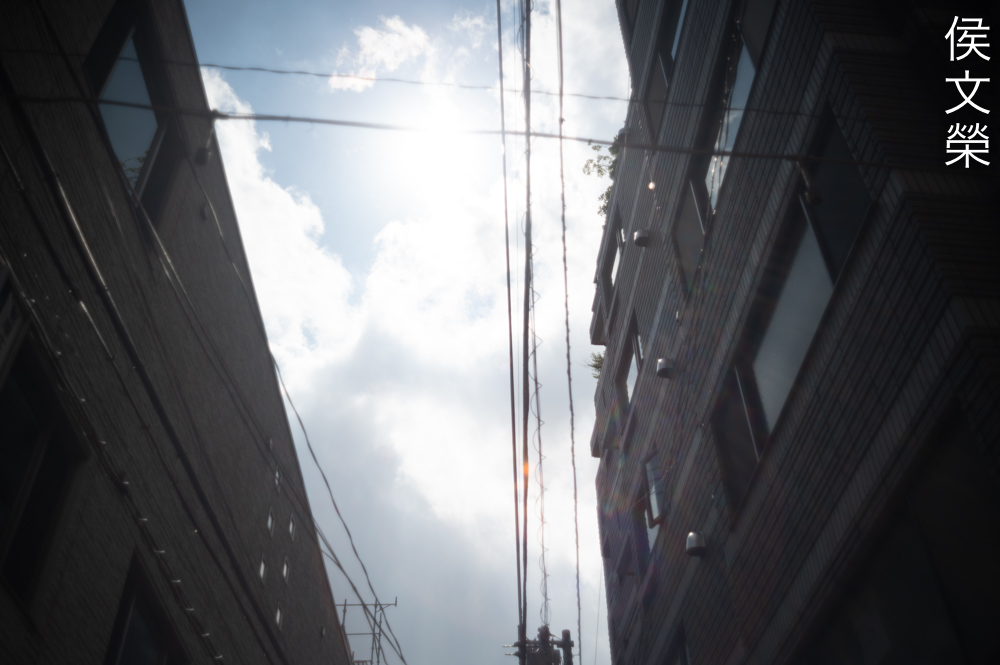
For a lens this wide, the level of distortion is lower than what I usually see from something this old. You’re not going to have too much trouble with this level of distortion, the profile is also shallow, which makes it trivial to correct using software.


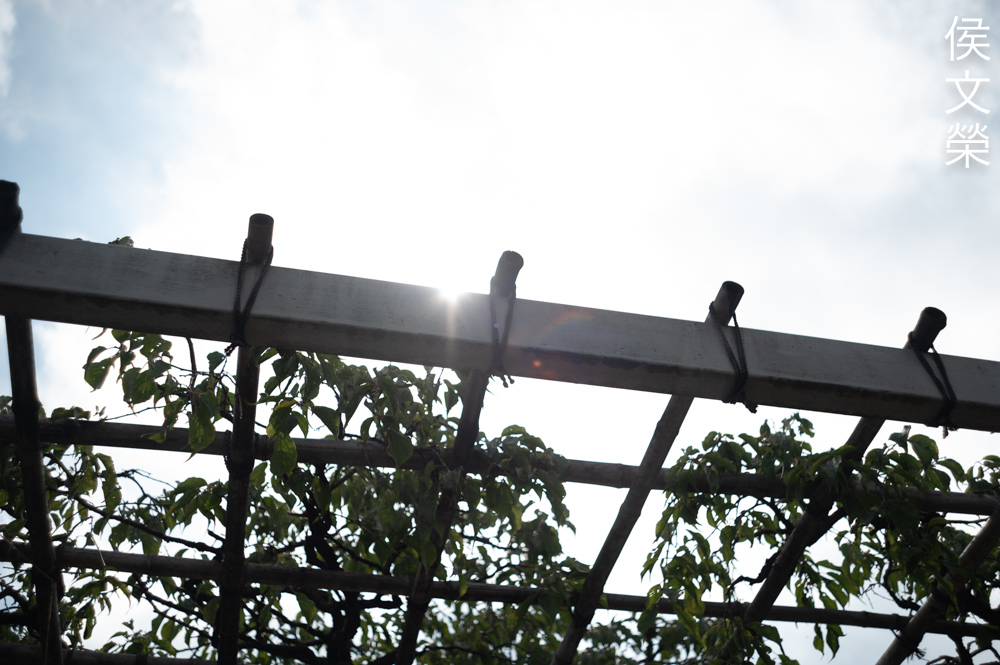
(Click to enlarge)
Vignetting is present wide-open, but it’s mostly concentrated at the corners. It’s tolerable at this level. The frame looks much brighter by f/4 and vignetting is mostly gone by f/5.6. It’s all but gone by f/8, I struggle to find any traces of it but I am sure there’s still a very low amount present, it’s a nothing to worry about.


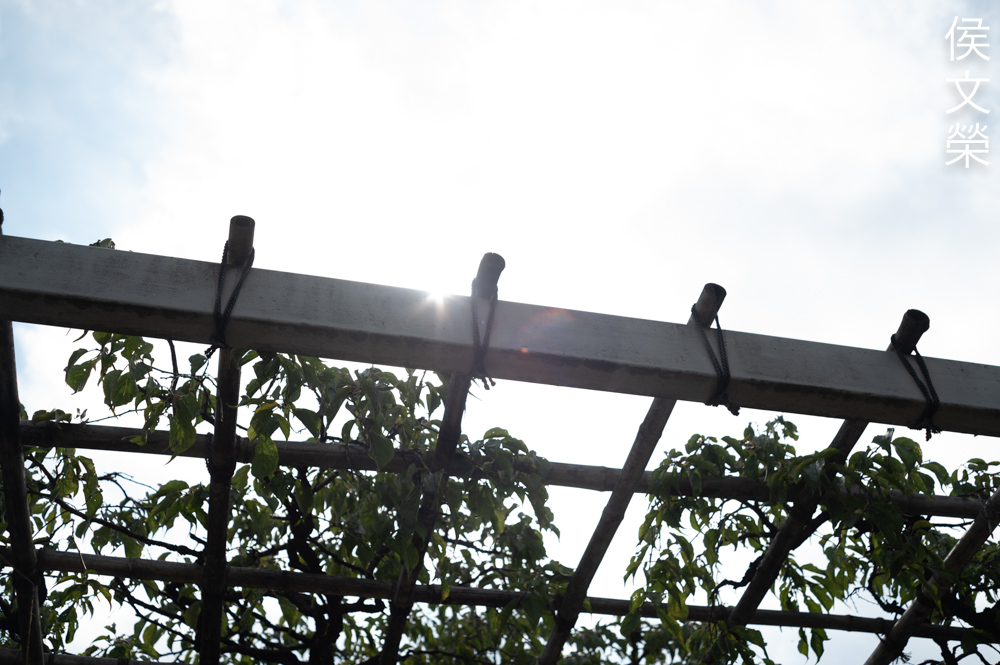
(Click to enlarge)
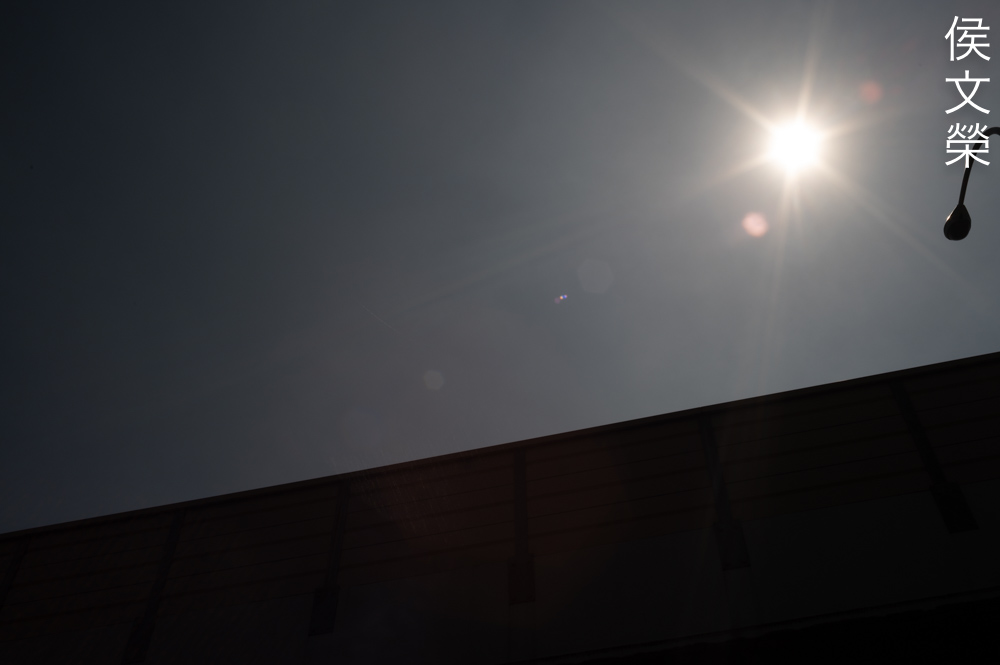
As expected from a lens of this vintage, it fares poorly when it comes to flare and ghost-resistance. There is nothing much you can do, using a hood won’t even help. The flare can cover the whole frame and that is enough to lower the contrast of your photos. The blobs formed are huge and ugly, I am sure that a lot of people will find this beautiful and can find a creative use for it, specially after a few cups of designer or craft coffee with names so long you can’t say it under a single breath.

Here’s an example of what I am talking about, notice how the saturation and contrast looks lower on the areas affected by flare. The blobs look hideous, you will just have to accept this.
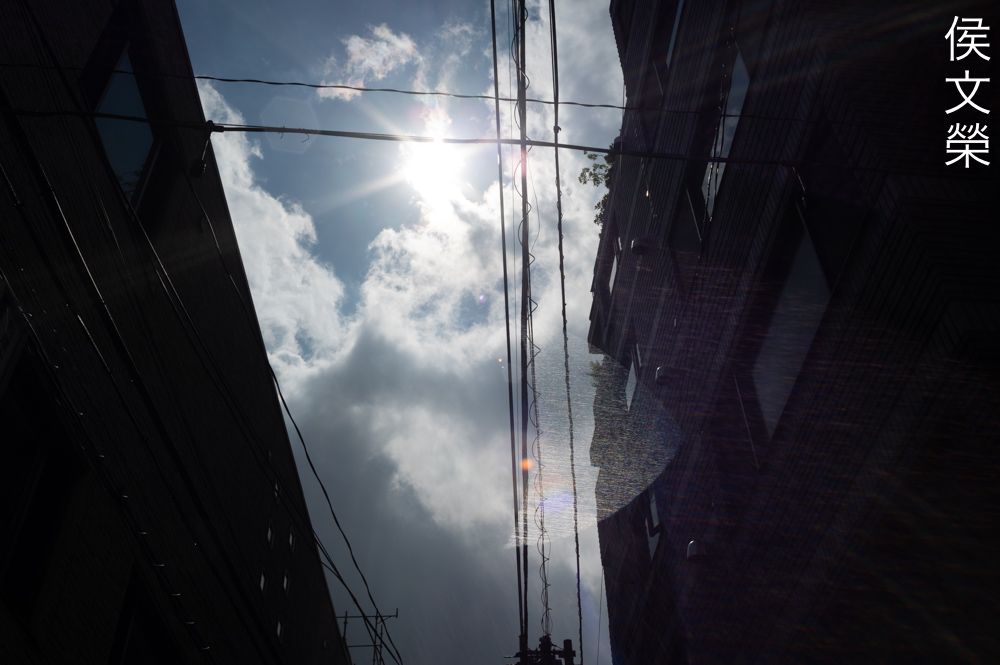
The internal reflections also affects the iris, which are unpainted so you will see it very well in some cases. It’s enough to register in your photos, even the grain of the thick, metal iris can be seen.


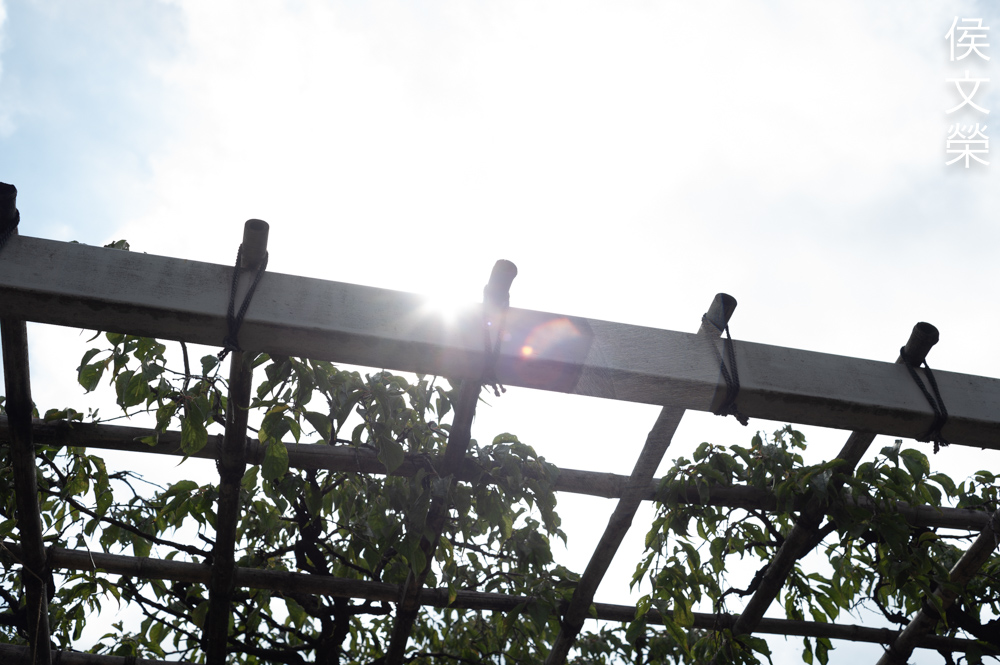
(Click to enlarge)
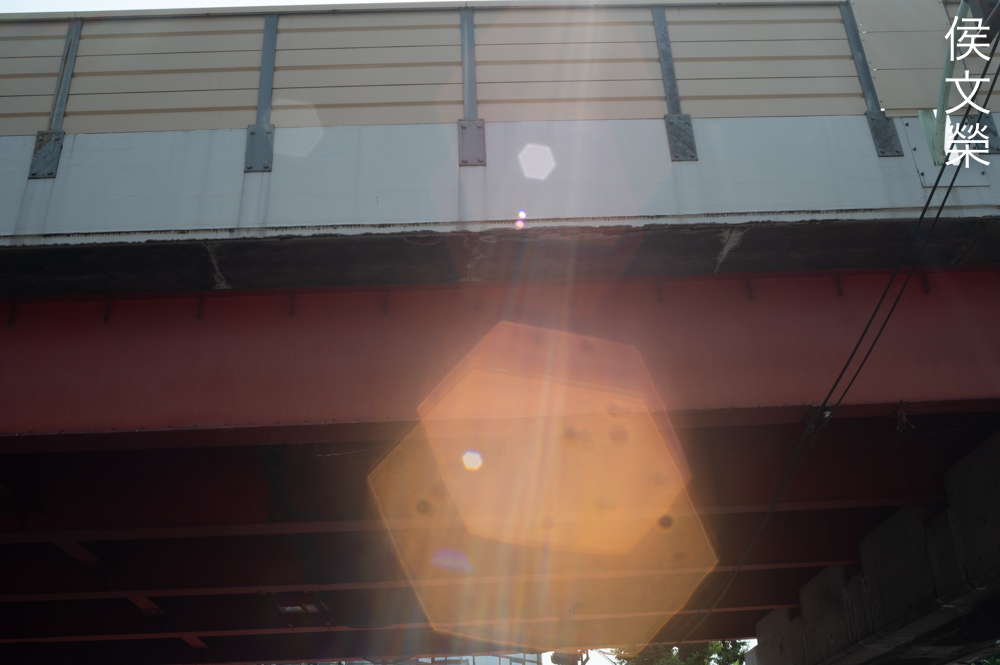
If you want a psychedelic-look, then look no further. Do you want to capture religious imagery? Then this lens is for you! Imagine how much time you will save in post.


(Click to enlarge)
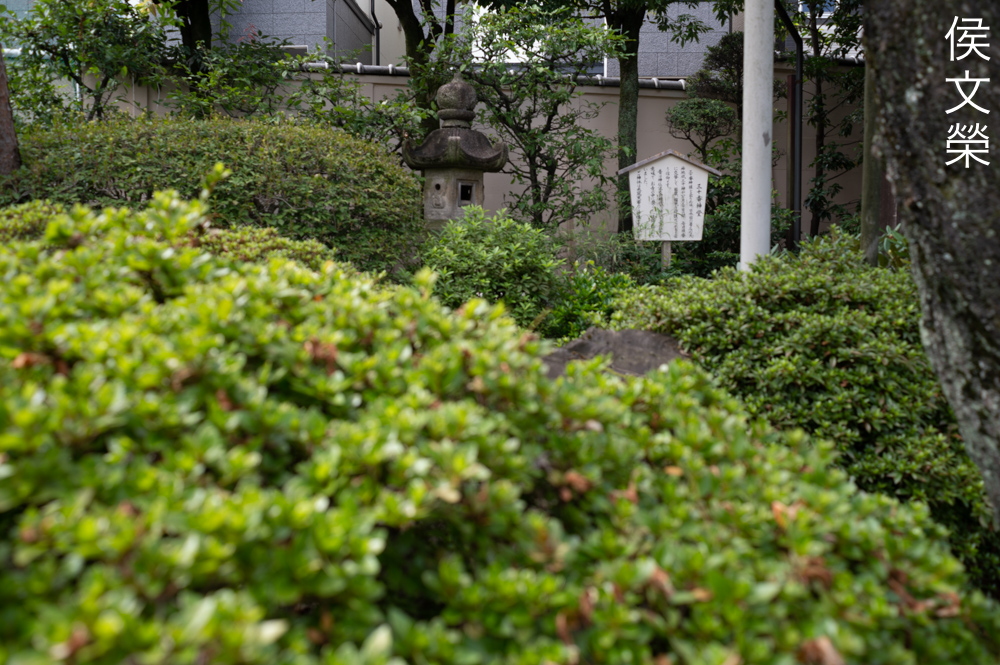
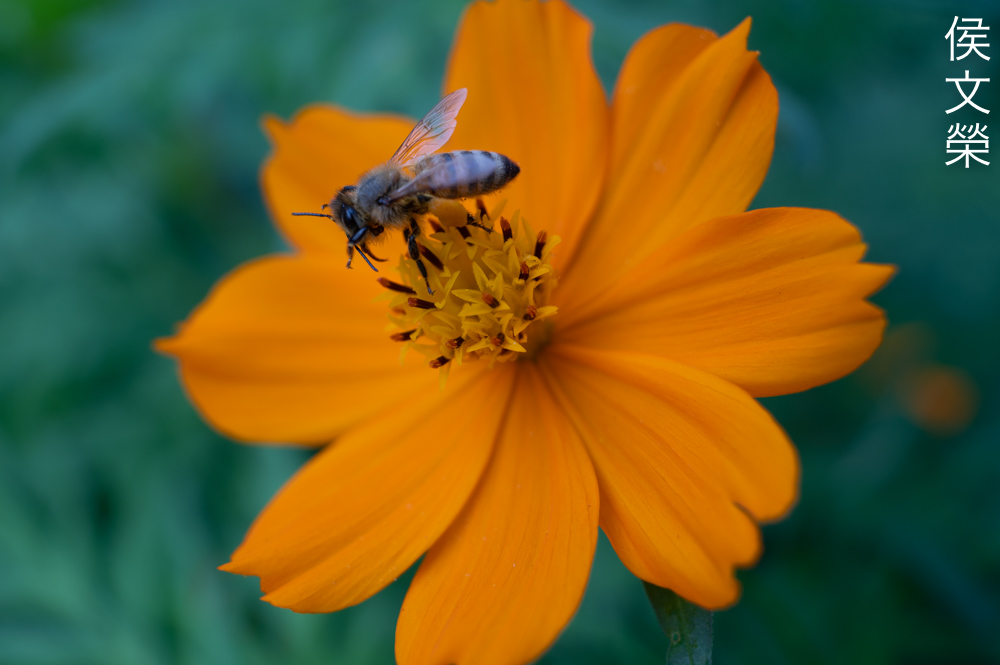
Surprisingly, the character of the bokeh isn’t bad at all, at least it’s better than what I was expecting. There is some weirdness happening here but it doesn’t look bad at all, in fact, it looks appealing to me. This is a happy surprise to me, so with this knowledge, use it to your advantage.


(Click to enlarge)
Chromatic aberration is nearly absent, I struggle to find large traces of it even when shooting wide-open, I can’t see any. Impressive, I will skip commenting in this section, it’s not even worth it.


(Click to enlarge)
Sharpness is good wide-open at the center, you can see that it’s sharp, but the resolution is not there yet. The corners looks bad but it’s a lot better than what I see from other lenses of the same period. Stop the iris down to f/4 and you will notice a huge improvement in resolving power. The center looks nice but the corners show the most improvement. The center look as if it has reached its peak by f/5.6, the corners are definitely looking a lot better, almost looking as good as the center at f/2.8. The center will not look much better at f/8, if it does then you will probably need to measure it with software. The corners show a bit of improvement at f/8, it’s enough to notice the change. Perhaps the corners will look better at f/11? This is impressive, it’s some of the best I’ve seen from a lens of this vintage.


(Click to enlarge)
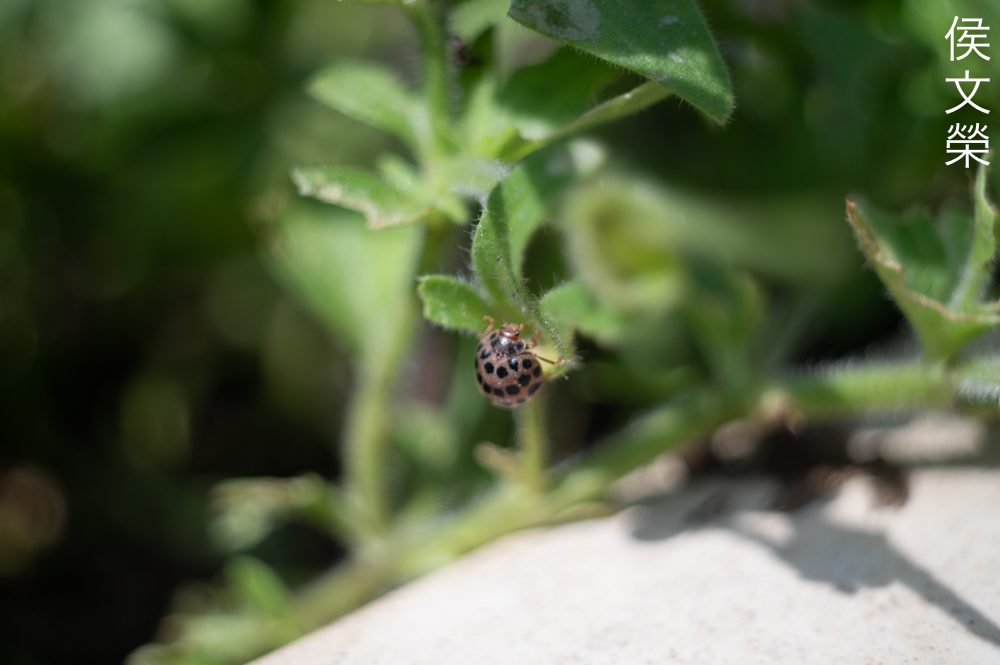
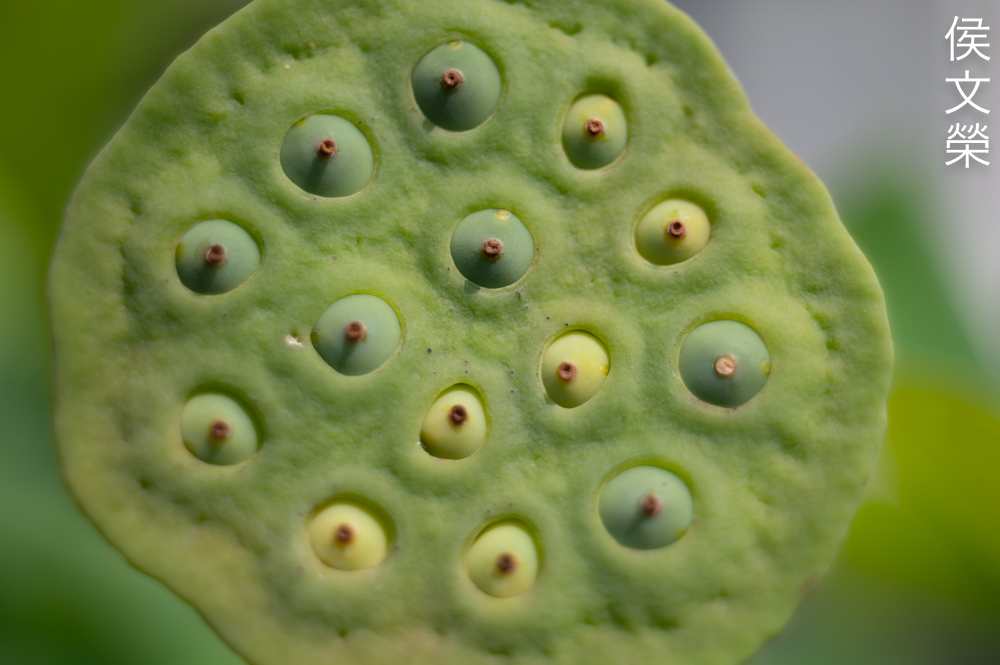
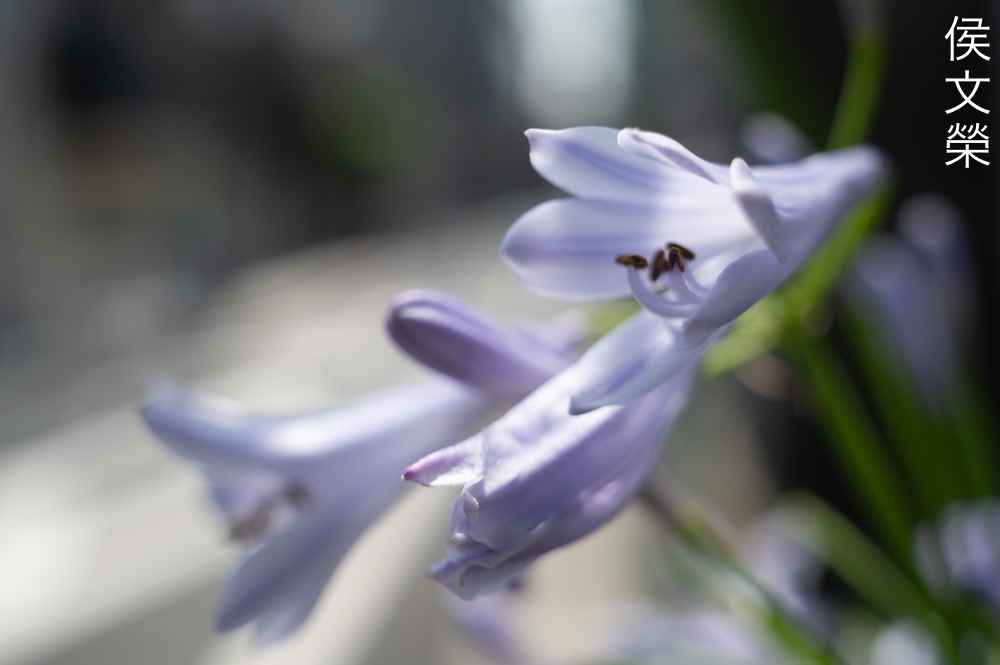
One of the defining features of this lens is how close you could focus with it, it’s not the same as a macro lens, or at least not at that level but it’s close enough for you take useful closeups. This is beneficial for a lot of scenarios such as weddings, videographers will find this helpful, too.
I love how refined the tones look, so smooth and pleasing. There’s nothing cheap about it, it’s definitely a premium lens, deserving of the Carl Zeiss brand.
It renders tones in a special way, the contrast is not as high as you would see with many modern lenses, it is not saying that the colors as washed-up, but how it presents them is different as you get to see more of the spectrum.

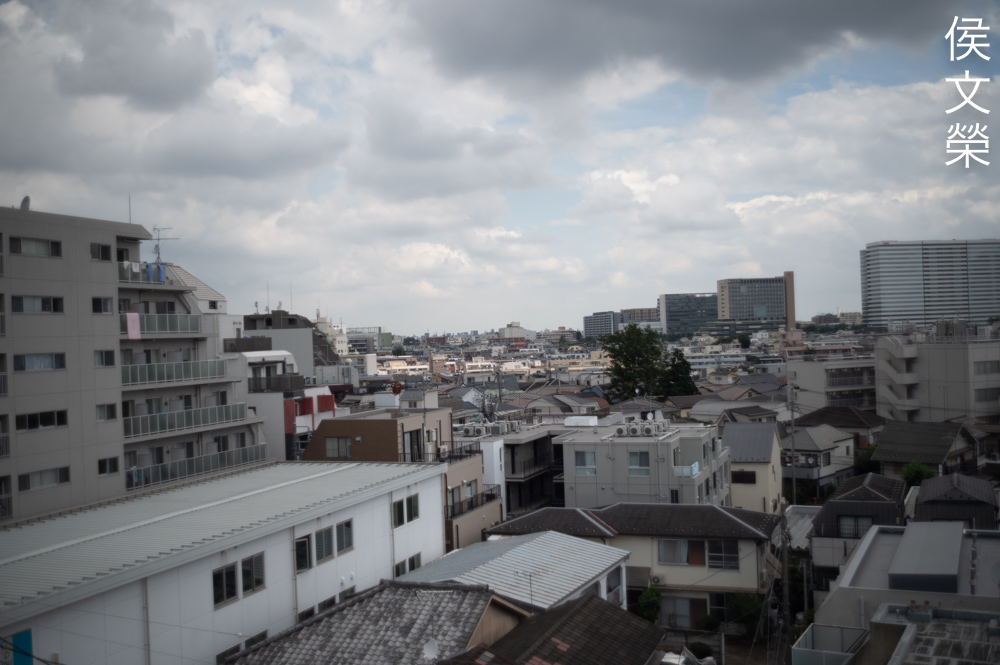
This lens may be useful for product photography, too. Its wideness and the ability to focus close helps, it’s great for presenting smaller items so they don’t look tiny. This is also great for landscape photography so you are able to position your foreground closer.

The out-of-focus detail don’t look bad at all but it’s not excellent either, I can say that it’s above-average when compared to many lenses of this class. I’ve seen worse, but I have not seen a lot of other lenses that exceed this as far as wide lenses go.

Flare and ghosting is a bit more manageable in more reasonable scenarios but it’s still enough to see how it affects your photos. Just be mindful of this trait and you should be able to avoid it in most cases.

I did notice that this lens tends to render with a cooler tint, as seen with many lenses from the film era, it’s done to make black-and-white photos appear to have more contrast. In color photography, it adds a little character to the photos, making them look more “vintage”.

Lowlight photography is not a problem because of its fast aperture. Since it’s a wide lens, you are able to shoot with a lower shutter speed than what you’re comfortable with.

So long as you do not frame your straight lines parallel to the edges of the frame, you’re able to get away with it and nobody will notice the distortion in your photos.

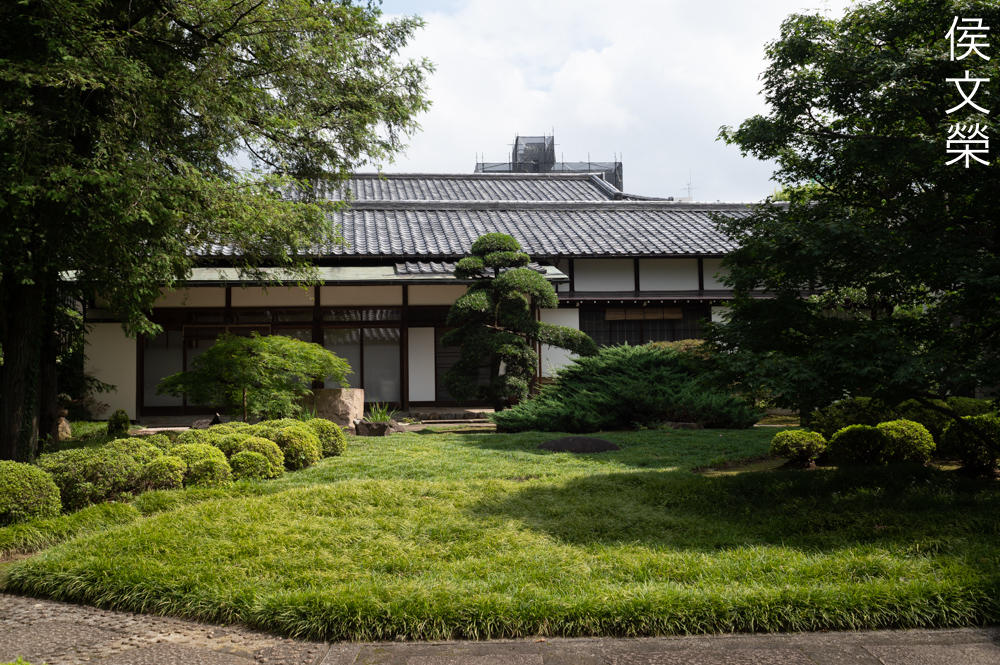
It’s also not bad for architectural photography where the lower level of distortion is much appreciated. It’s still not perfect but it’s more useful than other wide lenses from several decades ago.


(Click to enlarge)
I really enjoyed shooting with this lens, I am amazed at how well it performed under various situations. It has a wonderful and refined optical performance, not quite as clinical as modern lenses but it’s close for a lens that was designed many years ago, it’s a real gem that’s worth sharing with new photographers who are just getting into the hobby of enjoying vintage lenses.
Let’s now check some film pictures. Film has a unique look that is hard to simulate with a digital camera thanks to grain. It reacts differently to light, this means that you could mask a lens’ flaws or amplify them. Since this was designed to be used with film, it’s best that we judge this using its intended medium.


(Click to enlarge)
Since film is not as reflective as the glass surface of a camera’s sensor, at least theoretically, you shouldn’t see as much internal reflections from this lens. I could not validate that statement but I did find that I am not seeing the severity that we saw when we’re commenting on this topic before when shooting using a digital camera, what do you think?
Things like these should present a problem when testing for a lens’ out-of-focus character but I didn’t see any smearing or roughness, this is as good as it gets from a vintage wide lens.

The thin depth-of-field useful for isolating elements in your scene, the ability to focus this close and the smooth character of this lens is a great combination.

The hexagonal iris can have a slight tendency to render clumpy-looking details in the background if you are not careful, this is the worst that I could get. It doesn’t look as bad, in fact, it looks “painterly” just to give it a creative description.

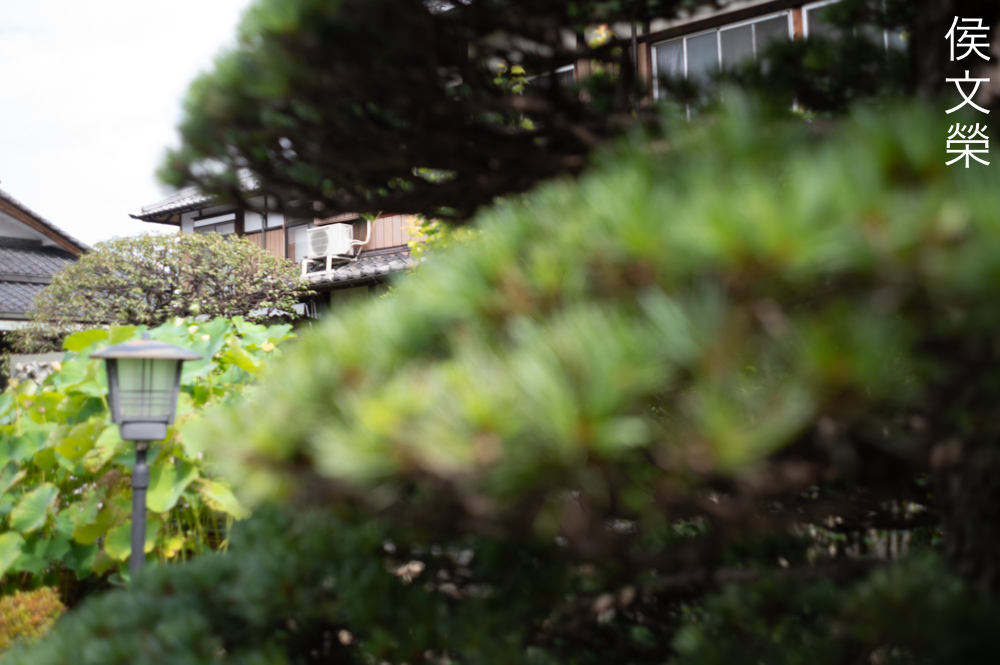
The focus transition looks smooth, not like something that you would associate with a Tessar. You will not get a “wall-of-focus” effect from this where the blurry parts of an image abruptly start and end. That’s not undesirable in some cases but it’s a trait that I associate with cheap lenses. This is subjective, I even like it sometimes just for continuity purposes when shooting a video.
Bright, overblown parts of a scene will look as if they are glowing, with thin layer of “bloom”. This is what some people call the “Leica glow”. It’s just some bullshit term people made to justify their overspending, you can get that with many vintage lenses from other manufacturers, too.
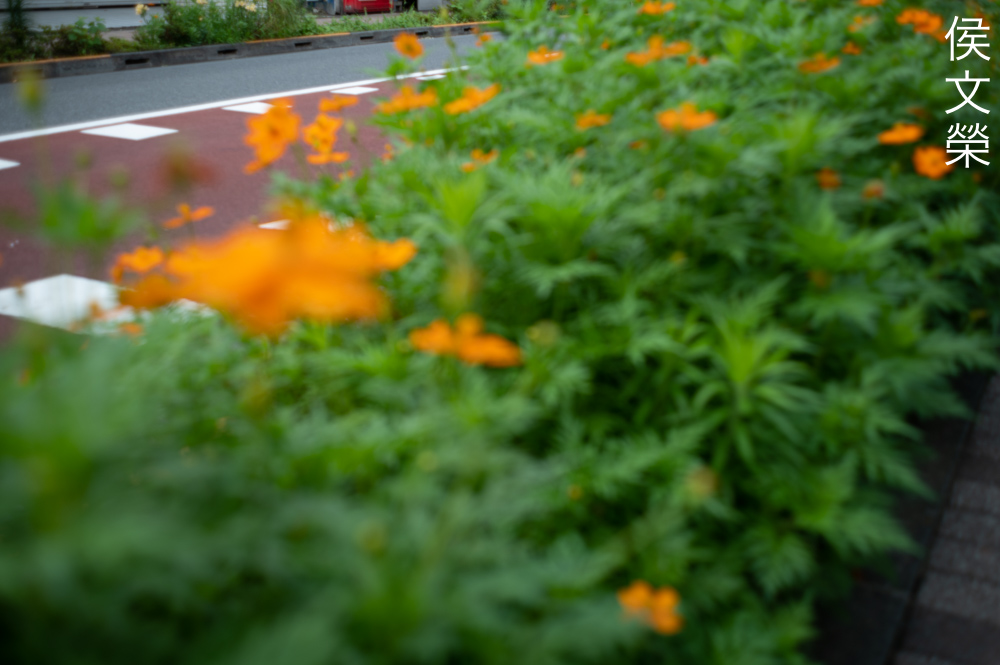
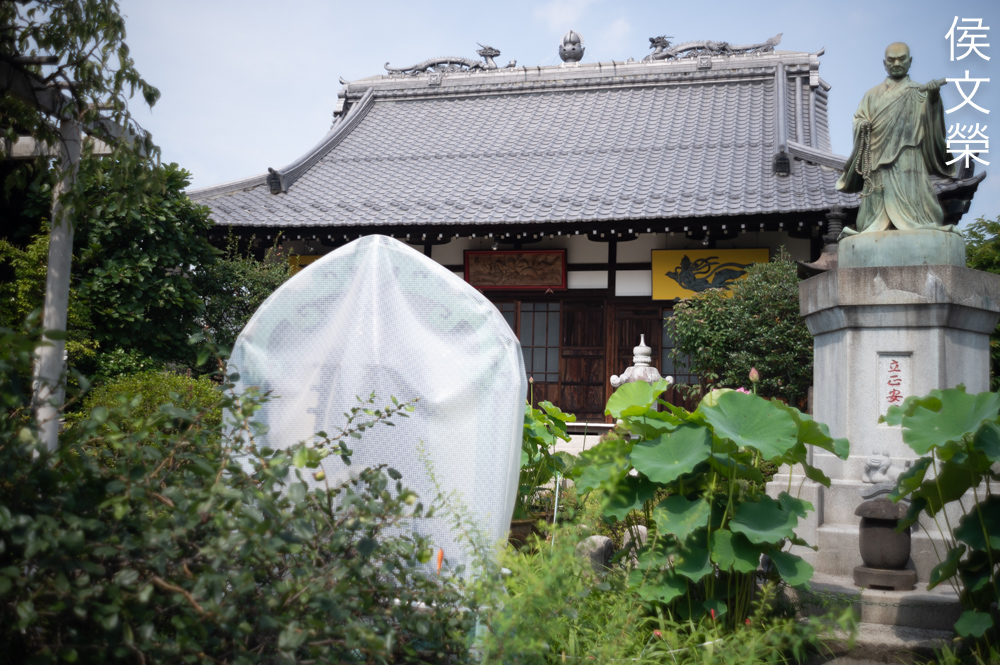
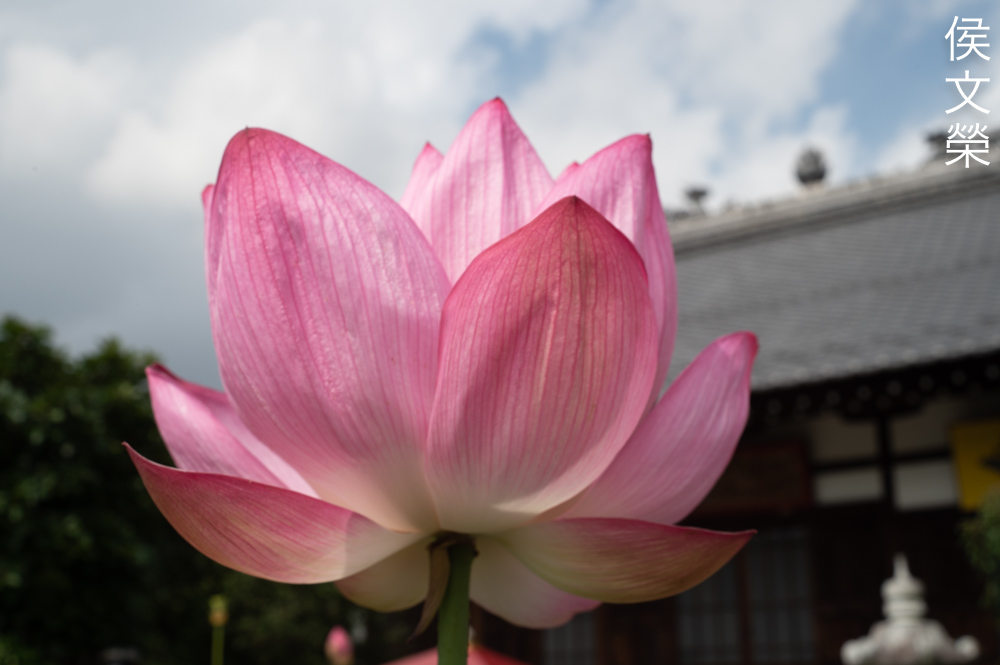
The tendency to add a slight bluish tint to your photos is something that you should be mindful of if you are shooting foliage, your greens will look a bit different from your perception.

Here’s another example illustrating how the foliage looks a little bit more bluish than what I wanted. This is a different part of the temple complex, with different plants.

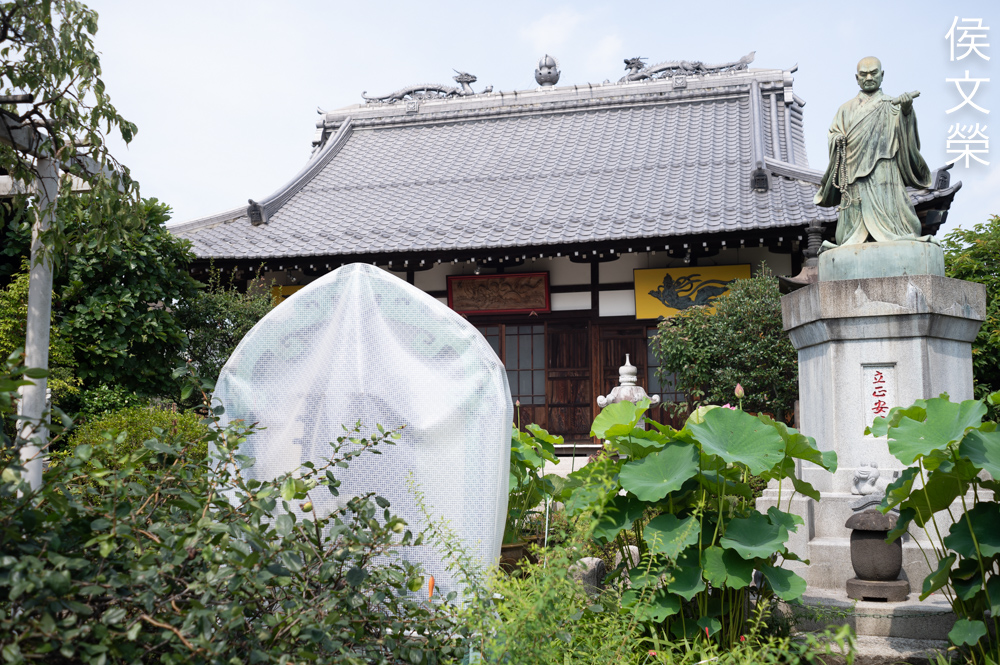
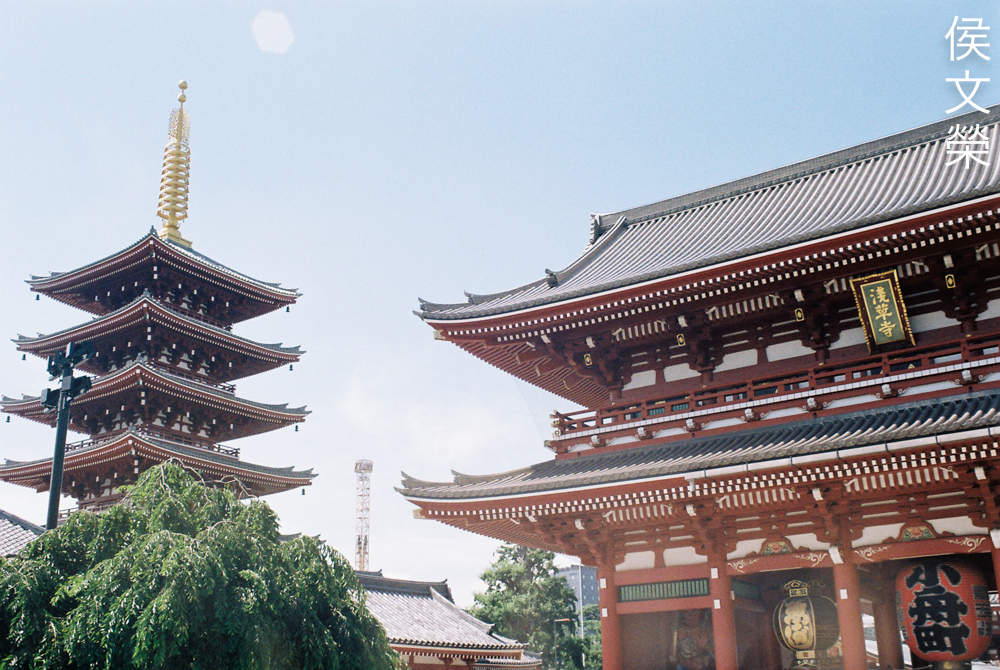
As with the previous photo, notice how the vermillion looks a bit different due to the cooler look. It’s not bad, it’s just something that you should be aware of when shooting bright colors.
It looks like I was able to get away with a lot of things with this lens, in this case, it’s distortion. It’s hard to see it here despite having my straight lines parallel to the horizontal edges of the frame.

Flare will subdue your photo’s contrast, making it look washed-out, flare and ghosts are the only issues I have with this lens.


(Click to enlarge)
Here’s the rest of the set, I want you to pay closer attention to the colors. Overall, I love how it performed when shooting with film, I can imagine how good these look back in the day. There’s a sense of clarity to the photos, there’s no “muddiness” to the look that’s associated with many cheap lenses and it renders with a refinement that’s associated with many premium lenses from Carl Zeiss (from this era). You cannot deny that the only major flaw of this lens is the inferior coating but that’s something that can’t be helped since the technology wasn’t there yet.
I can definitely recommend this to everybody, in any mount available. This is definitely one of the better lenses that I have had the opportunity to shoot with, it’s so good that it left an impression on me. Apart from the flaws that I have highlighted, which are easy to avoid, I don’t see why it can’t be relevant today for just about anything. I can see great value in this lens for shooting videos, where the ability to shoot at closer distances will be very useful. These aren’t cheap, so I bought the Exakta-mount variant because it’s the most affordable one I found, I only paid $70.00 for this, do not pay more for the same variety. If you are looking for one, make sure that all of the ring work, check the operation of the iris since it’s the most delicate part of this lens. Be sure that the iris actuates in a snappy way, it should be free of oil and rust. It should also have clean glass, free of fungus. Good luck on your search and happy shopping.
Before We Begin:
If this is your first attempt at repairing a lens then I suggest that you see my previous posts regarding screws & drivers, grease and other things. Also read what I wrote about the tools that you’ll need to fix your Nikkors.
I suggest that you read these primers before you begin (for beginners):
- Essential tools
- Best practices 1
- Best practices 2
- Best practices 3
- Ai conversion
- Working with Helicoids
Reading these should lessen the chance of ruining your lens if you are a novice. Before opening up anything, always look for other people who have done so in YouTube or the internet. Information is scarce, vague and scattered (that is why I started this) but you can still find some information if you search carefully.
I highly recommend that you read my working with helicoids post because this is very important and getting it wrong can ruin your day. If I can force you to read this, I would. It is that important!
For more advanced topics, you can read my fungus removal post as a start. It has a lot of useful information, it will be beneficial for you to read this.
Disassembly (Main Barrel):
This is one of the most complicated lenses that I have ever serviced despite the simplicity of the mount. It has a lot of small things that you need to pay attention to, the construction of the barrel is like a puzzle to some extent so you will need to dismantle this in the correct sequence. Needless to say, you will need to use some special tools in order to service this properly. If your lens needs repair, please send it to a legit repairman, share my blog if the person is not familiar with this lens so it will help him get the job done.
IMPORTANT:
The focusing ring has a part that look like rubber, it is not! It’s called gutta percha, something that we all had to use in dental school, it will dissolve when you soak it for too long in alcohol, don’t clean this part with alcohol, at least not for an extended period!

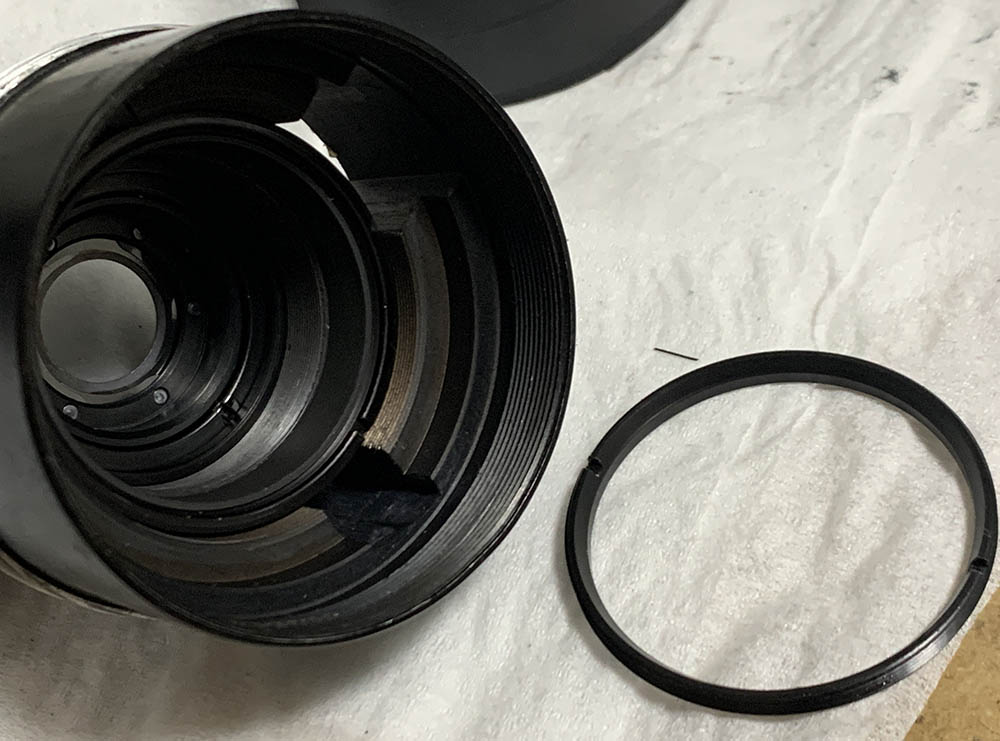
There are several rings at the rear and only one will allow you to remove the rear optics assembly. While it’s best to do this after removing the bayonet mount I’ve removed it as soon as possible just because I didn’t knew what to expect at that time since this was my first time to repair and Exakta-mount lens.

Use a lens spanner to unscrew the outermost retainer to extract the rear optics assembly. It’s the black one, not the big one colored brown.

Once the retainer is gone you can pick the assembly off with a special tool. Store it somewhere safe while you work on the rest of the barrel.
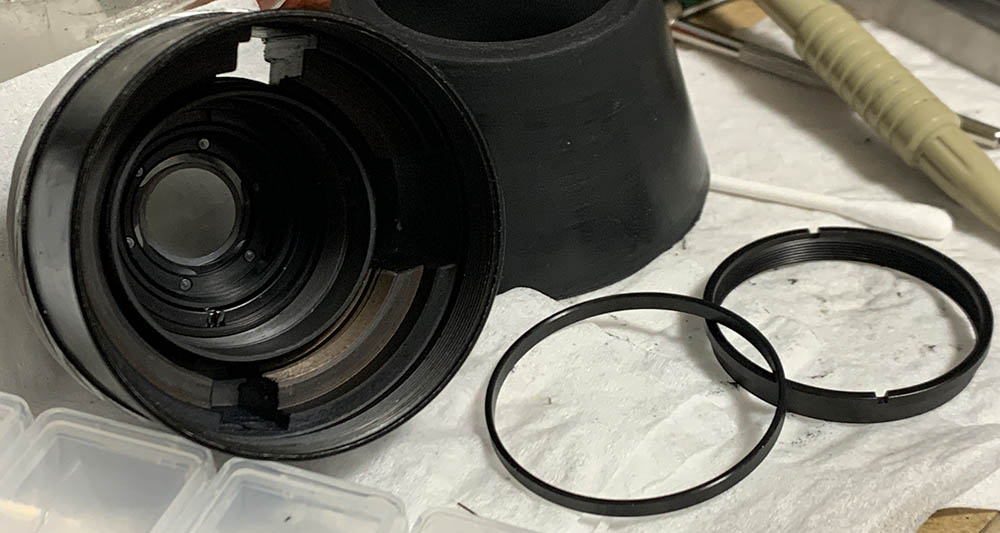
The bezel can be unscrewed with a rubber tool.

Use a lens spanner to unscrew the front optics assembly, be careful not to scratch the front element.

There are 3 larger screws at the rear, carefully extract them and you can pull the bayonet mount off. The aperture-ring can also be removed once the bayonet mount is gone. Be careful when you remove these so you won’t bend anything. Some of the parts here are quite delicate.

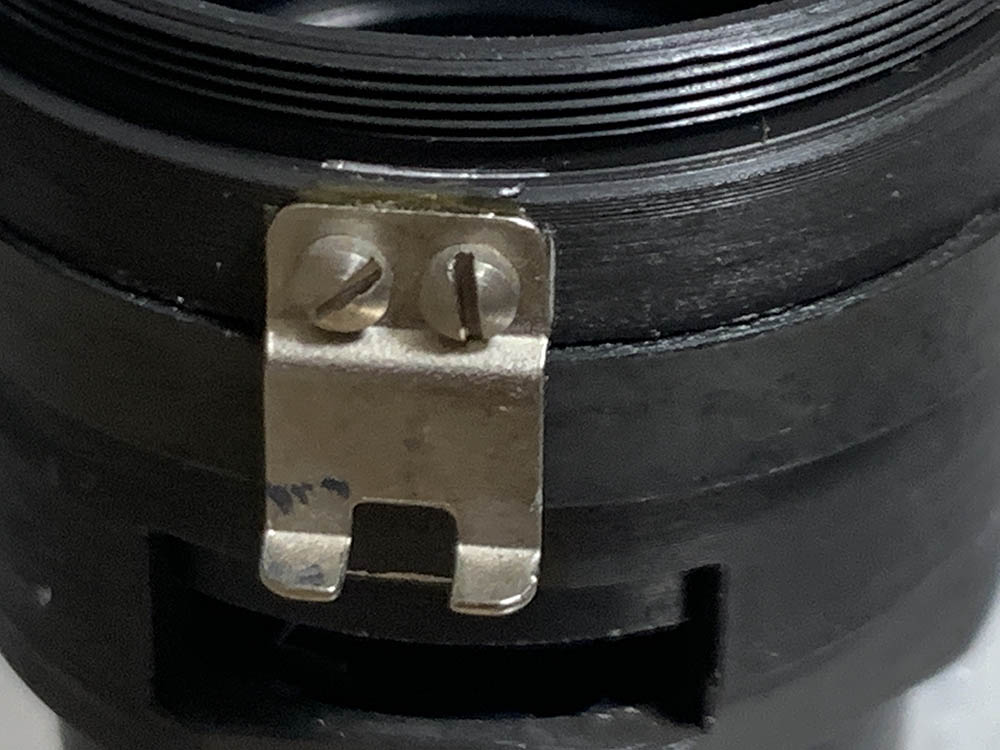
There’s a small ball here, pick this off so it won’t get misplaced. There’s a leaf-spring underneath it wedged under a slit and you’ll want to remove that, too. Clean everything very well since these are usually grimy.

You don’t need to do this but if you want to clean the mechanism of the iris-actuator-button you’ll have to extract the screws of its cover to open it.

Be careful when you remove the cover so nothing will get lost, this part is spring-loaded. Remove the spring and clean it well as it can be quite filthy.

Remove the button and lock but be sure to study how it works so you’ll know how to put this back again later. If you’re not able to align these properly you won’t be able to depress it properly.

The actuator arm and its mechanism is very delicate, it’s easy to warp anything here so be careful when you work on it. Study how it works by operating it and note its range.
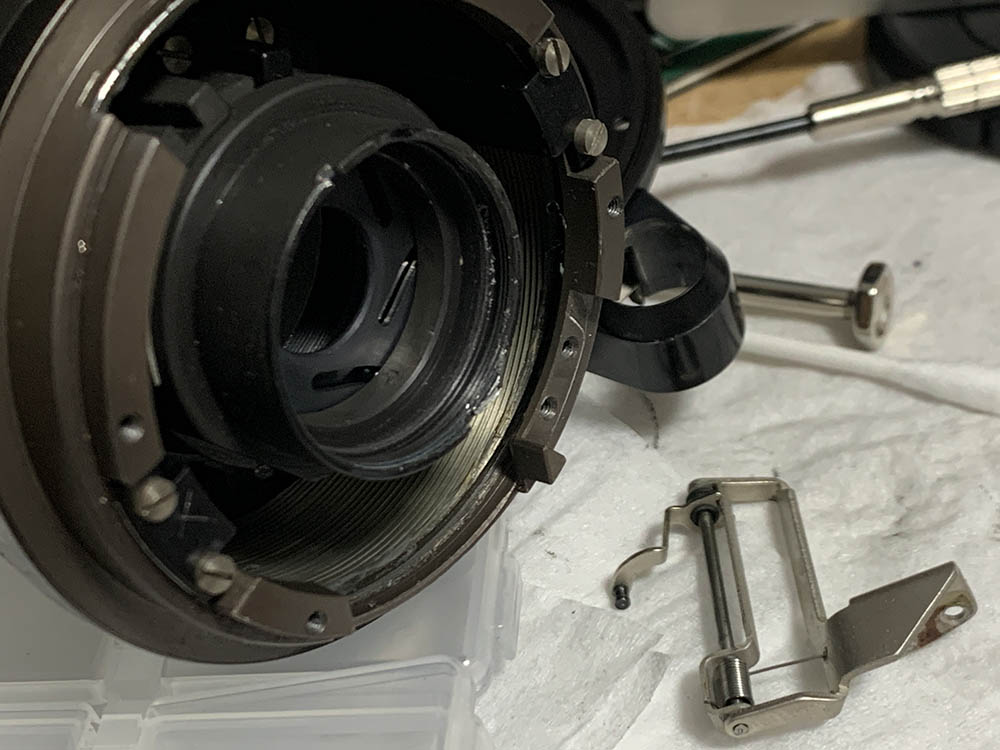
Unscrew its screws and remove it but not without noting its original position.
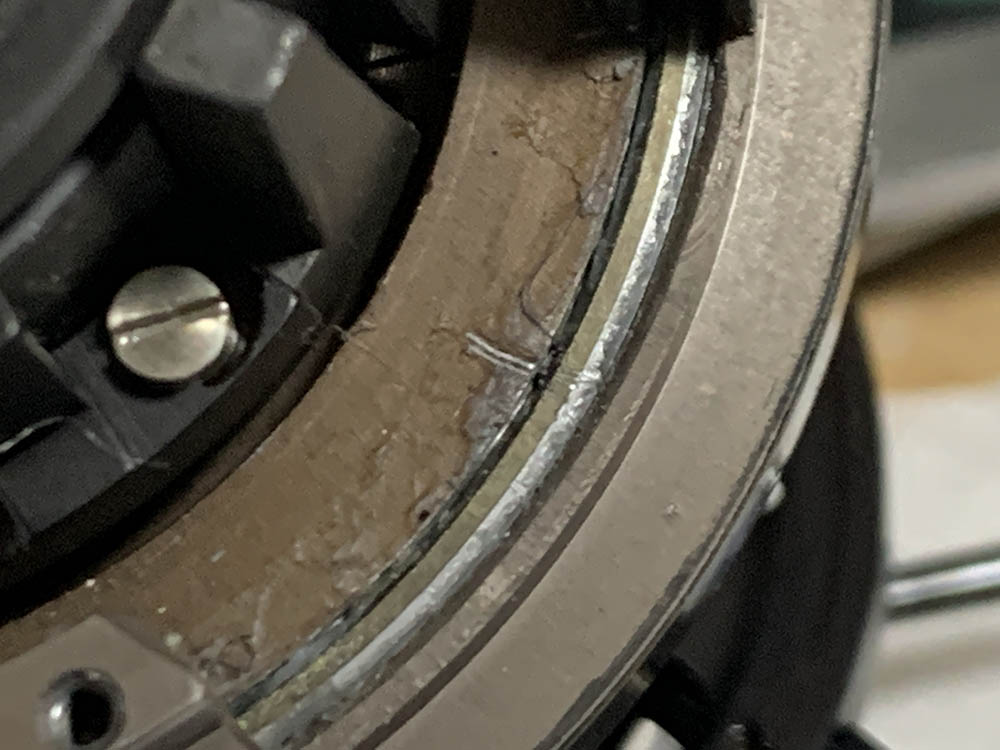
This is how things should align when it’s at infinity.
Carefully extract the screws of the helicoid keys and pull them off. Do not forget to note which key comes from which slot, you’ll have to put them back in their proper place.
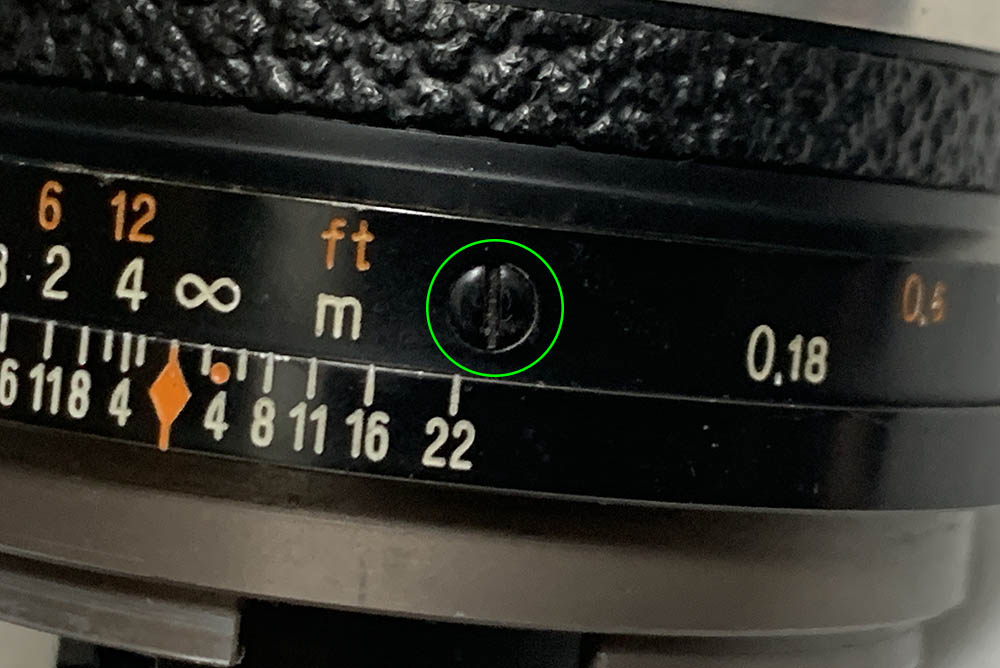
This screw limits the range of the focusing ring. Carefully extract it so you won’t scratch the finish.

Once the screw is gone collapse the helicoids all-the-way and note its position, you’ll have to reproduce this later after reassembly.
Separate the outer helicoid from the central one and never forget to note where they parted since this is also the same spot where they should mesh. Many people forget to do this so they get stuck. Read my article on servicing helicoids to know how to do this properly to prevent any problems.

Do the same for the inner helicoid and never forget to mark where it parted.

Unscrew these so you can remove the arm coupled to the iris mechanism. This is adjustable so don’t forget to note the original position before you remove this thing.
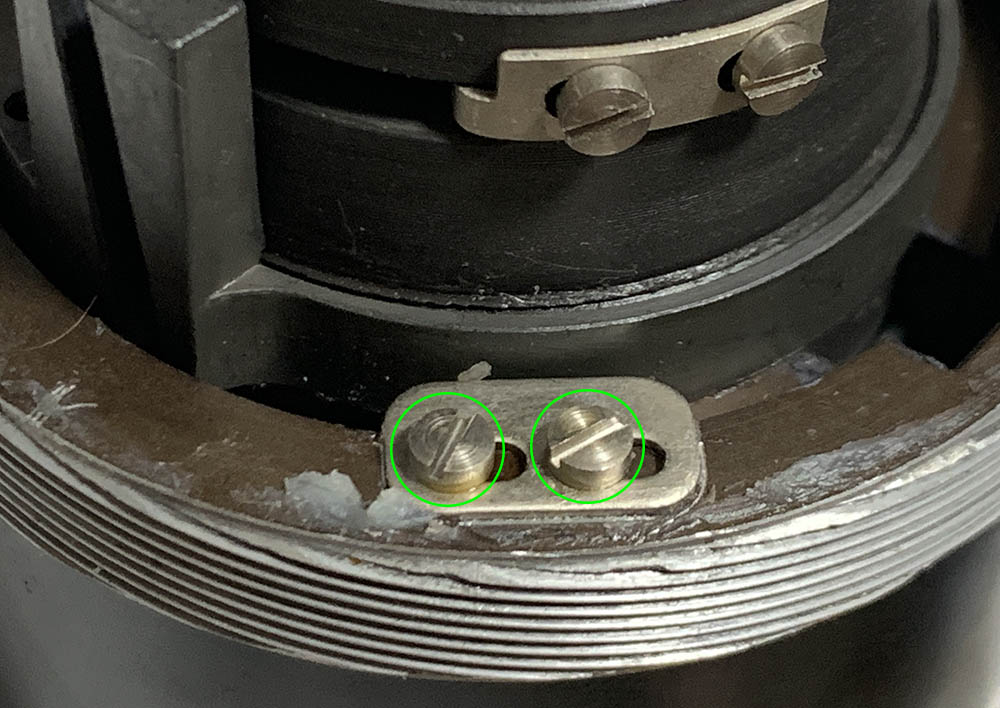
Extract these to remove the stopper of the aperture’s adjuster, this part is adjustable so note its original position.
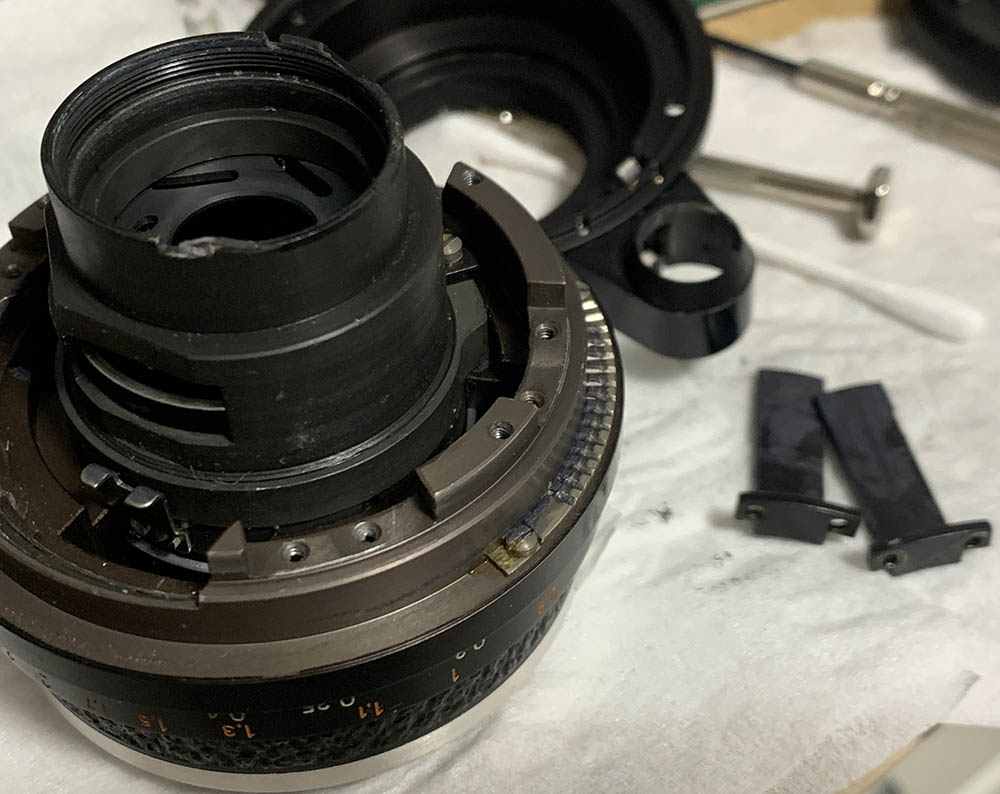
Unscrew this retainer so you can remove the housing of the objective.
You can also remove these in order to dismantle the iris mechanism but you won’t be able to do that at this point yet.

Remove the housing of the objective from the inner helicoid.
Extract these screws to remove the guide for the actuator arm’s rail.

This is the limiter of the iris mechanism. Note its original position before you remove this.

You’re now able to unscrew the adjuster of the iris mechanism.
I cleaned all of the big parts with a strong toilet cleanser – the grainier, the better. I scrubbed everything using a brush then rinsed them all very well with hot water before making a final rinse with pure alcohol to remove any remaining residue. Special care must be used when cleaning the helicoids, the threads are fine in some places and they can be caked with gunk, using a wooden toothpick helps here for stubborn deposits. Dry them well before you continue. When lubricating, be sure not to apply too much, all you will need is a thin film of fresh grease. Mate the helicoids then exercise them by turning several times, this will ensure that the grease is even. Wipe away any excess to make sure that you did a good, clean job. If you applied too much grease it will settle in your iris mechanism eventually, necessitating the need to open it again just to give everything another overhaul.
Disassembly (Objective):
I will condense this section to include the iris mechanism because it’s simple enough to fit in one section. The iris mechanism itself is not complicated but the design is unorthodox so it will take some time just to put everything back. You should not go this deep in most cases unless you’re dealing with a lens that has an oily iris. As far as the optics are concerned, it’s easy to remove and service them since there’s nothing special about the design. The key here is to not dismantle anything unless you need to.

Carefully unscrew this retainer to remove the iris mechanism.

Carefully remove the blades and the diaphragm.

The diaphragm’s closing-plate can be removed after extracting these screws but be sure to note its position first before you remove anything.
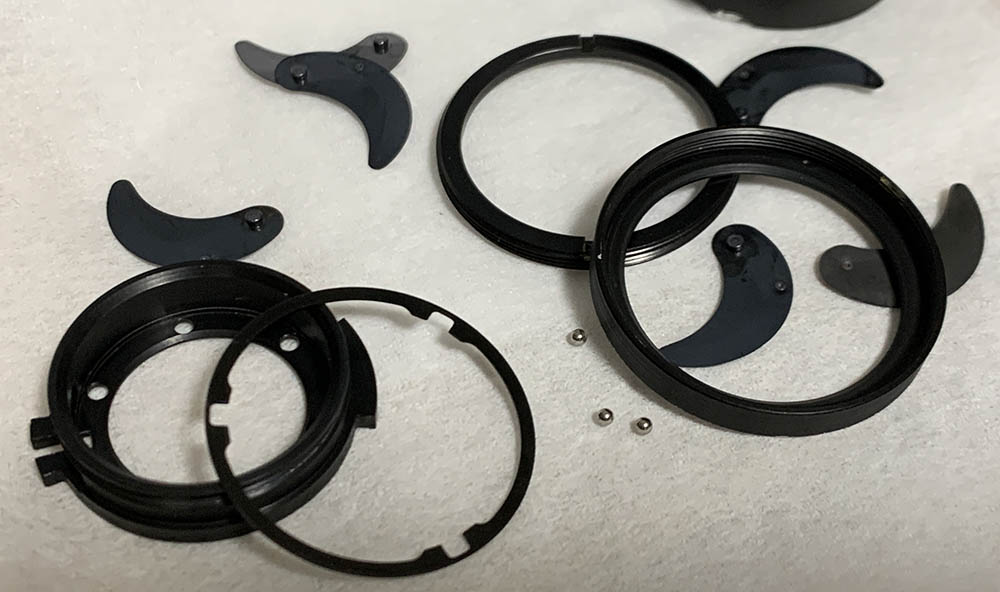
There’s no need to dismantle the diaphragm but this is how it looks like inside. It’s difficult to put this back properly, if yours works perfectly just leave it alone and just flush it with solvents to clean it if this part is oily.

The front group can be remove removed once its retainer is gone.

The 3rd group can be removed after its collar is unscrewed.

The 4th group can be removed just like this.
If your lens has fungus, read my article on how to clean lens fungus, just make sure that you dilute it with distilled water so it’s not going to be too strong as it may damage the coating.
Never lubricate the iris mechanism, if you must, a light dusting of powdered graphite is enough, blow off any excess powder after actuating the iris several times to finish the job.
Conclusion:
This is a very unusual lens, definitely different from what my readers are accustomed to seeing here. I had a great time working on it because I’ve gained new experiences from this. I do not want to make servicing these kinds of unusual lenses a regular occurrence here in the site but it’s definitely good to see a little bit of change from time to time.
Despite its quirks I could say that I’ve truly enjoyed shooting with this lens. The amazing photos that I get from this is a big reason for my liking this more than I previously anticipated.
Thanks for following my work, if you liked this article please share this with your friends so it will get more views. This site earns around $0.40 a day, we are totally reliant on views. You can also support this site, it helps me offset the cost of maintenance and hosting. You’re also helping me purchase, process and scan film. This site promotes the use of film so we are all in this together. See you again in the next article, Ric.
Help Support this Blog:
Maintaining this requires resources and a lot of time. If you think that it has helped you or you want to show your support by helping with the site’s upkeep, you can make a small donation to my paypal.com at richardHaw888@gmail.com. Money isn’t my prime motivation for this blog, I believe that I have enough to run this but you can help me make this site (and the companion facebook page) grow.
Buy me a roll of film or a burger?
Thank you very much for your continued support!
$2.00
Helping support this site will ensure that this will be kept going as long as I have the time and energy for this. I would appreciate it if you just leave out your name or details like your country’s name or other information so that the donations will totally be anonymous. This is a labor of love and I intend to keep it that way for as long as I can. Ric.

1 Comment (+add yours?)