
Hello, everybody! I have a weak right wrist due to a training injury so it’s sometimes hard for me to grip with this. That makes it difficult when repairing cameras but thankfully my left wrist is still fine. I am not ambidextrous at all and I can not use my left hand as good as my dominant arm but it’s good-enough for a lot of things. Many things were made for right-handed people, I could imagine how hard it is for a leftie. Thankfully, there are some things that were made for a leftie and I will show you a camera that will be perfect for those of you who are married to your left hand.
Introduction:
The Ihagee Exa was introduced in 1951 and was made until 1962 as a cheaper alternative to the Ihagee Exakta. There’s a couple of variations and the one in this article is a later model from around the late 1950s. While there are later ones that were made many people don’t consider them to be true Ihagee Exas so these early versions were called “original”, the later ones don’t have the same charm and quality as these ones do.

It’s a very handsome camera, the chrome-trims look beautiful as the black leatherette contrasts with the shiny parts. It’s also charming thanks to the old-school design that looks like a jukebox. What’s unusual with this and most of Ihagee’s cameras is the left-handed ergonomics. The speed-selector and plunger are both situated on the left-side but the knob for film-advance is located at the right. If you’re a leftie I’m sure that you’ll appreciate using this camera. Rumor is that the designer for the original Ihagee Exakta is a leftie and that probably explains why this is the case.
Despite its origin as a budget-camera it has an interchangeable finder system and later ones will even allow you to get the back off and swap that with another one. Build quality looks nice, typical of many 1950s cameras. The fit is nice and the metal parts were plated rather well with a thick substrate. It also shares the same mount with the Ihagee Exakta, it’s able to mount any lens made for the latter so long as it’s of the internal-bayonet type. It’s basically a “baby Exakta” but it only offers speeds from 1/150s to B. This is because it uses an unusual clam-shell shutter design wherein the mirror is also the opening “curtain” and the closing “curtain” is a rotating door. These are heavier than your usual fabric, foil and slats-type curtains so the speeds are capped to a measly 1/150s. This was done to save cost since there’s less parts and the omission of a retarder makes this even cheaper. This sounds limiting but the speeds from 1/25s to 1/150s are good enough for most photos. I actually think that it could benefit more if the highest-speed is at 1/350s but it’s enough for me. You also need to consider that films back then were rather slow and that makes this even more bearable. Using the then-common filters to adjust your contrast will even make your practical film-speeds even slower.

This is not period-correct because the prism belongs to a later period. Using a an eyelevel-finder makes it a lot easier to use, it also enables me to shoot with it in portrait comfortably.

This is unusual, I think the Nikkor-Q•C 13.5cm f/3.5 is the only Nikkor to have been made with an Exakta-mount. This is a nice combination but I recommend that you don’t use a waist-level finder when shooting with this lens.
This is a nice camera, it’s the cheapest option if you want to get into the Ihagee-system. It’s still a joy to use despite its age and limitations. If you’re someone who likes shooting with old, quirky cameras then this will give you a great time. You’re still able to take great photos with it so long as you know what you’re doing. If people back then could use this to take amazing photos then I don’t see why you couldn’t do that today. These cameras aren’t rare nor expensive, I got this one for $50.00 with the finder, you could even find one in better condition for a lot less. When looking for one, see if the view is clear. The shutters should sound right, too. Advance it and see how it feels, check if the film-counter turns as you turn the advance-dial. The mirror should ideally be clean but it’s hard to find one in immaculate condition these days. So long as it’s clear when you look-through the finder then that should be fine for everyday-use. It’s not hard to find one for sale so just check what’s available and maybe you’ll be able to find one that suits your tastes and budget. I wish you good luck when shopping for one.
Before We Begin:
If this is your first attempt at repairing a lens then I suggest that you see my previous posts regarding screws & drivers, grease and other things. Also read what I wrote about the tools that you’ll need to fix your Nikkors.
I suggest that you read these primers before you begin (for beginners):
Reading these should lessen the chance of ruining your lens if you are a novice. Before opening up anything, always look for other people who have done so in YouTube or the internet. Information is scarce, vague and scattered (that is why I started this) but you can still find some information if you search carefully.
I highly recommend that you read my working with helicoids post because this is very important and getting it wrong can ruin your day. If I can force you to read this, I would. It is that important!
For more advanced topics, you can read my fungus removal post as a start. It has a lot of useful information, it will be beneficial for you to read this.
Disassembly (Housing):
Most of the work involved in repairing this camera will have to do with removing things in order to access the internals. It’s not difficult to do but you will need several drivers of different sizes so you won’t scar the drivers and other parts. It is important to take plenty of notes as you go so you will be able to find your way when putting things back. This is not a difficult camera to take-apart, it’s one of the easiest I’ve encountered. There’s a couple of things that you should note and I will show you what they are in this section.
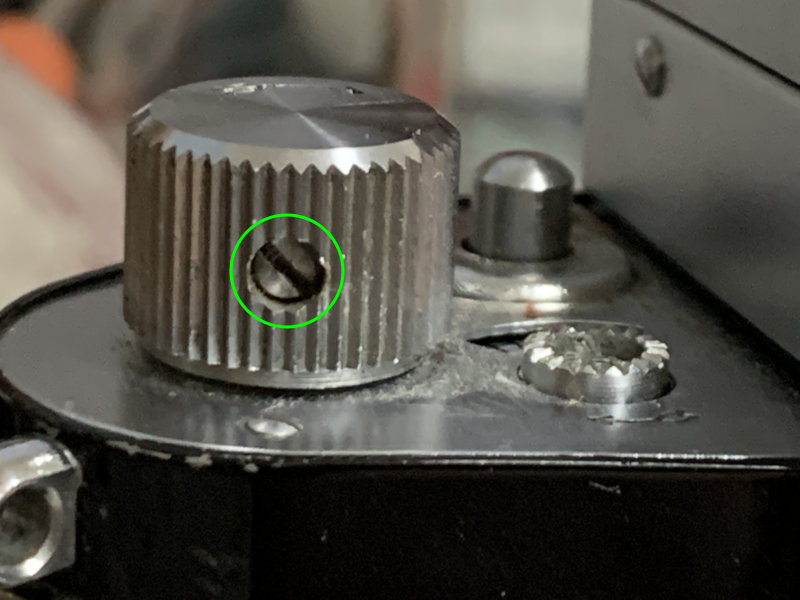
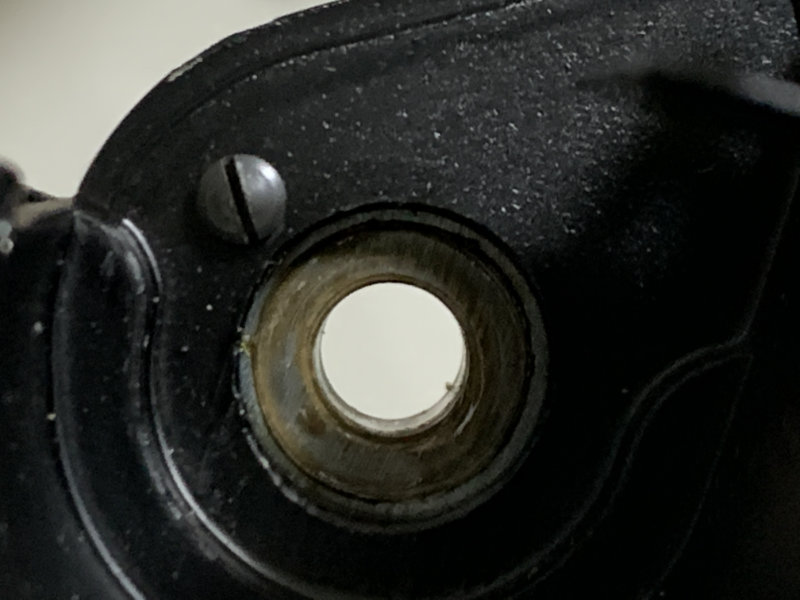
Locate and extract this screw so you can remove it from the advance spigot.
Pull it off and clean it well. This one has excessive grease applied to it, you should never apply this much when it’s time to put things back.
Extract these screws to remove the panel at this side of the camera.

Study how the mechanism works if it’s possible to wind it normally.
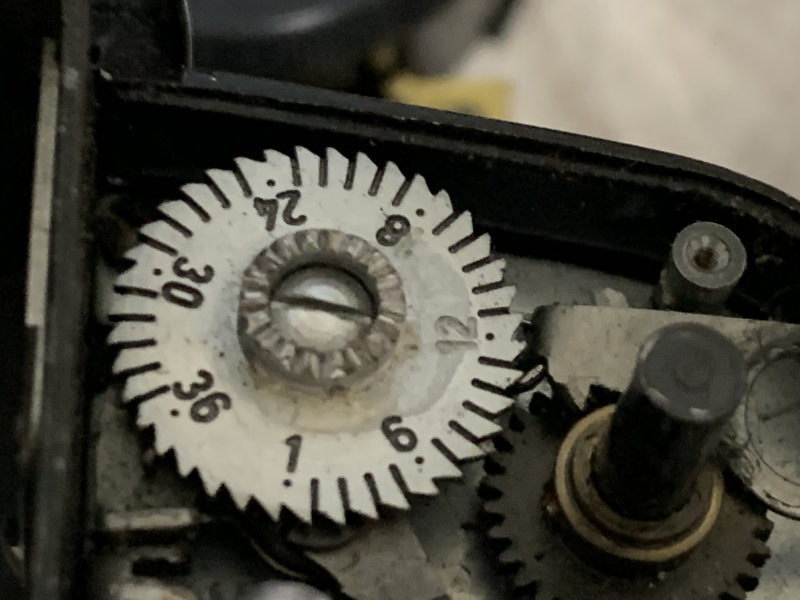
Extract the screw at the center of the film-counter dial in order to remove it but save that for later after you’ve got the internals off from the housing.
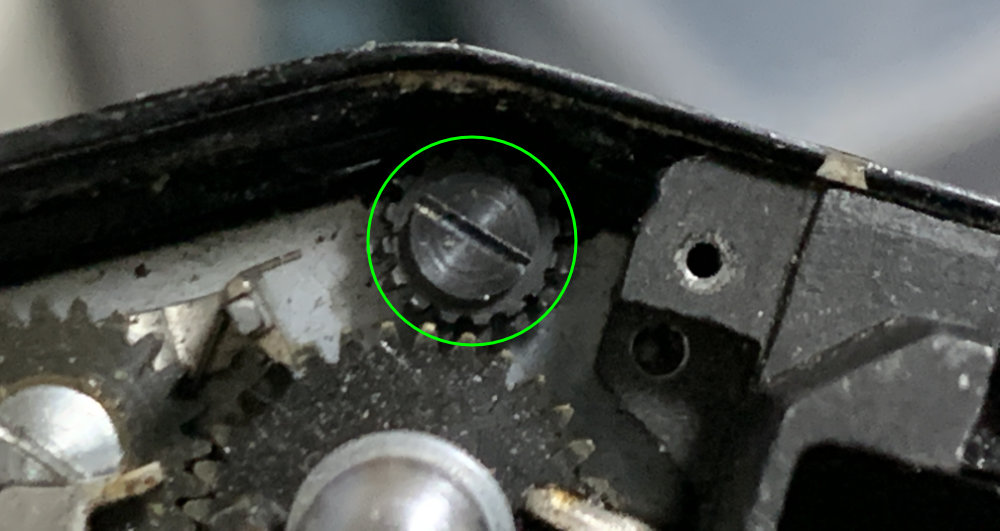
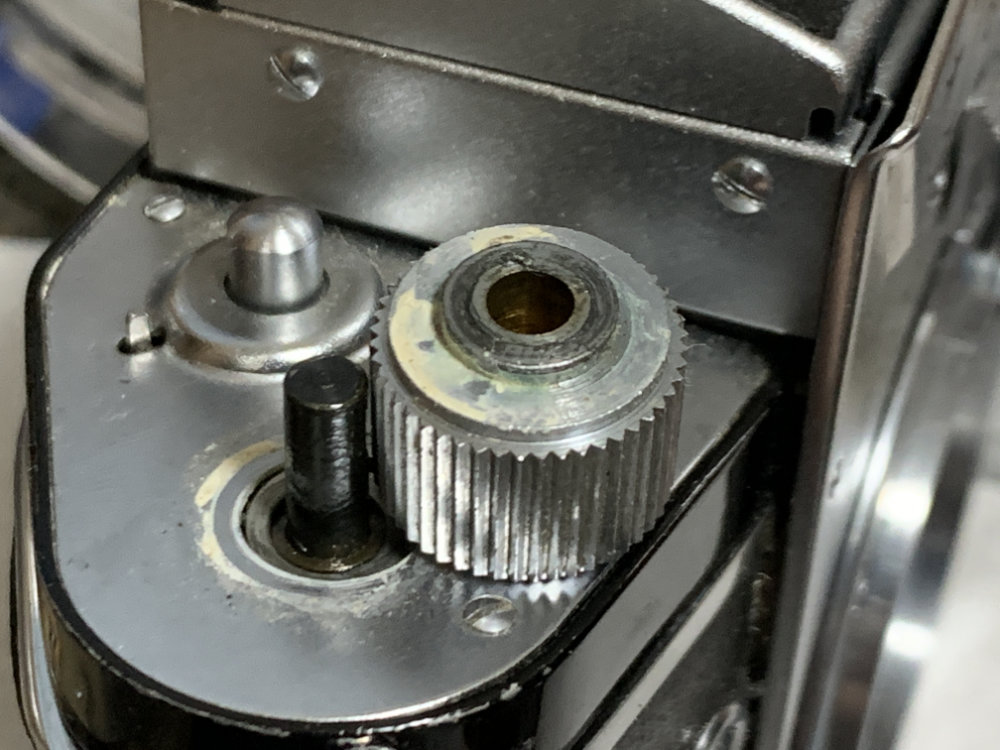
Carefully remove this screw and pull the cog off from the spindle.
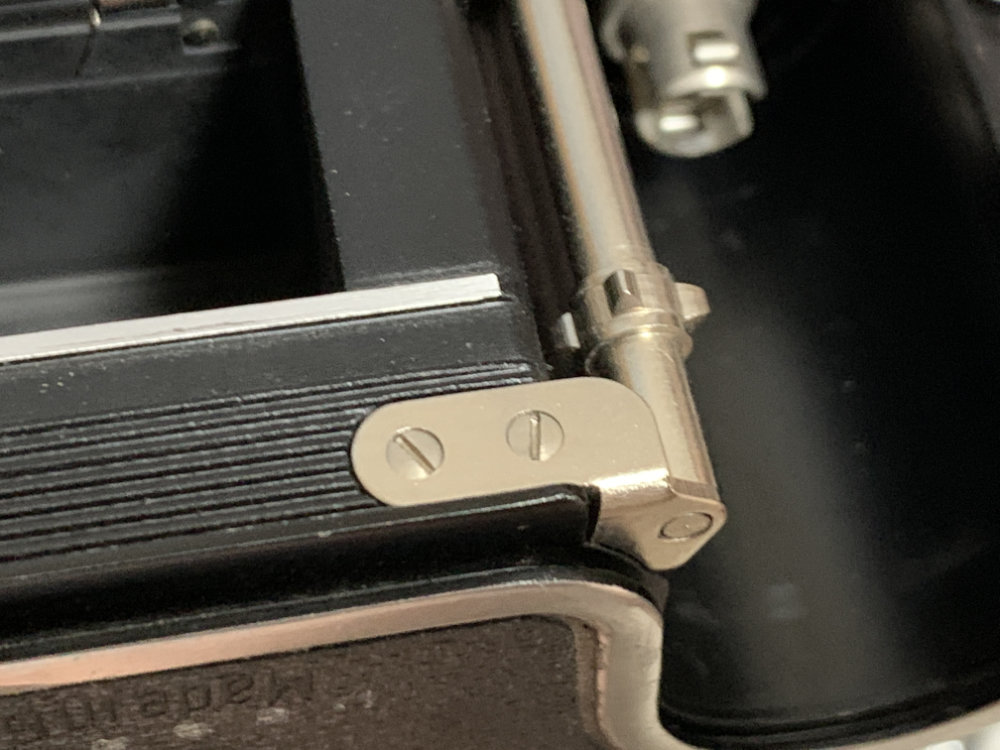
Extract these 2 screws and remove the brace so you can pull the spindle off.
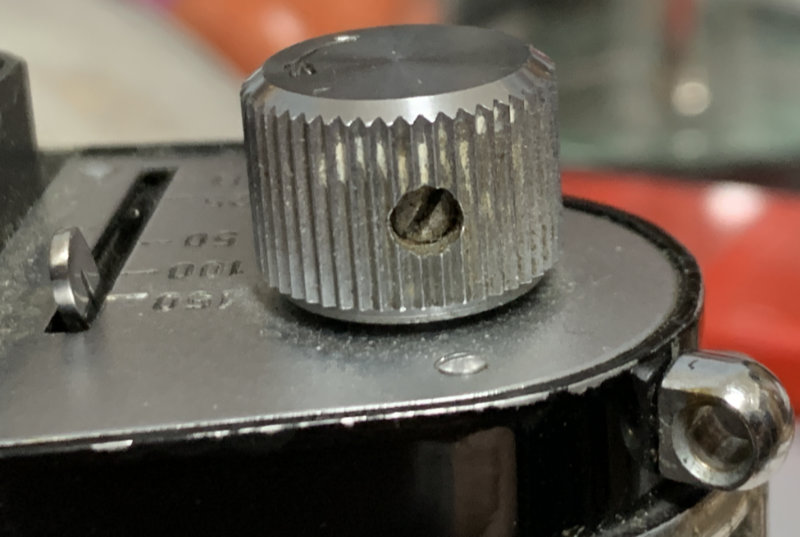
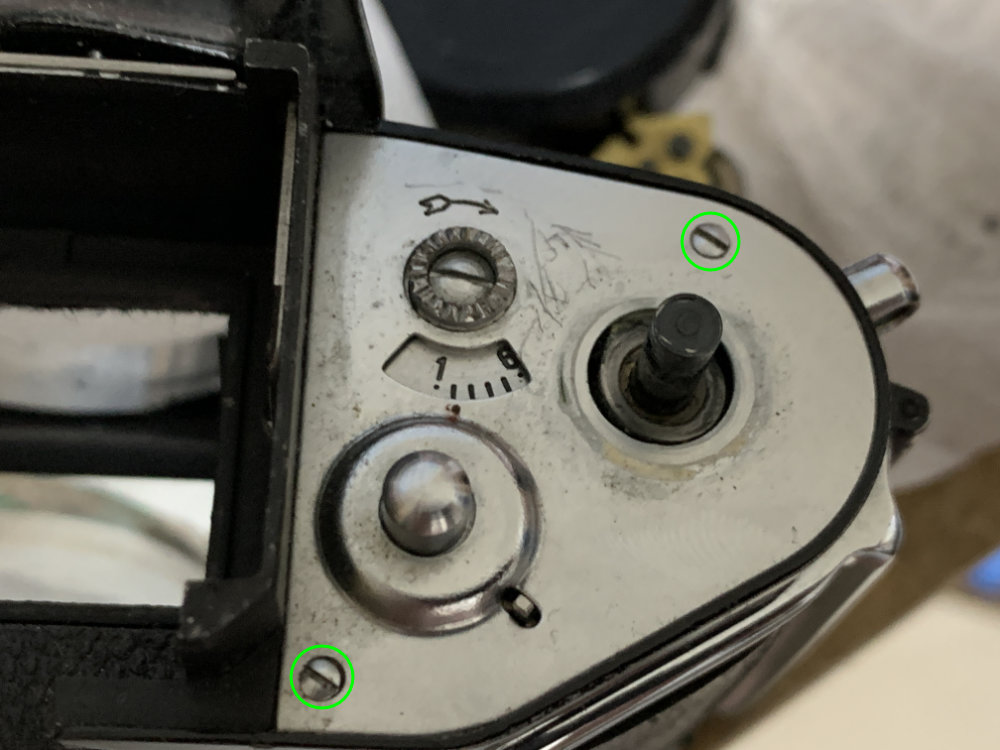
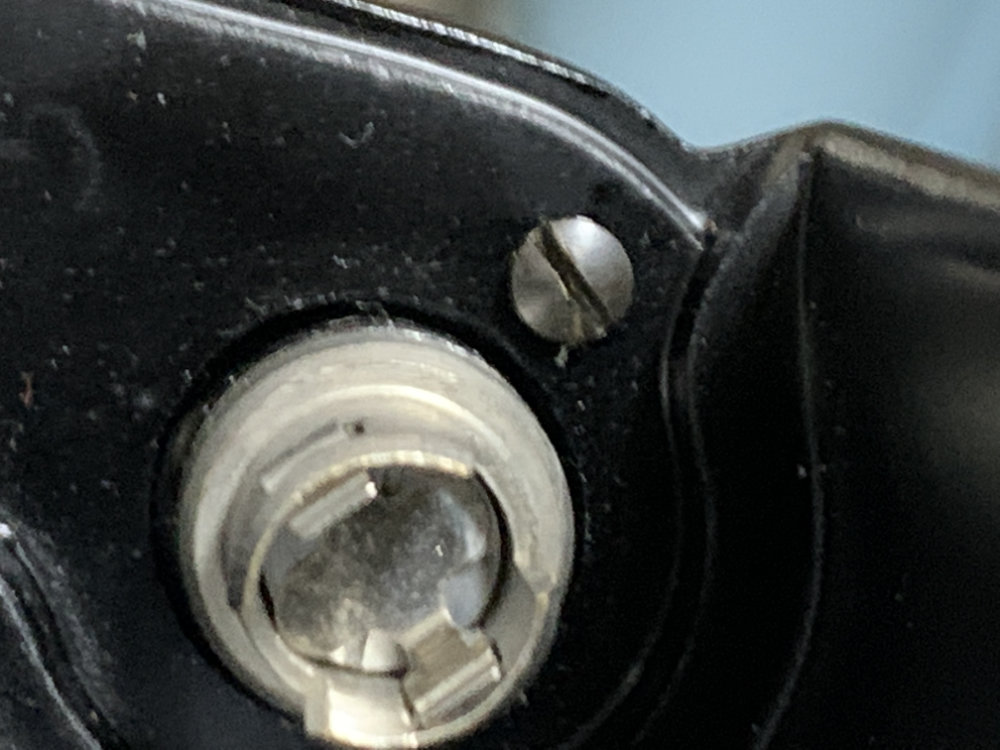
Remove this screw so you can pull the rewind-knob off.
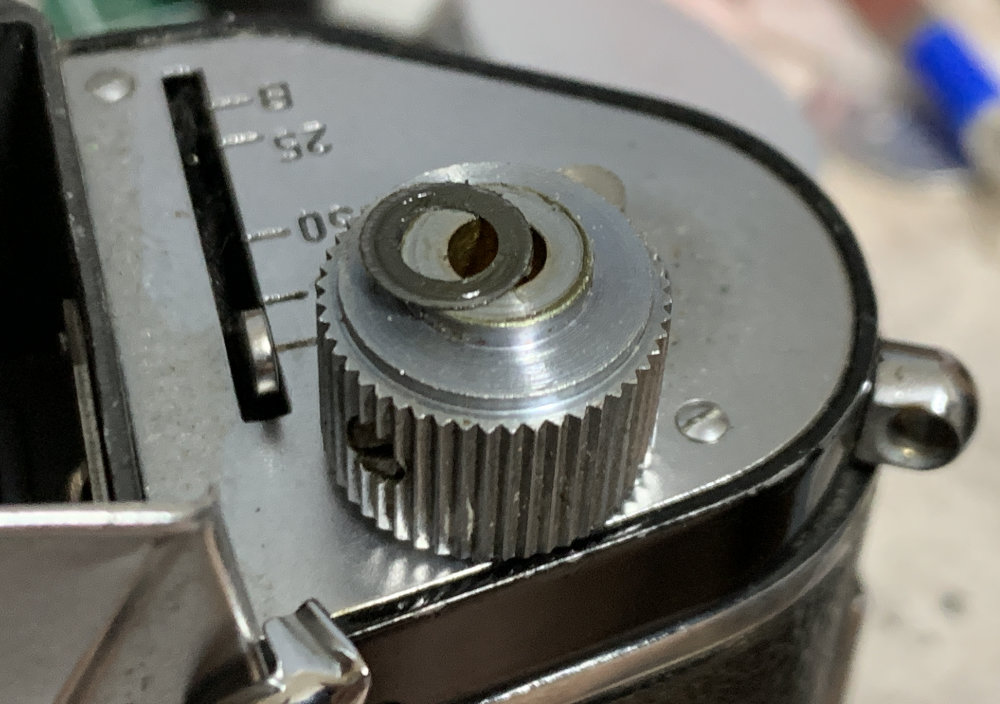
Pull the knob off and be sure not to lose any washers you see here.
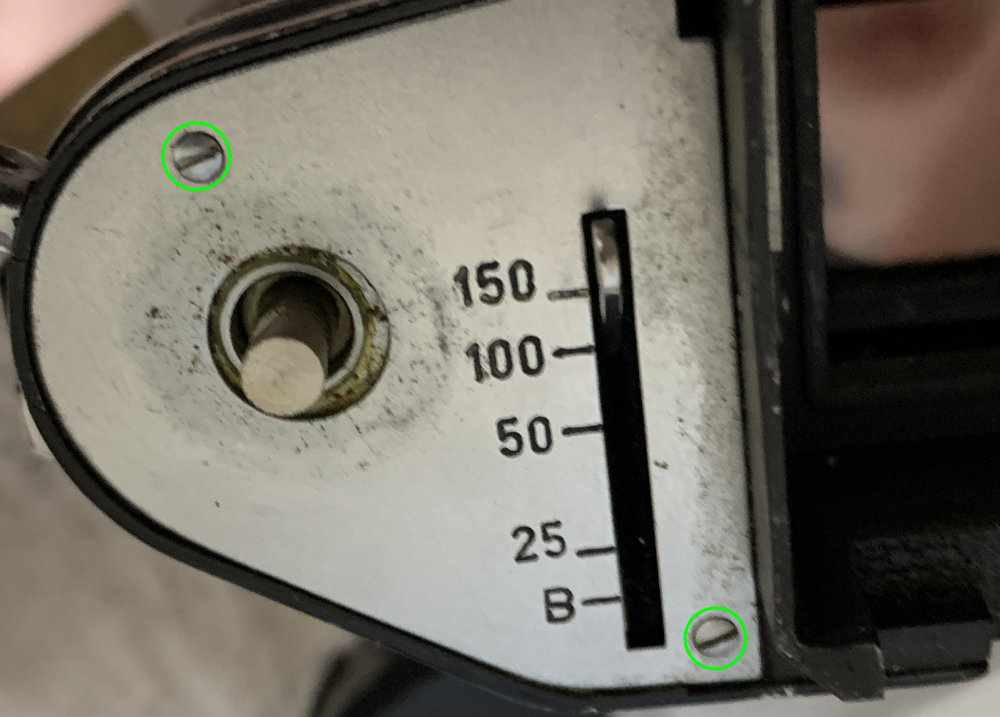
Extract these to remove the top-panel at this side of the camera.
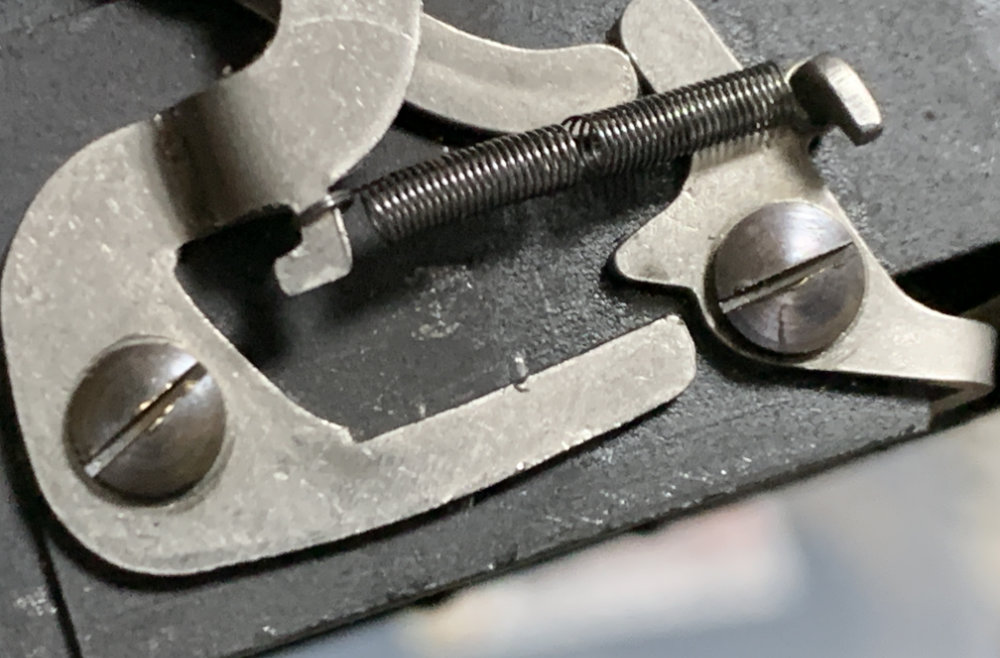
Once the panel is off you can now access these screws, it secures the baffle protecting the slit of the speed-changer. It prevents light, dirt and moisture from entering the inner parts of the camera.
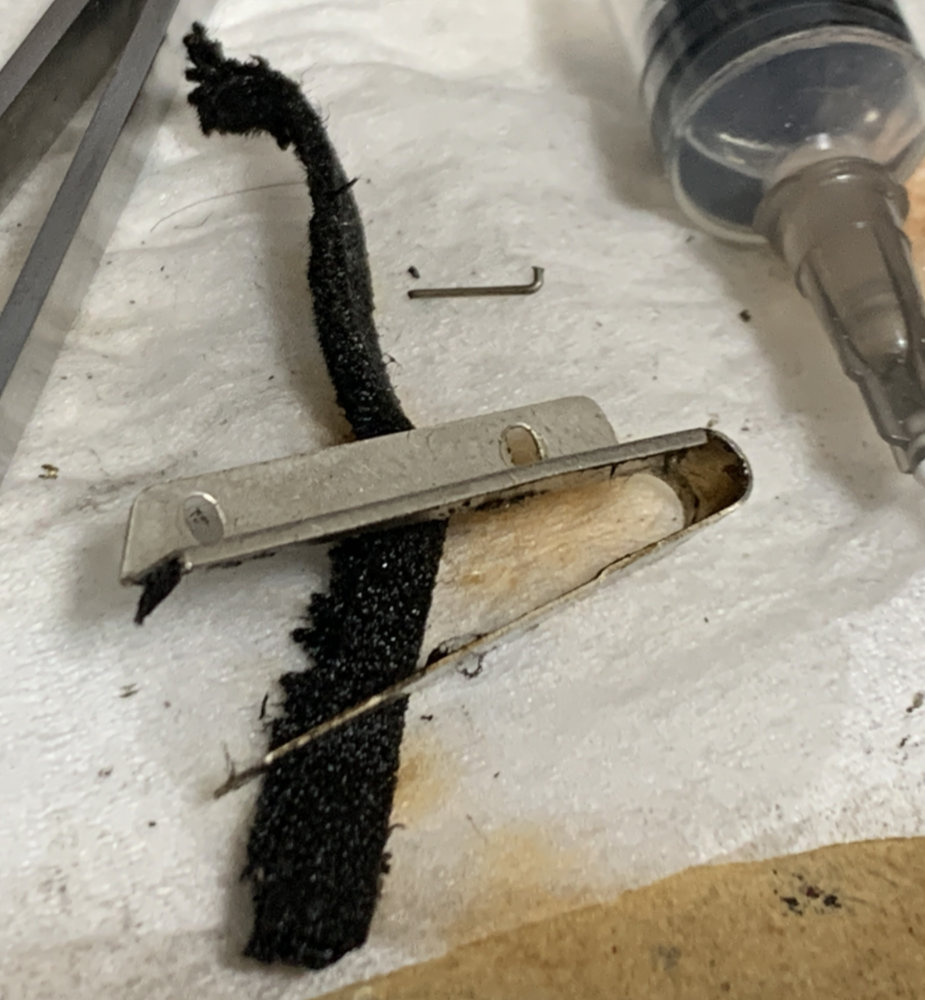
Replace the material with a thicker one that seals-shut when the speed-changer lever is out of the way.
(Click to enlarge)
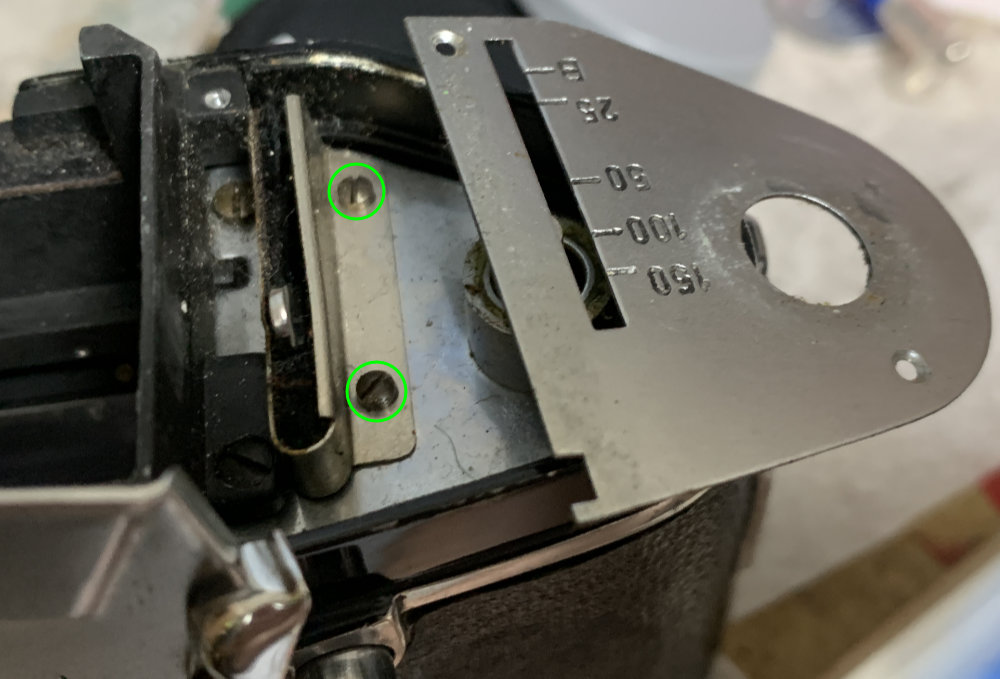
Locate and extract these screws from the film-chamber, one at each side of the camera.
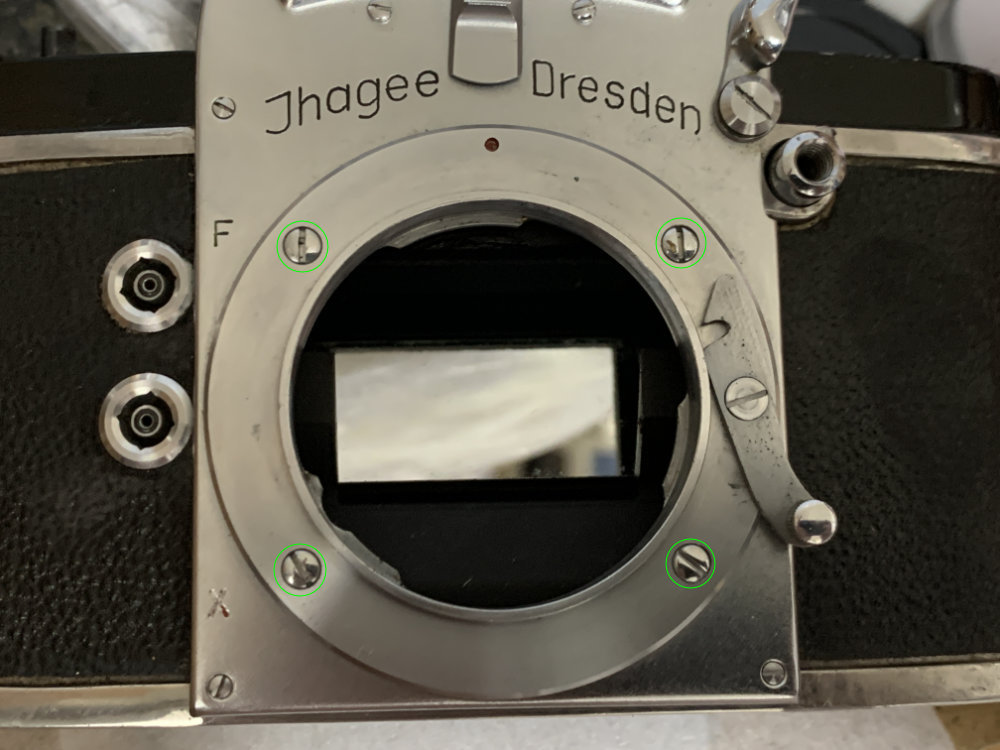
Extract these carefully to remove the mount.
Do not lose any shims you find here even if it’s merely a strip of paper like what you see in my camera.
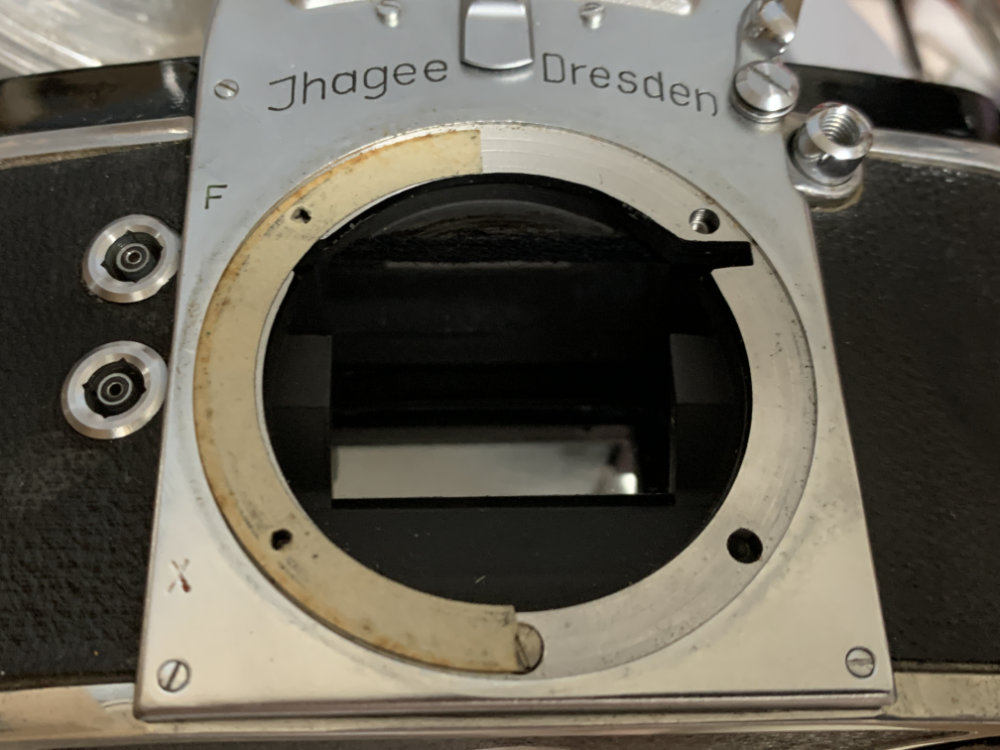
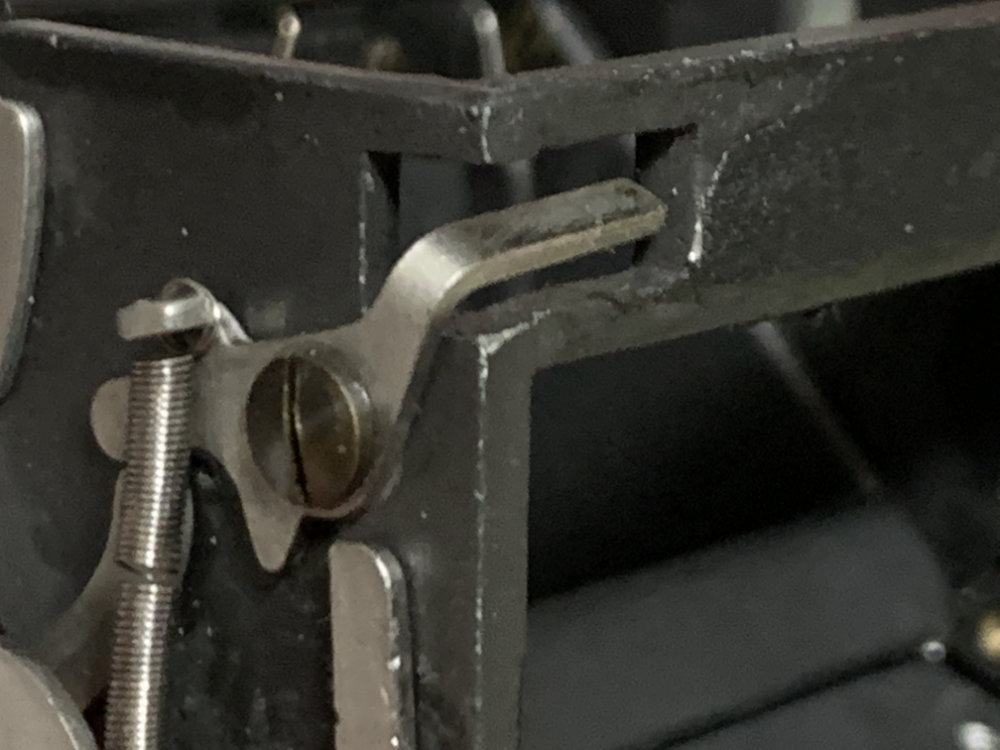
Extract the screw of the shutter-guard and don’t lose anything like this washer.
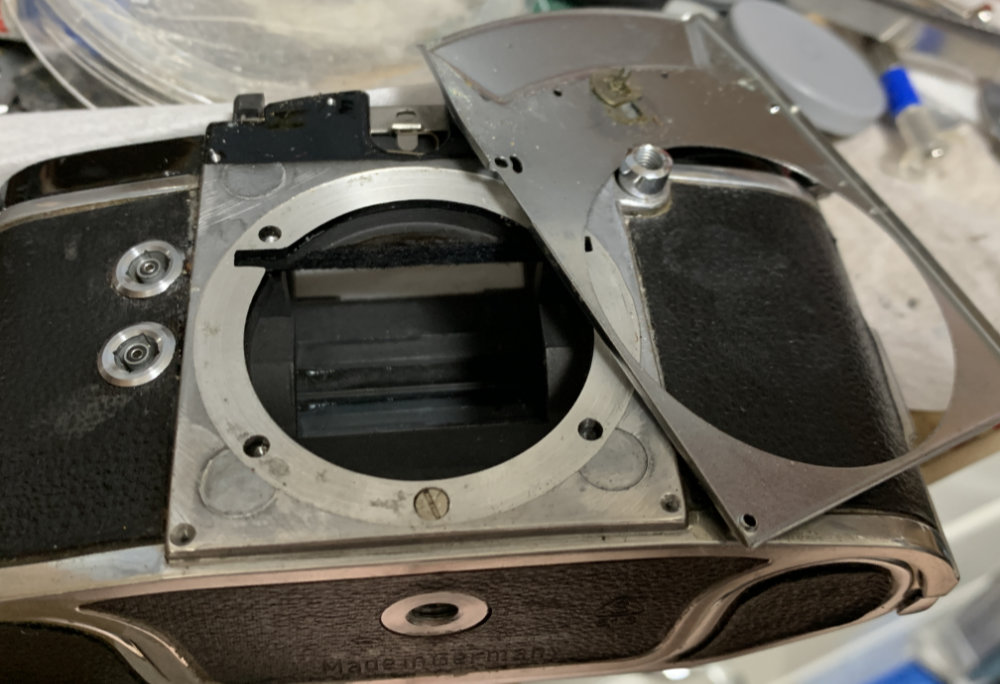
Remove the apron carefully so you won’t damage it. Extract this screw and you should be able to pull the housing off.
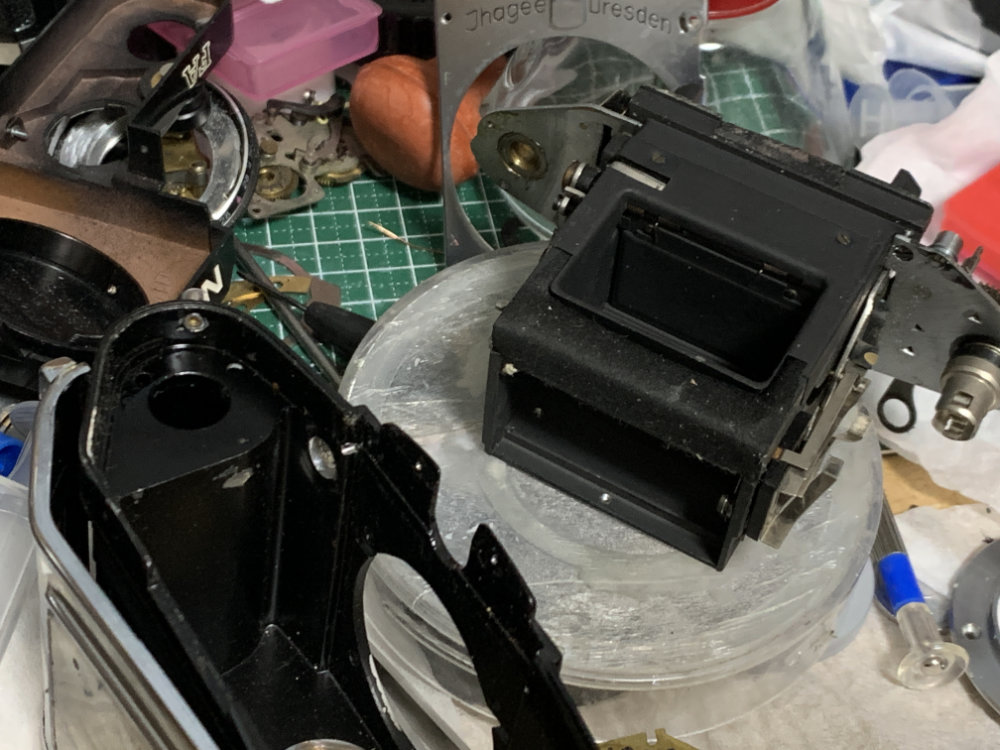
Carefully pull the housing off and make sure not to bend anything while you’re at it. Only push it at the rigid parts such as the spigot of the advance mechanism or the rewind fork. It may be tight so you’ll have to feel your way through it. I think it’s easier to remove it when the shutter is cocked but I am not sure about that.
Clean the housing really well but be careful with using solvents like alcohol because it will dissolve the leatherette. Only clean it with lens wipes. I tore all of the leatherette and replaced them with new ones that I’ve bought online. There’s a chance that some small parts may fall-off and you should be careful with that, too.
Disassembly (Internal):
Here’s where the real work begins. I don’t recommend removing anything more than you should unless the camera is a filthy mess. Mine looks clean inside because somebody worked on this prior to me and he sure left his mark, I am lucky just to be able to bring it back to operating condition after cleaning and adjusting this.
If you haven’t removed the film-counter dial before this is the best time to do this now. Carefully pull it off once you’ve extracted its screw then you can remove the pawl of the dial.

Use a special tool to push the pin off from the advance-shaft. Carefully do this so you won’t damage anything.
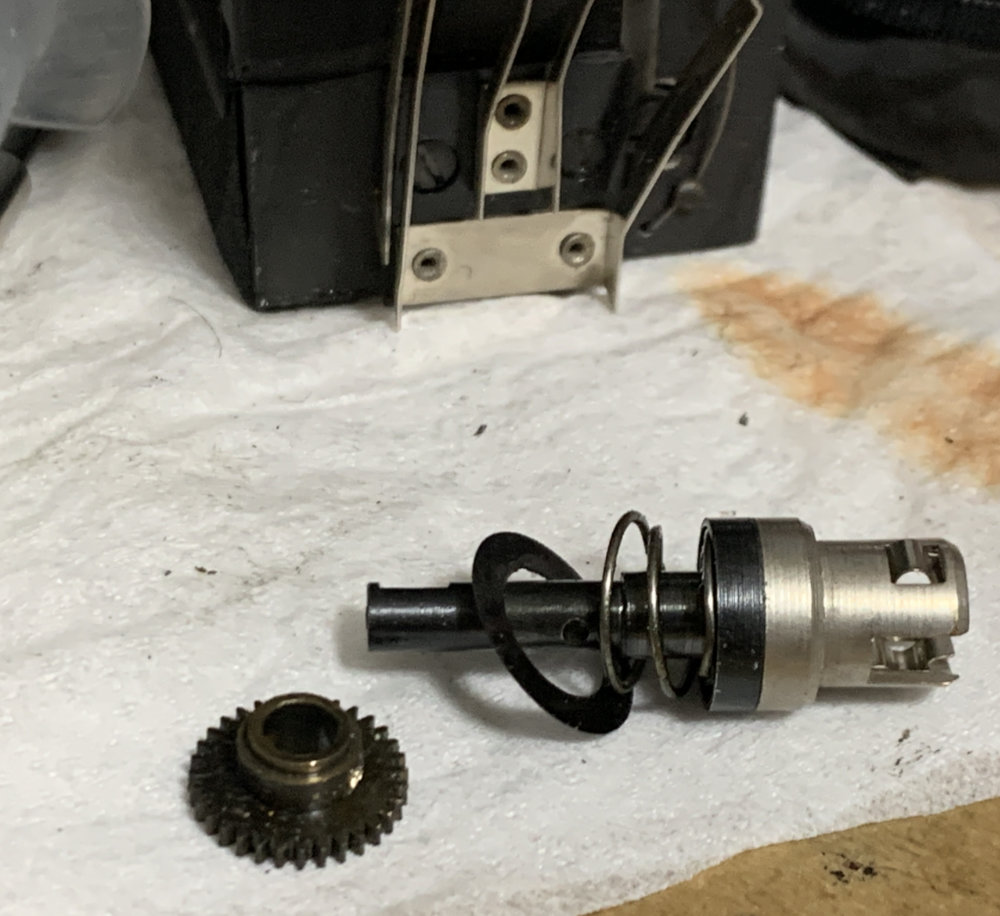
You’ll be able to dismantle the whole thing once you’re removed the sprocket. Carefully clean everything, do not leave any residue.
The main spring on my camera is damaged, it appears to have been pulled.

Extract the screws of the aperture-gate and remove it from the mirror-box assembly.
Clean everything very well and apply a very small amount of watch-repair oil to the pivots. Apply a thin film of grease to any metal-to-metal contact surfaces. Never lubricate anything that gets close to the mirrors to prevent soiling it. The parts that should move when the shutter is fired should move freely and make sure that they do by firing and doing a thorough observation of the shutter mechanism.
Clean the advance mechanism very well and apply a fresh coat of grease to the teeth of the cogs and the spigots. Use a thicker-type of grease for the advance and rewind spigots in order to get a nice, smooth feel when turning them.
Conclusion:
I had a lot of fun working with this camera, it’s a welcome experience because I am getting tired of repairing the same-looking mechanisms of many post-war cameras, most of which have copies or variations of the Barnack-type shutter. It took me around 2 nights to do the job with most of that time spent cleaning and figuring out how things work since I don’t have any useful information around. I got a manual from the internet but it was mostly useless when it comes to adjusting the shutter, it appears to be an incomplete documentation.
I can recommend this to beginners so long as they have the right tools for testing shutters and the right tools to open the camera. These are cheap and robust, the perfect camera to begin your journey into the wonderful world of camera repair and maintenance.
In most case you won’t have to adjust the shutter because it’s so rudimentary that there’s nothing much that could go wrong. If ever you need to adjust this be sure to put the other parts back before you even begin testing the speeds, all of the other parts will affect how the shutter operates because it adds resistance to the moving parts. Use a tester that has at least 2 sensors, one for each vertical-edge of the aperture gate. It’s essential to have this so the shutters will not cap. I’ve managed to get the difference between the shutters down to 0% which is something that I’ve never done, this is easy to achieve with this camera thanks to its lower maximum-speed.
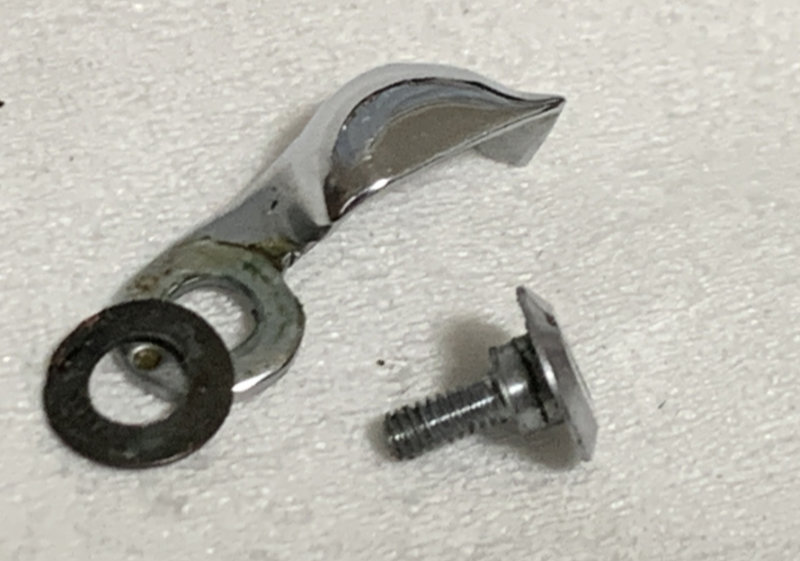
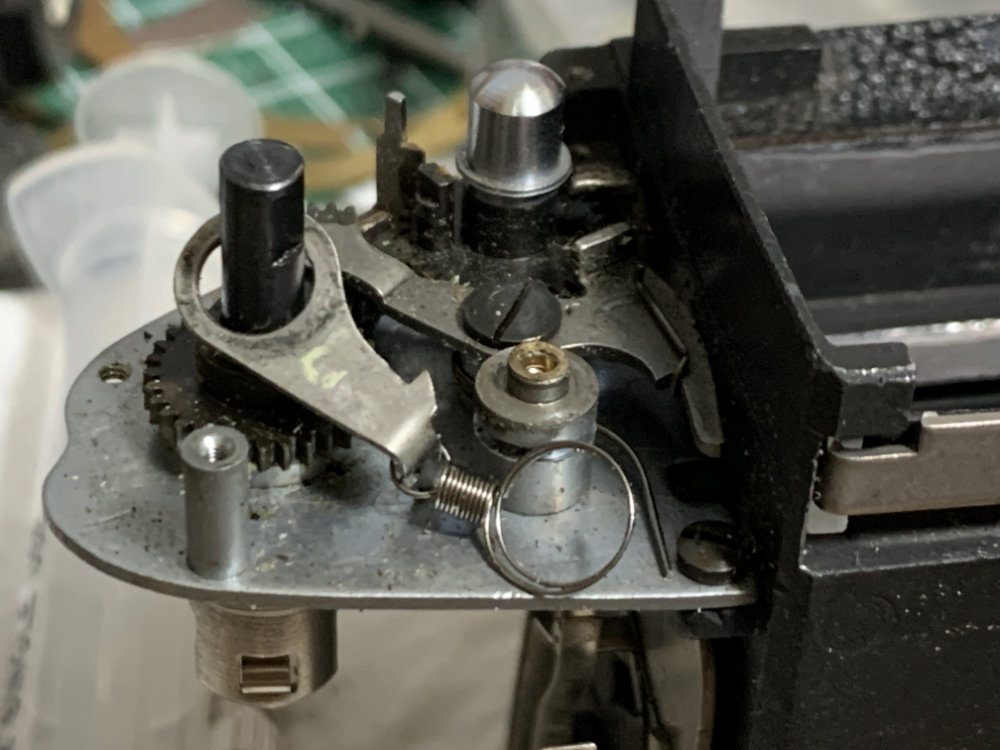
Carefully bend the latch in order to adjust the timing of the closing door. Only do this when you think that the door is releasing earlier or later than it should.
These springs should be tensioned or relaxed in order to adjust the speed of either the mirror or the door. This should not be done unless you know what you’re doing and should only be done once the other adjustments are done.
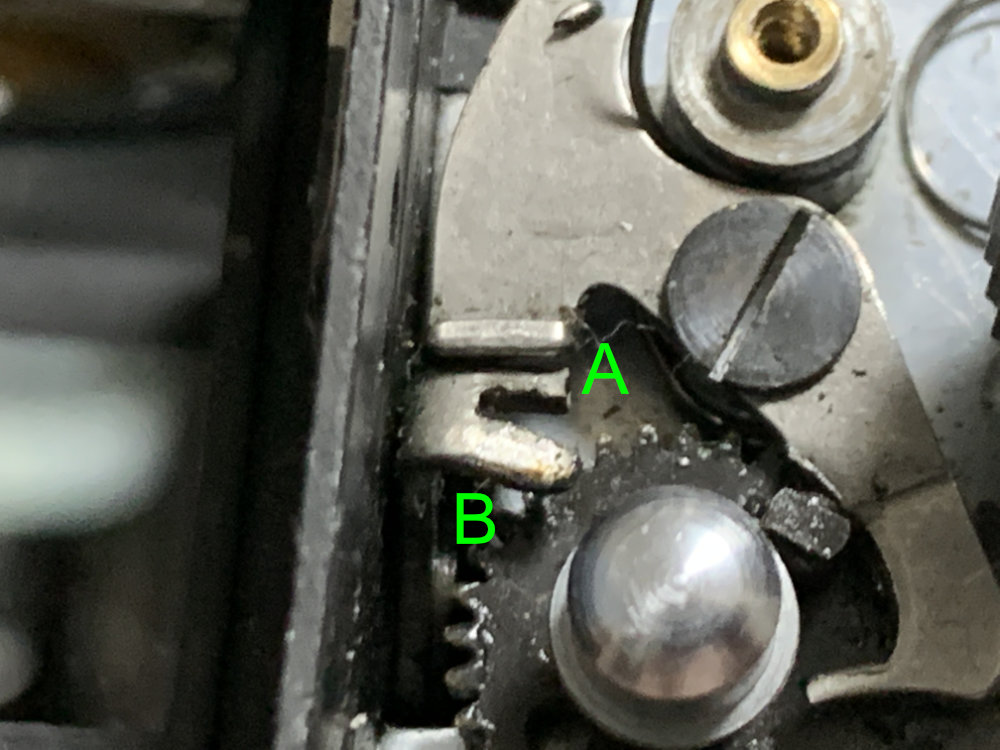
Bend the prongs of the charge-lever in order to change adjust when the mirror will be caught and secured and how it’s able to adjust the film-counter. If the mirror releases easily or won’t get caught when the camera’s housing is installed, bend “B” towards the rear so it gets triggered earlier. Bend “A” in order to adjust the actuator arm, you’ll rarely have to do this so just leave this alone. In fact, you’ll rarely have to do anything here if the camera has not been tampered. The charge-lever could also be bent from stress and wear but it should not reach the point where you should bend these at at all, mine is a mysterious case as it had been adjusted poorly before so I had to bend “B” to the extent that you see in this photo.
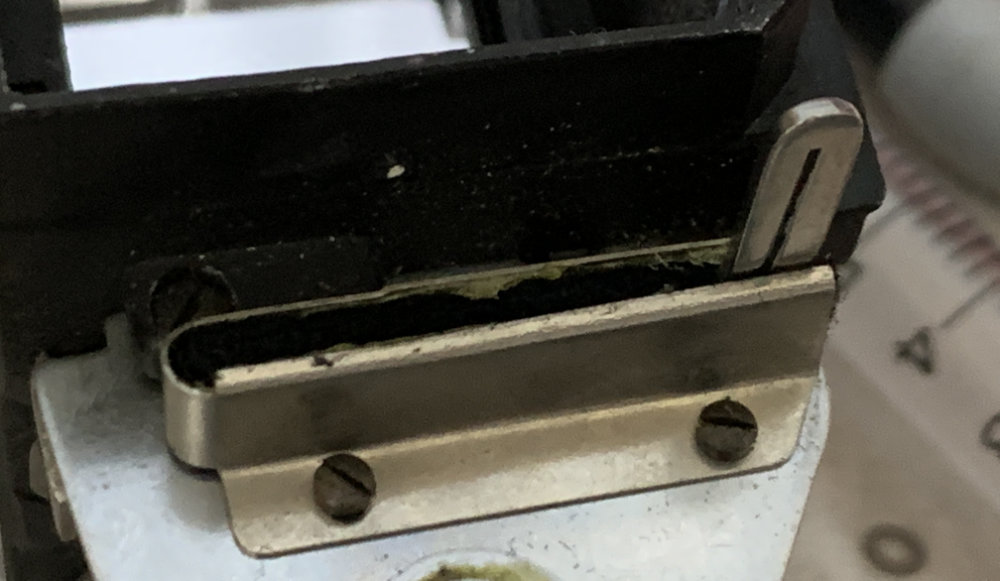
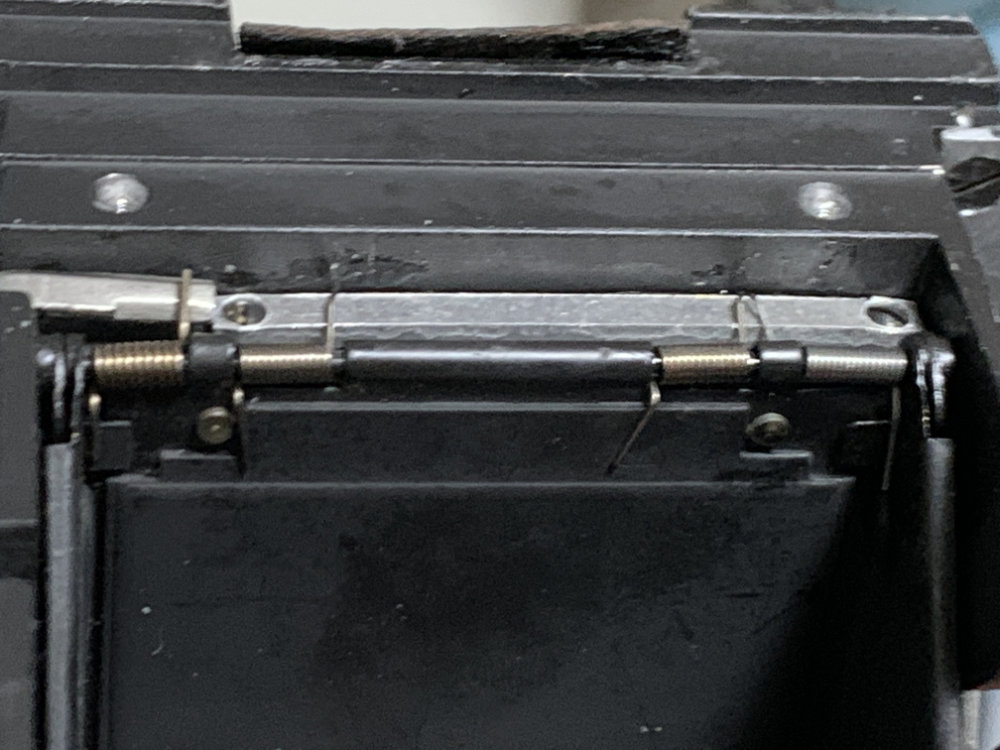
The seal has been replaced with a much-thicker material, ensuring a light-tight fit. Wipe the excess glue with solvents, I cleaned mine so it won’t look as ugly as you see here.
That’s all for now. I am not sure if there are other resources around for the repair of this camera but I hope that this is a useful article for those who are wondering about this. There’s nothing much to explain about how this thing works as it is a rather simple machine, it’s probably one of the simplest cameras you’ll ever work with.
Thanks for following my work, if you liked this article please share this with your friends so it will get more views. This site earns around $0.40 a day, we are totally reliant on views. You can also support this site, it helps me offset the cost of maintenance and hosting. You’re also helping me purchase, process and scan film. This site promotes the use of film so we are all in this together. See you again in the next article, Ric.
Help Support this Blog:
Maintaining this requires resources and a lot of time. If you think that it has helped you or you want to show your support by helping with the site’s upkeep, you can make a small donation to my paypal.com at richardHaw888@gmail.com. Money isn’t my prime motivation for this blog and I believe that I have enough to run this but you can help me make this site (and the companion facebook page) grow.
Buy me a roll of film or a burger?
Thank you very much for your continued support!
$2.00
Helping support this site will ensure that this will be kept going as long as I have the time and energy for this. I would appreciate it if you just leave out your name or details like your country’s name or other information so that the donations will totally be anonymous. This is a labor of love and I intend to keep it that way for as long as I can. Ric.

Jul 14, 2021 @ 14:08:42
I had one as part of my “Exacta arsenal” back in the day. Quiet (they got called “the mouse”), light, and dependable. I suppose people would consider them “too limited” today but in fact they were quite capable of taking excellent pictures. Far less complex than their “big brother” Exactas, and not as prone to shutter failure. I’m sure you know the 12 second to 1/1000 with self-timer works of the Exactas is complexity in the extreme.