
Hello, everybody! Do you have a vice that you have been staying away from with the best of your ability? I am sure but we all do. Is it smoking, alcohol or pornography? Or is it something more benign like buying cameras and lenses? It is very hard to keep the urge, the longer you keep it the stronger the climax is. This is how I felt when I made my latest purchase, it’s something that I have always wanted but the price is not something that I can easily afford. I was lucky that I found one for a reasonable price, it’s not cheap but it is fair. When I finally got it, I felt an overwhelming release, as if something that I have been keeping in for many years suddenly came out. I have nothing more to hide so I will show you my latest yo-yo.
Introduction:
The W-Nikkor•C 2.5cm f/4 is the smallest rangefinder Nikkor that you will ever find, that is if you measure it from the lens mount of the camera. As a W-Nikkor, it fills a unique place in the catalog for a super-wide lens. During that time, a 35mm lens is already considered wide and 28mm is the entry point to the really-wide category. It was made from 1953 up to an undetermined date so we assume that production lasted until the final days of the Nikon rangefinder era. There are only 2 variations for the Nikon S-mount, earlier ones come in shiny chrome like you see here while later ones are painted black. These were also made in Leica M39 screw mounts, too. Just like everything Leica, they will cost you more than a kidney to acquire.

It is very compact, it feels dense in your hand. The build quality is typical for its time, which means this is a very well-made product. There’s nothing much to manipulate with this lens as it lacks a focusing ring, this is one of the defining traits of this lens. It is truly unique in many ways.
It has a 4-elements-in-4-groups design which is a copy of the famous Topogon, this is why it’s called by a lot of enthusiasts as the “Japanese Topogon“. It is a very difficult to manufacture the glass as the curvature is rather high and some of the elements are very thin, measuring to about 0.5mm. The symmetrical nature of the optical design leads to interesting characteristics which are documented in this article by one of the best Japanese optical engineers, a man we call the “Father of the Kit Lens“. The Kit Lens King himself noted that one of the most desirable characteristics of a symmetrical design is the low levels of distortion. There are a couple of setbacks as well and we will see them all later in this article.
There’s one thing about this lens that sets it apart from the original Carl Zeiss Jena 25mm f/4 Topogon, it’s able to focus! The German lens isn’t able to, it has a rigid fixed-focus barrel. In this way, you can say that the Japanese copy is superior to the German original. It may not be that important for a lens this wide but being able to focus with a barrel this slim is an engineering achievement for its time. On top of that, it has the ability to couple with the camera’s rangefinder mechanism, how cool is that? Another Improvement is the shape of the iris, this one has an octagonal aperture while the original German is pentagonal. It isn’t a big deal for some people but you will notice the difference in how smooth the bokeh will look.

The front element is recessed. Within, you will find the aperture selector tab and the focusing scale, this is very unusual when you compare it with the usual W-Nikkor. The inner part rotates as you turn the gear of the camera’s focusing dial, which means that you are unable to focus without the camera. However, your fingers can turn the inner cup, that will turn the helicoid for you. This is how one would focus if the lens is adapted for use with digital cameras.

There is no filter thread for you to attach accessories to, it has a special adapter that attaches to the lugs at the front. The same lugs are also used to secure the very rare lens cap you see here. Unfortunately, I do not have that special adapter for the filters and shade.
You will notice that the iris will never be fully open even at f/4, this is deliberate because shooting at wider apertures than this will result in very poor performance especially as you reach the corners. In theory, you will be able to use this at a faster maximum aperture, perhaps by about 2-stops but the performance isn’t going to be acceptable. You can do this by removing the iris mechanism completely, but who wants that?

You will need a dedicated viewfinder to be able to frame your shot. Here it is attached to my Nikon SP, it is expensive when purchased by itself. The whole setup is very compact because the lens is shallow, it will only protrude by about 12mm or so, with the whole length residing within the camera itself. The Topogon is just as small, or maybe a bit taller.
There’s one thing about the viewfinder that I don’t like, you won’t see the corners if you’re wearing a pair of glasses. Even if you don’t, you’ll need to position your eye dangerously close to the eyepiece. This isn’t hygienic because you may end up with an eye infection and be accused of being a “Peeping Tom”. I wish it’s not the case because this is a very beautiful finder because everything else about it is impressive.

It is an ergonomic nightmare when adapting this to a mirrorless camera, focusing with it it’s never fun. It is very tedious to focus and manipulating the aperture selector tab will likely throw your focus off. I use a Rayqual adapter, the best that money can buy. The “cheap Chinese products” (CCP) cannot compare with it in terms of quality and tolerances, this is as precise as you can get.
Let’s now see how this lens performs. Many of you are curious as to how one of Nikon’s earliest lenses will fare with modern sensors. This is not a common lens at all, I think this is the only place where you can see how this lens performs. I took these photos with my Nikon Zf at f/4, f/5.6 f/8 and f/11. We’ll see the most changes happen in these apertures, these are also the most common apertures that people will prefer to shoot this with. Since this lens is so annoying to manipulate, I won’t be able to show every aspect on how it performs optically. Adjusting the aperture alone takes several seconds, I don’t have the time to shoot a series of photos while maintaining the correct focus, it’s just not possible.

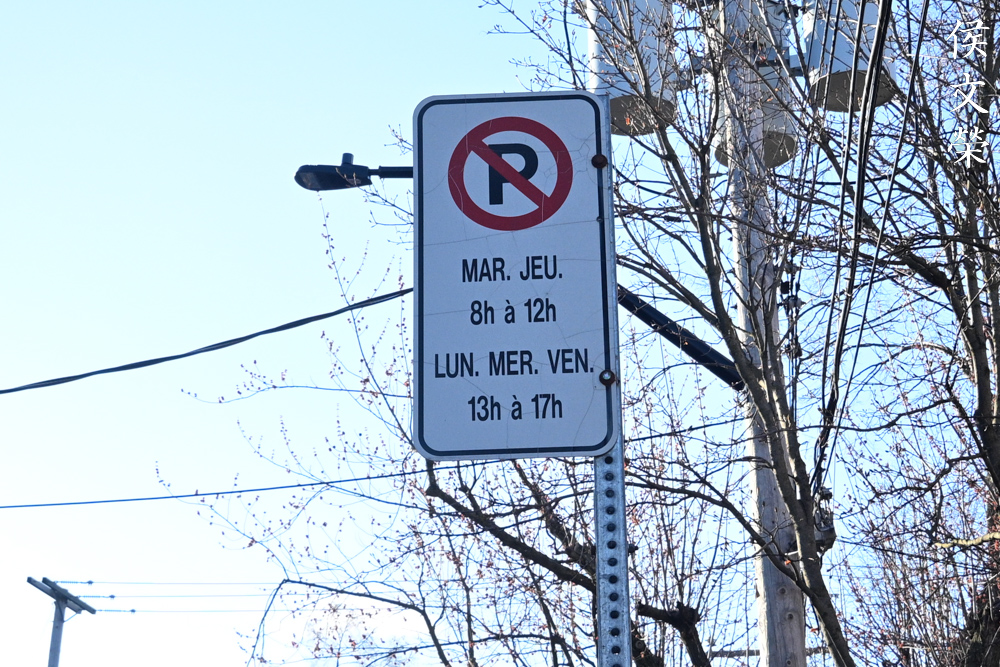
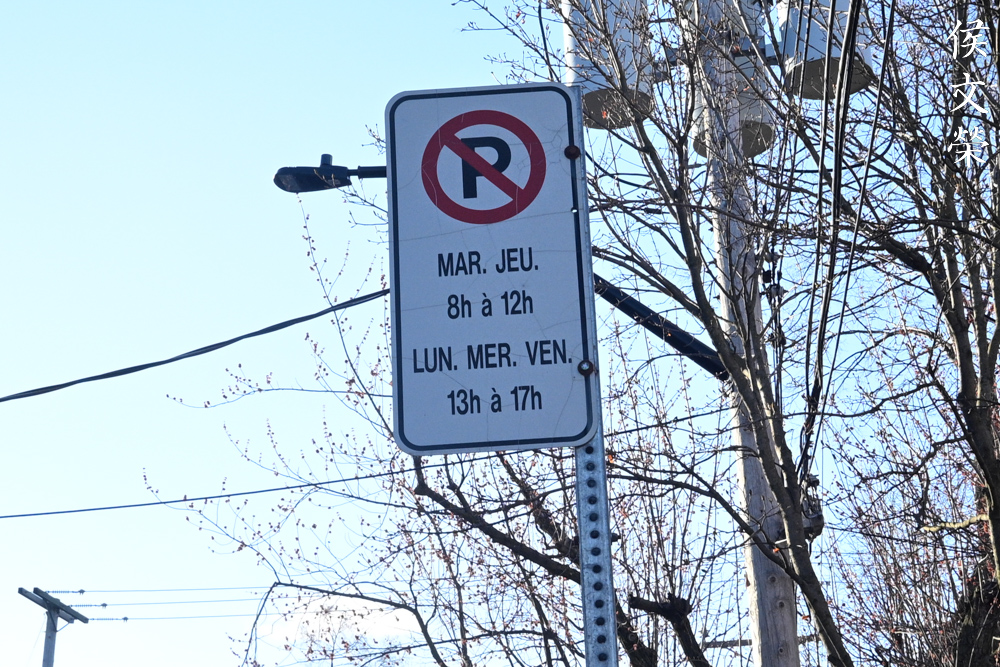
The effects of distortion can be easily seen even if the grid-pattern is not perfect as in the case of this wall which is crooked. While this is unacceptable for modern lenses, we can give this lens a pass since it’s very old.


(Click to enlarge)
This lens is known for its very dark corners, which is a famous “characteristic” of the design. You can stop it down as much as you want but the corners will never be clear and will only show minimal Improvement at best. Interestingly, I was told that this effect isn’t as bad when shooting with black-and-white film.


(Click to enlarge)
It is susceptible to flare and ghosts. This is not a surprise because the coating technology at that time isn’t as advanced as what we will see from lenses that were made a few decades after. Despite that, I have seen lenses that perform way worse than this and they were made a couple of years after this one.


(Click to enlarge)
It is sharp at the center even when shooting at f/4. Stopping it down to f/5.6 help improve its resolution, it is now able to resolve finer details. It remains sharp at f/8 but stopping it down to f/11 makes it softer by a small amount due to the effects of diffraction. The corners look decent except for the extremities where this lens performs the worst.
Aberrations are visible up until f/5.6, you won’t see much of it from f/8 on. Despite that, I found it difficult to produce any alarming amounts of purple or green artifacts even in extreme conditions.
Let’s now see some real-world photos. We can analyze test shots as much as we’d like but the only way to judge a lens is by shooting with it.

This photo shows a huge artifact, you will have to be very careful when shooting against the Sun.
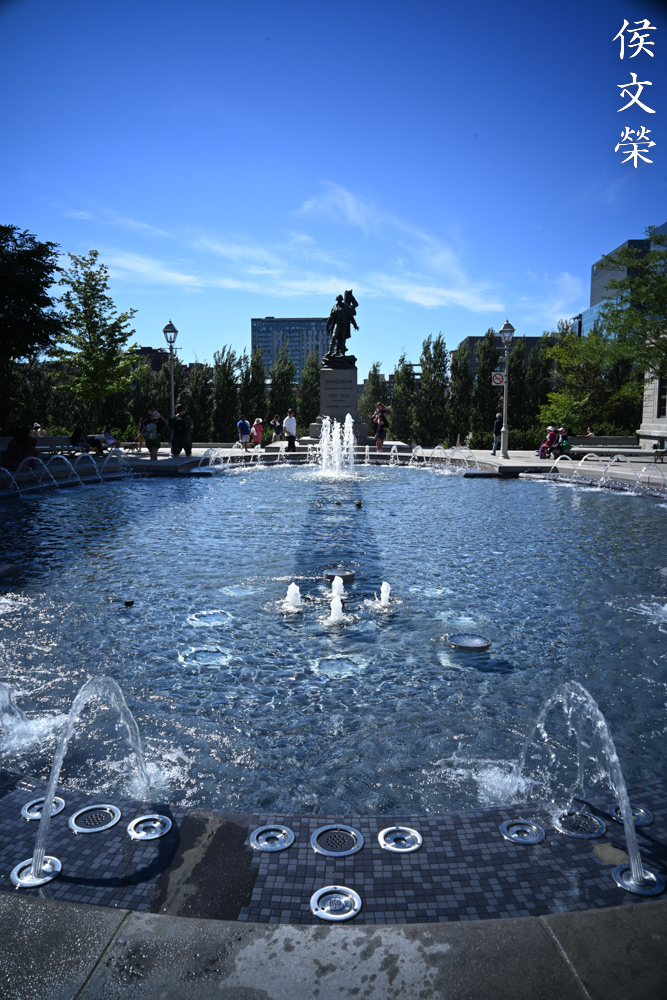
This scene is great for showing chromatic aberration, it has everything you need – shiny metal objects and water under sunny conditions. We’re not getting any hints of purple and green here in this photo.

This is very sharp photo (at the center). The corners appear dark and the details there are soft, you’ll have to accept this when shooting with this lens.

It has a slight bluish tint to its photos, many lenses from this era exhibit this trait. That’s because the blue tint helps you take nicer photos when shooting with black-and-white film. Just think of it like a blue filter.

If the dark corners bother you, just place them where your shadows naturally fall into. This will help mask the effects of vignetting yet still retain a certain degree of creativity.

The effects of distortion isn’t obvious because I have successfully placed my horizontal lines further from the spots where the bulge is most prominent. The lines appear straight, but they are not. It is also worth mentioning that overexposing your shot helps lighten the corners somewhat.

Angling your shot is probably the best way to help hide the effects of distortion.

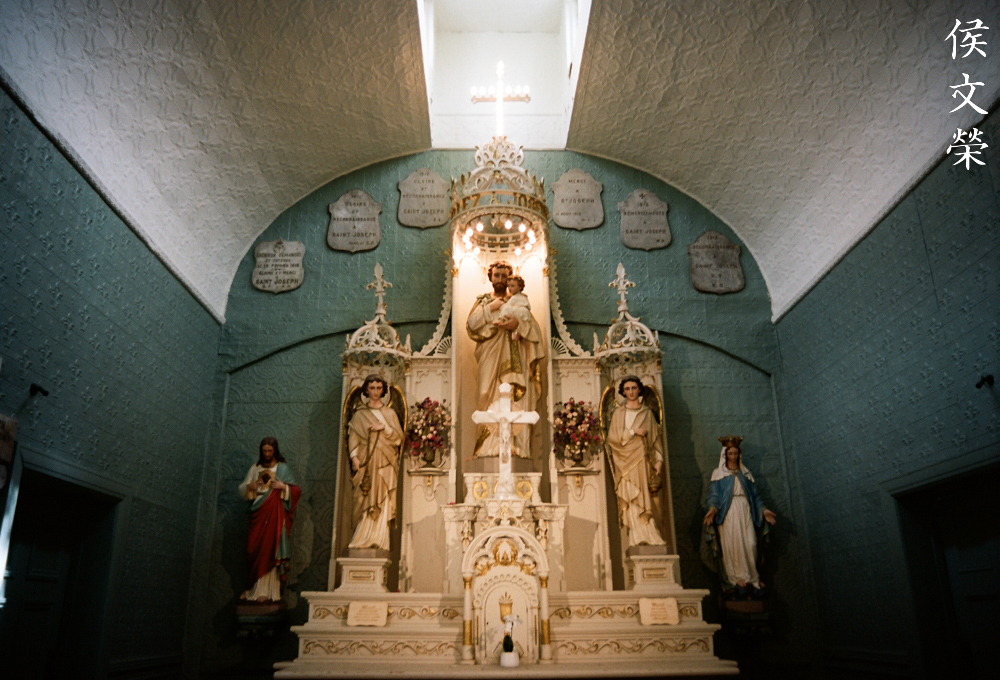
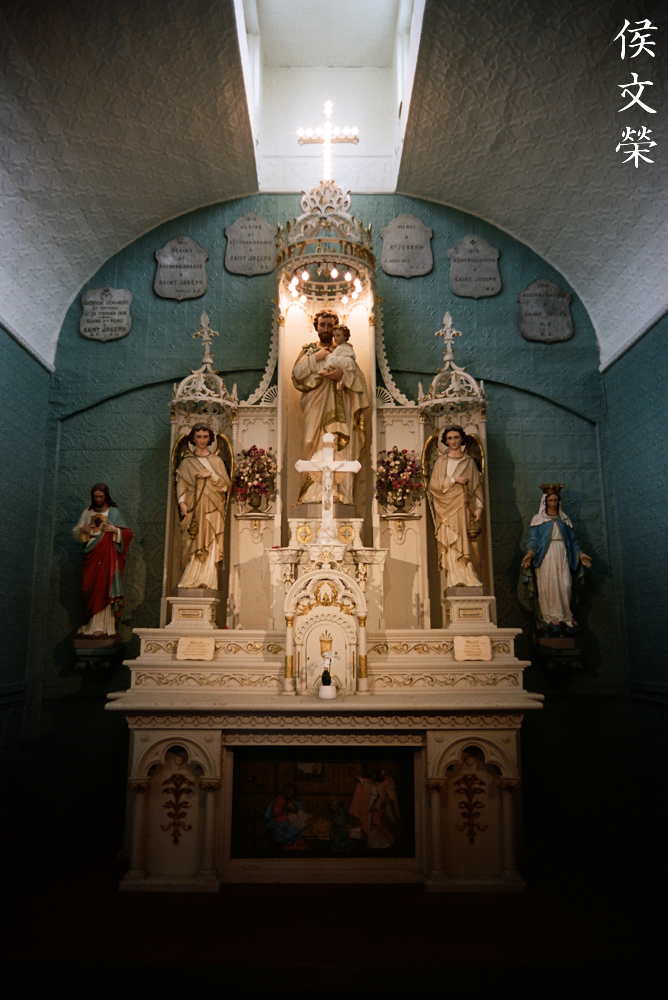
This is not the best lens for shooting interiors, not only is it too slow, the dark corners will make the scene appear much darker than it really is.

Since the focal length is short you will be able to handhold it while shooting with a slower shutter speed. I was leaning on a pillar when I took this, which added more stability to my setup.

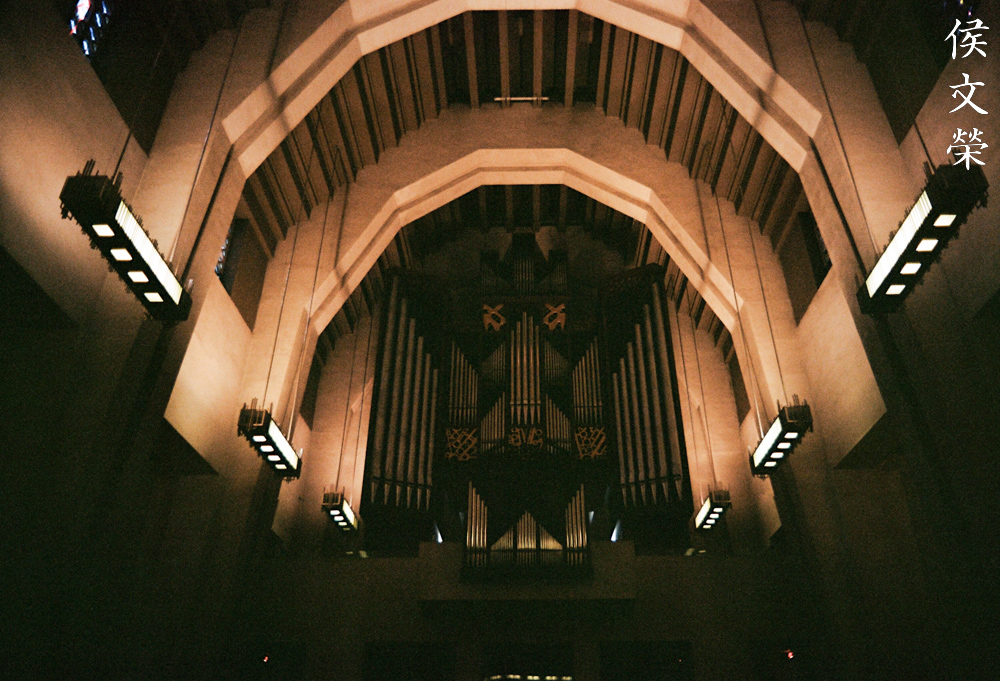
I deliberately took this photo just to show you how it renders indoor lights. It doesn’t look good, the best way to approach this is to stop the iris down to at least f/5.6 or f/8 so you will get nicer sun-stars. You will plenty of spherical aberration when shooting wide open under these conditions.


(Click to enlarge)
I did not enjoy shooting with this if I have to focus with it, but it’s a great lens for snapshots. You just aim it at your subject and use the scale to focus, that’s it. The focusing is internal so it’s not the best option for shooting with a digital camera, this requires an actual focusing helicoid that you can control externally. An adapter with such specifications hasn’t been made and I don’t think anybody will make one ever.
Let’s now see how this performs with film. This lens was made for use with black-and-white film, and that is why we are interested to see how it performs with its intended medium. I have not shot a roll of black-and-white film with it yet so we will see some examples that were taken with color film. I’ll update this in the near future so we can see some real black-and-white photos. But for now, these are enough to give us a good understanding of how it performs with film.

This photo was shot at f/11 or so, because it was a sunny day. Notice how the corners don’t look that dark compared to what you saw above when we shot it with a digital camera.

The corners do appear darker when shooting wide open with film but it’s much better compared to what I took with a digital camera. Of course, the image quality at the externalities still look poor.
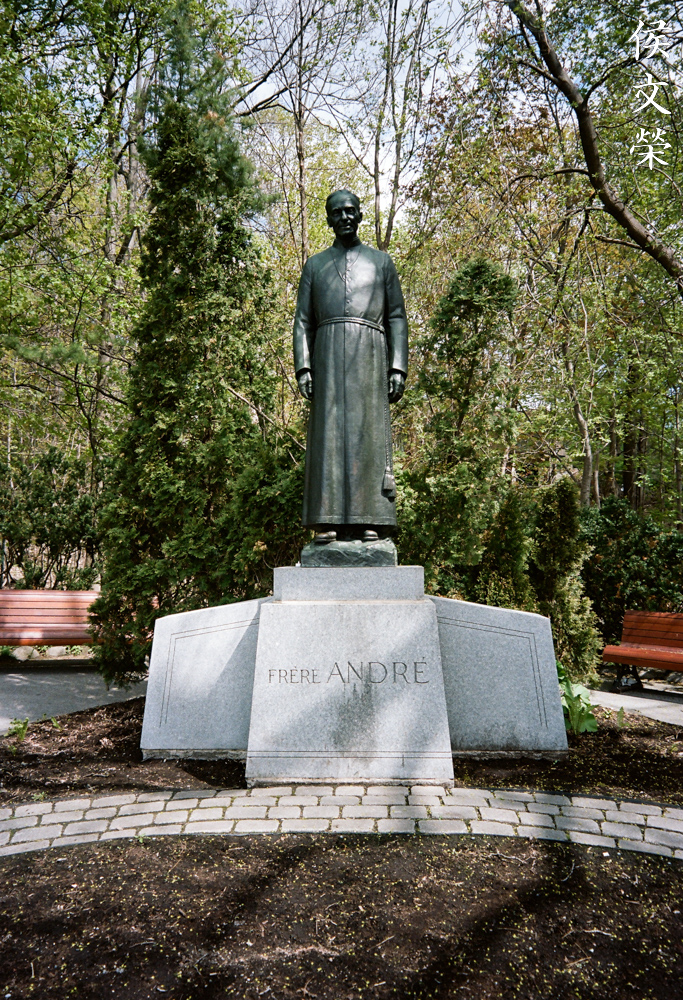
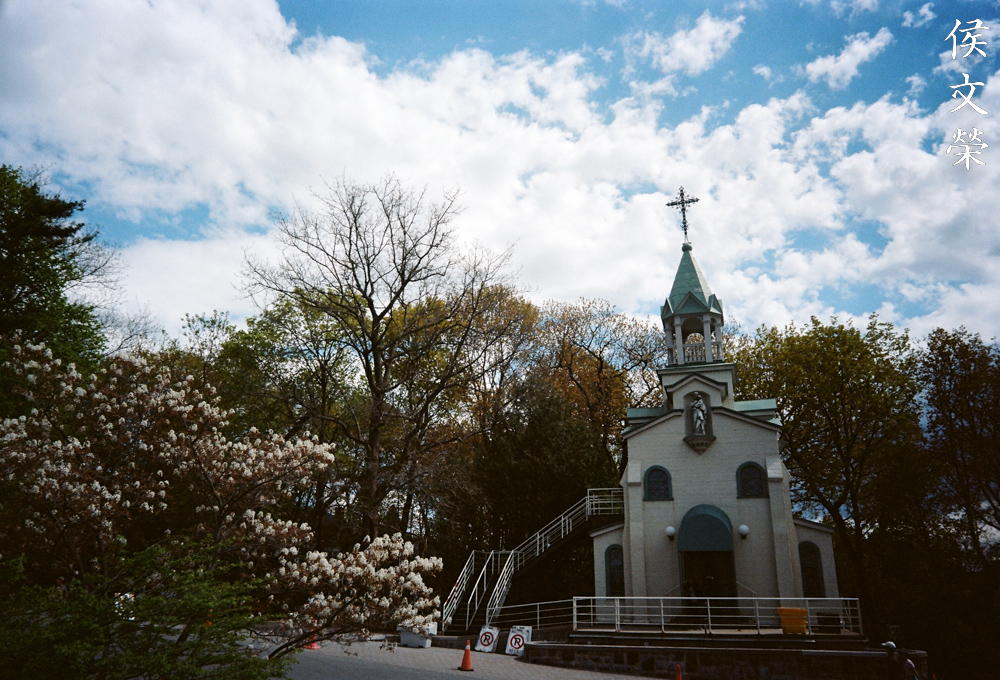
Stopping it down a bit alleviates the darkness at the corners somewhat. It’s still enough to give you a little bit of vignette to frame your subject, in this case, the miraculous Brother Andre.

Spherical aberration can help make white objects “glow”, this can be useful to some degree.
This is never a lens that’s meant for shooting indoors and in poor lighting conditions without a tripod. It’s possible to drag your shutter speed because of its short focal length. The fact that a rangefinder camera is more stable because of lesser vibration due to the lack of a flapping mirror helps a lot.


(Click to enlarge)
I will advise you to shoot with a faster film when you need to take indoor photos with this lens, preferably something that is faster than ISO800. Of course, a tripod is essential but you can also use the self timer as well if your camera comes with it.
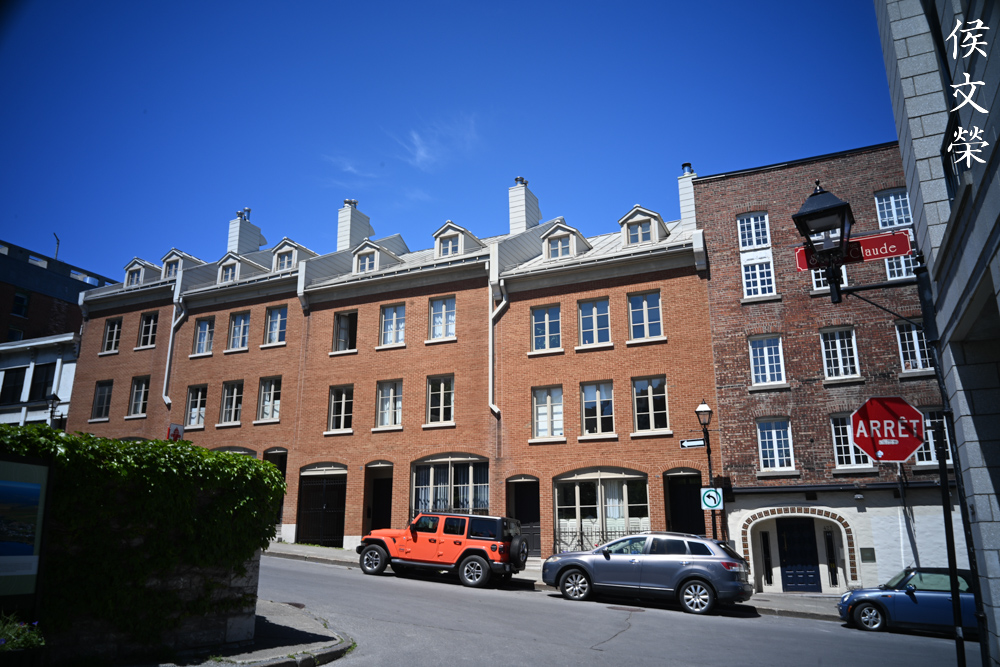
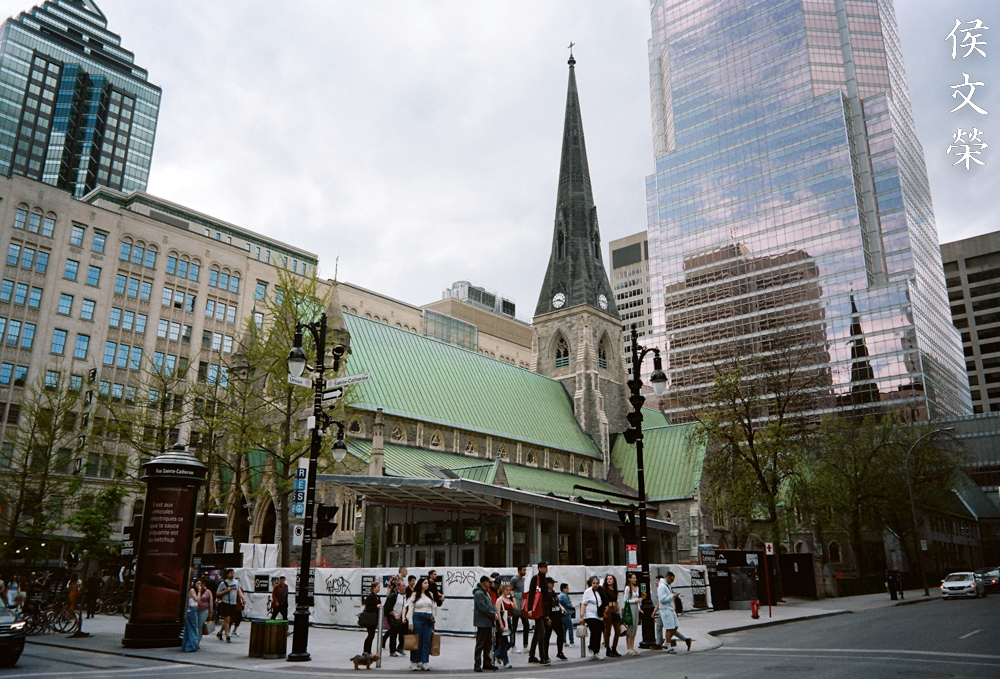
Let us now see some photos of architecture. It’s very tempting to use this lens to shoot buildings because it is wide, I get that. What I’m more interested to see this time is how the corners perform.

This photo doesn’t look so bad at all, even the corners look decent for a lens of this age.

This photo could benefit from a little bit of overexposure, that will help the corners look brighter.


(Click to enlarge)
I’m still not convinced that this lens is perfect for shooting architecture because of the poor performance at the corners, especially at the distant corners. It can be unpredictable at times so the best way to avoid any dark corners is to overexpose your shot by a stop or two. However, we must also put things in better context because the optical design is old and this may be the only Nikkor available at that time that can do the job. This is just a lens for aficionados these days.
This lens is a must-have if you are a hardcore Nikon or Contax rangefinder user. The only lens that’s wider than this is the Nikkor-O 2.1cm f/4 if you are sticking with Nikkors. The S-mount version costs much more, so you might as well go with the recent Voigtländer options. If you are not that serious about collecting or shooting with your Nikon rangefinders, you can probably skip it. The main reason why we purchase this is to play around with a Japanese Topogon, it’s all about the historical and technical context. The Voigtländer ones are much cheaper and perform better, they will even come with a warranty. With that said, I will not recommend this lens for the casual shooter. When looking for one of these, make sure that the lens is all clean, without any fungus or huge scratches. That’s because it’s not easy to clean the delicate optics and you may damage this in the process. It’s common for lenses this old to have the oily iris problem but it is easier to deal with for an expert repairman. Operate the lens and make sure that you can focus or change the aperture without trouble. The aperture blades need to be complete and not damaged, too. Don’t buy it if the special viewfinder is absent, the front cap and the special filter adapter are also important but the special viewfinder is kind of mandatory unless you want to shoot this with a digital camera full-time. They aren’t cheap at all, a set that comes with the viewfinder and caps will cost you $1,250 for a decent sample. I got mine for around that price, it is way more than what I am willing to spend in this economy but I had to own it in order to complete my collection. These are not rare so you can find them readily available, it’s just a matter of economics, if you’re willing to purchase one at the current price or just wait for a bargain. I have seen these being sold for less than $800 occasionally, the owners must be really lucky or patient. To wait for a good deal is the best advice I can give, happy hunting.
Before We Begin:
If this is your first attempt at repairing a lens, I suggest that you see my previous posts regarding screws & drivers, grease and other things. Also read what I wrote about the tools that you’ll need.
I suggest that you read these primers before you begin:
- Essential tools
- Best practices 1
- Best practices 2
- Best practices 3
- Ai conversion
- Working with Helicoids
Reading these should lessen the chance of ruining your lens. Before opening up anything, always look for other people who have done so on the internet. Information is vague and scattered but you can still find some information if you search carefully.
For more advanced topics, you can read my fungus removal article. It has a lot of useful information, it will be beneficial for you to read this. I also recommend that you read the working with helicoids article since it is very important!
Disassembly (Focusing Unit):
This is a very unique Nikkor because of how the barrel was designed, it’s the only one of its kind. Because of that, it has become an obsession for me to be able to take it apart to understand how it’s made. This is a very precious lens so please don’t attempt servicing it unless you are an experienced repairman. It is not something that an amateur can work on because you will need special tools. You will also have to follow a sequence in order to dismantle it properly. I was not aware of that sequence when I worked on this, I have only realized everything once I’m already halfway through the process. I’m thankful that I did not damage anything, please follow my exact instructions so you won’t regret anything. Of course, this requires special tools and openers in order to completely dismantle it, you will also need the skills and experience. If your lens needs to be serviced, be sure to send it to a reliable repairman.
Just like every W-Nikkor, we want to be able to remove the objective as soon as possible so we will focus on that in this section. Again, please read my instructions very carefully because my steps aren’t showing the exact correct sequence of disassembly.

Before we begin, take note that this should be the first step. I’m not aware of the correct sequence when I worked on my lens so I took things apart in the wrong sequence. Just scroll down up to this step and start from there. Then return to this step and move forward.
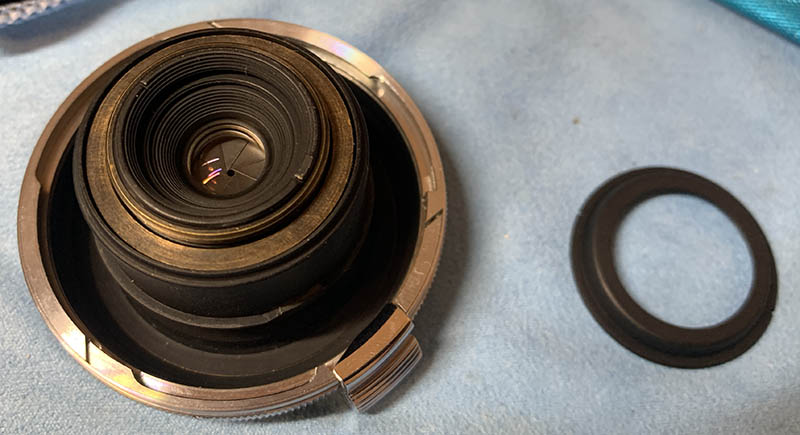
Unscrew this ring so you can dismantle the rangefinder coupling mechanism. I used my fingers to remove it, you may want to use a rubber cup if you wish.

Carefully unscrew this so can remove the cam.
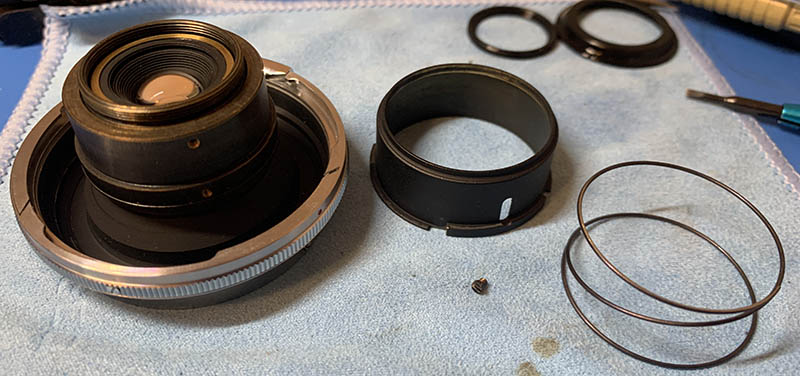
Remove the spring and set everything aside.

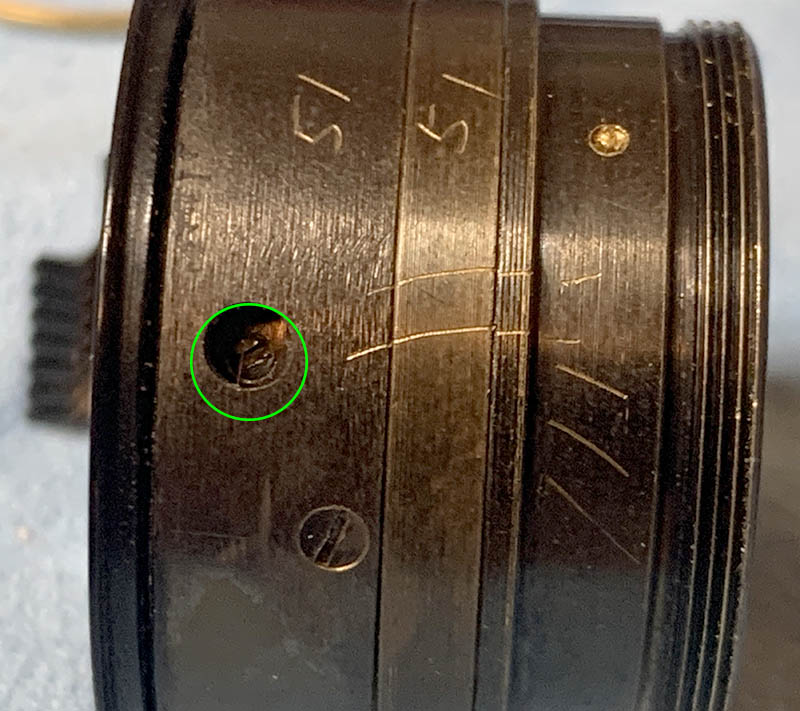
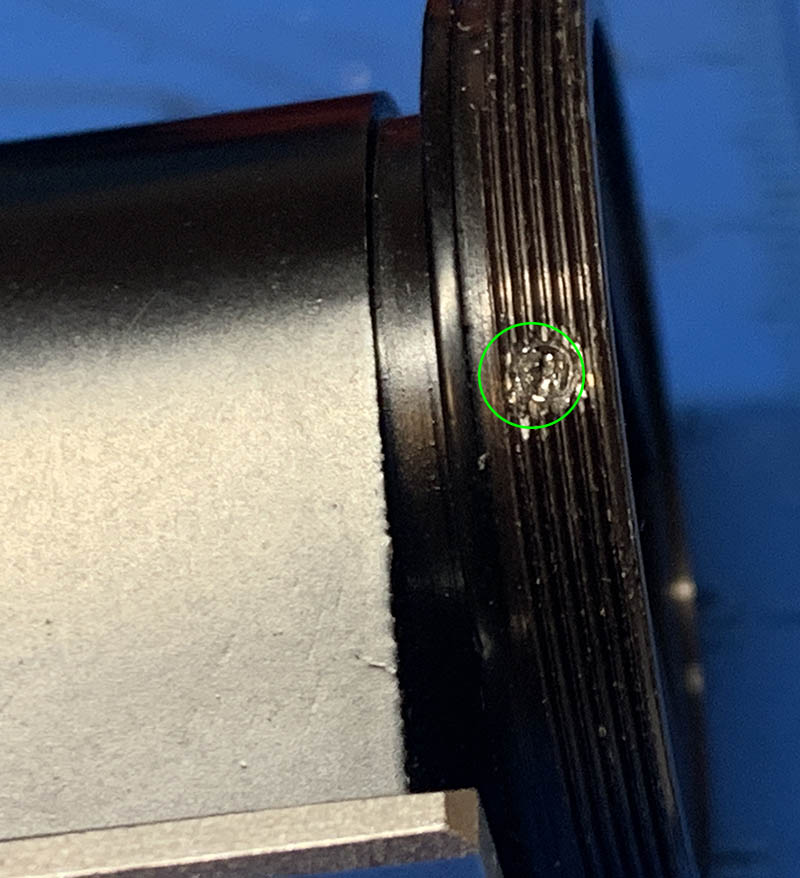
Locate and extract this little set screw and make sure not to damage it.

That will enable you to remove the objective from the rest of the barrel. Note that there’s a shim here, it’s used for adjusting the focus so never misplace or damage it.

These screws constrain the helicoid’s movement within the focusing range, the rightmost screw stops the helicoid from undoing itself while the other 2 screws secure a spring so that the helicoid is locked when it is infinity. You should adjust this spring later, marking its original position will help you put it back later so that it’s correctly installed.
Before you continue, make sure to remember how deep the helicoid goes because you should replicate it later after reassembly.

Separate the helicoids, never forget to note where they have separated because that’s also the same spot where they mesh. Forgetting to do this will lead to disaster, read my article on how to work with helicoids so you won’t get into this issue.

Extract all 3 screws that secure the inner barrel/helicoid to the outer barrel and push the inner barrel out with your fingers. Make sure to note its alignment first so you’ll know how to put it back again later. You don’t need to extract the 2 tall screws for the cap and filter attachment ring in order to do this. You don’t need to dismantle the outer barrel any further unless it’s really dirty.
I cleaned all of the big parts with a strong toilet cleanser – the grainier, the better. I scrubbed everything using a brush then rinsed them all very well with hot water before making a final rinse with pure alcohol to remove any remaining residue. Special care must be used when cleaning the helicoids, the threads are fine in some places and they can be caked with gunk, using a wooden toothpick helps here for stubborn deposits. Dry them well before you continue.
When lubricating, be sure not to apply too much, all you will need is a thin film of fresh grease. Mate the helicoids then exercise them by turning several times, this will ensure that the grease is evenly distributed. Wipe away any excess. If you have applied too much grease it will settle in the iris mechanism eventually, necessitating the need to open it again, just to give everything another overhaul.
Disassembly (Objective):
This is the most tricky part of the whole process because of the exceptionally delicate glass. You shouldn’t use a lot of force here or you can damage something. Extracting the glass is a little bit unconventional as they are not secured by a thread, this means that they are only held in place by their retainers, that’s all. It is risky to extract them without special tools. The iris mechanism is a little bit different because it uses an unconventional diaphragm plate with a convex side enclosing the blades, this makes it tricky to install the plate back into the housing as you’ll need to manually position each blade in order to make the plate fit.
Turn the ring to expose this little screw and carefully extract it. Make sure not to damage it, drop a bit of oil with lighter fluid in order to help lubricate it and dissolve whatever is making it stuck if the screw is a pain to deal with.
Also locate another screw that couples the aperture selector ring to the iris mechanism inside, you should not forget to remove it before you continue to the next steps.

Locate and extract 3 of these so you can remove the aperture selector ring assembly.

Unscrew the whole assembly off front objective’s housing.

You can use a lens spanner to extract this retainer ring if you wish, I used a rubber cup instead because it’s safer.

Carefully remove the 3rd and 4th elements and their housings. The safest way to remove them is to use a lens sucker for the 4th element and to drop the 3rd element with its housing onto a soft towel. Be careful not to damage anything especially the 3rd element because it is especially thin.

Use a rubber cup to unscrew the retainer of the 1st and 2nd elements and their housings. Repeat what’s done in the previous step in order to remove the optics and be exceptionally careful with the glass.
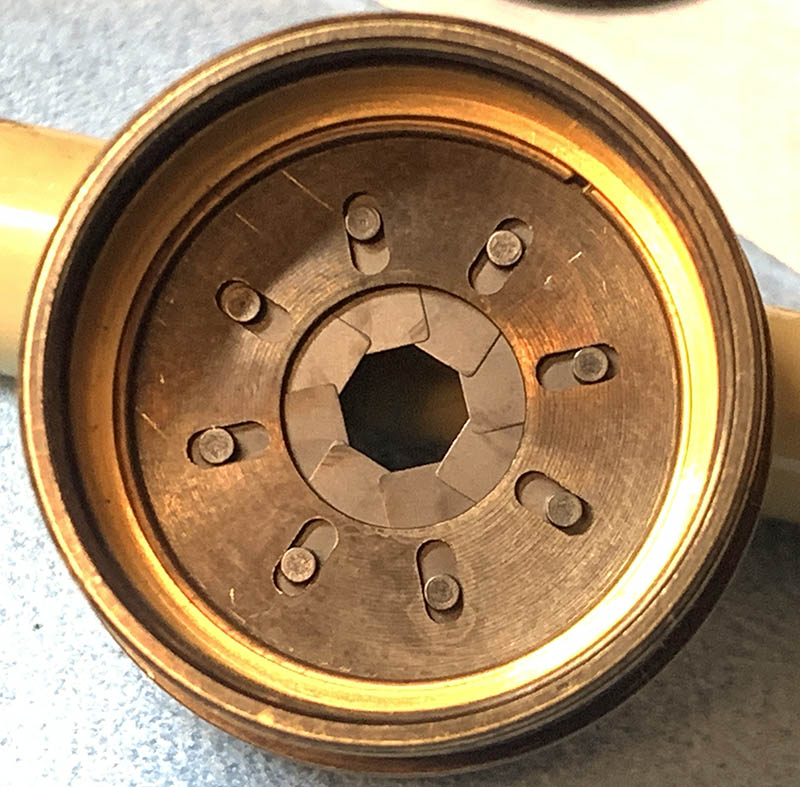
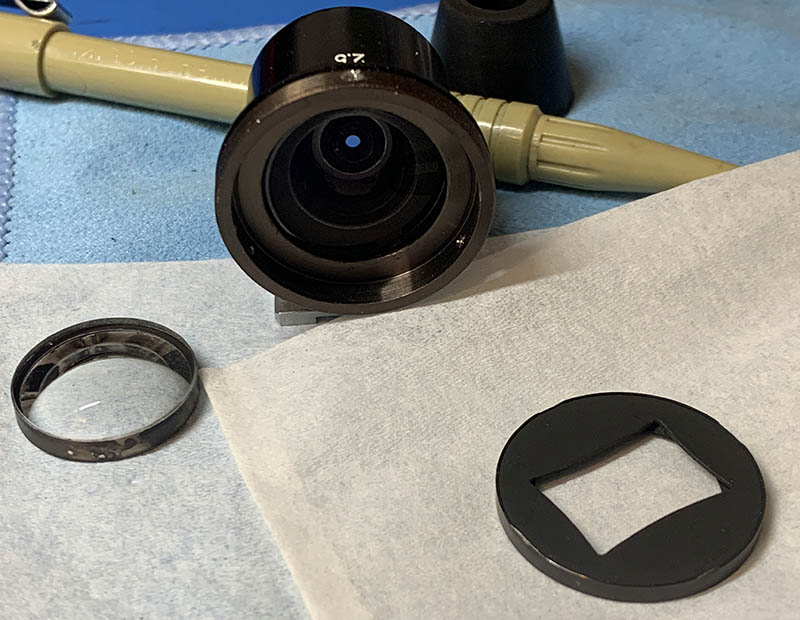
The aperture mechanism is now exposed, study how it operates before you proceed. Note that it’s never going to open completely. Look to the side and turn the diaphragm plate from the side, there is a slit at the wall that allows you to couple the plate to the aperture selector ring.
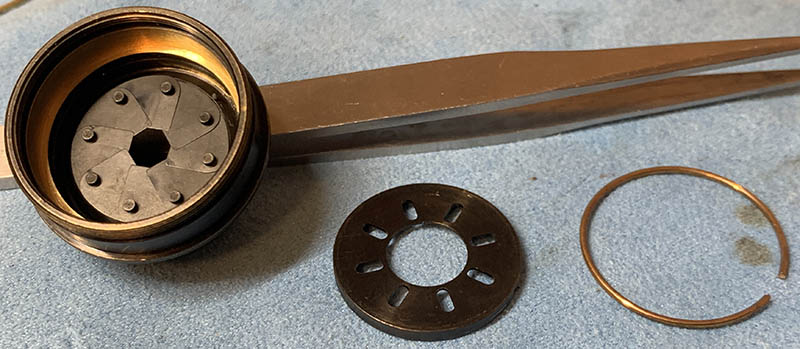
Remove the circlip so you can remove the diaphragm plate. What’s noteworthy about this plate is how it has convex side, that side will face the blades while the flat side faces out. Be aware of this so you should put the diaphragm plate back while the iris blades are partially closed and not fully open like what we’re used to seeing with most lenses.

Now that the diaphragm plate is gone, study the direction of the blades so you will know which side faces where.
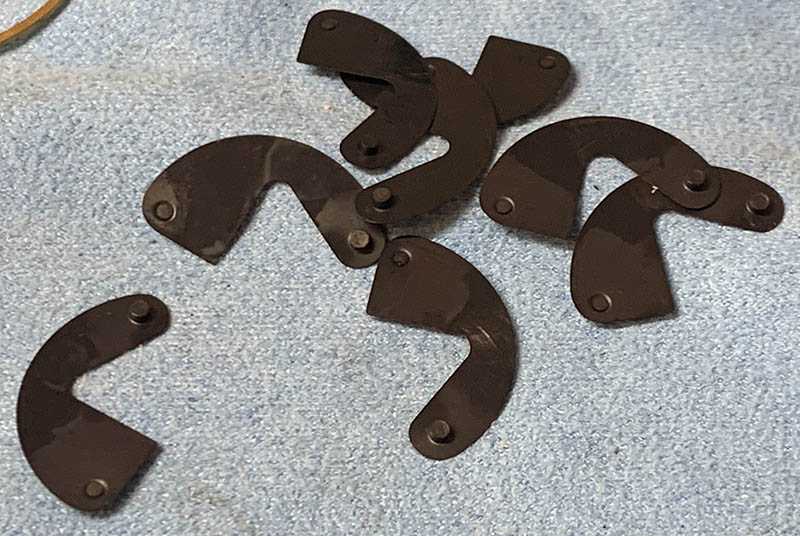
The safest way to remove the blades is by poking them through the rear by their pins, I use a needle for it and just carefully push them out. Make sure that they drop on top of a soft surface like a towel in order to prevent damaging them. These are very delicate and you should always handle them with care.
The blades were all coated with an oily film, they were cleaned individually with Q-tips and lighter fluid. It is important to handle them carefully, use a pair of plastic tweezers and handle them by their pins. Be very gentle with them like it’s their first time to be loved.
If your lens has fungus, read my article on how to clean lens fungus, just make sure that you dilute it with distilled water so it’s not going to be too strong as it may damage the coating.
This is the most delicate part of this article, once you’re done with this section, everything else is easy.
Disassembly (Viewfinder):
This is a bonus. The special viewfinder is itself a refractive optic, it’s a miniature lens! They are usually a bit dirty and may come with fungus because of poor storage. Lucky for us that we only peep through it with an eye so the optical quality isn’t that much of a big deal. As far as viewfinders go, this is conventional so I did not get stuck. The construction is impressive, Nikon did not spare the quality control here.

You simply unscrew the front ring in order to remove the front element. Don’t forget to note which side is facing the front by marking the wall with a pencil.
It is a good idea to use a Sharpie to mark the inner ring just under the front ring so you’ll know the exact alignment of the blind/window. Two dots for the opposite corners of the blind is enough.
Unscrew 3 of these so you can remove the blind.
Use a lens soccer to pull the glass off, you can do the same for the inner one, too. I did not go too deep, I I don’t need to remove the rest of the glass because they are relatively clean.
Just like an ordinary lens, you will want to clean the glass with Windex if there’s fungus. Just make sure to clean the residue off so that it’s squeaky-clean.
Conclusion:
It took me the whole afternoon to clean everything but I was happy because I learned lots of new things. I have always been curious about this lens and how to take it apart, I have now satisfied that itch. I’m happy now that I have successfully worked on this lens and I have presented another original content to you. It’s a huge undertaking to be able to document as many Nikkors as I could but this is my life’s work.
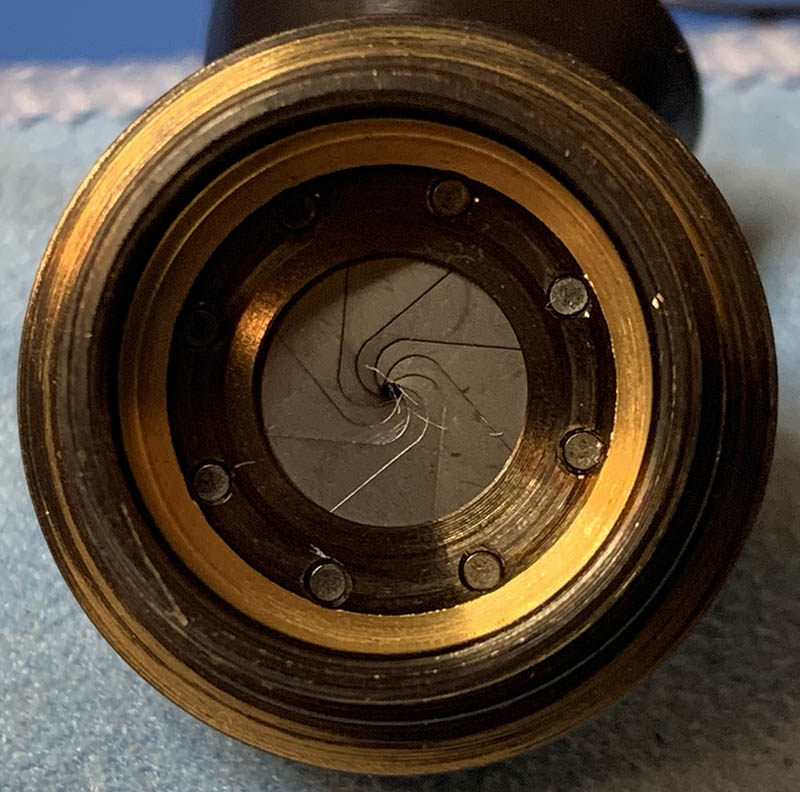
The iris mechanism has now been fully rebuilt. I just need to blow away the fibers and wipe them clean. It is now operating smoothly like it’s new.
This is a very unusual lens in terms of barrel design, if I only knew everything from the start I would have done it a little differently. This is how important my work is, it guides other repairmen.
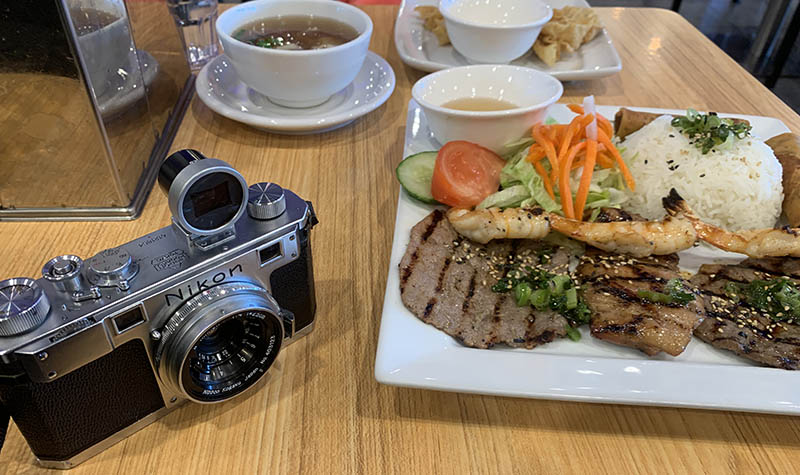
I had a great time shooting with this setup, it’s much better than adapting the lens to a mirrorless camera. If you would like to adapt it, it’s best to use the L39 version of this lens so you can focus properly with it.
It’s now time to say goodbye, at least for now. I have presented to you another original content, did you like it? If so, please consider leaving me a little tip. It helps me run this website. I only earn a few cents for every unique visitor, which means this site only earns less than $6 a day on page views. This site relies on your support and goodwill, it would have never lasted this long without your help. This is my life’s work, I take great pride in it, this site will hopefully outlive us all and continue educating and entertaining people about the joys of vintage photography equipment. I am also proud to say that I have helped inspire a new generation of camera repair enthusiasts, this is more than a labor of love, it’s a commitment. Thank you, it has been my pleasure to dedicate this article to you. See you again, Ric.
Help Support this Blog:
Maintaining this site requires resources and a lot of time. If you think that it has helped you or you want to show your support by helping with the site’s upkeep, you can make a small donation to my paypal.com at richardHaw888@gmail.com. Money isn’t my prime motivation, I believe that I have enough to run this by myself but you can help me make this site grow.
Leave me some tip?
Thank you very much for your continued support!
$2.00
Helping support this site will ensure that it will be kept going as long as I have the time and energy for this. I’d appreciate it if you just leave out your name or details like your country’s name or other info so that the donations will totally be anonymous. This is a labor of love and I intend to keep it that way for as long as I can. Ric.

1 Comment (+add yours?)