
Hello, everybody! Do you remember The Ventures? The band is the reason why I picked up a guitar during my teens, but I never got to learn playing it, which is unfortunate. Their hits such as “Wipeout“, “Pipeline“, “Walk, Don’t Run” and other hits defined a genre. Their music was copied, covered, but never surpassed. Even if newer instrumental bands replaced the aging group, their music is still studied by many musicians. We can also give the same honor to today’s topic, a lens so influential amongst Nikkor lovers that it has a reputation surrounding it, and just like The Ventures, this lens has something special that later lenses do not have. Do you want to know why I said that? Read the whole article to know why.
Introduction:
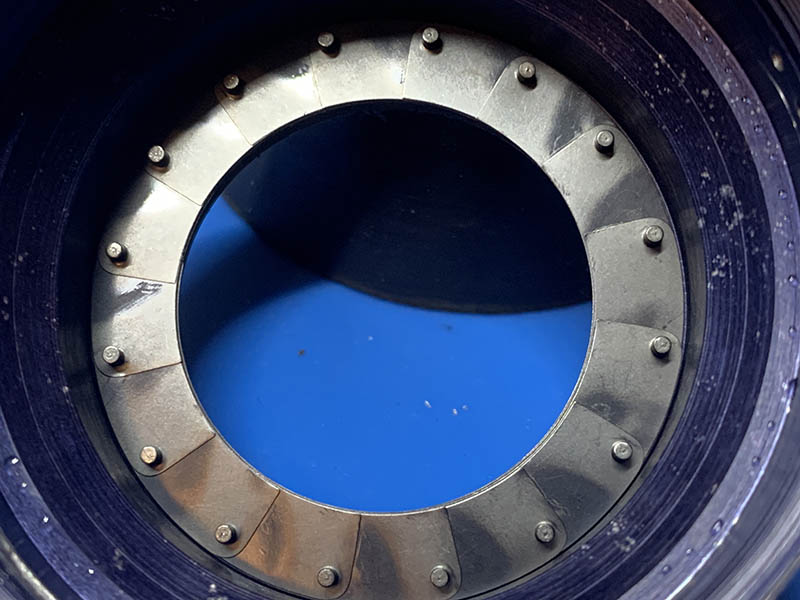
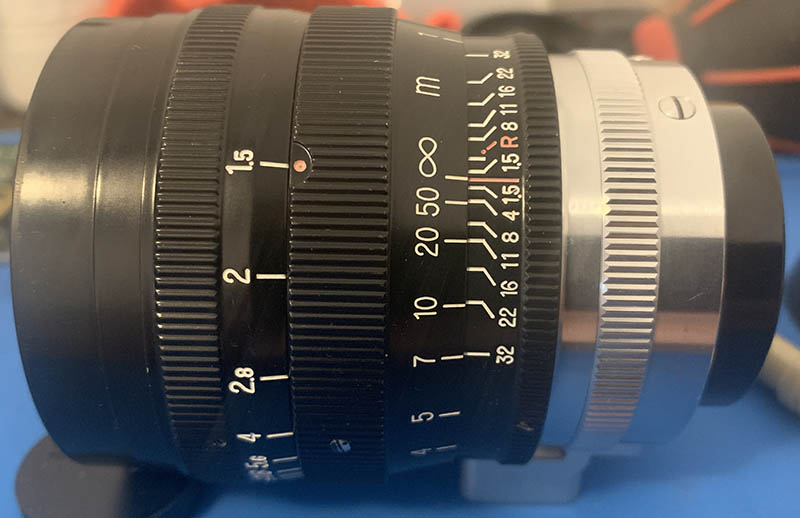
The Nikkor S•C 8.5cm f/1.5 was Nikon’s best and fastest 85mm for a very long time, it was produced from 1953 up to an unknown date. It was surpassed by the Nikkor 85mm f/1.4 Ai-S in 1981 after nearly 30 years of being the king of 85mm Nikkors. Despite that, it still has a claim at being the king due to its 16-bladed iris, the most I have found on a consumer Nikkor! That enables it to have unusually smooth backgrounds at moderate apertures. This feature made it a very expensive lens as it’s difficult to produce, there are only less than 2000 produced, most come with the native Nikon S-mount or the rare Contax rangefinder mount that we are starting to see more of lately. This article will showcase the L39/LTM variant.

The build of this lens is second-to-none, it’s dense despite being compact. The barrel is made with brass and some parts were made from aluminum alloy. The engravings are beautiful and functional, typical of a Nikkor. The front element is huge, necessitating the use of 57mm filters which were huge for that time.
It has a 7-elements-in-3-groups design of the Sonnar-type, you could think of it as an oversized version of the Nikkor S•C 5cm f/1.4. This means that there are less air-to-glass surfaces, enabling it to be faster and more resistant to internal reflections, things that counted during the infancy of multi-coated lenses. Since it’s a Sonnar, the typical traits of having a sharp center with smooth backgrounds also apply, along with a quirk which I call the “Sonnar curse” that manifests itself as a slight focus-shift as you manipulate the iris. I personally do not mind it that much for 50mm lenses but it can be tricky for something this long specially if you are shooting wide-open. The main highlight of this lens is the exquisite 16-bladed iris which is near-circular in shape, it’s impeccable and a marvel to see an almost-perfect circle for a lens aperture.
Listen to the sound that the helicoid makes, this is the sound of quality. I’m very impressed by the quality of the materials used and the level of machining done with nearly all early Nikkors. By far, this is the best sounding classic Nikkor that I have ever heard.

The Nikon Zf is the best platform to adapt this with, not only for the in-body-image-stabilization or IBIS and its other amazing features but also for its style. You must find a good adapter that will allow you to reach infinity but not go too-much beyond that point. I’ll buy a good Japanese or Taiwanese one when I see a good deal, these countries make the best adapters I have ever used.

Of course, the natural partner for this lens is an LTM camera, in this case, a Leica IIIf. It is very tricky to use because it’s so huge that it obstructs the view of the in-camera finder and to some extent, the rangefinder window, too. The original hood comes with holes so you can peek-through it. Using an accessory finder is the only way to frame with it without too much hassle, it feels unnatural but what can we do? It balances poorly with this setup for obvious reasons as the lens is nearly a kilogram so you must support it by using the tripod mount or hold it by the throat for handheld shooting.

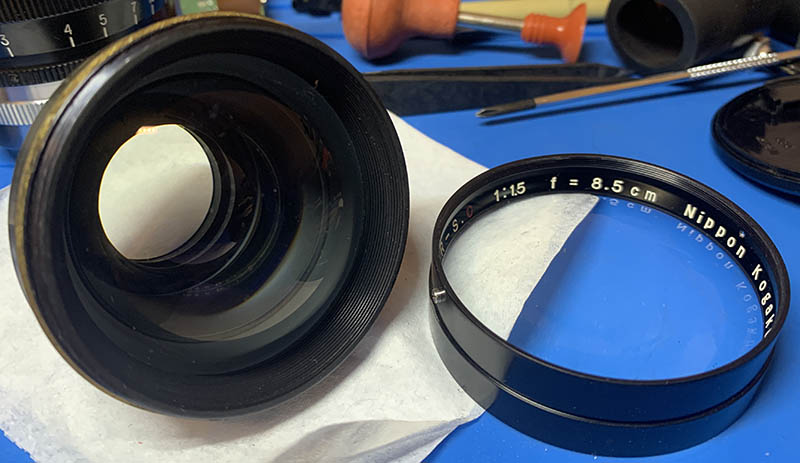
It has a rather large front, requiring 58mm-sized attachments. Original accessories are difficult to find, it has a shade especially made for it but it costs a lot more than the lens itself, I just but an aftermarket one because that’s all I can afford. It’s also worth mentioning that the S-mount version is even wider, it uses a 62mm filter thread. It’s not obvious from the picture above but they do not share the same accessories.

This is quite unusual, both versions exhibit differences other than the design of the lower barrels. In most telephoto Nikkors during the rangefinder era, the front part housing the optics is identical across versions but the lower barrel will obviously be different. Here, the S-mount version has a flared front barrel using a 62mm filter thread, while the LTM version has a straight nose that has two lugs for the hood and it uses a smaller filter thread of 58mm. I don’t know what’s going on but that’s how it is.
It handles poorly because the front barrel rotates as you focus and you can accidentally turn the focusing ring when you set your aperture. This means that you should set your aperture first before you focus. This is an annoying workflow that many people who shoots with older lenses have gotten used to. Holding the focusing ring as you set your aperture is a must. Being the heaviest rangefinder Nikkor also has its perks, I am able to gain more stability while shooting with it because of its weight alone. As mentioned before, it can be difficult to frame and focus with your viewfinder when shooting this with film, this is cumbersome, it’s the most time-consuming ritual that I must do in order to focus accurately.
Let’s now see how this lens performs. Many of you are curious as to how one of Nikon’s earliest lenses will fare with modern sensors. This is not a common lens at all, I think this is the only place where you can see how this lens performs. I took these photos with my Nikon Z f at f/1.5, f/2 f/2.8 and f/4. We’ll see the most changes happen in these apertures, these are also the most common apertures that people will prefer to shoot this with. Since this lens is so annoying to manipulate, I won’t be able to show every aspect on how it performs optically. Adjusting the aperture alone takes several seconds, I don’t have the time to shoot a series of photos while maintaining the correct focus, it’s just not possible.

This brick wall is not the best example for observing the effects of distortion, but whatever. I can’t see any observable amount of distortion with this lens. It is usually the case that a lens of this focal length and up will perform much better in this regard compared to lenses with shorter or much longer focal lengths. It’s been said that lenses from 85mm up until around 105mm are the easiest to design.


(Click to enlarge)
You will see a large amount of vignetting wide-open and it can reach close to the center of the frame. The frame looks much better at f/2 and you will only notice the darker corners when shooting against an even colored background. I can’t see any of it from f/2.8, you can see that it’s as good as gone. It’s impressive, I can tell from this test that this lens will render with a trippy look at f/1.5, then it will produce beautiful and clear photos at f/2 while still retaining a bit of that dreamy look. It’s technically great from f/2.8 onwards. I will see if my prediction is correct later in the sharpness test shots part.


(Click to enlarge)
It performs poorly when it comes to flare and ghost resistance, but that’s to be expected from a lens that is this old. What’s remarkable is it will give you exquisite sun-stars because the iris has so many blades. It’s something that you can use creatively.


(Click to enlarge)
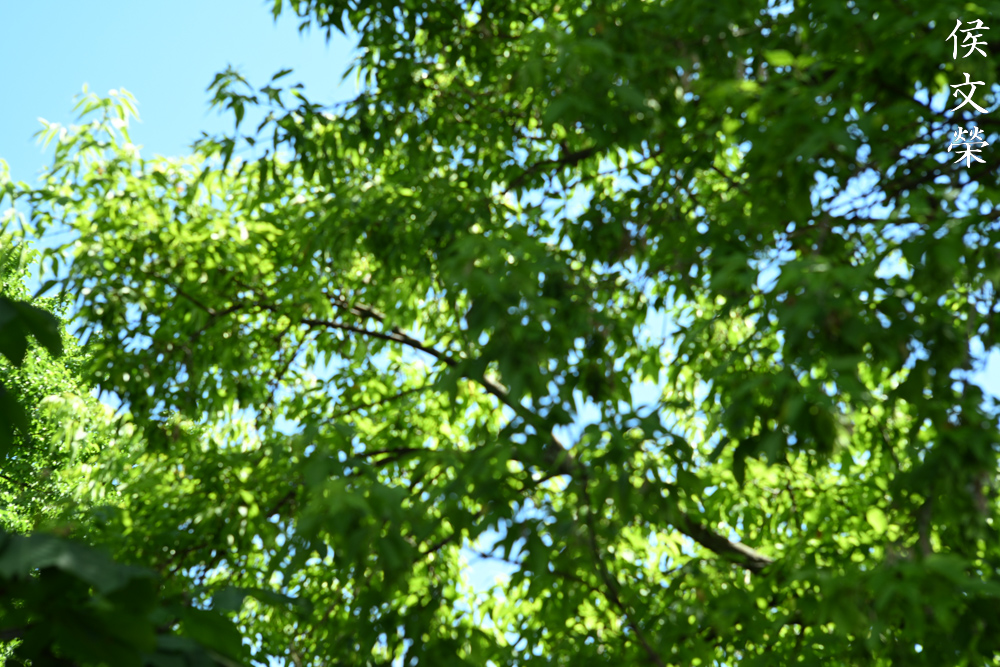
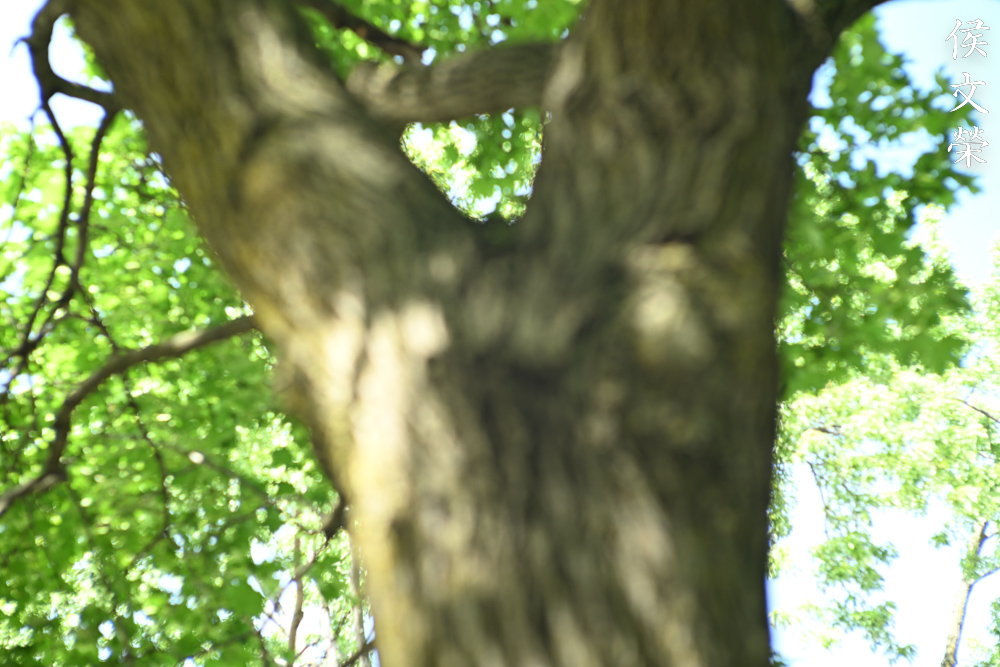
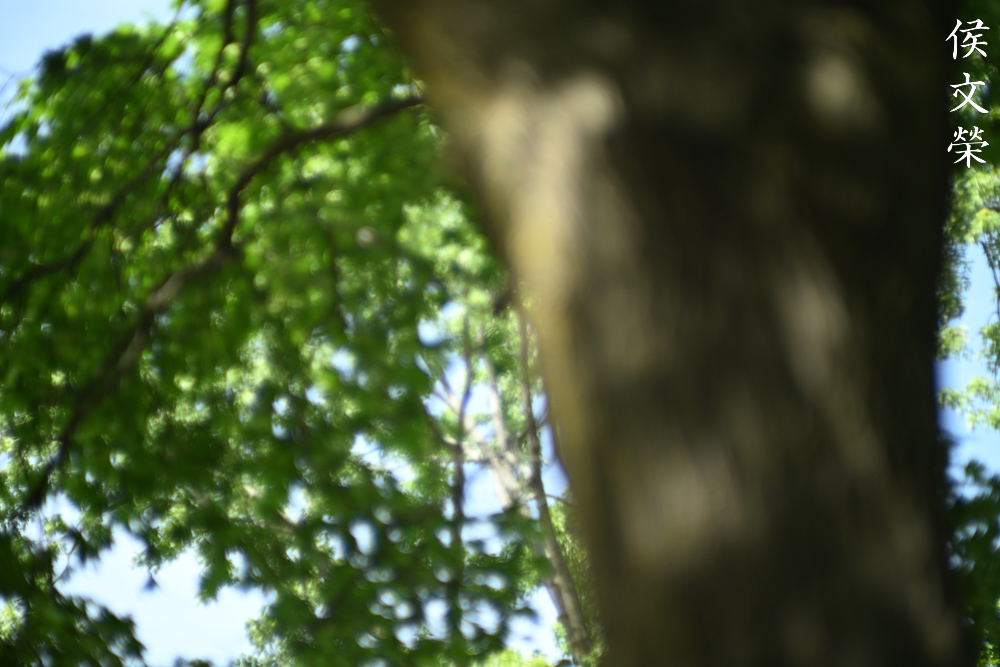
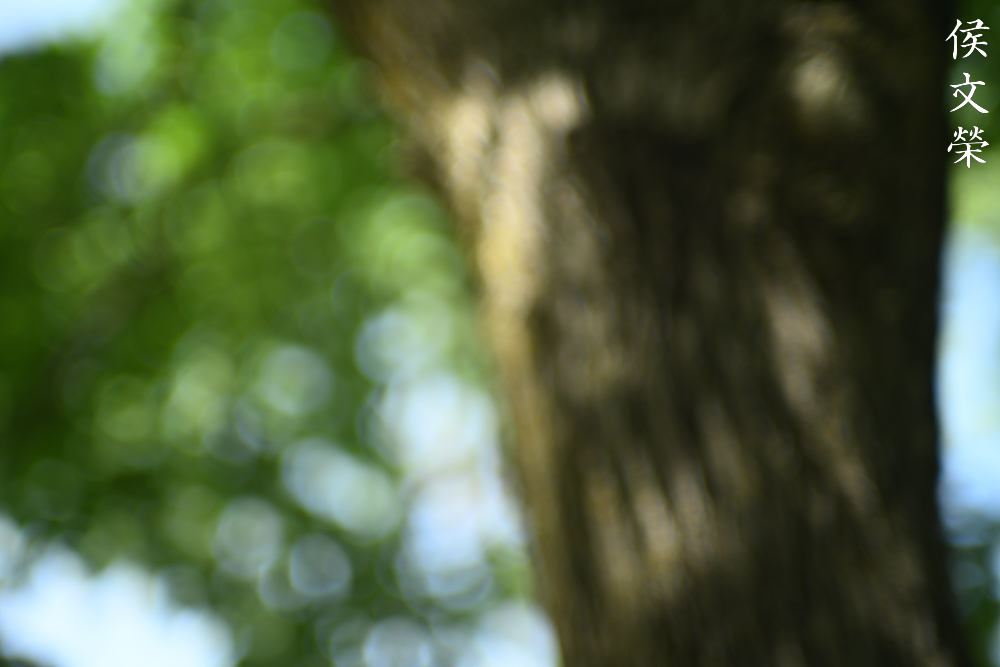
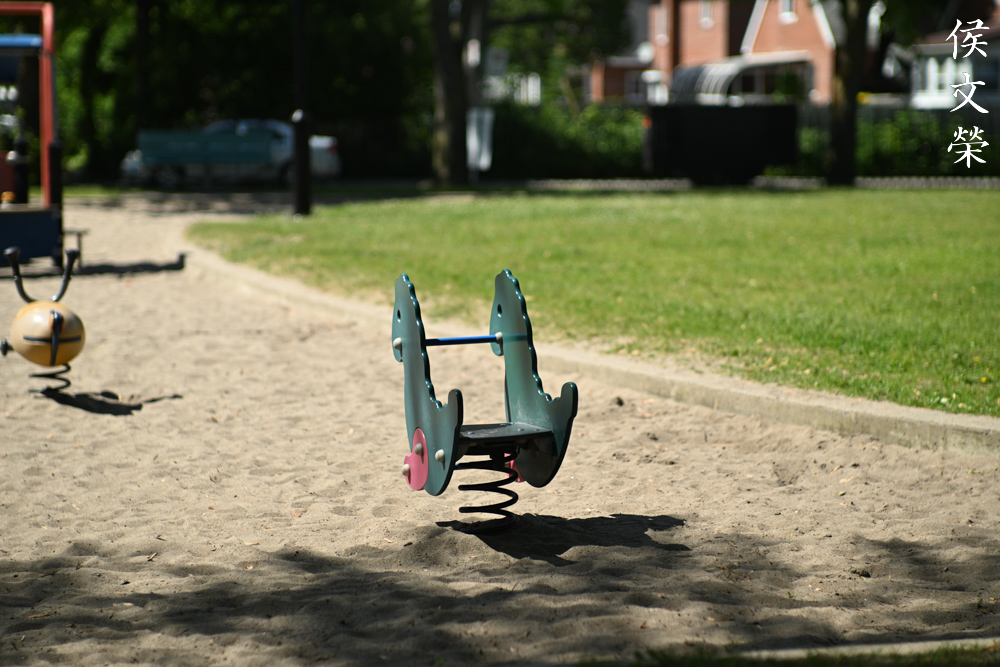
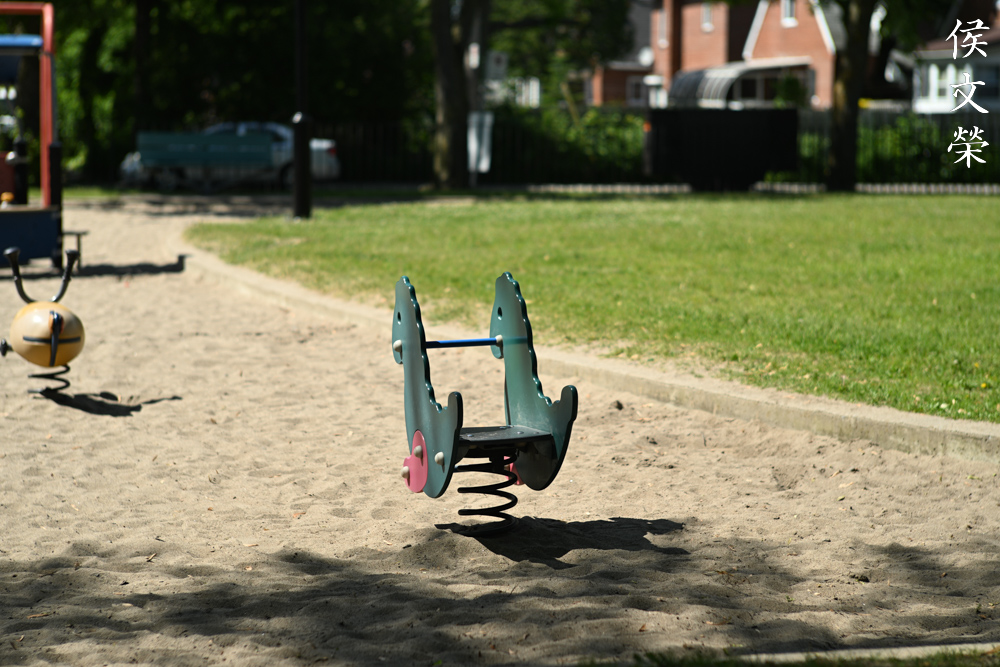
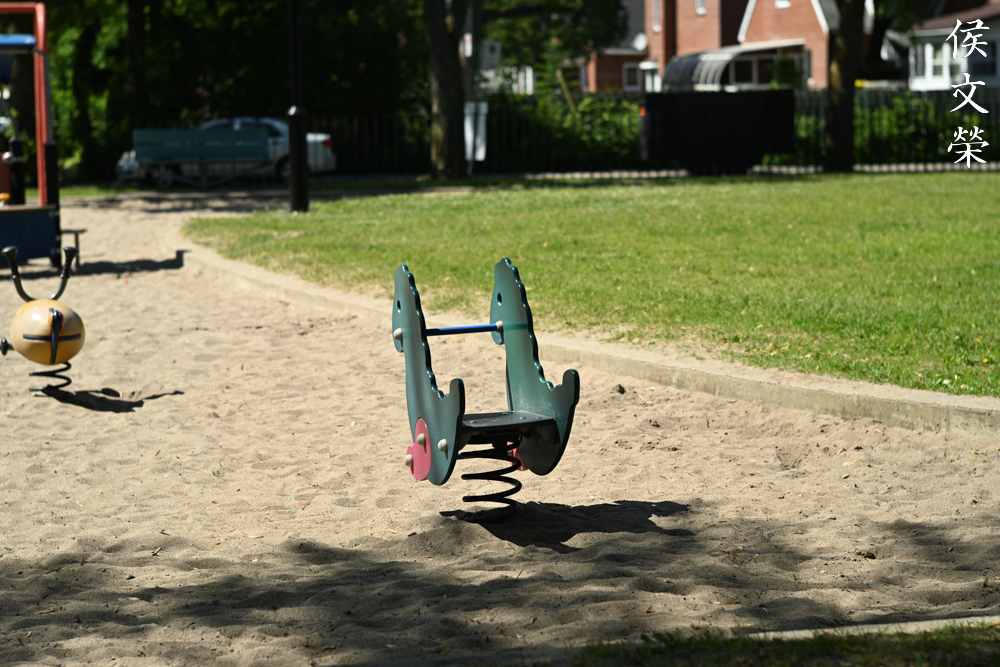
It is expected that all lenses of this class should render out-of-focus details smoothly, this is no exception. It performs really well for a lens of this vintage. The exquisite iris helps a lot so you won’t get clumpy and rough details in the blurry parts of your photos. It has a tendency to render with a soap-bubble look but it is not overwhelming or nauseating. I don’t like it at all but some people do.
Compared to later lenses that were made from the 1960s onwards, this lens won’t render as smooth and creamy as you would like nor expect, but this is pretty good for its time. This was the best that Japan had.


(Click to enlarge)
Chromatic aberration looks horrible at f/1.5, I will never use this lens at this aperture for shooting a white bridal gown! It cleans up beautifully by f/2, you won’t notice it unless you look for it. It’s as good as gone from f/2.8 on. While the results you see here may look undesirable, it’s actually quite beneficial if you are shooting portraits. I said that because you have the benefit of using a lens that renders in two ways. This will enable you to take photos of people with glowing skin at f/1.5 then stop the iris down a bit to take a photo with a more refined character. You can even stop it down to f/5.6 and you will end up with a photo that looks “clean” in the technical sense. Let’s see this in action later in the portraiture section.


(Click to enlarge)
It is now time to see how this lens performs in real-world scenarios. Since this lens is designed to be used primarily for portraiture, I shall do my best to show you some example portraits. These aren’t the best that I could do but these are all I have now given the situation and city that I am currently living in.

This is what you think with this lens is all about. It gives you the ability to shoot at f/1.5 which is very fast at the time of this lens’ introduction. With this ability, you are able to melt your background into a wash of colors. This photo is not a very good illustration of that because I was shooting in a hurry, if I were in a studio or if I have all the time in the world then this can be shown in a better way.

I really love how this lens renders skin when shot at f/1.5. It’s adequately sharp, but not too sharp so your subjects are portrayed in a more flattering way. All I’m trying to say is it’s not super sharp so any blemish or skin pores won’t be depicted in an unnatural way, at least in the way our minds perceive it to be.

Stopping the iris down by just a bit is probably the best way to shoot with this lens. You retain the dreamy look that you get with f/1.5 but the lens sharpens up quite a bit even that f/1.7.

The character of the blur is exquisite thanks to the 16-bladed iris. It ensures that the character of the blur is smooth at every aperture. An angular iris will produce rough-looking details. You must also stop the iris down by a very small amount in order to avoid having edges on the orbs.

Of course, there will be times when stopping down the iris won’t be enough. While the little orbs do not look offensive at all, they are still not as clean as what I am used to seeing from later lenses. Still, we must judge this lens within its context, so this is still an amazing lens for me.

When shooting wide open, there are times when the details don’t look sharp, leading you to think that it’s out-of-focus. This is not true sometimes, it’s just that this lens has a delicate rendering. While having thin depth-of-field at f/1.5 is desirable at times, it can backfire because it’s harder to acquire a precise focus.

This is a good photo illustrating what I have just mentioned in the previous photo. The focus is correct, it is right at the eyes of our subject, it’s just that the rendering is delicate or “soft”, making the photo look a bit blurry. Some will say that this is a desirable effect, naming the quality as “feminine”. I have a theory, it is entirely possible that this is indeed something very desirable at one point in time when film grain was a lot coarser than what we are used to seeing today. Having a lens that is a little bit “feminine” helps soften the skin of your subject, so it won’t look rough like stucco.

Of course, as with all fast lenses you will want to stop the aperture down a bit in order to get everyone in the frame to be in decent focus. You can also position their faces so that they are all roughly at the same plane.

This was shot at f/2.8 if I am not mistaken. This lens performs exquisitely at this aperture, if technicality is important to your work, this is the aperture that you should be shooting at.

You can see a little bit of chromatic aberration at the foreground near the sword’s hilt. This is the worst I could get this lens to exhibit this artifact in a real-world shoot.


(Click to enlarge)
This is a very interesting lens to shoot with. It’s great when adapted because you are able to confirm your focus with a mirrorless camera like the Nikon Zf. It will be quite difficult to do this consistently without it, I will not even dare shooting this with a Leica M3 and expect to have accurate focus most of the time. This is how challenging it is what you think this lens wide-open, even with a mirrorless camera. Despite that, it is a very good lens for portraiture if you have the time and patience. While modern lenses will outperform this in every way, this lens still has something to offer when it comes to rendering with “character”.
Do you want to see how this lens performs for the film? Please come back in the future because I will be doing another article about this lens, but with a different mount. I will be doing the film photos there and be sure to come back to see the photographs that I took with it.
I cannot recommend this lens for a daily shooter, this is meant for collectors. For every purpose, the other alternative is the Nikkor-P.C 8.5cm f/2. It is just a bit slower but it does the job just as well, it may even be better when shooting wide-open. It’s a lot cheaper and more accessible compared to this lens. You’ll only ever want to shoot you this if you desire specific look or effect. Leica users may also find this attractive as the German option is prohibitively expensive. Even with that, there are better options these days that’s a lot cheaper compared to this one. I was just lucky to be able to purchase one that isn’t expensive. If you’re looking for one of these, be sure that the iris is complete and working properly. A little bit of oil is fine, it’s understood that you will send it to a reputable repairman for an overhaul. The focusing ring should turn smoothly despite the age of the lens. The glass should be clean and clear, a few cleaning marks shouldn’t be a problem at all. A little bit of fungus and dust can be cleaned easily by a professional, but you should avoid buying a lens that shows any signs of balsam separation, that’s an expensive problem to solve. This is a derivative of the Sonnar so it’s susceptible to the separation issue. While somewhat rare, you can still buy one of these anytime you want. Just avoid paying too much for these, anything more than $2,000 is a scam! Do not feed the people who are selling these for such ridiculous amounts. Just wait for a while and you will be able to score one for a more realistic price. Happy hunting!
Before We Begin:
If this is your first attempt at repairing a lens, I suggest that you see my previous posts regarding screws & drivers, grease and other things. Also read what I wrote about the tools that you’ll need.
I suggest that you read these primers before you begin (for beginners):
- Essential tools
- Best practices 1
- Best practices 2
- Best practices 3
- Ai conversion
- Working with Helicoids
Reading these should lessen the chance of ruining your lens. Before opening up anything, always look for other people who have done so on the internet. Information is vague and scattered but you can still find some information if you search carefully.
For more advanced topics, you can read my fungus removal article. It has a lot of useful information, it will be beneficial for you to read this. I also recommend that you read the working with helicoids article since it is very important!
Disassembly (Main Barrel):
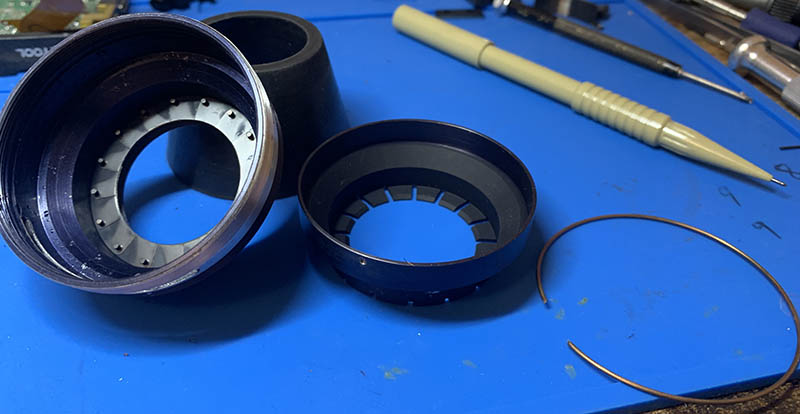
The construction of the barrel is typical of many longer LTM Nikkors, which means that you can separate the front barrel from the main barrel in a neat way and work on them separately. While the construction of the barrel is simple, only requiring a few parts, you will still want to exercise utmost care so you won’t damage anything. Some parts can be difficult to remove, so you must go at it slowly, applying alcohol or lighter fluid to the threads and wait for that drop of solvent to soften whatever made the parts stuck. It’s also important to never handle the lens by the aperture ring when you are removing something so you won’t accidentally destroy something so delicate.
This is a very valuable lens, please do not attempt working on it if you are not a seasoned repairer, you’ll also need special tools in order to open some of the parts here, too. Send the lens to a reputable repairer and show them my website to guide them through this magnificent lens.

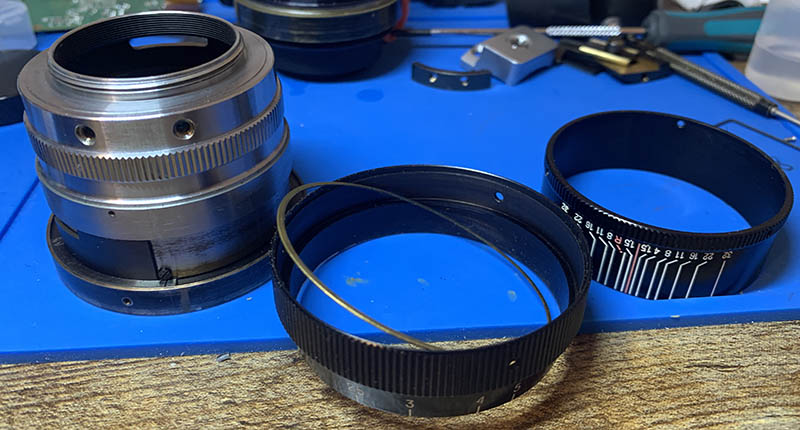
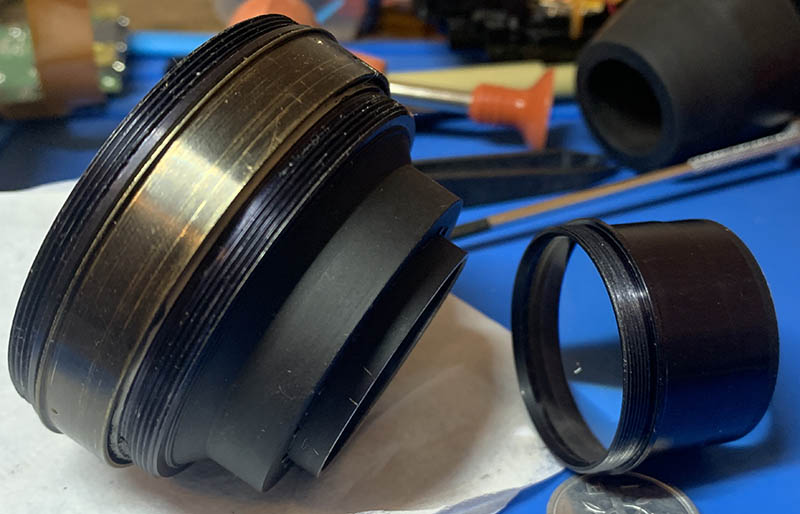
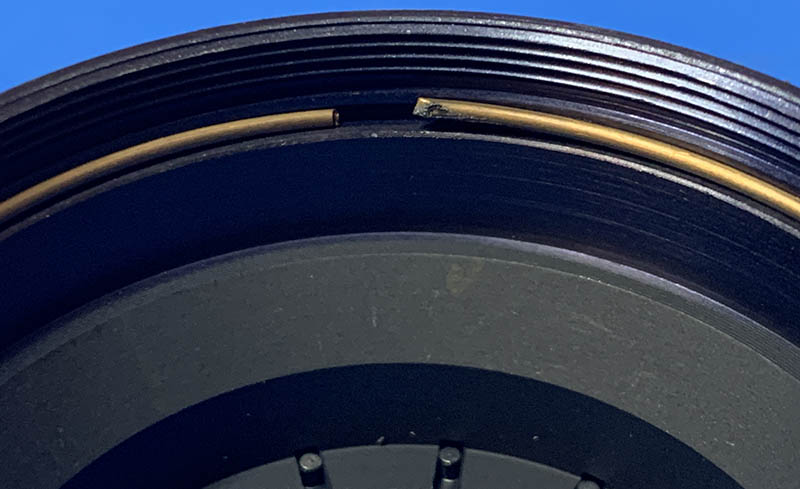
Unscrew the front barrel off, to do this safely, you must grip the lower barrel by the chrome grip and the front barrel by the front tube. Whatever you do, never get grip this using the aperture ring, you may risk damaging the iris when you apply force. The front barrel can be difficult to remove, if it won’t move, do not force it, it’s better to leave it alone than have a broken lens.
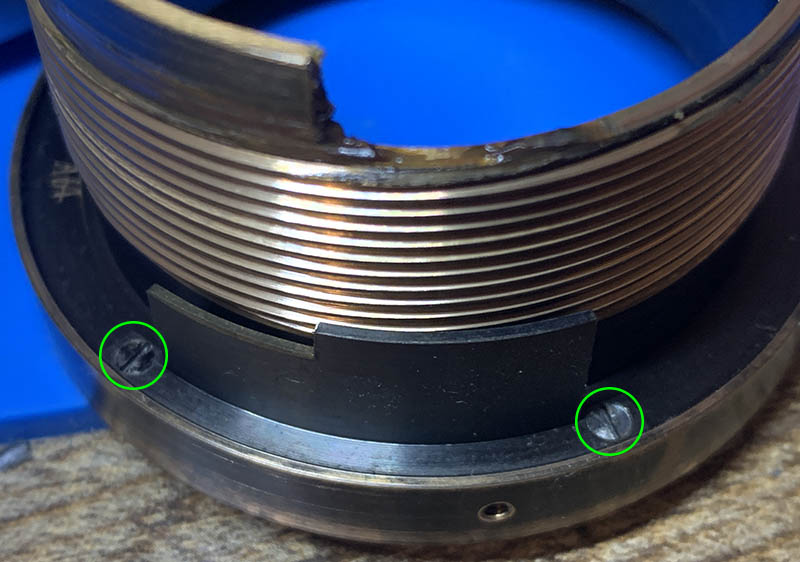
Once the front barrel is gone, you can loosen the set screws of the aperture ring and pull it off, you don’t need to remove the screws at all, just loosen them enough to enable you to slip the aperture ring off. Set the front barrel away, keep it in a safe place so you won’t scratch the front and rear elements.

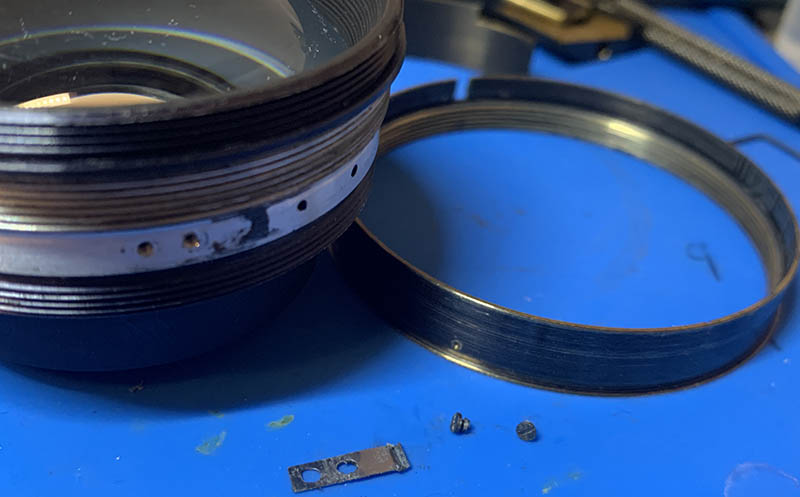
Pull this brass shim off and keep this in a safe place. This is used for adjusting the focus of the lens, make sure that you don’t warp or deform it.

Before you dismantle the main barrel it may be a good idea to measure its height. You should be able to replicate this later after reassembling it.

(Click to enlarge)
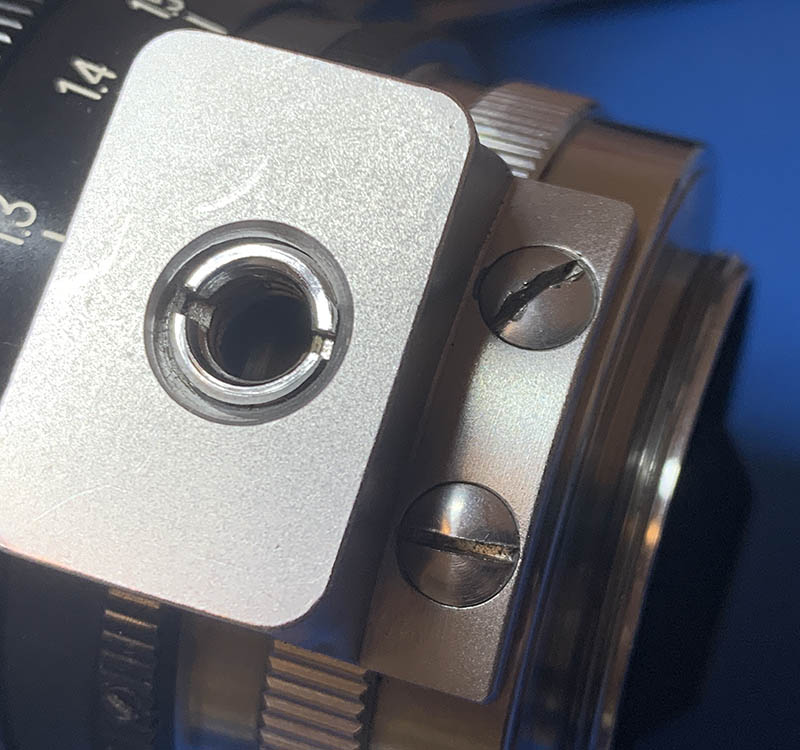
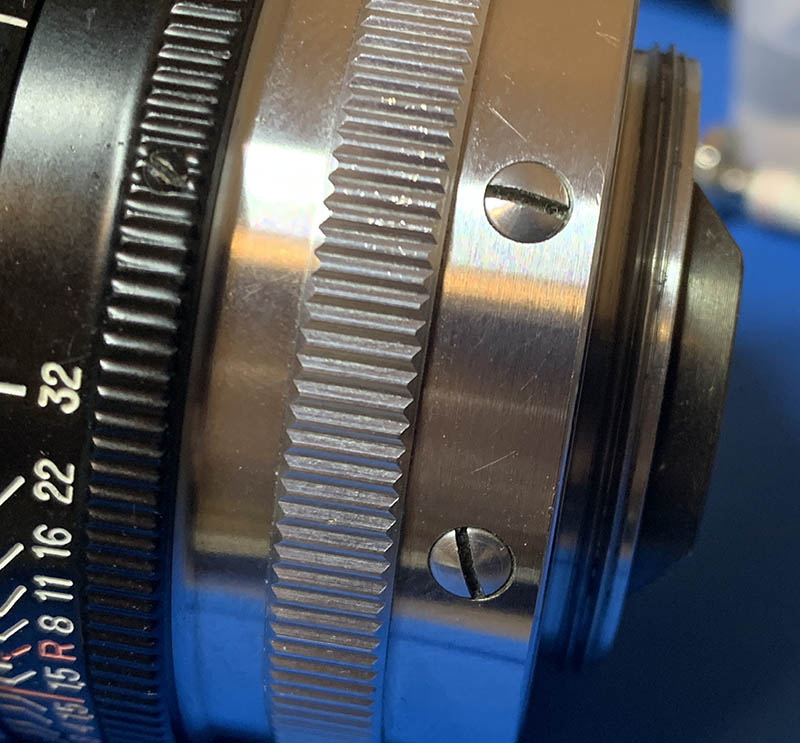
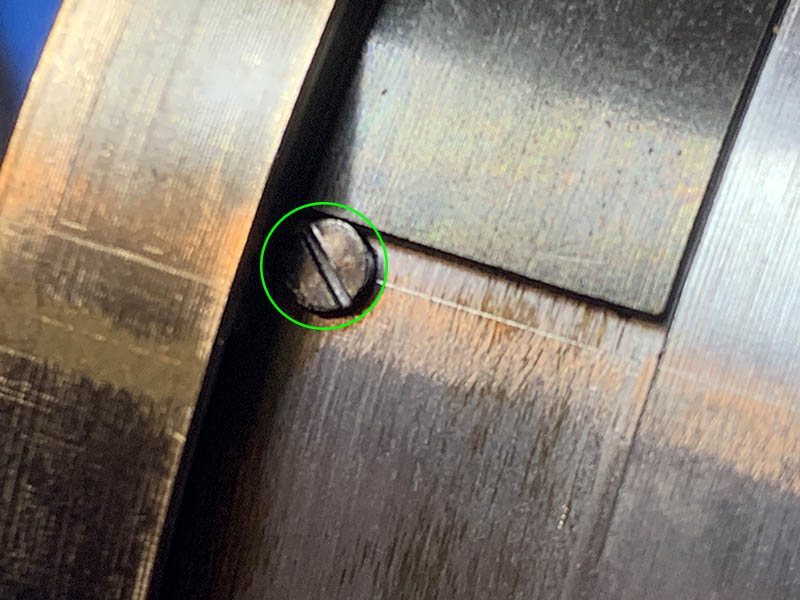
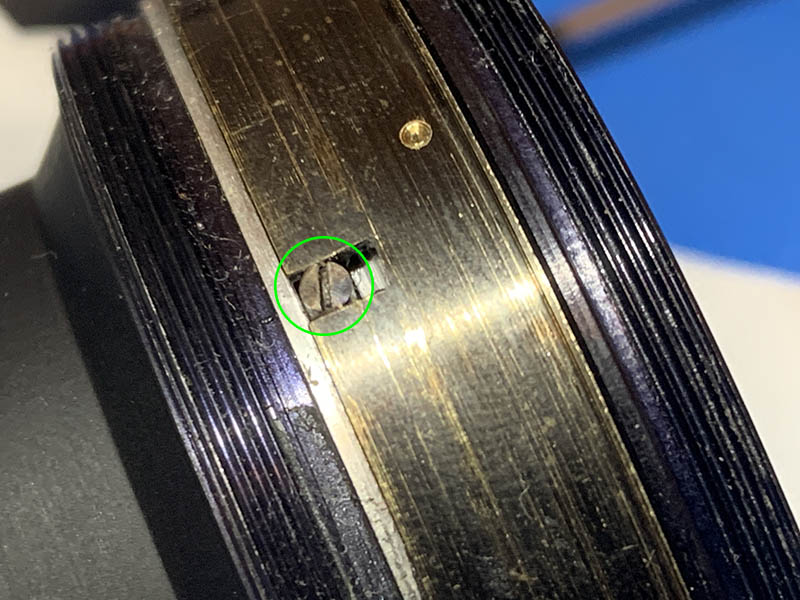
Extract these to remove the tripod mount, there’s an abutment at the other side, make sure that you note its direction since it’s asymmetrical. The foot is also adjustable as you can see in the photo. Also visible in the photo is the scar on the head of one of the screws, someone else was here.
(Click to enlarge)
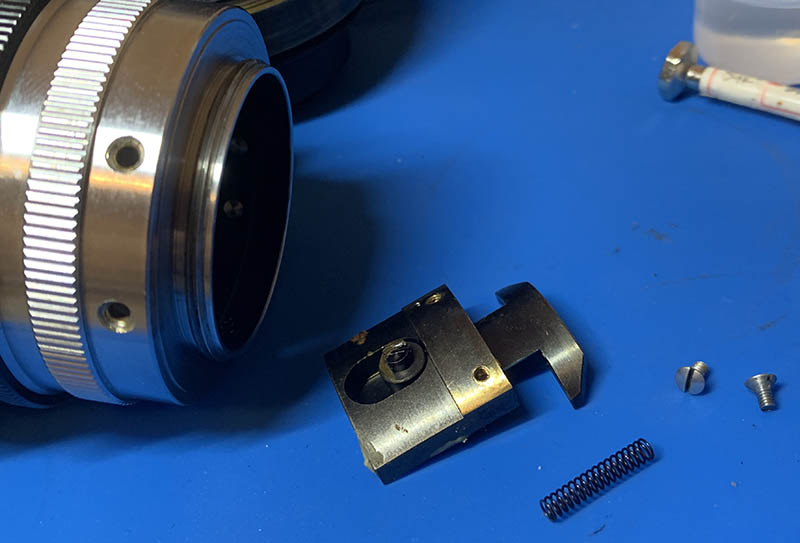
Extract these to remove the rangefinder coupler assembly, it’s spring-loaded so make sure to catch it, the spring could jettison itself and get lost.
(Click to enlarge)
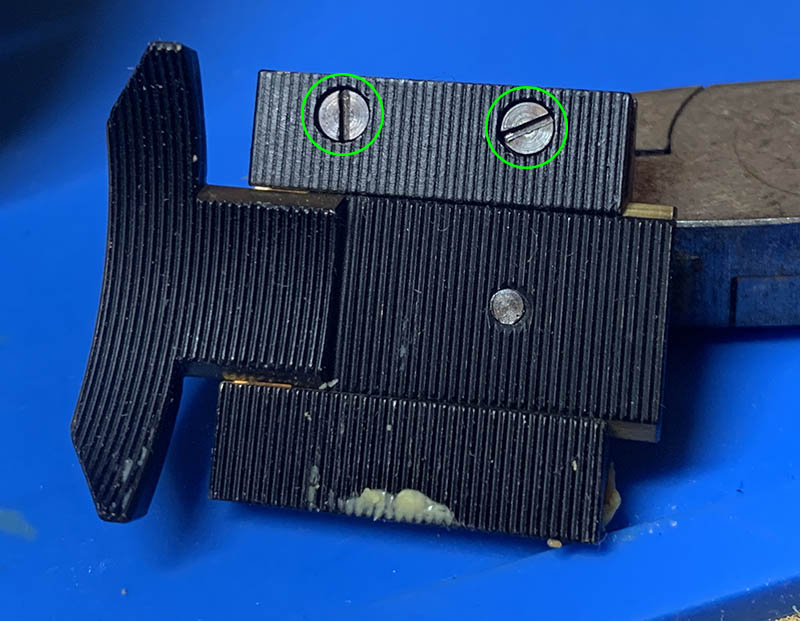
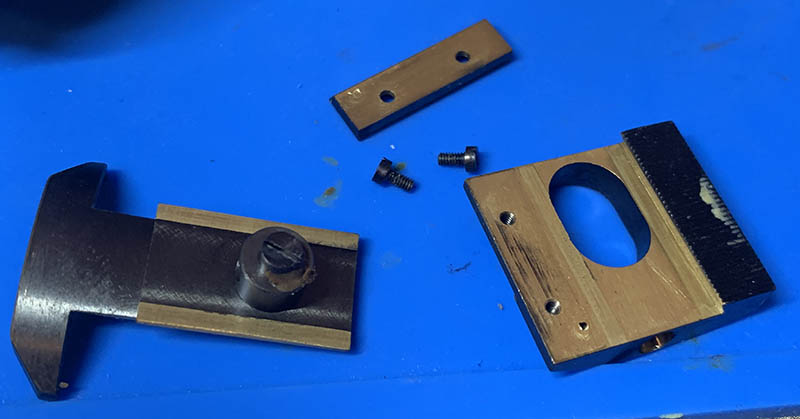
Extracting these screws will enable you to dismantle the whole assembly. Do not dismantle this further as I suspect that the big screw is an eccentric one and you won’t be able to adjust it accurately without the use of special tools.
The sleeve with the engraved scale can be removed after extracting its 3 screws, slide it off and it’s done. Extract the screws of the focusing ring and pull it off but be careful not to warp or damage the shim.
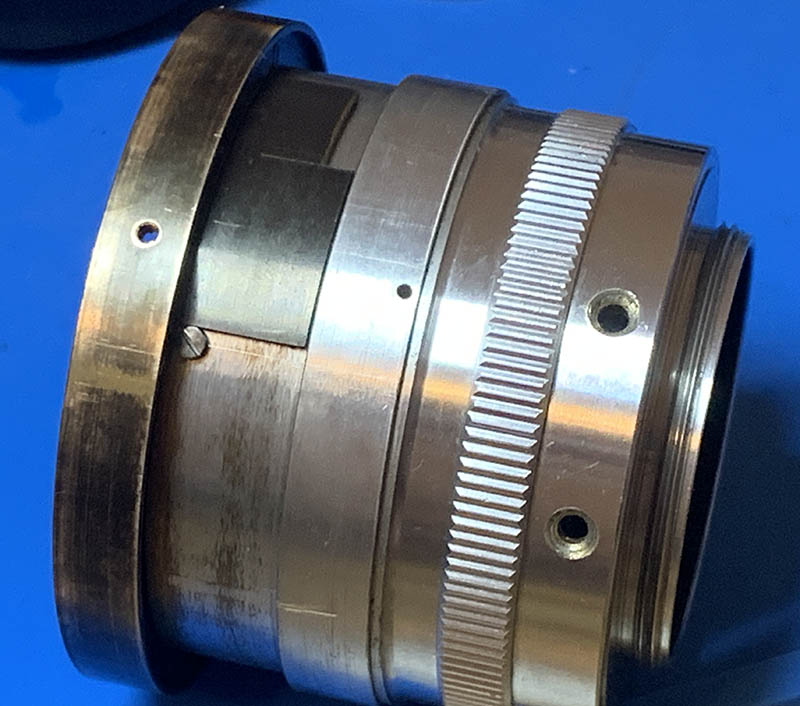
You can now admire the intricate work that went into the milling of the helicoids. Take as many notes as you can before going any further. Note the centerline with a marker and how deep it is if collapsed.
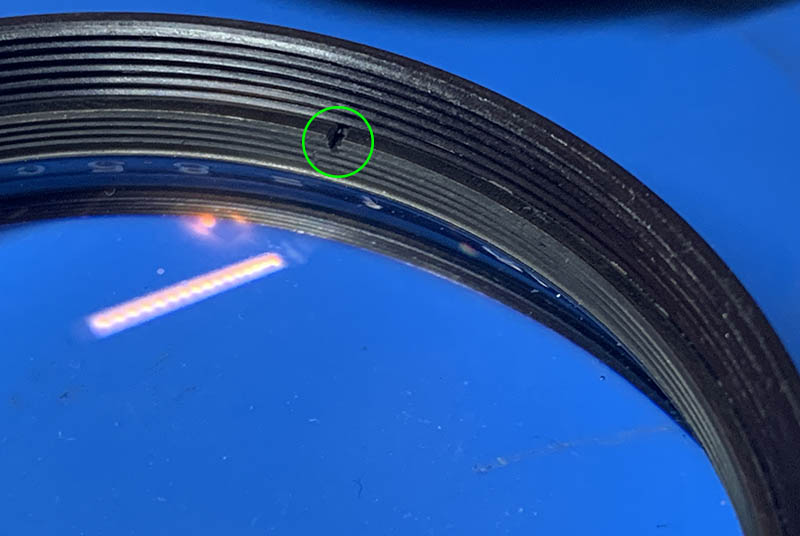
This screw prevents the helicoids from turning beyond the focusing range, carefully extract it.
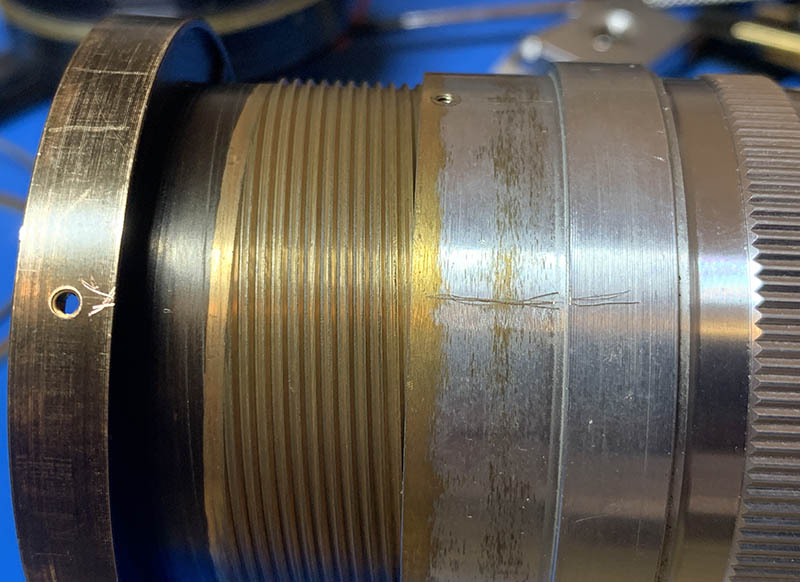
Unscrew the front helicoid until it separates. Don’t forget to note where they parted since it’s also the same spot where these should mesh. Many people forget to do this so they get stuck guessing where these should mate. To prevent this from happening to you read my article about servicing helicoids and follow my guide to the best of your ability.
Finally, extract these to remove the stop so you can clean the helicoid thoroughly.
I cleaned all of the big parts with a strong toilet cleanser – the grainier, the better. I scrubbed everything using a brush then rinsed them all very well with hot water before making a final rinse with pure alcohol to remove any remaining residue. Pay special attention when cleaning the helicoids or the other threads, they are fine in some places and they can be caked with gunk, using a wooden toothpick helps here for stubborn deposits. Dry them well before you continue. When lubricating, be sure not to apply too much, all you will need is a thin film of fresh grease. Combine the helicoids then exercise them by turning several times, this will ensure that the grease is applied evenly then wipe off any excess oil. If you’ve applied too much grease it will settle in the iris mechanism eventually, necessitating the need to open it again just to give everything another overhaul.
Disassembly (Front Barrel):
The front barrel also houses the iris mechanism so I will condense this article by including it here. There is not a lot of complicated assemblies here, just very delicate ones. This is a job for the professionals, the iris alone is a tough job to put back together and you will require the patience of a saint to be able to put the blades back in one go. It is very common to find these with oily blades and the only real way to address it is to do an overhaul of the iris mechanism.
Unscrew the front tube carefully so you won’t damage anything. Never grip by the aperture collar as it’s still coupled to the iris mechanism at this point.
(Click to enlarge)
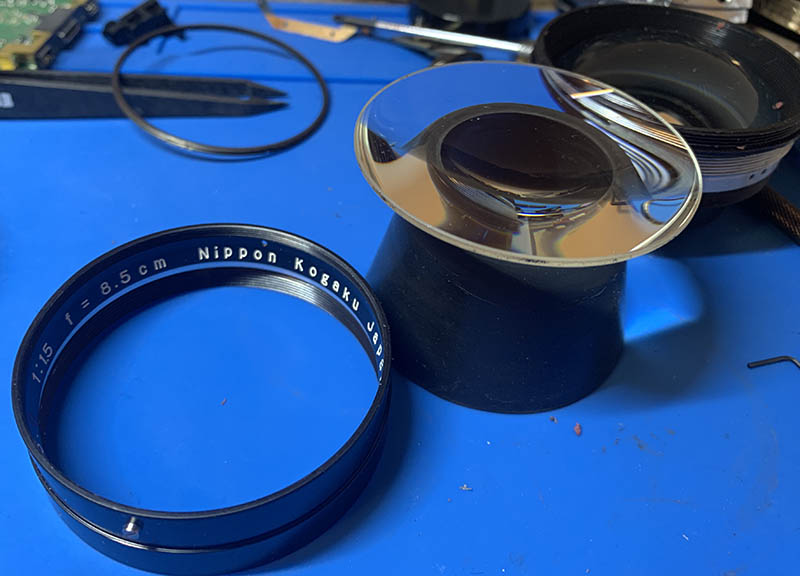
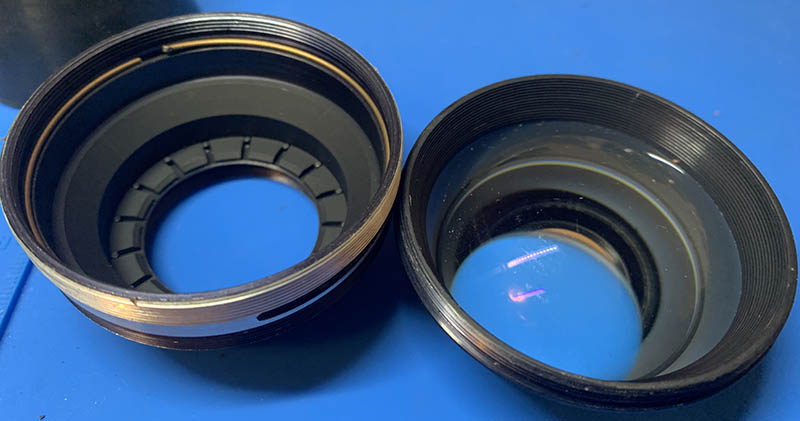
You can extract the front element by removing its retainer. Only do this if you have to, there’s no point in removing this if you only need to clean the glass because both surfaces can be accessed easily. The glass is very heavy so handle it with care and store it in a safe place.
Unscrew the housing of the rear optics assembly. This is a sealed unit, there’s no way you can go further without damaging this. Keep this in a safe place to prevent any accidents.
Extract this to decouple the iris mechanism, you should actually do this as soon as this is accessible to you right after removing the aperture ring in the previous section. Do not forget how deep this collar sits.
Turn the collar until it’s off, it slips through the front of the assembly. You can also remove the spring for the click-stops, it’s adjustable so note its position carefully.
The 2nd optical group and its housing can now be unscrewed, it’s a single unit so don’t bother going any further than what you see here. Mine was stuck to the housing of the iris mechanism, it took a lot of time before I was able to get this point, I had to use a forbidden technique which I will never teach anyone for fear of the said art falling into the evil hands of amateurs and butchers.
Carefully remove this circlip with your nails if they are long enough, I used a needle to do the job for me.
Pull the diaphragm cup off with your fingers but don’t forget to note its position first.
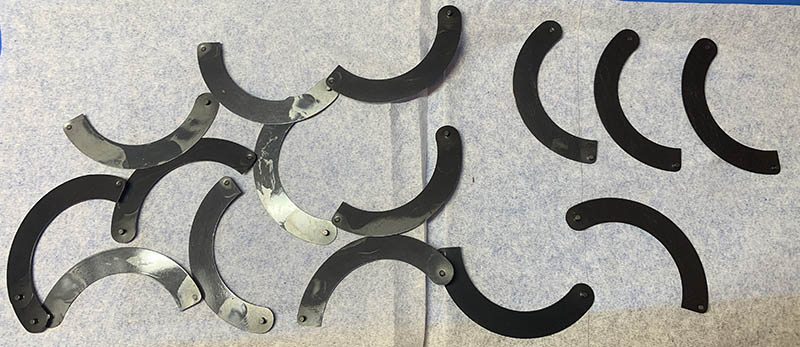
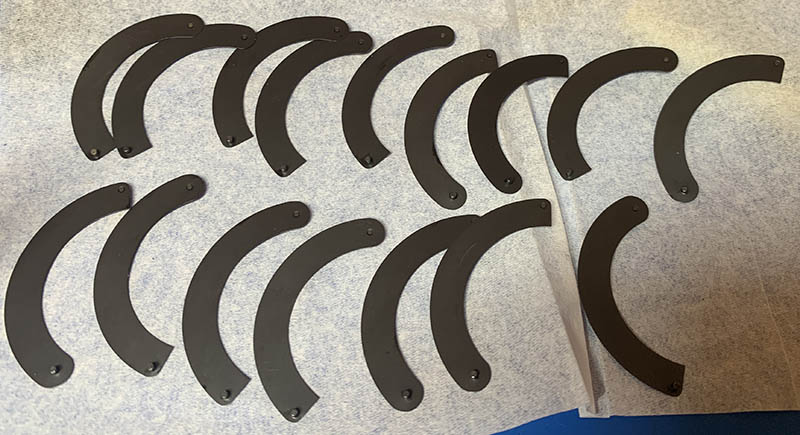
The iris is now in front of you! Resist the urge to remove everything as quick as possible. I gently tapped the housing from the back and the iris blades came off, caught by a soft towel for safety.

The iris was so oily that it came out like this, I carefully separated them with a pair of tweezers. The seller is a rat, he never showed the extent of the repairs needed to restore this lens. Not all Japanese sellers are honest, I should know, I have been dealing with them for a long time and they are the very reason why I started this hobby and blog, I just got tired from all the bullshit.
(Click to enlarge)
Each leaf was cleaned very carefully with Q-tips soaked in solvents, I used Zippo fluid for this as alcohol is not the right solvent for the type of grease used. Be sure to handle these carefully, accidentally destroying one is out of the question.
If your lens has fungus, read my article on how to clean lens fungus, just make sure that you dilute it with distilled water so it’s not going to be too strong as it may damage the coating.
Never lubricate the iris mechanism, if you must, a light dusting of powdered graphite is enough, blow off any excess powder after actuating the iris several times to finish the job.
Conclusion:
I had a lot of fun working with this lens, it’s a once-in-a-lifetime experience for me. I learned a few things while working on it despite its simple construction. I’ve learned and refined a new technique for removing stubborn parts without the use of heat. In total, I have spent a whole night dismantling and cleaning all of the parts, big and small, then it took me the whole morning the following day to reassemble it. All of that hard work paid off when I did a test shot and saw how exquisite it renders.

The iris mechanism is very intricate, the most complicated one I have ever worked on in a Nikkor. There’s 16 leaves in all, it took me some time to rebuild this but I did the job in one attempt, that’s how seasoned I am at repairing old Nikkors. Read my article on how to work with preset iris blades in order to know how I do this.
This lens is now so clean, just look at the white lettering. The germs and grease are now gone!
And that’s the end of another quality production, brought to you by yours truly. I’m always aiming to give my readers the best original content that’s not available elsewhere, where in the web can you find such a complete article of a rare lens? An introduction, then a review, then head to the climax which is the repair section, leaving you satisfied.
If you like my work and service to the community, please consider leaving me a tip, that helps me create and host my work. This is a media-heavy site and hosting it requires storage and bandwidth. You are also helping me offset the cost of purchasing, processing and scanning film, which isn’t cheap here where I am now compared to Tokyo. You are also ensuring that this site will still be here for years to come. Please do not download my content or rip them off, I am only earning a few cents for each unique view. So thanks to everyone who supports my work, you are the reason why this site has stayed up all these years. Cheers and see you guys again, Ric.
Help Support this Blog:
Maintaining this site requires resources and a lot of time. If you think that it has helped you or you want to show your support by helping with the site’s upkeep, you can make a small donation to my paypal.com at richardHaw888@gmail.com. Money isn’t my prime motivation for this blog, I believe I have enough to run this myself but you can help me make this site grow.
Leave me some tip?
Thank you very much for your continued support!
$2.00
Helping support this site will ensure that it will be kept going as long as I have the time and energy for this. I’d appreciate it if you just leave out your name or details like your country’s name or other info so that the donations will totally be anonymous. This is a labor of love and I intend to keep it that way for as long as I can. Ric.

1 Comment (+add yours?)