
Hello, everybody! I’ve got this crush on Kobayashi Akiko (小林明子) when she was younger, her face was beautiful and she is certainly very graceful specially when singing her hit “恋に落ちて” or “Fall in Love” in English. It’s a song about being in love from an innocent woman’s perspective. I see het at that point in her life as the epitome of femininity, beauty and a lot of other things that I associate a perfect woman to be. She’s now a certified “auntie”, not someone I would fancy for now but I still respect her. It seems that she as aged as gracefully as her hit which has been covered numerous times and by different singers in various languages. Today, I will show you something that’s equally graceful and it has aged well, too.
Introduction:
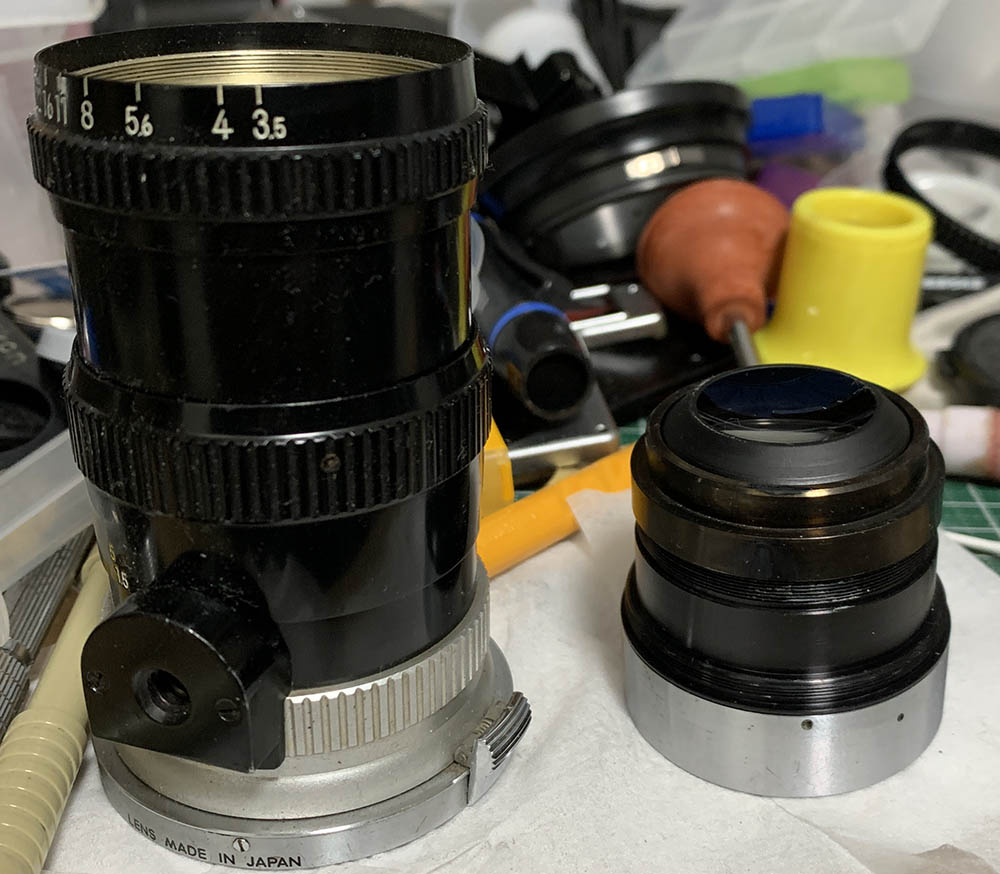
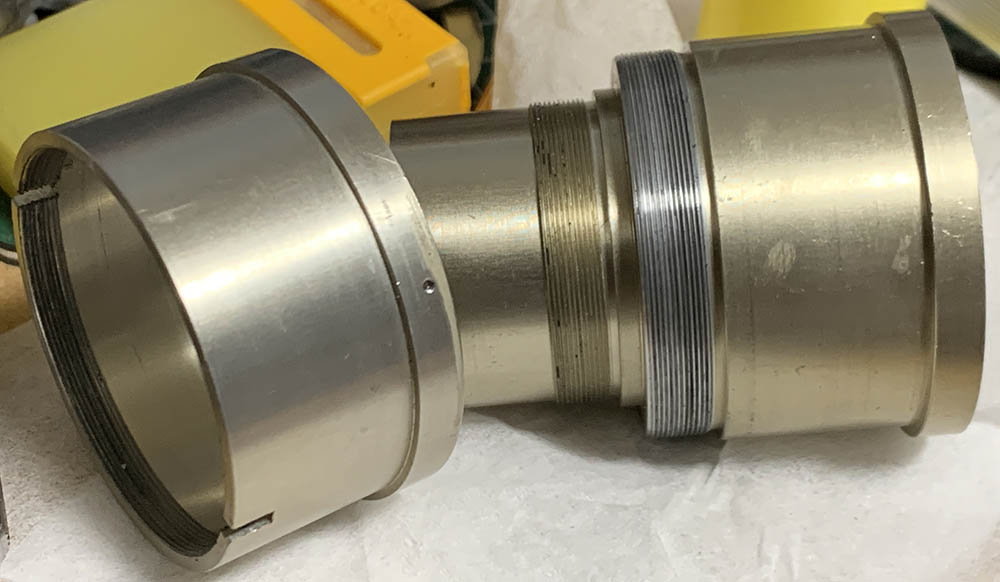
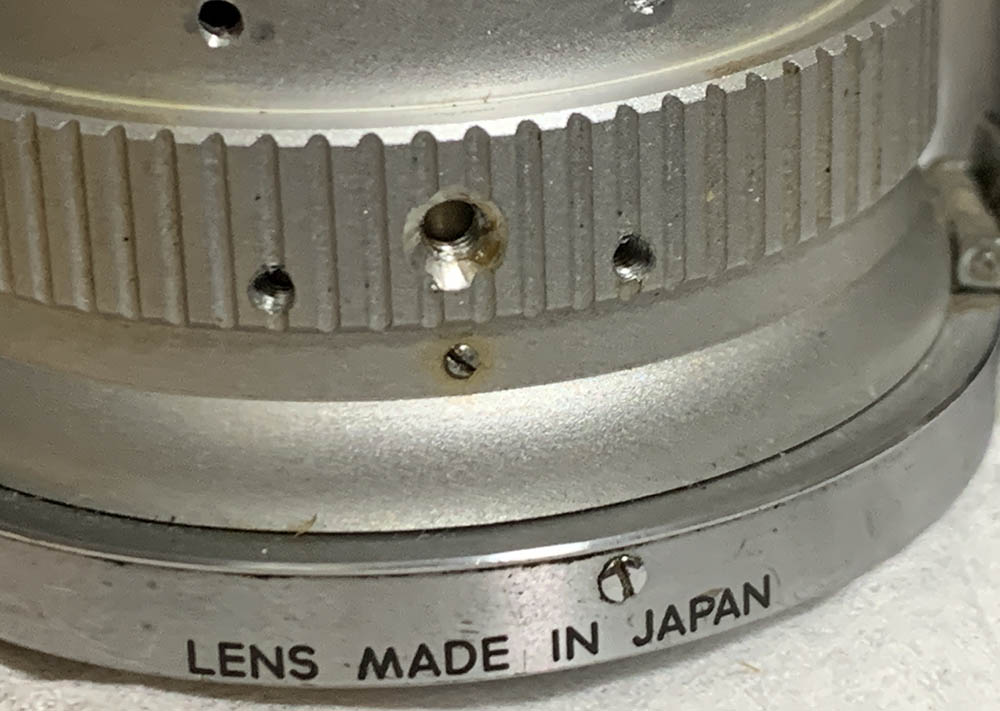
The Nikkor-Q•C 13.5cm f/3.5 had a long run, with production running from 1951–1962. The one we have in this article was made in the final patches so it’s close to the last one produced. The reason why we are interested in this version is the different style of its barrel. It now looks more modern and some parts are now made of aluminum alloy instead of the heavy brass that we are all used to seeing. This change came about around the latter half of the 1950s, but exact dates are unknown. Of all the known versions, this is the least desirable so it’s also the cheapest one you can get.

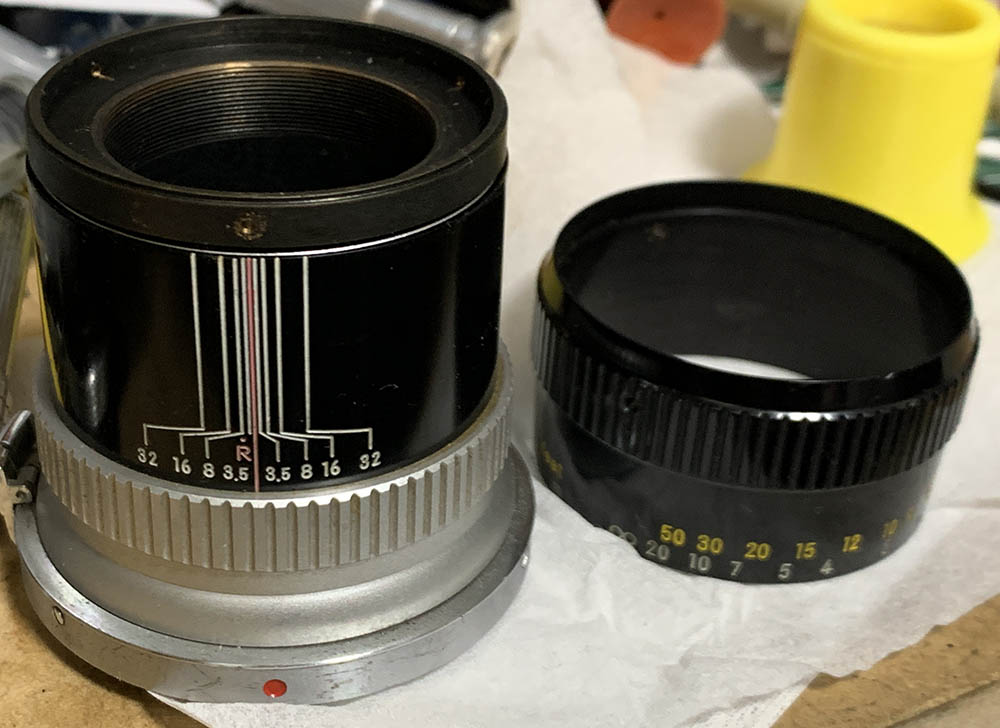
The barrel looks much sleeker and the black paint makes it look smart. Nothing much has changed when I use it except for feeling a bit lighter in my hands. It’s very beautiful with all those colorful markings. I must also say that the black paint helps contrast the colors much better. The previous version is also black but I don’t recall that having multicolored markings, they are just white numbers. This one makes it a lot easier to read everything and it also comes in both standard and metric.
Nothing has changed optically as far as everyone knows, still carries the same optical formula as the first version of this lens from more than a decade ago. I’m not even aware if there are any minor revisions that were done to the curvature of each element nor the materials used to make them. Because of this, we will assume that it performs exactly the same as the other Nikkor-Q•C 13.5cm f/3.5 versions.

These are the older versions, note that the overall scheme is similar all throughout the versions except for small details such as being chrome or painted. The version we showcase here in this article is the biggest revision to date in terms of design. While different, nothing much has changed in terms of operation and performance. I also forgot to mention that the hood is also different, the older ones use a heavy, 2-piece construction while this one uses the more familiar clip-on type that we are used to seeing from the 1960s up until the 1970s.
Since nothing has changed in terms of optics, I won’t be doing the traditional test shots in this article. I’m also not going to comment too much about its use since I’m tired of covering this series of lenses. If you are interested to find out more about these, read all about the other versions in my lens repair database.
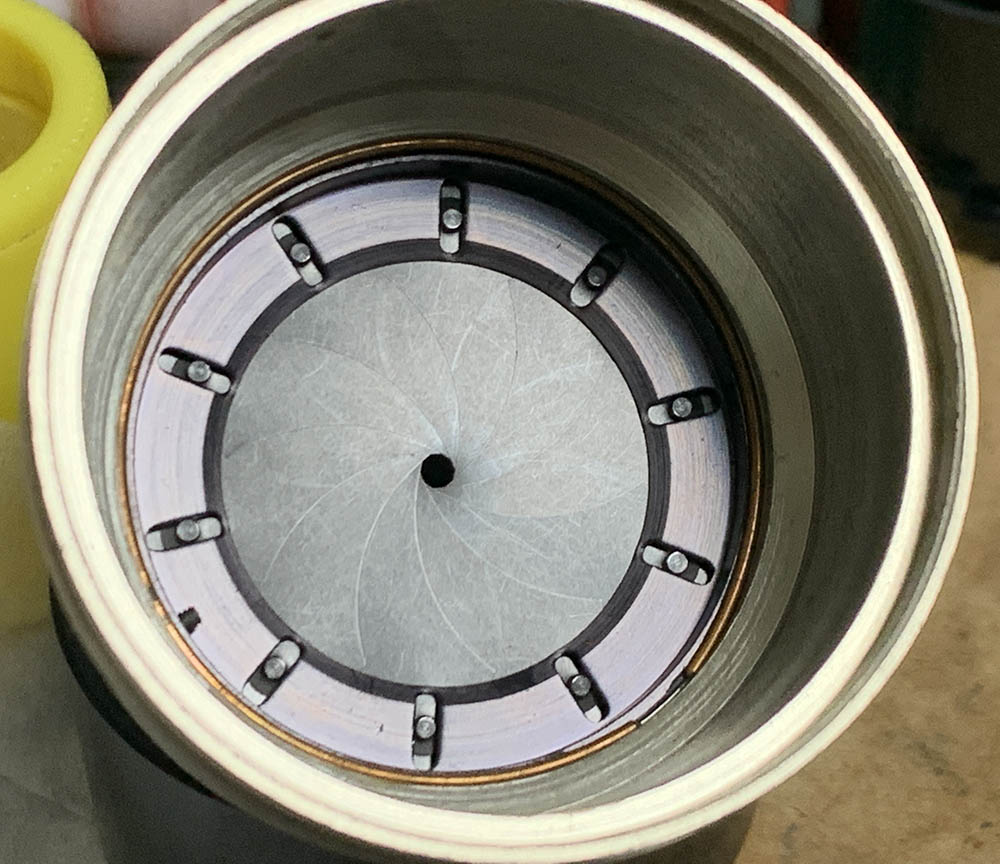
If you just want one of these to shoot with, then this version is the best one. It handles a lot better and it is lighter compared to the other versions. This is also the cheapest one, which makes it very appealing to Leica shooters because it also comes in the traditional screw-mount version. To me, this is the best model of all Japanese 135/3.5s out there. These are inexpensive and you should never pay more than $90.00 for good one, even the perfect ones shouldn’t cost much more than this. These aren’t rare at all and you can get one easily, you don’t even need to try. I got this for $55.00 from a shop, and it’s in great shape! If you are looking for one, be sure to inspect the iris very well and make sure that it’s not damaged. A little bit of oil can be tolerated and it can be easily serviced by a professional. The glass has to be clean and clear, no fungus or deep scratches at all. You should be able to see the coating when viewed from an angle. These rarely exhibit signs of heaviness in the focusing ring so yours should turn smoothly, and the iris should be operating perfectly, too. Lastly, test it on a camera and see if you could focus accurately with it, the focus should agree with what the focusing scale tells you. You can buy a generic hood for this if you want to, it’s not easy to find the original one and it can be a little bit pricey, too. These are worthless to collectors but it just means that you will be able to save some money by purchasing one. Happy hunting!
Before We Begin:
If this is your first attempt at repairing a lens, I suggest that you see my previous posts regarding screws & drivers, grease and other things. Also read what I wrote about the tools that you’ll need.
I suggest that you read these primers before you begin (for beginners):
- Essential tools
- Best practices 1
- Best practices 2
- Best practices 3
- Ai conversion
- Working with Helicoids
Reading these should lessen the chance of ruining your lens. Before opening up anything, always look for other people who have done so on the internet. Information is vague and scattered but you can still find some information if you search carefully.
For more advanced topics, you can read my fungus removal article. It has a lot of useful information, it will be beneficial for you to read this. I also recommend that you read the working with helicoids article since it is very important!
Disassembly (Front Barrel):
This lens shares a common scheme with its siblings. The front can be unscrewed, then the whole barrel is conveniently sectioned into 2 parts – the front barrel and the focusing unit. We will deal with the front in this section and I will also include the optics and iris here to make this article shorter. This lens is great for someone who has a little bit of experience repairing lenses, but it’s not for a total beginner because it has a manual iris, which is not the easiest thing to put back. If your lens needs attention, send it to a repairer. Make sure that the person you sent it to is competent and has a good reputation. There are many bogus operators around so you must be careful. If you found someone who can be trusted but he’s unfamiliar with this lens, show this article to him, it’s a great guide for people of all skill levels.
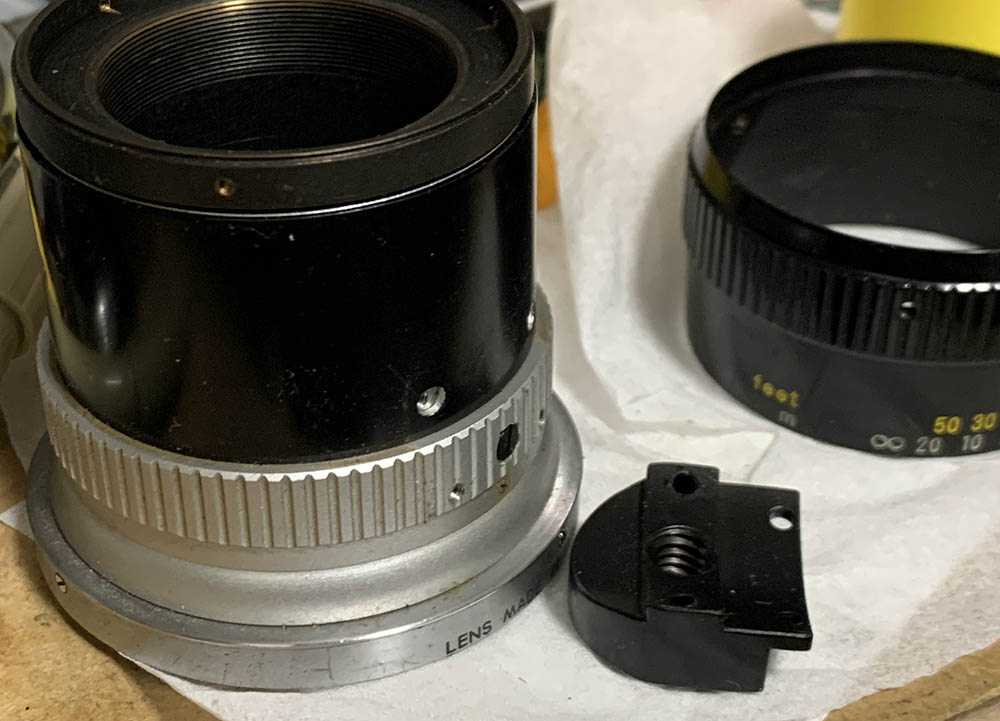
Carefully grab the focusing ring and unscrew the front barrel off. Be sure that your hands stay away from the aperture ring so you won’t accidentally damage the iris mechanism. Set the main barrel aside.
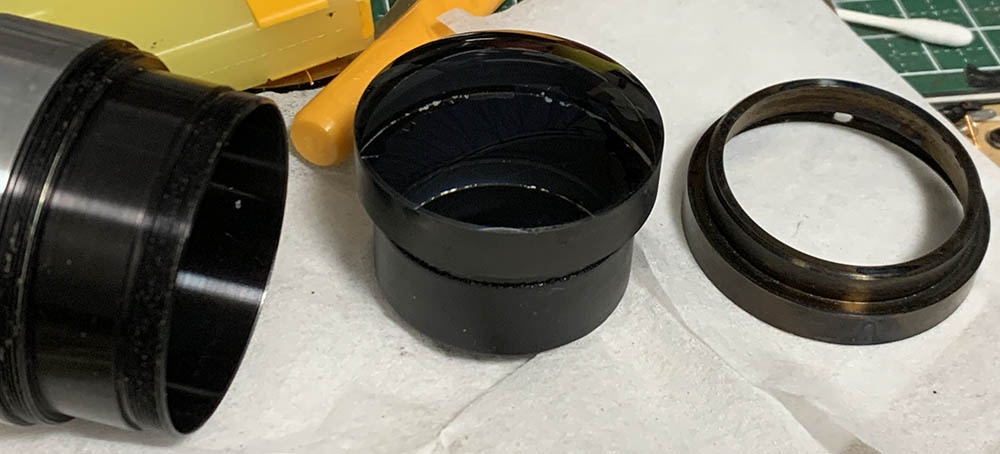
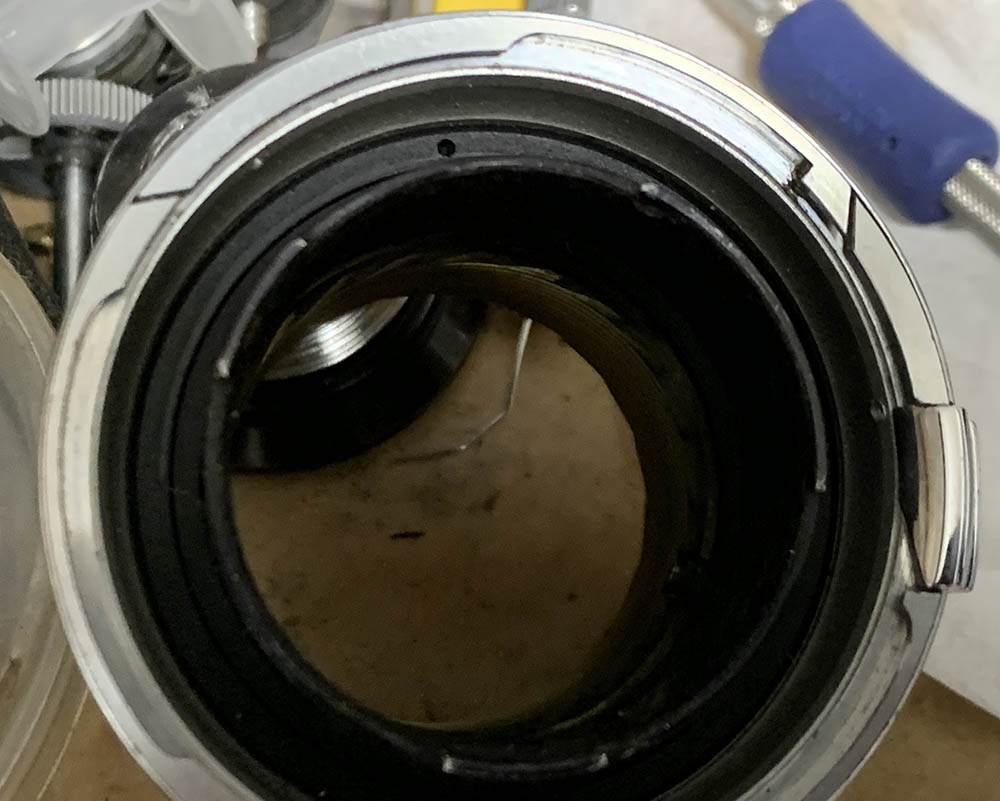
Unscrew the rear collar and pull the second optical group off using a lens sucker. Alternatively, it can also be pushed from the other side once you have removed the front element. I will show how it’s done in the next section.

Use a rubber tool to unscrew the front bezel off. It may be stuck due to age and solidified dirt, apply a bit of alcohol to the threads to help soften it then try your luck again. You must repeat the alcohol trick until you are able to safely unscrew the bezel. Sometimes, you may want to use acetone instead if it’s stuck.
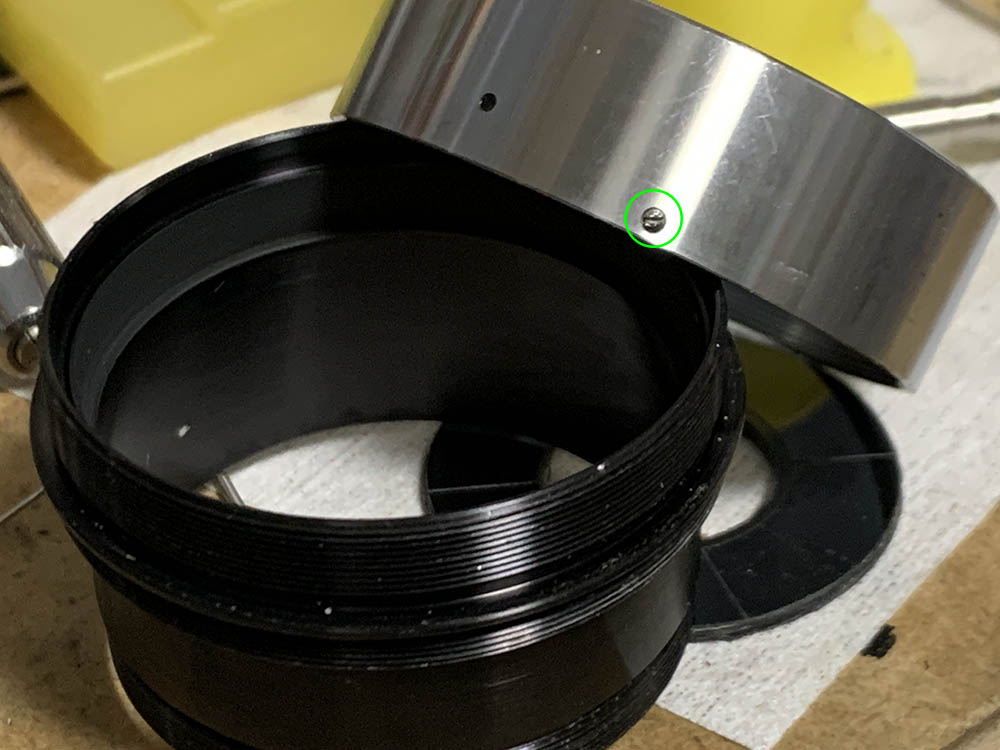
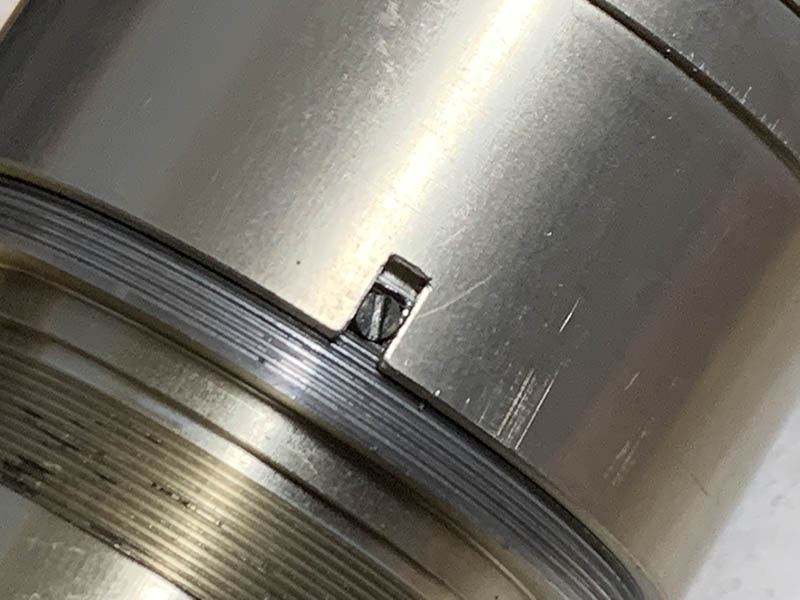
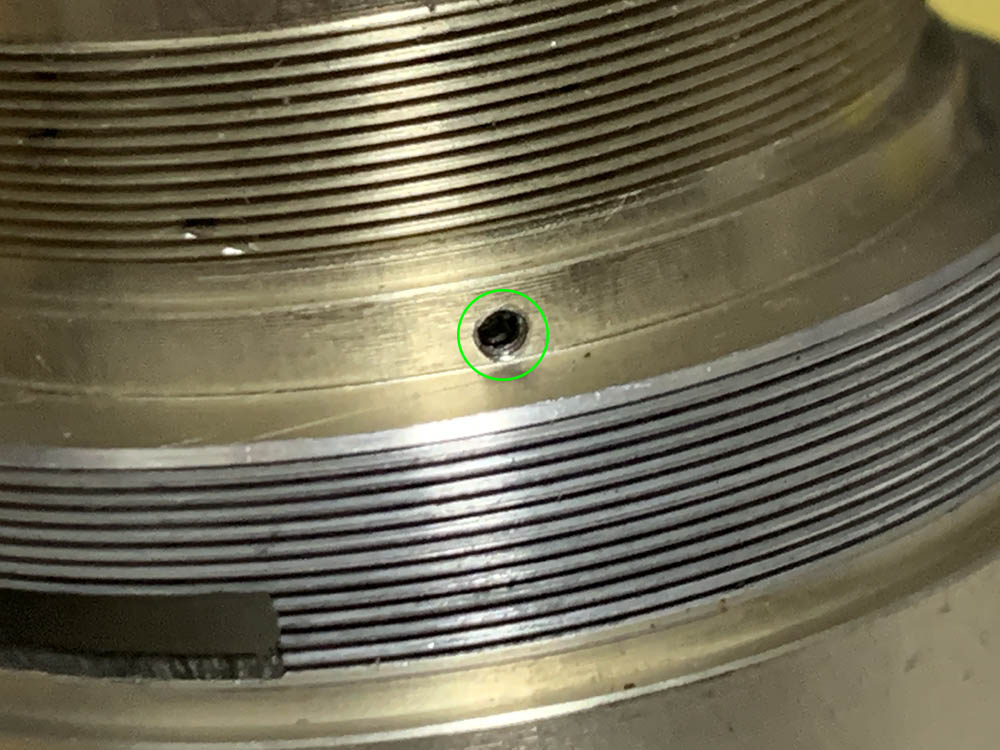
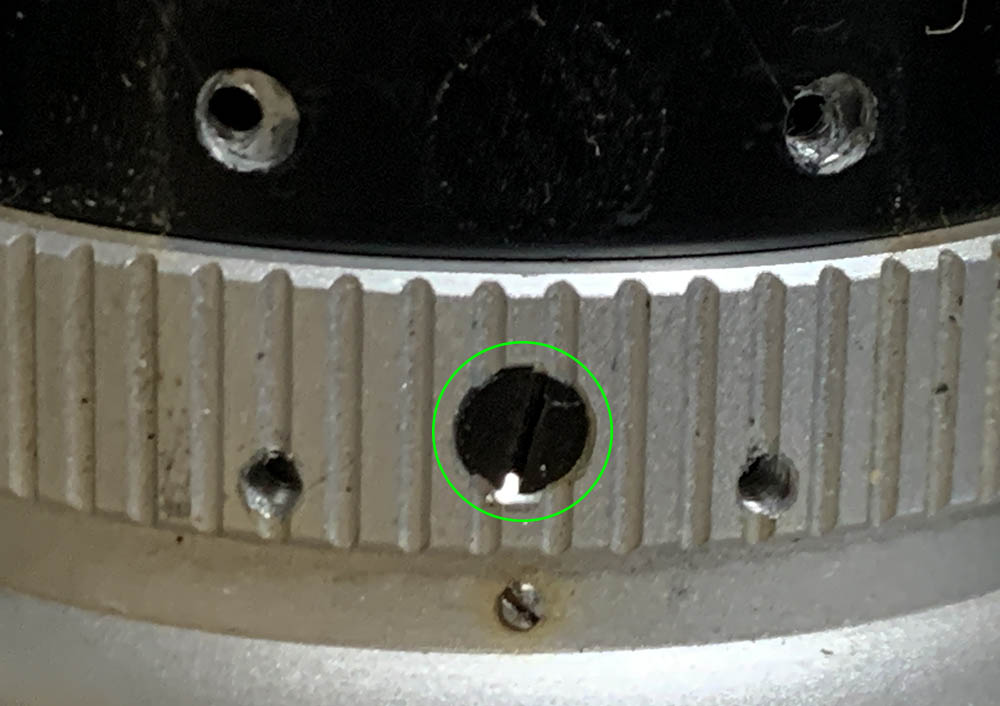
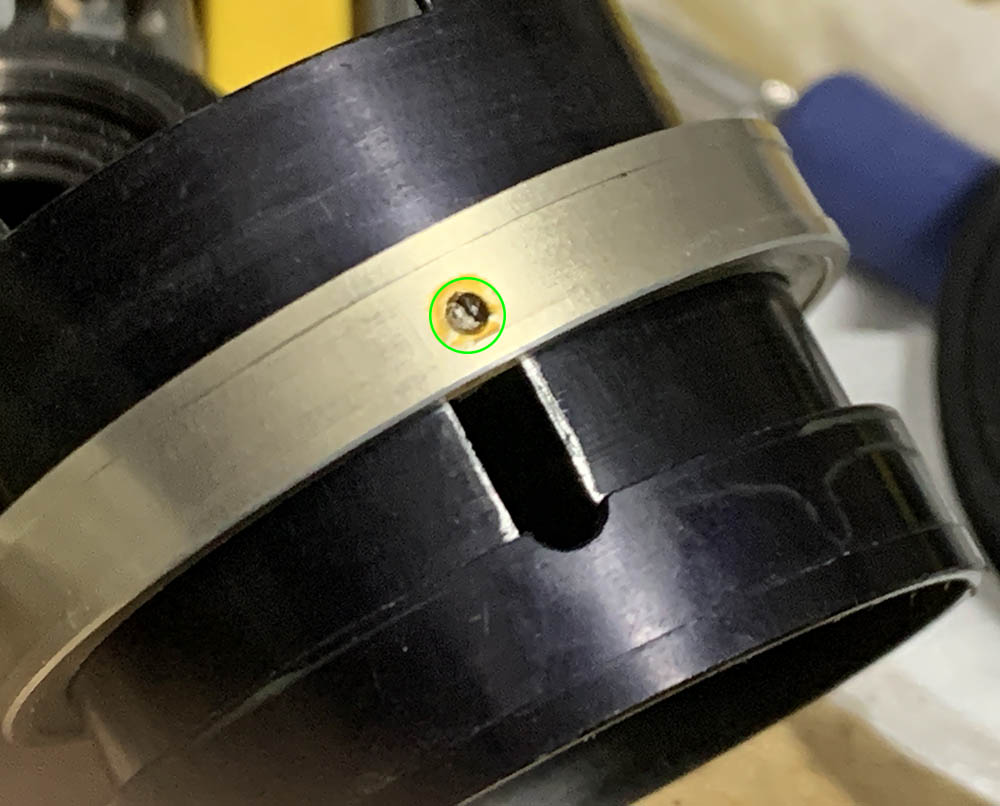
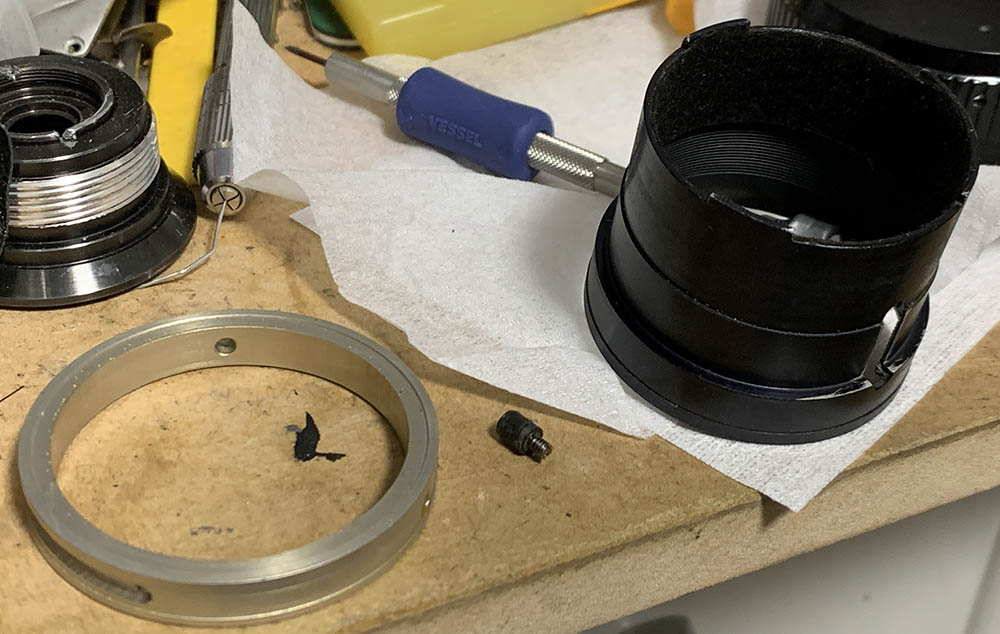
Locate and loosen this set screw so you can unscrew the front ring off. You don’t need to remove it at all, I usually leave them in their holes so I won’t accidentally lose these tiny screws.

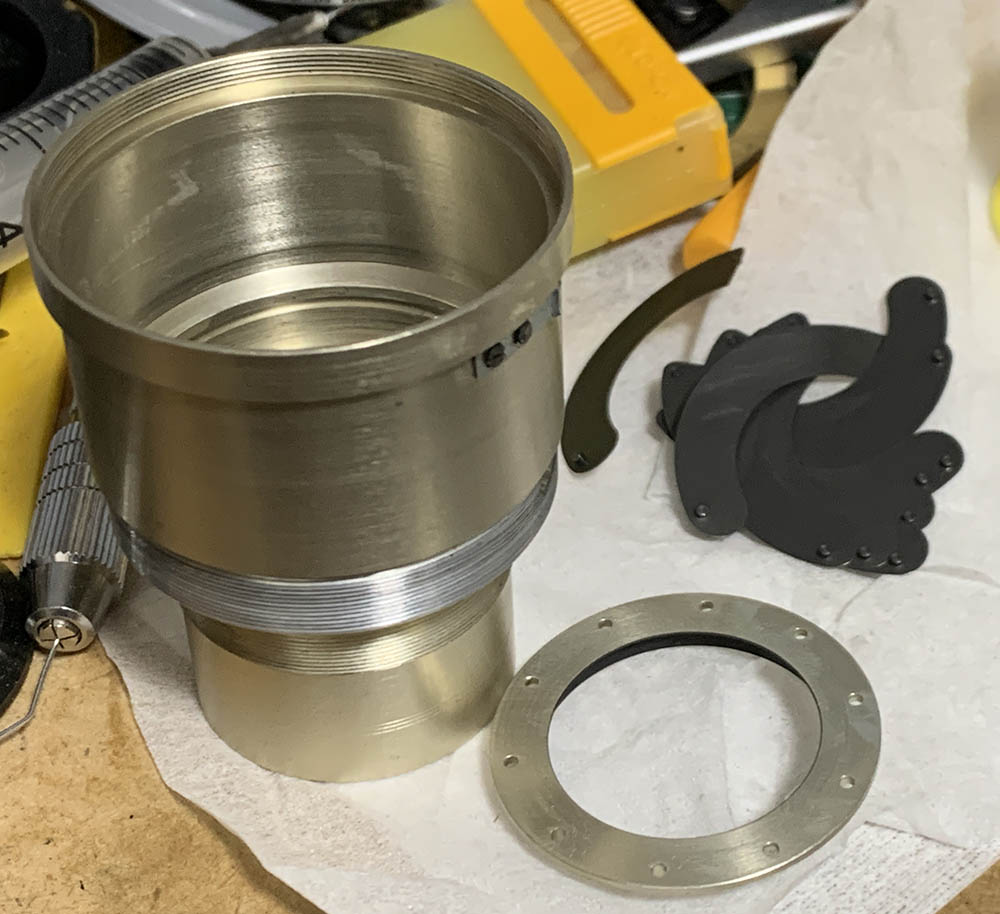
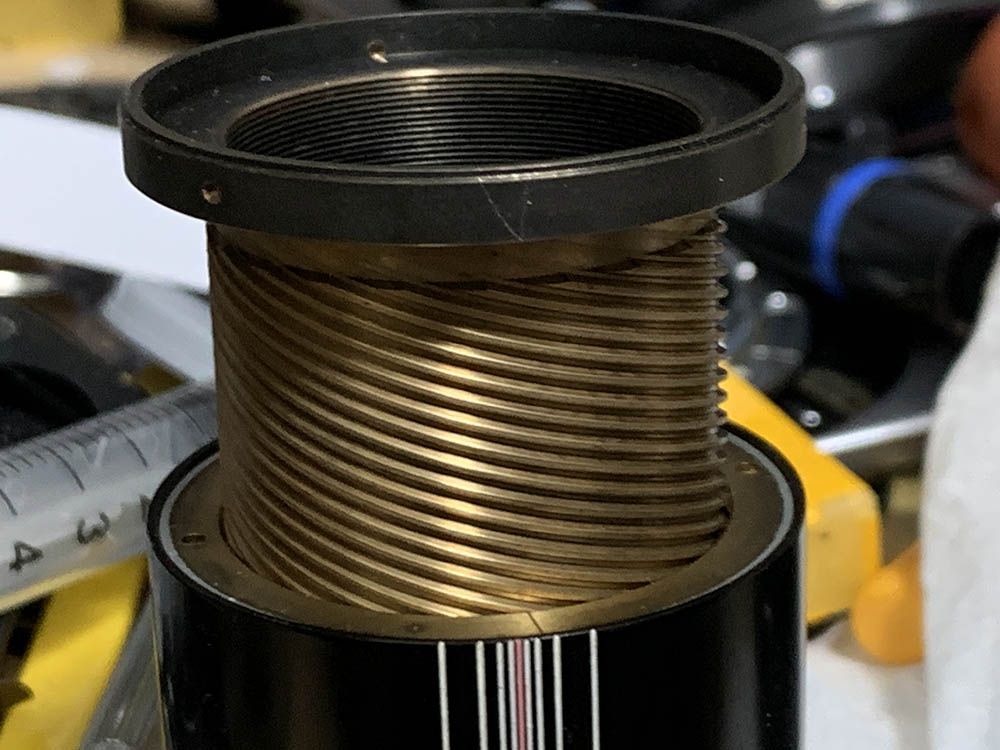
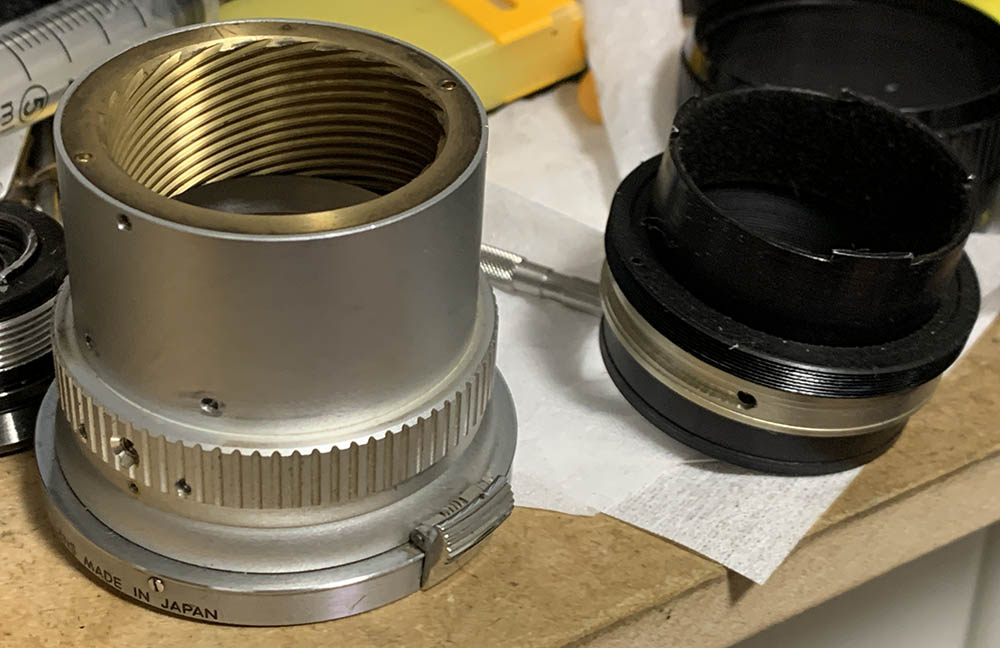
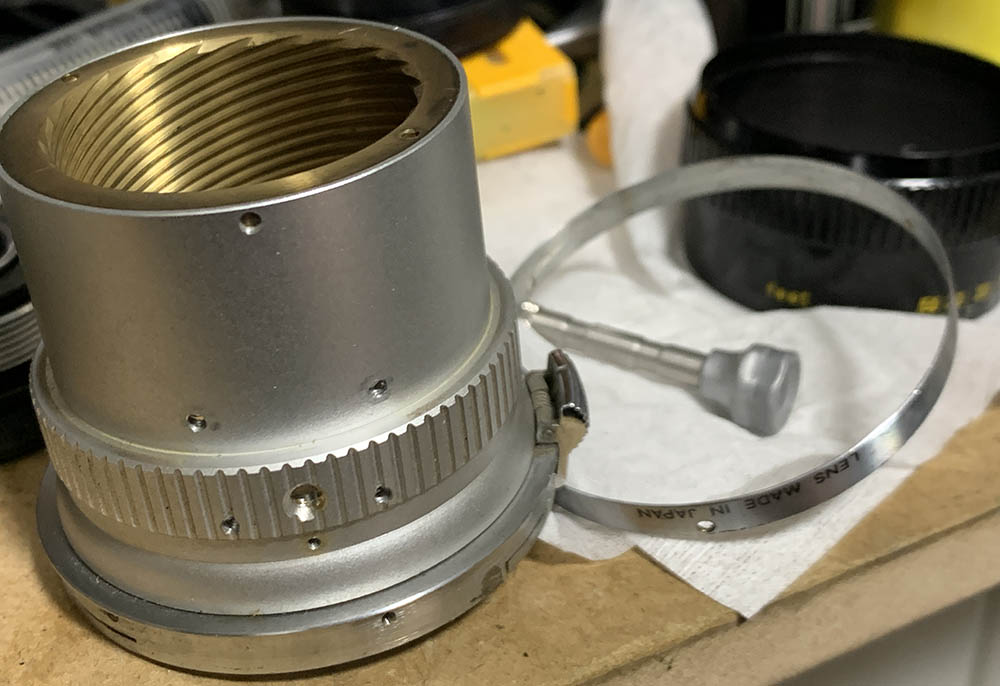
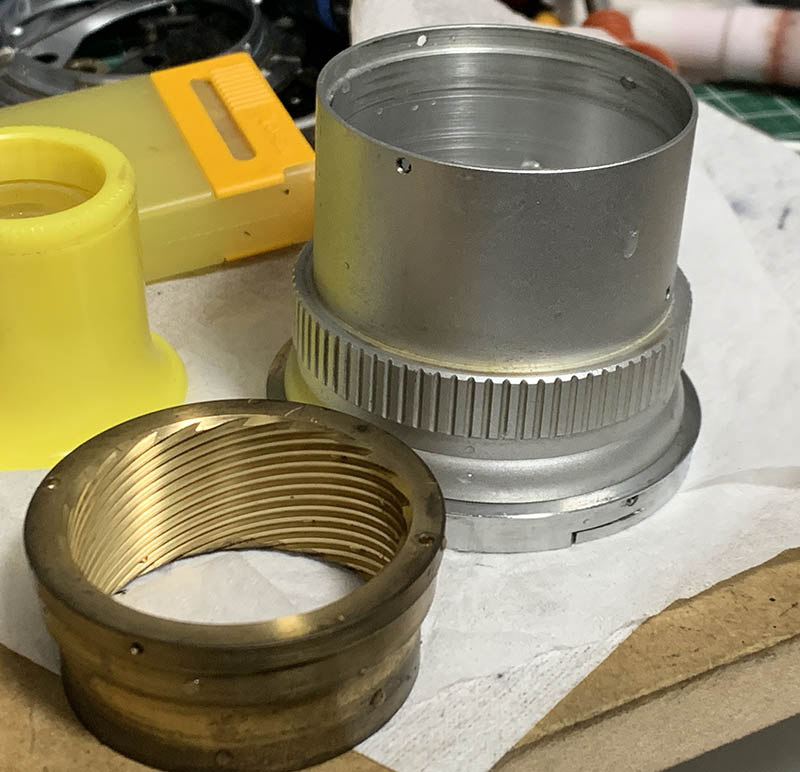
Unscrew the whole front barrel off from the focusing unit. Note that there is a brass shim here, it’s used in adjusting your lens’ focus, keep it safe so you won’t damage or misplace this valuable part.

Unscrew this ring so you can remove the rear element. Be sure to note where it’s facing so you will know how to put the rear element back again later.
Loosen all of the screws in the aperture ring so you can remove it.

Unscrew the sleeve from the front barrel.
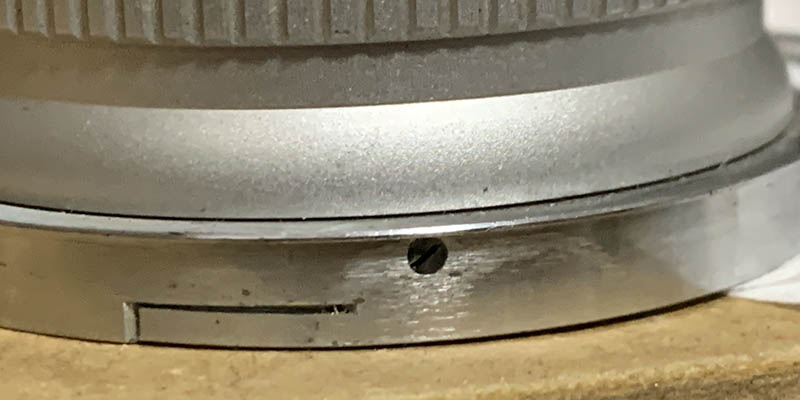
Locate and extract this little screw so you can remove the collar for the iris mechanism.
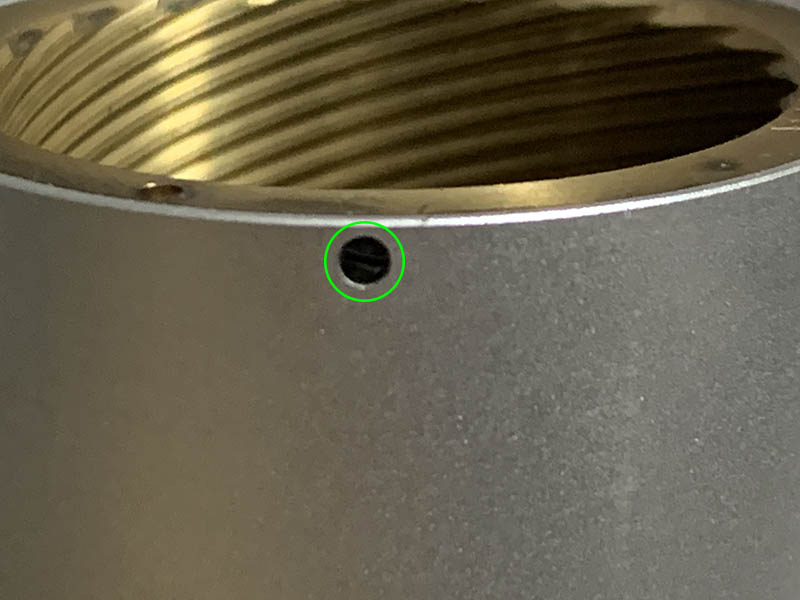
Unscrew the collar off. Notice that there are 2 slots for the screw, don’t forget to mark which one is used.
Carefully pick on the brass ring to remove it, the best way is to pick on it through the gap. Before you get to dismantling the whole mechanism, make sure to study it very well so you will know how to put things back again later.
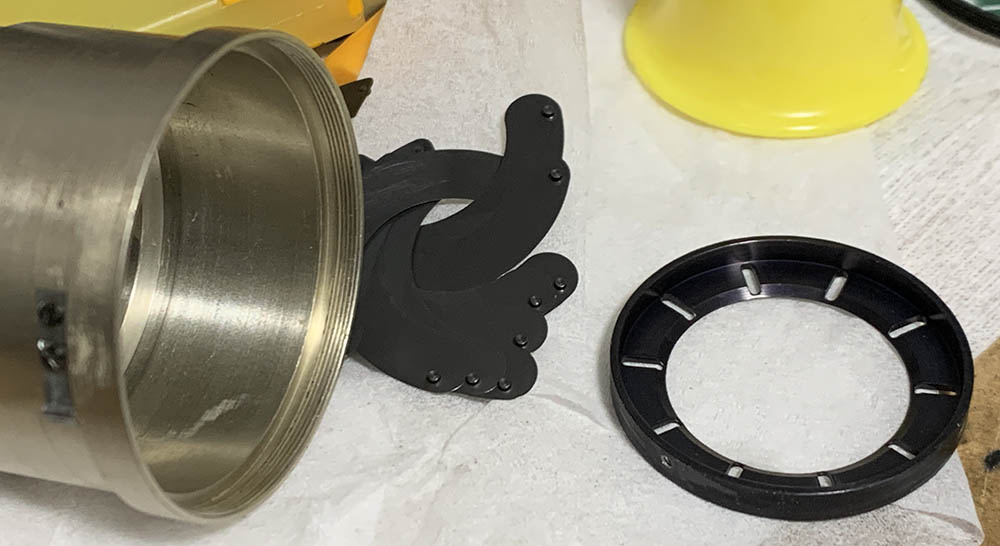
I used my fingers to pull the diaphragm ring off, and then carefully remove every leaf of the iris. I did this by tapping at the rear of the whole assembly and letting the iris drop on top of a soft surface so they will not get damaged.
Carefully loosen this little grub screw so you can remove the base of the iris mechanism.
Pull the base plate off with your fingers.
Each leaf was cleaned very carefully with Q-tips soaked in solvents, I used Zippo fluid for this as alcohol is not the right solvent for the type of grease used. Be sure to handle these carefully, accidentally destroying one is out of the question. Read my article on how to reassemble a manual iris to know how I did it.
If your lens has fungus, read my article on how to clean lens fungus, just make sure that you dilute it with distilled water so it’s not going to be too strong as it may damage the coating.
Never lubricate the iris mechanism, if you must, a light dusting of powdered graphite is enough, blow off any excess powder after actuating the iris several times to finish the job.
Disassembly (Focusing Unit):
This part should be familiar to all of you, that is if you are a regular of my blog. Despite the differences, it is still mostly similar to every lens of this type. If you have cleaned one of these then everything should be familiar to you.
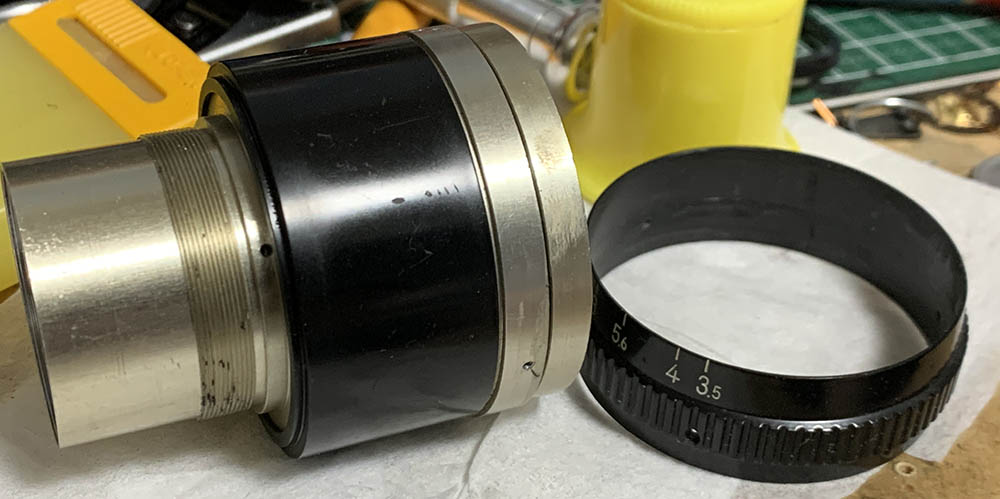
Remove the focusing ring by extracting or loosening its screws.
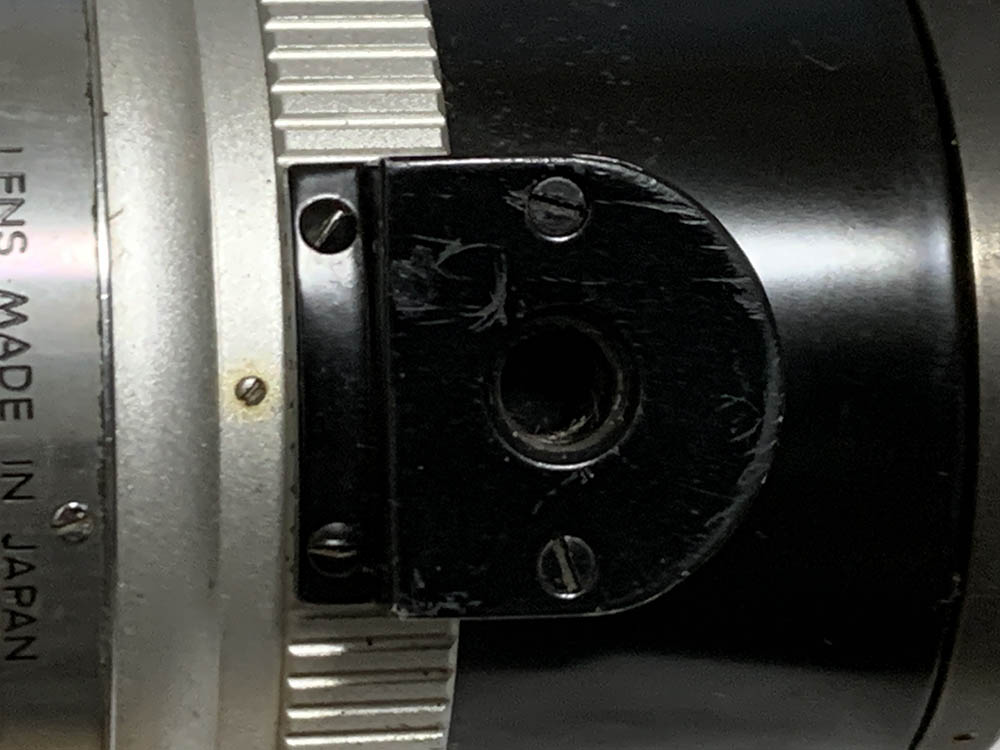
Extract the screws of the foot so you can remove it.
The foot itself conceals another screw underneath it.
Extract the screw so you can dismantle the focusing unit.
Once that screw is gone you are now able to separate the helicoids. Do not forget to mark the spot where the helicoids separated, because this is also the same place where they should mesh. Many people do not do this so they end up with a lens that won’t focus properly. To prevent this happening to you, follow my article on how to work with helicoids. Follow my guide very well and you should be safe.
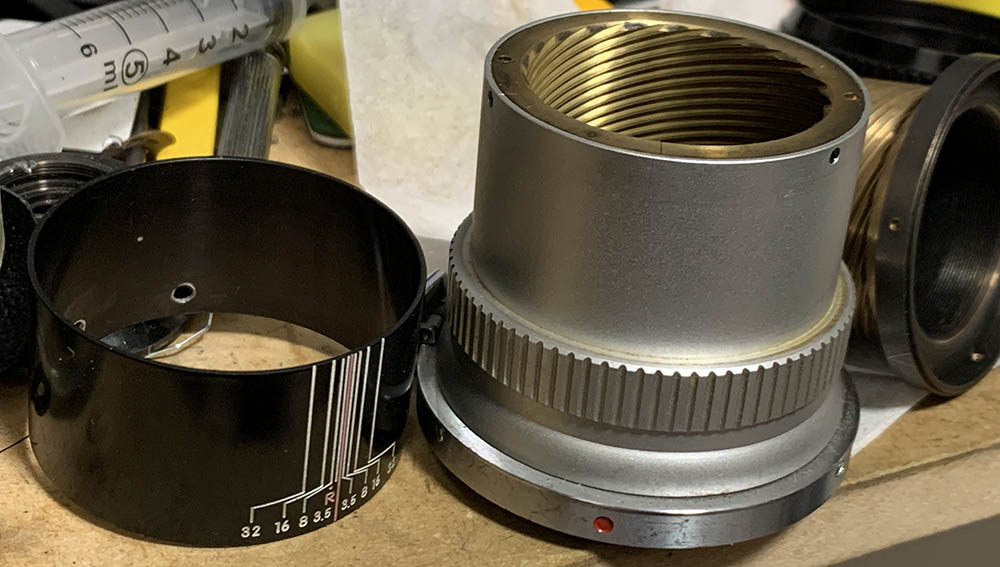
You can remove the sleeve now.
Loosen this screw or remove it in order to dismantle the focusing cam.
Use a lens spanner to unscrew the whole focusing cam mechanism.
It should neatly come off just like this.
Carefully extract this screw in order to remove the ring. Be careful with this because I think it unscrews by turning clockwise. I’m almost certain that all lenses of this type has a right-handed screw here.
Carefully remove and clean the parts of very well.

You should also remove the spring of the focusing cam, if you haven’t done that prior to this.
If you really want to clean everything, you can also remove the cover of the mount. This is optional, it isn’t easy to dismantle the lens mount completely so you should only proceed if you know what you’re doing.
Extracting these screws will allow you to remove the bayonet mount from the main barrel.
These screws secure the helicoid to the main barrel. Mark the alignment of the helicoid first before doing anything so you will know how it’s supposed to be installed later.
Carefully push the helicoid from the inside to get it off.
I cleaned all of the big parts with a strong toilet cleanser – the grainier, the better. I scrubbed everything using a brush then rinsed them all very well with hot water before making a final rinse with pure alcohol to remove any remaining residue. Pay special attention when cleaning the helicoids or the other threads, they are fine in some places and they can be caked with gunk, using a wooden toothpick helps here for stubborn deposits. Dry them well before you continue. When lubricating, be sure not to apply too much, all you will need is a thin film of fresh grease. Combine the helicoids then exercise them by turning several times, this will ensure that the grease is applied evenly then wipe off any excess oil. If you’ve applied too much grease it will settle in the iris mechanism eventually, necessitating the need to open it again just to give everything another overhaul.
Conclusion:
It took me several hours to service this lens because I’m all too familiar with it, it has no secrets to me. It’s still a great experience for me because I love every Nikkor that came out of the factory. I’m satisfied to see and document everything for you. Despite documenting several of these, I still have a few left to present to you in the coming months (they’re rare) so please come back everyday to see if there’s anything new.
In case you haven’t noticed, I’m somewhat of a “completionist“, if that’s even a real word. Repairing this is a must if I want to give you the most complete information about Nikkors anywhere online. That is what I promise to do until the day I could not, so please don’t download my articles because I only earn pennies for every few views! If you enjoy reading my articles, please share it with your friends so they will also find a new productive hobby such as collecting cameras and shooting film, it’s the past time of gentlemen. I’m also very grateful for all of the support you have been sending me, you are helping me host this site, and I cannot do everything by myself. This site has been helping people for close to a decade now, and it is all thanks to you! Every donation counts in today’s economy, just think of it as a little tip. That’s all for today, see you again in the next article. Ric.
Help Support this Blog:
Maintaining this site requires resources and a lot of time. If you think that it has helped you or you want to show your support by helping with the site’s upkeep, you can make a small donation to my paypal.com at richardHaw888@gmail.com. Money isn’t my prime motivation for this blog, I believe I have enough to run this myself but you can help me make this site grow.
Leave me some tip?
Thank you very much for your continued support!
$2.00
Helping support this site will ensure that it will be kept going as long as I have the time and energy for this. I’d appreciate it if you just leave out your name or details like your country’s name or other info so that the donations will totally be anonymous. This is a labor of love and I intend to keep it that way for as long as I can. Ric.

Sep 24, 2024 @ 00:43:39
Would love a guide on the LTM version. I have one but the focus seems to be off. It focuses fine on my cameras but somehow its always out of alignment once I get the photos back.