
Hello, everybody! Do you love blue cheese? I love it a lot and I eat it almost everyday. My favorite is made by the Danes, le Danablu or Bleu Danois. It’s not as stinky as Roquefort and it’s a bit dryer so it crumbles. It stinks just as well so the general taste and texture is slightly similar despite not being moist. There’s a lot of different varieties of blue cheeses, I hope to taste them all one day. How about you, do you like eating blue cheese? How do you like it with? Speaking of the differences between French and Danish cheeses, I’ll showcase something that came in different versions. You can think of it as Danablu and Roquefort in some ways because it’s essentially the same thing but they come in different flavors.
Introduction:
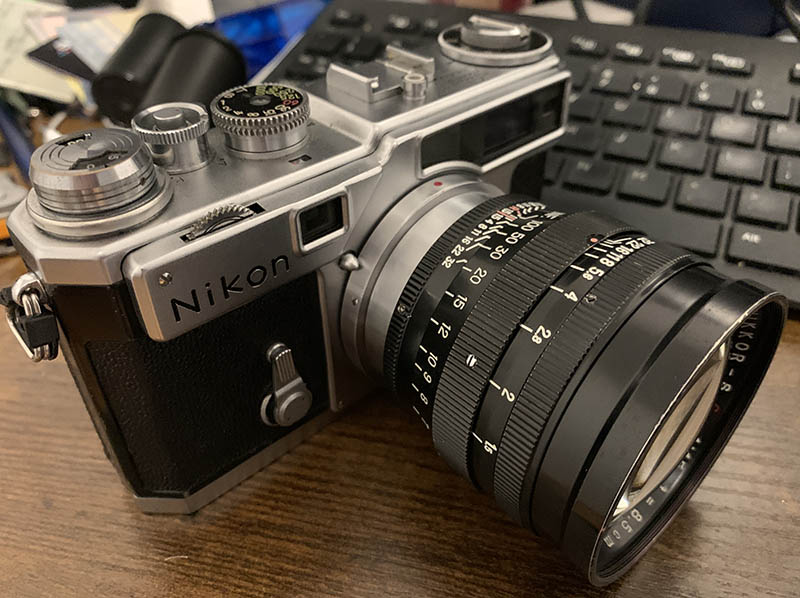
The Nikkor S•C 8.5cm f/1.5 is a legendary portrait lens for many Nikon shooters. Many people dreamed of owning one of these back in the day as it is today. It’s the Nikkor available for the Nikon rangefinder, and also for the whole company as well up until the introduction of the Nikkor 85mm f/1.4 Ai-S which is some 28 years after this one came out. I have written another article about this lens in Leica mount, so please go and see that article to find out more about its history and some other tests that I have done. We will only talk about what’s different in this article.

The all-metal barrel is robust, and feels substantial when held. You will never get anything like this today, especially from the CCP (Cheap Chinese Products). Everything feels precise and it’s nothing short of total luxury.
Optically, it’s identical to the Nikkor S•C 8.5cm f/1.5 (Leica Thread Mount). It has a Sonnar type design, so many of the Sonnar’s characteristics will also be observable with this lens, such as the beautiful rendering and the tendency to exhibit focus-shifting where it will change its focus when stopping to iris down.
The legendary Nikkor S•C 8.5cm f/1.5 is made in three different lens mounts, we have the Nikon mount in this article. It’s mostly identical to the Nikkor S•C 8.5cm f/1.5 (Leica Thread Mount) so what I say there will also be applicable for this lens, too. The third one is for the Contax mount, that is identical to this except for the slight difference in focusing which is handled by a different shim inside. The only difference you can find in the exterior is the engraved C character in the barrel. Compared to the other versions, this is the most common as it was produced in greater numbers, the Leica mount next, and the Contax count is the rarest of them all.

Its size easily dwarfs the Nikon SP. It can be a bit problematic when you mount this on a tripod because it does not come with a tripod foot, this means that your camera will support all the weight of the setup. It’s not so much of a problem if you’re shooting with the Nikkor S•C 8.5cm f/1.5 (Leica Thread Mount), that’s a more practical setup because it has a tripod foot.

You can easily adapt it to your mirrorless camera, I love using it with my Nikon Zf. You will have to look for a good adapter, because the cheap Chinese ones are mostly crap, mine won’t secure the lens properly, so I got a Rayqual instead. It’s from a Japanese company and everything about it is perfect, apart from being expensive. Never go cheap when using something for your expensive gear.

It’s more compact compared to the Nikkor S•C 8.5cm f/1.5 (Leica Thread Mount). I have no idea why they don’t share the same general barrel design unlike most Nikkors of the same era.

They also do not share the same filter size for some reason, how odd is that? They have identical optical designs, but why not have the same front barrel, but have different mounts just like the rest? This is a big mystery to me because it doesn’t make sense in terms of production.
I will not be doing the traditional sets of pictures showing how a lens performs under various situations. I already did that for the Nikkor S•C 8.5cm f/1.5 (Leica Thread Mount), go there to see how it performs. They have the same optical design anyway. I will not be showing sample images with my mirrorless camera, it’s all there at the other article. What’s new here are the sample pictures that were taken with film. It’s best to judge this lens with its intended media, that’s why we’re interested to see how it performs with film. Film’s ability to amplify or hide certain flaws is due to how the little grains of silver works, and it also affects how your pictures look like because film grain has an organic structure, unlike the uniform pattern of a sensor. That’s why it’s so difficult to mimic the look of film with a digital camera, so just shoot with the real thing.

You can’t focus very close with this lens because it’s coupled to the rangefinder of your camera.

It has adequate resolution for general photography, but it won’t be as sharp as the Nikkor 85mm f/1.4 Ai-S, which is several decades newer. Compared to other lenses of the day, there is actually pretty good.

Portraiture is the best use case for this lens. It’s known for its delicate (not soft) rendering when it’s shot at wider apertures, this helps a lot when rendering skin. It’s sharp enough to resolve important details but it is not so sharp as to depict every pore of the skin.

This is how sharp it can be when you stop it down just a little bit. Notice the excellent detail of the weave and texture of the textile. I may have missed the focus just a little bit because he’s moving erratically.

I believe I took this at f/5.6 or so. Check out how beautiful and sharp the photo is, you can even see all of the fluffy fibers of the hat. Having plenty of iris blades ensures that the aperture will be nearly circular, not polygonal even when stopped down considerably. That helps a lot in making the blurry parts looks much smoother compared to a lens with a less circular aperture.

As impressive as it is for a lens of its age, you can’t compare it against something that’s made many years later in terms of sharpness and other technical merits. It makes up for it by giving you a photo with soul. It is the defining feature of the classic Sonnars.

You don’t need to spend a fortune to buy a Leica lens just to get the so-called “Leica glow” horse shit. It’s a myth, many older lenses have it as well, including this one.


(Click to expand)
While we are on the subject of the “glow”, here’s something interesting. It has nothing to do with what I have just talked about in the previous panel because this set demonstrates how this lens is susceptible to hotspots when you give it the correct parameters.

It’s probably good for stage photography so long as you can get close enough to the performers. This is going to be great for shooting at lowlight scenarios, you will see what I mean by that later.


(Click to expand)
Here are more photos that I took that afternoon. I highly encourage you too click on the pictures and see how it performs when shooting with film. It’s pretty good for general photography, but it shines when it’s used for portraiture and reportage.
Let’s try seeing some photos that were taken at smaller apertures. The previous set was taken on a cloudy afternoon, this one was shot on a sunny day so my minimum aperture is around f/11. That turned out to be a blessing because my subjects were dancing. Using a smaller aperture means I can get more things in focus. It also gives us the benefit of seeing brighter, more saturated colors.

This lens is simply amazing when shooting at smaller apertures like f/11. It is difficult to notice the effects of diffraction when shooting with film, especially if it’s not fine grained. I know it’s there, we just can’t see it. Shooting at really small apertures helps negate the focus-shift that I have previously mentioned.

The deeper depth-of-field makes it a lot more forgiving when shooting moving subjects.


(Click to expand)
Exquisite is the word I should use when describing how beautiful it renders healthy skin. You can see that subtle “glow” which gives your subjects a healthy look. You can see it best with the flower lady, especially on that beautiful Morena.
The next set satisfied my itch, I have been wondering about how this lens will perform when shooting in lowlight events using a fast film. You see, when shooting at wider apertures, a lens will perform differently depending on how bright the location is. If it’s a little bit darker, you will get richer colors because there’s not enough light to flood the colors away so to speak. This is observable with most vintage lenses.

When you are forced to shoot in the dark, you at least have the option to shoot at f/1.5. Using a fast film like Kodak Porta 800 will enable you to maintain a decent shutter speed of 1/125s. That is fast enough to prevent a blurry photo, even if your subject is a dancing drag queen.

It’s difficult to focus precisely in the dark especially if your subjects are constantly moving. You’ll need to shoot a series of photos so you could at least get a single shot that’s focused.


(Click to expand)
I am very impressed by how it performed in lowlight conditions. To me, the photos look better when they were taken under less than optimal lighting conditions. It’s just difficult to nail your shot, this is because it exhibits a shift in focus as you stop the aperture down and not because of the shallow depth-of-field. It’s a derivative of the Sonnar, which is known to do this.
This lens is a must if you shoot with the Nikon system and you’re serious about it. There is nothing there to compare it with. The Nikkor-P•C 8.5cm f/2 is just as good for most cases but it won’t give you the extra speed when you need it, especially when shooting in darker places. However, this is not cheap at all and it is not as common. It’s only for people who know what they want and what they are doing. If you want this in your collection, be sure to check the auction sites often. There’s always a few for sale at a given time so you can buy one anytime. But if you want a good deal, just wait for it. Never pay more than $1,700.,00 for it! Always wait for the right one to show up. In checking the condition of the lens, be sure to check for the state of the aperture blades, the blades are very delicate and are easily damaged. Count them all and then operate the aperture ring carefully to see if it closes and opens smoothly. The glass should be clean, there will be minor scratches in the front glass but it’s normal for a lens of this age, consider yourself lucky if the glass is pristine. Make sure that there’s no signs of fungus, but that’s easily fixed by cleaning up. The most troublesome issue with this lens is balsam separation, that’s very expensive to correct and you will need a professional to do the job. There’s one master in the country of Taiwan that can help you deal with it for a reasonable price. Lastly, operate the focusing ring. Mount the lens to a camera and see if you can focus it properly. The best way to buy this lens is from a real physical shop so you are able to operate it yourself. I hope you can find one that suits your budget, it’s not impossible at all to get one of these for cheap. Look at me, all I did is wait and get lucky. Happy hunting!
Before We Begin:
If this is your first attempt at repairing a lens, I suggest that you see my previous posts regarding screws & drivers, grease and other things. Also read what I wrote about the tools that you’ll need.
I suggest that you read these primers before you begin:
- Essential tools
- Best practices 1
- Best practices 2
- Best practices 3
- Ai conversion
- Working with Helicoids
Reading these should lessen the chance of ruining your lens. Before opening up anything, always look for other people who have done so on the internet. Information is vague and scattered but you can still find some information if you search carefully.
For more advanced topics, you can read my fungus removal article. It has a lot of useful information, it will be beneficial for you to read this. I also recommend that you read the working with helicoids article so you will not get stuck because you couldn’t reassemble the helicoids back properly.
Disassembly (Main Barrel):
The construction of the barrel is typical of many longer Nikkors, which means that you can separate the front barrel from the main barrel in a neat way and work on them separately. While the construction of the main barrel is simple, only requiring a few parts, you’ll still want to exercise utmost care so you won’t damage anything. Some parts can be difficult to remove, so you must go at it slowly, applying alcohol or lighter fluid to the threads and wait for that drop of solvent to soften whatever made the parts stuck. It’s also important to never handle the lens by the aperture ring when you are removing something so you won’t accidentally destroy something so delicate. Lastly, take plenty of notes as you go so you will know how to put things back together later.
This is a very valuable lens, please do not attempt working on it if you are not a seasoned repairer, you’ll also need special tools in order to open some of the parts here, too. Send the lens to a reputable repairer and show them my website to guide them through this magnificent lens.

Unscrew the front barrel off, to do this safely, you must grip the lower barrel by the chrome grip and the front barrel by the front tube. Whatever you do, never get grip this using the aperture ring, you may risk damaging the iris when you apply force. The front barrel can be difficult to remove, if it won’t move, do not force it, it’s better to leave it alone than have a broken lens. In this picture, you will see a brass shim that is used for calibrating the focus of the lens. Never lose or damage this thing, it’s Irreplaceable.
Store the front part of the lens in a safe place while you work with the main barrel.

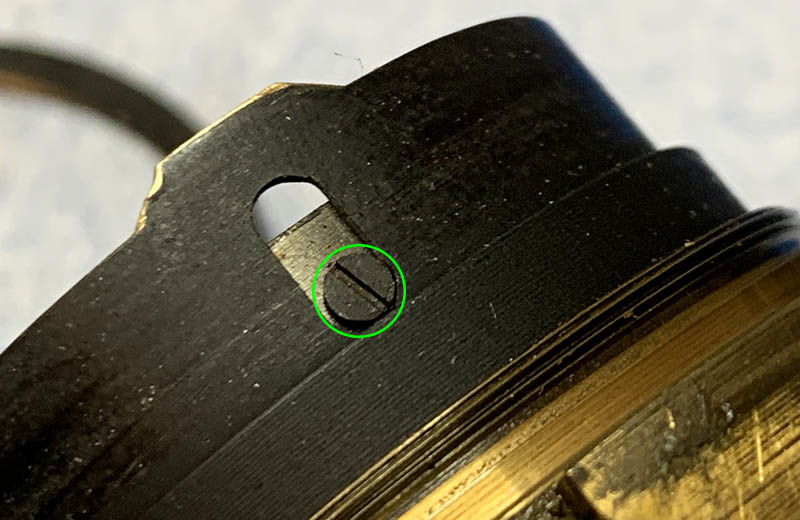
We begin by taking the focusing cam apart. Locate and extract this little screw. Be careful so you won’t damage it. This little screw secures the retaining ring, which we’ll be removing in the next step.

Carefully unscrew the retainer ring with a lens spanner and remove the cam assembly. We will have to take it apart in order to clean it properly.
Locate and carefully extract these screws. They can be tough to remove so it’s a good idea to heat them up first with a tiny torch or a soldering iron.

Once the screws are gone you’re able to dismantle everything as seen here. Clean everything properly, it is usually very greasy and full of germs here.
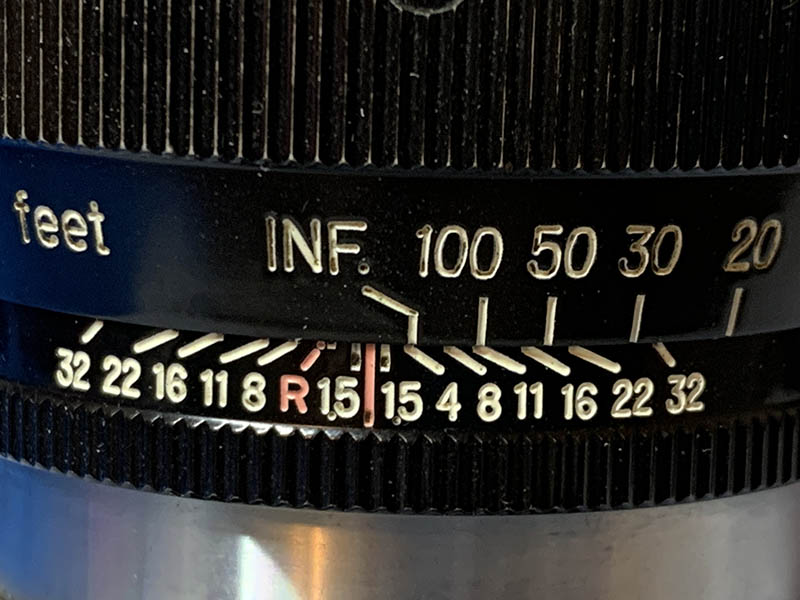
Now that the focusing cam assembly is gone, you’ll be able to freely turn the focusing ring beyond what is indicated by the focusing range. Collapse the helicoid and see how much it will go, mine stops here. It is very important too to get the same position later when you put it back after cleaning, if it’s off then you have screwed up the job and you’ll have to find the correct making point until you get it right.
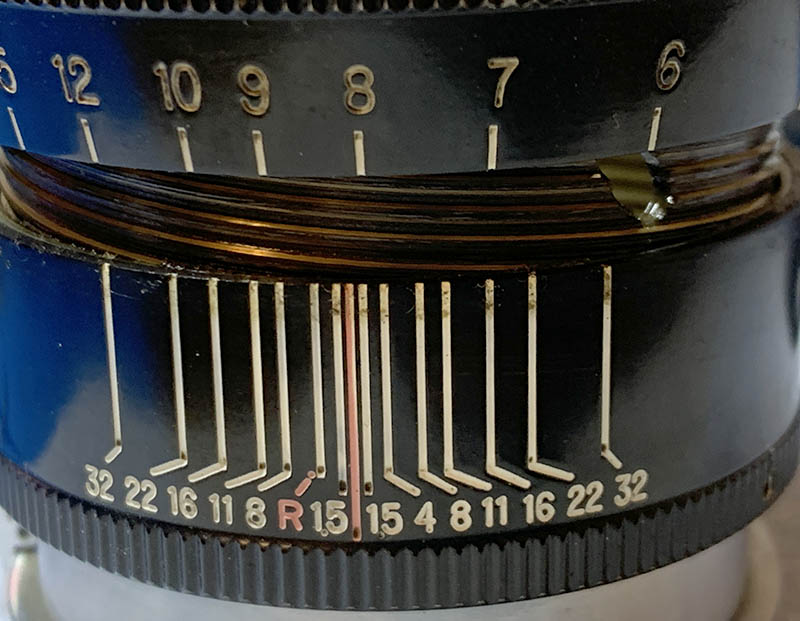
Unscrew the front helicoid until it separates. Don’t forget to note where they parted since it’s also the same spot where these should mesh. Many people forget to do this so they get stuck guessing where these should mate. To prevent this from happening to you read my article about servicing helicoids and follow my guide to the best of your ability.

Take apart everything by extracting the screws of the sleeve and focusing ring. Be sure to know how the parts are aligned first so you won’t have to guess then later.

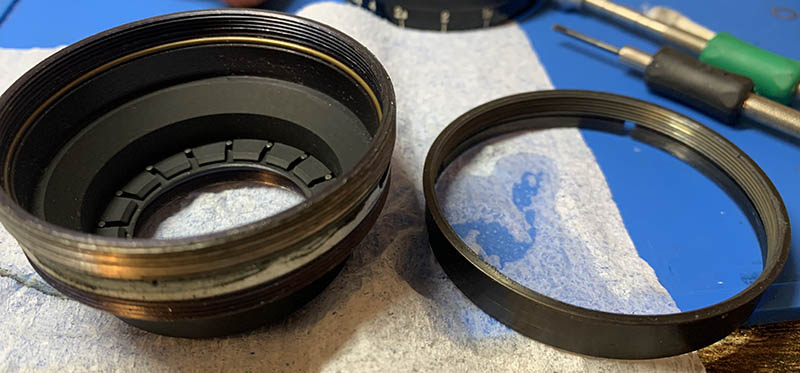
You can further dismantle the lower barrel if you want to just like how you see it here. This is totally not a requirement but it will help you clean all the dirt off. This step is not recommended if you don’t know how to do it properly, it’s only meant for professionals.
I cleaned all of the big parts with a strong toilet cleanser – the grainier, the better. I scrubbed everything using a brush then rinsed them all very well with hot water before making a final rinse with pure alcohol to remove any remaining residue. Pay special attention when cleaning the helicoids or the other threads, they are fine in some places and they can be caked with gunk, using a wooden toothpick helps here for stubborn deposits. Dry them well before you continue. When lubricating, be sure not to apply too much, all you will need is a thin film of fresh grease. Combine the helicoids then exercise them by turning several times, this will ensure that the grease is applied evenly then wipe off any excess oil. If you’ve applied too much grease it will settle in the iris mechanism eventually, necessitating the need to open it again just to give everything another overhaul.
Disassembly (Front Barrel):
The front barrel also houses the iris mechanism so I will condense this article by including it here. There is not a lot of complicated assemblies here, just very delicate ones. This is a job for the professionals, the iris alone is a tough job to put back together and you will require the patience of a saint to be able to put the blades back in one go. It is very common to find these with oily blades and the only real way to address it is to do an overhaul of the iris mechanism.

Unscrew the front tube carefully so you won’t damage anything. Never grip by the aperture collar as it’s still coupled to the iris mechanism at this point.

Unscrew the housing of the rear optics assembly. This is a sealed unit, there’s no way you can go further without damaging this. Keep this in a safe place to prevent any accidents.

The front part can be unscrewed just like this. I’m lucky that the glass is clean so I don’t have to dismantle anything further. All I did was clean the surfaces up and I’m good.

Carefully extract the screws of the aperture ring so you can remove it. Don’t forget to remember how the alignment should be so you won’t have to guess it later.
Let’s now continue by dismantling the iris mechanism.

Extract this to decouple the iris mechanism, you should actually do this as soon as this is accessible to you right after removing the aperture ring in the previous section. Do not forget how deep this collar sits.
Unscrew the collar until it’s off. Be careful not to damage the delicate thread.

Carefully remove this circlip with a pair of sharp tweezers. Pull the diaphragm cup with your fingers, that is all you need to dismantle the iris mechanism.

The iris is now in front of you! Resist the urge to remove everything as quick as possible. I gently tapped the housing from the back and the iris blades came off, caught by a soft towel for safety.

The iris was still relatively clean when I got to it but it’s still covered with a thin film of oil. I had to clean it very well just in case.
Each leaf was cleaned very carefully with Q-tips soaked in solvents, I used Zippo fluid for this as alcohol is not the right solvent for the type of grease used. Be sure to handle these carefully, accidentally destroying one is out of the question.
If your lens has fungus, read my article on how to clean lens fungus, just make sure that you dilute it with distilled water so it’s not going to be too strong as it may damage the coating.
Never lubricate the iris mechanism, if you must, a light dusting of powdered graphite is enough, blow off any excess powder after actuating the iris several times to finish the job.
Conclusion:
I have finally fulfilled one of my minor goals by overhauling this lens. It has been such a joy because the lens has been part of my wish list for many years. I am familiar with many older Nikkors so it did not take a long time for me to get the job done despite having to take everything apart down to the last screw. It’s such a joy to work on something that’s been made with high precision and quality. I’m impressed by all of the beautiful parts, I will show one of them to you.
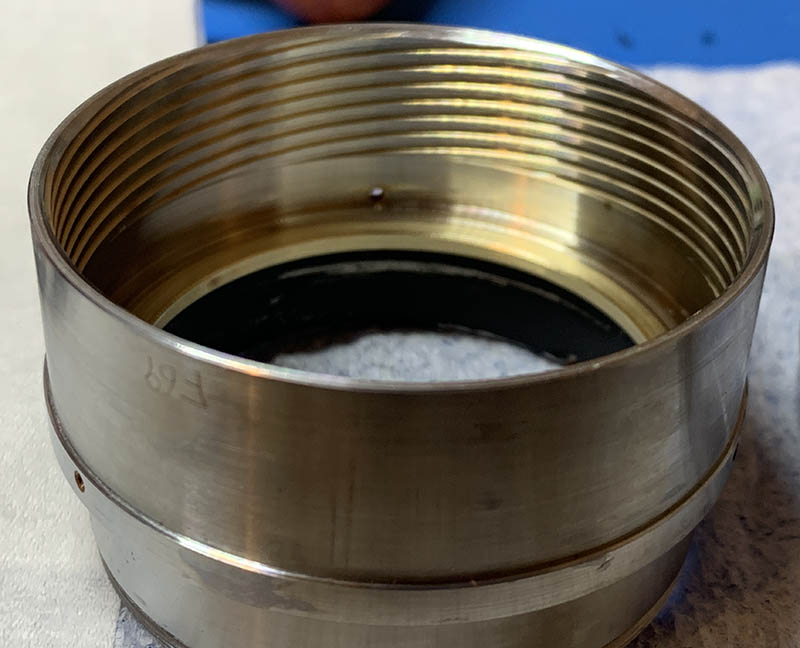
This big piece of brass is so beautiful, it was made with high precision and the milling is so clean. This is one of the most impressive things that I have seen from a vintage lens.
I’m very satisfied with the work that I did, there’s nothing more this lens deserves. Just take a look at the engraved numbers, they are now so clean. If you scroll up a bit you will see how dirty it was.
Going back to my opening paragraph in this article, on the topic of cheese. I ate Camembert and Brie, I’m more partial to the former because it’s smellier and the flavor is more bold. I really love cheese, it’s one of the best thing to eat all your life.
That’s it for this article. I have seen a lot of people waiting for me to publish a new one since the new year but I’m a bit busy these days so I can’t keep up with writing articles and taking photos. These articles take a lot of time and effort to prepare, unlike other websites I actually go out and take photos with the gear I feature in my articles. This site is not like the blog ran by a blind photographer nor the big clickbait one, I actually take pride in producing a lot of original content, with information you can’t find anywhere else. If you like my work please share it in social media. You can also leave me a small tip, that will help keep this site alive for the coming years. Sometimes, I wonder what will happen to my work after I’m gone. I hope it can continue to live on even without me. But whatever happens, never ever download my work. I only get a few cents a day from page visits. I don’t earn anything from affiliate links at all. Your support is the only way this site has endured for more than a decade, that’s hundreds of amazing high quality articles! Thank you all again and see you guys in another article! Ric.
Help Support this Blog:
Maintaining this site requires resources and a lot of time. If you think that it has helped you or you want to show your support by helping with the site’s upkeep, you can make a small donation to my paypal.com at richardHaw888@gmail.com. Money isn’t my prime motivation for this blog, I believe I have enough to run this myself but you can help me make this site grow.
Leave me some tip?
Thank you very much for your continued support!
$2.00
Helping support this site will ensure that it will be kept going as long as I have the time and energy for this. I’d appreciate it if you just leave out your name or details like your country’s name or other info so that the donations will totally be anonymous. This is a labor of love and I intend to keep it that way for as long as I can. Ric.
