
Hello, everybody! Chinese food is very oily, that’s why I try to avoid it as much as possible. Hot pots, fried foods, stir-fry, and even some steamed foods require a lot of oil in the process somewhere. You will have to choose which ones to eat because there’s still some healthy options such as steamed dim-sum. Food in mainland communist China and in some cases India as well are of questionable sources. That is why spice, oils, and other additives are used to mask the quality of the food. This isn’t to say that everything there is going to give you cancer, I’m just pointing out that some bad people will do anything to fool people even if it means endangering the health of many innocent lives. Today, I will show you something disgusting. It is just as oily as a Chinese food that I talked about, and just like the practice of masking food safety, it also has a nefarious way to give an impression that this product is of higher quality. Read along with me.
Introduction:
The 7Artisans 35mm f/1.4 II was probably announced around 6 years ago during the pandemic that came from mainland China. I have no idea when it was sold but I have been seeing it for a long time. I do not know what are the exact differences between the first version and this one except that the older one has a different design with more glass and aperture blades. What I know is many APS-C shooters with Sony and Fujifilm got one of these because they’re cheap and decent. I’ve also heard of people complaining about poor quality control and other similar concerns that we’re all so familiar with when it comes to “Made in China” products. The support is poor overseas so it will all will depend on who you got it from if there are any warranties at all. These come in different mounts but we’re only talking about the Nikon version in this article.

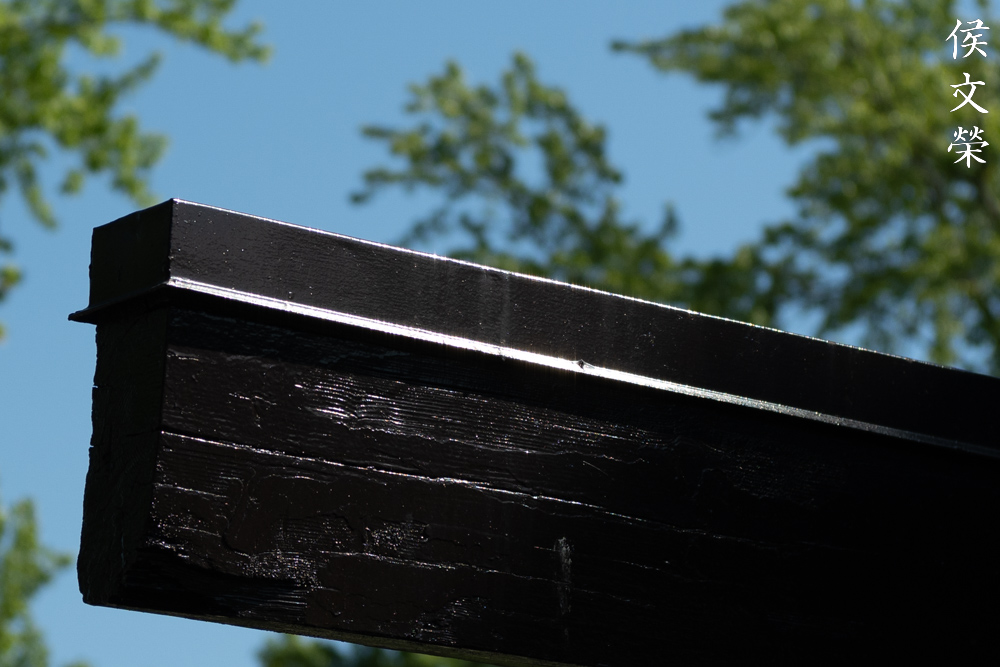
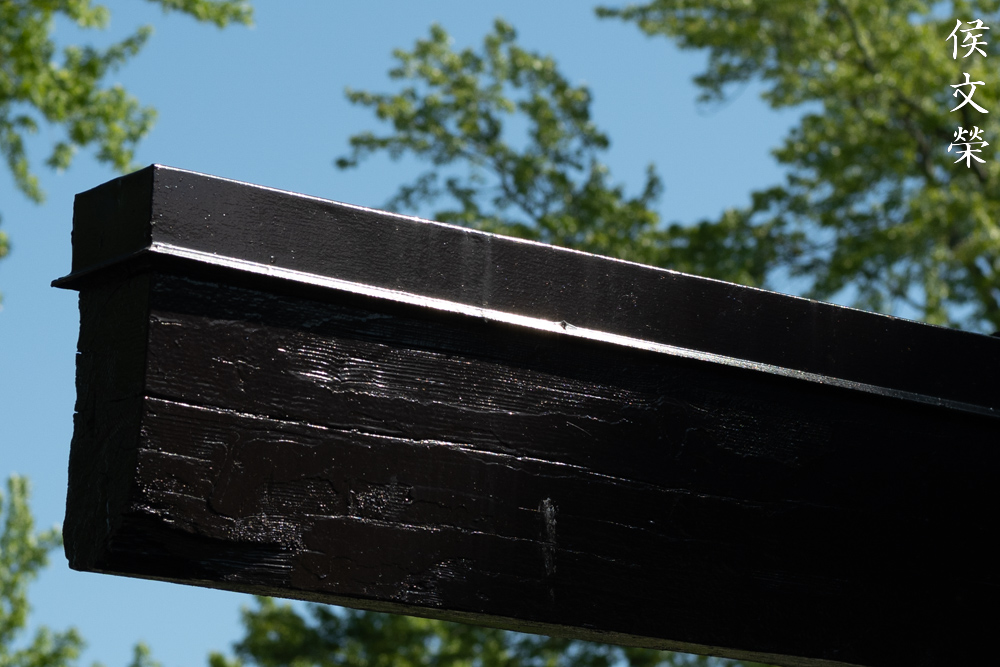
The exterior is completely made of metal. It feels heavier than it should and in an excessive way, too. The impression it will give people who don’t understand things is that they’re getting a premium product. It’s quite nice when it comes to the fit and finish as the exterior is concerned, and that’s all there is to it. We’ll also learn why this thing is so heavy and why the aperture ring does it have any detent clicks.
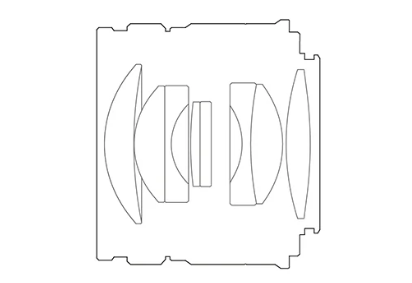
It has a classic 8-elements-in-5-groups design in a configuration that we’re familiar with. Nothing is known about the composition of the elements such as any high definition glass and other related data. All that’s mentioned is the glass is applied by Hoya of Japan (Kenko | Tokina). This gives some assurance because it is made under contract by one of the best glass manufacturers on the planet. There’s also no mention of the coating technology used, just “super resistant” or something corny like that. The aperture is made up of 9 curved blades which ensures that it will stay round at any setting. This will help ensure that the blurry parts of the image will look smooth. We shall see how it really performs later in this article.
Disclaimer: This isn’t a paid article! Many (communist Chinese) manufacturers reached out to me before, I have blocked or turned them all down without any reason except for my principles. I won’t even write an article for any other company based in another country. All of this is paid for from my own pocket so I can talk shit if something sucks and present to you the unfiltered truth!

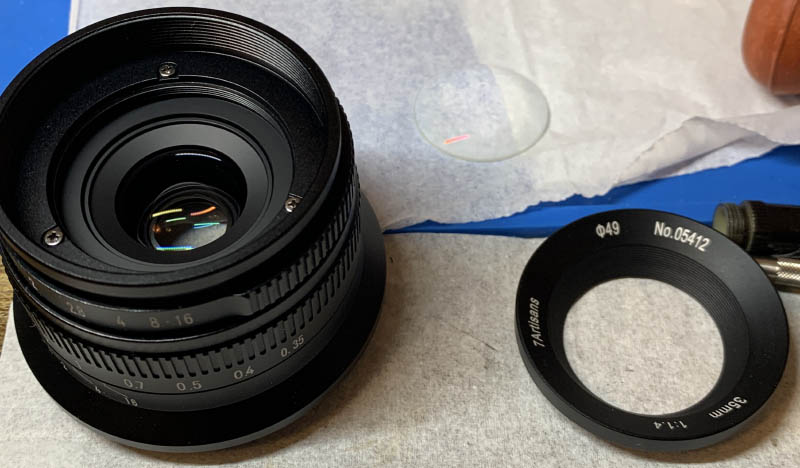
The item came to me in a box, with a lens cap, lens tissue, Q-tips, rag, USB card reader, and other useless trinkets. Of all the things I was given, the filter is the only one that’s useful. They’re insignificant but I liked the gesture. It’s like going to a Chinese restaurant and given a bowl of fruits. It’s sold as a used product by 7Artisans, I’m not sure if it’s refurbished or whatever. I got it for a very good price of $48.00 so I figured it may be something that’s returned to the factory or maybe an old stock.
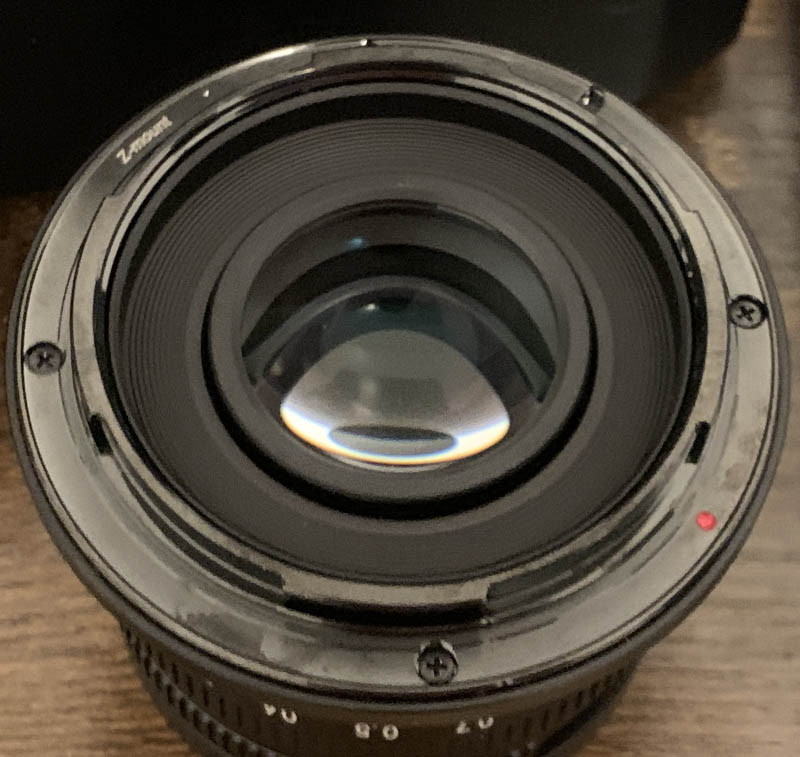
The lens mount isn’t made of brass or stainless steel, it’s made of something softer. I’m not sure what kind of alloy it is but it doesn’t inspire confidence because it felt more like plastic (maybe it is). There’s nothing more here, electronic contacts nor anything else, it’s a “dumb” lens.

The only reason I got it is I just wanted something to pair with my Nikon Z fc. I was looking for a cheap or used manual lens that comes in the Z-mount, I saw this for sale with a good price so I bought it. This lens is my first mainland communist Chinese lens so I might as well give you a teardown article about one of these cheap lenses that have flooded the market in recent years. Part of the reason why these lenses have proliferated lately is because it’s simpler to manufacture manual lenses for mirrorless cameras, you do not need to make precise adjustments to the focus and aperture values. Unlike with DSLR lenses, the aperture nor the focus doesn’t need to agree with the focusing and metering modules of the camera because your camera’s sensor sees through the lens directly and you’re able to calculate the exposure settings or focus live, these would be done independently with a DSLR so what you would see through a pentaprism and mirror setup (and what the camera sees) isn’t always what the sensor (or film) captures.
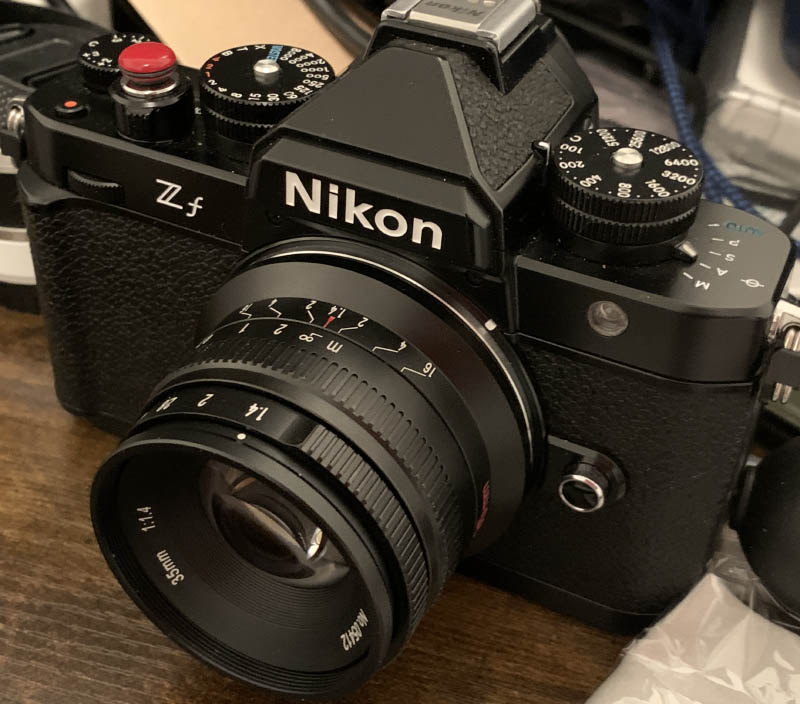
It’s an APS-C lens which means it’s useless for a full-frame camera. However, the Nikon Zf will give you a better shooting experience with it because it’s heavier and it has a stabilized sensor. The chunkier body is also better when it comes to handling the whole setup.
It feels awkward to use because the aperture ring is at the tip instead of the base like what we’re used to. I have turned the aperture ring by mistake several times because of this. It has no clicks on each f-stop so it can be imprecise when selecting an aperture value. I’m not even sure if the f-stop numbers are accurate. The focus throw is also very short, and I’m not sure if it’s able to focus to infinity accurately. I suspect that it couldn’t because it falls short in my tests. The aperture and focusing rings are difficult to turn, they feel mushy when you operate them as if there’s a sponge inside of them. We shall know why later. In addition to that, this will be a very poor lens for videography because of the issues I have mentioned.
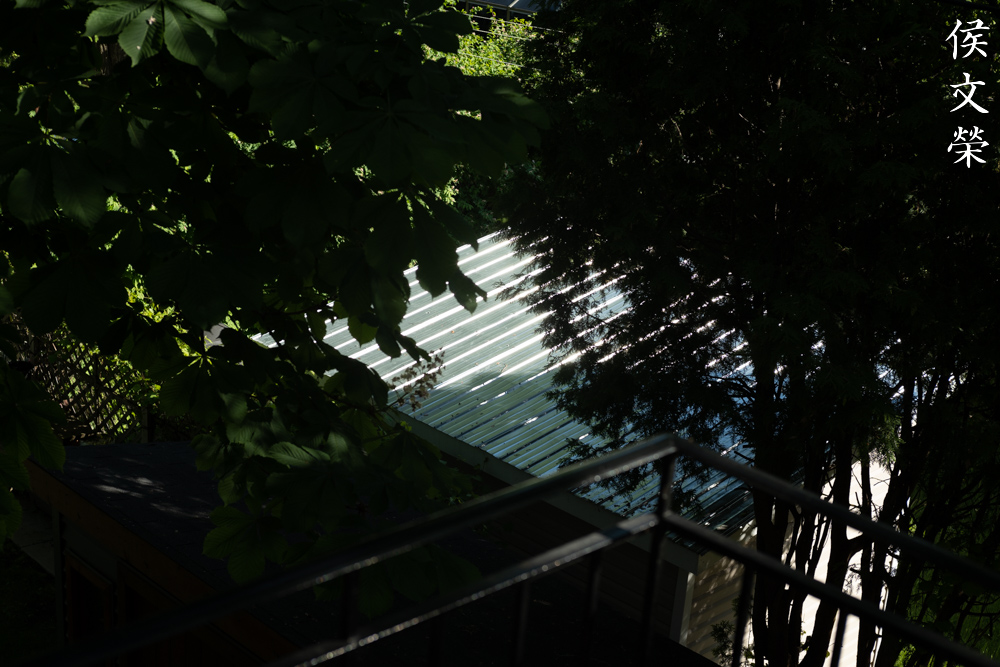
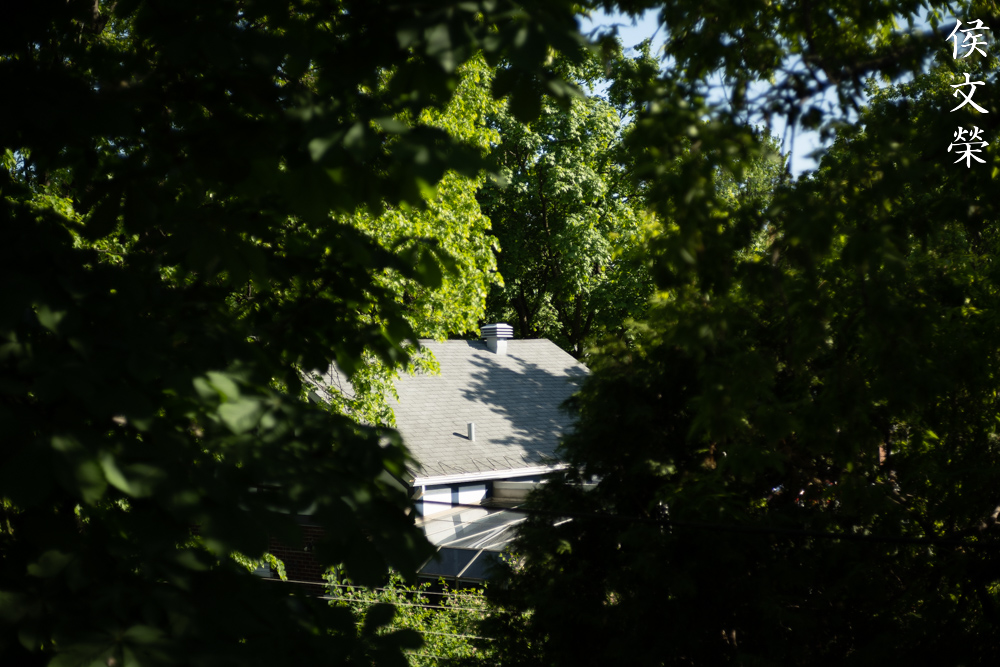
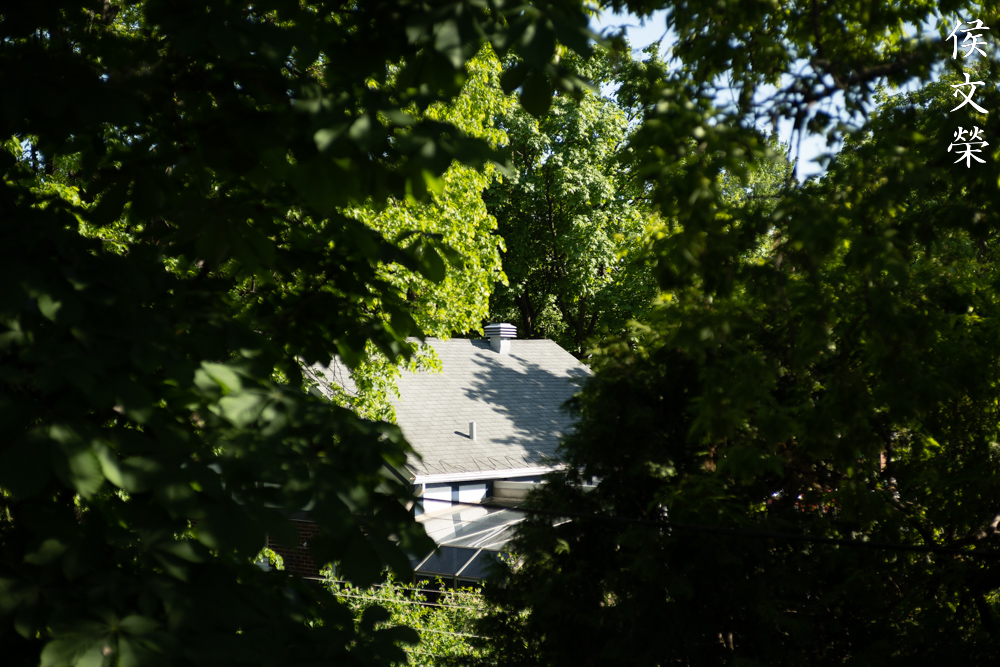
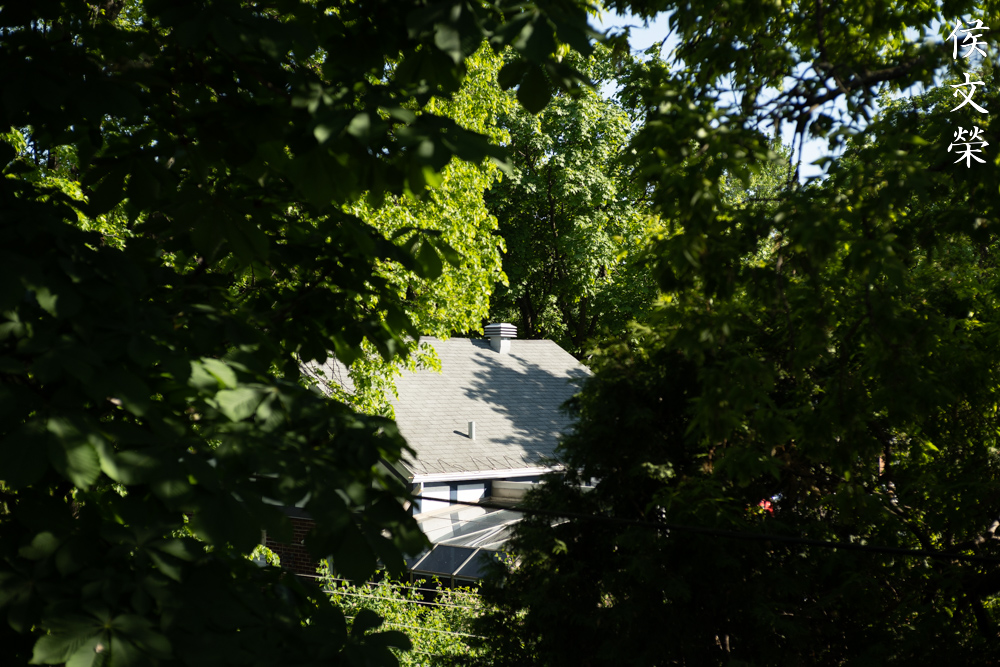
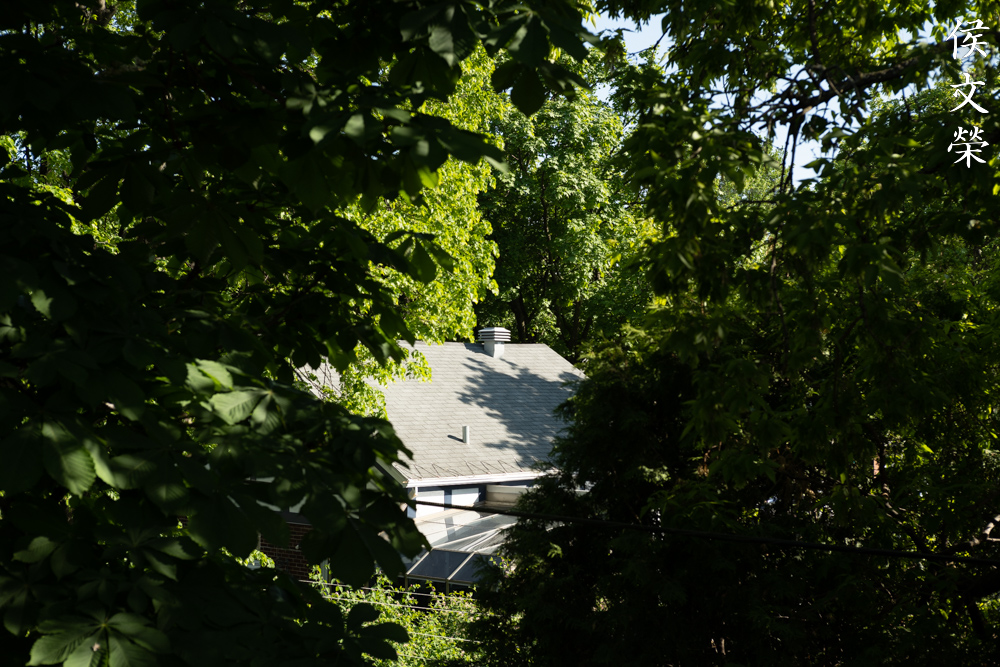
Let’s now see how this lens performs. It’s important to know how your lens performs, this will help a lot in understanding where it excels and it will also give you the insight so you’ll know where it fails. I captured these photos from f/1.4, f/2, f/2.8 and f/4, these apertures show the biggest changes. It’s also likely that a photographer will shoot within these apertures on a regular basis. These photos were taken with a Nikon Z fc.


(Click to expand)
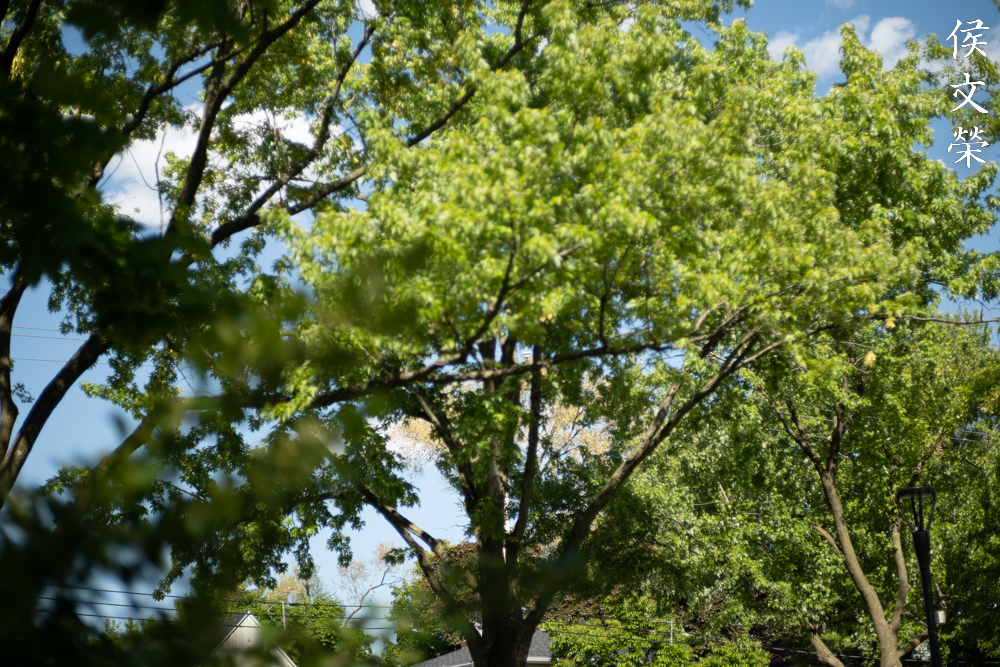
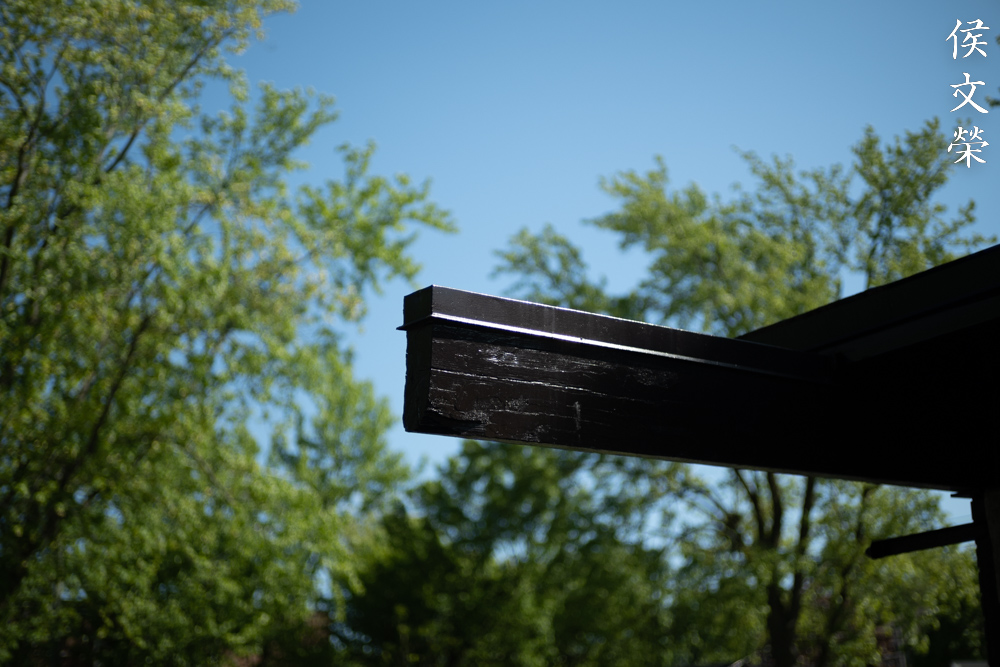
The distortion profile can easily be observed when you have straight lines that are parallel to the edges of the frame. This is very high considering that this is supposed to be a 50mm lens equivalent for the APS-C system. I’ve only seen these levels of distortion from ultrawide angle lenses that have been made several decades ago. I don’t think it’s difficult to correct in post but it’s still not ideal.


(Click to expand)
Vignetting is on the heavy side when shooting at f/1.4, the extremities are really dark and it even extends up to the center of the frame. Things look much brighter at f/2 apart from the extreme corners where the darkness can easily be seen. You won’t notice any obvious traces of light falloff by f/2.8 and you will need to look really hard at the extremities to find it. It’s still improves by f/4, it’s not totally gone but you won’t be able to see it unless you’re using software to help you enhance it.
What this means is the lens performs poorly when shooting at f/1.4 but it drastically improves from f/2. It is typical for a lens to show peak performance just by stopping it down by 2-3 stops, it goes the same for this one, too.


(Click to expand)
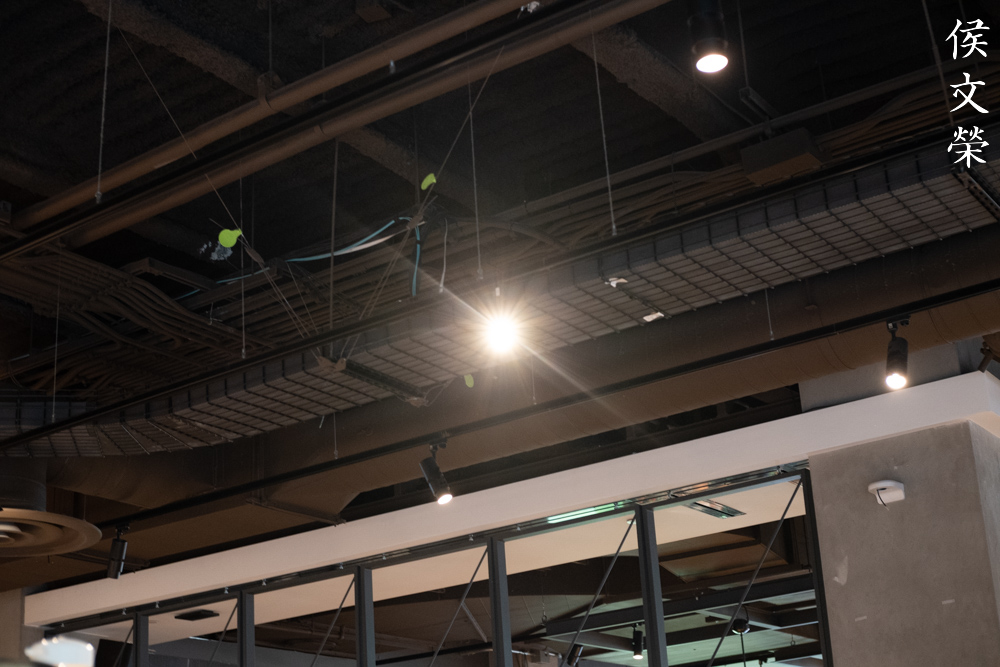
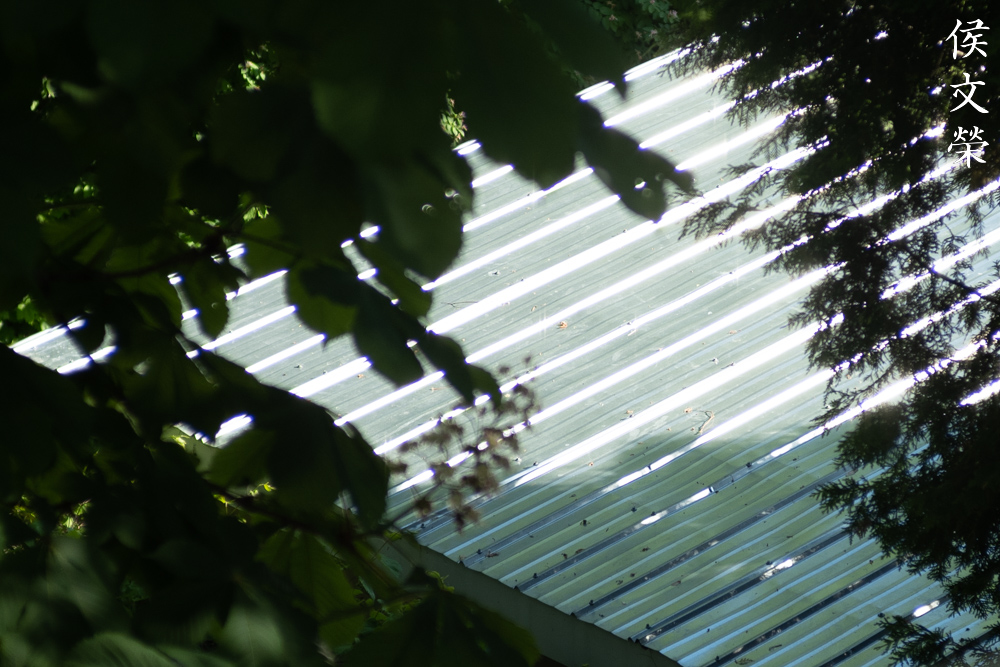
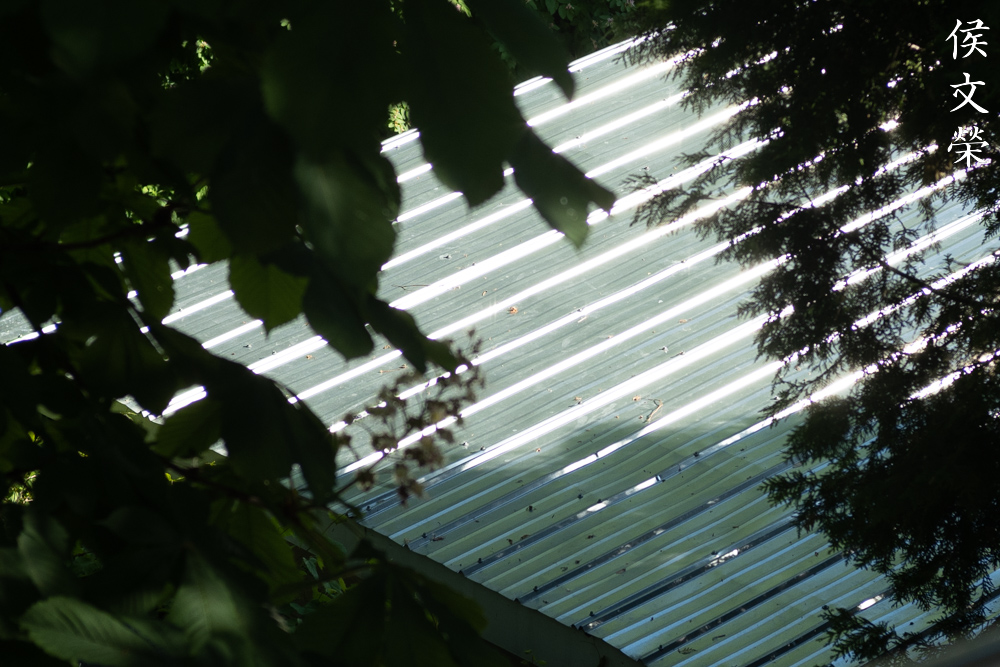
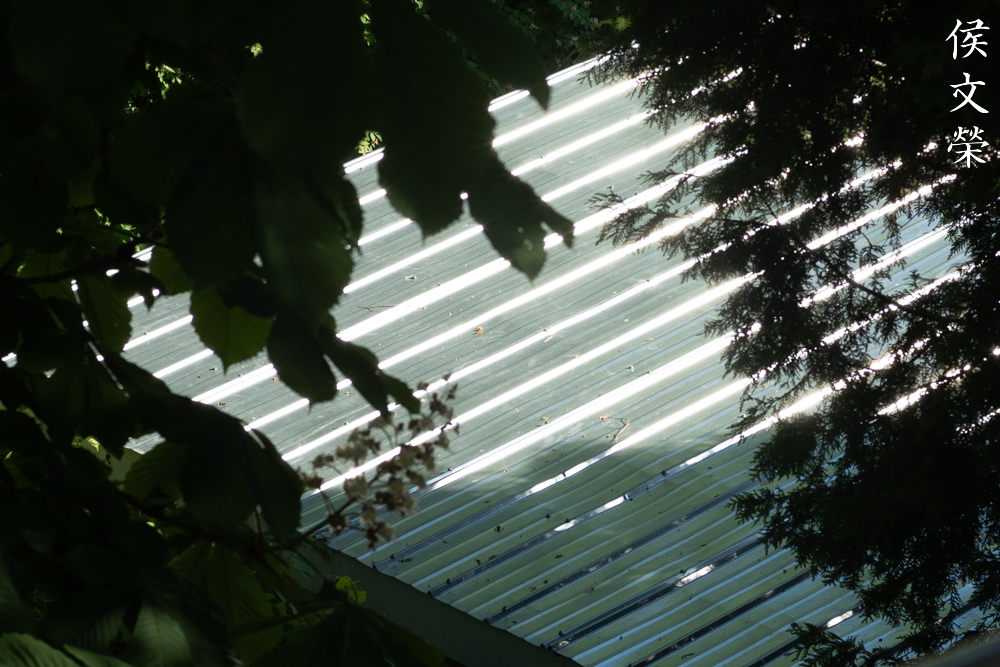
The coatings are of inferior quality compared to a Nikkor so you will see flare easily if you’re not careful. It is best to avoid anything bright within your frame, or just outside of it. The internal reflections look weird, I don’t know how to explain it but the shape looks a bit off. The good thing is it appears to be resilient, it’s so simple that it only has a few air-to-glass surfaces so this isn’t much of a problem.
(Click to expand)
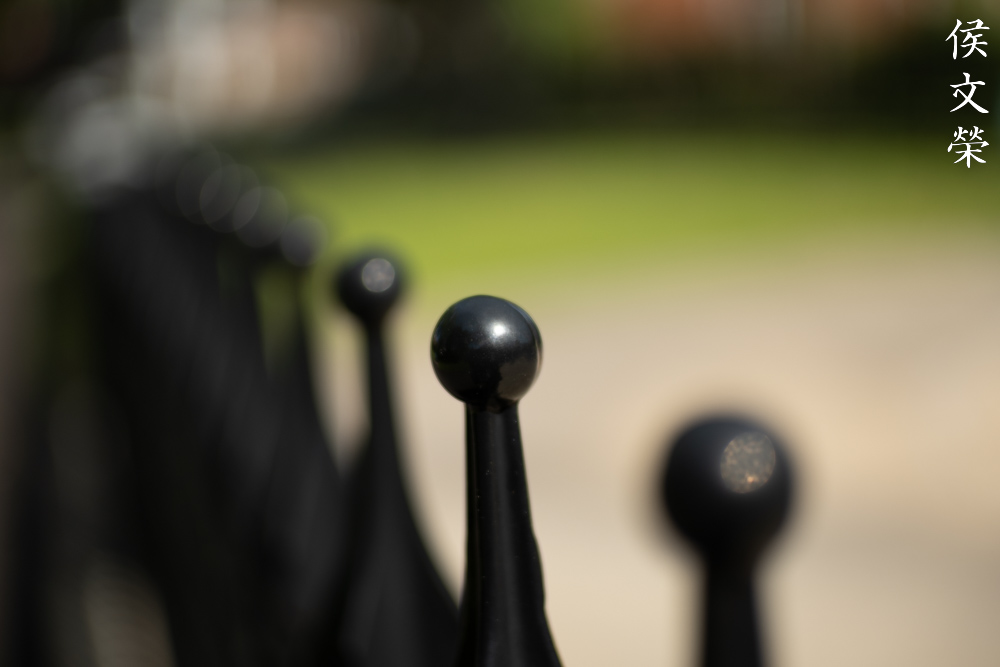
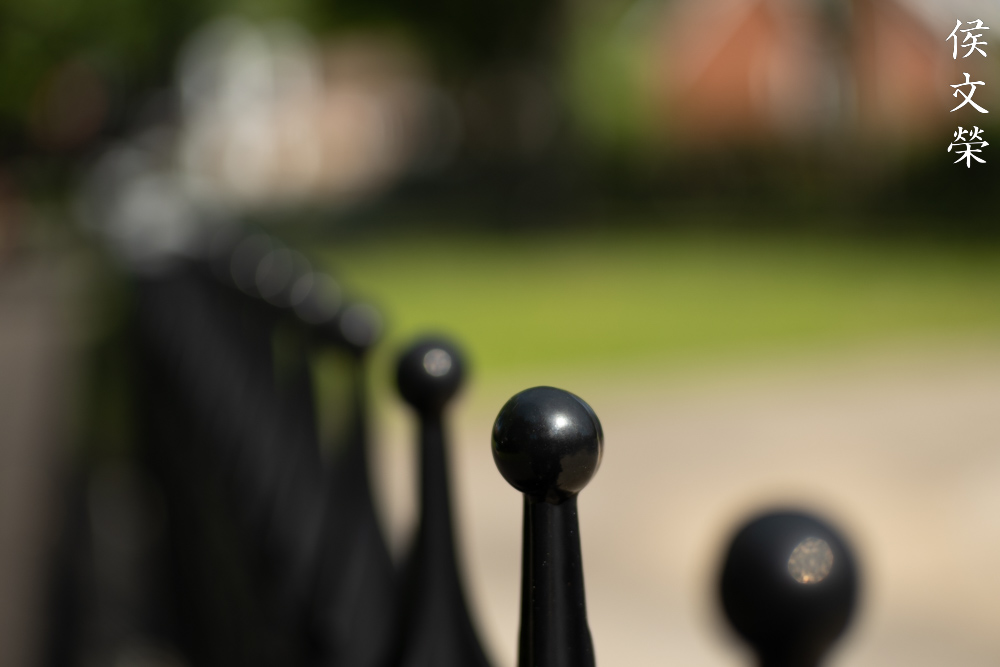
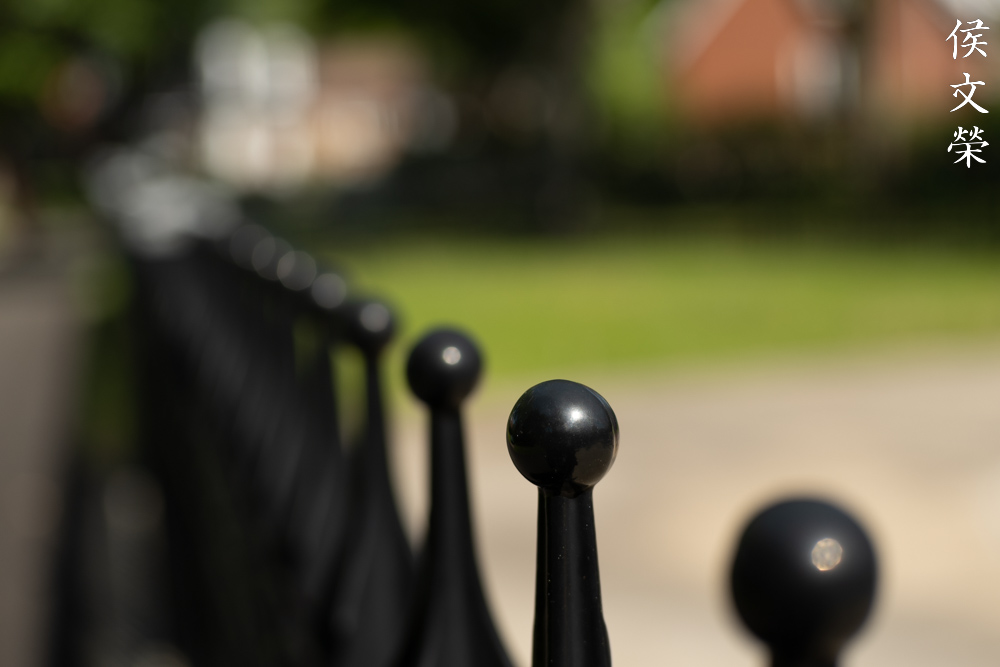
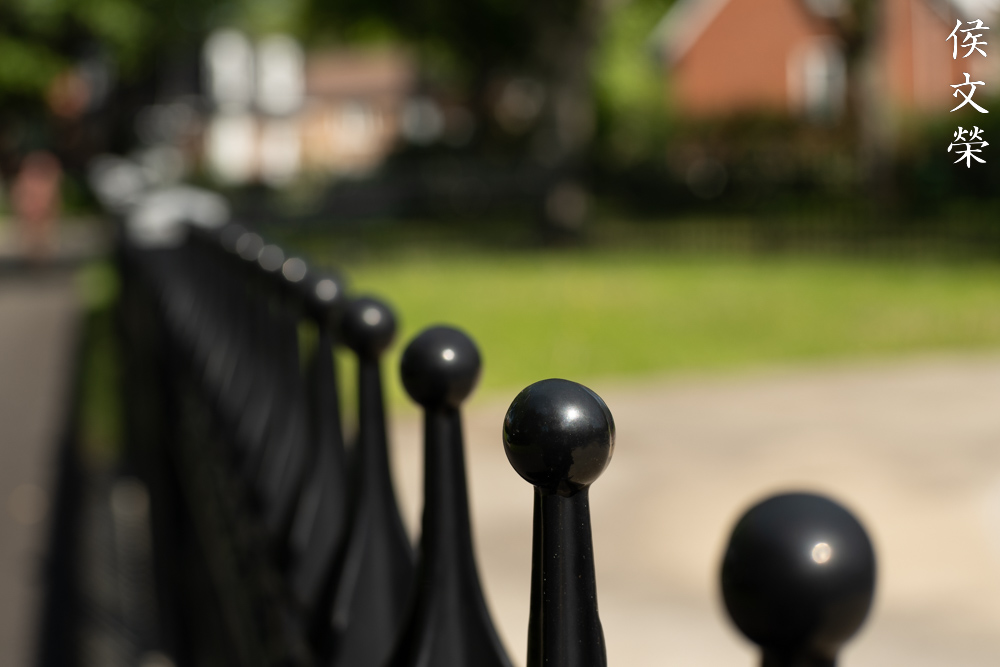
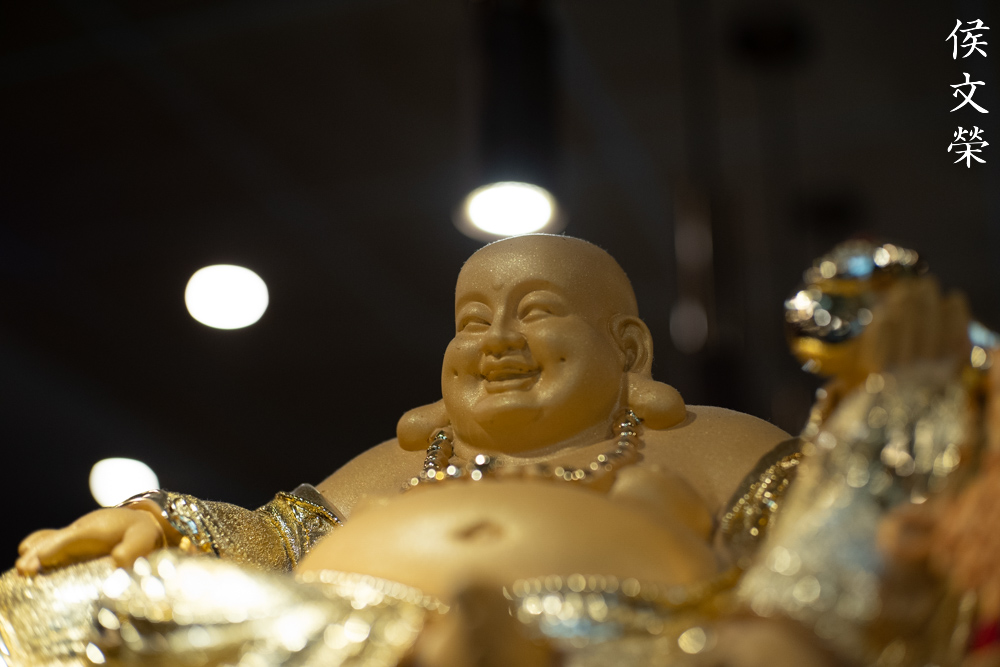
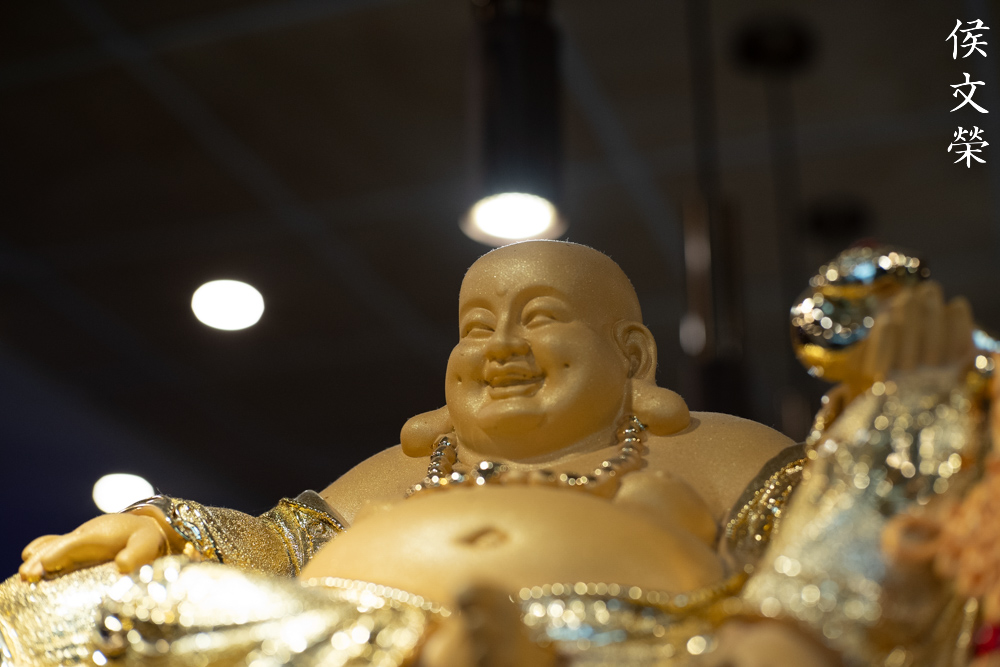
The blurry parts look pleasant thanks to the multi-bladed iris, a polygonal one will look rough. It’s smooth across the whole aperture range in general, I have yet to see it render rough details in the blurry parts.


(Click to expand)
The orbs look even but it’s possible to see outlines if you carefully look for it when shooting at f/1.4. It has a “vintage feel” to how it renders the blurry areas of your photos. You won’t see any elongated orbs, that is more common with 35mm (full-frame) lenses. You won’t get much of that “swirly” effect that hipsters all talk about but it’s still possible to see some of it in certain scenarios. The sun-stars look nice if you prefer this kind of look, I am biased towards the pointy variety that’s common with lenses that have a polygonal iris type. I think this section is where the lens shows one of its two main strengths.


(Click to expand)
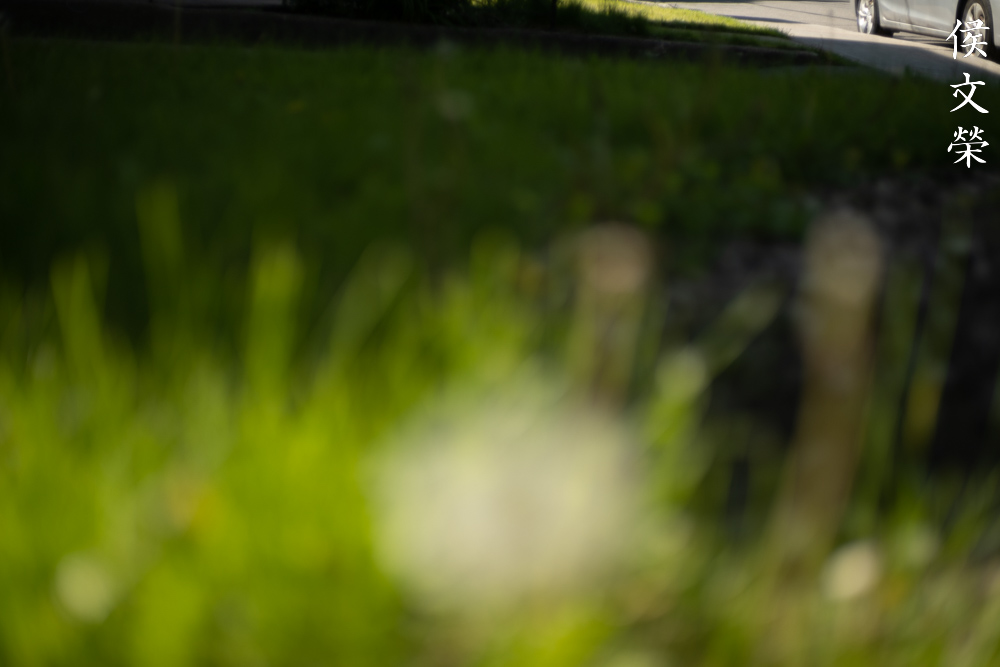
Chromatic aberration looks horrible when shooting at f/1.4. It’s not so bad here after the jpeg conversion but it looks bad in the original photos. Stopping it down to f/2 will alleviate most of it but it’s still there. It is even possible to see traces of it by f/2.8 but it’s as good as gone at f/4 around the area that’s in focus. I will advise you to be careful when shooting foliage or sparkling water because it’s easy to trigger the ugly magenta and green artifacts if you’re not careful.


(Click to expand)
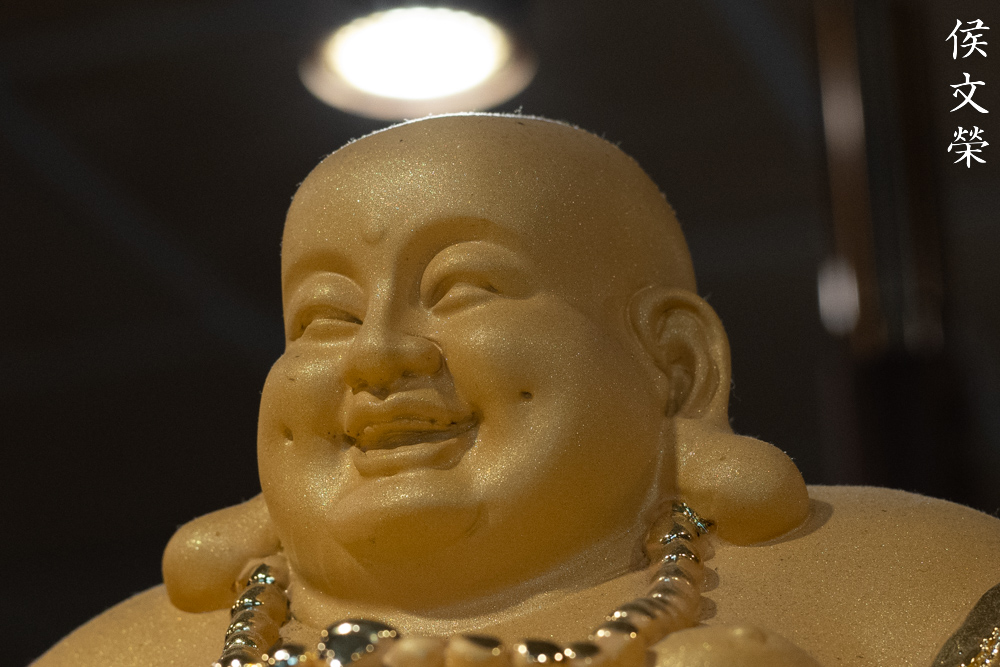
It is surprisingly good at the center even when shooting at f/1.4, sharpness is adequate and the resolution is enough in order to render a clear image at the center. There’s a noticeable improvement once you have stopped the aperture down to f/2 because the resolution is now enough to support the sharp center. You will see the center improve even more by f/2.8 where it is performing at its peak. Stopping it down to f/4 won’t give you much improvement when it comes to the center but the corners will certainly look better.
This is surprisingly good for its price as far as (center) sharpness goes. The corners don’t look as good, in fact, I think that they are behind the center by 3 stops or so. You will have to stop it down to f/8 in order to make the corners look as good as the center. This is not so bad because the important things within a photo are usually framed closer to the center.
I don’t have test shots for subjects that are further into the frame or at infinity, I got lazy. I’m not sure but I noticed that my lens didn’t perform as good as when shooting at objects that are closer. It is also worth mentioning that I get inconsistent performance out of it depending on condition, distance, and aperture. I am not sure which factor contributes to this observation the most but it generally performs good if you’re shooting at moderate distances. For example, I noticed that this lens isn’t really sharp when shooting at a subject at its minimum focusing distance at f/1.4. You can also see this with the following pictures below.
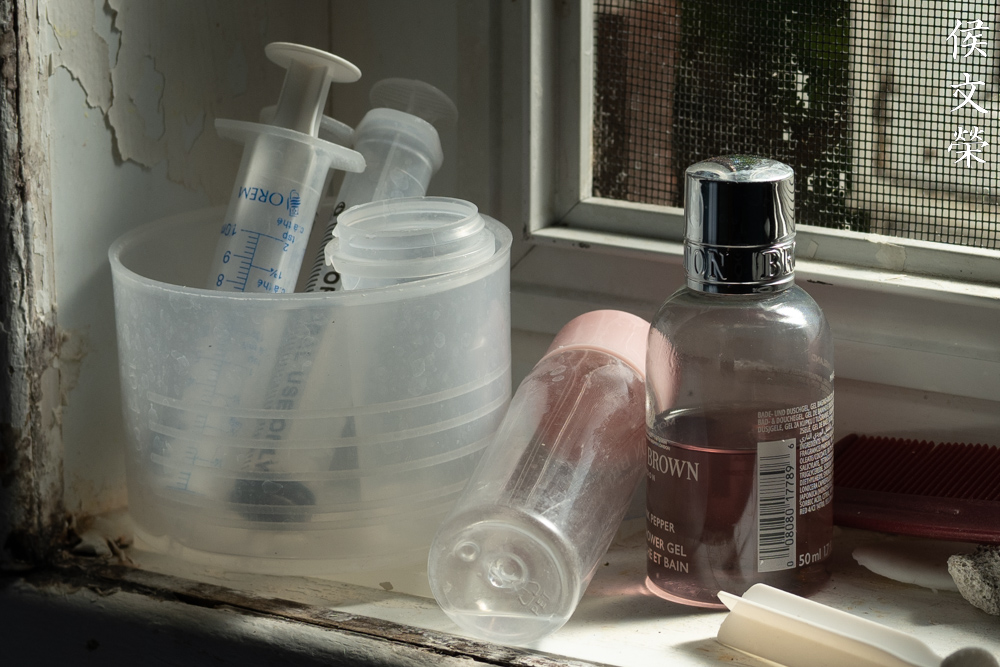
This is how close you’re able to focus with it. It’s not a macro lens nor anywhere close to it but it can be a useful feature to have in case you need close-ups such as product photography.
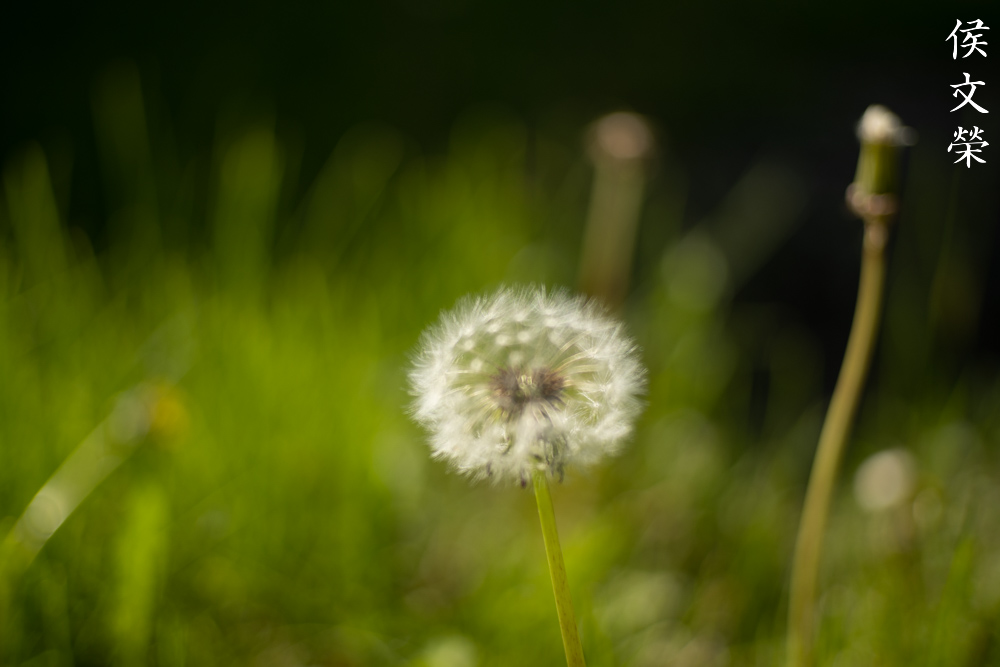
The character of the blurry parts in this photo looks fine enough for me but it is nauseating at times. This is not the best lens when it comes to the smoothness of the bokeh but it’s pretty good for a cheap lens. It doesn’t render like a modern lens at all, it reminds me more of lenses that were made many years ago. It’s a matter of preference but that’s how I feel about it.

The lens has enough imperfections to give your photos a “vintage feel” as if they were taken with an old lens. I don’t know if this is intentional or they just don’t know how to make modern lenses with a modern sensibility.

Since it mimics a 50mm lens’ field of vision it’s also a good lens for taking portraits. You will want a longer lens if you want to frame your subjects in a closer manner but this is good enough for many cases.
I can’t say that it has good contrast, especially considering that it’s not a vintage lens made using vintage glass recipes. In fact, even the older Zeiss lenses such as a Carl Zeiss Jena Tessar 50mm f/2.8 performs a lot better in this regard.

The colors that I get from this lens isn’t very saturated but it’s enough to render colorful subjects. It looks a bit “cool” as if you’re shooting film using a blue filter.

It’s best to stop the aperture down to a small as f/11 when shooting on a sunny day. This will allow you to avoid any observable amounts of chromatic aberration which can easily be found when shooting foliage.

The effects of distortion won’t be obvious so long as you know how to angle your shot. Don’t let that stop you from enjoying this lens.

Indoor photography won’t be much of a problem because of its bright aperture. It’s also easy to acquire focus because of the thin depth-of-field so long as you’re shooting with a wide enough aperture value.

The bright maximum aperture allows you to take photos in the dark while still maintaining a high shutter speed.

Shooting at night will probably be the main use case for this lens, it’s a great lens for walking around your neighborhood at night because it’s cheap and inconspicuous so it won’t attract unwanted attention. Even if you’ve had the bad luck of running into people that give you fatigue at least you won’t lose as much. It is a throwaway lens.


(Click to expand)
I don’t think it’s that bad at all as an everyday lens but the one thing I hated the most is how poor this is when it comes to ergonomics. There are no click-stops, it’s heavy, the focusing won’t give you a good feel because it’s imprecise, and the aperture ring is situated at the front. If this were to handle better like what a premium Japanese lens would then it will be awesome.
I can only recommend this to people who don’t have enough money to spend on the more expensive and exotic Japanese offerings. It is also not good for videography without extensive modifications because the focusing ring doesn’t feel precise (it’s mushy) and the focus throw is very short which makes it difficult to make small adjustments without using a specialized rig. Starving students will find it good enough and a lot of parents will be happy with the savings. These are very cheap, I got one from the official seller for a good price of $55.00 or so while the equivalent Japanese offerings cost around 10x more. I do not think these come with warranties and they have poor quality control (mine had fingerprints) so that’s probably where the savings go. You will have to be careful when buying one and make sure you’re able to test and scrutinize everything about the lens before you part with your money. For this reason, it’s best to buy the lens from an actual shop, they may even offer some kind of warranty if things did not turn out well. Check everything very well including the aperture and focusing rings. See if the focusing ring feels mushy or not as that’s an indication of broken plastic bushings inside. Look at the glass carefully and make sure they’re not dirty, shine a bright light through it just to make sure. Since the quality control is piss-poor you might see some dust or debris inside which you can easily blow off with a bulb blower after dismantling it. The amount of grease used inside the lens is excessive to say the least so be prepared to have it overhauled in a couple of months or years, you’ll see what I mean later. These aren’t rare at all you can find them easily, you could buy one for laughs just like I did. It’s a joke that costs $55.00 and it’s not even funny.
Before We Begin:
If this is your first attempt at repairing a lens, I suggest that you see my previous posts regarding screws & drivers, grease and other things. Also read what I wrote about the tools that you’ll need.
I suggest that you read these primers before you begin:
- Essential tools
- Best practices 1
- Best practices 2
- Best practices 3
- Ai conversion
- Working with Helicoids
Reading these should lessen the chance of ruining your lens. Before opening up anything, always look for other people who have done so on the internet. Information is vague and scattered but you can still find some information if you search carefully.
For more advanced topics, you can read my fungus removal article. It has a lot of useful information, it will be beneficial for you to read this. I also recommend that you read the working with helicoids article so you will not get stuck because you couldn’t reassemble the helicoids back properly.
Disassembly (Optics):
I’ll show you how to get to each of the optical groups in this section. This requires disassembling the front part and the partial disassembly of the rear part. Unlike what you guys are used to seeing in my articles, it does not have a removable housing for the objective. You’ll have to remove each block of glass manually. I don’t think this is a difficult task but you will still need special tools in order to perform the operation. This is probably a good lens for beginners to work with because it’s simple, cheap, and it doesn’t have any sort of historical value.
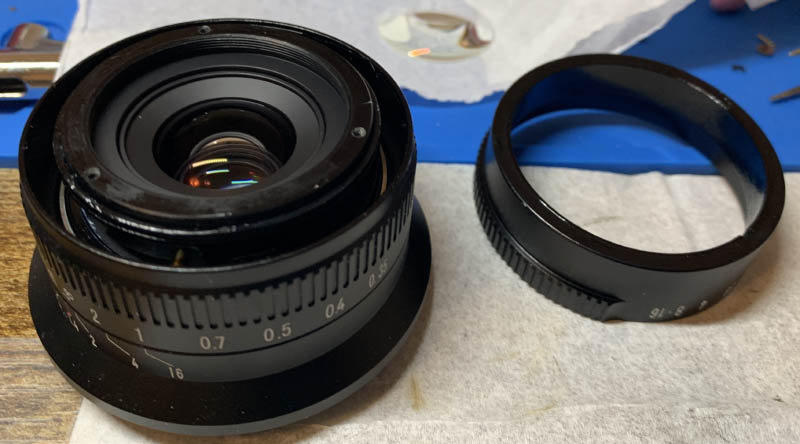
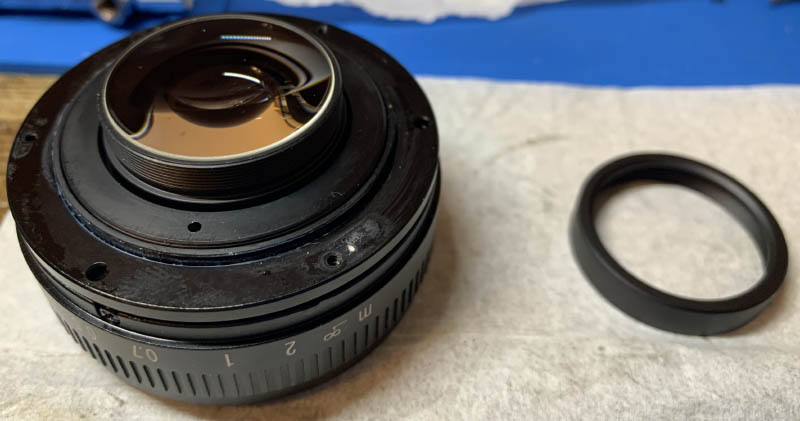
Use a rubber cup to unscrew the bezel and pick the front element off with a lens sucker.

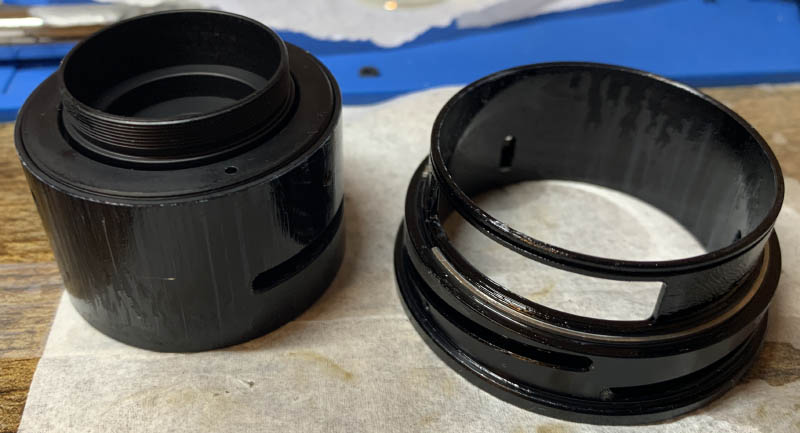
Extract these screws to remove the front barrel.
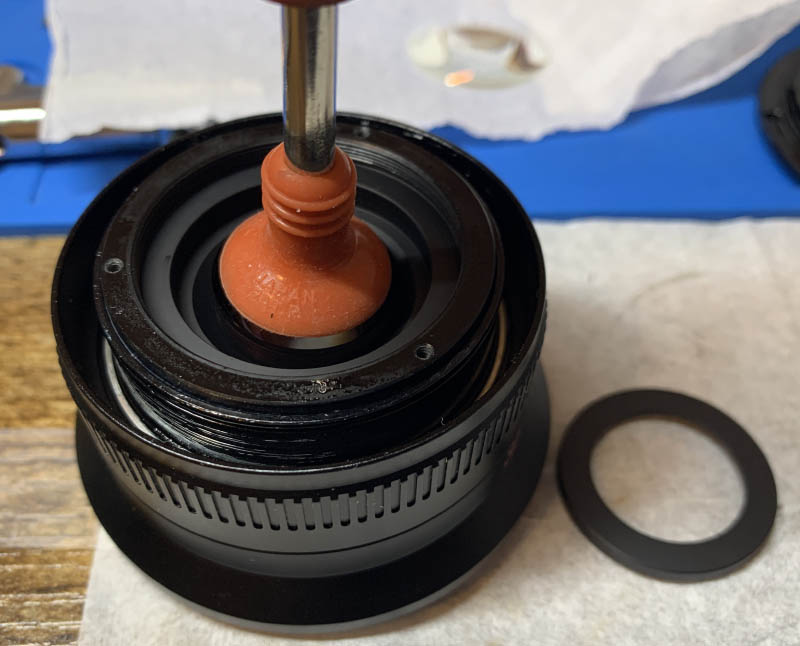
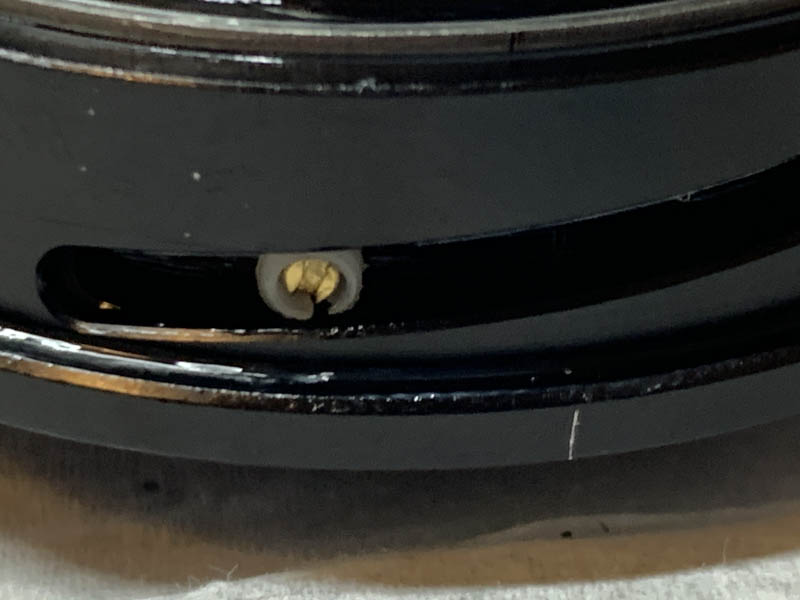
The aperture ring is secured by a brass circlip underneath the front barrel.
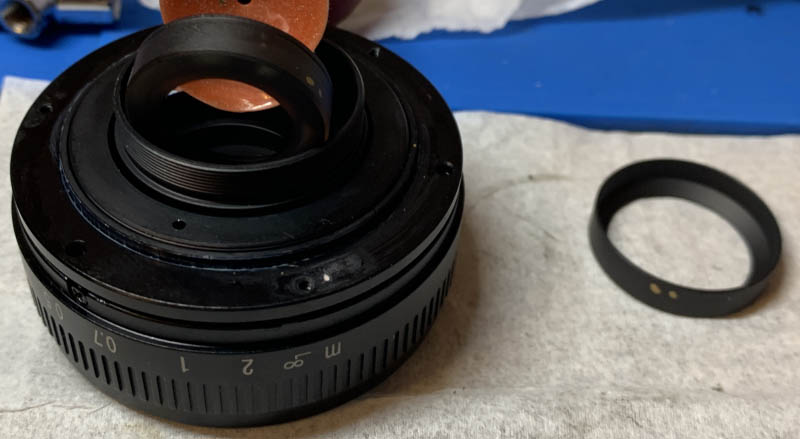
Pick that circlip off and you will be able to easily pull the aperture ring away from the lens barrel.

It’s now apparent why the aperture ring feel mushy to operate, an excessive use of grease is the problem. I still didn’t know why at this point, but the reason for the lens not having detent clicks is known. There is no space for you to put it because of poor design choices. I could have fabricated one but I wasn’t in the mood.
Carefully remove the spacer then pull the 2nd group off using a lens sucker.
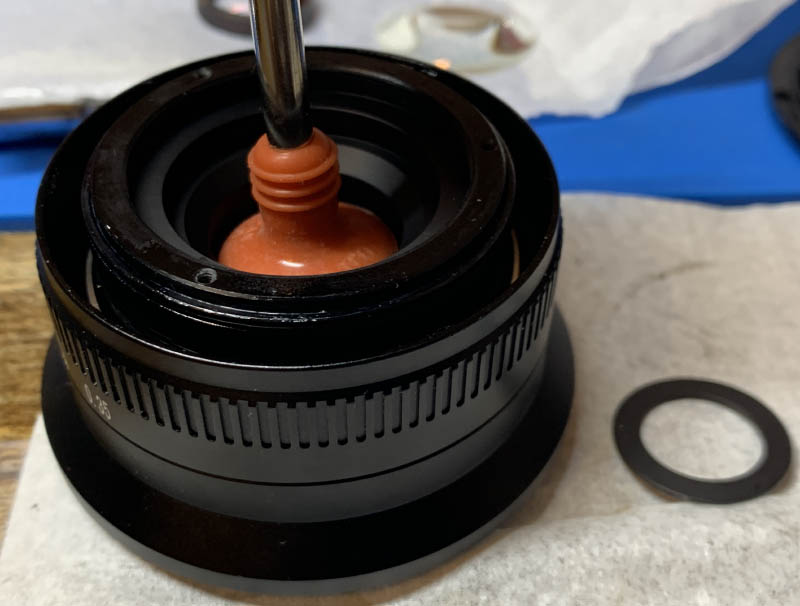
Do the same thing for the 3rd group. Notice that it also has its own spacer (or shim).

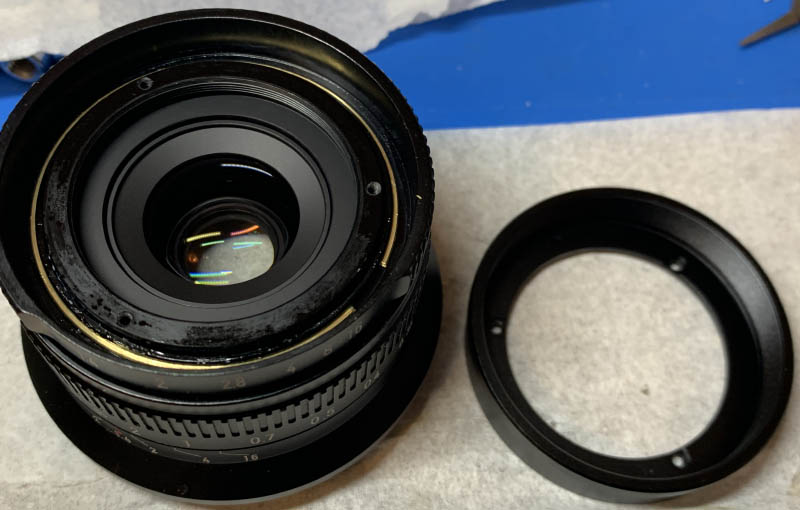
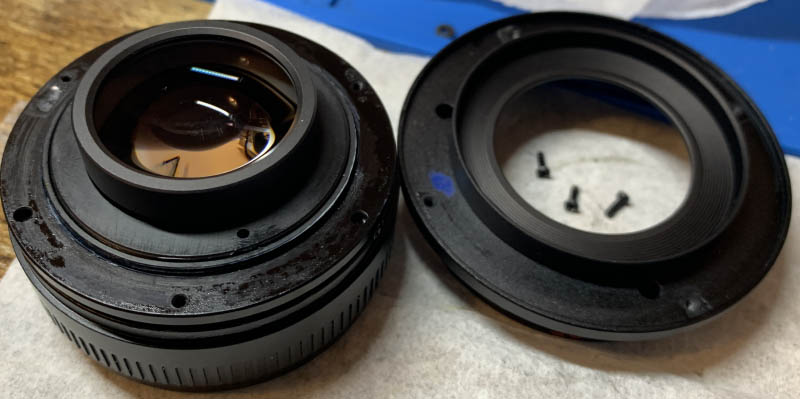
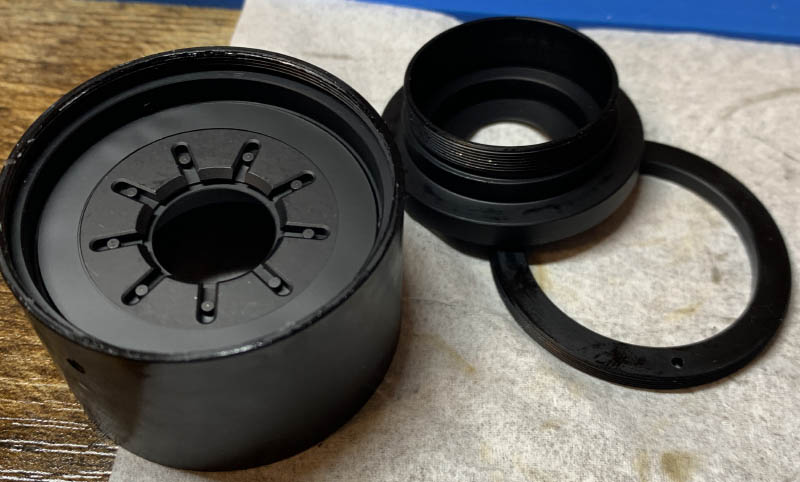
Extract all of the screws in the bayonet mount. Read my article on how to remove screws so you won’t strip the heads of the screws. Many people get stuck here because they don’t have the right technique.
There are shims underneath the bayonet mount, don’t lose any of them since this is the only way the lens can be adjusted to focus properly. What is also worth noting is the bayonet mount won’t sit flat perfectly if you’ve tightened any of the screws at one side, you should tighten them all at the same rate. This sucks, I’m not sure what causes this but it may be due to imprecise machining or a mistake in the beveling.
Extract the screws of the bottom plate in order to remove it. It’s heavy for no reason as they could have made the bayonet mount with better materials and made this part lighter, but it’s a solid piece of metal.
Unscrew the collar of the rear group and pull it off using a lens sucker.
Do the same thing for the 4th group. Notice that it has its own spacer, you should remember which way it should be facing. What’s puzzling to me is I found some fingerprints on the inner surface of the 4th group that is facing the iris. How could this lens pass quality control with such an issue? Seeing how communist Chinese lenses are made in the factory in the videos quickly give me the answer, they’re just made with a lower bar for quality. I saw people applying grease with their fingers and handling glass elements with no covering for their fingers, as if assembling dumplings inside a kitchen. They are not from 7Artisans but it gave me an impression of how things are made over there. Compare that to the meticulous attitude the Japanese manufacturers take and you can easily imagine why.
That’s just the beginning. This may be useful for people who wants to clean their lenses if the problem is in the optics. The next section will outline how to go deeper inside the lens and correct a big issue that I have with these.
If your lens has fungus read my article on how to clean lens fungus and follow all of my steps carefully. Do not forget to dilute the solution so you won’t have to use it in full concentration. It’s possible that you will damage whatever is in the surface of the glass.
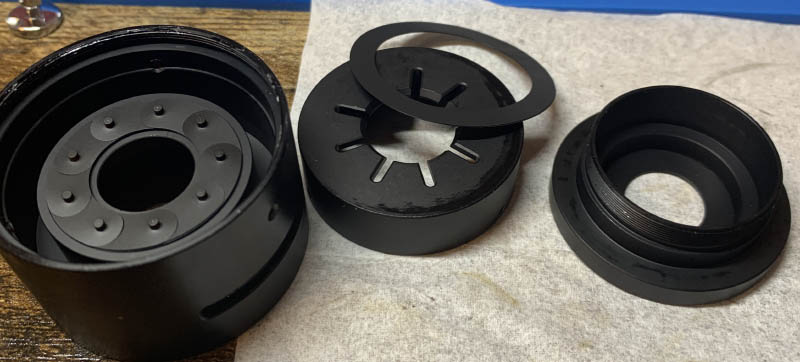
Disassembly (Barrel):
You normally won’t have to get this far but if your lens feels mushy to operate then this is the only place to fix it. It’s very simple to dismantle everything and it doesn’t take a lot of skill to put it back even if your iris needs to be overhauled. Just take a lot of notes and you should be fine.

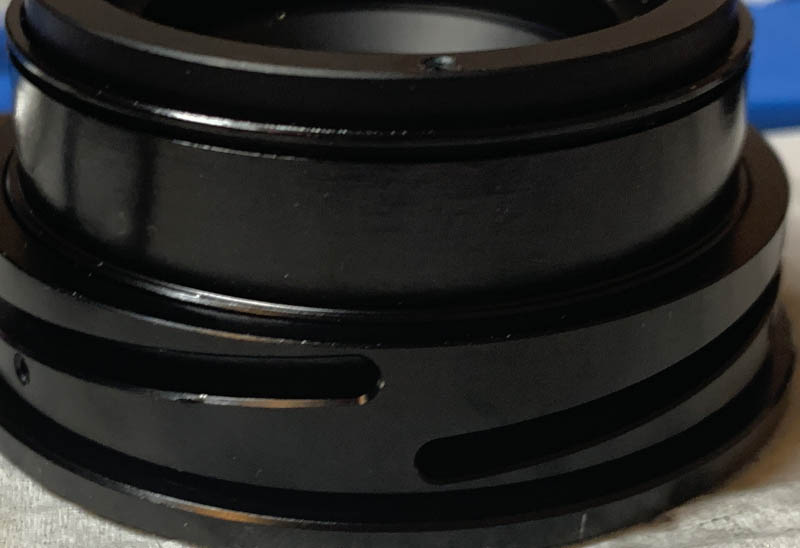
Note the original alignment of the focusing ring then extract these screws.
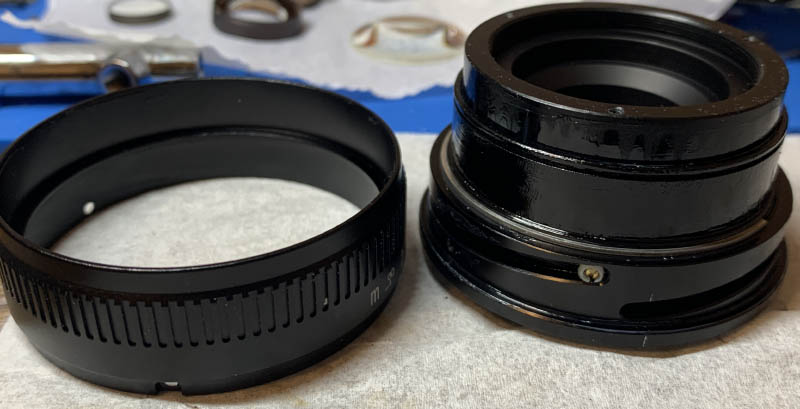
The focusing ring can be easily removed. Do this while the lens is focused to infinity and don’t disturb the alignment of the inner barrels while removing the focusing ring. This lens doesn’t have any helicoids, this is surprising to me. It has enough space for a proper set of helicoids it only has this, the only reason I can think of is cost cutting. The GN Auto-Nikkor 45mm f/2.8 has something similar but it’s done because there is not enough space and and the thrust shouldn’t be linear. The Nikkor 400mm f/5.6 ED-IF Ai-S has it for a different reason, that’s because the focusing group is set on a gondola like what you see in a zoom lens. It is strange from an engineering perspective so the only thing I can think of is saving money at the cost of materials, accuracy, and user experience. I guess these mainland communist Chinese brands don’t care for any of them, so long as they can manufacture them quick and cheap I suppose.
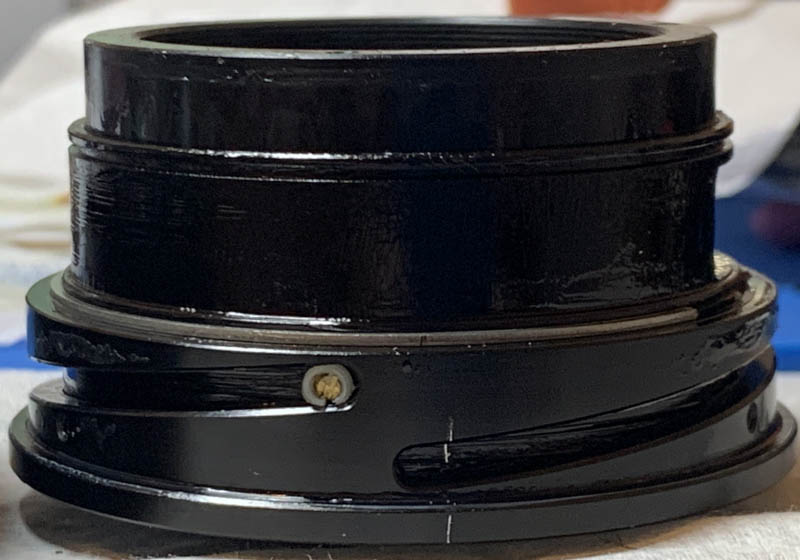
Take your notes while the barrels are either infinity or at the minimum focusing distance. Notice that it is dripping in oil inside, that’s oilier than the palms of the Chinese ladies working in the Asian barbershops! I estimate that there’s at least 3/4 of a teaspoon full of lubricant used in this lens! The good thing is, it will have a happy ending later in this article because I’ve gotten rid of all the excessive grease.
All of the rollers have cracked bushings! That’s part of the reason why the focusing ring feels mushy! I am not sure if these got broken soon after leaving the factory, they’re low quality. Remove these and extract the pins carefully with a screwdriver.
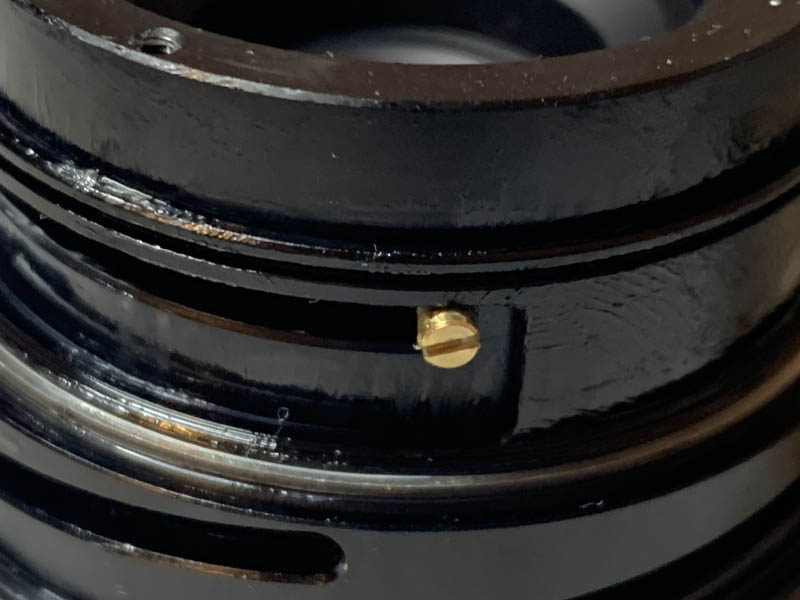
Carefully extract this pin, it’s used to couple the iris mechanism to the aperture ring.
You can safely pull the inner barrel off. Everything is drenched in grease, I was wondering why but I shall soon discover the reason why. They did this to give the impression that the rings feel damped, giving you a false sense of precision. Without the excessive use of grease everything feels very light, turning the rings will give you this weird sensation of dryness and you will feel every imperfection in the machining and the finish of the surfaces when they come into contact with each other.
Unscrew the collar so you can remove the housing of the rear groups. You are now able to dismantle the iris mechanism at this point.
Carefully remove the thin plastic films that serve as bushings then pull the diaphragm cup off. Note where the holes of the diaphragm cup are originally before you remove it so you will remember how to put back again later. This assembly has heavy, solid parts which is unnecessary. This saves time in manufacturing, it is also easier to put things together by unskilled cheap labor.
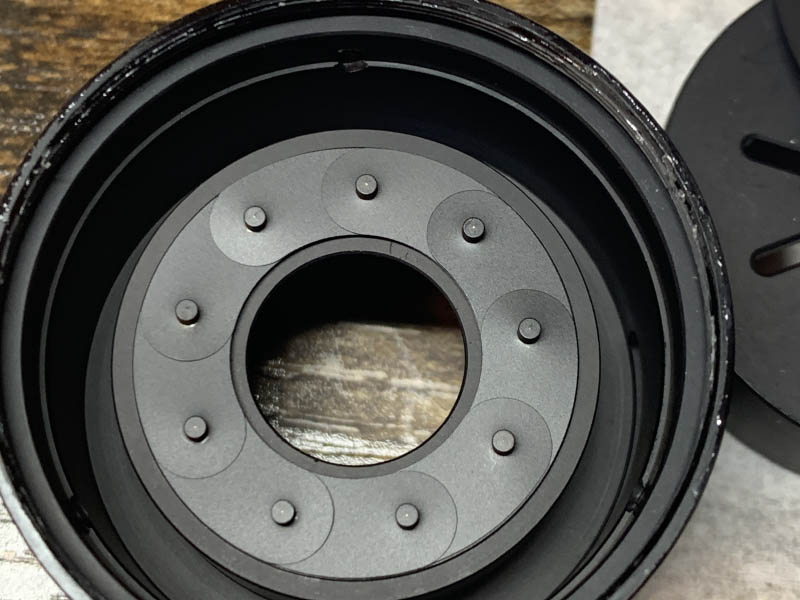
The blades can now be easily removed. Study how it works so you’ll know how to put it back. It is a simple implementation because everything comes in a single piece. It didn’t take me long to put the blades back, it’s shallow and there’s enough room for me to work on.
Pick the circlip off with a pair of tweezers so you can remove the thrust cam.
Carefully clean everything and never forget to get rid of every oily residue after rinsing. The lubrication is nasty and won’t come off easily even when treated with alcohol. That’s how much lubricant there is, it’s a huge mess inside! Dry everything very well before you apply a fresh coat of grease. Don’t apply anything to the aperture ring’s inner surfaces and only apply a very thin film on the focusing cams. If you use high quality grease with a thick consistency then you won’t have to apply too much in order to get it working in a smooth and damped manner. It’s my mistake because I don’t have a grease that’s thicker than what I currently have so my focusing ring turns easily with a dry sensation. I could feel every imperfection when I turn the focusing ring.
Conclusion:
What a mess! It took me way more time than usual because I had to clean everything very well. Even with all that work it took me around 4 hours to complete the job including the special things I had to do like a set of new bushings for the rollers. It’s a very unpleasant experience but it still give me something new to learn about these cheap products. At least I know what to expect from them the next time I had to open a cheap lens from that country. I don’t want to generalize but that’s the impression I got. I’ve heard a lot of stories regarding how poor the quality control is with these lenses and I can verify them now myself. It’s a tale of caution to me and the others, if you can afford buying something from Japan instead, do so since it will save you a lot of time and money. You won’t get buyer’s regret and at least you’ll get a warranty. It’s also baffling how these companies upload videos on how to correct their slop, assuming that the owners will adjust their lenses on their own in order to make them focus properly, or to tighten things up such as the front barrel being loose from the factory! This is some Temu level shit that only people who have not a lot of money and a lot of time can put up with.

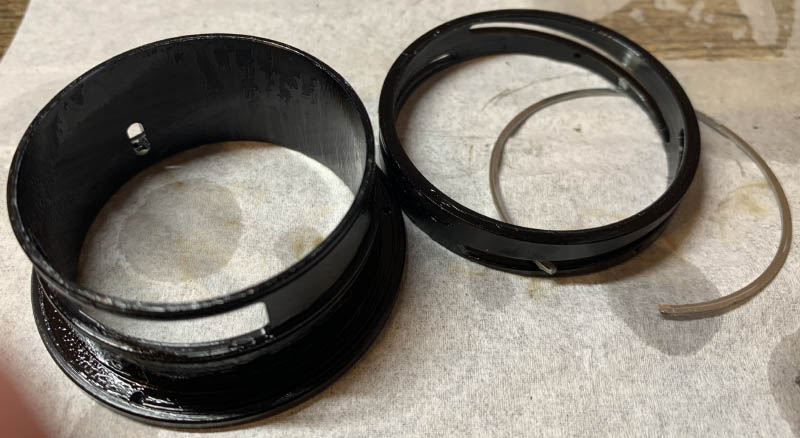
I fabricated these replacement bushings from scrap nylon parts that I have. I modified them to size then I cut them to fit the pins of the rollers. I think these will last longer than the original parts. These are crude but I don’t care so long as the feeling is smooth when I turn the focusing ring.
This is how clean the internal barrels look like after cleaning them. Just follow my tips on how to lubricate this in the previous section and you should be fine. One more thing that you could do is to use a very fine grit sandpaper to even out the finish of the paint for the inner barrel and the surfaces that it comes in the contact with. You then polish them even more with an even finer grit sandpaper for a super smooth finish. This will allow you to use even less grease in order to make the focusing ring feel super smooth. I usually see these parts in bare metal or in smooth finishes but we have an undulating surface on this one. This is what we call “orange peel” effect in airbrushing. If I could go back in time I wish I did it because I am way too far into the process and I don’t want to dismantle everything again just for that!

I just took it out to take photos so I could post sample pictures using it in this article. I’m not sure if this is going to come out of storage again after this article is published. I have no intentions of owning it for the long term, I might as well give it to a friend in the future.
That’s it for this article, it is something that I have been hesitant about for some time but I thought that it is something that will interest my readers. Did you enjoy the article? If you did, please share this with your friends or leave me a tip because that helps a lot. Your support is the reason why this site has gone on for such a long time and how I’m still able to create high quality articles with original content regularly. Many sites don’t offer this level of information and presentation, all of this is thanks to you and your support. It has been my pleasure to offer you this valuable resource. Thank you very much again and see you in the next article, Ric.
The Tiananmen massacre happened in June 4th of 1989, which is 36 years next week. That started out as a series of peaceful protests by students in April of that year, they demanded freedom, transparency and reform from the cruel communist government. This was triggered by the death of a progressive figure in the communist party called Hu Yaobang a few years before but culminated in a huge protest in 1989. The world was watching and hoping that this would set the direction of the country towards true democracy, but everyone was appalled by the violent crackdown led by the “People’s Liberation Army“. It is a warning to us all, we should never give away our freedom to anyone, most specially not to the government even if you think it meant well. How lucky are we to be born free without the government dictating our destinies! I dedicate this article to the victims of the Tiananmen massacre, specially to “Tank Man” whom we haven’t heard of since after his iconic photo was taken.
Help Support this Blog:
Maintaining this site requires resources and a lot of time. If you think that it has helped you or you want to show your support by helping with the site’s upkeep, you can make a small donation to my paypal.com at richardHaw888@gmail.com. Money isn’t my prime motivation for this blog, I believe I have enough to run this myself but you can help me make this site grow.
Leave me some tip?
Thank you very much for your continued support!
$2.00
Helping support this site will ensure that it will be kept going as long as I have the time and energy for this. I’d appreciate it if you just leave out your name or details like your country’s name or other info so that the donations will totally be anonymous. This is a labor of love and I intend to keep it that way for as long as I can. Ric.

May 30, 2025 @ 06:55:47
Hello Richard and thank you for this new article! Chinese-made lenses are very strange! The design can be attractive or repulsive, the construction can go from good to worst, and the results in photographs are random. I tested several models. The old version of the 35mm f/2 from 7artisans, which looked like a Summicron, and whose results were very good, for a ridiculously low price (currently impossible to find). The 50mm f/1.1 from 7artisans, also well built, with a certain personality, but without aperture notch, which is unpleasant. Currently, I have a 50mm f/1.1 from an exotic Chinese brand “Mister Ding” (+/- $400). It is beautiful, heavy, particularly well built, all metal and glass, notched aperture, smooth and precise focusing from the moment of delivery, a look and use very similar to Leica! The results are generally very good, I would say excellent from f/2, correct vignetting, a slightly vintage rendering of course. On the other hand, it does not support backlighting, it causes flare that is enough to make you cry. But, logically, having f/1.1, whatever the brand, is more intended for low light, it is probably necessary to take this into account and avoid weaknesses.