
Hello, everybody! Do you know that the Soviets had some of the most ambitious space programs? There is something called the Venera program which sent unmanned probes to the planet Venus. It’s probably the most ambitious and difficult feat man has ever attempted in space exploration because Venus has a very hostile environment that will easily crush and melt everything that went past its atmosphere. There are some people who will claim that it has the harshest environment in the solar system. The probes that the Soviets sent looked very unique, they are true masterpieces of engineering and science. Some of them have large discs that look like very wide photos, this is the most distinctive feature of the probes. I know a lens in my collection that looks like that. Like the Venera probes, it’s also an optical masterpiece in its time and it’s regarded by some as a high point in optical engineering. Read this article to know what it is.
Introduction:
The New-Nikkor 18mm f/4 was produced from 1974 to 1977, it was replaced by the Nikkor 18mm f/4 Ai, a similar lens with a few insignificant external differences. At that point it’s the widest Nikkor that allows any filter attachments in the front and is the most compact of all the ultrawide Nikkors. It sold well so it had a moderate run together with its successor and it was replaced by the Nikkor 18mm f3.5 Ai-S in 1982. It’s a popular lens so it has somewhat of a following despite its flaws such as not being sharp at the extremities, a susceptibility to internal reflections, and displaying a complex distortion profile. We shall examine how it really performs in this article to settle things once and for all.

The barrel is robust and typical of many Ai/K Nikkors when it comes to build quality. No compromises were made and it definitely feels like a premium product. The focusing ring has a short throw, typical of many wide lenses of this type and period. It is not a big deal because the focusing scale is easy to read and we usually use the scale instead of the viewfinder to determine what’s focused in the photo when it comes to shooting with wide manual lenses.
It has an impressive but complicated 13-elements-in-9-groups design with a maximum aperture of f/4. It’s not something that you will consider as fast these days but it was a big deal back then. This makes it hard to use in the dark and you will need special focusing screens to help you see better. This is a limitation of the F-mount more than anything because as wide as the F-mount is for its time, it’s still not enough for a bigger or brighter lens to be designed for it given the circumstances of that era. There will be wider lenses with faster apertures in the coming decades but that’s what was possible then. Of course, it is also coated with Nikon’s famous Nikon Integrated Coating (NIC) which is renowned for its properties and toughness. If you want to know the complete story, read this amazing story from the Nikon 1001 Nights series.

It uses a humongous 86mm filter size, the biggest that I know from any Nikkor prime lens of this type and era. The front ring is solid, but you must be very careful because they can get dented easily. This design is necessary in order to allow you to attach filters and accessories to it.

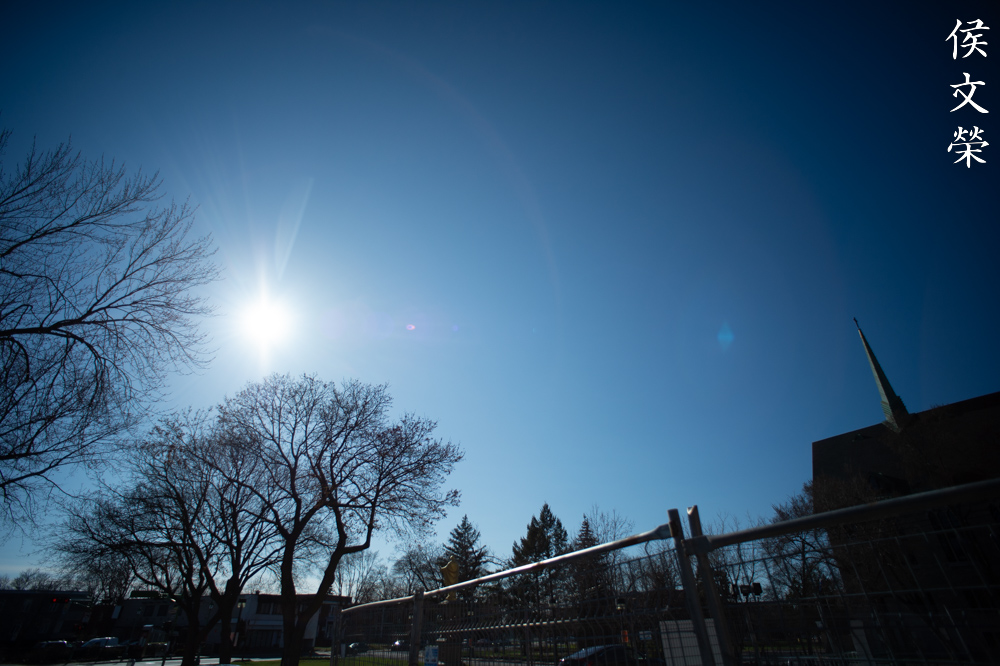
It has a bulbous front element which is impressive to look at. This allows it to bend light in order to cover an impressive 100° frustum. It feels like looking through a fisheye lens without the distortion when you’re peeping through a viewfinder.

The Nikon HN-15 hood won’t offer much protection from stray light but it’s better than nothing. You are not going to use it for that purpose (mainly) because it allows you to attach the popular Nikon Series-IX filters with it through a special holder.

The best way to shoot this (digitally) is with a Nikon Df for that authentic SLR experience. Otherwise, this is an easy lens to adapt for use with a mirrorless camera such as a Nikon Zf. While a mirrorless camera gives you the ability to focus precisely, a DSLR still feels easier to the eyes since you’re not straining them much by peeping at a tiny television inside of the camera.

The Nikon FM is a great camera to pair with this lens. Despite being smaller and lighter, everything about it just works. It felt pleasant to shoot with this setup, the only thing I do not like about this is you won’t be able to rest it flat since the front ring is so huge.
Learning how to use your lens is the best way to maximize it. It will help you take better pictures because you will learn which settings produce the best results. I shot these from f/4, f/5.6 and f/8 since these are the most common aperture values that we’ll use this with, and we will see the most changes here. For my convenience and back health, I used my old but reliable Nikon Df to take these photos.


(Click to expand)
The distortion profile looks complicated, the lines will bend and dip several times. This makes it difficult to correct in post, it’s not something that you can fix with just a single slider. If you’re shooting with film, it’s going to be impossible to correct. You’ll have to be careful of placing your straight lines if taking photos of art or architecture. You shall see later how this will affect the resulting photos and how I’ve avoided the ugly bulge to make my lines look straighter than they actually are, it’s not that bad at all.


(Click to expand)
Vignetting can easily be observed when shooting at f/4. The extremities are dark, closer to 4 stop in some places even. Things look much better at f/5.6 but it’s still ugly. The frame looks much brighter at f/8, you’ll notice it instantly. You can even squeeze out a little bit more by stopping down to f/11. What we see here is an indication that the center looks decent at f/5.6 but you should actually be shooting this from f/8 for better results. That is if you’re allowed to stop the iris down this small.


(Click to expand)
These photos illustrate how nasty the dark corners are so you should stop the aperture down whenever it is possible. You can use it creatively but it’s not for something like this as it’s not a portrait lens!


(Click to expand)
This lens is known to perform poorly when you have bright sources of light in or around the frame. This is because the coating technology back then wasn’t as good as it is today. Not only that, there’s many glass surfaces that can cause internal reflections and that amplifies the issue even more. This is concerning for a landscape photographer unless you can find a reason to incorporate the blobs creatively. On the flip side, I like how well it suppresses flare so the contrast still looks nice. The last bonus is you will get nice looking sun-stars thanks to the 7-bladed iris.


(Click to expand)
This is how the blobs look as you stop the aperture down. Try your best to avoid them forming, the hood is useless for preventing internal reflections from forming so don’t bother. The only way you can avoid it is to cleverly angle your shots so the blobs won’t show up inside the frame.


(Click to expand)
Nobody shoots these kinds of lenses to observe the blurry parts of a photo but let’s have a look anyway. I don’t think the character of the bokeh looks terrible, it’s neither smooth nor offensive. You shouldn’t worry about the smoothness of your blurry bits because it looks more than acceptable in all cases to me.


(Click to expand)
Chromatic aberration will be an issue when shooting at f/4 around the areas surrounding where the focus is. It’s mostly tolerable except for extreme cases especially with areas of high contrast. Stop the iris down to f/5.6 and you will notice some improvement but it’s still there if you look for it. It won’t completely go away even at f/8 when shooting a difficult scene, you’ll still find traces of it somehow. This is probably the biggest issue I have with this lens in terms of optical performance. The good news is the photos here are all examples of the worst cases you may encounter.
Why should this matter and why am I showing you so many examples just for this lens? That’s because it’s important for a lens aimed at landscape or architectural use to have exceptional suppression of chromatic aberration. It’s easy to trigger it when you have a tree line, sparkling water, shiny metal things and objects of similar nature within the frame when taking photos of the mentioned disciplines. I know this very well, I have many years of experience taking such photos not only for myself but for this blog as well. I don’t see it improving drastically even if you stop the aperture down to f/11.


(Click to expand)
Sharpness at the center looks good at f/4 but it lacks resolution when you look closer. The corners do not look that great but they’re acceptable for small prints, they just look dark. Stopping down to f/5.6 makes the center look much better because of the improved resolution and the corners starts to look better, it’s not bad at all. The center looks excellent by f/8 where you will see some improvement but you will see the biggest improvement at the corners of the frame because they now look so much better. While testing it, I noticed that this lens still improves even at f/11, this should probably be its peak when we are looking at the overall clarity and sharpness of the whole frame.
As you can see, shooting this at f/4 will give you pictures that look dark because of light falloff. I don’t like it at all so I advise you to shoot from f/5.6 as much as you can unless it’s absolutely unavoidable. For most cases, just choose from f/8 to f/11 so you will be guaranteed to get nice photos every time. Not only will the corners look better but you will also avoid getting the ugly dark corners that I hate so much. This lens should have been sold as an 18/5.6 instead because that’s what its performance says about it.

This is how it actually looks like when shooting directly at something bright. This may be interesting for a landscape photographer because it’s most certain that the majority of his shots will have the Sun inside of the frame, incorporated as as element in the composition. Shooting at smaller apertures give you this.

Not really a very good shot, this is only to give you an idea that a lens this wide will also be useful for the very rare occasion that you will want to shoot a stage event with it. It’s an unusual use case but it’s more common than you think. Skate photographers do this all the time because it exaggerates the lines and it makes the subjects look unreal.

A lens this wide is also great for taking photos in a museum. While this was not taken inside of one, it will give you an idea of how it looks like. Museums are usually cramped so you won’t have space to move just to find the perfect angle so this lens helps a lot. It may not be good for taking photos as reference, you’ll need something that will give you a flatter perspective such as a 55mm for this. The skewed lines will not be useful because it will make it difficult to count or measure things.

Indoor photography in the dark isn’t what this lens is all about, unless you’re using a tripod or you have a camera that can shoot at higher ISO’s and still give you useable images.

I’d skip using this for architectural photography since there are lenses with less distortion these days but do not let me stop you from doing it because this one is still pretty decent for this kind of work despite it having a slightly complicated distortion profile. This picture is also a good example show that it’s easy for a lens this wide to pick up stray light. The Sun is not even in the frame but I was able to get blobs.

You can find and alternative angle so the effects of distortion won’t be as obvious. This trick is great for a lot of things, but not for shooting art.

The lines are exaggerated, making this church look imposing. What ruins this shot is the curved tower, it’s bent because of distortion. While tolerable, it does make the building look less pretty. Maybe if you try to order the coffee with the most letters in its name in the most fashionable coffee shop in town and drink it, this picture might look straight for you.

It’s not really useful to shoot with this lens if a building is further into the frame unless you want to show what’s around it. I say this because with a lens this wide your building will look tiny.

But that isn’t always a bad thing, right? You can use it to satisfy your creative vision.


(Click to expand)
Here are more photos from that afternoon. I’ve mostly taken photos of building that day since it’s natural to do so with a lens this wide. It’s a shame that I wasn’t able to take landscape photos with it because it’s going to be a more useful topic for this article. That will really show what this lens is all about, or maybe not.


(Click to expand)
Here are some photos from one of our dear readers – Birna Rørslett. She is some kind of an expert when it comes to UV photography. She said that the works exceptionally well for both UV and IR photography. It does not have the dreaded “hotspot” effect at the center that all of us are so afraid of.


(Click to expand)
Here are more photos from her. These are magnificent pictures that I would otherwise never have shown you if not for her contribution. This just shows how wonderful this lens is when used by a skillful person.
Let’s now see some photos that were taken with film. Film reacts to light differently compared to a digital sensor, the former also has grain which could mask or amplify optical flaws. Since this lens was made for use with film, it’s best that we see how it performs with it. Only then can we give it a fair assessment. You don’t want to be judged by a standard that doesn’t fit your personality, right? I took these photos with a roll of Kodak Pro Image 100 on a Nikon FM. Most of the pictures here were taken with a smaller aperture because it was a sunny day, around f/8 up to f/16.


(Click to expand)
This is as I would have expected it to be. There’s a lot of elements in this design so there’s more surfaces to reflect light which ends up being blobs in your photos. To be fair, they don’t look ugly at all when shot with film and you could even incorporate it artistically to your photos. I’m actually surprised that flare is a bit more severe when shooting with film as opposed to digital. It’s not bad at all, but I wish it has less of it because it’s very difficult to avoid given how wide this lens is. My verdict here is this lens is above average in this context, I’ve seen worse and I have definitely seen better. Now, you must put this into perspective. I gave it a lot of slack because this lens was made many years ago. For it to perform like this is impressive, I have seen comparable performance from lenses that were made not too long ago.

This film is known for having less saturated colors, so bright colors look a little bit more “velvety”. The lens is a very good companion for it as you can see in this picture.

I love how this lens performs with film. Not only that, shooting with smaller apertures also brings out the best in it. The corners look a lot better and vigetting is all but gone.

Diffraction will be your biggest issue when stopping down to f/16 or anywhere near it. You will lose a lots of details near the center because it’s way past its peak. The corners perform better because they just got to party late! I can definitely say that f/11 is where the corners approach their peak as compared to f/8 for the center. You must be careful with this so choose your aperture value smartly.
A lens this wide isn’t traditionally used for reportage but it comes in handy sometimes. Don’t be afraid to experiment, you won’t know if something is good until you’ve tried it. At least that’s what I’ve told chicks a long time ago at the back seat of my car, I was quite the international playboy like Agent 007.
The effects of distortion can easily be seen depending on your subject and where you place your lines. It’s not something that should prevent you from taking pictures of architecture because it’s not ugly at all. In fact, it adds a little bit of charm to your pictures, making them look a little bit more organic.


(Click to expand)
As you can see, only one of the pictures have an obvious bulge at the center even if I was taking pictures from the front, it’s all about positioning your lines. Sure, you could see it if you looked for it but is it that bad? I could certainly live with it especially at this level. Imagine how old this thing is, there are lenses that were made recently that shows even worse performance than this. Isn’t it impressive?


(Click to expand)
This is for the videographers. I’ve cropped the pictures with a 16:9 aspect to give you an idea how it looks like. This is a good lens for shooting video but you should use a heavier grease or a rig that will give you a lot more turns in order for you to rack your focus more precisely because the focus throw is kind of short.


(Click to expand)
Here’s the rest of the roll. Man, I really like this lens a lot for shooting with film, this is a keeper! But this is a lens that only shines for shooting on a sunny day since you’re able to stop it down to f/11 which I see as its best aperture setting. I wouldn’t dare shooting with it in the dark even with a fast film, it’s just not that enticing at all specially considering how expensive film is today, I am not Elon Musk.
Man, is this is a good lens or what? It’s not very appealing when you look at the tests but the photos that were taken in real world use speak louder. This is also a very good lens for video as it’s not that expensive at all. The wide rim will allow you to attach all sorts of things to it using tape. I can highly recommend this to anyone who knows what they are doing. There are better options for the majority who just wants sharp and perfect pictures, and they can be cheaper, too. If you shoot with film and you’re willing to put up with the things that I have mentioned, this is something that you must have. These are not rare at all so it your budget won’t take a huge dip. It’s common to find these for under $400.00 in great shape so don’t spend more than that unless it’s a complete set in immaculate state. By complete I mean it has to come with the special hood, no matter how pathetic it is. It has its use which is for you to be able to attach system filters and attachments to the lens. Check the glass and make sure that it does not have balsam separation. It is hard to tell but it’s easier to detect it while looking through the rear. This lens has many cemented groups so it’s more susceptible to this issue. Make sure that there’s no fungus, debris, and other nasty things. It is easy to clean some of them but you won’t be able to reach all of them easily, some are even impossible! I got lucky to have bought a dirty lens with very clean glass for $300.00! Operate the focusing and aperture rings and make sure that they turn properly and smoothly. Check to see if the wide front ring has dings. It will be difficult for you to attach the hood or other attachments if this part is dented or warped. Lastly, see if the iris is oily. Actuate the iris several times, it should be snappy and not sluggish. An oily iris is not what I would call a deal breaker because I usually overhaul my lenses anyway but it’s better to avoid it. Just do not forget what I have told you and never pay more than what is right because you don’t want to feed all the fuckers that jack up the prices of used camera equipment, these people are what I collectively call the “Camera Mafia“. They’re nefarious and the scum of the hobby, they are only out for your cash! Be patient and it is possible to get a great deal like I did.
Before We Begin:
If this is your first attempt at repairing a lens, I suggest that you see my previous posts regarding screws & drivers, grease and other things. Also read what I wrote about the tools that you’ll need.
I suggest that you read these primers before you begin:
- Essential tools
- Best practices 1
- Best practices 2
- Best practices 3
- Ai conversion
- Working with Helicoids
Reading these should lessen the chance of ruining your lens. Before opening up anything, always look for other people who have done so on the internet. Information is vague and scattered but you can still find some information if you search carefully.
For more advanced topics, you can read my fungus removal article. It has a lot of useful information, it will be beneficial for you to read this. I also recommend that you read the working with helicoids article so you will not get stuck because you couldn’t reassemble the helicoids back properly.
Disassembly (Barrel):
The construction of the barrel is similar to the Nikkor-UD 20mm f/3.5 Auto. I don’t consider this a difficult lens to dismantle but it’s still challenging enough for a novice to work with. One must have the right tools and experience to work with this lens. It’s expensive so it is not suitable for practice. If your lens needs to be serviced, look for a reputable technician to take care of it. If he is not familiar with this lens, show him my article so it will help him do a good job.
As usual, do not forget to take as many reference photos as you go so you’ll know how to put things back again later.
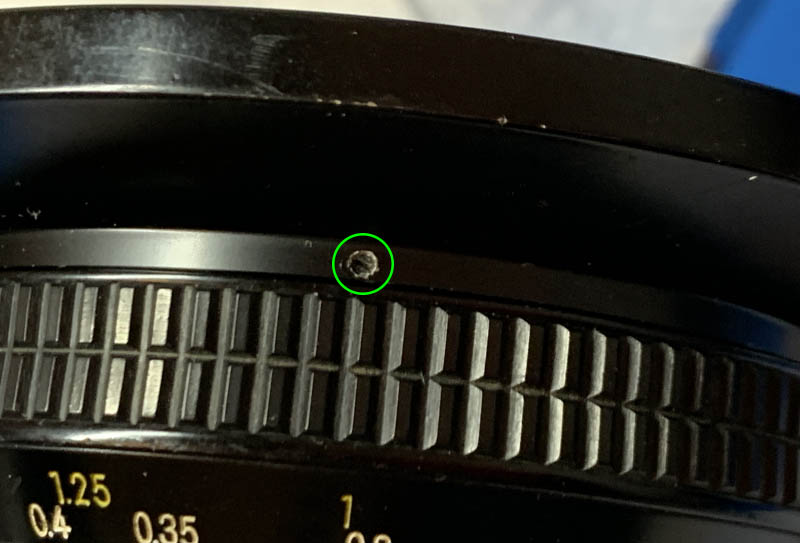
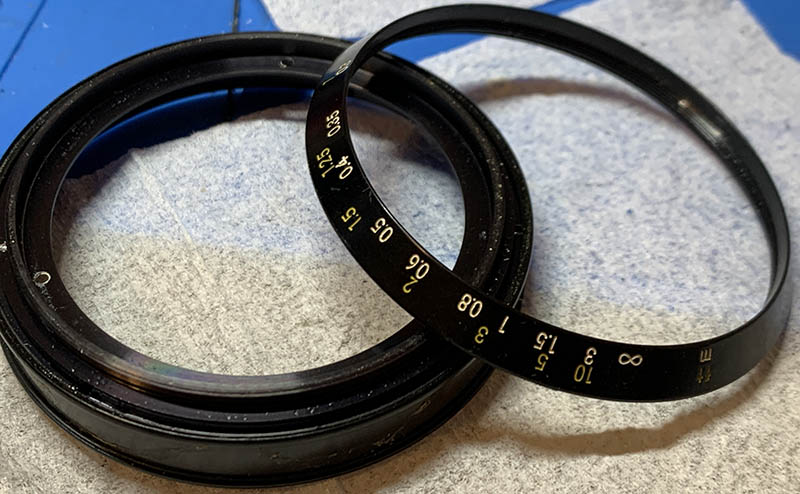
We begin by extracting this screw so we can remove the front ring. It may be sealed so place a tiny drop of acetone to soften the paint or whatever it is if this won’t come off easily.

Unscrew the front ring off, it may be tight so you may need to channel the Power of Gay Skull.

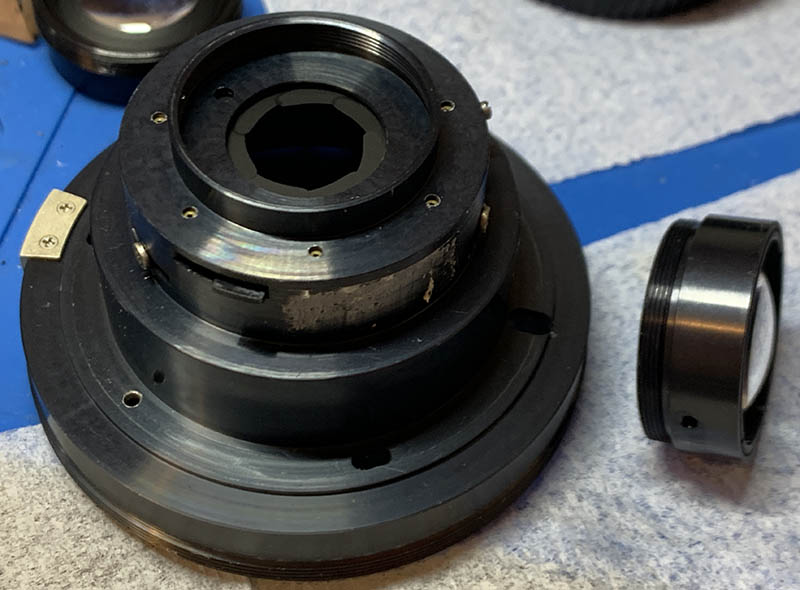
The front optical block should be removed next using a lens spanner. You must be careful because you may scratch the front element and make it ugly. Store this thing in a safe place while you work.

Extract these 3 screws in order to remove the objective’s housing. You don’t need to take any references, it has a small pin that serves as a guide so it’s guaranteed to be in the correct alignment every time.

Pull the housing off once the screws are gone. It’s in the classic Tower of Babel shape that is common to a lot of very wide lenses.

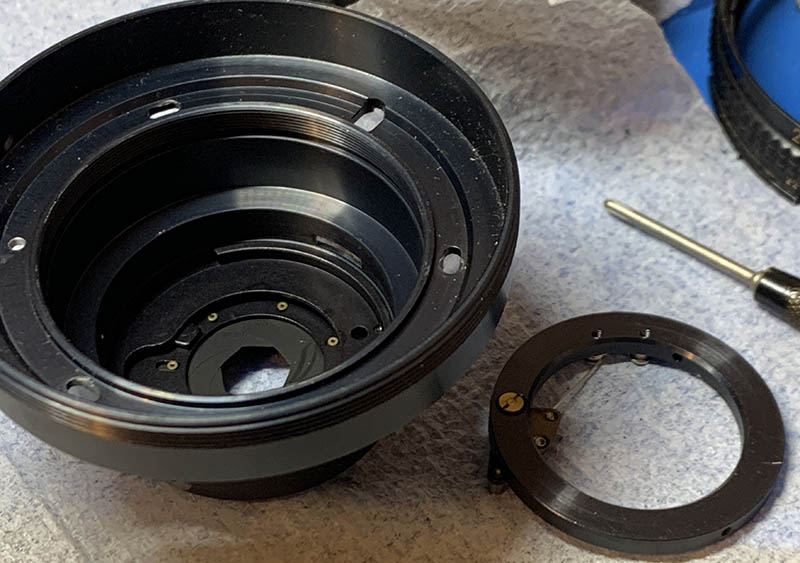
Carefully extract the screws from the lens mount, read my article on how to remove bayonet screws so you won’t strip them. Do not ignore this warning. Remove the bayonet mount and you should not dismantle it any further unless it’s broken or dirty because it has bearing balls that can be difficult to put back. Ignore the fact that the housing is still in the barrel in this photo, this is the correct sequence.
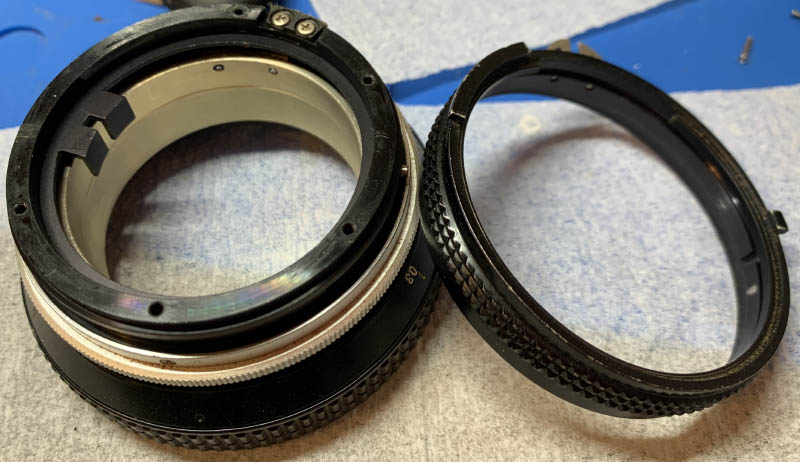
Carefully pull the aperture ring off, be sure it won’t snag on anything while doing so.

Let’s go back to the front, you can actually do this right after removing the housing. I made a small mark so I will know how the focusing ring is aligned to the helicoid underneath it.
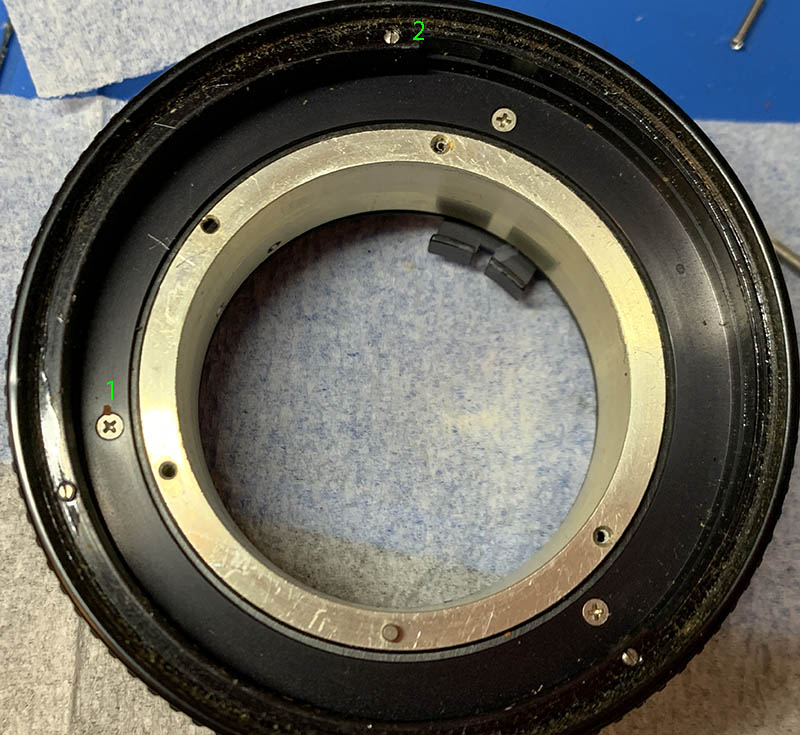
The screws marked as #1 secure the focusing ring, while the ones marked as #2 secure the focus adjuster. For now, just remove all the #1 screws to remove the focusing ring.
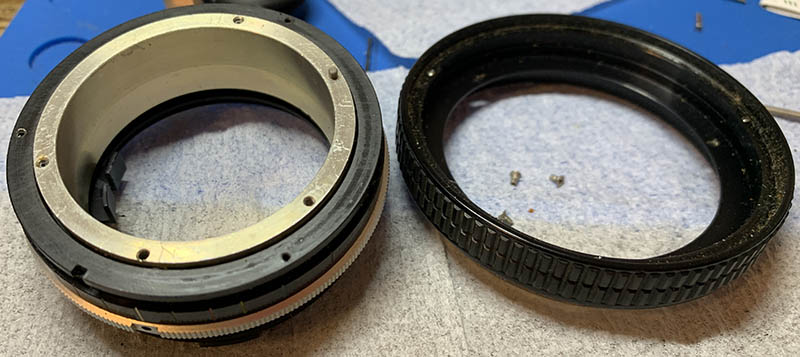
The focusing ring can be easily removed just like this.
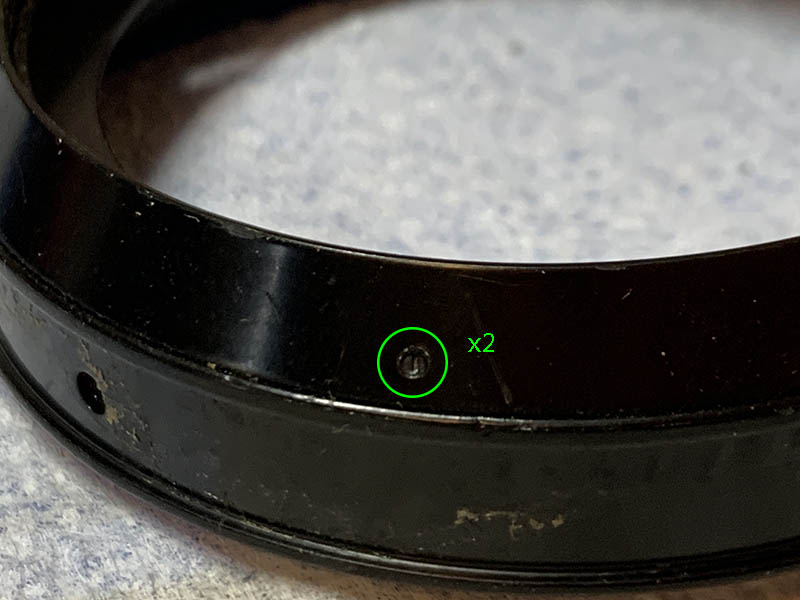
Locate and carefully extract these to remove the distance scale. It’s not required but it will allow you to clean the lens thoroughly because germs can hide here. These 2 screws are tiny and may also be sealed so a drop of acetone should help soften it up.
Unscrew the distance scale ring off. See how dirty it is underneath?

These screws secure the focus adjuster, they are labeled as #2 a few steps back. I did not remove mine as one of the screws got stripped since it’s brittle. Loosening these will allow you to turn the focus adjuster, I did not bother with it so I don’t have to readjust the focus later during reassembly.

Carefully remove these screws, the tall one couples the aperture ring to the iris mechanism. The screws on the silver part secures the grip and depth-of-field scale to the inner barrel, there’s 3 of them.

You may also want to detach the spring, but don’t forget to mark it’s original position first.

Removing the spring will allow you to pull the grip off safely so it won’t catch the spring.

Remove the grip along with the depth-of-field scale. Don’t dismantle this because it’s glued.

Carefully extract the screws of the helicoid key. You may want to heat them first just in case. Stripping the screws is out of the question because it will be difficult to extract these safely.

Unscrew the central helicoid until it separates. Do not forget to note where they parted since it’s also the same spot where these should mesh. Many people forget about it so they get stuck guessing where these should mate. To prevent this from happening to you, read my article on servicing helicoids and follow my guide to the best of your ability.

Do the same for the inner helicoid and never forget to mark where they parted.

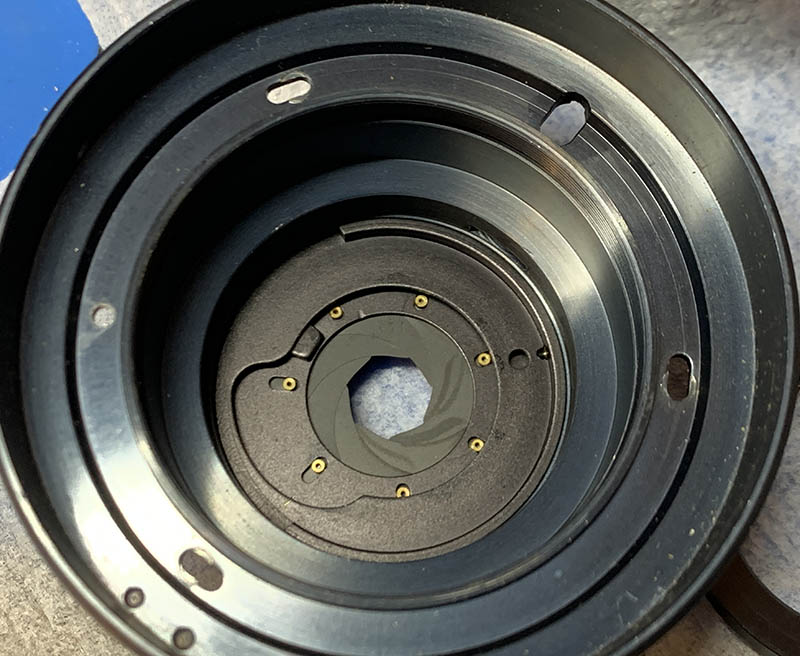
Finally, remove the brass circlip and pool the aperture coupler ring off from the inner barrel.
I cleaned all of the big parts with a strong toilet cleanser – the grainier, the better. I scrubbed everything using a brush then rinsed them all very well with hot water before making a final rinse with pure alcohol to remove any remaining residue. Pay special attention when cleaning the helicoids or the other threads, they are fine in some places and they can be caked with gunk, using a wooden toothpick helps here for stubborn deposits. Dry them well before you continue. When lubricating, be sure not to apply too much, all you will need is a thin film of fresh grease. Combine the helicoids then exercise them by turning several times, this will ensure that the grease is applied evenly then wipe off any excess oil. If you’ve applied too much grease it will settle in the iris mechanism eventually, necessitating the need to open it again just to give everything another overhaul.
Disassembly (Objective):
We won’t be taking apart the optics since it’s still clean and I’m too lazy that day, I just wanted to get this over with. There’s nothing special about the optics so you should be able to take yours apart easily. Read my other articles so you’ll be familiar with the process. However, I had to dismantle the iris mechanism as I wanted to clean everything very well.
A warning about taking apart the optics, always mark which side should be facing the front because it can be very confusing sometimes especially if a lens element appears to look symmetrical, they’re usually not!
We begin by removing the rear optical assembly. Set it aside in a safe place while you work.

Remove these, A is a pin that allows the aperture ring to couple with the iris mechanism inside. B is used for securing the diaphragm adjuster inside.
Carefully pull this thing out but don’t forget to note its original alignment because it’s adjustable.
Study the parts and how they work to familiarize yourself with it.

You can remove the other parts of the diaphragm with your fingers but be careful not to damage the aperture plates in the process.

This is how the aperture blades are arranged. You must be very careful when removing them because they are delicate. I push them from behind through the pins as it’s the most rigid part of each blade.
Each leaf was cleaned very carefully with Q-tips soaked in solvents, I used Zippo fluid for this as alcohol is not the right solvent for the type of grease used. Be sure to handle these carefully, accidentally destroying one is out of the question.
If your lens has fungus, read my article on how to clean lens fungus, just make sure that you dilute it with distilled water so it’s not going to be too strong as it may damage the coating.
Never lubricate the iris mechanism, if you must, a light dusting of powdered graphite is enough, blow off any excess powder after actuating the iris several times to finish the job.
Conclusion:
I have waited for a long time to purchase one of these so I can present it to you. I was expecting to learn a lot of new things from my experience with it but it turned out to have a familiar layout so it took me a few hours to overhaul the whole thing. Not having to clean the optics enabled me to overhaul this within 5 hours so I went to sleep early that night. Despite of that, I had a great time with this project. I’m happy just to be able to own and overhaul one of these, and present it to my dear readers. There’s not a lot of information about this lens specially regarding its repair so I hope it’s a welcome addition to my site.

It looks so clean and beautiful after the overhaul, you can now see its original colors. The dust and mold are now gone and the focusing ring operates so smooth.

I also removed the front element because there’s plenty of dirt stuck underneath its retainer. I cleaned all of the gunk out to the best my ability.

This is such a joy to use after the overhaul, it feels as good as new. I will be able to use this for many years to come. This is the joy of shooting with manual lenses, but they never get out of style.
I guess that’s it for today’s article! I don’t think this lens is popular enough for people to cover it and that is one of the reasons why not a lot of people knew about it. I don’t see a lot of reviews about it nor guys looking to repair one of these. There’s also a lot of conflicting opinions about it but this article should be a defining resource for my readers. Did you like this article? If so, please consider supporting my work by leaving me a little tip. Unlike the exorbitant amounts that fast food workers demand these days even if it is just handing food from the counter to your hands, the tip you leave me is very small and it contributes to the longevity of this website. This ensures that more people will read about it in the coming years. It’s a labor of love that you won’t find anywhere else. Many bloggers put out mediocre articles just to keep up with numbers and invest in absolutely nothing but recycled content, but this is not one of them that’s why the content you see here is amazing. I do my best to purchase, develop, and scan film from my own cash so that little tip from you helps me offset the cost. Thank you very much for your help, come back again later for more of my articles, Ric.
Help Support this Blog:
Maintaining this site requires resources and a lot of time. If you think that it has helped you or you want to show your support by helping with the site’s upkeep, you can make a small donation to my paypal.com at richardHaw888@gmail.com. Money isn’t my prime motivation for this blog, I believe I have enough to run this myself but you can help me make this site grow.
Leave me some tip?
Thank you very much for your continued support!
$2.00
Helping support this site will ensure that it will be kept going as long as I have the time and energy for this. I’d appreciate it if you just leave out your name or details like your country’s name or other info so that the donations will totally be anonymous. This is a labor of love and I intend to keep it that way for as long as I can. Ric.
