
Hello, everybody! Have you ever felt disillusioned or infatuated about going on a vacation to an exotic destination that you have always wanted to go? Your head is filled with expectations of what French society is like, British cuisine, Japanese hospitality, or even Indian mysticism. Upon arrival, you couldn’t believe yourself and thought that you have arrived in Pakistan, with ninjas all over the place. The food tasted bland (no wonder they’ve conquered the world!), Tokyo is filled with mainland Chinese peasants, and the spirituality is gone as you get blocked by hordes of scammers and olfactory assault along with rubbish. My friends, this is called “Paris Syndrome“, when a person suddenly has a mental breakdown because their expectation of a place is not what they’ve experienced. It’s good if it’s just that, but some people have lost their lives and dignity. I am sad to share that I felt that way but not about a destination, it’s about a lens. I have always wanted one, but after owning it and reading the numerous issues surrounding it, I was not very pleased at all! All those years, I have always thought that this is the ultimate lens of its class and it all proved to be just an illusion, a sad event in my Nikon journey. Read the whole post and you shall know why.
Introduction:
The AF-Micro-Nikkor 60mm f/2.8G ED needs no introduction since it’s a recent lens that was only discontinued a few years ago. It is also the last of a long line of Micro-Nikkors for the F-mount that started from the Micro-Nikkor-P 55mm f/3.5 Auto. It signals the end of an era where it’s replaced by the Nikon NIKKOR Z MC 50mm f/2.8 which I consider to be an inferior lens because I have an attachment to the F-mount ones. It replaced the AF Micro-Nikkor 60mm f/2.8D which was still being made concurrent with this up to a certain time because of just how good the older lens is. I was infatuated with AF-Micro-Nikkor 60mm f/2.8G ED and wanted it so much since 2008 when it was still relatively new. The reviews sang praises of it because of its optical excellence, but it hides an ugly truth, one that will forever change my impression of this lens.
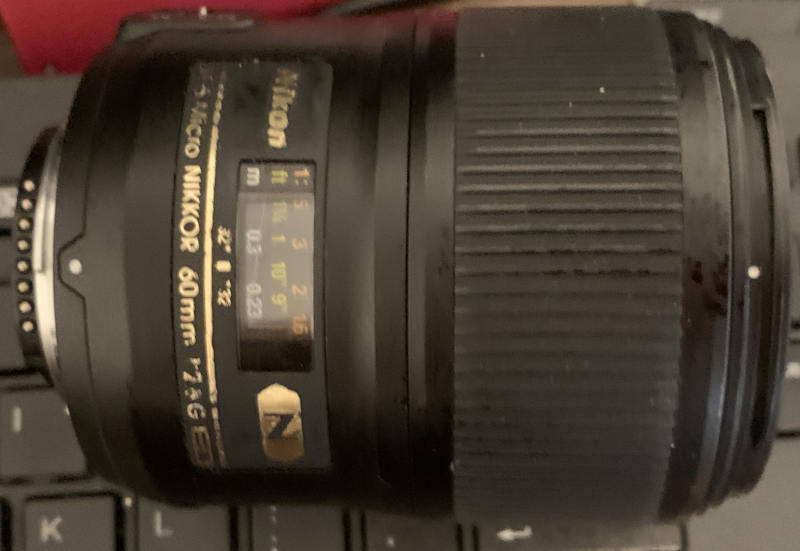
It’s kind of chunky for lens of its class and the interface is minimal, with only a switch and a focusing ring to operate. The build quality is excellent, better than many contemporary Nikkors and it’s sealed from the environment, too. Nothing moves while you use it, nothing racks in-and-out, everything is contained within the body so the size doesn’t matter in this context. Despite the use of plastics all over it feels solid, if it were to have a metal shell then it will be much heavier which won’t be good at all.
It has an impressive 12-elements-in-9-groups design which has one ED element, two aspherical ones that were coated with Nikon’s best like Nano Crystal Coat & Super Integrated Coating. The iris has 9 blades which are curved that ensures smoother blurs. It has the Silent Wave Motor (SWM) from the 2nd or so generation so it’s a little bit more reliable, but still problematic as you’ll soon see why. It’s also able to focus down really close like all lenses of this class and can go down to 1:1 on its own. Lastly, it’s all internal it has no moving parts externally that’s why it’s easier to make it sealed from the environment with the use of several gaskets. All the crazy specs I’ve mentioned points to an impressive lens on paper but it sucks big balls in reality. While it’s good optically, it’s not a lot better than the AF Micro-Nikkor 60mm f/2.8D. In fact, this one has more vignetting wide-open! On the other hand, most of the optical aberrations of the older lens are mostly gone. What’s truly bad about this lens is how its autofocus performs, which we shall read about in the next paragraph.
Searching the internet for faults about this lens will lead you to several, if not many complaints pertaining to its poor autofocus. It’s common to read that it gets stuck in confusion if you’ve accidentally focused on something that it was not able to resolve where it’s stuck at either end of the focusing range. Restarting the camera or removing the lens while the camera is either On or Off fixes it. It is also consistent and appears to happen with new lenses that are only several days old from the shop from field-abused ones. They can start showing this issue after an impact, a long period of inactivity or just about anything. I only found out about it after mine showed signs of this annoying issue. I have tested it with many cameras, from the Nikon D200 up to the Nikon D4s and Nikon Df and it happens consistently except for the Nikon Z fc which shows more promise but still gets it occasionally. For this reason I will only talk about this lens when used with the said camera. Besides, this lens has been reviewed to death in the past 2 decades that it will be pointless for me to add to the existing information online,
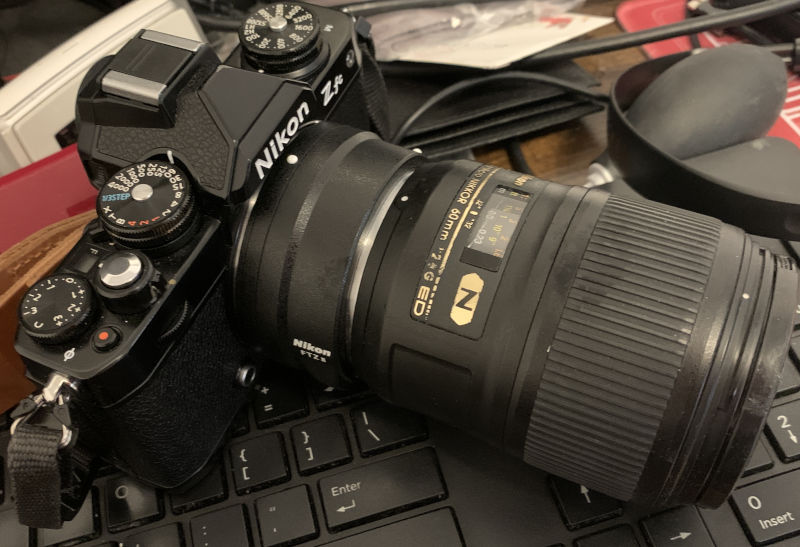
This is how it looks like with the Nikon Z fc and the Nikon FTZ-2. It feels kind of awkward with a mirrorless camera but it’s great with a DSLR such as a Nikon Df. It is the only body that I have tested and it’s the only one that works decently with this lens. There may be other cameras that perform more reliably but I don’t have any in my collection.
Like what I said, I won’t be wasting my time writing a review of it because many people did that and they did a better job than me! However, nobody wrote anything about it in the context of shooting it with a mirrorless camera! That’s what I will do, you will see more about how it handles with a Nikon Z fc and my impressions shooting with it. Not so much with the optical stuff but the actual feeling of using it.

Autofocus isn’t the best, it could keep up with bugs even on windy conditions but the focus ain’t optimal. It will be difficult to get critical sharpness like you would on a DSLR.

Acquiring focus is easier when shooting at wider apertures since the lens takes in more light. If I recall, it focuses while the iris is kind of closed instead of always being open like it is with a DSLR. Please correct me on this since I saw this myself and at times it shows something different, with the iris slightly actuated then closing just at the moment of making an exposure.

It’s easier to create pictures with the critical sharpness I was talking about if the subject is still. That’s obvious and I do not need to explain why.

Because of the nature of shooting an adapted lens even if it’s an F-mount one, exposure is usually off in my experience. It’s always a bit darker, maybe by 1-2 stops. This is annoying because everything looked fine in the LCD.

The autofocus can get confused with a subject like this, even if you have picked the area yourself. It is a different kind of challenge that I wasn’t used to.

Shooting with a mirrorless camera felt awkward because you’re peeping through a tiny hole into a tiny TV, it just doesn’t feel right to me and can be straining to the eye. However, focus-peeking is nice but it can also fool you into thinking that you have nailed the right focus when in fact it’s not even there. This kind of scene is a perfect example of what I am talking about.




(Click to expand)
I don’t know what to make of it, while it’s usable it’s not something that I enjoyed. I have been into macro photography for decades and it just doesn’t feel right to me. If you’re serious about it, just invest in something with a pentaprism and your eyes will be really happy that you did. Maybe if you’re shooting with a stand with a subject that don’t move like coins and dead bugs inside a studio, it will certainly be better because you’re able to see closer to what you’re going get. For shooting in the field, I’d prefer a setup that is a little more “real”, not virtual. It’s like having sex with someone on ZOOM. It feels like it, but it’s not the same thing.
I can’t recommend this because of the stupid autofocus issue that I have mentioned. Instead, just look at Tamron, they made a few lenses that are similar to this. I am not aware of any autofocus issues nor anything at all with them so do your own research! Sigma also has a few if I recall, but their older lenses suffer from skin disease as the rubber degrades. If you’re stubborn and wanted one, I will caution you by insisting that you test your prospect. Focus on something blank, like a wall then try and see if the autofocus is not stuck when focusing with a normal scene. If it is, restart the camera or take the lens off then put it back again just to see if that will put it back to normal operation. If the lens does this, skip it or haggle for a heavily discounted price. I got mine for well below the market price online because it’s sold as junk since it’s inoperable and it’s rough, like it has been held hostage in a kebab shop. It has definitely seen better days. Do not spend more than $200.00 on one, even if you did not your lens should be perfect or in mint condition. By mint, I mean like new and not what Japanese sellers describe as mint. The hood is useless for macro photography, it will get in your way when shooting at closer distances. It’s up to you, it’s your money after all not mine!
Before We Begin:
If this is your first attempt at repairing a lens, I suggest that you see my previous posts regarding screws & drivers, grease and other things. Also read what I wrote about the tools that you’ll need.
I suggest that you read these primers before you begin:
- Essential tools
- Best practices 1
- Best practices 2
- Best practices 3
- Ai conversion
- Working with Helicoids
Reading these should lessen the chance of ruining your lens. Before opening up anything, always look for other people who have done so on the internet. Information is vague and scattered but you can still find some information if you search carefully.
For more advanced topics, you can read my fungus removal article. It has a lot of useful information, it will be beneficial for you to read this. I also recommend that you read the working with helicoids article so you will not get stuck because you couldn’t reassemble the helicoids back properly.
Disassembly (Rear):
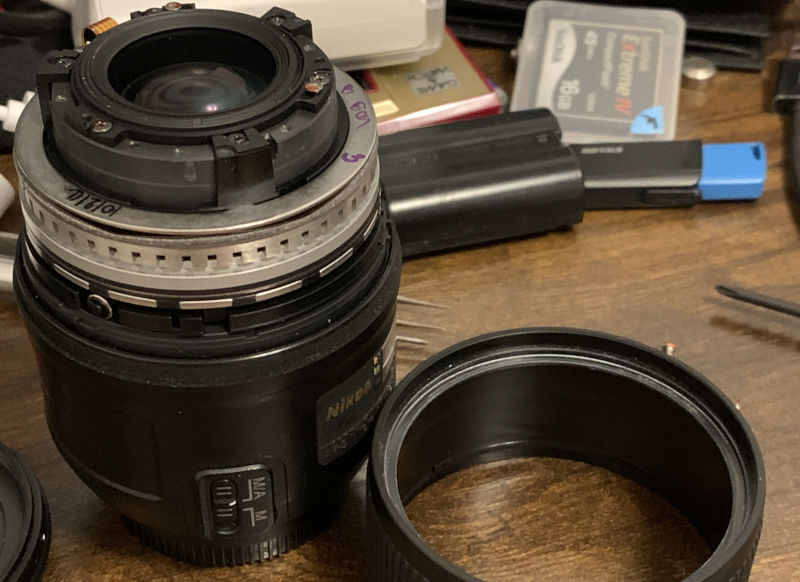
Taking this lens apart doesn’t take much, it’s one of the simpler designs from this era. However, one must still be careful with it as it still requires experience and dexterity to take apart and put back. This thing came to me with a broken aperture that won’t remain open and you should soon see why. It was caused by an inexperienced attempt at fixing whatever problem was there, if there’s one.
Before you begin, be sure that you have antistatic equipment as the slightest static discharge will brick your lens when you touch it with your bare hands and fry the electronics. Be sure that you have the right drivers as outlined in the section before this. If you are not comfortable with it, send your camera to a real repairman and have him deal with it. If he isn’t familiar with Nikkors, send him my site and let him follow it. If he still isn’t able to comprehend what he’s about to impart then find another guy for the job!
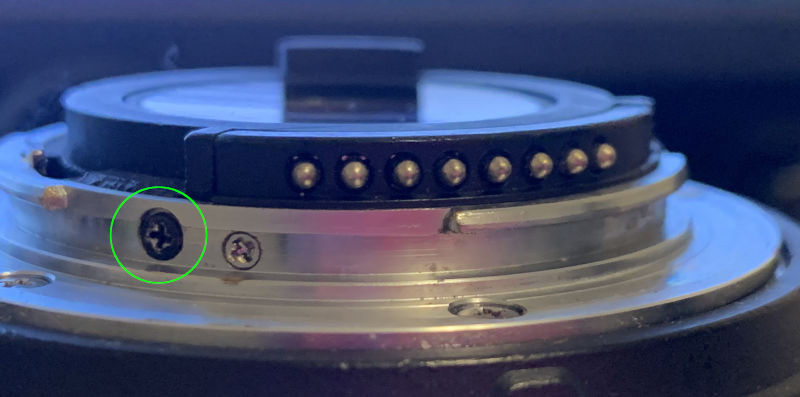
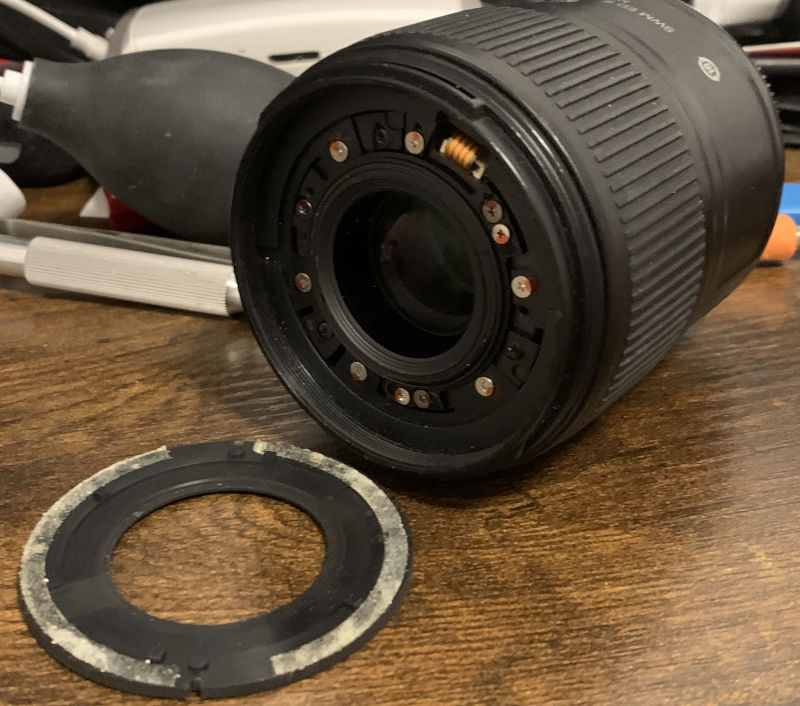
Locate and extract 3 of these, they secure the rear baffle. I am not sure why one of them is black, maybe for diversity?
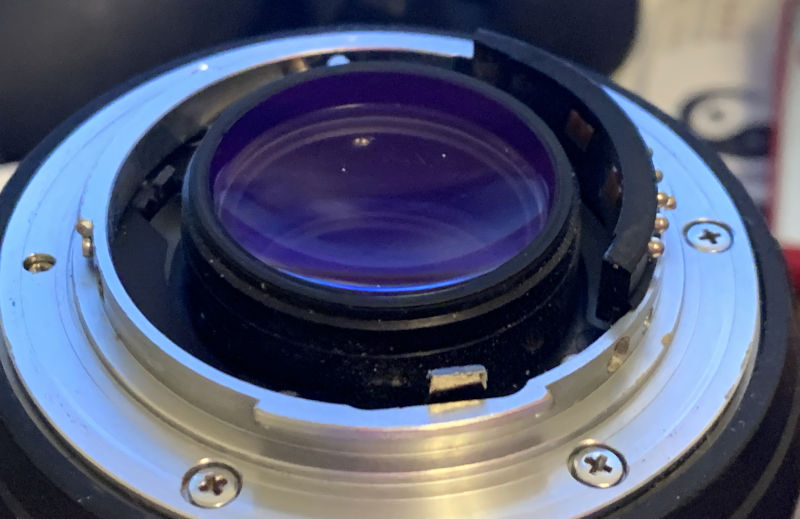
Carefully remove the baffle with your fingers. Next, extract the bayonet screws. Read my article on how to remove screws so you will know how to deal with these. Many people strip them because they lack the tool and savoir-faire to tackle this. As you can see here, one of the screws is stripped and replace with another type. A mark of an inexperienced tinkerer, it’s not looking good!
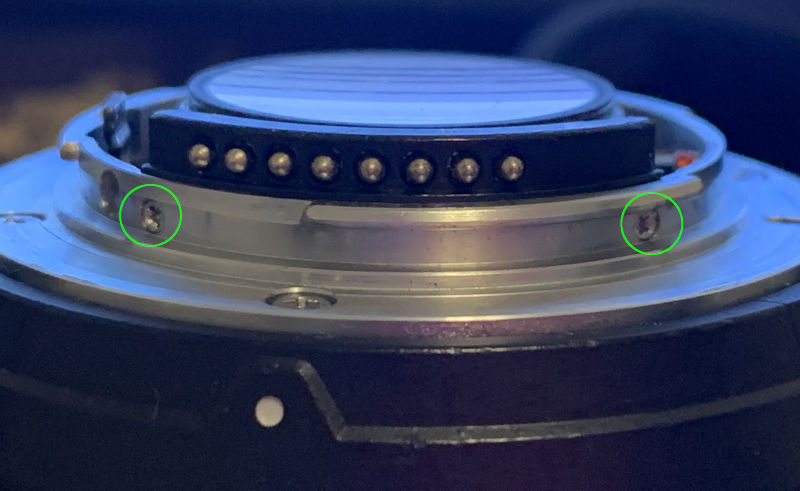
Carefully extract these so the contacts block isn’t fixed to the bayonet mount anymore. Apart from what’s been shown, don’t extract anything else, most specially that tall screw at the 6:00 position! That should remain untouched, forever!
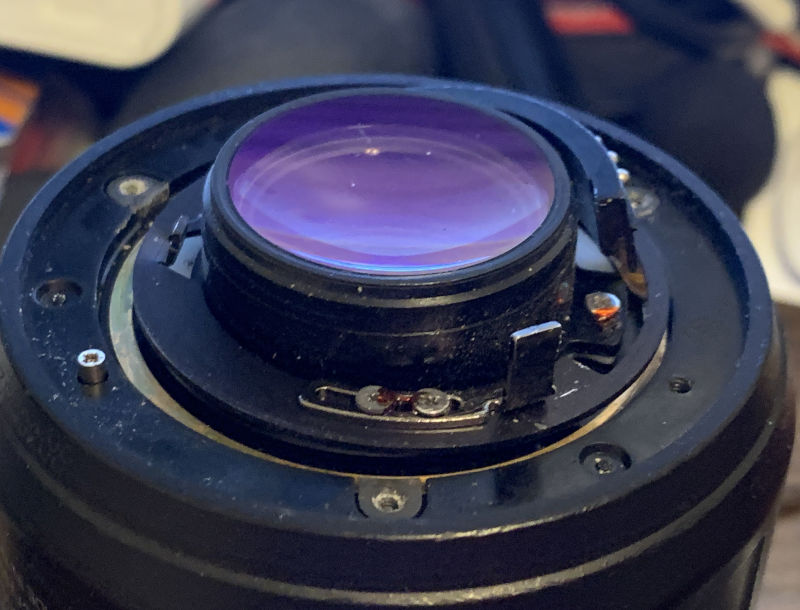
Carefully remove the bayonet mount. At this point I already knew that somebody else screwed this up because the assembly isn’t intact. The stop-down lever and its retainer are all loose! The spring isn’t connected, too. I am just thankful that nothing is missing. What happened here is the previous guy thought that the retainer ring is a shim and put it back like this.
One very important reminder! At this point when the bayonet screws are gone, the lower half of the shell can be removed! You will accidentally drop the lens if you held it by the rear barrel so reinstall the screws again or at least 2 of them so the lens won’t fall or separate as you handle it.
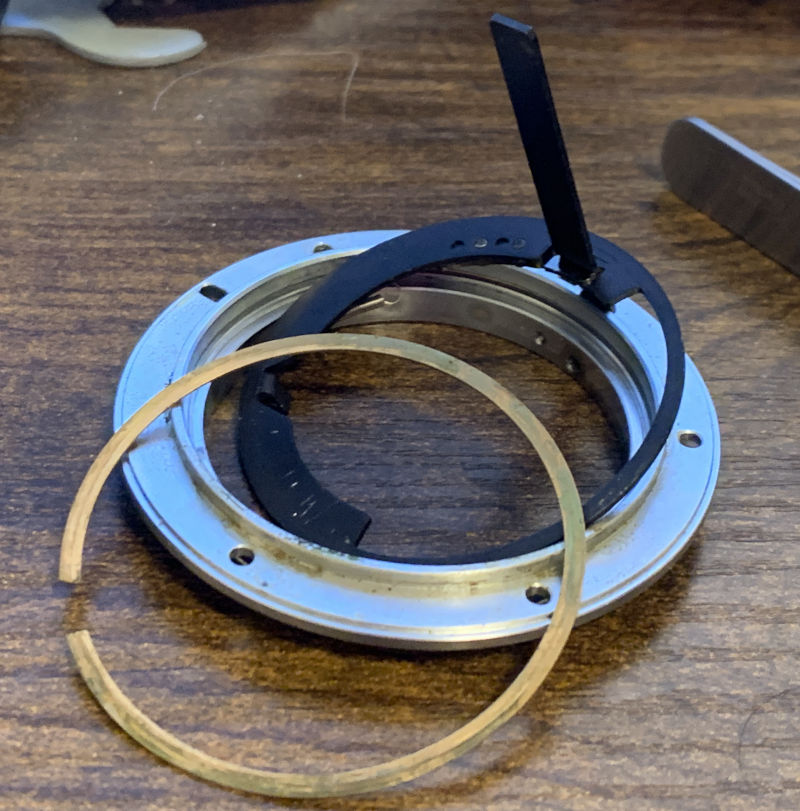
I had to put it back after cleaning everything up. This should be a single assembly together with the spring. The lever has been bent and the ring is warped. Sanding and bending it back to shape helps but it’s not as smooth as I wanted it to be. I am just happy that it is working, at least it’s better than having to source parts or make them myself.
There’s nothing much to do here, I did not remove the rear optical assembly and clean whatever is there as I didn’t see the dirt until much later when I have already put things back!
Disassembly (Front):
The front is easy to take apart, there’s nothing special and things were designed in a way to make maintenance a breeze. This is the most delicate part of the lens because the front optical group is in charge of centering the image. A misalignment here will become visible because your picture won’t be sharp! I will tell you how to prevent this from happening so read my notes very well.
The front is stuck with tape, you can peel it off easily with a hooked tool inserted into the slots from the front. Carefully pull it up so you won’t crack it and apply even pressure as you do it.
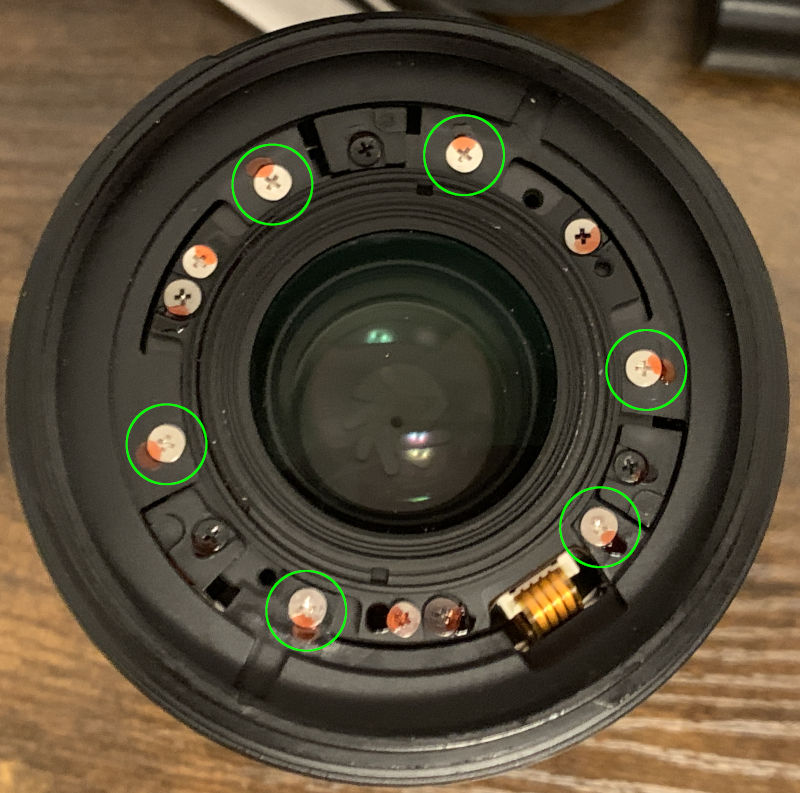
Extract these screws to remove the front ring and only these! The other screws are for adjusting the front optics and should never be touched at all cost unless there’s a serious case of fungus. If you must, be sure to mark the original position and alignment with a marker first.
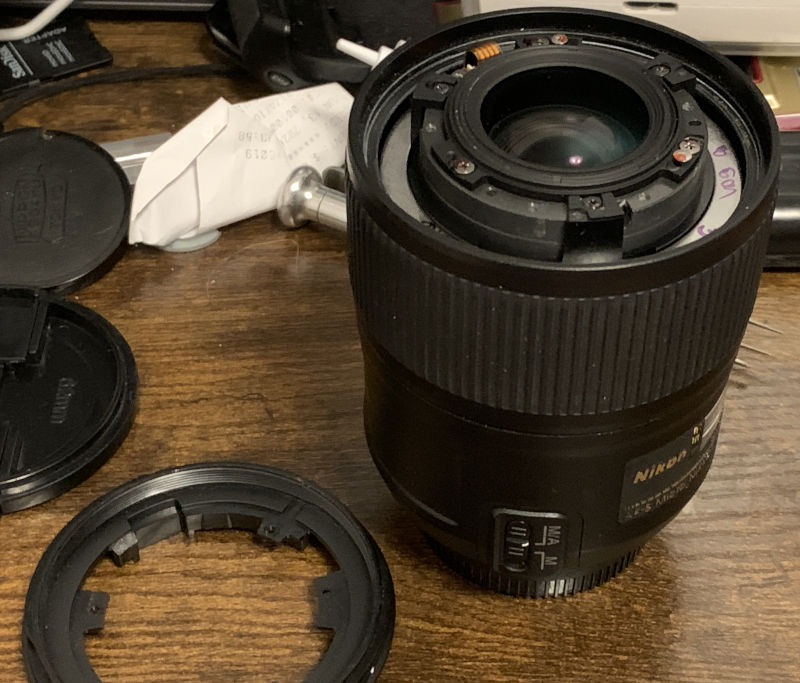
Once the screws are gone you’re able to remove the front ring.
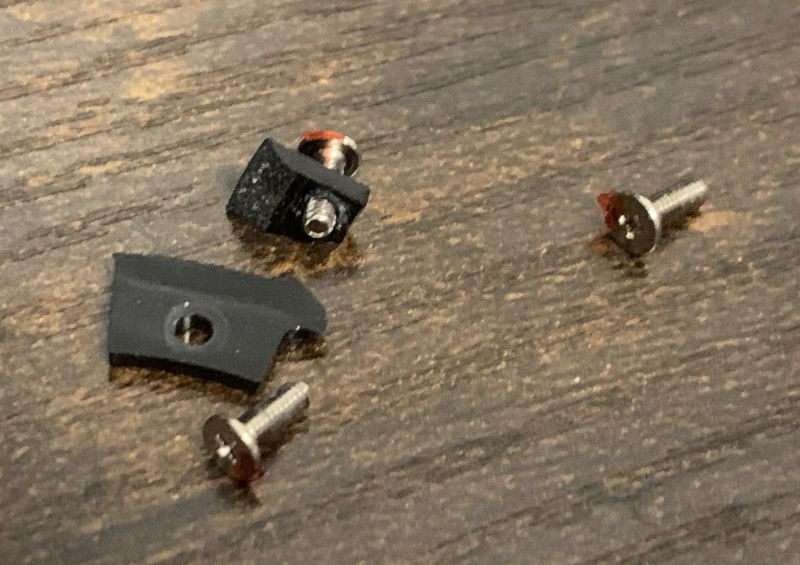
I am not entirely sure if I caused this but some of the tabs were cracked/broken. I could not have caused this, it may have been a violent drop or concussion that caused this. The focusing scale window is cracked as well so it may indicate past trauma.
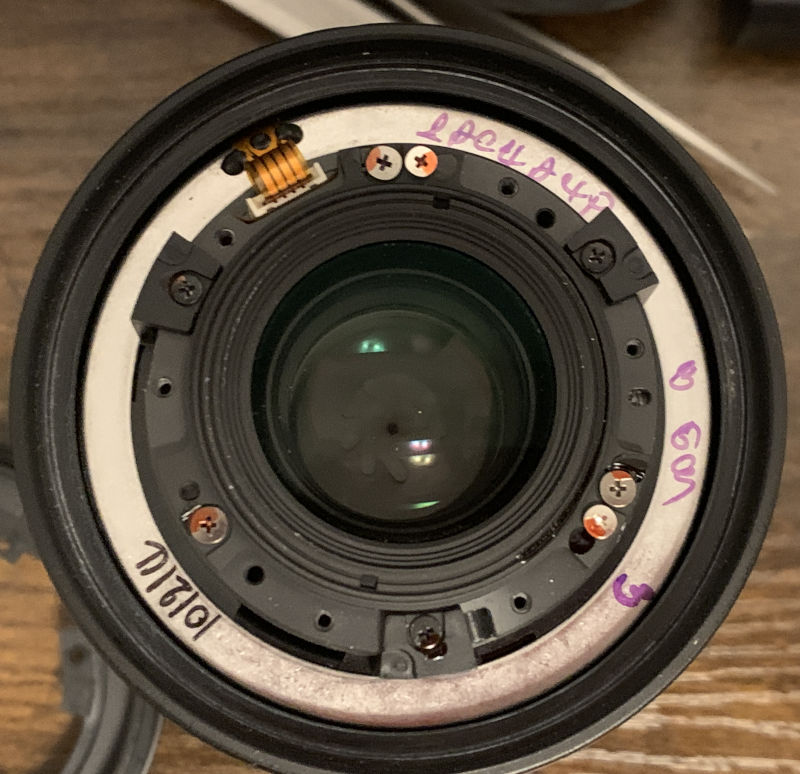
There’s nothing much to do here. I did not notice the dust inside while taking this apart or else I would have opened it earlier and blew it away. I only saw it much later and I wasn’t in the mood to reopen it.
The focusing ring simply slides out like this with no resistance. From this point on, be careful with your fingers!
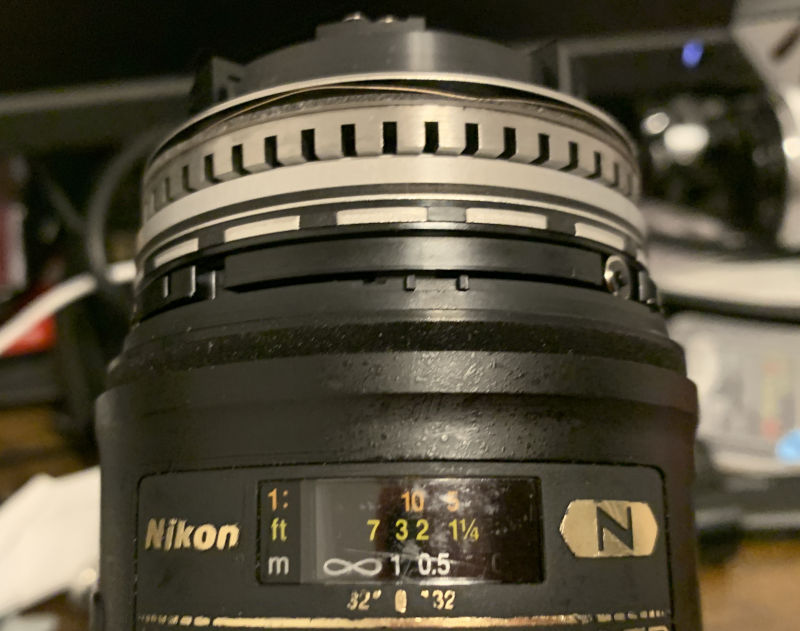
The motor is now exposed, you’re free to clean it in this manner or blow some air to get rid of any dirt. Just make sure that you are not using a strong blower as the dirt could find its way deep within the optics and you’ll have a bigger problem.
Never touch the rotor/stator (the motor, basically) with your bare fingers as the oil can damage it! Only clean them with a lint-free material and pure alcohol or lighter fluid! Wipe at the outer surface lightly to remove oil. The most sensitive part is where the rotor and stator meet. You can wipe them carefully with a small Q-tip. I use a special one that fits perfectly.
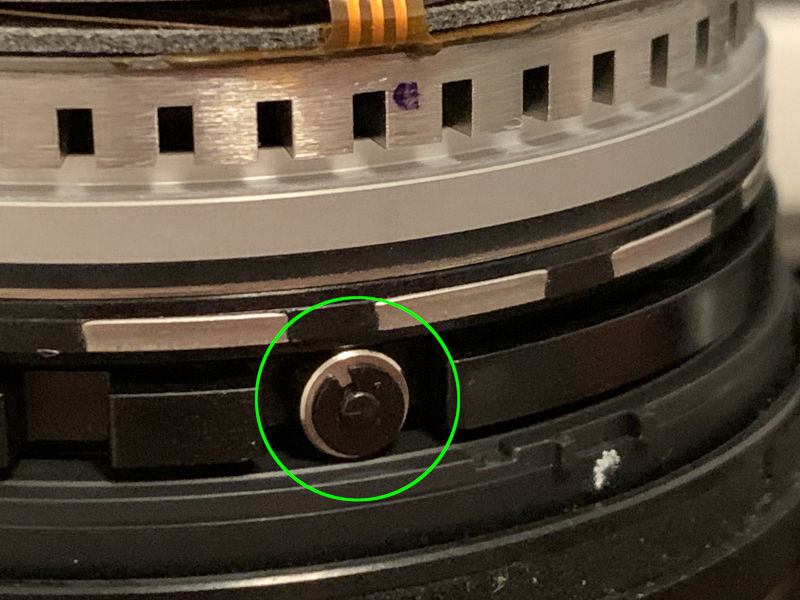
The rollers are notorious for getting gummy, adding to the resistance the motor has to face. Don’t dismantle them, just take a Q-tip and saturate it with solvent then wipe the bushings/circlips clean. A smaller Q-tip should be used to clean the roller’s surface where it comes into contact with the rails. Rotate the motor with a (rubber) gloved hand so you’re able to clean the rollers better.
Clean the inner surfaces of the barrels and focusing ring with a damp tissue with solvent, they tend to accumulate gunk there. Test the lens by mounting it on a camera and see if everything moves as they should. Put everything back once you are satisfied.
Conclusion:
It probably took me an hour or so to service this mainly because I was confused at what happened to the rear. I was lucky that the retainer is still there and only realized it by luck. If I were to do this all over again it’s probably going to take me less than an hour since the lens itself is simple and elegantly designed for easy maintenance much like a Toyota. After everything, I am just happy to have covered this for you and another milestone lens has been achieved. It took me 2 decades to find one with the right price and I am just happy that I am able to fix it despite the lens still acting poorly with focusing.
This is how it performs now. It should really be silent, more like a hiss than what you hear in this video. It won’t be that way unless I took everything apart and cleaned it thoroughly. The metal parts of the motor needs to be as smooth as a mirror so one must clean them carefully. It’s too much for me to bother with at this point in my life that I have a new baby in my life.
I am glad to see you again! You see, a little angel came into my life last winter and I have been busy with her. I don’t want her little lungs to be exposed to the hazardous chemicals I use so I left my workbench the way it was when she was born. It has a Nikon M and a few other things in disassembly and I may not be able to put them back again. I don’t care because they can be bought again if I have to, this little girl and my time with her is irreplaceable.
Thank you very much for supporting my work. If you want to see more of this or just want to see this site up for as long as we can please don’t forget to support it. It’s not much, we give more to people who just bring us a glass of beer at a pub even if she’s ugly. I went to a Five Guys once and they asked me for tips and I gave them the stare and gave nothing. I don’t have jiggly bits and I am a bald Asian uncle but I believe that my work has touched the lives or many people. I was even told that some people come to see my site just for the jokes and not for my repair or reviews, that’s fine so long as I made your day. Thank you guys again and you’ll see more things coming in the following months!
Help Support this Blog:
Maintaining this site requires resources and a lot of time. If you think that it has helped you or you want to show your support by helping with the site’s upkeep, you can make a small donation to my paypal.com at richardHaw888@gmail.com. Money isn’t my prime motivation for this blog, I believe I have enough to run this myself but you can help me make this site grow.
Leave me some tip?
Thank you very much for your continued support!
$2.00
Helping support this site will ensure that it will be kept going as long as I have the time and energy for this. I’d appreciate it if you just leave out your name or details like your country’s name or other info so that the donations will totally be anonymous. This is a labor of love and I intend to keep it that way for as long as I can. Ric.

