
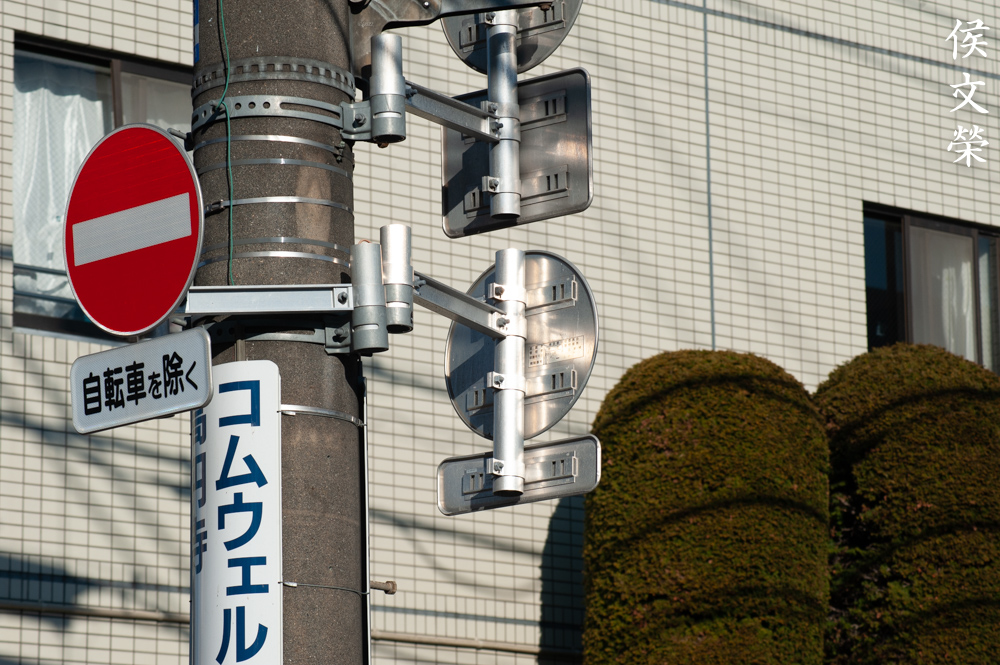
Hello, everybody! I’ve been watching some music videos and movies from the 1990s. I consider this era to be a “transition” era from “analog” to digital. Standards were not that well-defined yet, many things were in a state of flux until the mid-2000s where things began to take-shape. Many concepts from that era don’t appeal much to some people because they’re not “vintage” enough to be novelties or be tolerated for their flaws because the standards are too-close to what we consider to be the status-quo these days. They’re awkward but they play a huge role in forming many concepts that we have today so I think they require more recognition. Today, I will show you something from this era, it’s a bridge from the past that links us to the present. Many people do not give it the respect it deserves but without it we wouldn’t be enjoying some of the established lenses that we’re enjoying today. Read this article to learn more about the “Spice Girls” of Nikkors.
Introduction:
The AF Zoom-Nikkor 75-300mm f/4.5-5.6 was sold from 1989 to 1998. It was made to satisfy the need for a long 4x zoom that’s portable. It surely was until its successors were introduced which were all a lot smaller, lighter and made of plastic. To its credit, it replaced the Zoom-Nikkor 100-300mm f/5.6 Ai-S which was even heavier. It is also brighter and wider at the wide-end but it doesn’t have a fixed-aperture. That allowed it to be made with a more compact body which people were more than happy to compromise with. It proved to be quite popular thanks to its versatility, that “macro-gimmick” also allowed you to focus nearer, about 1.5 meters which is not that bad for a lens of this type back then. With it, you could shoot sports, journalism, fashion or anything else without the need to bring several lenses in your bag. It’s more about convenience, than image quality.

It’s a long lens so it comes with a tripod collar which helps keep your setup stable. You simply loosen the knob and adjust your setups orientation. It won’t click into-place at right-angles unlike some older lenses. The build quality is quite good, it’s mostly made out of metal, hinting that it was aimed at the professional market. It has a broad zoom-barrel which feels comfortable to use. The focusing ring isn’t as broad but it’s adequate. Using it manually doesn’t feel good at all, it turns lightly without much resistance or damping unlike manual lenses.
The optical formula is 13-elements-in-11-groups, quite moderate for a lens of this type. Image quality appears to be adequate but it won’t match the output you’ll get with prime lenses. The variable-aperture means that it will be a hassle to use it with manual Nikons but it was made at a time when people were shooting more with autofocus ones so the lens is able to communicate with the camera, telling it which aperture it’s at. This makes the camera compensate for any shifts in aperture value so you’ll get great exposure each time.

This is how it looks like when collapsed, it’s still long and it will require some space in your bag. Visible here is the limiter-switch, it’s used to constrain the focusing range so it won’t turn end-to-end when it hunts for focus. This is useful when you’re tracking moving subjects. The front turns as it focuses so keep your fingers clear of the focusing ring or you’ll impede its movement.

It’s best used with a larger camera such as a Nikon D3. Even with it the setup will feel front-heavy, something that we all have to bear with. It’s heavy carrying this over you shoulders or inside the bag, you’ll get tired and leave it at home the next day.

The mighty Nikon F5 and its brutal motor helps make it focus a lot faster. This was the setup of professionals back in their days, the setup feels great to use. The lack of stabilization is inconvenient specially at the longer range which limits its use to bright situations and being mounted on a tripod. There was nothing we could do back then but rely on our techniques and good timing to get a sharp photo with it.
Learning how your lens performs is key to maximizing its use. You will learn how to utilize its strengths and avoid its weaknesses. This knowledge helps in determining which lens to bring on a job. I shot these pictures from f/4.5, f/5.6 and f/8 at 75mm, f/5.6, f/8 and f/11 at 300mm and anything in-between at 135mm, these are the most common apertures that people would want to use it and we’ll see the most changes happen with these values. Some of the sets here were cropped close to 1:1 magnification so we could examine the details better. The photos were shot with my Nikon D3.


(Click to enlarge)
Distortion doesn’t seem so bad at the wide-end. It will curve a bit towards the center at 135mm where you will see some pincushion-type distortion. It’s strongest at 300mm but not as bad as I expected.


(Click to enlarge)
Vignetting is rather heavy wide-open, specially at 300mm. Stop the iris down by a stop and it improves quite a bit. It’s not as much of a problem once you’ve stopped the iris down by 2-stops.


(Click to enlarge)
It flares terribly and you’ll get generous amounts of ghosts where they appear as soft-looking blobs. I expected worse results but I wasn’t happy with this, either.


(Click to enlarge)
The character of the bokeh is rather poor at worst and mediocre at best. It’s difficult to avoid the ugly look and you won’t be able to anticipate it at times. Twigs, foliage and cables should be avoided in your background, it’s not going to render these beautifully. The look is rather “cheap” but what could you expect from it?


(Click to enlarge)
Chromatic aberration isn’t controlled well specially when shooting wide-open at 300mm. Stopping it down by a stop helps eliminate most of it but you’ll still see it specially in extreme situations. You’ll only see traces of it when you stop it down by 2-stops but it doesn’t seem to improve when you’re shooting at 300mm.


(Click to enlarge)
It’s sharp wide-open at 75mm and 135mm but the resolution is kind of low. It’s not bad at 300mm but it’s not as sharp as the wider focal-lengths and resolution is rather low. Stop it down by a stop and things look better at the center, the corners aren’t bad but noticeably softer. It still looks bat at 300mm but at least the center is a bit better, the corners still look terrible. Stop it down by 2-stops and the center looks much better. You will see some improvements at 300mm where it begins to look a lot better but the corners still look ugly specially if it is focused close to infinity. My lens performs a lot better at closer distances and performance drops drastically as you approach infinity. I will say that it doesn’t look so bad even at 300mm when shooting under 50m but it looks terrible beyond that where you’ll see the worst of it when shooting at 300mm.

This was shot stopped-down at about 2m to showcase how it looks like at the corners. It’s acceptable but I was hoping to see something better. Spherical aberration and some chromatic aberration can be observed in the overblown areas where it appears a little greenish. Other than that it looks nice with lots of “character”.

This was shot close to its minimum-distance at 300mm. You won’t be able to get really close to you subjects, it has a bogus “macro-gimmick” but this is the most that you could get from it.

This is a tight-crop of the previous photo to give you an idea of its performance at this range. It was shot with a smaller aperture, around f/8 if I recall. This isn’t its strongest focal-length, I expected this to be sharper.

Chromatic aberration is a problem at 300mm, you should stop the iris down in order to minimize its effect. It’s ugly when shot wide-open but there’s nothing much you could do about it.

Here’s a crop of the photo above. This makes the output appear “cheap”, I think this is its biggest weakness as it’s difficult to avoid.

It’s not a bad lens, you could shoot something usable with it but it’s not going to look good. It’s betted than not being able to take the shot so I’d bear with it if this is the only option I have.

It’s not a sharp lens at 300mm but detail is adequate for small prints or for viewing with a small screen. This is something that you should consider when using this lens, a high-MP sensor will show more flaws since it lacks the resolution wide-open to resolve smaller details when used wide-open at 300mm. The good thing is it’s able to track this little bird without much problem.

It’s a great lens for portraiture, it renders skin nicely. It’s not super-sharp but it’s enough to render any details that matter so long as you got the focus right. This is great for rendering skin so it won’t look too-harsh, it will help mask small imperfections on the skin.

The foreground blur appears quite pleasant in this photo, I think it looks better than the background blur. You could see some longitudinal aberration in the branches which makes them appear a bit “muddy”.

This is a bit blurred since I was shooting at a slower-speed. You will have to be mindful of your shutter’s speed when using this because it’s not a stabilized lens and it’s not a fast one, too. On the good side, the background’s blur character looks great.

Tracking moving subjects can be challenging with it but it’s not impossible specially if a camera with fast and reliable autofocus is used such as a Nikon D3. Using the focus-limiter helps so it won’t hunt across its range.

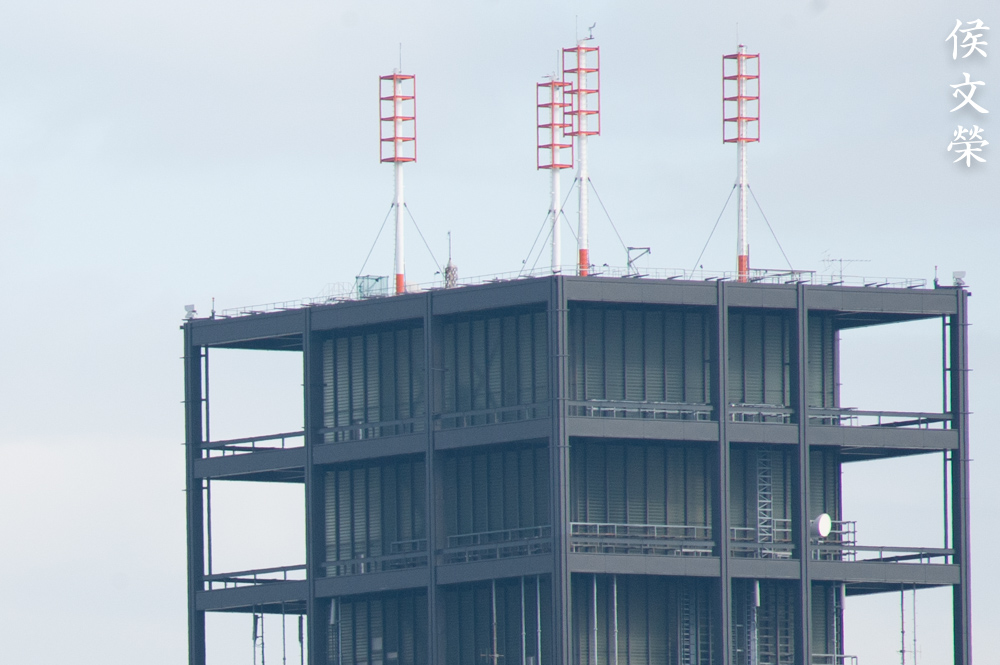
This photo looks sharp in my monitor. I can say that my lens performs a bit better at further distances, this is a great lens for taking photos of distant objects such as this tower.


(Click to enlarge)
I enjoyed shooting with it. I think this is still a capable lens so long as you’re aware of its limitations. It is able to render sharp photos when stopped-down and the character of the bokeh appears to be quite nice specially if you’re shooting with longer focal-lengths. This can be the answer to photographers who don’t have much to spend on a long lens for portraiture or creep-shots at the beach. Sports photographers should consider this as well as a cheap alternative to the premium lenses sold these days. It’s able to take great action photos so long as you maintain a decent speed and shoot in a bright location or with a flash.
Let’s now check some film photos. Film has a unique look that is hard to simulate with a digital camera thanks to grain. It reacts differently to light, this means that it could mask a lens’ flaws or amplify them. Since it was designed to be used with film, it’s best that we judge this using its intended medium. Most of these were taken at f/5.6 or f/8 unless there’s not enough light. I used Kodak Color Plus 200 with my Nikon F5 to shoot these.

Its bokeh quality appears to be nice when shooting with film. It’s smooth, clean and the transition is smooth. It is also sharp when stopped-down, making even a cheap film look nice.

It’s nice for portraiture with film as expected. This is the best cheap zoom for portraiture if you shoot film, it’s going to give you plenty of great photos so long as you have enough light to work with.

You could blow the background away and turn it into a wash of colors. This is easy to do with a long lens but doing it smoothly while retaining a sharp focused-area is a bit harder. This lens does it really well, rendering your scenes exquisitely despite its humble specs.

You can use its amazing subject-isolation properties to lead your viewers’ eyes to your subjects. I’d like you to observe the character of the bokeh in this photo, it’s still nice but also on the border of looking rough. It’s nice that it still kept things smooth despite having many distracting details in the background.


(Click to enlarge)
This is really a lovely lens when shooting with film, I believe that it’s best-enjoyed shooting with it. I felt like a photographer from the 1990’s while shooting with this setup, I had to relearn some skills in order to use this effectively such as bracing my setup from underneath to make it more stable.
This is a nice lens for shooting with film, I think I like the results that were shot with it compared to what I got from my Nikon D3. I’d recommend this to film shooters, people who shoot with digital should look for a newer lens made in recent years since they have VR and the image quality is a lot better. This is only for people who enjoy shooting with cheap zooms or those who don’t have much of a choice due to budget. These are cheap, an excellent one won’t cost you more than $50.00, I even got this for $15.00 because it had dirty glass. Looking for one isn’t difficult but make sure that the iris is dry and snappy when actuated. An oily iris is difficult to repair, you’ll have to dismantle it down to the core in order to get to it, that’s not worth it. Check to see if the elements are clean, if the dirt is situated in the central elements you’ll have to remove a lot of things in order to clean its glass properly. Operate its rings and make sure that they work fine. Try its autofocus and make sure that it has a working focus-limiter. Take your time when shopping for these and you’ll get one for very little money.
Before We Begin:
If this is your first attempt at repairing a lens I suggest that you check my previous posts regarding screws & drivers, grease and other things. Also read what I wrote about the tools that you’ll need to fix your Nikkors.
I suggest that you read these primers before you begin (for beginners):
Reading these should lessen the chance of ruining your lens if you are a novice. Before opening up anything, always look for other people who have done so in YouTube or the internet. Information is scarce, vague and scattered (that is why I started this) but you can still find some information if you search carefully.
I highly recommend that you read my working with helicoids post because this is very important and getting it wrong can ruin your day. If I can force you to read this, I would. It is that important!
For more advanced topics, you can read my fungus removal post as a start. It has a lot of useful information, it will be beneficial for you to read this.
Disassembly:
I was expecting to open this up to the inner elements including the rear ones but they looked fine so I did not dismantle it any further. Working with autofocus lenses means that you only work on what’s needed and the rest is left untouched. This article will only tackle how to clean the front elements, if your lens needs cleaning at the rear optical assemblies you should consider reading my other articles to find hints. If you’re a beginner without the right tools and experience just spare yourself some headache and bring it to a repairman and be sure that they’re reputable as there are many bogus operators out there.
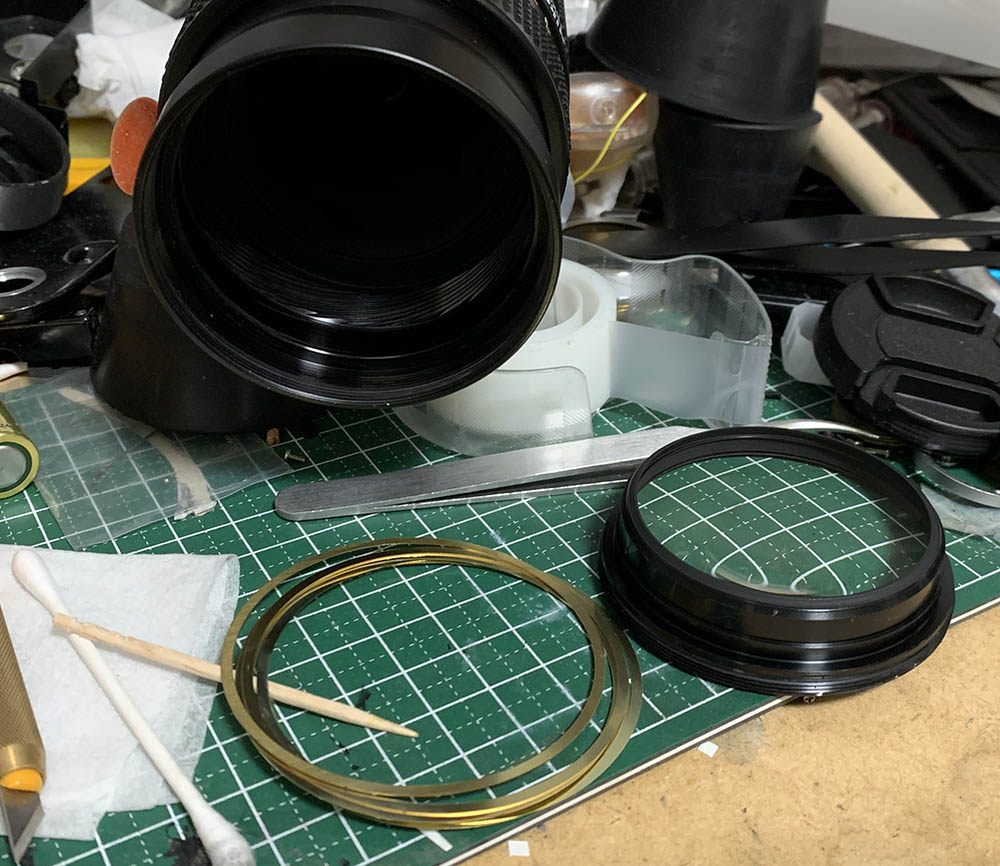
The front optics assembly can be unscrewed with a lens spanner. It’s tough to remove, drop some alcohol and let it work on the threads. It may take several applications and a lot of waiting before it could dissolve the seal or at least make them easier to deal with. You’ll require a good set of lens spanners for this, not the cheap and flimsy Chinese ones sold online. Note that there are several shims underneath it, never misplace or warp any of them, they’re used to adjust the front-focus.

Extract the floating group with a lens spanner that has long-bits installed. Zoom the barrel to make it easier to access. These screws you see here secure the front barrel, never unscrew them unless you know what you are doing.

There’s a thick shim underneath it, don’t misplace or damage it.
Clean the glass carefully. If your lens has fungus, read my article on how to clean lens fungus. Do not use the solution at full-strength, thin it with distilled water. Don’t soak the elements in the solution for too long or it will dissolve the coatings. The cemented group is fragile so handle it with a lot of care.
Conclusion:
It only took me a few minutes to service this once I got the front off but it took me the whole afternoon just to wait for the seal to dissolve. I wasn’t expecting this to be such an easy task but I am not complaining. This just means that there’s not much for me to document for you. I will update this when I get the chance to work with one that needs more attention.
Thanks for following my work, if you liked this article please share this with your friends so it will get more views. This site earns around $1.10 a day, it’s totally reliant on views. You can also support this site, it helps me offset the cost of maintenance and hosting. You are also helping me purchase, process and scan film. This site promotes the use of film so we’re all in this together. See you again in the next article, Ric.
Help Support this Blog:
Maintaining this requires resources and a lot of time. If you think that it has helped you or you want to show your support by helping with the site’s upkeep, you can make a small donation to my paypal.com at richardHaw888@gmail.com. Money isn’t my prime motivation for this blog and I believe that I have enough to run this but you can help me make this site (and the companion facebook page) grow.
Buy me a roll of film or a burger?
Thank you very much for your continued support!
$2.00
Helping support this site will ensure that this will be kept going as long as I have the time and energy for this. I would appreciate it if you just leave out your name or details like your country’s name or other information so that the donations will totally be anonymous. This is a labor of love and I intend to keep it that way for as long as I can. Ric.

Jun 24, 2023 @ 00:24:33
Hello, my 75-300mm lens only works autofocus from 200mm to 270mm, my d300 camera, can you help me?