
Hello, everybody! Do you know about the song “Somewhere Over the Rainbow“? I’m pretty sure you have heard of it in one form or another. The original song came from the “Wizard of Oz” movie in 1939 which has Judy Garland in it. It has since been covered in different languages and by different singers, some are famous while some are unknowns. However, the best known version today is the version sang by the late Israel Kamakawiwoʻole, a huge mountain of a man with a sweet voice and a ukulele. I personally prefer his version over the rest because I felt it has more depth in it despite being simpler. A recent cover is at times better since the original song, it has happened several times. The topic of this article is something similar in the sense that it’s the last known version of a popular line of lenses. It’s also the best in terms of looks and ergonomics as it has benefited from several years of previous refinements. Read this article to know about this beautiful lens.
Introduction:
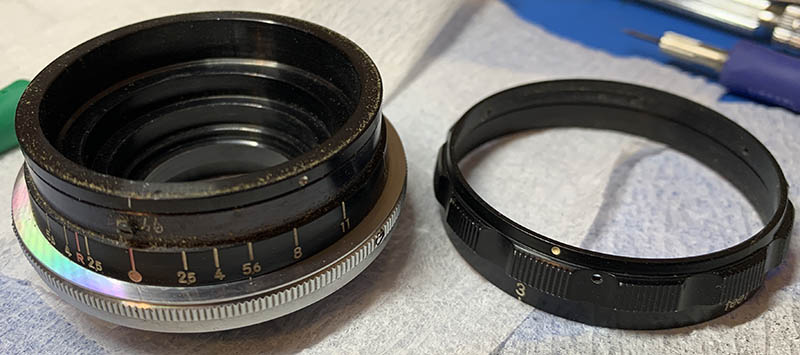
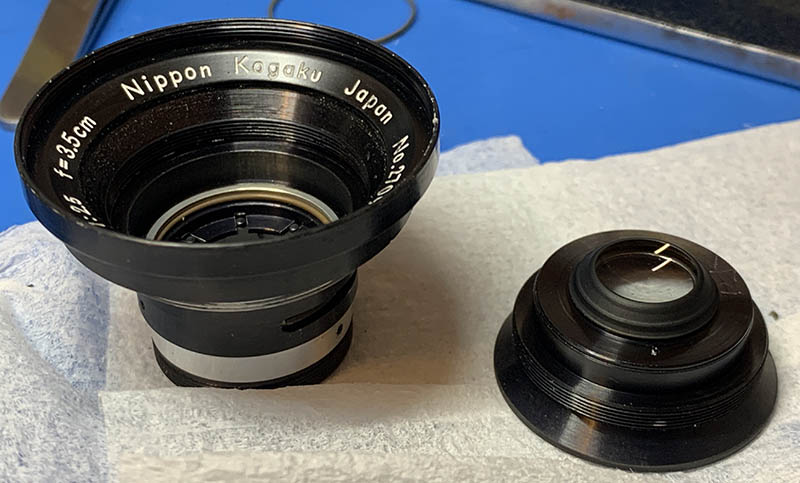
The W-Nikkor 3.5cm f/2.5 has gone through several iterations, what I’ll showcase today is the last one to come out of the factory. Nobody knew exactly when its production started or ended but this came out in the final years of the Nikon rangefinder era around 1959–1960. The optical formula remained the same, it is the barrel that’s new this time. The design of the barrel looks similar to the W-Nikkor 3.5cm f/1.8 so the aperture values are much easier to see and the barrel is much lighter compared to the older ones since it is now made from aluminum alloy instead of brass. In my opinion, this is the best version of this lens. The ergonomics alone is worth the extra price and rarity of this little gem.

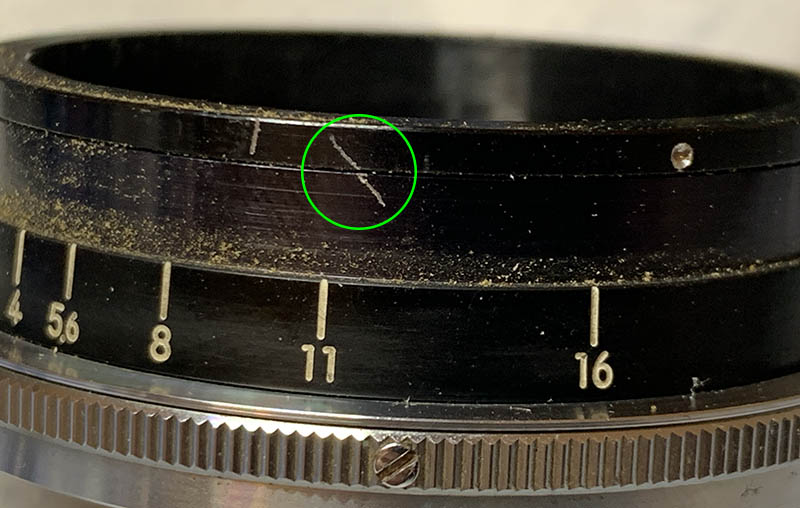
The barrel looks very beautiful and modern compared to the older versions of this lens. It is easier to see the numbers now that the barrel is colored black and the letters are in white. The knurling also helps a lot so your hands will not slip and it also makes it easier to recognize which barrel you’re operating.
It has a 6-elements-in-4 groups design that it inherited from the W-Nikkor•C 3.5cm f/2.5. I am not aware of any changes that were made in the optics so we are going to assume that everything is identical. The older lens is a favorite amongst many photographers, including me. It is one of the most popular lenses that Nikon ever meet for their rangefinders.

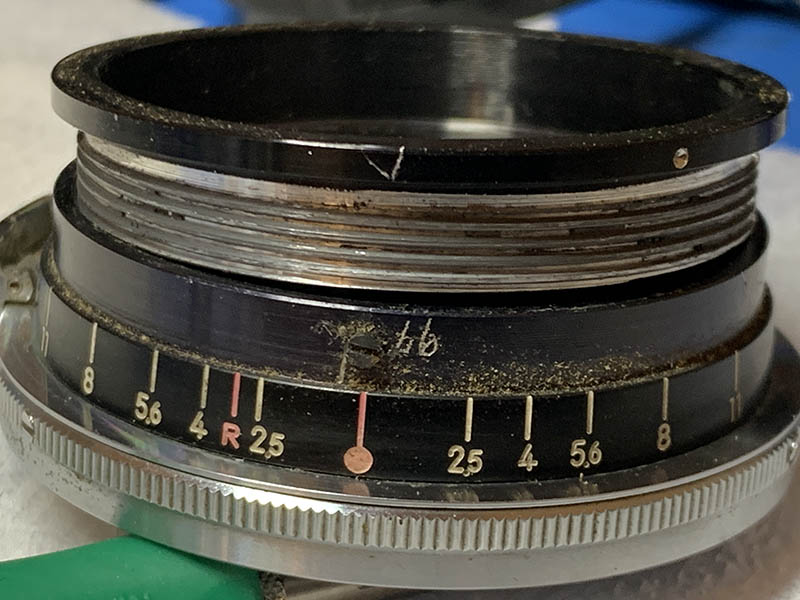
Compared to the earlier ones, this lens is much lighter thanks to the aluminum parts. They were originally made with brass which is sturdier but it made the whole thing really heavy. Another big improvement is a more useful aperture ring because you are now able to see the values without the need to look at what is in the front of the lens. It also appears that the new style aperture ring has threads milled into it.
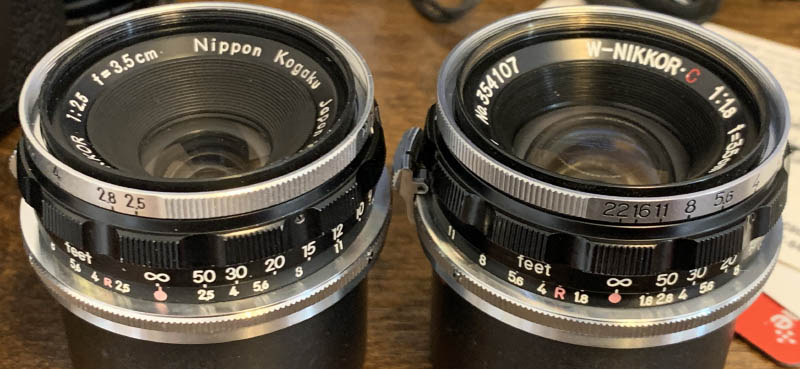
The W-Nikkor 3.5cm f/1.8 looks really similar to it, that’s why it’s easy to get confused between them. The designs of both lenses represent the height of W-Nikkor ergonomics and aesthetics.

It is perfect when paired with a Nikon SP because it has a built-in viewfinder for 35mm. That viewfinder is tiny but at least you don’t need to attach a separate one so the accessory shoe can accommodate a light meter such as this Voigtländer VC Meter.
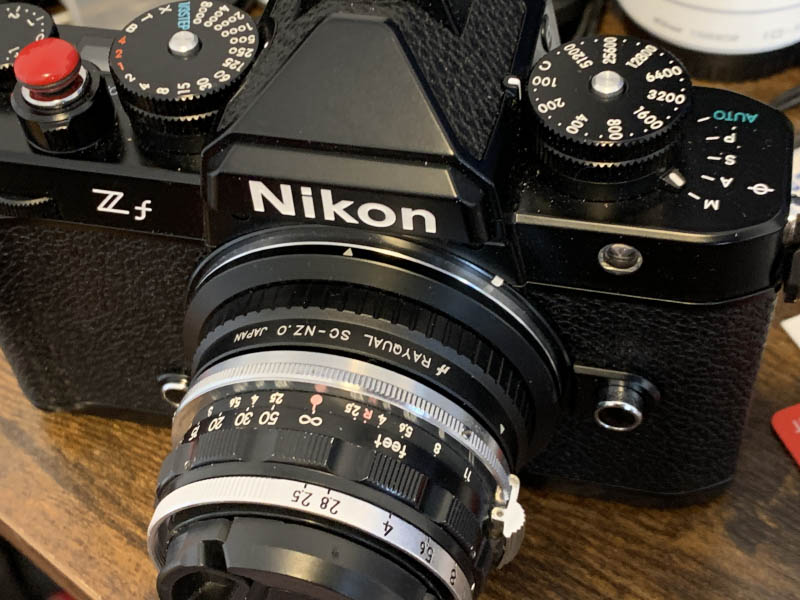
It works really well when you adapt it to a mirrorless camera. I use the best Japanese adapter available to me (Rayqual) because the CCP (Cheap Chinese Products) sometimes do not lock properly. You bought an expensive lens, why mount it with a cheap adapter? It’s like buying a Ferrari and using recycled rubber.
Since it is optically identical to the W-Nikkor•C 3.5cm f/2.5 and the W-Nikkor•C 3.5cm f/2.5 (LTM), I do not want to repeat myself for the third time by reviewing this lens in detail. However, I’ll still show photos that I have shot with it and concentrate more on how different it handles compared to the other versions.
This is the best lens in the 35/2.5 family, that’s why I recommend this to anyone shooting with rangefinder Nikons. You will definitely notice the difference between this and the earlier versions. These are somewhat rare but they are starting to become a lot more common lately. Due to their popularity and slight scarcity, these will cost you about $400.00 for something that is presentable. You should never pay any more than what I mentioned unless it comes complete with everything, including the very rare hood. I got mine for a reasonable price, way below what the market is offering because it was very dirty and sold for junk. If you are looking for one, be sure to check the iris. You should be able to operate it smoothly and it should not be broken or missing any parts. The iris can sometimes be oily, but that’s expected of many old lenses. Its glass should be clear, with no signs of balsam separation. Minor fungus infestation can be cleaned and a little bit of dirt means nothing. You should not find any deep scratches or cracks in the glass, but cleaning marks should never be a problem unless you can feel them with your nails. Lastly, turn the focusing ring, a little bit of heaviness or dryness is acceptable but a seized or excessively gummy feel is abnormal. If your lens feels gritty when focusing, it’s not a very good sign because you will need a professional to polish the helicoids back to the proper smoothness. I wish you luck in finding one of these, happy hunting!
Before We Begin:
If this is your first attempt at repairing a lens, I suggest that you see my previous posts regarding screws & drivers, grease and other things. Also read what I wrote about the tools that you’ll need.
I suggest that you read these primers before you begin (for beginners):
- Essential tools
- Best practices 1
- Best practices 2
- Best practices 3
- Ai conversion
- Working with Helicoids
Reading these should lessen the chance of ruining your lens. Before opening up anything, always look for other people who have done so on the internet. Information is vague and scattered but you can still find some information if you search carefully.
For more advanced topics, you can read my fungus removal article. It has a lot of useful information, it will be beneficial for you to read this. I also recommend that you read the working with helicoids article since it is very important!
Disassembly (Main Barrel):
Taking this lens apart isn’t difficult at all if you are familiar with repairing Nikkors from the same period. I am somewhat of an expert in this field so it’s peanuts to me. All of these follow a common schematic, it’s always to start from the rear then work your way to the front. Simply follow my guide and you should be able to get things done safely. Of course, do not forget to take plenty of photos before you proceed, it’s very important so you will know how to put things back again later.
If you are a novice, please don’t risk it. You’ll need special tools and experience to complete the job in a safe manner. Tools are expensive and experience takes time to earn, why not just pay a professional for his time? Look for a reputable repairman and show him my article if he is not familiar with this lens.
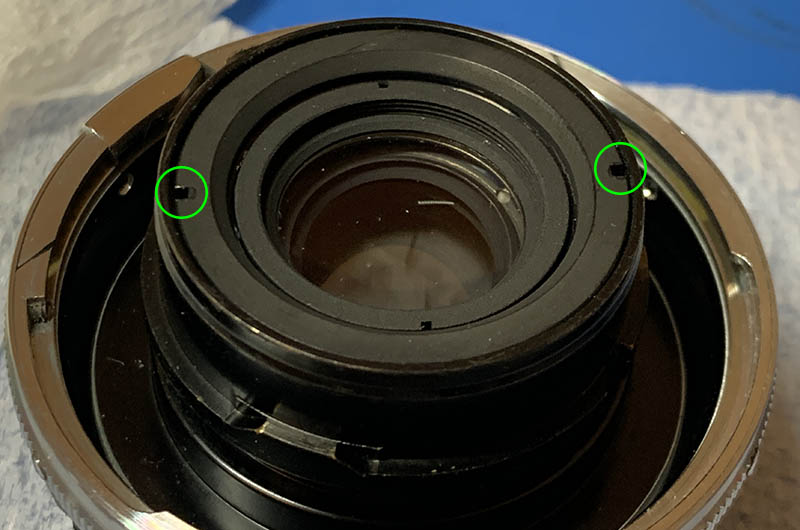
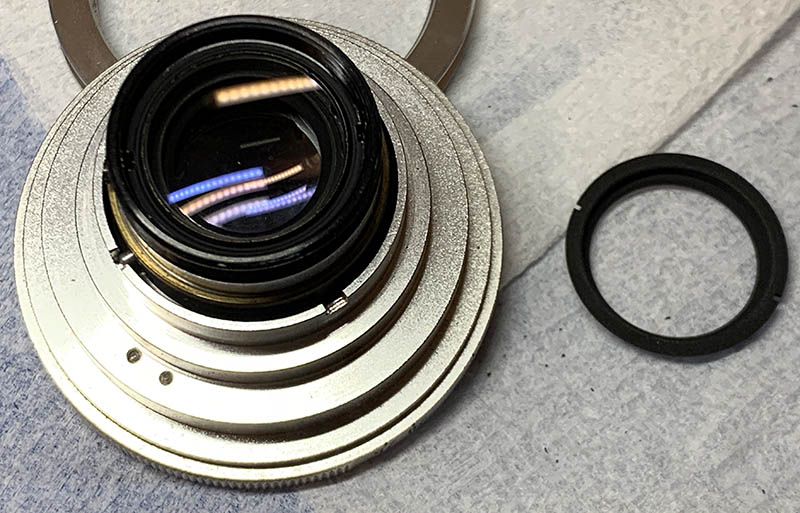
Carefully unscrew this plate, it’s not hard to remove at all, in fact, I used my fingers to get it off.
That plate is used to keep the 2 major assemblies together. You have to be careful when you remove it so you won’t drop the precious front assembly to the ground. Note that there’s a shim here, do not lose this. You won’t be able to get it off at this point just yet.
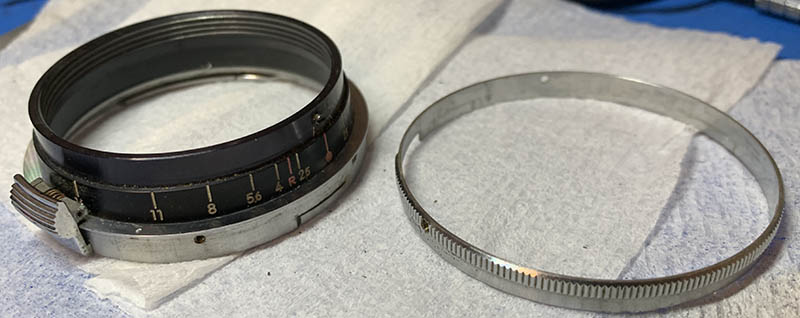
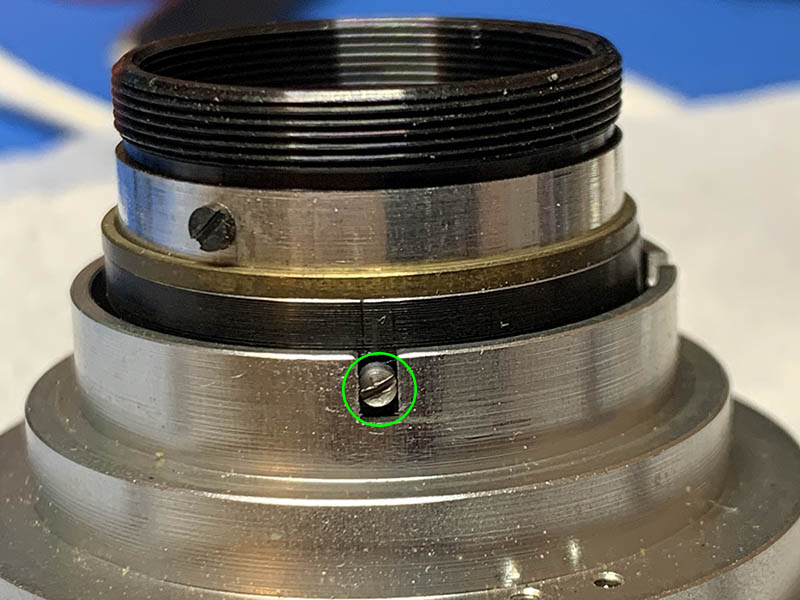
Loosen the grub screws of the focusing ring and pull it off carefully.
Since the focusing ring keeps the helicoid from turning beyond the focusing range, removing it will allow you to collapse the helicoids. Make a small mark with the helicoids fully collapsed, you should be able to reproduce this later. If the mark is off by a lot then you have reinstalled the helicoids incorrectly.
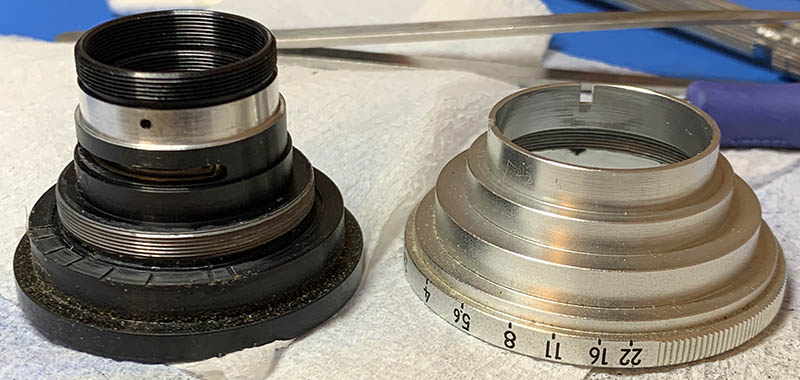
Separate this and do not forget to mark where it parted. Again, don’t forget to read my how to work with helicoids article to prevent any trouble from happening. Many people ignore this step so they end up with a bag of parts because they could not put the helicoids back together properly.
This step is optional but I did it because I want to make sure that my lens is clean. Extract the screws that are around the grip and carefully pull it off using your nails. I wouldn’t normally go further than this, but if the lenses extremely dirty I will have to tear it apart even more.
I cleaned all of the big parts with a strong toilet cleanser – the grainier, the better. I scrubbed everything using a brush then rinsed them all very well with hot water before making a final rinse with pure alcohol to remove any remaining residue. Pay special attention when cleaning the helicoids or the other threads, they are fine in some places and they can be caked with gunk, using a wooden toothpick helps here for stubborn deposits. Dry them well before you continue. When lubricating, be sure not to apply too much, all you will need is a thin film of fresh grease. Combine the helicoids then exercise them by turning several times, this will ensure that the grease is applied evenly then wipe off any excess oil. If you’ve applied too much grease it will settle in the iris mechanism eventually, necessitating the need to open it again just to give everything another overhaul.
Disassembly (Objective):
There’s nothing special here, it’s similar to many vintage Nikkors. The iris mechanism is the most difficult part to deal with in this section but it’s easier compared to many rangefinder Nikkors because its housing can be removed as a single unit, making it easier to access and clean.
Unscrew this retainer with your fingers or using a rubber tool for more friction.

Doing so will reveal the housing for the last element underneath it, use a lens spanner and carefully turn it until you’re able to remove the housing using a lens sucker. Be careful not to scratch the glass.
Use a lens spanner to remove the 3rd group and be careful with the glass.

You then use a lens sucker to remove the housing of the 3rd group.
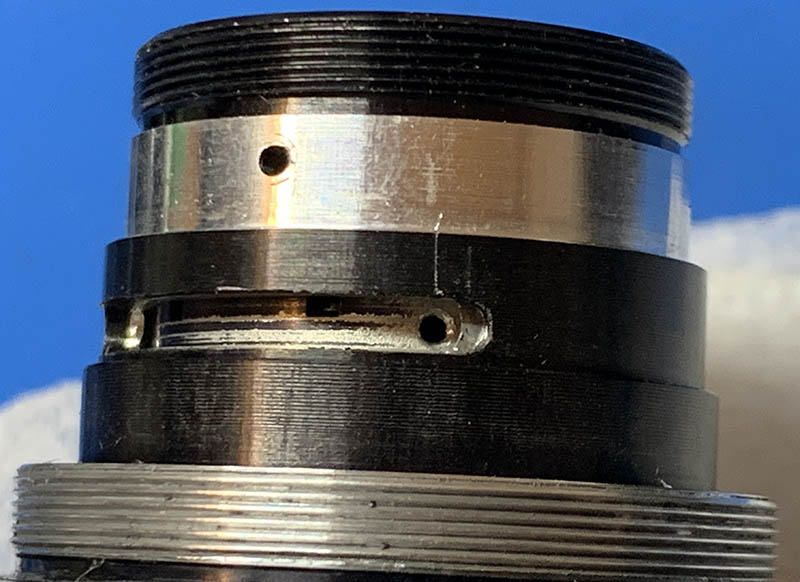
Carefully unscrew this so you can remove the aperture ring. You may also remove the other screw in this picture so you can remove the shim.
Unscrew the aperture ring until you get off, be careful not to cross-thread it because the thread is fine.
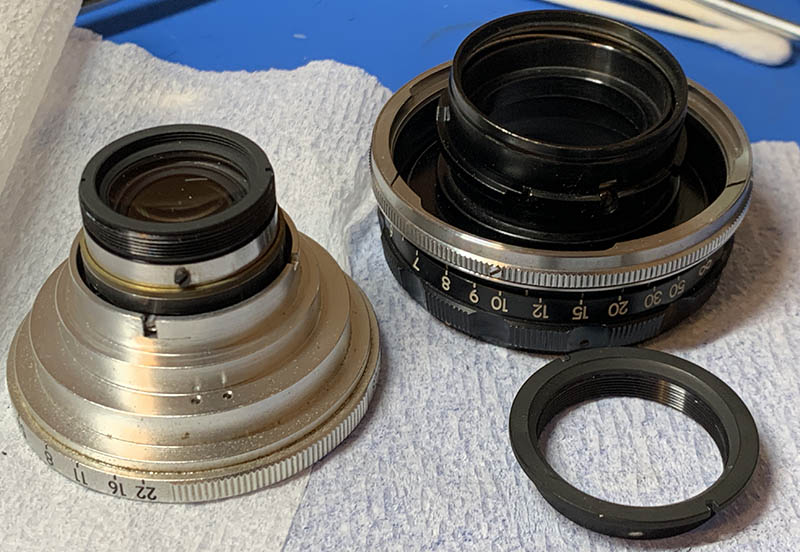
Use a rubber cup to unscrew the front optics assembly.

You can further dismantle the front assembly down into 2 separate parts just like this. You should not go any further than this.
Before you continue, mark the range of the iris mechanism so you will know how it should be adjusted. It is an adjustable part and you should be able to put it back correctly later.
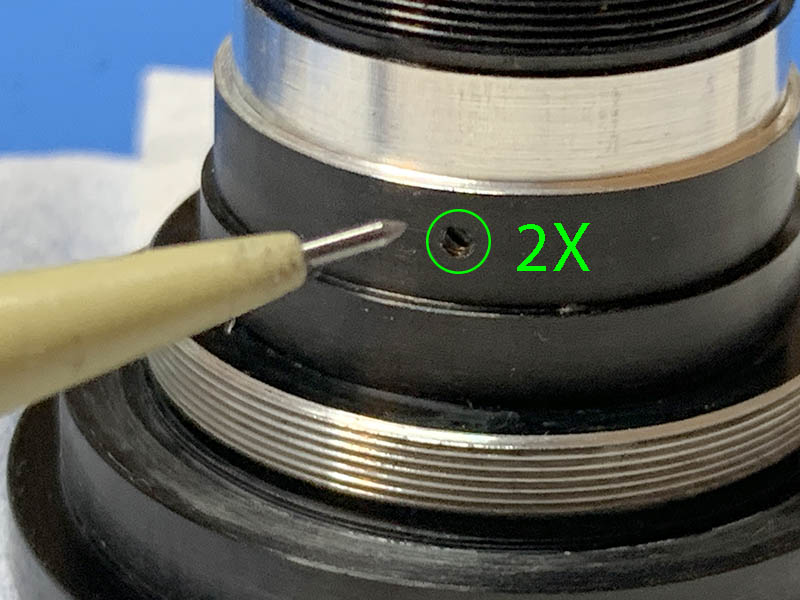
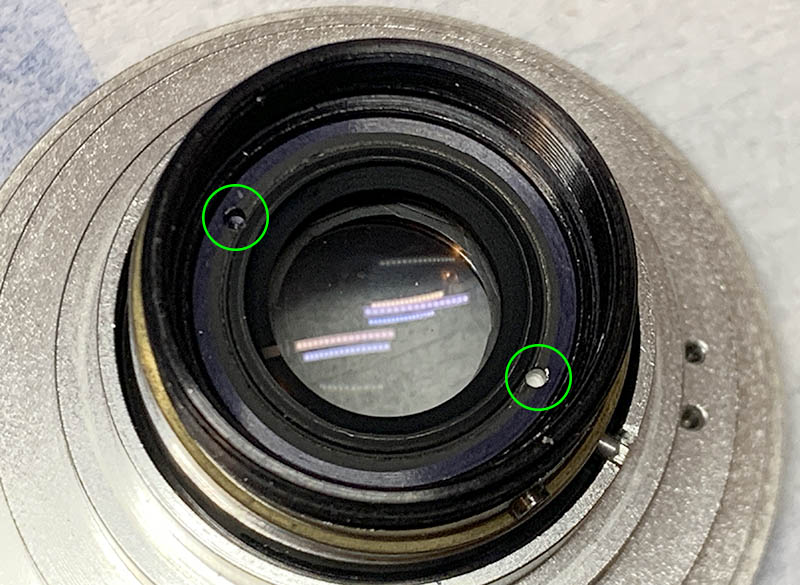
Extract these set screws so you can remove the iris mechanism.

Carefully push the iris mechanism from behind using a rubber tool and be sure to avoid touching any of the blades when doing so.

Use a needle to pry this circlip off while being careful not to damage the iris. It keeps everything together so you can safely remove the diaphragm plate once it’s gone.
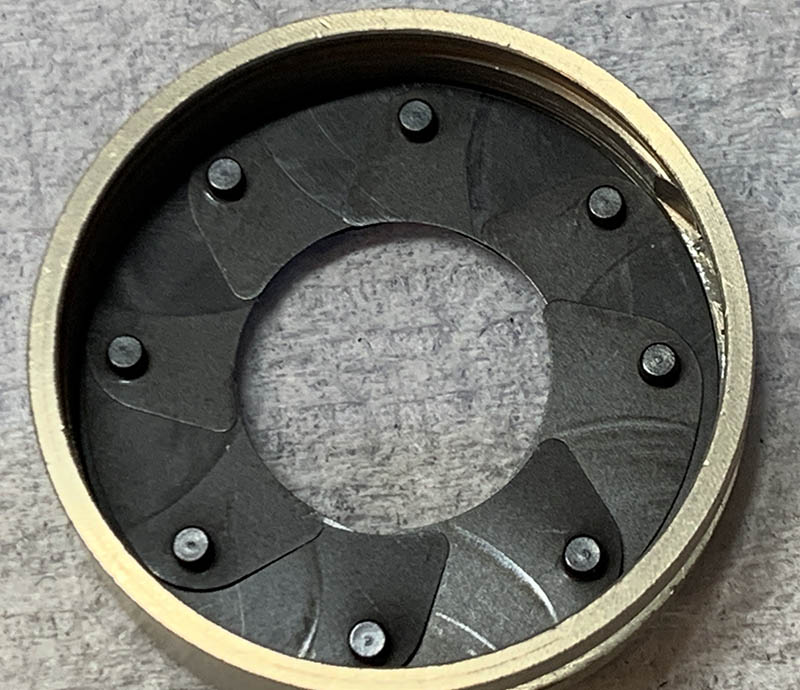
Inspect the iris so you will know how to put it back together later. Pay attention to the direction that each blade is facing, you don’t want to put them back incorrectly.
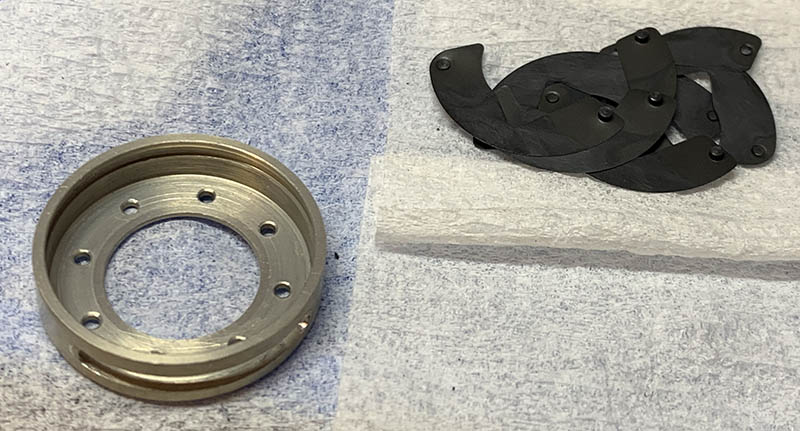
Remove the blades carefully by popping them off from the rear, a gentle tap with your finger is enough to dislodge them. Use a soft towel to cushion them while they fall.
Each leaf was cleaned very carefully with Q-tips soaked in solvents, I used Zippo fluid for this as alcohol is not the right solvent for the type of grease used. Be sure to handle these carefully, accidentally destroying one is out of the question. Read my article on how to reassemble a manual iris to know how I did it.
Never lubricate the iris mechanism, if you must, a light dusting of powdered graphite is enough, blow off any excess powder after actuating the iris several times to finish the job.
If your lens has fungus, read my article on how to clean lens fungus, just make sure that you dilute it with distilled water so it’s not going to be too strong as it may damage the coating.
Conclusion:
I have always wanted to work on one of these for a long time. It wasn’t easy looking for one that’s priced reasonably but I finally found one that I can present to you. Cleaning this gave me so much satisfaction, I did not notice the time that I’ve spent working on it, but it took me a few hours because I’m familiar with Nikkors from this time period. It would have taken me less time if one of the screws of the focusing ring isn’t stripped, that one took me some time to fix. Overall, the experience is very positive and I would like to work on another one again. Of all the 35/2.5 Nikkors, this one has the smartest construction, it makes me wonder what Nikon could have been making in the years to come after this lens was made, that is if they continued their rangefinder camera production.

Life can be a simple or as complicated as you want it to be. I choose simplicity and that reflects in what I shoot with when it comes to photography. Just sit back and enjoy living life in the slow lane. How can you see the beautiful sights and hear the songs of the birds if you are not mindful of the present moment?
That’s all for today, I hope you enjoyed my little presentation of such a lovely lens. We don’t see a lot of topics about this lens and it’s only here that you can find information about what’s inside. If you like this article, please consider sharing this with your friends so I can get more views. You can also help this site by supporting me, the little donation helps me keep this website alive. It’s not much, just think of me like a busking performer in the subway, except that I show you unique content that you won’t find anywhere else. This website will be 10 years old soon, it would not have lasted this long without your help. Thanks a lot to all my readers and supporters, see you guys again next time. Ric
Help Support this Blog:
Maintaining this site requires resources and a lot of time. If you think that it has helped you or you want to show your support by helping with the site’s upkeep, you can make a small donation to my paypal.com at richardHaw888@gmail.com. Money isn’t my prime motivation for this blog, I believe I have enough to run this myself but you can help me make this site grow.
Leave me some tip?
Thank you very much for your continued support!
$2.00
Helping support this site will ensure that it will be kept going as long as I have the time and energy for this. I’d appreciate it if you just leave out your name or details like your country’s name or other info so that the donations will totally be anonymous. This is a labor of love and I intend to keep it that way for as long as I can. Ric.

Apr 08, 2025 @ 10:31:59
grand! Reports Detail [Demographic Shifts] and Their Impact on [Urban Planning] 2025 precious