
Hello, everybody! Have you ever fancied making love to that hot girl you had a crush on when you were young? I’ve had several regrets in my life and one of them is not getting it on with that girl that the whole batch was swooning over at that time. It’s really sad, after a couple of years I’ve learned from her own lips that she had me in her heart all along ever since we were 14! She’s this amazing, beautiful, and intelligent woman, she deserves everything best in her life. You can say that she is a jewel amongst gravel, that’s how rare she is, and she has aged beautifully! It’s pointless grabbing on to your memories and so playing with your turtle won’t bring back time. With all that frustration, something good has to happen, right? Well, it’s fortunate that I’ve been able to finally purchase something that I have always wanted with my tax return. I felt so much relief that it has healed my decades long worth of regret even for a short time. Do you want to know what that is? Please read this article so you will know all about this magical lens that can heal the heart of an old man.
Introduction:
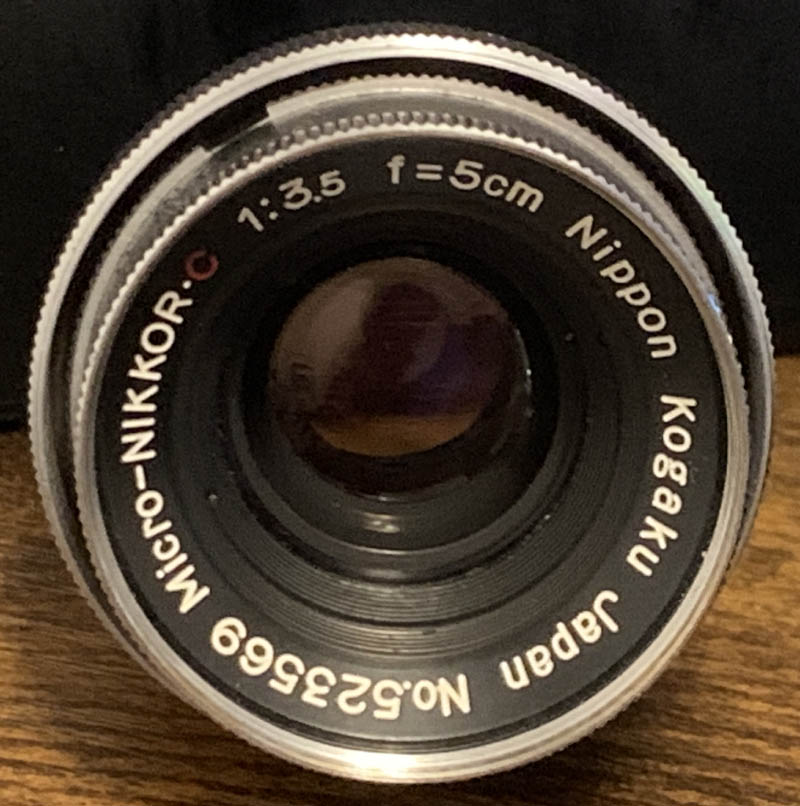
The Micro-Nikkor 5cm f/3.5 is a very special lens, with an equally special purpose and legacy. It is the first Micro-Nikkor ever made. It was sold in 1956 and only two special clients who requires high resolution for their lenses. The special cases are reproduction, microfiche, scientific use, the medical field, and so on. It’s the best in terms of resolving power of all the rangefinder era Nikkors, even when shot wide-open. There was a need back then to manufacture a photographic lens with enough resolution to capture the intricate characters used in the Japanese language so Nippon Kogaku took on the task to design a masterpiece. It’s development is partly documented in the amazing article by Sato sensei. You can also read my old article about the Micro-Nikkor 5cm f/3.5 in Leica mount.

Unlike the Micro-Nikkor 5cm f/3.5 in Leica mount, this one does not have a focusing unit and it uses the helicoid of the camera to focus. What’s similar is it shares the collapsible design that serves some purpose when you want to use this for shooting at higher magnification. The construction is the best I’ve ever seen amongst all small 5cm rangefinder Nikkors. There’s no slop and the finish is exceptional. This is a high end product in every way, even the tiny screws are exquisite.
It has an optical design of 5-elements-in-4-groups, which is common amongst many Micro-Nikkors of the same class. The basic idea behind the design stayed for a decades up until the days of the F-mount. If you want to know more, read my article about the Micro-Nikkor 5cm f/3.5 in Leica mount. It’s identical, it’s just that the other one has a different mount.
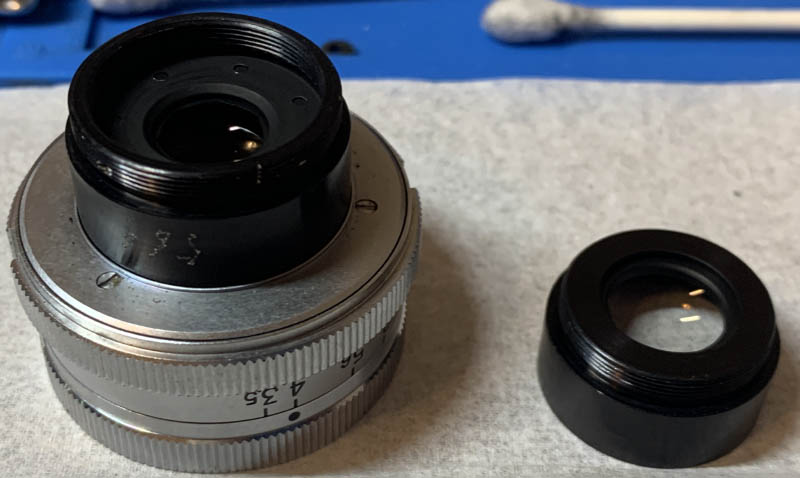
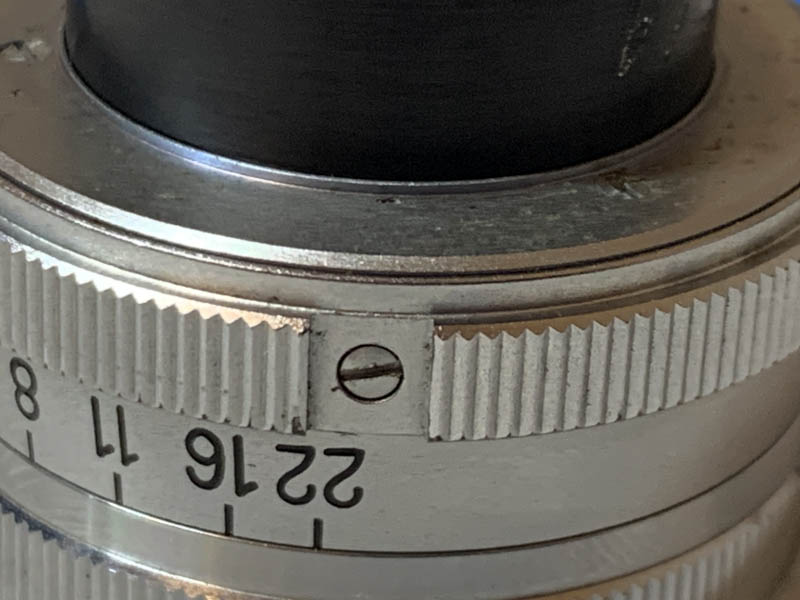
There’s a notch in the aperture ring which allows you to attach a special hood. That allows you to change the aperture easily while the lens is collapsed. I sometimes wonder why they did not design it in another way so we don’t need this workaround. The hood I mentioned is rare, and very expensive. If you have it, I will be happy to share your picture of it here in this article so other people will also see it.
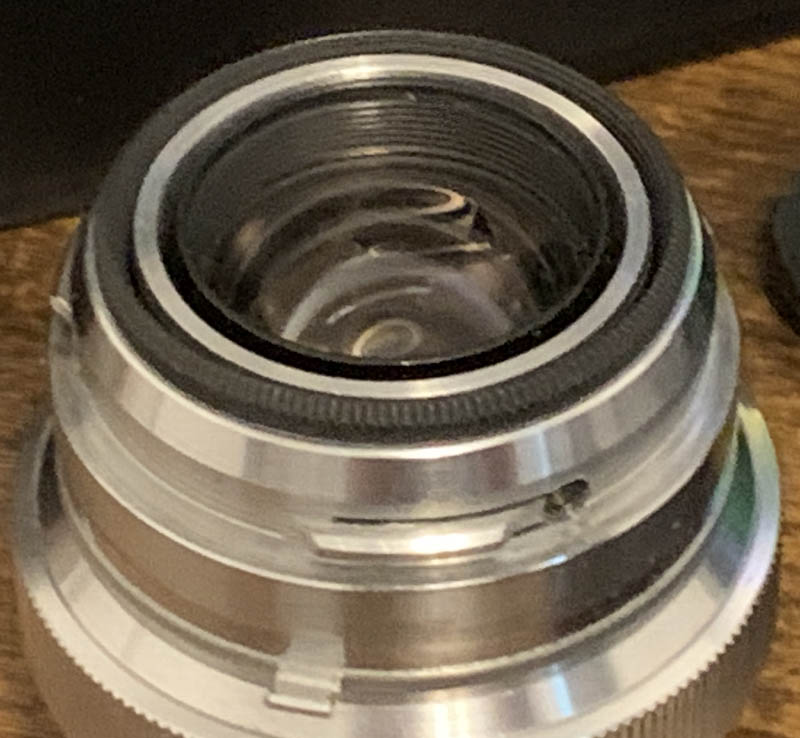
The rear is similar to many smaller 5cm Nikkors, it’s just that the finish is more refined in my observation.
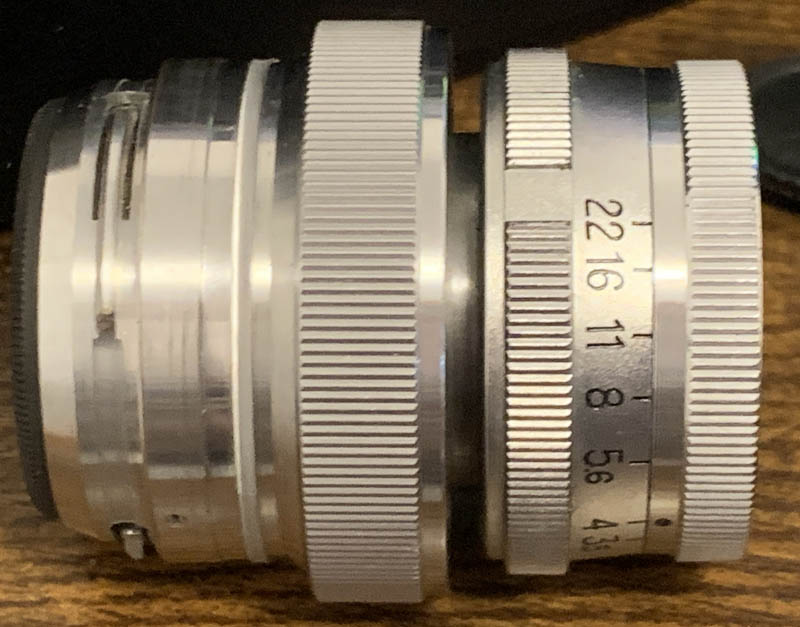
(Click to expand)
This is how it looks like when you deploy or collapse the lens. Collapsing it not only makes it compact but it also serves a purpose. When mounted to an extending contraption such as bellows, it is recommended to collapse the lens when taking high magnification photos where it functions more like an enlarger lens of some kind.

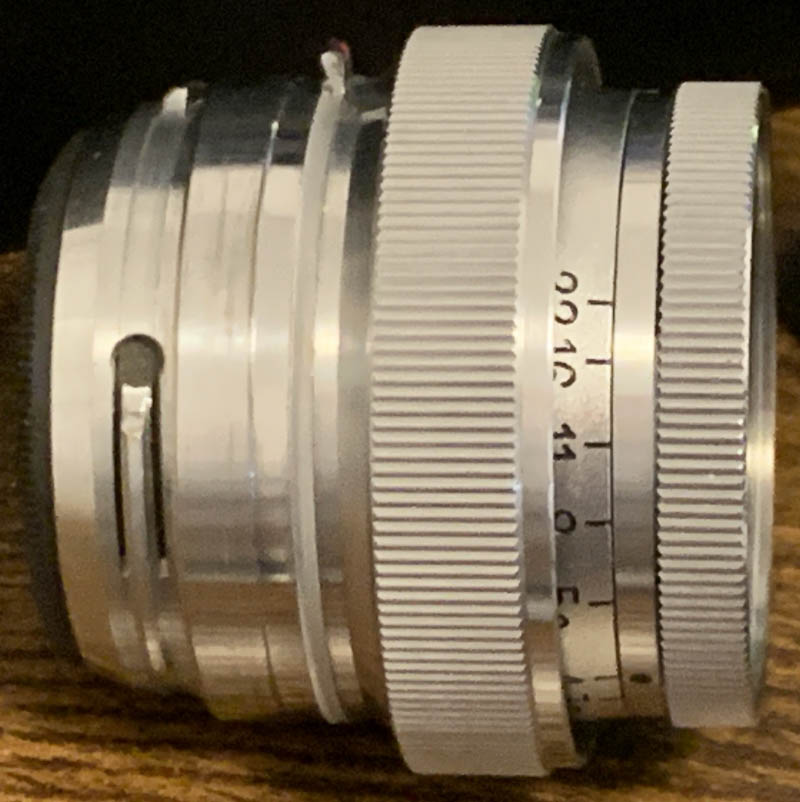
Here it is beside the Micro-Nikkor 5cm f/3.5 in Leica mount, the only difference is the mount. Apart from it, there’s a big difference in terms of handling. Of course, the Micro-Nikkor 5cm f/3.5 in Leica mount handles much better thanks to the focusing unit. It’s also possible to extend it even more so you can focus it much closer with the lens mounted on a camera. That’s impossible with the S-mount variant because it uses the camera’s helicoid to focus.
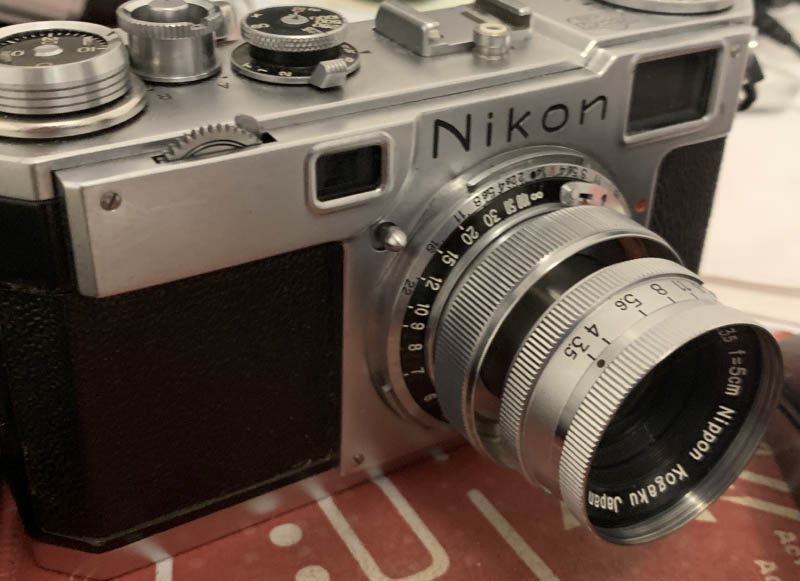
It looks very good when mounted on a Nikon S2, I think it is the best camera the shooting with thanks to its bright and huge window. It’s exceptional when used as a photographic lens because it’s so sharp! I am not sure if using the special magnifying goggles with your camera will allow you to focus closer with it.

You will need a special adapter that has a focusing unit in order to shoot with it on a mirrorless camera. It won’t offer much value when shooting like this because you’re not able to focus really close with it, unlike the Micro-Nikkor 5cm f/3.5 in Leica mount which allows you to get really close to your subject. That is the only issue I have with it, what use is a macro lens if you can’t focus close?
We won’t be looking at any pictures that were taken with this lens because it’s optically identical to the Micro-Nikkor 5cm f/3.5 in Leica mount. Please read that article so you’ll see a breakdown of how this lens performs. I won’t be wasting my time repeating what I have just said in that article.
I will only recommend this to collectors because it doesn’t offer much value as a user lens. If you want to adapt it to a mirrorless camera, the Micro-Nikkor 5cm f/3.5 in Leica mount is much better. If you are really so inclined, you must purchase a set of extension rings so you can focus close with this. I guess that’s the only drawback I have with this particular lens. These are rare, but not as rare as the Micro-Nikkor 5cm f/3.5 in Leica mount so they cost less. Despite that, they’re still expensive even in bad condition. Be prepared to pay much more if the set includes that special hood that I was talking about. These can usually be found for $1,500.00 in good condition while the excellent ones costs around $1,700.00 or so. Avoid paying more than what I mentioned, anything more than that is highway robbery! Don’t feed the “Camera Mafia“! You should find one with clean, clear glass without any signs of balsam separation nor fungus. The aperture is sometimes oily but it’s mandatory to overhaul them after purchasing because these are very old. Turn the aperture ring and make sure it works properly. Mount it to a camera and make sure it’s not wiggling. The tolerance should be tight in every regard. You must wait for one to appear that matches your budget and expectations. This one took me more than a decade to get and I’m glad I waited! Just be patient, you can get one as well for a reasonable deal.
Before We Begin:
If this is your first attempt at repairing a lens, I suggest that you see my previous posts regarding screws & drivers, grease and other things. Also read what I wrote about the tools that you’ll need.
I suggest that you read these primers before you begin:
- Essential tools
- Best practices 1
- Best practices 2
- Best practices 3
- Ai conversion
- Working with Helicoids
Reading these should lessen the chance of ruining your lens. Before opening up anything, always look for other people who have done so on the internet. Information is vague and scattered but you can still find some information if you search carefully.
For more advanced topics, you can read my fungus removal article. It has a lot of useful information, it will be beneficial for you to read this. I also recommend that you read the working with helicoids article so you will not get stuck because you couldn’t reassemble the helicoids back properly.
Disassembly:
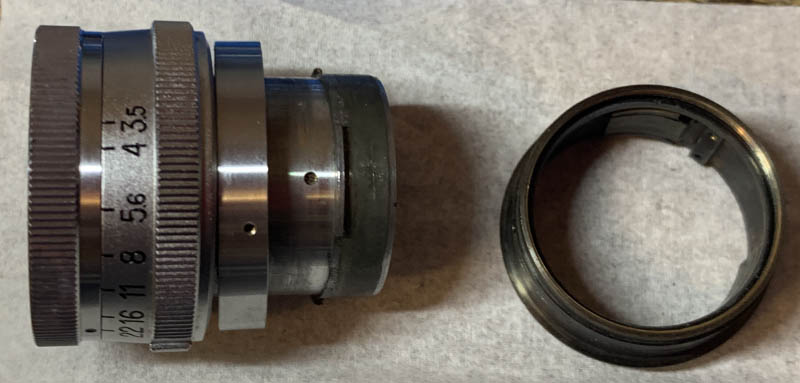
The construction is very simple. In fact, there’s nothing much to talk about it if you have read my article of the Micro-Nikkor 5cm f/3.5 in Leica mount because the front part is identical and the mount is so simple, it can be dismantled completely within a few minutes. The biggest difference in this article is I will show you the correct sequence for dismantling the front part, so it still offers something valuable. Don’t attempt to service this if you’re a novice because this is a valuable lens. Send it to an expert to prevent any problems! You will require special tools to open it, any accidents will result in an expensive junk!

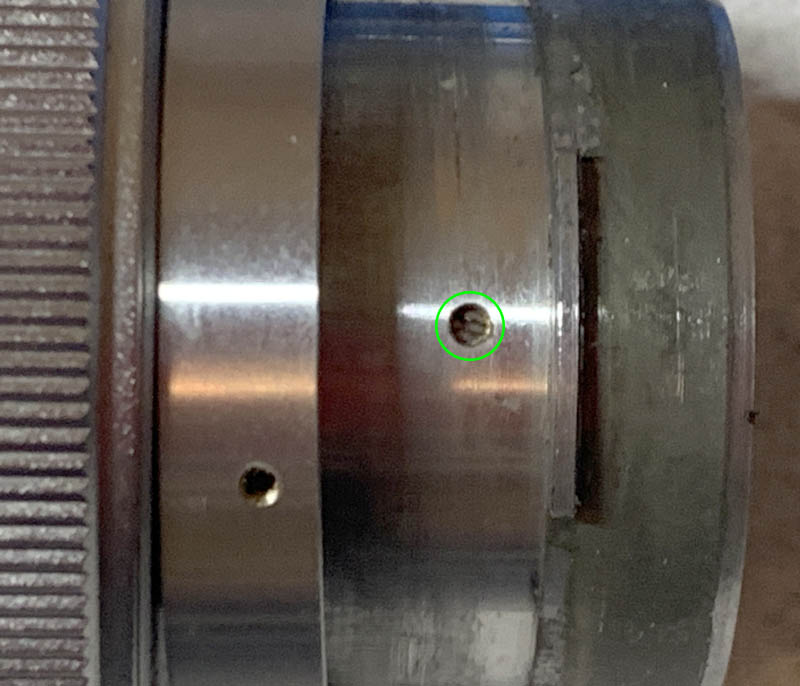
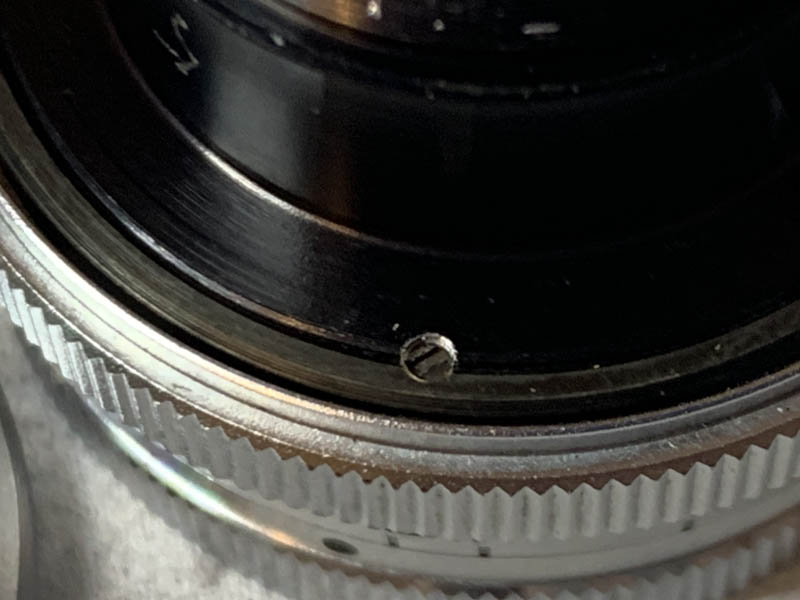
Locate and extract this set screw, it’s the only thing keeping everything together. It also makes sure that the barrels are aligned properly so don’t forget that during reassembly. Keep it safe.

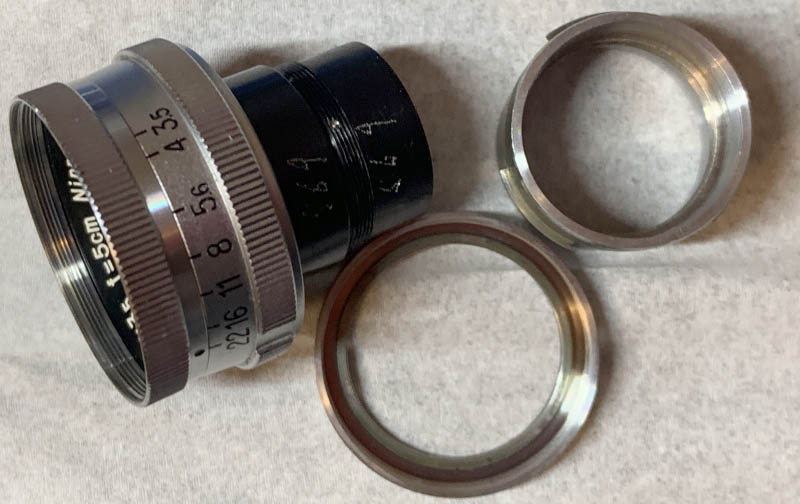
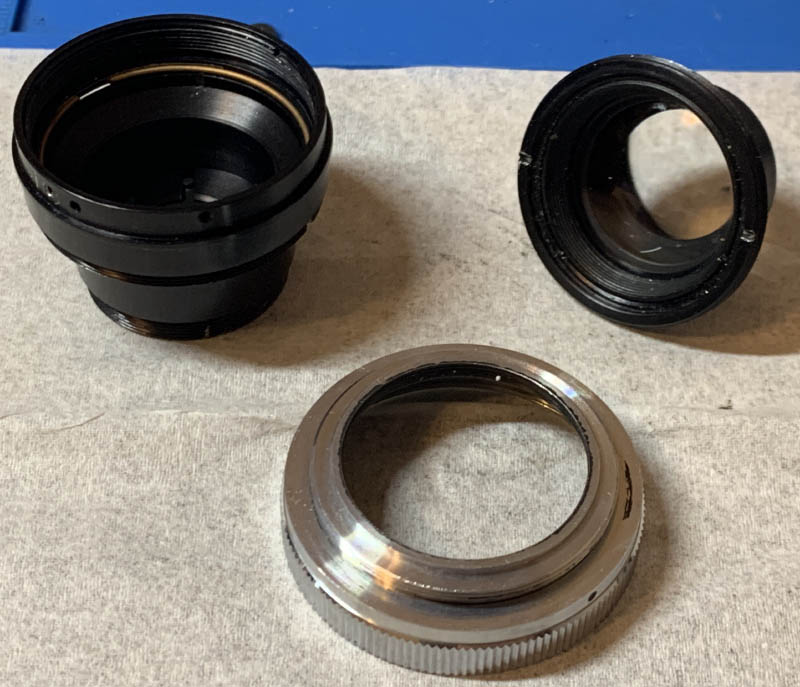
Unscrews the rear collar so you can pull it off. Note that there’s a shim here as usual. Don’t lose it, it’s for adjusting the focus of the lens!

Locate and extract this screw so you can free the collar.
Unscrewing the collar will allow you to remove this big brass part.
Locate this screw and extract it.
Once the screw is gone you’re not able to turn the outer barrel until you are able to remove it.
The rear elements assembly can now be unscrewed. Don’t bother this modeling it even further.
Extract this carefully, it serves as a pin so it has a long stalk. This pin couples the aperture ring to the iris mechanism so turning it will also allow you to turn the iris mechanism inside.
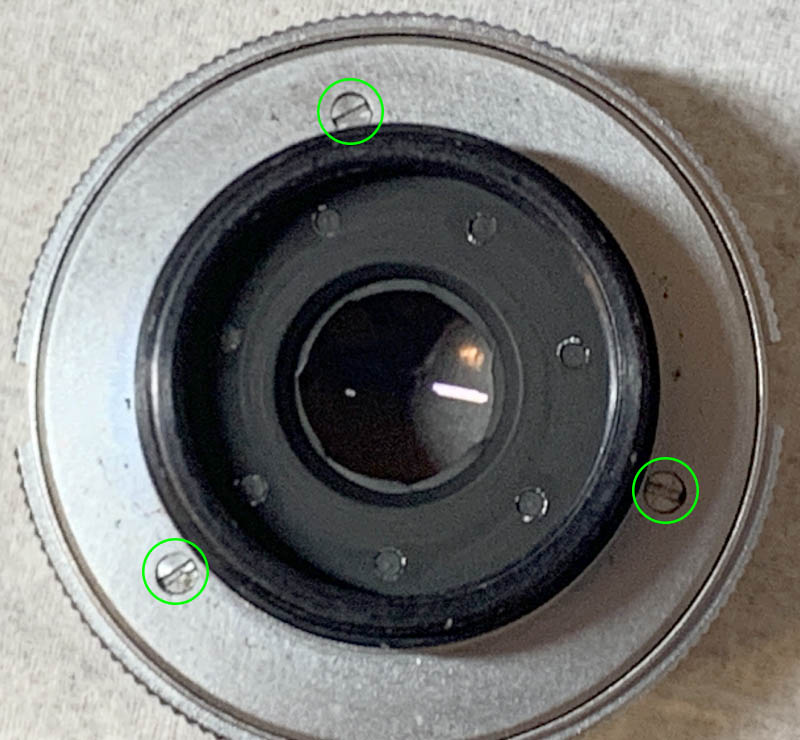
Extract these screws to remove the cover of the aperture ring assembly.
There’s a set screw here to lock the retainer of the aperture ring. Extract the little screw and set it aside.

You can remove the aperture ring once you unscrewed its retainer off.

You can remove these screws so you can clean the spring thoroughly.
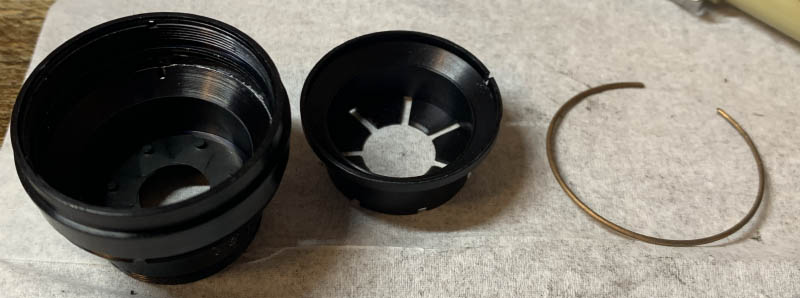
I do not know what’s up, it seems that the front ring on my lens can be easily unscrewed from the rest of the assembly. There aren’t any screws to secure this at all despite having threaded holes so I installed the screws myself later during reassembly.
The front elements housing can be removed with a rubber cup. I avoided using a lens spanner to prevent any damage to the front element. This is an expensive lens and I don’t want to damage it. It’s kind of hard to remove so I had to apply some alcohol to soften it up.

The front elements assembly can be completely dismantled in this manner. Note that there is a plastic or rubber gasket between the front element and its retainer. Don’t soak this part in alcohol or solvent!
You can dismantle the iris mechanism after you remove this brass ring. You then pick the diaphragm cup with your fingers.

The iris is now in front of you. Study how it works so you will know how to put it back again later.
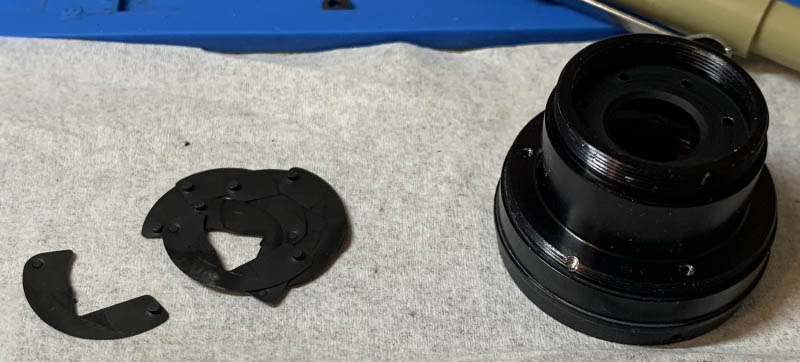
It’s simple to remove the iris blades, simple drop them on a piece of tissue or something that can cushion the fall. Mine came off neatly because they’re so oily. Handle them with utmost care so you won’t damage anything. This is an old lens so some of its parts can be brittle.
Clean everything very well by brushing them with detergent and rinse them thoroughly. Do a final rinse in alcohol to remove any residue then dry the parts before you reassemble anything. Clean the blades with a couple of Q-tips soaked in lighter fluid. Be very careful with them and only handle them by the pins. Don’t apply any lubrication to anything except for the spring for the aperture ring. Even then, only apply a really thin film of grease. Excess grease will easily migrate to the iris, making it oily again. Finally, if your lens has fingers, read my article on how to remove fungus and follow it carefully.
Conclusion:
This article completes my series on the 50/55mm Micro-Nikkors. It’s a project that took me a decade so it is a special article. The whole thing took me a few hours to overhaul, I could have used less time because I am familiar with this by this point, it’s just that some of the parts took more time to take apart so I had to wait. I’m so happy to have finally presented this special article to the community.
It feels so good to be finally able to shoot with one of my most desired lenses, I’ve been waiting to do it for a very long time. It was once a dream but it’s now in front of me.
That’s all for this article, it’s very short because we’ve already covered it in an older article. Did you enjoy reading about this magnificent lens? If so, please help me by sharing it with your friends. You can help me by leaving me a little tip because your support helps me so much. This site is heavy on images and I have to host it somewhere. It helps keep this amazing resource up for generations to come. We’ve been doing this for decades and this site won’t last as long if it weren’t for your help. Thank you very much and don’t forget to come back regularly because I’m actively updating the site. Also, I’d really appreciate it if you do not download the whole site nor my articles because I only earn less than $0.60 from unique views every single day. I was also made aware that some content creators are using my blog to create content. That’s all fine with me so long as you link my page so people will know about me. Thank you again and see you in the next article, Ric.
Help Support this Blog:
Maintaining this site requires resources and a lot of time. If you think that it has helped you or you want to show your support by helping with the site’s upkeep, you can make a small donation to my paypal.com at richardHaw888@gmail.com. Money isn’t my prime motivation for this blog, I believe I have enough to run this myself but you can help me make this site grow.
Leave me some tip?
Thank you very much for your continued support!
$2.00
Helping support this site will ensure that it will be kept going as long as I have the time and energy for this. I’d appreciate it if you just leave out your name or details like your country’s name or other info so that the donations will totally be anonymous. This is a labor of love and I intend to keep it that way for as long as I can. Ric.
