
Hello, everybody! I’m glad that you have followed me in this series and this is the final part. I will only fix what I needed to do so I apologize if my article didn’t go deep enough but I am sure that this will still be welcome because there is a lack of information on the internet in all things Nikon rangefinder related. Sit back and be entertained by my post.
Introduction:
We’re at the last part of our Nikon SP repair series. Part 1 showed you how to take apart the front and do a quick clean and part 2 showed you how to remove the top panel. This part, we will be dealing with the rangefinder assembly. The Nikon SP can be vulnerable to dirt getting into its optics and this article will show you how to clean it properly.
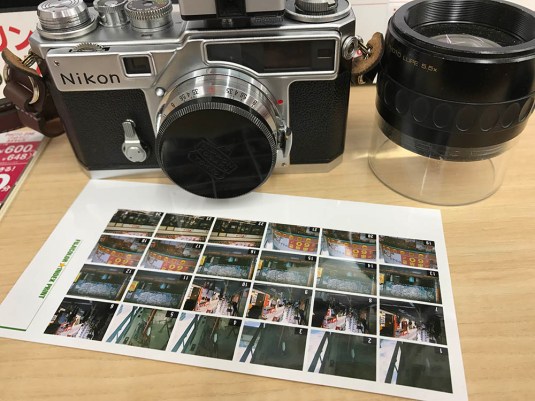 What a beautiful machine. A clean rangefinder will help you focus properly because you can see the patch properly. The patch on the Nikon SP can be small and fuzzy and that is due to dirt fogging-up the mirrors and lenses of the Nikon SP.
This part is the most difficult of our series because the Nikon SP is the most delicate of all of Nikon’s rangefinder cameras and you will soon see why. Again, send yours to a reliable repairman and don’t DIY this if you don’t have the proper tools or experience! This blog’s only for your entertainment and information. A Nikon SP is a very delicate machine!
Before We Begin:
If this is the first attempt at opening a lens then I suggest that you read my previous posts regarding screws & drivers, grease and other things. Also read regarding the tools that you will need in order to fix your Nikkors.
I highly suggest that you read these primers before you begin (for beginners):
- Essential tools
- Best practices 1
- Best practices 2
- Best practices 3
- Ai conversion
- Working with Helicoids
Reading these primers should lessen the chance of ruining your lens if you are a beginner. Also before opening up any lens, always look for other people who have done so in Youtube and the internet. Information is scarce, vague and scattered (that is why I started this) but you can still find some information if you search carefully.
I highly recommend that you also read my working with helicoids post because this is very important and getting it wrong can ruin your day. If I can force you to read this, I would. It is that important!
For more advanced topics, you can read my fungus removal post as a start. This post has a lot of useful information here and there and it will be beneficial for you to read this.
Disassembly:
Before we begin, I would like to stress the importance of using a screws organizer. You’ll also want to document each step properly because this can get confusing. Also remember that you are dealing with a camera that was made around 1957 so the parts can be brittle and can easily break when you used the wrong driver or applied pressure on something.
You also don’t want to use too much solvents or oil in this. Only oil what is needed and if you can get away with just blowing air then that would do. Never use canned air because the pressure is too powerful and it can send debris into places that you can never access. A good bulb blower is all that you need.
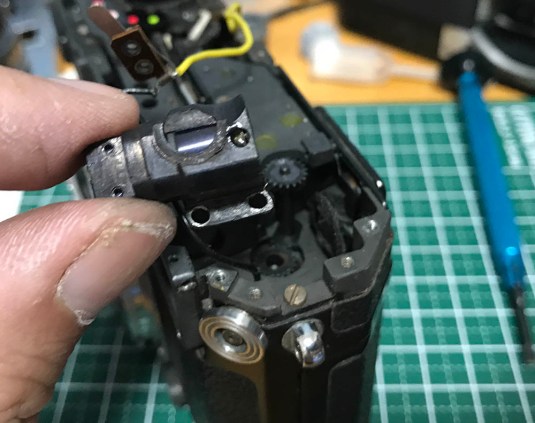
 Begin by removing these 3 screws. These screws secure the frame lines selector assembly and be careful to note which screw should go where. I recall that one of the screws is not the same as the rest and it’s either longer or shorter than the others.
The shutter speeds can be calibrated when you remove the film advance mechanism to the right of the camera. I will not go through that because it’s very delicate I don’t have to do this on my Nikon SP. I wrote a short article on how to calibrate your shutter speeds if you need to. That’s just showing you the easy way but if you need to calibrate it to a tee, it is essential that you have to open this camera even further and I’ll never show you how.
 The frame lines selector assembly can now be safely removed. It has a eccentric dial that pushes on a lever in the rangefinder assembly to display the correct frame line. You don’t have to disassemble this any further and if yours is gritty and not smooth, just use zippo oil (naphtha) to flood and just apply small amounts of fine watch oil to its spindle just to help it turn smooth. I would also apply just a bit of grease on the detent spring so when I turn the frame line selector dial it would click smoothly into place.
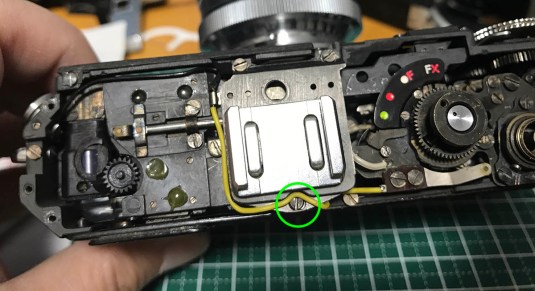 The accessory shoe is being secured by 3 screws. There are 2 small ones at the front and a big one at the rear. Be careful because the big one is covered by a wire (it’s a hot shoe).
 The wire is screwed to the base of the accessory shoe and you should unscrew these.
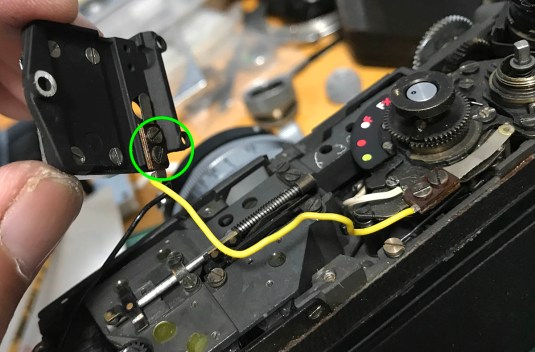
 This will allow you to remove the accessory shoe without harming the wire.
 If I am correct, the black wire is the ground and it’s connected to the body casting. Leave it alone, I am sure that you can work on the camera without removing it. Just be careful not to damage because we’re dealing with decades-old solders and wires.
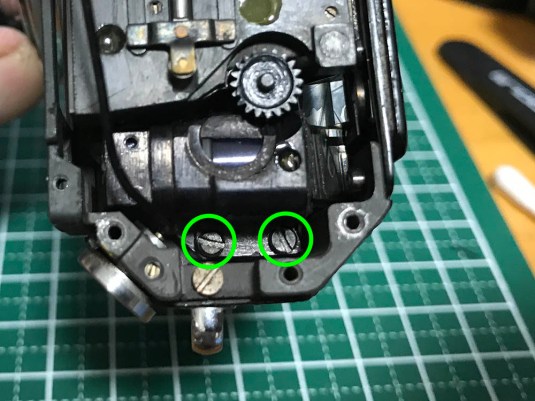
 To remove the front bezel and lens of the wide finder, you will have to remove 2 screws on top of it. Be careful not to press on the front glass because it may sink inside.
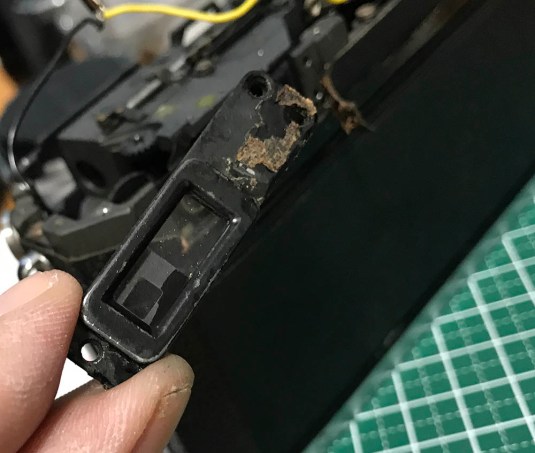
 Here are the 2 screw holes. Once you remove it, you can then clean the front glass with a Q-tip and naphtha. If you wish to do a thorough cleaning, just gently push on the window from the front and everything should come out at the rear end. It consists of the housing, the front glass and a rubber spacer. I am not sure if there are other things inside here.
 The wide-angle finder assembly is secured to the body casting by these 2 screws. Remove the screws and you can carefully pull it out but make sure that the delicate prism block is safe. The old foam connecting the 2 can get gooey with age and can bind the 2 together. If yours is stuck, just place a VERY small drop of alcohol on the foam and let it soak until it’s soft enough to be separated. Mine was old and flaky so this wasn’t a problem.
 With the screws gone, you can see that the wide finder can be adjusted. Take note of how it was adjusted and try your best to put it back to the same position.
The cog you see beside the wide-angle finder is for the rewind crank. The Nikon SP uses a by-pass system for this because the wide-angle finder is in the way. Normally, the crank’s shaft is one solid assembly but we have a series of cogs here. This cog has to be cleaned, re-lubricated with the proper grease and reinstalled. Be careful of it’s orientation since it is not symmetrical and one end has a bigger cog.
 The wide-angle finder assembly can now be safely removed. I didn’t bother to open it up, it can be near-imposible to put it back properly because it’s so delicate. You can clean the outer glass surfaces if you need to. Messing this up amounts to a failed repair.
The by-pass mechanism’s cog can now be safely removed. You can study how it works if you’re really into it.
 To remove the viewfinder bezel, you will have to partially remove the leatherette. Use a little bit of alcohol to soften the glue and then carefully pick at it with a small driver. Just repeat the alcohol routine if it won’t come-off. You will want to be very careful with this because these decades-old leatherette can be very brittle and easily torn. You will find 3 screws here. The 2 screws to the left are easy to remove but the screw to the right can be tricky to remove because it’s secured with a nut on the other end.
 Here is the nut. I held the nut with a pair of tweezers before I remove the screw. It was a very difficult job because just beside that nut is the very delicate prism assembly. If you ruined the prism assembly then you can say goodbye to your Nikon SP!
 Here are the 3 screws.
 The viewfinder bezel can now be removed. Old glue may have bound it to the chassis so you may want to saturate the edges with some alcohol to soften it a bit.
 It comes in 2 parts, the bezel itself and a light shield.
 The whole rangefinder assembly is being secured by these 3 screws. Screw #2 is covered by the flash sync selector display so you must remove it first.
 Carefully unscrew these 2 screws.
 Carefully remove this delicate part and store it somewhere safe.
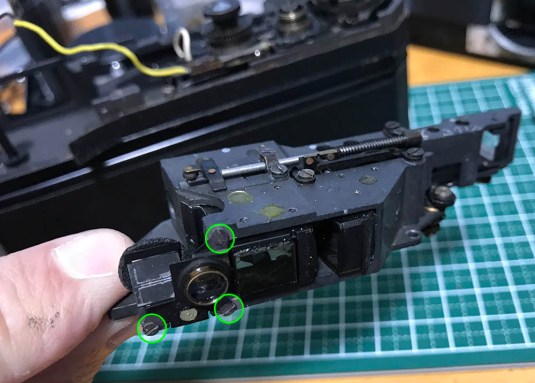 You can now safely remove the rangefinder assembly. You can easily remove it by lifting it from the bottom through the mount. Press on the rangefinder cam with your finger so it lifts the whole rangefinder assembly a bit and pick it up with your fingers. You should be very careful with handling this thing. It’s a very delicate object.
The prism assembly is being held by these 3 screws. If you can get away without having to remove this then good! If you damaged this part then you’ll end up with a black finder because light isn’t reflecting properly.
 Here is the old foam. I had to carefully remove mine by softening it with alcohol. Apply it in very small amounts until it makes the foam soft enough to be peeled. Be careful with the frame lines. They are simply printed to one of the surface and if you rubbed it off you will have no frame lines! Dirt usually gets trapped here and the dirt can come from this foam as bits of it get deteriorated and settle in the glass. Mine has some nasty fungi and I had to carefully wipe it off. Thankfully, the wide-angle finder was saved.
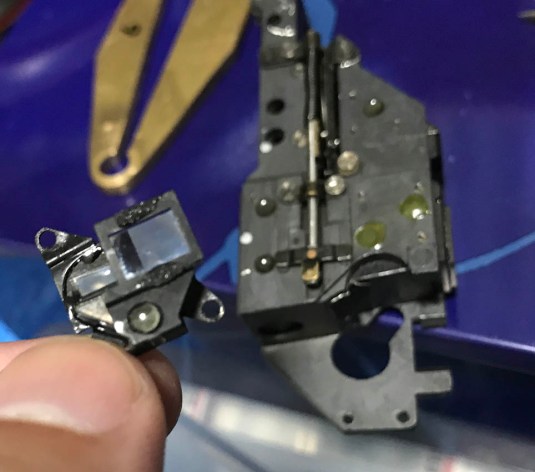 Here is the very delicate prism assembly, it’s basically 4 prisms that were glued together. Cleaning it got me nervous and you can bet that I was seating my nuts when I was doing it. Wipe every surface of the prism assembly carefully with alcohol and a Q-tip. Using the tip of a flat sable brush will also do the job. Remember, go at it slowly and don’t put too much alcohol or it might dissolve the glue holding the prisms together.
 Cleaning the rangefinder assembly is not easy. You want to clean every optical surface so light can pass-through properly. Never disassemble anything here because you may not put it back to factory tolerances. For really tight spaces, use a strip of clean paper to slip it between the thin spaces and carefully clean it. A drop of alcohol on a strip of paper will help you clean the surfaces of the half-mirror because a dirty half-mirror is the cause of a feint rangefinder patch. I forgot how long this took me but I spent a long time cleaning every surface that’s accessible to me. Just go at it slowly and never force it.
That’s it for the disassembly. You can just follow the steps in reverse to put things back in place but first check how things are before you completely reassemble it only to find out that you forgot to clean something or that something is a bit off. Check as you go.
Conclusion:
This was a fun project and I learned a lot doing this. Remember, send this to a repairman you trust. It’s better to spend a few $100 for a proper job than lose $1000+ because you’re skills aren’t up to it and you managed to turn your camera into a junk. Like what I said in the previous parts, I will never attempt working on this if I don’t have a manual. I have a great Japanese repair manual and that helped me get the job done.
 These strips of foam had to be replaced. They keep dust from getting into your optics.
 Finally done! Thank goodness. At this point, you will want to recalibrate the rangefinder. If you missed it, I showed how to do this in part 1. You will have to recalibrate it because you took the rangefinder assembly out and that will definitely put it out of spec.
Thanks for following me on this series. Did you enjoy it? If you did, please share this with your camera club so that our tiny community can grow! I really wanted to write this but I was really busy and I only got the time to do this now. We will be going back to lenses in the next article because that’s our focus in this blog. See you guys again next time, Ric.
Help Support this Blog:
Maintaining this blog requires money to operate. If you think that this site has helped you or you want to show your support by helping with the upkeep of this site, you can simple make a small donation to my paypal.com account (richardHaw888@gmail.com). Money is not my prime motivation for this blog and I believe that I have enough to run this but you can help me make this site (and the companion facebook page) grow.
Leave me some tip?
Thank you very much for your continued support!
$2.00
Helping support this site will ensure that this will be kept going as long as I have the time and energy for this. I would appreciate it if you just leave out your name or details like your country and other information so that the donations will totally be anonymous it is at all possible. This is a labor of love and I intend to keep it that way for as long as I can. Ric.

Aug 30, 2019 @ 21:22:14
Enjoyed the article on the Nikon SP repair. I also have a Nikon SP and the focusing wheel has always been really stiff. What could I do to make it smoother, easier to use? I was given this camera and have been slowly working on it. I have it paired with a Nikon 3.5cm 1:2.5 f3.5cm W-Nikkor-C.