
Hello, everybody! We’re now going to continue part 2 of our Nikon SP repair series. In part 1 we discussed how to open up the front part of the Nikon SP and also how to clean and do some minor calibration of the things that you can access there. Today, we’ll go to the more gritty part, that is the removal of the top panel. This partial overhaul is never going to be complete without opening the top panel, any serious work has to involve it. This article isn’t a complete overhaul article but it’s deep-enough to cover simpler CLA for the Nikon SP. This is just for your entertainment and education so if yours need attention, send it to a technician so that it can properly be repaired. This is not a DIY project for the beginner or even an experience repairer. You have to make sure that the technician you’re sending your camera to is qualified and is of good repute in the camera community. He has to be well-versed in classic Nikon repair, if not then he’s not the right person for the job.

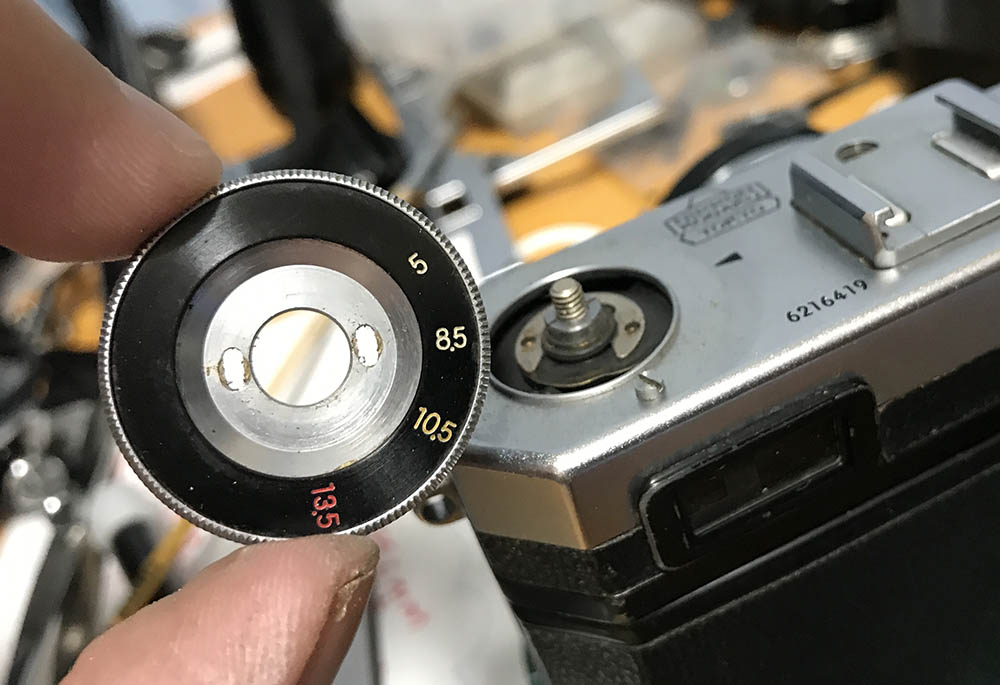
Such a lovely machine with all those chrome dials and engraving. Shooting with this can help you improve your photography skills, it slows you down and think. If you’re really into it and want to go even slower then consider shooting medium format film. Shown here is the Nikkor-P•C 10.5cm f/2.5, it is the perfect partner for the Nikon SP.
My Nikon SP was a junk. I fixed most of the important things in part 1 but I can’t leave the viewfinders riddled with fungi. This required me to open the camera further so I can reach the insides to clean it. I also lubricated some of the parts found on the film advance mechanism and that helped smooth the operation a bit. It’s far from like-new condition but it’s certainly much better than how I got it.
This part requires that you have special tools. If you don’t have those then I will recommend that you purchase or make them first before you proceed. I’ll show you what I used and how I made them (if possible). Camera repair is in a different league and lens repair is so easy compared to fixing these. A small mistake can become costly and end up being frustrating. Like I said in part 1 I’ll never attempt repairing this camera without a repair guide. I have an excellent Japanese repair manual, that’s what helped me get through this project.
Before We Begin:
If this is your first attempt at repairing a lens then I suggest that you check my previous posts regarding screws & drivers, grease and other things. Also read what I wrote about the tools that you’ll need to fix your Nikkors.
I suggest that you read these primers before you begin (for beginners):
Reading these primers should lessen the chance of ruining your lens if you are a novice. Before opening up any lens, always look for other people who have done so in Youtube or the internet. Information is scarce, vague and scattered (that is why I started this) but you can still find some information if you search carefully.
I highly recommend that you read my working with helicoids post because this is very important and getting it wrong can ruin your day. If I can force you to read this, I would. It is that important!
For more advanced topics, you can read my fungus removal post as a start. This post has a lot of useful information and it will be beneficial for you to read this.
Disassembly:
Before you begin this make sure that you have a good organizer. I use a pills organizer, they are perfect because they come with small cells, I can put my screws and other small parts in each cell to correspond to each step. This is a camera, it’s a precision equipment and the screws will never be the same for every assembly. Some may appear to be similar but on closer inspection, they’re just a few tenths of a millimeter shorter. It’s very important that you keep notes and organize your screws to keep track of things.
Again, make sure that you use the proper drivers, you’ll need several ones. If you haven’t read part 1, I talked about how important having the correct drivers are, read it before you begin. Please do not simply browse through my pictures and assume that it is easy. Read my commentaries even if they are repetitive or boring.

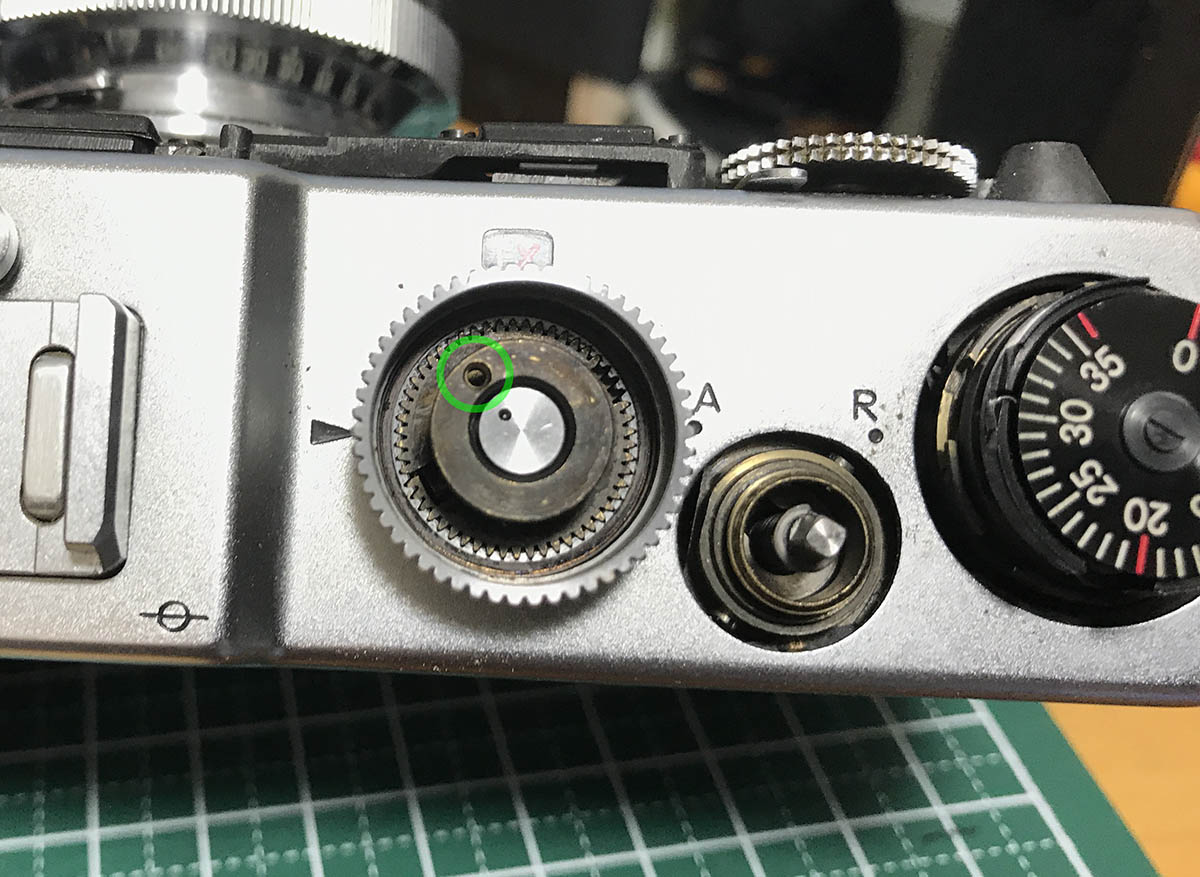
To remove the A/R ring, you will need to remove a tiny set screw that can be accessed by turning it until the set screw is visible through a small hole. Use a small driver to extract that little set screw and set it aside.

That screw that we just removed in the previous step secures the A/R ring’s collar. It has to be removed using a special tool. Read my article about my A/R Ring Opener to find out how to make and use one. Alternatively, a DIY Pipe Key Alternative is also a good tool. Whichever tool you ended up using should be fine so long as you don’t scar the surface of the collar. Remember, all you want is to loosen the cover with these tools. You then unscrew it by using a needle or a pin. You also re-tighten the collar with the very tool that you have used to open it. There’s no need to apply glue or lacquer to secure it.
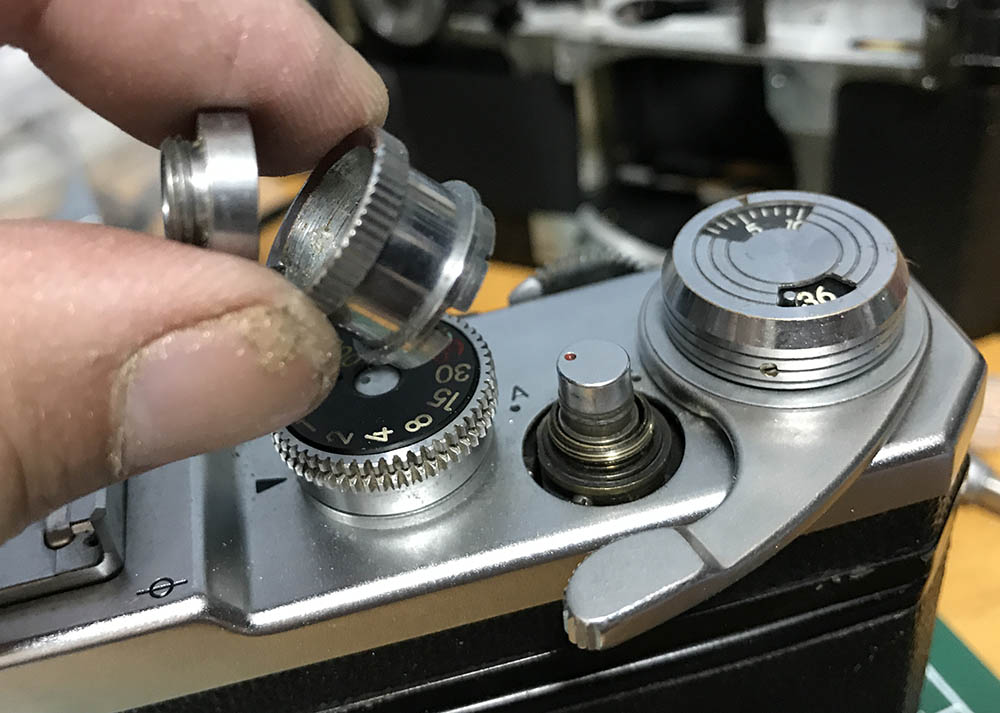
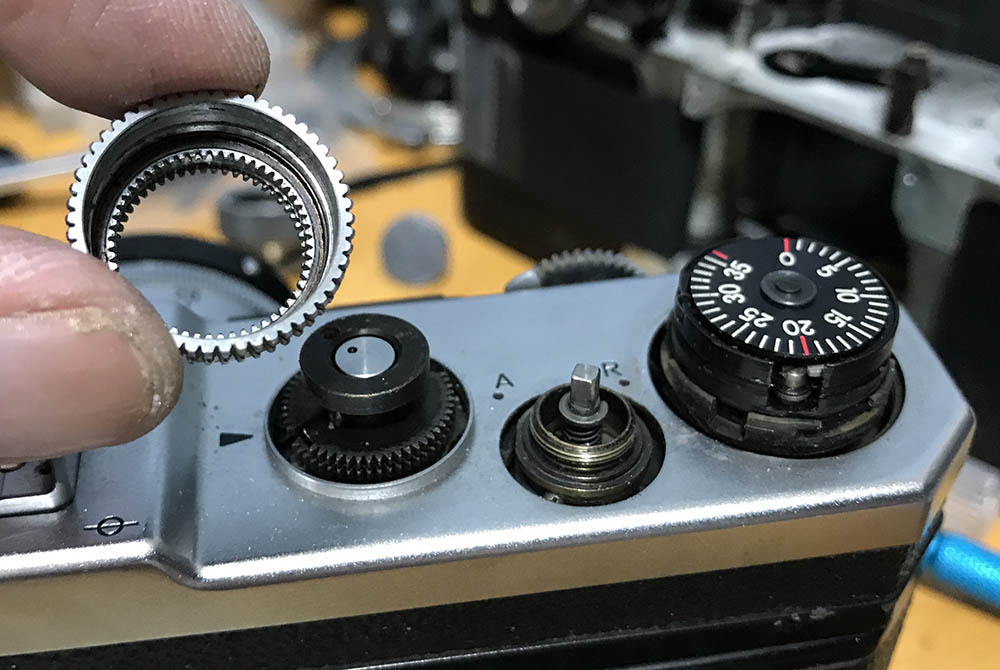
We can now safely remove the A/R ring and its cover. You can also remove the plunger button at this point if you wish but I’m leaving it there for now.

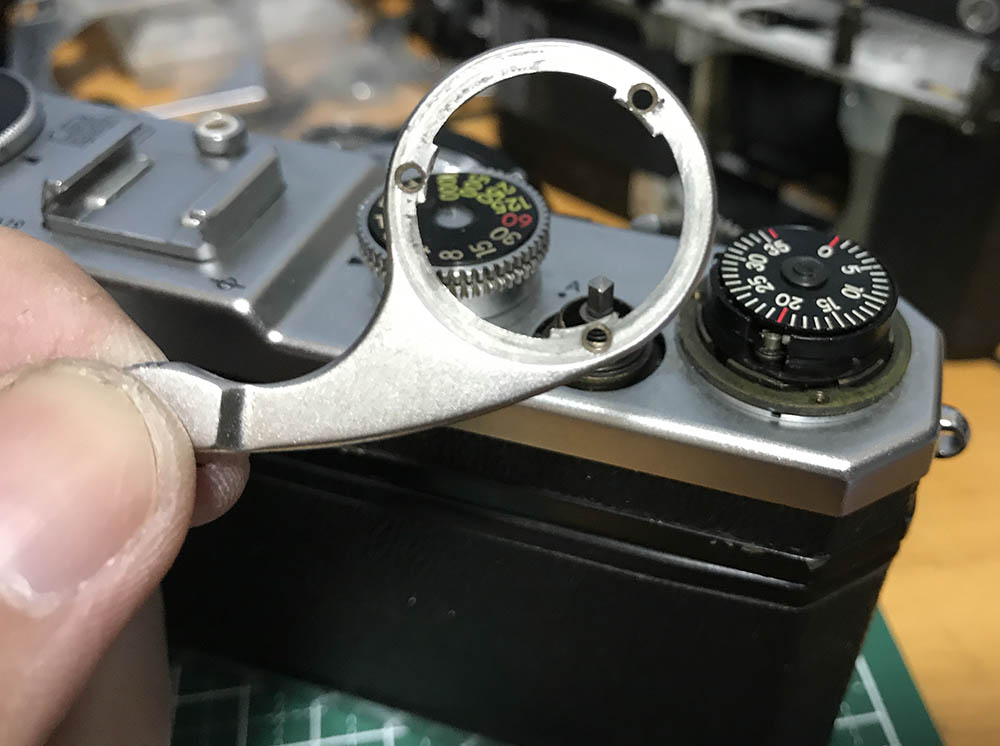
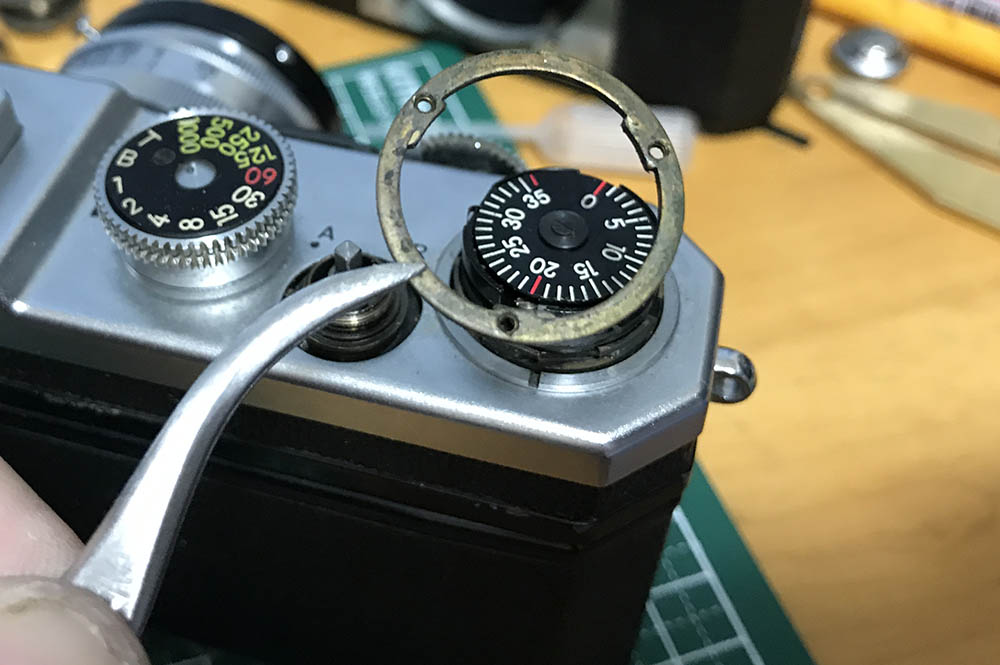
Next is the frame counter’s housing. I am not sure if there are 3 screws here but they’ll have to be extracted in order for you to remove the housing.

The housing comes-off easily. The window for the film counter is just glued to the inner surface of the housing so be careful not to push that off.

The frame count selector can be removed with a pair of tweezers. These are just indicators for your film capacity, they aren’t connected to anything.

Remove the plunger, remember that it has a key underneath it that should fit into a square slot on the plunger’s mechanism.

Remove this collar. It’s basically a spacer so the housing doesn’t press-on the film count selector.

This protective ring can be easily removed by lifting it with your fingernail. They cover the screws underneath so they do not look unsightly. Remember which side should face up.

The film advance lever is being secured by these screws. Carefully remove them in order to proceed, they’re made of brass so be careful not to damage them.
The film advance lever can now be removed. These aren’t solid like the ones found on the Nikon F and they can easily be bent. I actually find these to be quite flimsy. You must press on the lever a bit so its flanges are not inserted to their slots in the film advance mechanism’s housing.
This brass collar can now be removed. If yours is stuck, make sure that they aren’t engaging the film advance mechanism. Turn them counter-clockwise and they should be free. Be careful putting these back because the flanges that take them can be flimsy and easily-bent since they are made of brass.

You can finally get to this collar. These can be tricky to remove, you’ll need a proper pipe key for these. I don’t want to risk scratching the surrounding metal part of the top panel so I avoid using shortcuts but if you really must you can also utilize the pipe key alternative I showed you a few steps back.

These can be difficult to put back, you should also be very careful with how it has meshed with the thread on the film advance mechanism. Be sure that it’s seated properly and not at an angle before you retighten it or you’ll strip its threads.
Carefully remove this screw to open the shutter speed dial. Make sure that you don’t scar the dial with your driver.

The dial can be safely removed. Its paint can easily be rubbed-off, I’ll warn you against scrubbing it with a toothbrush. I washed mine with some soap and warm water and then scrub it with a soft paint brush.
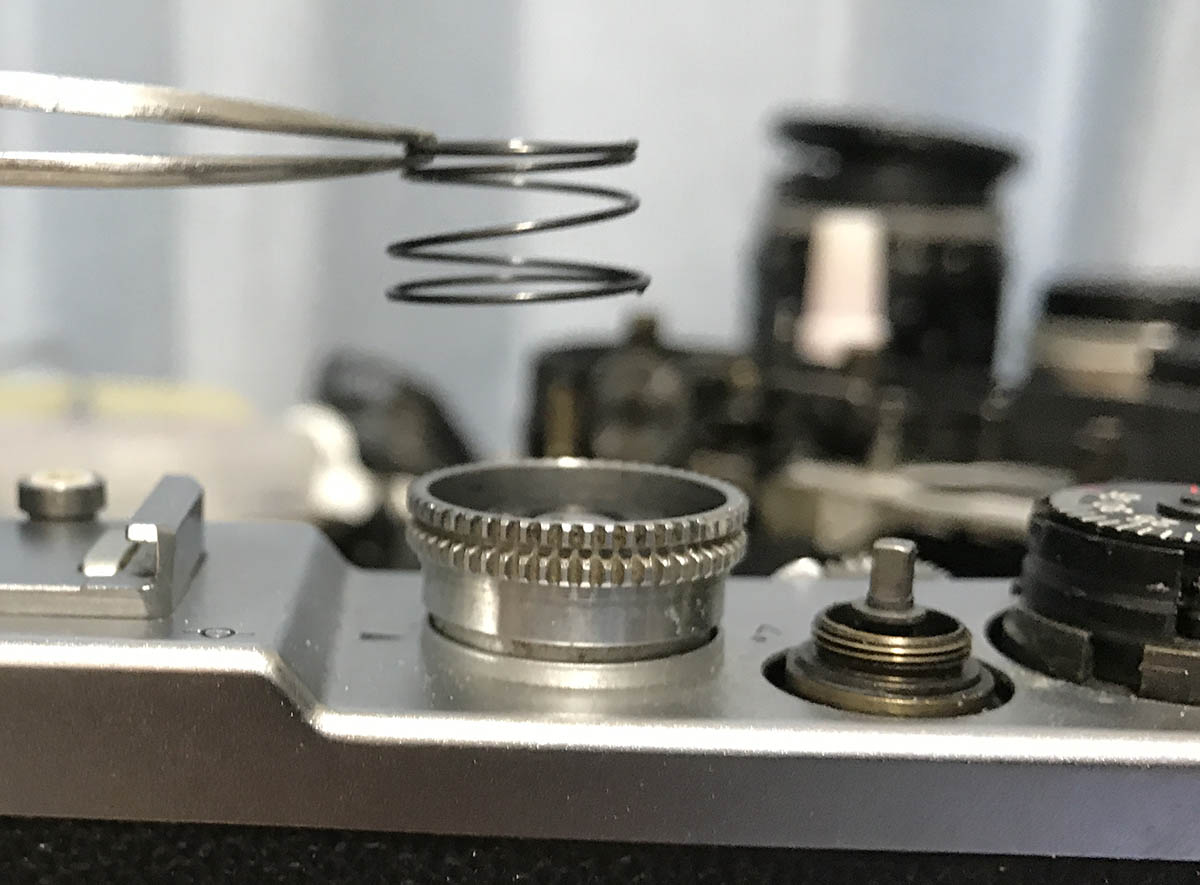
Remove this spring and make sure you take note of its orientation.

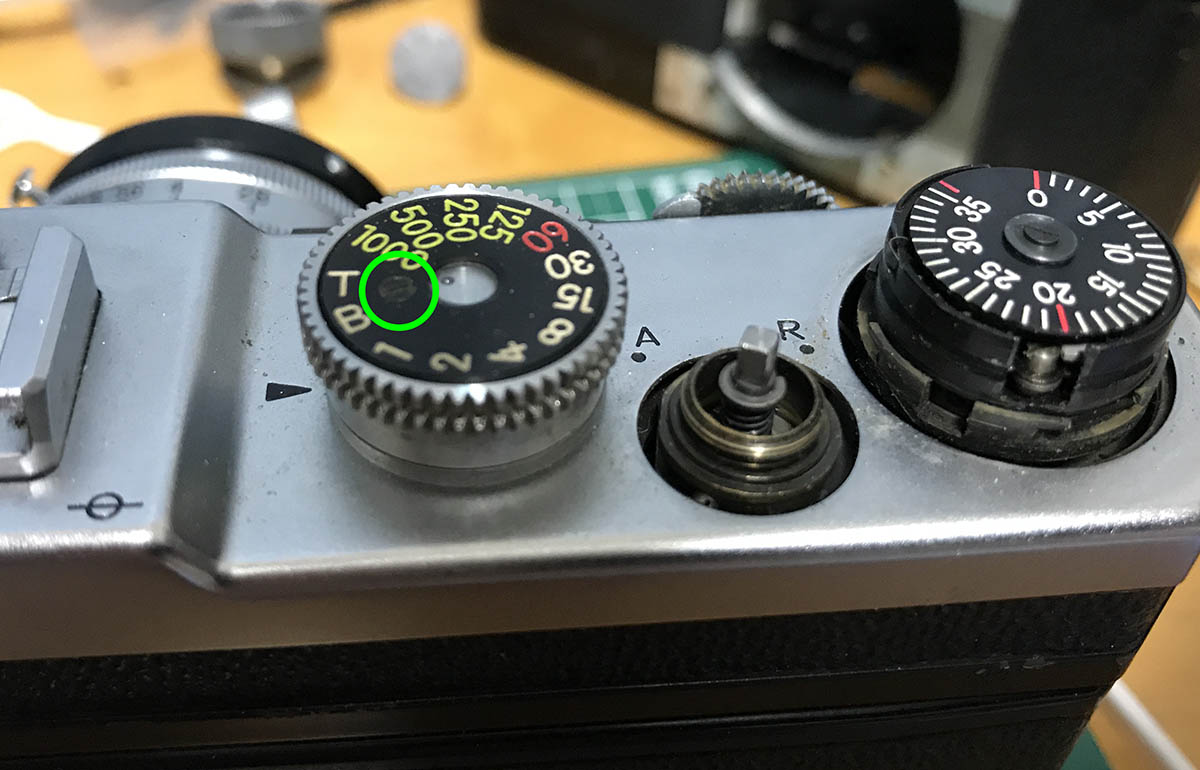
When the screw hole is at this position, it’s in the time (T) mode.
To set a standard, I set the speed to bulb (B) whenever I remove the shutter speed dial or when I am going to separate an assembly that is connected to the shutter assembly. This is the position for bulb, always remember it.
The shutter speed dial’s crown can be removed from the camera.

The contact terminal can be removed using a friction wrench. If you do not have it you can fabricate one yourself. If you don’t have this tool then forget about proceeding with the repair, shame on you if you’re a repairman.

Be careful not to damage the plastic insulation because they crack easily.

Loosen a screw found in the rewind crank. Removing the rewinder is easy. Slip a wooden peg into the fork to jam it and you can turn the crank until it unscrews.

Don’t force it if it doesn’t move or else you will do some irreversible harm to the sprocket and this is one of the weaker points of the Nikon SP as you will soon see why in part 3 (it uses a bypass system).

This is the frame lines selector dial, it can be removed by unscrewing these.
The frame lines selector dial is adjustable as evident by the elongated holes. Later, when it’s time to put things back together you will have to adjust the dial to accurately match its frame lines while peeking through the finder, it should match the arrow indicator at the top panel. If it’s off by a bit nudge it and tighten its screws once you’re satisfied.

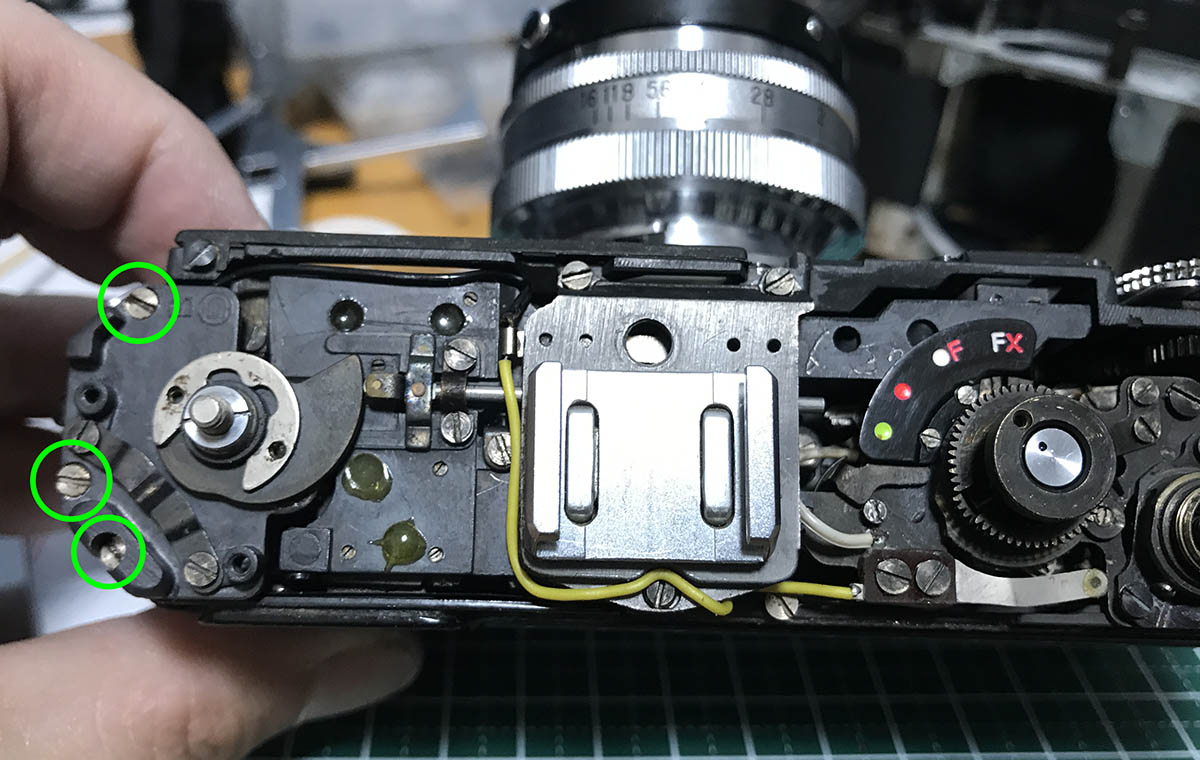
Under the dial are 2 more screws. These are the last things that secure the whole top panel to the camera.
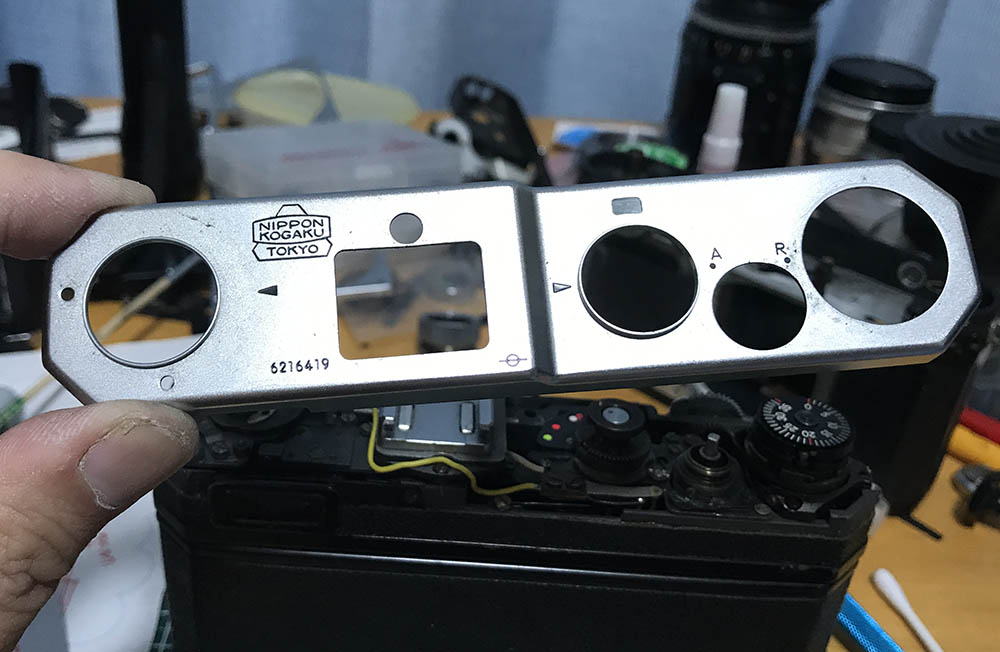
It’s a lot of effort but it’s all worth it. Admire the engineering that went into this masterpiece. I’m never going to get tired at looking at the insides of the Nikon SP because it’s such a work of art.
That’s all for the top panel. If you think it’s too much hassle to remove this then I have succeeded in scaring you. I do not want to give the impression that the work I do is easy and that everybody else can do it. Truth be told, I spend plenty of money making mistakes in the hopes that you do not make the same mistakes as I did and flood the market with badly-repaired junks. Again, send it to a repairer. Make sure that he’s competent or else he won’t be doing a better job than me.
Conclusion:
We have now removed the top panel. Any serious repair needs to start with removing it. It protects the sensitive mechanisms of this camera such as the rangefinder assembly and film advance mechanisms.
Here is a preview of part 3. Just look at how complicated it can get. See how cramped the insides of the Nikon SP is? There’s practically no wasted space.
I hope that you enjoyed this article, see you guys again in part 3! Thank you for supporting the blog, it ensures that it continues to benefit other people. I use your donations to pay for hosting and to fund my film purchases. This is enough to enable me to offset the cost of keeping this blog alive. Thank you all again, Ric.
Help Support this Blog:
Maintaining this blog requires money to operate. If you think that this site has helped you or you want to show your support by helping with the site’s upkeep, you can make a small donation to my paypal.com (richardHaw888@gmail.com). Money is not my prime motivation for this blog and I believe that I have enough to run this but you can help me make this site (and the companion facebook page) grow.
Leave me some tip?
Thank you very much for your continued support!
$2.00
Helping support this site will ensure that this will be kept going as long as I have the time and energy for this. I would appreciate it if you just leave out your name or details like your country’s name or other information so that the donations will totally be anonymous. This is a labor of love and I intend to keep it that way for as long as I can. Ric.

Jul 17, 2022 @ 17:13:38
Dear Richard
I just want to thank you for your generous Info. on this camera ( sp ). I recently aquired a late model which is imaculate except one problem, the wide finder is dirty and needs cleaning! I’ve been studying your page on opening the top and getting to this problem. My skills are fairly decent on repairs and have done numerous lens, older cameras, and repairs etc. Sp Repairs are just to costly and after I get my nerve up, I may do this cleaning. Couldnt have done it without your Info. , and again thank you very much for your technical contribution on this masterpiece of a camera