
Hello, everybody! Do you like watching “Japanese prawn” or “車海老”? I used to be an aquarist and these creatures are amazing to watch, they’re big and their colors are amazing. Needless to say, they are tasty. I know of a few varieties for preparation but my favorite is “tempura”. There are 3 main ways to prepare the meat, tempura, sushi and salt-baked, of the 3 major ways, the most popular one is tempura by far. Today, I will show you something that is also “big”, it also comes in 3 major variations. And just like the Japanese prawns, this is also something that you do not encounter everyday because it’s special, even expensive! It is also something to celebrate, stay a while and listen to my story.
Introduction:
The Nikkor-N 5cm f/1.1 was produced from 1956 to somewhere around 1959. It was Nikon’s fastest lens, only to be replaced by the recent Nikkor Z 58mm f/0.95 S Noct after more than a half-a-century’s time. It’s considered to be a breakthrough for the company in terms of lens design and mechanical engineering. Its reputation is such that it has earned a following over the years because for such a long time, Nikon didn’t make a true successor for it, with the next-fastest one being the Nikkor 50mm f/1.2 Ai. Sure, Nikon made the Nikkor-S 55mm f/1.2 Auto but it isn’t a 50mm “normal” lens, so most people do not consider that lens as a true successor. While the Nikkor-N 5cm f/1.1 was hailed as a breakthrough, it was merely a response to the world’s then fastest lens – the Zunow 5cm f/1.1 which came out a few years earlier. That lens sent a big message throughout the optics industry, and of course, Nikon had to respond.

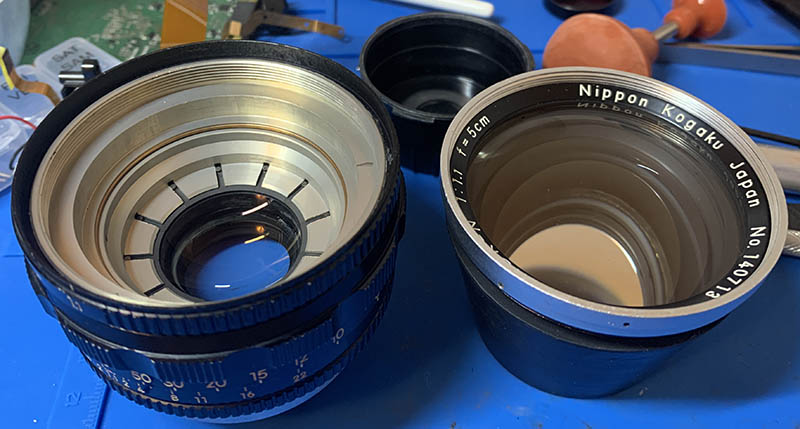
We are going to look at the “external-mount” version of this lens, it has 3 known variants which we’ll talk about later. The barrel’s engineering is surprisingly modern, it has a focusing unit and the front barrel will not turn as you focus, unlike the internal-mount 50mm Nikkors. The aperture ring is at the front, closer to the tip of the lens, while the focusing ring is situated at the center. The aperture ring is not evenly-spaced, a typical limitation of many older lenses. The attachment ring is 62mm, it’s best to only use Nikon’s filters of the same period because of the threads and position of the glass, using something else may scratch its front element since it’s too bulbous.

It uses a 9-element-in-6-groups design (Gauss) that incorporates rare-earth materials into the mix, giving it better qualities for correcting optical aberrations. If you want to learn more about the optics, read what Sato-sensei has to say about it in his amazing article. Another detail that’s worth mentioning is how slim the gap is for the iris, if you look at the illustration above, you can see that there’s almost no space for the iris mechanism, this is a challenge that was overcome partially by using very thin blades, they are so thin that they easily get damaged when you operate the iris carelessly, such as turning it too quick. If you feel some resistance or see some oil, stop turning the iris and have lens serviced! Many have fallen to this and only Kiitos can solve this by using a replacement set. The blades are so thin, the only other lens that I got to service that has something similar to this is the Carl Zeiss Opton Sonnar 50mm F/1.5 from the 1940s. It is also prone to warping or “caving-in”, meaning that the plane does not stay flat. It curves inwards, which gives it a curved cross section, while this is by design, it should not curve too much. If you notice that the plane of the iris appears to be curving way too much, be sure not to operate the aperture ring, send it to a real repairman as soon as possible.
I mentioned that there are 3 known variants of this lens, they are:
- Internal-mount: mounts like most usual 50mm Nikkors, but it’s too heavy and a damage risk.
- External-mount: the subject of this article, a focusing unit was incorporated for safety.
- Leica-mount: came with Leica’s L39 mount, very rare and expensive – rich man’s toy.
All of the above uses the same optical design to my knowledge. The most desirable is the external-mount version because it can be easily mounted and adapted for other cameras. Some people use these for their Leicas, while mounting it is easy, making sure that the rangefinder is in agreement with the lens is another story, you will need to adjust it together with the camera (with its adapter). It is not a job that an amateur can do. The 2nd most desirable one is the rare and expensive Leica-mount version because it’s even easier to mount to a Leica or any Leica-clone. Finding one in great condition and price will be your biggest issue, they sell for a couple of kidneys’ worth in Yen, seriously. The least desirable version is the internal-mount, nobody wants it because it can damage the adapter or bayonet of a camera due to its weight. That is the cheapest one around but still expensive. Currently, the prices are all inflated artificially, these used to cost a lot less back then even just around 7 years ago. I usually see these sell for around $2,000.00 or so, and in great condition, too. Now they sell for double that price.

This is a very large lens by Nikon rangefinder standards, the barrel alone is so big it will cover your view if you peek through the eyepiece of your camera. It’s not going to cover your view completely but you are going to see it cover about a quarter of the whole frame. Not only that, focusing with this thing is not an easy task especially if you are shooting wide-open, the depth-of-field is so thin that you will lose some of your shots due to miss focusing on your part. That’s why it’s better to shoot a couple of photos for safety. This is not such a big deal when you are focusing beyond 15 meters even at f/1.1.

The rear of the lens protrudes as much as this so it’s really close to the shutter. Be very careful when you place it on top of a table, you will want to have the rear facing up instead for safety.

The Nikon S2 is the best companion for it because of the huge life-size viewfinder, the focusing patch is also the brightest, enabling you to make precise adjustments when focusing. All variants of this lens is so huge that they will cover about less than a quarter of the view, obstructing your frame. The hood for this is even bigger and it has holes in it so you can see-through the hood.

One of our dear readers shared this photo of his hood. This is the original one, not the reproduction that was made more than a decade ago. This is an expensive accessory because of its rarity and fragility. If I’m not mistaken, there are 2 versions of this – a plastic version and a metal one. If you are shooting this with a mirrorless camera like the Nikon Zf a cheaper solution is to use a step-up-ring and a much larger hood for telephoto lenses. It ain’t pretty but at least it’s cheap. You will have to be careful though because the thread of the ring may have a slightly different thread pitch from the lens, attaching that will damage your lens.

Adapting it to a Nikon Zf is effortless, all you need is a cheap adapter. These cheap Chinese adapters are not good and will focus-beyond infinity, you’ll need to shim them to get them to focus more accurately. The Japanese and Taiwanese ones are more expensive but they are all worth it, but the ones produced by Amedeo are the best. The ability to magnify your view digitally is useful for accurate focusing, this is the most convenient way to enjoy shooting with this lens.
Learning how your lens performs is the key to maximizing it. You will learn how to utilize its strengths and avoid its weaknesses. This knowledge helps in determining which lens to bring on an assignment. I shot these from f/1.1, f/1.4, f/2, f/2.8 and f/4 because these are the most common apertures that people would want to use it. The photos were shot with a Nikon Zf and some of the pictures were cropped closer to 1:1 magnification so we can see the details better.

Distortion is quite pronounced, even for a 5cm lens of this vintage, the profile looks simple and should be easy to correct in post, but that will remove a lot of pixels from the edges of your frame.


(Click to enlarge)
Vignetting is heavy wide-open, absolutely hideous. Stopping it down to f/1.4 doesn’t help much, you will need to stop it down to at least f/2 to see some noticeable improvement. Things look better at f/2.8 and I think it won’t get significantly better beyond f/4 where the dark parts are located at the extreme corners. If you need to stop the aperture down more than f/5.6 then you should shoot with a Nikkor-H•C 5cm f/2 instead, did that make sense?


(Click to enlarge)
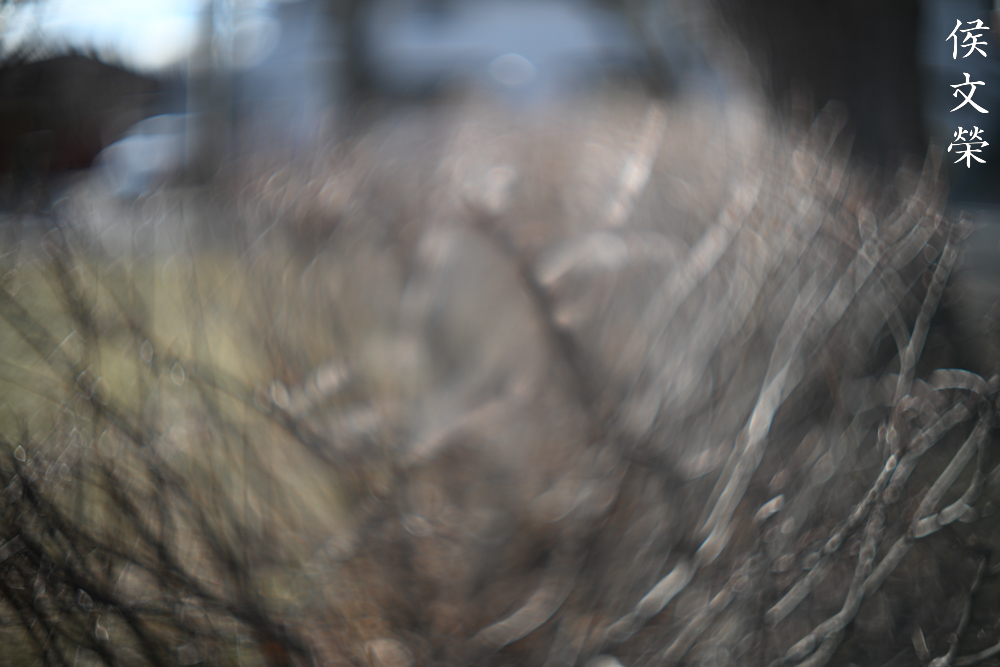
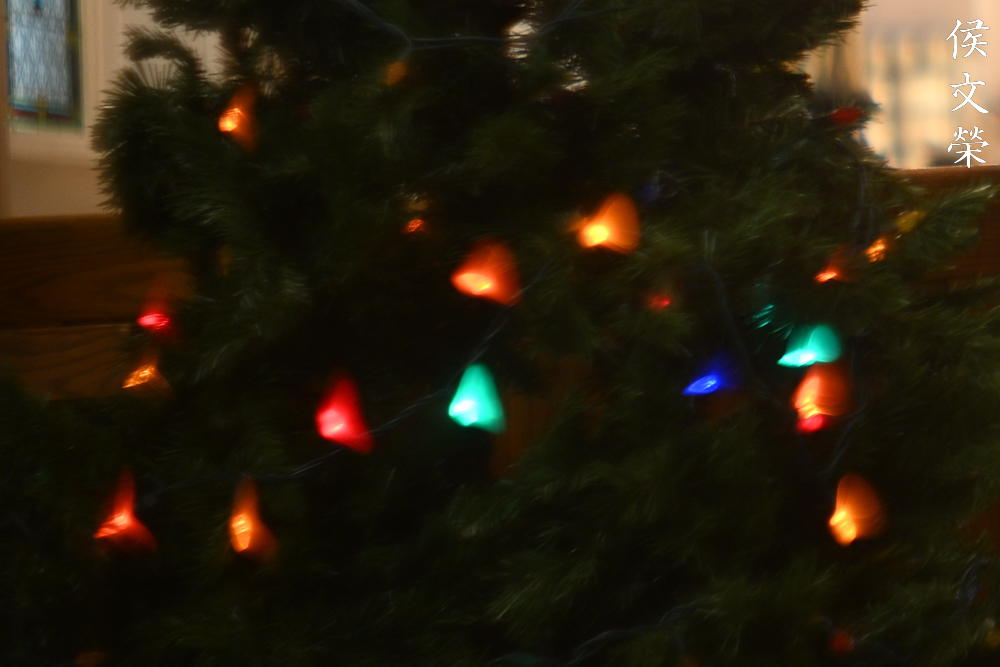
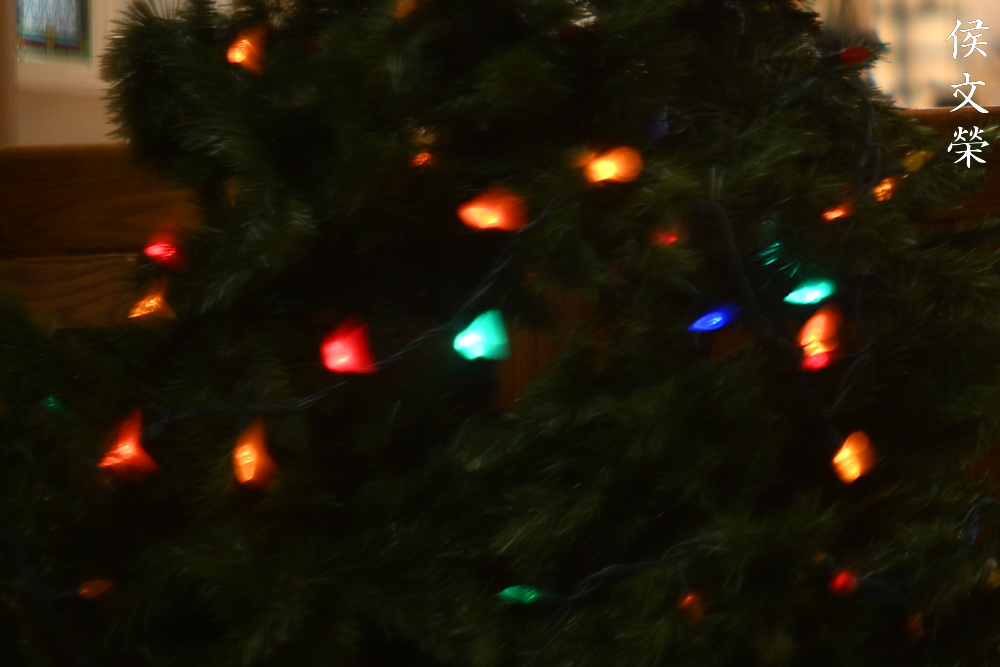
The character of the bokeh is an acquired taste, some like this bubble-look but I find it nauseating. It can be nice for creative use sometimes and should be confined to that. We’re lucky that we have many layers of iris blades so the discs look a lot more circular than angular, if it only has 8 blades or less, we will have an even rougher look. Stopping the iris down helps a lot in mitigating this, in the last set, the iris was set to around f/2.8 to f/4, notice that it looks a lot more acceptable here compared to the others where the iris was at its widest. There is a merit to this, you can have 3 different “looks” with just one lens, shooting wide-open can give you a trippy-look and stopping the iris down to f/2.8 will give you a more refined and smoother look, and stopping it down to f/5.6 will give you a more “normal” feel to your photos.


(Click to enlarge)
The curvature is so pronounced that the discs becomes distorted as they get closer to the edges, looking more like jellyfishes than the usual cat’s-eye/lemon-shaped discs that we usually see with older lenses. It’s going to look much better once you set the iris to f/2 and from f/2.8 onwards, the discs look a lot rounder and more suitable for professional work.
Another thing that I’d want you to pay attention to is the shape of the orbs, notice that there are spikes at the edges of the orbs when you stop the iris down to around f/4 or so. This is caused by the intersections between the blades, I personally don’t like it since that will affect how smooth the rendering of the bokeh in certain scenarios, but since the spikes are small maybe this lens can get away with it.


(Click to enlarge)
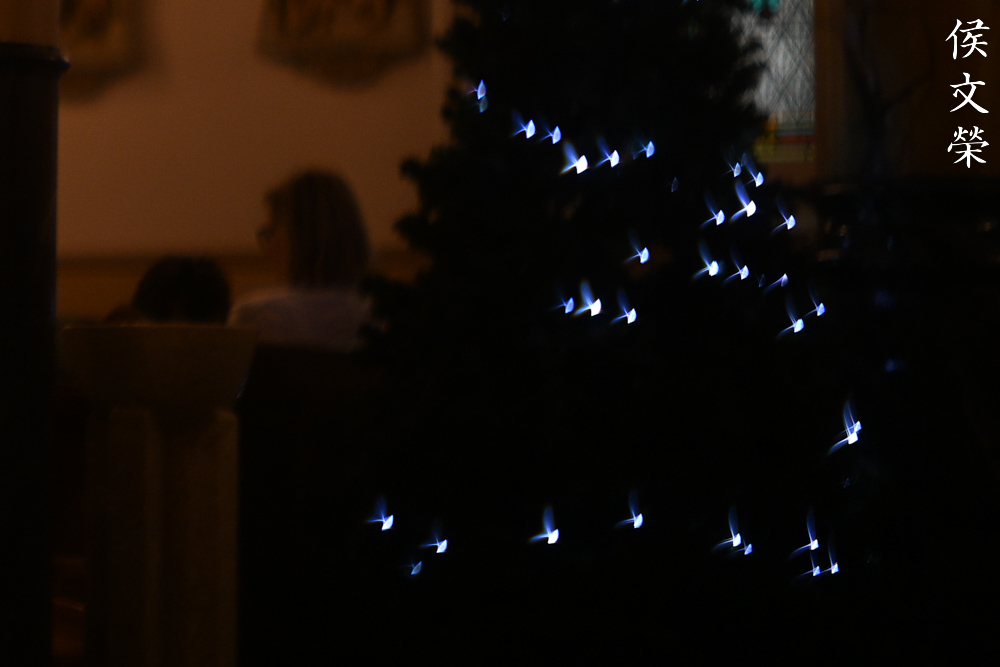
Coma is hideous wide-open, point-lights look more like bells and lemons. Stopping it down to f/2 helps a lot but you will need to stop this down to at least f/4 to make your lights look acceptable. This is a shame because it would have been a great lens for astrophotography, that was the limits of technology way back then so we can’t complain too much.

(Click to enlarge)
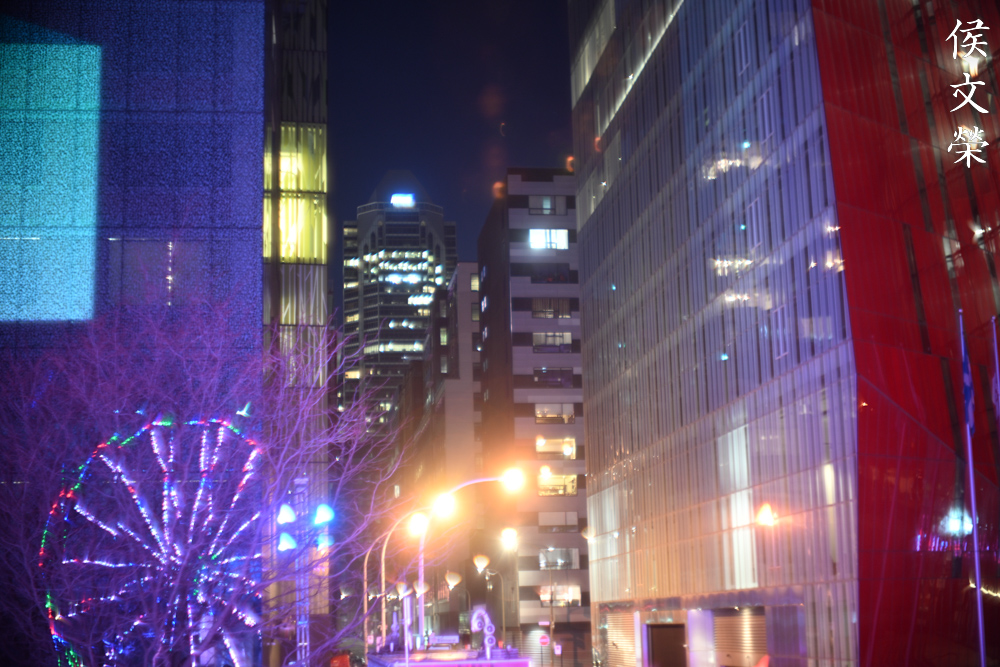
This is how it will affect your photos in actual use, note how the lights look as they get closer to us. This is not all that bad, I can imagine how bad it would look if I were to shoot a cityscape or skyline at night.


(Click to enlarge)
Of course, flare and ghosts are easy to trigger with this lens due to the older coatings used along with the number and size of the elements. Using a hood helps somewhat but only when the light is coming from a certain angle from the side. It won’t be of much helps if the stray light is aiming directly at your frame, like having bright light sources within or just outside of the view. Flare can cover the whole frame if you’re not careful, which makes everything it affects look pale because of the loss of contrast.


(Click to enlarge)
The photo to the left was shot wide-open while the other one to the right was shot at f/2.8. Notice how I was able to form a huge blob out of nowhere, it’s probably from a strong light source just outside of the frame. Stopping the aperture down will reduce it significantly, you can see the effect happen right before your very eyes. Even with using a shallow hood, it was not good enough to shield the front element from stray light coming from the side.


(Click to enlarge)
This is how it looks like when shooting directly into strong sources of light, the coating is so old that it is not able to be effective. Despite Nikon having one of the best coating technology of that time it’s still not enough to effectively eliminate internal reflections completely. Just be aware of this limitation, it isn’t hard to avoid this, just stop the aperture down to at least f/2.8 when faced with this kind of scenario.

For infrared photography, this lens performs rather well according to our expert Birna Rørslett. It’s actually surprising because I would expect that it would be vulnerable to forming hotspots somewhere around the center of the frame. I’m not knowledgeable in this field that’s why I can’t make assumptions.


(Click to enlarge)
Chromatic aberration is quite strong wide-open but cleans-up neatly by f/1.4, it is impressive. Stopping it down to f/2.8 will eliminate it almost completely except when shooting in extreme scenarios.
Spherical aberration behaves similarly but is a stop behind and can be confused as bloom sometimes.

(Click to enlarge)
This is how different it looks when you compare the results from f/1.1 and f/2, notice how the light bleeds and almost covers the adjacent details, almost like a bloom of some kind. This is a useful effect for taking high-key photos or any trippy-looking effect for your creative expression.


(Click to enlarge)
The center is adequately sharp wide-open but lacks the resolution, resulting in a dreamy-look. The effects of multiple aberrations makes it even look softer, this is useful for creative photography. Stop it down to f/1.4 and you will notice an improvement in resolving power, the aberrations look more subdued so you’ll get a cleaner center with a respectably sharp look. The center looks really good at f/2, but it will reach its peak at around f/2.8 and f/4. I am impressed by what I see at the center, it looks great at f/1.4. Impressive for a lens that came out at during the 1950s.
The corners tell a different story, they are at least 3-4 stops away from the performance of the center and it looks way worse as you get to the extremities, which will never look pin-sharp even at f/4. However, it’s also worth noting that my copy performs a lot better at moderate distances, from about 3m to 10m and focusing any closer or further looks less sharp. You’ll notice that in my sample photos above. The corners look sort of decent when shooting something within the optimal range. Perhaps this was designed for a certain use-case more than anything?


(Click to enlarge)
These photos show just how sharp the center is, they were shot from f/1.1 to f/2. I also noticed that it is a lot sharper when shooting at darker scenarios where there isn’t a lot of bright lights near where I wanted to focus, making it less prone to the “blooming” effect which lowers contrast.


(Click to enlarge)
This is what I was talking about from the previous set, it’s best illustrated by the Baby Jesus photo. Notice how sharp it is for a lens of this class and vintage, it only lacks resolution. The soft glow makes the photo look more magical, the only one missing here is a caganero. Going back to the topic of sharpness, please focus your attention to the lacework instead of the face of the wooden infant, I have missed my focus and ended up focusing closer instead of the face, see how good the details look here, not bad for an old lens.

Here is a crop from roughly the same plane as the lacework, It’s a bit closer to the corner so it’s not going to be as sharp but it’s acceptable considering that this is nowhere near the center of the frame at f/1.1.

(Click to enlarge)
The first photo with the crucifix shows how the glow could be used creatively by helping make the shiny highlights look like they’re glowing. While it affects the image by taking away some contrast where there is the glowing thing happening, it also adds an interesting look to the photo.
This is where some of the Nikkor-N 5cm f/1.1’s lesser peers fail, from what I saw, only the Zunow can be considered as the Japanese lens that can match it at this level. While it’s good, the Zunow has flaws, too.
I’d imagine that this is a great use-case for this lens, if only we’re able to focus closer.

I do not consider this to be a good lens for portraiture because the background blur can look distracting, the deformed light orbs also look ugly, too. It does look unique and can be used for creative effect when shooting a movie.

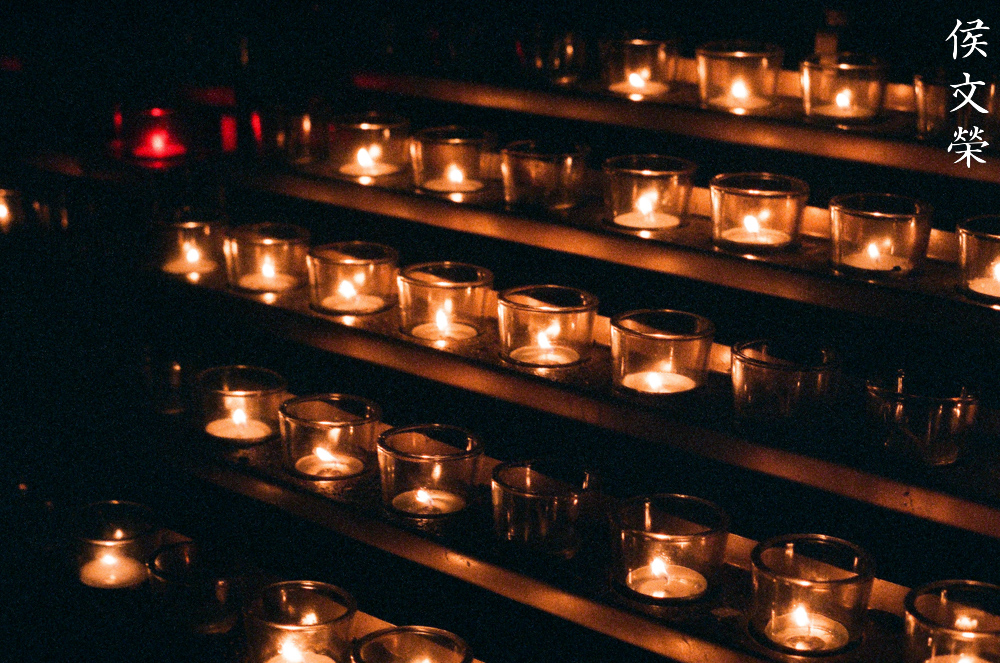
It excels in these kinds of scenarios where you have limited light and there are no strong light sources in the scene. Notice how sharp it is and how beautiful it’s able to render the scene. The elongated orbs don’t look pleasing at all but what can you do, this is a lens from the 1950s.

Apart from giving you the ability to gather more light in dim situations, having the ability to shoot at f/1.1 means that you can shoot with a faster shutter speed, enabling you to freeze motion to a certain extent. I think I took this at f/1.1 with ISO800 at 1/125s.

Stage photography is not the best use case for this lens, you are better off shooting with the cheaper but reliable Nikkor-S.C 5cm f/1.4 instead. There’s not a lot of difference between f/1.1 and f/1.4 when it comes to the ability to gather light when shooting wide-open.

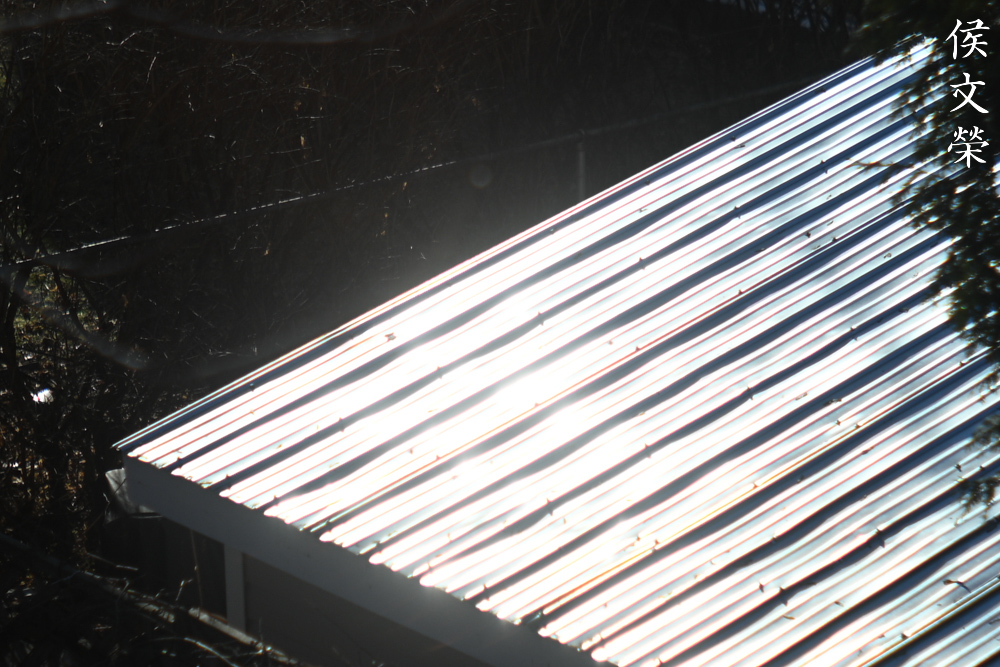
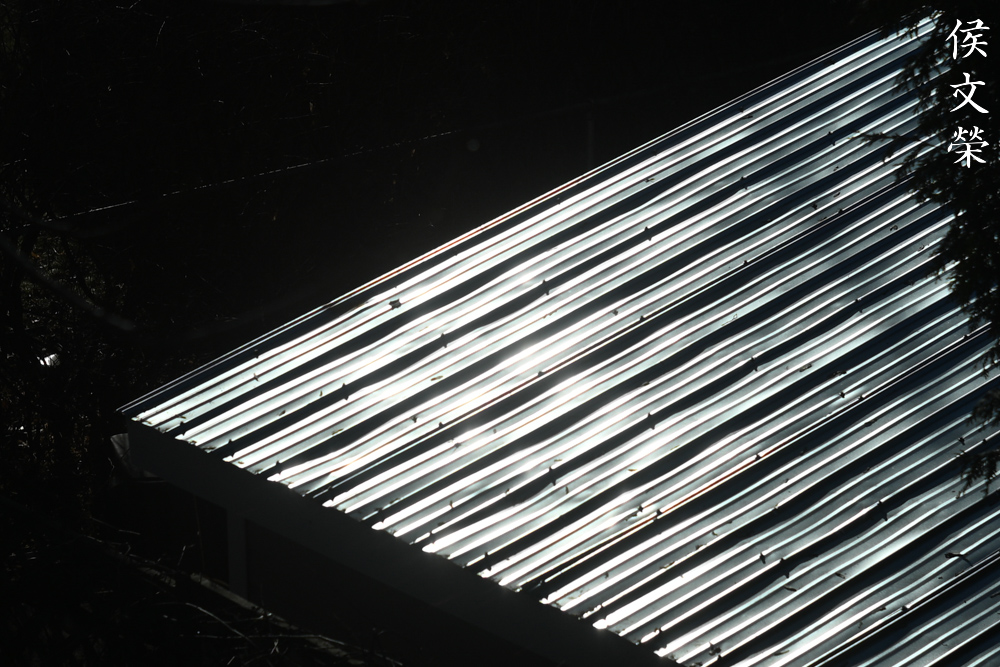
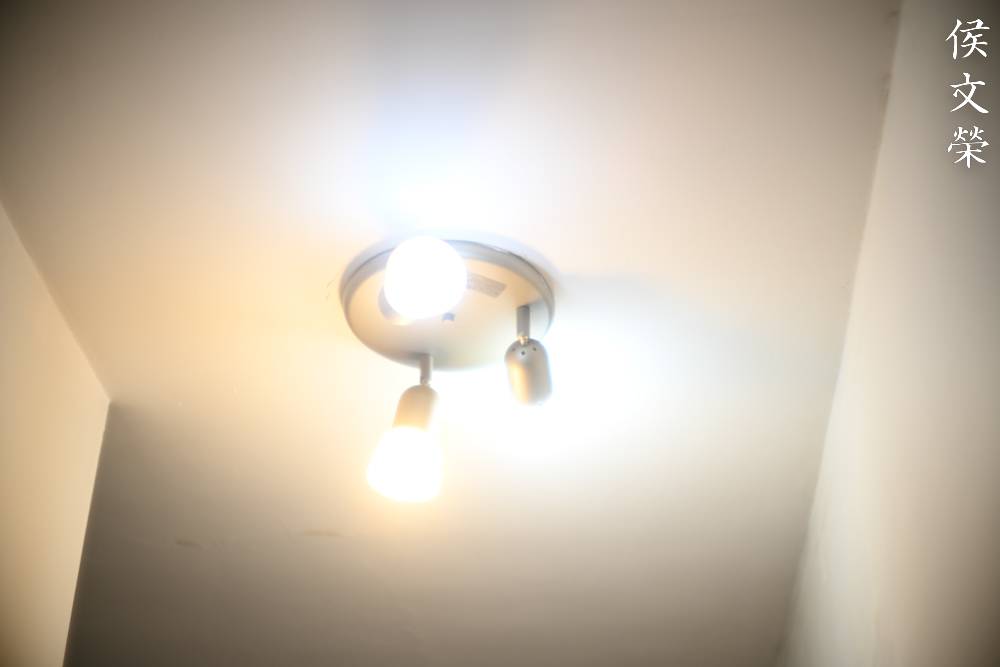
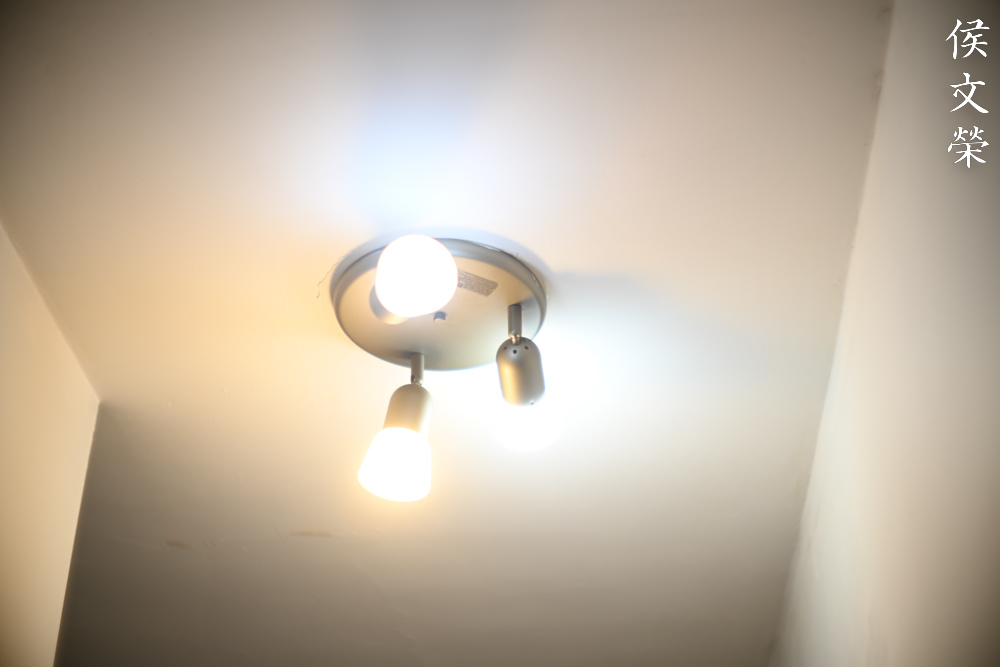
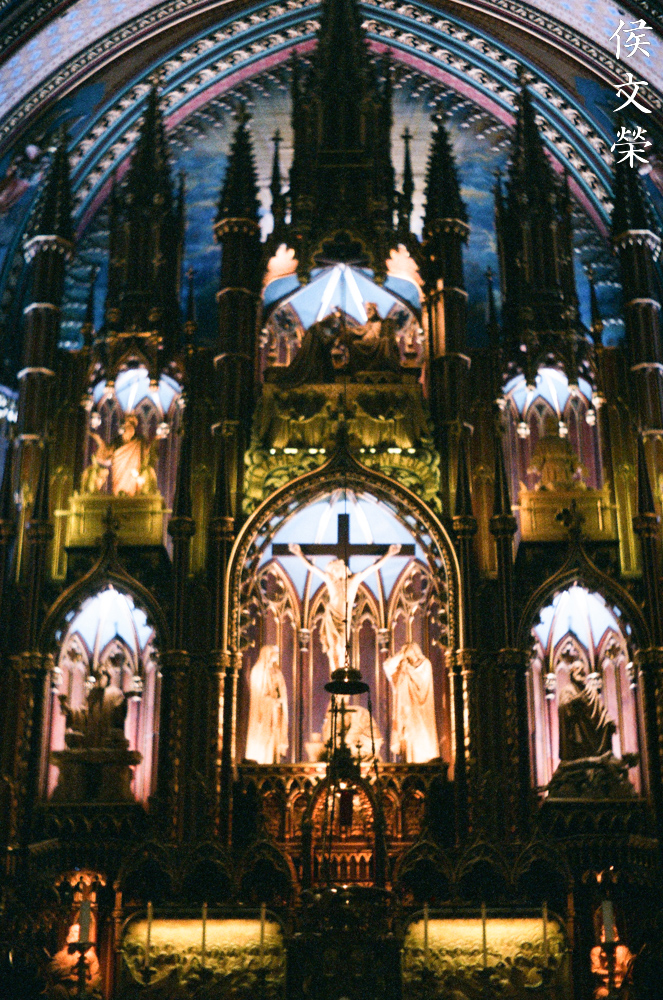
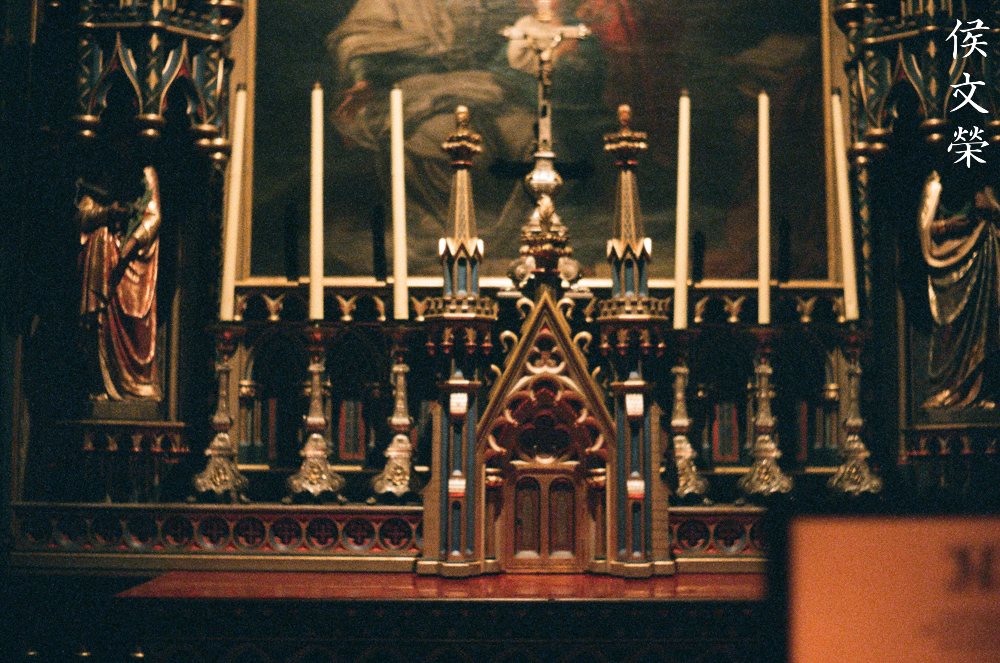
Interior photography is also one of the things that you can enjoy with this lens, it’s less picky because you are able to work at a more leisurely pace.

I love how it renders, it has a natural look despite having ugly artificial lighting in your scene. The bloom in this photo helps give you the impression that the signage is indeed very bright. A more recent lens will probably subdue this effect, giving you a cleaner look but the photo has no character at all.

I think this was shot at f/1.4 or f/2. The Nikon Zf has In-Body-Image-Stabilization or IBIS, that enables you to drag the shutter without worrying too much about your shaky hands.

The depth-of-field is so thin at f/1.1 that it can be difficult to get things in focus even if you’re focusing at something a bit further into the frame. While this is expected, it’s just more difficult to work with because you only have a sliver of depth-of-field to use effectively.


(Click to enlarge)
I really like shooting with this lens a lot, it’s not much faster compared to the Nikkor-S.C 5cm f/1.4 and it’s definitely not as technically astounding as the Nikkor-S 50mm f/1.4 Millennium but it has a unique charm of its own. The pictures that it produces when shot wide-open has a special, “dreamy” look, it’s something that you can use creatively. It has a lot of flaws like high amounts of coma, weird looking bokeh balls, an annoying tendency to form ghosts and other things that we don’t see much with modern optics but this lens has something special and it’s not just its “mythical” status amongst the Nikon fans, it has the secret sauce. I really enjoyed shooting with this lens a lot, I would not have said that if I wasn’t shooting with the Nikon Zf because both their ergonomics matches very well together.
Let’s now see some photos that were shot with film. Since this lens was made to work with it, I think that it’s only fitting that we judge this lens’ performance using its intended medium. Film photos look different from digital ones, it can help mask or amplify any imperfection in a lens’ performance. Film is also not as reflective compared to a digital sensor, it adds another depth to our “tests”. There’s no other film that is worthy enough to be tested with this, so the choice is obvious – Fujifilm Natura 1600. A legendary lens is only fit to be tested with a legendary film, let’s see how it looks like.
It’s sad that we couldn’t focus closer than this, the minimum focusing distance of every S-mount lenses is limited to what the internal focusing mechanism of the camera can provide. This would have been a nicer photo if we could even get closer by a foot.

It can be difficult to nail your focus when shooting wide-open since you are not looking through the lens. Even a slight movement of the focusing ring is enough to throw things off.

If you absolutely need to have 2 subjects in focus you will need to stop the aperture down a bit and make sure that their faces are not too far from each other in the direction facing your lens. I think this was shot at f/2.

This is how thin the depth-of-field is even when focusing at something further, it will make interior shots look like they are miniatures taken with a macro lens.
This was shot wide-open, it can be a real hit-or-miss affairs when shooting at f/1.1. It’s temperamental in a sense which can challenge your patience when you look at your film after processing. This is the reason why you should take several photos of a single subject if it’s important.


(Click to enlarge)
Here’s the rest of the roll, I will admit that I did not get as many keepers as I’d like. I wasn’t familiar with it when I took these photos. Maybe I should shoot another roll and add the photos so this article. Despite it all, I had a taste of how this lens was supposed to be used which gave me a better appreciation for it. The ability to shoot with a slightly faster shutter speed is sure helpful trade off, you’ll have to be careful about choosing which scenarios are best for shooting at f/1.1.
I can only recommend this lens to those who know what they want, this is a specialty lens and it’s difficult to use effectively wide-open. If you do not need to shoot at f/1.1 then a Nikkor-S·C 5cm f/1.4 will be more than enough, except that this lens will perform better at f/2. This lens is more for bragging than anything, I doubt that you’ll want to use it as often. There is a special hood for this, and it’s just as expensive as this lens, if not more. There’s a 3rd party option as well, but it’s just as rare and also quit expensive, too. If you are just shooting with it using a mirrorless camera then a cheap plastic hood (62mm) will do just fine. The original and 3rd party hoods are humongous, making them impractical to use. When looking for one, see if you can get the same type as the one that I have (external-mount), the ergonomics are much better but they cost a bit more. Make sure that the glass is clean, bubbles are fine, but fungus and other noticeable damage are no good, such as balsam separation. A few cleaning marks cannot be avoid with a lens of this vintage and they won’t affect your photos that much. There has been a sharp rise in the prices of these, at about twice from 2017. It used to be possible to purchase one for $1800.00 easily, anytime at Japan but it has now inflated, making the running price around $3800 for a good one. I was lucky to get this for below the running price at 2016, because the lens has some flaws. Just wait and you will get lucky. Before we all forget, make sure that the iris works properly, as mentioned earlier in this article, the iris is prone to bent, snapped blades due to how thin they are, this is the most important part that you should be looking out for, only Kiitos can replace the iris with a replacement set. Happy hunting!
Before We Begin:
If this is your first attempt at repairing a lens then I suggest that you see my previous posts regarding screws & drivers, grease and other things. Also read what I wrote about the tools that you’ll need to fix your Nikkors.
I suggest that you read these primers before you begin (for beginners):
- Essential tools
- Best practices 1
- Best practices 2
- Best practices 3
- Ai conversion
- Working with Helicoids
Reading these should lessen the chance of ruining your lens if you are a novice. Before opening up anything, always look for other people who have done so in YouTube or the internet. Information is scarce, vague and scattered (that is why I started this) but you can still find some information if you search carefully.
I highly recommend that you read my working with helicoids post because this is very important and getting it wrong can ruin your day. If I can force you to read this, I would. It is that important!
For more advanced topics, you can read my fungus removal post as a start. It has a lot of useful information, it will be beneficial for you to read this.
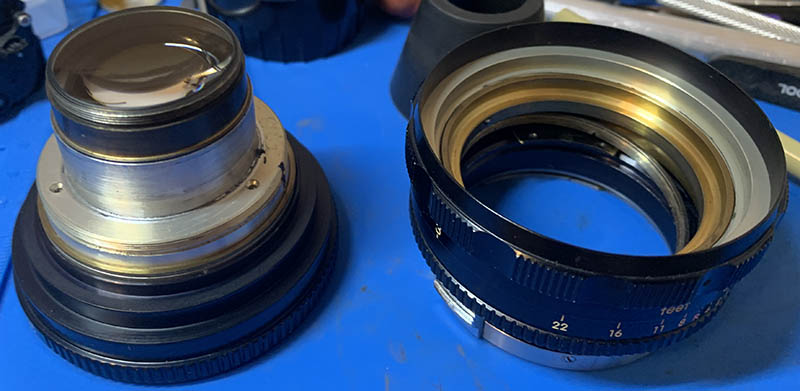
Disassembly (Front Part):
We will remove the front part of the lens in this section. I will not take apart everything here because my lens is not dirty at all, in fact, I was told that this has been serviced recently. Do not dismantle anything if you can help it, only remove something if you need to access a problematic part. The less you remove the better it is. This is not a lens for a beginner to tackle, you will require special tools and the experience just to make decisions when faced with a challenge. If your lens needs to be serviced, send it to a reputable repairman, show him my article to help him get the job done safely.
Whatever you do, never grab the barrel by the aperture ring when you want to unscrew something. It’s a sure way to destroy the delicate iris mechanism.
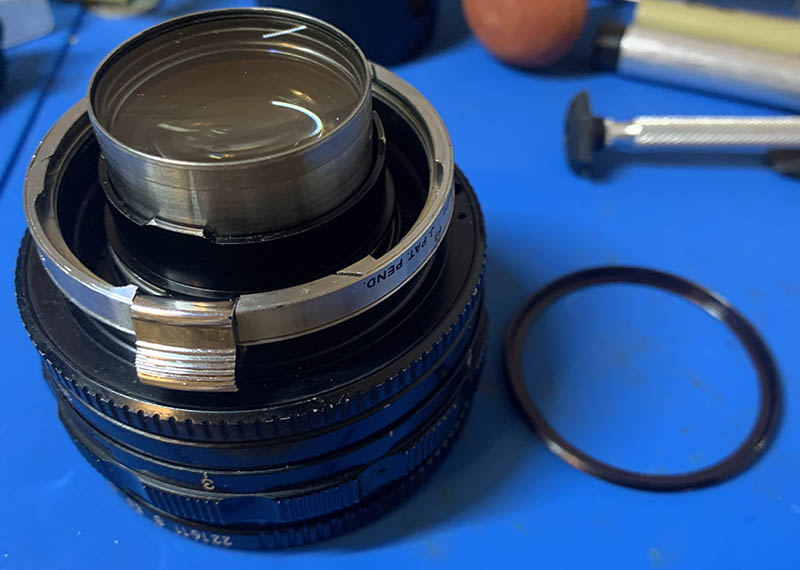
You can remove the front part now or later, I chose to remove it now because it’s heavy. Not having it in the barrel makes things a lot easier for me.
The front element can be accessed by extracting this and turning the front ring off, I left mine alone since my lens is not dirty anyway.
You can unscrew this housing by using a lens spanner, mine was recently serviced so it’s reasonably clean that’s why I left it alone.
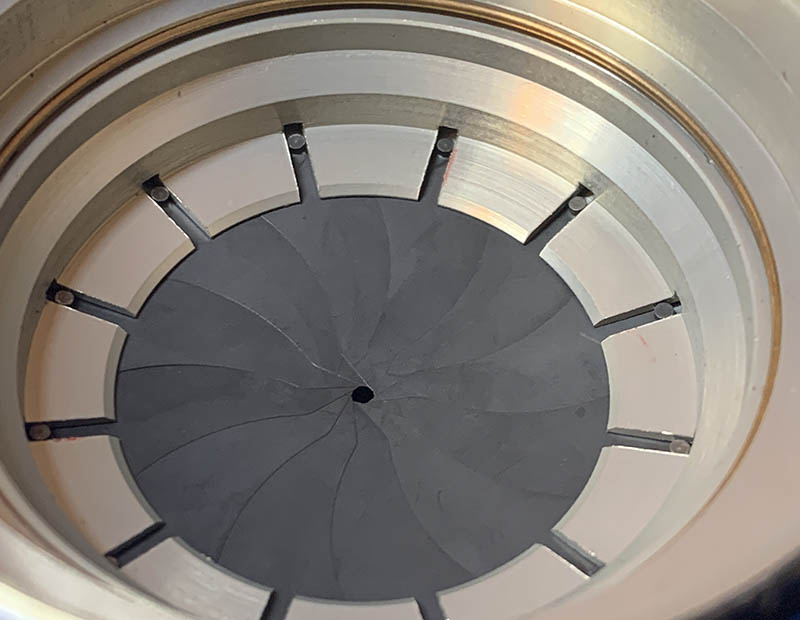
The iris mechanism looks dry and reasonably clean so I did not take it apart. Notice that the plane of the iris curves and dips inward slightly, this is by design.
If your lens has fungus, read my article on how to clean lens fungus, just make sure that you dilute it with distilled water so it’s not going to be too strong as it may damage the coating.
Disassembly (Main Barrel):
This is the most complicated rangefinder Nikkor that I have ever worked on, it is like a puzzle because of the way you need to remove things. You must follow the correct sequence and some of them will never be obvious unless you have the experience. This is a lens for professionals to service, you’ll soon see why.
Whatever you do, never grab the barrel by the aperture ring when you want to unscrew something. It’s a sure way to destroy the delicate iris mechanism.
Use a lens spanner and carefully unscrew this cover.
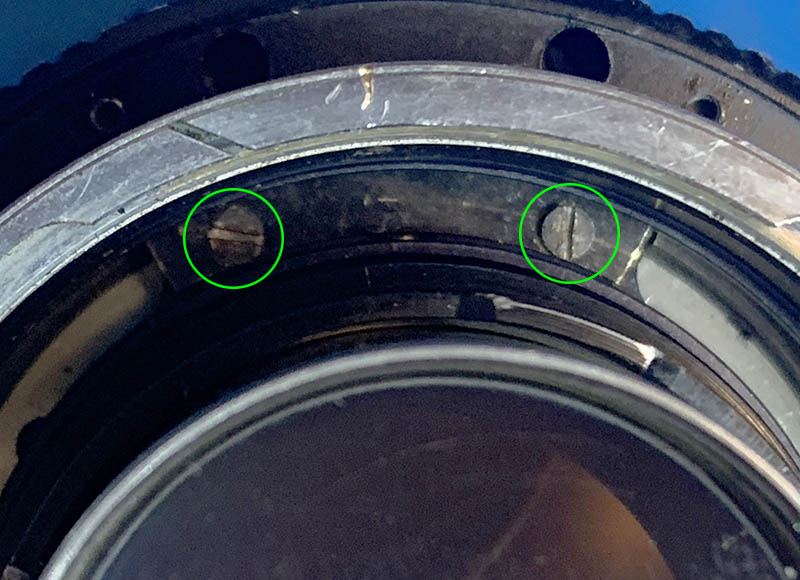
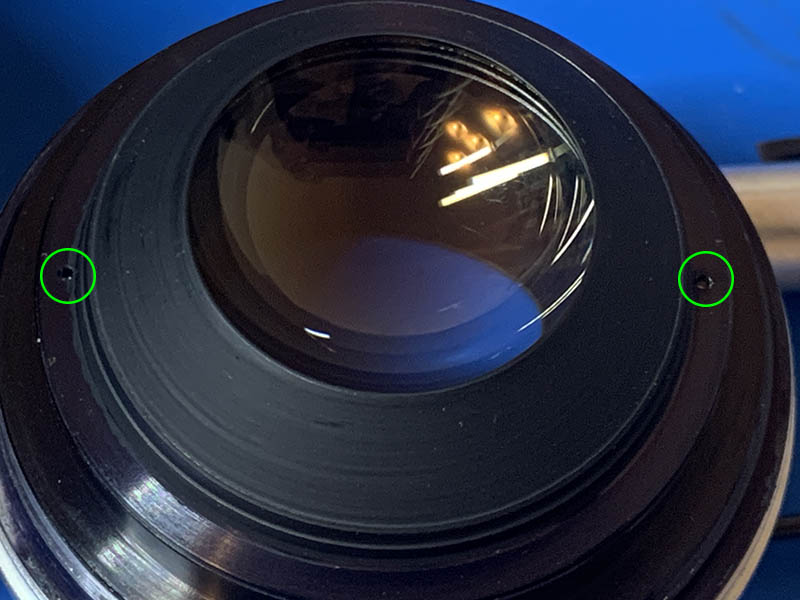
Once the cover is gone you can access these screws, extract them carefully.
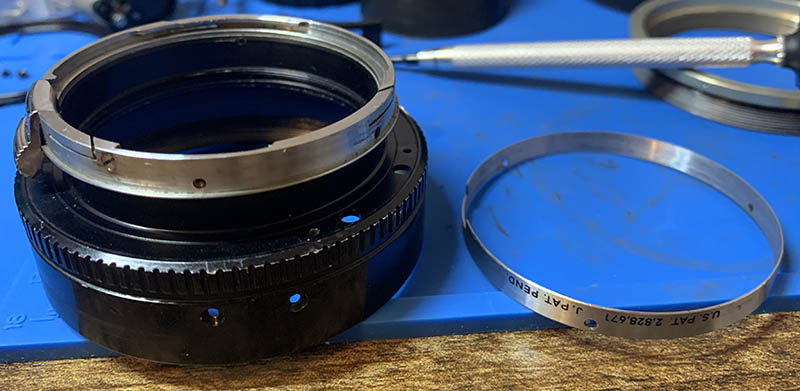
Those screws secure the rangefinder coupling cam assembly, turn the assembly towards the left so you can remove it. The 2 holes you see here corresponds to the 2 screw holes, it can be difficult to align the holes later when it’s time to reassemble this so you will need a magnifier to help you get things done.

Pull the assembly off and clean everything carefully. Putting this back can be tricky but there’s a trick, it has to be lowered carefully in place by your left fingers and supporting it with a pair of tweezers by your right hand. Note that there’s a slot in the cam that should be aligned with a very shallow screw found in the ring, that screw should travel within the slot freely. The challenge is lowering the whole assembly but still maintaining the alignment of this screw and its slot.
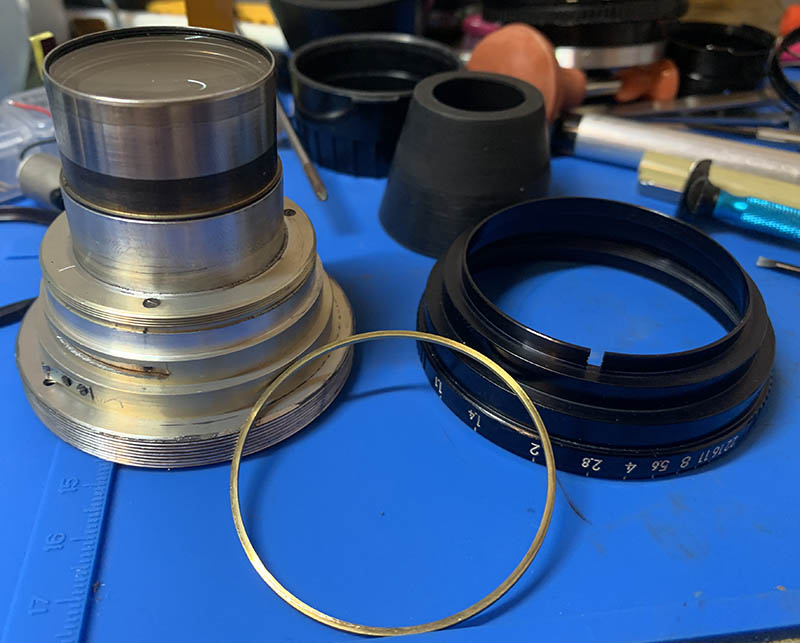
To make things easier, I have unscrewed the housing of the rear element, you can even unscrew the whole rear optical assembly if you wish. Just be very careful because the glass is exposed. Set aside the parts you have just removed in a safe place.
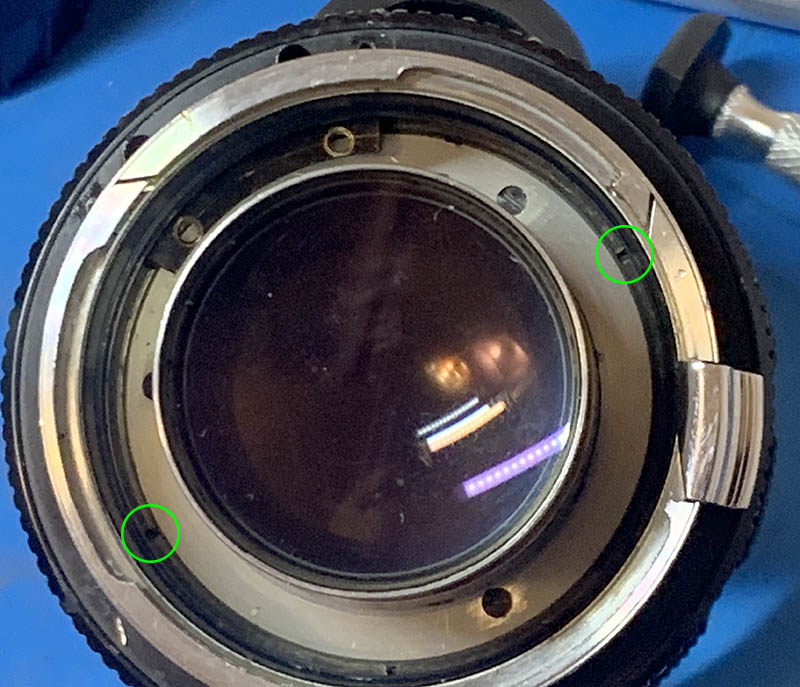
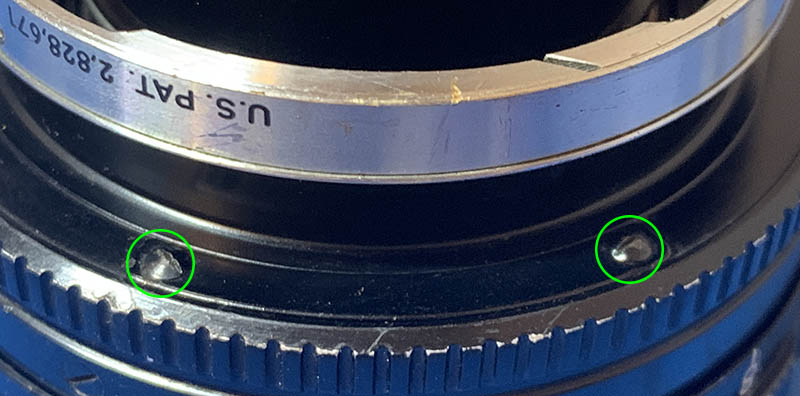
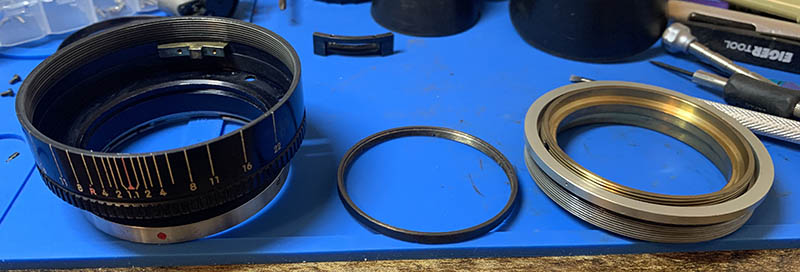
Here is another tricky part to remove. Get a lens spanner that can reach these slots and unscrew the ring. This ring has several slots which makes it more convenient to remove because part of the ring is blocked. You have to be very careful when doing this so you won’t damage anything, it’s easy to cross-thread this ring, if that happened then you will never get this ring off.
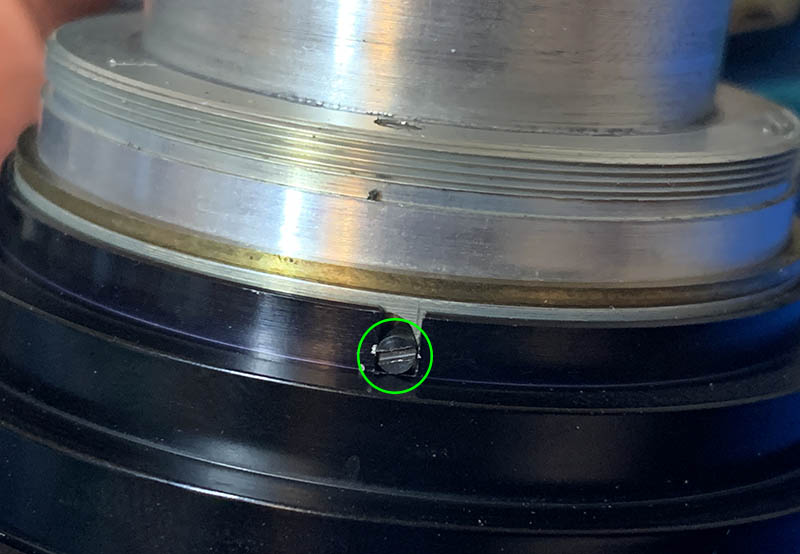
Notice that there are 3 screws that are visible here, never ever remove them because they secure the iris mechanism’s base plate. Extracting the screws now will risk damaging the delicate iris blades, they are a lot thinner compared to the usual thickness so they are easily damaged. You should only extract these when the iris blades are gone.
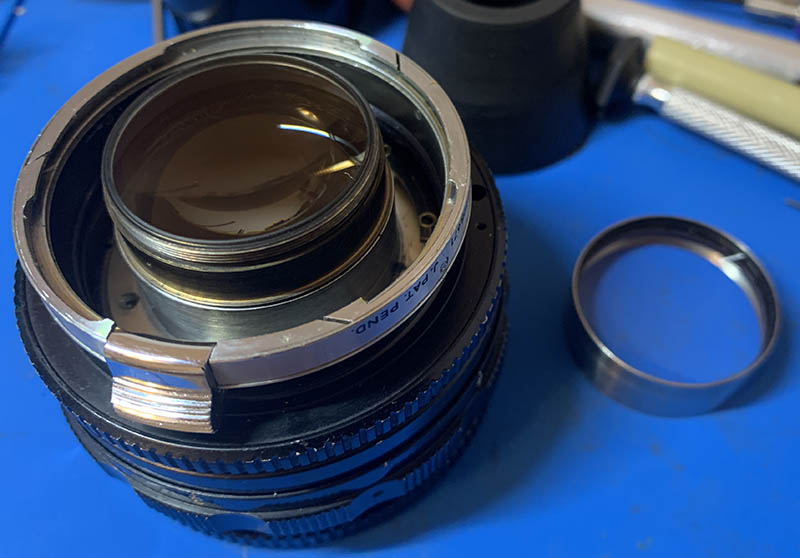
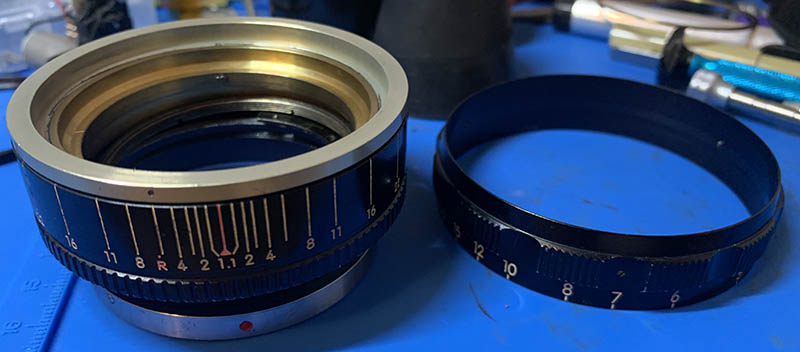
That ring keeps everything together, you can now pull the front barrel off from the focusing unit.
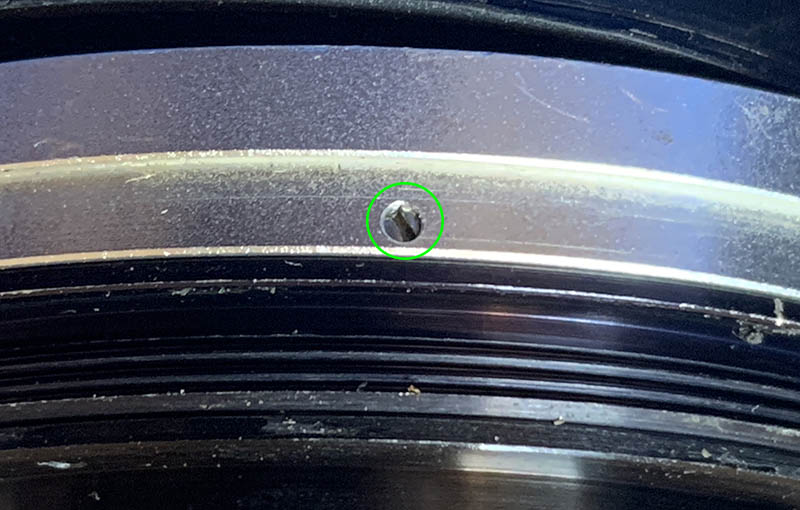
Extract this screw as soon as possible for safety, it couples the aperture ring to the iris mechanism.
Unscrew the aperture ring until it comes off. There is a shim sitting at the front barrel, keep it safe since it is used for adjusting the focus of the lens.
Loosen the tiny set screws of the focusing ring so you can remove it. The screws are very tiny and they are easily misplaced.
Extract these and remove a thin strip of metal covering the access holes underneath it.
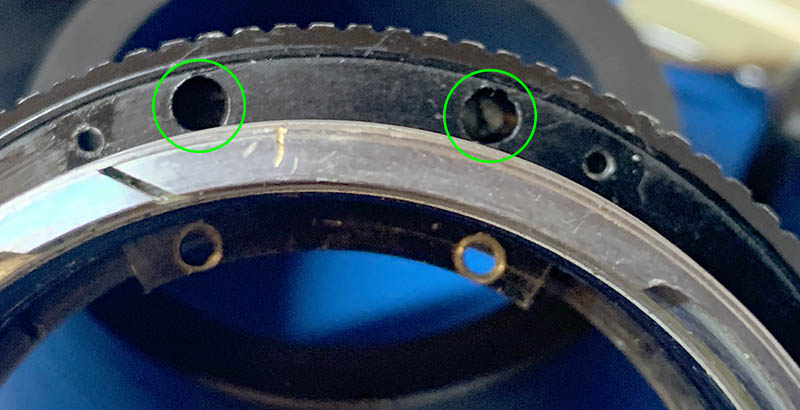
Carefully extract these screws that are deep within the barrel.
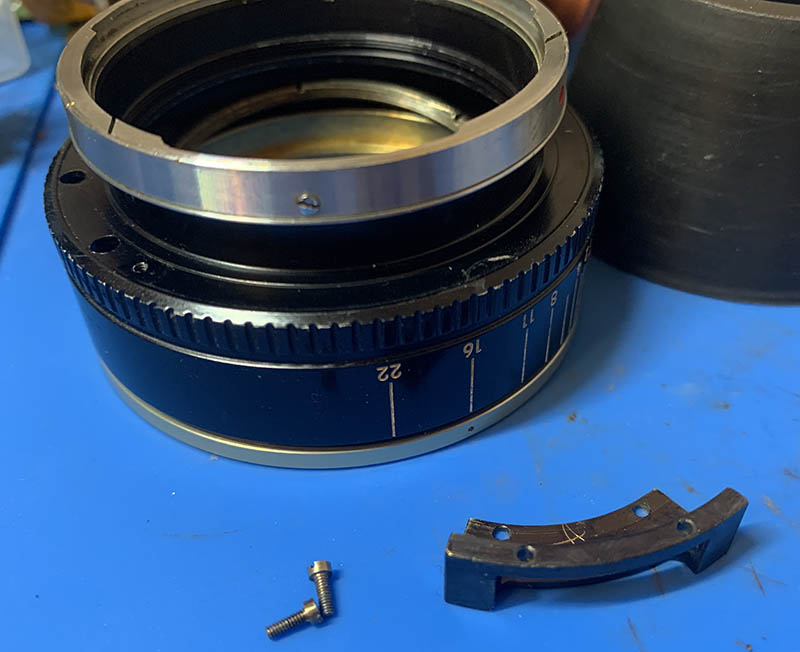
The screws keep this thing in place, this block constraints the range of the focusing ring so it won’t turn beyond the focusing range. This thing also connects to the rangefinder coupling cam assembly, turning the focusing ring will also turn the said cam. This is a tricky part to put back so take plenty of notes.
Separate this and do not forget to mark where it parted. Again, don’t forget to read my how to work with helicoids article to prevent any trouble from happening.
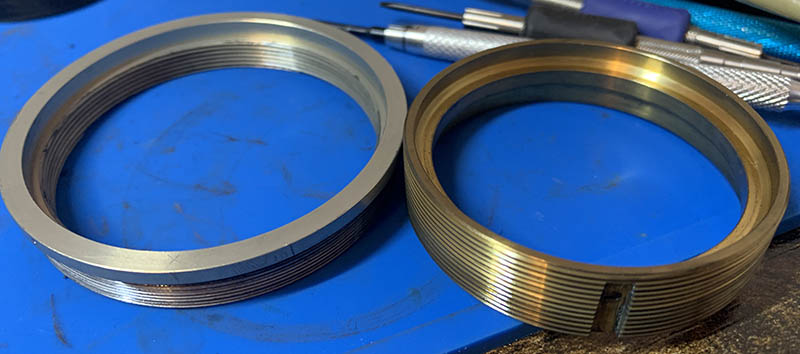
Once the central helicoid is off you can now remove the ring that keeps things together. You should put this ring back together with the central helicoid later during reassembly and don’t forget which direction this ring should be facing, here’s a hint, the surface with the slots should be facing the rear of the barrel.
If you look closely at this picture you will see a metal block inside the outer helicoid/main barrel, that is for constraining the orientation of the inner helicoid. You can remove it now or remove it earlier, it is all up to you. Putting everything back together can be tricky because of this block, what I do is screw back the inner helicoid with this block still attached then extract its screws then make my adjustments to the inner helicoid, this makes the job so much easier.
Unscrew the inner helicoid off from the central helicoid and never forget to note where they parted.
This step is optional, you can further dismantle the main barrel by removing this sleeve. You can remove the bayonet mount by extracting all of its screws then pulling it off. Mine is stuck so I just left it alone.
I cleaned all of the big parts with a strong toilet cleanser – the grainier, the better. I scrubbed everything using a brush then rinsed them all very well with hot water before making a final rinse with pure alcohol to remove any remaining residue. Special care must be used when cleaning the helicoids, the threads are fine in some places and they can be caked with gunk, using a wooden toothpick helps here for stubborn deposits. Dry them well before you continue. When lubricating, be sure not to apply too much, all you will need is a thin film of fresh grease. Mate the helicoids then exercise them by turning several times, this will ensure that the grease is evenly distributed. Wipe away any excess. If you have applied too much grease it will settle in the iris mechanism eventually, necessitating the need to open it again, just to give everything another overhaul.
Conclusion:
This lens has been in my wish-list for a long time and I can finally now present it to you. I’ve been itching to work on it because I’d like to know what Nikon did in order to manufacture such an amazing barrel for it, you heard that right, I am more interested in the engineering involved in the barrel then the optics of this magnificent lens. Now that I knew its secrets, it did not take me a lot of time to take it apart, I think I have spent more time cleaning it is that anything else. This is such a wonderful experience and I am glad that I have reached another milestone in my life.

It’s now time to enjoy shooting with this lens, there’s a certain refinement to it especially when you use it with a sexy camera. It’s not something that you will encounter everyday and people will definitely look at your setup when shooting on the streets. Since I can’t afford the original nor the reproduction hood, the next best thing I could use is a cheap aluminum shade from eBay.
That’s it for this article, did you enjoy it? If you did, please share this with your friends and please do not download my contents, I only rely on unique visits to my site, from which I only earn a few cents each. To those who have been supporting our cause throughout the years, thank you very much! The hosting has just been renewed for another year a few weeks ago, a huge chunk of it came from you. Purchasing film and developing it costs money, the labs charges more for scanning, too. Each dollar you send helps offset the cost, enabling me to produce the quality content that everybody loves. It helps ensure that this site is going to live another year on the internet. Thank you very much again, please come back often to see any of my articles and check if there’s a new one published. I am very busy these days but I make it a point to publish new articles and update existing ones. See you guys again next time, Richard.
Help Support this Blog:
Maintaining this site requires resources and a lot of time. If you think that it has helped you or you want to show your support by helping with the site’s upkeep, you can make a small donation to my paypal.com at richardHaw888@gmail.com. Money isn’t my prime motivation for this, I believe that I have enough to run this by myself but you can help me make this site (and the companion facebook page) grow.
Leave me some tip?
Thank you very much for your continued support!
$2.00
Helping support this site will ensure that it will be kept going as long as I have the time and energy for this. I’d appreciate it if you just leave out your name or details like your country’s name or other info so that the donations will totally be anonymous. This is a labor of love and I intend to keep it that way for as long as I can. Ric.

1 Comment (+add yours?)