
Oh, the seasons are changing. We are now entering mid-Spring and the weather here in Tokyo is beginning to get warmer and more humid but it is still relatively cool specially if you compare it to the punishingly hot summers here in Tokyo. This transitional weather is making me sick and I have another gout attack again so quality of life has gone down a bit. Speaking of transitional, I am going to show you a very important transitional lens in this week’s article so please stay and read along.
Introduction:
We’re going to continue with our series on the 105/2.5 family of lenses and the next one’s the successor to the previous one that we discussed last month. This one came with better coatings and hence it’s called Auto-Nikkor-P.C. 105mm f/2.5! The “C” stands for “coated” so Nikon’s marketing is simply reminding you that this lens is different and that you should buy it in case your lens is not coated. Sarcasm aside, this is an awesome lens and I shoot with this lens quite often because of the unique look that it gives to my pictures.
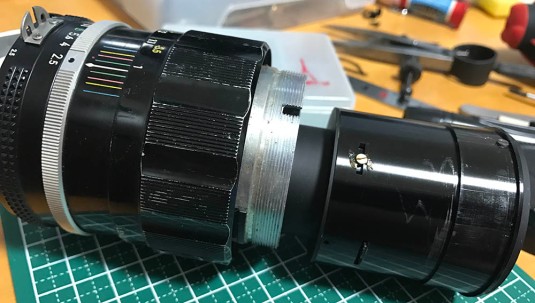
 This lens came to me in a rough state but the glass was clean so I did not bother to open the objective up to clean it as it would be pointless. Looks like a pro used this lens as you can see from the wear but that is no problem at all, in fact the wear made it unique.
 This lens sits between the original silver-nosed look and the modern rubber-gripped type so I will consider this design to be transitional. The change from it’s predecessor isn’t just cosmetic because this lens has a different optical formula! Whilst the original formula of the Auto-Nikkor-P 105mm f/2.5 consisted of 5/3 (5 elements in 3 groups) and is a Sonnar-type lens, this one has a completely new optical formula of 5/4 and is of the Xenotar-type design but is more commonly known as the “(double) Gauss-type” by collectors. The lens was perfected by no other than Wakimoto Zenji’s prodigy in order to focus closer and to have a flatter field that is much more suitable for portraiture as Nikon found that more photographers are using this lens for that purpose. In my style of shooting this difference doesn’t mean much but I can see the differences between the 2 if I look for it. I will make a separate article on this when I have the time.
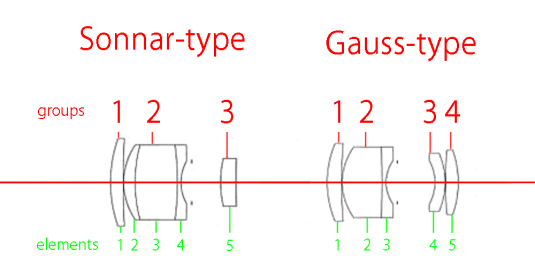 I was starting to get worried that all this talk about groups and elements may confuse my readers who aren’t familiar with these technical terms so I prepared a simple illustration to help you visualise what groups and elements mean. A group is simply a collection or a lens element that is considered a single unit and an element is an individual lens. See the image above, it shows what is exactly different between the Sonnar and Gauss versions. I personally prefer the Sonnar’s rendering but this is subjective and very personal.
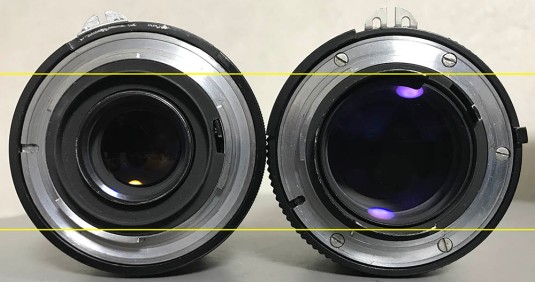 Here are the 2 versions beside each other. Externally, you can easily discern between the 2 by the size of the rear element. Keen-eyed readers will also notice that the colour of the coatings are different on the Gauss version, this one has a later coating technology.
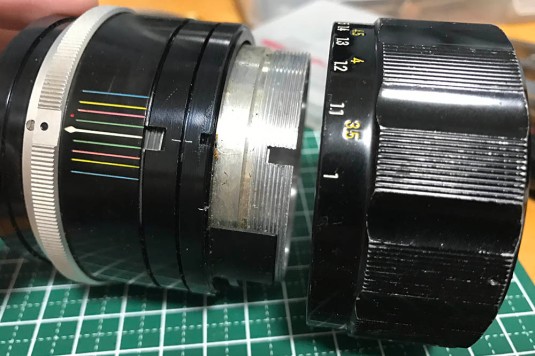
Going back to the barrel’s design, Nikon made it sure that the refresh in design will also be functionally better than the older one by making the front barrel black. The older one has a silver front barrel and some people claim that the reflections from the shiny metal barrel and threads contribute to image degradation so it had to go away. Also of interest is that the focusing ring has been broadened to allow for easier focusing especially when you are wearing gloves. All these changes gave it a modern look while still retaining the robustness of the all-metal construction. This lens can stand plenty of abuse!
 This particular lens came with an Ai ring. It originally came with a non-Ai aperture ring, I suspect that the owner had this modified at Nikon. Having the Ai update makes things much more simple because you can use this with modern cameras with the Ai-coupling tab and it will meter properly in the M and A modes. Very handy!
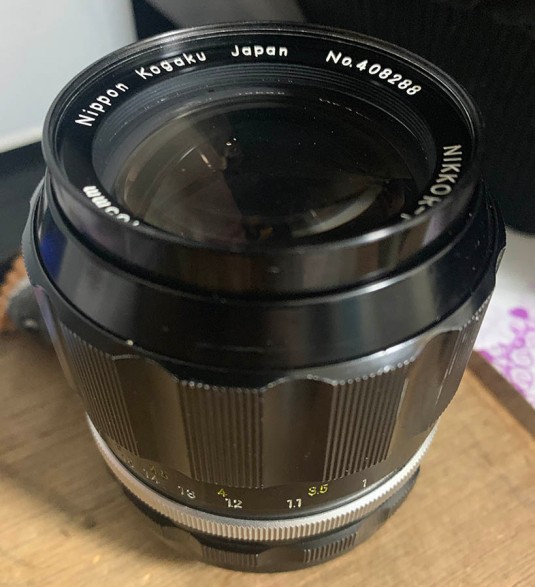 This is the rare version of this lens, it uses the older Nippon Kogaku name instead of what many of us are familiar with these days (Nikon). These were made in small batches and it can be hard to look for these. This one came with the older pre-Ai ring so you cannot use it with Ai-capable cameras without converting the aperture ring.


(Click images to enlarge)
As you can see from the images above, the lens is superb for portraiture the rendering is exquisite with the smooth backgrounds and sharp details where in-focus. The lens is also not clinically sharp as macro lenses so imperfections on the skin aren’t made prominent in the resulting pictures. Just like the Sonnar version of this lens family, this lens also has the amazing ability of rendering smooth backgrounds even if the subject is far from the nearer distances and this makes it even more suitable for use with full-body shots and as a lens for general photography. If you know what you are doing, then the potential of this lens is near limitless. Always know your gear to know when to use it or not to use it.
Let’s now see some pictures that were taken using film. Film has a unique look which is difficult to simulate with digital because of film grain. I consider both film and digital to be different mediums that render differently so seeing how a lens performs under these 2 different media will help us understand a lens better.
 The beautiful quality of the bokeh is why you shoot with this lens. The long 105mm focal is great for candid shots and the frame compression that you get with a 105mm lens will help you in framing situations like this one where you want your subjects to be the same size. A wider lens will make the closest subject to you bigger and the further one smaller due to the effects of foreshortening
 Sharpness with film is excellent from the center of the frame to the outer thirds but the corners are soft as you can see by zooming-into the monkey’s right arm. This was taken wide-open.


(Click to enlarge)
Here are some samples that were shot at the usual portraiture distances for bust-shots. It is perfect for these kinds of pictures becase a longer lens will make your subjects flat and small compared to the background. Use a 50mm lens and frame your shots like what we have here and your subjects will look larger. Picking the correct focal length is important when taking pictures of people. A long lens isn’t just used to get closer to a subject.


(Click to enlarge)
This kind of framing is best used with a 135mm lens but 105mm will still do because it’s a a bit closer to the 135mm focal length than an 85mm lens in terms of compression. I love this lens’ ability to render exquisite backgrounds while still keeping your subjects sharp. The transition between what’s focused and what’s not is also smooth so you won’t notice any abrupt change in focus. Some people like that, I don’t.


(Click to enlarge)
I took these photos to show how it renders twigs and foliage. These can show how bad or good a lens’ bokeh quality is because foliage has a high-frequency details and the leaves are multi-faceted, facing random directions so light reflects differently at every point. It’s what I use to show if a lens has the tendency to produce harsh-looking bokeh. Twigs will render with weird-looking edging and produce a “double-image” on lenses with poor and harsh bokeh quality. If you click on the pictures you will notice that this lens doesn’t have any of those so it pasts my simple bokeh quality test. Another test that I do is look at what people today call “bokeh balls” and examine if they look uniform, dirty or whatever. I did not do that for this article because you can clearly see the results in some of my pictures.


(Click to enlarge)
Here are some of the pictures that I took that afternoon. Did you like what you saw? It’s a very good lens and I am sure that it’s still relevant today so long as you’re not too lazy for manual-focus.
I hope that these pictures answered a lot of questions regarding how this lens performs. I regularly see people asking about this online and read replies that border on sarcasm to out-right ignorance, the samples shown aren’t helpful, too.
Is this the right lens for you? For less than $100 each for a decent copy I will say yes and I can recommend this lens for a wide range of uses but this lens really shines as a portrait lens as you saw in my sample pictures. If you are going to buy one online make sure that you get one with an Ai-ring so you can use it with newer Nikon cameras. They are usually just a bit more expensive than one that comes with the older aperture ring but that small amount of money is worth it. This lens is such a legend amongst many photographers, it’s still relevant today as a professional portraiture lens as the day it came out decades ago. I love this lens a lot and it offers so many things for very little money. Buy one of these and enjoy using a true classic lens that will last the test of time.
Before We Begin:
If this is the first attempt at opening a lens then I suggest that you read my previous posts regarding screws & drivers, grease and other things. Please also read what I wrote about the tools that you will need in order to fix your Nikkors.
I highly suggest that you read these primers before you begin (for beginners):
- Essential tools
- Best practices 1
- Best practices 2
- Best practices 3
- Ai conversion
- Working with Helicoids
Reading these primers should lessen the chance of ruining your lens if you are a novice. Before opening up any lens, always look for other people who have done so in Youtube or the internet. Information is scarce, vague and scattered (that is why I started this) but you can still find some information if you search carefully.
I highly recommend that you also read my working with helicoids post because this is very important and getting it wrong can ruin your day. If I can force you to read this, I would. It is that important!
For more advanced topics, you can read my fungus removal post as a start. This post has a lot of useful information here and there and it will be beneficial for you to read this.
Disassembly (Lens Barrel):
The lens itself isn’t difficult to disassemble to its basic parts if you have the basic skills for this as well as the proper tools needed for each task. I would like to warn you that in this particular period in Nikon’s lens manufacturing history, Nikon went crazy with it’s use of glue so you will need plenty of solvents for this lens and use stronger versions if needed just to make sure it does the job. Nikon even used some kind of epoxy in this era for some of the screws (usually just 1) in the bayonet and the helicoid keys of the larger lenses. You can smell peanut butter when you heat the screws and that smell can only come from an epoxy-like material of the A+B variant. I know, my nose is sensitive.
 Start with removing this set screw. This little set screw makes sure that the front collar of the focusing ring stays put. Be careful NOT to lose it and remember where it was screwed into position when you put it back, there should be a depression on the other side of the screw in which it sinks into. If you got that wrong then your focusing will feel rough.
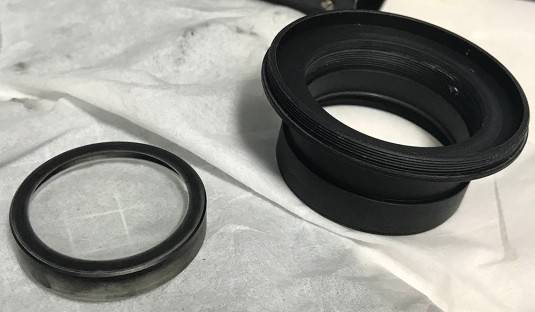
 Here is the front collar. Simply unscrew it from the focusing ring (counter clock-wise).
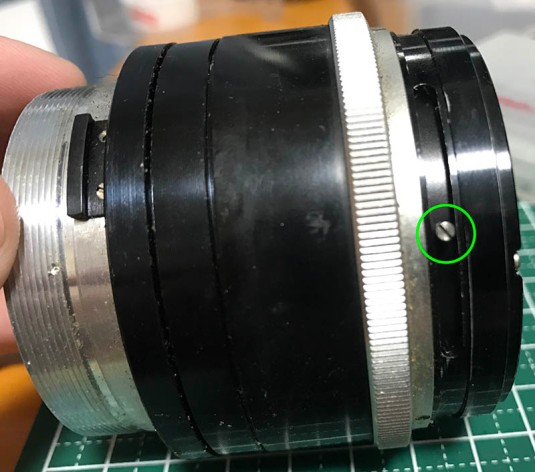
 You can now access another set screw. This time, it secures the front barrel. Again, do not forget about the depression for this screw. This is even smaller and easier to misplace!
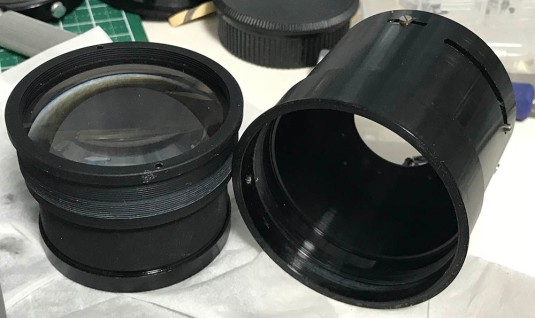
 The front ring screws off just like this. At this point, the objective is loose and it can drop to the floor easily because of it’s weight alone so be careful and never point this down!
 The objective can now be pulled away from the lens barrel. This part can easily roll of the edge of a table so be careful and store it somewhere safe. Never store the objective facing up or down with either end facing anything. The glass is exposed and you do not want to scratch it. I store these on their side and secured by 2 heavy things on both sides.
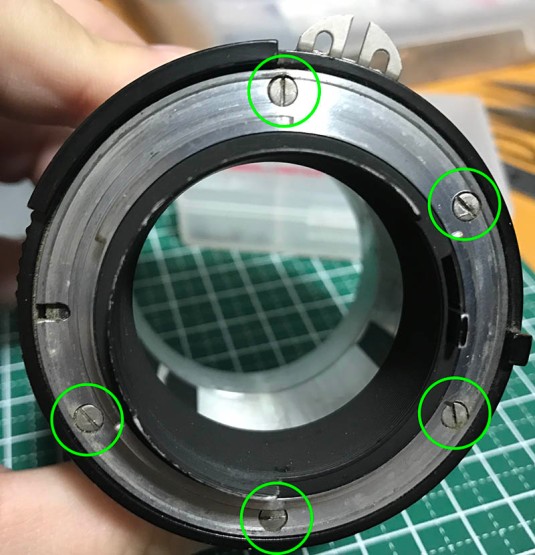 Time to work on the other end of the lens! Carefully remove these screws from the base of the lens mount. Make sure you use the correct screwdriver for this and if you have not read my write-up on screws, please do so now and this link will take you there. Its screws look scarred and it can only mean one thing – somebody worked on this lens before.
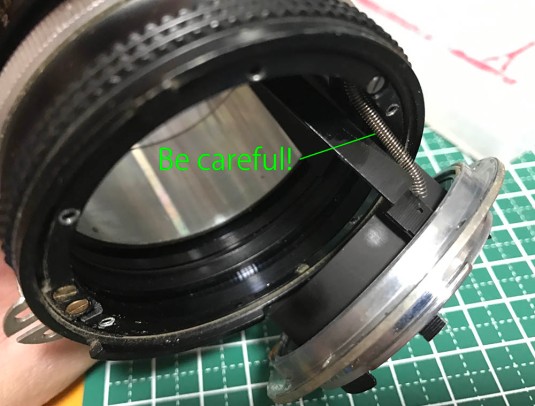 Once the screws are gone, you can pull the bayonet mount off from the lens but be aware that there is a spring connected to the lens barrel and be careful not to damage this part by pulling the bayonet plate too far. An overstretched spring holds no tension! Carefully use a pair of tweezers to remove the spring from either end and store it somewhere safe.
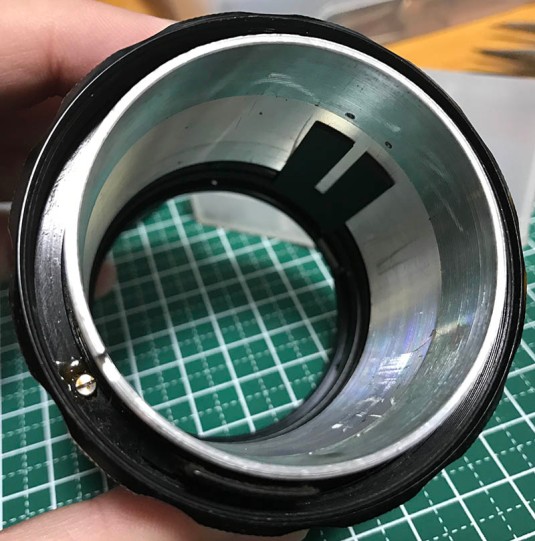
 The aperture ring can now be removed. Nothing is screwed into it so it’s safe to pull this out from the lens itself. Notice the gunk underneath it, yuck!
 Let’s go back to the front! We need to remove these screws from the focusing ring but be sure note their original orientation first by scratching a mark first so that you will have a reference point to come back to because this is a precision adjustment point. These hold down the focusing ring when tightened but you can shift the focusing ring 1mm to 2mm on either side and it let’s you adjust your infinity focusing. You will have to calibrate the infinity focus of this lens once you get it back after overhauling it.
 The focusing ring should come off easily. If it is somehow stuck then it is due to the dried grease of some kind glue used on the factory. Do not force your way and apply some kind of solvent like alcohol on the screw holes and the seams of the focusing ring found under it and let it work for a bit before you attempt pulling this part away from the lens again.
If you look at the centre of the image around the lip of the helicoids, you will notice that I made several scratch marks there so that I will remember its configuration later during reassembly. These small marks will show me how it should be when the lens is collapsed all the way to infinity. These marks are important, so please do not forget taking notes!
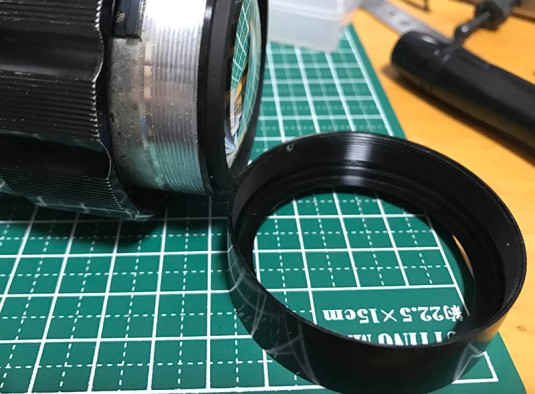
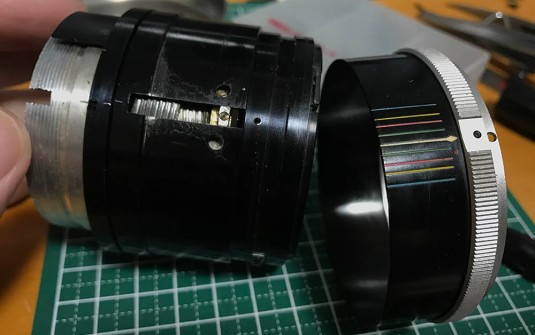
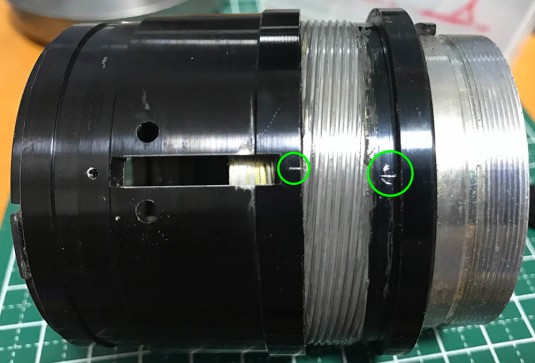
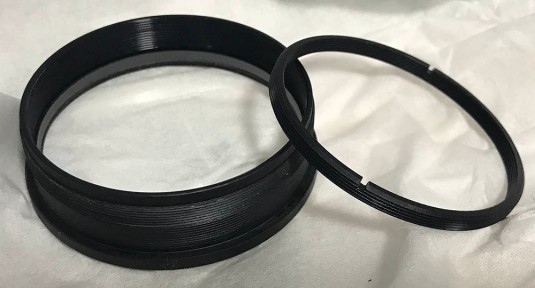
 Now it is time to remove the decorative sleeve with the focus scale and the grip. Remove the tall-headed screw encircled in the picture. This screw connects to the aperture ring so that the aperture fork assembly found inside also rotates with it.
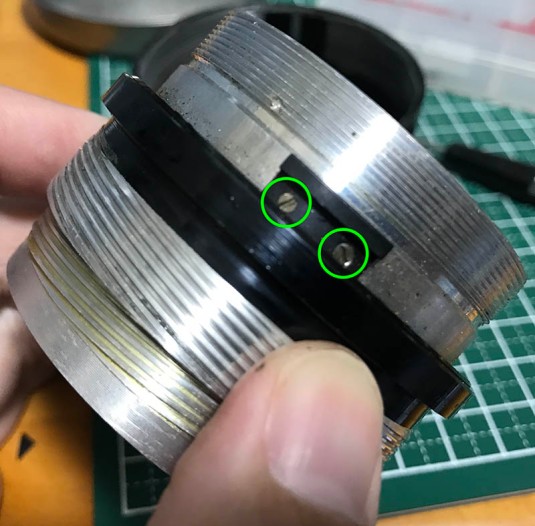
 Now that the tall-headed screw from the previous section is out of the way the shiny grip can now be pulled away but wait, there are screws securing it to the lens! Remove 3 of these and the sleeve and grip should come off.
 Mine took some effort before it came off. Nikon usually glues this part to the main barrel or decades-old dried grease have caked these parts together. To free this up, use a couple of drops of alcohol and see if it works and if that did nothing to help then use benzine to help melt down the old grease or whatever is in it before you attempt to pull it off from the lens barrel. Just make sure to give it time to work before you attempt it.
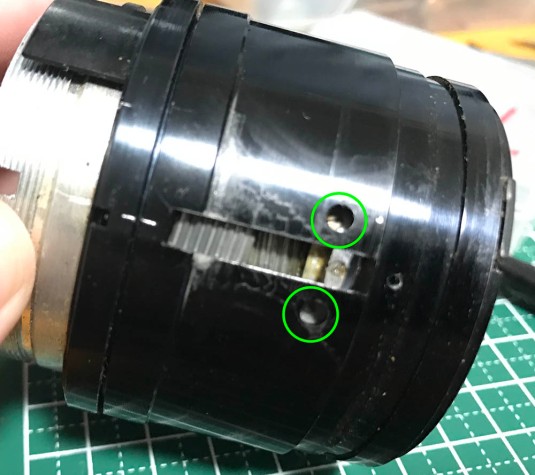 The sheath is not only decorative and merely showing the scale but most importantly it is protecting the helicoid keys underneath it. Carefully use a screw that fits into the head of these screws and with a firm grip unscrew these off so that the helicoid key can be pulled off from the lens. The helicoid key keeps the helicoids in sync as you turn the central one, achieving focus as it collapses and expands. Note the orientation of the helicoid key.
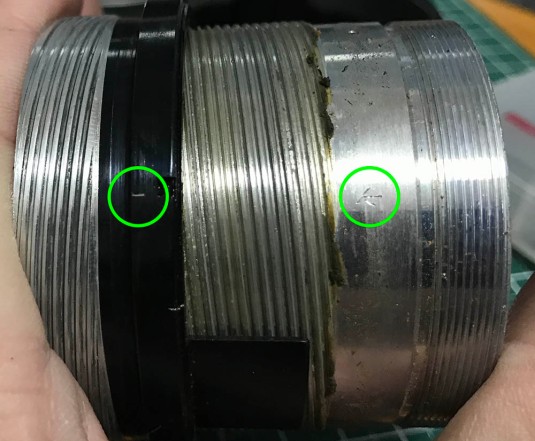
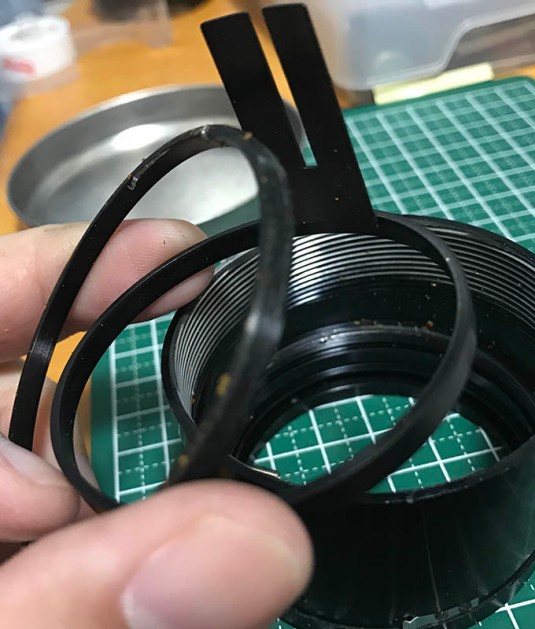
 Now that the helicoid key is gone, the helicoids can now be separated. I usually start with the outer helicoid and mark where it separates from the central helicoid. I scribed marks so I will know how they will mate when I need to reassemble it. Forgetting to do this will just result in a long and painful time trying to figure out where they should exactly mate.
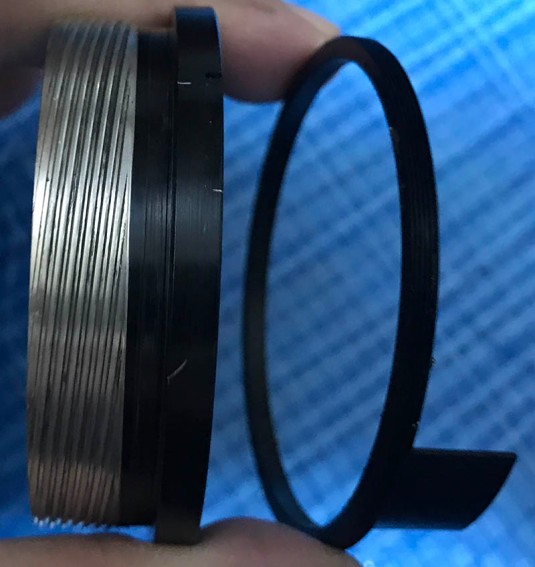
 You should remove this helicoid stop by unscrewing these 2 screws. This makes sure that your helicoids will not go past the focus range of the lens. This is in the way so this had to go and if yours will not budge then it must be glued stuck into the helicoid.
 Again, always mark where the helicoids separate. This should be mandatory and I should not have to explain this every time I write something.
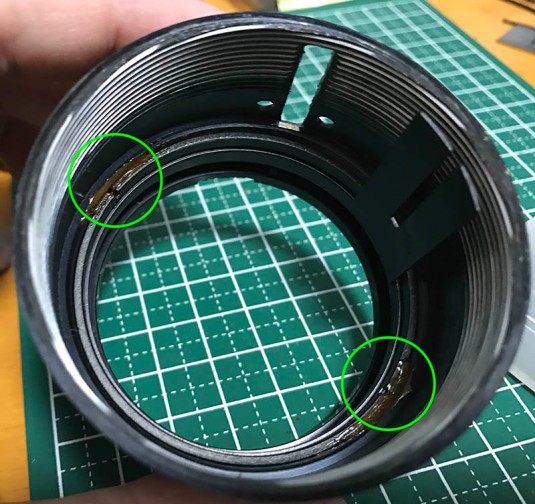
 Back to the inner helicoid, you should remove this part also if you want to make sure this is a thorough job because gunk tends to accumulate under this part. This can be removed by saturating this part with alcohol and repeating the process until this ring is free. This part is usually glued to secure it and some even have 3 set screws just to make it stay put.
 To remove the aperture fork and it’s ring, you must first saturate these parts with alcohol to soften the glue before you attempt to remove this part. The retention ring is glued into place just to make sure it doesn’t get loose over time. Once you are sure that the solvent has done the job of softening it, get a spanner and remove this ring but be careful not to scar the threads of the helicoid!
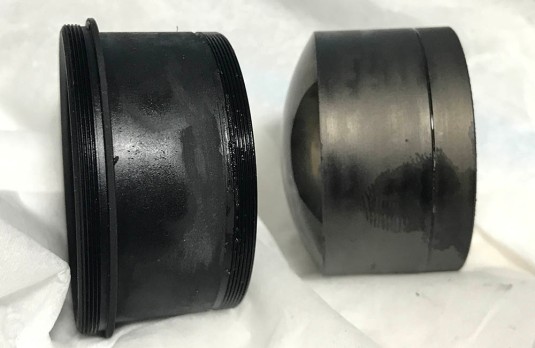
 And off it goes! We have completely disassembled the lens barrel down to it’s basic parts!
Clean the helicoids really well, any residue will contaminate the fresh grease which can make it turn-bad quicker. If your helicoids feel rough even after a fresh coat of grease it only means that you need to lap the helicoids. I won’t show you how to do that here and I will make an article about that in the future.
Disassembly (Objective):
Cleaning the objective is simple provided you have the correct tools. You will need a good lens spanner and a few pipe-keys if you can make them. Most of the parts were sealed at the factory with lacquer so you will have to apply a small amount of alcohol to soften the seal so you won’t exert too much force when removing them and damage anything when your hands slip. I will not show you how to work with the iris but it should be similar to the other lenses in this series.
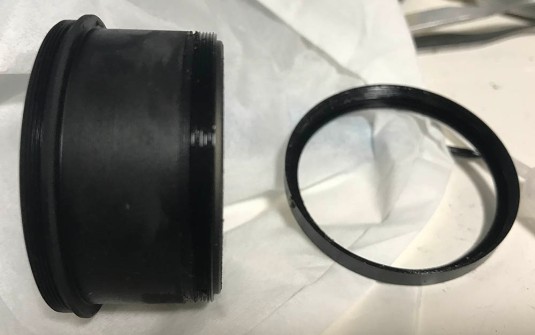
 The rear elements assembly can be separated as a unit from the objective’s housing.
 Accessing the 4th element requires removing this ring. It can be removed with a spanner but be careful not to scratch the glass. It can be stuck at times so be patient and use small amounts of alcohol to soften the seal.
 Extract it using a lens sucker. Do note which side should be facing the front so you won’t get confused later and put this back facing the wrong direction. Leave the 5th element in its housing. You can unscrew its housing off if I’m correct but the element itself is stuck. I didn’t need to remove it to access both of its surfaces so just leave it there.
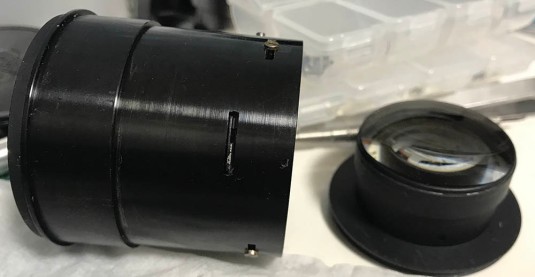
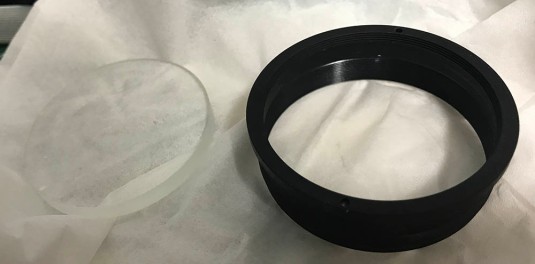
 The front elements assembly can be removed as a single block. It’s heavy so be careful, it can slip out from your hand if you’re not careful. It’s the heaviest assembly in this lens.
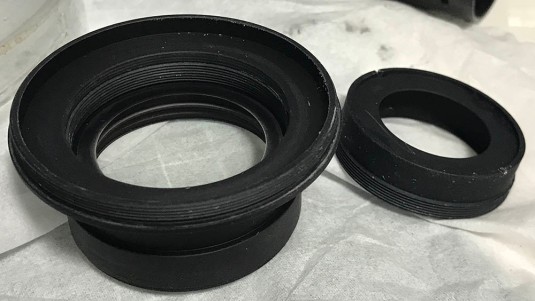
 The front part can be unscrewed like this so you can access what’s inside.
 The front element is secured by this retainer. Carefully remove it with a pipe-key, a lens spanner with the right type of bits will also be helpful.
 It can be difficult to remove but a few applications of alcohol should help soften the seal.
 Carefully extract the front element with a lens sucker and don’t forget to note which side should be facing the front.
 This is probably the most delicate part of the lens, the 2nd and 3rd elements were glued together to form a lens group called a doublet. It can be removed after unscrewing this. It can be tough because of the seal, be careful with the alcohol here because the group was cemented using Canada balsam and alcohol while damage it when you allow it to.
 This thing can be stuck into the housing’s inner walls. The cement for the lens can melt, it will develop a thin, sticky film and that will make things difficult for you. If you still have the front element installed the pressure formed will prevent you from extracting this so you will have to remove the front element first so you can easily remove this.
That’s all for the objective. Do not dismantle anything that you don’t need to fix because you may end up with a bigger problem when something goes wrong. The iris blades can sometimes get oily and that’s the only time to dismantle it or if the lens suffered fungus damage that’s so severe that you will want to dismantle everything for a deep-clean.
Conclusion:
This lens took me around 3 hours to overhaul because I needed to clean up the hardened gunk in between parts. It was pleasurable working with this lens and I enjoyed every bit of it, appreciating the high mechanical standards of years-gone-by.
Before you put everything back make sure to install the front barrel and the front part of the focusing ring last because you will need to calibrate your lens’ focus first. If you are not familiar with this, read my article on how to adjust your lens’ focus. Telephoto lenses have to have their focus spot-on and so you will have to get it right or don’t bother at all.
Thank you all for the support! Are you liking this series on the 105/2.5 family of lenses or are you beginning to get bored? Please tell me so I will know. If you guys are still OK with this then I’ll continue next time with the lens that started it all. See you again in the next article, if this article helped you then please help me continue to write original works by supporting this blog. This will help me offset the cost of maintaining the site, purchasing film and developing them along with scanning isn’t also cheap so any help is welcome. It is because of you that this blog continues to exist. Thank again, Ric.
Help Support this Blog:
Maintaining this blog requires money to operate. If you think that this site has helped you or you want to show your support by helping with the upkeep of this site, you can simple make a small donation to my paypal.com account (richardHaw888@gmail.com). Money is not my prime motivation for this blog and I believe that I have enough to run this but you can help me make this site (and the companion facebook page) grow.
Helping support this site will ensure that this will be kept going as long as I have the time and energy for this. I would appreciate it if you just leave out your name or details like your country and other information so that the donations will totally be anonymous it is at all possible. This is a labor of love and I intend to keep it that way for as long as I can. Ric.

Jan 14, 2021 @ 04:59:38
3 Days of the Condor, this camera lens was mounted on Faye Dunaway’s Nikon.
Nov 30, 2021 @ 02:38:45
I have b issue with my Nikkor 105 f2.5 CD. the the index/DOF collar can be moved left and right. I wondering if this is a big fix or a an easy one
Thanks